NEW Classic Lemon Meringue Pie (low FODMAP)
30 Minutes prep • 4 hours (or overnight) chill • Low FODMAP • Gluten-Free • Serves 8 • Ok to make-ahead: Steps 1 - 9
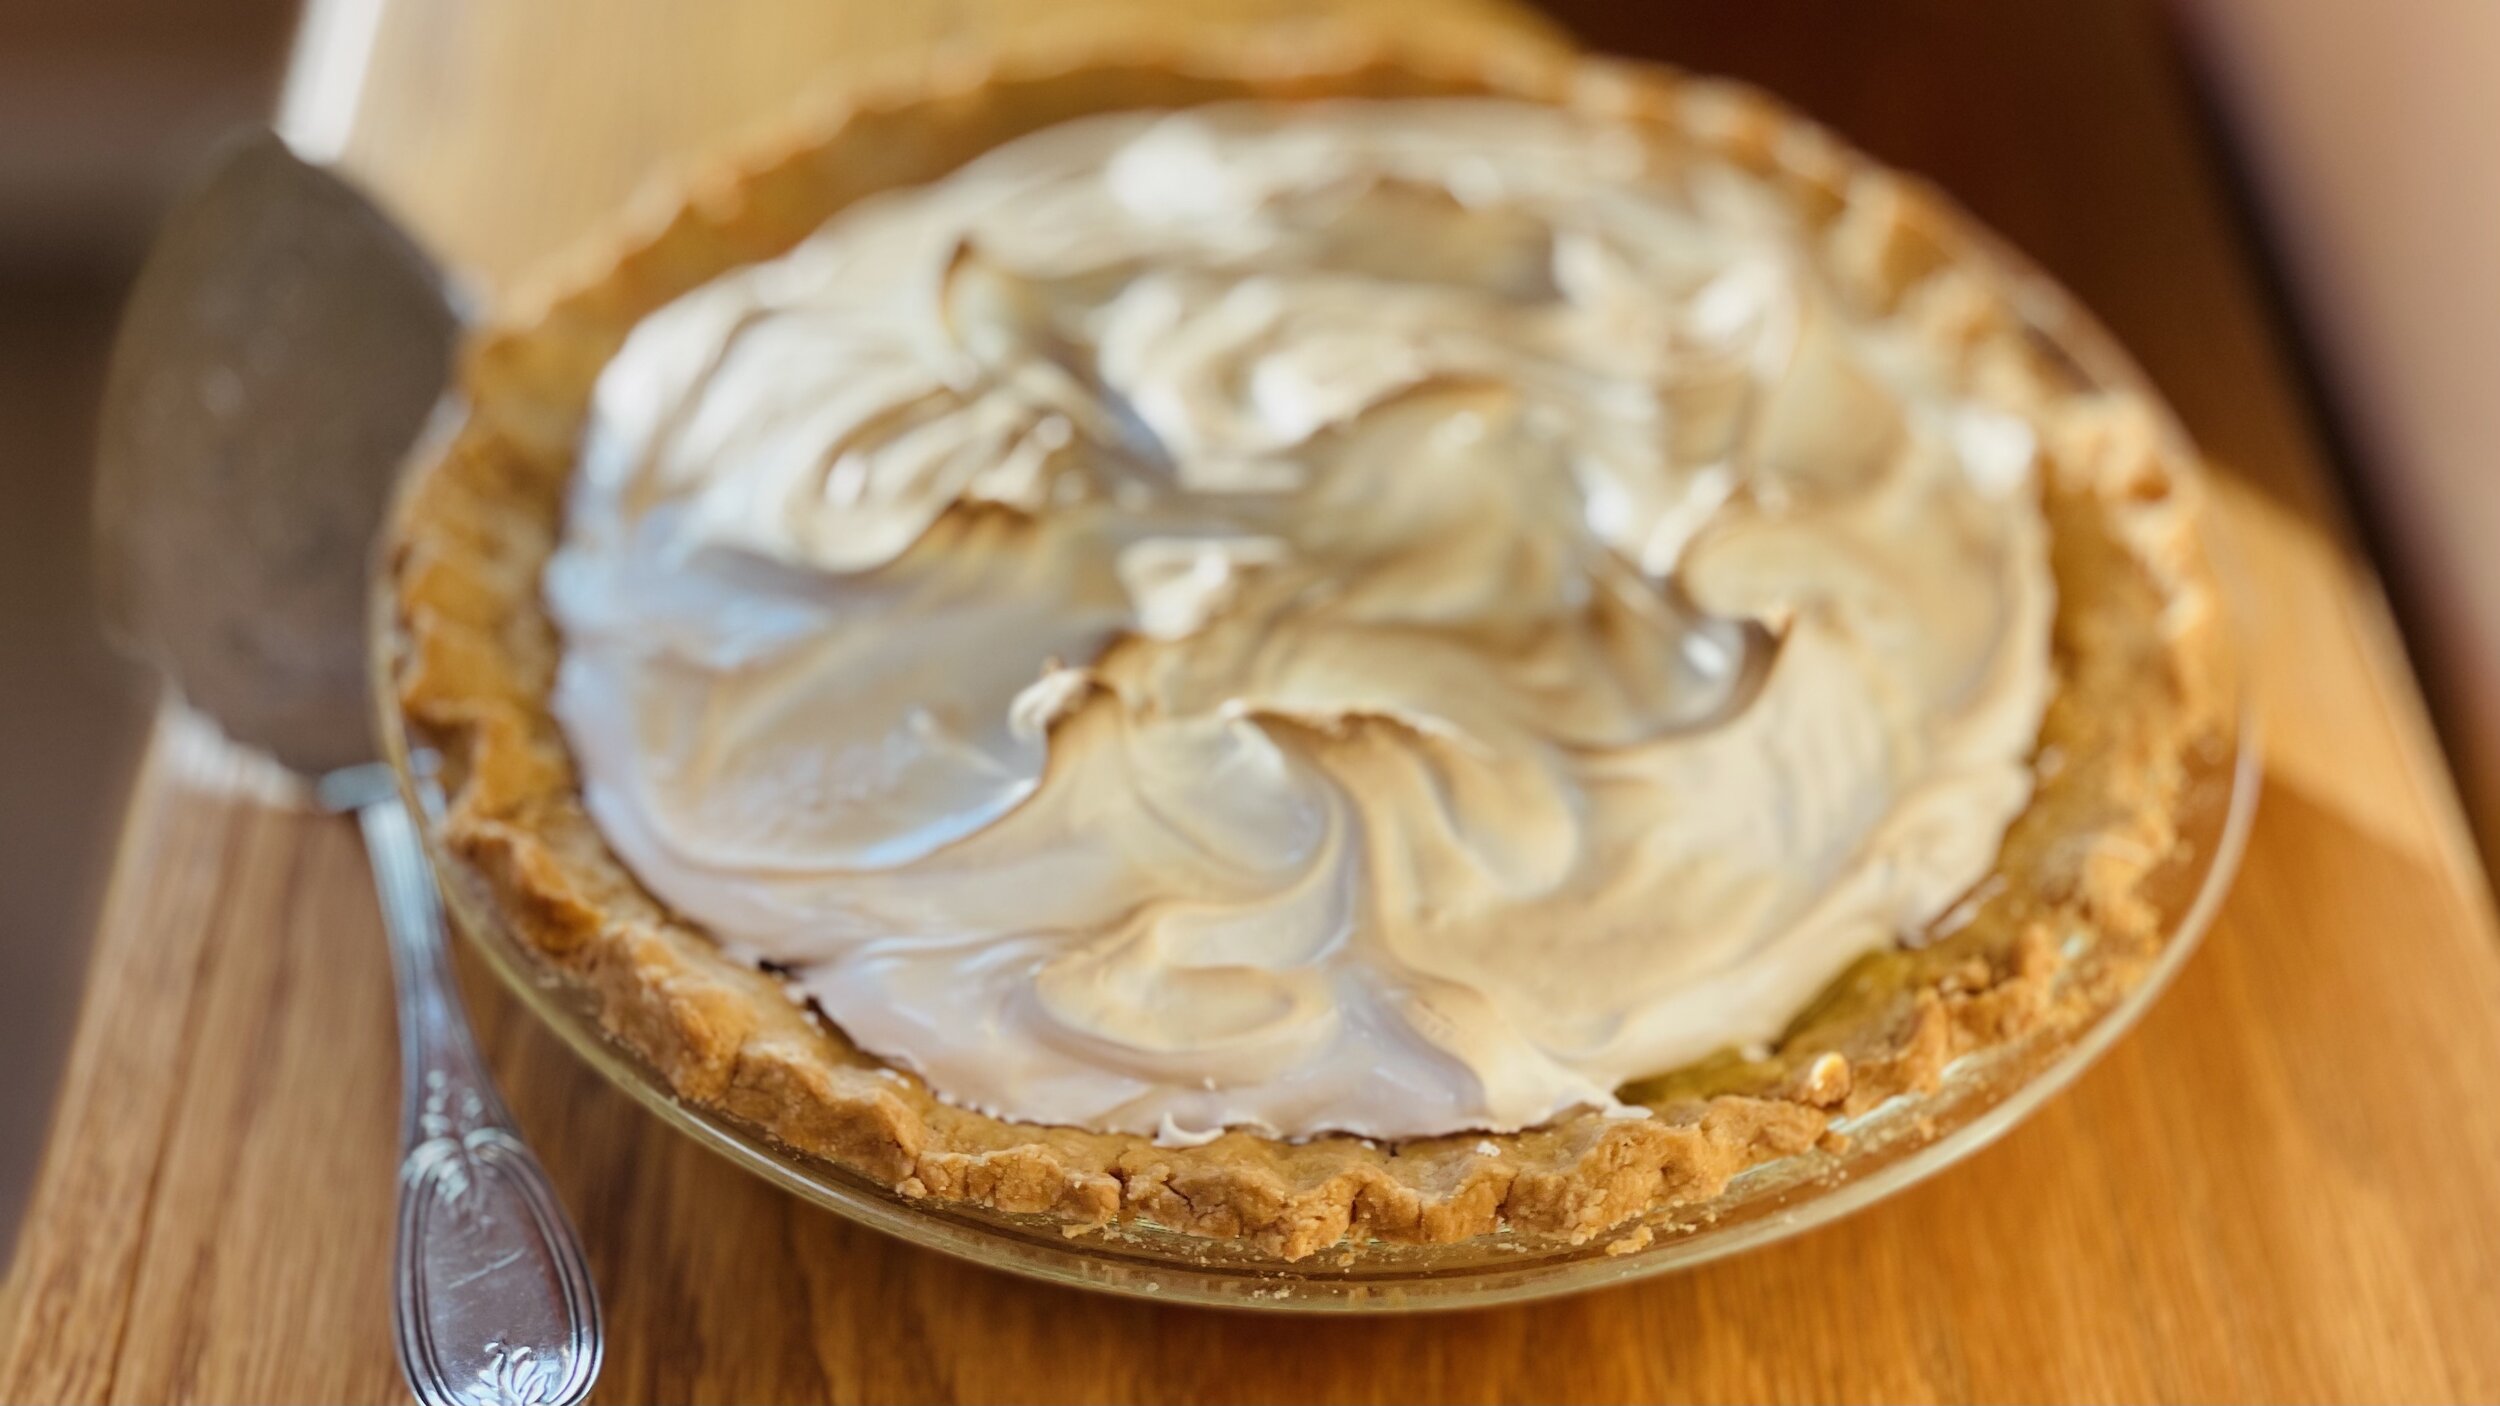
My grandma Katherine made AMAZING pies and she always said your lemon pie should be tart enough to “make your eyebrows sweat.” This new version of a classic recipe is just the right combination of tart and sweet, with a creamy Swiss meringue topping a smooth and lemony filling all piled high in our Perfect Buttery Pate Brise pie crust. Sound divine? It is!
Ingredients: Pie
1 pre-baked 9-inch Perfect Buttery Pate Brise pie crust
1 1/2 cups water
1 1/2 cups granulated sugar
Juice and grated rind of two lemons (preferably Meyer)
3 tablespoons corn starch
1/4 cup granulated sugar
3 large or 4 medium egg yolks
Ingredients: Swiss Meringue
3 large or 4 medium egg whites
3/4 cup granulated sugar
1/2 teaspoon vanilla extract
1/4 teaspoon salt
Directions
(1) Make the pie crust: You may make our Perfect Buttery Pate Brise pie crust or purchase a gluten-free butter pie crust that is ready-made and pre-bake the crust in a 350 degree F oven for about 10-12 minutes until crust starts to brown lightly. Remove from oven and set aside.
(2) Prepare the filling: Put the water, sugar, lemon zest, and juice in a saucepan and bring to a boil then reduce heat to medium.
Combine cornstarch and 1/4 cup sugar in a small bowl.
Combine egg yolks with 1 tablespoon of water and blend in with the cornstarch and sugar mixture.
(3) Cook the filling: Add the cornstarch and egg yolk mixture slowly into the hot sugar water while stirring constantly over medium heat. Continue cooking and stirring over medium heat until the lemon filling thickens.
(4) Cool the filling: Remove the pan from heat and pour the filling into the prepared pie shell and cover the filling with a piece of parchment or waxed paper. (This helps the meringue stick to the filling.) Put it in the refrigerator and let it cool while you prepare the Swiss meringue.
Make-ahead note: Because it needs time to chill, this pie does well when you make it many hours ahead or even the day before you want to serve it. You can make it through step 4 and chill overnight or you can make the entire pie and chill it.
(5) Prepare the Swiss meringue: Whisk the egg whites and sugar together in the bowl of a stand mixer.
(6) Cook the meringue: Bring a saucepan with a few inches of water to a simmer. Set the mixer bowl over the simmering water, making sure the water does not touch the bottom of the bowl.
Continuously, but gently, stir the mixture until the egg whites are very warm to the touch and the sugar has completely dissolved (about 4 minutes). Test by dipping a finger into the mixture and rubbing it between your fingers—the mixture should not feel grainy or gritty at all and should be very warm to the touch.
(7) Preheat your broiler.
(8) Whip the meringue: While the broiler is heating, whip the egg whites on medium-high until stiff peaks form. Add in the salt and vanilla extract and whip to combine well.
(9) Finish: Remove the parchment or waxed paper from the surface of the pie filling then spread the meringue on top of the filling and make decorative piques with your spreading knife. Make sure to spread the meringue all the way to the crust.
Put the pie under the broiler and cook for 20 to 60 seconds, or until the meringue is golden brown with some deeply caramelized spots. Watch it while it cooks so it doesn’t get overly brown!
Remove the pie from the oven and cool completely in the refrigerator before slicing and serving.
(10) Serve: Garnish with a sprinkling of grated lemon peel if you like.
This pie is wonderful served the day that it’s made but if you have any pie left keep it in an airtight container in the fridge. It will still be delicious the next day.
Eat and enjoy every bite because you can!
This post may contain affiliate links so you can easily purchase items listed on the page. In some cases, we have provided a special discount code for IBS Game Changers so be sure to use it when you purchase an item to get the discount that has been arranged just for you!
More Deliciously Low FODMAP™ desserts you might enjoy
10 Minutes prep • 15 Minutes cook • Low FODMAP • Gluten-Free • Keto Friendly • Makes 36 bars
5 Minutes prep • 10 Minutes cook • Low FODMAP • Gluten-Free • Lactose-Free • Makes 5 cups
15 Minutes prep • 20 Minutes cook • 30 Minutes cool • Low FODMAP • Gluten-free • Makes 18 bars
20 Minutes prep • 10 Minutes cook • Low FODMAP • Gluten-free • Makes 12 Sandwiched Cookies
20 Minutes prep • 20 Minutes cook • Low FODMAP • Gluten-free • Lactose-free • Makes 12 - 24
20 Minutes prep • 2 Hours chill • 10 Minutes cook • Low FODMAP • Gluten-free • Makes 24 - 36
I’m here to show you how to fully embrace the flavors of fall while keeping your digestive system happy.
10 Minutes prep • Overnight Chill • Low FODMAP • Gluten-free • Lactose-free • Serves 2 - 4

