Deliciously Low FODMAP

Inspire yourself with hundreds of delicious low FODMAP recipes, tips, and tools, and enjoy the abundance that is yours even when you have IBS.
Use the buttons and filters to find something specific or browse the complete collection for inspiration.
Discover a treasure trove of recipes with my FREE recipe club! Get new ideas delivered straight to your inbox every week.
Deliciously Low FODMAP is a trademark of IBS Game Changer, LLC
Filter to find Recipes and Tools
More Filtering Options
- All 731
- Appetizer 50
- BBQ 46
- Bowl 32
- Breakfast 58
- Cocktails 13
- Collection 1 58
- Collection 10 27
- Collection 11 30
- Collection 12 27
- Collection 13 31
- Collection 14 29
- Collection 15 31
- Collection 16 34
- Collection 17 31
- Collection 18 33
- Collection 19 36
- Collection 2 32
- Collection 20 33
- Collection 21 33
- Collection 22 40
- Collection 23 13
- Collection 24 1
- Collection 3 28
- Collection 4 29
- Collection 5 30
- Collection 6 32
- Collection 7 31
- Collection 8 31
- Collection 9 32
- Condiments 6
- Crock Pot 4
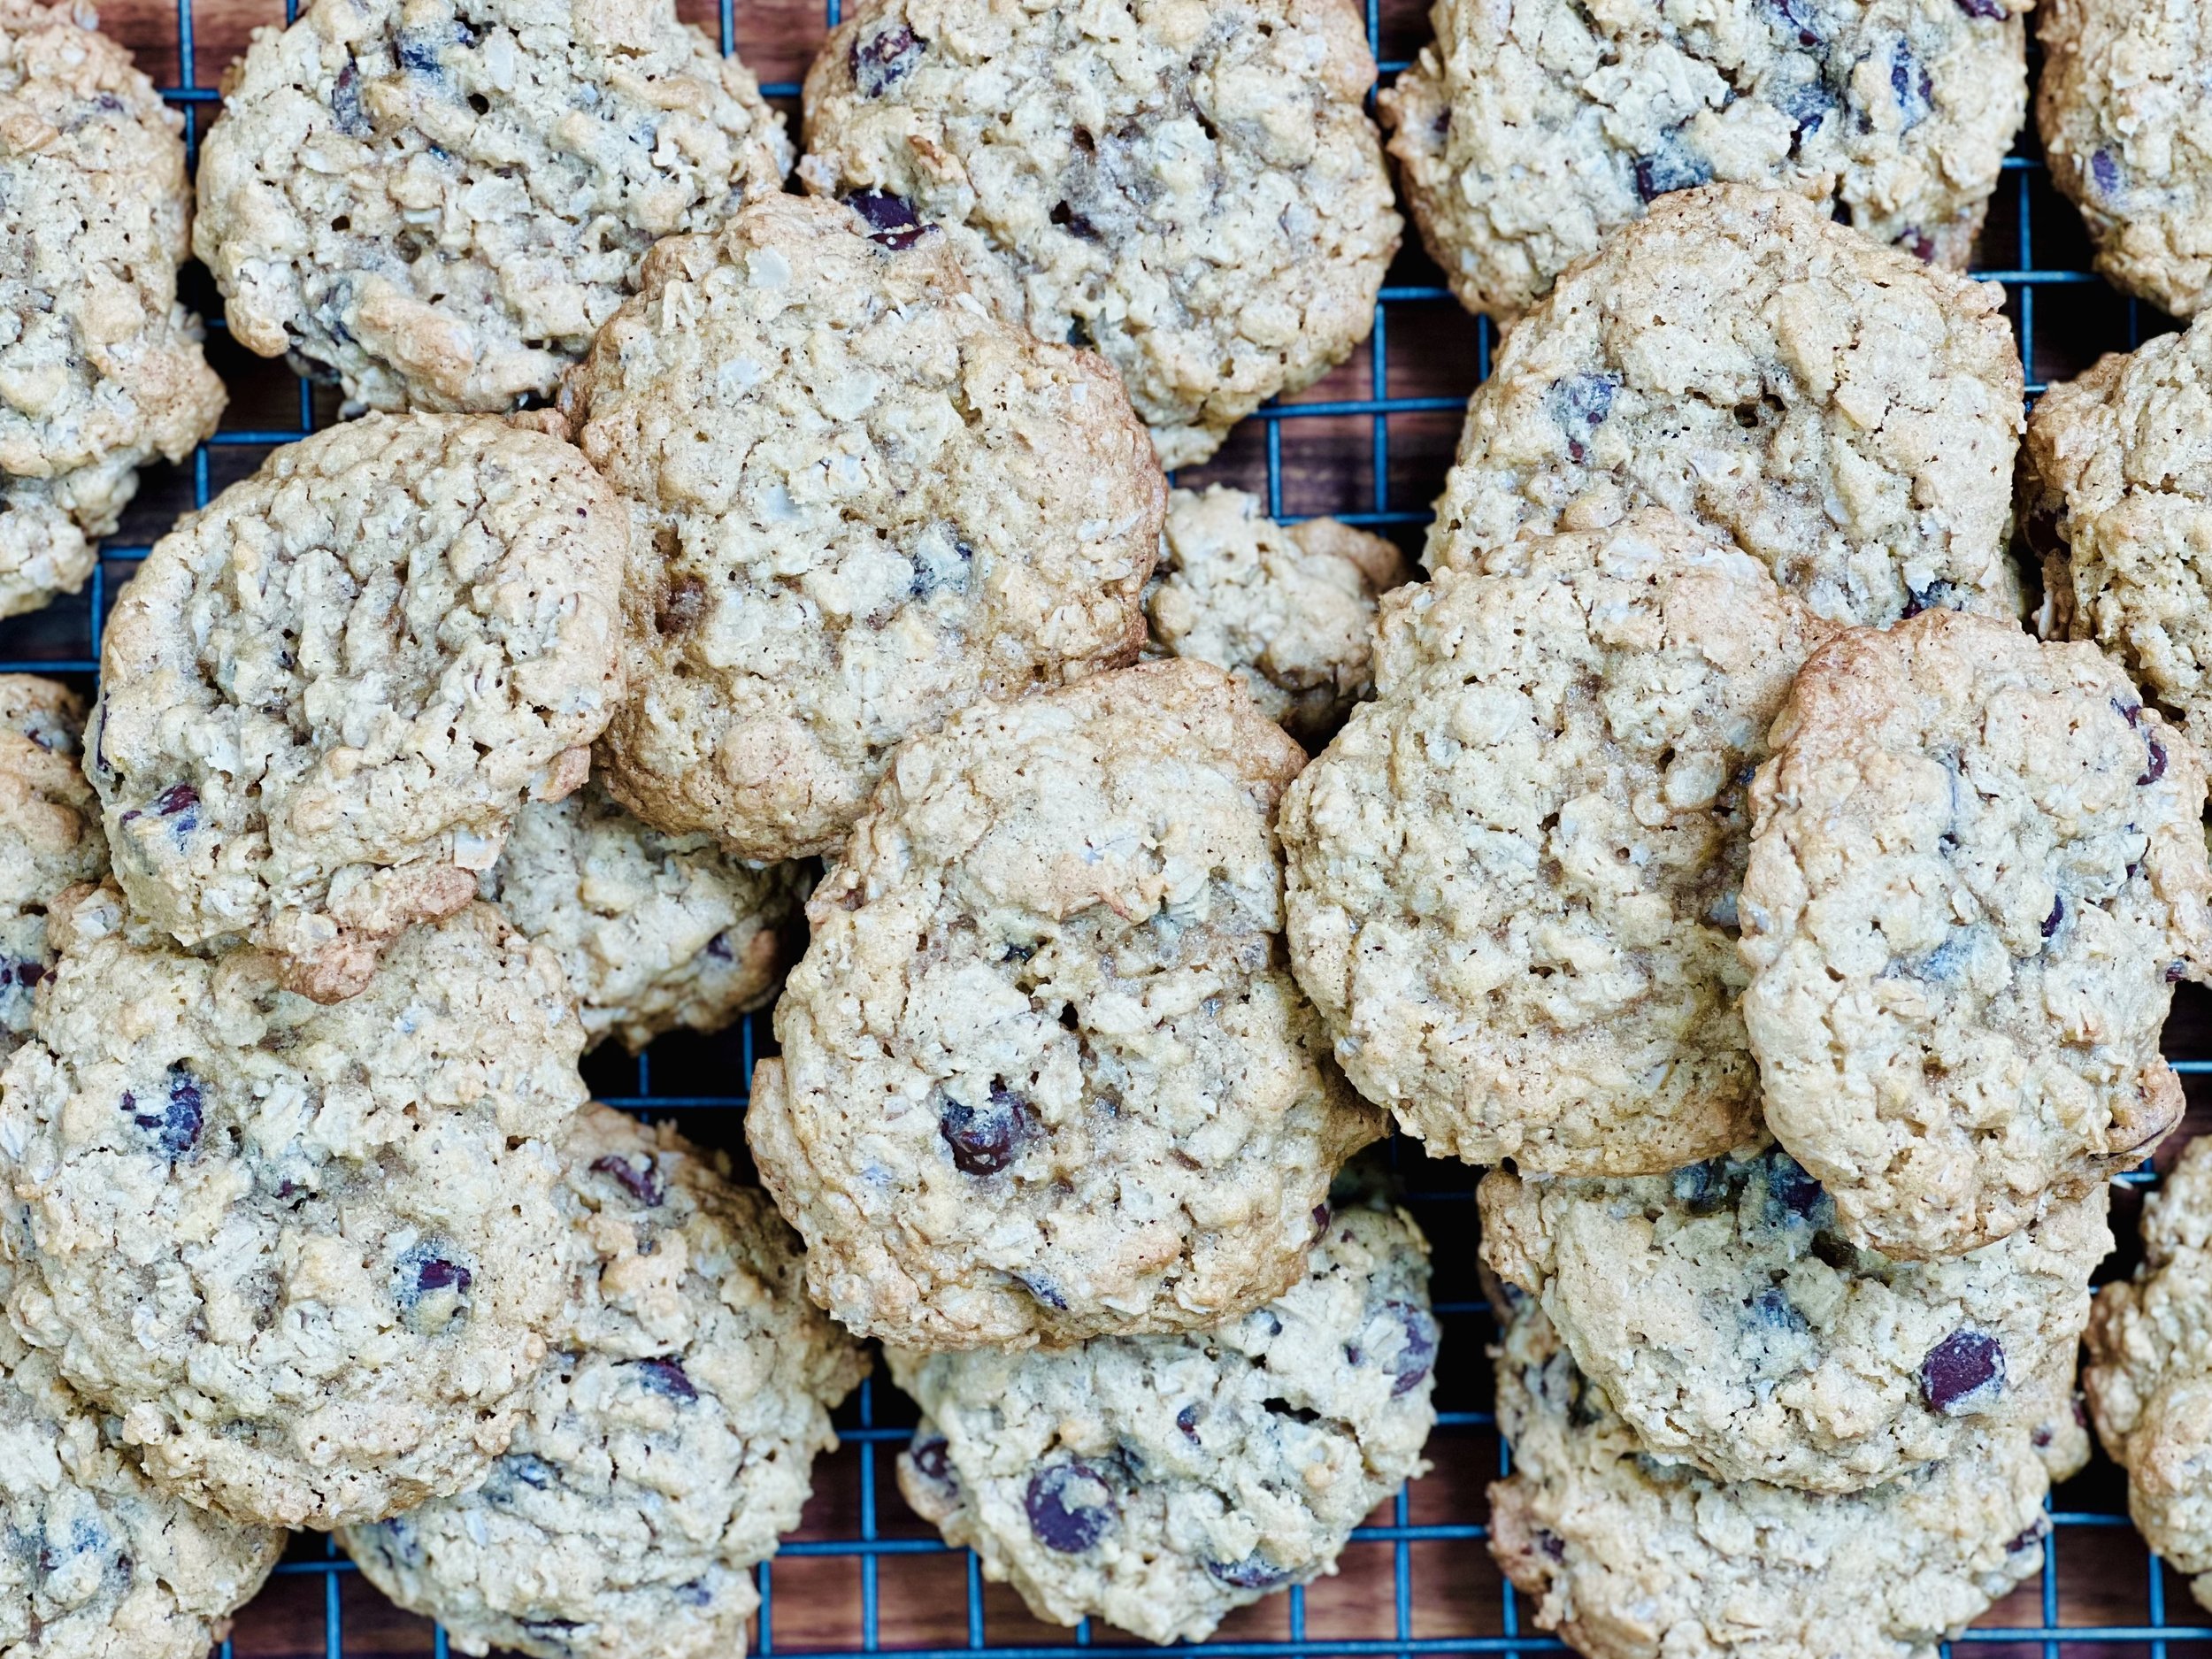
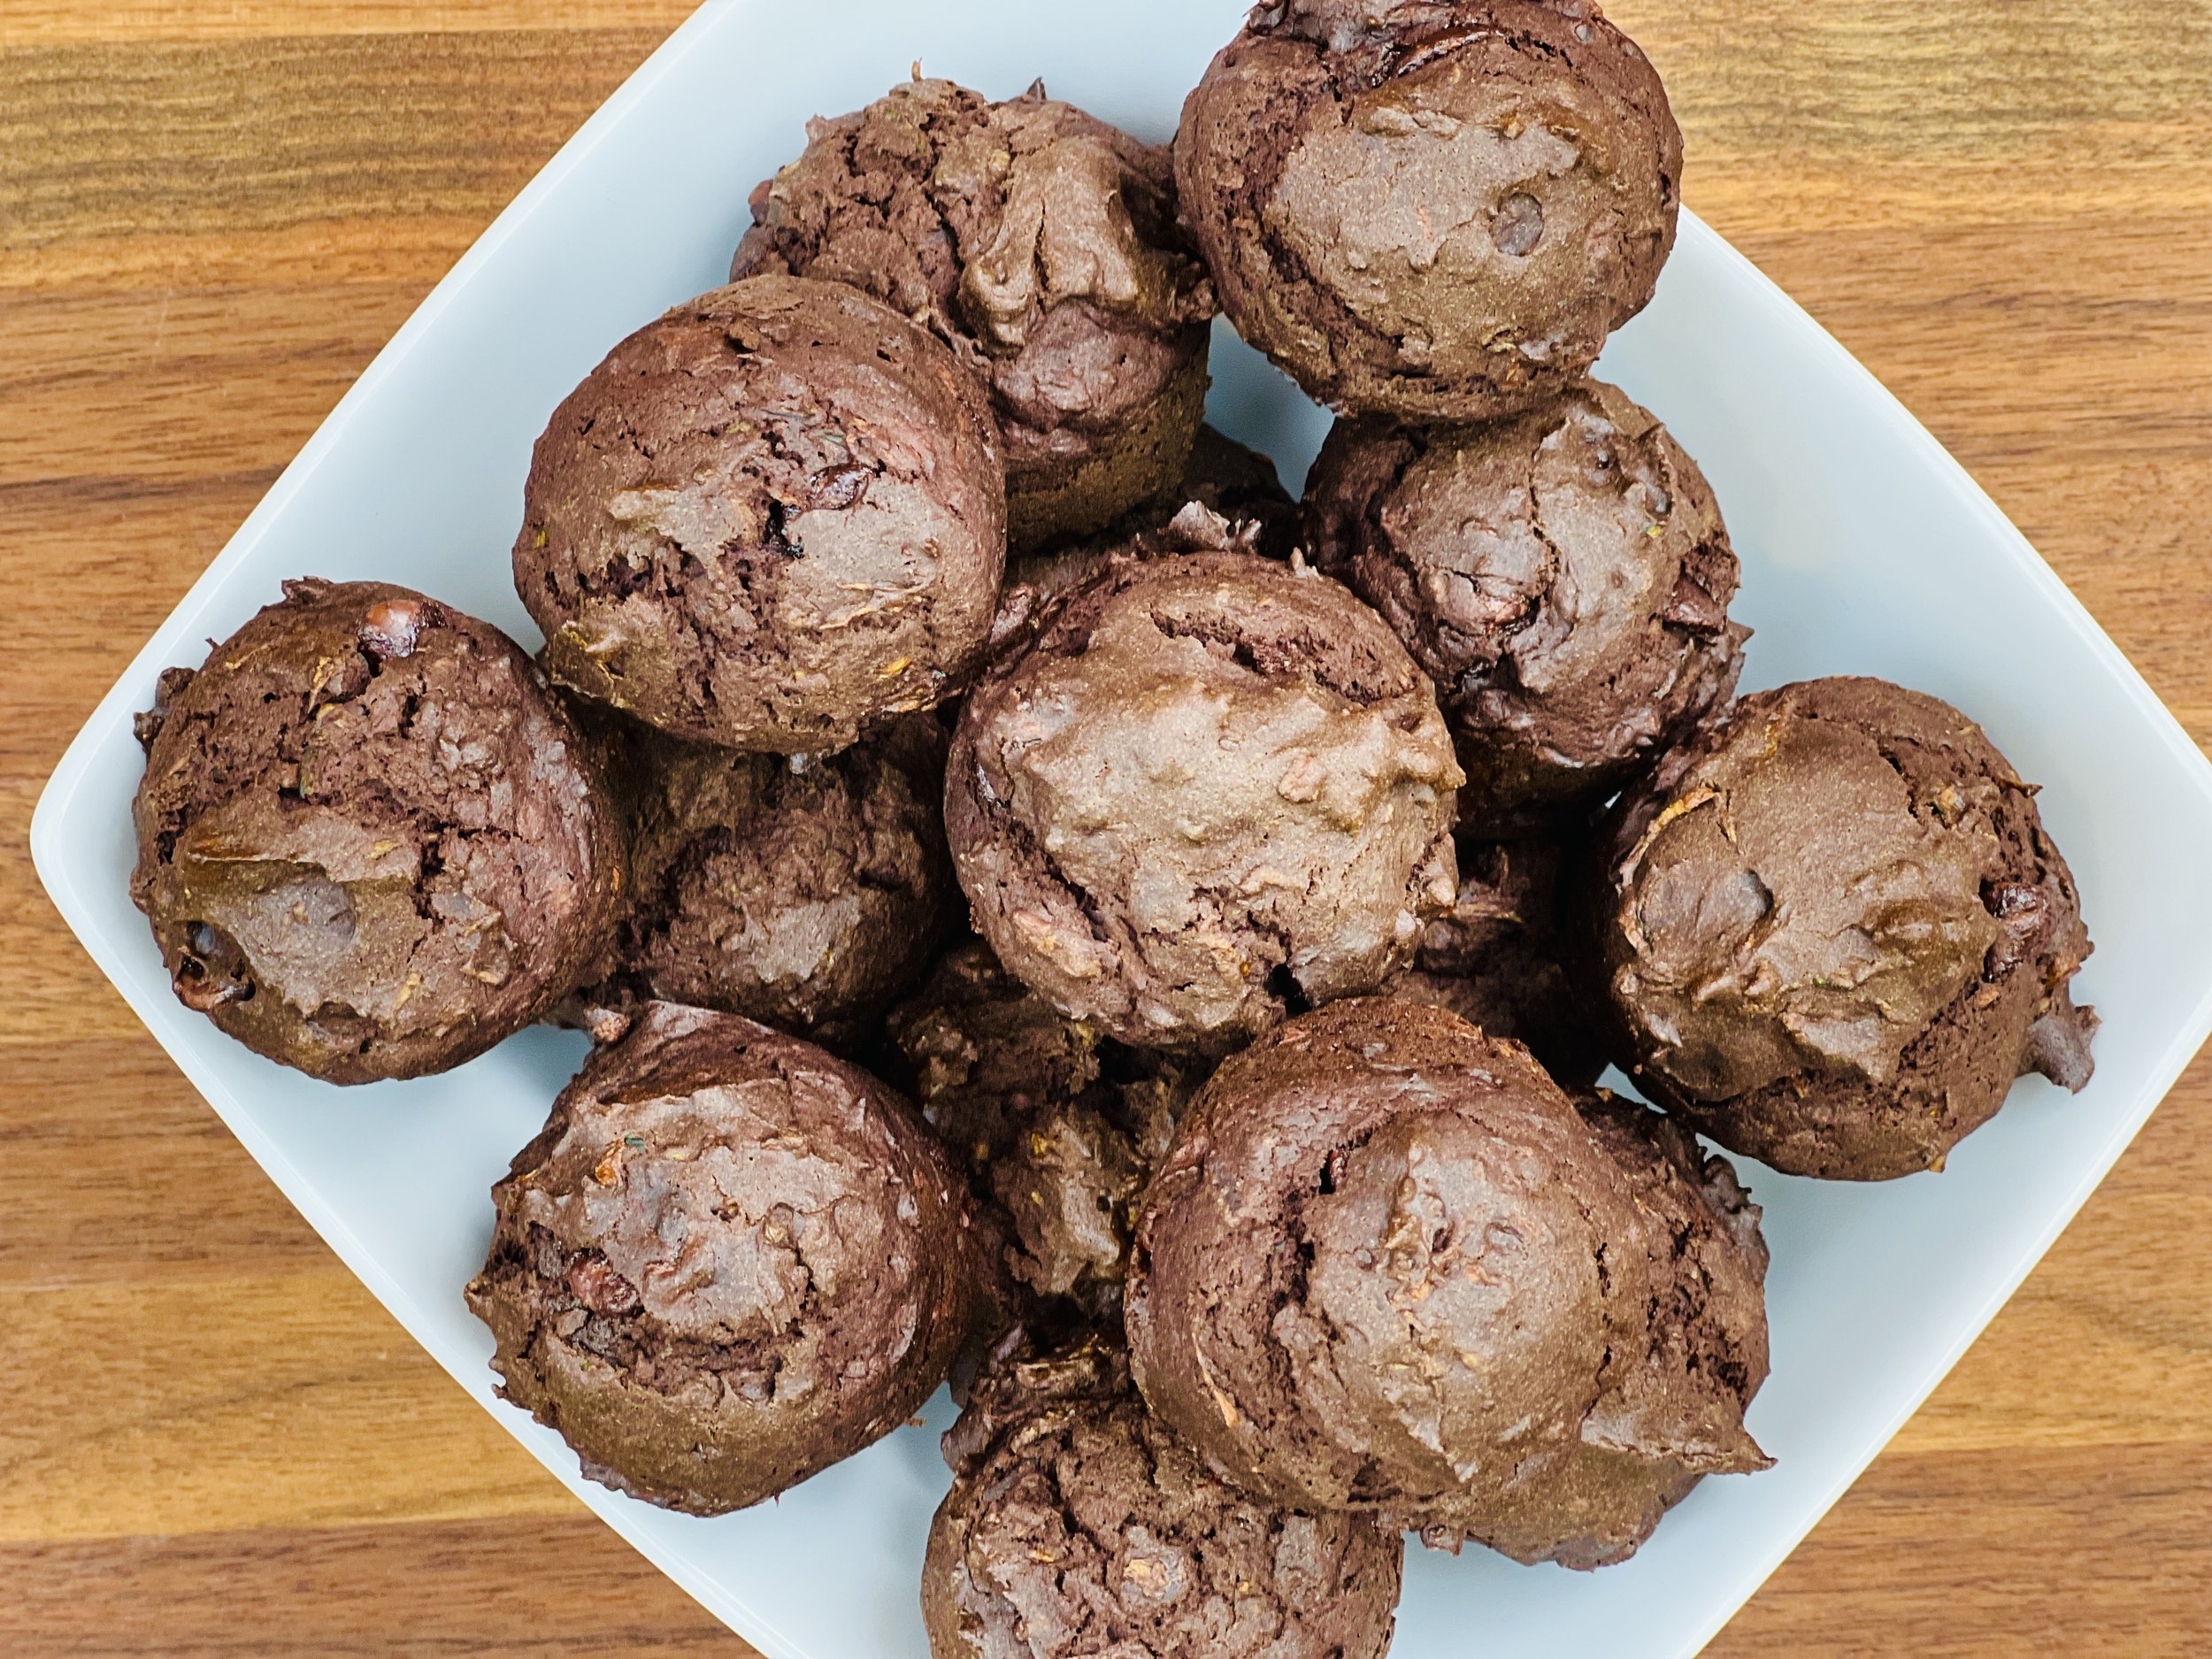
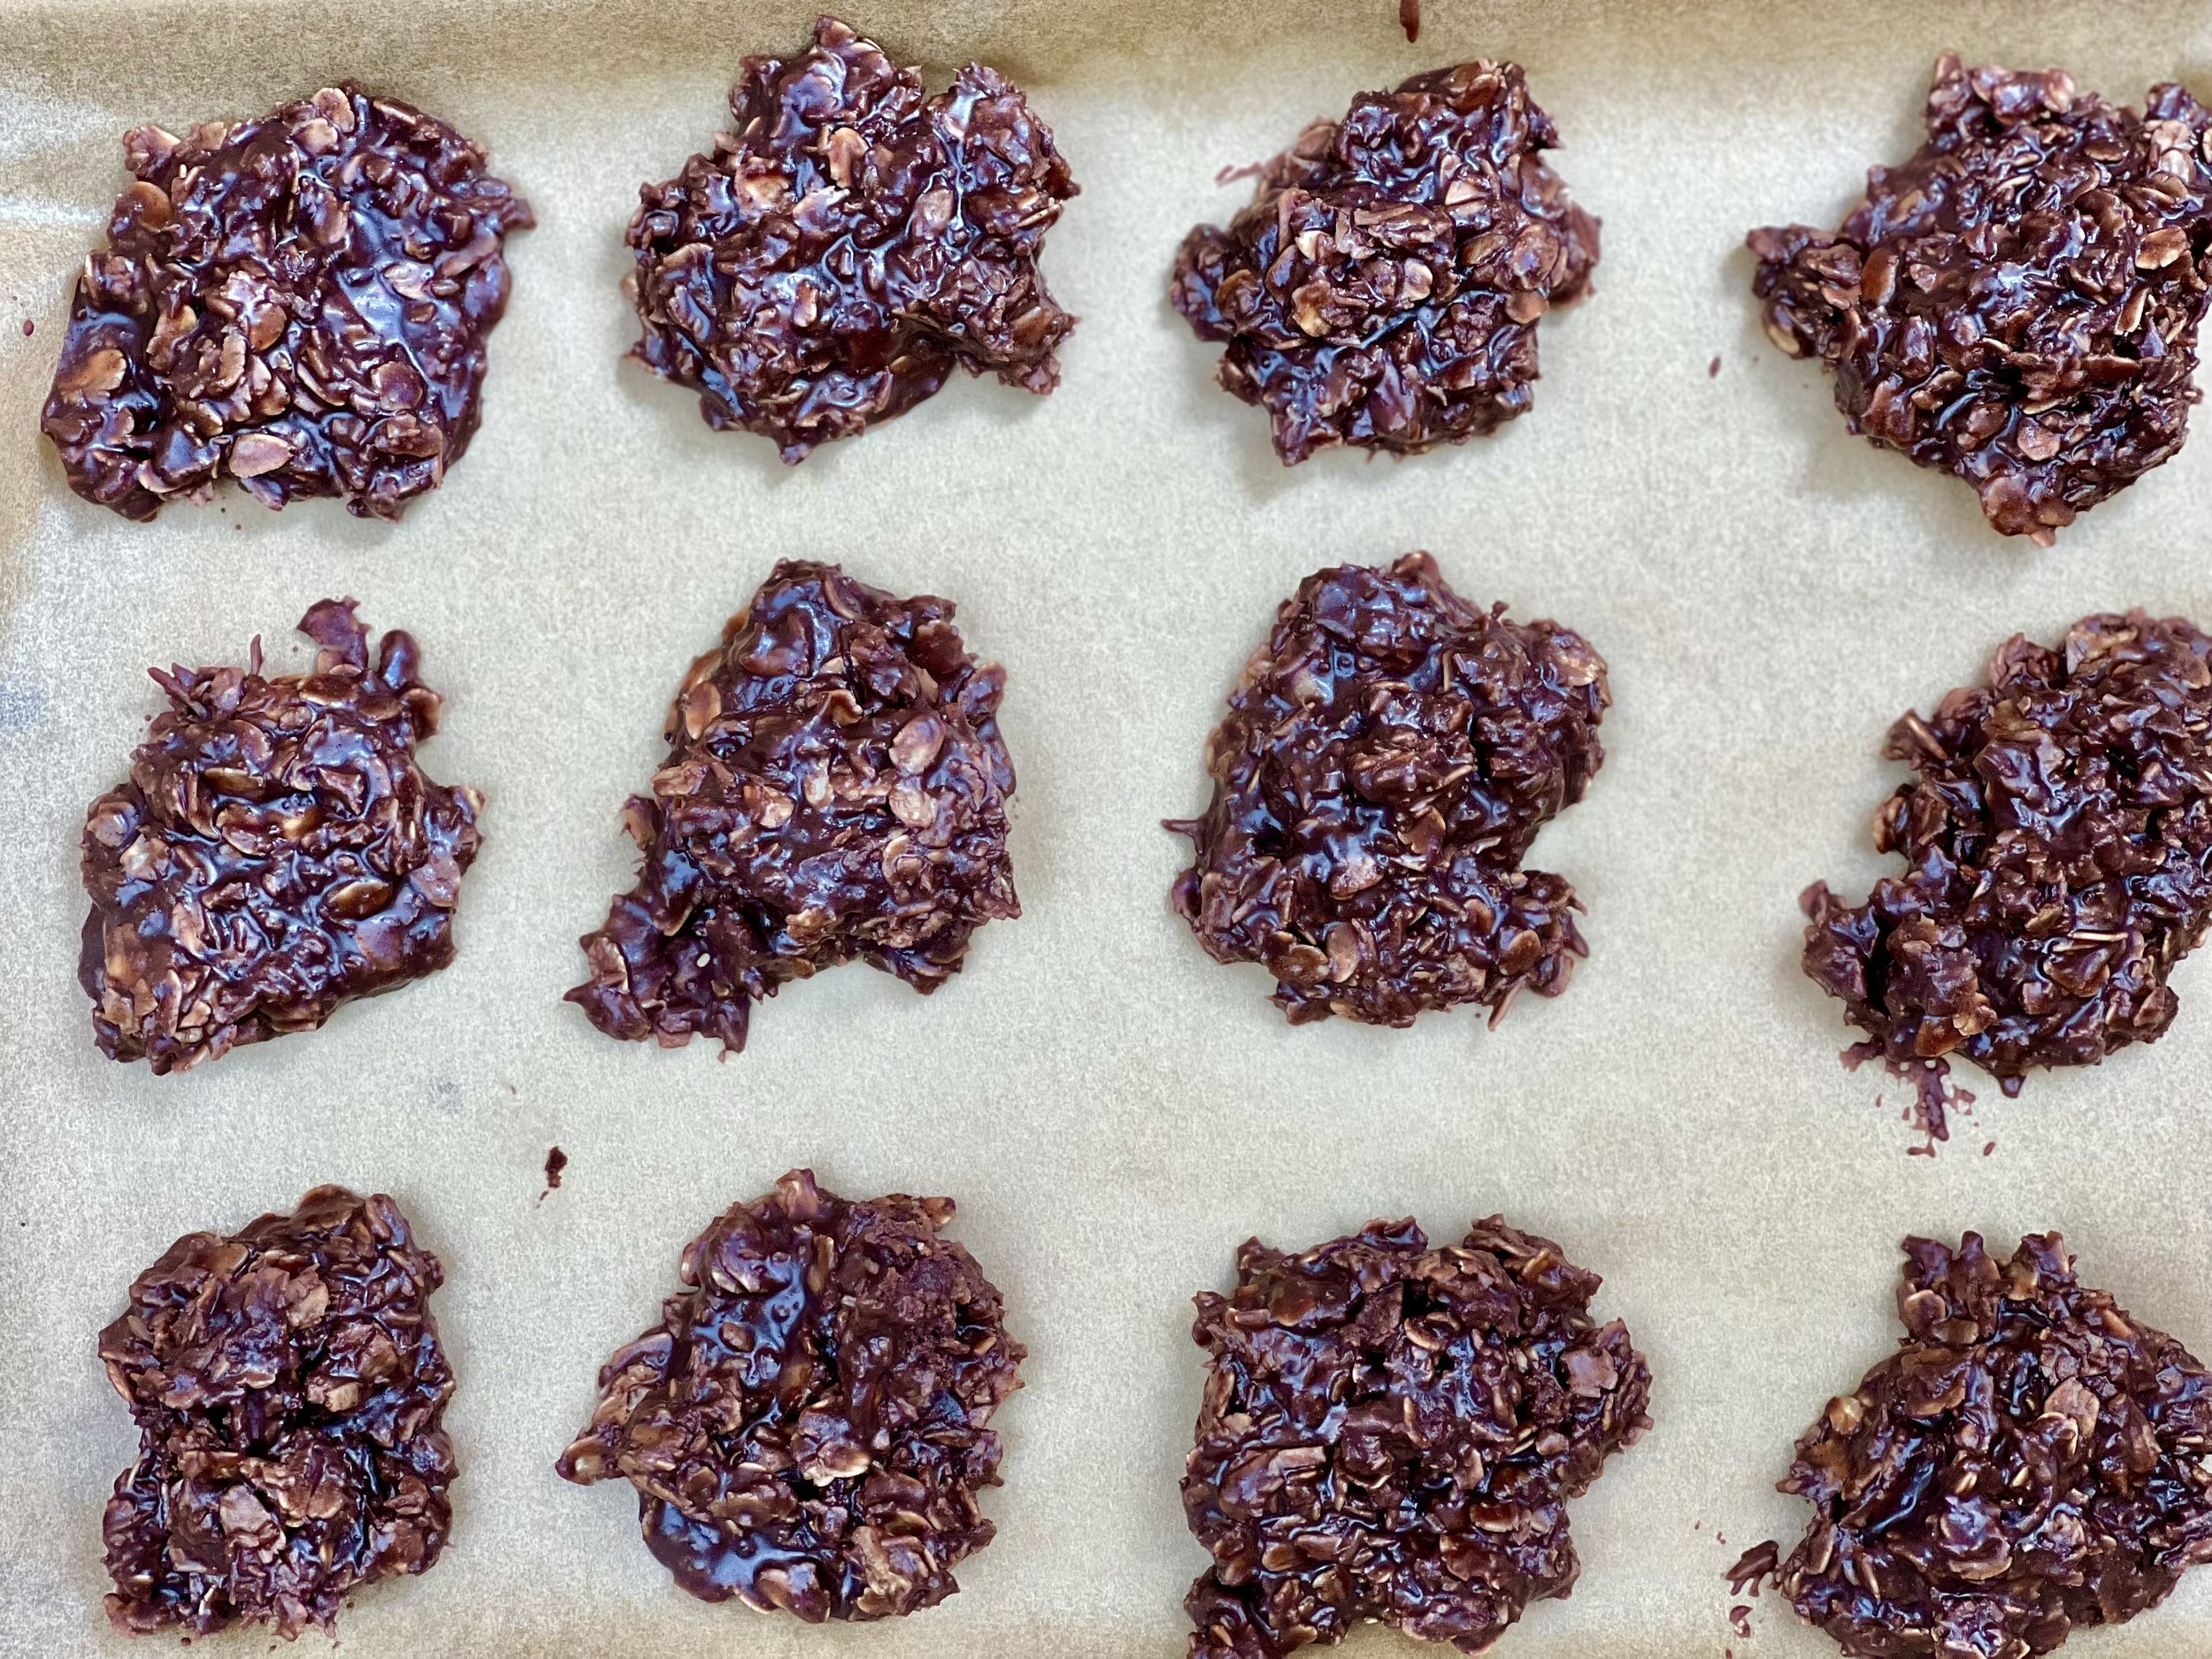
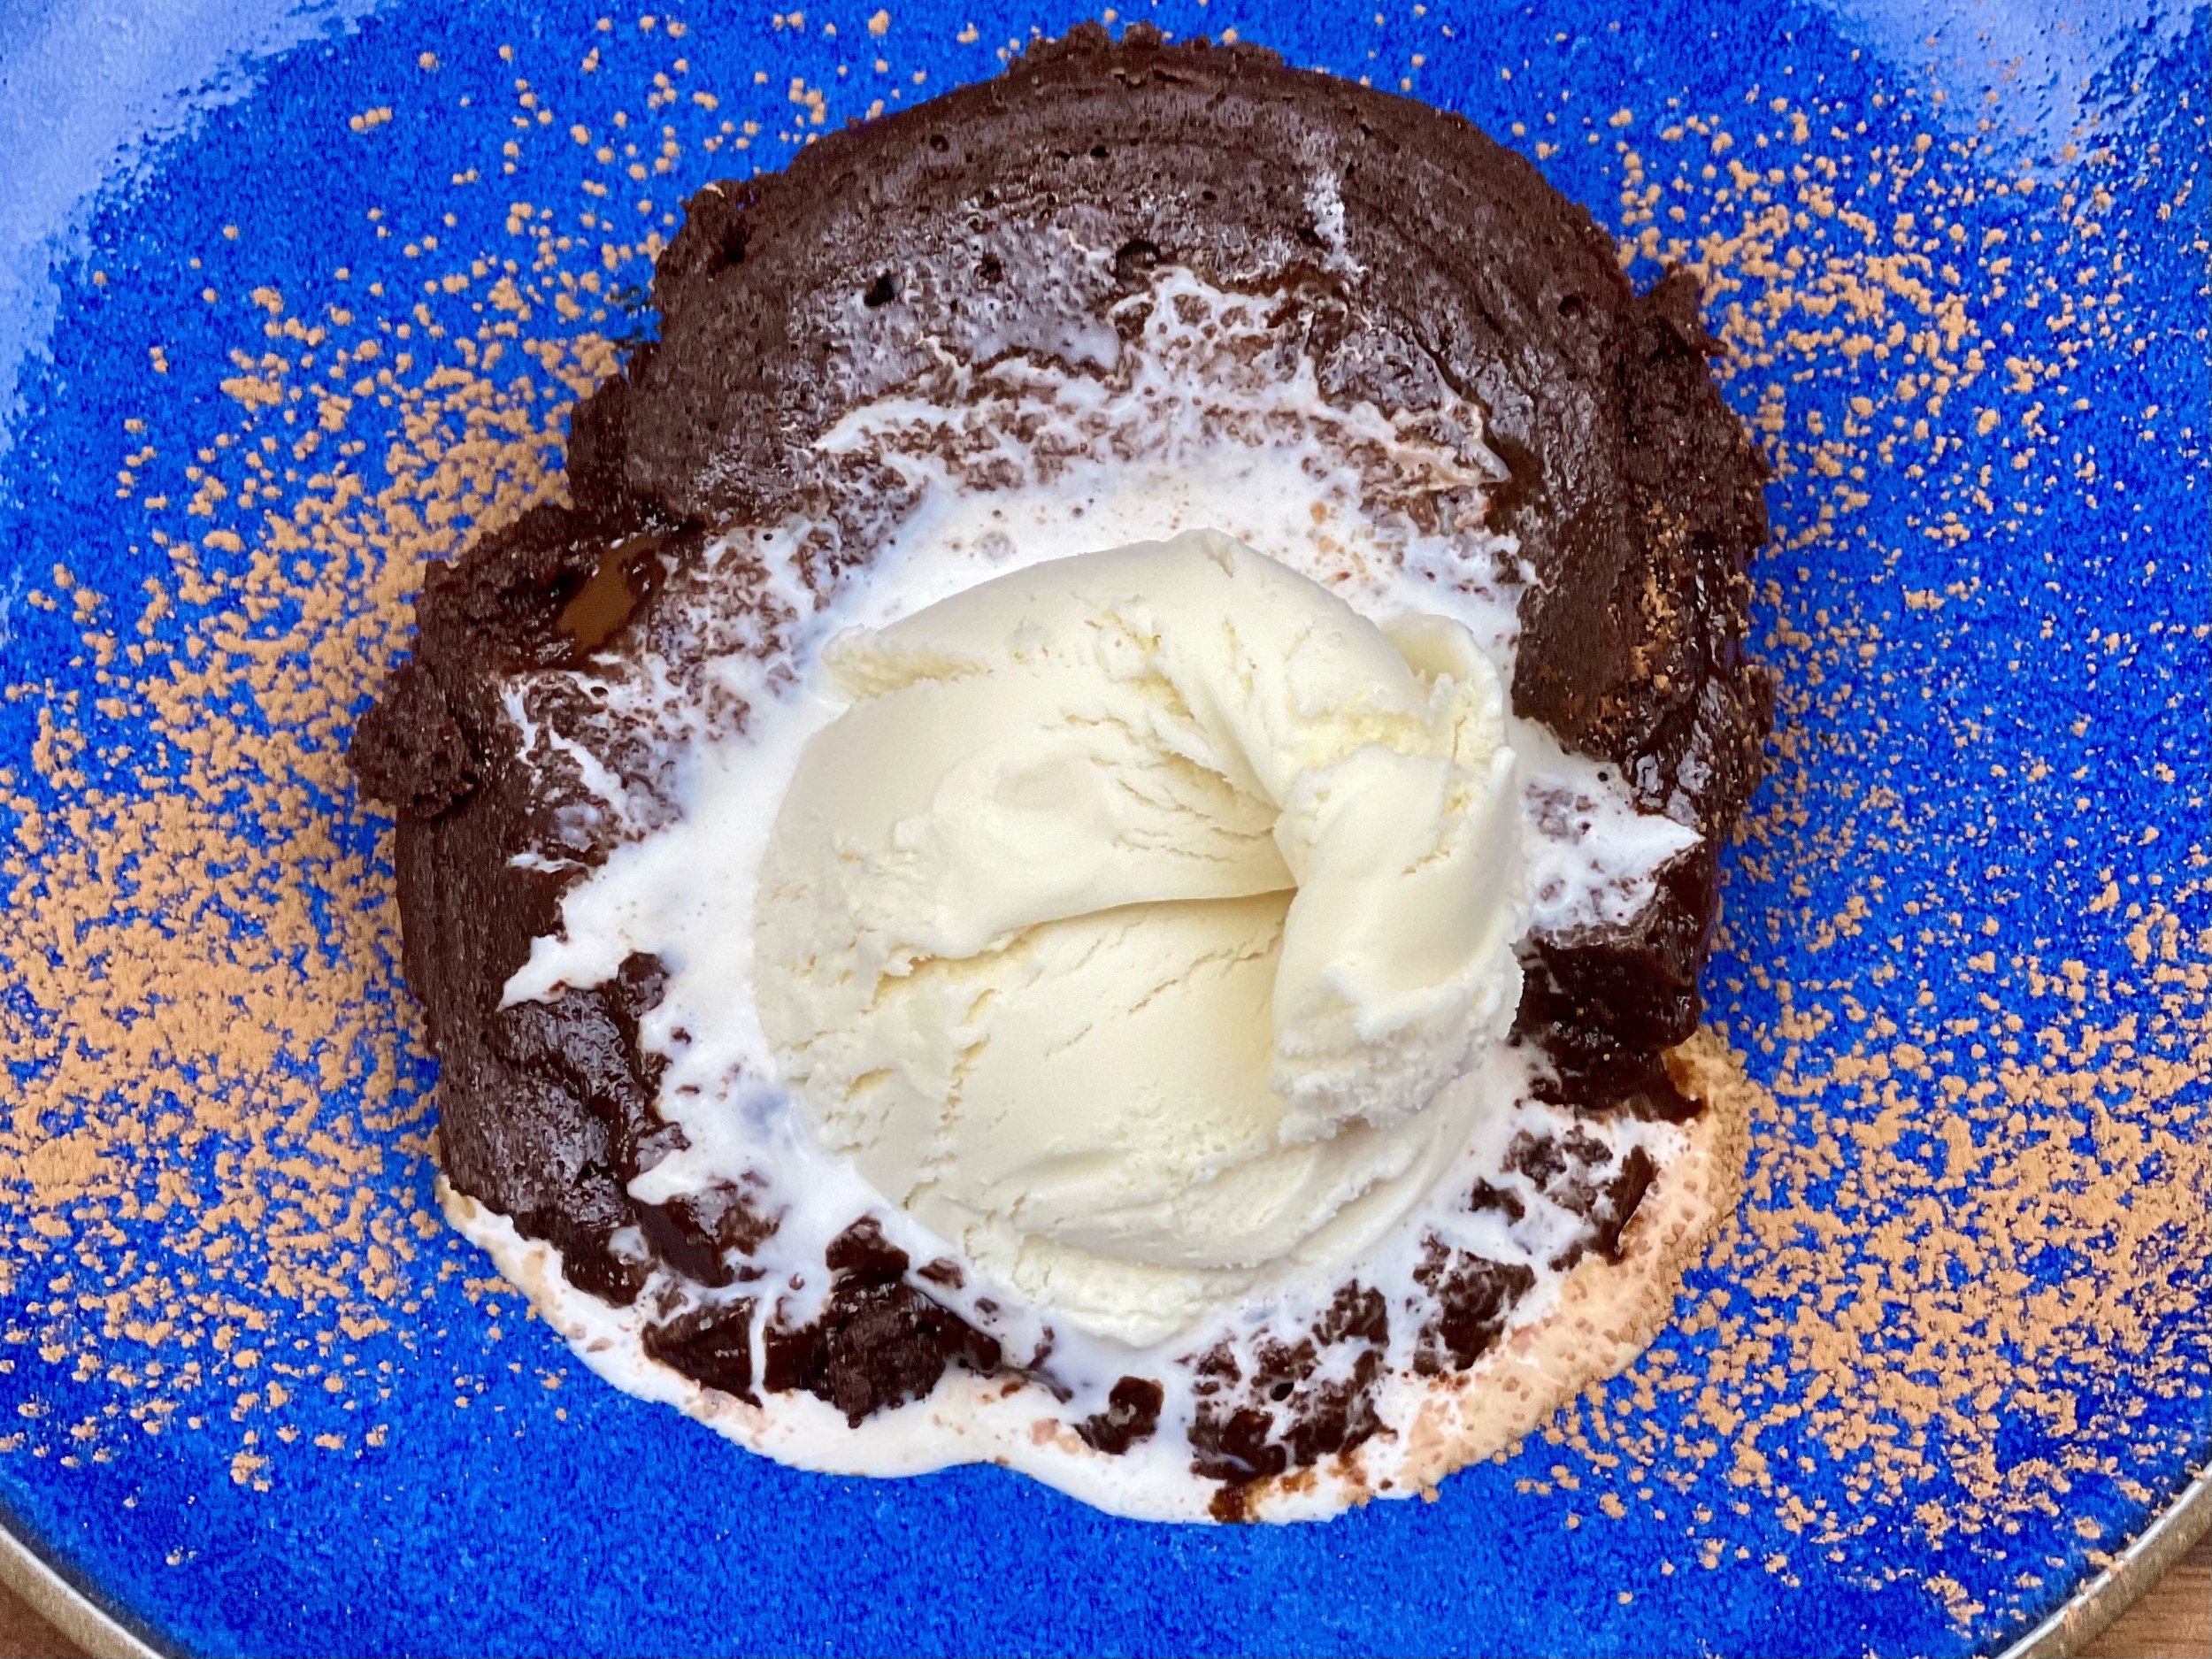
- Dessert 107
- Diabetes Game Changer Exception Protocol Contains Alcohol 11
- Diabetes Game Changer Exception Protocol Contains Flour 109
- Diabetes Game Changer Exception Protocol Contains Flour AND Sugar 77
- Diabetes Game Changer Exception Protocol Contains Sugar 49
- Diabetes Game Changer First Four Weeks 364
- Dinner 332
- Drink 8
- Easter 1
- Free Guide 17
- Gluten-free 592
- Gut Microbiome 2
- Guthealth 3
- Holidays 69
- IBS Triggers 4
- Keto Friendly 125
- Lactose-Free 175
- Low FODMAP Diet 717
Real whipped cream
15 Minutes • Gluten-free • Low FODMAP • Serves 6 - 8
15 Minutes • Gluten-free • Low FODMAP • Serves 6 - 8 • Whipped cream is a great way to make an average dessert into a fabulous dessert. And, in my opinion, real whipped cream tastes far better than cool whip or the chemical stuff you can buy in a can. If you make it yourself, you know exactly what’s in it and ½ cup is considered a low FODMAP serving so you can enjoy it without consequences.

INGREDIENTS:
1-pint heavy whipping cream
2 tablespoons powdered sugar (or to taste)
1 teaspoon vanilla extract
DIRECTIONS:
Keep cream well-chilled until ready to whip and don’t prepare this too far ahead of time as it’s best freshly whipped (a few hours is OK and then keep it in the fridge).
Pour cream in a large metal or glass mixing bowl or the largest bowl of your stand mixer and, using your largest whisk (or the whisk attachment on your mixer), beat until soft peaks form.
Add sugar and vanilla and whip a bit more to combine. Taste and adjust sugar as needed.
Serve on your pie or on your brownies, in your coffee, on your fruit cup…the possibilities are endless.

This recipe contains affiliate links so you can easily purchase items listed on the page. This is for your information and convenience. If you purchase through this link, I may earn a commission but there is no additional cost to you. Please read my disclosure for more information.
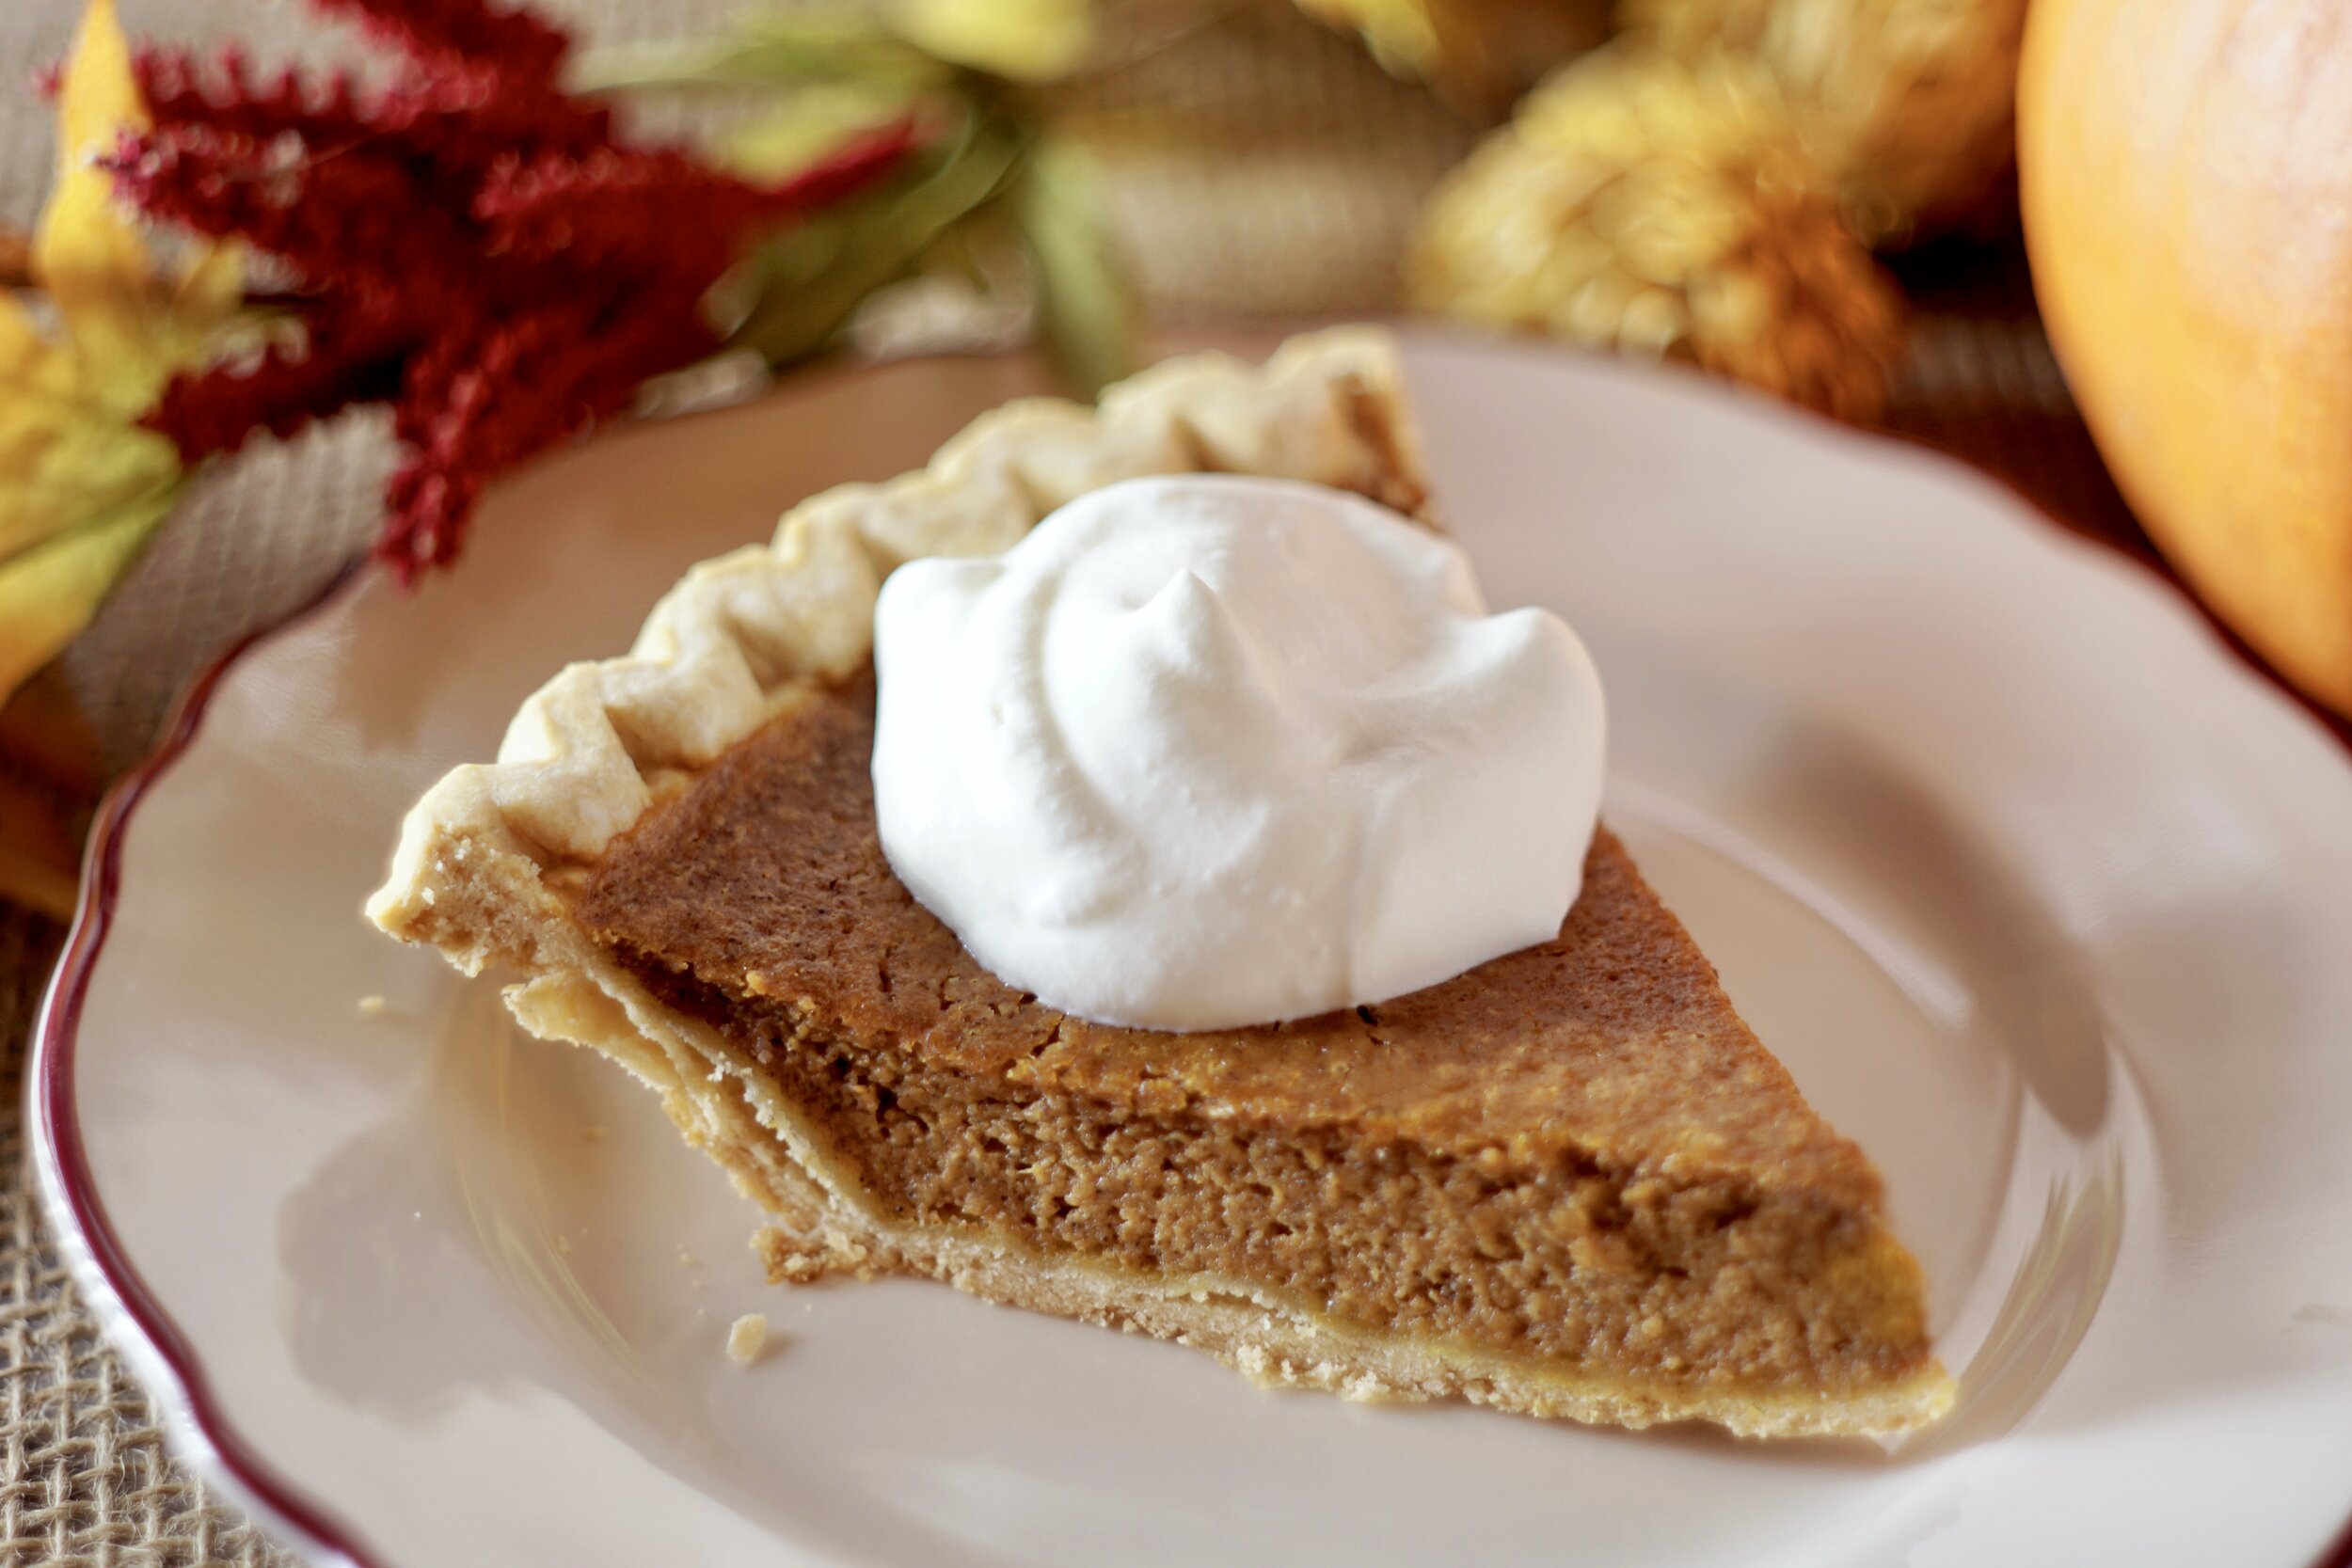
Better than classic Pumpkin Pie
60 Minutes (mostly baking time) • Gluten-free • Low FODMAP • Serves 6 - 8
60 Minutes (mostly baking time) • Gluten-free • Low FODMAP • Serves 6 - 8 • This version of the classic pumpkin pie is rich and flavorful and low FODMAP too. Baked in our perfect buttery pate brisee pie crust and filled with just the right combination of pumpkin, eggs, cream, and spices to deliver a wonderful flavor every time. Serve with freshly whipped cream for the best combination of flavor, color, and tradition. Looking for more holiday recipes? Check out our post on Navigating a Holiday Feast while on a low FODMAP diet.

INGREDIENTS:
1 1/2 cups white sugar (cut back to 1 cup of sugar if you are sensitive to too much sugar)
1 teaspoon salt
3 teaspoon cinnamon
1 1/2 teaspoon ginger
3/4 teaspoon cloves
1/2 teaspoon allspice
4 eggs
1 large can pumpkin puree - 28 ounces (I prefer Libby’s brand)
24 ounces lactose-free half and half or whole milk (use lactose-free low fat or even nonfat milk if you are sensitive to fat)
DIRECTIONS:
Preheat the oven to 425° F.
Prepare our perfect buttery pate brisee pie crust and place it in the freezer until you’re ready to fill it.
Combine all ingredients in a mixing bowl and whisk to combine thoroughly.
Once your filling is ready, remove the crust from the freezer, brush the inside of the crust with egg white, then pour the filling in and put it on a lower shelf of the oven.
Bake at 425 degrees F for 15 minutes, then reduce the oven temperature to 350 degrees F and continue to cook for about 40 to 50 minutes more until no longer jiggly in the middle.
Watch the crust for over-browning and, if this starts to happen, cover (just the crust) with foil or a silicon pie ring.
Remove from oven and let cool to room temperature before serving.
Pro Tip: I much prefer to make this pie the day before I’m serving it and let it chill overnight. The flavors tend to meld and bolden as it rests.
Serve with a dollop of whipped cream (less than ½ cup for low FODMAP serving). I whip my own…and it’s so much better than canned.
Original recipe inspired by Sarah Aitken, Ashland, Oregon
One pan chicken enchilada rice bake
60 Minutes • Gluten-free • Low FODMAP • Serves 4
60 Minutes • Gluten-free • Low FODMAP • Serves 4 • A cross between enchiladas, Mexican rice, and nachos, this Mexican seasoned chicken dish is simple, hearty, and delicious.

INGREDIENTS:
2 tablespoons garlic-infused olive oil
1 pound ground chicken (or use ground beef or turkey instead)
One bunch scallions - green part only - chopped
1-2 jalapeños, seeded and chopped, use to your taste
2 teaspoons smoked paprika
1 teaspoon ground cumin
1 teaspoon kosher salt
2 1/2 cups (19 ounces) low FODMAP red enchilada sauce (recipe below)
1 cup dry long-grain rice
1/2 cup fresh cilantro, chopped, plus more for serving
Juice of 1 lime
2 cups tortilla chips
1-2 cups shredded extra-sharp cheddar cheese
Sliced avocado, cilantro, and lactose-free sour cream, for serving
DIRECTIONS:
In a large oven-safe skillet, heat the olive oil over high heat. When the oil shimmers, add the ground chicken and scallions. Cook, breaking up the meat as it cooks until the chicken is browned, about 5 minutes. Add the jalapeños, paprika, cumin, and salt, cook 1 minute. Stir in the enchilada sauce and 2 cups of water. Bring to a boil, stir in the rice. Place the lid on the skillet and turn the heat down to the lowest setting possible. Allow the rice to cook for 20 minutes until most of the liquid has cooked into the rice, but not all of it.
Meanwhile, preheat the oven to 425 degrees F
Remove skillet from the heat and stir in the cilantro and lime juice. Transfer to an oven-safe serving dish if you prefer. Sprinkle 1/3 of the cheese over the chicken/rice. Add the tortilla chips on top, pressing them gently into the cheese. Evenly sprinkle on the remaining cheese. Transfer to the oven and bake 10 minutes, until the cheese is melted.
Serve topped as desired with avocado, cilantro, and lactose-free sour cream.
Low FODMAP Red Enchilada Sauce
INGREDIENTS:
1/4 cup garlic-infused olive oil
1/4 cup gluten-free all-purpose flour
½ to 2 teaspoons chili powder, such as ground ancho chili powder
2 cups Low FODMAP Chicken Stock, either homemade or purchased
One 14.5-ounce can of diced tomatoes
1/2 teaspoon cumin
1/2 teaspoon oregano
1/2 teaspoon salt
DIRECTIONS:
For the Sauce: Heat the oil in a medium-sized pot over medium heat until hot, then whisk in flour and cook, stirring often, for a minute or two to lightly cook the roux, which is the basis for your sauce. Whisk in chili powder and cook for 15 to 30 seconds then slowly whisk in chicken or vegetable broth, then tomatoes, cumin, oregano, and salt until combined. Bring to a simmer over medium heat and cook, stirring often, for about 10 minutes. Set aside. This makes about 3 cups of sauce; you might not use all of it for this recipe but it will keep, refrigerated, in a covered container for up to a week.
Recipe for Red Enchilada sauce from Robin Jaffin/Dede Wilson.
This recipe contains affiliate links so you can easily purchase items listed on the page. This is for your information and convenience. If you purchase through this link, I may earn a commission but there is no additional cost to you. Please read my disclosure for more information.
White cheddar risotto with sauteed curly kale (low FODMAP)
45 Minutes • Gluten-free • Low FODMAP • Serves 4 - 6
45 Minutes • Gluten-free • Low FODMAP • Serves 4 - 6 • This meal takes comfort food to a whole new level! Creamy risotto with the tang of extra sharp white cheddar and the richness of sauteed curly kale is a delightful combination. Makes an excellent vegetarian main course (made with veggie broth) or a delicious side dish. And, of course, this dish is gluten-free and FODMAP friendly.

INGREDIENTS:
5 cups low FODMAP chicken broth plus one additional cup if needed (or use low FODMAP vegetable broth)
3 tablespoons garlic-infused olive oil
2 tablespoons salted butter
2 cups Japanese sushi rice or arborio rice
1 cup dry white wine, such as Pinot Grigio or Sauvignon Blanc
1 teaspoon kosher salt
1 tablespoon lemon zest, plus 3 tablespoons lemon juice
1/2 cup freshly grated parmesan cheese
8 ounces white cheddar, grated
4 cups curly kale, washed and chopped roughly (you can also use spinach if you prefer)
2 tablespoons fresh thyme leaves, finely chopped
DIRECTIONS:
In a saucepan or microwave-safe bowl, heat the chicken broth until steaming.
Heat 2 tablespoons olive oil and 2 tablespoons butter in a large pot or Dutch oven set over medium-high heat. Stir in the rice, cook until lightly golden and toasted, 2-3 minutes. Add the wine and 1 teaspoon salt, continue to cook for 3-4 minutes, or until the wine has absorbed into the rice. Stir in 5 cups warmed broth and bring to a boil over high heat, cover, reduce the heat to low, and simmer for 15 minutes.
After 15 minutes, stir in the remaining up to 1 cup broth (to get the consistency you prefer), and the grated parmesan. Stir until thickened, about 2-3 minutes. Add the grated cheddar, lemon juice, lemon zest, and thyme. Stir to combine, then remove from the heat. If the risotto gets too thick, add additional warm broth to thin. It should be creamy, but with just a touch of liquid. Taste, and adjust seasoning with salt.
While the risotto cooks, make the kale. Heat the remaining 1 tablespoon olive oil in a medium skillet over medium heat. Saute the kale until softened, about 3 minutes. Remove from the heat and stir the sauteed kale into the rice mixture.
To serve, divide the risotto in bowls with additional parmesan cheese sprinkled over the top.
This recipe contains affiliate links so you can easily purchase items listed on the page. This is for your information and convenience. If you purchase through this link, I may earn a commission but there is no additional cost to you. Please read my disclosure for more information.
Fudge brownies, chocolate peanut butter ganache, crisp sugar brulee (yup, low FODMAP too)
60 Minutes • Gluten-free • Low FODMAP • Makes 12 servings
60 Minutes • Gluten-free • Low FODMAP • Makes 12 servings • Don’t be scared off by the layers. These brownies are simple to make and simply guaranteed to blow your socks off. You’ll even get to do some very easy sugar work so you can pretend you’re on the Great British Baking Show! The rich flavor of the brownie combined with the crisp crunch of the caramel brulee is a sensory treat. Bring it all together with a chocolate peanut butter ganache and you’ve got a winner! These make a very pretty holiday gift if you can bear to part with them.

INGREDIENTS
BROWNIES:
1 1/2 sticks (12 tablespoons) salted butter
1 1/2 cups semi-sweet chocolate chips
1 cup granulated sugar
1 tablespoon Kahlúa (optional but very good!)
2 teaspoons vanilla extract
2 teaspoons instant decaf coffee (I use one sleeve of decaf Starbucks Via)
3 large eggs (or four medium), at room temperature
1/3 cup gluten-free all-purpose flour (I use Bob’s Red Mill One for One)
1/3 cup unsweetened cocoa powder
1 teaspoon baking powder
1/4 teaspoon kosher salt
CHOCOLATE PEANUT BUTTER GANACHE
3.5 ounces semi-sweet chocolate chips (I use Guittard)
3.5 ounces milk chocolate chips (I use Guittard)
1/3 cup heavy cream (or lactose-free half and half )
1/3 cup creamy peanut butter
CARAMEL BRÛLÉE
1/2 cup granulated sugar
DIRECTIONS:
Preheat the oven to 350° F. Line a 9x9 inch square pan with parchment paper.
In the microwave, melt together the butter and 1 cup of the semi-sweet chocolate chips (stirring at 30-second intervals) until melted and smooth. Stir in the sugar, Kahlúa (if using) vanilla, and instant coffee.
In a small bowl whisk the eggs for 1 minute until bubbly on top. Stir the eggs into the chocolate mix. Add the flour, cocoa powder, and baking powder. Stir until just combined. Stir in the remaining 1/2 cup chocolate chips. Evenly spread the mixture into the prepared baking pan. Bake for 26-28 minutes or until the brownies are just set. Let cool.
Meanwhile, make the ganache. In a microwave-safe bowl, melt together the semi-sweet and milk chocolate chips and cream or half and half until melted and smooth. Swirl in the peanut butter and spread over cooled brownies reaching to the edges all around. Allow the brownies to set at least one hour in the fridge or two hours at room temperature. Sprinkle with caramel brûlée, if desired. Cut into bars.
To make the Caramel Brûlée. Line a baking sheet with parchment paper. In a medium pot, cook the sugar over medium heat, stirring occasionally with a heat-proof spatula until the sugar has melted, and turns a golden caramel, about 8 minutes. Remove from the heat and carefully pour the caramel onto the prepared baking sheet. Spread in a thin, even layer and sprinkle with flaky sea salt. Let sit for 5 minutes. Once hardened, break the caramel into small pieces/shards by tapping it with the back of a metal spoon.
Original recipe inspired by Tieghan Gerard of Half Baked Harvest
This recipe contains affiliate links so you can easily purchase items listed on the page. This is for your information and convenience. If you purchase through this link, I may earn a commission but there is no additional cost to you. Please read my disclosure for more information.
Super simple baked Dijon chicken with panko crust (low FODMAP)
30 Minutes • Gluten-free • Low FODMAP • Serves 4
30 Minutes • Gluten-free • Low FODMAP • Serves 4 • This chicken can be served as a main course or a hot appetizer. It’s low FODMAP, gluten free and oh so simple to make.

INGREDIENTS:
1/8 cup butter, melted
1/8 cup garlic infused olive oil
1/4 cup Dijon mustard
1/2 cup gluten free Panko crumbs (you can substitute crushed Kellogg’s Corn Flakes or other gluten free corn flakes)
2 tablespoons fresh grated parmesan cheese
1 1/2 tablespoons fresh thyme, chopped
4 boneless, skinless chicken cutlets (chicken breast filleted in two) or 8 - 12 chicken tenderloins
DIJON SAUCE (double these amounts if you prefer more sauce):
1/4 cup mayonnaise (without added FODMAPs)
1/8 cup Dijon mustard
1/2 tablespoon toasted sesame oil
1 teaspoon gluten free soy sauce
DIRECTIONS:
Preheat oven to 500 degrees F. Line a rimmed baking sheet with parchment (not required but makes clean-up a snap).
Whisk together the melted butter, olive oil and Dijon mustard.
In a separate bowl, combine the Panko crumbs, parmesan and thyme.
One at a time, dip the chicken cutlets in the butter mixture then press just the one side of the chicken in the Panko mixture.
Place chicken, crumb side up, on a rimmed baking sheet lined with parchment.
Bake until crumbs are golden and thickest part of chicken is no longer pink inside (about 15 minutes).
Plate and serve, drizzled with Dijon sauce, alongside our Simple Gem Salad or cut into bite-size pieces and serve as a hot appetizer with the sauce as a dip.
Original recipe inspired by my sister, Sarah Aitken, of Ashland, Oregon.
This recipe contains affiliate links so you can easily purchase items listed on the page. This is for your information and convenience. If you purchase through this link, I may earn a commission but there is no additional cost to you. Please read my disclosure for more information.
Katherine’s Mongolian Beef and (or) Veggies
30 Minutes (+ 30-minutes to marinate meat) • Gluten-free • Lactose-free • Low FODMAP • Serves 4
30 Minutes (+ 30-minutes to marinate meat) • Gluten-free • Lactose-free • Low FODMAP • Serves 4 • Make this dish with meat only, meat and vegetables or vegetables only. You decide what you want for dinner! It’s hearty, delicious, and pretty to look at, but best of all, it’s IBS friendly.

INGREDIENTS:
Meat:
3 tablespoon garlic infused olive oil
1 pound flank steak or sirloin sliced thinly sliced ACROSS the grain
¾ teaspoon baking soda (to tenderize the meat)
4 scallions (green part only) sliced on the diagonal
2 tablespoons white sesame seeds
Veggies:
3 tablespoons garlic infused olive oil
1 head broccoli (florets only-no stems)
1 cups chopped Oyster mushrooms (optional)
1 red, orange, or yellow pepper or 2 carrots – thinly sliced for color
1 can sliced water chestnuts – for crunch
2 scallions (green part only) sliced on the diagonal
Sauce (for both meat and veggies):
4 tablespoons garlic-infused olive or vegetable oil
2 teaspoons ginger, minced
1 cup soy sauce (low sodium is best)
1/2 cup water
1/3 - 1/2 cup packed brown sugar
½ teaspoon red pepper flakes
Ramen or rice:
4 – 6 biscuits ramen noodles – cooked and drained (keep warm)
Or steamed white rice – (keep warm)
DIRECTIONS:
When ready to prepare the meal, cook the rice or the pasta per package instructions and keep warm.
Slice steak thinly across the grain (you can freeze it for a short while to make it easier to slice thinly). To tenderize your meat before cooking:
Sprinkle 3/4 tsp baking soda/pound (bi-carbonate soda) on sliced flank steak or sirloin
Toss with fingers, let stand for 30 minutes
Meanwhile, prepare the sauce:
Heat oil in a small saucepan over medium-low.
Add ginger and stir just until fragrant (about 1 minute).
Add soy sauce, water, brown sugar, and red pepper flakes, and bring to a boil.
Let boil 3-5 minutes or until slightly thickened. Set aside.
Cook the meat:
Put two tablespoons of the olive oil in a large frying pan and heat to medium-high
Once the oil is hot, quickly stir fry in small batches so steak cooks quickly – it doesn’t need to cook all the through as it will cook completely when combined with the sauce
Overcrowding the pan can cause the beef to steam rather than sear
Add more olive oil if needed for the next batch
Once all the beef has been cooked, combine with the sauce and heat over medium until hot and bubbly. Remove from heat, stir in green onions, and set aside.
Cook the vegetables:
Use the same pan you cooked the meat in, or a second pan (if you have strict vegetarians) to cook the vegetables.
Put about 2 tablespoons garlic olive oil in the pan and heat over medium-high heat
When the oil is hot, add the broccoli and cook for about five minutes, then add the mushrooms, water chestnuts, and carrots after a few minutes. Cook all until the broccoli is just fork tender. Add the peppers at the last minute so they don’t get overcooked and too soft.
To serve: place pasta or rice in a bowl, top with meat and/or veggies. Add some of the sauce from the pan. Sprinkle with sliced scallions and sesame seeds if you like.
Enjoy!
This recipe contains affiliate links so you can easily purchase items listed on the page. This is for your information and convenience. If you purchase through this link, I may earn a commission but there is no additional cost to you. Please read my disclosure for more information.
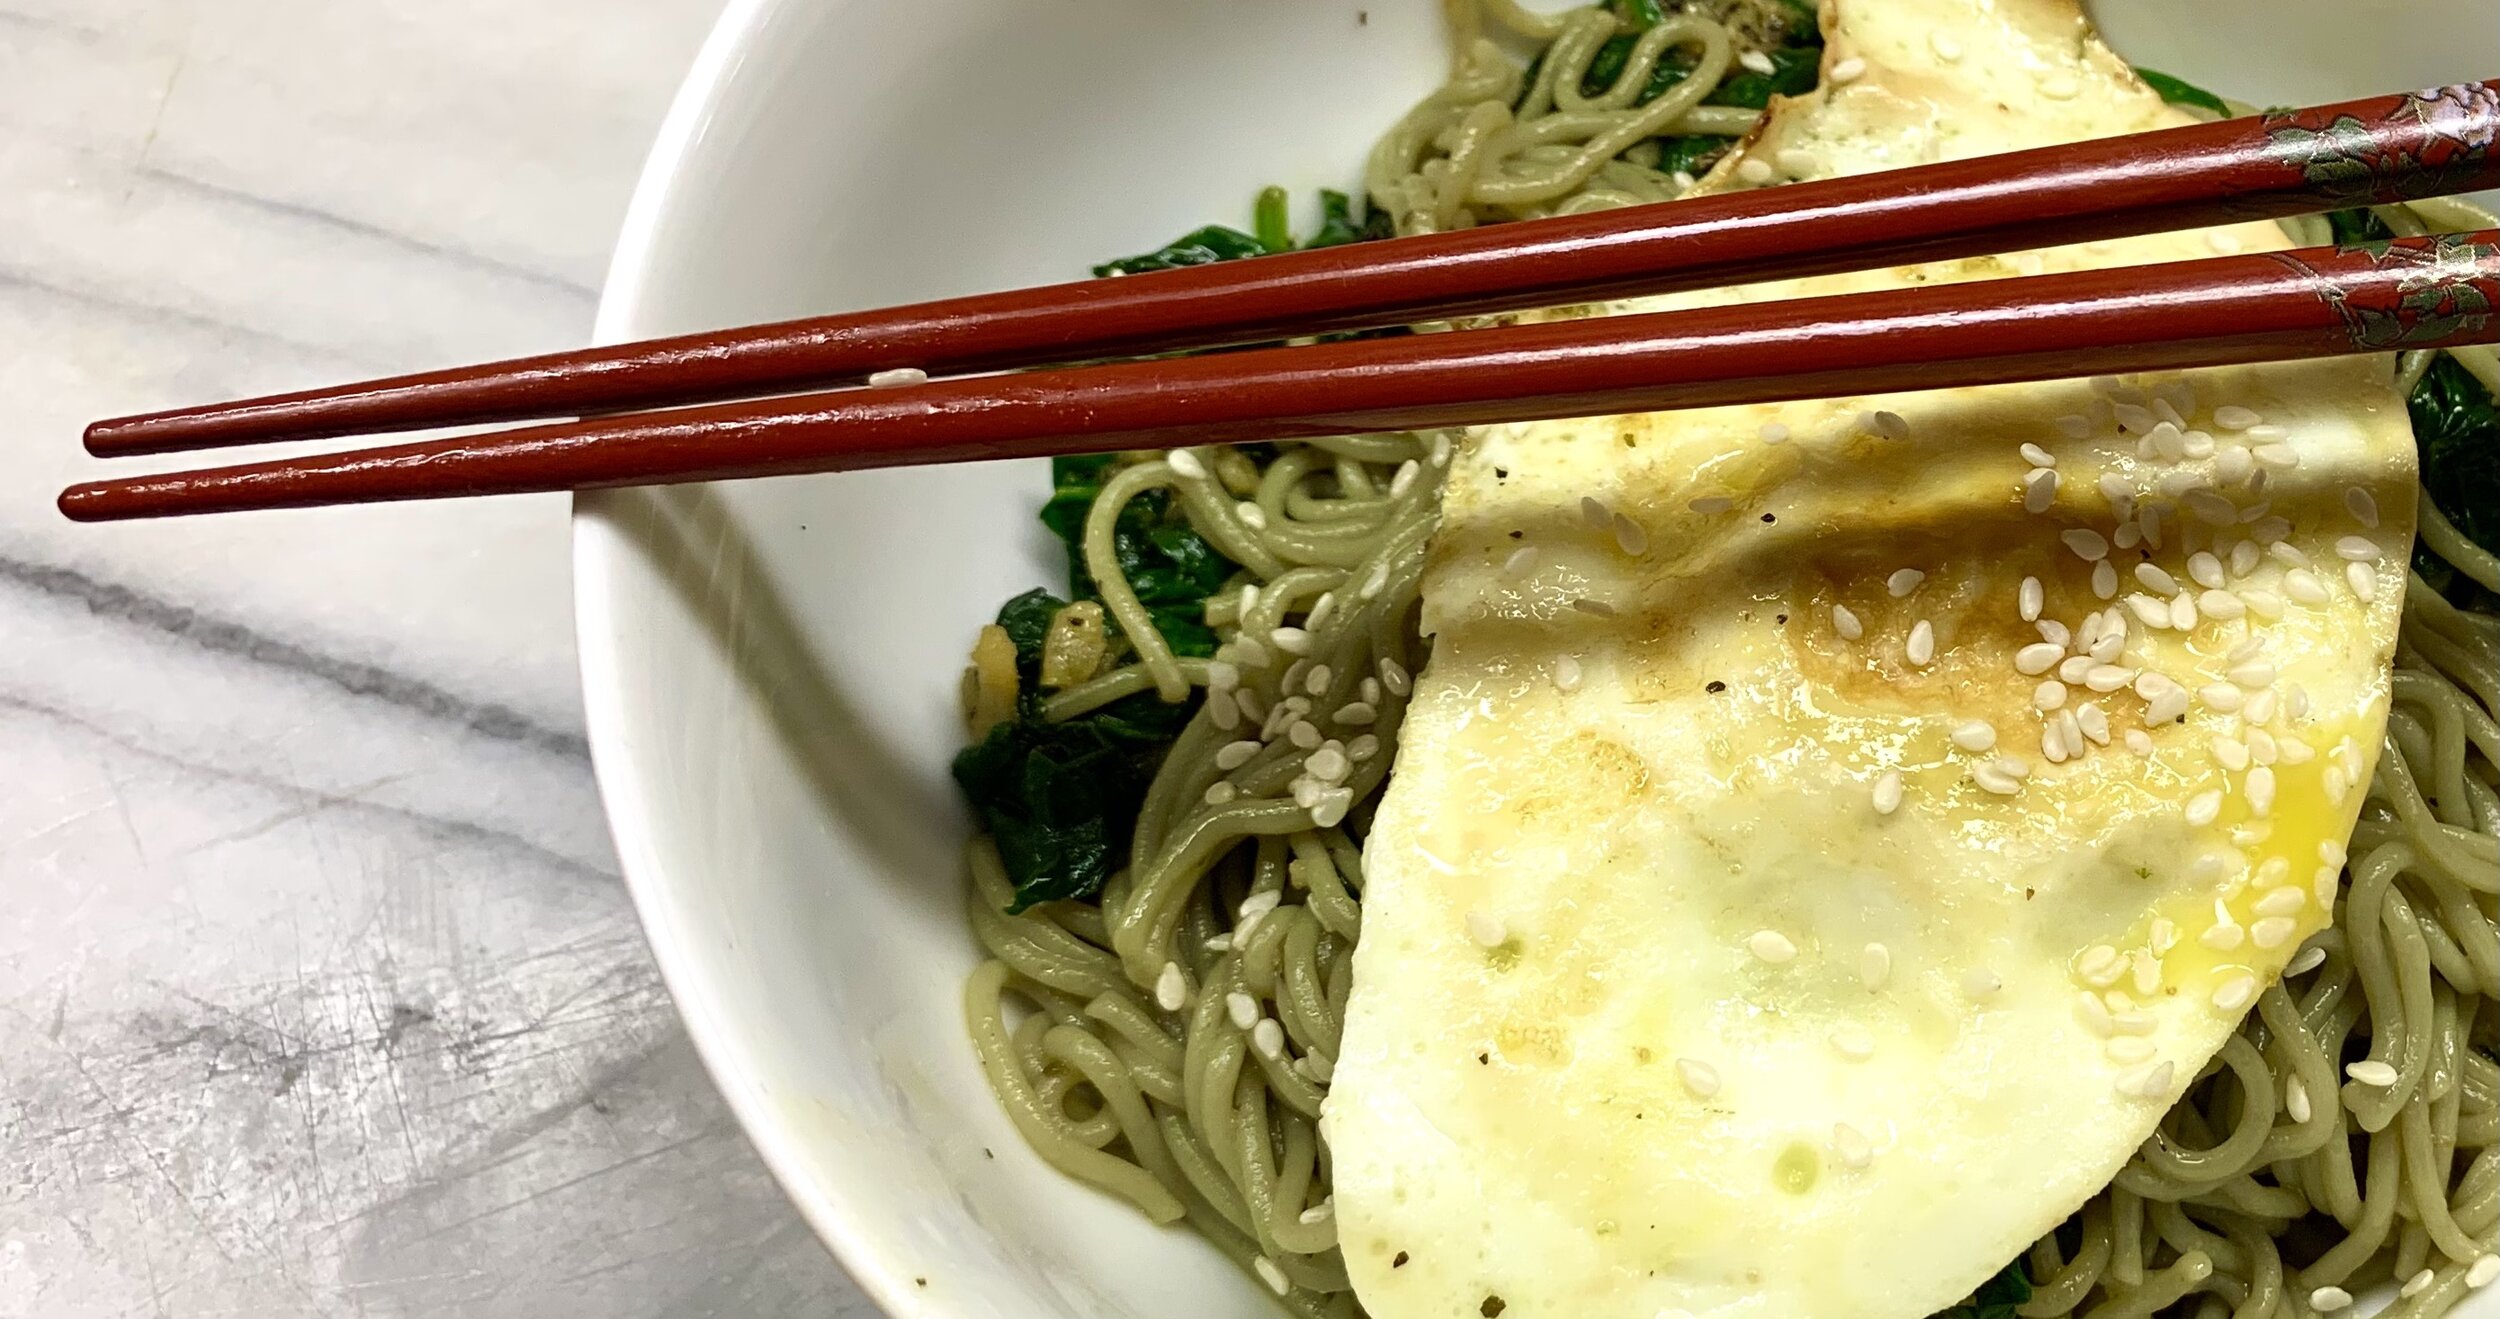
20-Minutes. 10 Ingredients. FODMAP friendly Garlic Butter Ramen
45 Minutes • Gluten-free • Low FODMAP • Serves 4 - 6
20 Minutes • Gluten-free • Low FODMAP • Serves 4 • This dish is simple to make, full of fresh and fabulous flavors, and oh so comforting to eat. Perfect for a weeknight pasta dinner or easy Sunday supper.
INGREDIENTS
(Makes four servings)
4-6 tablespoons garlic infused olive oil
4 tablespoons salted butter
4” piece of fresh ginger, peeled and grated
4-6 cups finely chopped spinach or kale
8 biscuits (2 packages) of Lotus Foods Jade Pearl rice ramen noodles (or other low FODMAP ramen noodles)
4-6 tablespoons gluten free low sodium soy sauce
1 cup fresh basil, chopped, plus more for serving
4 eggs (optional but VERY delicious)
Toasted sesame seeds (optional but very pretty) - You can make your own by toasting raw sesame seeds in a dry frying pan
Freshly ground black pepper
DIRECTIONS
In a large skillet, over medium heat, melt the butter and olive oil together. Add the grated ginger, stirring regularly for about 3 minutes. Add the spinach or kale and cook another 2-3 minutes until the greens are wilted.
Meanwhile, cook the ramen noodles according to package instructions. Drain and add, along with the soy sauce, to the frying pan with the greens and the ginger. Toss well over medium heat until ramen is warmed through and coated with the sauce.
Remove from the heat and add the basil, tossing to combine.
Divide the ramen mixture among four warmed bowls.
Add a bit more olive oil to the skillet you used to cook the pasta and place over medium heat. Crack 4 eggs into the pan – keeping them separated – and cook “over easy.”
Then top each bowl of ramen noodles with a fried egg, a sprinkling of toasted sesame seeds, and fresh basil. Season with pepper and serve immediately.
This recipe contains affiliate links so you can easily purchase items listed on the page. This is for your information and convenience. If you purchase through this link, I may earn a commission but there is no additional cost to you. Please read my disclosure for more information.
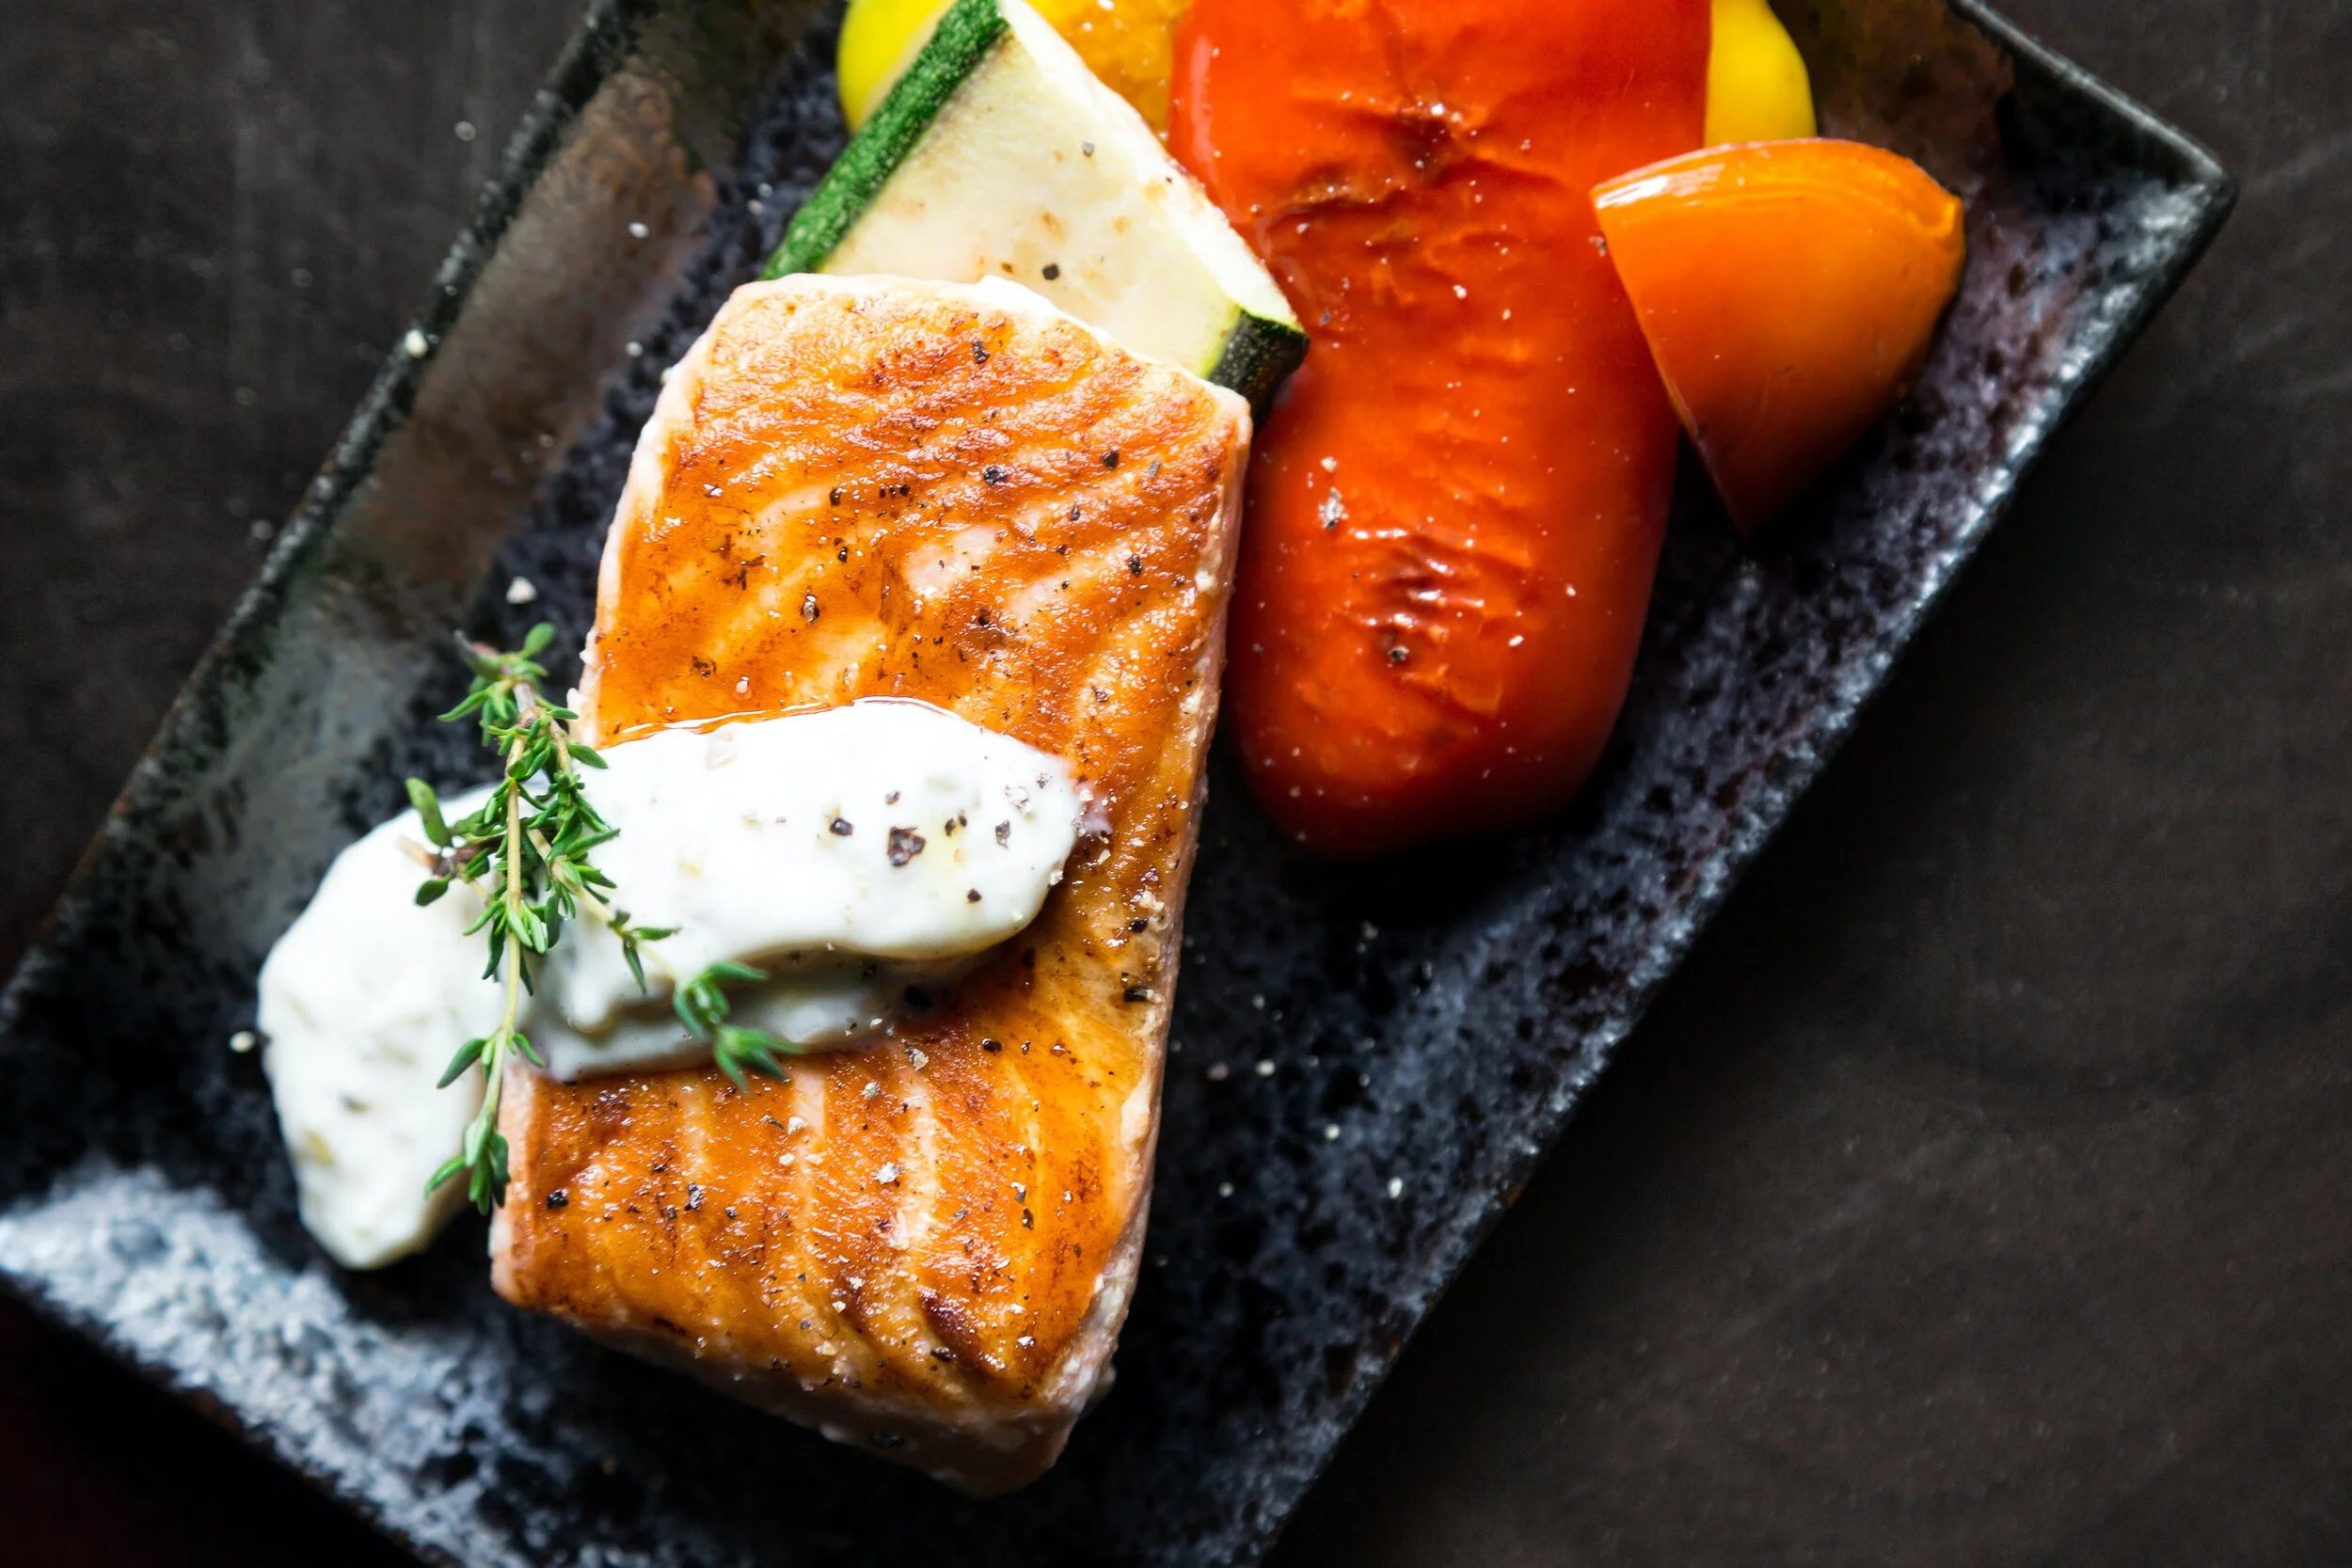
Cedar plank salmon with lemon cream
45 Minutes (+1 hour to soak cedar planks) • Gluten-free • Lactose-free • Low FODMAP • Serves 8
45 Minutes (+1 hour to soak cedar planks) • Gluten-free • Lactose-free • Low FODMAP • Serves 8 • Don’t be surprised I’m posting a grilling recipe in the dead of winter. I like grilling rain or shine and salmon is a hearty fish you can enjoy year-round. This low FODMAP salmon is the best I’ve ever had. I prefer using steelhead, but you can modify this recipe to use the type of salmon you prefer. The Lemon cream sauce is especially good with salmon but goes well with any fish or seafood and is super easy to make.
INGREDIENTS
3 (12-inch) untreated cedar planks
1 1/2 - 2 pounds Steelhead (or other) salmon filets (boneless and skin on)
⅓ cup garlic-infused olive oil
1 ½ tablespoons rice vinegar
1 teaspoon toasted sesame oil
⅓ cup gluten free soy sauce
¼ cup chopped green onions (green part only)
1 tablespoon grated fresh ginger root
LEMON CREAM INGREDIENTS
1 cup lactose free sour cream
1 teaspoon lemon zest, grated
2 tablespoons lemon juice, fresh-squeezed
1/2 teaspoon granulated sugar
DIRECTIONS
Soak the cedar planks for at least 1 hour in warm water. Soak longer if you have time.
In a shallow dish, stir together the olive oil, rice vinegar, sesame oil, soy sauce, scallion greens, and ginger. Place the salmon fillets in the marinade and turn to coat. Cover and marinate for at least 15 minutes, or up to one hour.
Preheat an outdoor grill for medium heat. Place the planks on the grate. The boards are ready when they start to smoke and crackle just a little.
Place the salmon fillets onto the planks and discard the marinade. Cover, and grill for about 20 minutes. Fish is done when you can flake it with a fork. It will continue to cook after you remove it from the grill.
Remove salmon from cedar planks and serve on warmed plates with lightly steamed vegetables, steamed white rice and, if you like, a lemon cream (see recipe below). Garnish with a sprig of fresh thyme and a grinding of fresh pepper.
LEMON CREAM DIRECTIONS
While your salmon is marinating, in a medium bowl, combine sour cream, lemon zest, lemon juice, and sugar; mix until well blended. Store, covered, in refrigerator until ready to use.
This recipe contains affiliate links so you can easily purchase items listed on the page. This is for your information and convenience. If you purchase through this link, I may earn a commission but there is no additional cost to you. Please read my disclosure for more information.
Cranberry orange tea pastry
75 Minutes (mostly baking time) • Gluten-free • Low FODMAP • Serves 8
75 Minutes (mostly baking time) • Gluten-free • Low FODMAP • Serves 8 • Sweet and tart with a delicate crumb and pretty color. Delightful heated with a bit of butter melted into each slice. Or follow my grandmother’s lead and serve warm in a bowl with a spoon of hard sauce (recipe included) and turn this into a rich and delicious holiday dessert.

INGREDIENTS:
¾ cup lactose free whole milk
1 tablespoon lemon juice
1 ¾ cups Betty Crocker rice flour blend (or other rice flour blend containing white rice flour, potato starch, tapioca starch, and Xanthan gum)
1 teaspoon baking powder
¼ teaspoon baking soda
¾ cup white sugar
6 tablespoons (3/4 stick) unsalted butter – melted and cooled
¼ cup fresh squeezed orange juice
2 teaspoons orange zest
1 large egg or 1 medium egg plus one egg white – at room temperature
1 cup raw cranberries
½ cup walnuts – toasted in a dry frying pan and finely chopped
DIRECTIONS (makes two small loaves or one larger loaf)
Preheat oven to 350 degrees F
Grease your bread pan(s) and put a strip of parchment down the middle and leave the extra hanging over the short ends of the pan.
Combine milk and lemon juice in a measuring cup and let it sit for 5 minutes to sour.
Combine flour, baking soda, baking powder, and salt and set aside.
Pour the soured milk into a large mixing bowl. Whisk in the sugar, melted (cooled) butter, orange juice and zest until fully incorporated.
Whisk in the egg until the mixture is smooth.
Pour wet ingredients over dry ingredients and fold together until just combined. Then fold in the cranberries and the walnuts.
Pour batter into prepared loaf pan(s) and cook for 45 – 60 minutes (less time for smaller pans). When you insert a toothpick in the center of the loaf, it should come out clean when the bread is fully cooked.
Cool in pan 10 minutes then turn out to cool completely. Wrap in plastic wrap and eat within 3-4 days. Bread freezes well so make extra and freeze a loaf!
OPTIONAL HARD SAUCE INGREDIENTS:
1 cup sugar
½ cup butter
½ cup lactose free whole milk, half and half, or cream
1 teaspoon Brandy
DIRECTIONS:
Combine all ingredients in a saucepan over medium heat until sugar is dissolved. Pour over cake and serve warm.
Low FODMAP serving size is one slice. A bit more if you’ve made the small loaf.
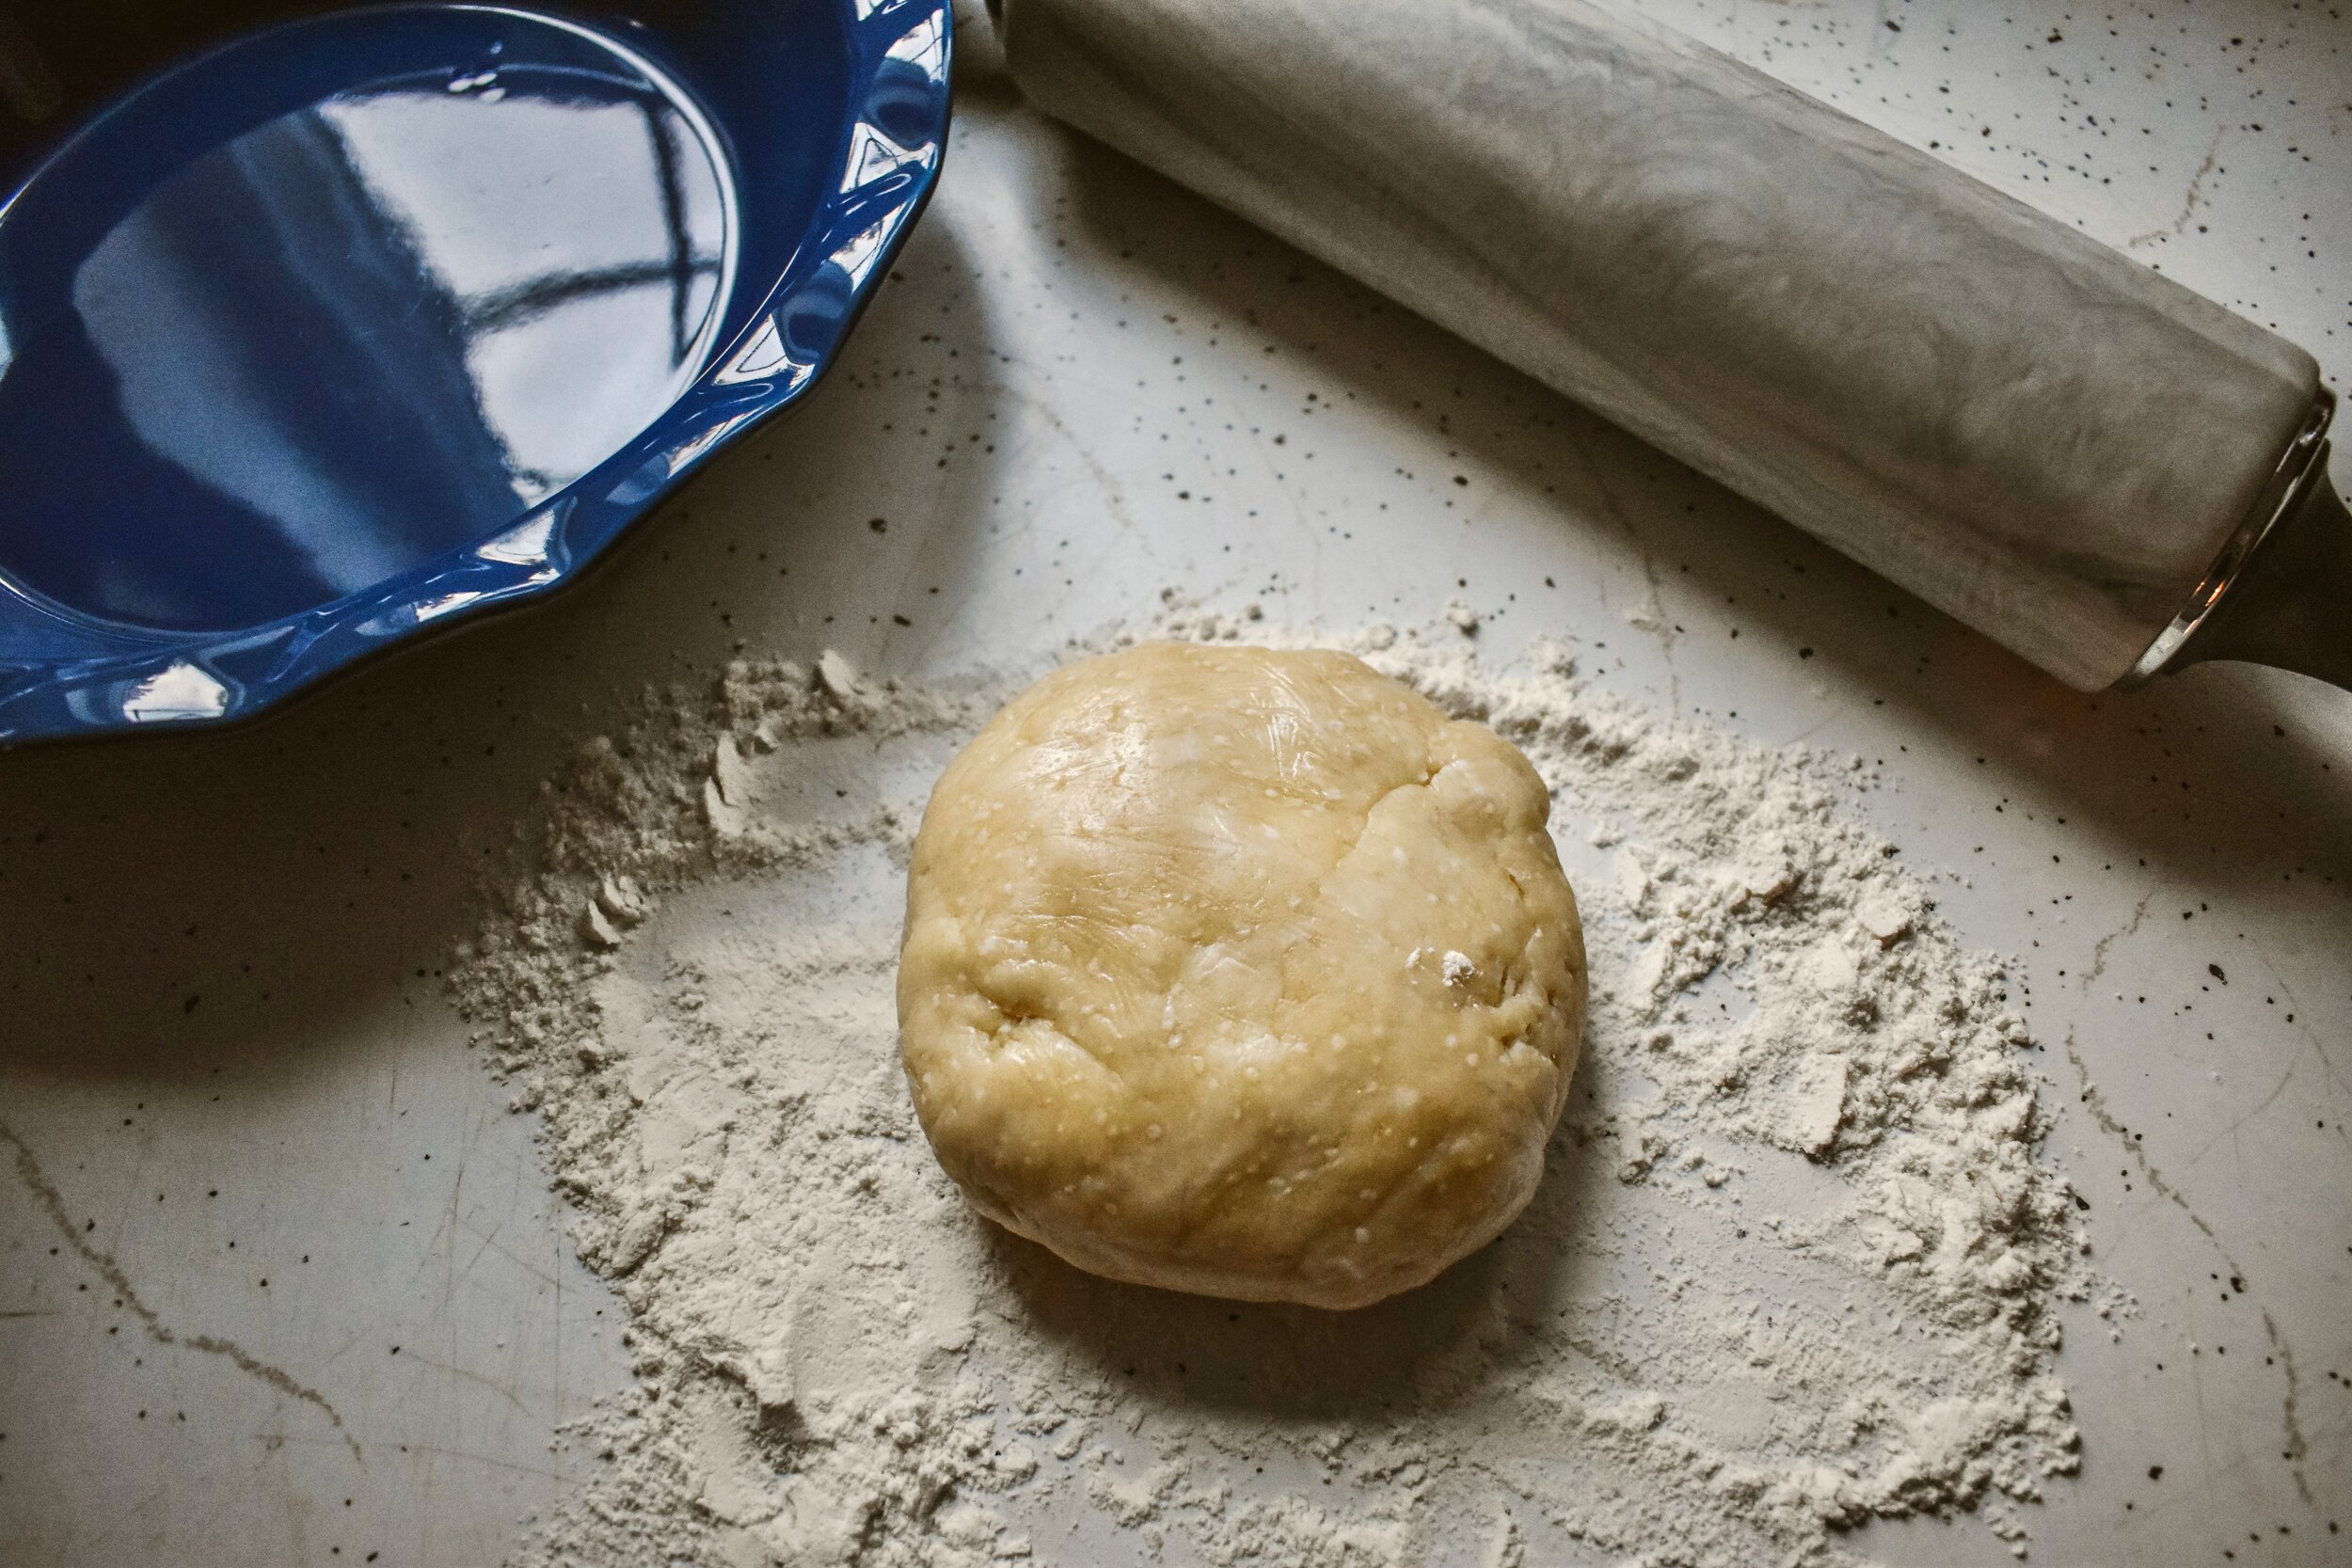
Perfect Buttery Pate Brisee Low FODMAP Pie Crust
15 Minutes • Gluten-free • Low FODMAP • Serves 8
15 Minutes • Gluten-free • Low FODMAP • Serves 8 • I had given up on creating a flaky, buttery, pie crust that was gluten-free until I came up with this combination of rice flour and butter and a few other things that resulted in a melt-in-your-mouth crust that complements anything you put inside—sweet or savory! Try this crust with our Better Than Classic Pumpkin Pie or our Spring Vegetable Quiche. You’ll love it.
Ingredients
2 egg whites
1/3 cup ice water
1/2 teaspoon apple cider vinegar
2 1/2 cups Betty Crocker Rice Flour Blend (or other rice flour blend containing white rice flour, potato starch, tapioca starch, and Xanthan gum)
1 tablespoon sugar (optional – for pie with sweet filling)
1 teaspoon baking soda
1 teaspoon baking powder
1/2 teaspoon salt
1 cup (2 sticks) very cold unsalted butter cut into cubes
Directions
Makes one large deep dish or two small pie crusts.
Whisk the egg whites, water, and apple cider vinegar together and set aside in the refrigerator.
Put the flour blend, sugar (if using), baking soda, baking powder, and salt in the bowl of a food processor fitted with the metal blade and pulse to combine. Add the butter cubes and pulse until the butter is evenly distributed in the flour mixture. With the food processor on, pour the egg, water, vinegar mixture into the feed tube of the food processor until the blend comes together and is evenly moistened and holds together if squeezed gently.
Empty the dough into your deep-dish pie pan or split it between your two small pie pans. Gently bring the dough together with your hands then press it into the pan with your fingers. If your fingers stick you can sprinkle the crust lightly with additional gluten-free flour. Press out to an even thickness on the bottom and up the sides of the pan with a small overlap on the edges. The dough is quite delicate and falls apart easily, but this pie crust is unlike crust made with regular flour in that it doesn’t get chewy when you handle it. So don’t worry if you have a lot of poking and pushing to do to get it evenly distributed in the pan – it will end up being delicious!
Once you’ve formed the crust into the pie pan(s), place the crust(s) in the freezer long enough to freeze (20 - 30 minutes). Once frozen, you can wrap them in plastic wrap and keep them in the freezer until you’re ready to use them.
When ready to use the pie crust(s), remove from the freezer, brush the inside of the frozen crust with egg white, then add your filling and place it in the oven. Bake as directed in your recipe.
If you have some extra dough, roll it out, cut it into shapes with a cookie cutter or freehand. Transfer to a parchment-lined baking sheet. Brush with lactose-free whole milk or half and half and sprinkle with sugar and cinnamon. Then bake for about 15 minutes until crisp and just starting to brown at the edges. You can also use these cutouts for your upper pie crust by placing them (uncooked) on top of your pie filling before baking.
Eat and enjoy every bite because you can!
This post may contain affiliate links so you can easily purchase items listed on the page. In some cases, we have provided a special discount code for IBS Game Changers so be sure to use it when you purchase an item to get the discount that has been arranged just for you!


Katherine’s Perfect Kale Chips
30 Minutes • Gluten-free • Lactose-free • Low FODMAP • Serves 2 - 4
30 Minutes • Gluten-free • Lactose-free • Low FODMAP • Serves 2 - 4 • They’re so good you’ll want to eat the whole bunch of kale this way so make sure you make enough! Pro tip: You can use this same recipe for roasted broccoli and it's delicious too! (Just make sure you use the tops only to keep it low FODMAP).

INGREDIENTS
1 bunch kale – leaves trimmed away from stems (discard the stems)
1 tablespoon olive oil
Salt (about ½ tsp)
Pepper (generous grinding)
Cayenne pepper (1/4 tsp)
Paprika (1/4 tsp)
Chili powder (1/4 tsp)
DIRECTIONS
Preheat oven to 300 (keeping the temp lower helps prevent burning)
Line rimmed baking dish with parchment paper
Wash kale and dry as much as possible.
Cut or tear into palm size pieces.
Put in plastic bag.
Drizzle ½ the olive oil in the bag and shake vigorously to coat kale leaves.
Add the remaining olive oil and shake again.
Spread in 1 layer on the parchment.
Sprinkle with salt, pepper and spices
Cook for 10 minutes.
Rotate pan (turn it around)
Cook for another 10 minutes.
Remove from oven and cool slightly (if you can wait that long!)
This recipe contains affiliate links so you can easily purchase items listed on the page. This is for your information and convenience. If you purchase through this link, I may earn a commission but there is no additional cost to you. Please read my disclosure for more information.
Homemade ginger tea is a delight for your tummy and your tastebuds
Ginger is a great soother for an upset stomach and ginger tea is a delightful alternative to coffee.
Ginger is a great soother for an upset stomach and ginger tea is a delightful alternative to coffee or other sorts of tea when you want a hot drink. Making your own ginger tea is simple – and you can make up a batch and keep it in the fridge for a few days if you’re a big ginger tea drinker like I am.

INGREDIENTS
Ginger – 1” per cup (scrubbed clean but not necessary to peel)
Water – 1 cup per serving
Lemon or orange slice (optional)
Maple syrup (optional)
DIRECTIONS
Thinly slice your fresh ginger. You don’t need to peel it first but do rinse it and scrub off any visible dirt. Plan on using about a one-inch piece of ginger per cup of tea.
In a saucepan, combine the ginger with fresh water (use one cup of water per serving).
Bring the mixture to a boil over high heat. Reduce the heat as necessary to maintain a gentle simmer.
Simmer for five minutes (or up to 10 minutes, if you want extra-strong tea). I usually think it’s pungent enough at five minutes.
Pour the tea through a fine sieve to catch all of the ginger. If desired, serve your tea with a thin round of lemon or orange for some complementary acidity. You might also appreciate a light drizzle of maple syrup, which will temper the fiery ginger flavor.
Some low FODMAP variations
Cinnamon Stick Ginger Tea
For a sweet and warming variation, add a cinnamon stick to your tea before bringing to a simmer.
Fresh Mint Ginger Tea
Fresh mint helps balance the spicy nature of your ginger tea. Add a few sprigs of fresh mint to the water before bringing it to a simmer.
Extra Spicy Anti-Inflammatory Ginger Tea
Turmeric offers anti-inflammatory benefits along with a pretty orange color. Treat fresh turmeric the same way that you treat fresh ginger—scrub the roots and cut it into thin slices and add it to your ginger and water mixture before bringing it to a simmer. (1 teaspoon per serving of Turmeric is low FODMAP.)
Original recipe inspired by Cookie and Kate
This recipe contains affiliate links so you can easily purchase items listed on the page. This is for your information and convenience. If you purchase through this link, I may earn a commission but there is no additional cost to you. Please read my disclosure for more information.
Arugula salad with toasted hazelnuts and parmesan (low FODMAP)
20 Minutes • Gluten-free • Low FODMAP • Serves 4
20 Minutes • Gluten-free • Low FODMAP • Serves 4 • This simple salad, with wild arugula, toasted hazelnuts, fresh grated Parmesan, and lemon Dijon dressing is my all-time favorite. The combination of toasted hazelnuts, a lemony dressing, and fresh parmesan is wonderful on arugula. (My little secret: I like to make this salad and put it on top of margarita pizza. It’s a game changer!)
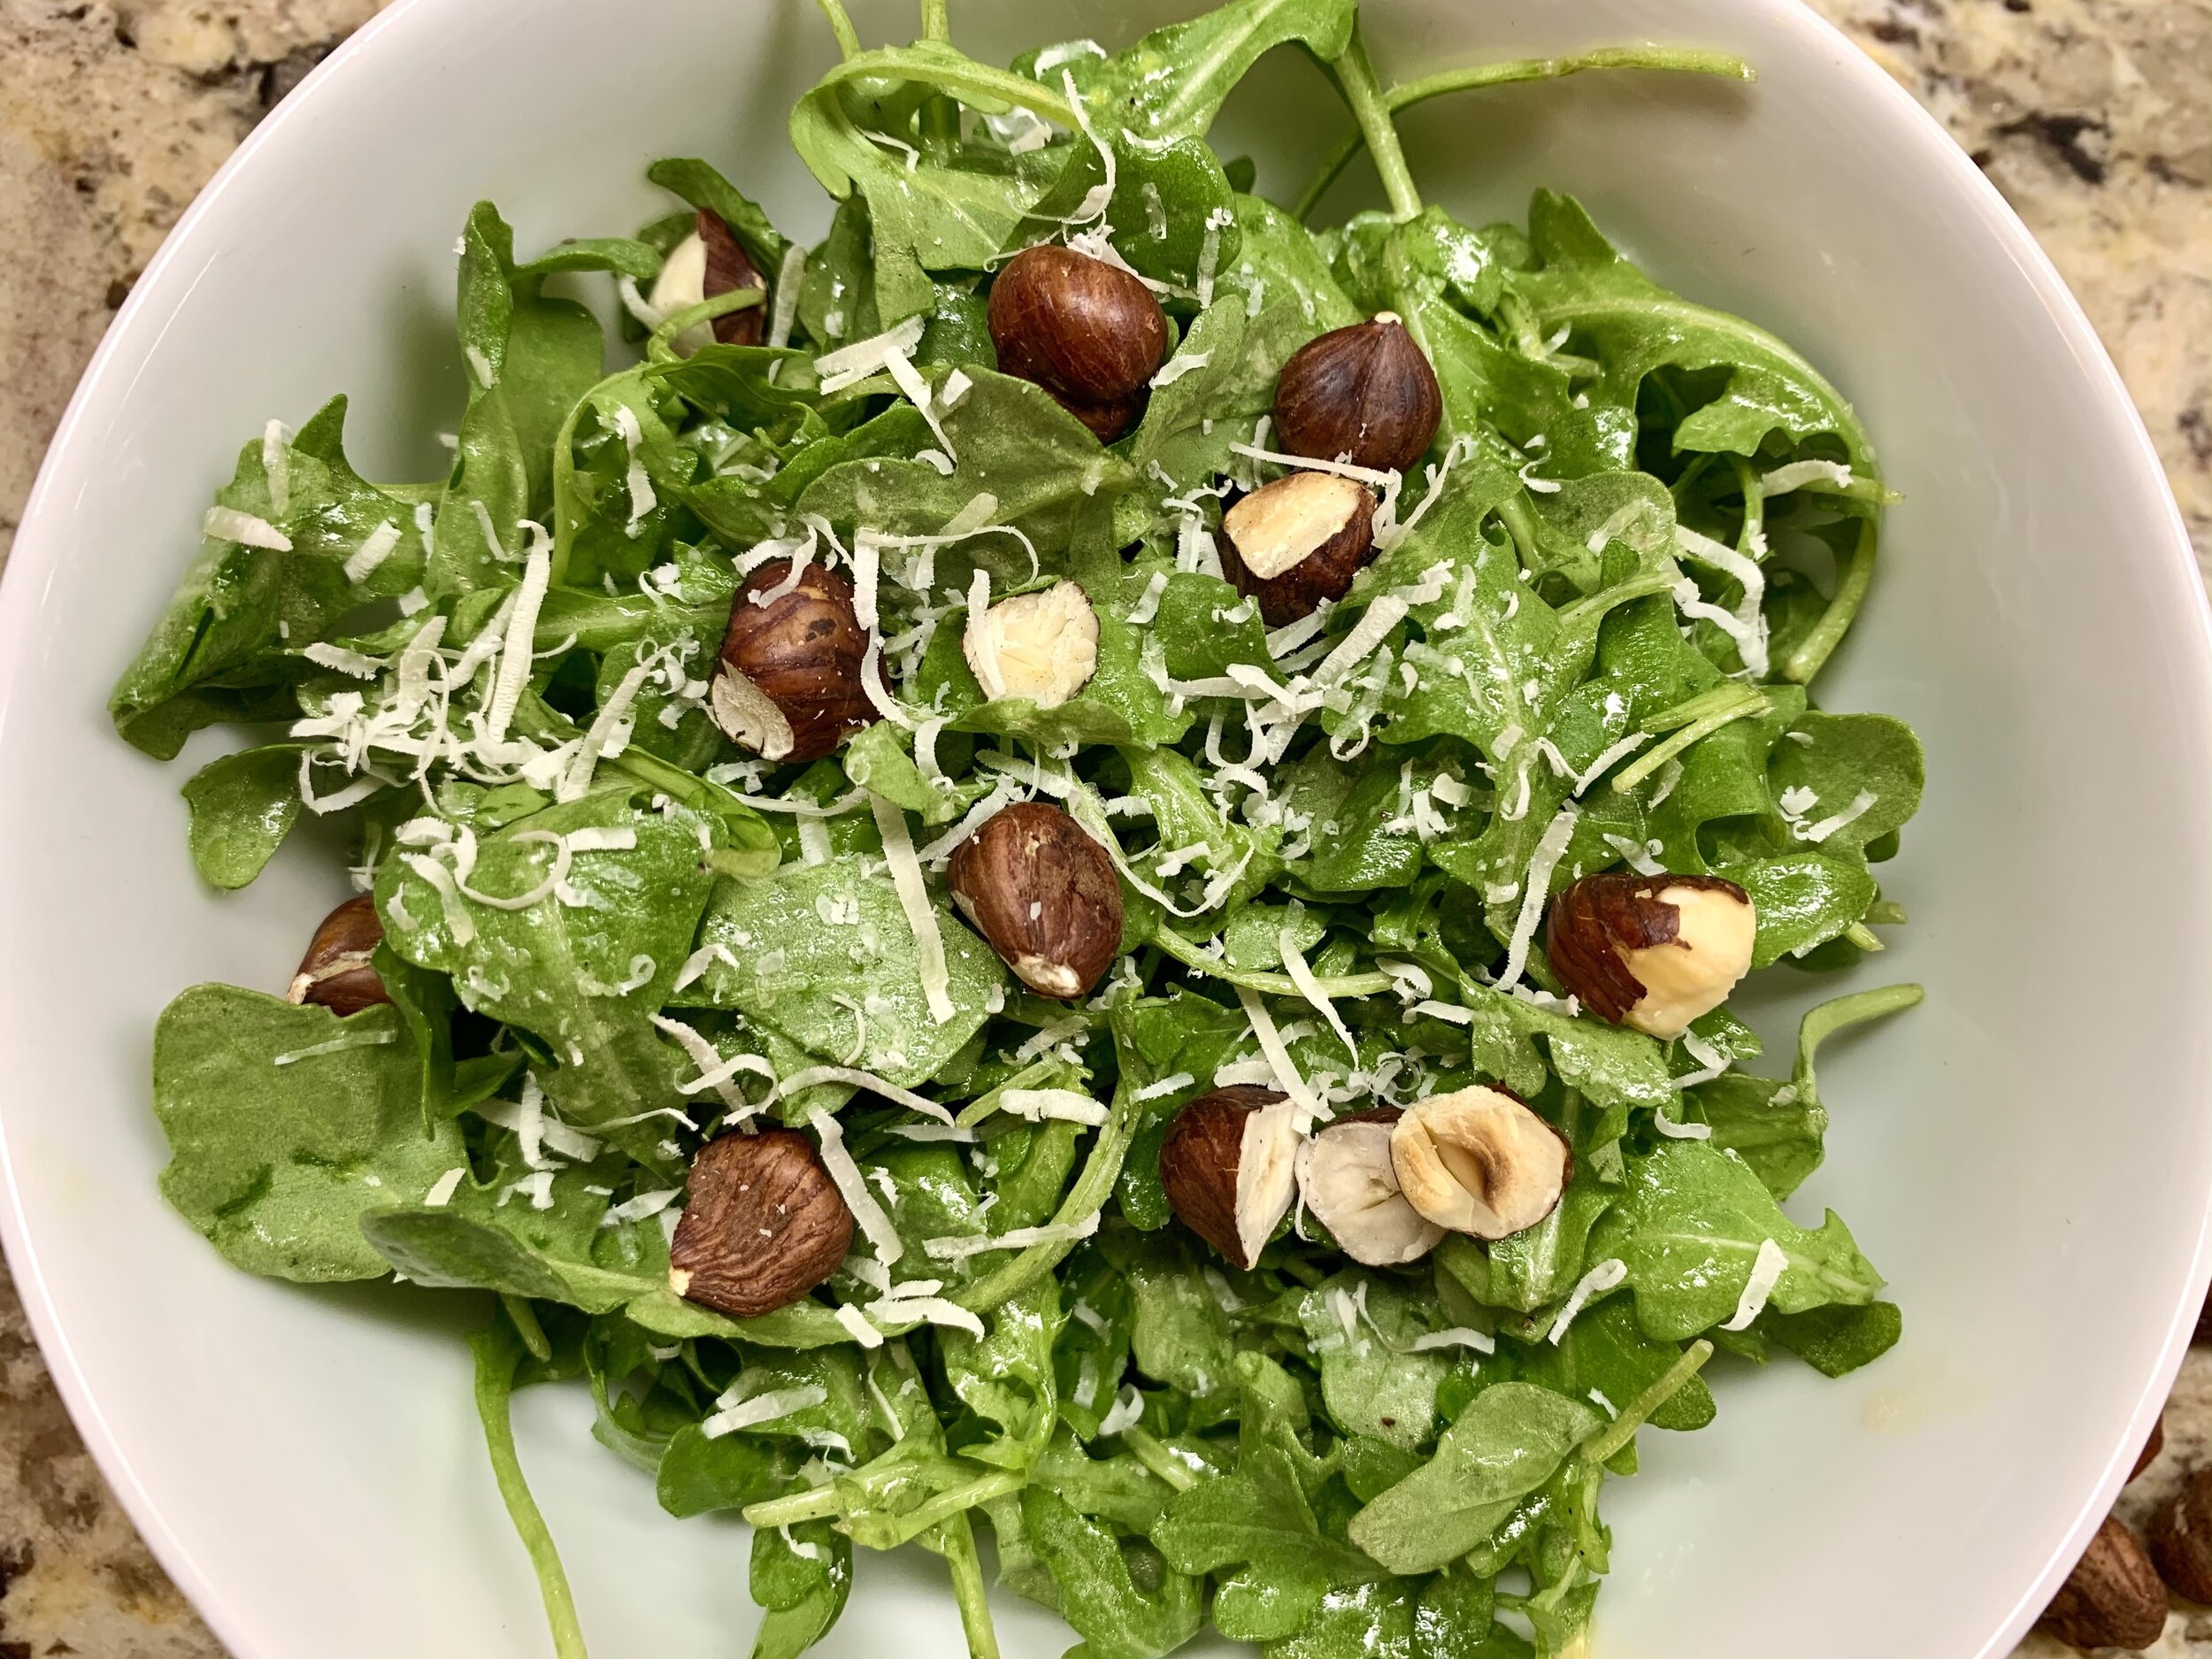
SALAD INGREDIENTS
2-3 cups Fresh arugula (preferably organic)
Raw hazelnuts (max 10 nuts per serving)
½ cup fresh grated Parmesan
LEMON DIJON DRESSING INGREDIENTS
Juice of one lemon-about 1/3 cup (preferably Meyer lemon)
Equal amount (about 1/3 cup) extra virgin olive oil
1 tablespoon Dijon mustard
Salt and freshly ground pepper to taste
DIRECTIONS
Cut hazelnuts in half and place in frying pan over medium high heat. Toast, stirring occasionally, for about 4 minutes.
Place arugula in salad bowl.
Mix all dressing ingredients together in a small jar and shake to combine. Adjust salt and pepper to taste. If taste it too tart, add a bit more olive oil.
Pour dressing over salad, add toasted hazelnuts and toss the salad to combine.
Sprinkle with fresh grated parmesan and serve.
Recipe inspired by Vesta, Redwood City, California.
This recipe contains affiliate links so you can easily purchase items listed on the page. This is for your information and convenience. If you purchase through this link, I may earn a commission but there is no additional cost to you. Please read my disclosure for more information.
Honing the practice of having a great day. Every day.
Using your brain to benefit yourself is incredibly powerful, free, and, once you establish a practice, quick and easy.
Waking up and going directly into your workday can put you in an anxious, high-stress state from the start. If you don’t give yourself time to sort through your own thoughts, ideas, to-do lists, and anxieties before launching the day, it’s a perfect recipe for a stressful, scattered, and unproductive day. And yet, that’s how most of us function!
In this blog, we have talked about building habits and planning ahead by using that part of your brain that has your best interests in mind. When you wake up in the morning, your mind is open and relaxed and your thoughts can flow easily. You can quickly access what you learned from yesterday’s experiences and prioritize what things you plan to do today. Capturing that energy and harnessing that clarity of thought is one of the best tools to maximize your own potential and begin to meet, and even exceed, your goals — no matter what they might be.
Using your brain to benefit yourself is incredibly powerful, free, and, once you establish a practice, quick and easy.

But how do you do it? One of the most powerful, and easy-to-implement, practices is to download (write down) your thoughts first thing in the morning. This thought download serves to capture key learnings from the day before and inform your priorities for the day/week/month ahead. It takes a bit of practice but if you can take 10 - 15 minutes each morning to do it for yourself, you will reap incredible rewards. Of course I can hear some of you saying no way, I don’t have time for that. What would I write down? How would I even start? This is stupid.
Use this template to give it a try. There’s no downside.
For those of you in the IBS Game Changer program, you’re already documenting some of this stuff on a daily basis in the IBS Game Changer journal you received when you signed up for the program. Good for you! You’ve already started to establish a practice. To help you take that to the next level, I’m sharing a template that should be very helpful.
Following this template will make the work of downloading your thoughts a powerful tool that benefits…you!
“It’s not what happens to us but what we learn from it that matters most.” - Michael Hyatt
Yesterday
What happened?
Don’t chronicle everything, just the highs, lows, and anything you want to remember later.
What did you read or hear?
List important books, articles, podcasts you consumed since your last thought download.
What were your biggest wins?
This gives you a sense of momentum to start the new day.
What lessons did you learn?
Try to distill your experience down to a couple of lessons you want to remember. It’s not what happens to us but what we learn from it that matters most.
What stood out?
I don’t want to lose what I learn in my reading and listening, so I record key insights.
Today
What are you thankful for right now?
This is one practical way you can cultivate a sense of abundance and gratitude.
What are you thinking and feeling right now?
Your thoughts and feelings are the be-all-end-all because they drive everything you feel, actions you take, and the results you get. Writing them down prevents you from ignoring or suppressing them and gives you an opportunity to check in on yourself.
What are your goals for this week/today?
Keep your goals focused and no more than 3
Allow yourself to include goals related to personal growth and self care in addition to work and productivity
What are your top 3 priorities to support those goals today?
Stay focused so you can keep your priorities in mind. It’s ok to list them all, but then prioritize and focus on the top 3. \
What can you do for someone else?
Doing things for others is one of the best ways to feel connected and reap personal rewards. This can be as simple as reaching out to a friend or family member with a call, text, or card or it can be as much as volunteering your time at a local food pantry or shelter to help strangers who are in need. The simple act of helping someone else is powerful in lifting your own spirit.
Tomorrow
What are your goals for this week/tomorrow?
Give some thought to tomorrow and what your focus can be to maintain your progress.
What can you do next to move forward on your goals?
Think through your goals, priorities and schedule and identify a few key actions you could take tomorrow to keep your momentum going.
Here’s a text version of the prompts you can copy and use as you establish your daily practice.
Yesterday
What happened?
What did you read or hear?
What were your biggest wins?
What lessons did you learn?
What stood out? What did you like best?
Today
What are you thankful for right now?
What are you thinking and feeling right now?
What are your goals for this week/today?
What are your top 3 priorities to support those goals today?
What can you do for someone else?
Tomorrow
What are your goals for this week/tomorrow?
What can you do next to move forward on your goals?
It doesn’t take long to build a practice that works for you and allows you to mentally prepare yourself for a great day every day!
Queso chicken and rice with fresh salsa that’s low FODMAP and amazing!
60 Minutes • Gluten-free • Low FODMAP • Serves 8
60 Minutes • Gluten-free • Low FODMAP • Serves 8 • This dish is the perfect combination of flavors and colors and will transport you straight to the Southwestern US, famous for Tex-Mex cuisine. You’ll love it and it will quickly become a favorite for the whole family.

INGREDIENTS:
2 tablespoons garlic-infused olive oil
4-6 boneless, skinless chicken breasts (depending on size)
1 ounce low FODMAP taco Seasoning (see recipe below)
15 oz. fresh low FODMAP salsa (see recipe below)
3/4 cup lactose free milk
4-5 ounces can diced green chilies
1 red bell pepper, chopped
2-3 green onions, chopped (green part only)
4 cups cooked white rice
1 cup shredded sharp cheddar cheese
DIRECTIONS:
Preheat oven to 375° F. Butter a baking dish large enough to accommodate the rice mixture with chicken breasts overlaid so the sauce doesn’t bubble over.
In a large skillet, heat oil over medium heat. Sprinkle chicken with half of taco seasoning mix. Cook chicken for 6-8 minutes, turning once, until golden brown on both sides. Cut larger breasts so all pieces are about the same size. Chicken may not be cooked all the way through but will finish baking in the oven.
In large bowl, stir together salsa con queso, milk and diced green chilies; stir in bell pepper, green onions and remaining taco seasoning. Set aside 1 cup of the sauce mixture. Stir rice into remaining sauce mixture.
Place rice mixture in casserole; place chicken on top of rice. Top with reserved sauce mixture, and sprinkle with shredded cheese.
Cover with parchment (so the foil doesn’t stick to the cheese) and then with foil and bake for 20-30 minutes. Uncover and bake about 10 minutes more, or until sauce is bubbly and chicken is cooked through. Garnish with chopped tomatoes and cilantro before serving.
Serve with: Lactose free sour cream, chopped tomatoes, fresh cilantro, and crisp tortilla chips.
IBS Friendly Taco Seasoning
INGREDIENTS:
Combine and store in airtight container
1 tablespoon chili powder
1/4 teaspoon crushed red pepper flakes
1/4 teaspoon dried oregano
1/2 teaspoon paprika
1 1/2 teaspoons ground cumin
1 teaspoon sea salt
1 teaspoon black pepper
DIRECTIONS:
Combine all ingredients and store in air tight container.
Fresh Salsa (with Salsa con Queso option)
INGREDIENTS:
1-2 Jalapeno peppers – seeded and finely chopped (wear gloves while you seed and chop)
5 ripe tomatoes chopped – heirloom are nice or choose “on the vine” for best flavor
1 cup chopped fresh cilantro
1-2 scallions chopped (green part only)
½ teaspoon ground cumin
¼ teaspoon cayenne pepper
1 teaspoon chili powder
2 tablespoons lime juice
FOR THE “CON QUESO” VERSION (only if you can tolerate the added lactose from the additional cheese):
1 pound sharp cheddar cheese (grated)
¼ cup lactose free milk
DIRECTIONS:
In a food processor, place seeded jalapeno, roughly chopped tomatoes, chopped cilantro, cumin, chili powder and lime juice. Process using pulse setting until an evenly chunky texture is obtained.
For the Con Queso version: grate cheese and combine with milk. Cook over medium heat, stirring occasionally, 7-10 minutes or until cheese is melted. Add salsa and mix until well combined.
This recipe contains affiliate links so you can easily purchase items listed on the page. This is for your information and convenience. If you purchase through this link, I may earn a commission but there is no additional cost to you. Please read my disclosure for more information.
30-minute Szechuan noodles and chicken (low FODMAP and so good!)
30 Minutes • Gluten-free • Lactose-free • Low FODMAP • Serves 4
30 Minutes • Gluten-free • Lactose-free • Low FODMAP • Serves 4 • Szechuan style noodles in a fabulous sauce and tossed with gingery ground chicken, mushrooms and kale. (Don’t be afraid of the kale! It’s delicious and mild as it’s chopped and cooked in this recipe.) And to top it off? Toasted chili oil you make yourself. You will want to put it on everything. You can make this quick and healthy vegetable-filled noodle dish in about 30 minutes – less time than picking up takeout and ohhhh so much better!

INGREDIENTS:
1/3 cup combined ½ garlic infused olive oil and ½ toasted sesame oil (1/3 cup total)
1 tablespoon crushed red pepper flakes
1/3 cup raw peanuts, roughly chopped
2-3 strips orange or clementine peel (use your vegetable peeler to make the strips)
10 ounces gluten free ramen noodles (I use Lotus Foods Organic Quick-Cook Jade Pearl Rice Ramen Noodles)
1/2 cup gluten free low sodium soy sauce
2 tablespoons maple syrup (or honey if you tolerate)
1/2 cup water
2 tablespoons toasted sesame oil
1 pound ground chicken
3 cups oyster mushrooms, chopped
1 inch fresh ginger, grated
2 cups roughly chopped kale
2 tablespoons raw sesame seeds
Green onions and additional peanuts for serving
DIRECTIONS:
Make the chili oil first. In a large skillet, heat the garlic-infused olive oil combined with the sesame oil (1/3 cup total), and the peanuts over medium heat. Cook, stirring occasionally until the peanuts turn golden, about 5 minutes. Don’t cook too hot and watch for burning as that will change the taste. Remove from the heat and transfer the oil to a heatproof bowl or glass jar. Stir in the red pepper flakes and orange peel and let sit while you make the rest of the meal.
Combine the soy sauce, maple syrup, and water and set aside. Wash and chop the kale, mushrooms and green onions.
Meanwhile, Cook the noodles according to package directions. Drain and set aside.
Place the skillet used to make the chili oil, over medium-high heat. Add 2 tablespoons sesame oil and the chicken. Season with black pepper and brown the chicken all over, breaking the chicken up as it cooks, about 5 minutes. Add the mushrooms and ginger and cook another 2-3 minutes. Slowly pour in 1/2 of the soy sauce/water mixture. Bring the mixture to a simmer and cook until the sauce coats the chicken and it begins to caramelize and get crispy, about 5 minutes. Add the remaining soy sauce mixture, the kale, and the sesame seeds. Bring the mixture to a simmer.
Stir in the noodles and 1 tablespoons chili oil (or more depending on how spicy you prefer and can tolerate).
Remove from the heat. Serve warm, topped with additional chili oil, peanuts and green onions.
Original recipe inspired by Tieghan Gerard, Half Baked Harvest
This recipe contains affiliate links so you can easily purchase items listed on the page. This is for your information and convenience. If you purchase through this link, I may earn a commission but there is no additional cost to you. Please read my disclosure for more information.
Gnocchi and rosemary bacon in a creamy and delicious soup that’s low FODMAP? What?
45 Minutes • Gluten-free • Low FODMAP • Serves 4
45 Minutes • Gluten-free • Low FODMAP • Serves 4 • This creamy soup is delightfully warming and chock full of delicious low FODMAP ingredients. The perfect meal when you’re craving warm comfort but you still want to feel good afterwards!

INGREDIENTS:
4 slices thick cut bacon, chopped
1 tablespoon fresh chopped rosemary
2 tablespoons garlic-infused olive oil
4 scallions chopped (green part only)
6 carrots, chopped
4 celery stalks, chopped
2 tablespoons fresh thyme leaves (or 2 teaspoons dried thyme)
1 tablespoon fresh basil (or 1 teaspoon dried basil)
1-2 teaspoons fennel seeds lightly crushed (to your taste)
1 pinch crushed red pepper flakes
kosher salt and black pepper
2 tablespoons salted butter
2 tablespoons rice flour or gluten free one for one flour
4-6 cups low FODMAP chicken broth (more for more “soup” and less if you want more “stuff.”)
4-6 cups roughly chopped kale or spinach
1 1/2 cups canned coconut milk, or lactose free whole milk
1/2 cup grated parmesan or asiago cheese, plus more for serving
1 pound fresh potato gnocchi (read the ingredients to be sure potato gnocchi is gluten free)
DIRECTIONS:
Cook the bacon in a large Dutch oven (soup pot) over medium heat until crisp, about 5 minutes. During the last minute of cooking, add the rosemary to the cooking bacon and cook for one minute. Remove the bacon. If there's excess bacon grease, drain off all but about 1 tablespoon. Add the scallions and cook 3 minutes, until softened. Add the carrots, celery, thyme, basil, fennel, crushed red pepper, and a pinch each of salt and pepper. Cook another 5 minutes, until very fragrant.
Stir in the butter and flour, cook 1 minute. Add 4 cups broth. Simmer over medium heat for 20 minutes, until the carrots are tender.
About 10 minutes before serving, stir in the kale/spinach, cream/milk, parmesan, and gnocchi. If the soup is too thick, add additional broth.
Serve the soup topped with the rosemary bacon and parmesan and some toasted sourdough or gluten free bread.
Original recipe inspired by Tieghen Gerard of Half Baked Harvest
This recipe contains affiliate links so you can easily purchase items listed on the page. This is for your information and convenience. If you purchase through this link, I may earn a commission but there is no additional cost to you. Please read my disclosure for more information.
Easy peasy creamy sage fusilli with pumpkin cream sauce (so good and low FODMAP too!)
30 Minutes • Gluten-free • Dairy-free • Low FODMAP • Serves 4
30 Minutes • Gluten-free • Dairy-free • Low FODMAP • Serves 4 • Simple to make, this sage fusilli pasta with pumpkin cream sauce is delicious, gluten free and low FODMAP. Serve this pasta as a hearty vegetarian main course for 4 or as an excellent side dish for more.

INGREDIENTS:
1 cup canned pumpkin
1/2 cup canned light coconut milk
1 teaspoon ground sage or 1 tablespoon fresh sage, finely chopped
1/8 teaspoon cayenne pepper
1 tablespoon garlic infused olive oil
salt + pepper, to taste
12 ounces gluten free fusilli pasta
1/2 cup chopped walnuts
1/4 cup chopped chives
¾ cup freshly grated parmesan
DIRECTIONS:
Prepare your pasta according to package instructions.
While the pasta is cooking prepare the pumpkin cream.
Combine pumpkin, coconut milk, sage, cayenne pepper, garlic infused olive oil, salt and pepper in a saucepan over medium heat. Once heated through, let simmer over low heat until pasta is ready.
Drain pasta and rinse to prevent sticking. Add pasta to saucepan and stir gently to combine.
Place in heated serving bowl or serve in individual bowls with walnuts, shredded parmesan and chives.
Original recipe inspired by Kate Scarlata of Maine.
This recipe contains affiliate links so you can easily purchase items listed on the page. This is for your information and convenience. If you purchase through this link, I may earn a commission but there is no additional cost to you. Please read my disclosure for more information.
IBS friendly Sweet Potatoes with candied pecans. Yup. I just said that.
45 Minutes • Gluten-free • Low FODMAP • Serves 8 - 10
45 Minutes • Gluten-free • Low FODMAP • Serves 8 - 10 • Mashed sweet potatoes are a wonderful holiday tradition but more than 1/2 cup can be too much if you’re on a low FODMAP diet. This recipe combines sweet potatoes with Russet potatoes so you can enjoy a bit more. The candied spiced pecans are the piece de resistance so don’t leave them out! In fact, the pecans are so good, you’ll want to eat them plain. Consider including them with your appetizers before the meal, or alongside a post-dinner cheese plate with grapes and an array of aged cheeses.
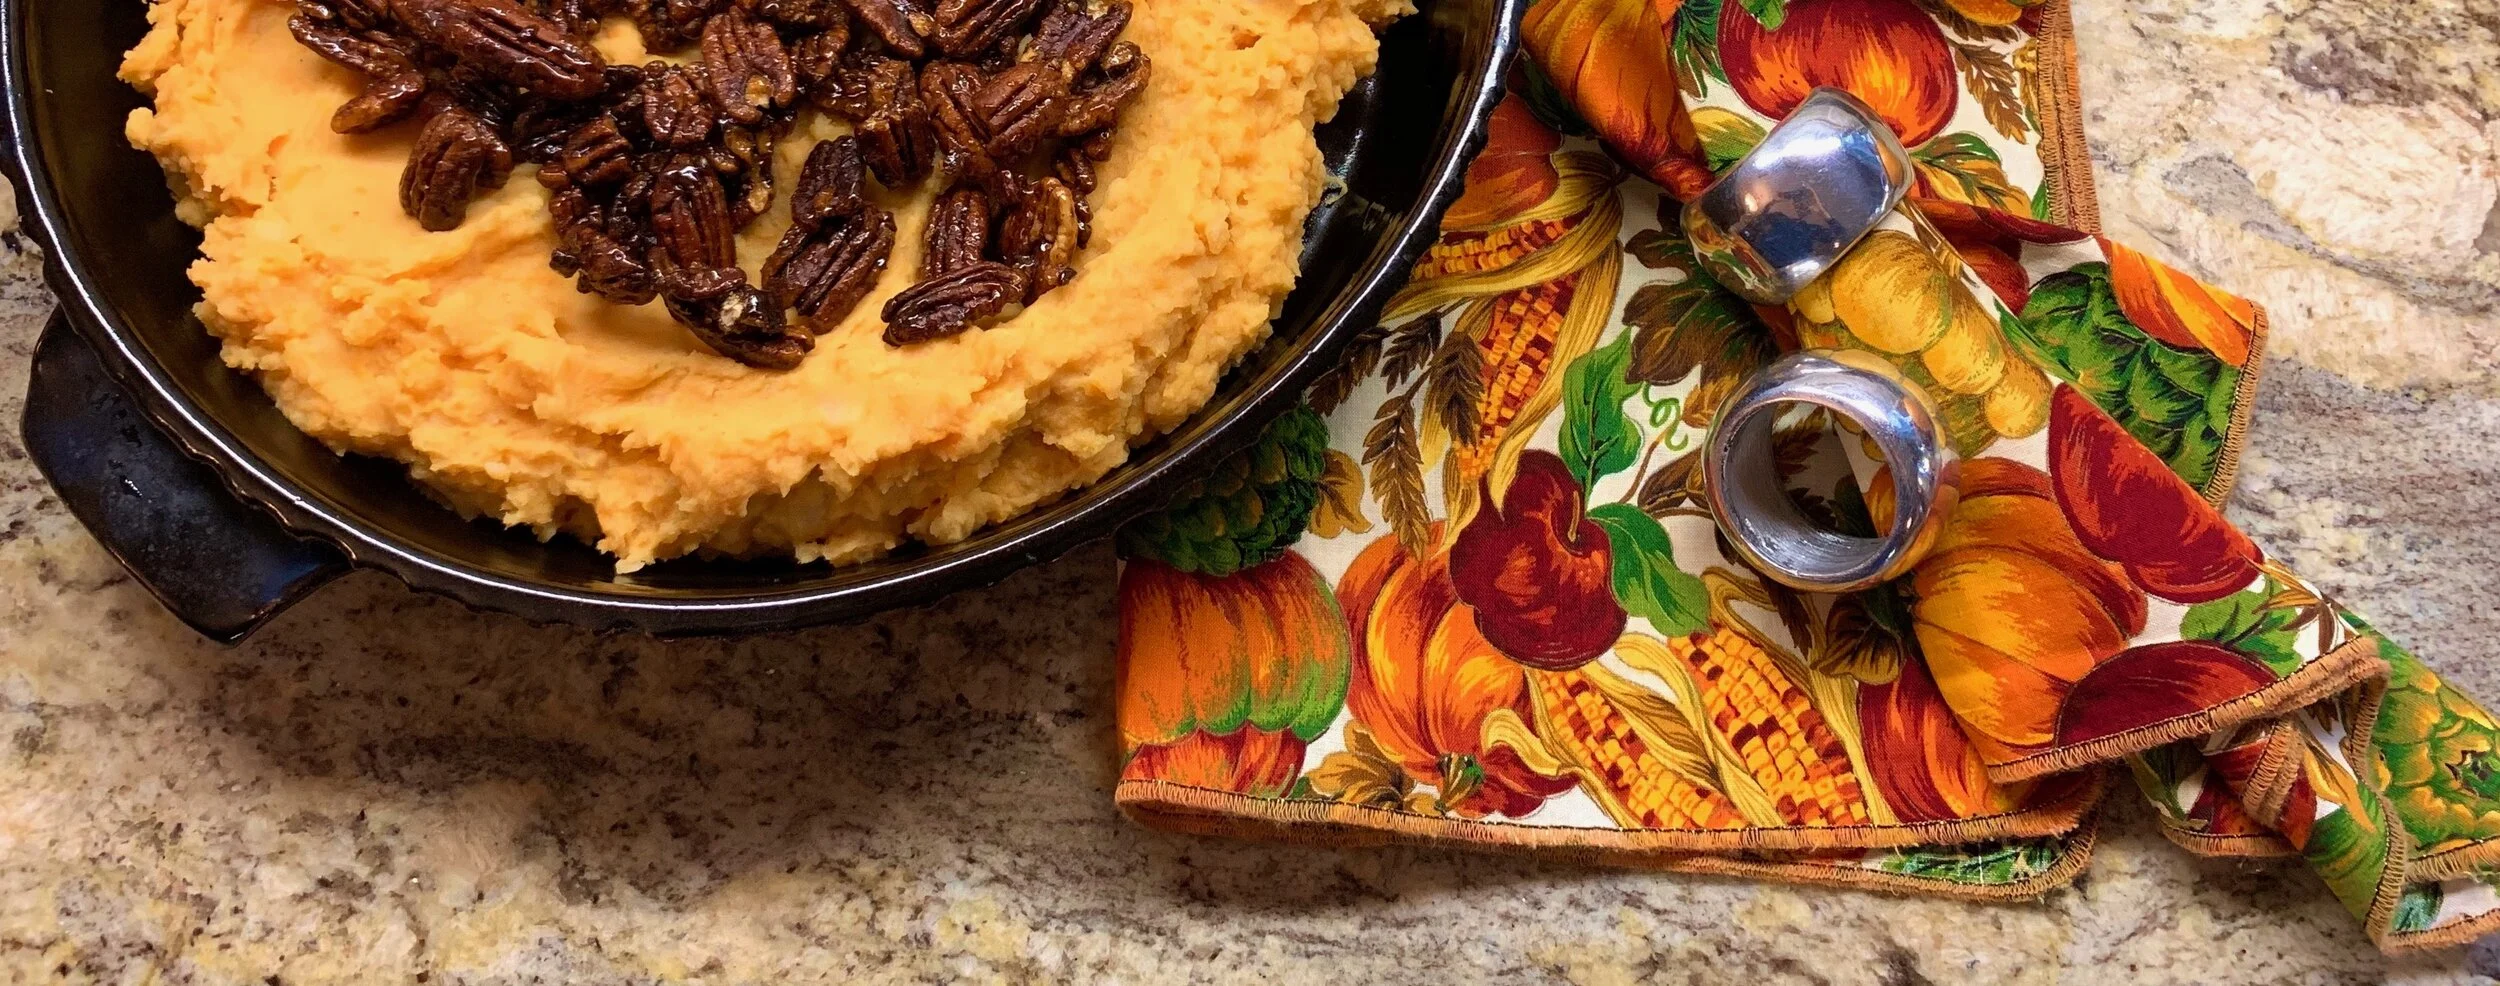
INGREDIENTS:
1.5 pounds Russet or other white potatoes, peeled and cut into large chunks
1.5 pounds orange fleshed sweet potatoes, peeled and cut into large chunks
1/4 cup to 1/2 cup lactose-free whole milk
4 tablespoons unsalted butter, cut into pieces
Kosher salt
Freshly ground black pepper
2 tablespoons maple syrup
1 tablespoon orange zest (optional)
1/2 cup candied spiced pecans (recipe below), chopped, optional
DIRECTIONS:
Cook potatoes in large pot of salted water. Bring to a boil over high heat then turn heat down to simmer and cook partially covered until potatoes are tender when pierced with a knife.
Drain well in a colander then return all of the potatoes to the pot. Place over low heat and stir them around to dry them out a bit. Remove from heat.
Add about 1/4 cup of the milk, the maple syrup, orange zest and butter and begin to mash. Taste and season with salt and pepper and add remaining milk, as needed, to make satiny, smooth, creamy yet fluffy mashed potatoes.
Sprinkle with Candied Spiced Pecans, see recipe here. Serve immediately. Low FODMAP serving size is 1 cup.
This recipe contains affiliate links so you can easily purchase items listed on the page. This is for your information and convenience. If you purchase through this link, I may earn a commission but there is no additional cost to you. Please read my disclosure for more information.