Deliciously Low FODMAP
Inspire yourself with hundreds of delicious low FODMAP recipes, tips, and tools, and enjoy the abundance that is yours even when you have IBS.
Use the buttons and filters to find something specific or browse the complete collection for inspiration.
Discover a treasure trove of recipes with my FREE recipe club! Get new ideas delivered straight to your inbox every week.
Deliciously Low FODMAP is a trademark of IBS Game Changer, LLC
Filter to find Recipes and Tools
More Filtering Options
- All 733
- Appetizer 50
- BBQ 46
- Bowl 32
- Breakfast 58
- Cocktails 13
- Collection 1 58
- Collection 10 27
- Collection 11 30
- Collection 12 27
- Collection 13 31
- Collection 14 29
- Collection 15 31
- Collection 16 34
- Collection 17 31
- Collection 18 33
- Collection 19 36
- Collection 2 32
- Collection 20 33
- Collection 21 33
- Collection 22 40
- Collection 23 15
- Collection 24 1
- Collection 3 28
- Collection 4 29
- Collection 5 30
- Collection 6 32
- Collection 7 31
- Collection 8 31
- Collection 9 32
- Condiments 6
- Crock Pot 4
- Dessert 108
- Diabetes Game Changer Exception Protocol Contains Alcohol 11
- Diabetes Game Changer Exception Protocol Contains Flour 109
- Diabetes Game Changer Exception Protocol Contains Flour AND Sugar 77
- Diabetes Game Changer Exception Protocol Contains Sugar 49
- Diabetes Game Changer First Four Weeks 366
- Dinner 333
- Drink 8
- Easter 1
- Free Guide 17
- Gluten-free 594
- Gut Microbiome 2
- Guthealth 3
- Holidays 69
- IBS Triggers 4
- Keto Friendly 126
- Lactose-Free 175
- Low FODMAP Diet 719
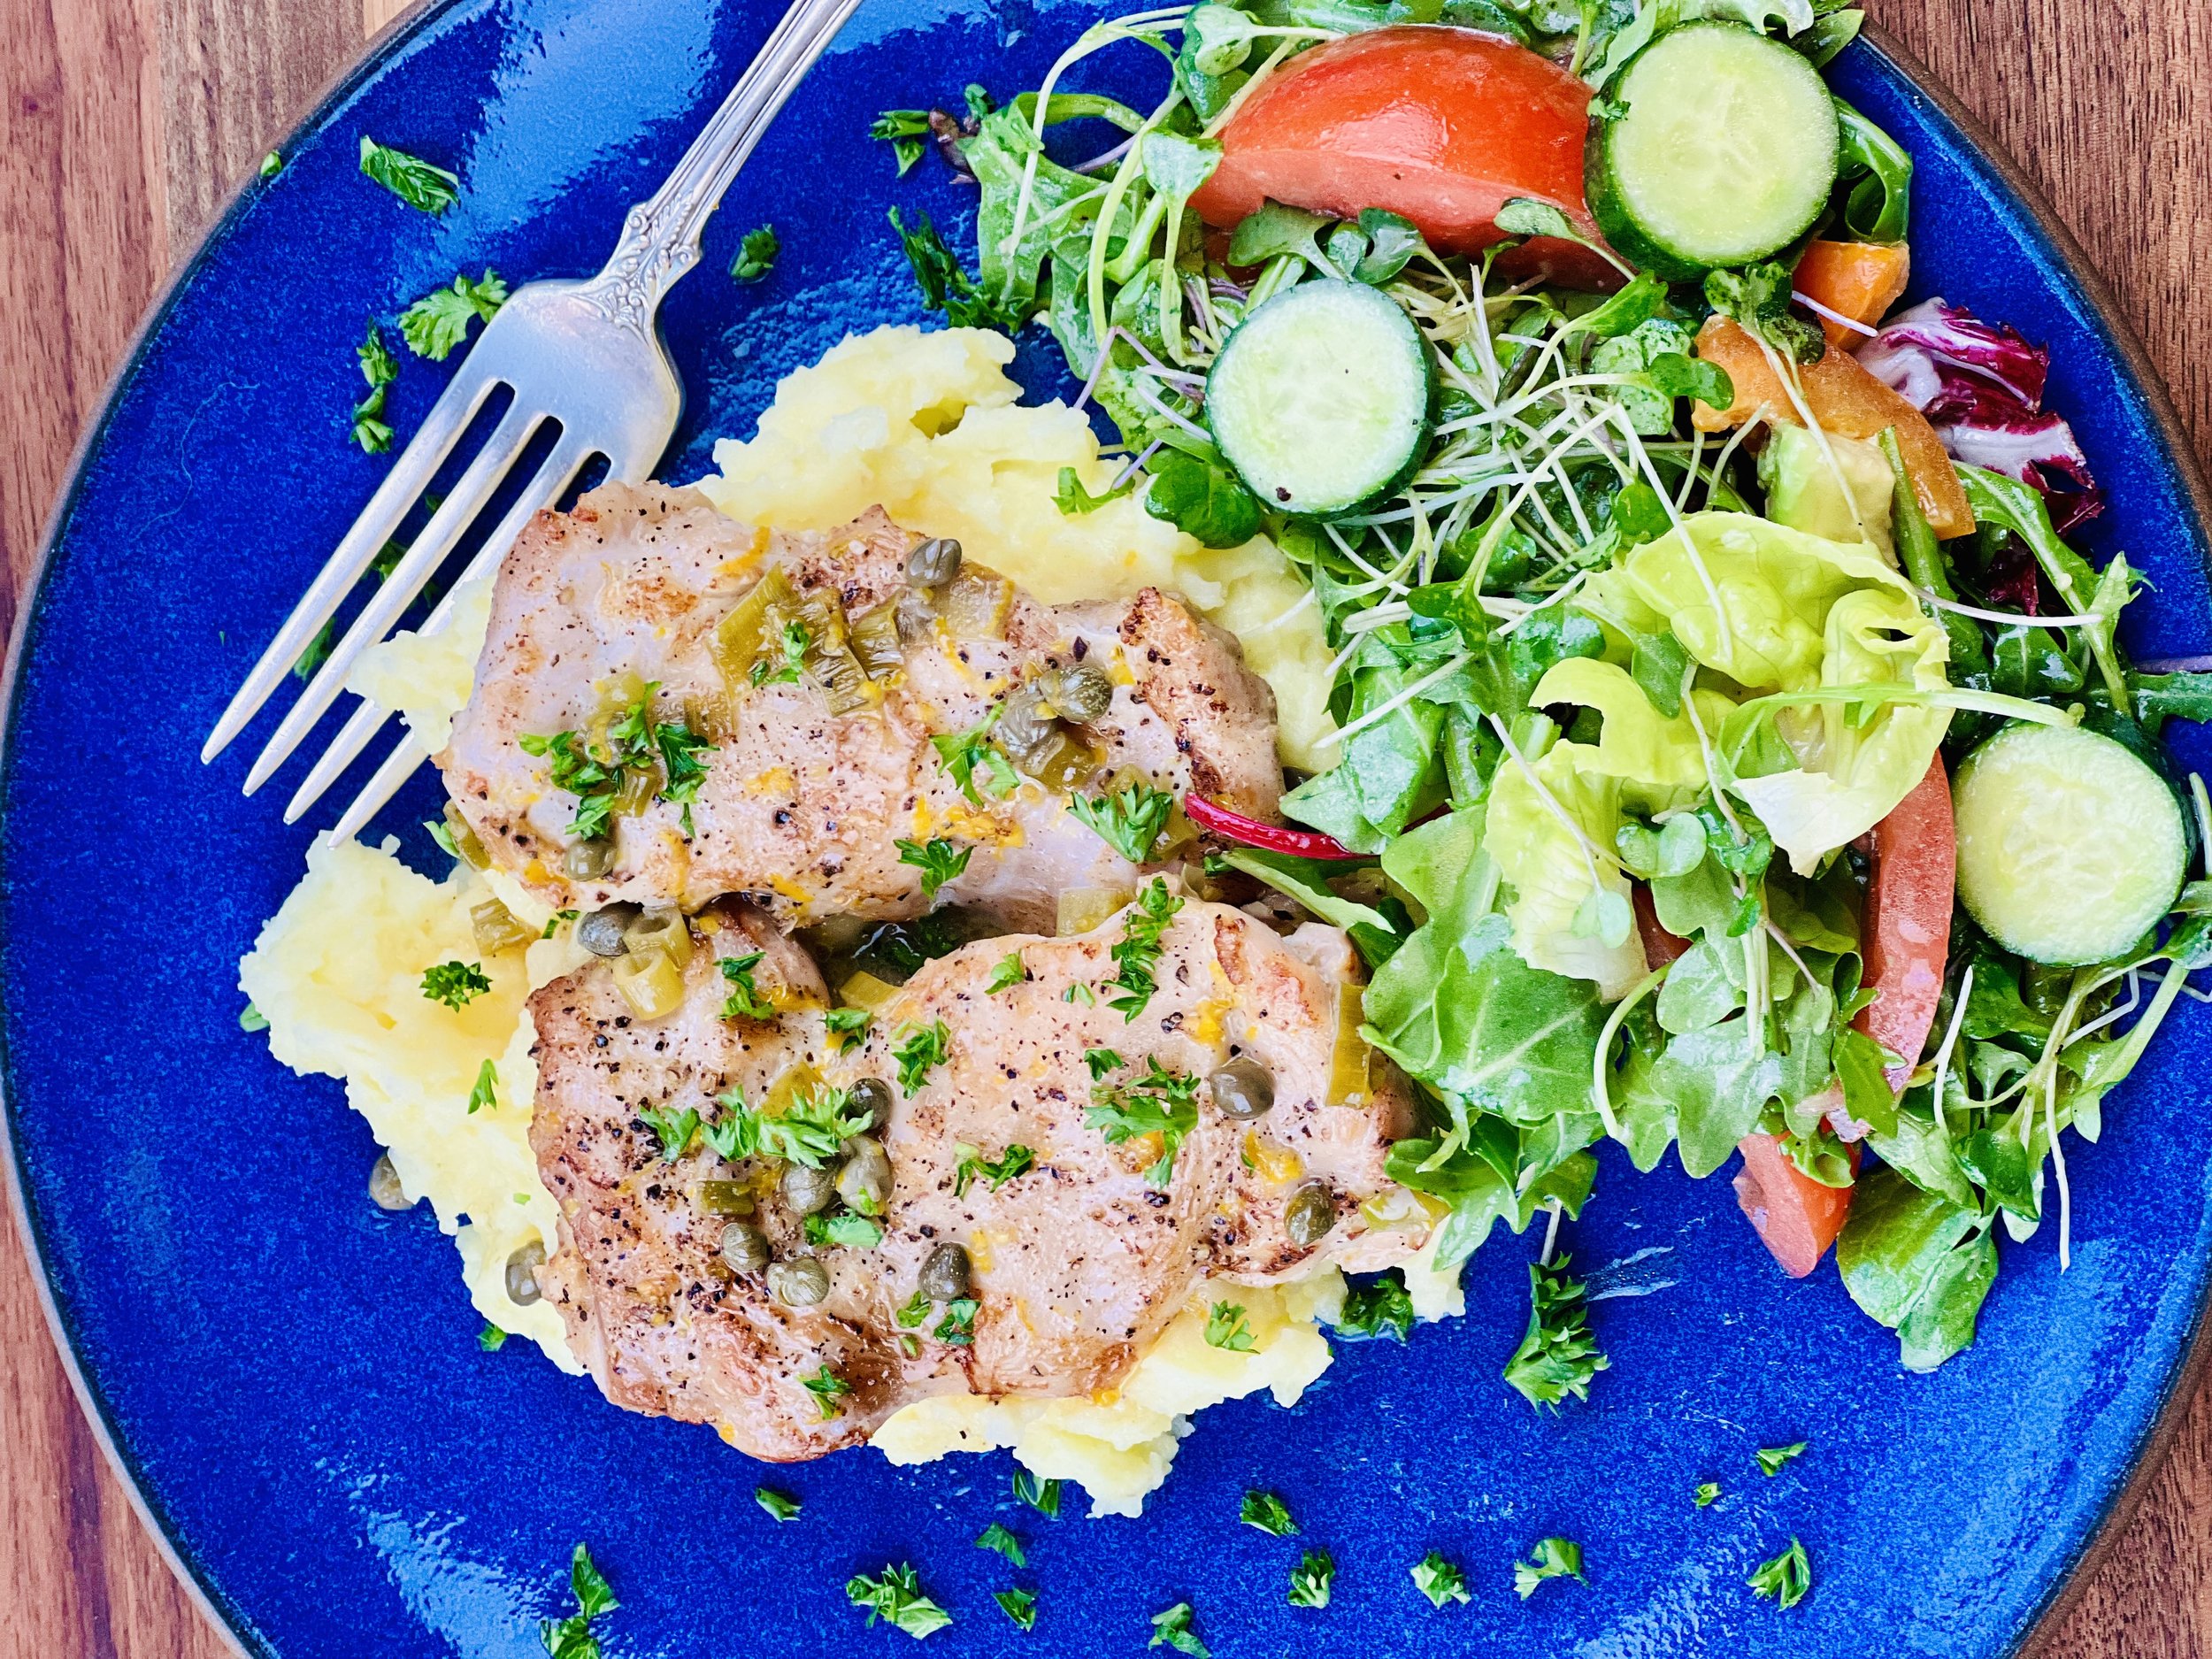
Lemony Butter Chicken Thighs and Mashed Yukon Potatoes (low FODMAP)
15 Minutes prep • 20 Minutes cook • Low FODMAP • Gluten-free • Serves 4
20 Minutes prep • 25 Minutes cook • Low FODMAP • Gluten-free • Serves 4 • Ok to make ahead: Step 1
Tender chicken with a buttery lemon sauce over creamy mashed potatoes. I mean really, what’s not to love? This recipe is simple to make and can easily be halved or doubled to accommodate a larger or smaller group. Serve it with my simple green salad with lemon Dijon vinaigrette or my Heirloom Tomato Salad for a perfect combination.
Ingredients: Chicken
2 tablespoons garlic-infused olive oil
3 tablespoons butter
8 boneless skin-on chicken thighs (skinless is also ok)
One bunch green onions, green part only, chopped
1 cup chicken broth (I used Gourmend low FODMAP Chicken broth)
Juice and zest of 1 lemon approximately 1/2 cup juice
1/2 cup capers rinsed
1/4 teaspoon each, or any combination of dry thyme, basil, parsley, or dill
1 tablespoon fresh tender herbs finely chopped (parsley, thyme, basil, dill, etc.) optional for serving
Kosher salt and black pepper to taste
Ingredients: Mashed Potatoes
4 Yukon Gold potatoes (peeled and chopped into 2 inch chunks)
1/2 stick butter sliced or cubed so it melts more rapidly
1/2 cup lactose-free half and half, whole milk, or heavy cream (warmed)
Kosher salt and black or white pepper to taste (white pepper keeps your potatoes sparkly white if you like them that way)
Directions
(1) Prepare the chicken: This step is optional but results in a more flavorful and tender chicken. Remove chicken from the package and put it in one layer on a rimmed plate or baking dish. Season both sides of each piece lightly with Kosher salt. Cover the dish with plastic wrap and refrigerate until ready to use or at least 4 hours before cooking.
(2) Prepare: the potatoes Peel and chop your potatoes into approximately equal chunks. Keep them on the larger side so the potatoes don’t absorb too much liquid.
(3) Cook the potatoes: Place potato chunks in a large pot of generously salted water and bring to a boil. Reduce the heat so the water keeps gently boiling and cook until your potatoes can be easily pierced with a fork. Depending on the size of your potato chunks, this should take about 10 minutes. Meanwhile, you can start cooking the chicken. See directions below.
(4) Drain the potatoes: Drain the water off the potatoes and return the pot to the burner to cook for a minute or two to evaporate any remaining water.
(5) Mash the potatoes: Add butter chunks and about half the warmed half and half, whole milk or cream. Begin mashing your potatoes with a hand masher, a fork, or if you prefer you can mash them in a stand mixer — just be careful not to over mix or they’ll become gluey. Add more half and half, whole milk or cream as needed to achieve your desired consistency.
(6) Finish: Taste and add salt and pepper to your preference. Transfer to a warmed serving bowl, cover, and keep warm until ready to serve.
(7) Cook the chicken: In a large skillet over medium-high heat, melt together the olive oil and 1 tablespoon of the butter. Add the chicken, skin side down, and sprinkle with fresh pepper. Cover and allow to brown for 6-7 minutes. Flip the chicken, season with salt and pepper, and cook for another 6 - 7 minutes. Remove the chicken from the pan and cover to keep warm.
(8) Prepare the sauce: Add the green onions, and saute briefly. Then pour in the chicken stock, lemon juice, and zest. Allow the sauce to come to a simmer then simmer for 5 minutes.
(9) Finish: Add the capers and dry herbs, the remaining 2 tablespoons of butter and stir until the butter melts. Add the chicken back to the pan and continue to simmer until the chicken is cooked through and the sauce has reduced a little (about 5 minutes). If the sauce reduces too much before your chicken is cooked through, you can add more chicken broth to the pan.)
(10) Plate and serve: Put a scoop of mashed potatoes on the plate and make a well in the center. Drizzle with the lemony pan sauce. Add the chicken and drizzle again. Sprinkle with chopped fresh herbs (if using). Serve with one of my fresh green salads for a perfect meal!
Eat and enjoy every bite because you can!
Recipe note: I use Diamond Crystal Kosher salt in all my recipes because it has a wonderful flat and crisp flake that tastes delicious. It is also the least salty salt available so you can use it more liberally as a seasoning than you can table salt or sea salt. If you use another type of salt, you may need to reduce the amount so it is not over-salted.
Link note: This post contains links for you to easily purchase items listed on the page. In some cases, we have provided a special discount code for IBS Game Changers so be sure to use it when you purchase an item to get the discount that has been arranged just for you! As an Amazon Associate, I earn a commission from qualifying Amazon purchases.
More Deliciously Low FODMAP™ main course recipes
15 Minutes prep • 30 Minutes cook • Low FODMAP • Serves 4 • Ok to make-ahead: Steps 1 - 2
10 Minutes prep • 25 Minutes cook • Low FODMAP • Gluten-Free • Serves 6 • Ok to make-ahead: Step 1
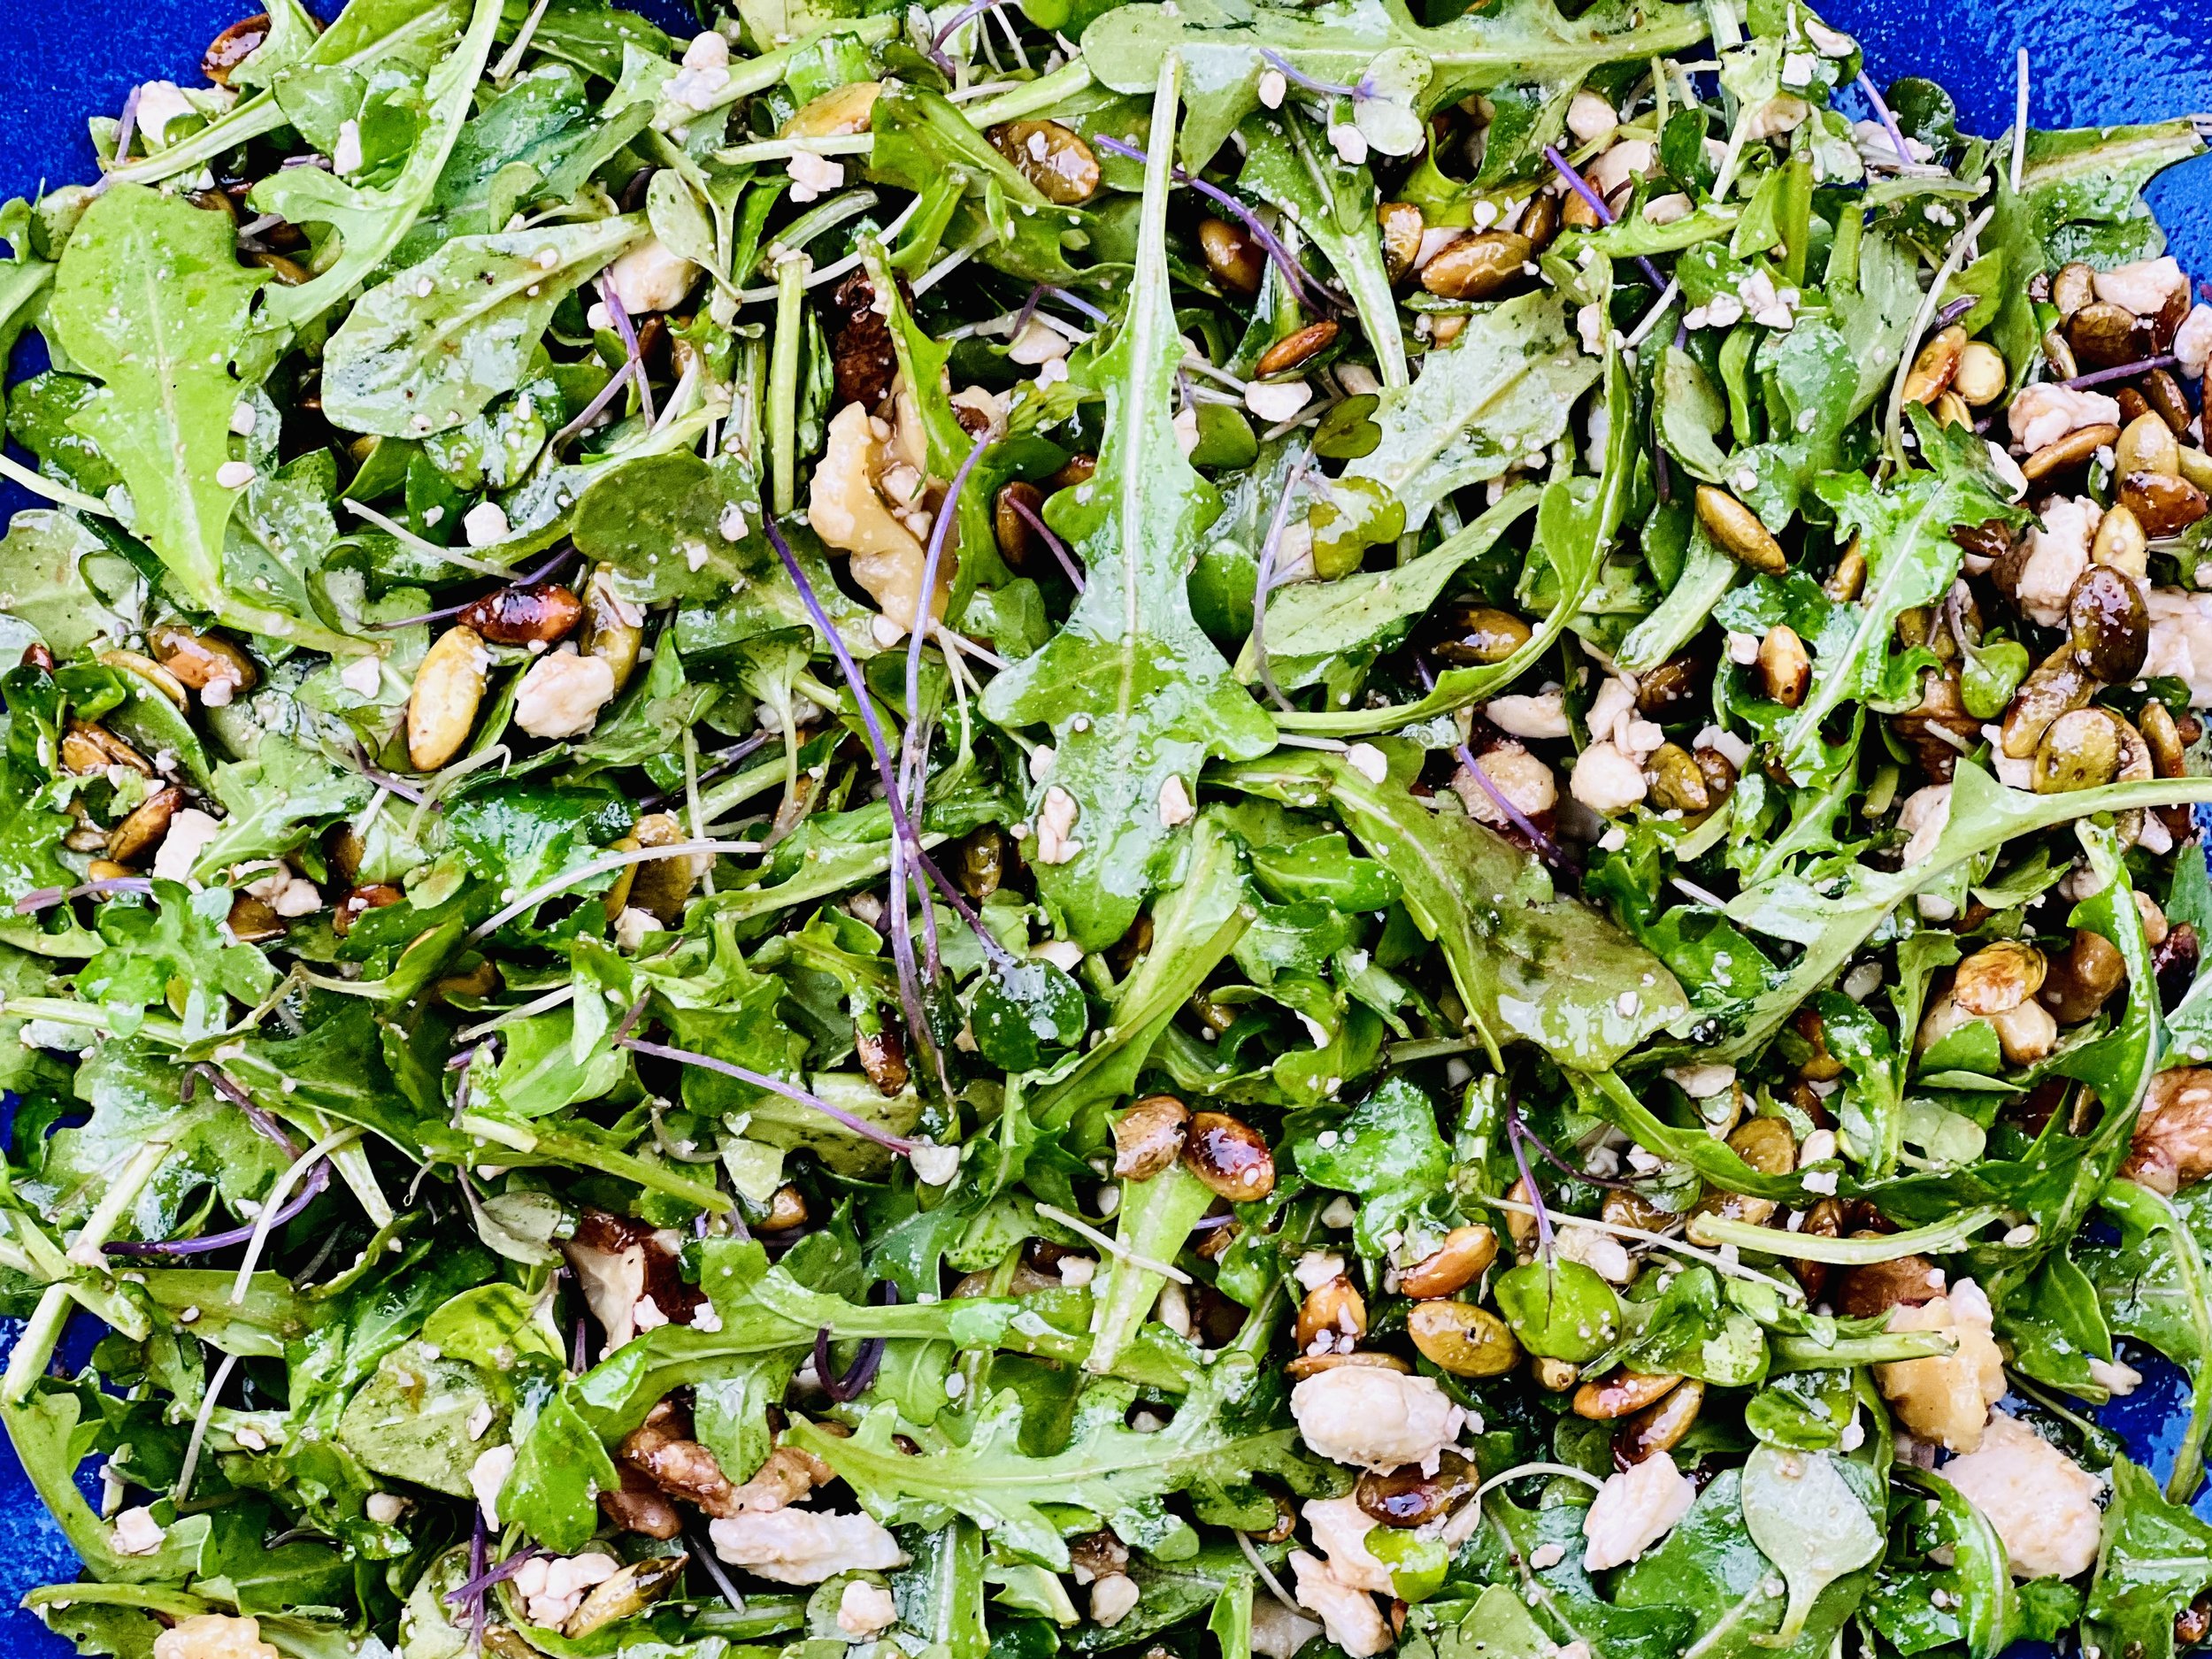
Target 30 Greens, Seeds, and Nuts Salad (low FODMAP)
20 Minutes prep • Low FODMAP • Gluten-free • Vegetarian • Serves 4
20 Minutes prep • Low FODMAP • Gluten-free • Vegetarian • Serves 4 • Ok to make ahead: Steps 1 - 2
As you’ve heard from me before, for the optimal health of your gut biome, the recommendation is to eat 30 different plant-based foods every week. This salad is a great way to pack some of those plants into your diet in a delicious way! Adding mixed microgreens can give you 3 or 4 different plant varieties and adding nuts and seeds will not only add plant variety but also protein, flavor, and crunch!
Ingredients: Salad
3 cups baby arugula
1 cup mixed microgreens
1/2 cup roasted and salted pumpkin seeds
1/2 cup walnuts, roughly chopped
1/2 cup Feta cheese, crumbled
1/2 Avocado, chopped (optional)
Ingredients: Dressing
1/2 cup olive oil
3 tablespoons red wine vinegar
1/2 teaspoon Kosher salt and 1/2 teaspoon black pepper
1 teaspoon maple syrup
1/2 teaspoon Colman’s dry mustard (optional)
Directions
(1) Prepare: Wash and dry the arugula and put it in a large salad bowl. Chop the walnuts. Crumble the feta.
(2) Make the dressing: Put all dressing ingredients in a small jar and shake to blend. Taste and adjust salt and pepper as needed.
Make-ahead note: At this point, you may keep the greens in the refrigerator until you’re ready to dress and serve the salad.
(3) Make the salad: Add the rest of the salad ingredients to the salad bowl.
(4) Finish: Add the dressing to the salad. Toss to combine. Sprinkle lightly with Diamond Crystal Kosher salt (optional). Serve.
Eat and enjoy every bite because you can!
Recipe note: I use Diamond Crystal Kosher salt in all my recipes because it has a wonderful flat and crisp flake that tastes delicious. It is also the least salty salt available so you can use it more liberally as a seasoning than you can table salt or sea salt. If you use another type of salt, you may need to reduce the amount so it is not over-salted.
Link note: This post contains links for you to easily purchase items listed on the page. In some cases, we have provided a special discount code for IBS Game Changers so be sure to use it when you purchase an item to get the discount that has been arranged just for you! As an Amazon Associate, I earn a commission from qualifying Amazon purchases.
More Deliciously Low FODMAP™ salad recipes
5 Minutes prep • 15 Minutes cook • Low FODMAP • Gluten-free • Lactose-free • Vegan • Serves 4
15 Minutes prep • Low FODMAP • Gluten-free • Lactose-free • Vegetarian • Vegan • Serves 4
30 Minutes prep • Low FODMAP • Gluten-free • Lactose-free • Vegetarian • Vegan • Serves 4+ • Serving Size 2 cups
15 Minutes prep • 30 Minutes cook • Low FODMAP • Gluten-free • Lactose-free • Serves 4-6
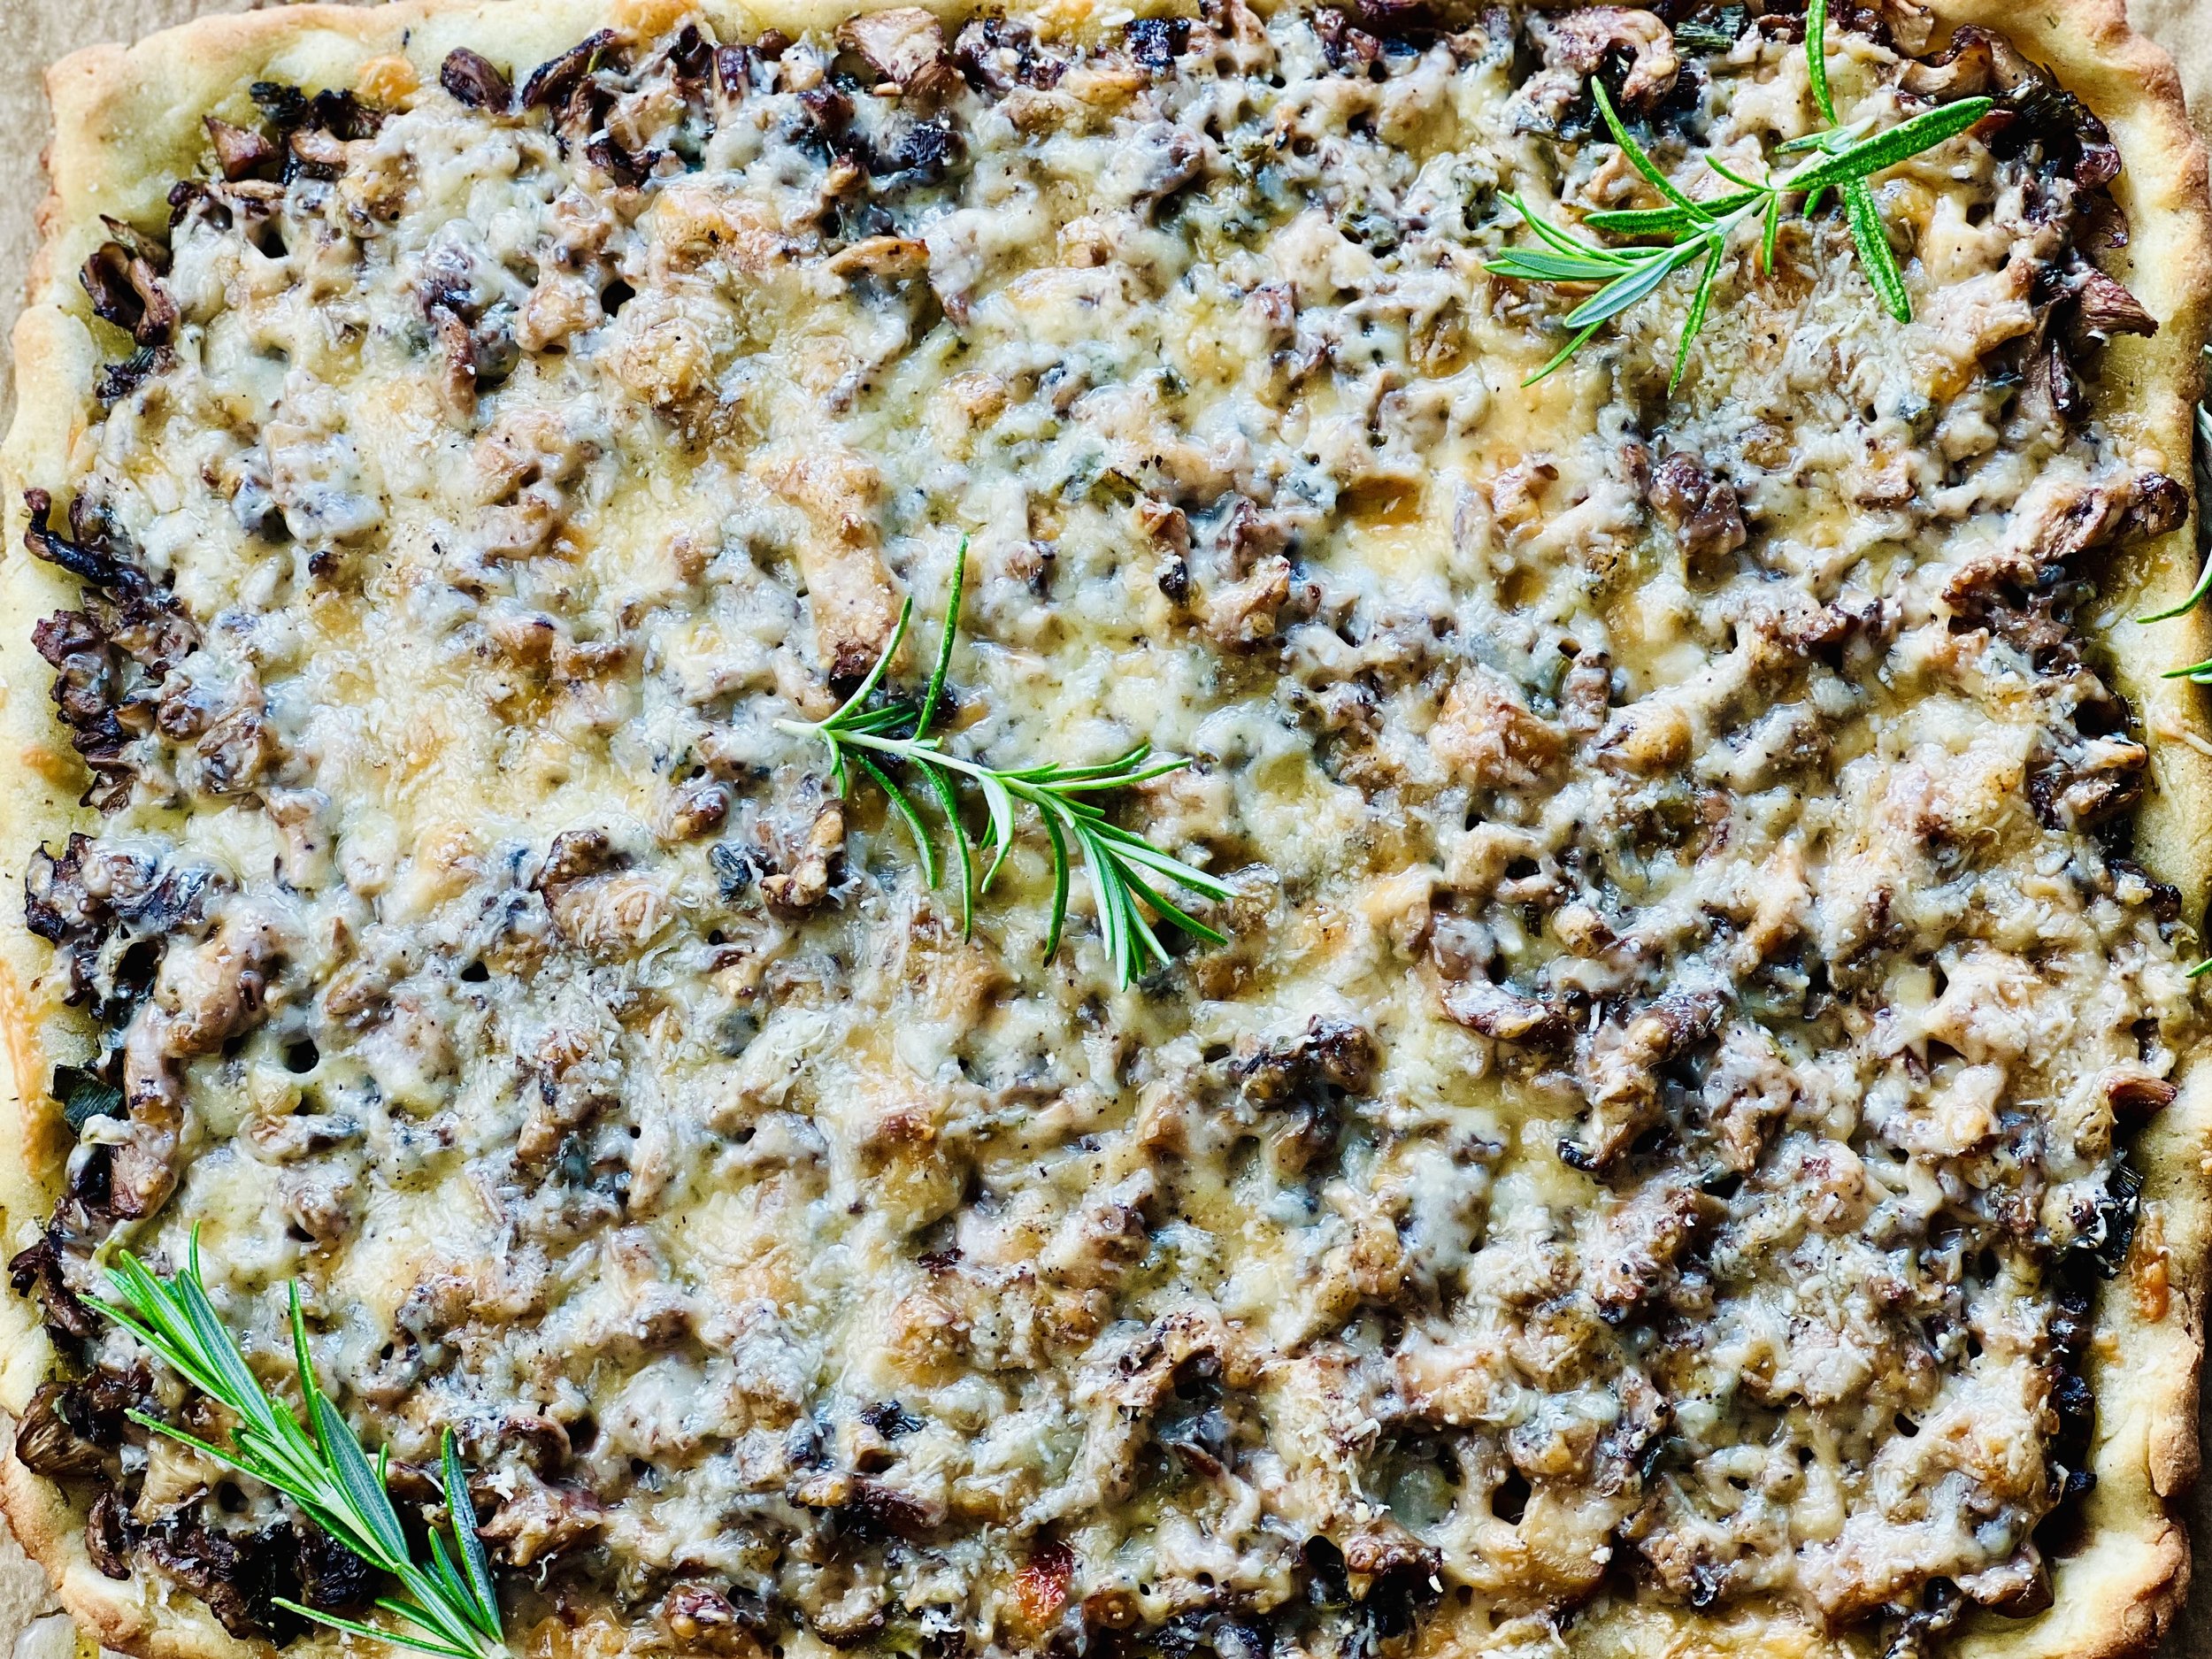
Rosemary Mushroom Flatbread (low FODMAP)
15 Minutes prep • 20 Minutes cook • Low FODMAP • Gluten-Free • Serves 4 - 8
15 Minutes prep • 20 Minutes cook • Low FODMAP • Gluten-Free • Serves 4 - 8 • Ok to make-ahead: Steps 1-3
Let’s be honest. Flatbread is just pizza with a thinner crust. And, it’s great because you really taste the flavor of your toppings when they aren’t buried in bread. This flatbread is incredibly flavorful and filling. The combination of the oyster mushrooms cooked with olive oil and rosemary gives it a richness you don’t expect from a meatless dish. It makes a wonderful vegetarian main course, side, or appetizer depending on how you slice it. And, no matter how you slice it, it’s delicious!
Ingredients: Rosemary Mushrooms
2 tablespoons garlic-infused olive oil
1 tablespoon butter
1 bunch green onions, green part only, chopped
3 cups oyster mushrooms, finely chopped
1 tablespoon fresh rosemary, chopped
2 tablespoons red wine
2 teaspoons balsamic vinegar
1 1/2 cups white cheddar, Catamount Hills cheddar, Swiss, or Gruyere cheese
Ingredients: Flatbread
3/4 cup warm water (105 – 110 degrees F)
1 packet active dry yeast (2 1/4 tsp)
2 cups gluten-free flour (Bob’s Red Mill 1 to 1 works well)
1 tablespoon sugar
1 tsp salt
1 large egg
1 tsp apple cider vinegar (or white vinegar works too)
1 tsp dried rosemary
2 tablespoon garlic-infused olive oil, plus more to coat and spread the dough
Directions: Rosemary Mushrooms
(1) Prepare: Preheat your oven to 400degrees F and line a rimmed baking sheet with parchment paper. Set aside.
(2) Cook the mushrooms: In a large skillet, heat the butter and olive oil over medium-high heat. When hot but not smoking, add the mushrooms, green onions, rosemary, and sea salt. Sauté, stirring often, until most of the liquid has evaporated.
(3) Finish: Reduce the heat to medium and add the red wine, balsamic vinegar, salt, and pepper. Continue to cook until the mushroom mixture is as dry as possible. Let the mixture cool for 5 – 10 minutes. While the mushrooms are cooling, make your flatbread dough.
Directions: Flatbread
(4) Prepare: Set a pizza stone or cookie sheet on the lower rack of the oven and preheat the oven to 425 degrees F.
(5) Prove the yeast: Combine water, sugar, and yeast in a small bowl and let sit for 5 minutes until it begins to froth.
(6) Blend the flatbread dough: Combine flour, salt, and dried rosemary in a large bowl. Add in the egg, olive oil, vinegar, and yeast mixture. Stir until the flour is combined and the dough comes away from the sides of the bowl. Don’t add more flour – the dough is supposed to be a bit sticky. Transfer the dough to a piece of parchment covering a cookie sheet.
(7) Form the crust: Use your fingers dipped in olive oil to press and push the dough out into a rectangle. You’ll need to keep dipping your fingers in the olive oil to keep them from sticking but no worries—it just makes the flatbread taste better! Keep pressing the dough out into a rectangle on the parchment until it’s fairly thin and all about the same thickness. The surface of your crust won’t be smooth, but it doesn’t matter, your toppings will be covering it anyway. You can roll the edges under or “flute” them with your fingers like a pie crust if you like a tidy edge.
(8) Pre-bake the flatbread: Before adding any toppings, transfer the crust on the parchment to the hot pizza stone or cookie sheet in the oven and cook for 8 minutes.
(9) Add toppings: Remove from the oven and brush the entire crust with garlic-infused or regular olive oil. Then, layer on the mushrooms and finish with the grated cheese. Season with salt and pepper.
(10) Finish: Slide the flatbread back on the pizza stone or hot cookie sheet in the oven and cook for another 8-10 minutes until the edges of the crust are browning and the cheese is nicely melted.
(11) Plate and serve: Remove from the oven and let cool for a minute or two. Then cut into desired size squares or rectangles. Smaller for appetizer or side and larger for a main course. This flatbread is best fresh but if you have any leftover, heat briefly in the microwave to soften the crust and melt the cheese.
Eat and enjoy every bite because you can!
Recipe note: I use Diamond Crystal Kosher salt in all my recipes because it has a wonderful flat and crisp flake that tastes delicious. It is also the least salty salt available so you can use it more liberally as a seasoning than you can table salt or sea salt. If you use another type of salt, you may need to reduce the amount so it is not over-salted.
Link note: This post contains links for you to easily purchase items listed on the page. In some cases, we have provided a special discount code for IBS Game Changers so be sure to use it when you purchase an item to get the discount that has been arranged just for you! As an Amazon Associate, I earn a commission from qualifying Amazon purchases.
More Deliciously Low FODMAP™ appetizer recipes
5 Minutes prep • 15 Minutes cook • Low FODMAP • Gluten-Free • Lactose-Free • Makes 2 cups
10 Minutes Prep • 50 Minutes Cook • Low FODMAP • Gluten-free • Dairy Free • Vegan • Serving size 3 - 4 crackers
10 Minutes prep • 15 Minutes rest • Low FODMAP • Gluten-free • Dairy-free • Serving size 3 tablespoons
10 Minutes prep • 20 Minutes cook • Low FODMAP • Gluten-free • Lactose-free • Vegan • Serves 5
15 Minutes prep • 1 hour chill • Low FODMAP • Gluten-free • Vegetarian • Serves 4 or more
10 Minutes prep • Low FODMAP • Gluten-Free • Lactose-free • Vegetarian • Vegan • Makes 1.5 cups
5 Minutes prep • 10 Minutes cook • Low FODMAP • Gluten-free • Lactose-free • Makes 1 cup
20 Minutes prep • 16 Minutes cook • Low FODMAP • Vegetarian • Serves 8 • Ok to make-ahead: Steps 1-5
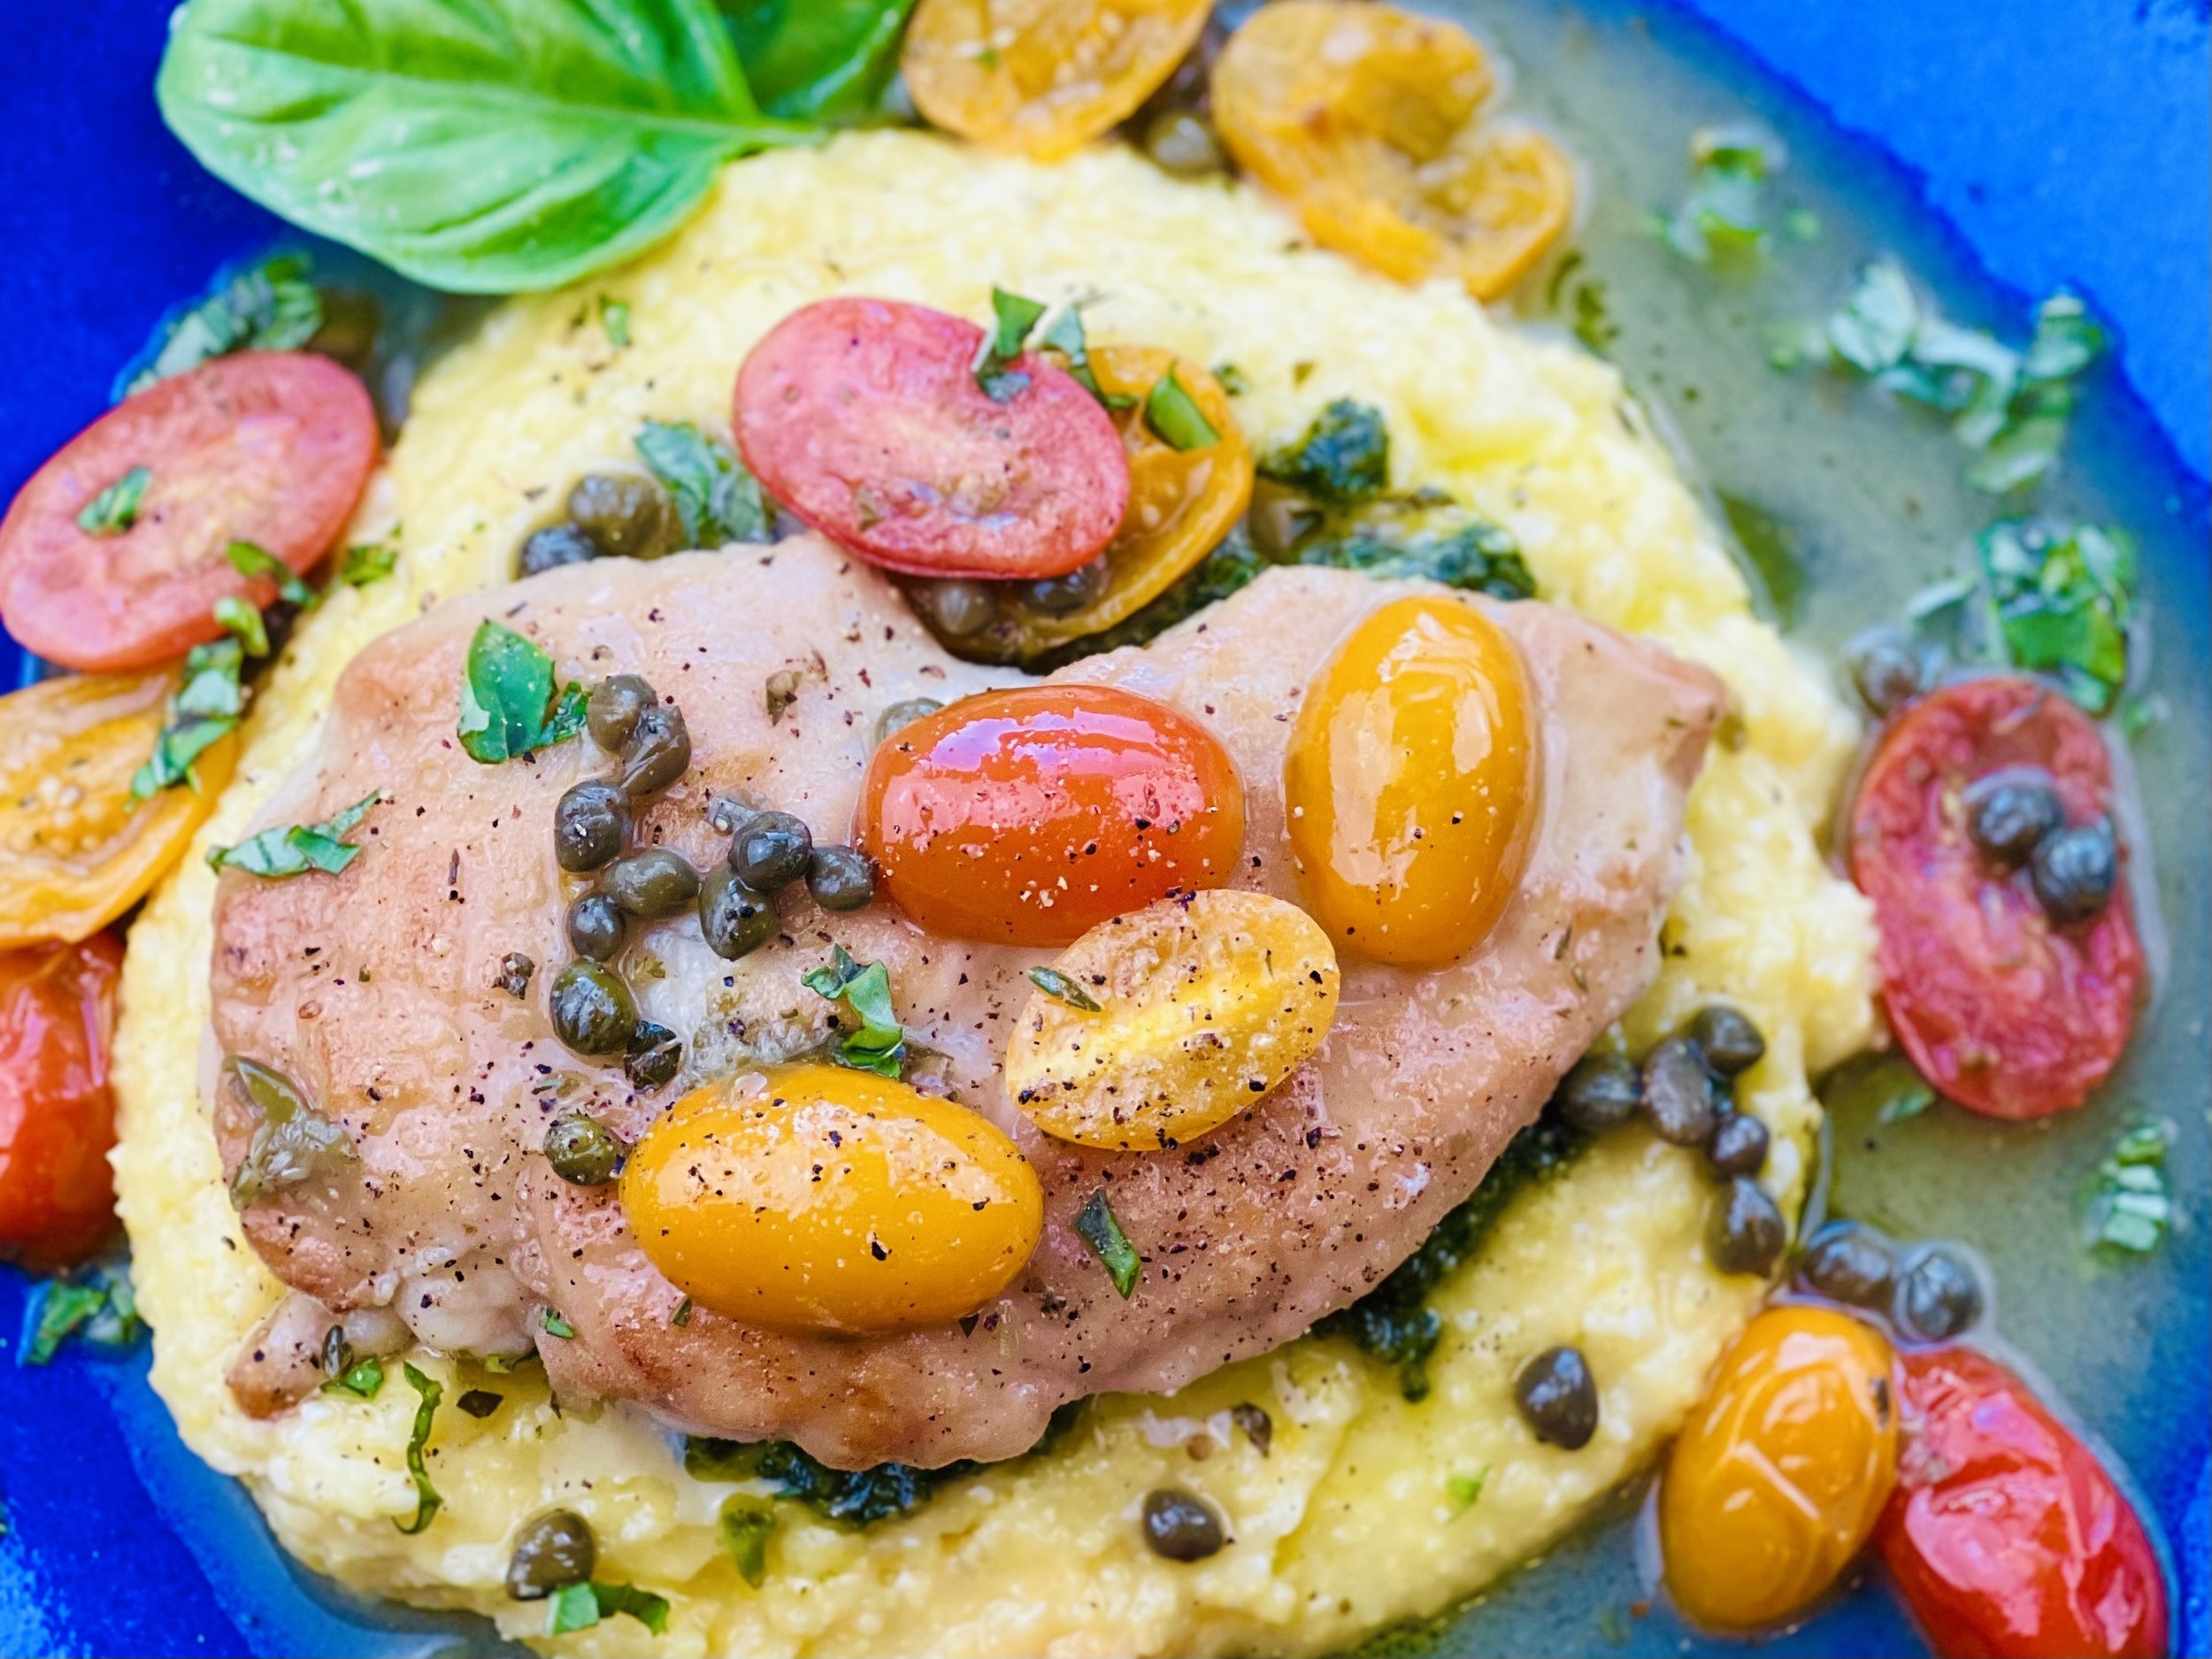
Butter Lemon Pesto Chicken and Polenta (low FODMAP)
20 Minutes prep • 20 Minutes Cook • Low FODMAP • Gluten-free • Serves 4
20 Minutes prep • 20 Minutes Cook • Low FODMAP • Gluten-free • Serves 4 • Ok to make ahead: Step 1
Polenta drizzled with pesto makes a wonderful, flavorful, and creamy base for this deliciously buttery chicken. You can make my low FODMAP lemon-basil pesto ahead so you can whip this up fast for a weeknight family dinner. It can also be plated and served efficiently so it makes a great dish for a group too.
Ingredients: Chicken
4 chicken cutlets, or 2 boneless chicken breasts, sliced horizontally
1/3 cup gluten-free flour
1/4 cup grated parmesan
3 tablespoons garlic-infused olive oil
1/2 cup dry white wine, such as Pinot Grigio or Sauvignon Blanc
1/3 cup fresh lemon juice
4 tablespoons salted butter
1 cup multicolored cherry tomatoes, cut in half
1 tablespoon fresh thyme
3 tablespoons capers, rinsed
2 tablespoons basil, chopped
1/4 cup lemon-basil pesto, see my recipe here
Ingredients: Polenta
3/4 cup polenta
3 tablespoons salted butter
1/4 cup grated parmesan
2 tablespoons lemon-basil pesto, see my recipe here (optional)
Directions
(1) Prepare: Make the pesto. Grate the parmesan. Season the chicken with salt and pepper. Place the flour and parmesan in a shallow bowl and dredge the chicken in the flour/cheese mix, pressing to adhere.
Make-ahead note: At this point, you can keep the pesto and the chicken in the refrigerator until you’re ready to cook.
(2) Cook the chicken: Heat the garlic-infused olive oil in a large skillet over medium-high heat. Add the chicken and sear on both sides until golden, about 3-5 minutes per side. Remove the chicken from the skillet to a plate.
(3) Make the polenta: Meanwhile, make the polenta. Put 3 cups of hot water in a microwave-safe bowl. Stir in the salt and the polenta. Cover loosely with plastic wrap and microwave on high for 8 minutes. Uncover and whisk to blend. Cook another 2 minutes if you want it a bit thicker. Remove from the microwave and stir in the butter and parmesan. You may also stir in a couple tablespoons of the pesto.
(4) Make the sauce: To the skillet you cooked the chicken in, add the butter, cherry tomatoes, and a pinch each of salt and pepper. Cook about 3 minutes. Add the capers, and thyme, cook another 2 minutes. Pour in the wine and lemon juice, cook for 1 minute. Return the chicken to the pan, cover and simmer for 3 - 5 minutes, until the chicken is just cooked through.
(5) Plate and serve: Spoon the polenta onto plates. Spoon some pesto on top of the pesto. Add the chicken and cherry tomatoes over the pesto and drizzle the pan sauce over the top of everything. Sprinkle with basil.
Eat and enjoy every bite because you can!
Recipe note: I use Diamond Crystal Kosher salt in all my recipes because it has a wonderful flat and crisp flake that tastes delicious. It is also the least salty salt available so you can use it more liberally as a seasoning than you can table salt or sea salt. If you use another type of salt, you may need to reduce the amount so it is not over-salted.
Link note: This post contains links for you to easily purchase items listed on the page. In some cases, we have provided a special discount code for IBS Game Changers so be sure to use it when you purchase an item to get the discount that has been arranged just for you! As an Amazon Associate, I earn a commission from qualifying Amazon purchases.
More Deliciously Low FODMAP™ main course recipes
15 Minutes prep • 30 Minutes cook • Low FODMAP • Serves 4 • Ok to make-ahead: Steps 1 - 2
10 Minutes prep • 25 Minutes cook • Low FODMAP • Gluten-Free • Serves 6 • Ok to make-ahead: Step 1
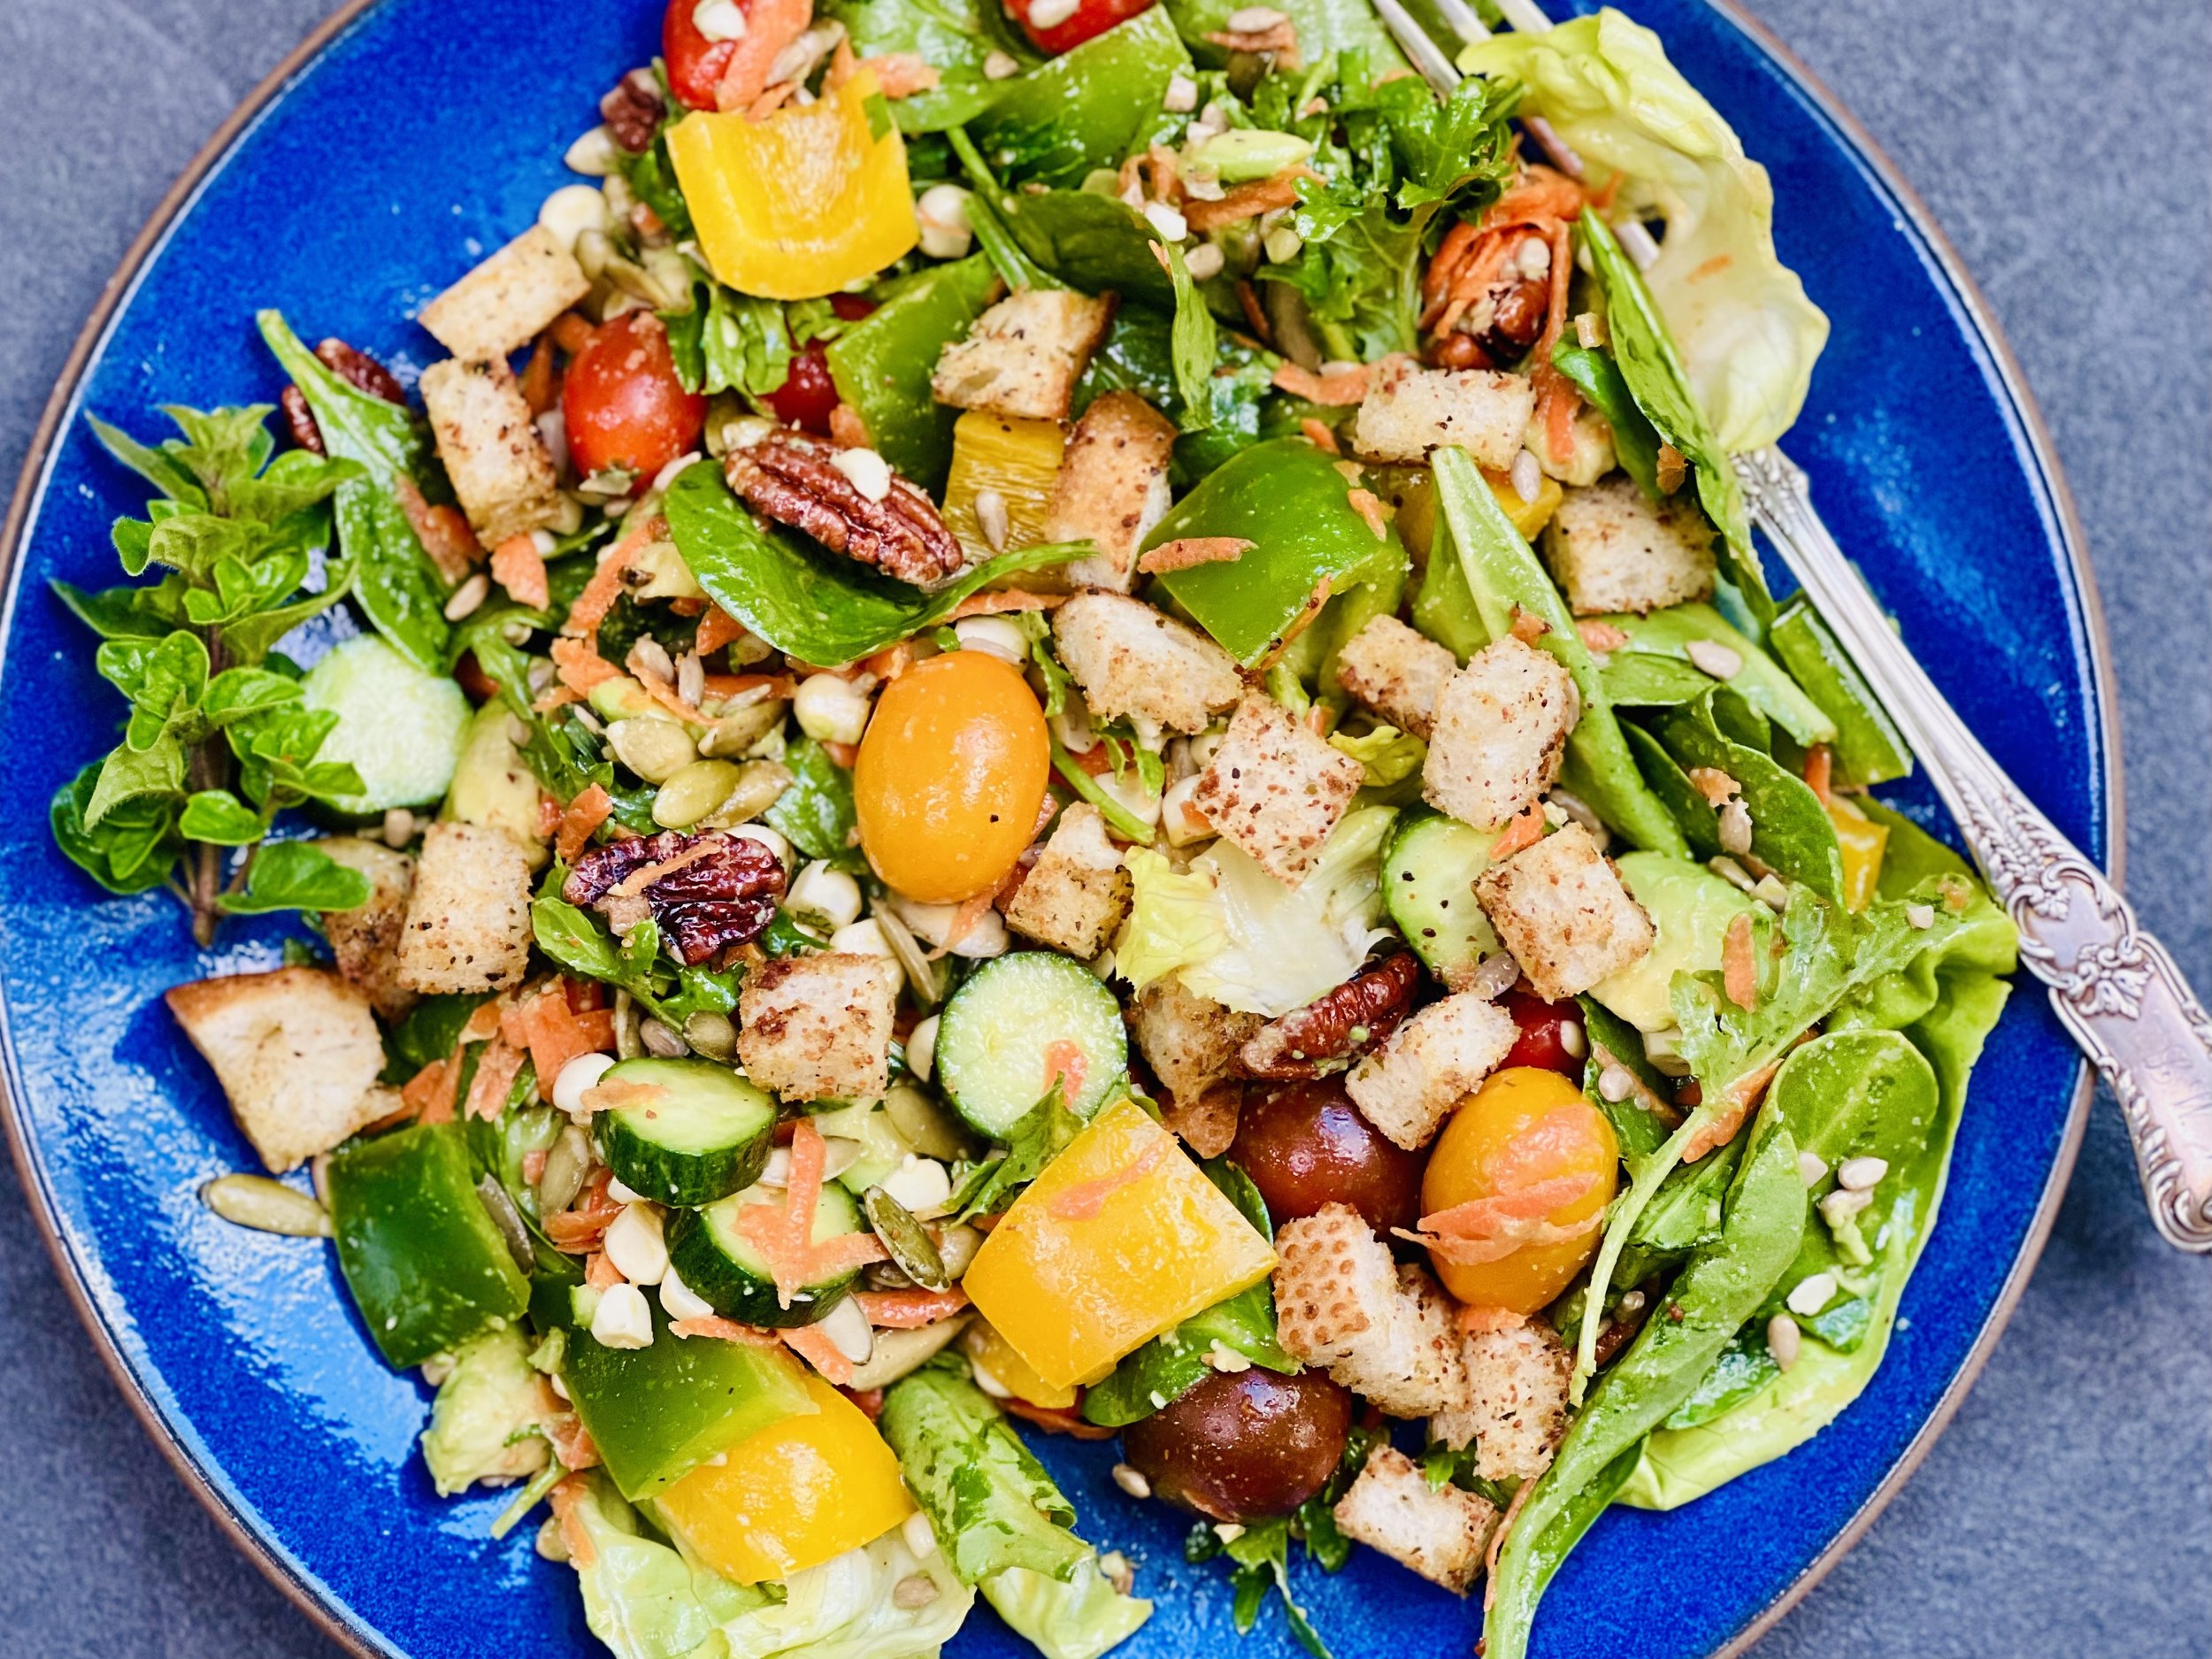
Target 30 Lemon Dijon Salad (low FODMAP)
20 Minutes prep • Low FODMAP • Lactose-free • Vegetarian • Serves 4
20 Minutes prep • Low FODMAP • Lactose-free • Vegetarian • Serves 4 • Ok to make ahead: Steps 1 - 3
I’m still thinking about eating 30 plants per week so I wanted to share another recipe with you to inspire you to do the same! Don’t feel you need to have every ingredient on my list to have a salad success. Be creative. See what’s in season. See what looks good at the farmer’s market, produce stand, or grocery store. Add nuts or seeds to not only add plant variety but also protein, flavor, and crunch! Learn more about how well your gut biome responds to plant variety in this very interesting article here. It’s not volume, it’s variety that makes your gut biome thrive. Plants aren’t just vegetables, they include nuts, seeds, herbs, spices, fruits, vegetables, and even plant-based oils. This salad is a great way to pack more plants into your day than you ever expected. And it’s delicious!
This is an exclusive recipe just for recipe club members.
In addition to the two free recipes I create each week I am creating and delivering one very special recipe just for my recipe club members. If you’re not yet a member, I encourage you to join! Membership in the club includes access to the complete archive of recipes with filters so it can become your virtual low FODMAP cookbook plus, I am creating and delivering one special NEW recipe every week ONLY for recipe club members. And, for my true fans, I’ll be sharing behind-the-scenes content, and updates on the progress of the new cookbook.
Your membership in the club helps me continue creating new, delicious, easy-to-make, low FODMAP recipes just for you.
As always, all recipes will emphasize simple ingredients, easy preparation, and delicious low FODMAP results. Recipes will be for everything from main courses, salads, soups, side dishes, appetizers, desserts, sauces, breakfast and lunch, and even mocktails and cocktails. Everything you need to prepare fantastic low FODMAP meals everyone will love.
Join the club. Become a Patron. Let’s keep making delicious Low FODMAP meals together.
More Deliciously Low FODMAP™ salad recipes
5 Minutes prep • 15 Minutes cook • Low FODMAP • Gluten-free • Lactose-free • Vegan • Serves 4
15 Minutes prep • Low FODMAP • Gluten-free • Lactose-free • Vegetarian • Vegan • Serves 4
30 Minutes prep • Low FODMAP • Gluten-free • Lactose-free • Vegetarian • Vegan • Serves 4+ • Serving Size 2 cups
15 Minutes prep • 30 Minutes cook • Low FODMAP • Gluten-free • Lactose-free • Serves 4-6
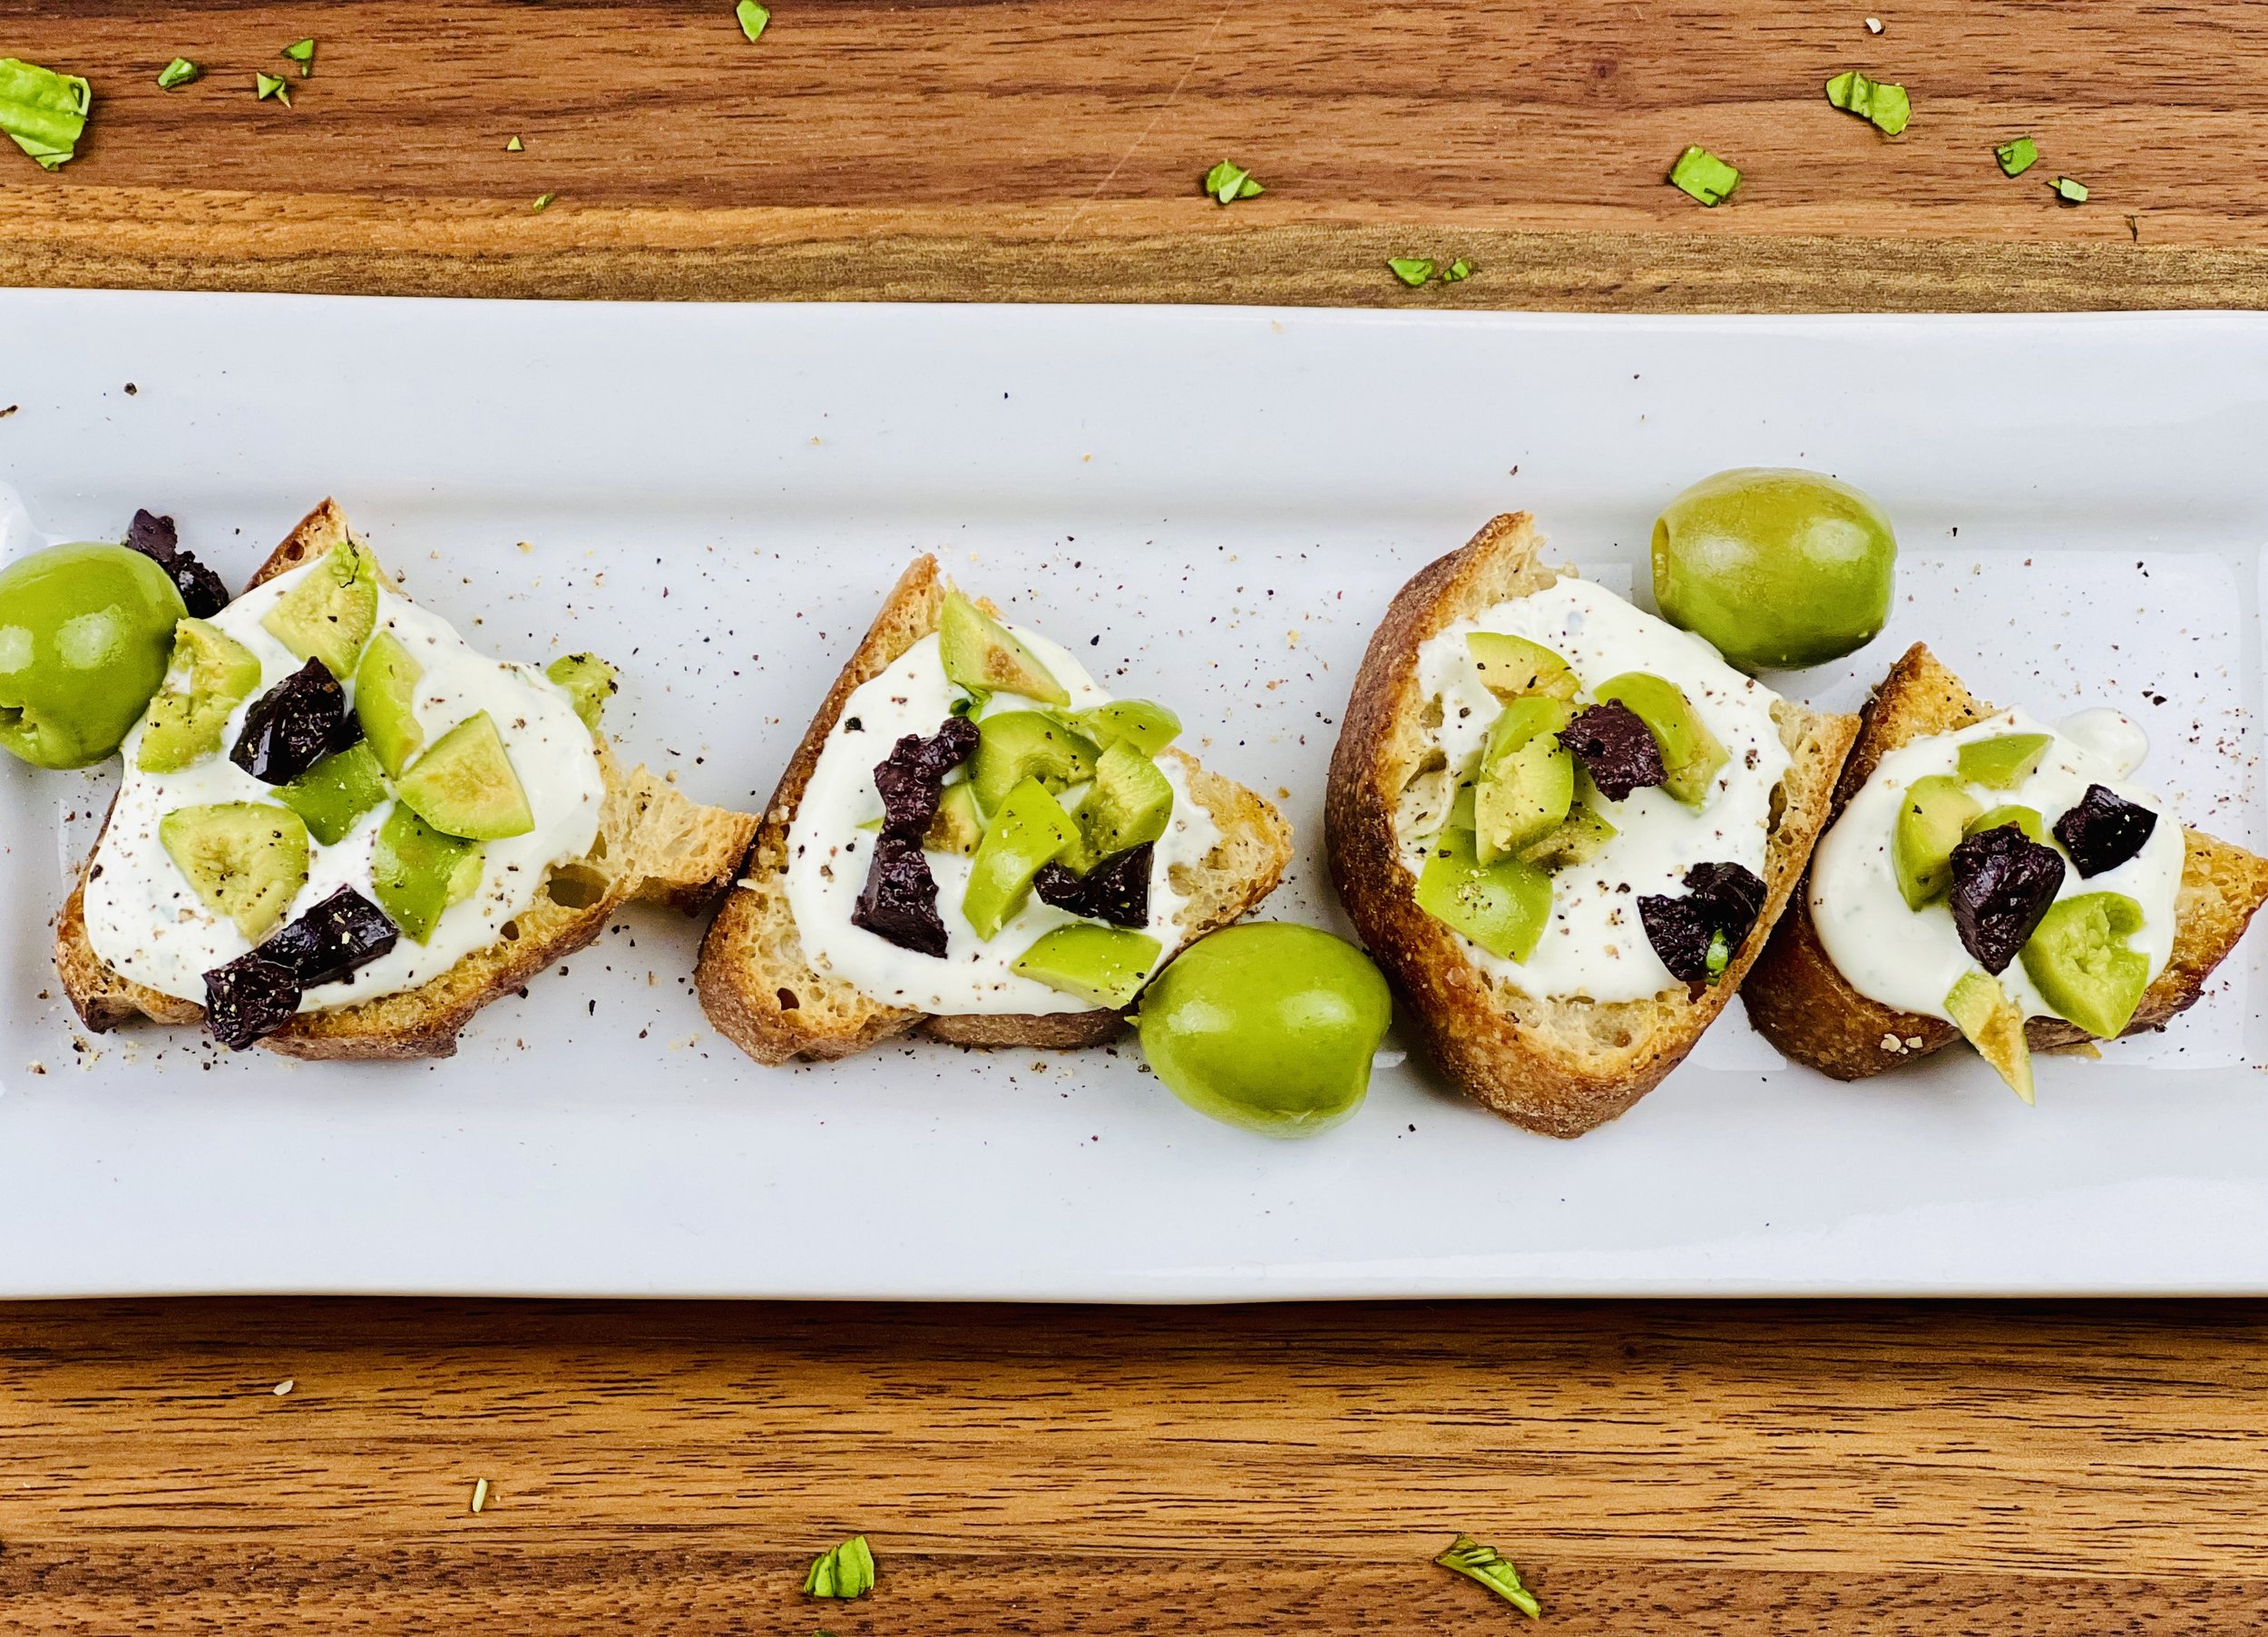
Sourdough Crostini with Olives and Herbed Ricotta Cream (low FODMAP)
20 Minutes prep • 16 Minutes cook • Low FODMAP • Vegetarian • Serves 8
20 Minutes prep • 16 Minutes cook • Low FODMAP • Vegetarian • Serves 8 • Ok to make-ahead: Steps 1-5
This one is for all the olive and tapenade lovers out there. You know who you are! Crisp sourdough crostini, smooth and creamy herbed ricotta, and the delightful taste of your favorite olives make this a perfect appetizer that’s sure to please all your olive-loving friends. And, since it’s low FODMAP, you get to enjoy it too!
Ingredients: Crostini
1 traditional sourdough baguette cut into thin slices (one- or two-bite size at the most)
1/4 - 1/2 cup olive oil
1/4 - 1/2 cup fresh-grated parmesan cheese
Ingredients: Topping
12 ounces lactose-free cottage cheese
1/4 cup heavy cream
1 teaspoon Smoke N Sanity Essence of Garlic Salt (use code IBSGC10 for 10% discount)
1 tablespoon garlic-infused olive oil
1/2 teaspoon maple syrup
1 1/2 tablespoons fresh herbs (basil, oregano, chives, etc.) finely chopped
1/4 teaspoon fresh ground black pepper
3/4 cup chopped castelvetrano and/or kalamata olives (or olives of your choice)
Directions: Crostini
(1) Prepare: Preheat oven to 350 degrees F. Slice sourdough bread into thin, bite-size or two-bite-size pieces. Chop the olives and set them aside.
(2) Bake crostini: Arrange bread slices on a rimmed baking sheet (or two) in a single layer. Brush both sides of the bread slices with olive oil, and season with salt and pepper. Bake for about 8 minutes on one side, then turn over, sprinkle with parmesan and continue baking until golden and crisp, about another 8 minutes.
(3) Finish: Let cool on baking sheets.
Directions: Herbed Ricotta Cream
(4) Make the cream base: Combine cottage cheese and cream in the bowl of a food processor. Blend until smooth. Scrape down the side periodically.
(5) Add the herbs: Add all remaining ingredients (except the olives!) and blend until well combined. Taste and adjust salt and pepper if needed.
Make-ahead note: At this point, you can keep the herbed cream in the refrigerator and store the crostini in an airtight container (once fully cooled) until you’re ready to assemble your appetizer.
Directions: Olive Crustini
(6) Load up the crostini: Put a scoop of herbed ricotta cream on each crostini. Top with a scoop of chopped olives. Place on a plate. Sprinkle the plate with additional chopped fresh herbs, a light sprinkle of Kosher salt, and a grind or two of black pepper.
Eat and enjoy every bite because you can!
Recipe note: I use Diamond Crystal Kosher salt in all my recipes because it has a wonderful flat and crisp flake that tastes delicious. It is also the least salty salt available so you can use it more liberally as a seasoning than you can table salt or sea salt. If you use another type of salt, you may need to reduce the amount so it is not over-salted.
Link note: This post contains links for you to easily purchase items listed on the page. In some cases, we have provided a special discount code for IBS Game Changers so be sure to use it when you purchase an item to get the discount that has been arranged just for you! As an Amazon Associate, I earn a commission from qualifying Amazon purchases.
More Deliciously Low FODMAP™ appetizer recipes
5 Minutes prep • 15 Minutes cook • Low FODMAP • Gluten-Free • Lactose-Free • Makes 2 cups
10 Minutes Prep • 50 Minutes Cook • Low FODMAP • Gluten-free • Dairy Free • Vegan • Serving size 3 - 4 crackers
10 Minutes prep • 15 Minutes rest • Low FODMAP • Gluten-free • Dairy-free • Serving size 3 tablespoons
10 Minutes prep • 20 Minutes cook • Low FODMAP • Gluten-free • Lactose-free • Vegan • Serves 5
15 Minutes prep • 1 hour chill • Low FODMAP • Gluten-free • Vegetarian • Serves 4 or more
10 Minutes prep • Low FODMAP • Gluten-Free • Lactose-free • Vegetarian • Vegan • Makes 1.5 cups
10 Minutes Prep • 50 Minutes Cook • Gluten-free • Dairy-free • Low FODMAP • Serving size 3-4 crackers
5 Minutes prep • 10 Minutes cook • Low FODMAP • Gluten-free • Lactose-free • Makes 1 cup
20 Minutes prep • 16 Minutes cook • Low FODMAP • Vegetarian • Serves 8 • Ok to make-ahead: Steps 1-5
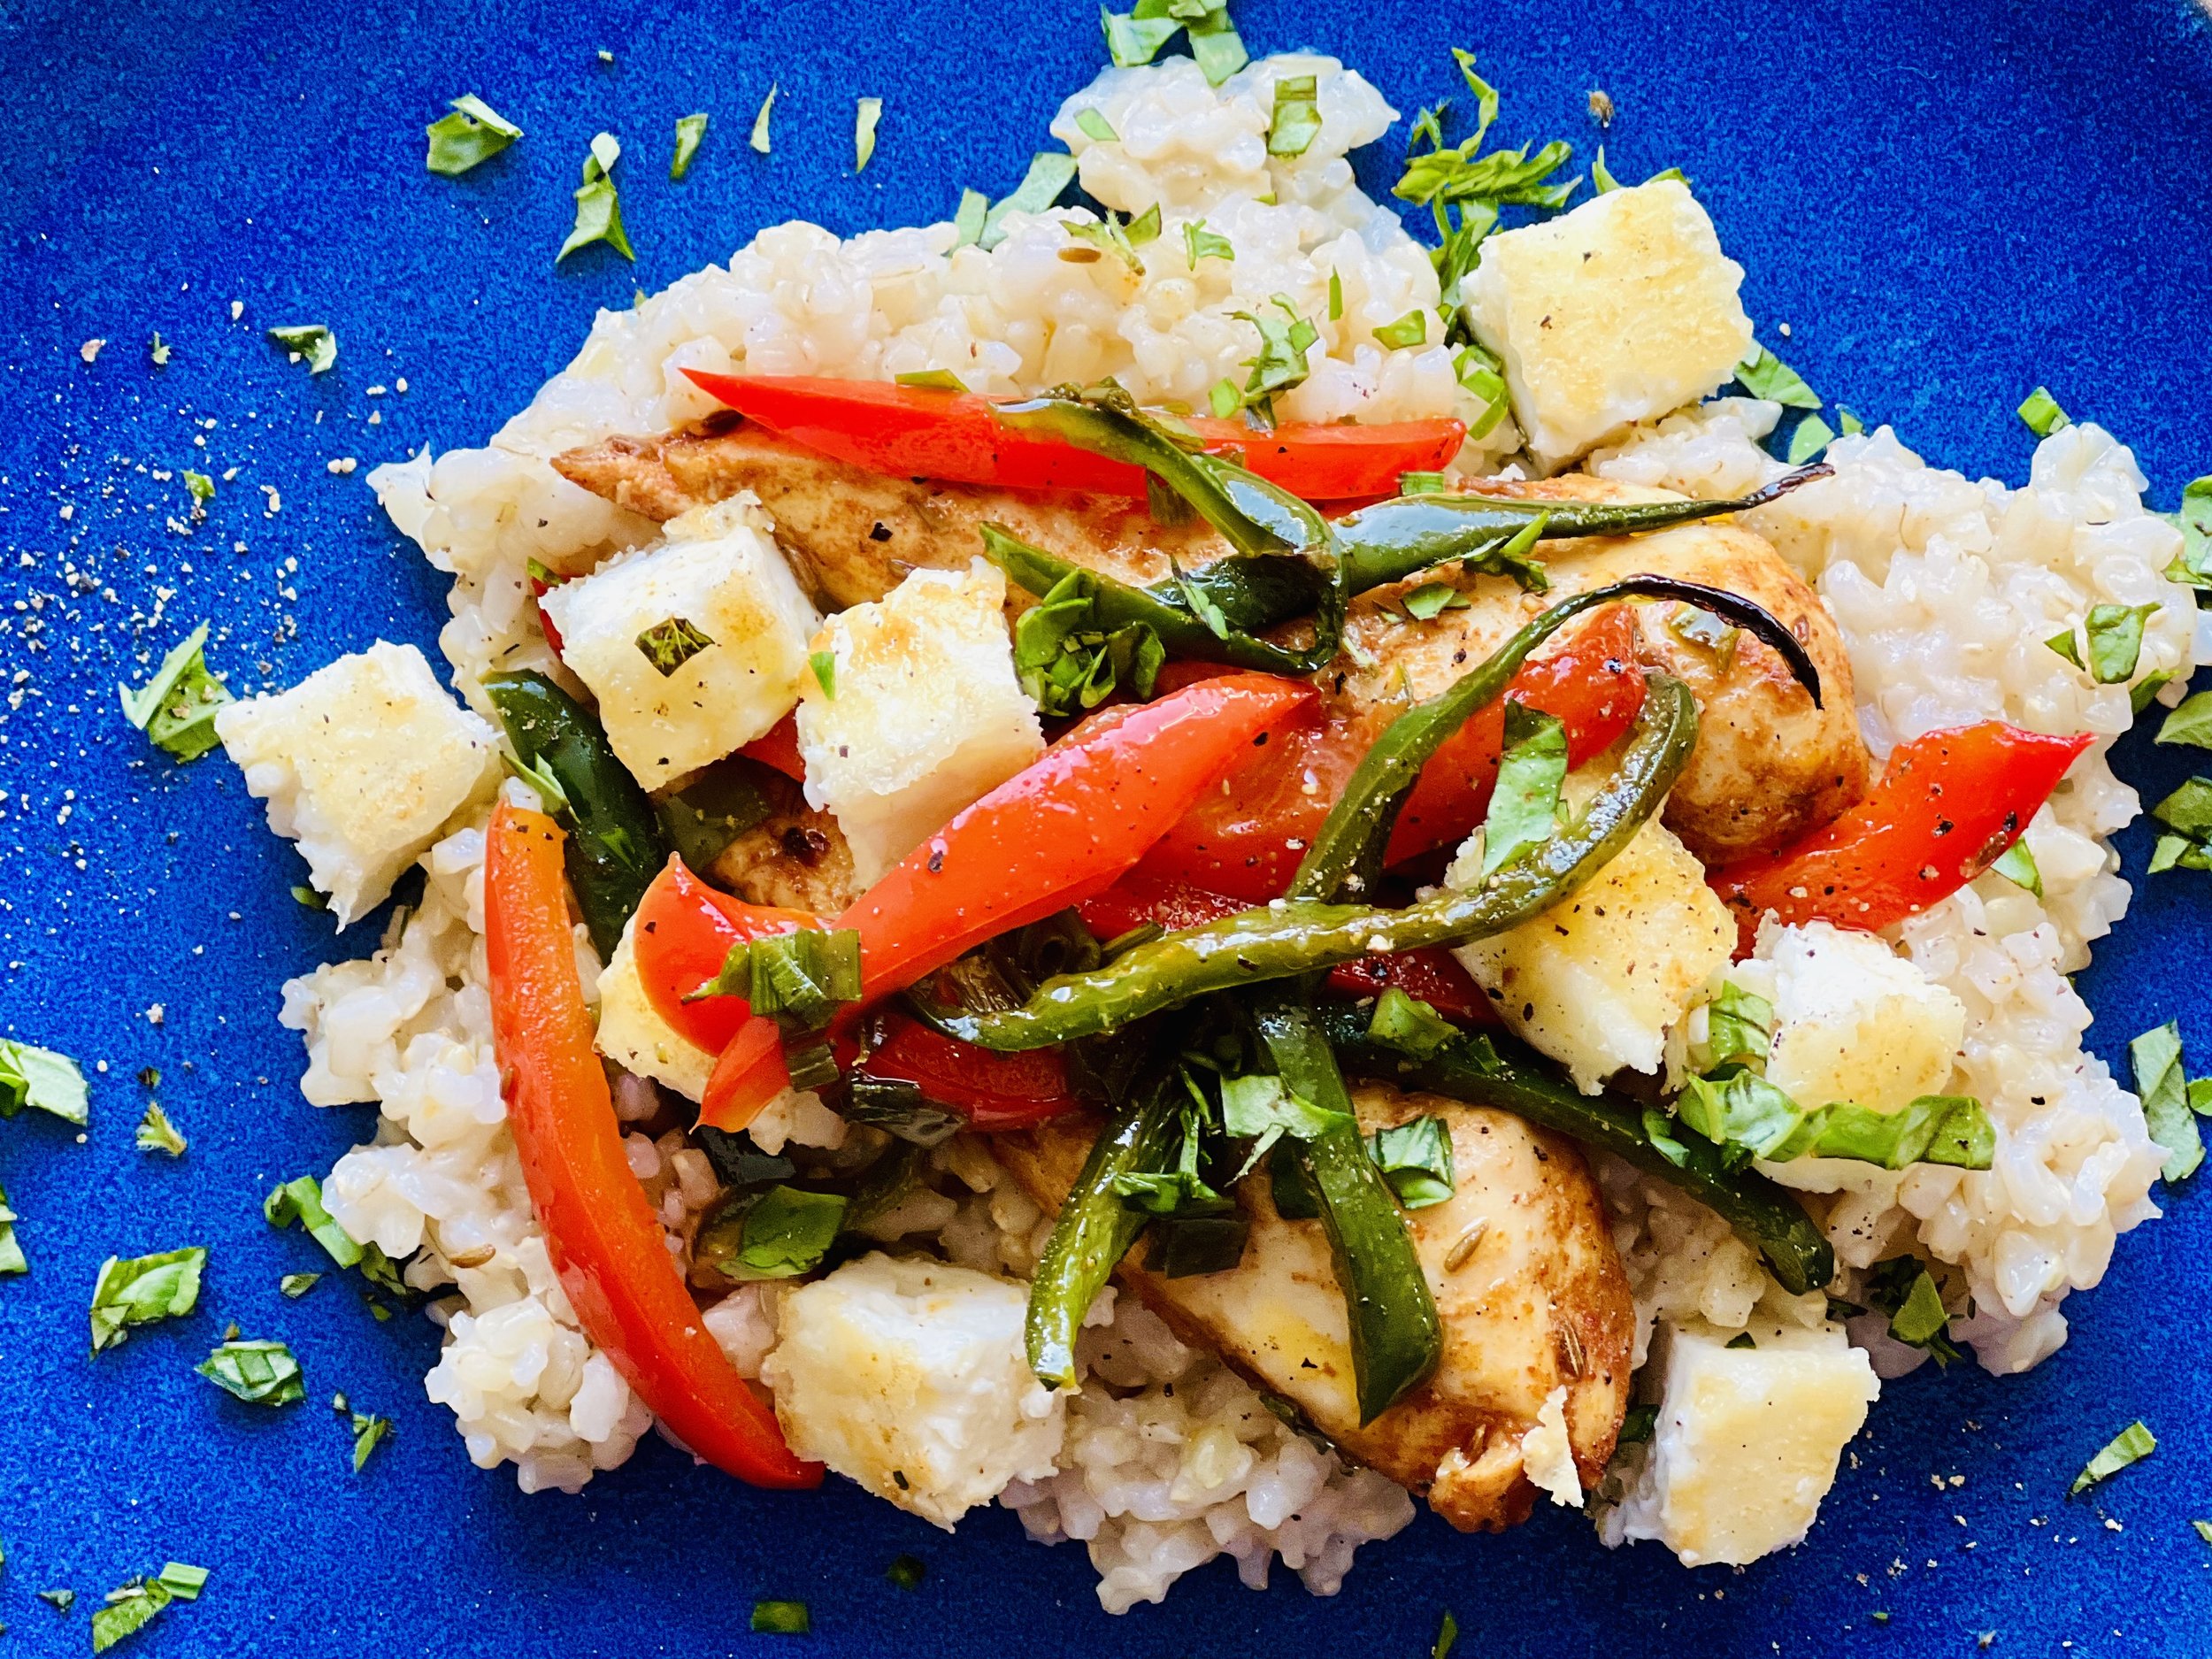
Sheetpan Chicken and Peppers with Crispy Feta Croutons (low FODMAP)
20 Minutes prep • 20 Minutes cook • Low FODMAP • Gluten-free • Serves 4 • OK to make ahead: Step 1
This blend of peppers, spices, and garlic-infused olive oil combined with the chicken and the rice makes for a truly delicious meal. It’s perfect for a weeknight (or any night) since it comes together quickly and cooks in one pan. It’s also great for company since you can easily double the recipe to serve more people.
Ingredients
1 1/2 cups rice (white or brown)
1 pound boneless skinless chicken tenders
4 tablespoons garlic-infused olive oil
2 teaspoons paprika
2 teaspoons cumin seed
1 teaspoon ground ginger
2 medium-size red bell peppers, seeded and sliced
1-2 jalapeno peppers, seeded and sliced
1 bunch of green onions (green part only), chopped
1 8 ounce block of feta, patted dry and sliced 1/2 inch thick slices
1/4 cup cornstarch
3/4 cup mixed fresh herbs, basil, oregano, chives
1/3 cup garlic-infused olive oil
1 tablespoon lemon juice
1 tablespoon rice vinegar
2 teaspoons maple syrup
Directions
(1) Cook rice: Cook the rice (white or brown per your preference) per package instructions.
Make-ahead note: At this point you can keep the rice warm until you’re ready to serve.
(2) Prepare: Preheat the oven to 425 degrees F. Line a rimmed baking sheet with parchment to make clean up simple.
(3) Season and cook the chicken: In a bowl, toss together the chicken, 3 tablespoons olive oil, paprika, cumin, ginger, and a pinch each of salt, pepper, and chili flakes. Lay the chicken in one layer on the prepared pan. Add the sliced peppers, and chopped green onions over the top of the chicken. Bake 20 to 25 minutes, until the chicken is just cooked through.
(4) Make the feta croutons: Meanwhile, make the crispy feta croutons. Add the cornstarch to a shallow bowl. Add the block of feta and toss to coat all sides. Heat 1 tablespoon olive oil in a large skillet over medium heat. Add the feta and cook for 2 to 3 minutes per side, until golden and crisp. Transfer the feta to a plate. When cool, cut into cubes.
(5) Make the vinaigrette: Combine all ingredients in a small jar. Season with salt and pepper.
(6) Plate and serve: Put a scoop of rice on each plate. Top with chicken, peppers, and feta. Drizzle with the vinaigrette and sprinkle with the fresh herbs.
Eat and enjoy every bite because you can!
Recipe note: I use Diamond Crystal Kosher salt in all my recipes because it has a wonderful flat and crisp flake that tastes delicious. It is also the least salty salt available so you can use it more liberally as a seasoning than you can table salt or sea salt. If you use another type of salt, you may need to reduce the amount so it is not over-salted.
Link note: This post contains links for you to easily purchase items listed on the page. In some cases, we have provided a special discount code for IBS Game Changers so be sure to use it when you purchase an item to get the discount that has been arranged just for you! As an Amazon Associate, I earn a commission from qualifying Amazon purchases.
More Deliciously Low FODMAP™ main course recipes
15 Minutes prep • 30 Minutes cook • Low FODMAP • Serves 4 • Ok to make-ahead: Steps 1 - 2
10 Minutes prep • 25 Minutes cook • Low FODMAP • Gluten-Free • Serves 6 • Ok to make-ahead: Step 1
Creamy Herbed Ricotta Dip (low FODMAP)
15 Minutes prep • 30 Minutes chill • Low FODMAP • Gluten-free • Makes 1 1/2 cups
15 Minutes prep • 30 Minutes chill • Low FODMAP • Gluten-free • Makes 1 1/2 cups • Ok to make-ahead: Steps 1-3
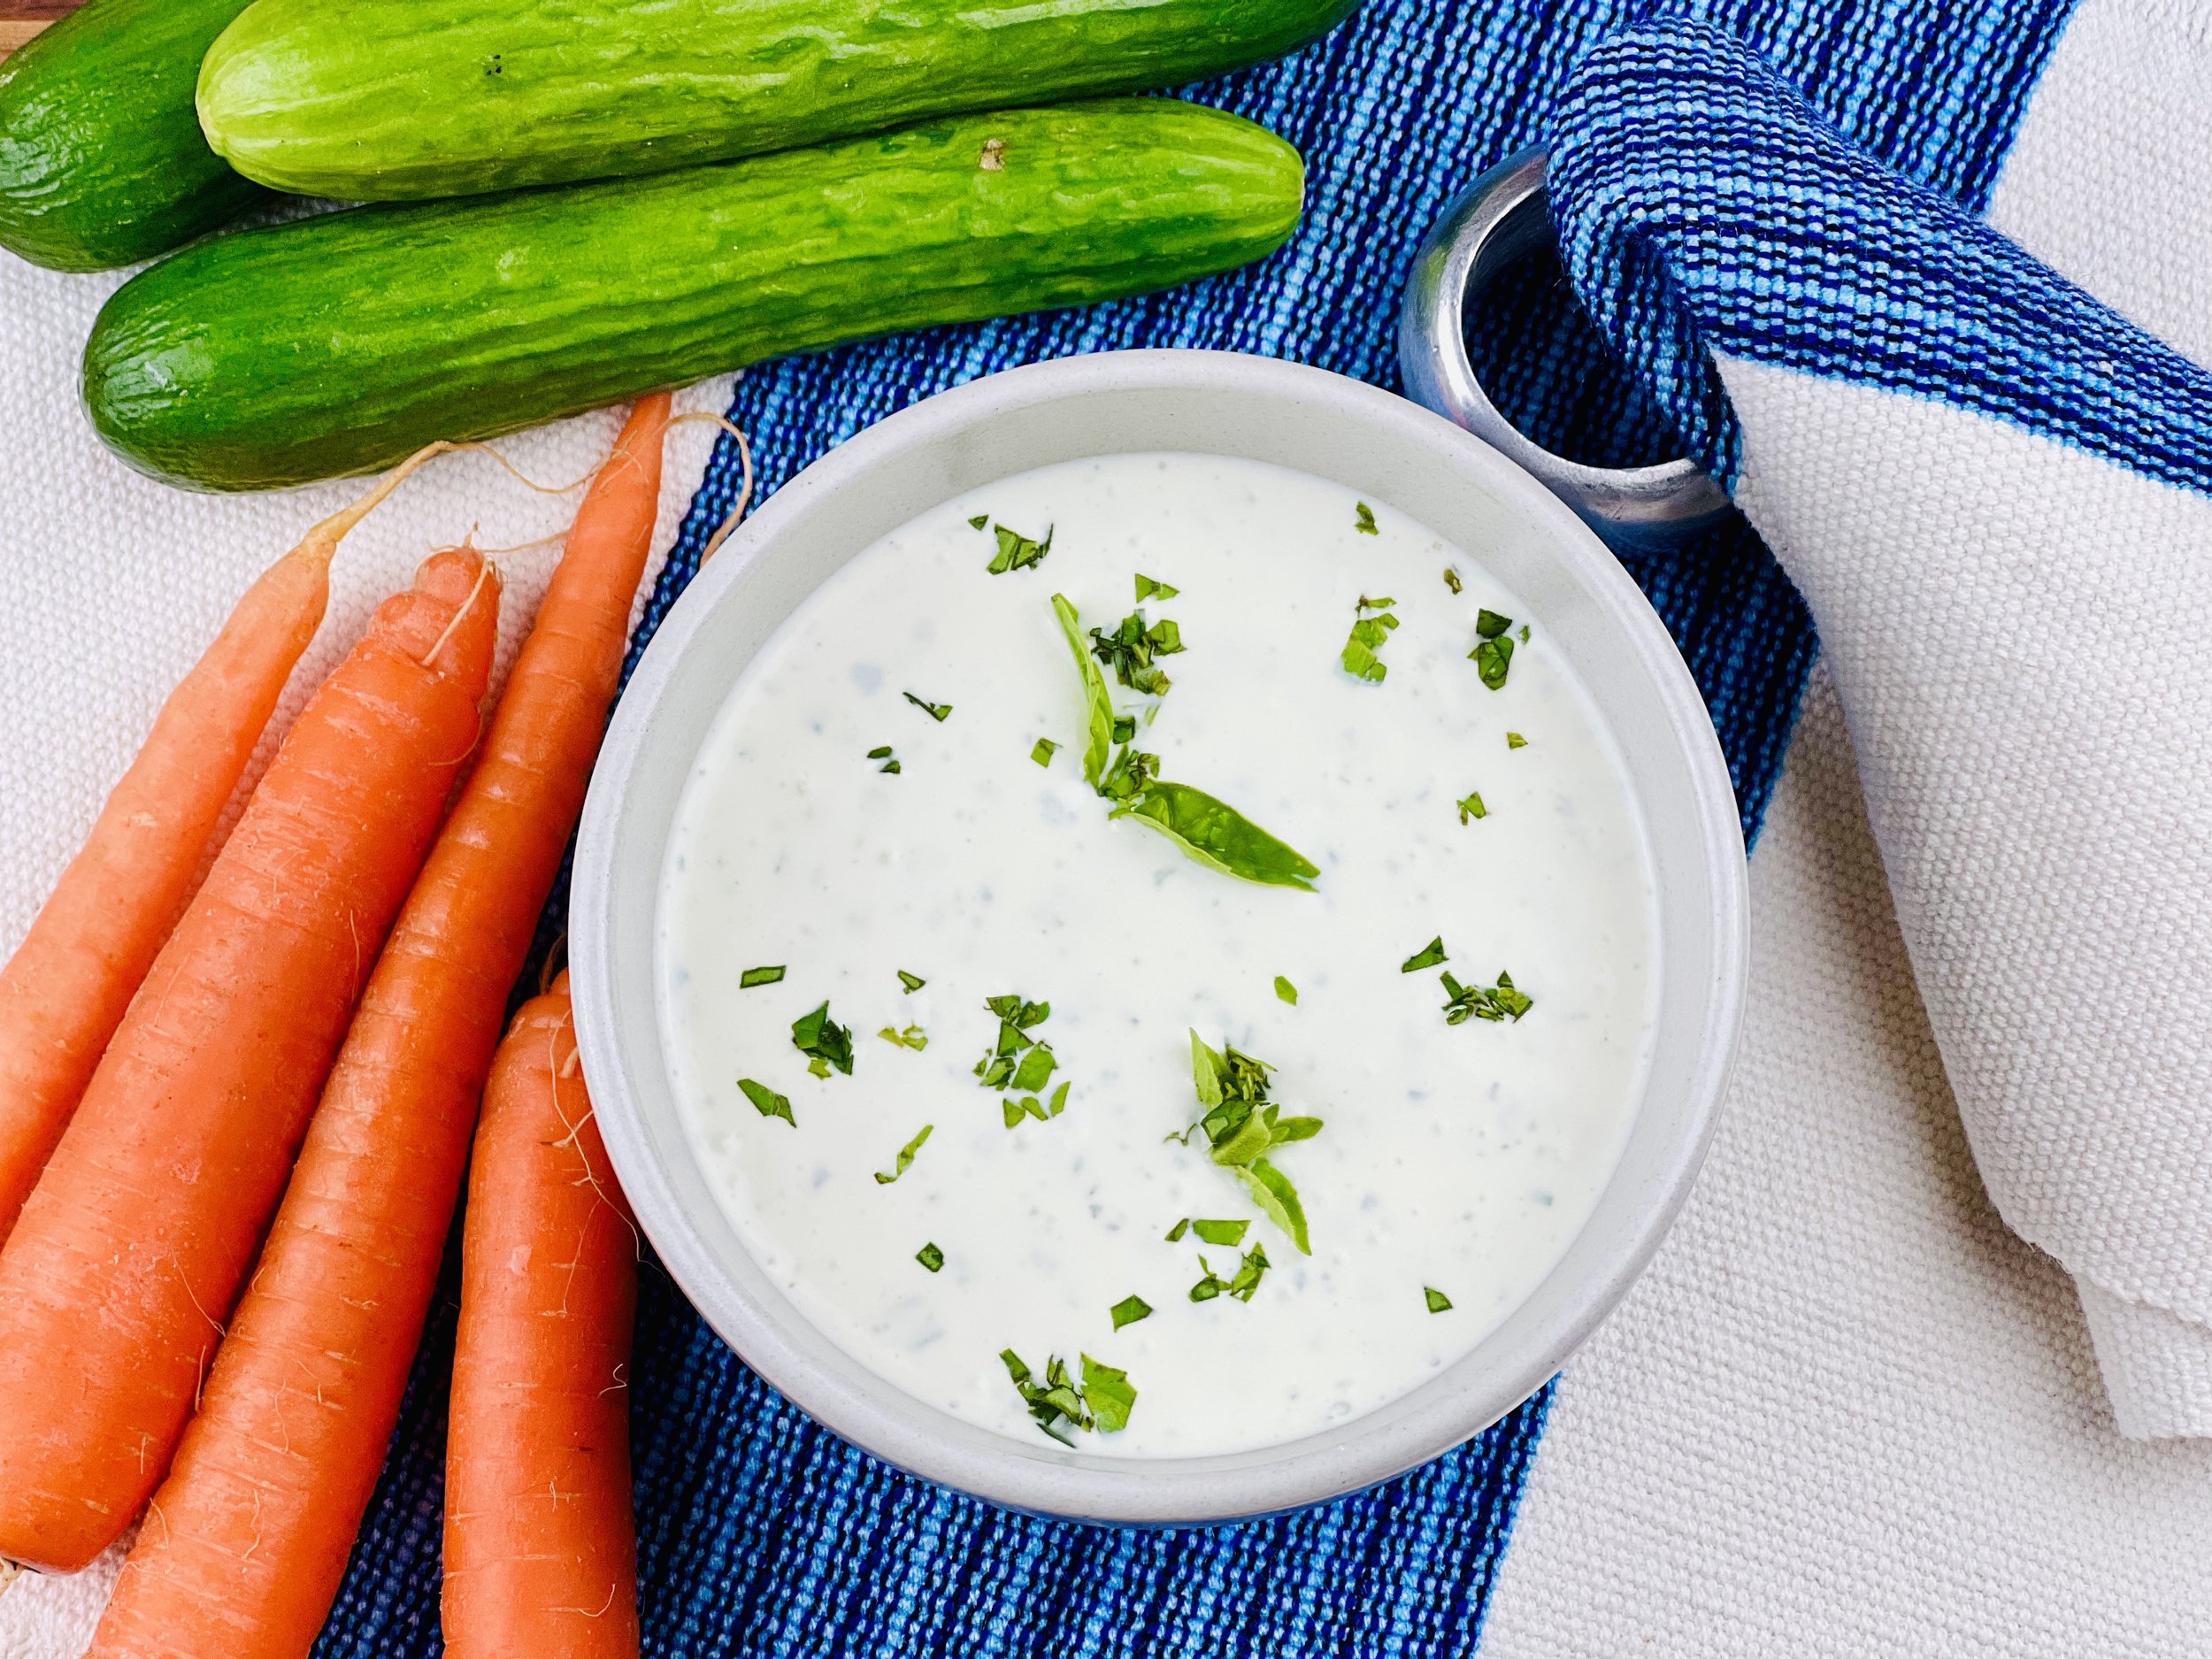
This dip is smooth, creamy, delicious, and very simple to make. It’s the perfect low FODMAP dip for all your cut veggies and chips. It also makes a great spread for sourdough crostini. Starting with lactose-free cottage cheese is the secret to making this dip IBS friendly.
This is an exclusive recipe just for recipe club members.
In addition to the two free recipes I create each week I am creating and delivering one very special recipe just for my recipe club members. If you’re not yet a member, I encourage you to join! Membership in the club includes access to the complete archive of recipes with filters so it can become your virtual low FODMAP cookbook plus, I am creating and delivering one special NEW recipe every week ONLY for recipe club members. And, for my true fans, I’ll be sharing behind-the-scenes content, and updates on the progress of the new cookbook.
Your membership in the club helps me continue creating new, delicious, easy-to-make, low FODMAP recipes just for you.
As always, all recipes will emphasize simple ingredients, easy preparation, and delicious low FODMAP results. Recipes will be for everything from main courses, salads, soups, side dishes, appetizers, desserts, sauces, breakfast and lunch, and even mocktails and cocktails. Everything you need to prepare fantastic low FODMAP meals everyone will love.
Join the club. Become a Patron. Let’s keep making delicious Low FODMAP meals together.
More Deliciously Low FODMAP™ appetizer recipes
5 Minutes prep • 15 Minutes cook • Low FODMAP • Gluten-Free • Lactose-Free • Makes 2 cups
10 Minutes Prep • 50 Minutes Cook • Low FODMAP • Gluten-free • Dairy Free • Vegan • Serving size 3 - 4 crackers
10 Minutes prep • 15 Minutes rest • Low FODMAP • Gluten-free • Dairy-free • Serving size 3 tablespoons
10 Minutes prep • 20 Minutes cook • Low FODMAP • Gluten-free • Lactose-free • Vegan • Serves 5
15 Minutes prep • 1 hour chill • Low FODMAP • Gluten-free • Vegetarian • Serves 4 or more
10 Minutes prep • Low FODMAP • Gluten-Free • Lactose-free • Vegetarian • Vegan • Makes 1.5 cups
10 Minutes Prep • 50 Minutes Cook • Gluten-free • Dairy-free • Low FODMAP • Serving size 3-4 crackers
5 Minutes prep • 10 Minutes cook • Low FODMAP • Gluten-free • Lactose-free • Makes 1 cup
20 Minutes prep • 16 Minutes cook • Low FODMAP • Vegetarian • Serves 8 • Ok to make-ahead: Steps 1-5
Sweet and Crispy Brussels Sprouts (low FODMAP)
20 Minutes prep • 15 Minutes Cook • Low FODMAP • Gluten-free • Lactose-free • Serves 4
20 Minutes prep • 15 Minutes Cook • Low FODMAP • Gluten-free • Lactose-free • Serves 4 • Ok to make ahead: Step 1
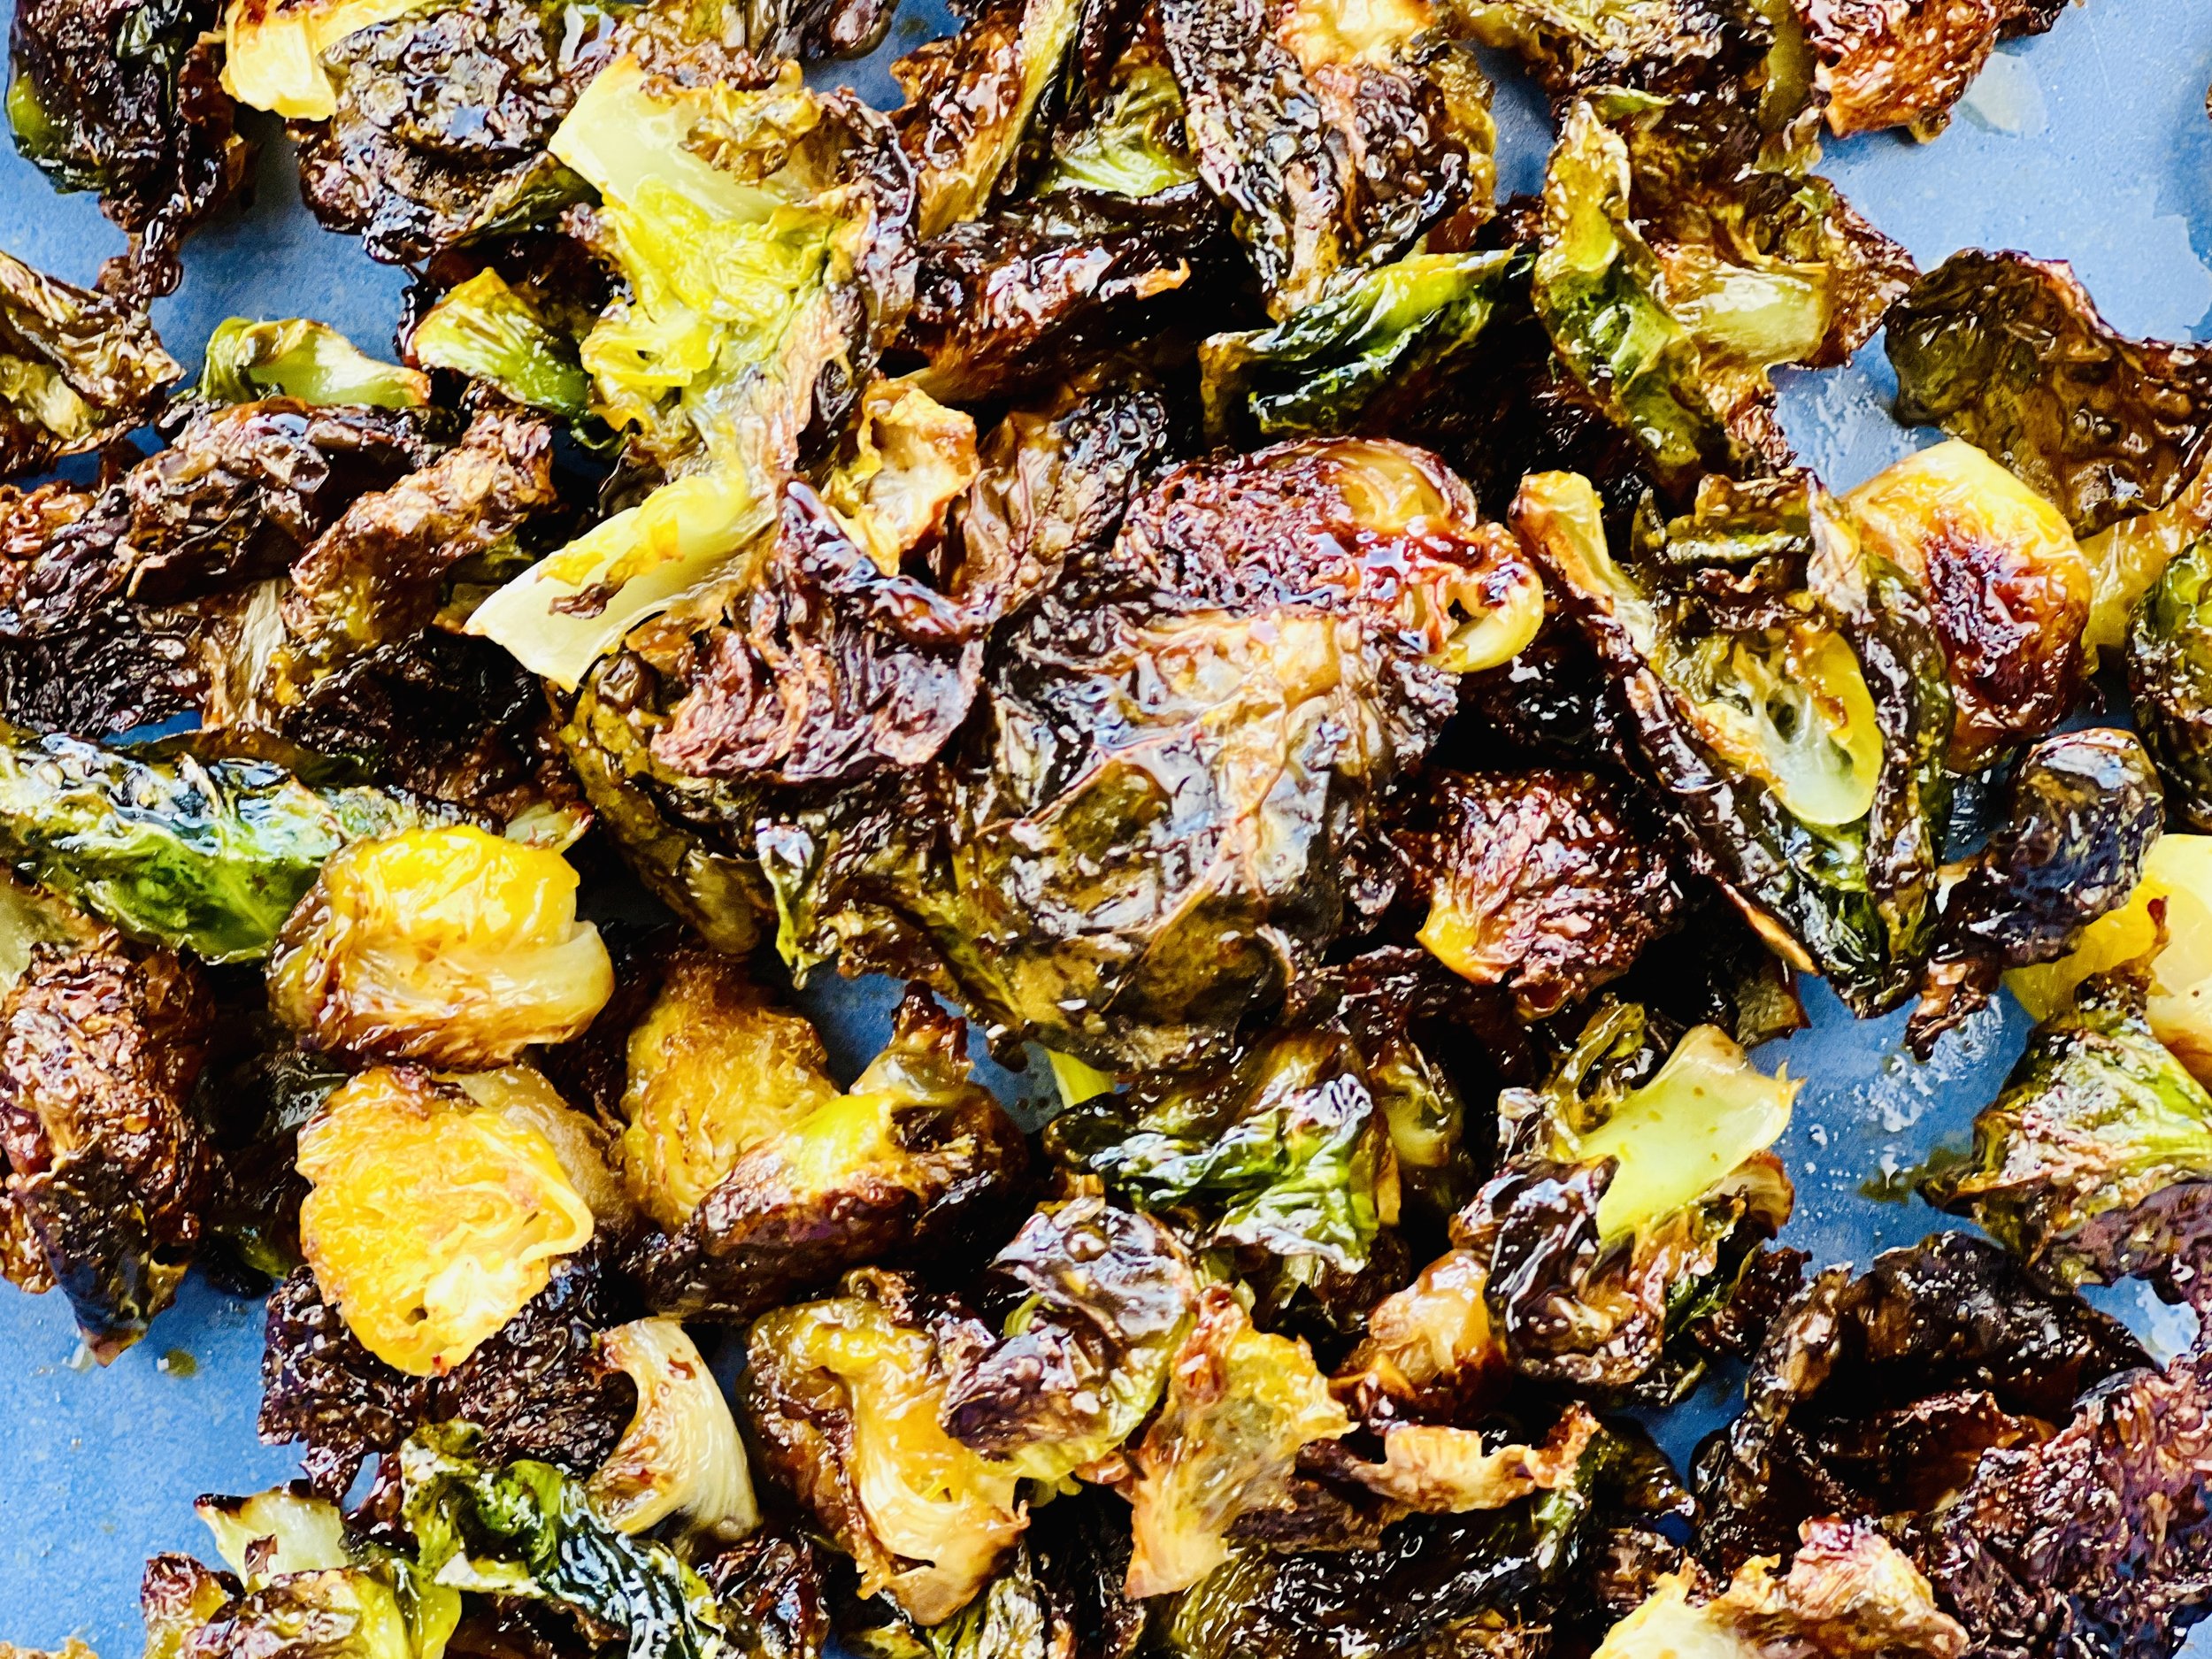
Did you think Brussels sprouts were gone from your low FODMAP diet? Think again! A low FODMAP serving of Brussels sprouts is only 2 - 3 sprouts, which means you need to find a way to enjoy every single bite. By removing the leaves and roasting them separately, this recipe allows you to stretch that low FODMAP serving to a very satisfying amount. Crispy, sweet, and delicious, these Brussels sprouts make a fantastic addition to any pan of roasted vegetables, or as a crisp “chip” alongside your next appetizer tray, or as a small side you can enjoy every single bite of all on its own.
Ingredients
8 - 12 brussels sprouts (2 - 3 sprouts/1.78 ounces total are considered a low FODMAP serving)
2 tablespoons of olive oil
2 tablespoons of real maple syrup
1 teaspoon Kosher salt
Directions
(1) Prepare: Preheat the oven to 400 degrees F. Wash sprouts and cut the base off each sprout so you can remove the individual leaves. remove all leaves and then cut the small compact center in half and put it all in a roasting pan.
(2) Roast: Combine olive oil and maple syrup and toss with the sprout leaves in the roasting pan. Sprinkle with Kosher salt. Put the roasting pan in the oven and roast for about 15 - 18 minutes stirring every few minutes to prevent burning. Roast until the leaves are crisp and darkened but not burned.
(3) Finish: Remove from the oven and serve hot, or cool on the tray to room temperature. Taste and sprinkle with additional Kosher salt if needed to enhance the sweet/salty taste to perfection.
(4) Plate and serve: Use as a topping for other roasted vegetables, serve as an appetizer “chip,” or serve as a delicious side dish.
Eat and enjoy every bite because you can!
Recipe note: I use Diamond Crystal Kosher salt in all my recipes because it has a wonderful flat and crisp flake that tastes delicious. It is also the least salty salt available so you can use it more liberally as a seasoning than you can table salt or sea salt. If you use another type of salt, you may need to reduce the amount so it is not over-salted.
Link note: This post contains links for you to easily purchase items listed on the page. In some cases, we have provided a special discount code for IBS Game Changers so be sure to use it when you purchase an item to get the discount that has been arranged just for you! As an Amazon Associate, I earn a commission from qualifying Amazon purchases.
More Deliciously Low FODMAP™ side dish recipes
5 Minutes prep • 15 Minutes cook • Low FODMAP • Gluten-Free • Lactose-Free • Makes 2 cups
15 Minutes prep • 30 Minutes cook • Low FODMAP • Serves 4 • Ok to make-ahead: Steps 1 - 2
15 Minutes prep • 18 Minutes cook • Low FODMAP • Gluten-free • Makes 15 • Serving size 2
10 Minutes prep • 10 Minutes cook • Low FODMAP • Gluten-free • Lactose-free • Vegan • Serves 4
10 Minutes prep • 25 Minutes cook • Low FODMAP • Gluten-free • Vegetarian • Plant Forward • Serves 4
20 Minutes prep • 25 Minutes cook • Low FODMAP • Gluten-free • Lactose-free • Vegetarian • Serves 4
10 Minutes prep • 20 Minutes cook • Low FODMAP • Gluten-free • Lactose-free • Vegan • Serves 5
15 Minutes prep • 45 Minutes cook • Low FODMAP • Gluten-free • Vegetarian • Serves 4 - 6
30 Minutes prep • 20 Minutes cook • Low FODMAP • Gluten-free • Vegetarian • Makes 10 Squares
25 Minutes prep • 40 Minutes cook • Low FODMAP • Gluten-free • Vegetarian • Serves 4 - 6
Chicken Katsu and Veggie Rice Bowls (low FODMAP)
20 Minutes prep • 20 Minutes cook • Low FODMAP • Gluten-free • Serves 4
20 Minutes prep • 20 Minutes cook • Low FODMAP • Gluten-free • Lactose-free • Serves 4 • Ok to make-ahead: Steps 1-3
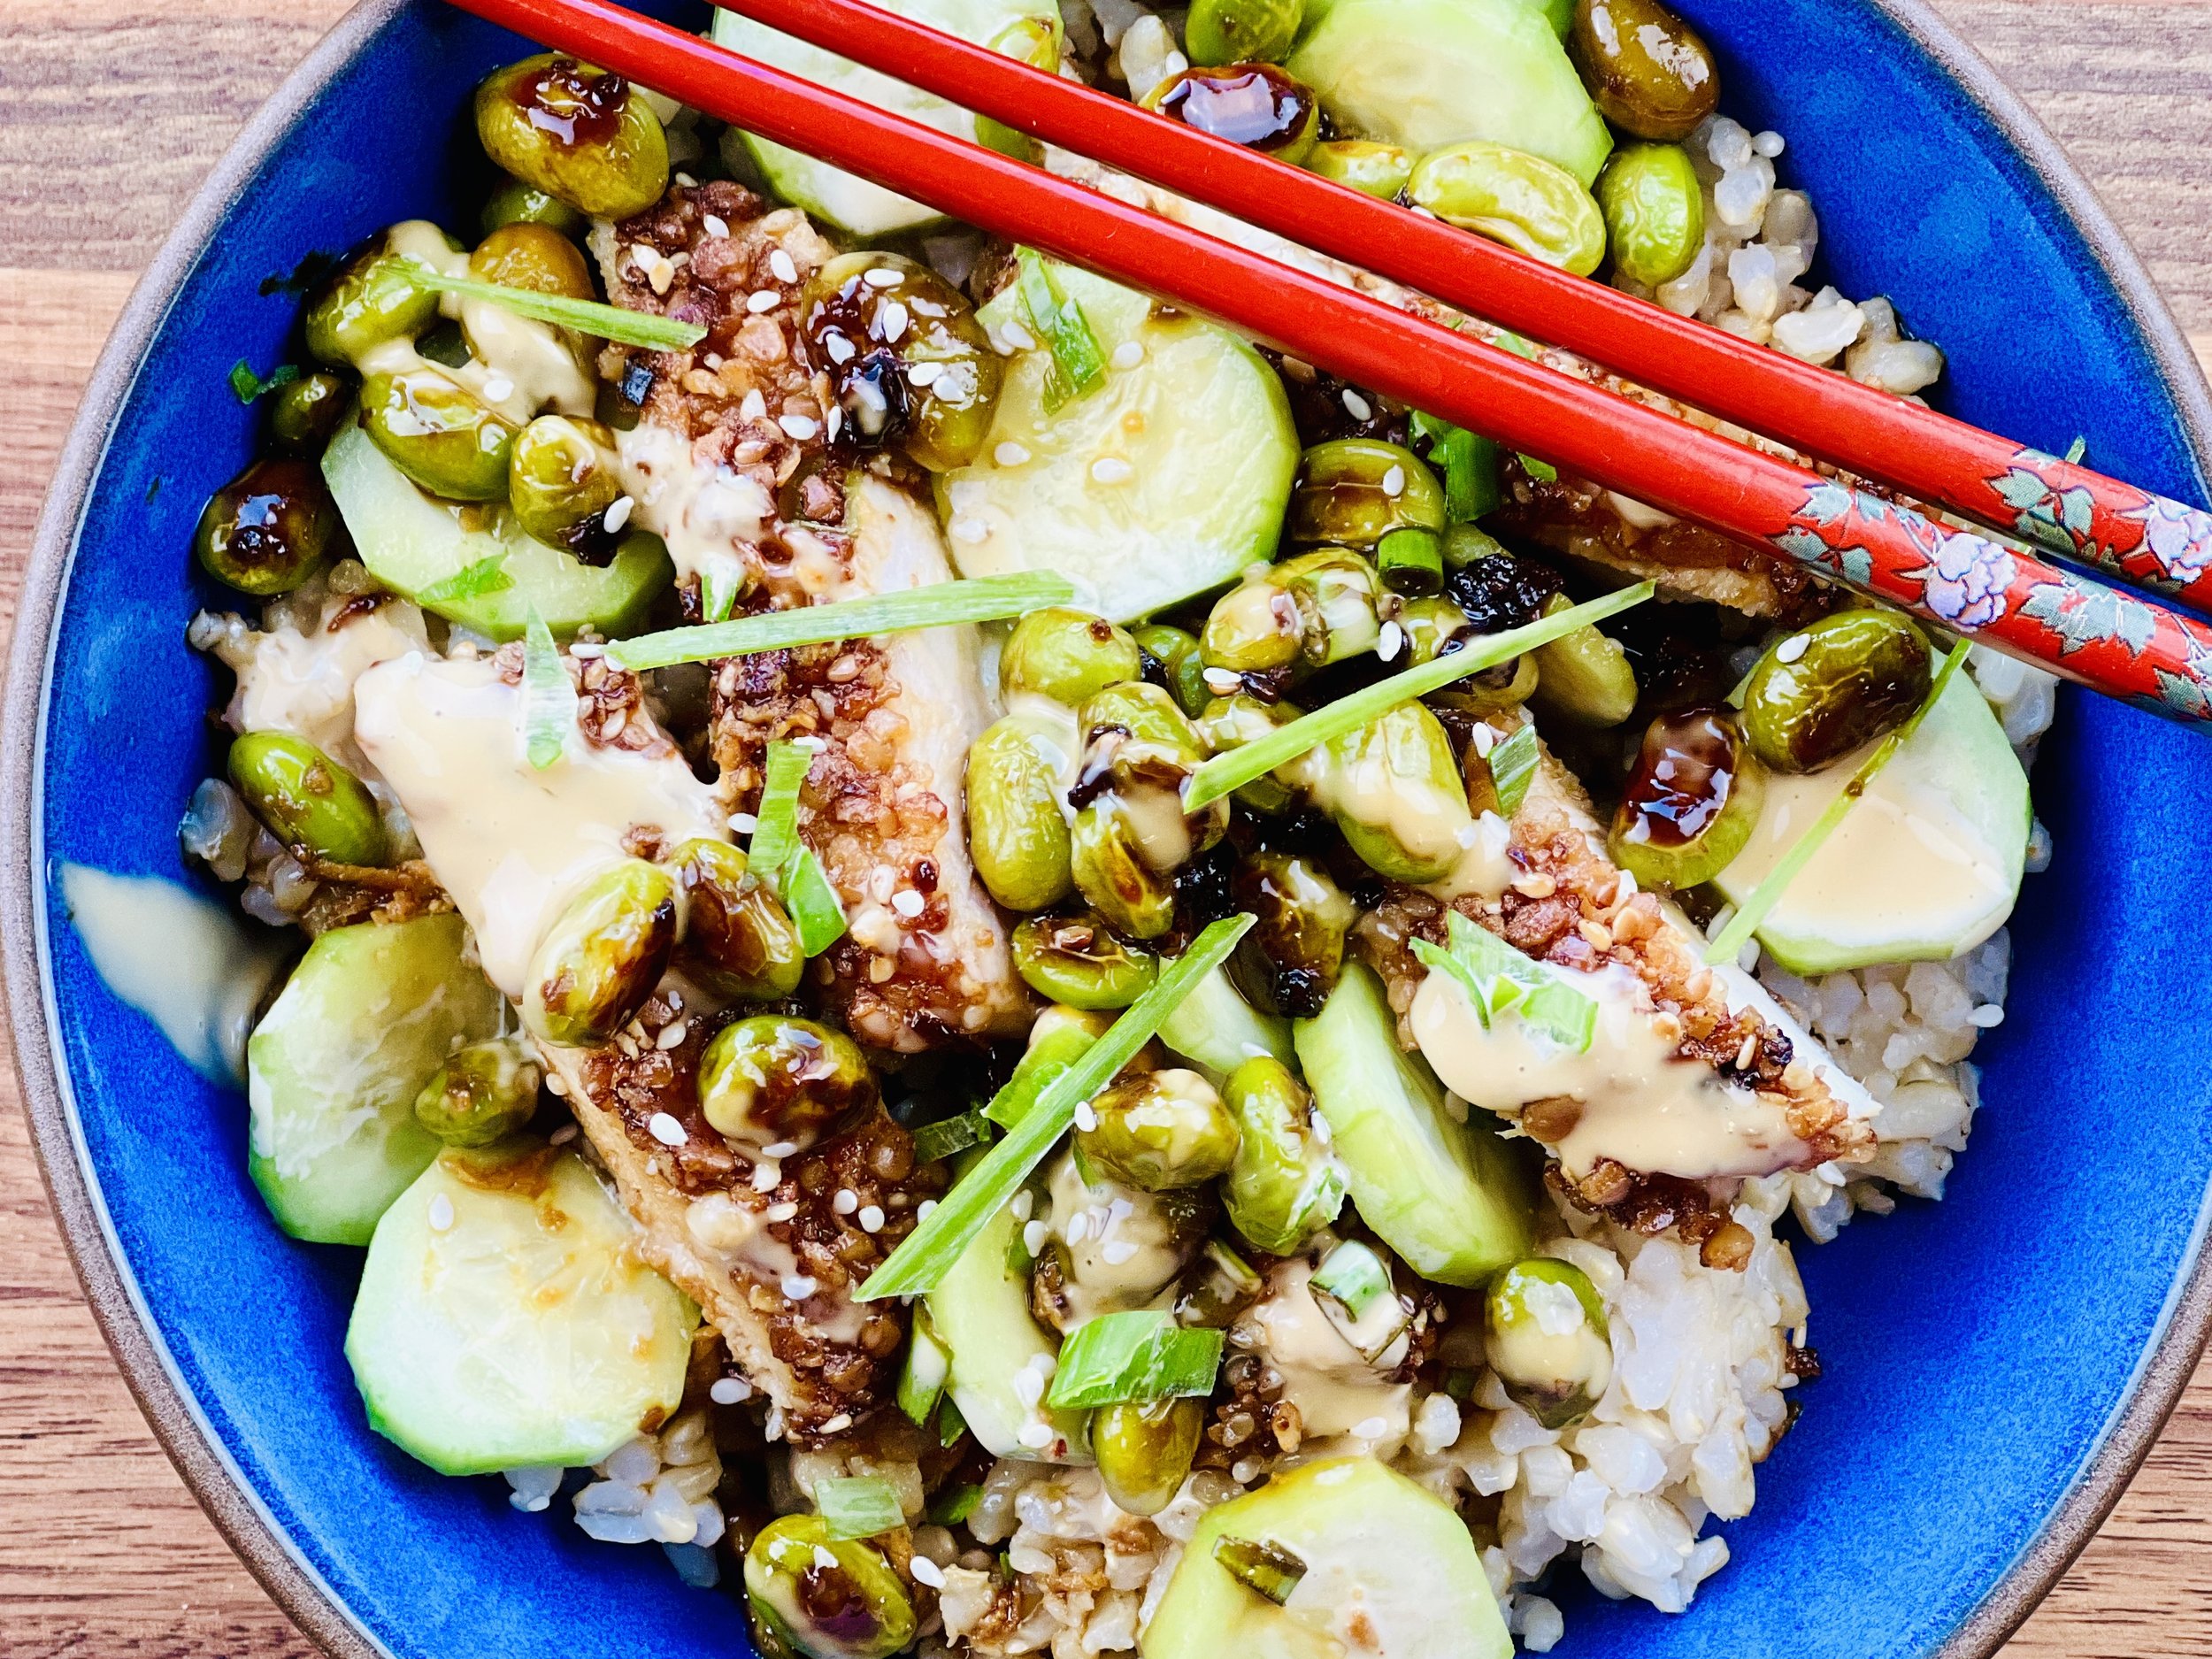
Crispy chicken, tasty edamame, cool cucumber, and steamed rice make this a perfect, and perfectly delicious, one-bowl meal. I love it with brown rice, but you can use whatever you have on hand. Adding a bit of toasted sesame oil to the rice gives it a nice complex flavor to balance the crisp saltiness of the chicken Katsu. There are a few steps to making this meal, but all are easy and the result is well worth the effort!
Ingredients: Chicken Katsu
2/3 cup, plus 2 tablespoons gluten-free low sodium soy sauce
2 tablespoons toasted sesame oil, divided
1 tablespoon maple syrup
1 tablespoon fresh ginger, grated
2 tablespoons green onions (green part only), chopped
1 teaspoon, plus 3 tablespoons sesame seeds, plus more for serving
2 boneless chicken breasts, sliced in half horizontally
3/4 cup gluten-free Panko crumbs
1 cup frozen shelled edamame
Persian cucumber, peeled and sliced, and additional chopped green onions (green part only), for serving
Ingredients: Soy Mayonnaise
1/3 cup mayonnaise
1 tablespoon gluten-free soy sauce
1 teaspoon rice vinegar
Red pepper flakes (to taste)
Ingredients: Rice
1 1/2 cups white rice or 1 cup brown rice
1 tablespoon toasted sesame oil
3 cups water
1 teaspoon Kosher salt
Directions
(1) Salt the chicken: This step is optional but results in more flavorful and tender meat. Cut chicken breasts horizontally and trim off any fat or skin. Season both sides of each piece of chicken evenly with Kosher salt and lay the meat on a rimmed plate or baking dish. Cover with plastic wrap and refrigerate 4 hours, overnight, or until ready to cook. (I like to salt meat when I bring it home from the market then re-wrap it and keep it in the refrigerator until I’m ready to do something with it.)
(2) Make the sauce/marinade: In a medium bowl, combine 2/3 cup soy sauce, sesame oil, maple syrup, ginger, green onion, 1 teaspoon sesame seeds, and red pepper flakes.
(3) Make the soy mayonnaise: Combine all ingredients in a small bowl and stir with a fork or whisk to combine. Taste and add red pepper flakes to your liking.
Make-ahead note: At this point, you may keep everything in the refrigerator until you’re ready to cook.
(4) Make white or brown rice: In a saucepan, heat 1 tablespoon of toasted sesame oil until hot but not smoking. Rinse the rice in a sieve until the water runs clear. Drain and add the rice to the hot oil and let it toast for about 2 minutes. Add the water and salt. Stir to blend. Cover, bring to a gentle boil, then reduce the heat to low and keep covered while simmering for 20 minutes (for white rice) or 45 - 60 minutes (for brown rice). Turn the heat off and let sit for another 5 - 10 minutes. Fluff the rice with a fork.
(5) Marinate the chicken: Place the chicken in a bowl and pour about 1/2 cup of the sauce over the chicken, save the rest in a separate container for serving. Let the chicken marinate for about 10 minutes.
(6) Dredge the chicken: Place the Panko and 3 tablespoons of sesame seeds in a shallow bowl. Dredge both sides of the chicken through the Panko mixture, pressing to adhere. Set the chicken aside on a plate. Discard the marinade.
(7) Cook the chicken: Heat a few tablespoons of toasted sesame oil in a large skillet over medium-high. Add the chicken and cook until golden brown, 3-4 minutes. Flip the chicken and cook until golden brown on the other side, about 2 - 3 minutes. Transfer to a cutting board. Let the chicken sit for a couple of minutes, then use a sharp knife to cut the meat into strips.
(8) Cook the edamame: While the chicken rests, add the edamame to the skillet, cook until thawed, then add 2 tablespoons soy sauce. Cook another minute, then remove from the heat.
(9) Plate and serve: Add a scoop of rice to each bowl, top with edamame, cucumber, chicken, and green onions. Drizzle with the reserved soy sauce mixture, and the soy mayonnaise.
Eat and enjoy every bite because you can!
Recipe note: I use Diamond Crystal Kosher salt in all my recipes because it has a wonderful flat and crisp flake that tastes delicious. It is also the least salty salt available so you can use it more liberally as a seasoning than you can table salt or sea salt. If you use another type of salt, you may need to reduce the amount so it is not over-salted.
Link note: This post contains links for you to easily purchase items listed on the page. In some cases, we have provided a special discount code for IBS Game Changers so be sure to use it when you purchase an item to get the discount that has been arranged just for you! As an Amazon Associate, I earn a commission from qualifying Amazon purchases.
More Deliciously Low FODMAP™ main course recipes
15 Minutes prep • 30 Minutes cook • Low FODMAP • Serves 4 • Ok to make-ahead: Steps 1 - 2
10 Minutes prep • 25 Minutes cook • Low FODMAP • Gluten-Free • Serves 6 • Ok to make-ahead: Step 1
Crisp Vegetable and Rice Salad (low FODMAP)
20 Minutes prep • 20 Minutes cook • Low FODMAP • Gluten-free • Lactose-free • Serves 4
20 Minutes prep • 20 Minutes cook • Low FODMAP • Gluten-free • Lactose-free • Serves 4 • Ok to make-ahead: Steps 1-3
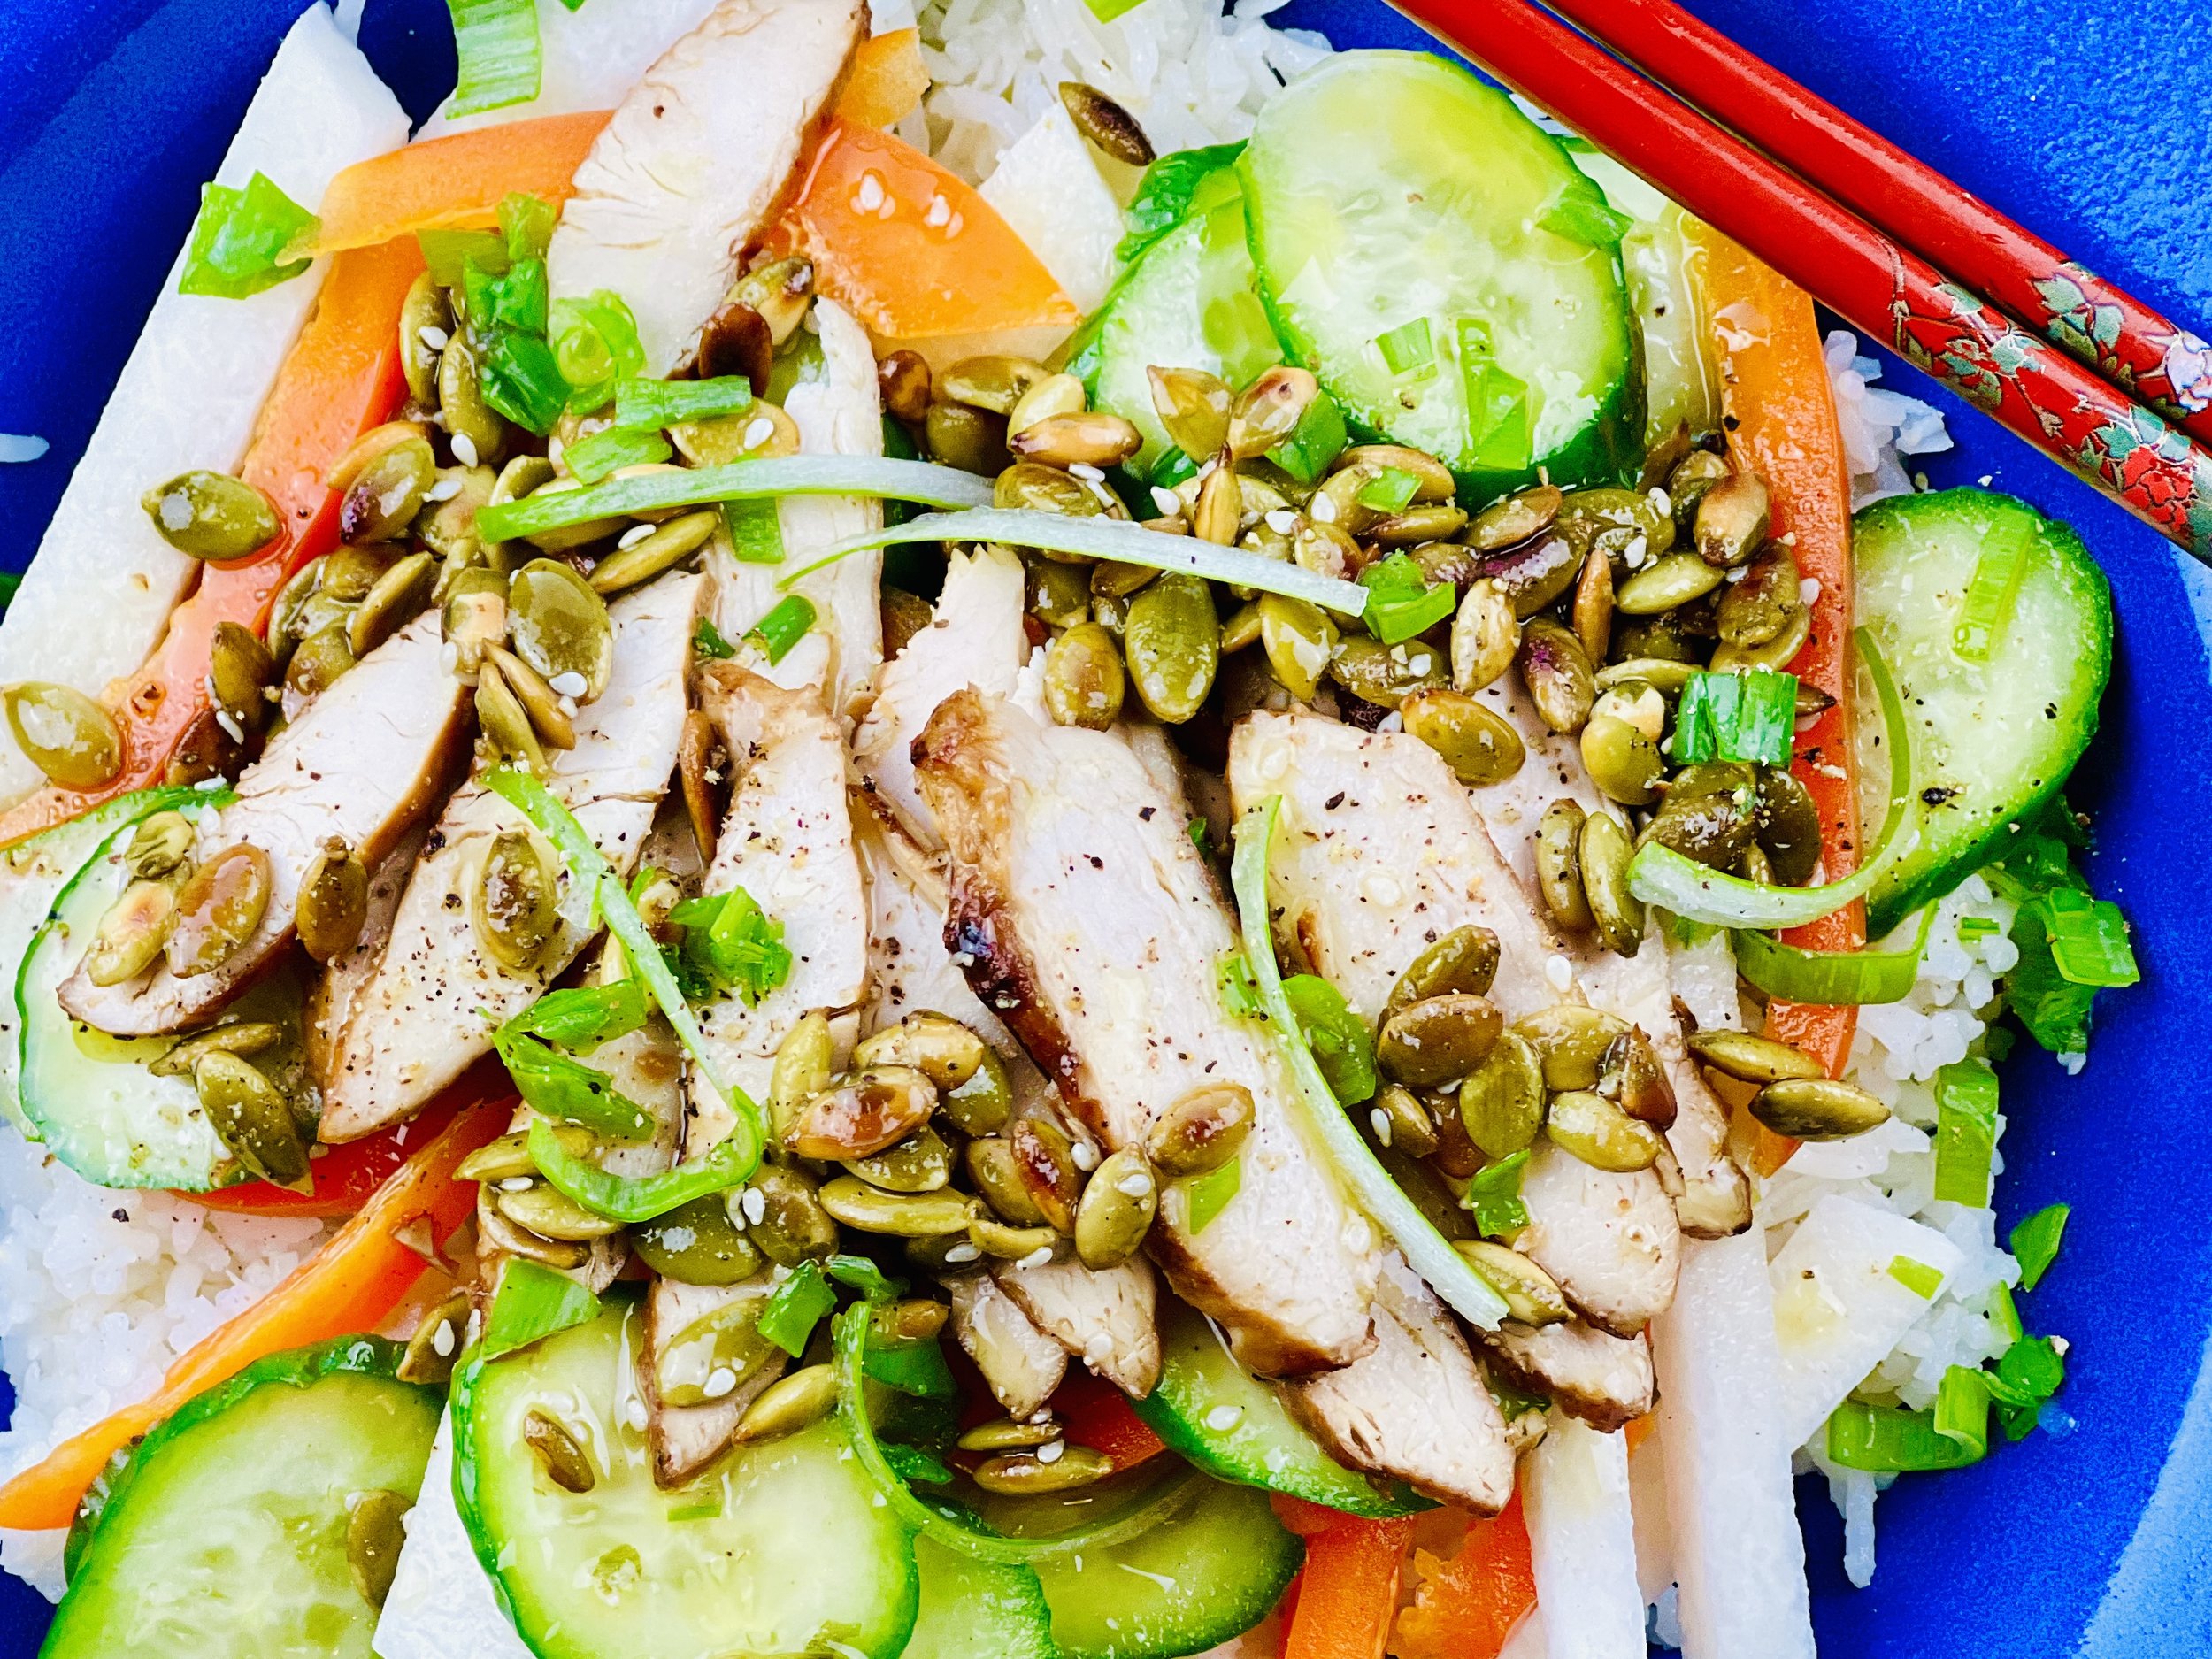
Warm rice, crisp cool vegetables, flavorful chicken, and tangy dressing. What’s not to love? This salad is a perfect one-dish meal that has a little something for everyone. Substitute other crisp vegetables you have on hand. Use chicken you have leftover or make it fresh. Leave the chicken out for your veggie family/friends.
This is an exclusive recipe just for recipe club members.
In addition to the two free recipes I create each week I am creating and delivering one very special recipe just for my recipe club members. If you’re not yet a member, I encourage you to join! Membership in the club includes access to the complete archive of recipes with filters so it can become your virtual low FODMAP cookbook plus, I am creating and delivering one special NEW recipe every week ONLY for recipe club members. And, for my true fans, I’ll be sharing behind-the-scenes content, and updates on the progress of the new cookbook.
Your membership in the club helps me continue creating new, delicious, easy-to-make, low FODMAP recipes just for you.
As always, all recipes will emphasize simple ingredients, easy preparation, and delicious low FODMAP results. Recipes will be for everything from main courses, salads, soups, side dishes, appetizers, desserts, sauces, breakfast and lunch, and even mocktails and cocktails. Everything you need to prepare fantastic low FODMAP meals everyone will love.
Join the club. Become a Patron. Let’s keep making delicious Low FODMAP meals together.
More Deliciously Low FODMAP™ salad recipes
5 Minutes prep • 15 Minutes cook • Low FODMAP • Gluten-free • Lactose-free • Vegan • Serves 4
15 Minutes prep • Low FODMAP • Gluten-free • Lactose-free • Vegetarian • Vegan • Serves 4
30 Minutes prep • Low FODMAP • Gluten-free • Lactose-free • Vegetarian • Vegan • Serves 4+ • Serving Size 2 cups
15 Minutes prep • 30 Minutes cook • Low FODMAP • Gluten-free • Lactose-free • Serves 4-6
Perfect Egg Salad or Deviled Eggs (low FODMAP)
10 minutes • Gluten-free • Dairy-free • Low FODMAP • Serves 1
10 Minutes prep • Low FODMAP • Gluten-free • Lactose-free • Serves 2 - 4 • Ok to make ahead: Steps 1 - 3
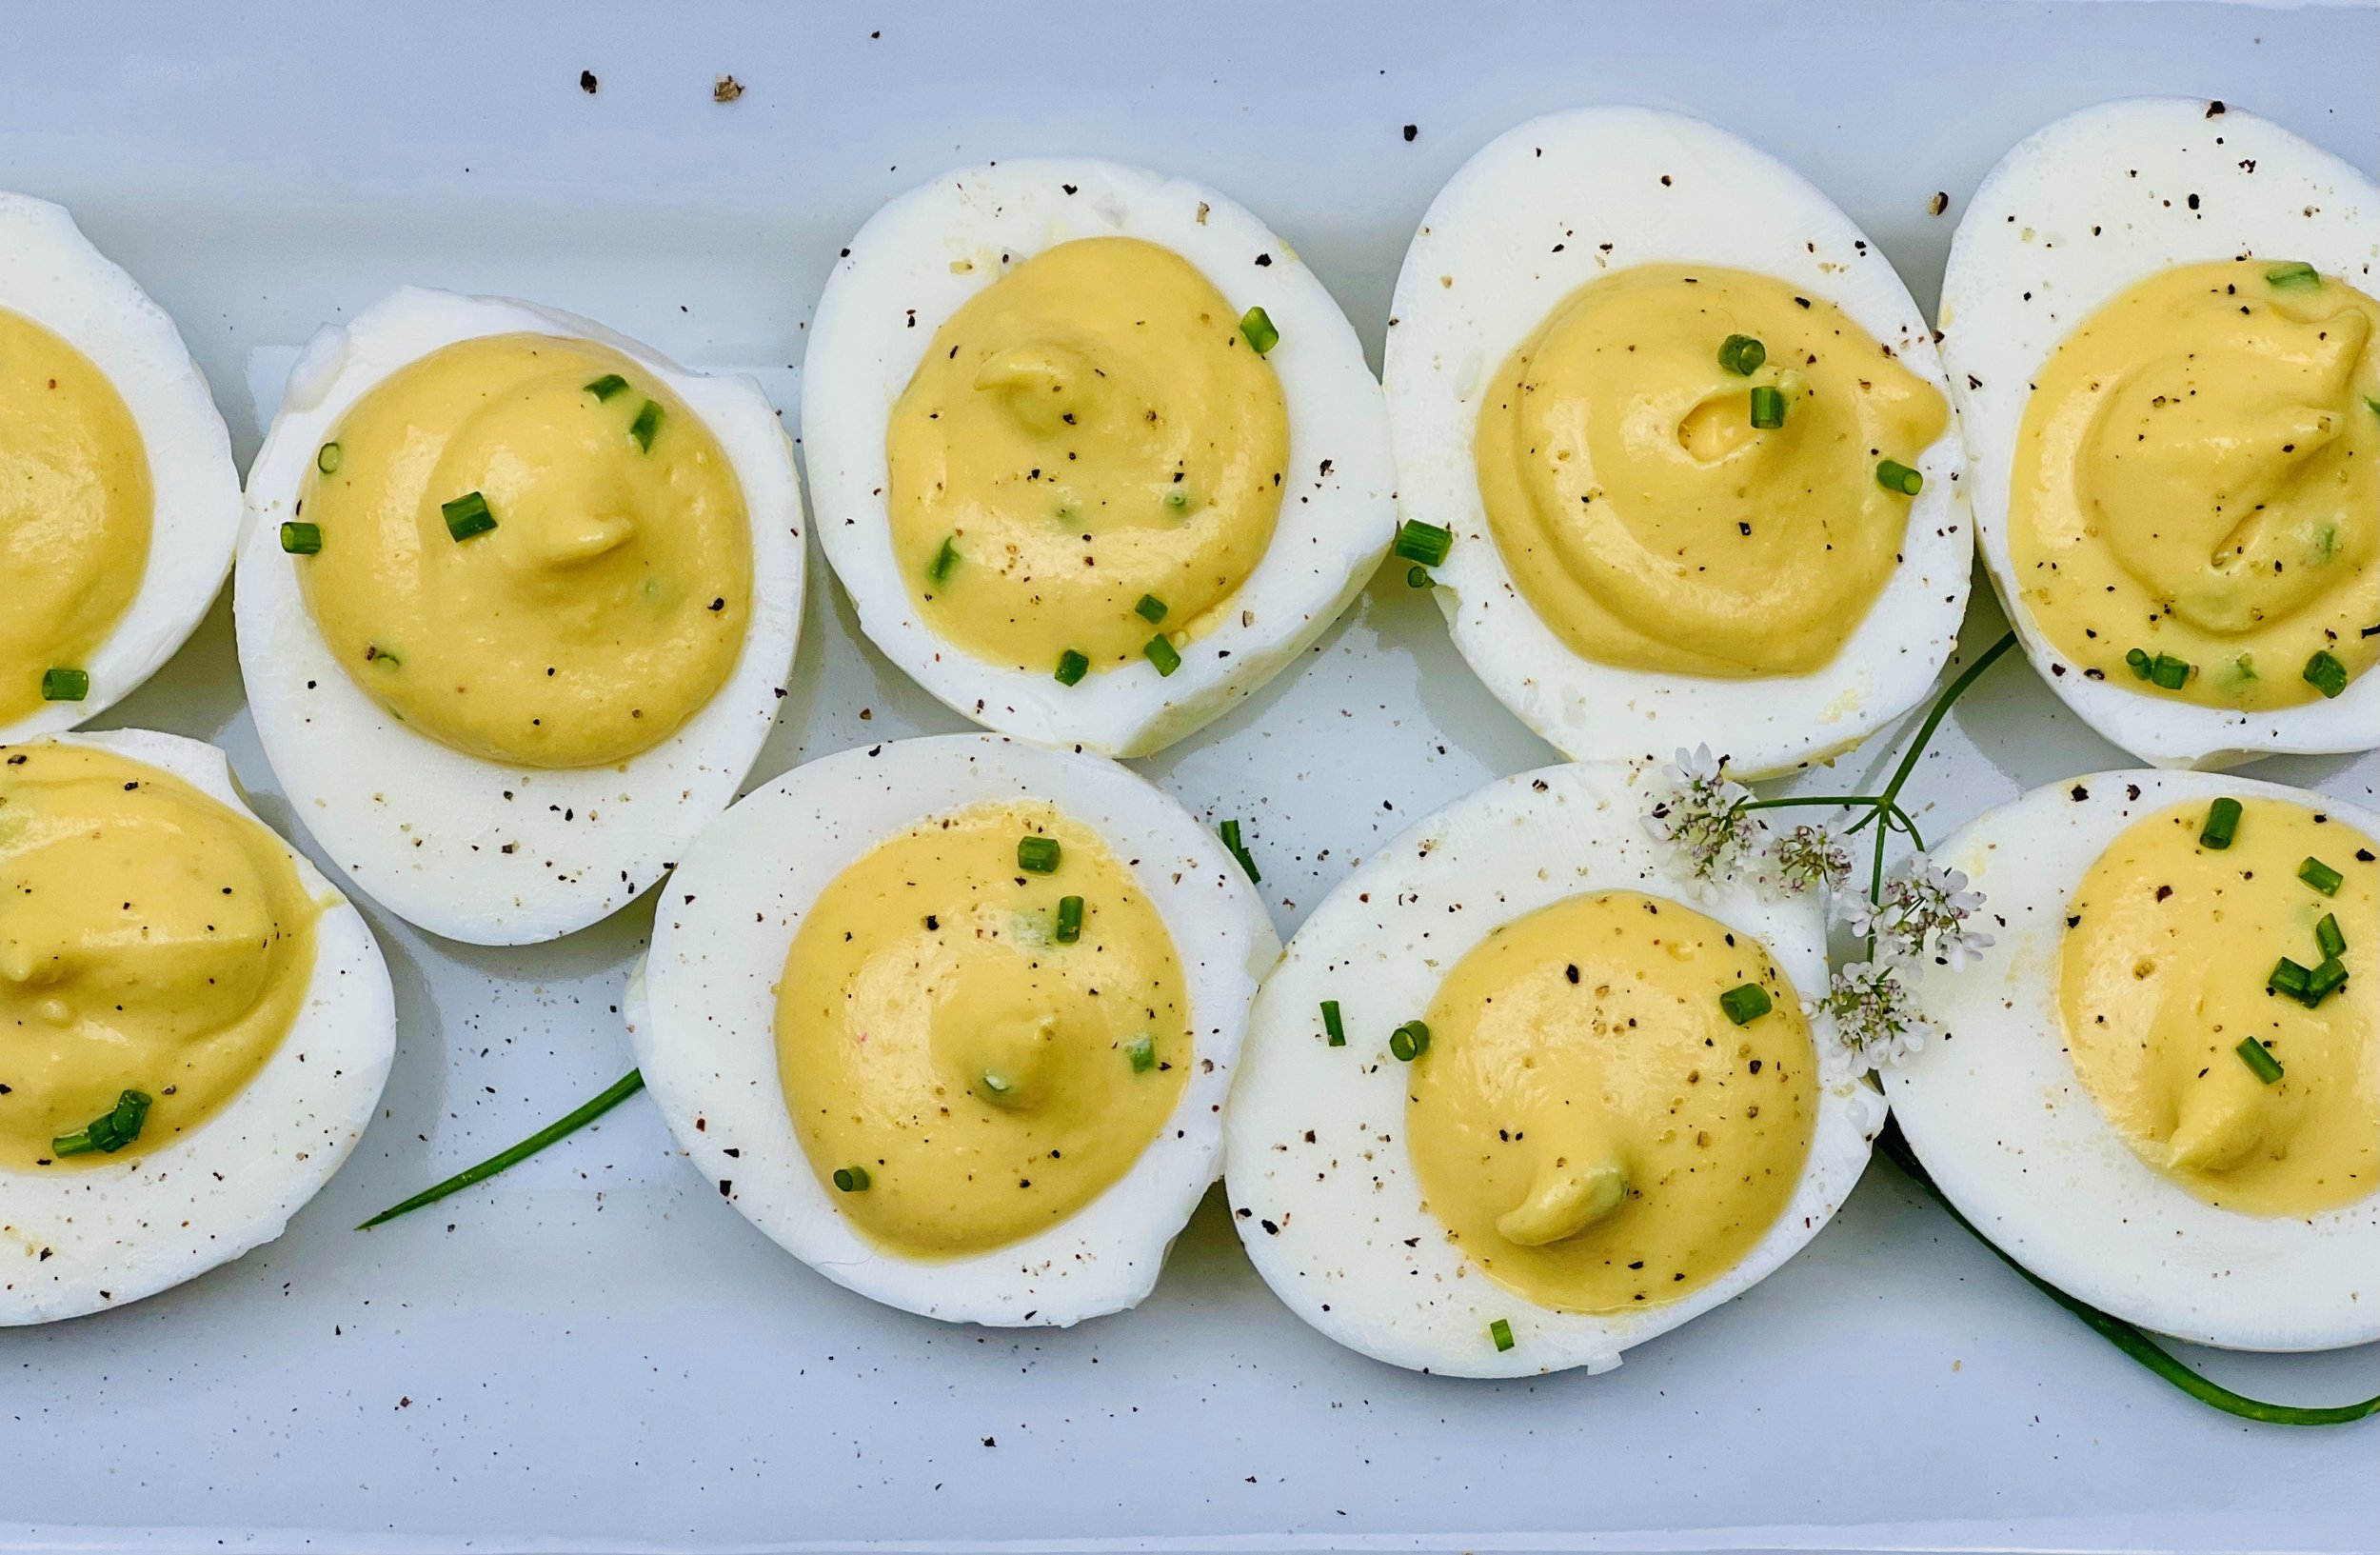
Many of us find ourselves with an overwhelming number of hard boiled eggs this time of year. What do you do with all those hard-boiled eggs? I make this perfect egg salad and serve it on crisp toasted sourdough bread. Or, I make delicious deviled eggs and serve them for lunch, as an appetizer, or just as a snack. Any way you make them, deviled eggs can be devilishly delicious!

Ingredients
4 hard-boiled eggs
1 tablespoon dijon mustard
2 - 3 tablespoons mayonnaise (depending on how large your eggs are)
½ stalk celery, finely chopped (optional)
Kosher salt and black pepper to taste
Fresh chives, dill, or parsley, chopped (optional)
Directions: Egg Salad
(1) Prepare: Peel and chop your hard-boiled eggs.
(2) Combine: Add all other ingredients except the chopped herbs, salt, and pepper.
Stir to combine.
(3) Finish: Taste and add salt and pepper to your liking.
(4) Plate and serve: Serve on toasted sourdough bread, rice cake, or on a bed of butter lettuce. Sprinkle with chopped herbs if using.
Directions: Deviled Eggs
(1) Prepare: Peel and cut your hard-boiled eggs in half.
(2) Combine: Scoop out the yolks and put in a small bowl with all other ingredients except the chopped herbs, salt, and pepper.
Stir to combine.
(3) Finish: Taste and add salt and pepper to your liking.
(4) Devil the eggs: Fill each half egg white with the egg yolk mixture. Sprinkle with chopped chives, parsley, or tiny sprigs of fresh dill. Want to get really fancy? Add a few brightly colored salmon roe caviar for garnish
Eat and enjoy every bite because you can!
This post may contain affiliate links so you can easily purchase items listed on the page. There is no increased cost to you for purchasing items through these links so feel free to use them!
More Deliciously Low FODMAP™ appetizer recipes
5 Minutes prep • 15 Minutes cook • Low FODMAP • Gluten-Free • Lactose-Free • Makes 2 cups
10 Minutes Prep • 50 Minutes Cook • Low FODMAP • Gluten-free • Dairy Free • Vegan • Serving size 3 - 4 crackers
10 Minutes prep • 15 Minutes rest • Low FODMAP • Gluten-free • Dairy-free • Serving size 3 tablespoons
10 Minutes prep • 20 Minutes cook • Low FODMAP • Gluten-free • Lactose-free • Vegan • Serves 5
15 Minutes prep • 1 hour chill • Low FODMAP • Gluten-free • Vegetarian • Serves 4 or more
10 Minutes prep • Low FODMAP • Gluten-Free • Lactose-free • Vegetarian • Vegan • Makes 1.5 cups
10 Minutes Prep • 50 Minutes Cook • Gluten-free • Dairy-free • Low FODMAP • Serving size 3-4 crackers
5 Minutes prep • 10 Minutes cook • Low FODMAP • Gluten-free • Lactose-free • Makes 1 cup
20 Minutes prep • 16 Minutes cook • Low FODMAP • Vegetarian • Serves 8 • Ok to make-ahead: Steps 1-5
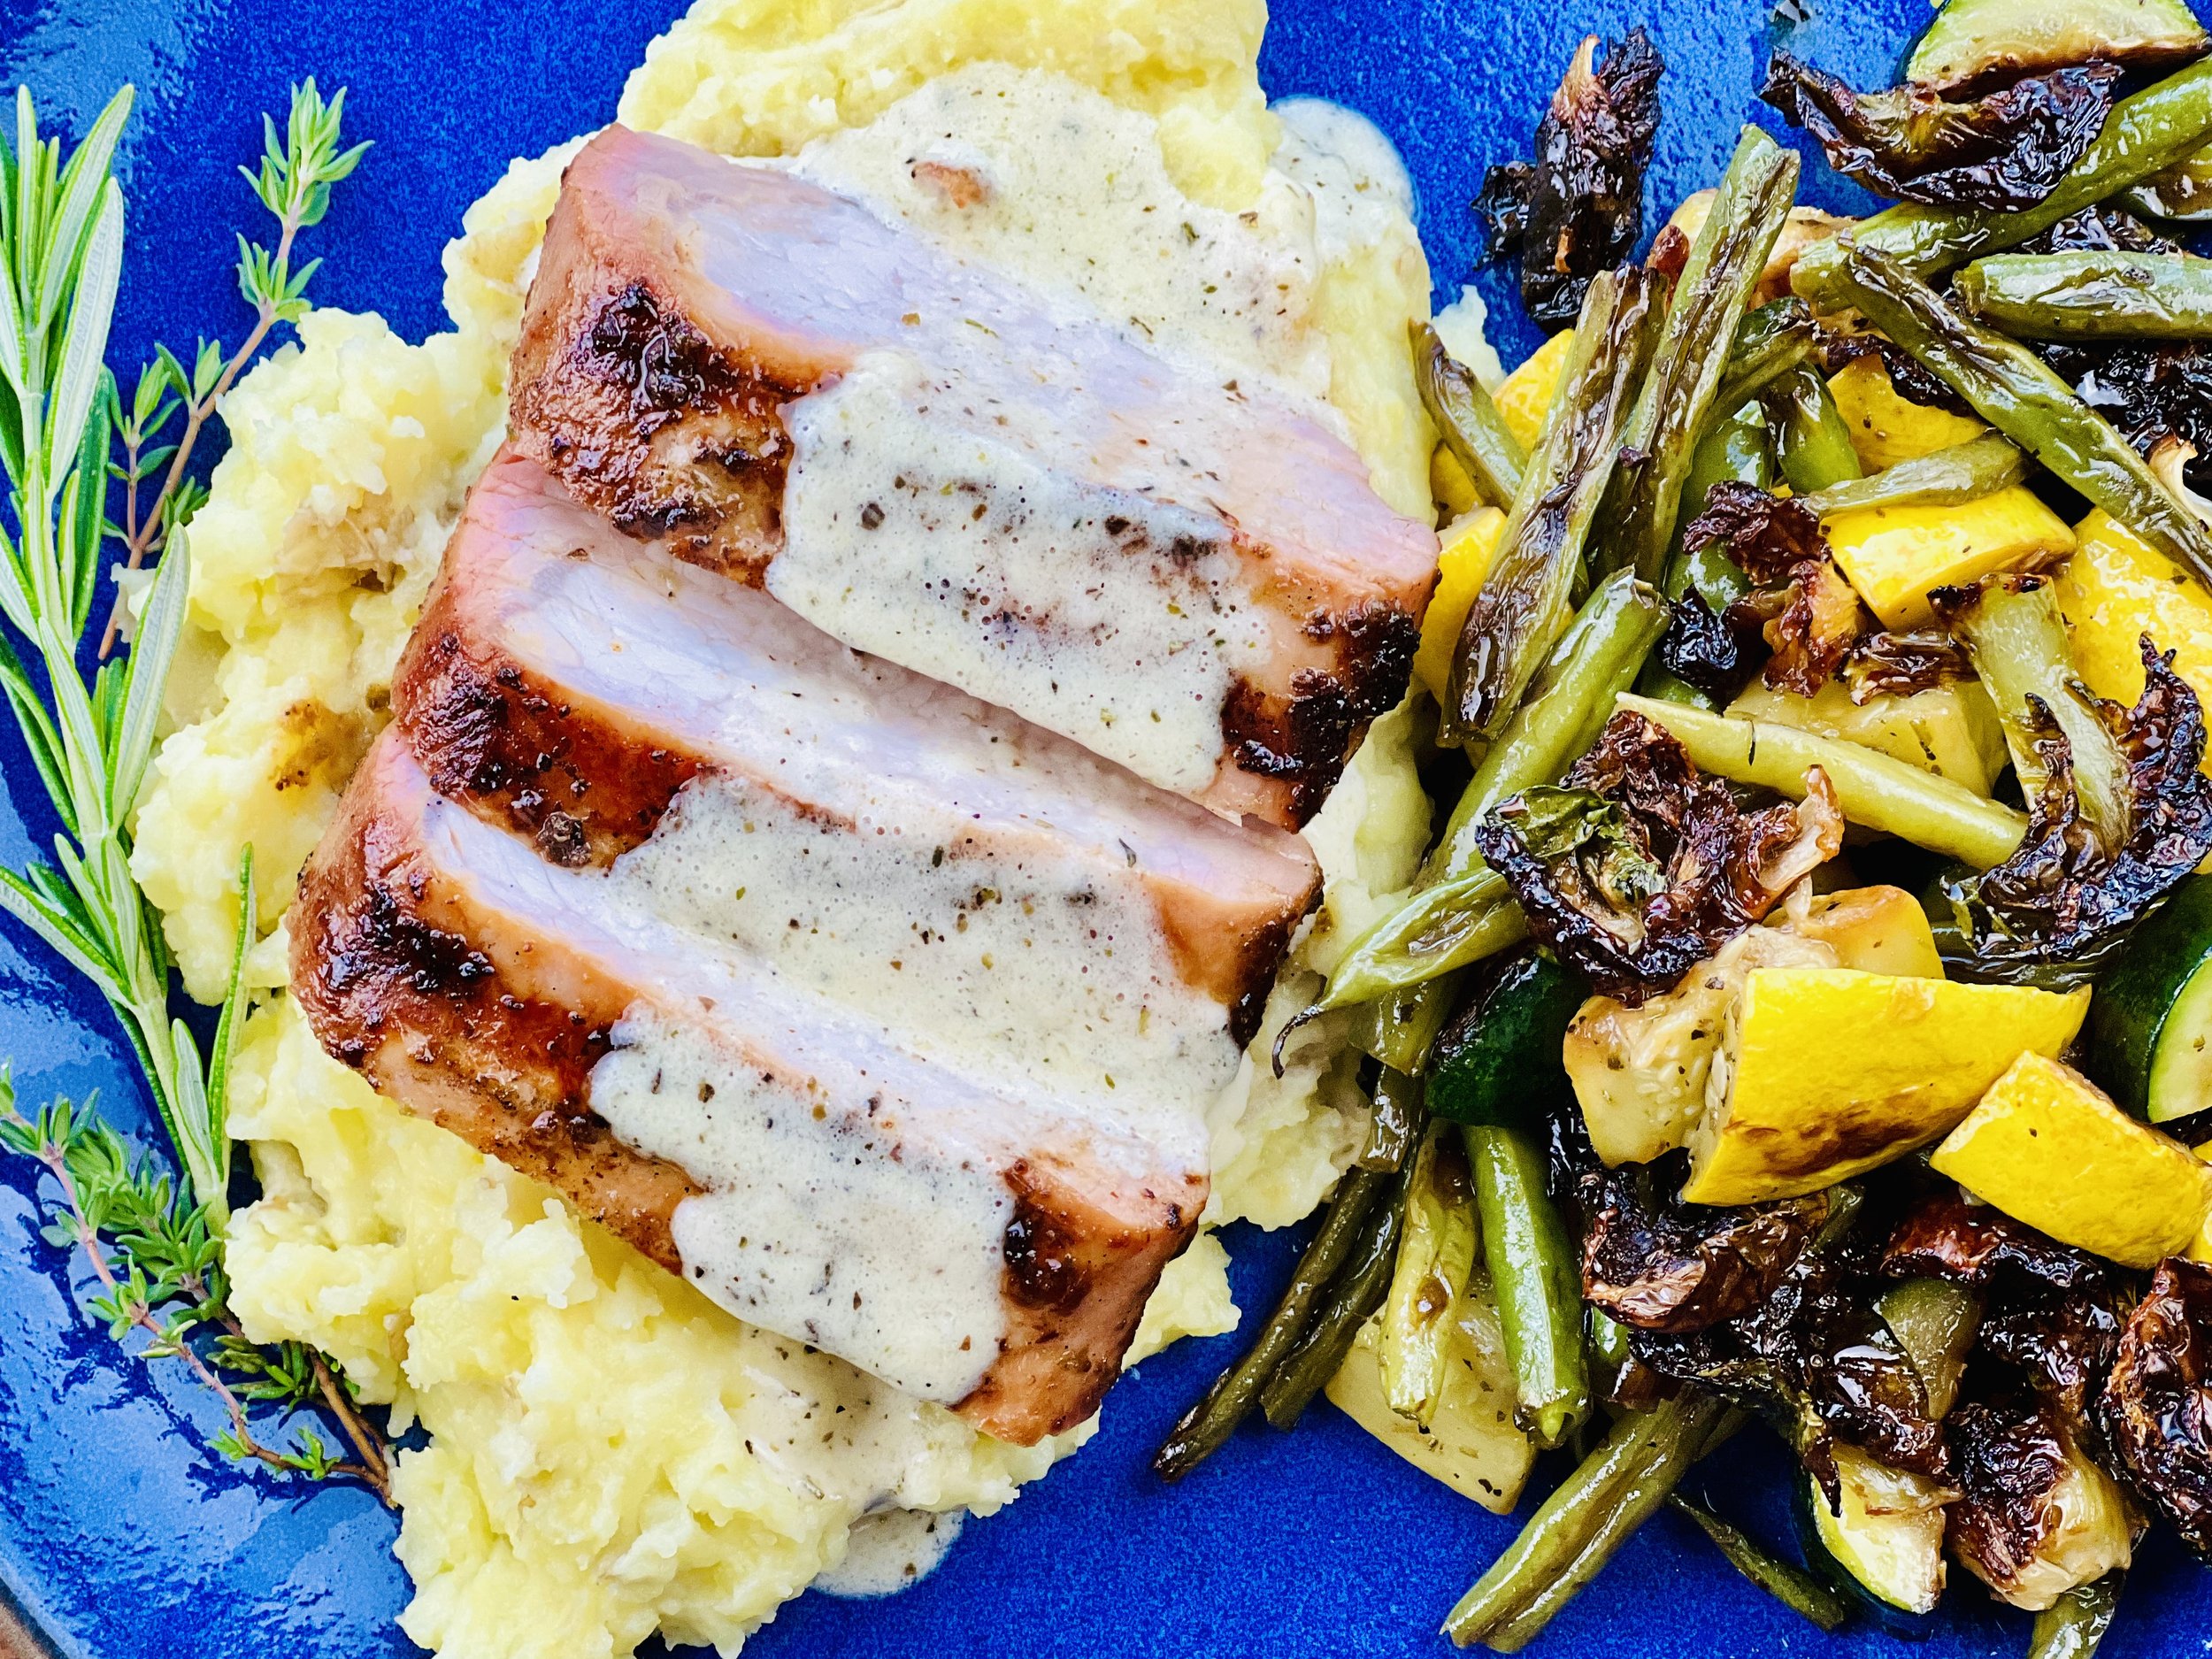
Roasted Pork Tenderloin with Alfredo Cream (low FODMAP)
1 hour 25 Minutes Prep/Marinate • 20 Minutes Cook • Gluten-free • Serves 6
1 hour 25 Minutes Prep/Marinate • 20 Minutes Cook • Gluten-free • Serves 6 • Ok to make ahead: Steps 1 - 3
This very flavorful roasted pork tenderloin is made even better with a generous drizzle of Alfredo cream. Add to that a bed of mashed potatoes and a side of roasted vegetables so you don’t miss a bit of the flavor! I love this roasted pork on the smoker, but it is a meal that can be made any time of year in the oven, on the smoker, or on the grill.
Ingredients: Pork Tenderloin
2 pork tenderloins (1 lb each)
1 lemon
2 sprigs fresh thyme, leaves only, plus more for garnish
1 sprig fresh rosemary, leaves only, plus more for garnish
2 tablespoons gluten-free low sodium soy sauce
2 teaspoons kosher salt
1/2 teaspoon freshly ground black pepper
1/4 cup garlic-infused olive oil
Ingredients: Alfredo Cream
1 tablespoon garlic-infused olive oil
2 teaspoons Italian seasoning
1/2 cup cream + more if needed
2 tablespoons butter
1/2 cup fresh grated Parmesan cheese
Salt and pepper
Directions
(1) Prepare: Using a sharp knife, trim any excess fat or silver skin from the tenderloins. This next step is optional but results in more flavorful and tender meat. Season both sides of each tenderloin with Kosher salt and lay the meat on a rimmed plate or baking dish. Cover with plastic wrap and refrigerate 4 hours, overnight, or until ready to marinate. (I like to salt meat when I bring it home from the market then re-wrap it and keep it in the refrigerator until I’m ready to do something with it.)
(2) Make the marinade: Zest and juice the lemon. Add the lemon zest and juice to a mini food processor or blender, along with the thyme leaves, rosemary leaves, soy sauce, salt, and pepper. Pulse until the herbs are finely chopped and are well blended with the oil and soy sauce.
(3) Marinate the meat: Pour the sauce over the meat and turn the meat over a few times to get it well coated. Cover the meat with plastic wrap and refrigerate for at least 1 hour or up to 8 hours. Turn the meat periodically while it marinates to ensure even coverage.
(4) Preheat the oven, grill, or smoker: When ready to cook the meat, set the oven, grill, or smoker temperature to 450°F and preheat, grill/smoker lid closed for 15 minutes.
(5) Cook the meat: Arrange the pork on a rack in a roasting pan, or directly on the grill grates in your smoker or grill. Roast for about 10 - 15 minutes, then flip and continue roasting until the internal temperature reaches 145°F, 5-10 minutes more.
(6) Make the Alfredo cream: Add the olive oil to a small frying pan. When hot, add the Italian seasoning to the oil and cook the spices in the oil for about a minute (this will “bloom” or bring out the flavor of the spices nicely). Add the cream and the butter to the pan and heat over medium-low heat until the butter melts. Add the Parmesan cheese and whisk until the cheese is melted and the sauce is thickened. Add more cream, if needed, to thin the sauce if it’s a bit too thick.
(6) Finish: Remove the pork from the oven or grill and let rest for 5 minutes before carving.
(7) Plate and serve: Serve on a bed of mashed potatoes alongside a salad or some roasted vegetables.
Eat and enjoy every bite because you can!
This post contains links for you to easily purchase items listed on the page. In some cases, we have provided a special discount code for IBS Game Changers so be sure to use it when you purchase an item to get the discount that has been arranged just for you! As an Amazon Associate, I earn a commission from qualifying Amazon purchases.
More Deliciously Low FODMAP™ main course recipes
15 Minutes prep • 30 Minutes cook • Low FODMAP • Serves 4 • Ok to make-ahead: Steps 1 - 2
10 Minutes prep • 25 Minutes cook • Low FODMAP • Gluten-Free • Serves 6 • Ok to make-ahead: Step 1
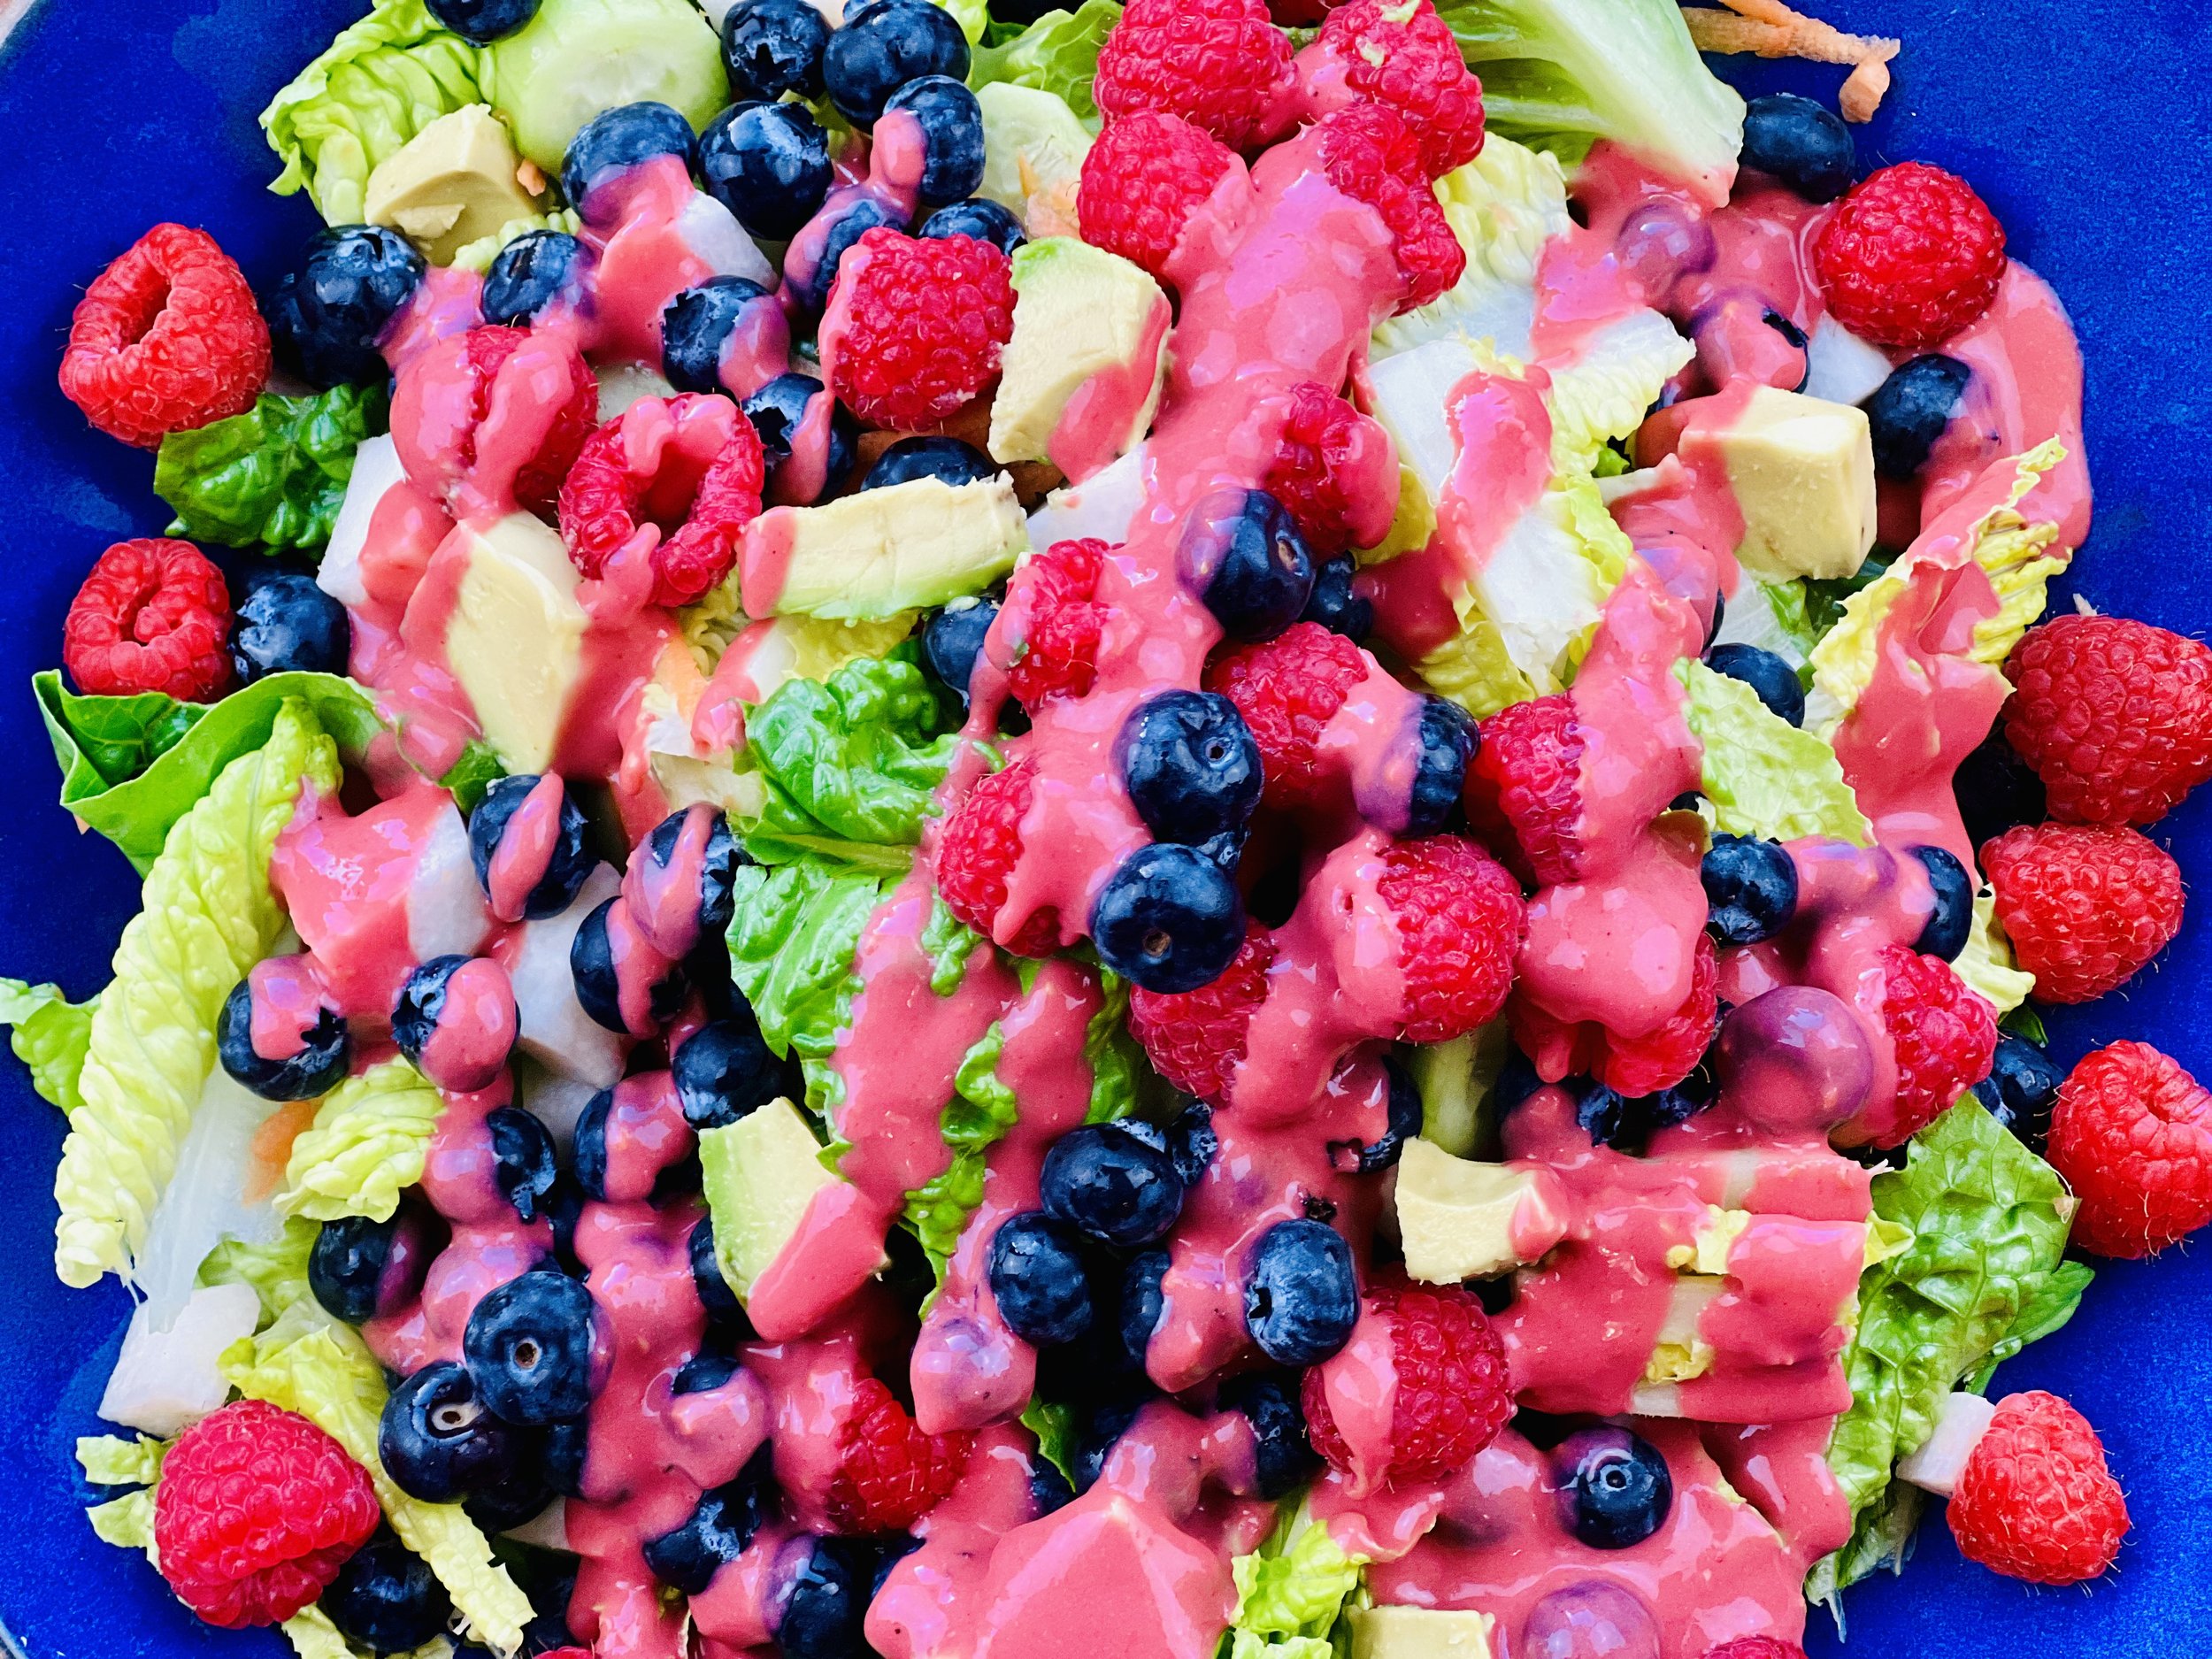
Spring Berry Salad with Gayla’s Raspberry Coulis (low FODMAP)
20 Minutes prep • Low FODMAP • Gluten-free • Lactose-free • Serves 4
20 Minutes prep • Low FODMAP • Gluten-free • Lactose-free • Serves 4 • Ok to make ahead: Steps 1 - 2
A beautiful centerpiece for your holiday table, this is the perfect spring or summer salad when berries are in season. The crisp lettuce provides the perfect balance for the sweet berries and tart/sweet coulis. I first discovered this amazing salad in Mexico where the berries are plentiful and the flavors and colors of the fruits and vegetables in the markets are amazing. My friend Gayla whipped up a raspberry coulis for the perfect finish to this delightful salad.
This is an exclusive recipe just for recipe club members.
In addition to the two free recipes I create each week I am creating and delivering one very special recipe just for my recipe club members. If you’re not yet a member, I encourage you to join! Membership in the club includes access to the complete archive of recipes with filters so it can become your virtual low FODMAP cookbook plus, I am creating and delivering one special NEW recipe every week ONLY for recipe club members. And, for my true fans, I’ll be sharing behind-the-scenes content, and updates on the progress of the new cookbook.
Your membership in the club helps me continue creating new, delicious, easy-to-make, low FODMAP recipes just for you.
As always, all recipes will emphasize simple ingredients, easy preparation, and delicious low FODMAP results. Recipes will be for everything from main courses, salads, soups, side dishes, appetizers, desserts, sauces, breakfast and lunch, and even mocktails and cocktails. Everything you need to prepare fantastic low FODMAP meals everyone will love.
Join the club. Become a Patron. Let’s keep making delicious Low FODMAP meals together.
More Deliciously Low FODMAP™ salad recipes
5 Minutes prep • 15 Minutes cook • Low FODMAP • Gluten-free • Lactose-free • Vegan • Serves 4
15 Minutes prep • Low FODMAP • Gluten-free • Lactose-free • Vegetarian • Vegan • Serves 4
30 Minutes prep • Low FODMAP • Gluten-free • Lactose-free • Vegetarian • Vegan • Serves 4+ • Serving Size 2 cups
15 Minutes prep • 30 Minutes cook • Low FODMAP • Gluten-free • Lactose-free • Serves 4-6
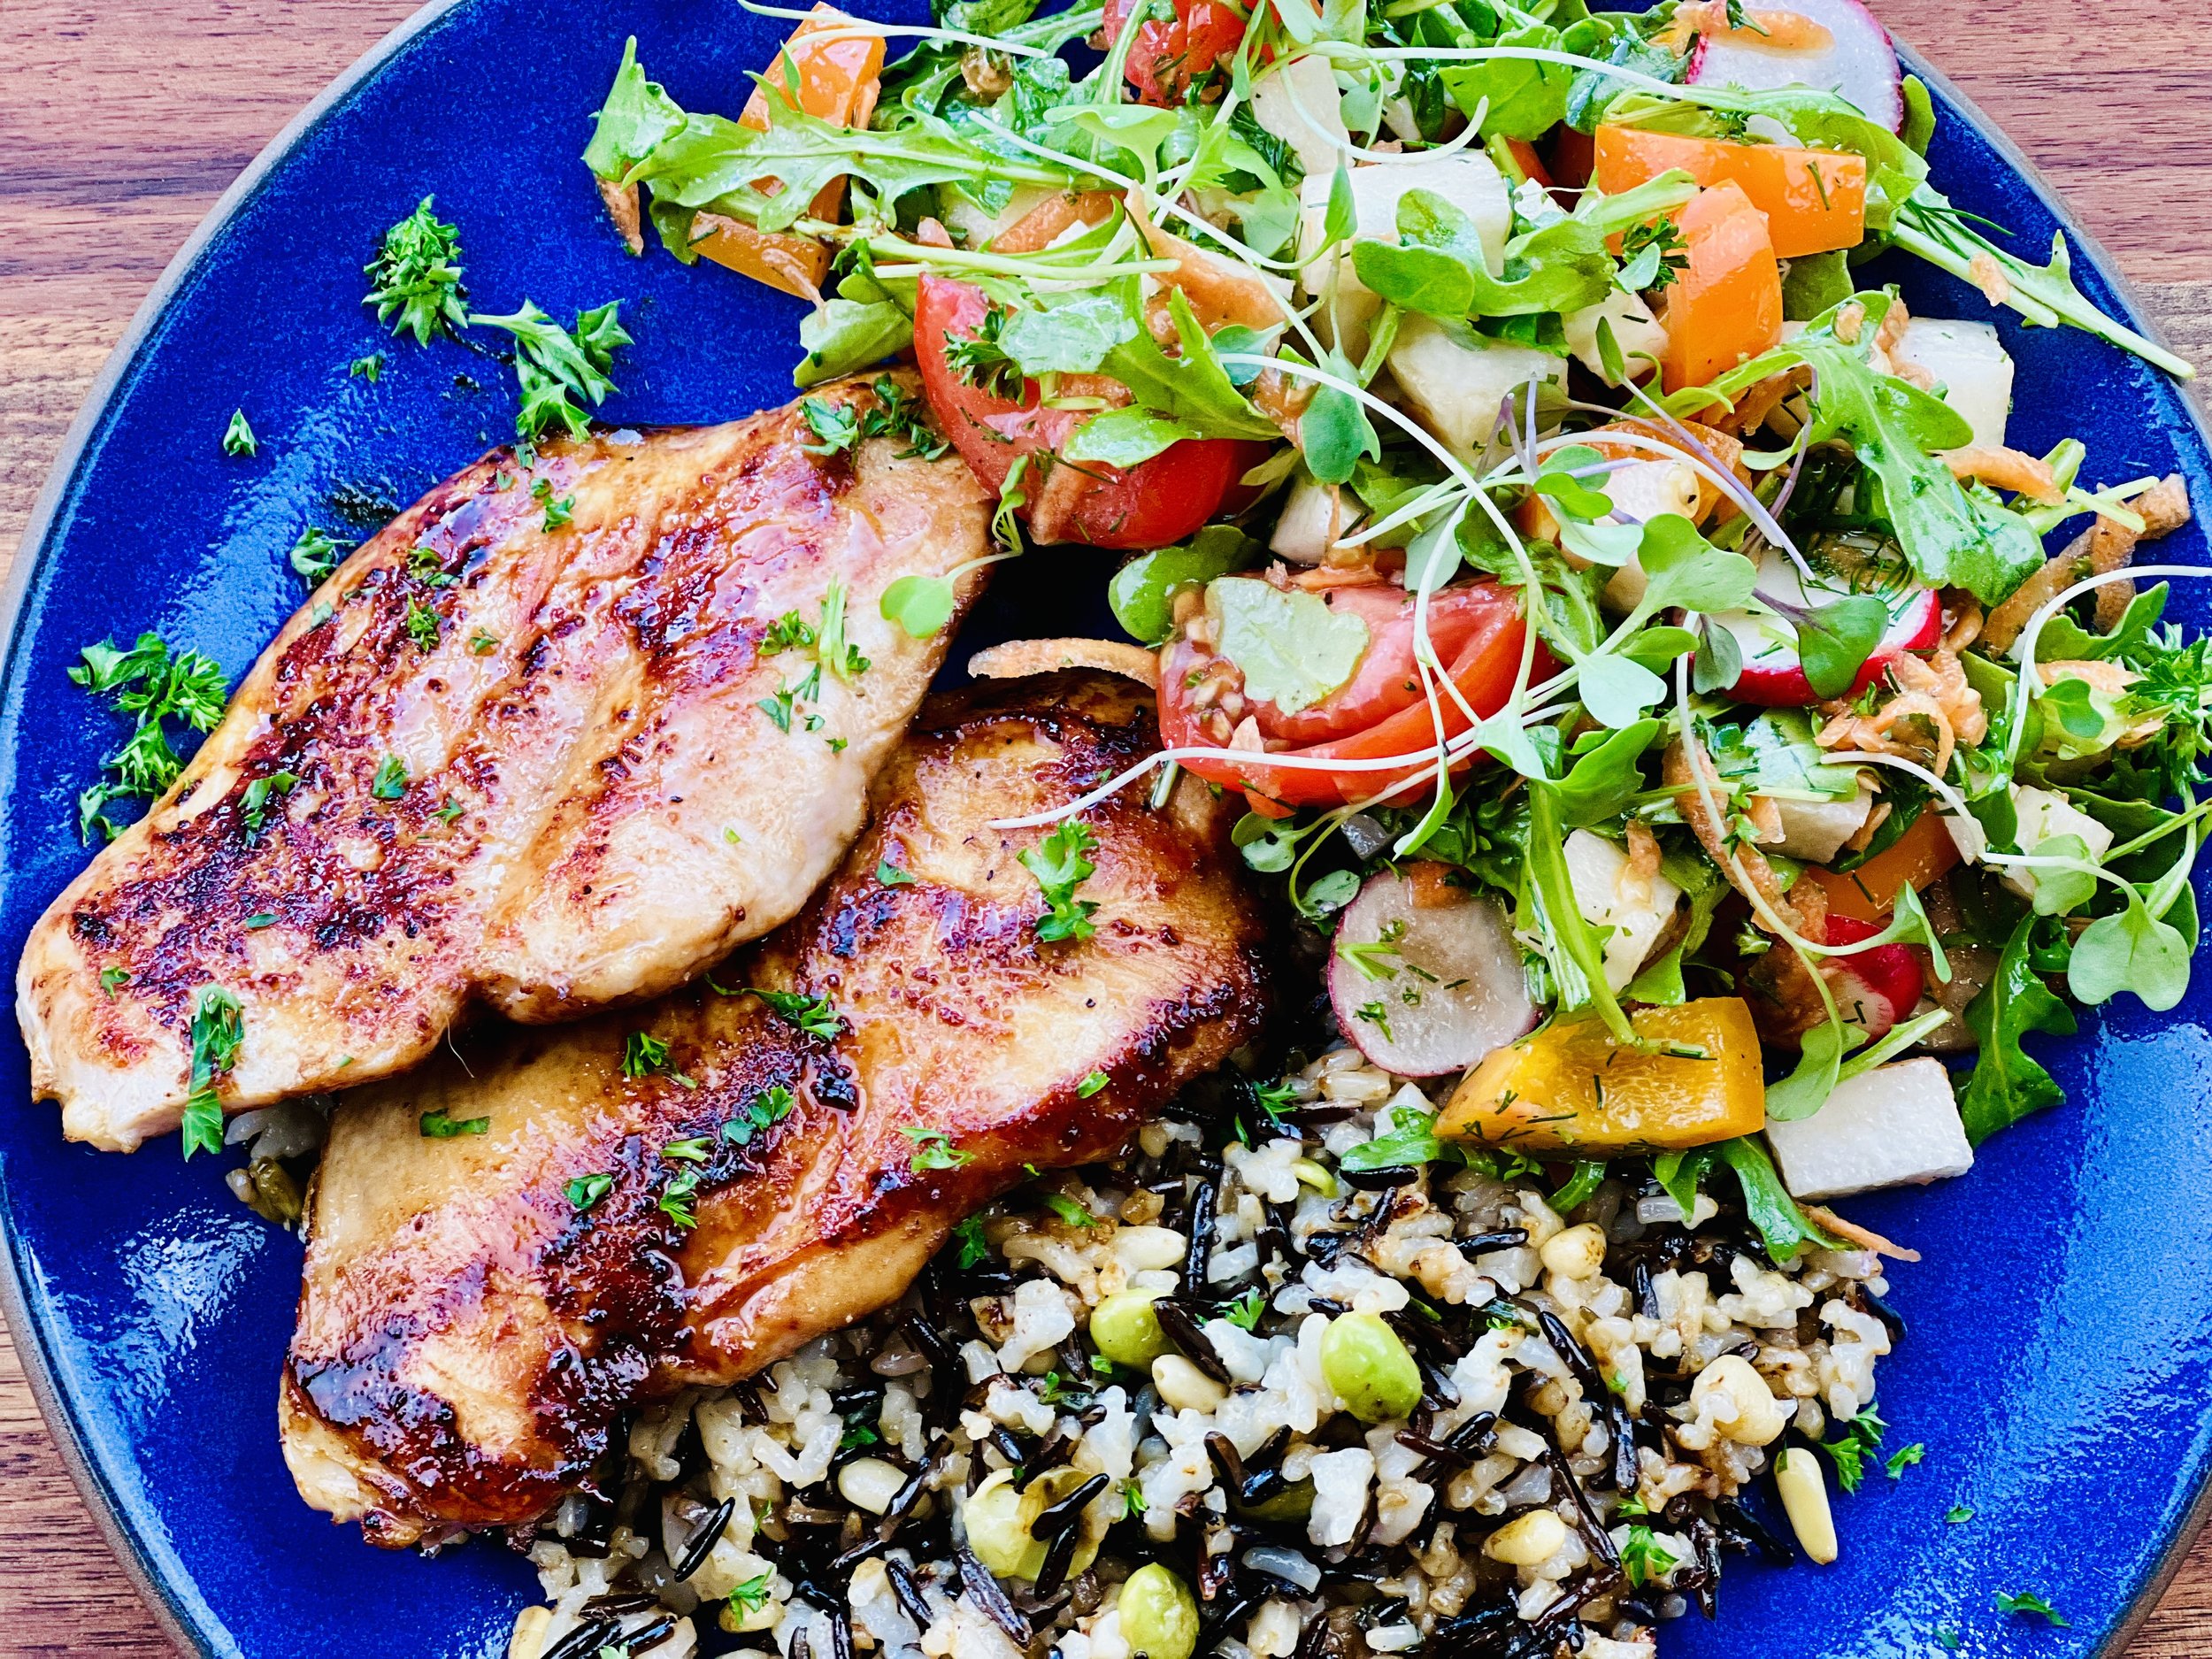
Perfect Teriyaki Chicken Breasts and Fried Rice (low FODMAP)
20 Minutes prep • 20 Minutes Cook • Low FODMAP • Gluten-free • Lactose-free • Serves 4
20 Minutes prep • 20 Minutes Cook • Low FODMAP • Gluten-free • Lactose-free • Serves 4 • Ok to make ahead: Step 1
Moist, flavorful, and one of the simplest recipes that will turn out delicious chicken every time! Throw your cooked rice in the pan after you’ve finished cooking the chicken so the rice gathers the flavor and juices from the chicken and the seasoning. It makes a perfect bed for this wonderful chicken. I used my Fancy Oven Rice, but you can use any rice you have on hand.
Ingredients
2 cups cooked rice (3/4 cups uncooked white rice or 1/2 cup uncooked brown rice)
4 chicken breasts, boneless, skinless
2 tablespoons garlic-infused olive oil
2 tablespoons Smoke N Sanity Teriyaki seasoning (this seasoning is low FODMAP and very low sodium)
2 tablespoons of parsley, chopped
Directions
(1) Prepare the chicken: This step is optional but results in a more flavorful and tender chicken for your chicken recipe. Remove chicken breasts from the package and slice them horizontally. Season both sides of each breast lightly with Kosher salt and lay them on a rimmed plate or baking dish. Cover the dish with plastic wrap and refrigerate until ready to use or at least 4 hours before cooking.
(2) Cook the rice: If you don’t have a couple of cups of cooked rice leftover from something like my Fancy Oven Rice, then cook 3/4 cup uncooked white rice or 1/2 cup uncooked brown rice per package instructions.
(3) Cook the chicken: When ready to cook the chicken, preheat the oven to 300 and put a plate in the oven to warm. Put the oil in the frying pan and warm over medium-high heat. Sprinkle the chicken on one side with teriyaki seasoning and, once the oil is hot in the frying pan, lay the chicken breasts seasoned side down in the pan. Don’t overlap chicken pieces. Just lay them in one layer and cook in two batches if needed (adding a bit more oil before adding the second batch). The oil should sizzle but not smoke when you put the chicken in.
(4) Season the chicken: Sprinkle the top side of the chicken as it cooks. Cook for about 5 minutes until it’s nicely browned on the bottom. Flip the chicken and cook for another 3 - 5 minutes until nicely browned and just done in the middle.
(5) Remove the chicken and fry the rice: When the chicken is cooked, remove it to the warmed plate and keep it in the warm oven until ready to serve. Add the cooked rice to the pan in which you cooked the chicken. Stir and scrape the bottom of the pan to get all the good flavor into the rice. Cook for about 5 minutes until the rice is warmed through and well combined with the pan flavoring.
(6) Plate and serve: Put a scoop of rice on each plate and lay the chicken on top of the rice. Sprinkle with chopped parsley. Serve alongside one of our fabulous low FODMAP salads.
Eat and enjoy every bite because you can!
This post contains links for you to easily purchase items listed on the page. In some cases, we have provided a special discount code for IBS Game Changers so be sure to use it when you purchase an item to get the discount that has been arranged just for you! As an Amazon Associate, I earn a commission from qualifying Amazon purchases.
More Deliciously Low FODMAP™ main course recipes
15 Minutes prep • 30 Minutes cook • Low FODMAP • Serves 4 • Ok to make-ahead: Steps 1 - 2
10 Minutes prep • 25 Minutes cook • Low FODMAP • Gluten-Free • Serves 6 • Ok to make-ahead: Step 1
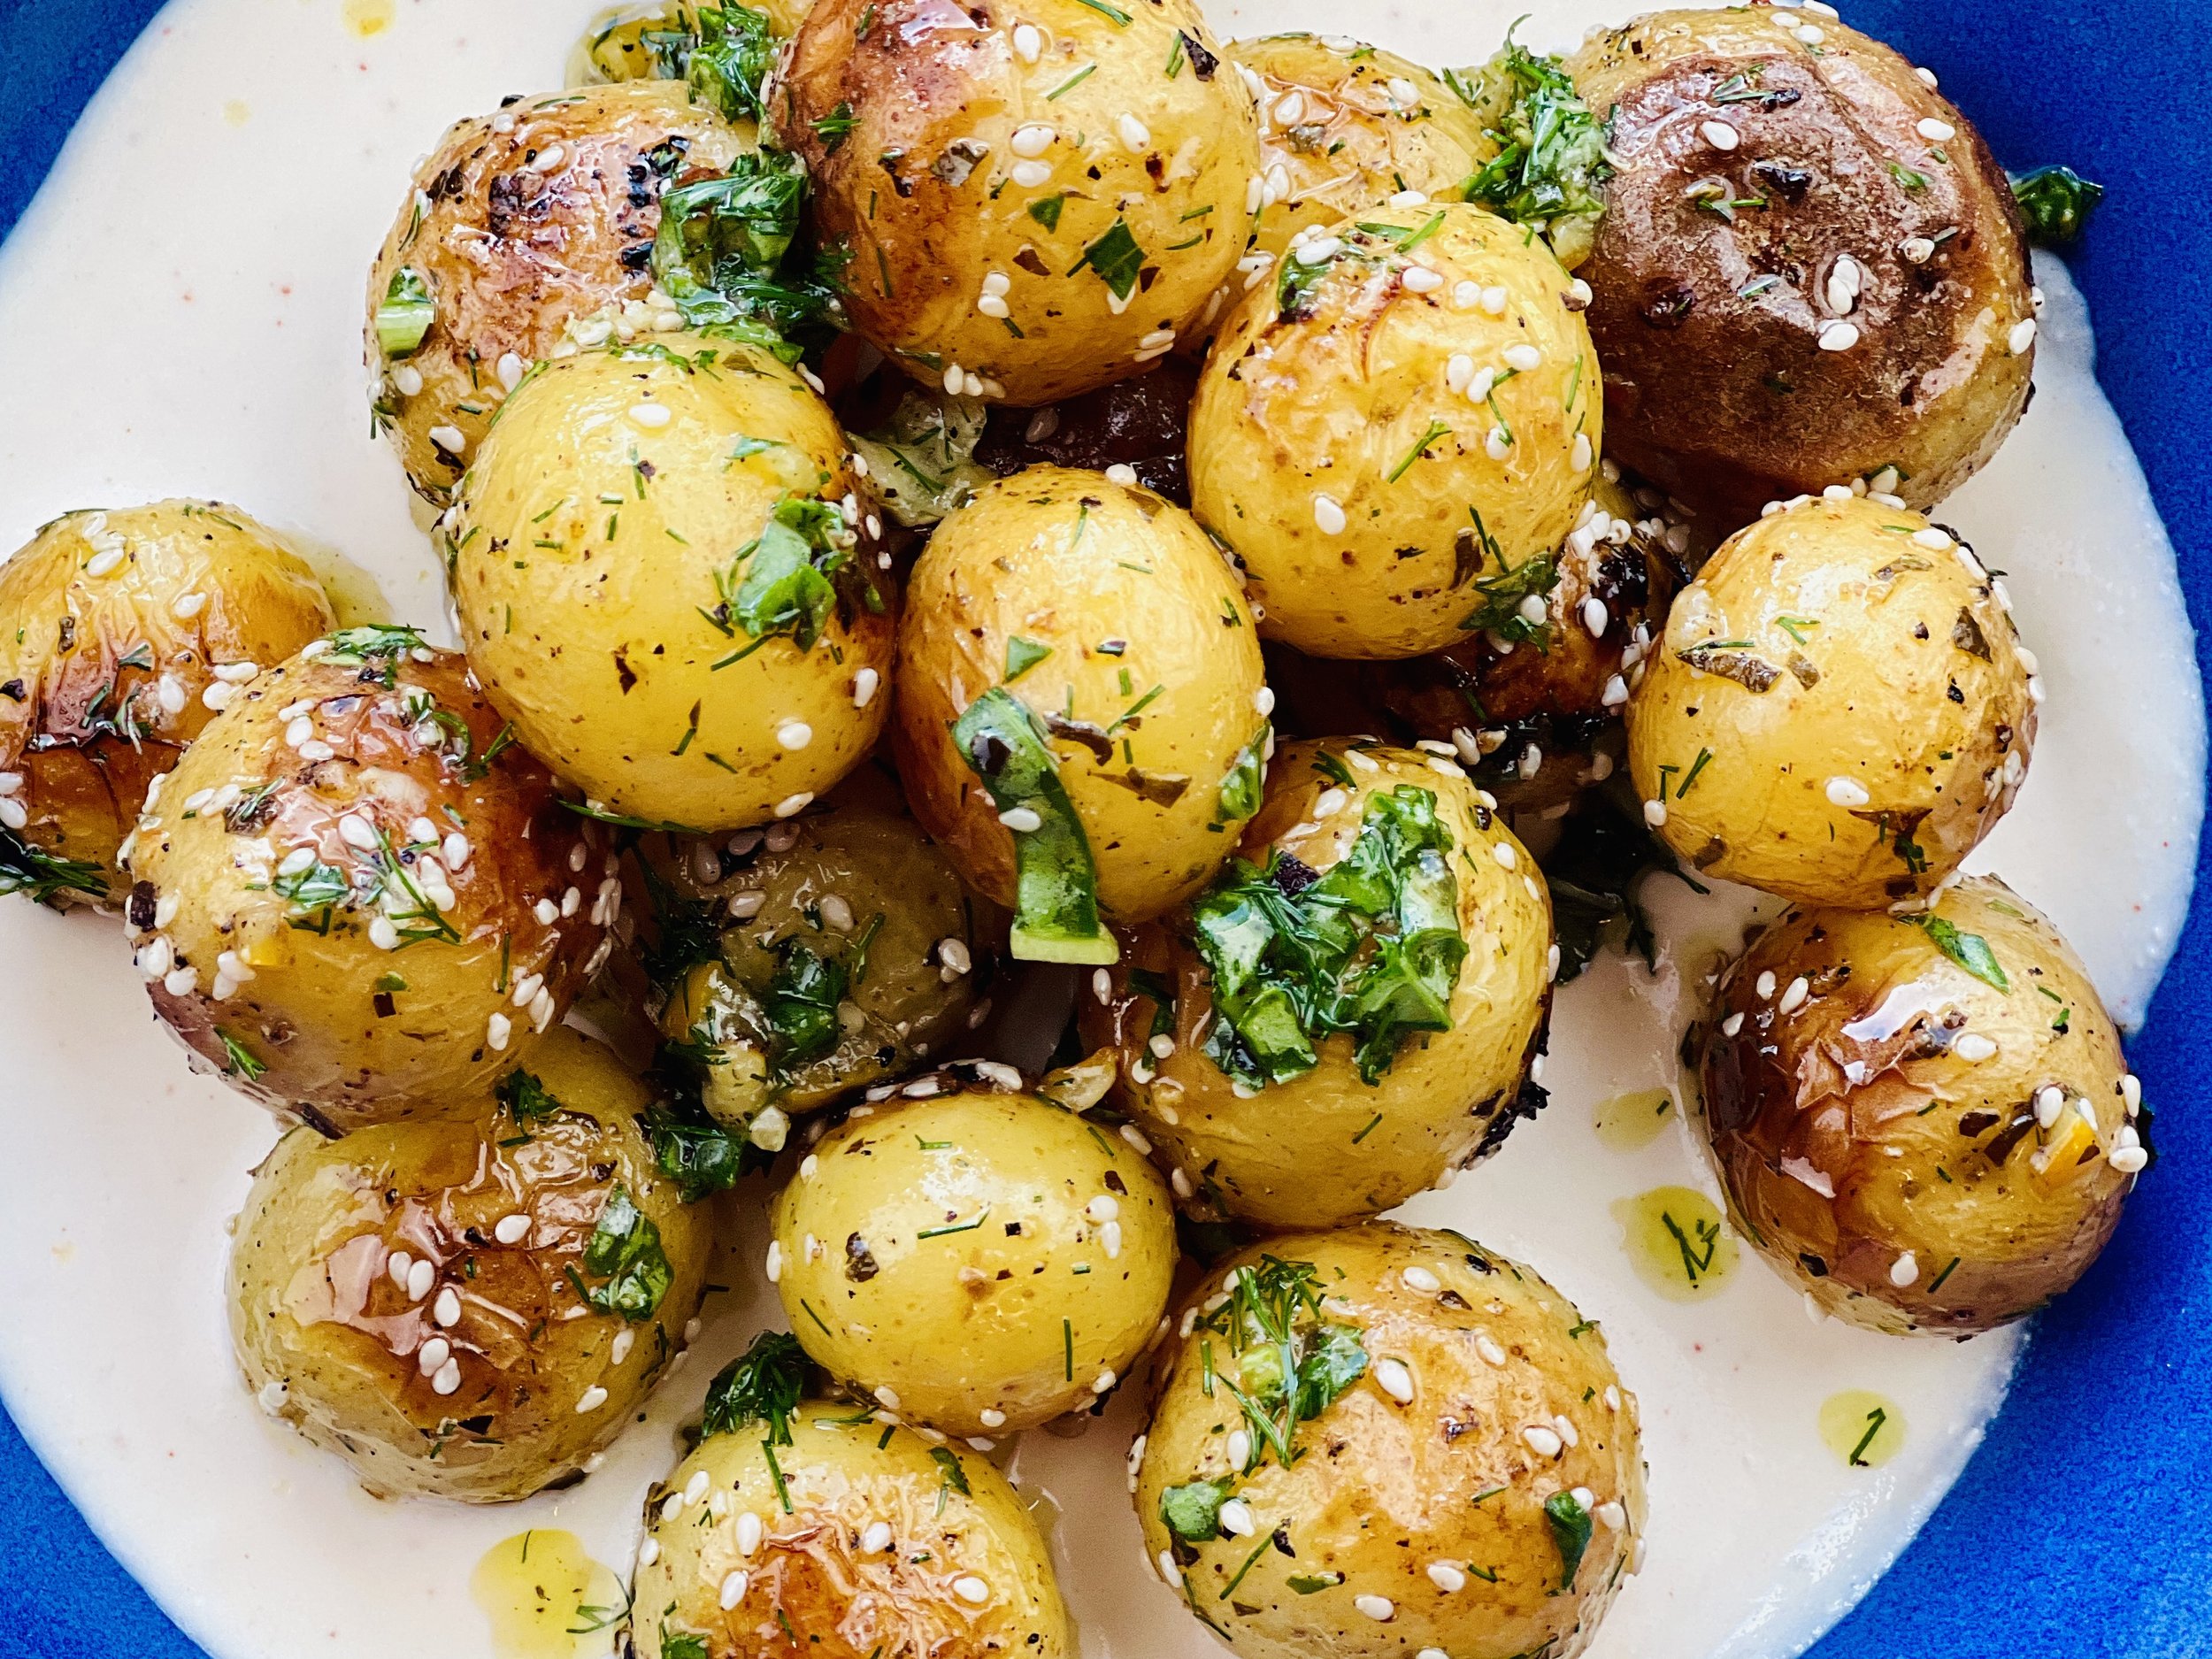
Crispy Potatoes With Fresh Herbs and Feta Cream (low FODMAP)
25 Minutes prep • 40 Minutes cook • Low FODMAP • Gluten-free • Vegetarian • Serves 4 - 6
25 Minutes prep • 40 Minutes cook • Low FODMAP • Gluten-free • Vegetarian • Serves 4 - 6 • OK to make ahead: Step 5
A delicious spin on standard roasted potatoes, these are crispy, creamy, and very flavorful. Choose the herbs that go best with what you’re serving for your main course. If it is heavy on rosemary, then use rosemary in your potatoes. If it’s Mediterranean, then use oregano, basil, and chives. Use what’s in your fridge, your herb garden, or at your local farmer’s market.
Ingredients
2 pounds mixed baby potatoes, halved or quartered if large
1 lemon, quartered
1/4 cup fresh oregano, chopped
1/4 cup, plus 1/3 cup garlic-infused olive oil
1/2 cup mixed fresh herbs, chopped - basil, dill, parsley, oregano, chives (you decide!)
2 teaspoons maple syrup
1-2 tablespoons white sesame seeds
Ingredients: Feta Cream
8 ounces feta cheese
1/4 cup lactose-free yogurt or cream cheese (at room temperature)
2-4 tablespoons lemon juice
1 tablespoon garlic-infused olive oil
1/4 teaspoon smoked paprika
Directions
(1) Prepare: Preheat the oven to 425 degrees F. Wash potatoes and cut larger potatoes so all are about the same size.
(2) Roast potatoes and lemon: In a mixing bowl, toss the potatoes, lemon wedges, and oregano with 1/4 cup garlic-infused olive oil. Spread in one layer on a rimmed baking sheet. Season with salt and pepper. Roast for 20 minutes, or until tender.
(3) Remove charred lemon: Remove the charred lemon from the baking sheet to a cutting board. Continue to cook the potatoes for another 20-25 minutes, until crispy.
(4) Make the herb sauce: To make the herb oil. Finely chop 1-2 roasted lemon wedges – rind and all, discarding any seeds. Chop/mash the garlic into a paste. Add the lemon and garlic to a bowl. Add 1/3 cup olive oil, the mixed herbs, and the honey. Season with salt, pepper, and chili flakes.
(5) Make the feta cream: Combine the feta, yogurt or cream cheese, lemon juice, garlic-infused olive oil, and smoked paprika in a mini food processor or blender and blend until creamy. If needed, thin with additional lemon juice or garlic-infused olive oil (depending on how lemony and thin you want it). It should be thick enough to hold its shape on the serving plate.
(6) Finish: Remove the potatoes from the oven and put them back in the mixing bowl. Toss with half the herb oil and the sesame seeds. Taste and add salt or pepper if needed.
(7) Plate and serve: Spread the feta cream on your serving dish, spoon the potatoes over the feta, and drizzle with the remaining herb sauce. Sprinkle everything lightly with a bit of salt.
Eat and enjoy every bite because you can!
This post contains links for you to easily purchase items listed on the page. In some cases, we have provided a special discount code for IBS Game Changers so be sure to use it when you purchase an item to get the discount that has been arranged just for you! As an Amazon Associate, I earn a commission from qualifying Amazon purchases.
More Deliciously Low FODMAP™ side dish recipes
5 Minutes prep • 15 Minutes cook • Low FODMAP • Gluten-Free • Lactose-Free • Makes 2 cups
15 Minutes prep • 30 Minutes cook • Low FODMAP • Serves 4 • Ok to make-ahead: Steps 1 - 2
15 Minutes prep • 18 Minutes cook • Low FODMAP • Gluten-free • Makes 15 • Serving size 2
10 Minutes prep • 10 Minutes cook • Low FODMAP • Gluten-free • Lactose-free • Vegan • Serves 4
10 Minutes prep • 25 Minutes cook • Low FODMAP • Gluten-free • Vegetarian • Plant Forward • Serves 4
20 Minutes prep • 25 Minutes cook • Low FODMAP • Gluten-free • Lactose-free • Vegetarian • Serves 4
10 Minutes prep • 20 Minutes cook • Low FODMAP • Gluten-free • Lactose-free • Vegan • Serves 5
15 Minutes prep • 45 Minutes cook • Low FODMAP • Gluten-free • Vegetarian • Serves 4 - 6
30 Minutes prep • 20 Minutes cook • Low FODMAP • Gluten-free • Vegetarian • Makes 10 Squares
25 Minutes prep • 40 Minutes cook • Low FODMAP • Gluten-free • Vegetarian • Serves 4 - 6
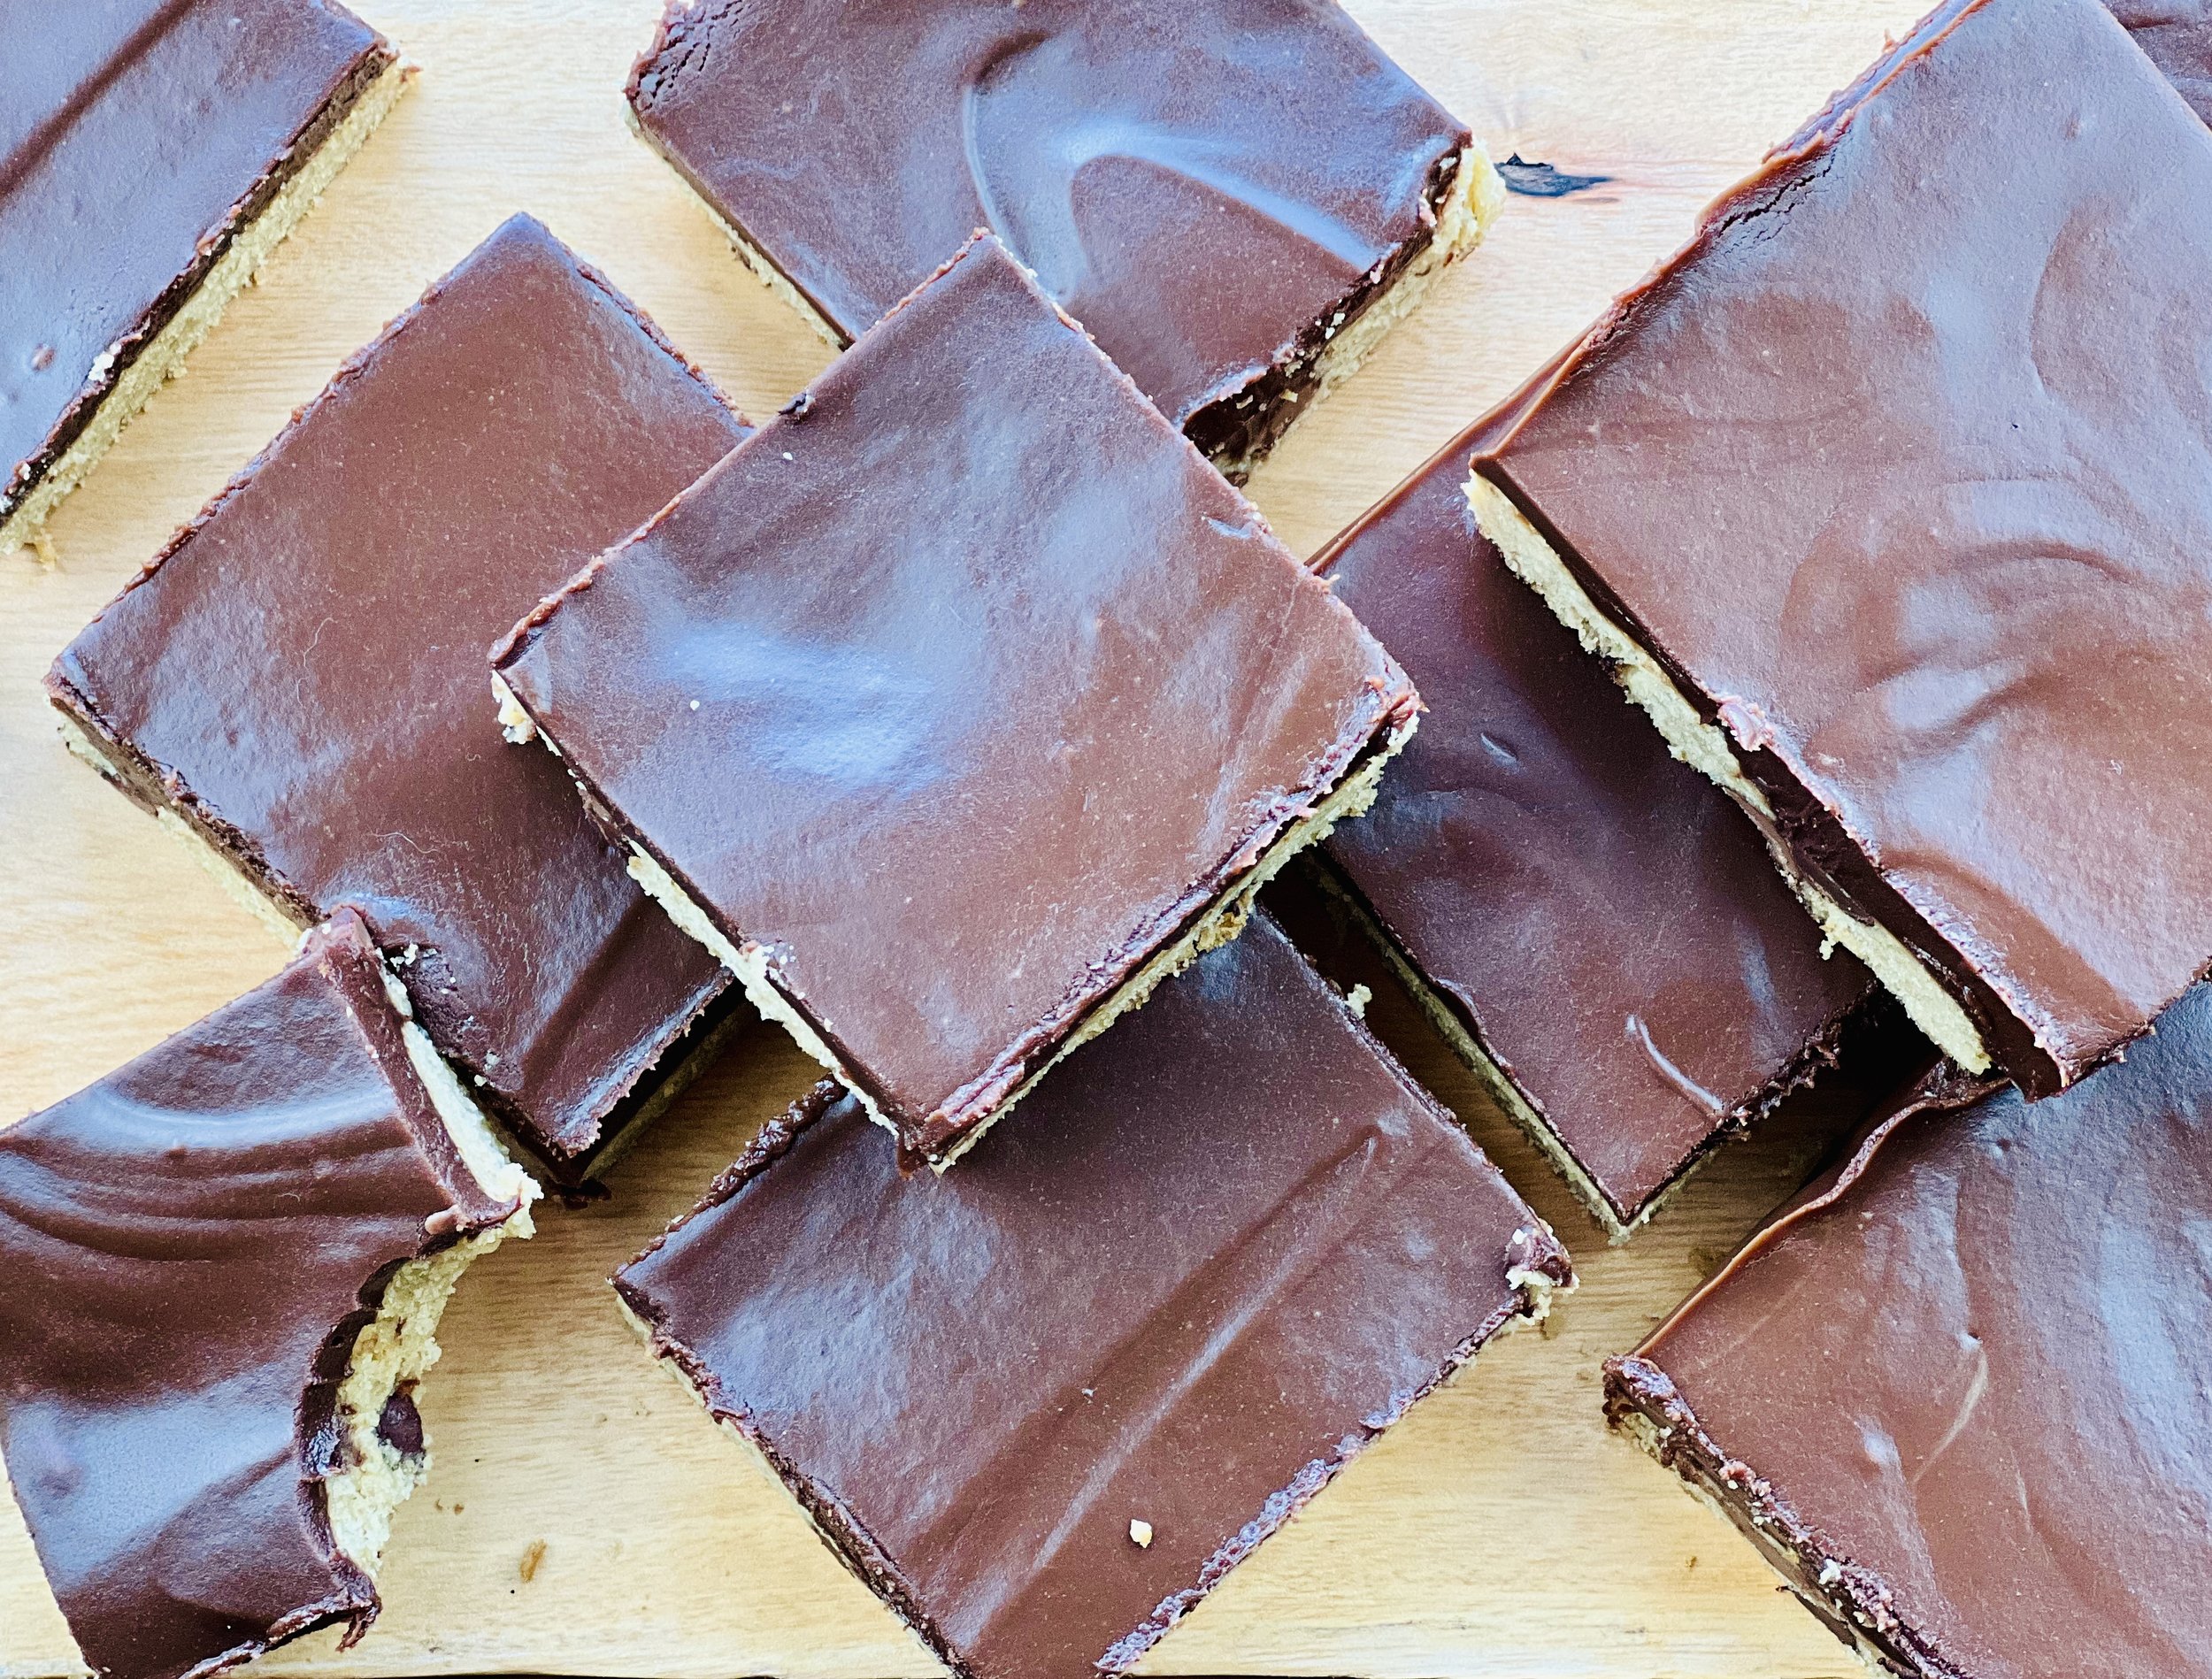
Peanut Butter Blondies with Chocolate Peanut Butter Ganache (low FODMAP)
20 Minutes prep • 20 Minutes cook • Low FODMAP • Gluten-free • Makes 24
20 Minutes prep • 20 Minutes cook • Low FODMAP • Gluten-free • Makes 24 • Ok to make-ahead: Steps 1-6
These are truly a peanut butter lover’s delight. The bars are somewhat dense and hearty and the ganache adds a creamy layer that makes the perfect topping. Because the ganache stays a bit soft these bars don’t stack well so they need to be stored in one layer (but they won’t last long enough to stack and store anyway!)
This is an exclusive recipe just for recipe club members.
In addition to the two free recipes I create each week I am creating and delivering one very special recipe just for my recipe club members. If you’re not yet a member, I encourage you to join! Membership in the club includes access to the complete archive of recipes with filters so it can become your virtual low FODMAP cookbook plus, I am creating and delivering one special NEW recipe every week ONLY for recipe club members. And, for my true fans, I’ll be sharing behind-the-scenes content, and updates on the progress of the new cookbook.
Your membership in the club helps me continue creating new, delicious, easy-to-make, low FODMAP recipes just for you.
As always, all recipes will emphasize simple ingredients, easy preparation, and delicious low FODMAP results. Recipes will be for everything from main courses, salads, soups, side dishes, appetizers, desserts, sauces, breakfast and lunch, and even mocktails and cocktails. Everything you need to prepare fantastic low FODMAP meals everyone will love.
Join the club. Become a Patron. Let’s keep making delicious Low FODMAP meals together.
More Deliciously Low FODMAP™ dessert recipes
10 Minutes prep • 15 Minutes cook • Low FODMAP • Gluten-Free • Keto Friendly • Makes 36 bars
5 Minutes prep • 10 Minutes cook • Low FODMAP • Gluten-Free • Lactose-Free • Makes 5 cups
15 Minutes prep • 20 Minutes cook • 30 Minutes cool • Low FODMAP • Gluten-free • Makes 18 bars
20 Minutes prep • 10 Minutes cook • Low FODMAP • Gluten-free • Makes 12 Sandwiched Cookies
20 Minutes prep • 20 Minutes cook • Low FODMAP • Gluten-free • Lactose-free • Makes 12 - 24
20 Minutes prep • 2 Hours chill • 10 Minutes cook • Low FODMAP • Gluten-free • Makes 24 - 36
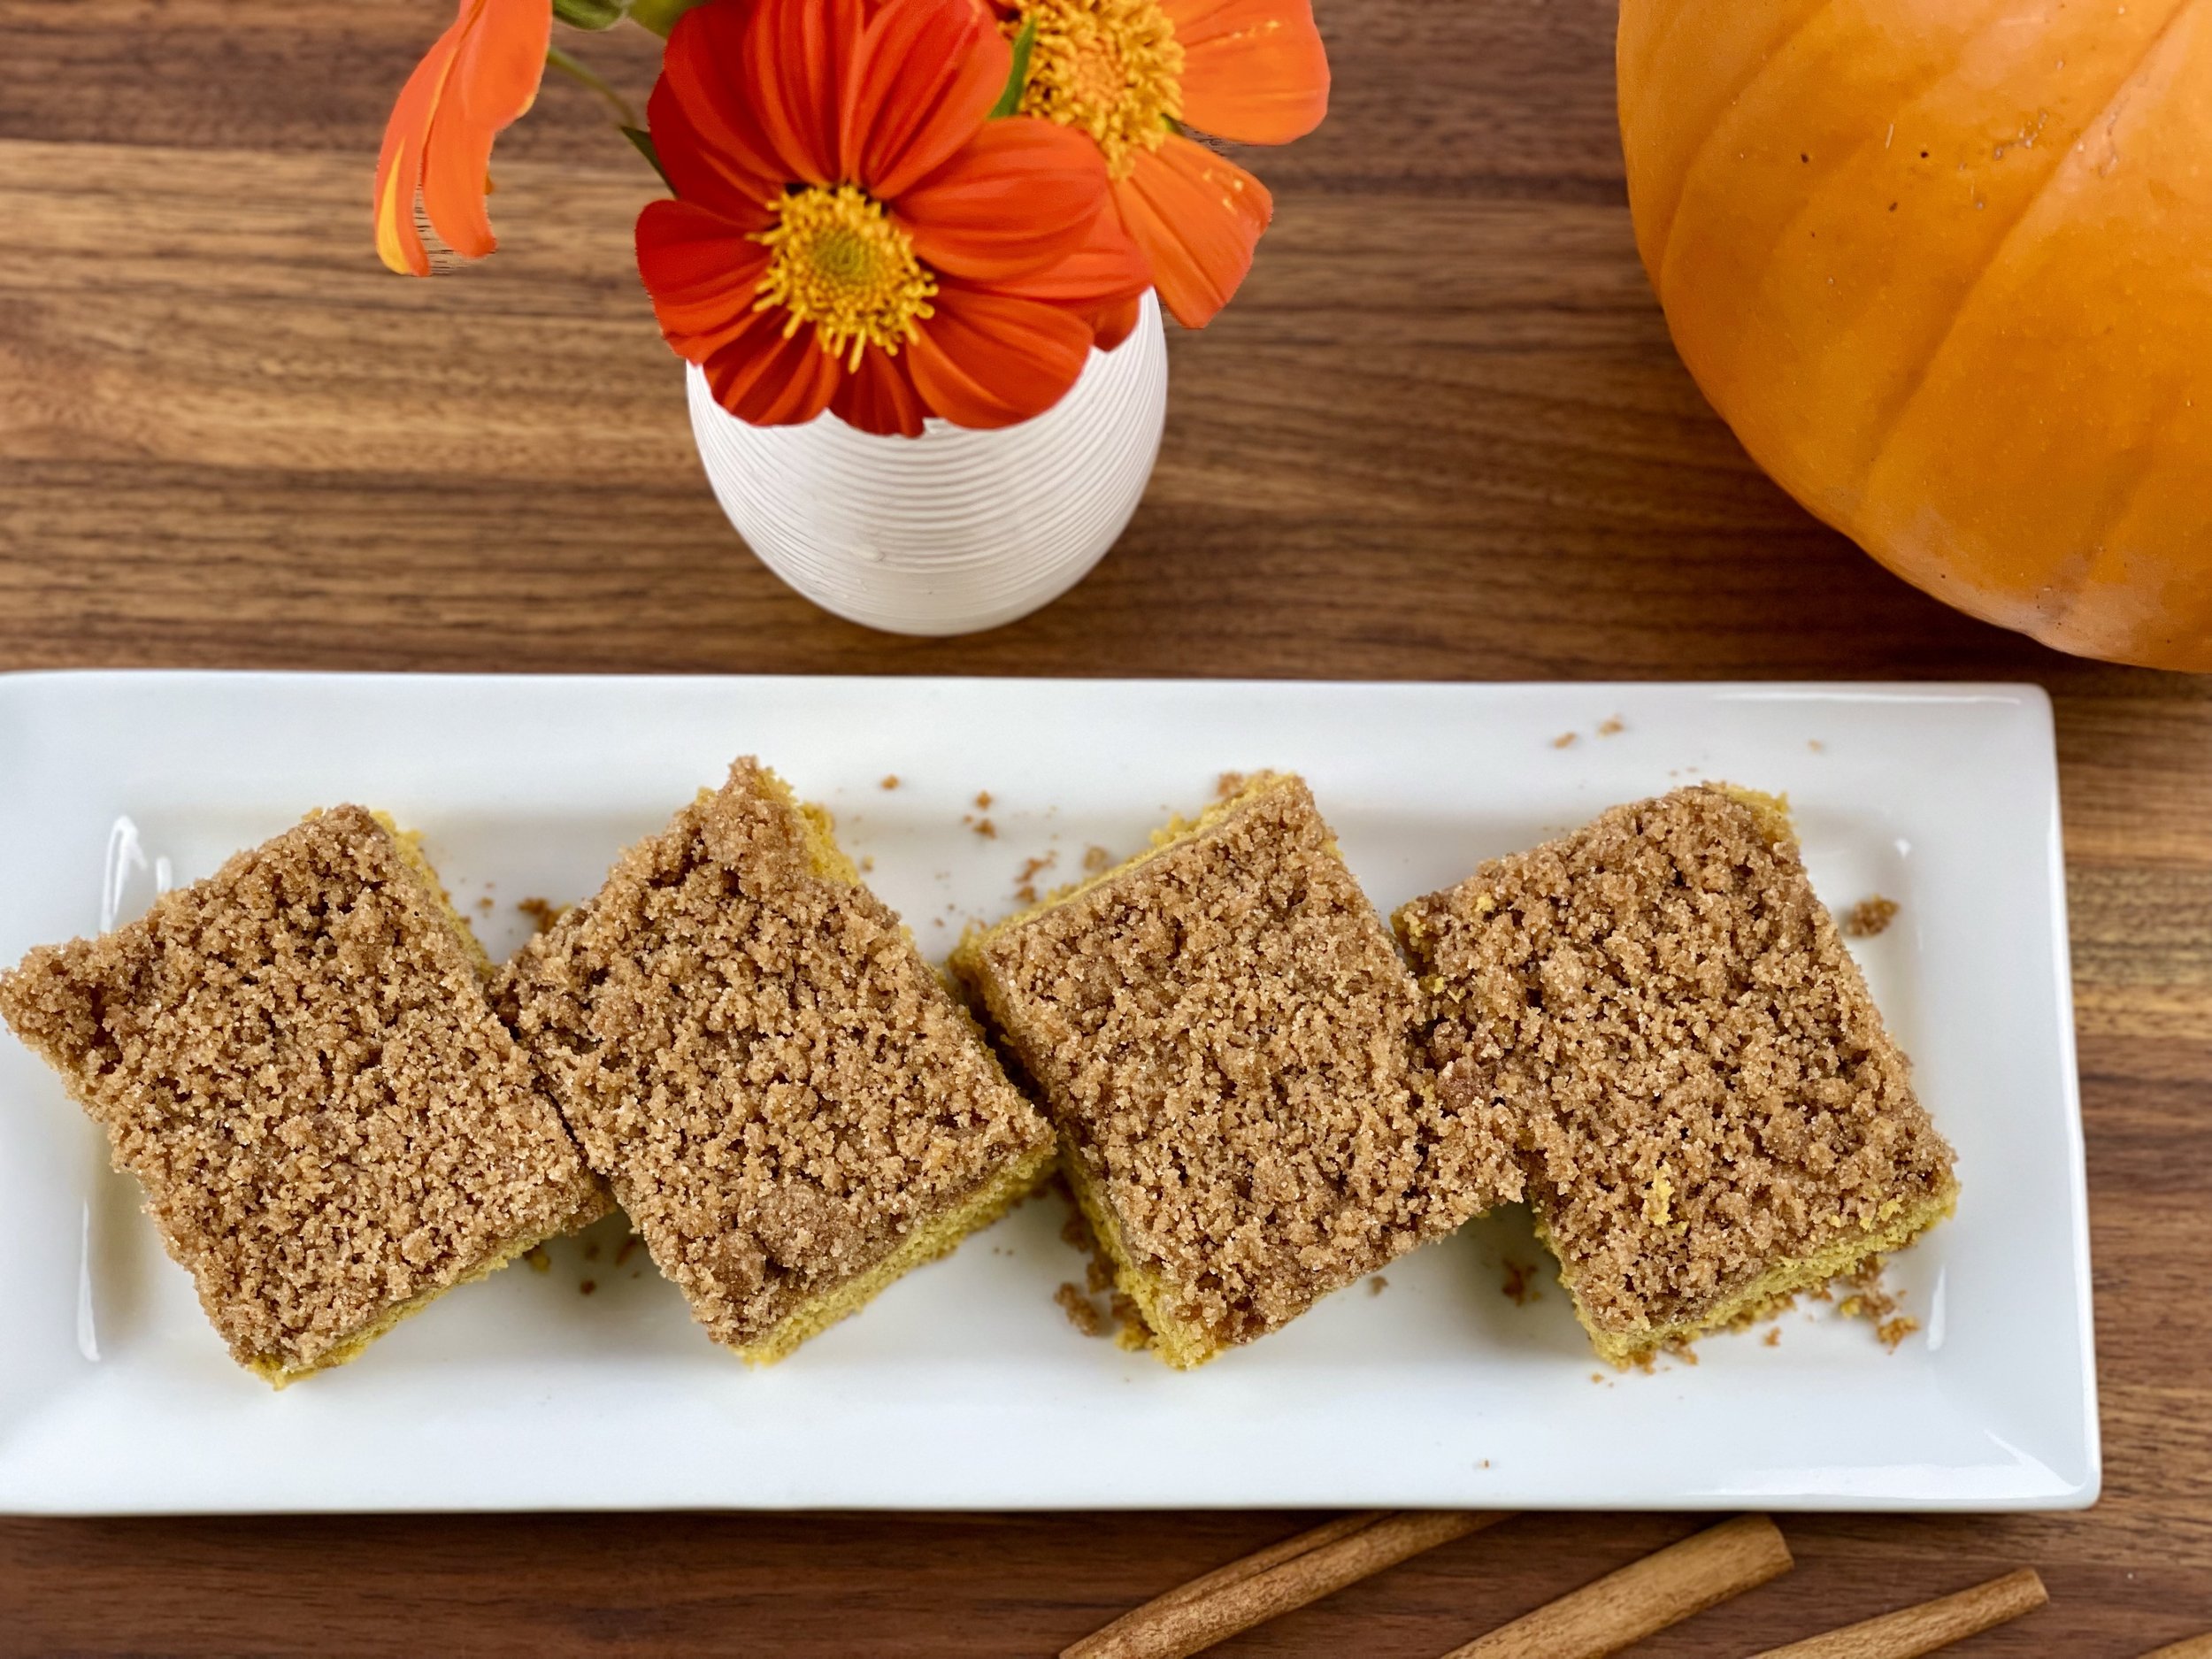
I’m here to show you how to fully embrace the flavors of fall while keeping your digestive system happy.
10 Minutes prep • Overnight Chill • Low FODMAP • Gluten-free • Lactose-free • Serves 2 - 4
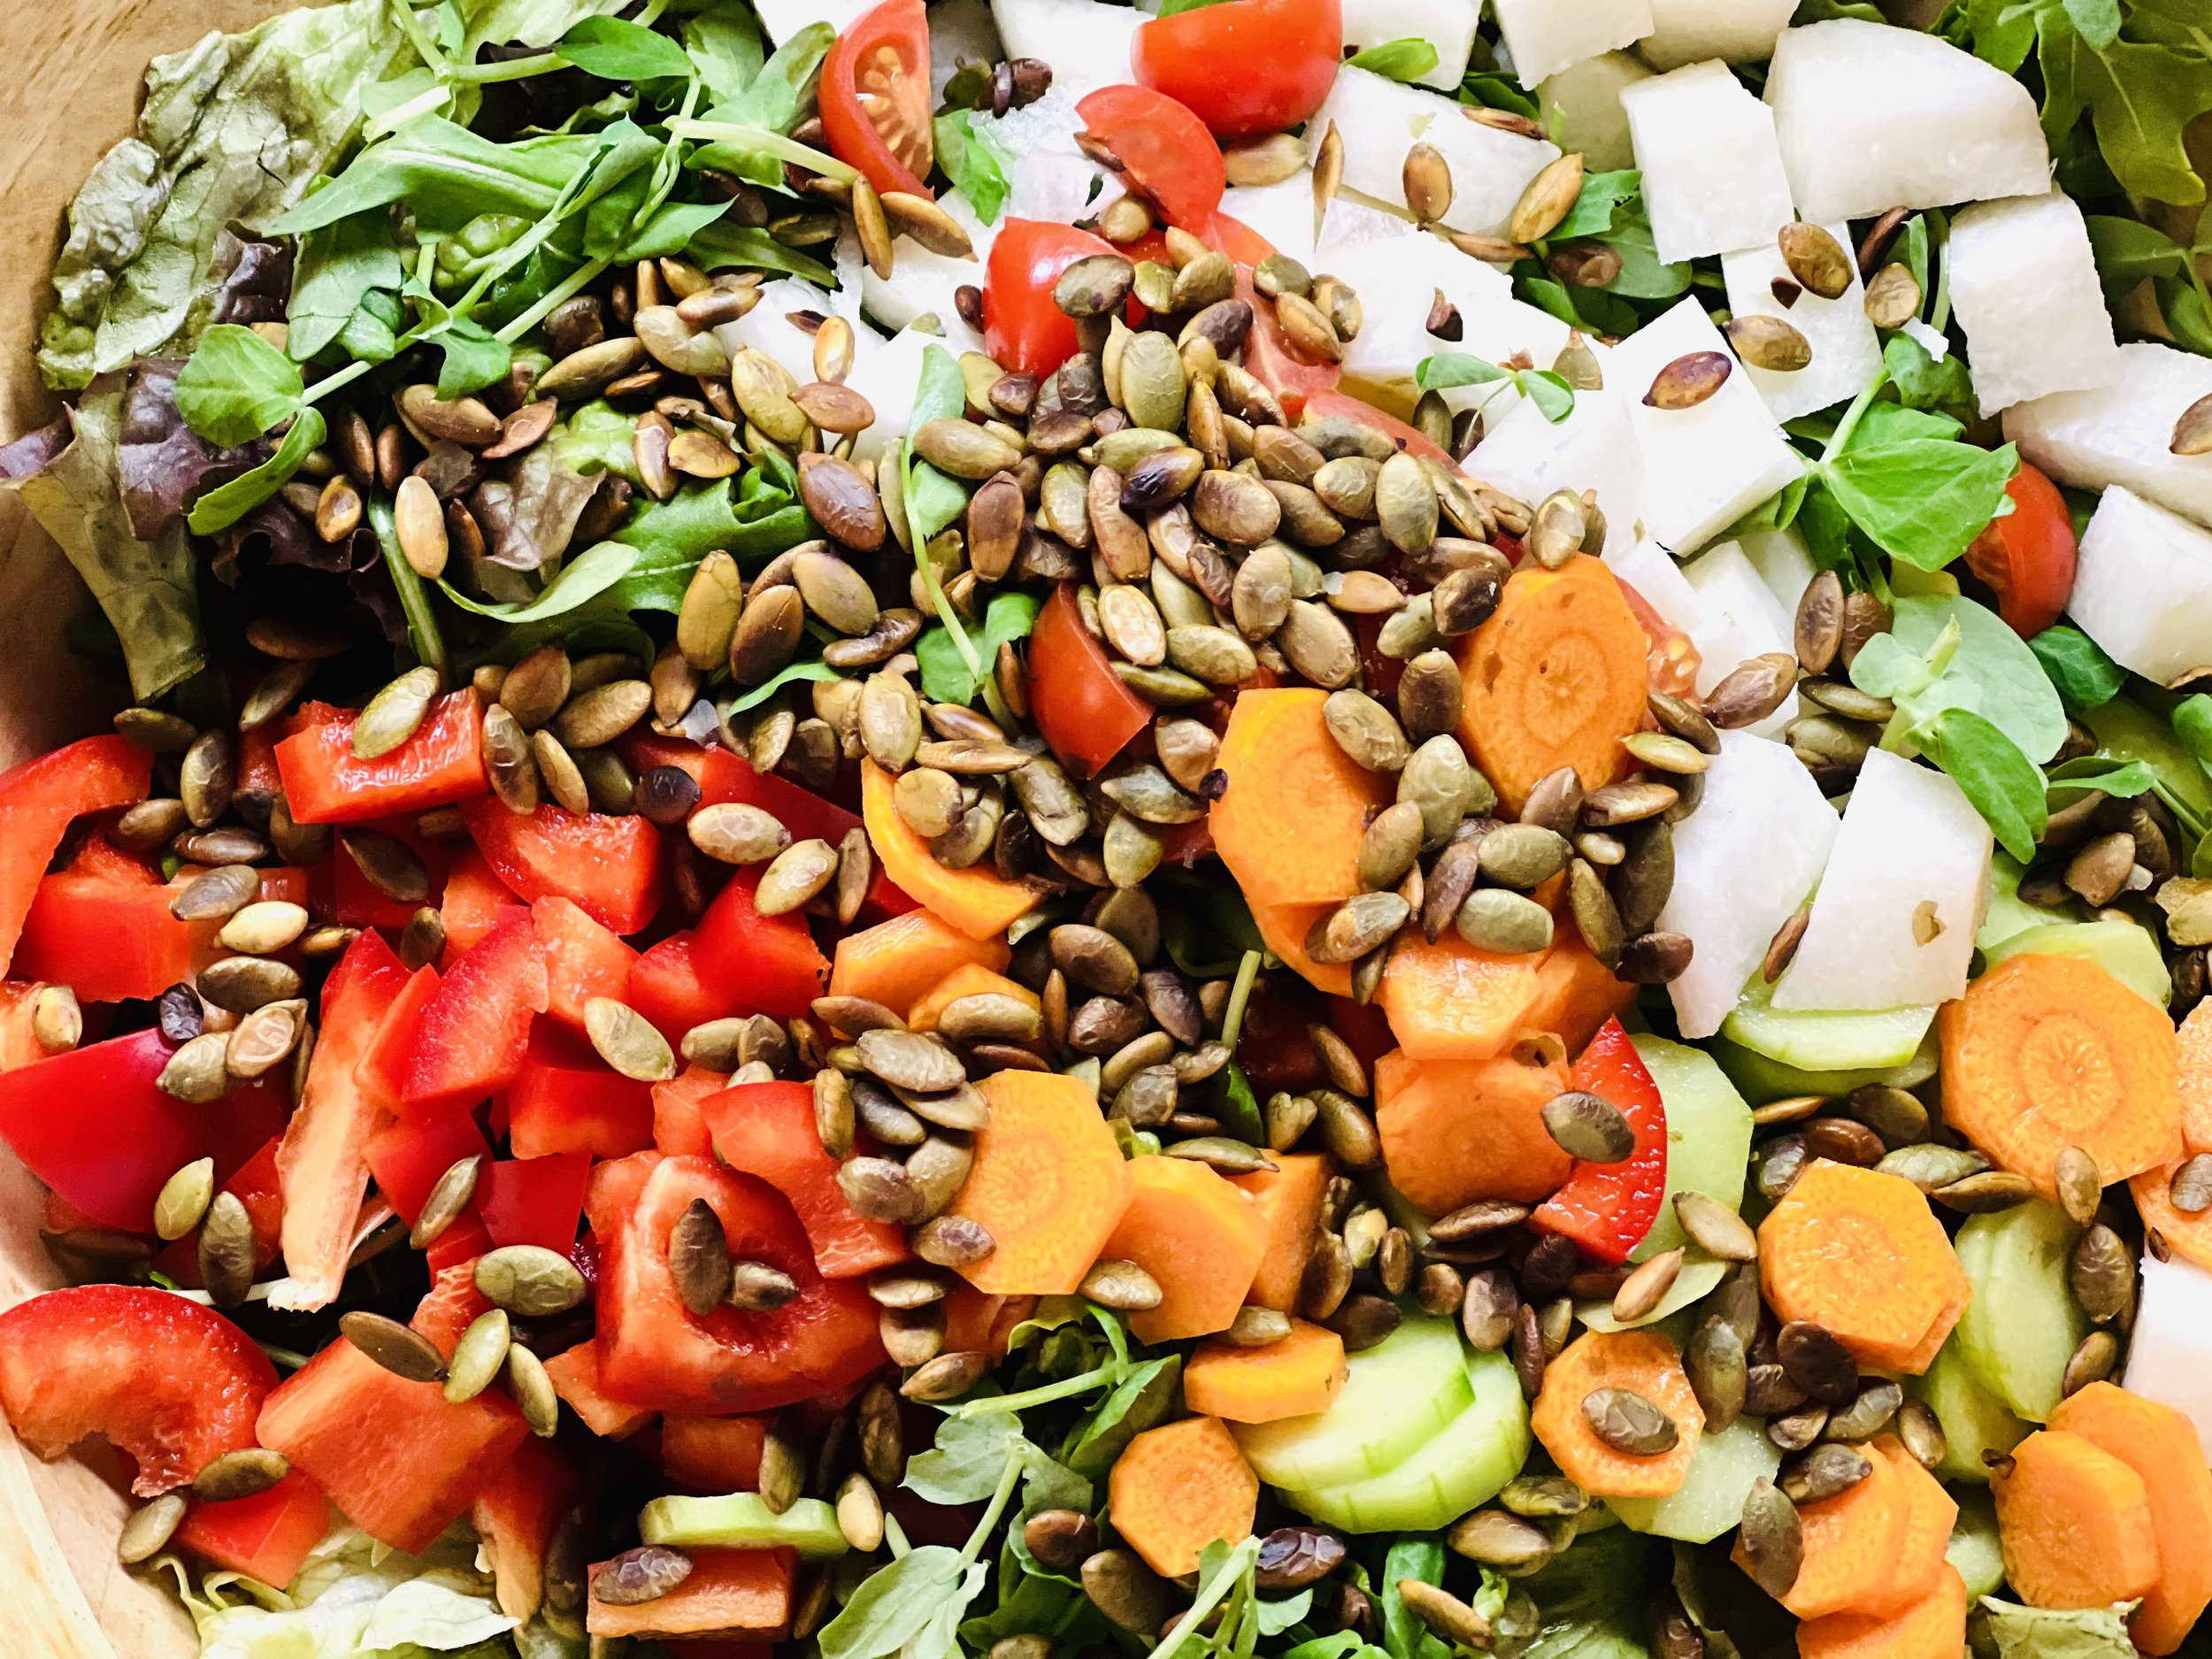
Target 30 Green Salad (low FODMAP)
20 Minutes prep • Low FODMAP • Gluten-free • Lactose-free • Vegetarian • Serves 4
20 Minutes prep • Low FODMAP • Gluten-free • Lactose-free • Vegetarian • Serves 4 • Ok to make ahead: Steps 1 - 4
Want your gut biome to become your superpower? Feed it what it needs! For the optimal health of your gut biome, the latest recommendation is to eat 30 different plant-based foods every week. Learn more about that in this very interesting article here. That doesn’t mean you stuff yourself with salad all day every day. It’s not volume, it’s variety that makes your gut biome so happy. Plants include nuts, seeds, herbs, spices, fruits, vegetables, and even oils. If you’re like I am, you love salad, and this salad is a great way to pack some plants into your diet in a delicious way! Be creative. See what’s in season. See what looks good at the farmer’s market, produce stand, or grocery store. Add nuts or seeds to not only add plant variety but also protein, flavor, and crunch!
Ingredients: Salad
2 cups red leaf lettuce
1 cup baby arugula
2 Persian cucumbers, peeled and sliced
1 red bell pepper, chopped
3 carrots, peeled and sliced
1 cup Jicama, chopped
1 cup cherry tomatoes, cut in half
1/2 cup microgreens or pea shoots (optional)
1/2 cup pumpkin seeds, roasted and salted
1/2 avocado, chopped
Ingredients: Dressing
3 tablespoons garlic-infused olive oil
1 tablespoon red wine vinegar
1/2 teaspoon Colman’s dry mustard
1/2 teaspoon each Kosher salt and black pepper
Directions
(1) Prepare the lettuce: Wash and spin dry the lettuce. Tear into bite-sized pieces and put into a large salad bowl.
(2) Prepare the vegetables: Peel, slice, chop the other vegetables, then add to the salad bowl with the lettuce.
(3) Add the seeds: Sprinkle generously with roasted and salted pumpkin seeds.
(4) Make the dressing: Add all dressing ingredients to a small jar. Shake well to combine.
(5) Toss: Drizzle salad with dressing and toss well to combine. Sprinkle the whole bowl very lightly with Kosher salt (preferably Diamond Crystal Kosher salt that has a very flat crystal so it will “float” nicely on the lettuce and lend a very delicate taste and tiny crunch).
(6) Plate and serve right away.
Eat and enjoy every bite because you can!
This post contains links for you to easily purchase items listed on the page. In some cases, we have provided a special discount code for IBS Game Changers so be sure to use it when you purchase an item to get the discount that has been arranged just for you! As an Amazon Associate, I earn a commission from qualifying Amazon purchases.
More Deliciously Low FODMAP™ salad recipes
5 Minutes prep • 15 Minutes cook • Low FODMAP • Gluten-free • Lactose-free • Vegan • Serves 4
15 Minutes prep • Low FODMAP • Gluten-free • Lactose-free • Vegetarian • Vegan • Serves 4
30 Minutes prep • Low FODMAP • Gluten-free • Lactose-free • Vegetarian • Vegan • Serves 4+ • Serving Size 2 cups
15 Minutes prep • 30 Minutes cook • Low FODMAP • Gluten-free • Lactose-free • Serves 4-6
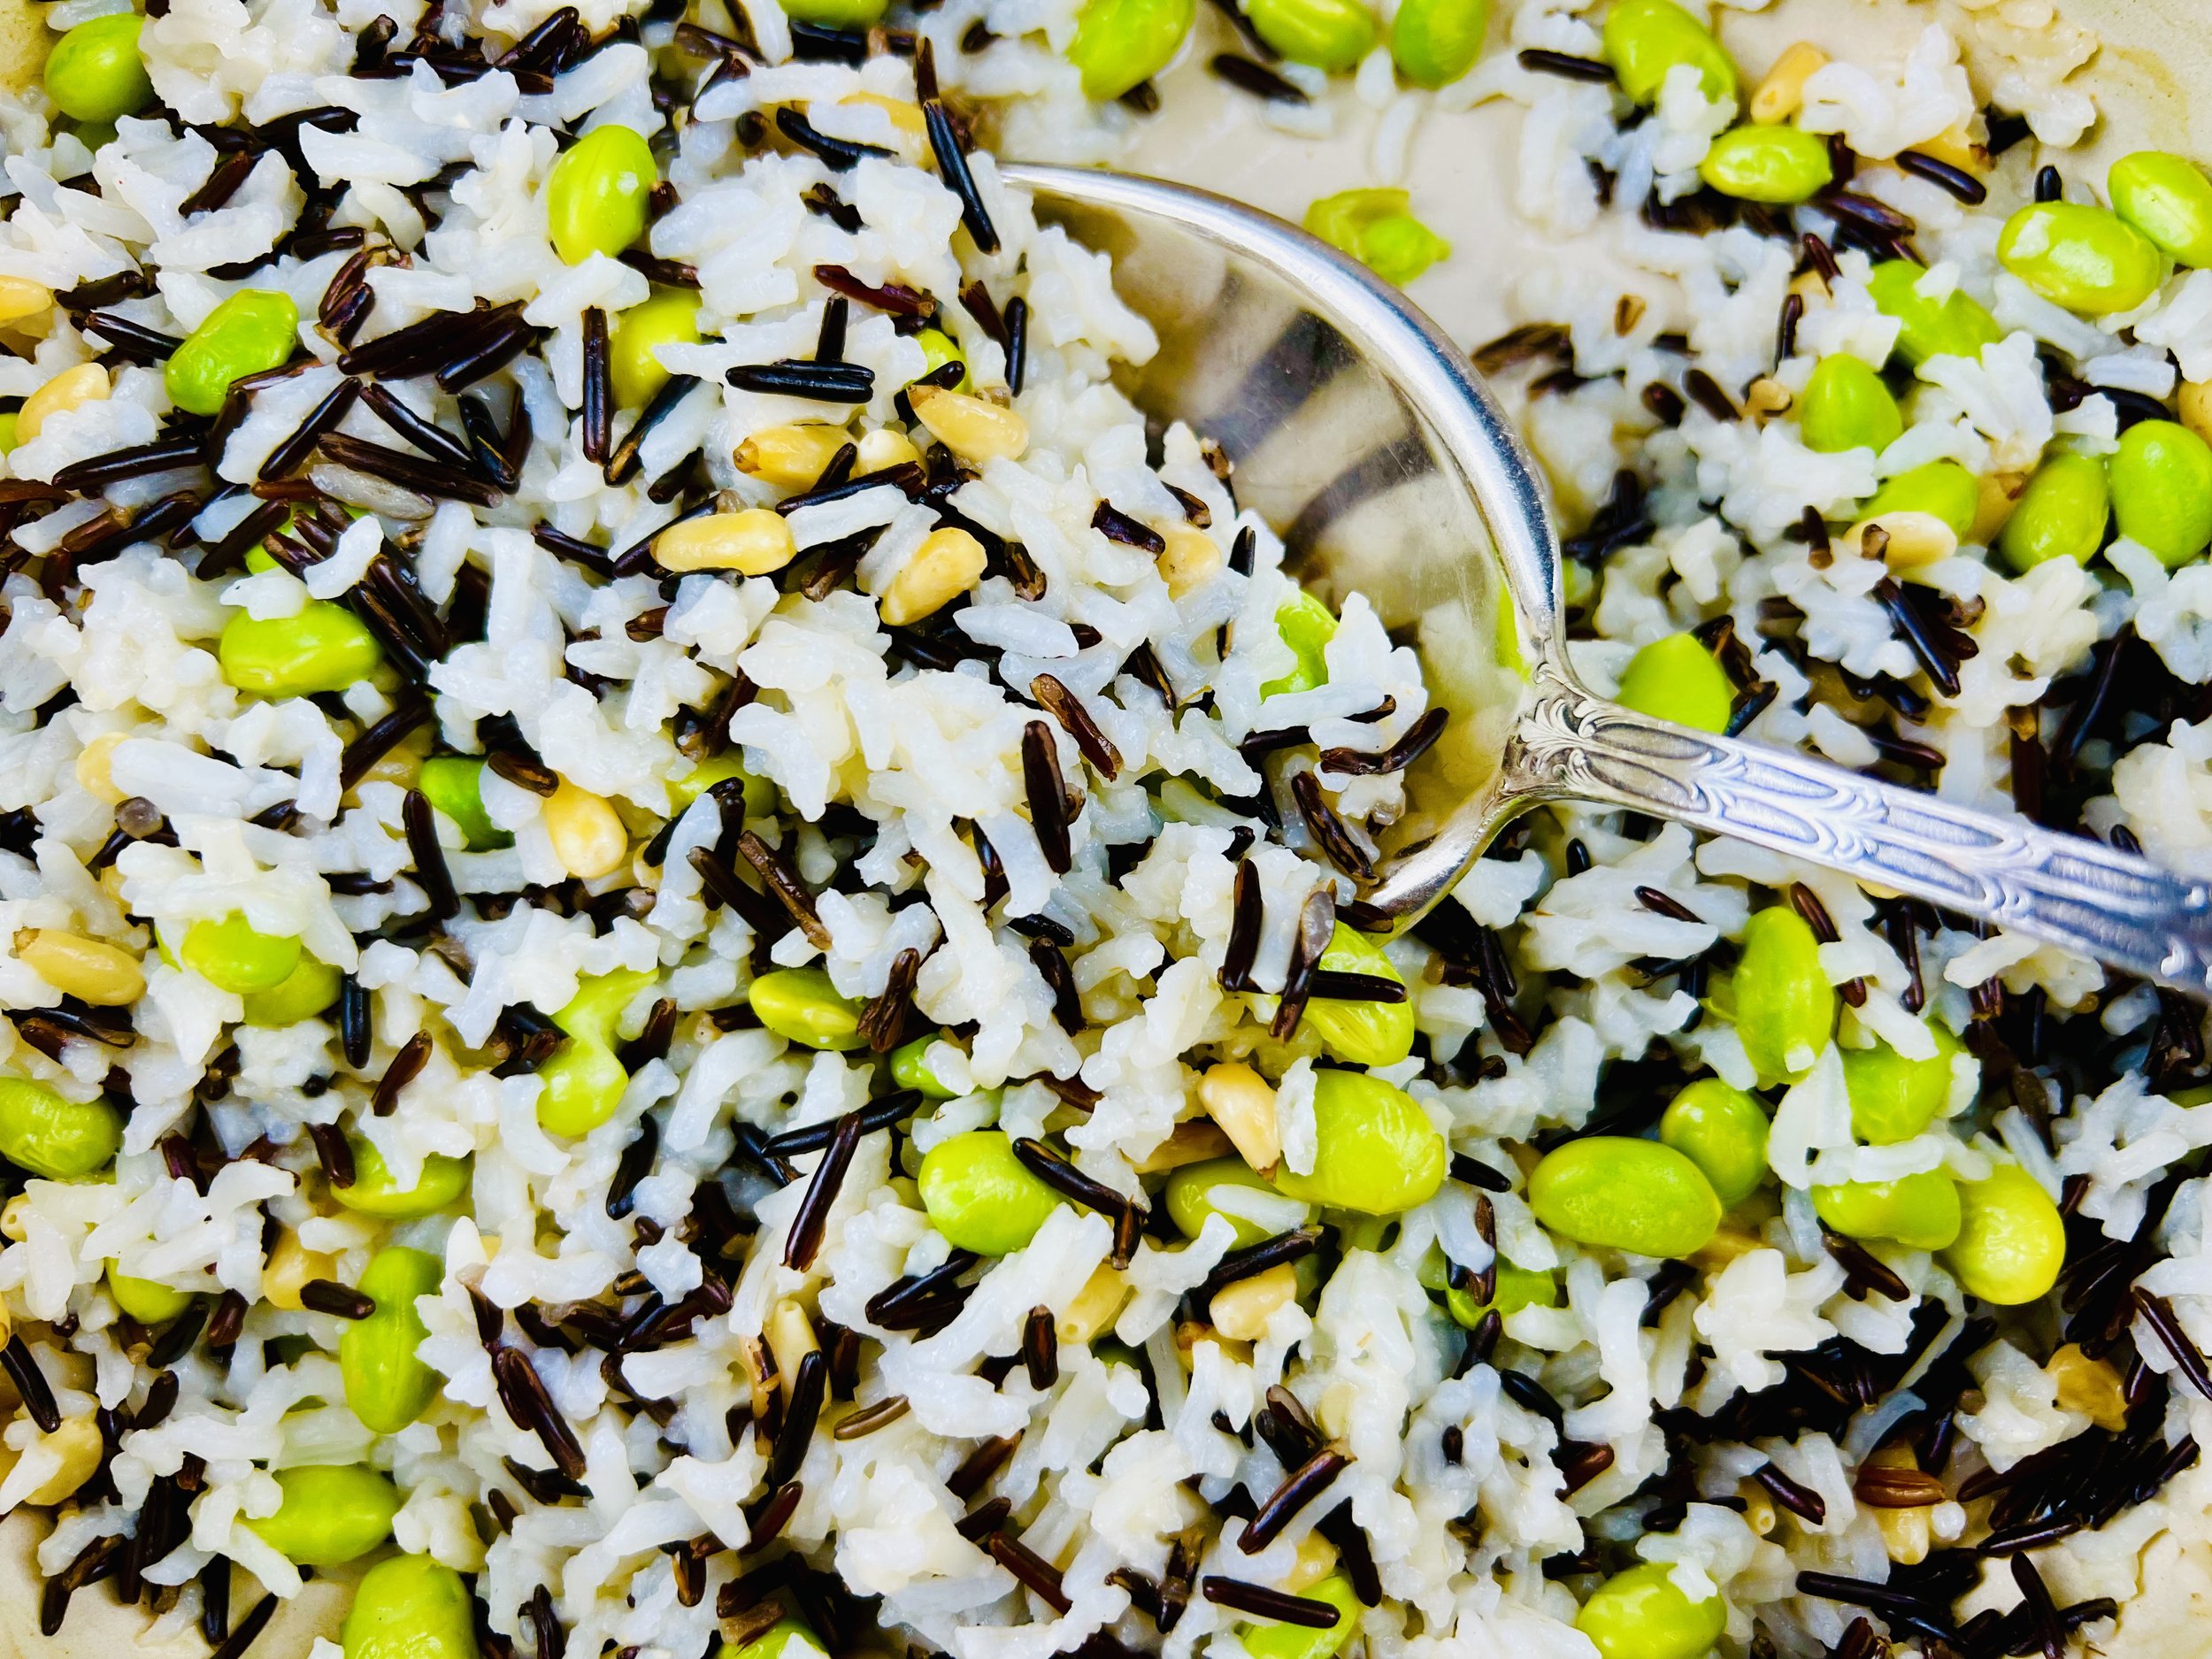
Fancy Oven Rice (low FODMAP)
5 Minutes prep • 30 Minutes cook • Low FODMAP • Gluten-free • Serves 4
5 Minutes prep • 30 Minutes cook • Low FODMAP • Gluten-free • Serves 4 • Ok to make ahead: Step 1
When simple plain rice just won’t do, go for fancy oven rice. So easy to make and so delicious! The combination of wild rice and white rice, adds complexity to an otherwise simple side dish. The edamame and pine nuts add protein, color, and flavor that make this a side dish to be proud of.
Ingredients
1/2 cup wild rice
2/3 cup white rice
2 1/2 cups low FODMAP chicken broth or water
2 tablespoons butter
Kosher salt and black pepper to taste
1/2 cup pine nuts
2/3 cup frozen edamame
Directions
(1) Prepare: Preheat oven to 350 degrees F.
(2) Start wild rice: Put wild rice and 1 1/2 cups chicken broth or water in an oven-proof casserole with the lid on. Put it in the preheated oven and bake for 10 minutes.
(3) Add white rice: Remove from oven and stir in white rice, 1 additional cup of chicken broth or water, and the butter. Put the cover back on and return to the oven and bake for another 15 minutes.
(4) Finish: Remove from the oven and stir in pine nuts and edamame. Return to the oven and bake for another 10 minutes.
(5) Plate and serve: Fluff rice mixture with a fork. Taste and add salt and/or pepper as needed. Serve alongside your favorite main dish.
Eat and enjoy every bite because you can!
This post contains links for you to easily purchase items listed on the page. In some cases, we have provided a special discount code for IBS Game Changers so be sure to use it when you purchase an item to get the discount that has been arranged just for you! As an Amazon Associate, I earn a commission from qualifying Amazon purchases.
More Deliciously Low FODMAP™ side dish recipes
5 Minutes prep • 15 Minutes cook • Low FODMAP • Gluten-Free • Lactose-Free • Makes 2 cups
15 Minutes prep • 30 Minutes cook • Low FODMAP • Serves 4 • Ok to make-ahead: Steps 1 - 2
15 Minutes prep • 18 Minutes cook • Low FODMAP • Gluten-free • Makes 15 • Serving size 2
10 Minutes prep • 10 Minutes cook • Low FODMAP • Gluten-free • Lactose-free • Vegan • Serves 4
10 Minutes prep • 25 Minutes cook • Low FODMAP • Gluten-free • Vegetarian • Plant Forward • Serves 4
20 Minutes prep • 25 Minutes cook • Low FODMAP • Gluten-free • Lactose-free • Vegetarian • Serves 4
10 Minutes prep • 20 Minutes cook • Low FODMAP • Gluten-free • Lactose-free • Vegan • Serves 5
15 Minutes prep • 45 Minutes cook • Low FODMAP • Gluten-free • Vegetarian • Serves 4 - 6
30 Minutes prep • 20 Minutes cook • Low FODMAP • Gluten-free • Vegetarian • Makes 10 Squares
25 Minutes prep • 40 Minutes cook • Low FODMAP • Gluten-free • Vegetarian • Serves 4 - 6
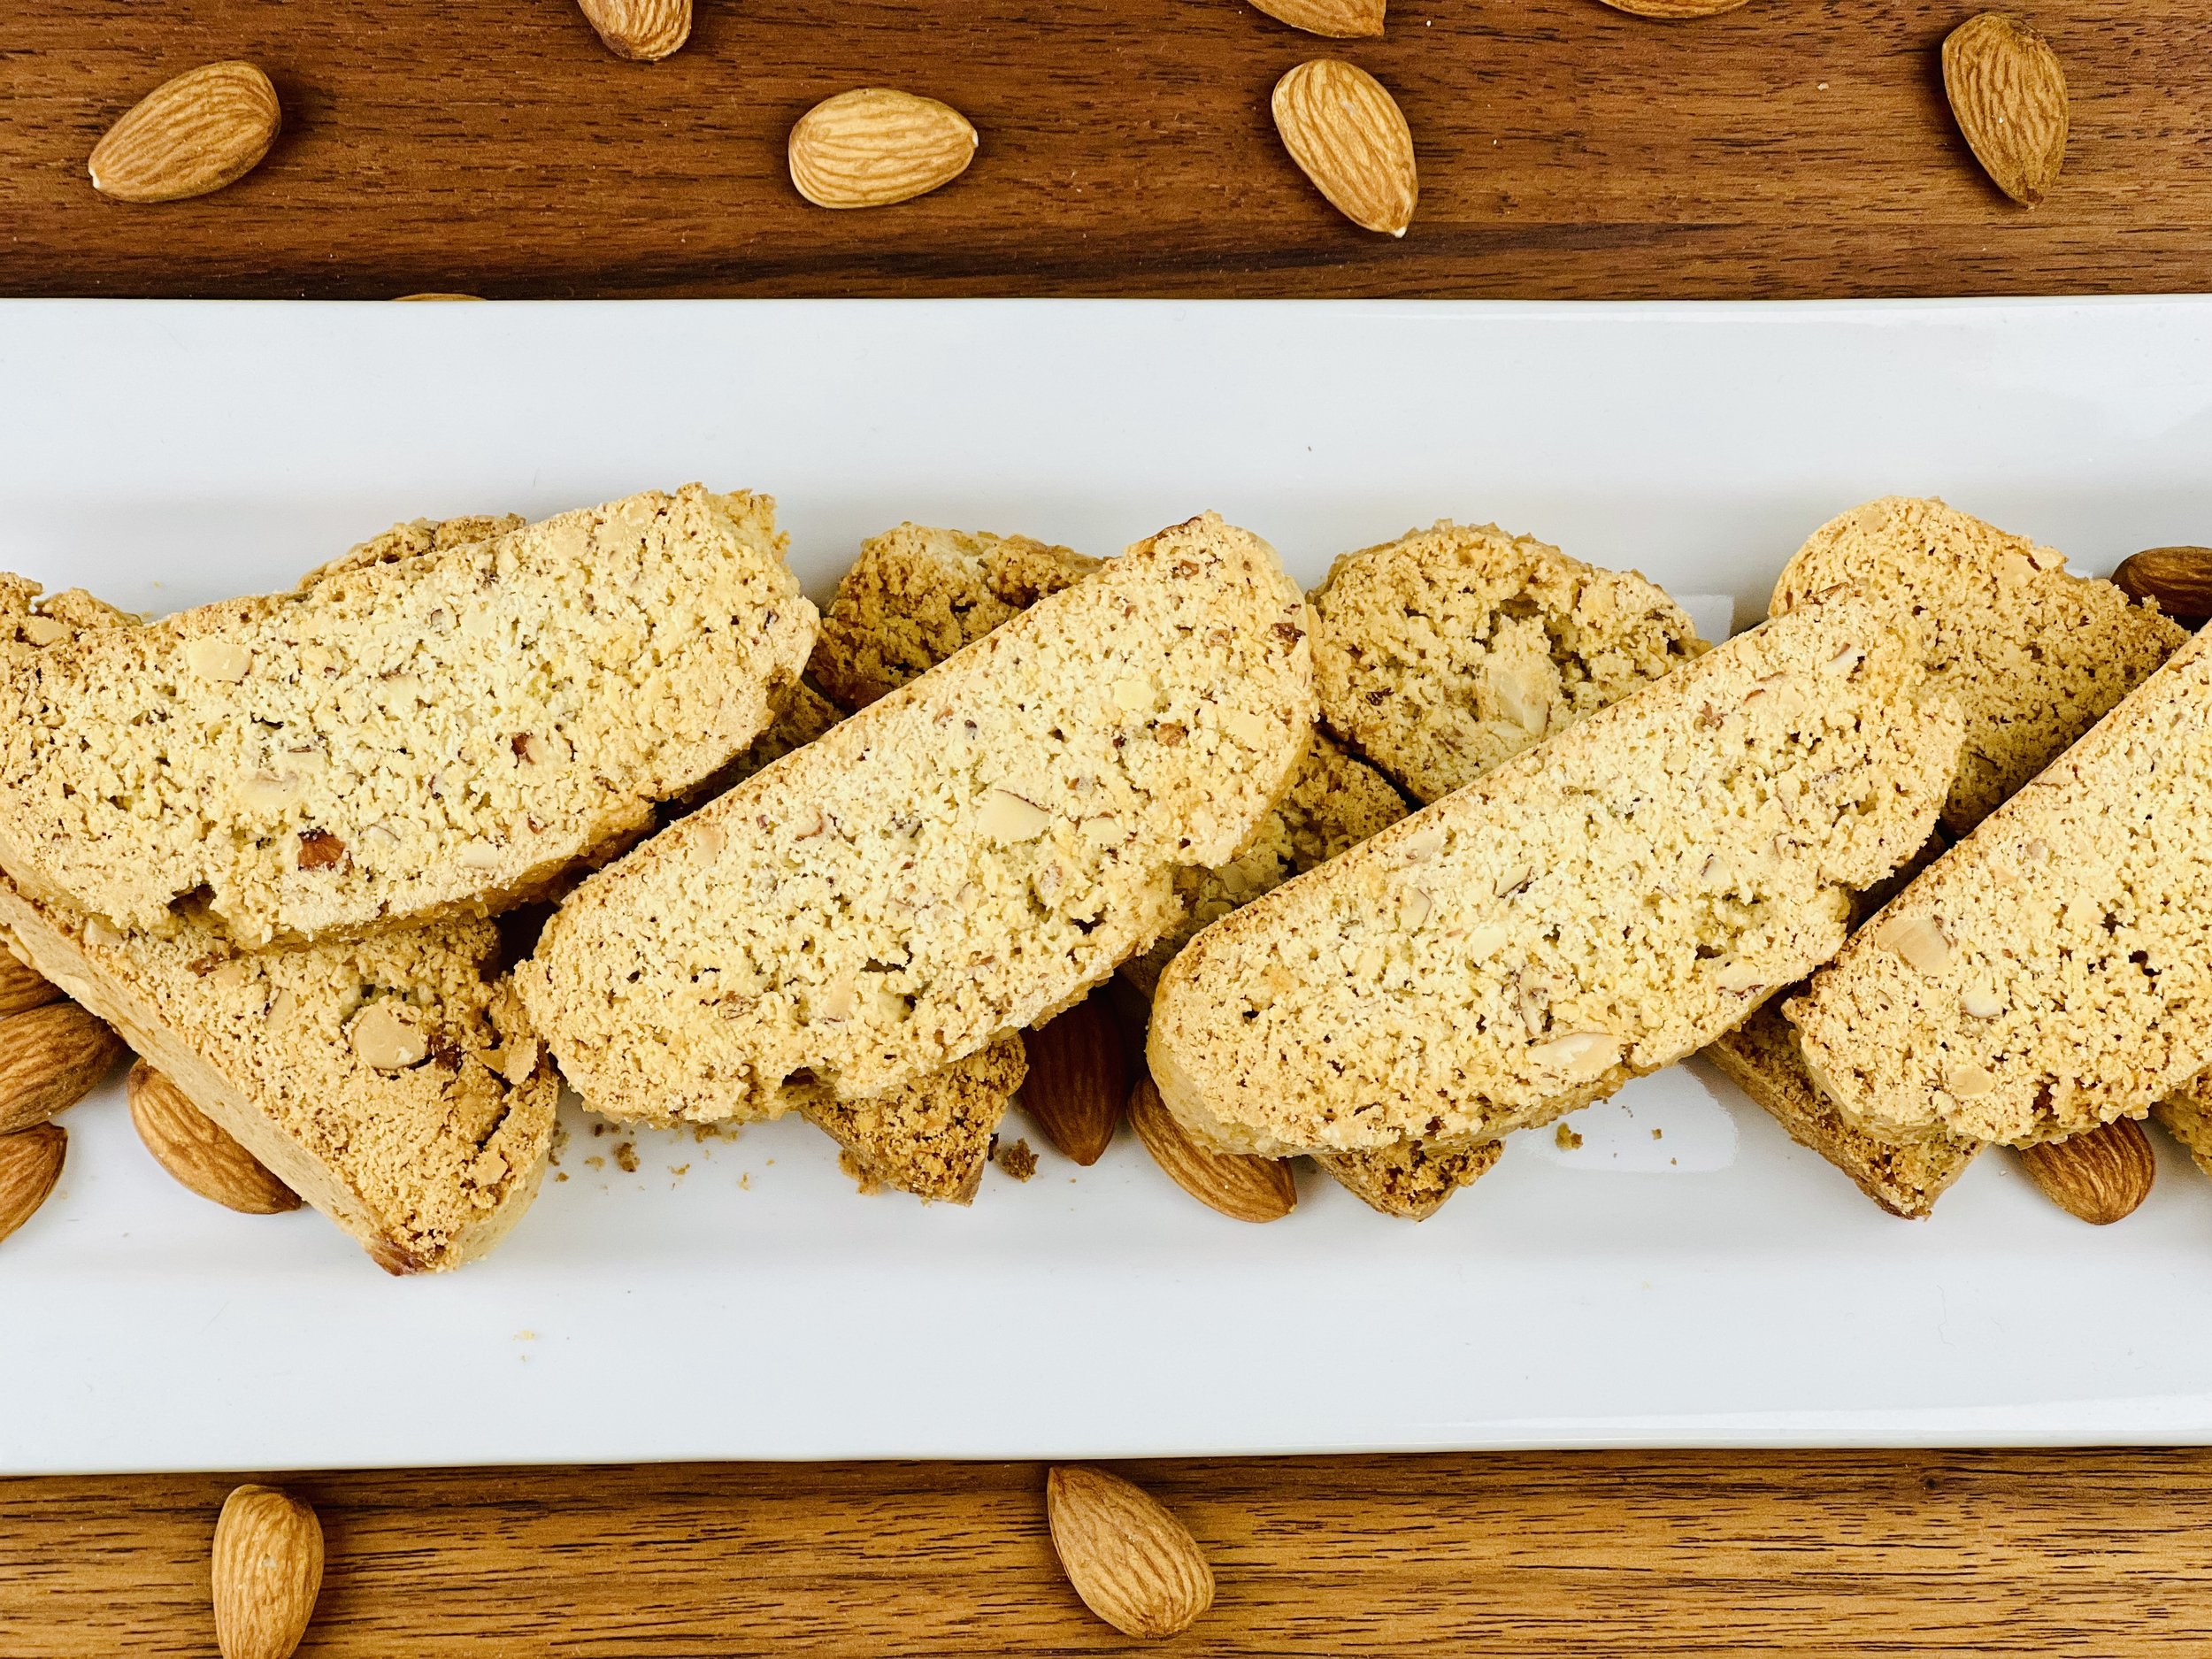
Classic Biscotti (low FODMAP)
15 Minutes prep • 30 Minutes cook • Low FODMAP • Gluten-free • Makes 36
15 Minutes prep • 30 Minutes cook • Low FODMAP • Gluten-free • Makes 36 • Ok to make-ahead: Steps 1-9
This recipe delivers a classic Biscotti taste that is lightly flavored with anise. The cookies are crisp and delicious and they go wonderfully with a cup of coffee or tea. You may dip them in chocolate if you like for a bit more decadent cookie but I love them just plain. Biscotti are the perfect gluten-free cookie because they don’t require any light springiness that might come from leavening and gluten. They do require a bit of fat (not always found in biscotti recipes) and I like to add some cornstarch to keep them light.
This is an exclusive recipe just for recipe club members.
Each week I am creating and delivering one very special recipe just for my recipe club members. If you’re not yet a member, I encourage you to join! Membership in the club includes access to the complete archive of recipes with filters so it can become your virtual low FODMAP cookbook plus, I am creating and delivering one special NEW recipe every week ONLY for recipe club members. And, for my true fans, I’ll be sharing behind-the-scenes content, and updates on the progress of the new cookbook.
Your membership in the club helps me continue creating new, delicious, easy-to-make, low FODMAP recipes just for you.
As always, all recipes will emphasize simple ingredients, easy preparation, and delicious low FODMAP results. Recipes will be for everything from main courses, salads, soups, side dishes, appetizers, desserts, sauces, breakfast and lunch, and even mocktails and cocktails. Everything you need to prepare fantastic low FODMAP meals everyone will love.
Join the club. Become a Patron. Let’s keep making delicious Low FODMAP meals together.
More Deliciously Low FODMAP™ dessert recipes
10 Minutes prep • 15 Minutes cook • Low FODMAP • Gluten-Free • Keto Friendly • Makes 36 bars
5 Minutes prep • 10 Minutes cook • Low FODMAP • Gluten-Free • Lactose-Free • Makes 5 cups
15 Minutes prep • 20 Minutes cook • 30 Minutes cool • Low FODMAP • Gluten-free • Makes 18 bars
20 Minutes prep • 10 Minutes cook • Low FODMAP • Gluten-free • Makes 12 Sandwiched Cookies
20 Minutes prep • 20 Minutes cook • Low FODMAP • Gluten-free • Lactose-free • Makes 12 - 24
20 Minutes prep • 2 Hours chill • 10 Minutes cook • Low FODMAP • Gluten-free • Makes 24 - 36
I’m here to show you how to fully embrace the flavors of fall while keeping your digestive system happy.
10 Minutes prep • Overnight Chill • Low FODMAP • Gluten-free • Lactose-free • Serves 2 - 4












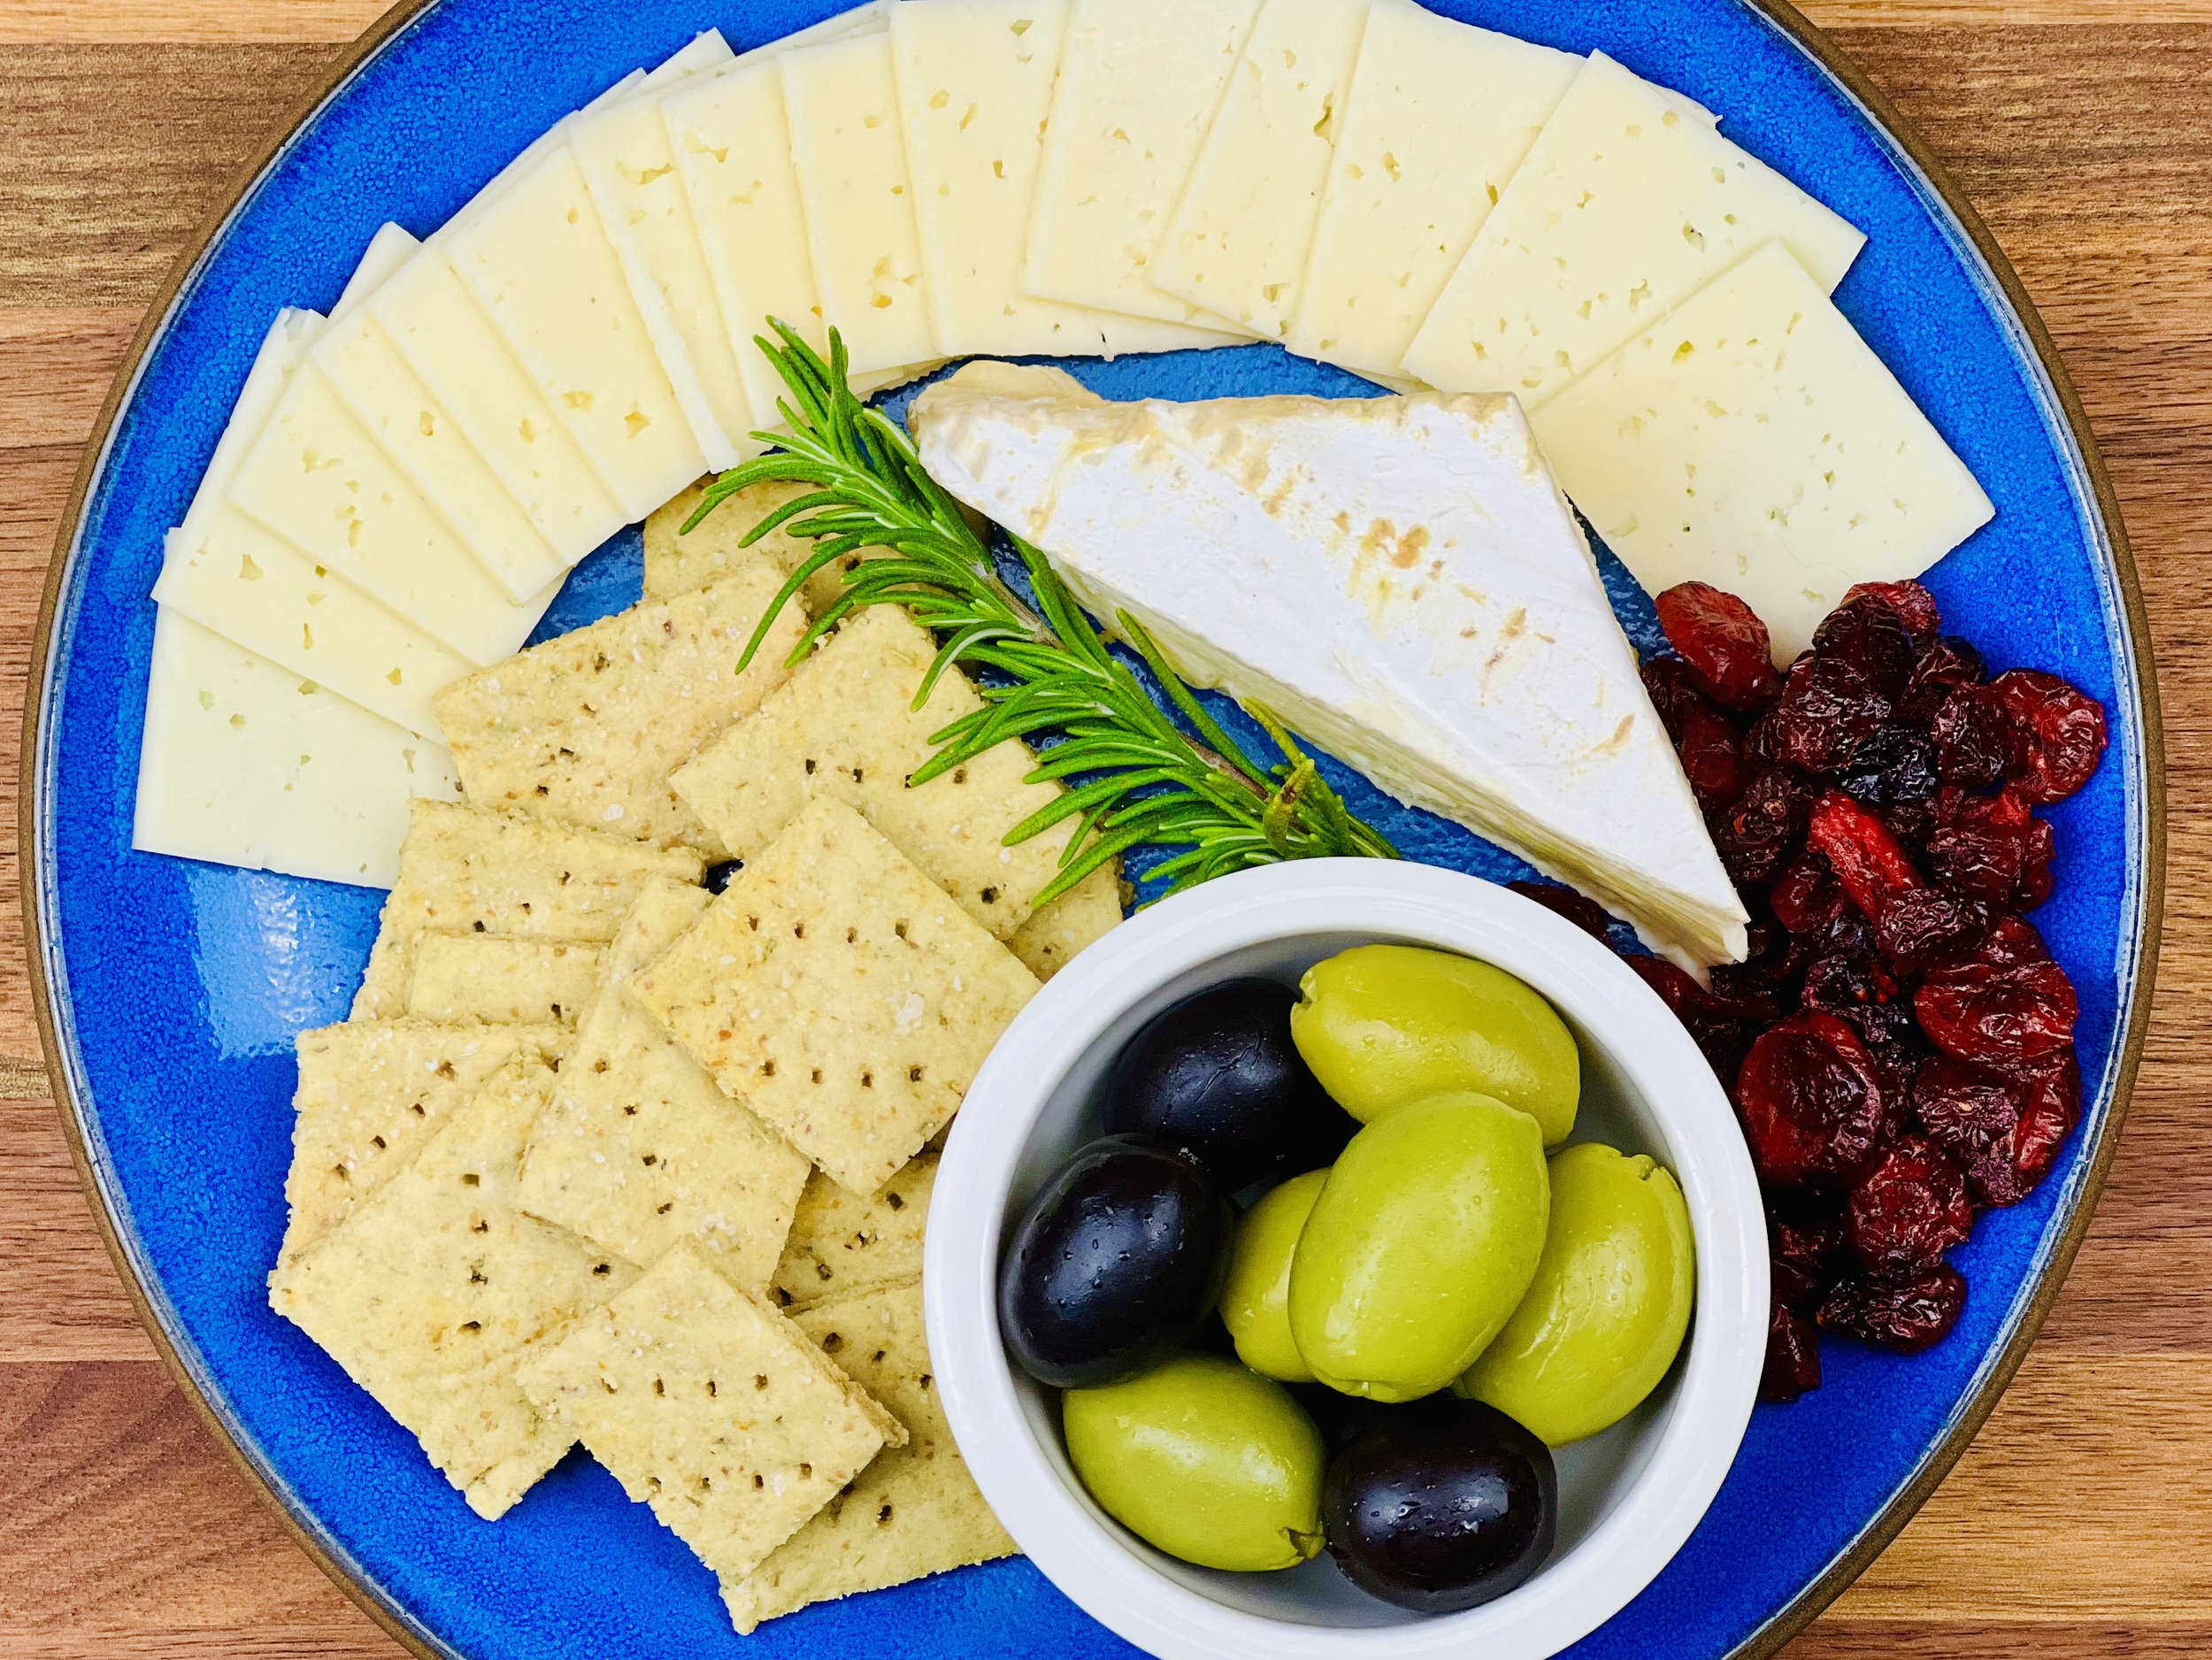
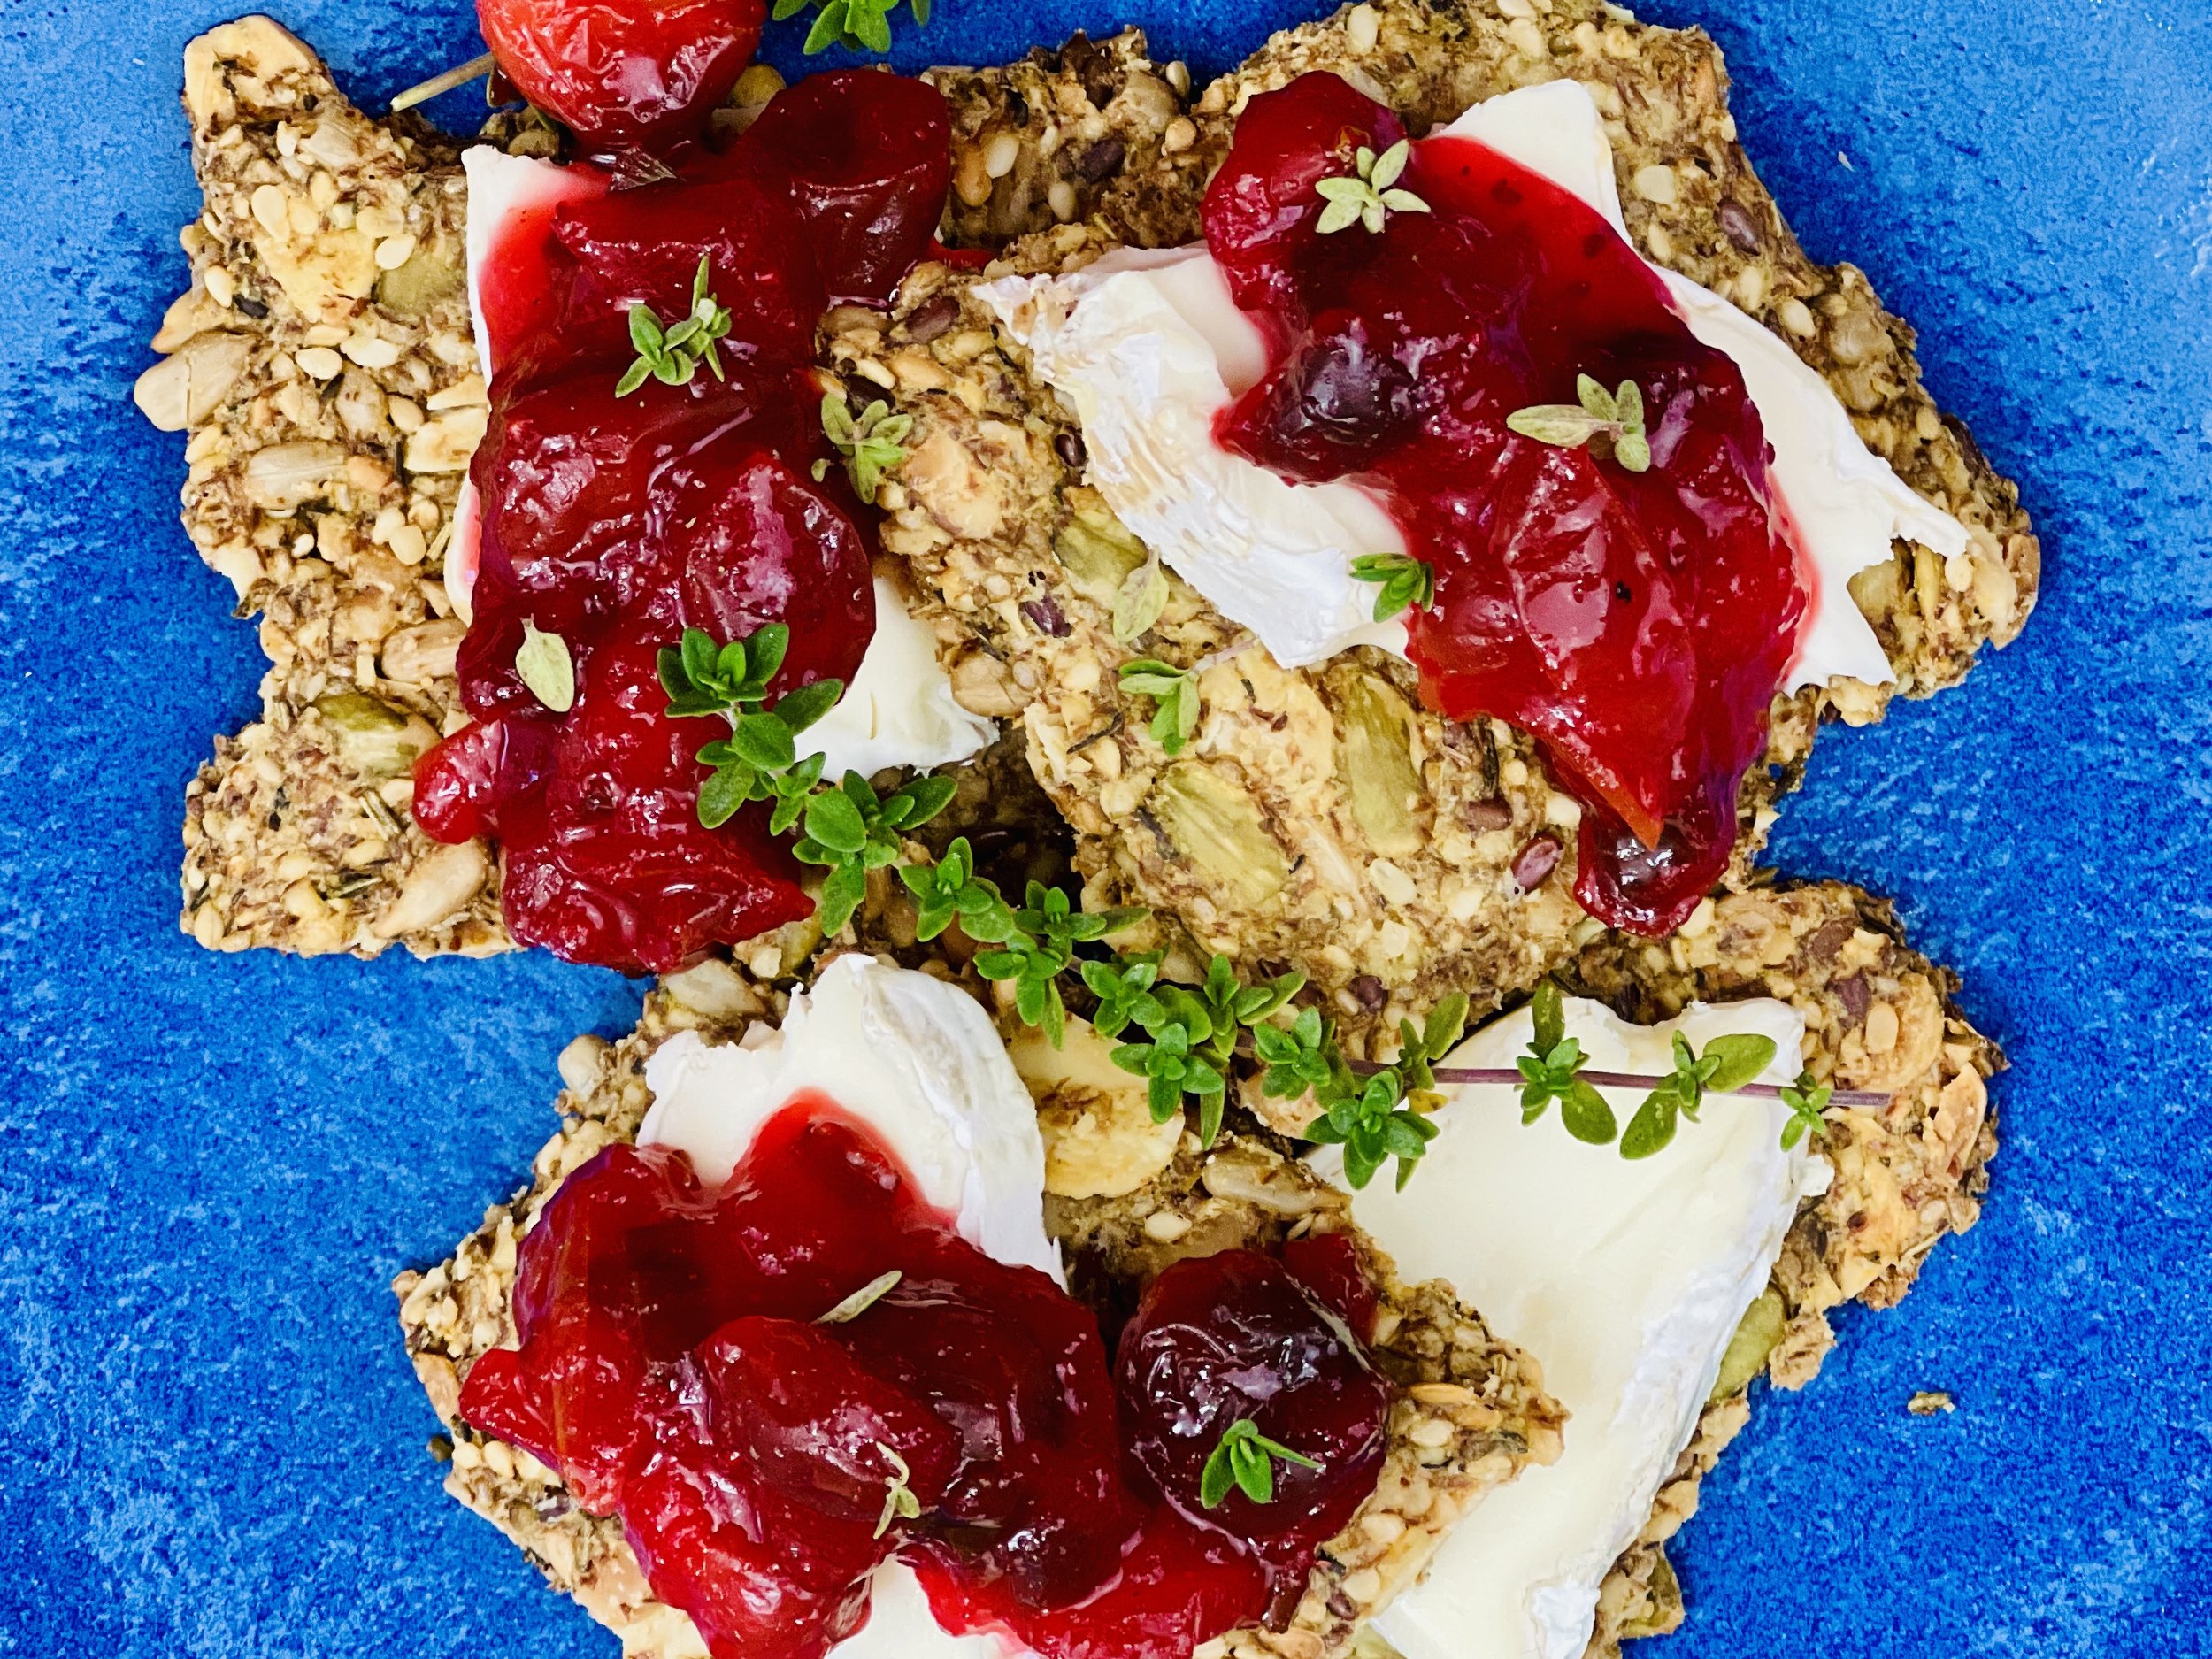

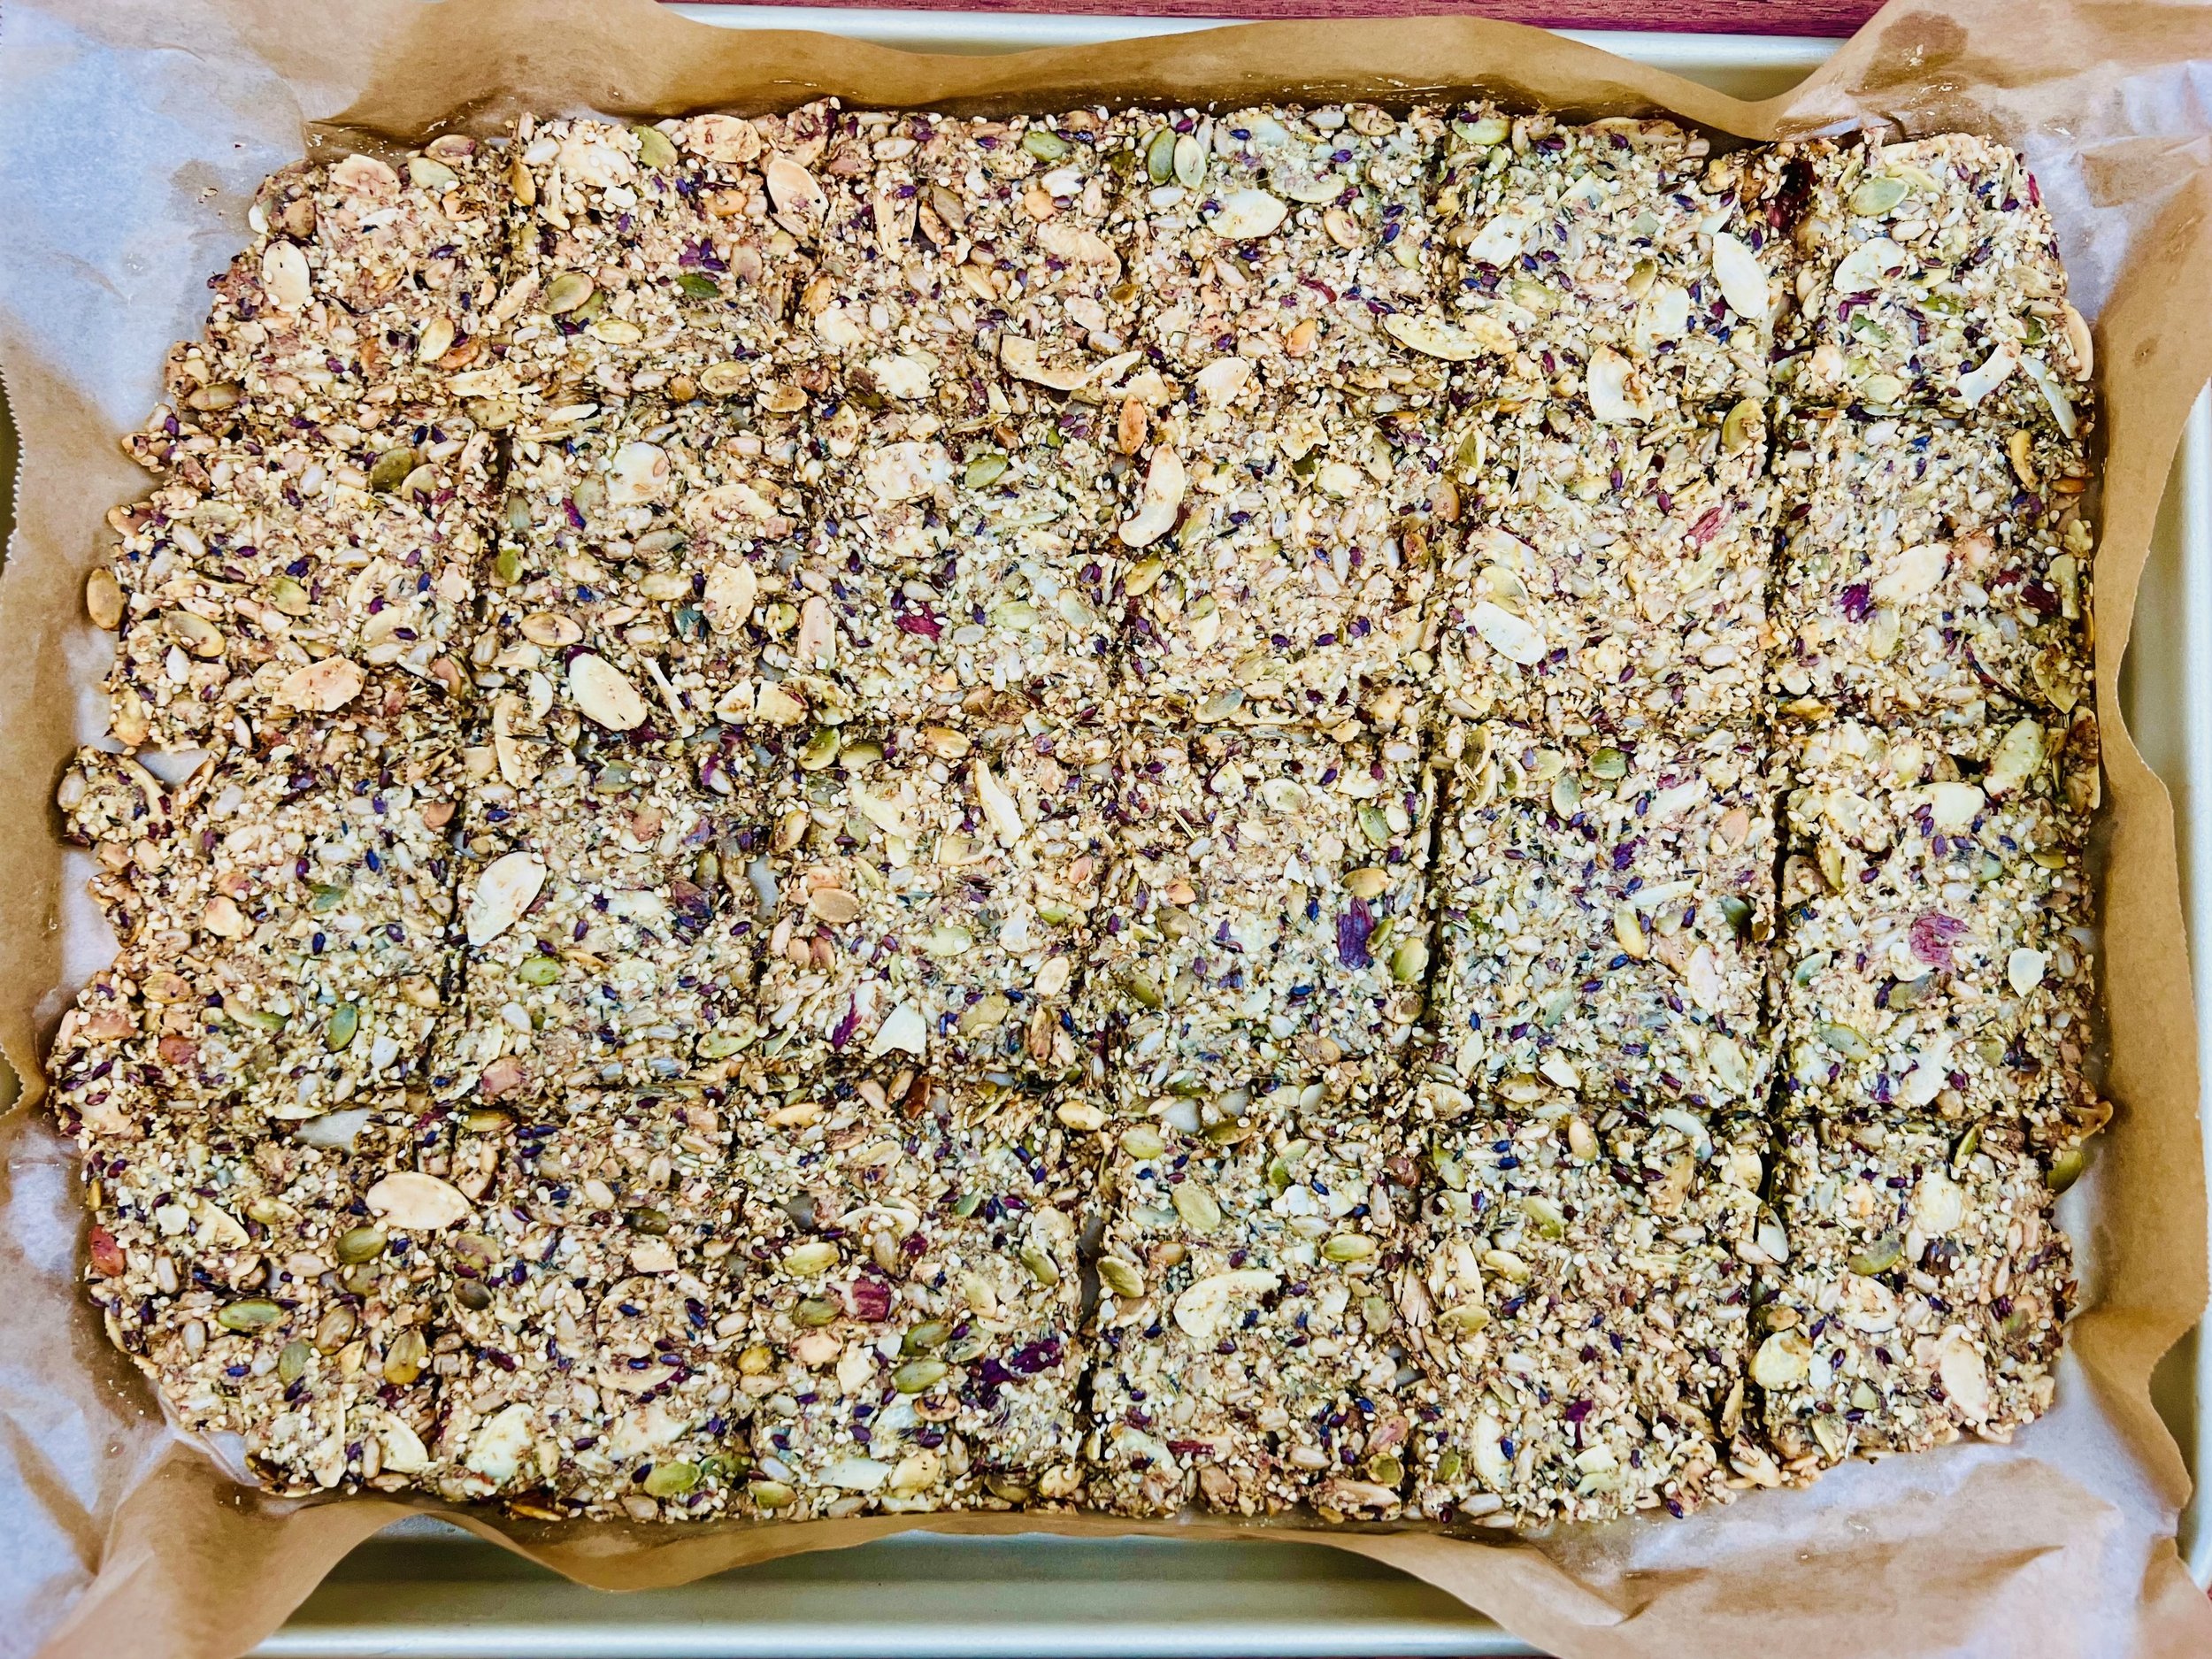









10 Minutes Prep • 50 Minutes Cook • Gluten-free • Dairy-free • Low FODMAP • Serving size 3-4 crackers