Deliciously Low FODMAP

Inspire yourself with hundreds of delicious low FODMAP recipes, tips, and tools, and enjoy the abundance that is yours even when you have IBS.
Use the buttons and filters to find something specific or browse the complete collection for inspiration.
Discover a treasure trove of recipes with my FREE recipe club! Get new ideas delivered straight to your inbox every week.
Deliciously Low FODMAP is a trademark of IBS Game Changer, LLC
Filter to find Recipes and Tools
More Filtering Options
- All 730
- Appetizer 50
- BBQ 46
- Bowl 32
- Breakfast 58
- Cocktails 13
- Collection 1 58
- Collection 10 27
- Collection 11 30
- Collection 12 27
- Collection 13 31
- Collection 14 29
- Collection 15 31
- Collection 16 34
- Collection 17 31
- Collection 18 33
- Collection 19 36
- Collection 2 32
- Collection 20 33
- Collection 21 33
- Collection 22 40
- Collection 23 12
- Collection 24 1
- Collection 3 28
- Collection 4 29
- Collection 5 30
- Collection 6 32
- Collection 7 31
- Collection 8 31
- Collection 9 32
- Condiments 6
- Crock Pot 4
- Dessert 107
- Diabetes Game Changer Exception Protocol Contains Alcohol 11
- Diabetes Game Changer Exception Protocol Contains Flour 109
- Diabetes Game Changer Exception Protocol Contains Flour AND Sugar 77
- Diabetes Game Changer Exception Protocol Contains Sugar 49
- Diabetes Game Changer First Four Weeks 363
- Dinner 331
- Drink 8
- Easter 1
- Free Guide 17
- Gluten-free 591
- Gut Microbiome 2
- Guthealth 3
- Holidays 69
- IBS Triggers 4
- Keto Friendly 124
- Lactose-Free 175
- Low FODMAP Diet 716
IBS Awareness Month Tip #3
IBS is the most common functional gastrointestinal (GI) disorder out there. It affects men and women, adults and children. Are you one of them? Make peace with IBS. Don’t let it run your life. Be an IBS Game Changer.
IBS is the most common functional gastrointestinal (GI) disorder out there. It affects men and women, adults and children. Are you one of them? Make peace with IBS. Don’t let it run your life. Be an IBS Game Changer.

Most of us who have IBS experience significant, negative, daily impacts on our lives. And most of us who have IBS have no idea how to change that.
That’s exactly why I developed the IBS Game Changer program. Because I did all the research and all the testing and I developed a solution that works.
If you’re at your wit’s end with your symptoms running your life please check out the IBS Game Changer program. It’s not just a game-changer, it’s a life-changer.
Our promise to you: You will feel better in less than eight weeks. You will have the knowledge you need to feel better for the rest of your life. And, if you do not see results in eight weeks, we will give you your money back.*
*As explained in program agreement
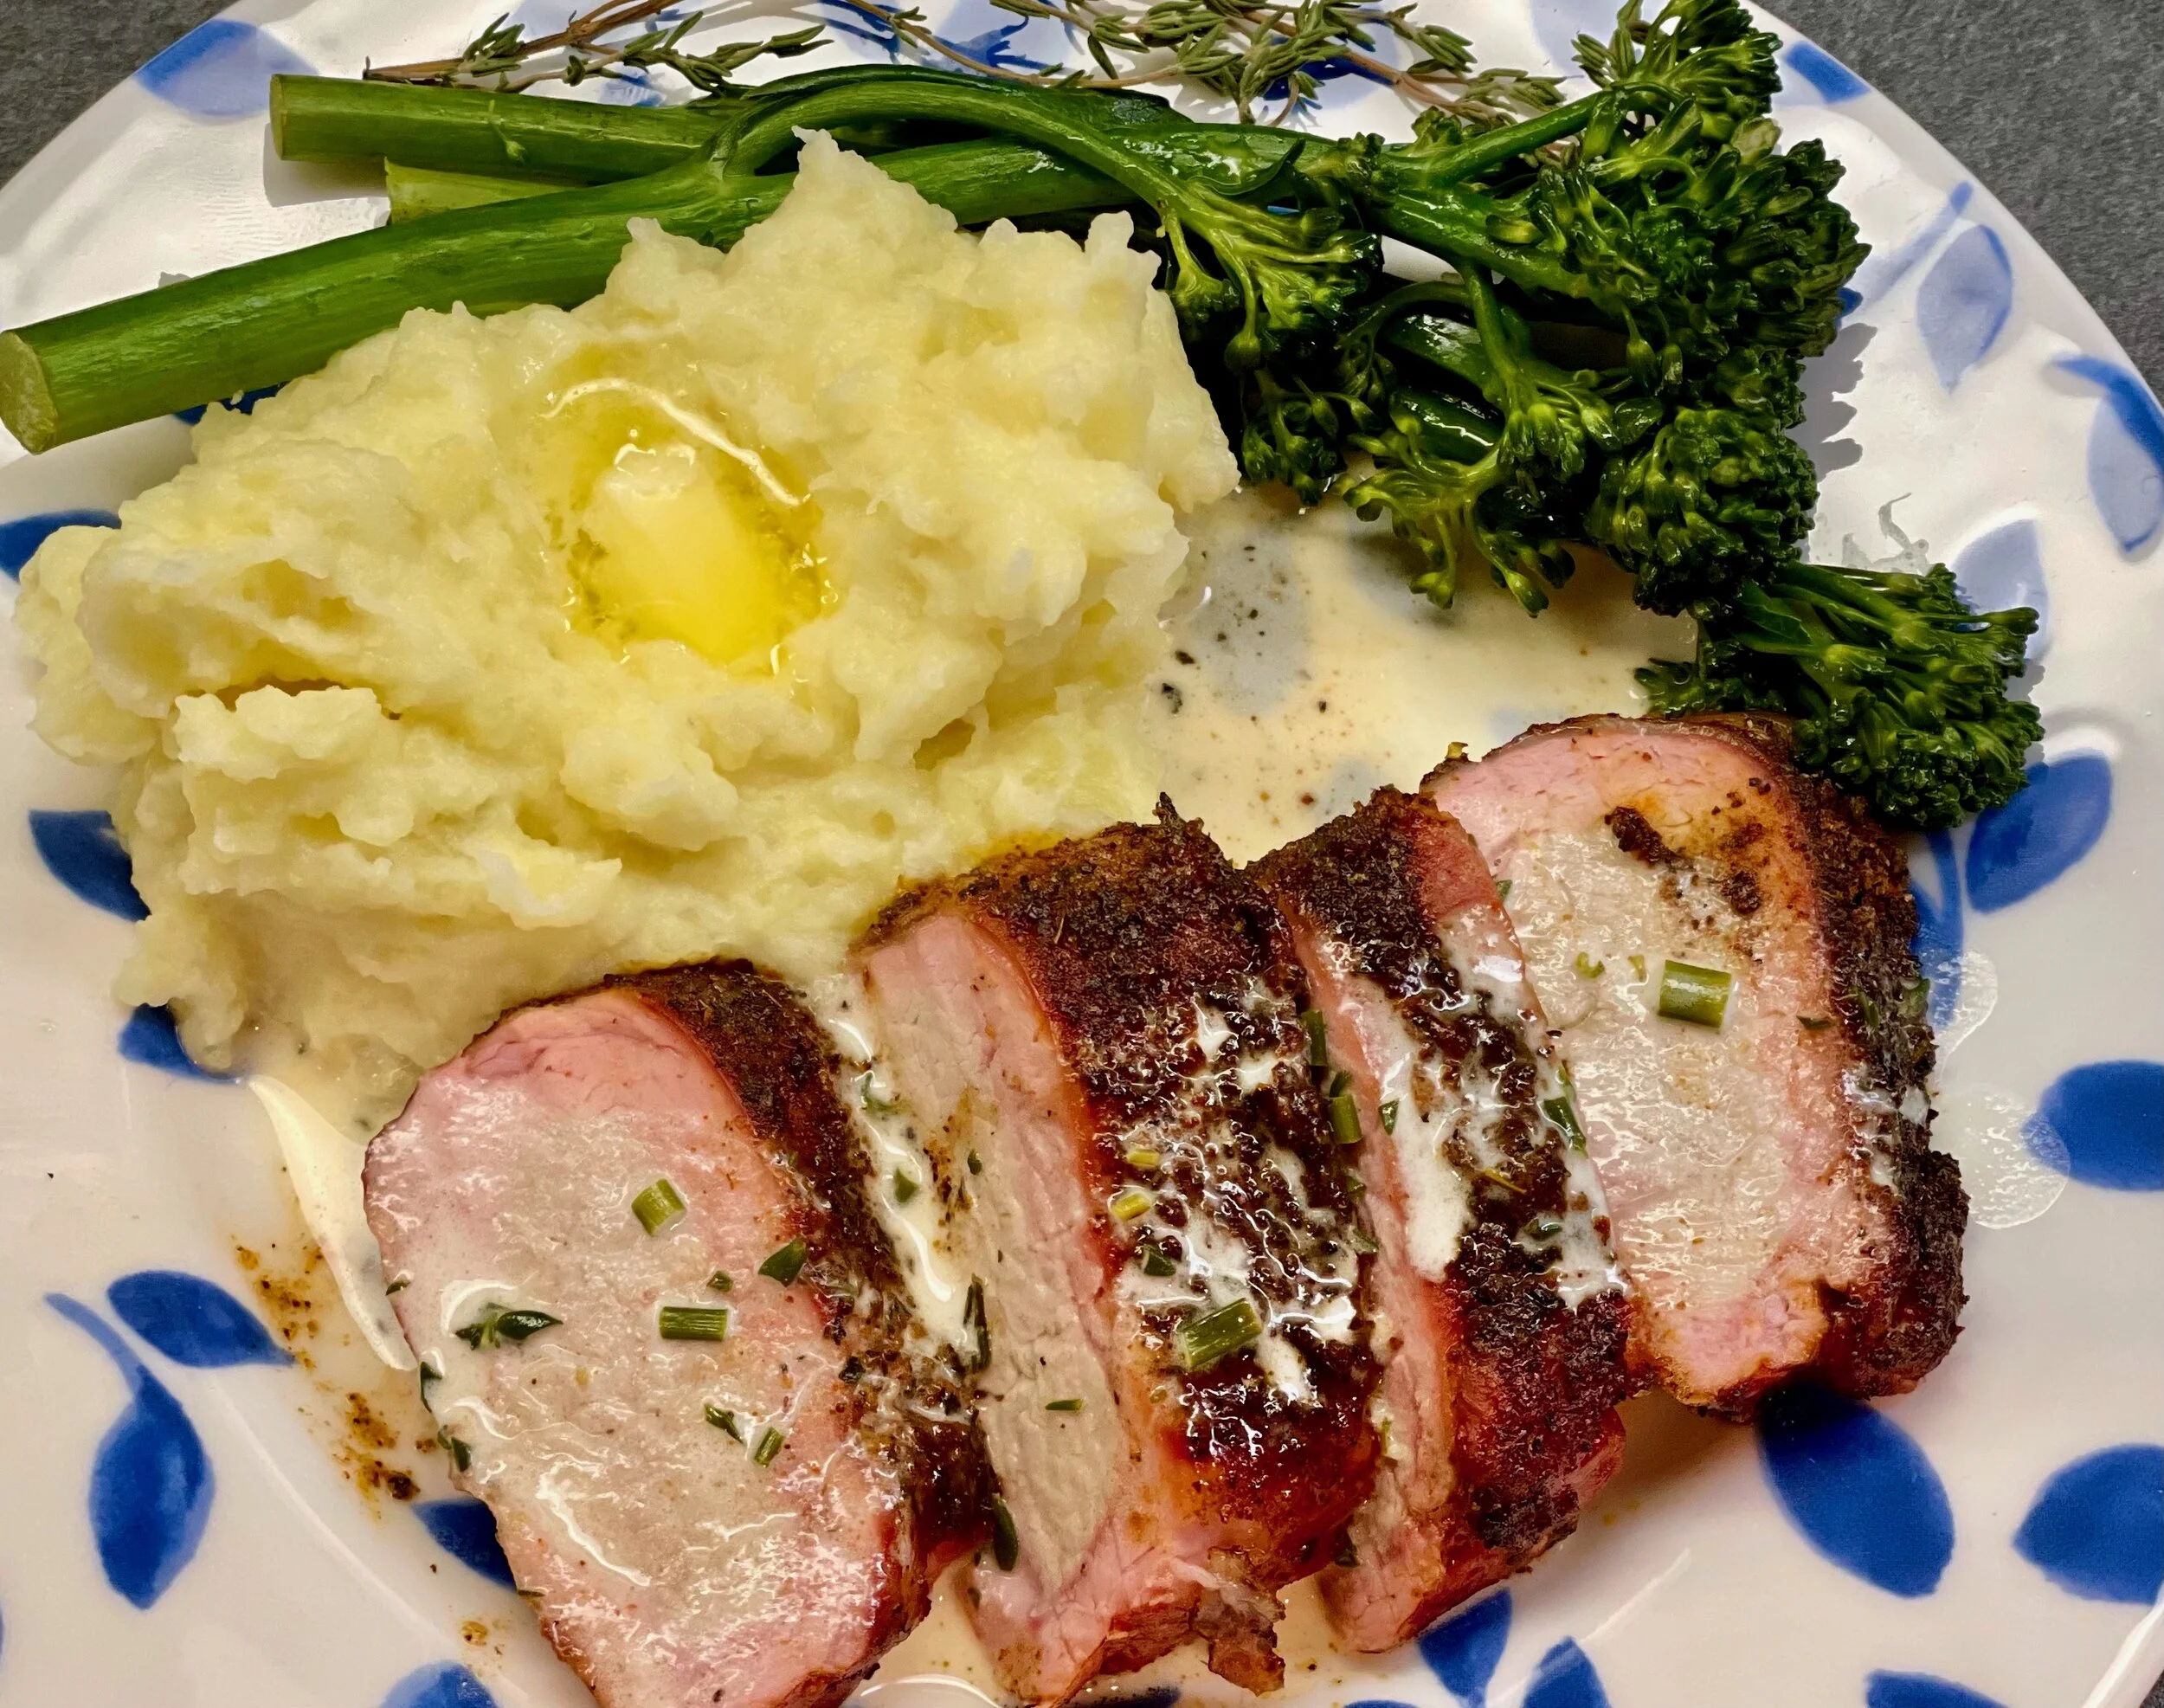
Roasted pork tenderloin with white wine cream sauce (Low FODMAP)
10 minutes prep • 60 minutes grill or 3+ hours smoker • Gluten-free • Low FODMAP • Serves 4 - 6
10 minutes prep • 60 minutes grill or 3+ hours smoker • Gluten-free • Low FODMAP • Serves 4 - 6 • This pork tenderloin is flavorful and crispy on the outside, juicy and tender on the inside. Served with our white wine cream sauce, this may just be our favorite pork tenderloin anywhere!
INGREDIENTS:
Two 1-pound pork tenderloins (see pro tip)
2 tablespoons garlic-infused olive oil
2 teaspoons basil
2 teaspoons oregano
1 teaspoon marjoram
2 teaspoons garlic scape powder
2 teaspoons cumin
2 teaspoons salt
2 teaspoons chili powder
1 teaspoon smoked paprika (optional but highly recommended)
1/2 teaspoon black pepper
2 tablespoons dark brown sugar
DIRECTIONS:
Pierce tenderloins all over with a fork then rub the garlic-infused olive oil onto all sides of the meat.
Make your rub by whisking together the remaining ten dry ingredients. Sprinkle rub mixture all over tenderloin(s), patting it onto the surface of the meat on all sides.
GRILL DIRECTIONS:
Preheat grill to medium-high (about 400 degrees F).
Grill for 20-30 minutes until the outside is browned and crispy but not burned, and the internal temperature of the thickest part registers at least 145 degrees F.
SMOKER DIRECTIONS:
Preheat smoker to 180 degrees.
Place tenderloins diagonally on the smoker grill and smoke at 180 degrees for 3 hours until outside is browned.
Increase the smoker temperature to 275 degrees F and cook until the internal temperature of the thickest part registers at least 145 degrees F. For 1-pound tenderloins, this should only take about 15 or 20 minutes.
OVEN-BAKE DIRECTIONS:
Preheat oven to 400 degrees and lightly grease a large baking/casserole dish.
Bake for 25-35 minutes until outside is browned and the internal temperature of the thickest part registers at least 145 degrees F.
Spoon any remaining juices from the pan over the slices for extra flavor and juiciness.
TO SERVE:
Allow meat to rest, covered with foil, on a cutting board for 5-10 minutes before slicing. Slice into 3/4-inch pieces.
Serve with our white wine cream sauce, mashed Yukon potatoes, and a vegetable of your choice.
Allow meat to rest, covered with foil, for 5-10 minutes before slicing. Slice into 3/4 - 1-inch pieces.
Serve with our white wine cream sauce, mashed Yukon potatoes, and a vegetable of your choice.
Enjoy!
Pro tips:
This recipe is pretty flexible and you can use 1-2 very small pork tenderloins, or one medium-large pork tenderloin OR you can double or even triple the ingredients for the seasonings and serve a LOT of people with very large tenderloins.
This post may contain affiliate links so you can easily purchase items listed on the page. There is no increased cost to you for purchasing items through these links so feel free to use them!
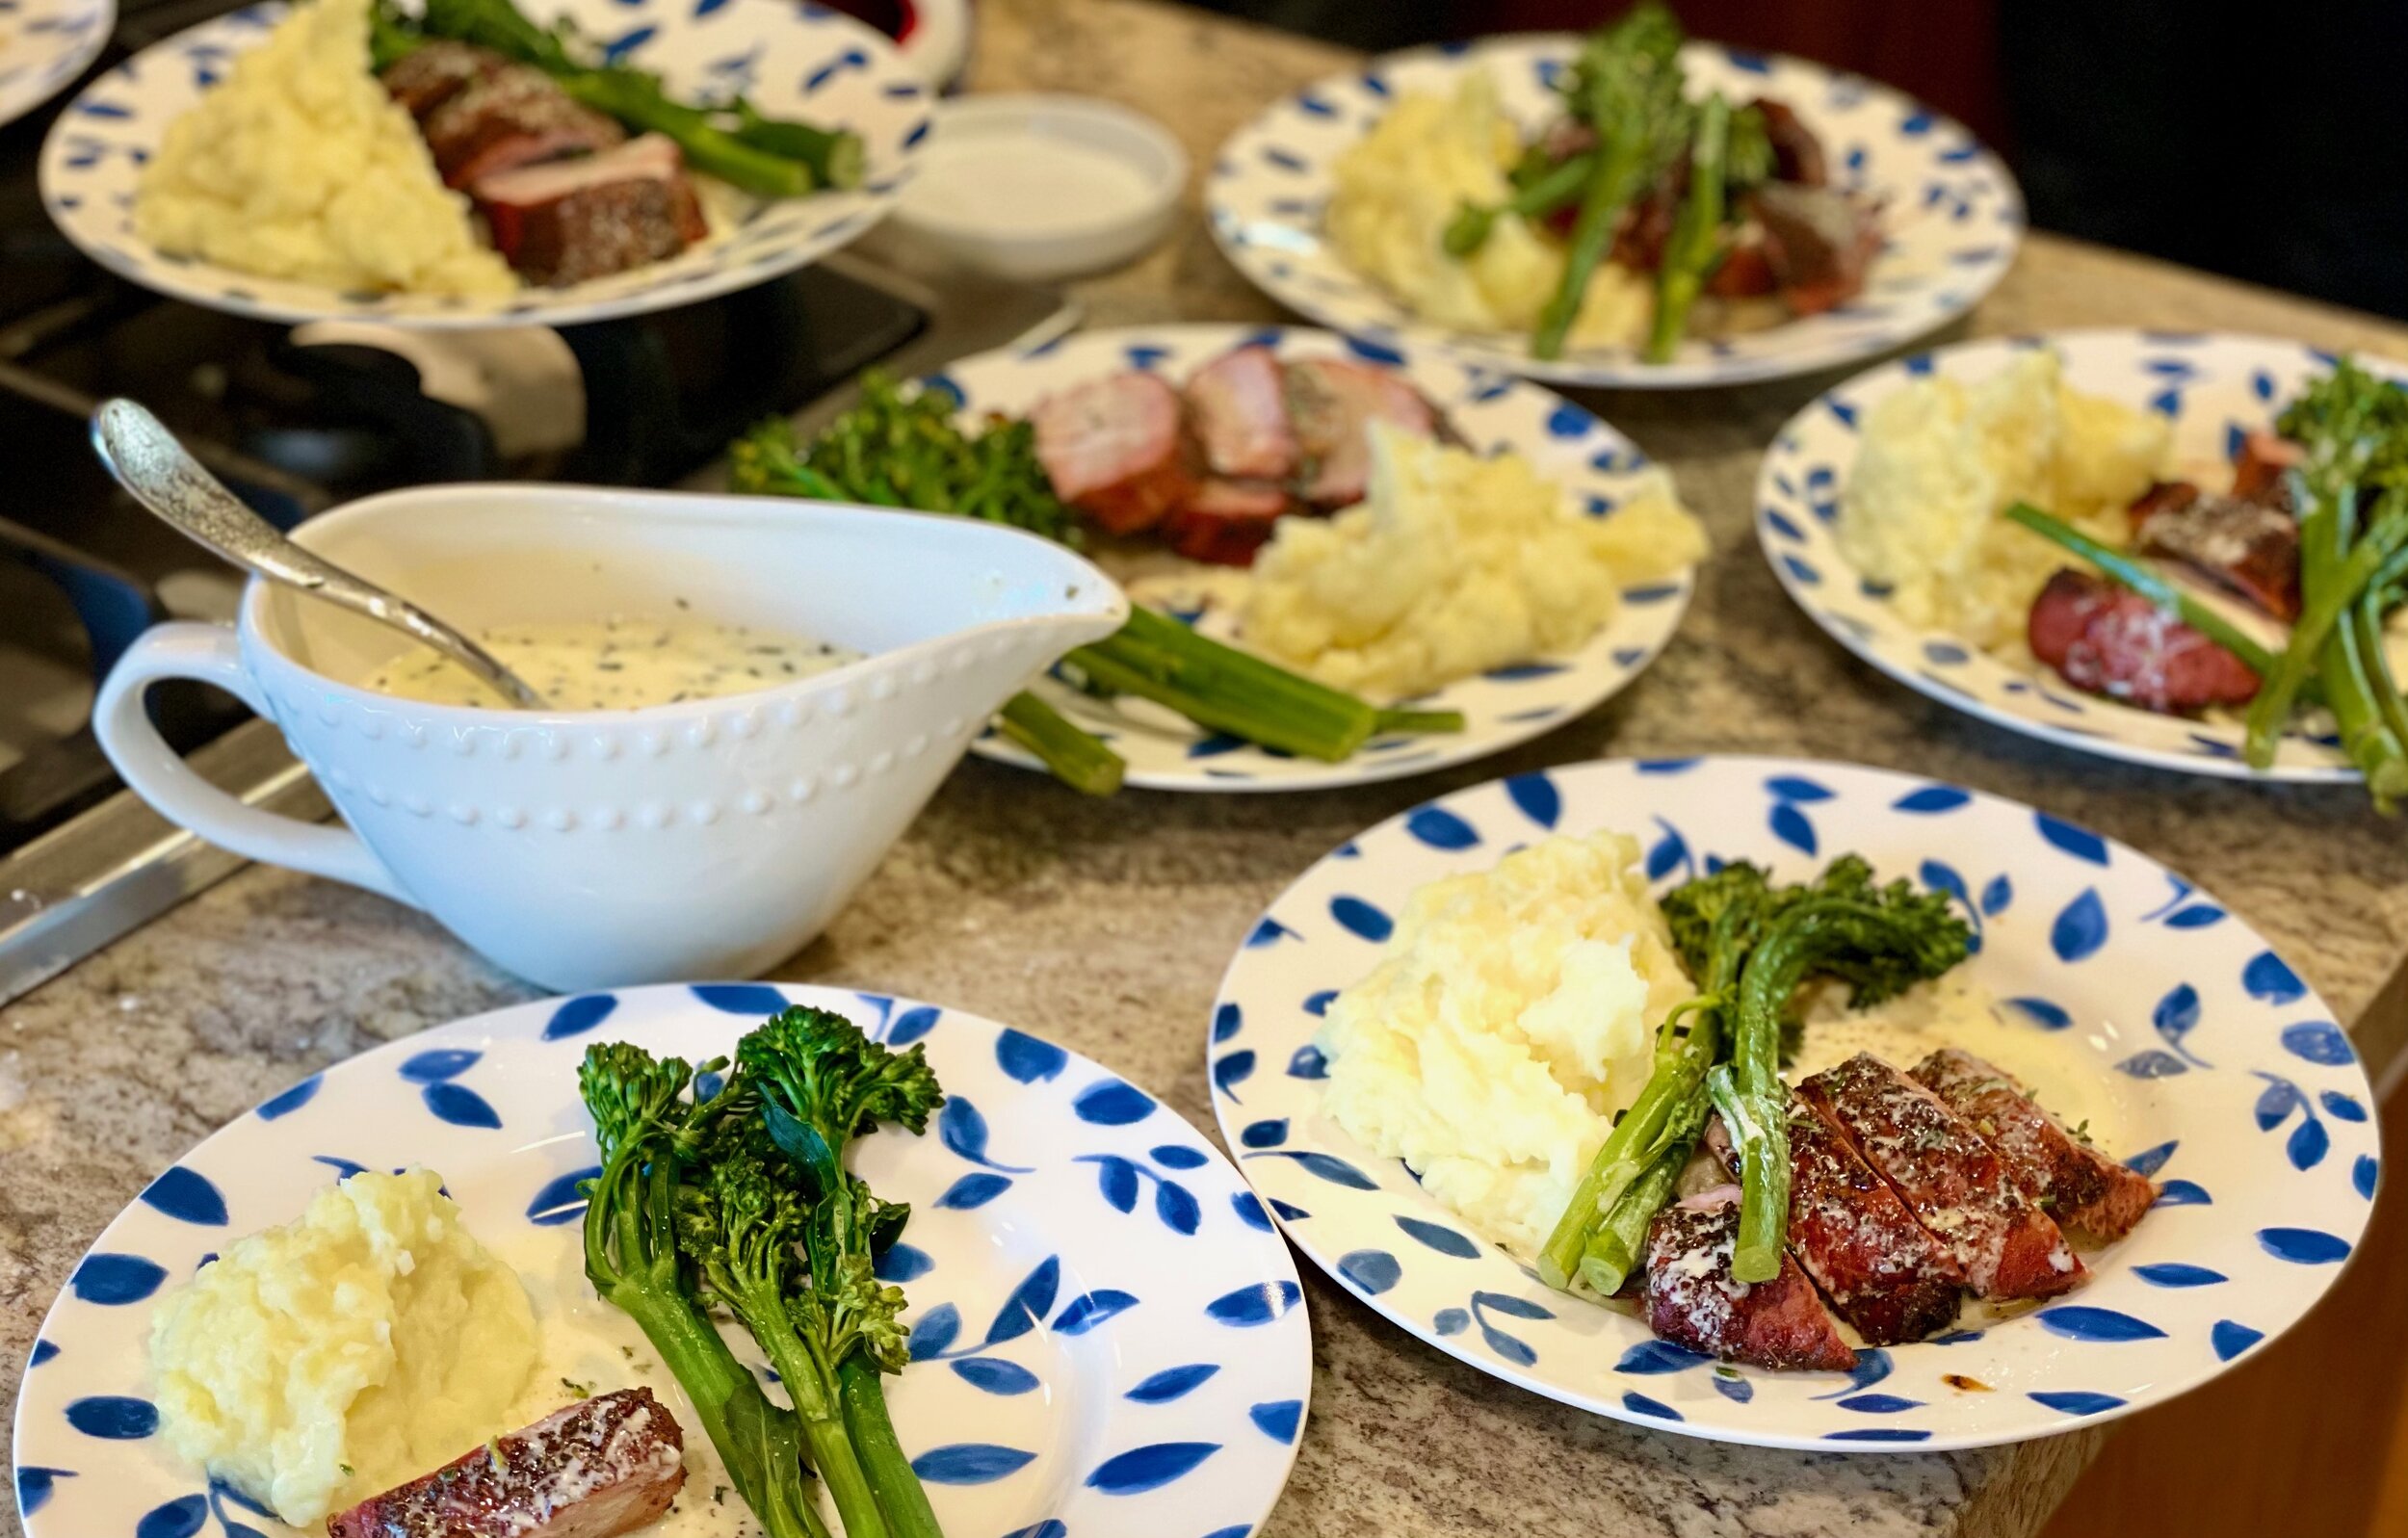
White wine cream sauce with fresh herbs (low FODMAP)
15 minutes • Gluten-free • Low FODMAP • Makes about 1 cup •
15 minutes • Gluten-free • Low FODMAP • Makes about 1 cup
This white wine cream sauce is quick to make and tastes wonderful with meat, fish, potatoes, and more. You can make it ahead and store it in the fridge to save time. It’s worth the extra effort to have a delicious low FODMAP cream sauce with your meat.
Ingredients
1 tablespoon butter
1 tablespoon each minced chives, and fresh thyme or rosemary
1/2 cup white wine (such as sauvignon blanc or pinot grigio)
1 cup heavy cream (or lactose-free half and half for a lighter sauce)
1/2 cup freshly grated parmesan cheese
1/4 teaspoon salt plus additional salt and pepper to taste
Directions
(1) Prepare cream sauce: Melt butter in a medium-size skillet over medium-high heat. Add chives or green onions, and saute for about 1 minute. Add white wine and cook for about 30 seconds, then add the cream or half and half.
(2) Cook cream sauce: Cook for about 10 - 12 minutes over medium heat stirring frequently.
(3) Finish: Add salt and chopped thyme or rosemary and the grated parmesan cheese. Stir until the cheese is incorporated (about a minute). Season with more salt and pepper if needed.
Make-ahead note: At this point, you may set the sauce aside and then reheat it when you are ready to serve.
(4) Serve: Transfer to serving pitcher and serve with your favorite meat such as our roasted pork tenderloin.
Eat and enjoy every bit because you can!
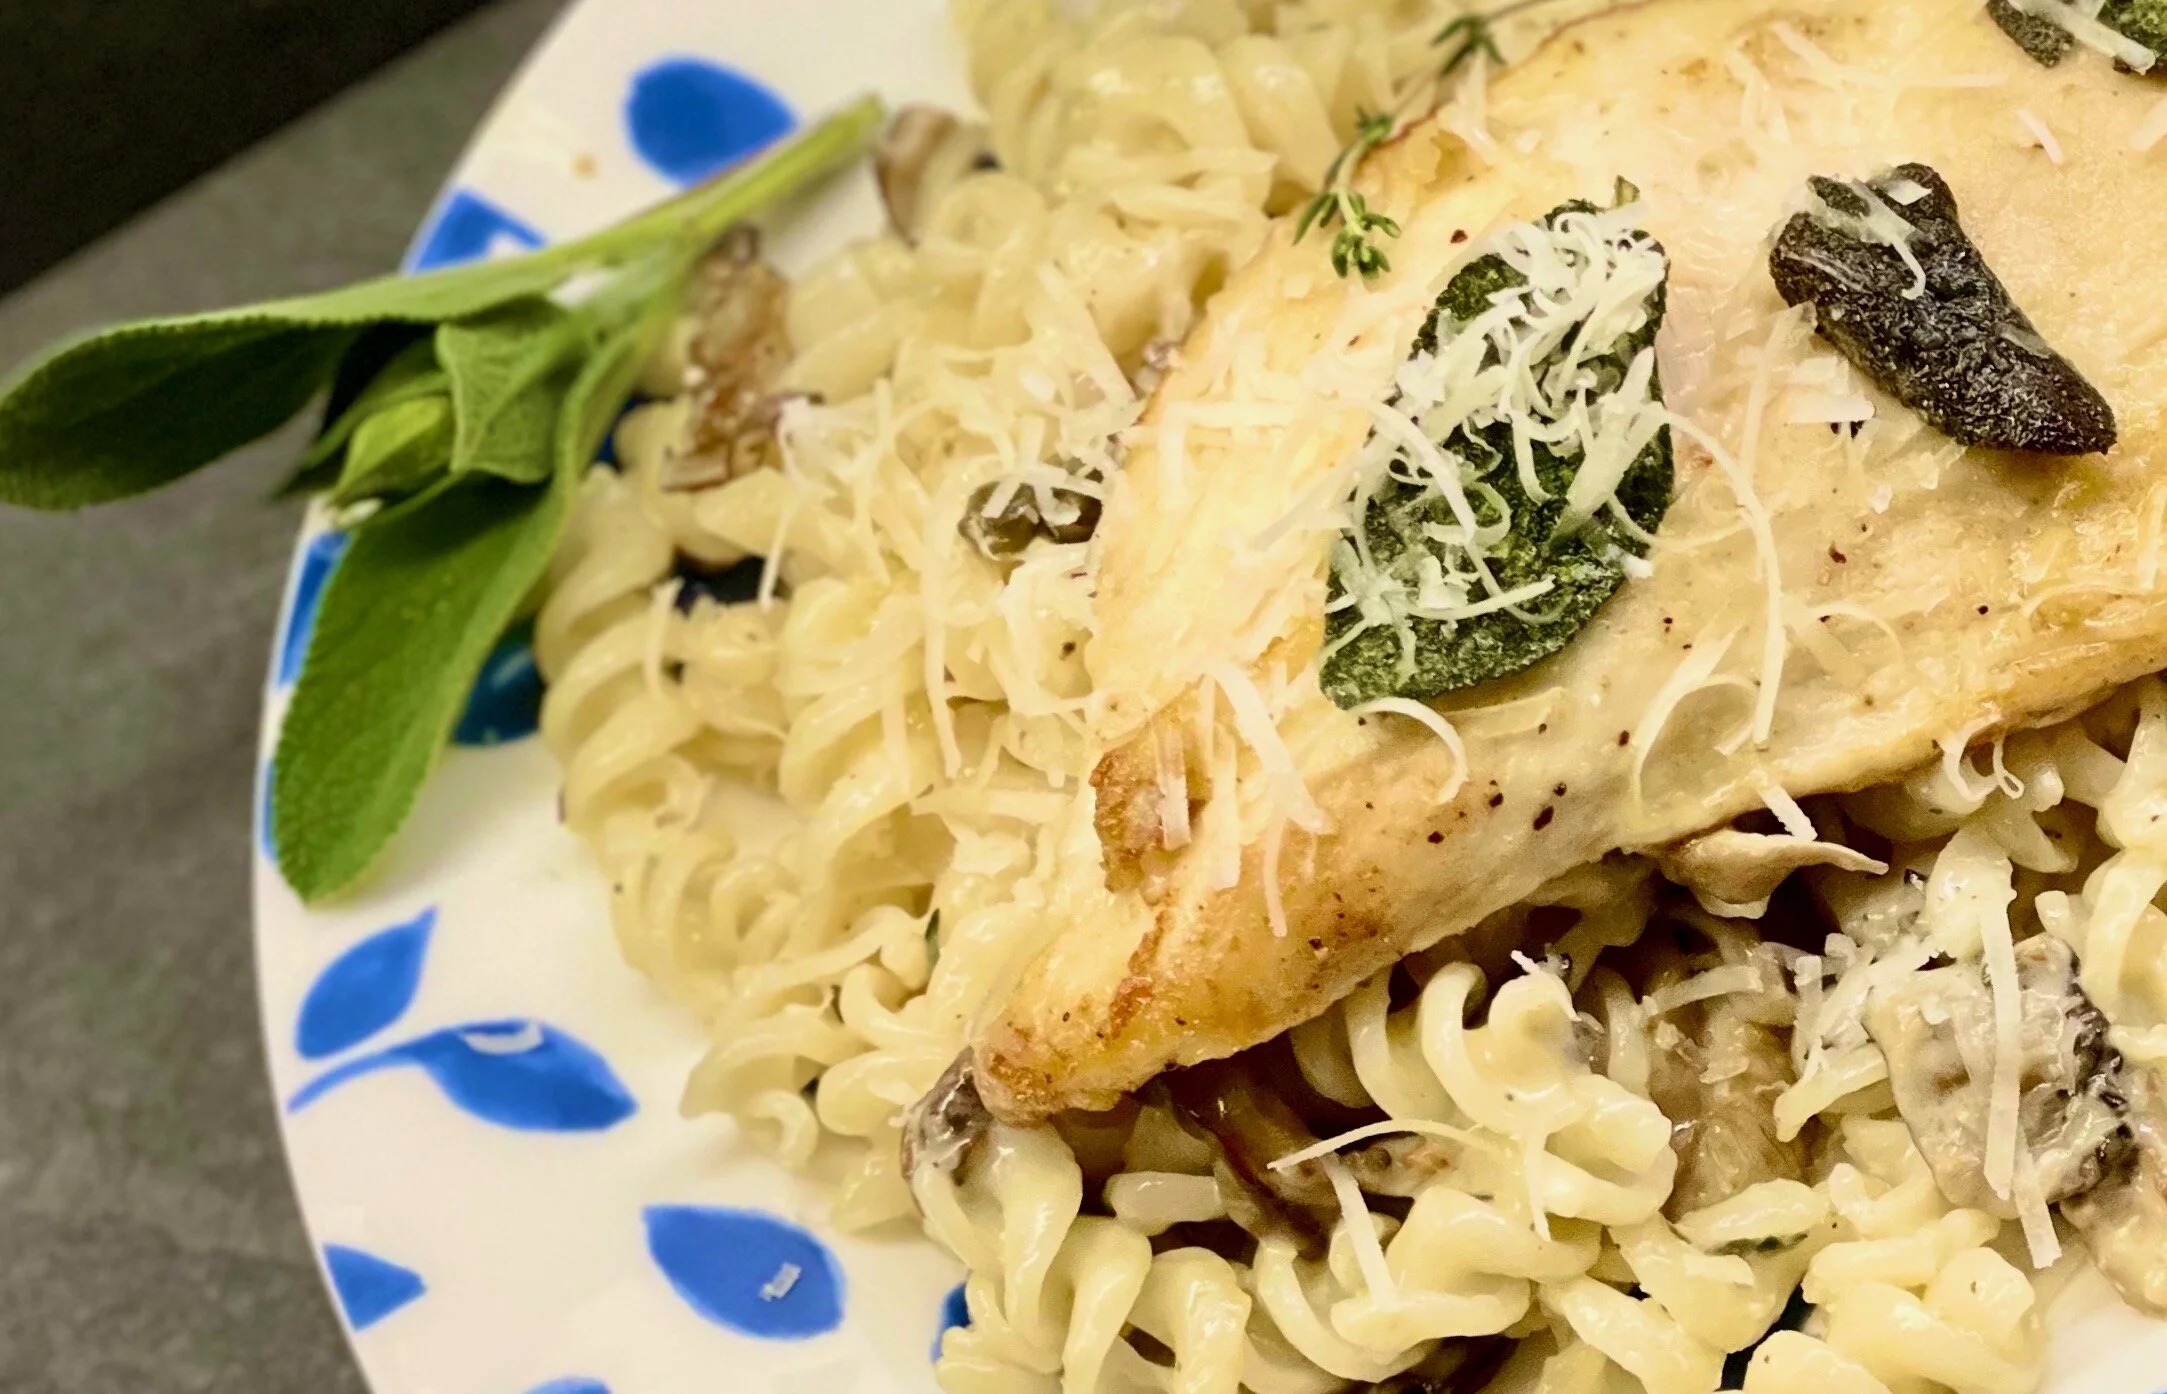
Chicken with crispy sage, mushrooms, and creamy pasta (low FODMAP)
45 minutes • Gluten-free • Low FODMAP • Serves 4
45 minutes • Gluten-free • Low FODMAP • Serves 4 • Crispy sage and creamy pasta are a wonderful combination in this quick and delicious chicken recipe. This is easy enough to make for a weeknight dinner or plate and serve this for guests. They’ll love it.
INGREDIENTS:
1 pound gluten-free pasta
2 boneless chicken breasts, sliced in half horizontally
1/3 cup gluten-free flour
4 tablespoons garlic-infused olive oil
4 tablespoons salted butter
12 fresh sage leaves
1/2 cup dry white wine, such as Pinot Grigio or Sauvignon Blanc
1/3 cup fresh-squeezed lemon juice
1 tablespoons capers drained
FOR THE PASTA:
2 tablespoons garlic-infused olive oil
4 cups oyster mushrooms, chopped
2 tablespoons fresh thyme leaves
1 pound gluten-free pasta
1/3 cup lactose-free whole milk or heavy cream
1/2 cup freshly grated parmesan cheese
1/2 cup freshly grated manchego cheese
DIRECTIONS:
Season the chicken with salt and pepper. Place the flour in a shallow bowl and dredge the chicken through the flour mix, pressing gently to adhere.
Heat 2 tablespoons olive oil in a large skillet set over medium-high heat. When the oil is shimmers, add the chicken and sear on both sides until golden, about 3-5 minutes per side. Remove the chicken from the skillet.
To the same skillet, add the butter and sage. Sear the sage until crisp, about 1 minute. Remove the sage from the skillet and add to the plate with the chicken. Pour the wine and lemon juice into the skillet, cook for 1 minute. Add the capers and season with salt and pepper. Return the chicken to the skillet and simmer for 5-10 minutes or until warmed through.
Meanwhile, make the pasta. Bring a large pot of salted water to a boil. Cook the pasta according to package directions until al dente. Reserve 1/2 cup of the pasta cooking water. Drain.
Heat the olive oil in a large skillet over high heat. When the oil shimmers, add the mushrooms and season with salt and pepper. Cook undisturbed for 5 minutes or until golden. Stir and continue cooking until the mushrooms have caramelized for 3-5 minutes. Reduce the heat to medium. Add the thyme, and a pinch each of salt, and pepper.
Pour in the milk or cream and 1/2 cup pasta cooking water. Add the pasta, parmesan, and manchego cheese. Toss until the cheese is melted and the sauce is creamy.
To serve, divide the pasta among plates and top with the chicken and sage. Spoon over the pan sauce. Add a sprinkle of grated parmesan.
Enjoy!
Original recipe inspired by Tieghan Gerard, Half Baked Harvest
This post may contain affiliate links so you can easily purchase items listed on the page. There is no increased cost to you for purchasing items through these links so feel free to use them!
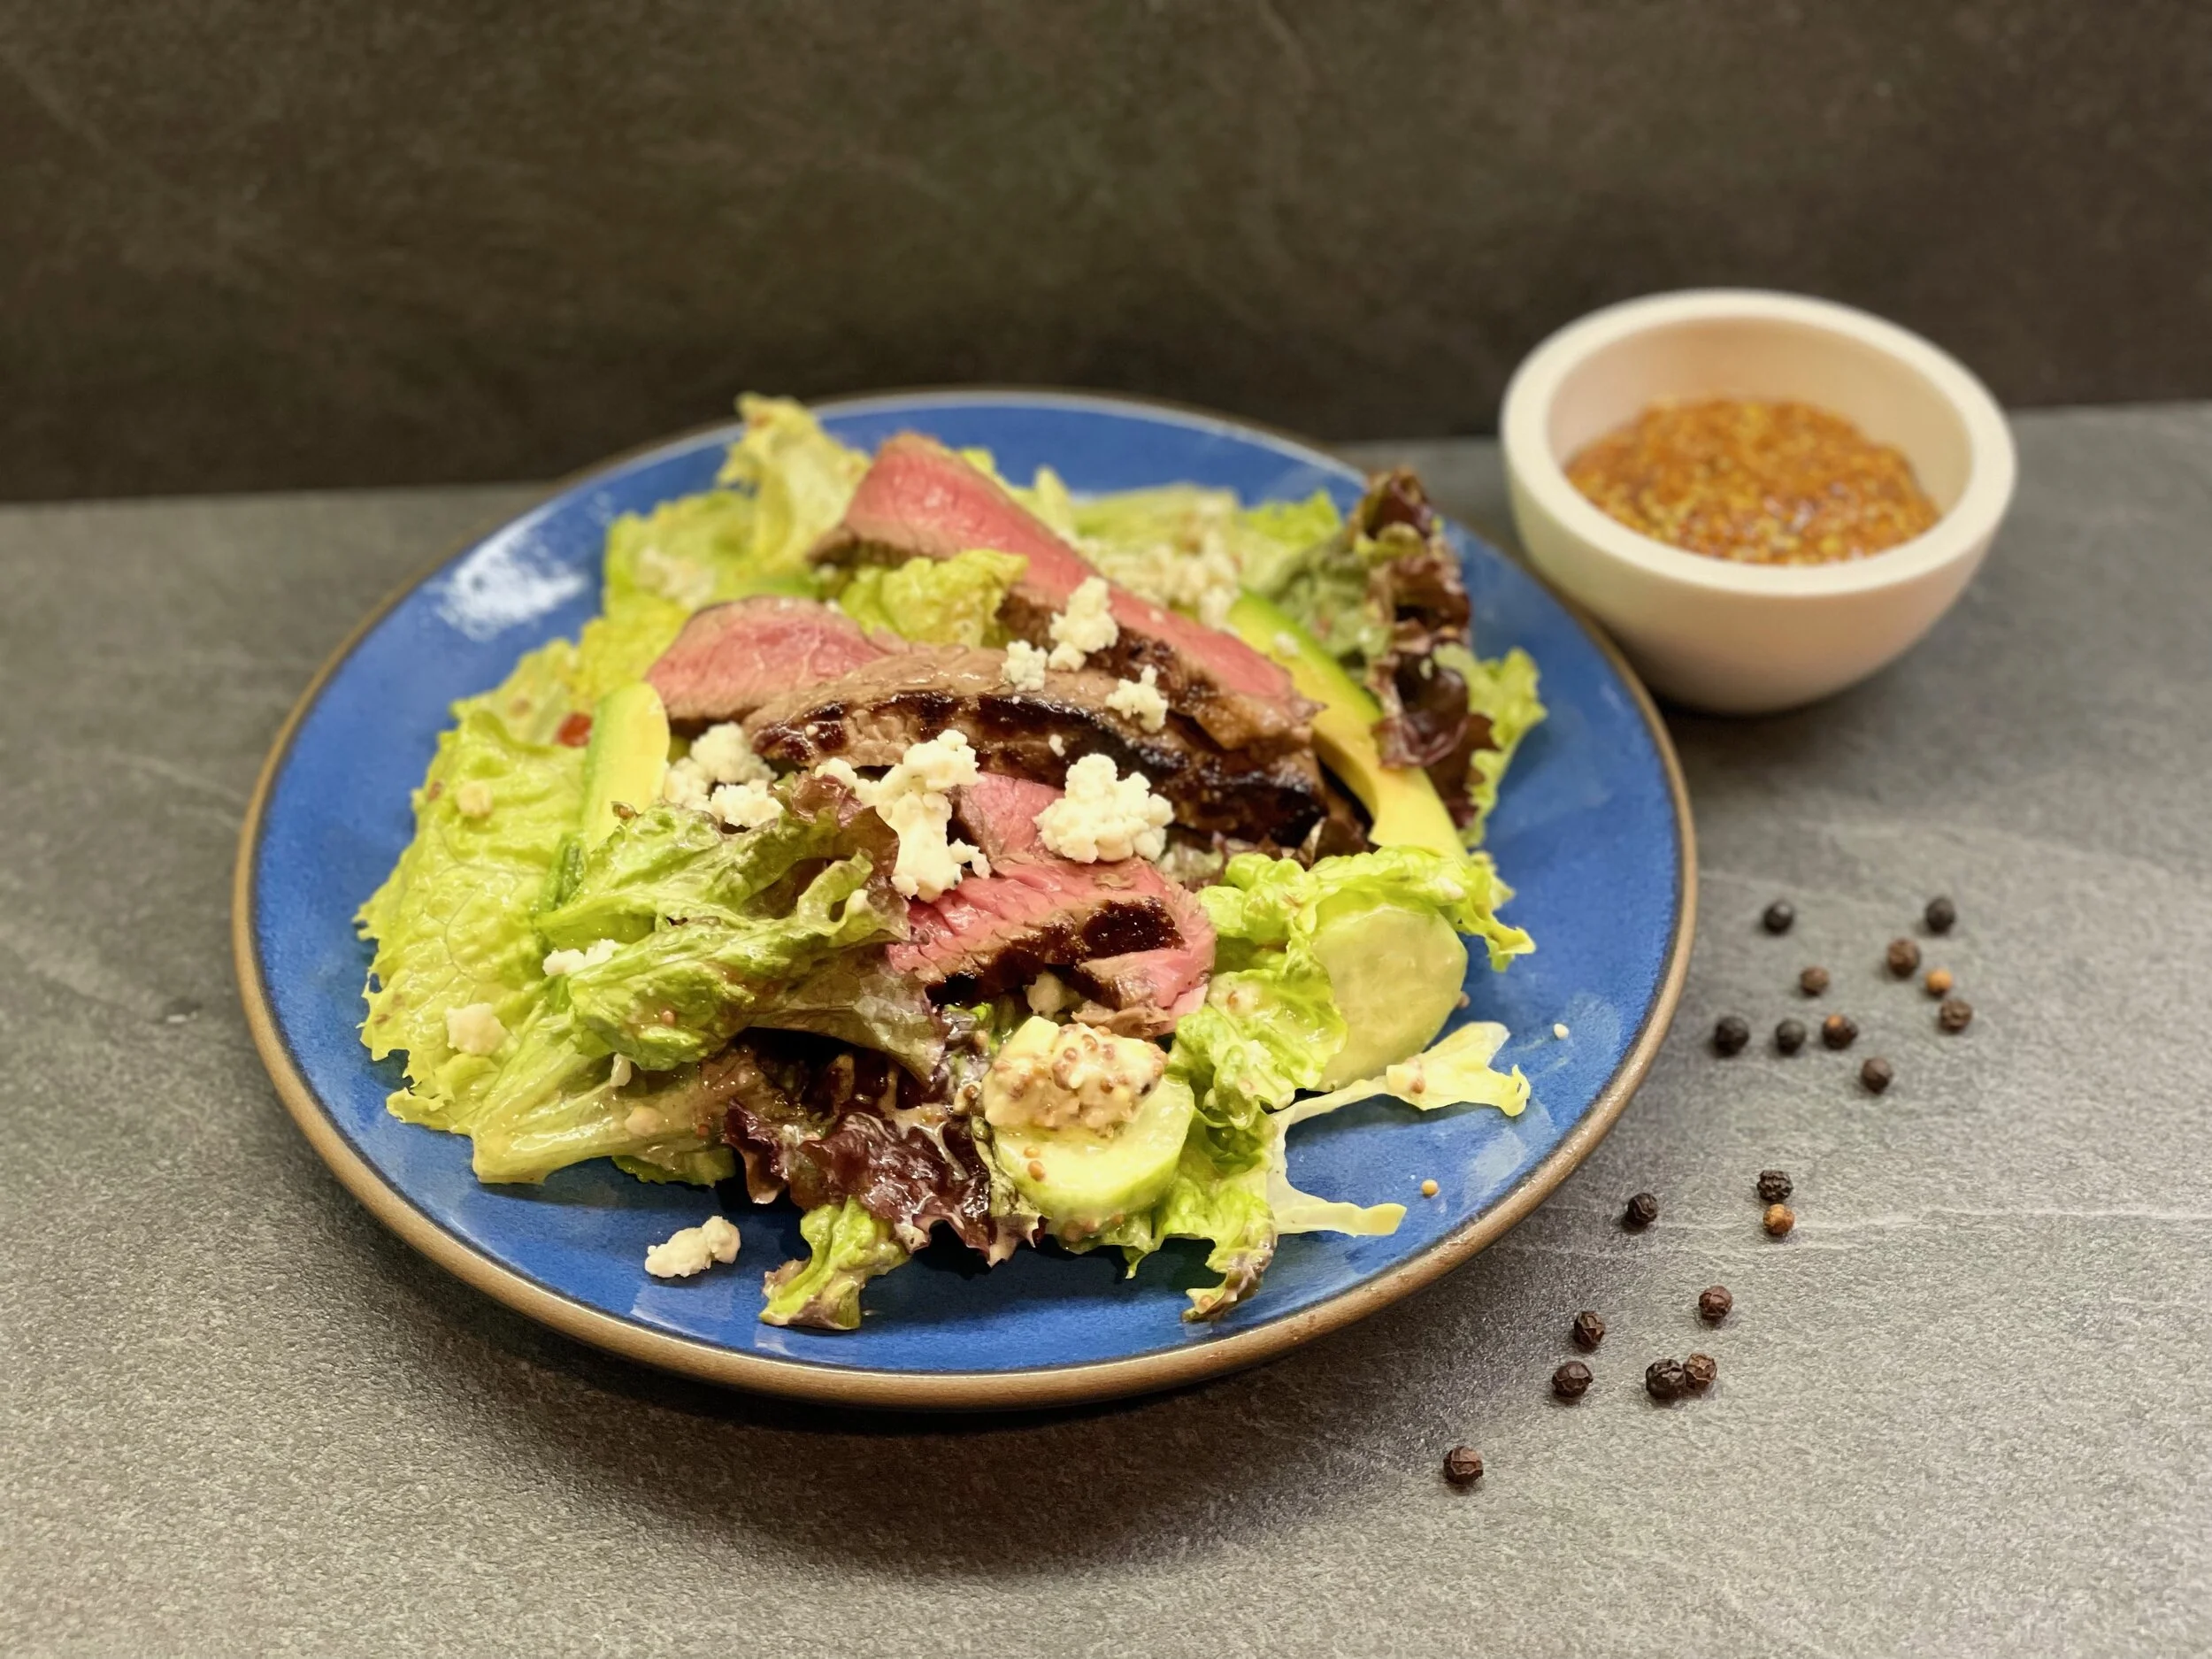
Steak salad with grainy mustard balsamic vinaigrette (low FODMAP)
30 minutes (plus marinating time) • Gluten-free • Low FODMAP • Serves 6
30 minutes (plus marinating time) • Gluten-free • Low FODMAP • Serves 6 • This amazing steak salad is so fantastic I’m excited to share it with you. The marinade (and marinating overnight) is key to the flavor of the steak so plan ahead and prep your marinade the night before you plan to serve this.
STEAK INGREDIENTS:
1.5-pound flank steak (grass-fed, organic)
3/8 cup red wine or sherry
3/8 cup garlic-infused olive oil
1 1/2 teaspoon black pepper
1 1/2 teaspoon kosher salt
1/4 cup balsamic vinegar
SALAD INGREDIENTS:
One head red leaf lettuce, butter lettuce, or romaine (whatever you prefer)
1 cup cherry tomatoes, cut in half
2-3 Persian cucumbers, sliced
3/4 avocado, sliced (1/8 avocado is low FODMAP serving)
Blue cheese crumbles (optional — but really good!)
BALSAMIC MUSTARD VINAIGRETTE INGREDIENTS:
1/2 tablespoon Dijon mustard
1/2 tablespoon grainy mustard
1/2 tablespoon balsamic vinegar
2 tablespoons olive oil
DIRECTIONS:
Prepare your grill for high, direct heat with one part of the grill for lower, indirect heat.
Remove the steak from the marinade and place it on the hot side of the grill. Grill for a minute or two on each side to get a good sear, then move the steak to the cooler side of the grill, cover with a foil “hat” and cook a few minutes more until done to your liking (120 to 125°F for rare, 130-140°F for medium-rare, and 145°F for medium).
When the steak has cooked to your preferred level of doneness, remove it from the grill and place it on a cutting board. Cover with your aluminum foil “hat” to hold in the heat while the steak rests for 10 to 15 minutes.
While the steak is resting, whisk the salad dressing ingredients in a small bowl. Thin the dressing with up to a tablespoon of water, as needed. Pour the dressing over the salad and toss.
Thinly slice the steak across the grain. Plate the salad with a few slices of steak over the top. Add the crumbled blue cheese and serve.
The salad dressing will keep for a few weeks in your fridge so feel free to make extra to have on hand for your dinner salads.
Enjoy!
This post may contain affiliate links so you can easily purchase items listed on the page. There is no increased cost to you for purchasing items through these links so feel free to use them!
IBS Awareness Month Tip #2
Approximately 20 - 40% of all visits to gastroenterologists are due to IBS symptoms. Don’t be a statistic. Be an IBS Game Changer.
Approximately 20 - 40% of all visits to gastroenterologists are due to IBS symptoms. Don’t be a statistic. Be an IBS Game Changer.

Most of us who have IBS have ended up in the emergency room at least once. And, most of us who have IBS have also ended up at the GI doctor more than once without any real help for our symptoms.
That’s exactly why I developed the IBS Game Changer program. Because I did all the research and all the testing and I developed a solution that works.
If you’re at your wit’s end with your symptoms running your life you should definitely check out my program. It’s not just a game-changer, it’s a life-changer.
Our promise to you: You will feel better in less than eight weeks. You will have the knowledge you need to feel better for the rest of your life. And, if you do not see results in eight weeks, we will give you your money back.*
*As explained in program agreement
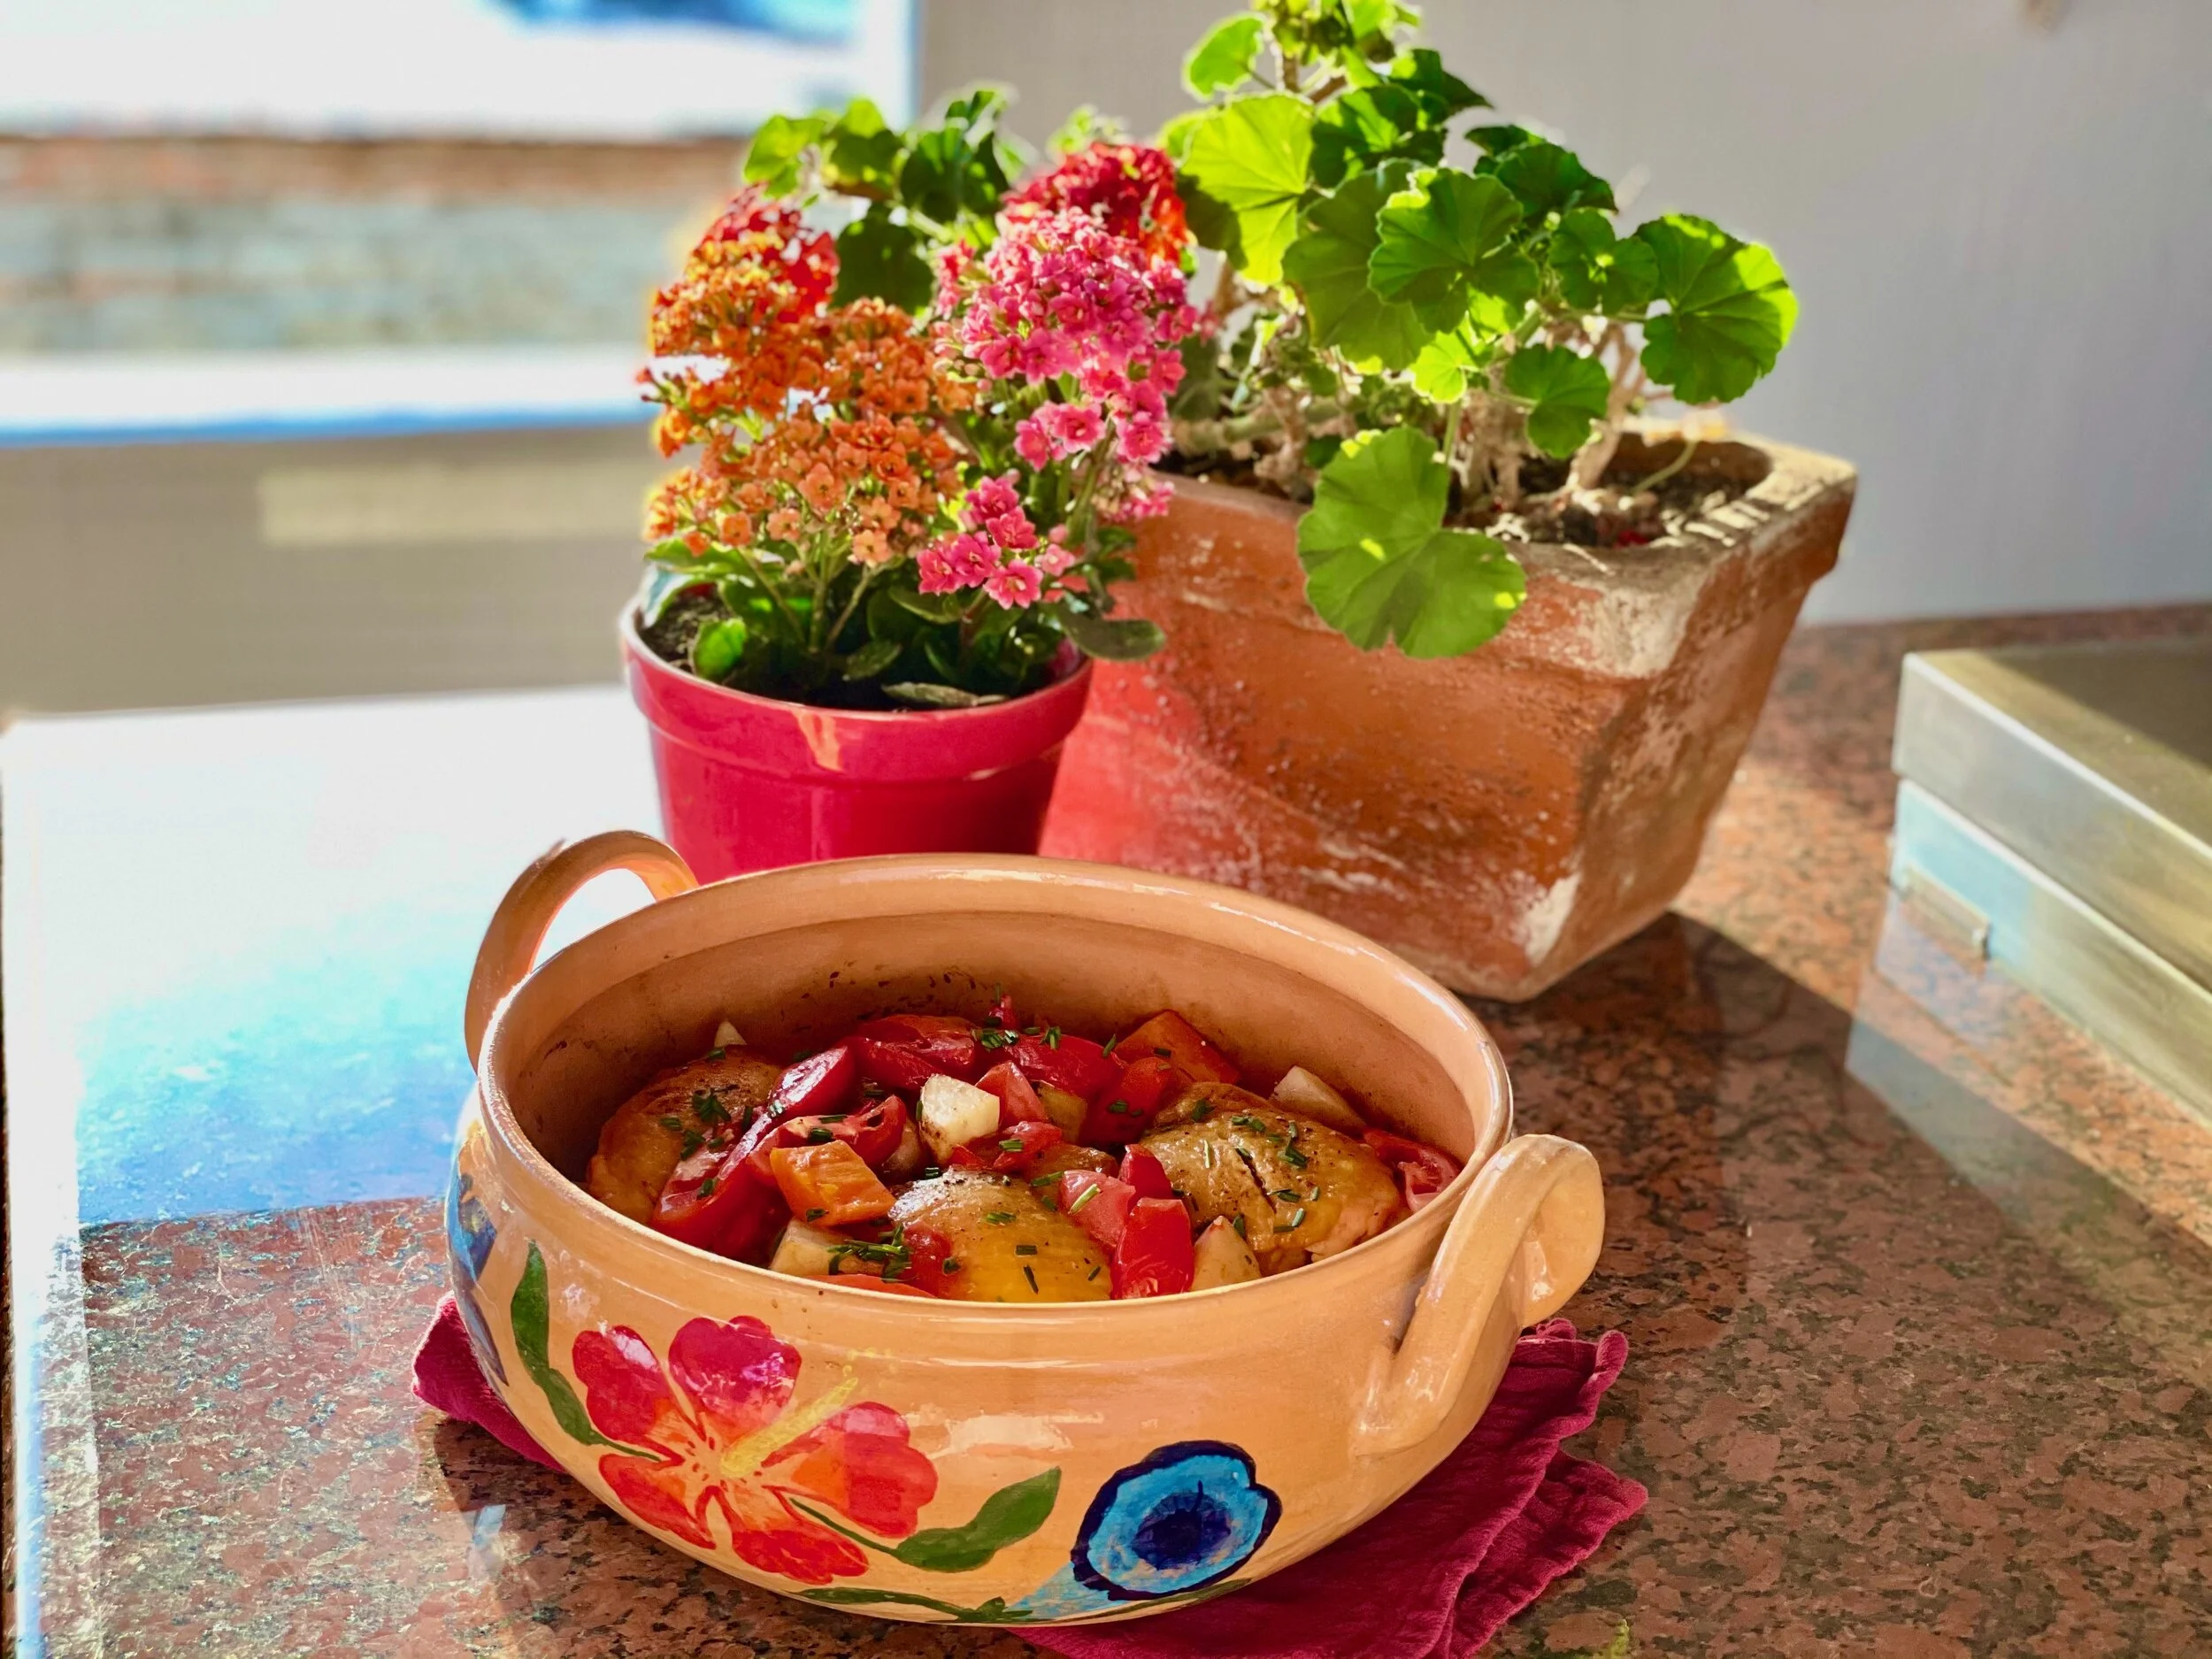
Garlic lemon chicken and root vegetables (low FODMAP)
10 minutes prep • 60 minutes cook • Gluten-free • Dairy-free • Low FODMAP • Serves 4 - 6
10 minutes prep • 60 minutes cook • Gluten-free • Dairy-free • Low FODMAP • Serves 4 - 6 • This one-dish dinner is perfect for guests because it cooks in the oven so you can socialize. Serve as is or with our make-ahead roasted tomatillo and pineapple salsa.
INGREDIENTS:
4 chicken breasts or 4 - 6 chicken thighs – skin-on / bone-in (if the chicken breasts are very large, cut them in half before cooking)
2 cups carrots chopped into 1” segments
1 pound baby new potatoes (white or red, cut into bite-size pieces)
1/2 cup fresh-squeezed lemon juice
1/2 cup garlic-infused olive oil
1 teaspoon paprika
1 teaspoon chili powder
1 teaspoon dry oregano
4 Roma tomatoes (cut in wedges) or 2 cups cherry tomatoes
1/2 cup chives or green onions (green part only) chopped
DIRECTIONS:
Preheat oven to 400 degrees F.
In the bottom of a roasting pan or baking dish, place the chopped carrots and potatoes.
Lay the chicken over the carrots and potatoes, skin side up.
Sprinkle the paprika, chili powder, and oregano over the chicken.
Salt and pepper the chicken.
Combine the garlic-infused olive oil and lemon juice and pour it over the chicken and vegetables.
Put the pan in your preheated oven—no cover needed.
Bake for 30 minutes.
Spoon the juice from the roasting pan generously over the chicken. Add that tomatoes and chives or green onions and return the pan to the oven.
Bake for another 30 minutes.
Remove from oven and check the chicken temp (it should be 165 degrees F) or cut into the thickest part of one of the pieces of chicken to be sure it’s cooked. If the juice runs clear it is cooked. If it’s pink then cook it for another 5 minutes.
Once cooked, remove from the oven and let it rest for 5 - 10 minutes before serving. Serve the vegetables with the chicken and tomatoes over the top and spoon the pan juice generously over the top of all.
Serve as is or with our roasted tomatillo and pineapple salsa.
Enjoy!
This post may contain affiliate links so you can easily purchase items listed on the page. There is no increased cost to you for purchasing items through these links so feel free to use them!
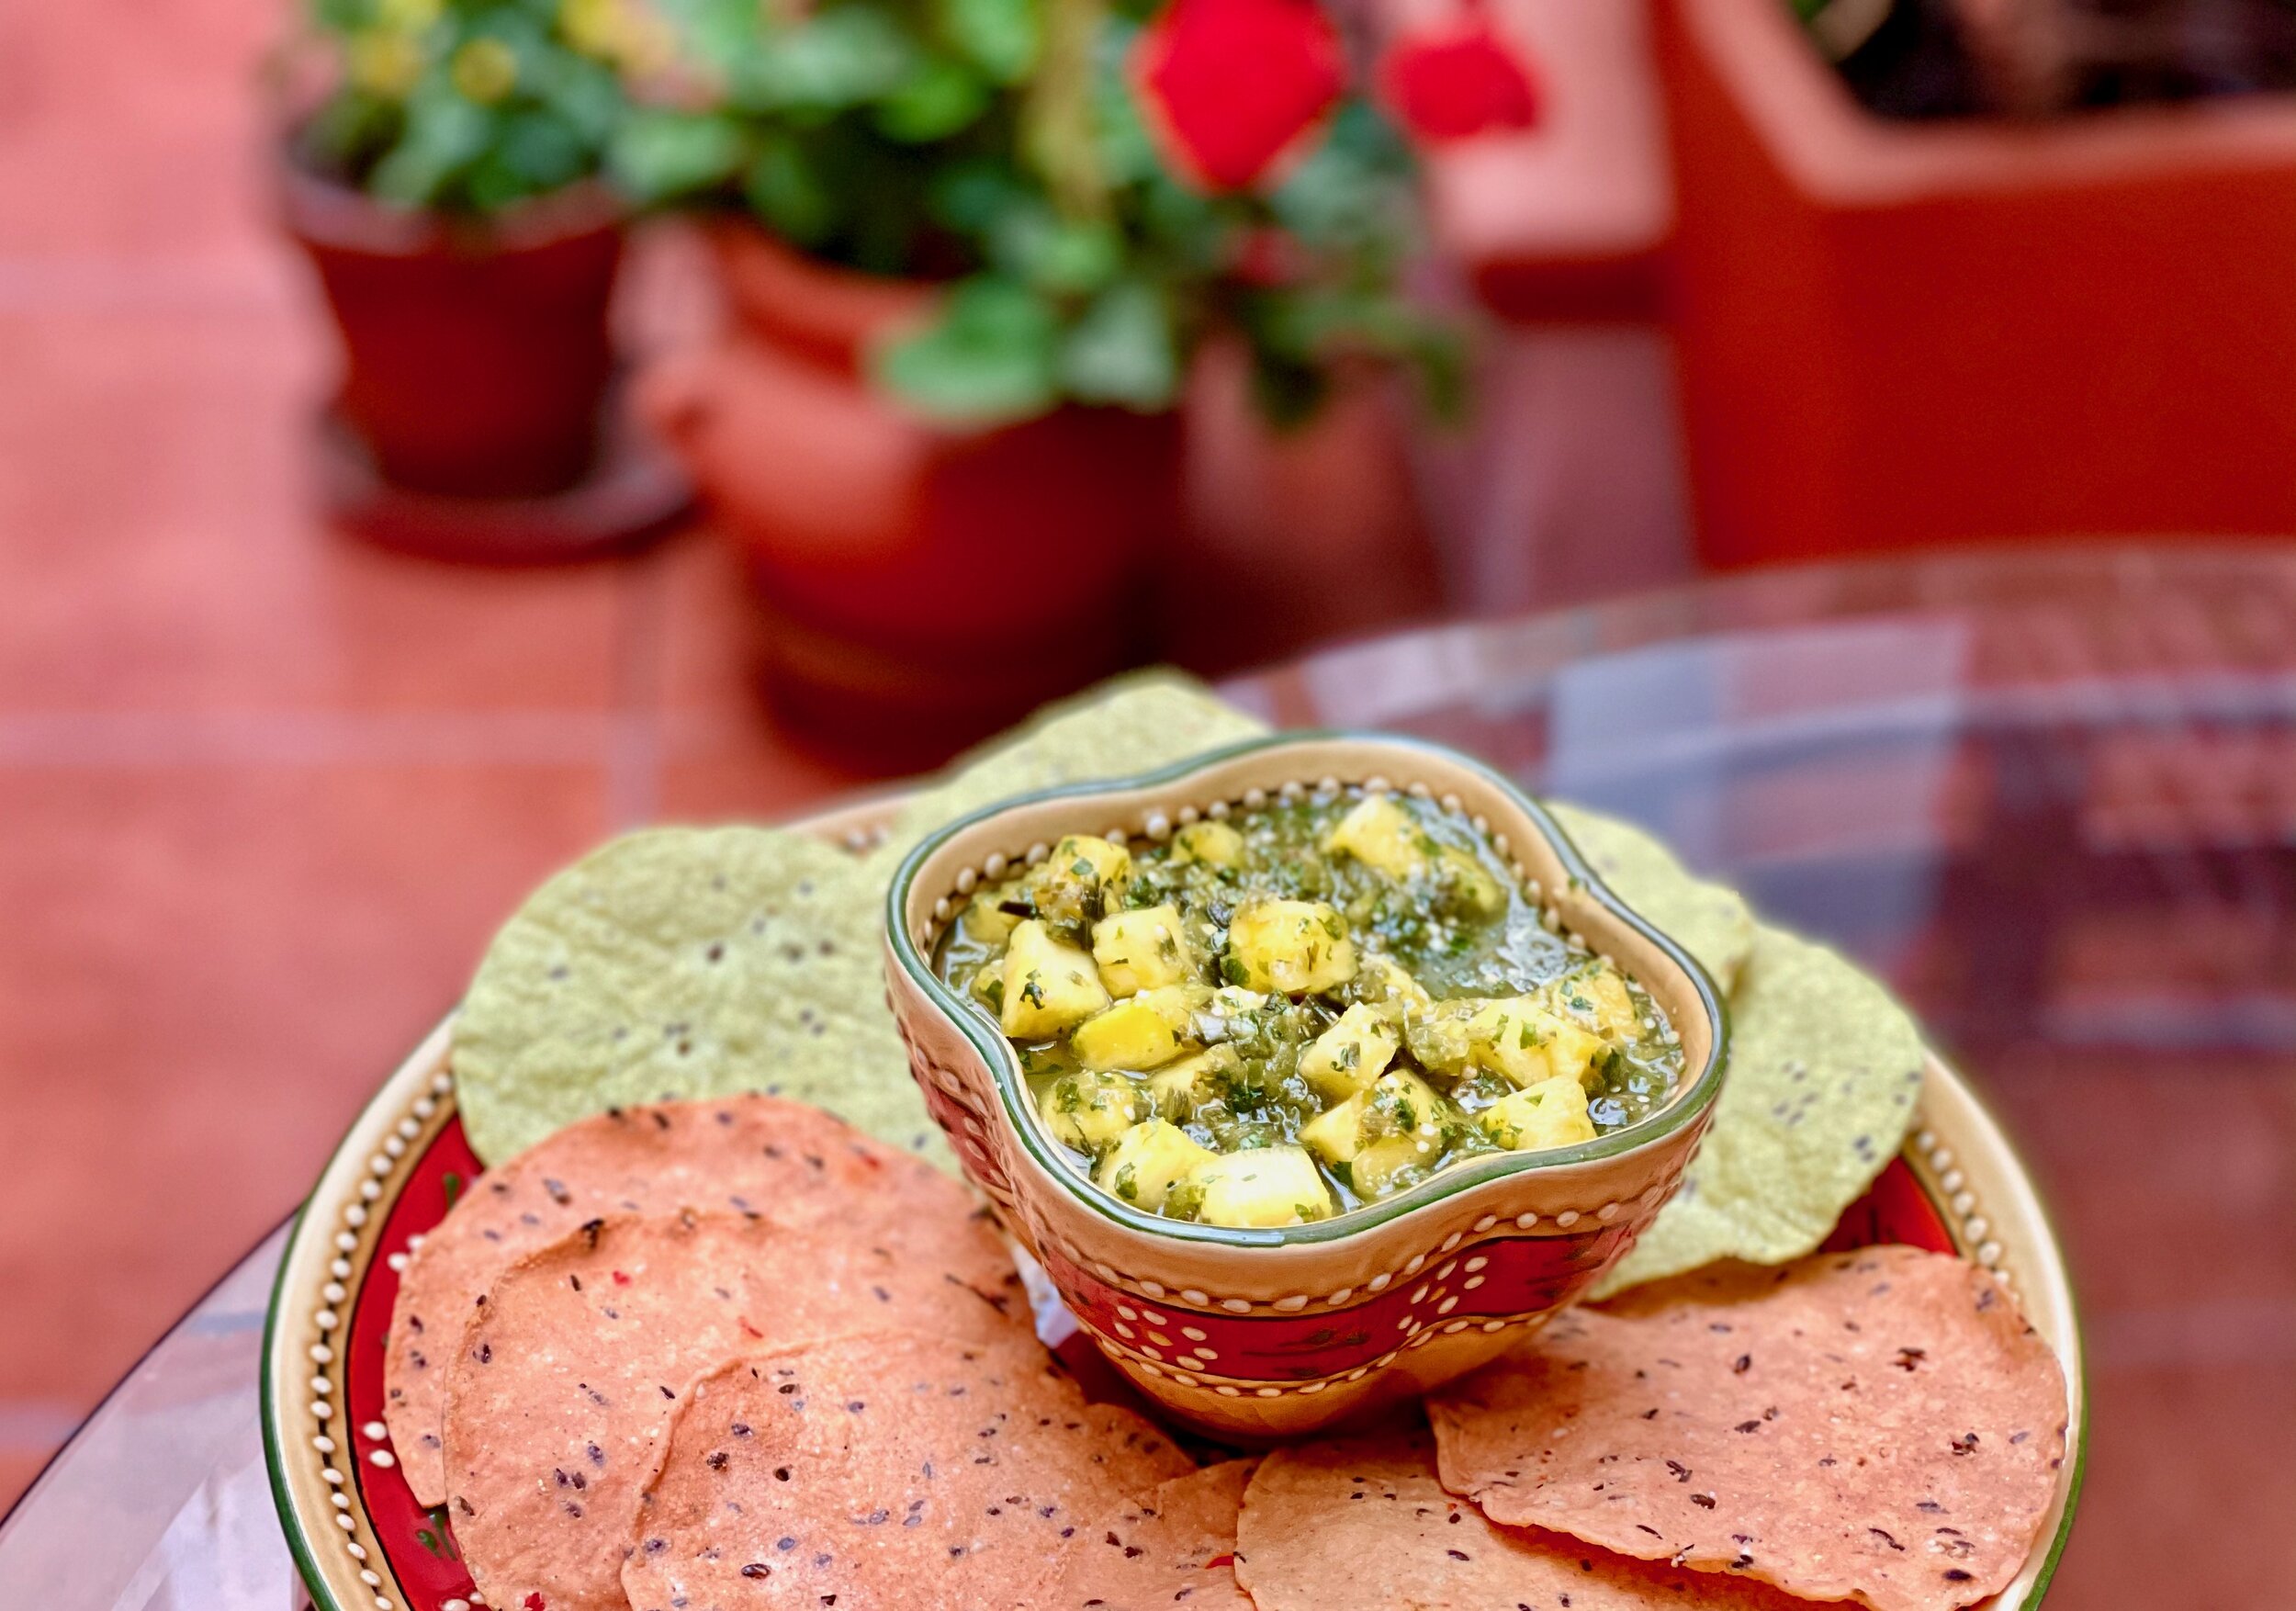
Roasted tomatillo and pineapple salsa verde (low FODMAP)
10 minutes prep • 10 minutes cook • Gluten-free • Vegetarian • Low FODMAP • Makes about 2 cups
10 minutes prep • 10 minutes cook • Gluten-free • Vegetarian • Low FODMAP • Makes about 2 cups • This delicious salsa is perfect with low FODMAP tortilla chips or serve it with our garlic lemon chicken and root vegetables.
INGREDIENTS:
1 1/2 pounds tomatillos
1-2 jalapeno peppers, seeded and chopped
4 green onions (green part only), chopped
1/2 cup fresh cilantro, chopped
1/4 cup garlic-infused olive oil
1-2 teaspoons salt (to taste)
1 cup fresh pineapple, chopped
DIRECTIONS:
Preheat broiler.
Remove the husks from the tomatillos and rinse them under warm water to remove stickiness.
Cut tomatillos in half and place, skin side up, on a rimmed baking sheet with the chopped jalapeno and green onions.
Put the pan on the highest oven shelf closest to the broiler, and cook until tomatillos are softened and slightly charred, about 5 minutes.
Put the roasted ingredients together with the cilantro, salt, and garlic-infused olive oil, in a food processor or blender, and pulse until well combined. Pour into a serving bowl, stir in the pineapple and serve.
Pro Tip: Salsa can be made 1 day ahead and kept covered in the refrigerator until ready to use.
This salsa is delicious with low FODMAP tortilla chips or serve it with our garlic lemon chicken and root vegetables.
This post may contain affiliate links so you can easily purchase items listed on the page. There is no increased cost to you for purchasing items through these links so feel free to use them!
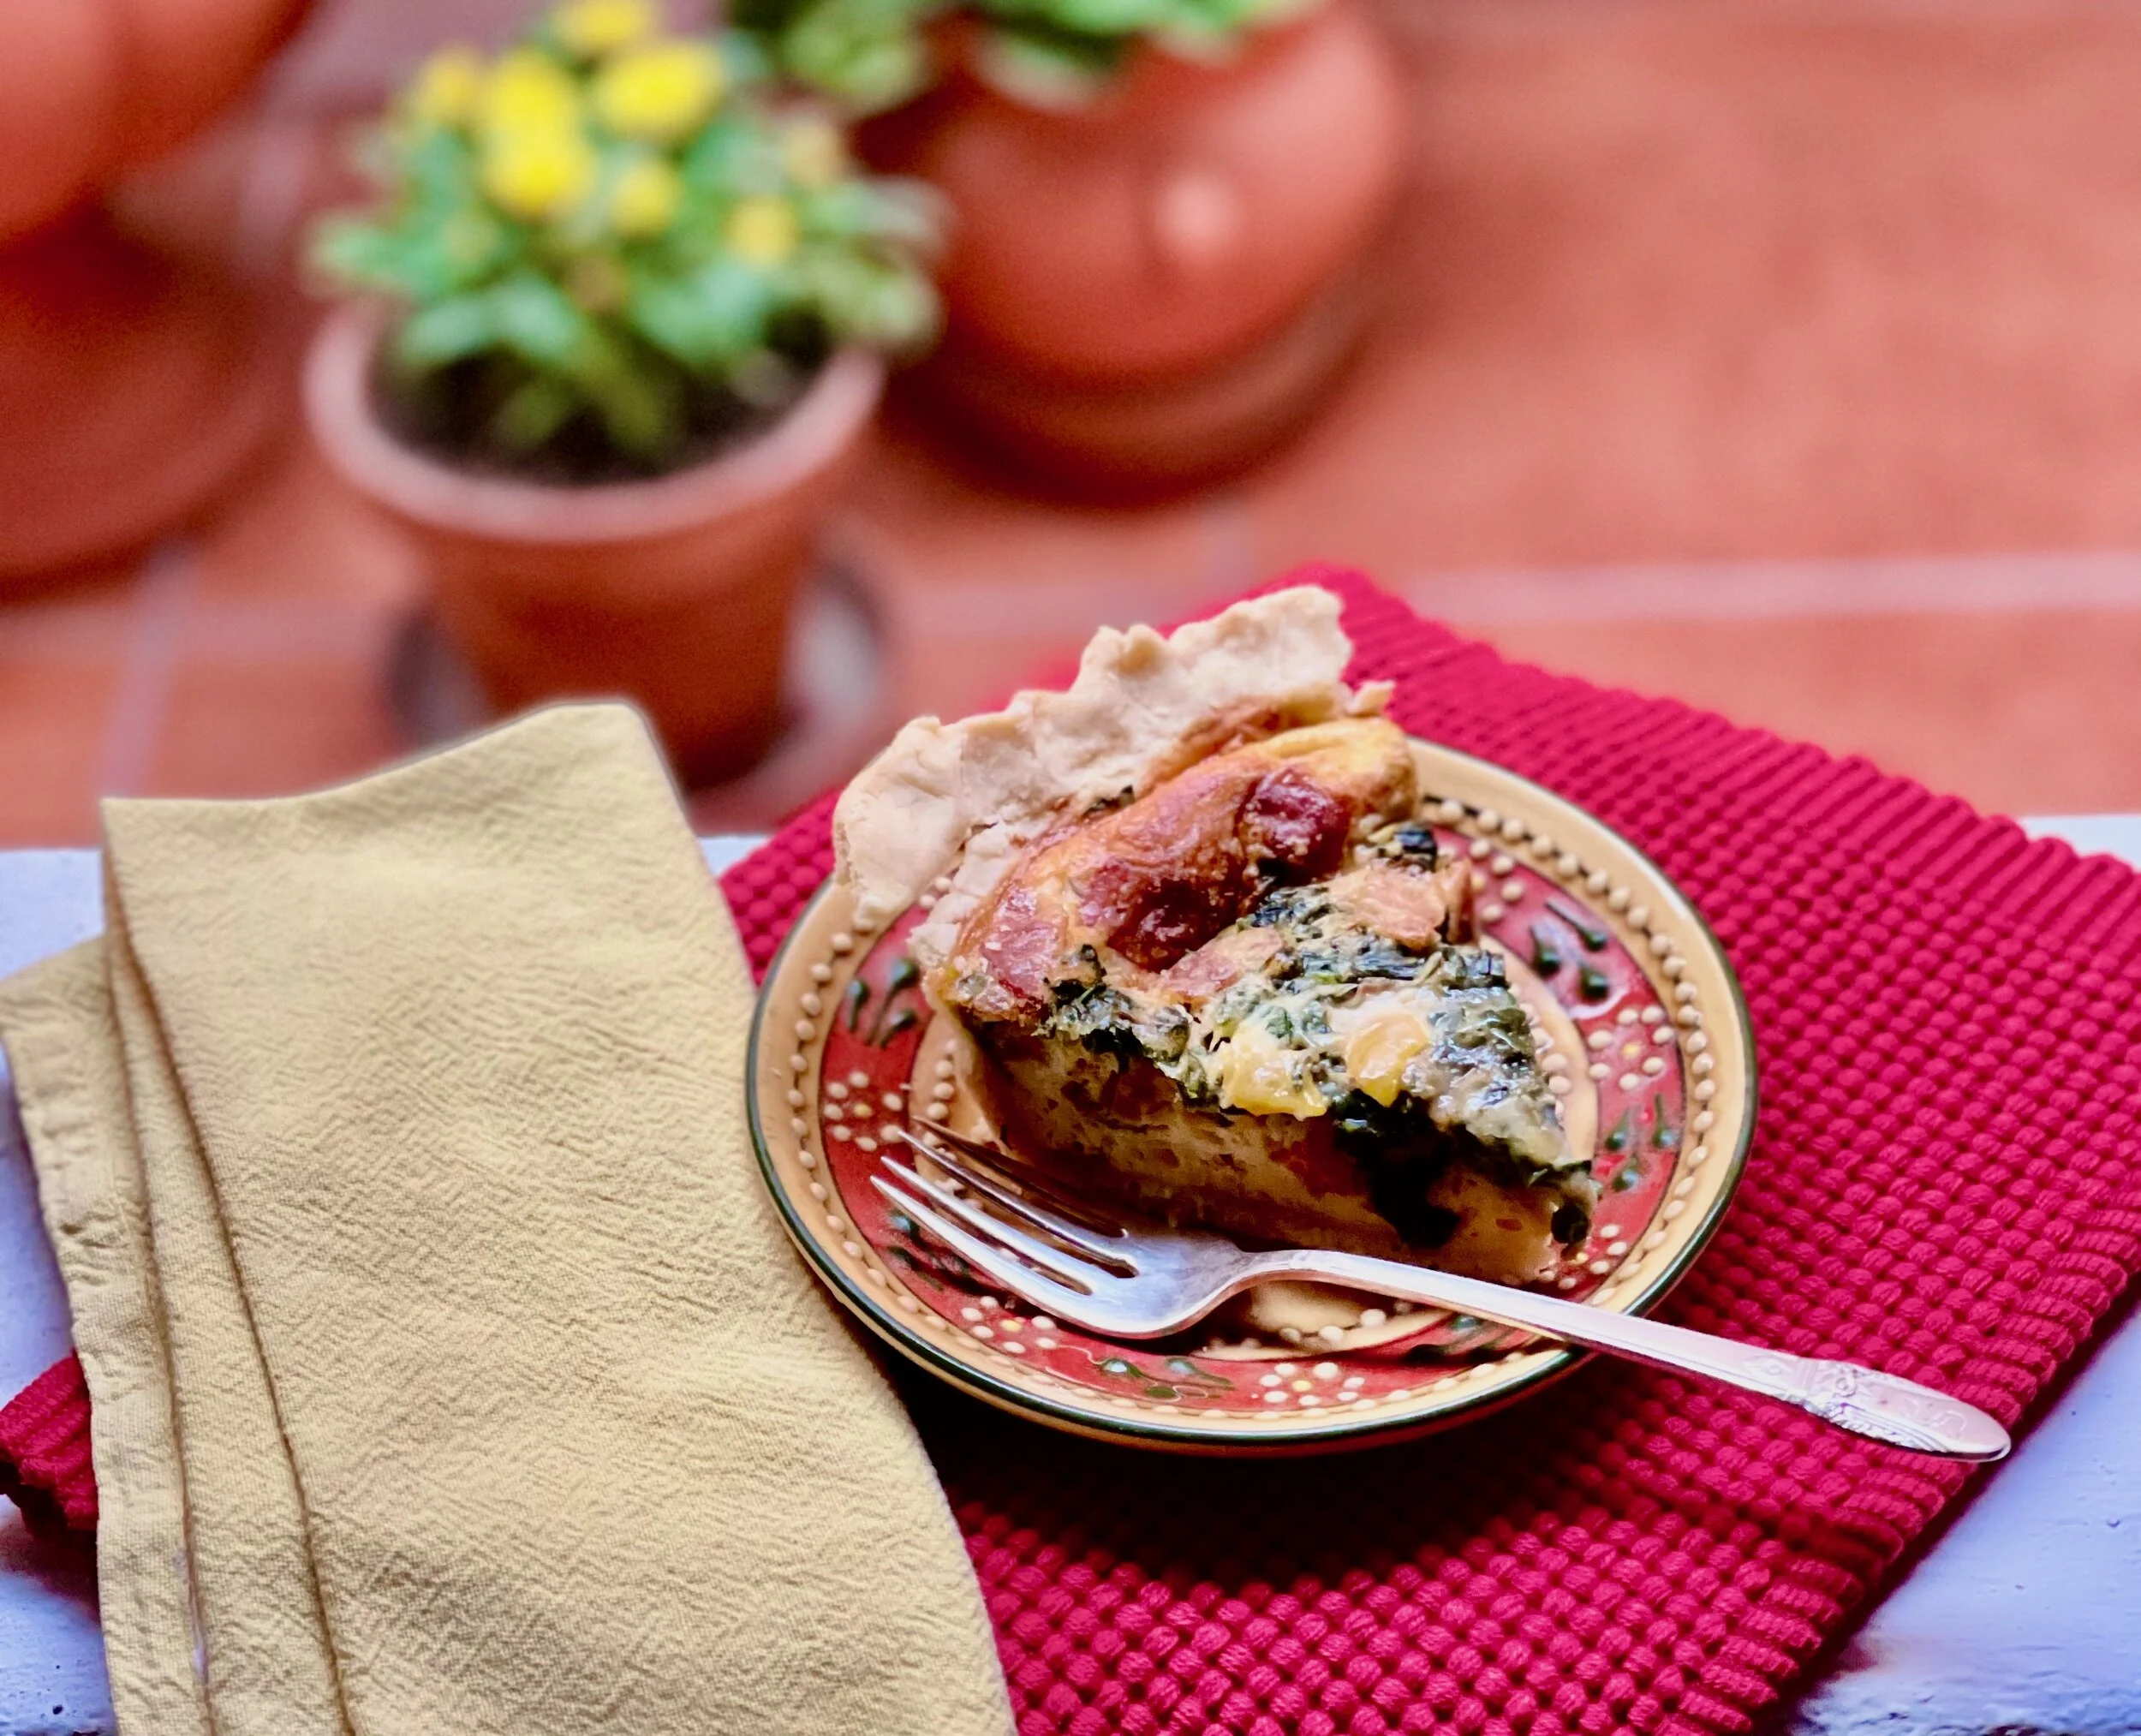
Deep dish quiche with perfect butter crust (low FODMAP)
45 minutes Prep • 60 minutes Cook • Gluten-free • Vegetarian • Low FODMAP • Makes one deep dish or two standard depth quiches
45 minutes Prep • 60 minutes Cook • Gluten-free • Vegetarian • Low FODMAP • Makes one deep dish or two standard depth quiches • Quiche is delicious warm out of the oven or at room temperature so it’s a very versatile item to serve for brunch, lunch, or a light dinner. This simple recipe can include any number of vegetables or cheese you have on hand. I made this one with spinach, sharp cheddar, brie, and a bit of bacon, but you could also use mushrooms, bell peppers, pancetta, prosciutto, gruyere, or even pepper jack cheese. Omit the meat for a vegetarian version. Use your imagination!
INGREDIENTS:
1 tablespoon butter
1 tablespoon garlic-infused olive oil
4 green onions (green part only) chopped
3 cups fresh or one package frozen spinach (defrosted and squeezed dry if frozen)
1 cup oyster mushrooms - sliced (optional)
1 teaspoon dried thyme
3/4 cup brie cheese rind removed and cut into chunks (or sub any other low lactose cheese you have on hand)
3/4 cup extra sharp cheddar cheese shredded (or sub any other low lactose cheese you have on hand)
7 eggs
2 cups lactose-free milk (you can use 2% or whole milk for a creamier taste)
3-4 slices bacon, pancetta, or prosciutto, cooked and chopped (optional)
Flaky salt and fresh thyme for garnish (optional)
DIRECTIONS:
Preheat the oven to 350 degrees F.
Prepare our perfect buttery pie crust in one deep-dish pie pan or two standard depth pans and put in the freezer.
Meanwhile, prepare the filling. Heat a large skillet over medium heat and add the butter and olive oil. Once melted, add the green onions and cook over medium-low heat for about 1 minute. Stir in the spinach and mushrooms (if using), cook until the spinach is wilted and much of the moisture has evaporated from the mixture. Add the dried thyme and salt and pepper.
Once the moisture has cooked out of the spinach and mushrooms remove them from the heat.
Allow the mixture to cool while you remove the crust from the freezer, brush the interior of the crust(s) with one egg white, and spread your cheeses evenly over the bottom of the crust.
Spoon the spinach mixture over the cheese. Sprinkle evenly with cooked bacon, pancetta, or prosciutto (if using).
Whisk the eggs and milk in a bowl and pour gently over the vegetable mixture.
Bake a deep-dish quiche for 60 minutes then jiggle the pan to see if the center is no longer liquid.
Bake standard depth quiches for 45 minutes then jiggle the pan to see if the center is no longer liquid.
When done, remove from oven, garnish with flaky salt and fresh thyme (if using) and allow to sit 10 - 15 minutes before cutting.
Bon appetit!
Pro Tips:
Freeze the brie for about 30 minutes (or more) to make it easier to cut the rind off without losing a bunch of the cheese too.
You can make your pie crust and cook the bacon, pancetta, or prosciutto ahead of time and store in the freezer until you’re ready to assemble.
This post may contain affiliate links so you can easily purchase items listed on the page. There is no increased cost to you for purchasing items through these links so feel free to use them!
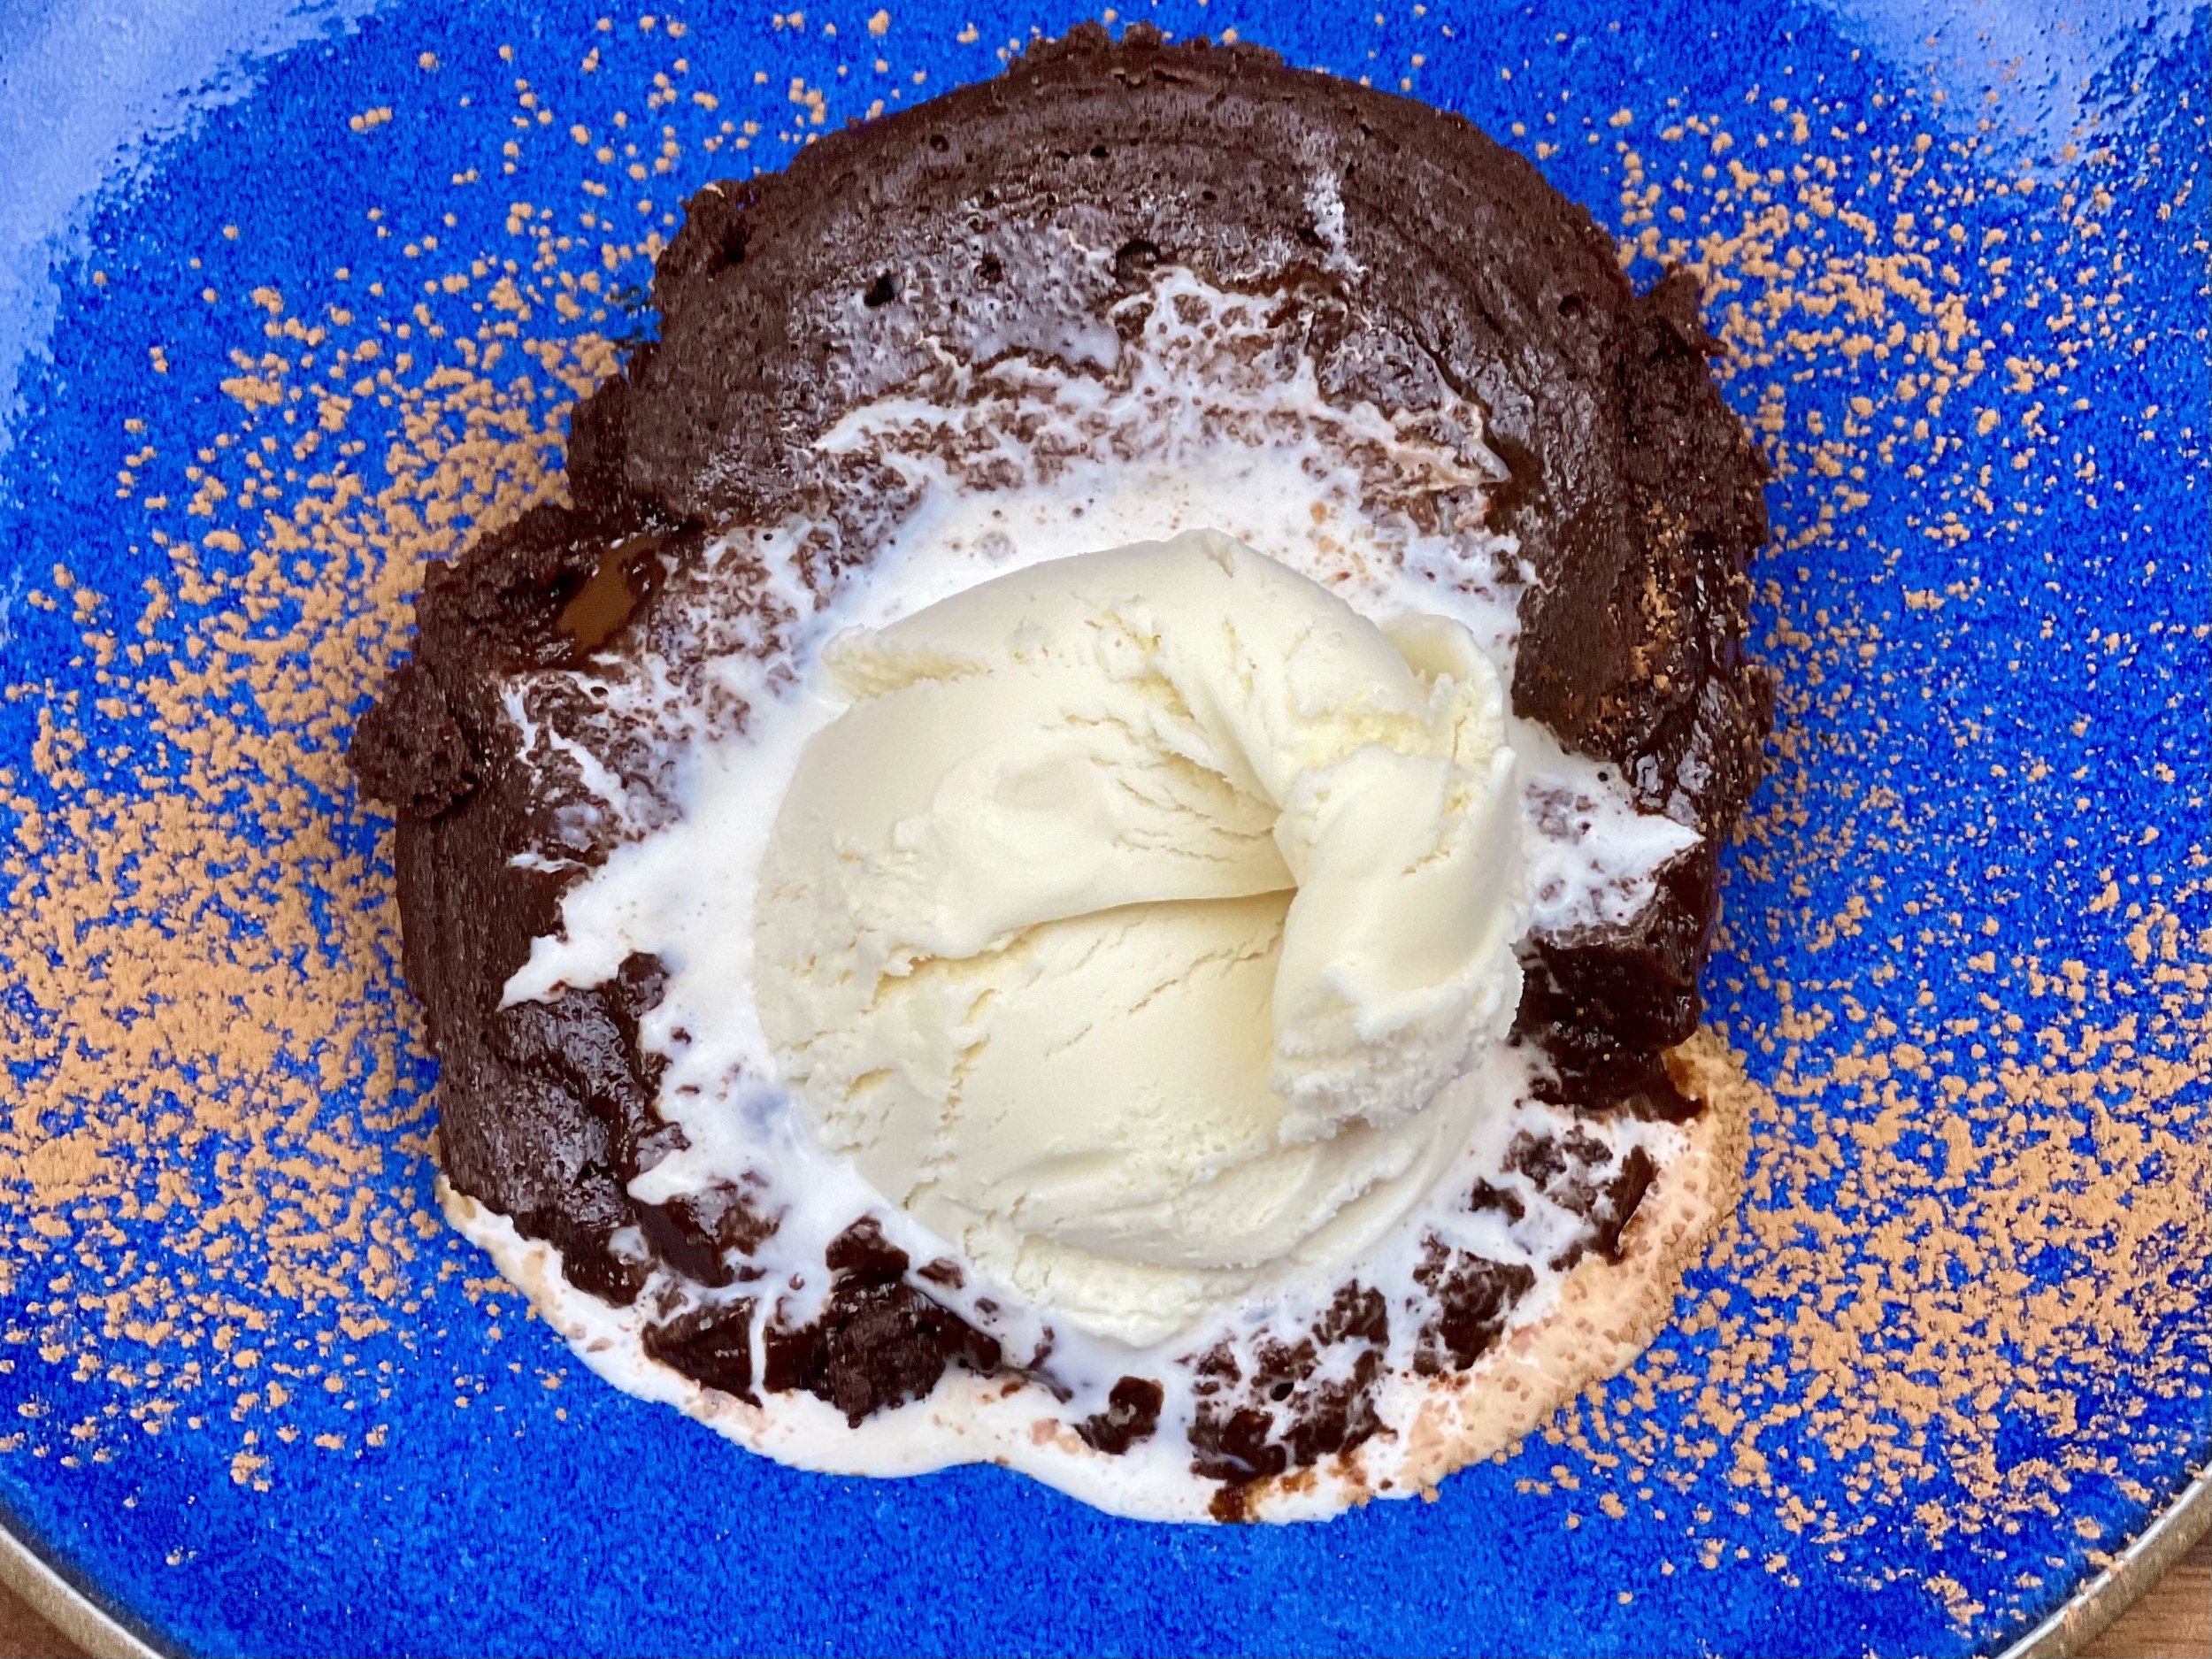
Leslie’s lemon curd a la meringue (low FODMAP)
20 minutes (plus chilling time) • Gluten-free • Low FODMAP • Serves 5 or 6
20 minutes (plus chilling time) • Gluten-free • Low FODMAP • Serves 5 or 6 • You only need 5 simple ingredients for this amazing lemon curd – and the recipe comes together in a snap. Add a layer of Leslie’s perfect meringue to the top and you’ve got a fabulous and elegant dessert.

Ingredients
4 eggs
1 1/2 cups granulated sugar
1 tablespoon lemon zest (about 1 lemon)
6 tablespoons unsalted butter, softened to room temperature (or use salted butter and omit the 1/8 tsp of salt)
1/2 cup fresh squeezed lemon juice (about 4 lemons-preferably Meyer)
1/8 teaspoon salt
Directions
Put lemon zest and sugar in food processor and blend for a minute to combine zest into the sugar.
Add softened butter and pulse to combine.
Add lemon juice and pulse to combine.
Add eggs one at a time and pulse to combine after each addition. Add salt (unless you used salted butter).
Place mixture in saucepan or double boiler and stir constantly until just boiling and thickened.
Remove pan from heat. Pour curd into a jar or bowl and place a piece of plastic wrap directly on top so it is touching the top of the curd. (This prevents a skin from forming on top.) The curd will continue to thicken as it cools. Once cool, the plastic wrap can be removed.
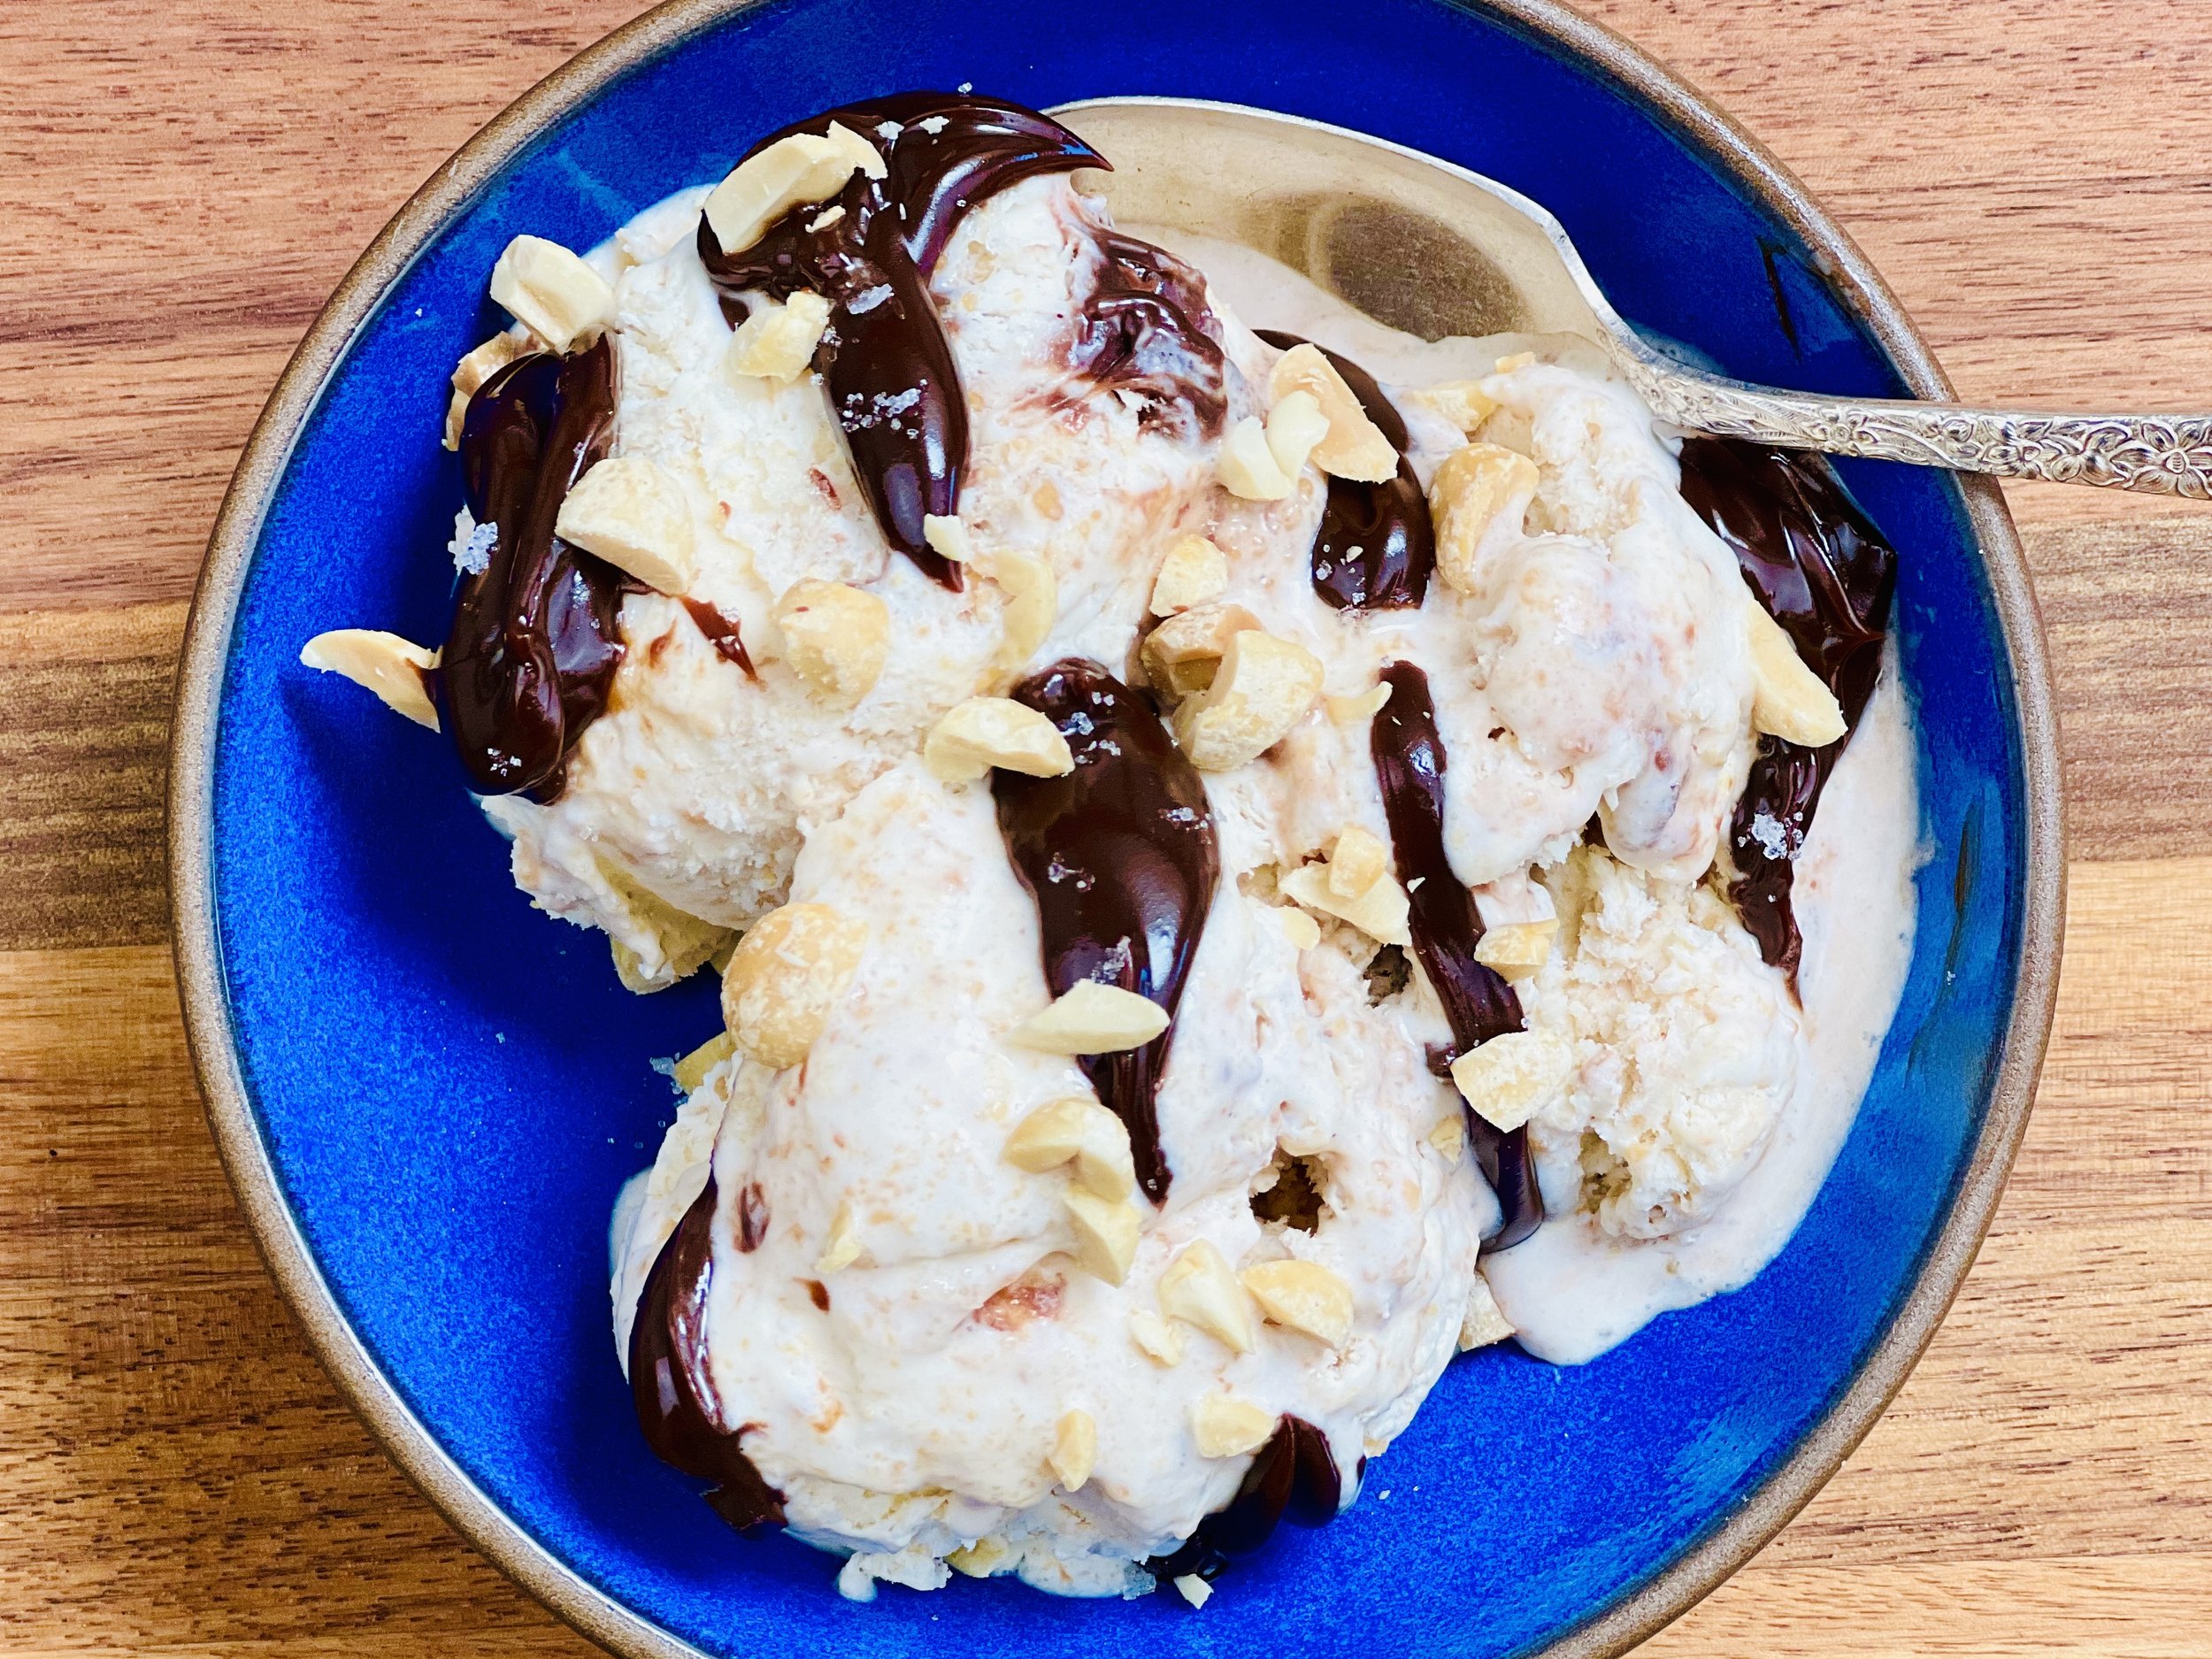
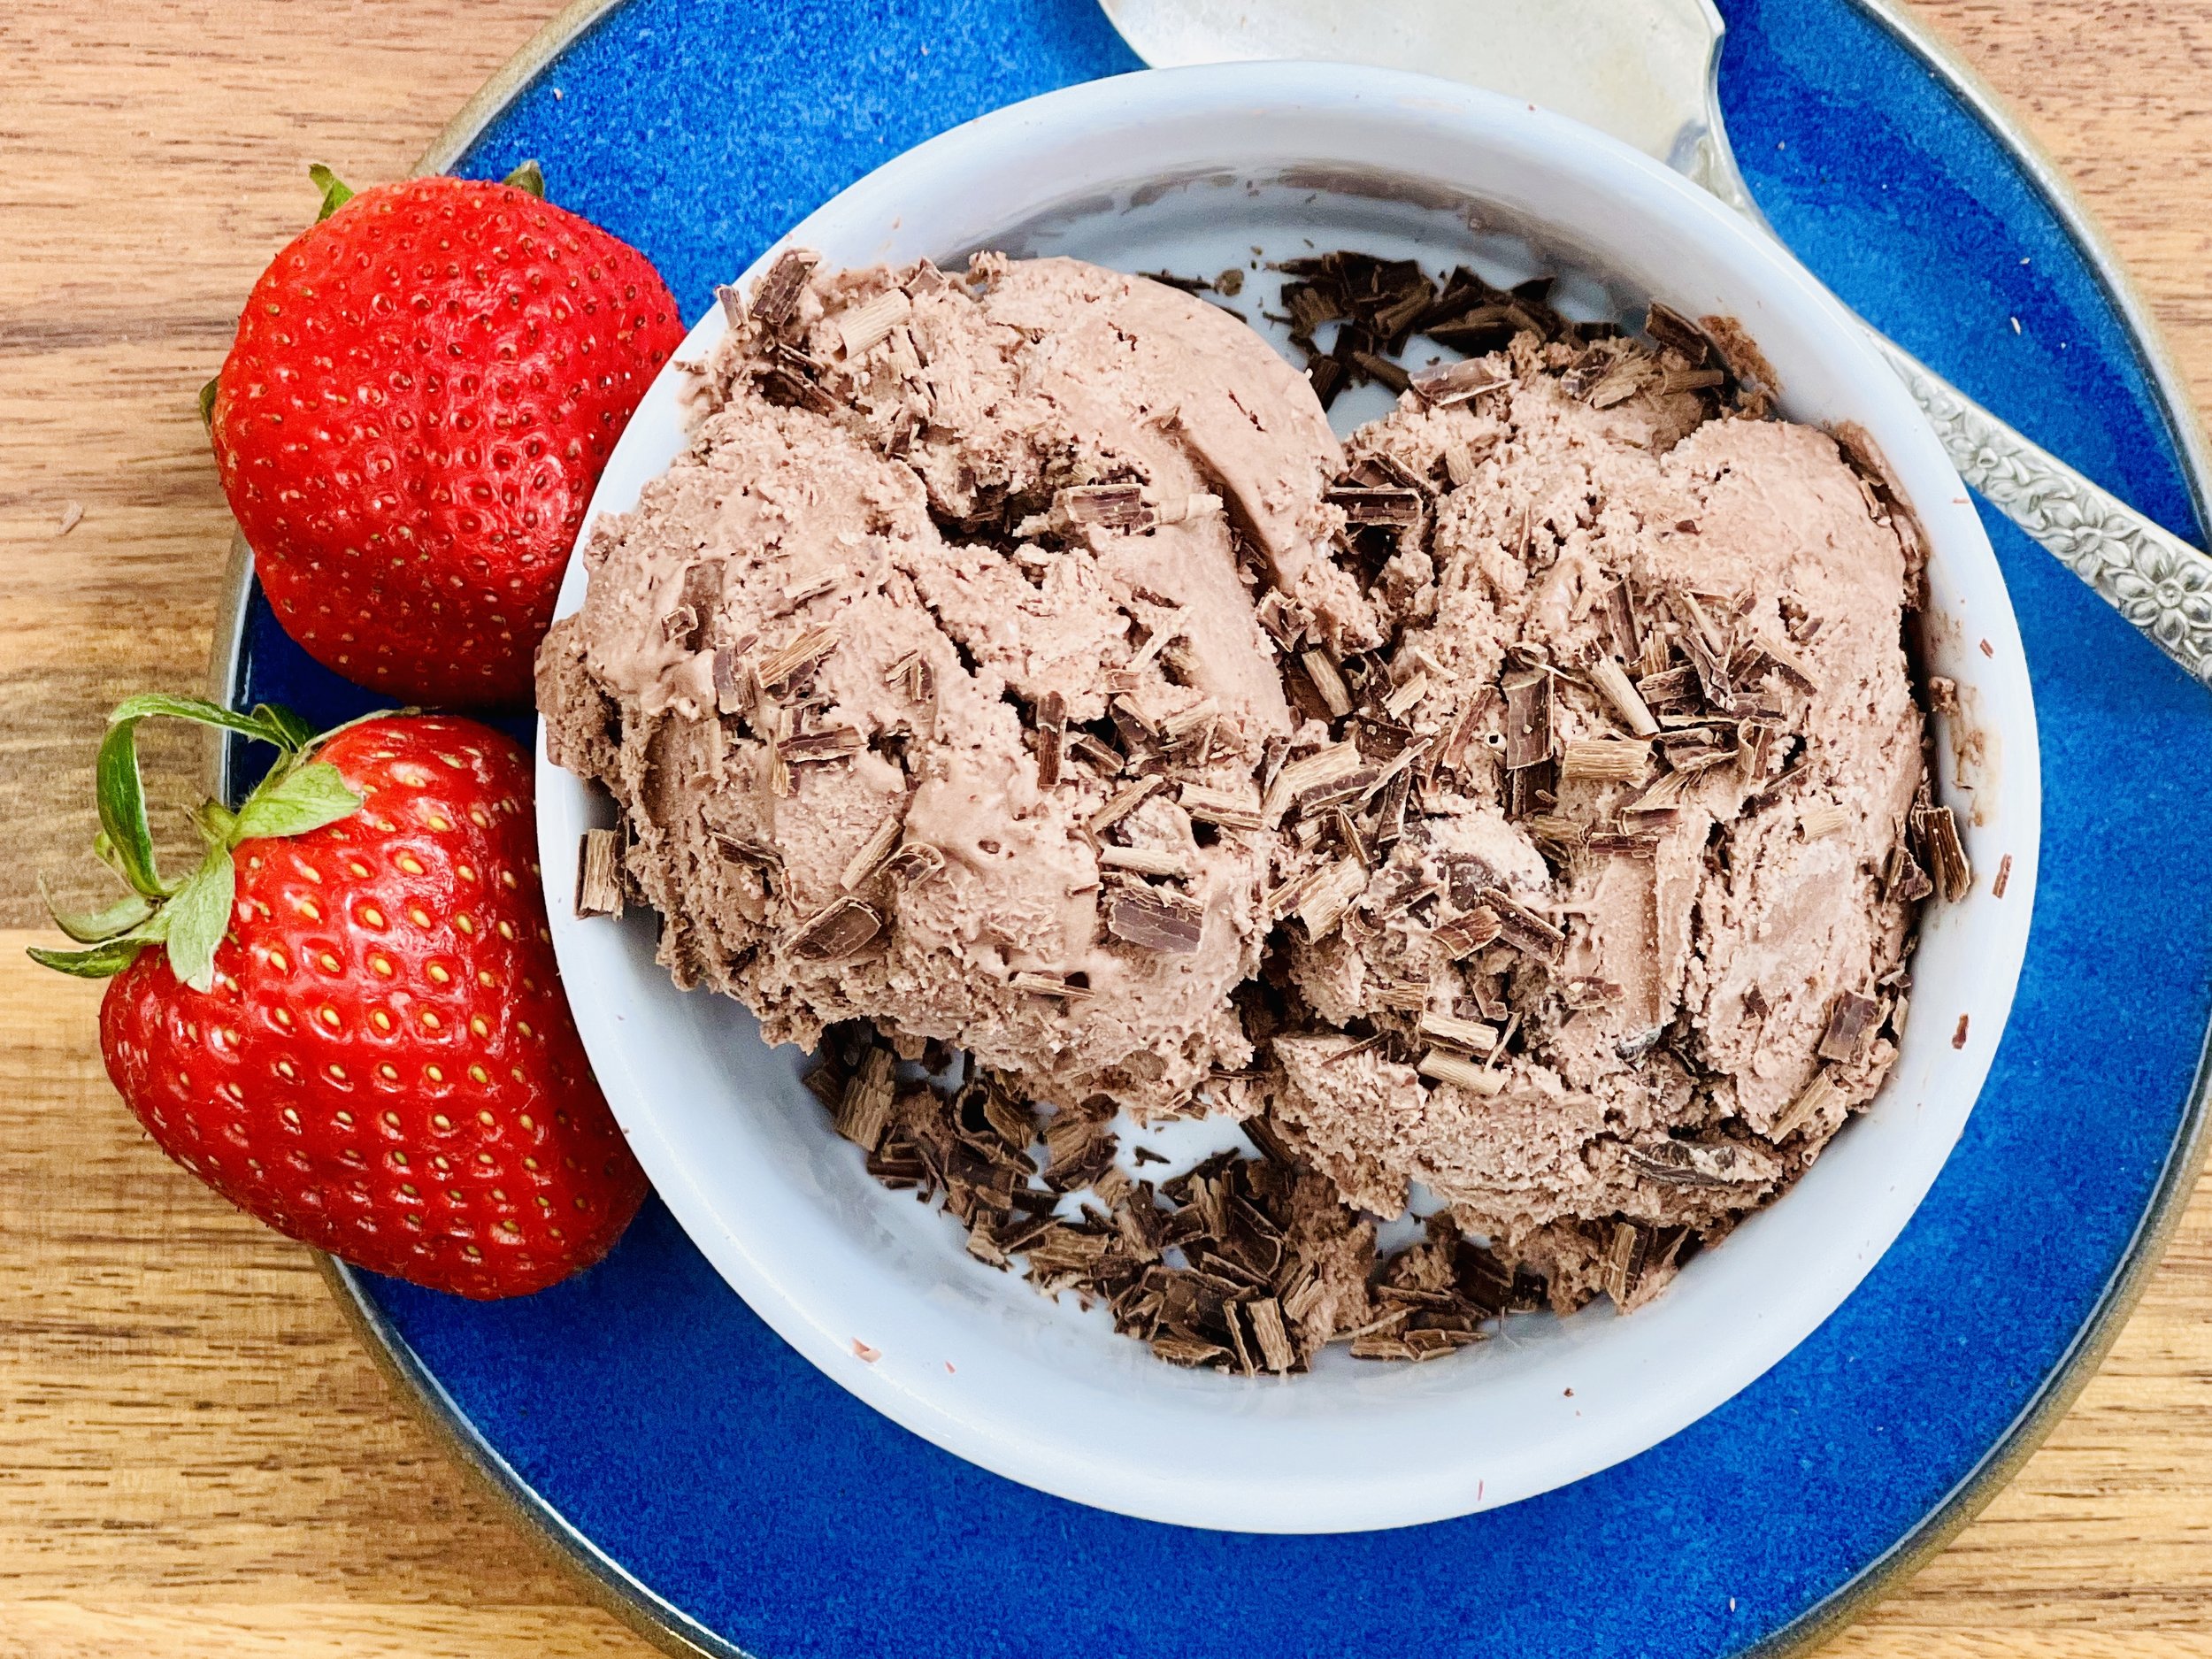
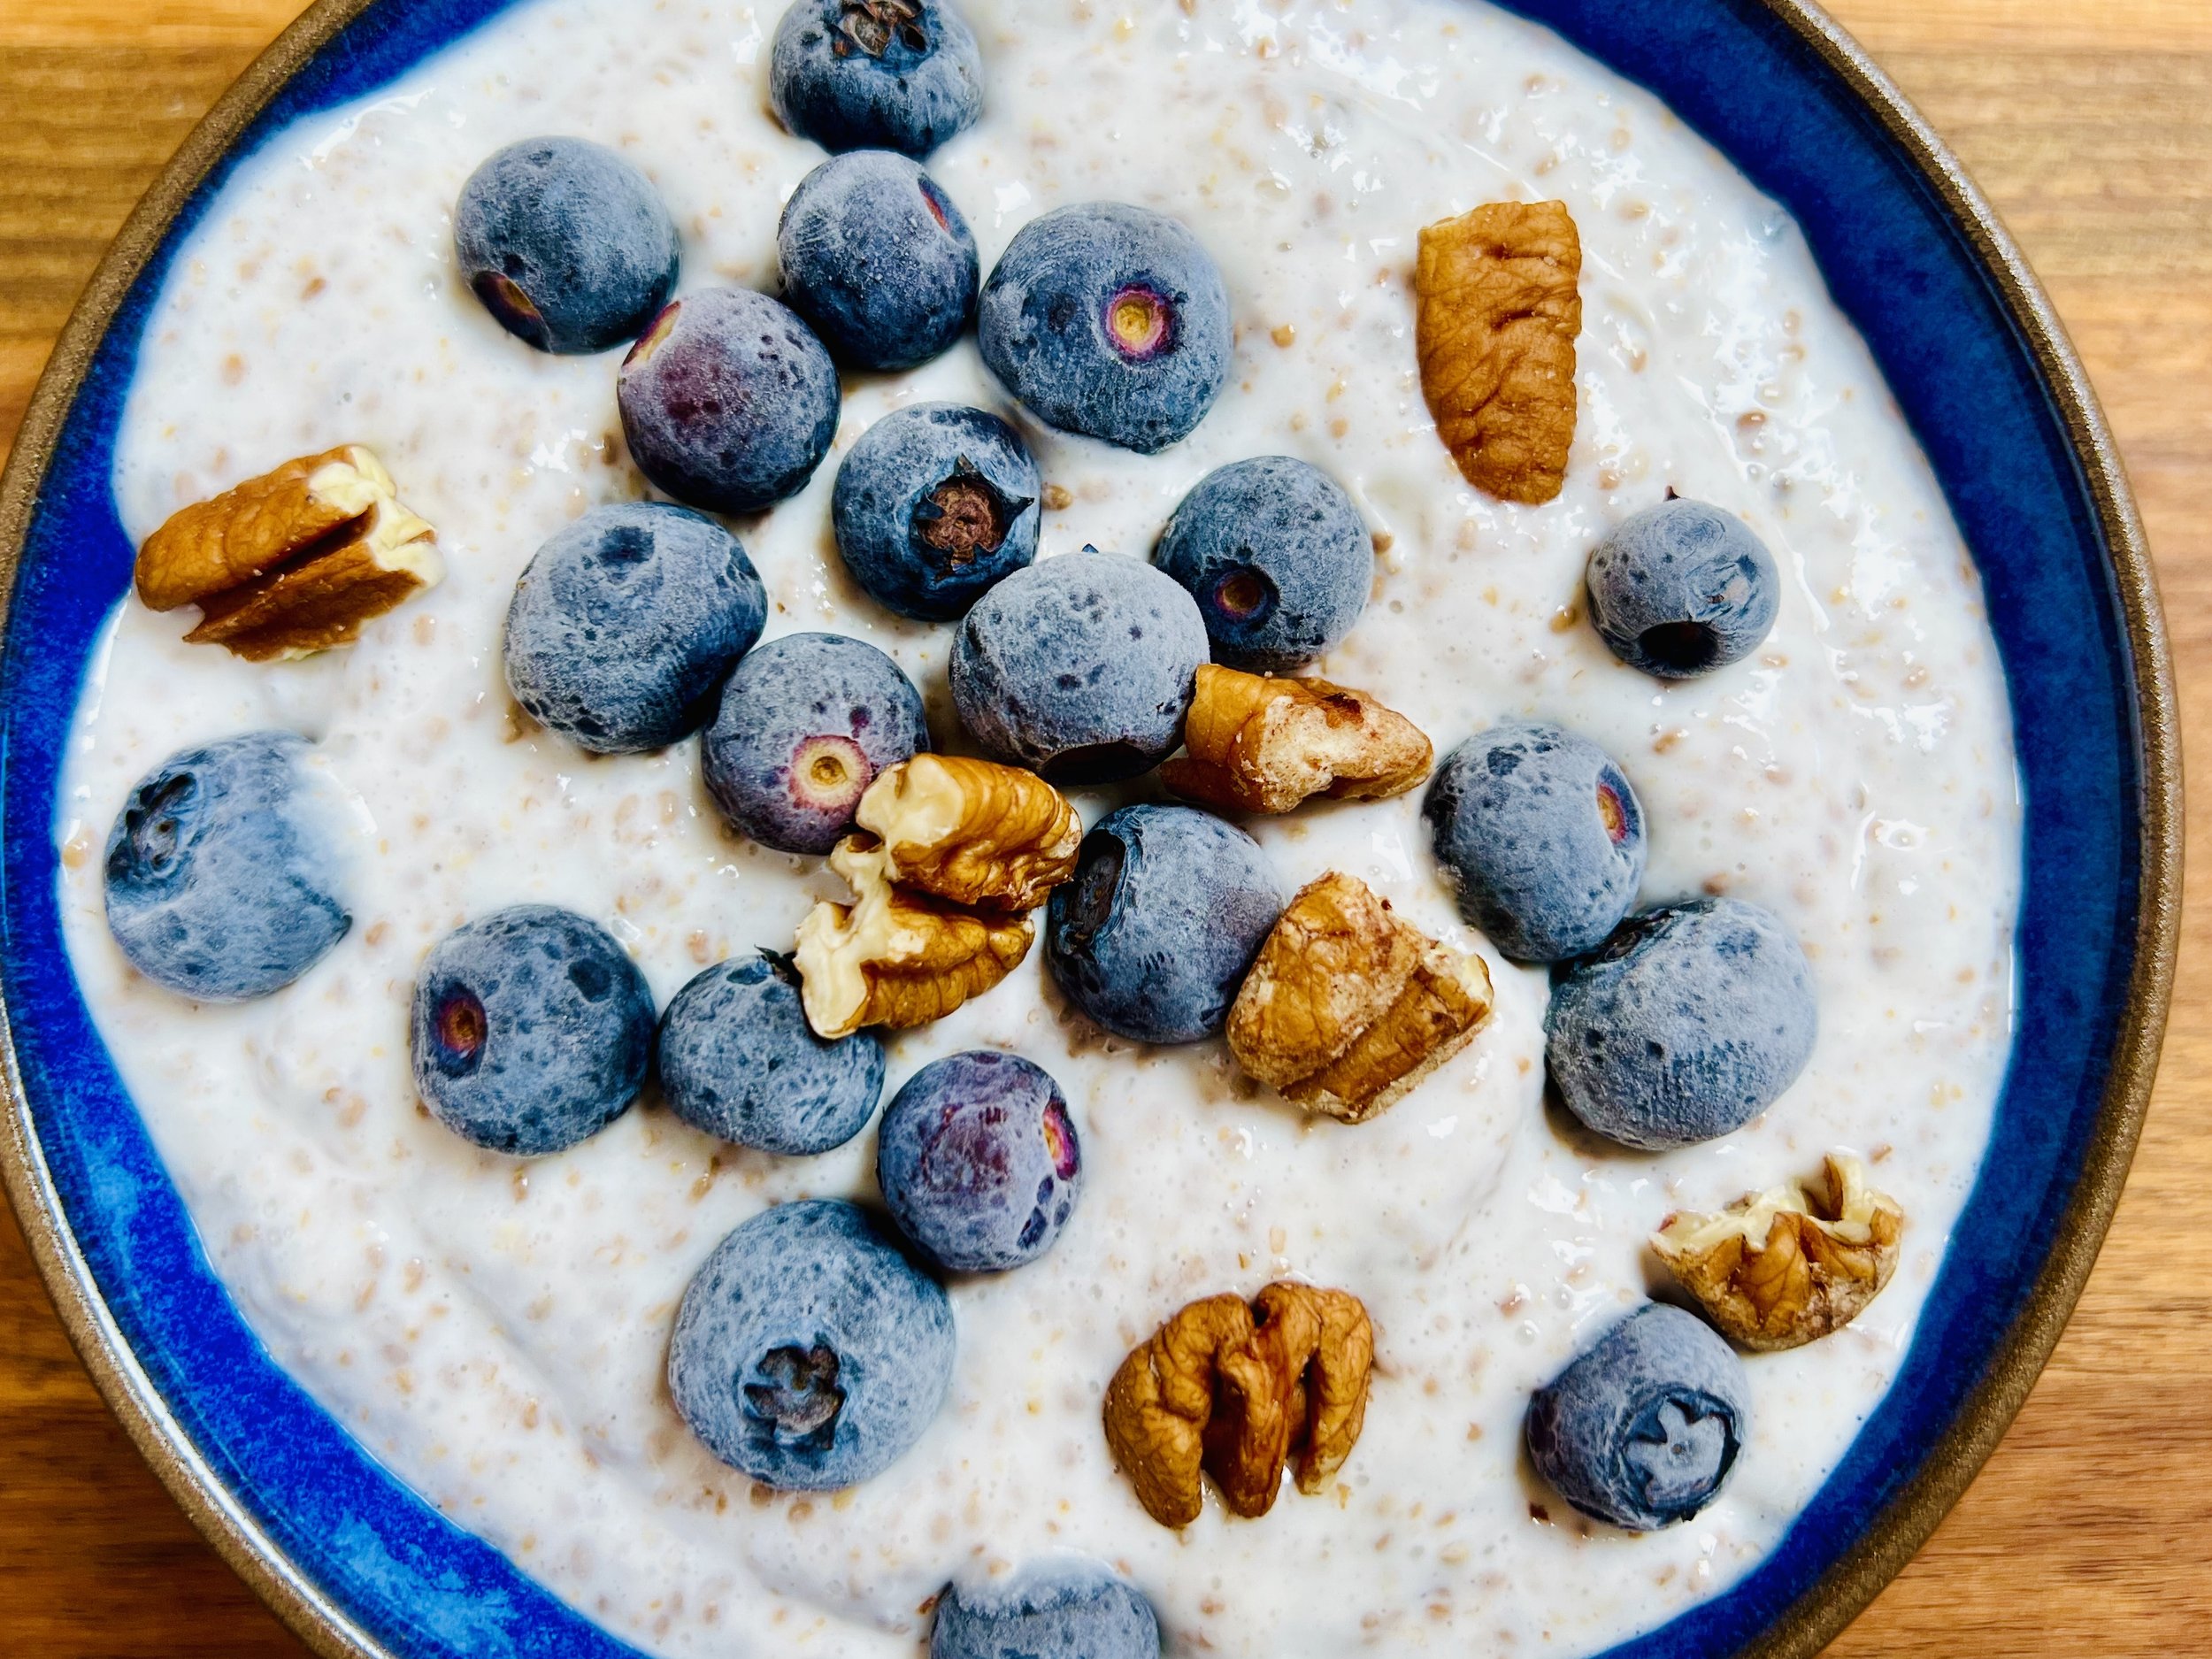
Serve in a wide rim glass with Leslie’s perfect meringue on the top, or stir it into your favorite lactose-free plain yogurt, or even on lactose-free (low FODMAP) vanilla ice cream with a sprinkle of blueberries.
Enjoy!
Pro Tips: Do not use bottled lemon juice. Use fresh-squeezed lemon juice. Meyer lemons preferred.
You may prepare the lemon curd ahead and refrigerate the curd for up to 7 days.
Original recipe contributed by my dear friend Leslie Kingsbury of Ajijic, Mexico
This post may contain affiliate links so you can easily purchase items listed on the page. In some cases, we have provided a special discount code for IBS Game Changers so be sure to use it when you purchase an item to get the discount that has been arranged just for you!
More Deliciously Low FODMAP™ desserts you might enjoy


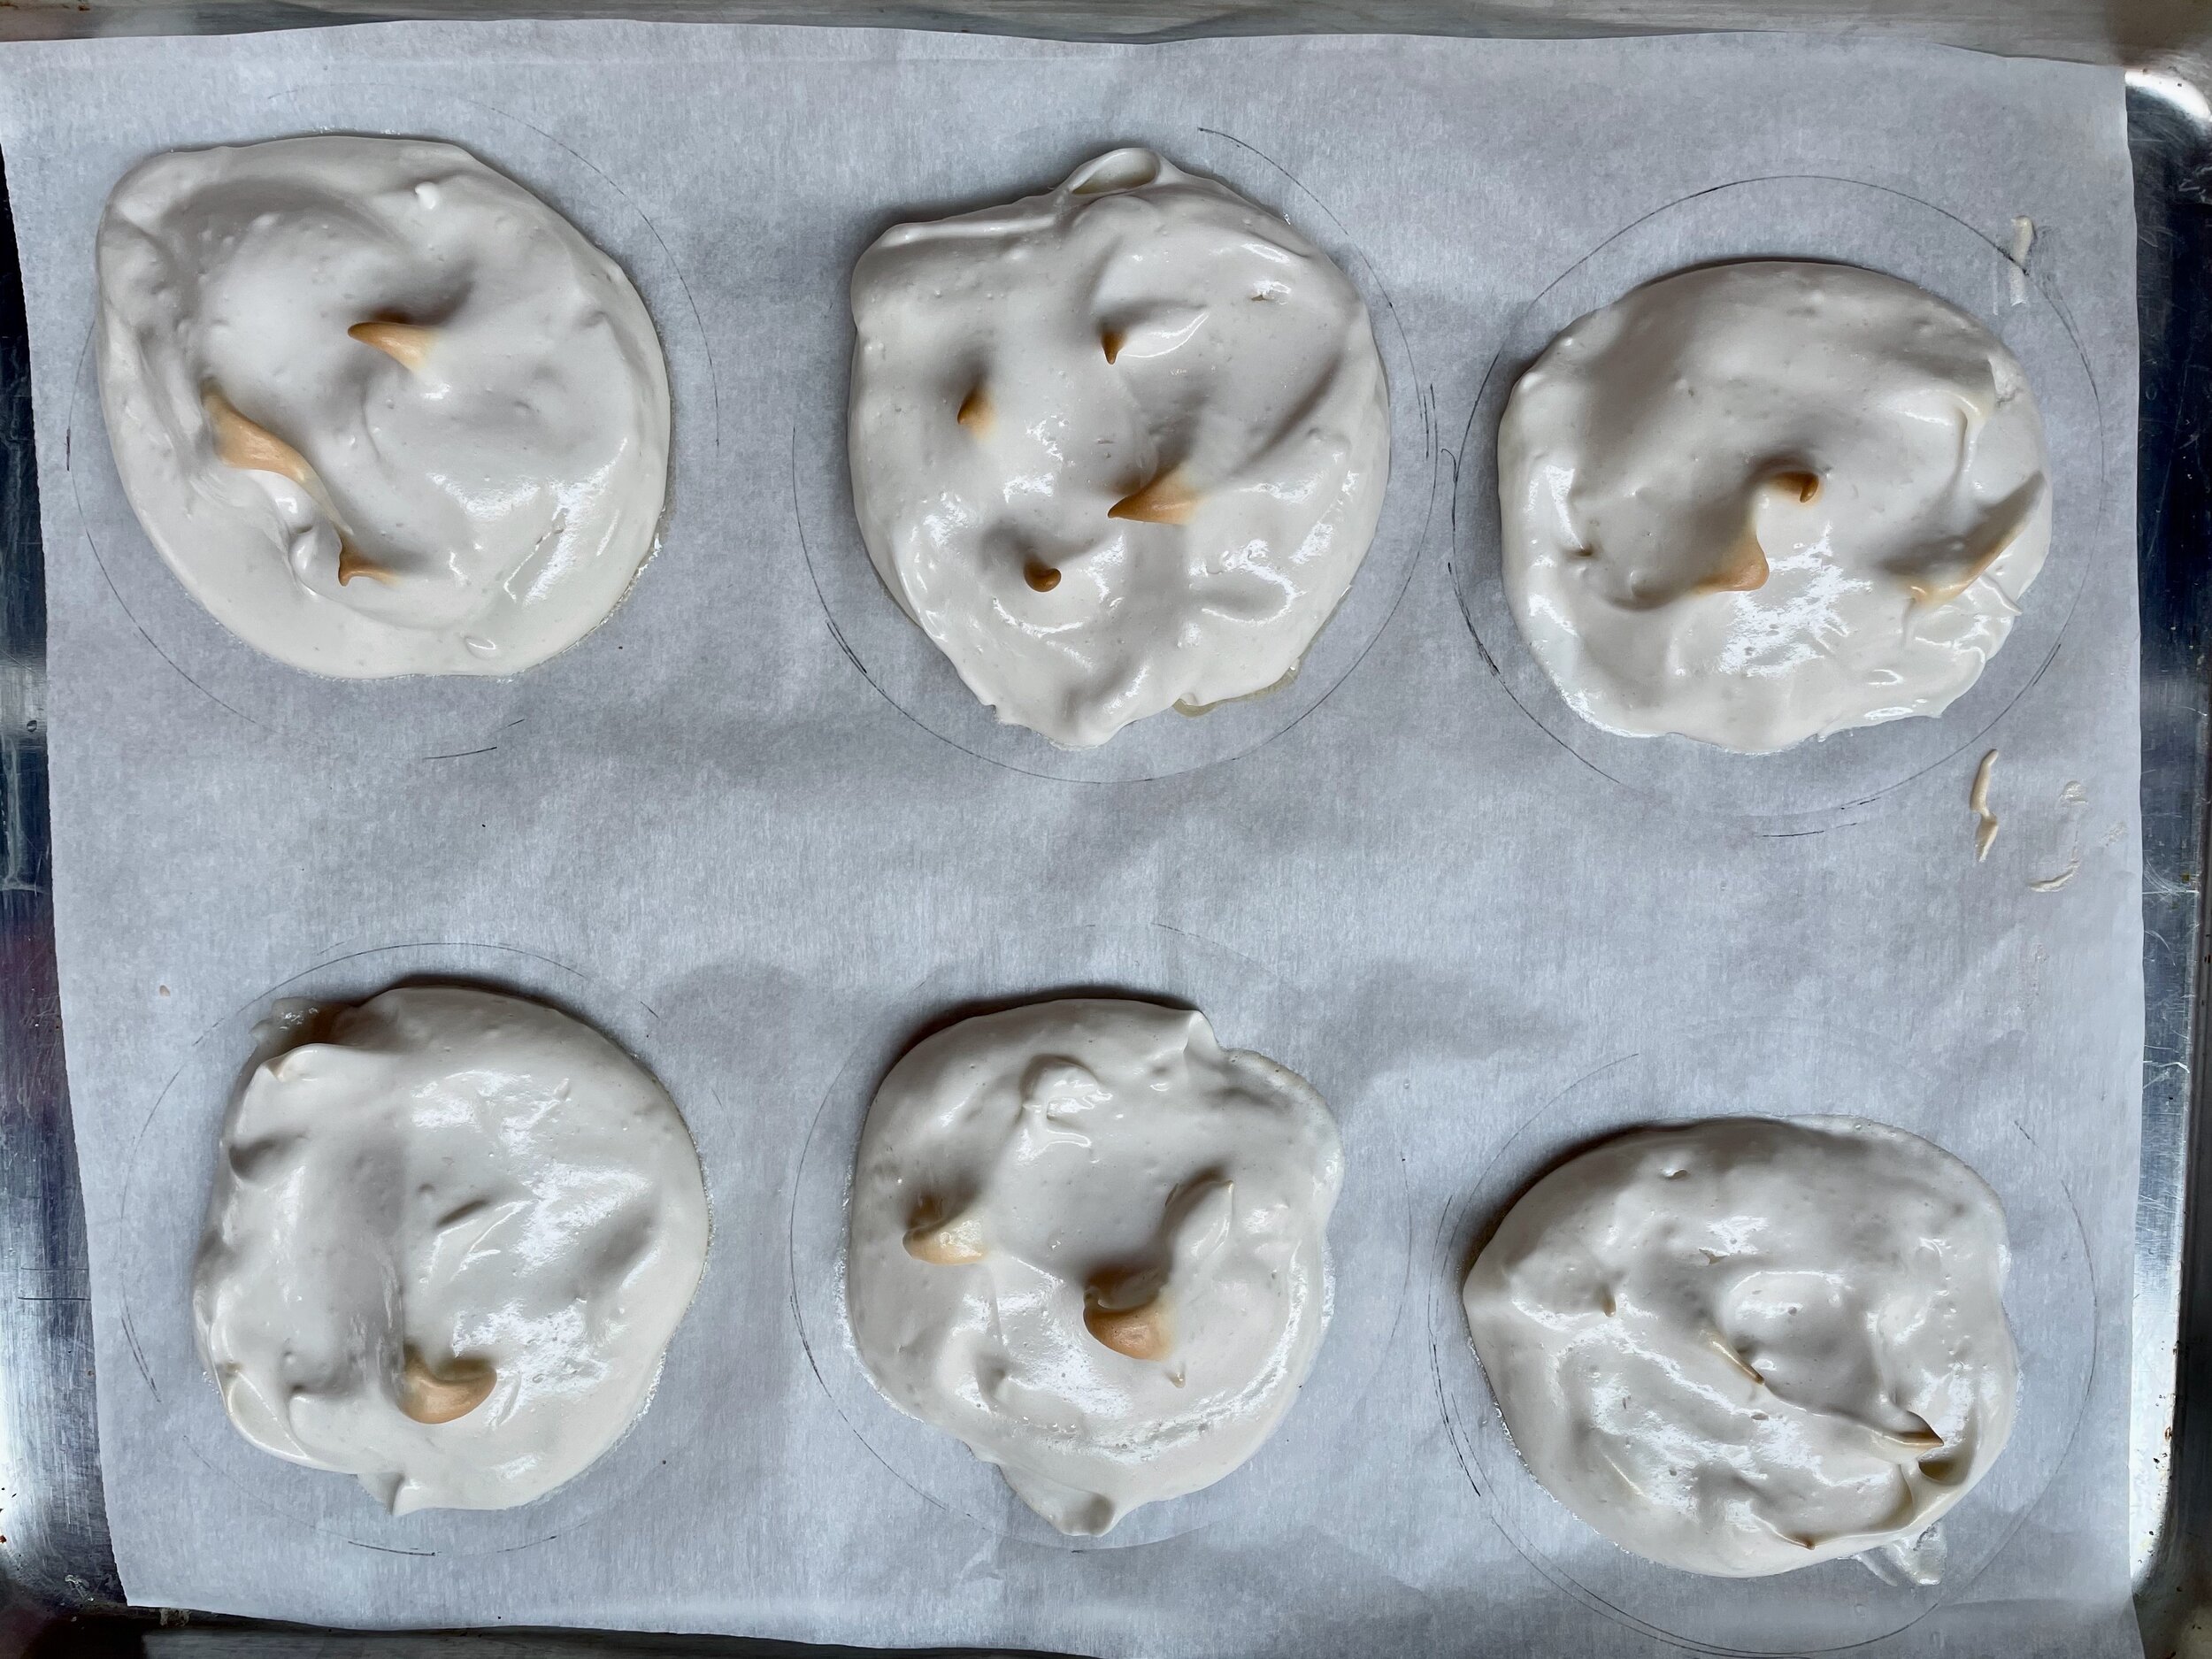
Leslie’s perfect (low FODMAP) meringue
20 minutes (plus chilling time) • Gluten-free • Dairy-free • Low FODMAP • Makes about 2 cups
20 minutes (plus chilling time) • Gluten-free • Dairy-free • Low FODMAP • Makes about 2 cups • Making meringue is super simple and it can make a plain dessert into something fabulous in no time.
Ingredients
1 tablespoon cornstarch
1 tablespoon granulated sugar
1/3 cup water
4 large egg whites at room temperature
½ teaspoon vanilla
¼ teaspoon cream of tartar
½ cup powdered (confectioner’s) sugar
Directions
Remove eggs from the refrigerator and allow them to come to room temperature.
Combine cornstarch and sugar. Gradually stir the water in, making a smooth runny paste.
Bring to a boil over medium heat stirring briskly, then boil 15 seconds. Remove from heat, cover, and set aside.
Beat room temperature egg whites in a metal bowl until foamy.
Add the vanilla and the cream of tartar and continue to beat until soft peaks form.
Very gradually, beat in the powdered sugar.
Then, once the sugar is all mixed in, beat on high until peaks are very stiff and glossy but not dry.
Reduce speed to low and beat in the cornstarch paste 1 tablespoon at a time. When all the paste is incorporated, increase speed to medium and beat for 10 seconds.
Either spread over hot pie filling (starting at the edges and working your way in) and bake as directed in the recipe.
Or line a baking sheet with parchment and mark circles to match your serving glass/dish size (as shown in the image above). Then, spoon or pipe the meringue onto the parchment in a size that is slightly smaller than the marked circles (so the final meringue will fit nicely in your serving dish).
Use a knife or rubber spatula to make little peaks in the meringue that will brown as the meringues bake.
Bake for 20 minutes at 325 degrees F.
When meringues are cooked, let them cool on the parchment, then carefully lift them off the paper and onto your dessert when ready to serve.
Pro Tip: Serve over Leslie’s Lemon Curd for an amazing dessert!
Original recipe contributed by my dear friend Leslie Kingsbury of Ajijic, Mexico
This post may contain affiliate links so you can easily purchase items listed on the page. In some cases, we have provided a special discount code for IBS Game Changers so be sure to use it when you purchase an item to get the discount that has been arranged just for you!
More Deliciously Low FODMAP™ desserts you might enjoy
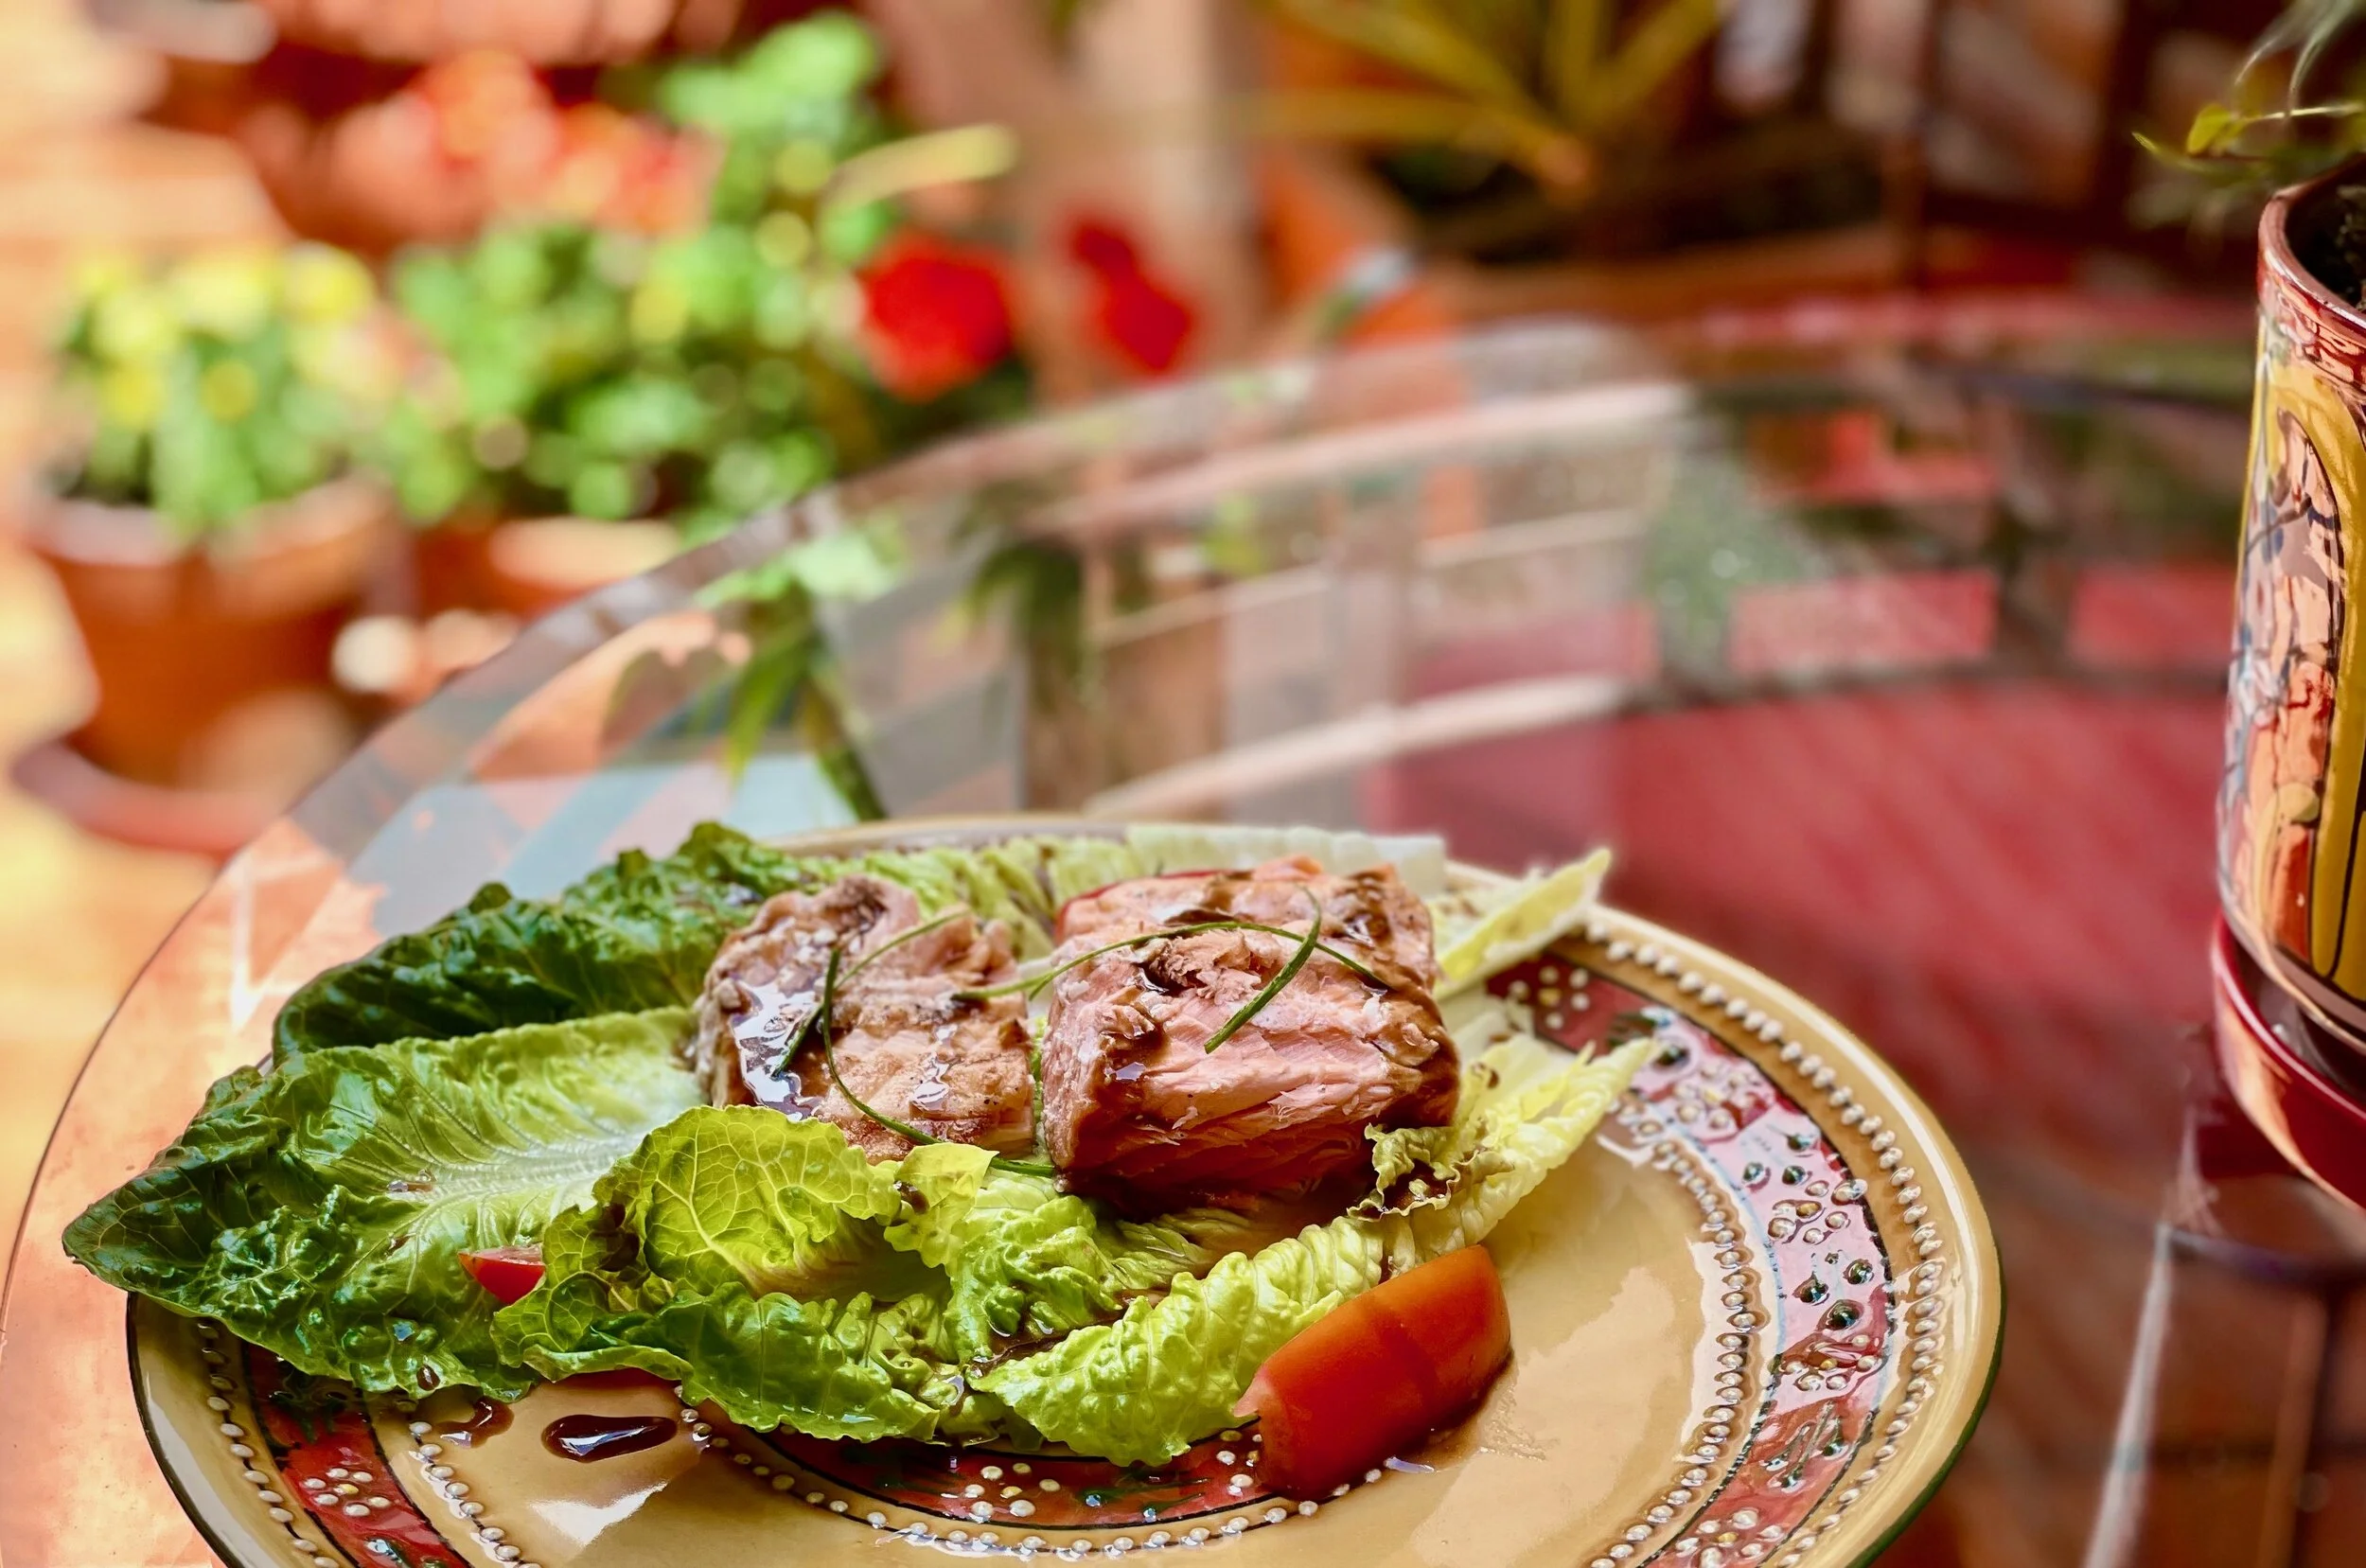
Salmon Salad with Balsamic Mustard Vinaigrette (low FODMAP)
20 minutes • Gluten-free • Dairy-free • Low FODMAP • Serves 4
20 Minutes • Low FODMAP • Gluten-Free • Lactose-free • Serves 4 • Ok to make-ahead: Steps 1 - 2
This is a simple, yet elegant salad with cold salmon and a sweet balsamic dressing that is a perfect pairing with the fish. It’s a great recipe if you have leftover salmon so make extra salmon when you have the chance! Alternatively, you can prepare our Smoked Salmon which makes an amazing centerpiece for this salad.
Ingredients
1-pound salmon cooked and chilled
12 leaves romaine (washed and patted dry)
2 Roma tomatoes (sliced) or cherry tomatoes (cut in half)
1 green onion (green part only) sliced very thinly into small ribbons
DRESSING INGREDIENTS:
2 teaspoons Dijon mustard
1/4 cup olive oil
1/4 cup balsamic vinegar
1/4 cup maple syrup
Directions
(1) Prepare the lettuce: Wash and pat dry the lettuce. Lay the lettuce leaves on the plate.
(2) Prepare the dressing: Shake the salad dressing ingredients in a small jar. Drizzle the dressing over the salmon and the salad.
(3) Finish: Lay the salmon on the lettuce and add the tomatoes and green onions.
(4) Plate and serve: Serve with a small pitcher of extra dressing on the side.
Make-ahead note: This dressing will keep for a week in the fridge so feel free to make it ahead and make extra to have on hand.
Eat and enjoy every bite because you can!
This post may contain affiliate links so you can easily purchase items listed on the page. There is no increased cost to you for purchasing items through these links so feel free to use them!
Low FODMAP quick Florentine chicken with brie
10 Minutes Prep • 15 Minutes Cook • Gluten-free • Low FODMAP • Serves 4
10 Minutes Prep • 15 Minutes Cook • Gluten-free • Low FODMAP • Serves 4 • I love serving this for dinner guests because it’s so quick to make and finishes in the oven so you can be ready to plate it all at once. It’s colorful, flavorful, and delicious. Serve over steamed rice, gluten-free pasta, or keep it light and serve it with a crisp green salad.

INGREDIENTS:
1 large egg, beaten
1/4 cup gluten-free flour
4 boneless skinless chicken breast cutlets (about 3/4 inch thick)
Kosher salt and pepper
6 tablespoons cold salted butter*, cubed
2 - 4 tablespoons garlic-infused olive oil
2 cups cherry tomatoes
2 tablespoons fresh thyme (stripped from the stems)
1 pinch crushed red pepper flakes (optional)
4 ounces brie (double or triple cream is best), rind removed**
3 tablespoons fresh-squeezed lemon juice
1/2 cup (or more to taste) fresh basil, chiffonade (sliced in thin strips)
DIRECTIONS:
Place the egg and flour in separate shallow bowls.
Season the chicken with salt and pepper. Dredge both sides of the chicken through the egg, and then through the flour, tossing to coat. Place the chicken on a plate.
In an oven-safe skillet set over medium heat, add 1 - 2 tablespoons olive oil. When the oil shimmers, add the tomatoes, 1 tablespoon thyme, and a pinch each of salt, pepper, and red pepper flakes. Cook until the tomatoes begin to pop, about 4-5 minutes. Turn off the heat and transfer the tomatoes to a plate.
In the same skillet, melt together 4 tablespoons butter and 1 - 2 tablespoons olive oil. When the oil shimmers, add the chicken and cook until the bottom side is golden brown, about 3-4 minutes. Flip the chicken and add 2 more tablespoons butter and 1 tablespoon thyme, swirling the butter around the chicken. Cook, basting the chicken with the butter until the chicken is cooked and golden brown, about 4 to 5 minutes.
Meanwhile, preheat the broiler.
Remove your skillet from the heat, add the brie slices on top of each chicken cutlet. Spoon the tomatoes and lemon juice over the top. Transfer to the oven, broil for 2 minutes until the cheese is melted. Top the chicken with lots of fresh basil. Serve with plenty of fresh basil over rice or gluten-free pasta, or alongside a crisp green salad or steamed broccoli florets tossed in a bit of the chicken sauce.
Enjoy!
Pro tips:
*Use cultured butter if you can find it. It's fermented for 20 hours then churned to 82% butterfat which makes the taste incredibly rich and it raises the smoke point, making it ideal for browning.
** Put the brie in the freezer for about 20 minutes and then cut the rind off once it’s firmed up.
This post may contain affiliate links so you can easily purchase items listed on the page. There is no increased cost to you for purchasing items through these links so feel free to use them!
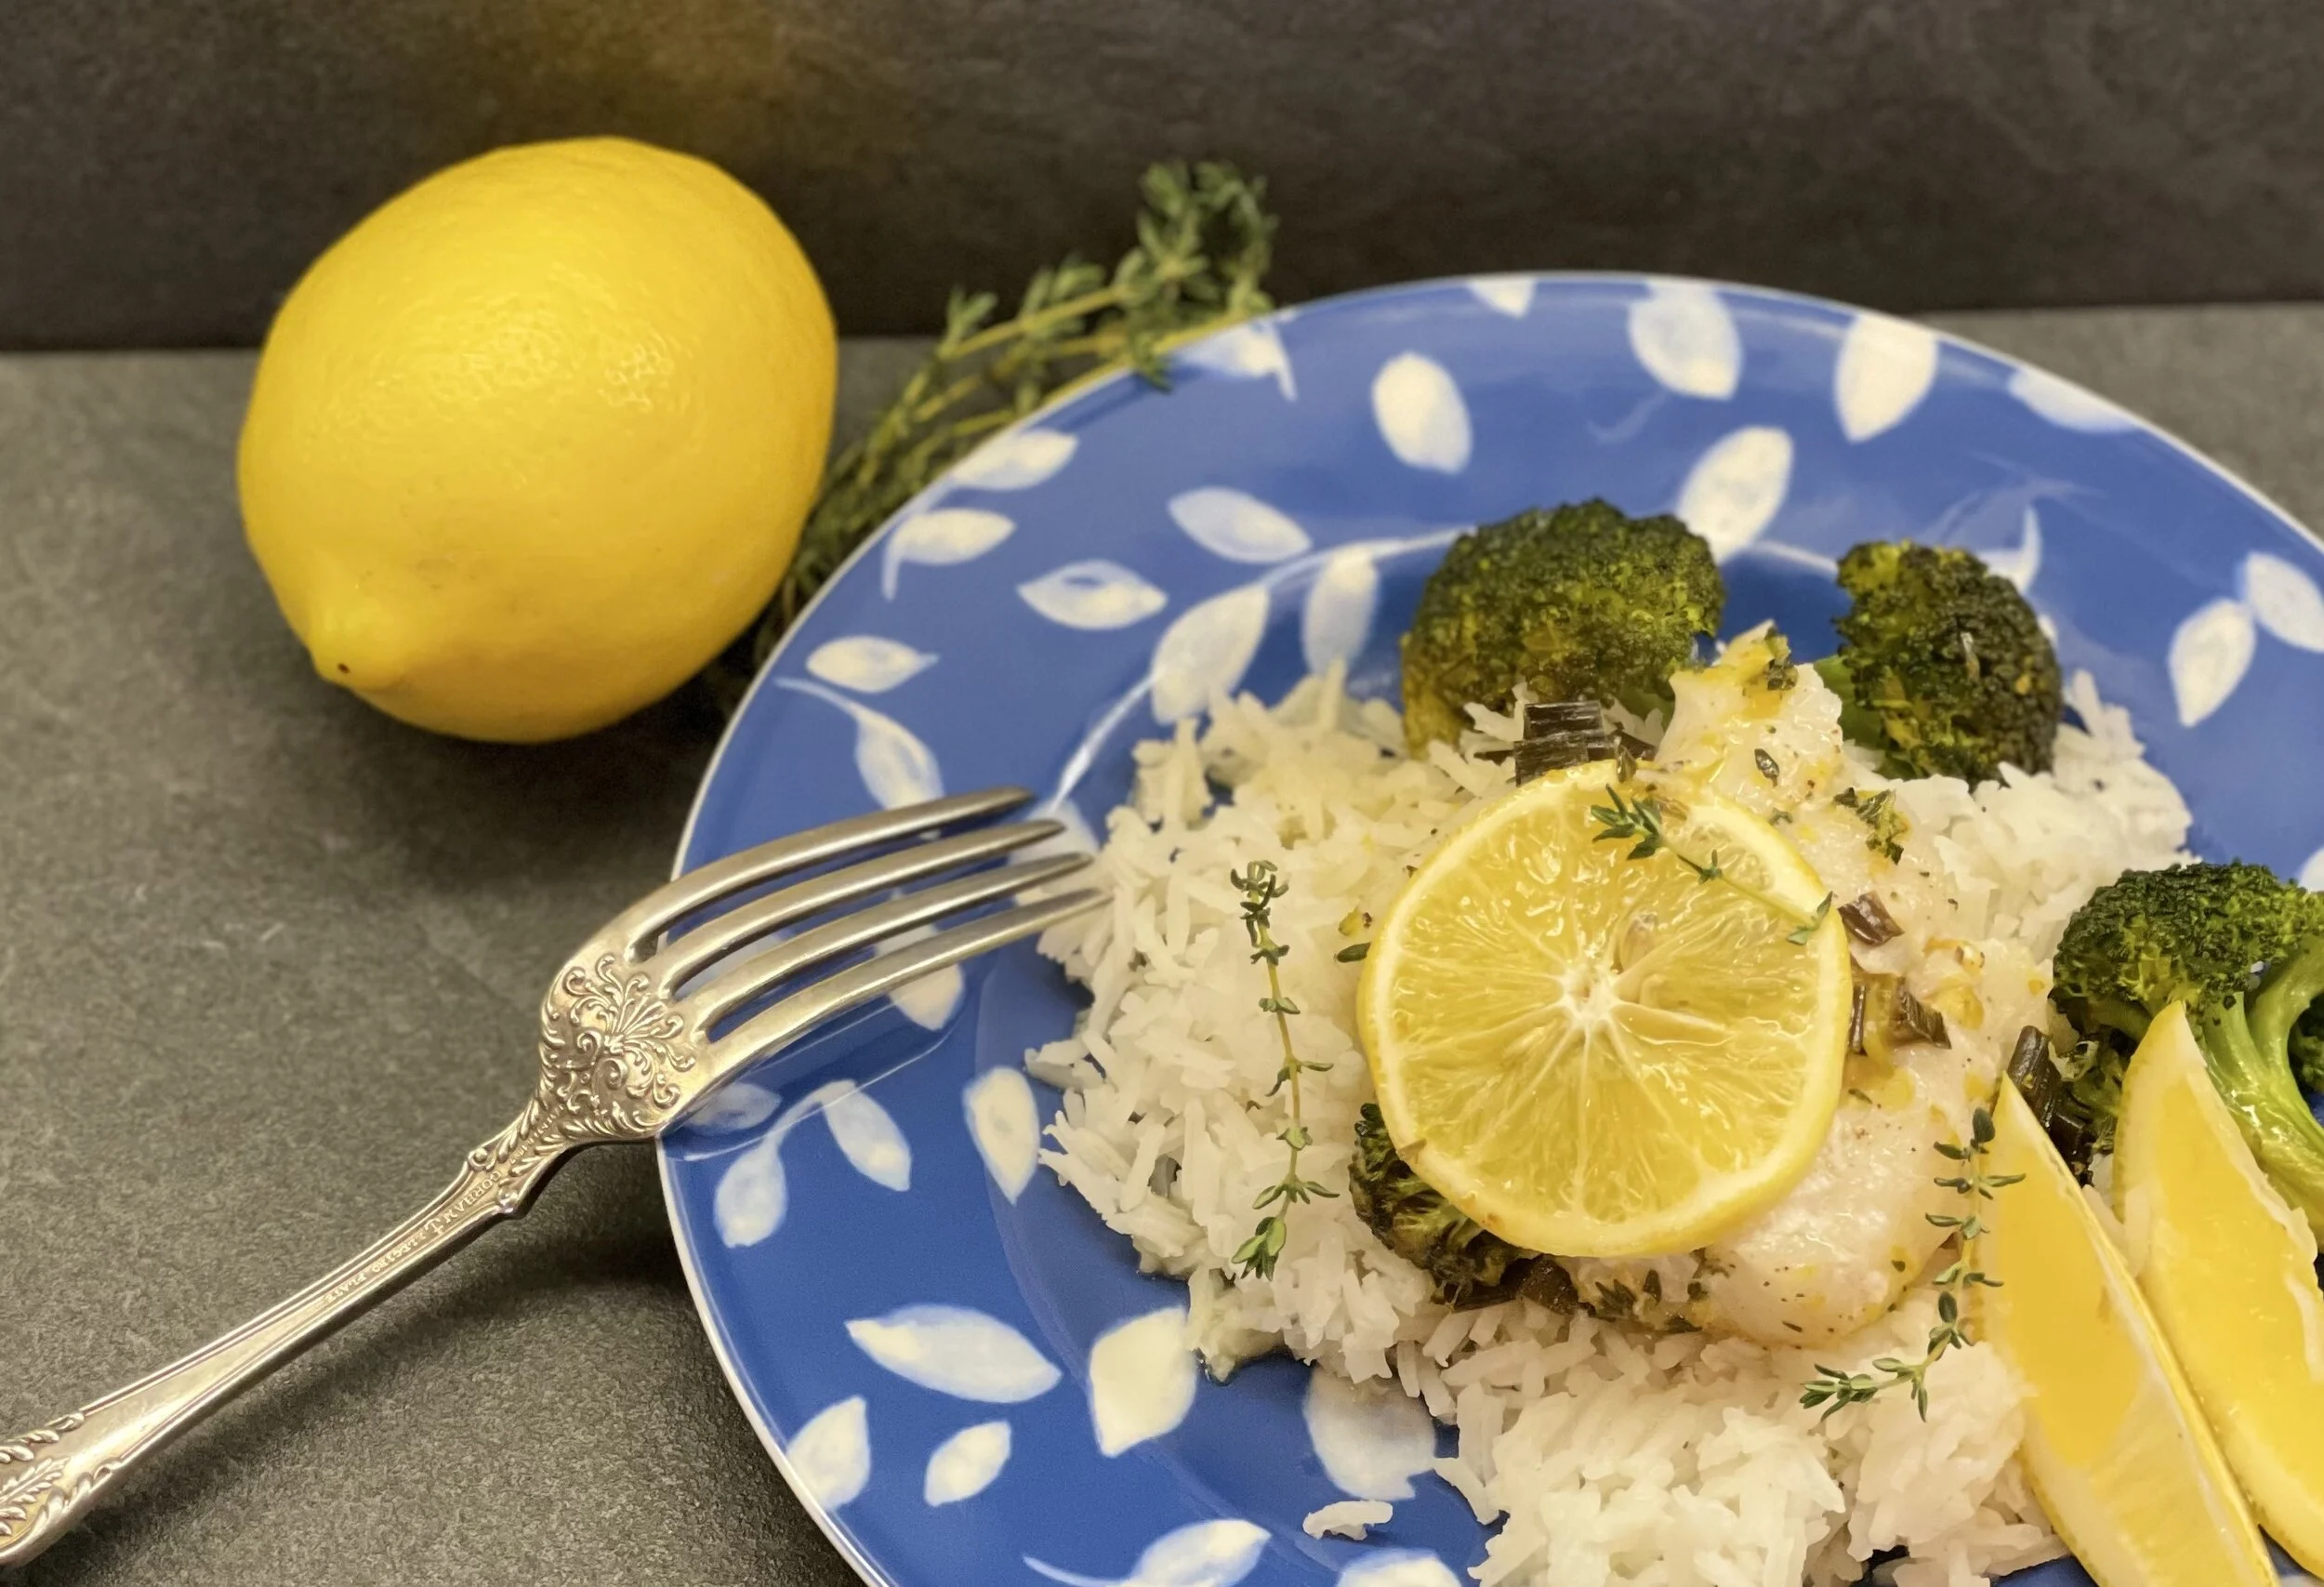
Low FODMAP baked lemon thyme cod
30 Minutes • Gluten-free • Low FODMAP • Serves 4
30 Minutes • Gluten-free • Low FODMAP • Serves 4 • This recipe delivers a wonderful delicate flavor that is sure to please the whole family. It’s light and flavorful and you cook the vegetables with the fish so it's an easy one-pan meal. Get the freshest fish you can for the best flavor and texture.
MARINADE INGREDIENTS:
1 – 1 1/2 pounds cod – or sub black cod, halibut, sea bass, or other firm white fish
2 tablespoons garlic-infused olive oil
1 teaspoon kosher salt
½ teaspoon pepper
2 teaspoons fresh thyme
Zest from one lemon
INGREDIENTS:
2 tablespoons garlic-infused olive oil
1 leek, green part only, thinly sliced
2 cups broccoli florets only (discard the stems)
Zest of one lemon
1 tablespoons fresh thyme
1/2 cup low FODMAP chicken broth, more as needed
1/2 cup dry white wine
Generous pinch salt and pepper
DIRECTIONS:
Preheat oven to 400 degrees F.
Cut cod into 4 pieces and pat dry. Place in a bowl, drizzle with olive oil and sprinkle with salt and pepper, thyme, and zest of one lemon and toss to coat well. Set aside.
Heat 2 tablespoons olive oil over medium heat in an oven-proof skillet, cast iron skillet, or dutch oven. Add leek greens and cook, stirring until leek greens and tender. Add the broccoli, zest of one lemon, fresh thyme, broth, and white wine. Stir in salt and pepper, simmer on medium-low heat until liquid has reduced by half, about 5 minutes.
If the broccoli needs a bit longer, add another splash of broth or wine and cover the pan for a few minutes, letting it steam and get tender. Once broccoli is tender. If the mixture seems dry, add another splash of broth—you want this slightly wet ( ¼- ½ inch liquid in the bottom of the pan).
Nestle in the fish in the pan, scraping out any excess marinade over the fish. Bake in the oven until fish is cooked through—about 10-15 minutes, depending on thickness.
Serve on a bed of steamed rice with extra lemon slices.
Enjoy!
This post may contain affiliate links so you can easily purchase items listed on the page. There is no increased cost to you for purchasing items through these links so feel free to use them!
Low FODMAP veggie stir fry
10 Minutes Prep • 15 Minutes Cook • Gluten-free • Low FODMAP • Vegetarian • Serves 4
10 Minutes Prep • 15 Minutes Cook • Gluten-free • Low FODMAP • Vegetarian • Serves 4 • This stir fry is quick to make, full of flavor, texture, and color. It’s also easy to modify with veggies you have on hand. I hope you enjoy this dish as much as we do.
INGREDIENTS:
7 ounces broccoli florets only
10 radishes (sliced or quartered)
1 red bell pepper (thinly sliced)
1 sweet potato (thinly sliced in half moons)
2 cups brown or white rice
2 tablespoons roasted and salted peanuts (chopped)
2 tablespoons garlic-infused olive oil
4-6 green onions (green part only - sliced)
Optional: Sliced avocado (1/8 per serving is low FODMAP), fresh sprouts (such as broccoli sprouts) or cilantro, to garnish
SAUCE
4 tablespoons gluten-free low sodium soy sauce
4 tsp toasted sesame oil (for flavor)
3 tablespoons rice vinegar or lime juice
1 tablespoon mirin or maple syrup
1 tablespoon finely grated ginger, adjust to taste
2 teaspoons cornstarch or arrowroot
DIRECTIONS:
Chop your veggies into small, equal size pieces. Cut the broccoli into florets and discard the stems. Slice or quarter the radishes, slice the bell pepper into thin slices and slice the sweet potato into thin slices or half-moons.
Prepare rice according to package instructions. If using brown rice, allow extra cooking time before you start cooking your veggies.
Mix all the sauce ingredients together in a bowl or mason jar. Adjust the amount of ginger to taste and set aside.
Heat a large frying pan over medium-high heat, add in a tablespoon of oil to the hot pan and swirl it around so that it coats the bottom of the pan.
Throw in the broccoli and sweet potato and stir-fry for about 1 minute.
After 1 minute, add the bell pepper and stir-fry for another minute.
Next add in the radishes, and green onions. Stir fry for another minute or so.
Push the contents of the pan to the side with your spatula and give the prepared sauce a good stir or shake (so it’s well combined before you add) and pour the sauce into the hot pan.
Turn the heat off immediately after adding the sauce, it should thicken in the residual heat of the pan. Mix it into the veggies.
Divide the cooked rice between four bowls, top with stir-fried veggies, and chopped peanuts cashews. Garnish with sliced avocado, fresh sprouts, or cilantro if you wish.
This post may contain affiliate links so you can easily purchase items listed on the page. There is no increased cost to you for purchasing items through these links so feel free to use them!
Are probiotics the answer for your IBS symptoms?
Another free guide to help you get your IBS symptoms under control.
The answer to this question is maybe yes and maybe no. And, you won’t know if it’s a yes until you test it in a very systematic way. How do you do that? Let me tell you…

If you want to try a probiotic, you have to be systematic or you will never know if it is helping, hurting, or doing nothing at all.
Here’s how you do that:
Choose a 15-30-day period when you can easily eat a purely low FODMAP diet so you have a clean environment in which to test your body’s response to probiotic therapy. Introduce the daily probiotic and take it daily for 15-30 days. If you notice a positive change in your gut behavior then a probiotic may be the answer for you. If you’ve been scrupulous about eating a low FODMAP diet during your probiotic introduction and you notice a negative change (increased diarrhea, constipation, gas, or another discomfort) then a probiotic is likely not the answer for you. If you don’t notice any change at all, then continuing to take a probiotic is up to you. If it makes you FEEL like you’re doing something helpful and there’s no negative consequence, go for it.
There are many options of probiotics out there. One example that contains all three strains that are beneficial for those of us with IBS is Garden of Life Raw Probiotics Ultimate Care. I recommend you browse the probiotics that are available to you locally and read the ingredients to see what strains are included. Probiotics from the Bifidobacterium, Lactobacillus, and Saccharomyces families have shown particular promise for those of us with IBS. (See this article or this article for more on that).
A word of caution: Watch out for the prebiotic soluble fibers inulin and fructooligosaccharides (FOS), which are highly fermentable fibers that should be avoided because they often trigger IBS symptoms. These sneaky little ingredients are frequently added to protein shakes and bars, yogurts, probiotic supplements, fiber supplements, and more.
Wait…what are probiotics and why would they be helpful for my IBS?
Probiotics are an interesting topic for people with irritable bowel syndrome (IBS). Many IBS sufferers take probiotics in the hope that balancing out their gut bacteria will improve their symptoms. A number of studies have shown that specific probiotics may have the potential to do just that.
As you know, if you’ve been following me, I’m not a huge proponent of taking medications or supplements if you can manage your symptoms and maintain your good health through diet. Antibiotics and other medications that may be used to treat symptoms of IBS can damage healthy bacteria living in the gut and actually lead to worsening symptoms of IBS. The more medications you take, the more unknowns you throw into your system, and identifying and solving the real problems can get even harder.
That being said, in some cases a supplement may actually be needed. As noted, probiotics from the Bifidobacterium, Lactobacillus, and Saccharomyces families have shown particular promise for those of us with IBS and may be worth a try, especially if you are not able to tolerate even small amounts of certain high FODMAP food categories or you’re having trouble getting your symptoms under control even with a careful low FODMAP diet approach.
Why is that? Your digestive system is filled with a collection of beneficial bacteria known as “gut flora,” and these bacteria play an important role in your overall health. Sometimes, and for various reasons, your gut flora can get thrown out of balance, allowing harmful bacteria to multiply and take over. Your gut flora, if out of balance, may contribute to the symptoms of IBS. Probiotics may help restore balance in a number of ways, including by inhibiting the growth of harmful bacteria, reducing inflammation, and slowing down the digestive system.
What Are Probiotics?
Probiotics are strains of live bacteria or yeast that are found in foods and supplements. They’re safe, similar to your natural gut flora, and may provide some benefits to your health such as supporting weight loss, improving heart health, improving digestion, and boosting the immune system.
Common foods that naturally contain probiotics tend to be fermented such as yogurt, sauerkraut, tempeh, or kimchi. While we can eat some of these foods (lactose-free yogurt and plain tempeh), others are high in FODMAPs and should be avoided (sauerkraut and kimchi).
How Do Probiotics Work with IBS?
IBS symptoms have been linked to certain changes in the gut flora. For example, people with IBS have been shown to have lower amounts of Lactobacillus and Bifidobacterium in their guts, and higher levels of harmful Streptococcus, E. coli, and Clostridium.
Whether this change is a cause or the result of IBS is uncertain but we do know changes in the gut flora can influence IBS symptoms by increasing inflammation, increasing sensitivity to gas in the intestine, reducing immune function, and changing digestive motility.
Probiotics may improve symptoms in the following ways:
Inhibiting the growth of disease-causing bacteria
Enhancing the immune system’s barrier functions
Helping fight inflammation
Slowing down bowel movements
Reducing gas production by balancing the gut flora
Reducing the gut’s sensitivity to gas buildup
So, are probiotics the answer for you? Only you can answer that question. I hope I have given you the information you need to do that in a systematic way.
This post may contain affiliate links so you can easily purchase items listed on the page. There is no increased cost to you for purchasing items through these links so feel free to use them!
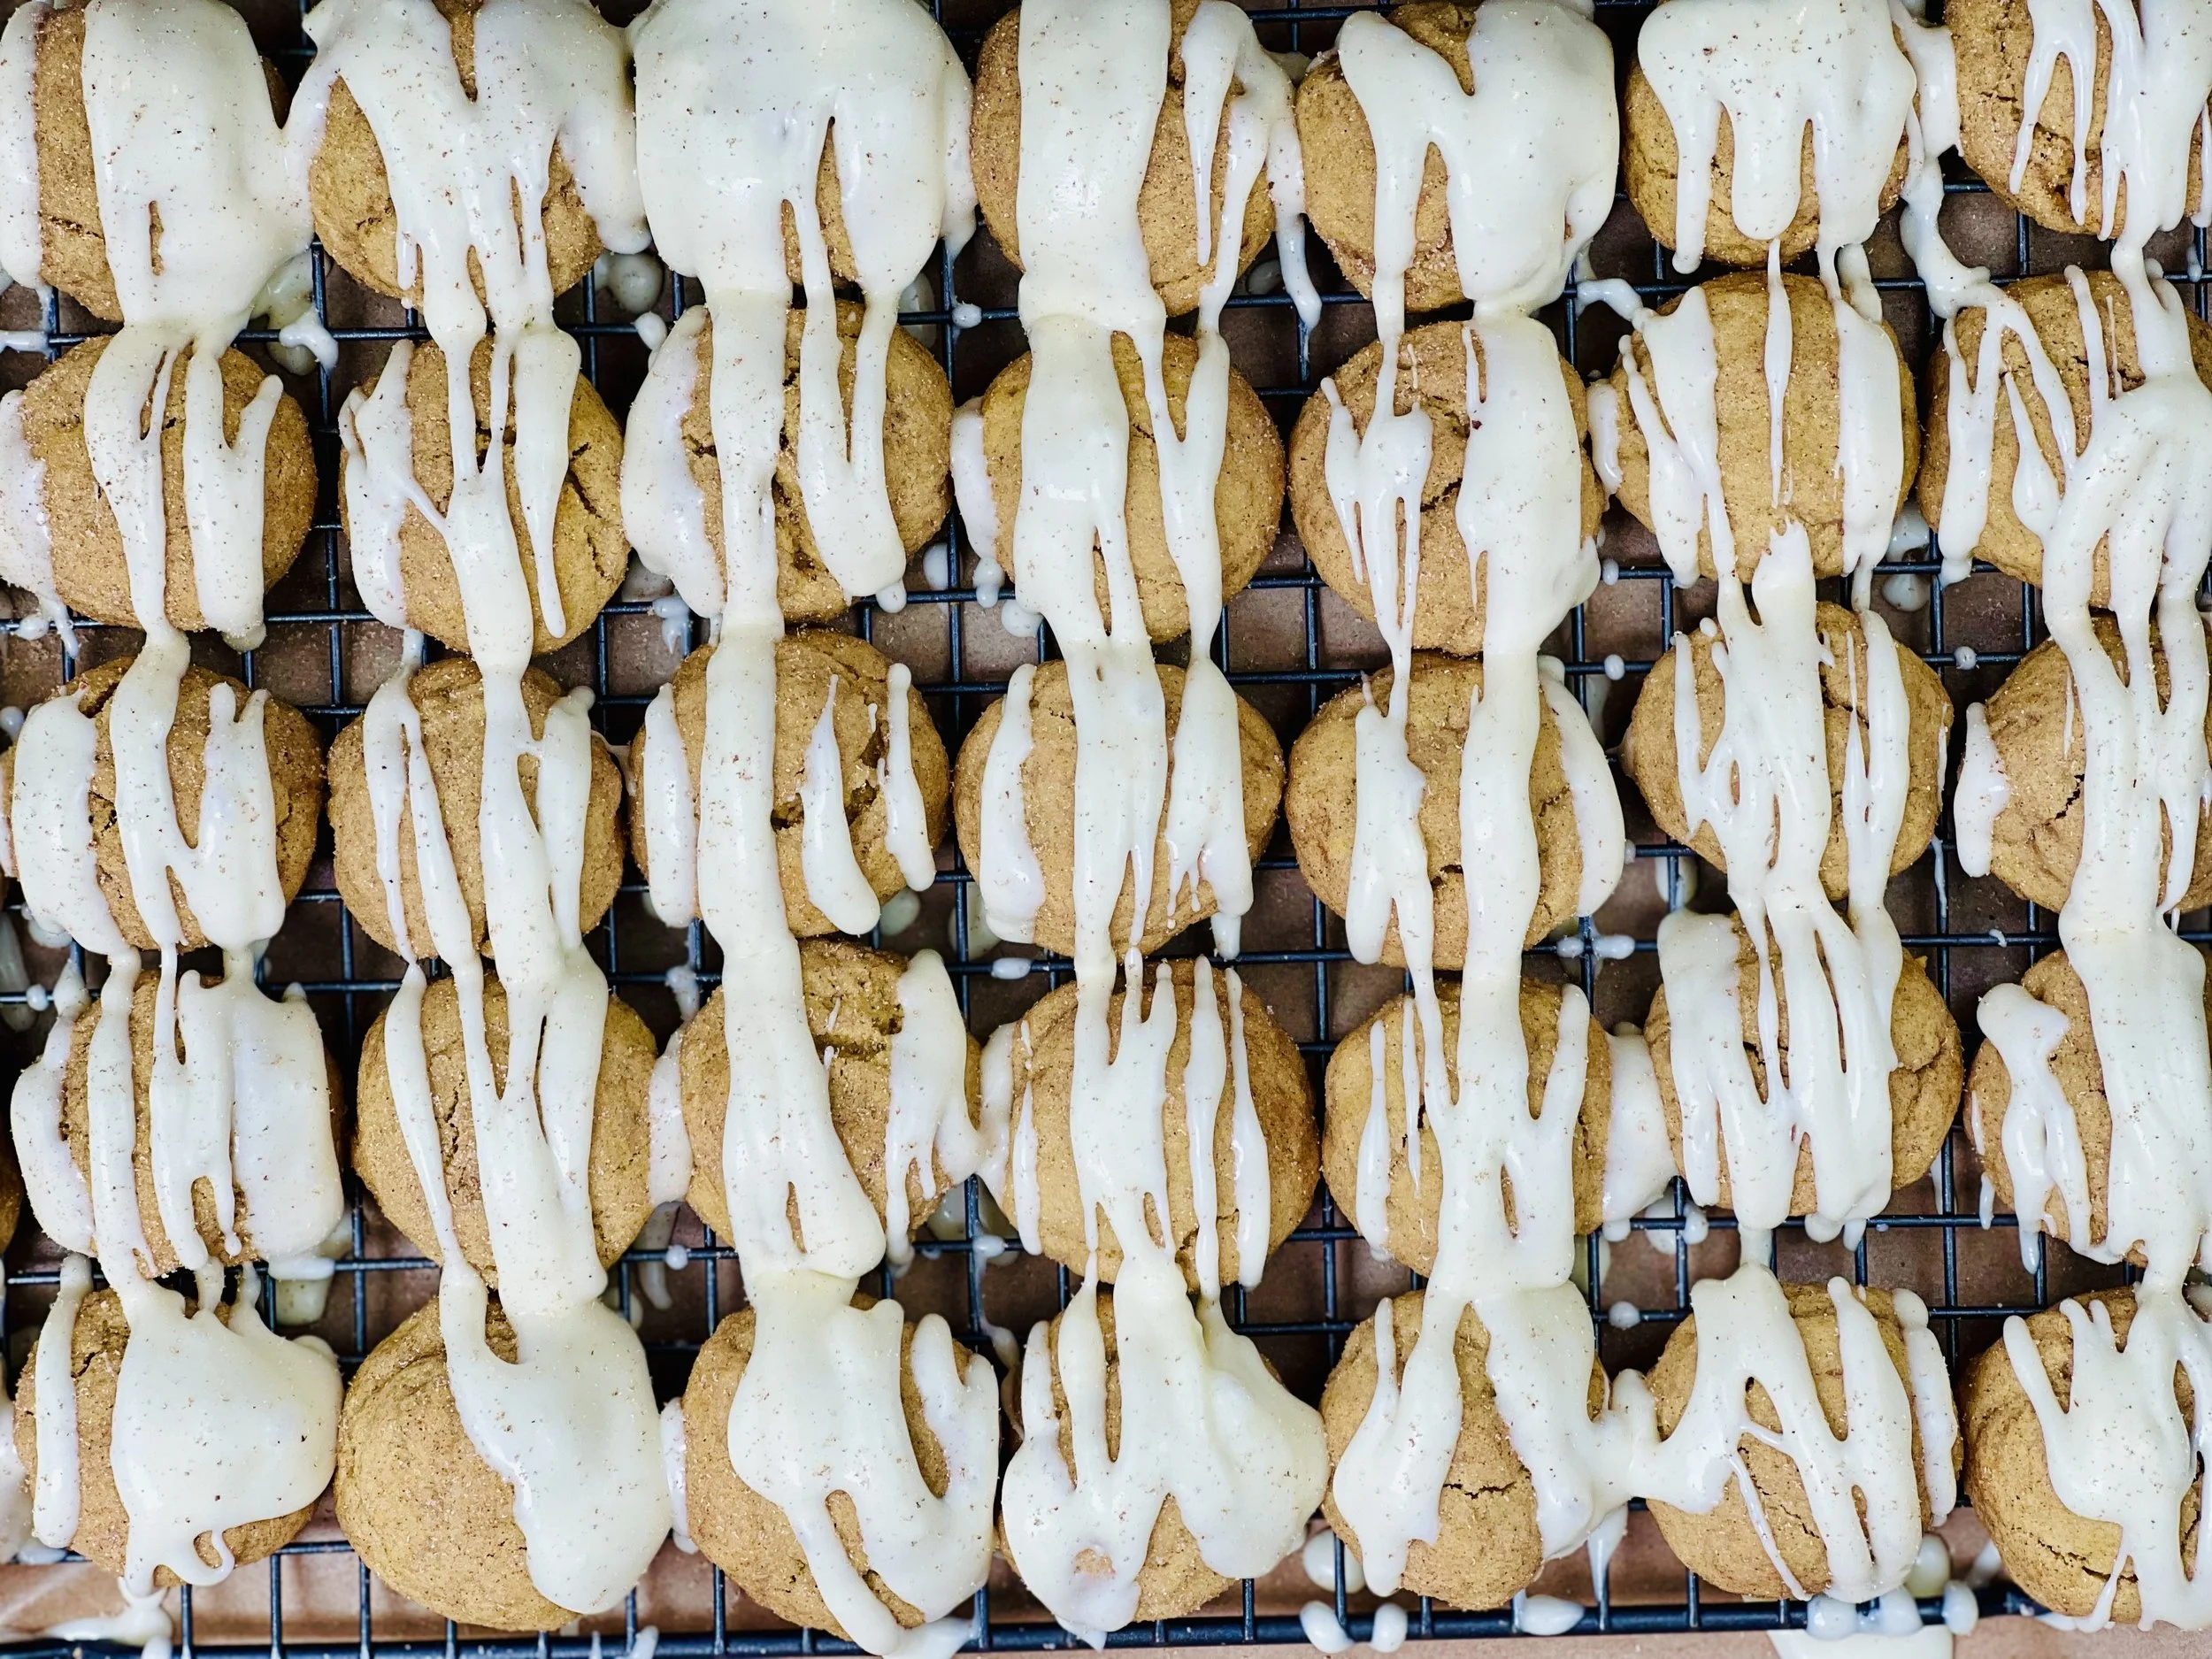
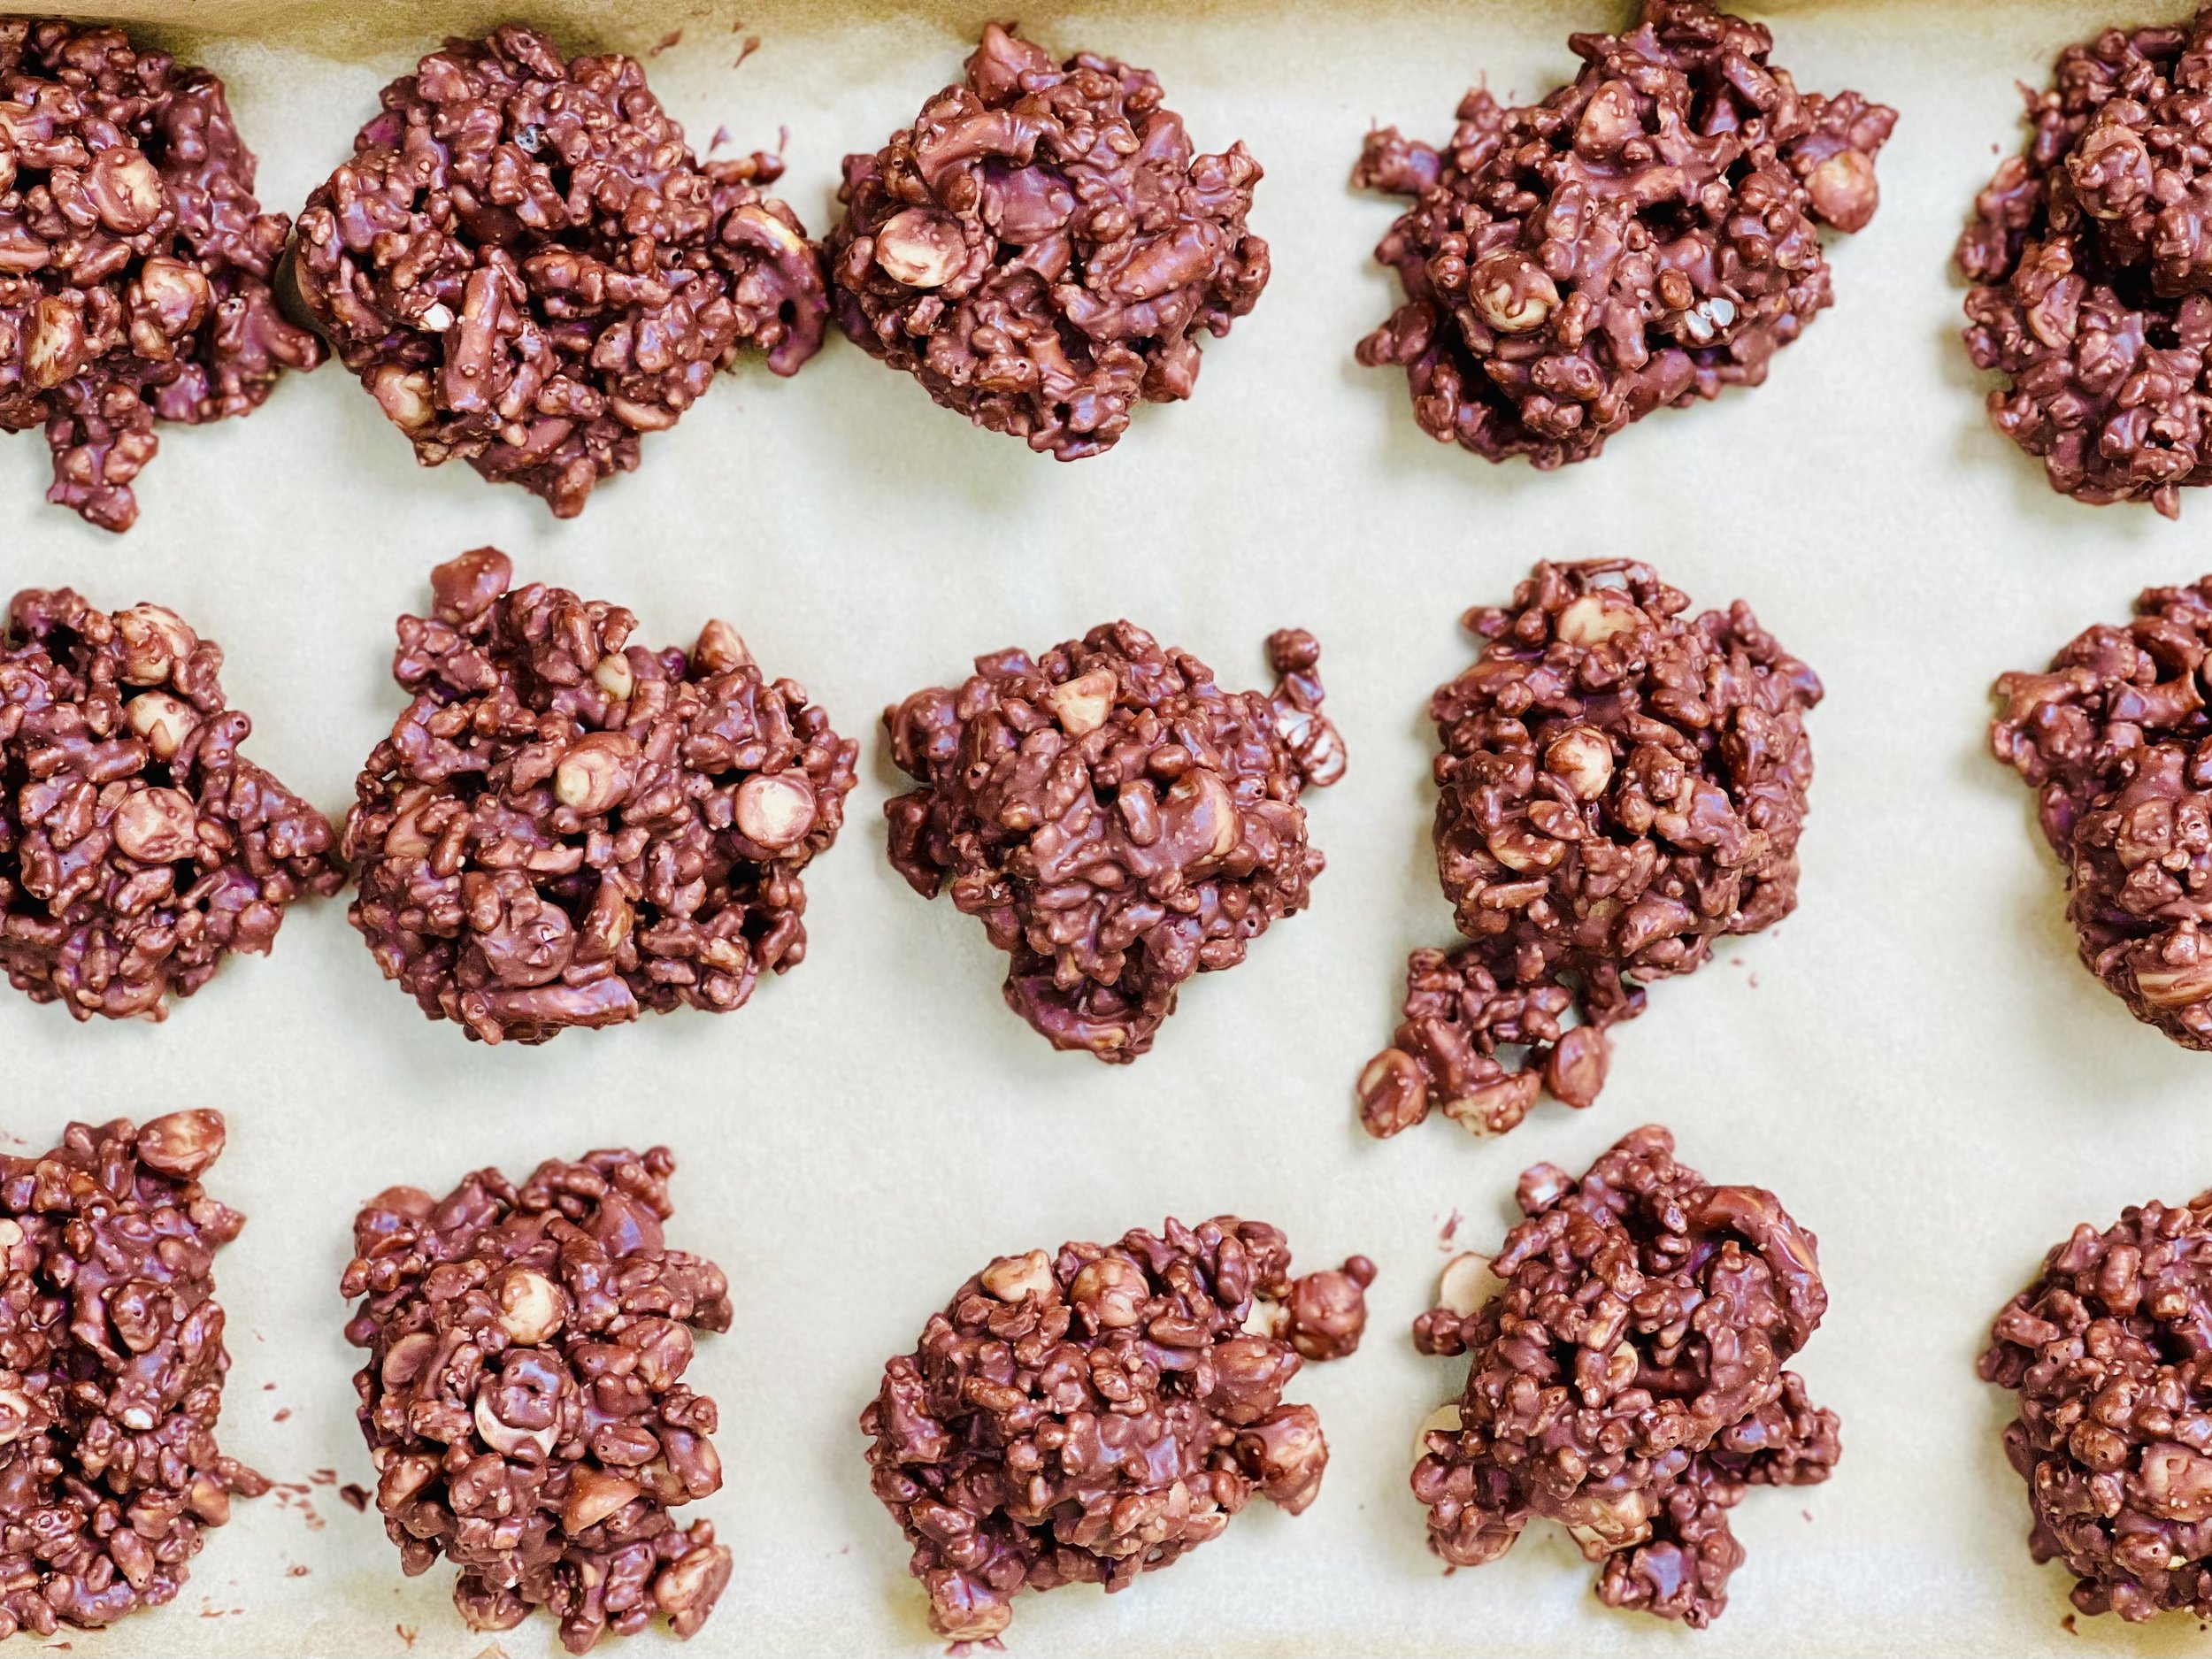
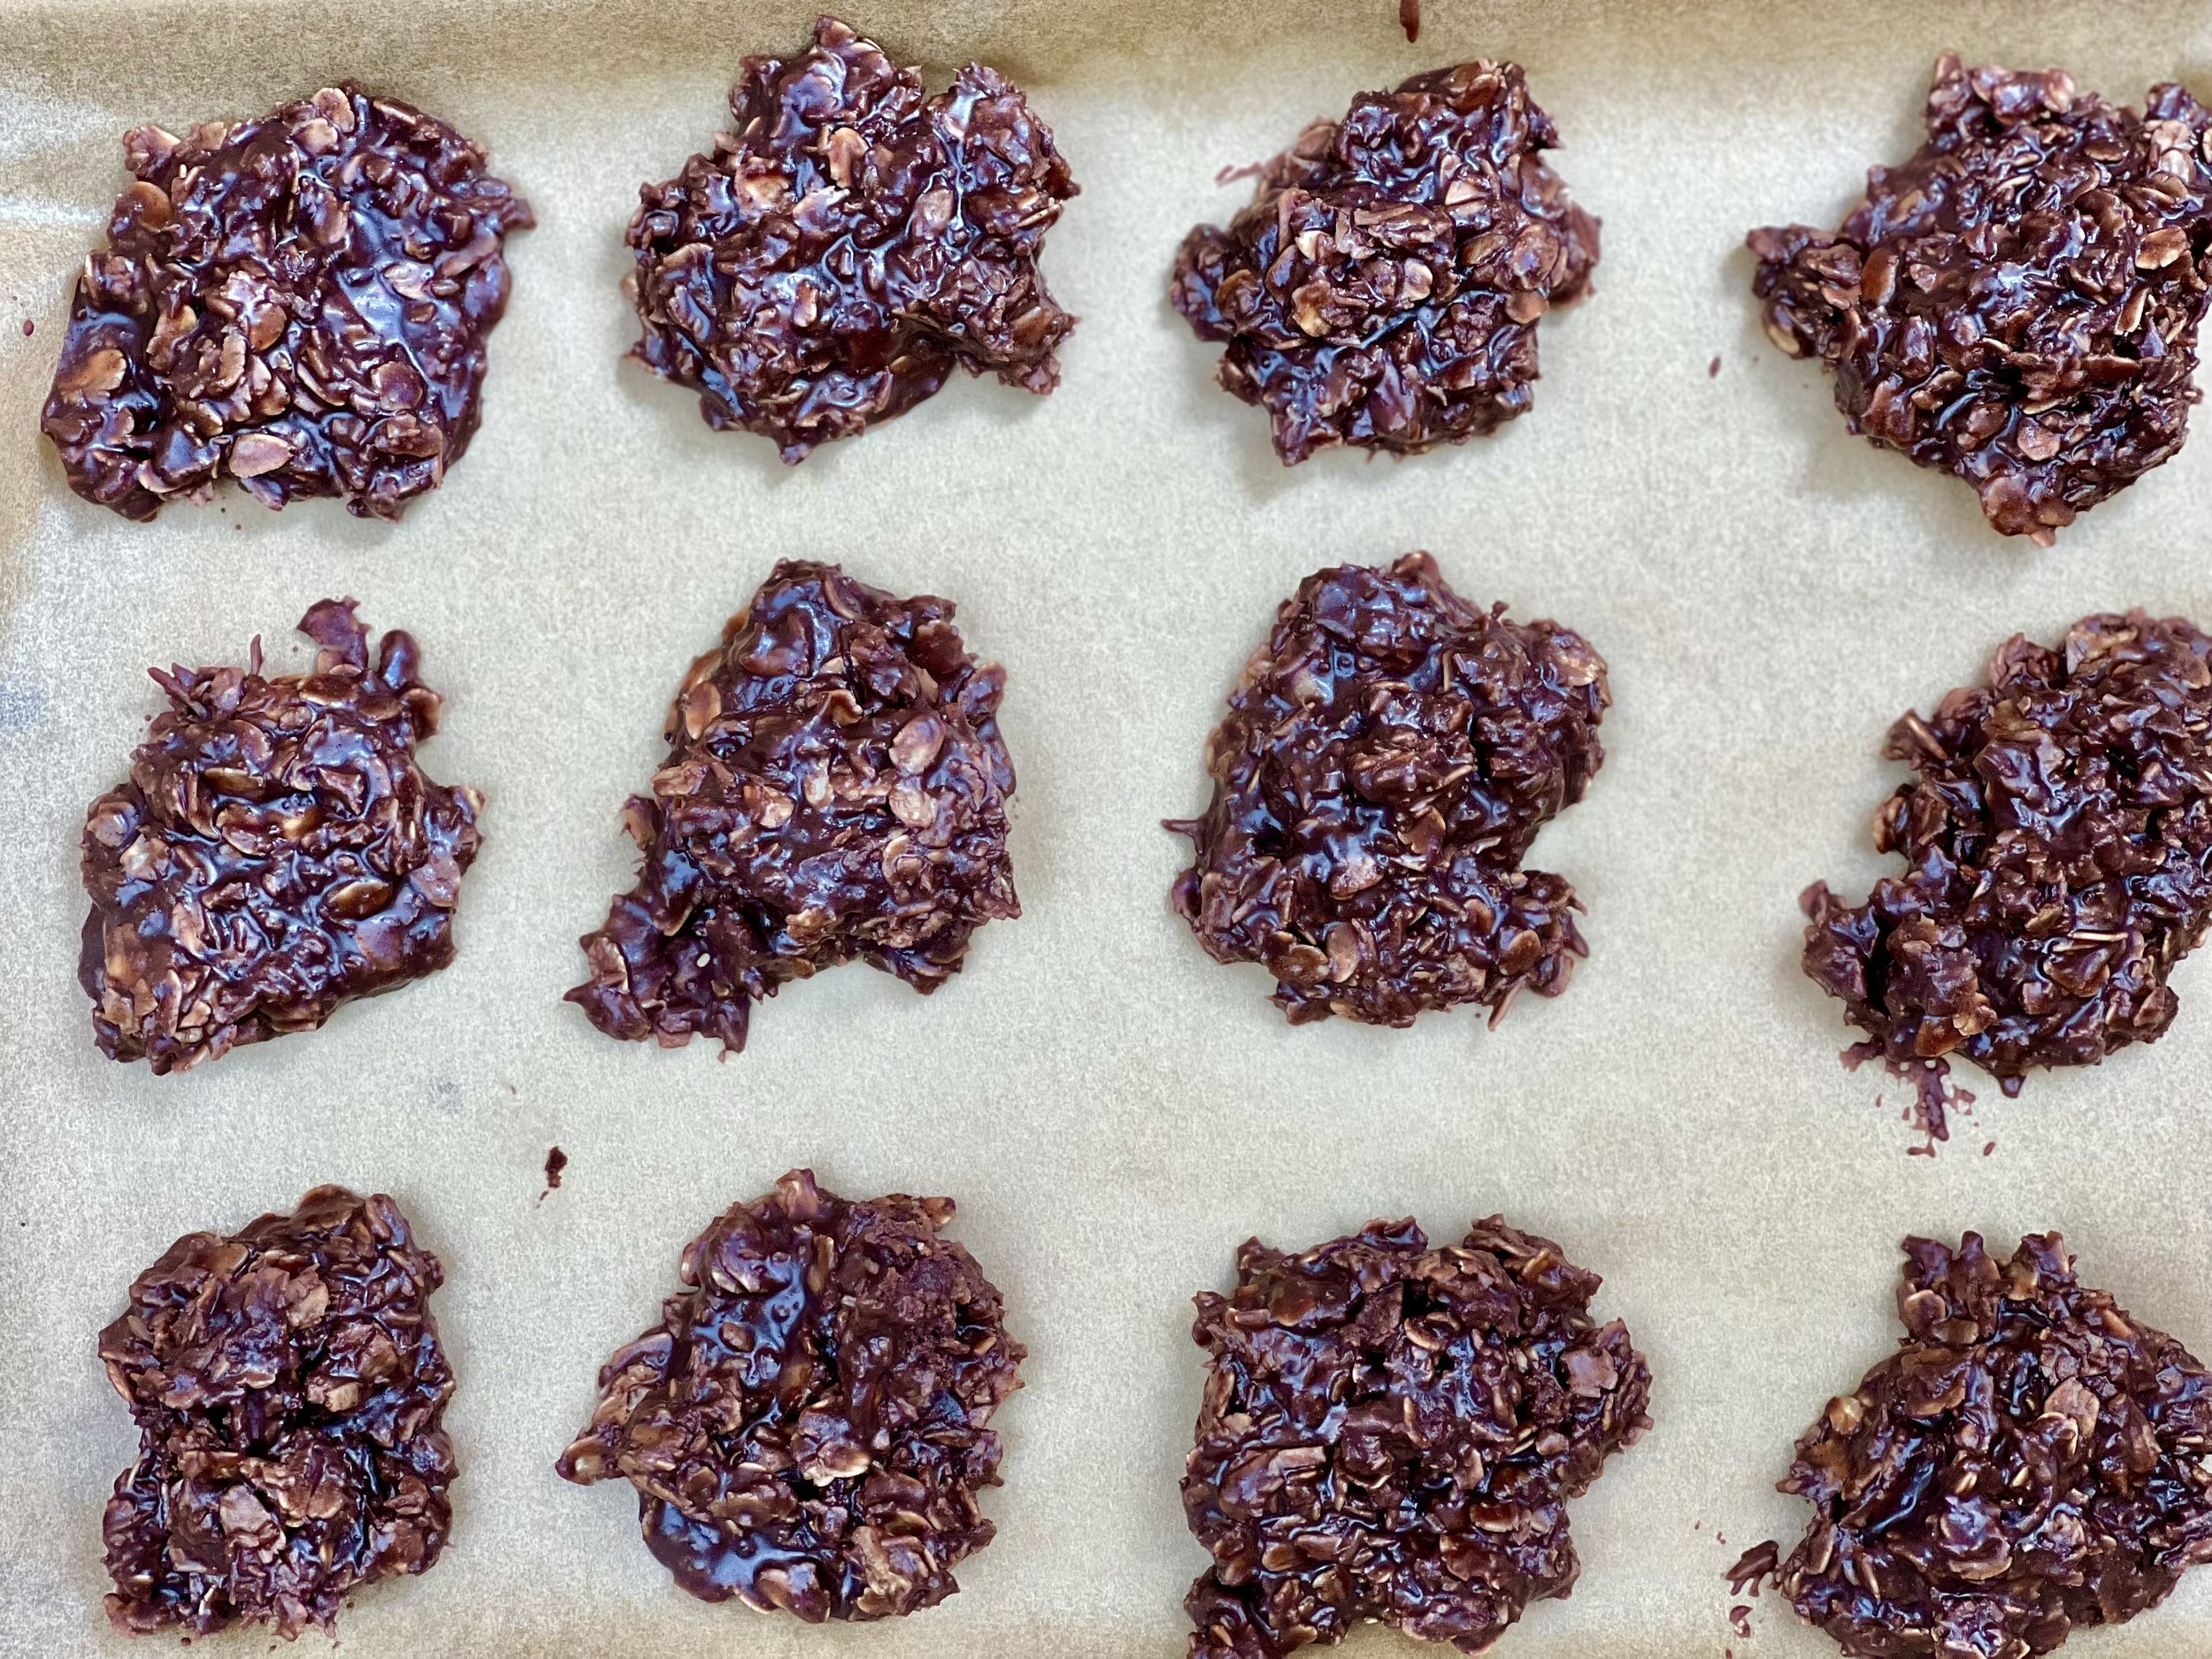
Nana Sears flourless peanut butter cookies (low FODMAP)
20 Minutes • Gluten-free • Low FODMAP • Makes 24 cookies
20 Minutes • Gluten-free • Low FODMAP • Makes 24 cookies • If you like peanut butter cookies, you will LOVE these. So simple to make (we love simple ingredients) and delightful to eat. Nana Sears didn’t make these to be low FODMAP she just made them to be delicious!

INGREDIENTS:
1 cup creamy peanut butter
1 cup granulated sugar + more for rolling
1 egg
1 teaspoon baking soda
1/2 cup semi-sweet chocolate chips
1 teaspoon coconut oil
1/2 cup roasted salted peanuts chopped
DIRECTIONS:
Preheat oven to 350 degrees F and line a cookie sheet with parchment paper.
Combine peanut butter and sugar and mix well. You can do this by hand or in your stand mixer.
Add egg and baking soda and continue to mix until fully combined.
Roll 1 tablespoon of dough at a time in a small ball, then roll in sugar and put it on your tray. Don’t put them too close as they spread when they cook.
Press each dough ball down with a fork (dip the fork in sugar if it sticks).
Bake for 10 minutes then remove from oven and allow to cool on sheet.
Melt the semisweet chocolate with the coconut oil in the microwave. Use a fork to drizzle it across the cookies.
Sprinkle with chopped peanuts and salt. Let cool fully.
Enjoy!
Original recipe from Helen Sears Chaknova. Thank you Helen! I love these!
This post may contain affiliate links so you can easily purchase items listed on the page. There is no increased cost to you for purchasing items through these links so feel free to use them!
Low FODMAP broccoli parmesan risotto
10 Minutes Prep • 30 Minutes Cook • Gluten-free • Low FODMAP • Serves 4
10 Minutes Prep • 30 Minutes Cook • Gluten-free • Low FODMAP • Serves 4 • Broccoli is one of the most perfect low FODMAP veggies as long as you stick to the tops only. This risotto is a quick go-to that blends the creaminess of the rice, the tang of the parmesan, and packs it with good greens for your health!

INGREDIENTS:
1 pound broccoli florets
2 cups flat-leaf parsley, plus whole leaves for garnish
1 cup lactose-free half and half or whole milk
8 - 9 cups low FODMAP chicken stock
2 cups Arborio rice
4 tablespoons unsalted butter
4 green onions (green part only), finely minced
1 cup white wine
2 cups grated Parmesan cheese, plus shavings for garnish
DIRECTIONS:
Bring a large pot of water to a boil, salt generously, then toss in the broccoli florets for a brief 2 minutes. Remove immediately and run under cold water. Wrap in a towel and wring out as much of the water as possible. Place in a food processor along with the parsley and half and half or milk. Pulse until very smooth.
Pour the chicken broth into a small pot. This next step is optional: For a creamier risotto, place the rice in a sieve and rinse in the stock (you may have to tilt the pot to submerge rice in stock). Bring the now cloudier, starchier stock to a gentle simmer and keep warm over low heat.
In a medium braiser or any wide-bottomed, high-sided pan (I just use the large pot from cooking the broccoli earlier), melt butter and sauté green onions for a minute or two until tender. Stir in the drained rice, coating each grain until butter-slicked. Add the wine and cook to reduce, stirring constantly.
Once the alcohol has evaporated, lower the heat and slowly ladle in the hot stock (one or two ladlefuls at a time), stirring until fully absorbed by the rice between each addition. Keep stirring until the rice is al dente, about 18 to 20 minutes.
When cooked to your liking, stir in the broccoli floret puree and grated Parmesan, which should loosen the risotto up a bit. Season to taste with salt and pepper. If desired, garnish with whole parsley leaves and Parmesan shavings.
Enjoy!
This post may contain affiliate links so you can easily purchase items listed on the page. There is no increased cost to you for purchasing items through these links so feel free to use them!
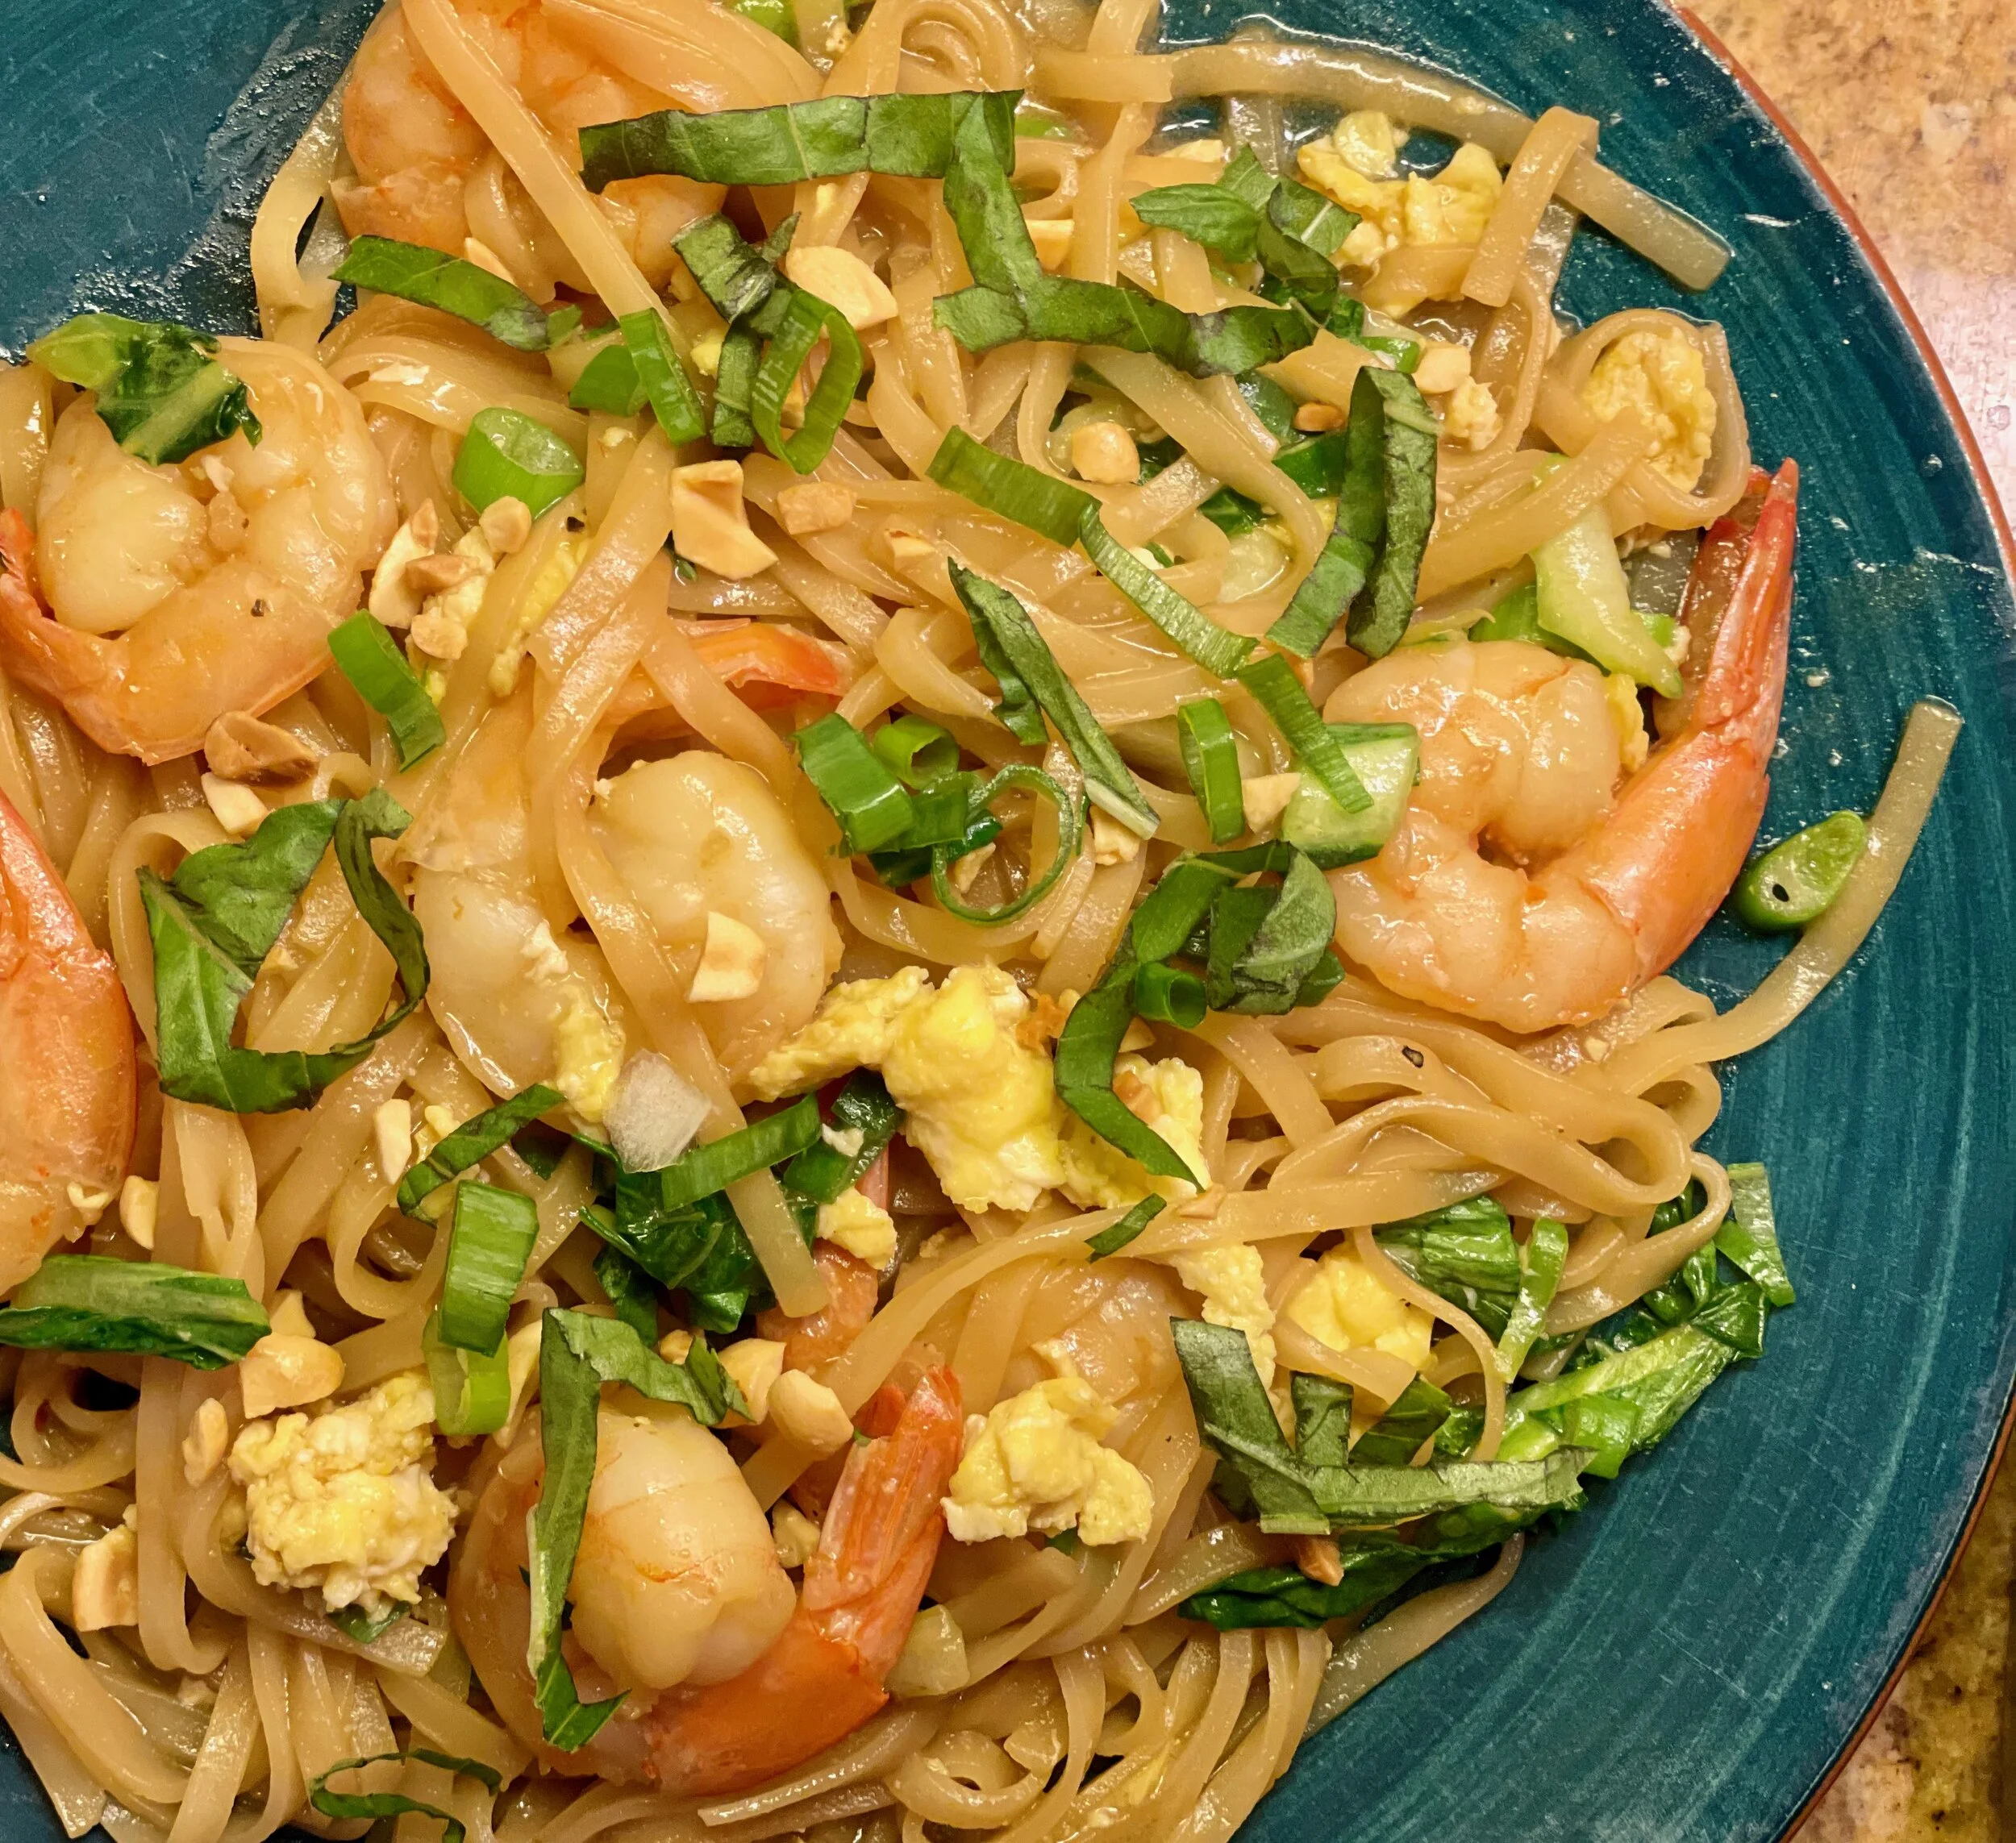
Low FODMAP garlic butter shrimp pad Thai
30 Minutes • Gluten-free • Low FODMAP • Serves 4
30 Minutes • Gluten-free • Low FODMAP • Serves 4 • Craving a good garlic butter shrimp pad Thai that won’t give you a stomachache? Then you’ll LOVE this recipe! This pad Thai is wonderfully flavorful, fresh, and quick to make. And best of all? It's low FODMAP so your tummy will be happy too.
INGREDIENTS
8 ounces wide rice noodles
4 tablespoons gluten-free low sodium soy sauce, using more or less to taste
2 tablespoon rice vinegar
3 tablespoons maple syrup
1/4 teaspoon chili flakes, plus more for serving
1 pound cooked jumbo shrimp, peeled and deveined
3 tablespoons garlic-infused olive oil
3 tablespoons salted butter
2-3 eggs, beaten
2 cups bean sprouts or chopped baby bok choy (or half and half)
4 green onions (green part only) chopped, plus more for serving
1/4 cup roasted peanuts, chopped
Thai or regular basil and limes, for serving
DIRECTIONS:
Thaw your shrimp in a colander for three minutes under running cool water or overnight in the fridge.
Prepare the rice noodles according to package instructions and set them aside.
To make the sauce. In a small bowl, combine the soy sauce, rice vinegar, maple syrup, and chili flakes.
Heat the olive oil and butter in a large skillet over medium heat. When melted and hot, add the shrimp and saute for 2-3 minutes. Add a pinch of both chili flakes and black pepper. Continue to cook the shrimp in the butter for another 1-2 minutes until they are well heated.
Add the noodles and sauce, tossing to combine. Cook until the noodles are warmed through and begin soaking up the sauce, about 1 minute. In a separate skillet, scramble the eggs then add to the noodle mixture with the bok choy and toss to combine. Remove from the heat. Add the bean sprouts and green onions, toss once more to combine.
Divide the noodles and shrimp between plates. Top with basil, green onions, peanuts, and chili flakes, and a squeeze of lime juice.
Enjoy!
This post may contain affiliate links so you can easily purchase items listed on the page. There is no increased cost to you for purchasing items through these links so feel free to use them!
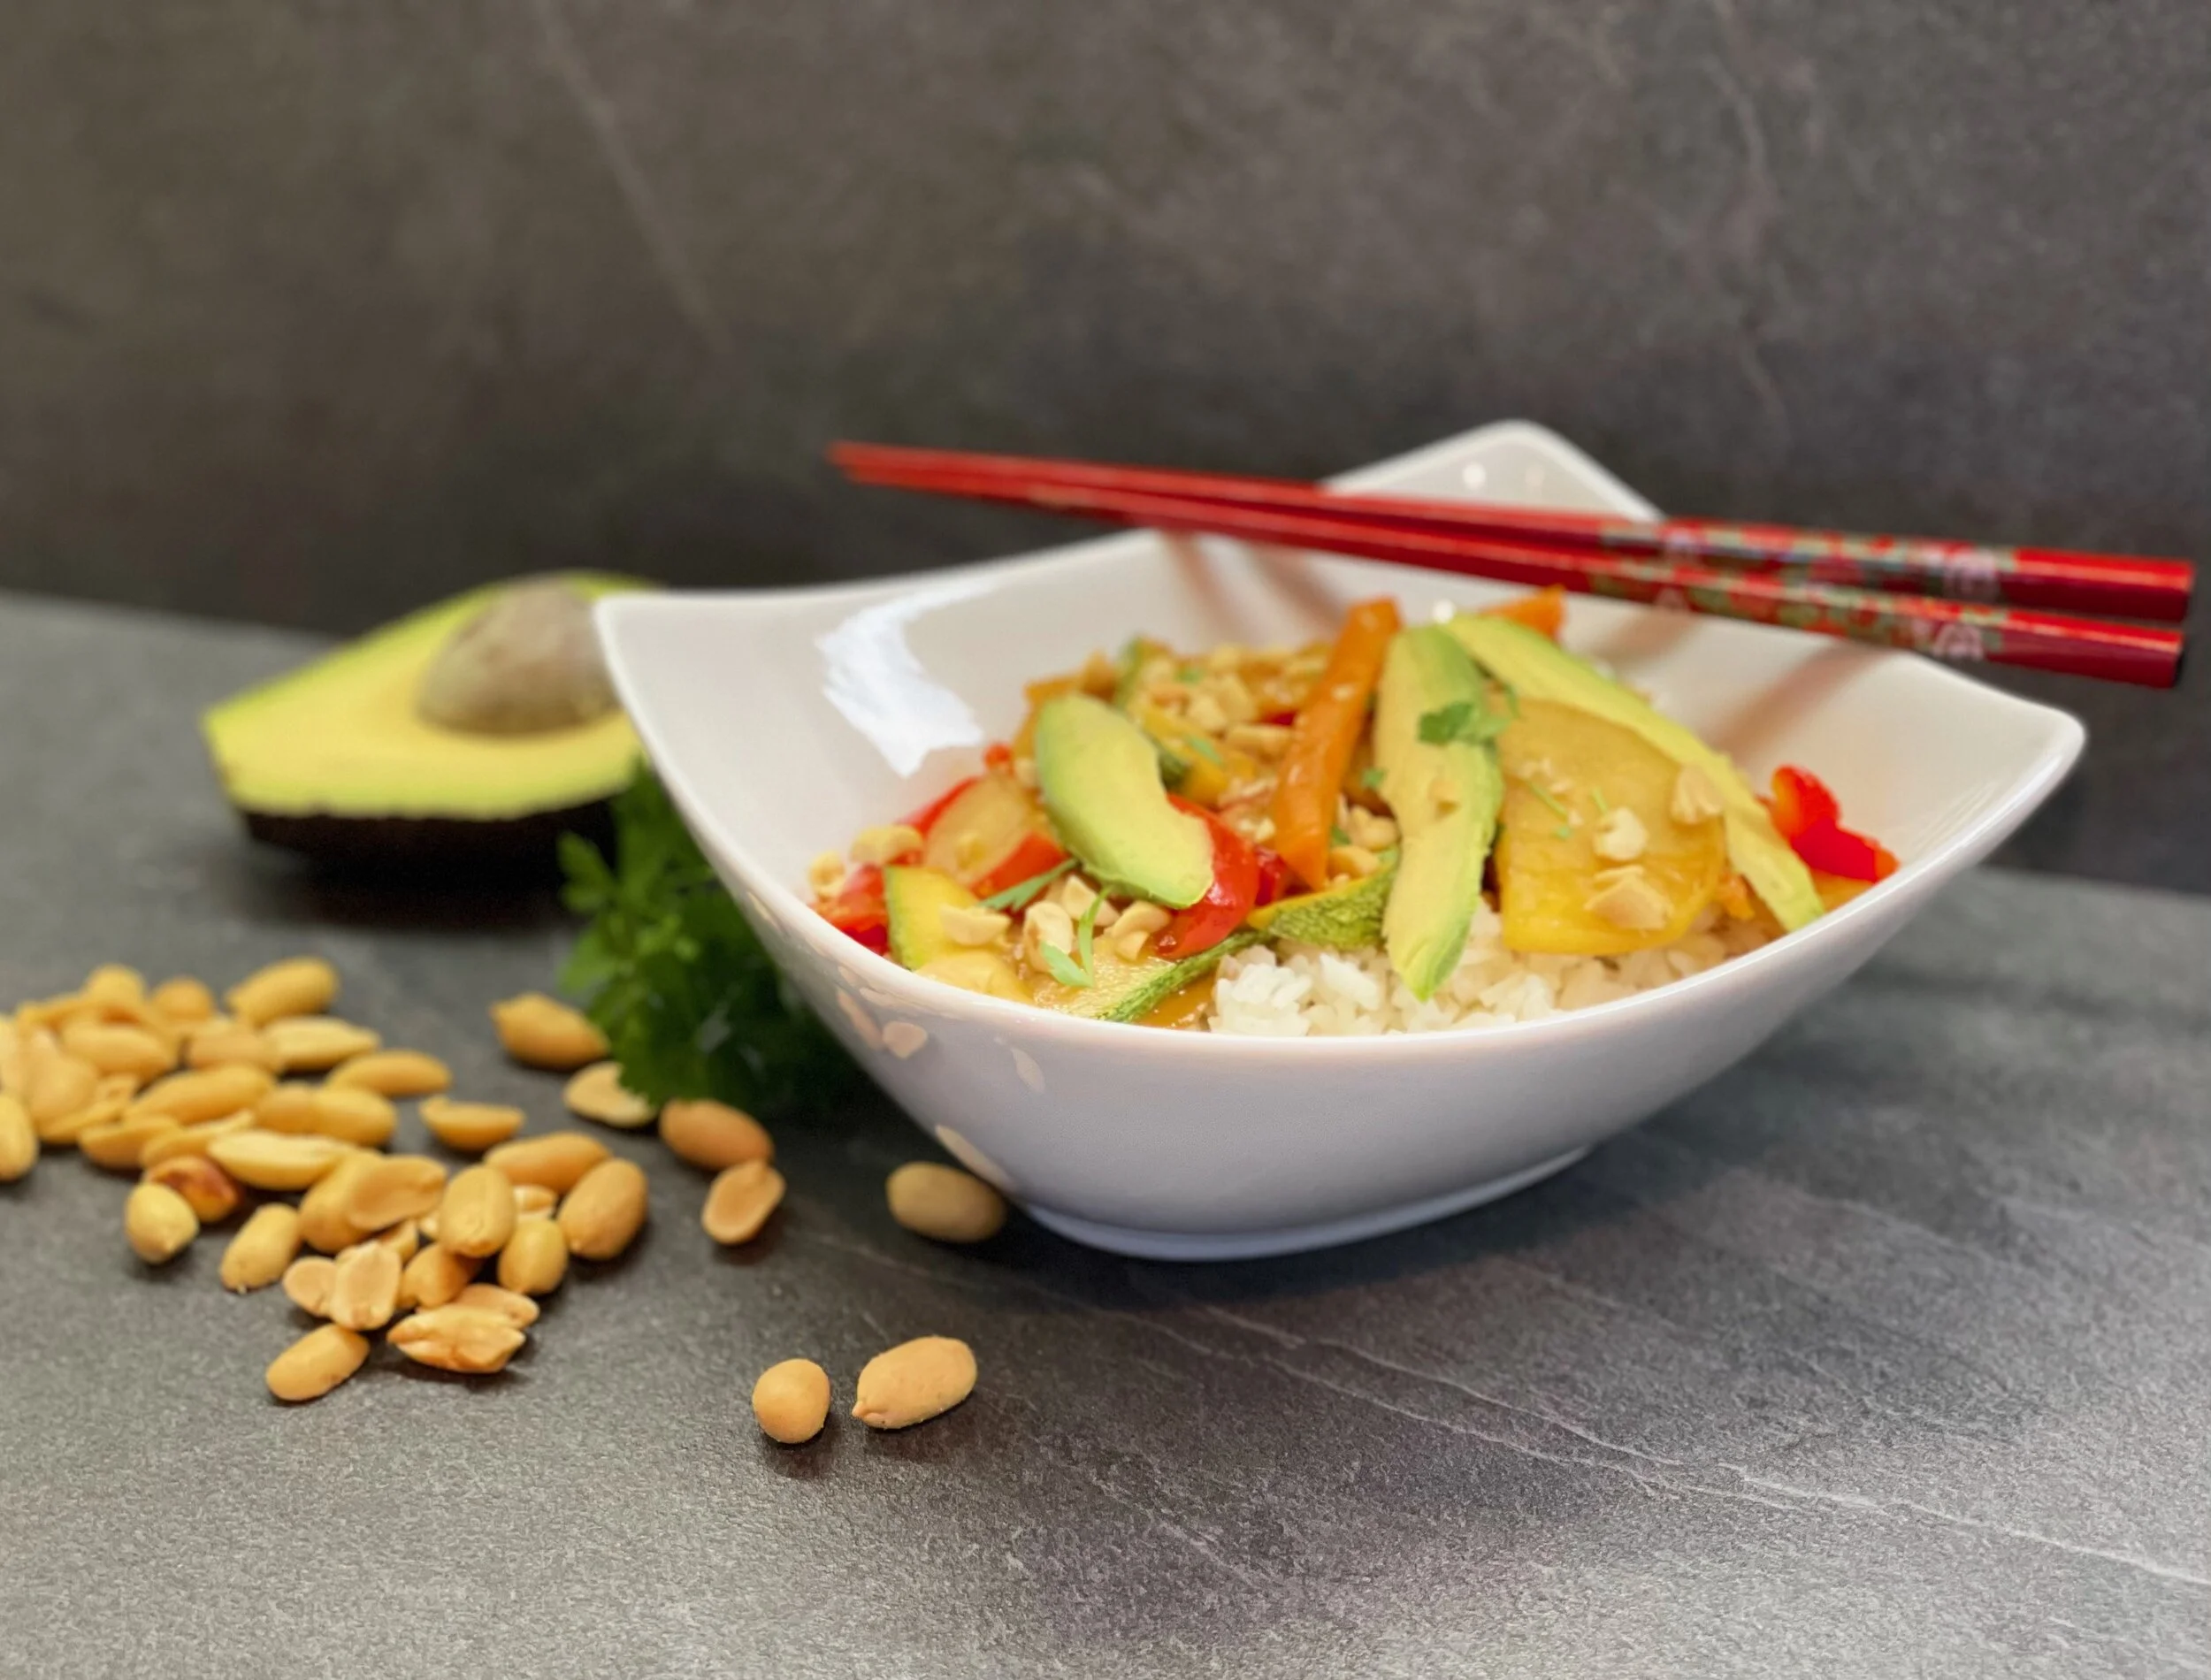
Low FODMAP Budha bowl
Prep 20 Minutes • Cook 30 Minutes • Gluten-free • Low FODMAP • Serves 4
Prep 20 Minutes • Cook 30 Minutes • Gluten-free • Low FODMAP • Serves 4 • This simple vegetarian dish is simply wonderful! The colors and flavors are crisp and fresh and the sweet potatoes bring a delightful creaminess to the whole thing. The ginger vinaigrette is FULL of flavor, and you’ll love it on any veggie bowl or salad.

INGREDIENTS:
2 heads of broccoli tops (no stems) cut into bite-sized pieces
1 large sweet potato (orange or white), cut into wedges (low FODMAP serving size is 1/2 cup)
2 tablespoons extra virgin olive oil
Kosher salt and pepper
2 tablespoons raw sesame seeds
2 cups shredded purple cabbage (low FODMAP serving size is 3/4 cup)
Juice from 1 lemon
1 cup cooked white rice, brown rice, or quinoa
2 carrots shredded
1/2 avocado sliced (low FODMAP serving is 1/8 of an avocado)
1 Cara Cara orange, blood orange, or navel orange, sliced
TURMERIC GINGER VINAIGRETTE:
1 tablespoon garlic-infused olive oil
1-inch piece fresh ginger, peeled
1 tablespoon apple cider vinegar
1 tablespoon maple syrup
Juice from 1 lemon
½ teaspoon ground turmeric
Kosher salt and pepper
1 pinch cayenne pepper
DIRECTIONS:
Preheat the oven to 425 degrees F and line a rimmed baking sheet with parchment (for easier cleanup).
Place the sweet potato wedges in a bowl and toss with 1 tablespoon olive oil, and a pinch each of salt and pepper. Transfer to the on the prepared baking sheet and put them in the oven to cook for 15-20 minutes, then remove from the oven.
Toss the broccoli with the remaining tablespoon of olive oil, and add to the baking sheet with the sesame seeds sprinkled over the top. Return to the oven and roast for another 15 minutes or until the sweet potatoes and broccoli are done to your likeness.
Meanwhile, combine the shredded cabbage, lemon juice, and a pinch of salt in a medium bowl and massage with your hands for 30 seconds to 1 minute to tenderize the cabbage.
To assemble, divide the rice among bowls. Add the roasted veggies, cabbage, carrots, avocado, and oranges. Top with sprouts and hemp seeds and drizzle with the dressing (recipe follows).
DIRECTIONS TURMERIC GINGER VINAIGRETTE
Combine all ingredients in a blender and blend until mostly smooth. Taste and adjust seasonings as needed.
Enjoy!
Original recipe inspired by Tieghan Gerard, Half Baked Harvest
This post may contain affiliate links so you can easily purchase items listed on the page. There is no increased cost to you for purchasing items through these links so feel free to use them!