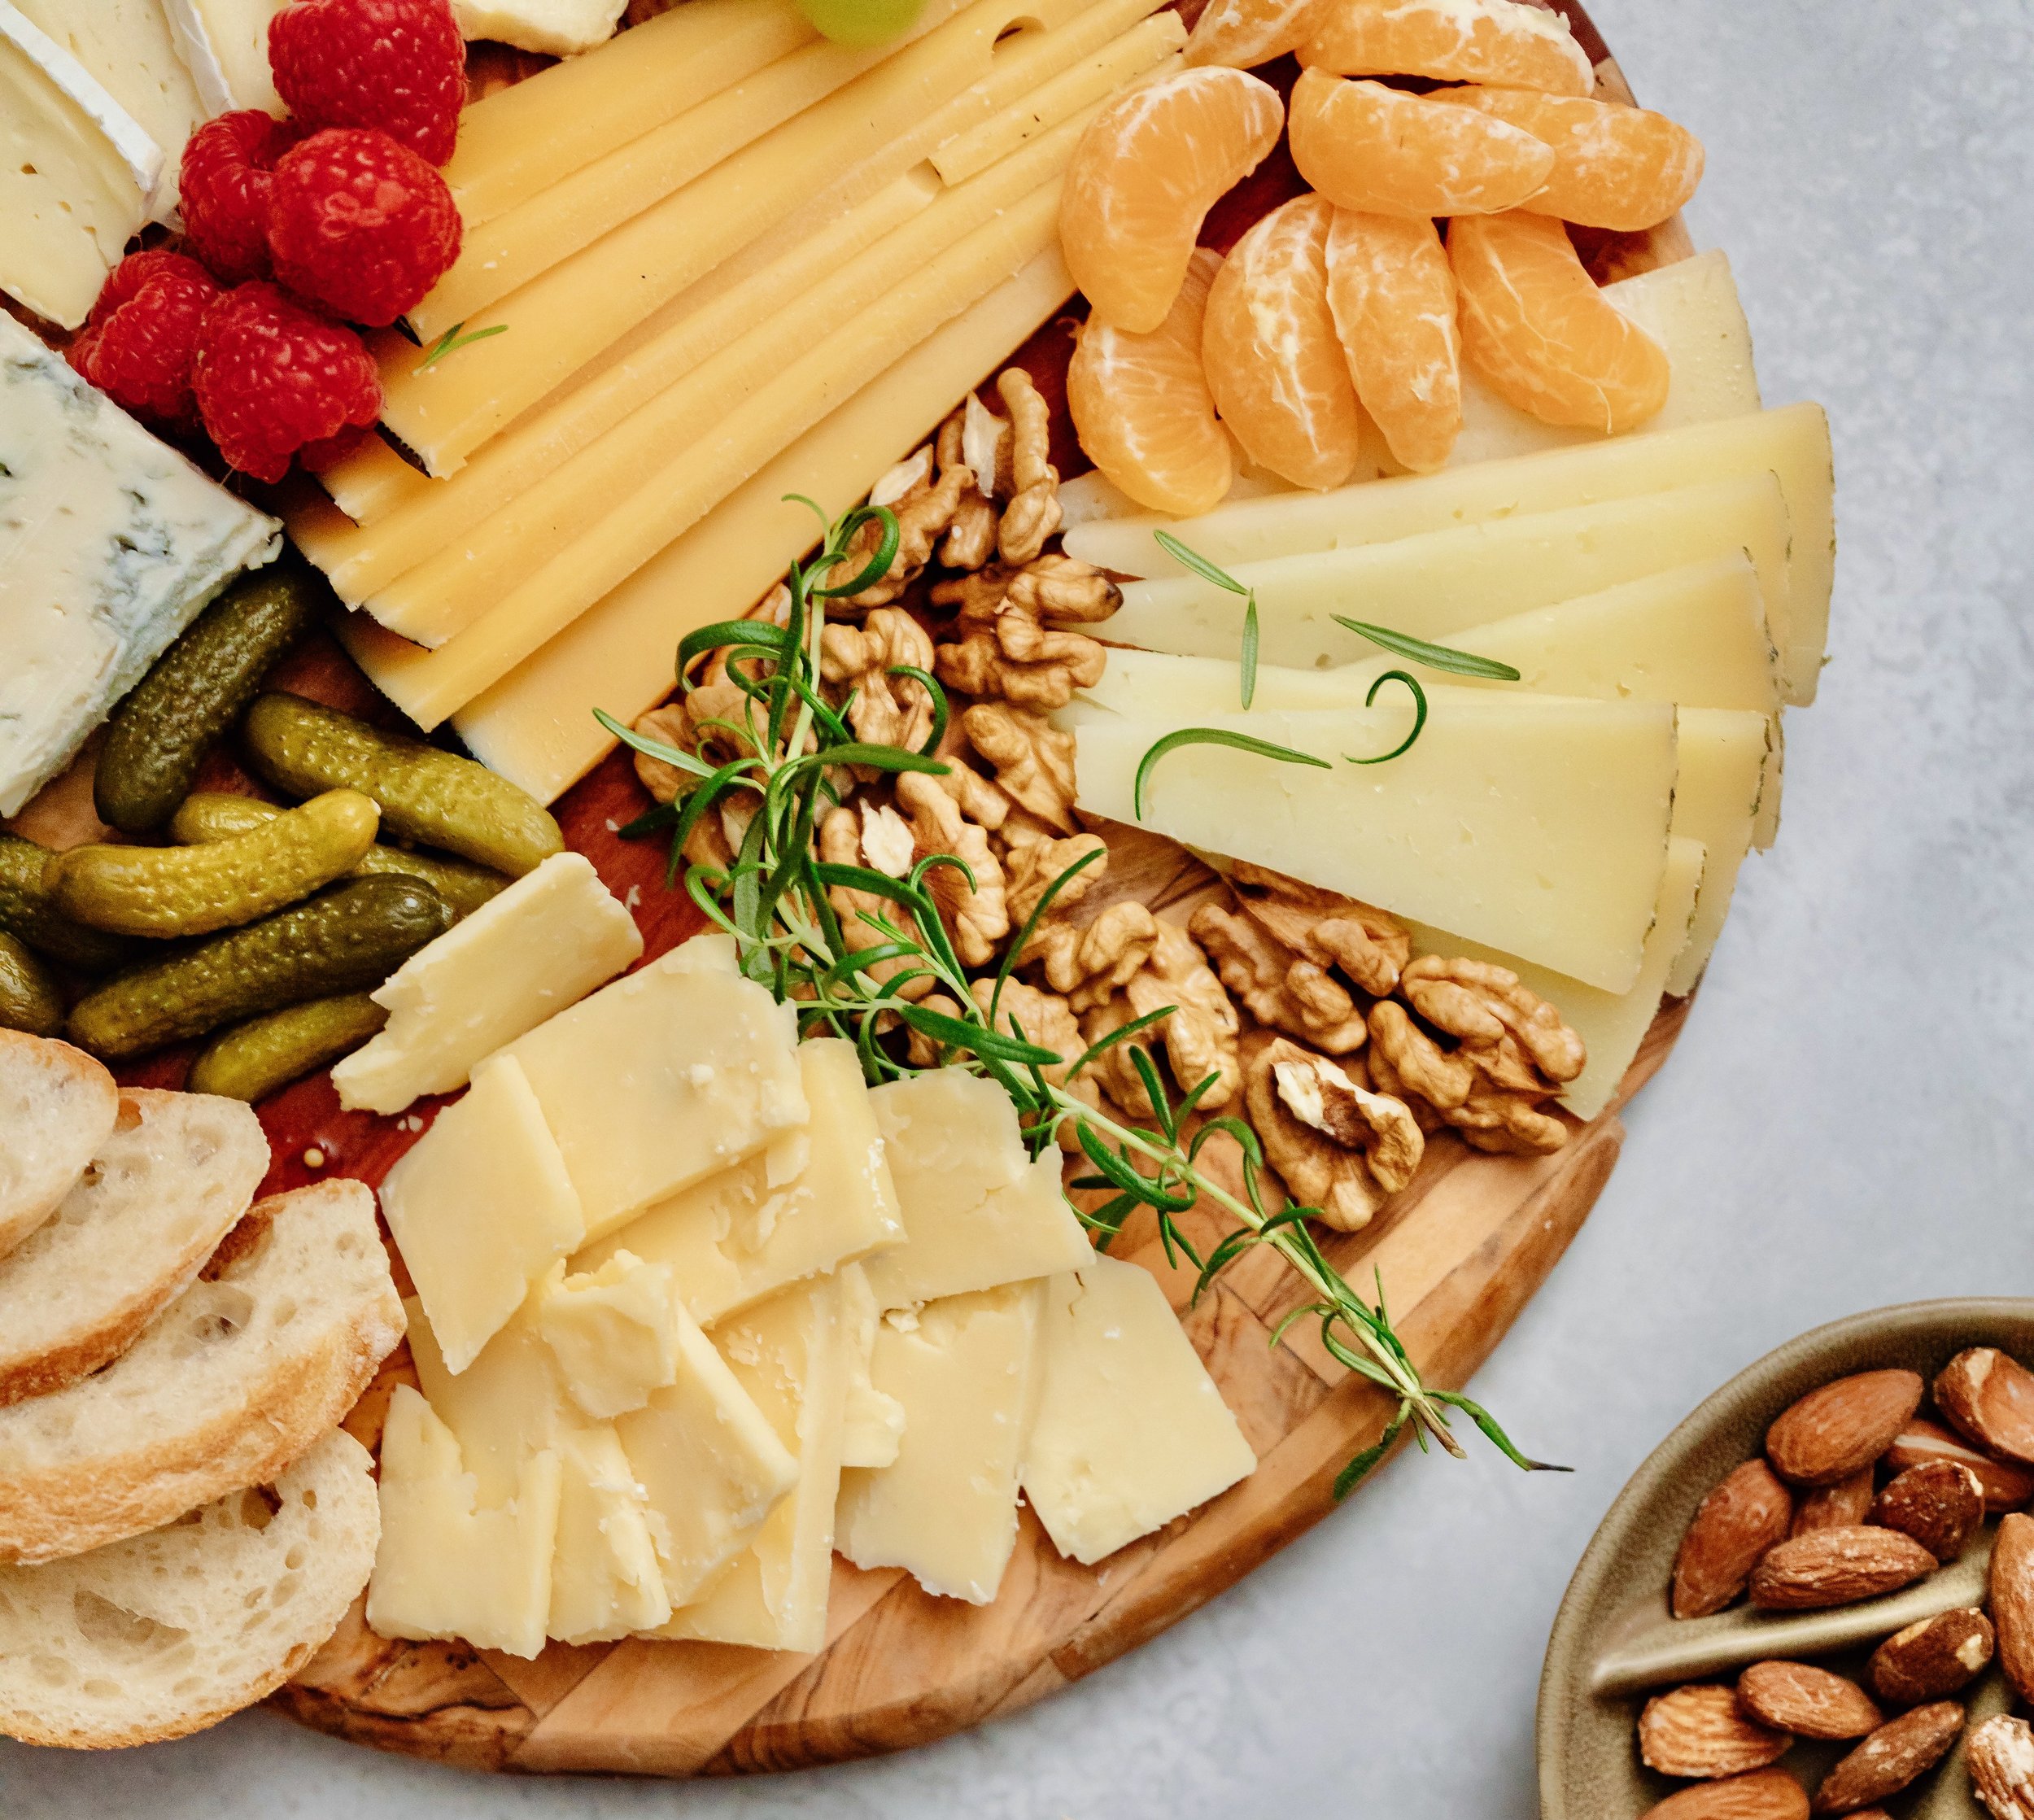
Deliciously Low FODMAP

Inspire yourself with hundreds of delicious low FODMAP recipes, tips, and tools, and enjoy the abundance that is yours even when you have IBS.
Use the buttons and filters to find something specific or browse the complete collection for inspiration.
Discover a treasure trove of recipes with my FREE recipe club! Get new ideas delivered straight to your inbox every week.
Deliciously Low FODMAP is a trademark of IBS Game Changer, LLC
Filter to find Recipes and Tools
More Filtering Options
- All 728
- Appetizer 50
- BBQ 46
- Bowl 32
- Breakfast 58
- Cocktails 13
- Collection 1 58
- Collection 10 27
- Collection 11 30
- Collection 12 27
- Collection 13 31
- Collection 14 29
- Collection 15 31
- Collection 16 34
- Collection 17 31
- Collection 18 33
- Collection 19 36
- Collection 2 32
- Collection 20 33
- Collection 21 33
- Collection 22 40
- Collection 23 10
- Collection 24 1
- Collection 3 28
- Collection 4 29
- Collection 5 30
- Collection 6 32
- Collection 7 31
- Collection 8 31
- Collection 9 32
- Condiments 6
- Crock Pot 4
- Dessert 107
- Diabetes Game Changer Exception Protocol Contains Alcohol 11
- Diabetes Game Changer Exception Protocol Contains Flour 108
- Diabetes Game Changer Exception Protocol Contains Flour AND Sugar 77
- Diabetes Game Changer Exception Protocol Contains Sugar 49
- Diabetes Game Changer First Four Weeks 363
- Dinner 330
- Drink 8
- Free Guide 17
- Gluten-free 590
- Gut Microbiome 2
- Guthealth 3
- Holidays 68
- IBS Triggers 4
- Keto Friendly 124
- Lactose-Free 175
- Low FODMAP Diet 714
- Low Net Carb 138
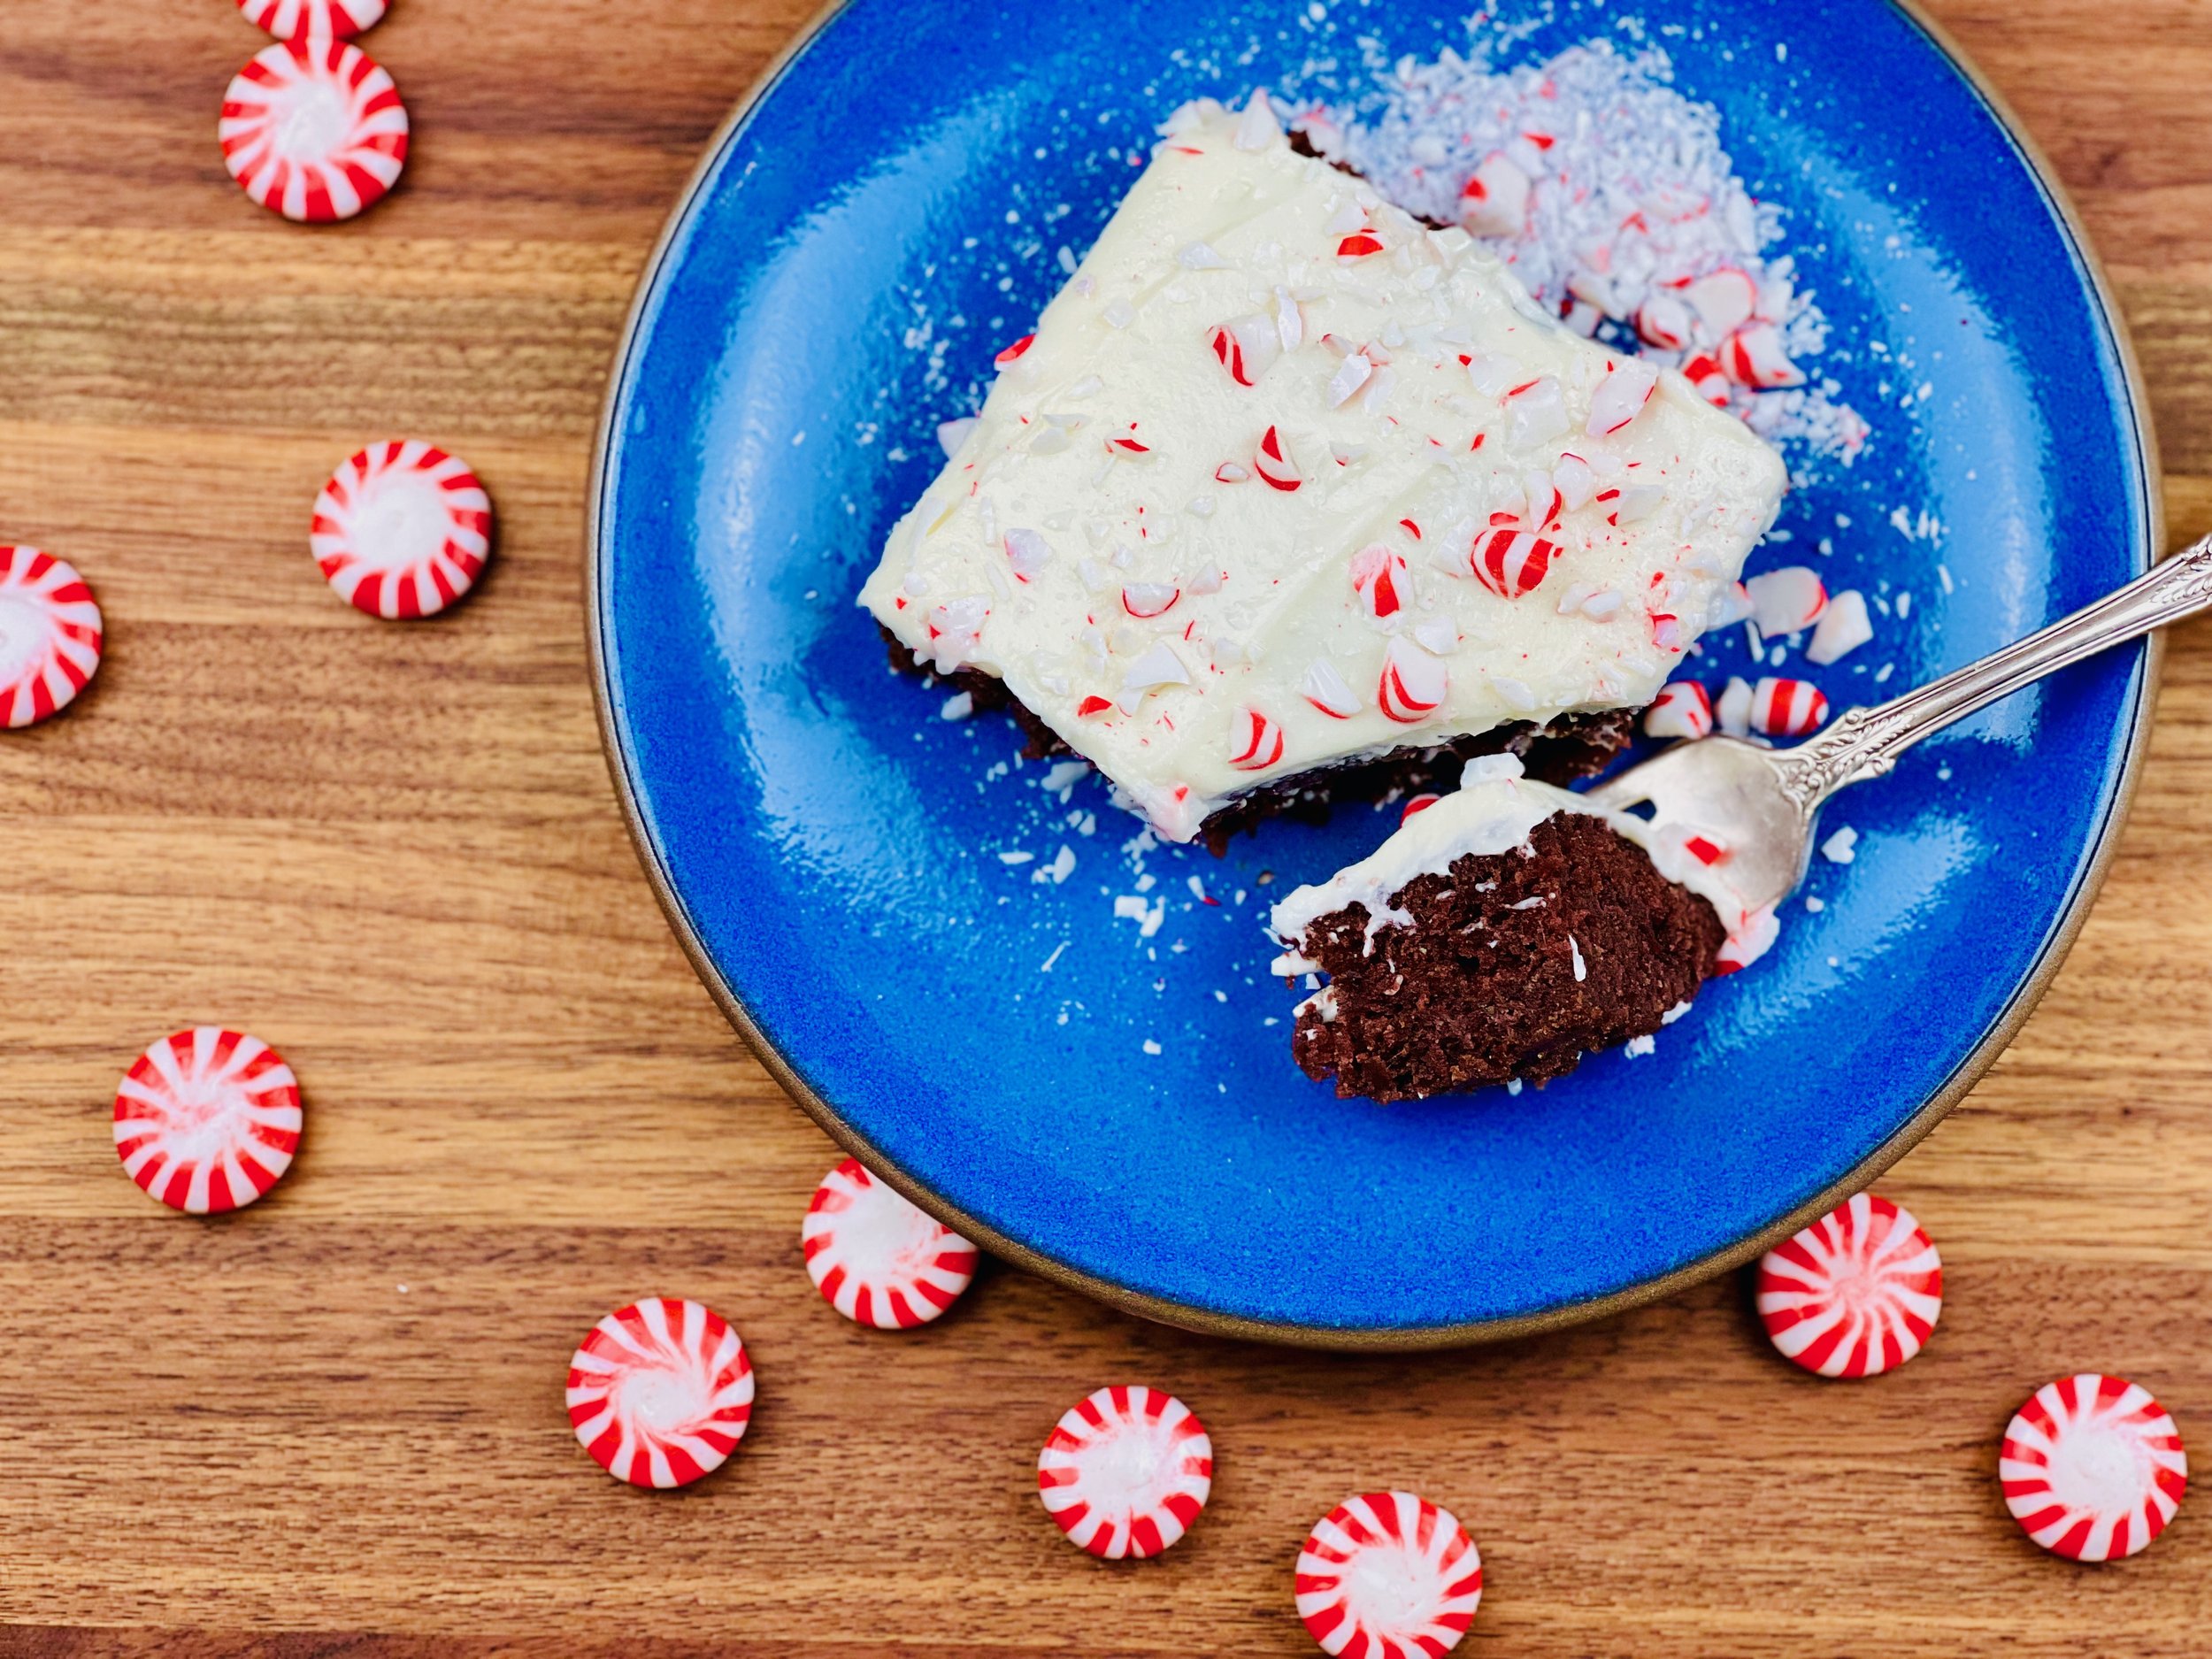
Peppermint Bark Sheet Cake (low FODMAP)
20 Minutes prep • 20 Minutes cook • Low FODMAP • Gluten-free • Serves 12
20 Minutes prep • 20 Minutes cook • Low FODMAP • Gluten-free • Serves 12 • Ok to make ahead: Steps 1 - 6
When my client asked if I had a recipe for a chocolate peppermint cake, the first thing that came to mind was peppermint bark! And so, this delicious cake was born. I started with rich chocolate sheet cake that is light and springy. The frosting is, of course, a white chocolate buttercream. And to capture the pepperminty goodness of holiday bark, the cake is topped with crushed peppermint candy. It truly tastes like Christmas in July!
Ingredients: Cake
2 cups white sugar
2 cups gluten-free flour (I used 1 ½ cups King Arthur Measure for Measure and ½ cup gfJule’s All-Purpose Flour)
½ teaspoon salt
1 stick butter
½ cup vegetable oil (I used Canola oil)
1 cup water
¼ cup unsweetened cocoa powder
½ cup lactose-free whole milk mixed with ½ tablespoon of white vinegar (to sour)
2 large eggs
1 teaspoon baking soda
1 teaspoon Vanilla
Ingredients: White Chocolate Frosting
2 sticks unsalted butter, at room temperature
12-ounces white chocolate chips, melted and cooled slightly
1 cup powdered sugar
1 teaspoon vanilla extract OR 1/2 teaspoon peppermint extract and 1/2 teaspoon vanilla extract
10 Peppermint candies, crushed
Directions: Cake
(1) Prepare: Preheat oven to 350 degrees F and grease and flour an 11” x 17” rimmed baking sheet.
(2) Sour the milk: Combine milk and vinegar and set aside.
(3) Combine dry ingredients: In a mixing bowl whisk together the sugar, flour, and salt and set aside.
(4) Melt the butter and chocolate: In a saucepan over medium heat, melt the butter with the water, oil, and cocoa powder and heat just until it starts to boil. Pour the chocolate mixture over the flour mixture and stir well to combine.
(5) Add the eggs and milk: Beat the eggs together with the soured milk and then stir into the chocolate mixture until well combined. Add baking soda, and vanilla and stir very well to blend.
(6) Bake: Pour into the prepared pan and spread evenly in the pan. Bake for 20 minutes. Remove from oven and let cool.
Directions: Frosting
(1) Beat the butter and chocolate: In the bowl of your stand mixer, beat the butter until it’s creamy. With the mixer running, slowly add the melted white chocolate.
(2) Add the sugar: Add the powdered sugar and vanilla and beat on low speed until well combined. Scrape down the sides and bottom of the bowl to be sure everything blends well together. Beat until light and fluffy. If the frosting is too runny, put it in the refrigerator for 15 or 20 minutes or until the desired consistency.
(3) Finish: When the cake has cooled, spread the frosting over the cake and sprinkle with crushed peppermint. Store leftover cake in an airtight container in the refrigerator for 2-3 days.
Note: To crush the peppermint, put unwrapped candies in a plastic bag and tap with the back of a metal spoon. Keep tapping until the candies are broken into small pieces. Then sprinkle them out of the bag onto the cake.
Eat and enjoy every bite because you can!
Link note: This post contains links for you to easily purchase items listed on the page. In some cases, we have provided a special discount code for IBS Game Changers so be sure to use it when you purchase an item to get the discount that has been arranged just for you! As an Amazon Associate, I earn a commission from qualifying Amazon purchases.
More Deliciously Low FODMAP™ dessert recipes


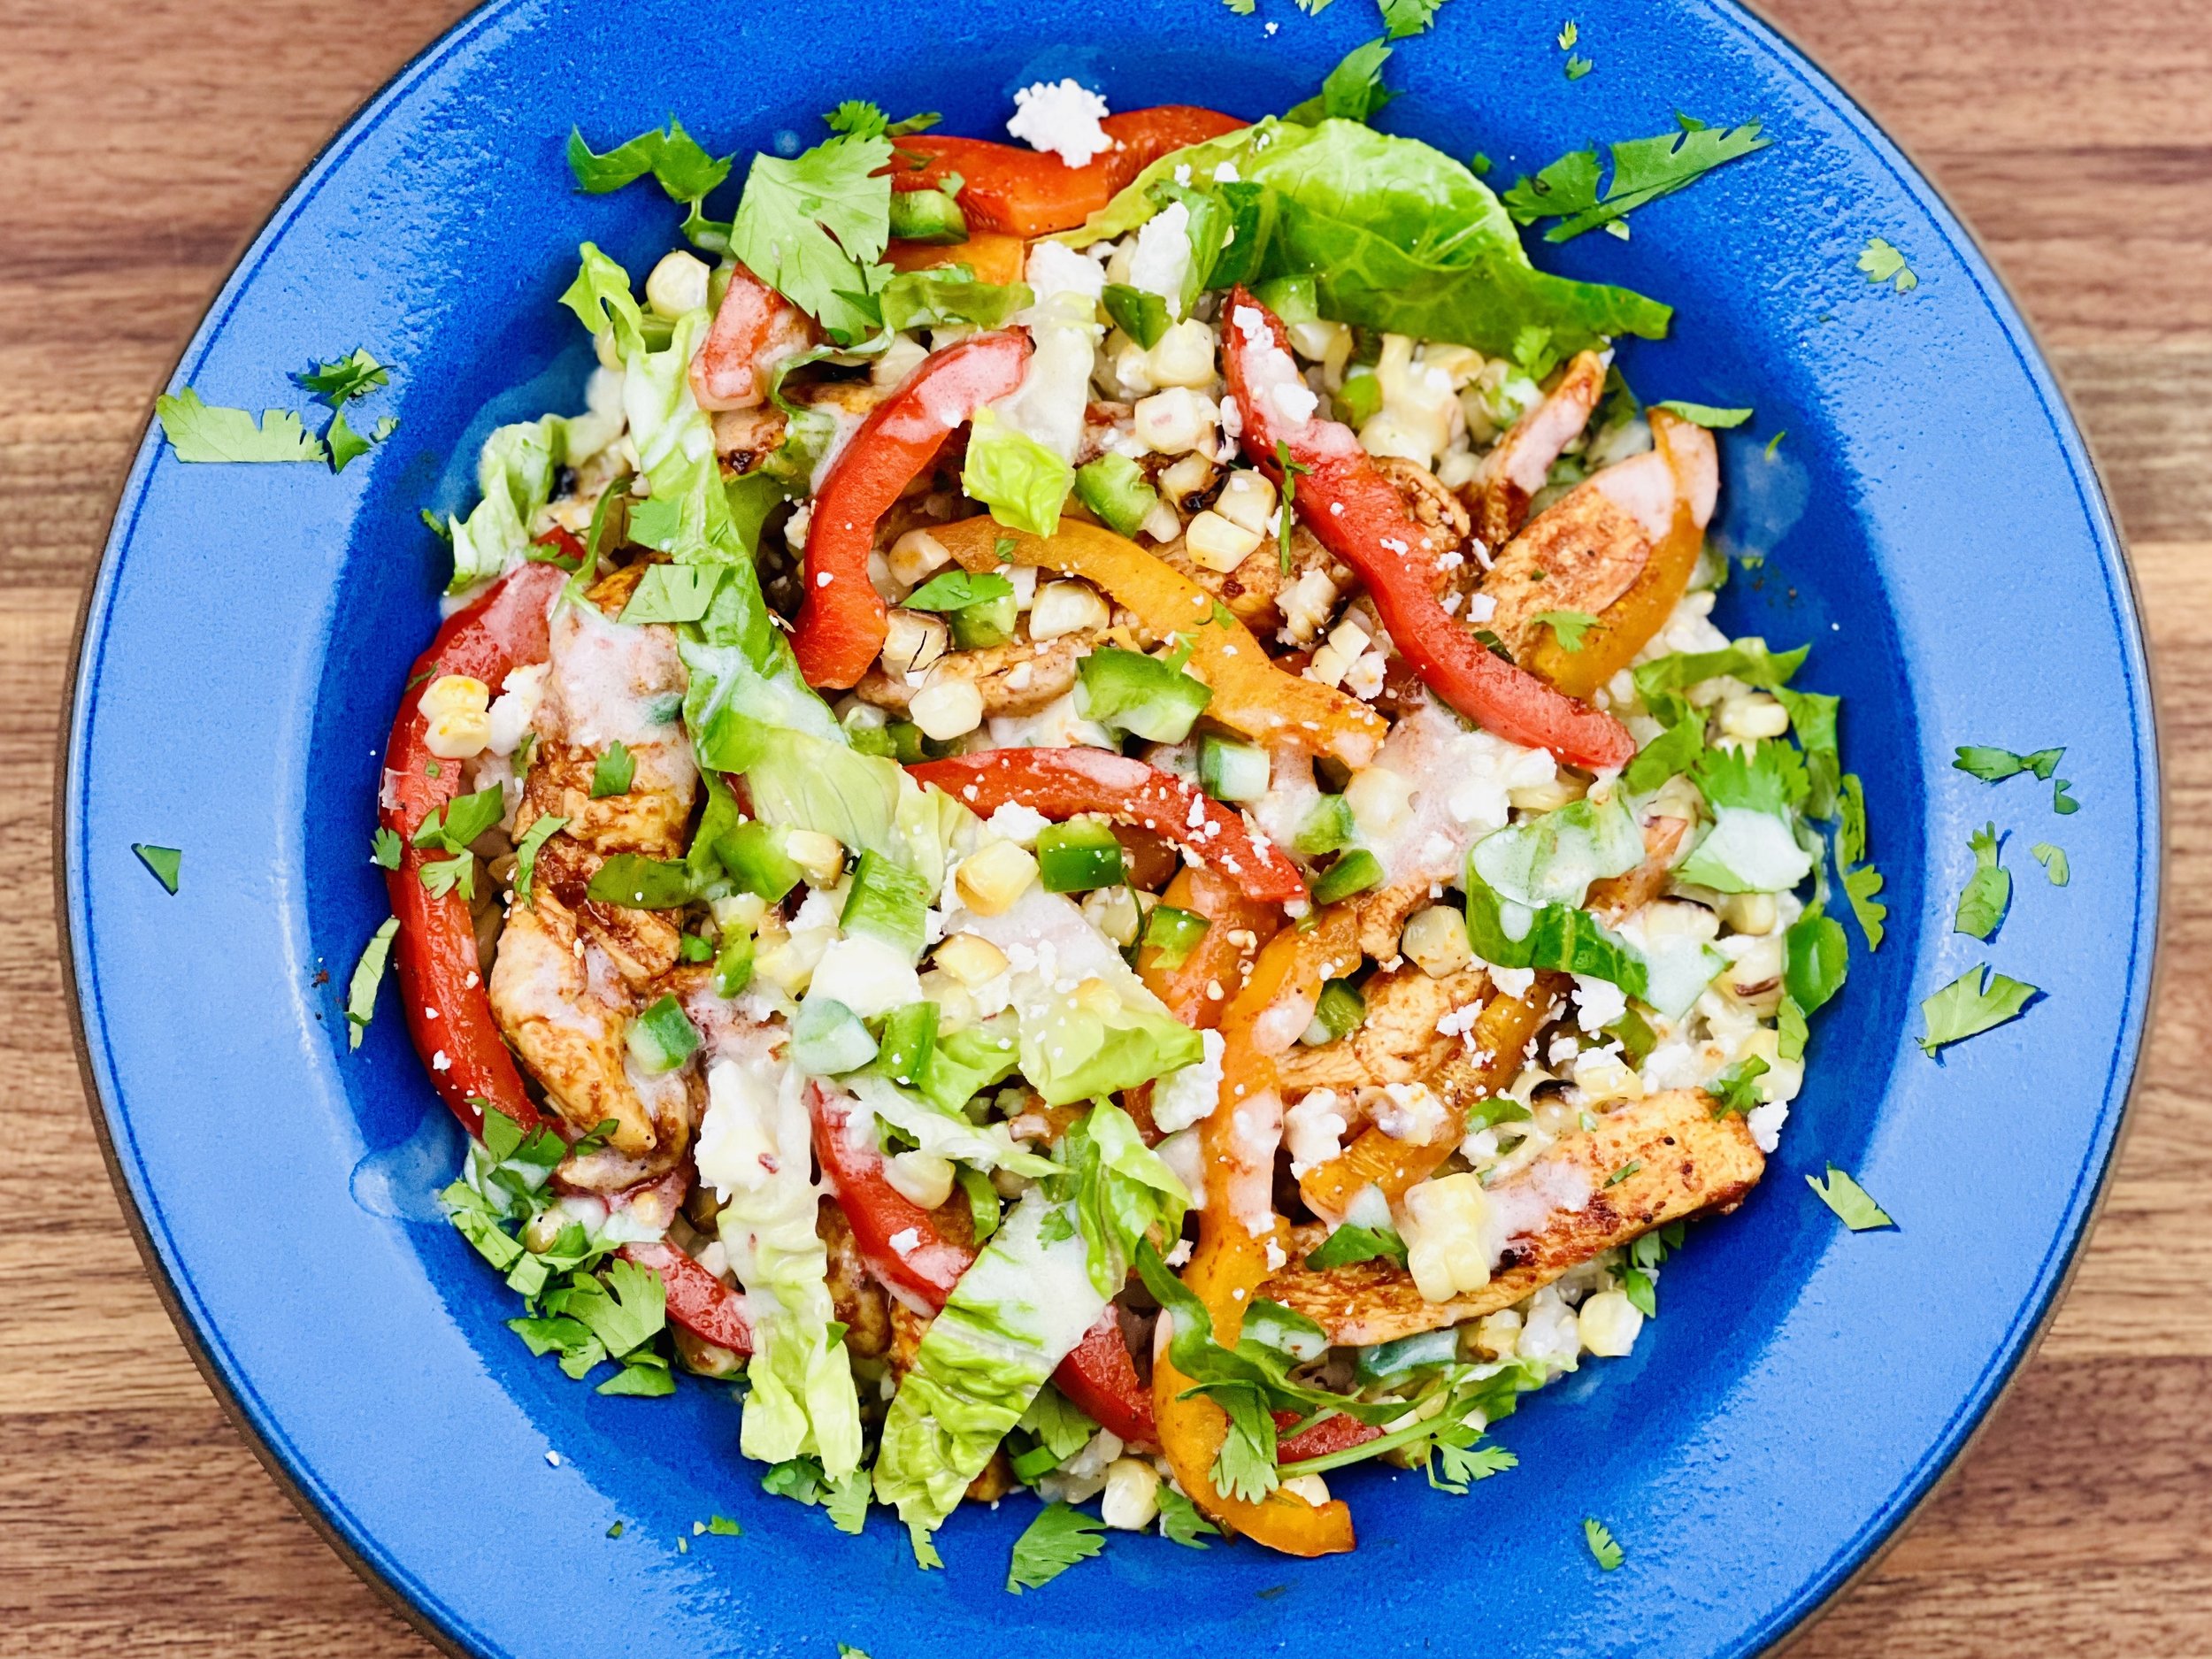
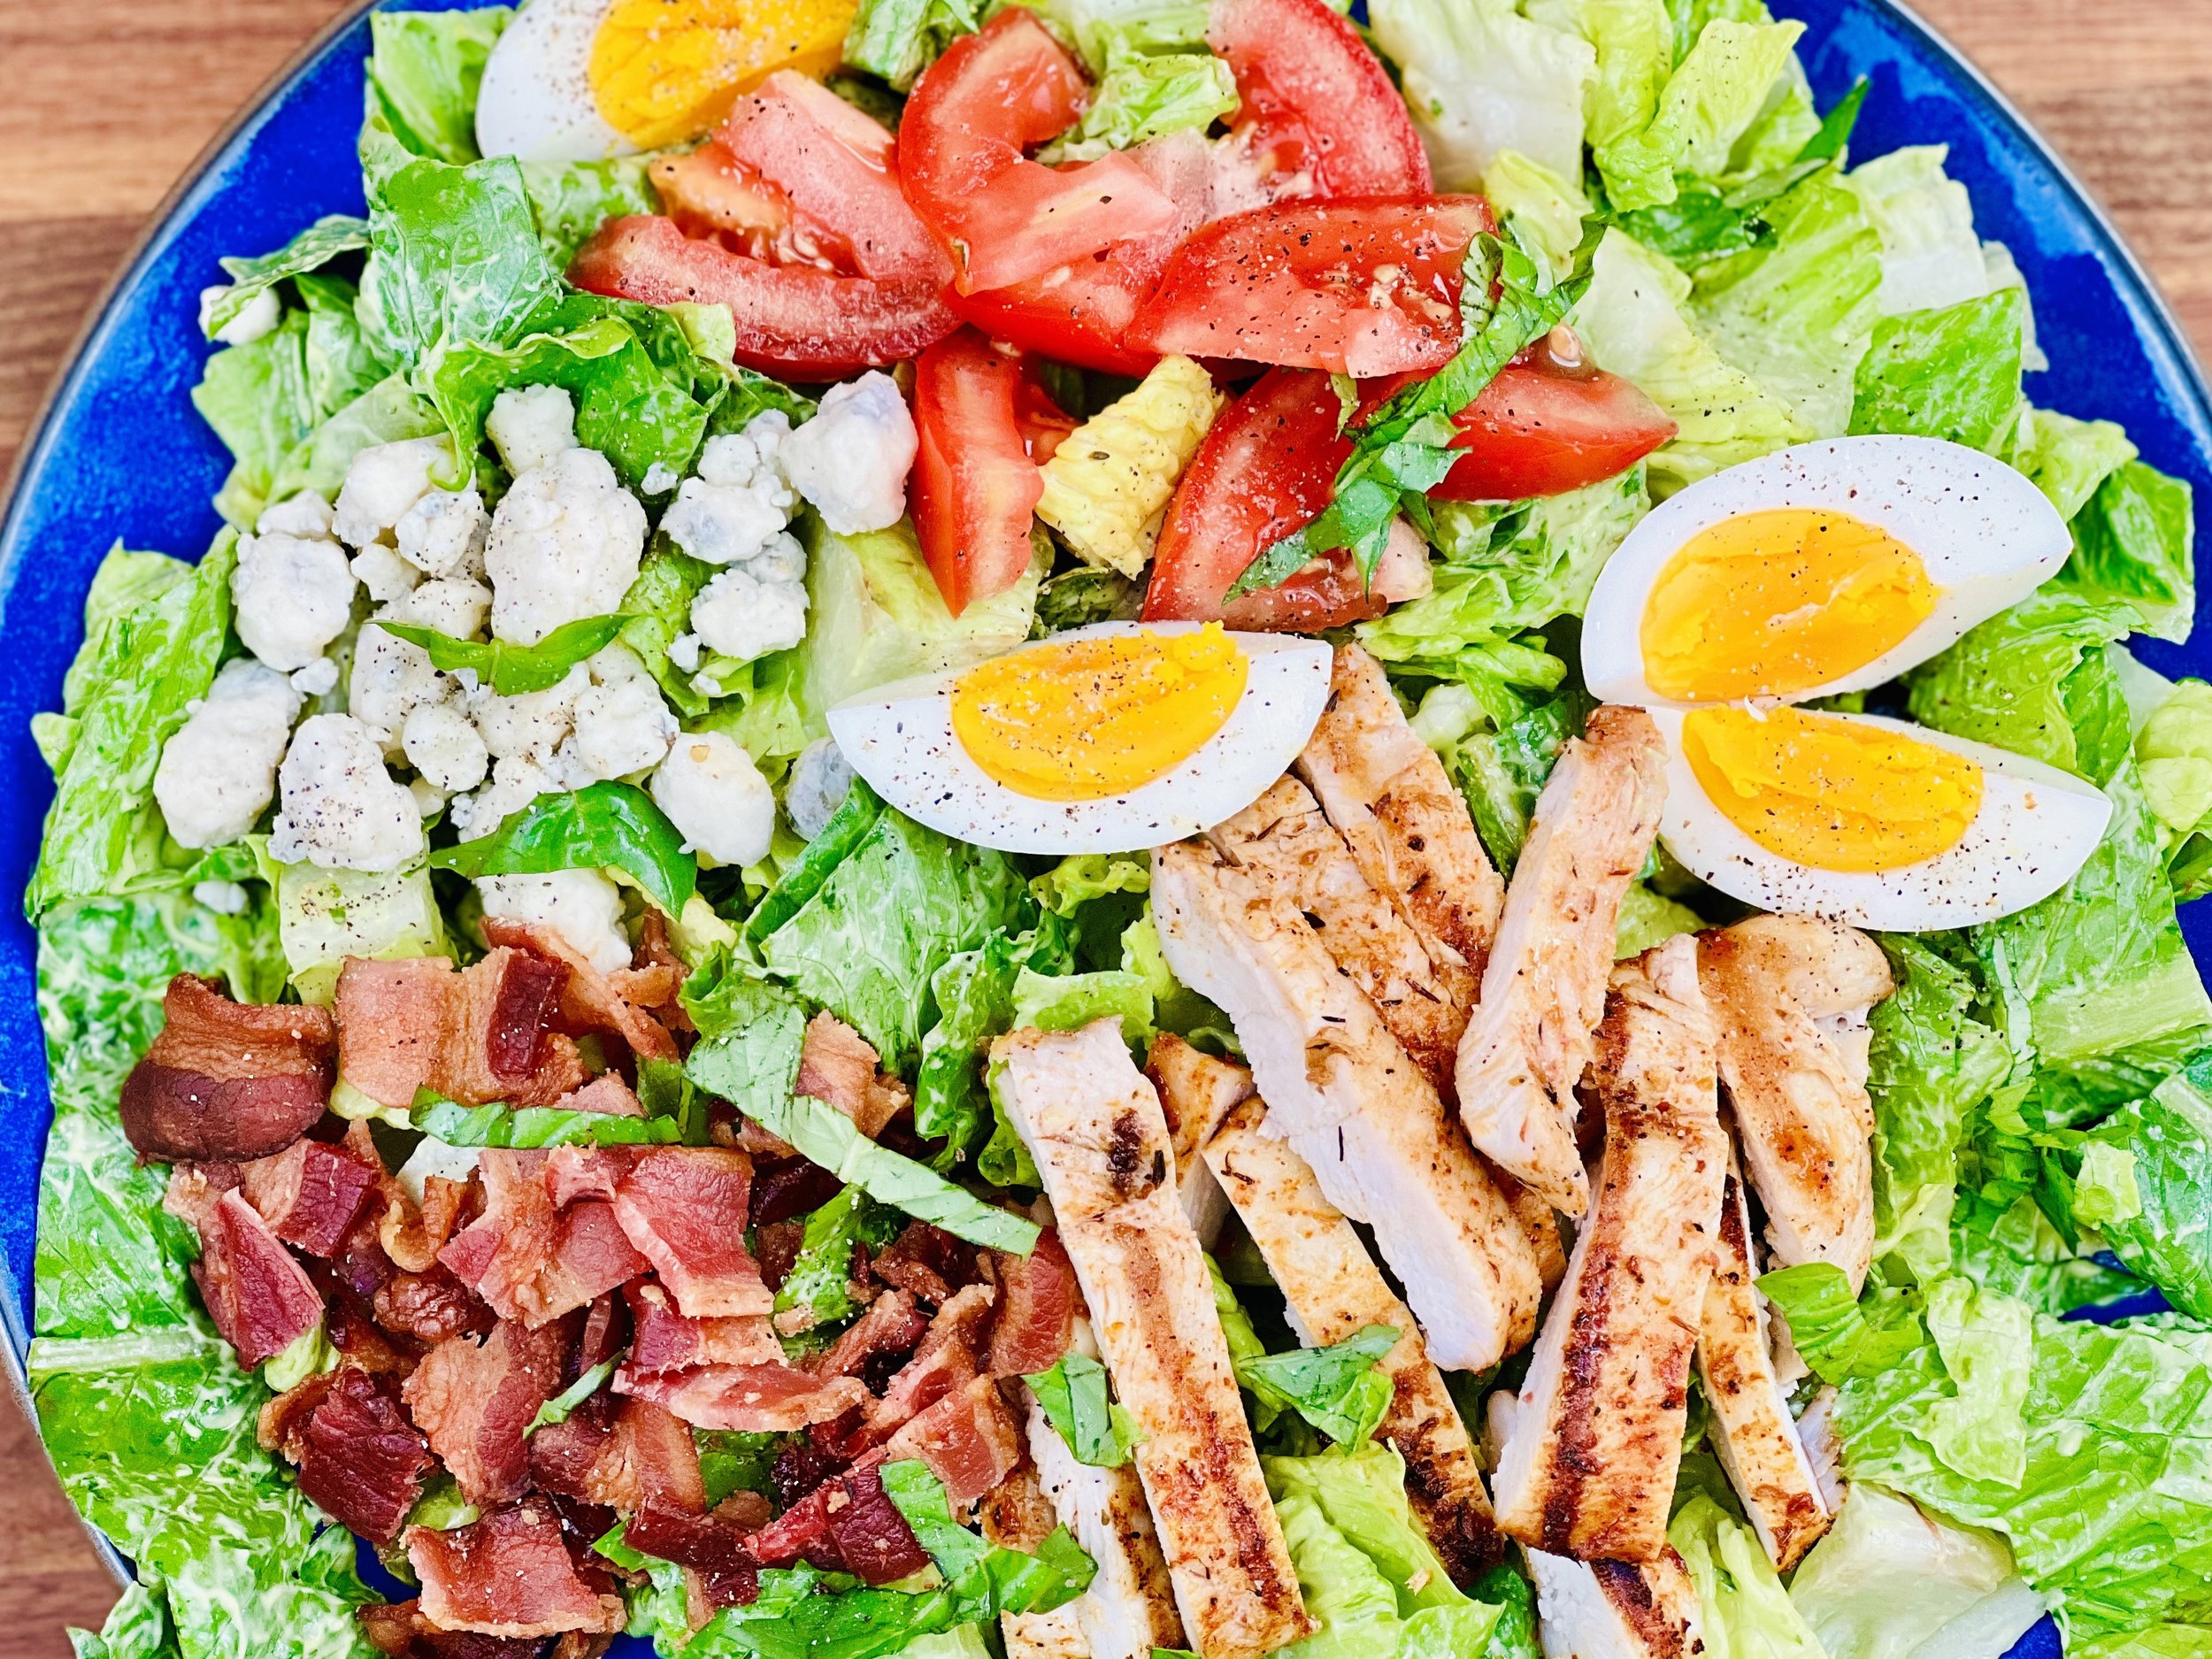
Chicken Fajita Salad Bowls (low FODMAP)
30 Minutes prep • 20 Minutes cook • Low FODMAP • Serves 6
30 Minutes prep • 20 Minutes cook • Low FODMAP • Serves 4-6 • Ok to make ahead: Steps 1-2
All the great taste of fajitas, combined with a delightful array of vegetables, makes this chicken fajita salad bowl a perfect one-dish meal. The roasted corn and Cotija cheese give the salad a wonderful Mexican street food flavor, while the lettuce and lime vinaigrette make it taste like a salad. It’s fresh, flavorful, healthy, and low FODMAP of course.
Ingredients: Fajitas
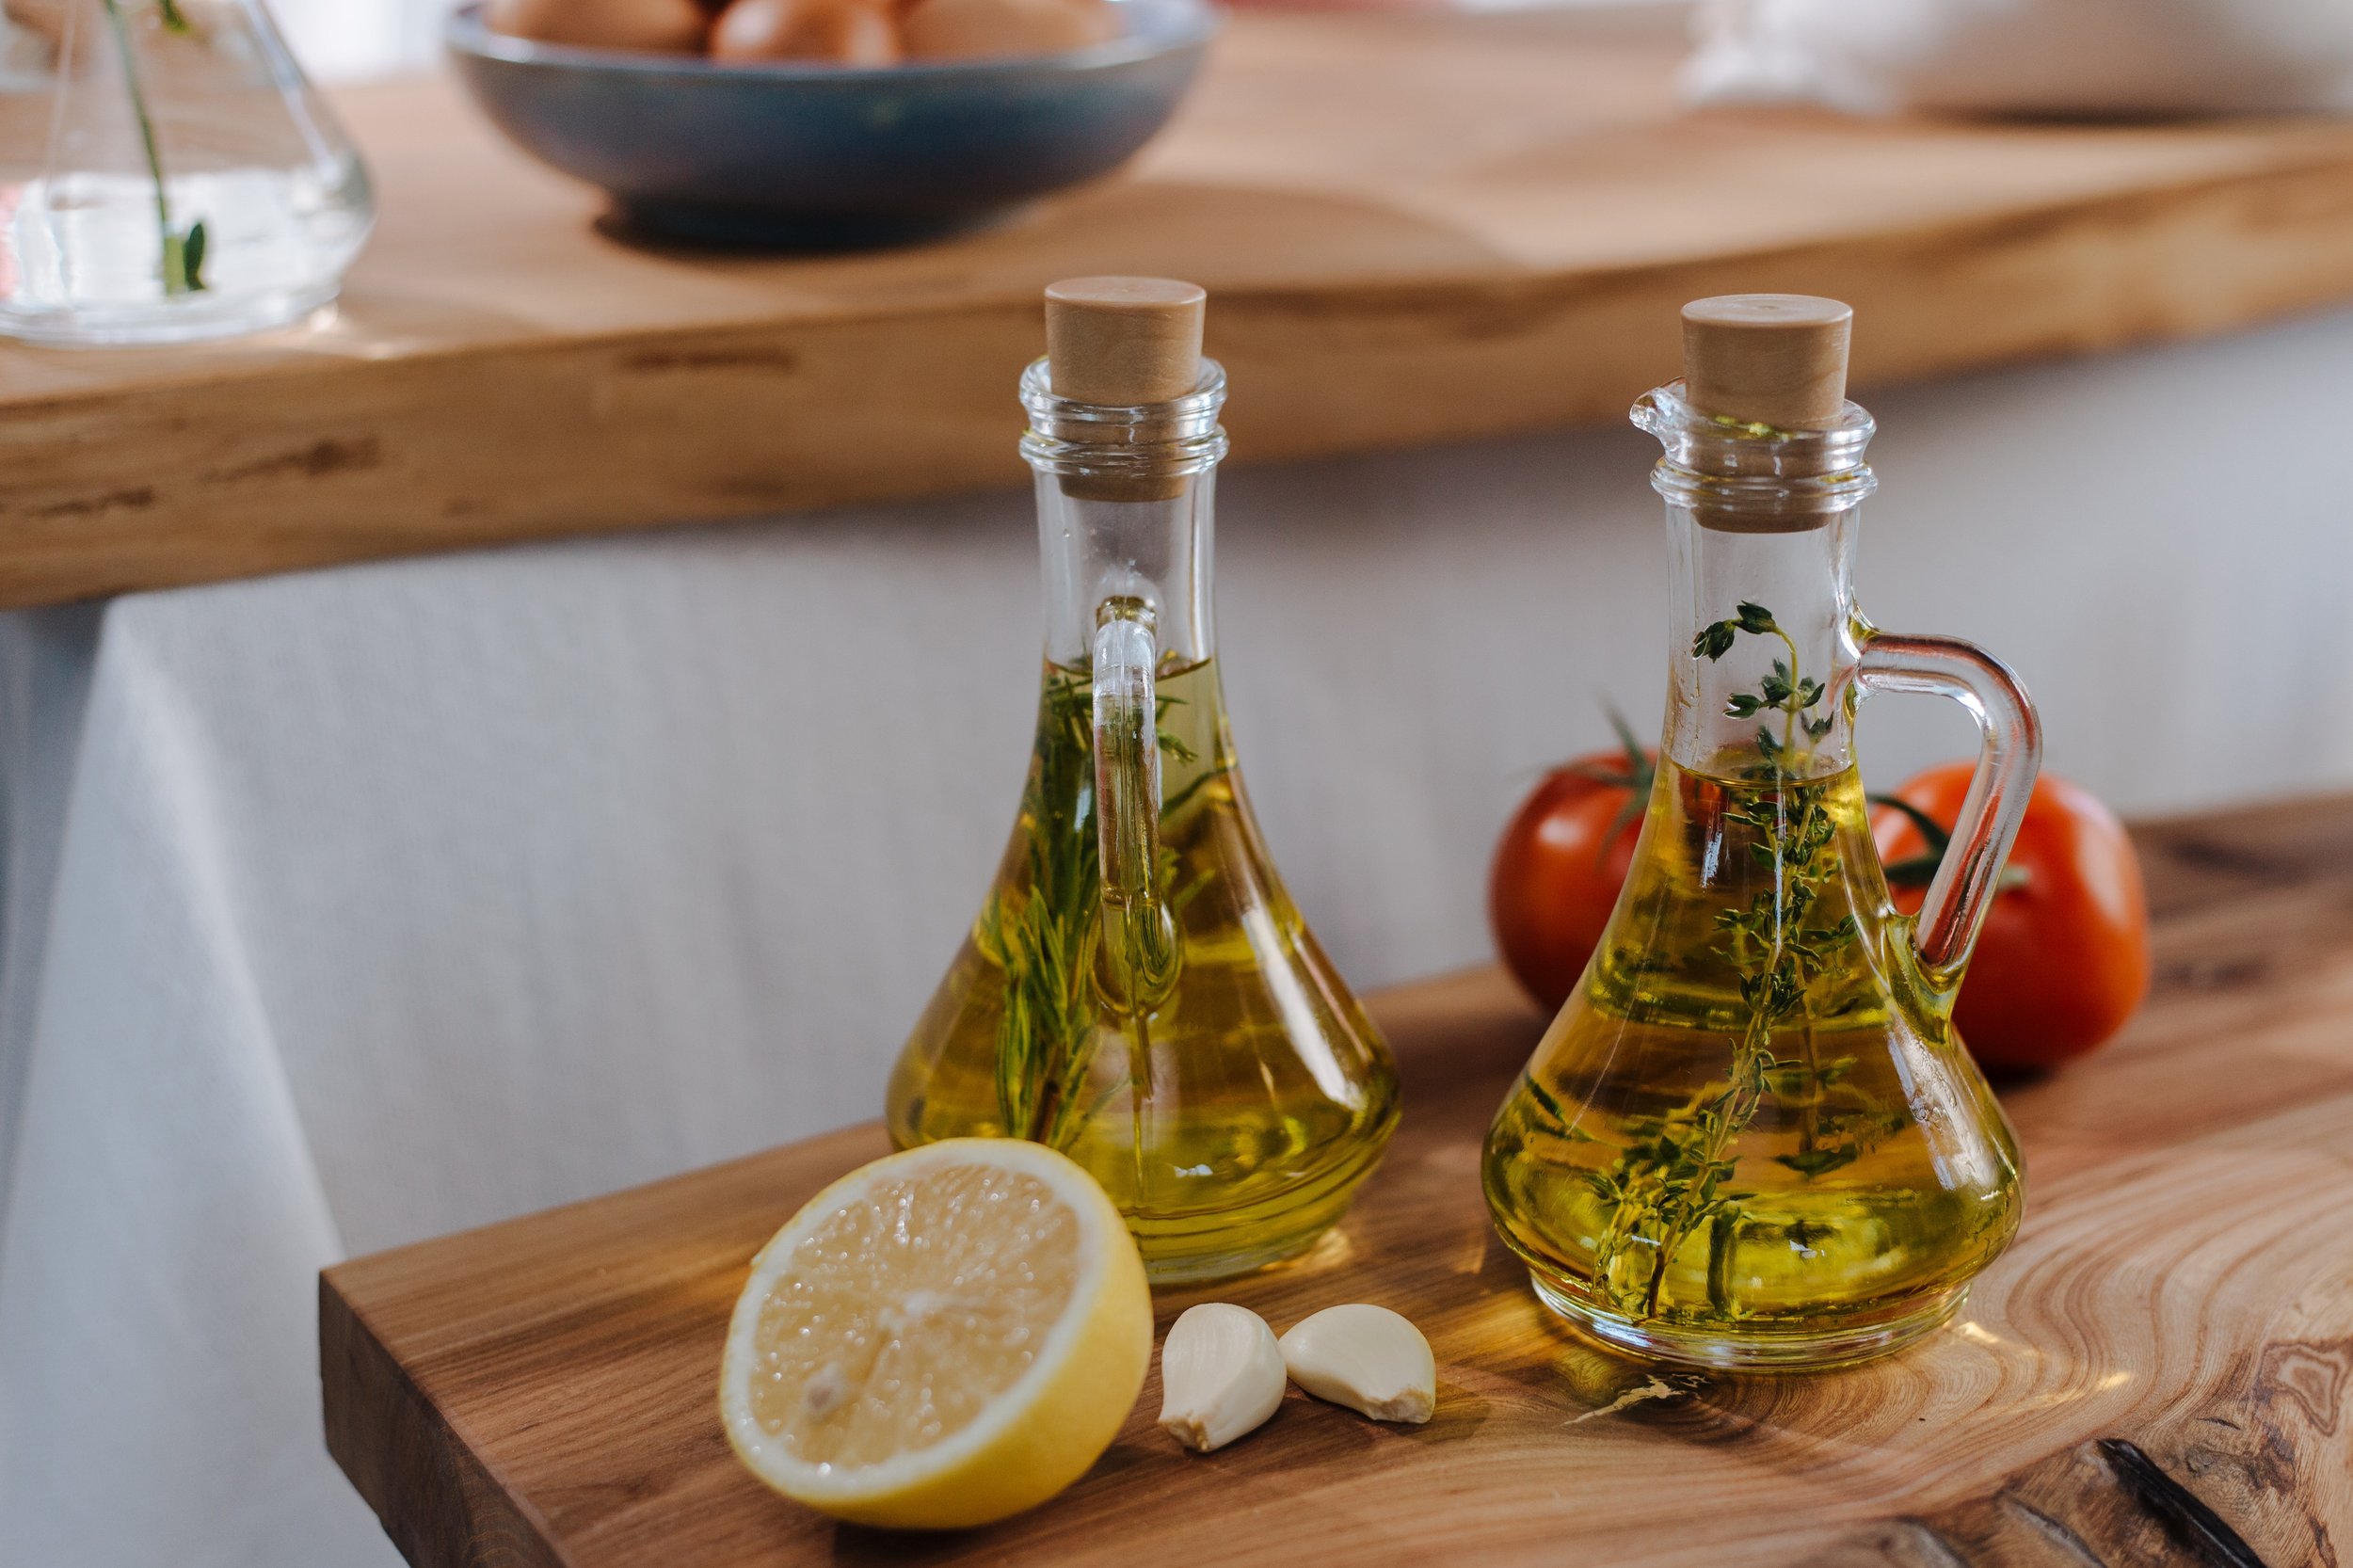
2 tablespoons garlic-infused olive oil
1 1/2 pounds boneless chicken breasts or thighs, thinly sliced
2 tablespoons smoked paprika
2 teaspoons chili powder
1 teaspoon dry cumin
1 teaspoon Kosher salt and 1/4 teaspoon black pepper
3 green onions, green part only, chopped
3 bell peppers, sliced
3-4 cups cooked rice
3 cups grilled corn kernels
1/2 cup cotija cheese or Feta cheese, crumbled
Chopped lettuce, jalapeños, and cilantro, for serving
Ingredients: Lime Vinaigrette
3 tablespoons cup garlic-infused olive oil
3 tablespoons plain yogurt
3 tablespoons lime juice
2 teaspoons maple syrup
1 teaspoon Smoke N Sanity Essence of Garlic Salt
1/4 teaspoon red chili pepper flakes (or to taste)
Directions
(1) Prepare the chicken: This step is optional but results in a more flavorful and tender chicken. Remove chicken from the package, and put it in one layer on a rimmed plate or baking dish. Season both sides of each piece lightly with Kosher salt (about 1/4 - 1/2 teaspoon per side). Cover the dish with plastic wrap and refrigerate until ready to use, ideally about 4 hours before cooking or overnight.
(2) Make the vinaigrette: Combine all ingredients in a glass jar and shake well to combine. Taste, and season with salt as needed.
Make-ahead note: At this point, you may leave the chicken and the vinaigrette in the refrigerator until you are ready to prepare the meal.
(3) Prepare: Slice the chicken across the grain into strips, then toss together with the olive oil, smoked paprika, chili powder, cumin, salt, and pepper. Meanwhile, put the rice on to cook per package instructions.
(4) Cook the chicken: Heat a large skillet over medium-high to high heat. When the pan is warm, add the garlic-infused olive oil. When the oil is hot, add the chicken and cook until it’s seared all over and cooked through, about 8-10 minutes. Remove the chicken to a plate and set aside.
(5) Cook the peppers: In the same skillet, add the green onions and cook for about a minute. Add the sliced bell peppers, sprinkle the remainder of the seasoning mixture over the vegetables, and cook until the peppers are tender, about 3 minutes. Add the chicken back to the pan with the peppers and toss to combine.
(6) Plate and serve: Put a scoop of rice in each bowl. Spoon the chicken and peppers over the rice. Top with lettuce and grilled corn. Then pour over the vinaigrette. Crumble the cheese over each bowl. Top with chopped lettuce, jalapeños, and cilantro.
Eat and enjoy every bite because you can!
Recipe note: I use Diamond Crystal Kosher salt in all my recipes because it has a wonderful flat and crisp flake that tastes delicious. It is also the least salty salt available so you can use it more liberally as a seasoning than you can table salt or sea salt. If you use another type of salt, you may need to reduce the amount so it is not over-salted.
Link note: This post contains links for you to easily purchase items listed on the page. In some cases, we have provided a special discount code for IBS Game Changers so be sure to use it when you purchase an item to get the discount that has been arranged just for you! As an Amazon Associate, I earn a commission from qualifying Amazon purchases.
More Deliciously Low FODMAP™ salad recipes


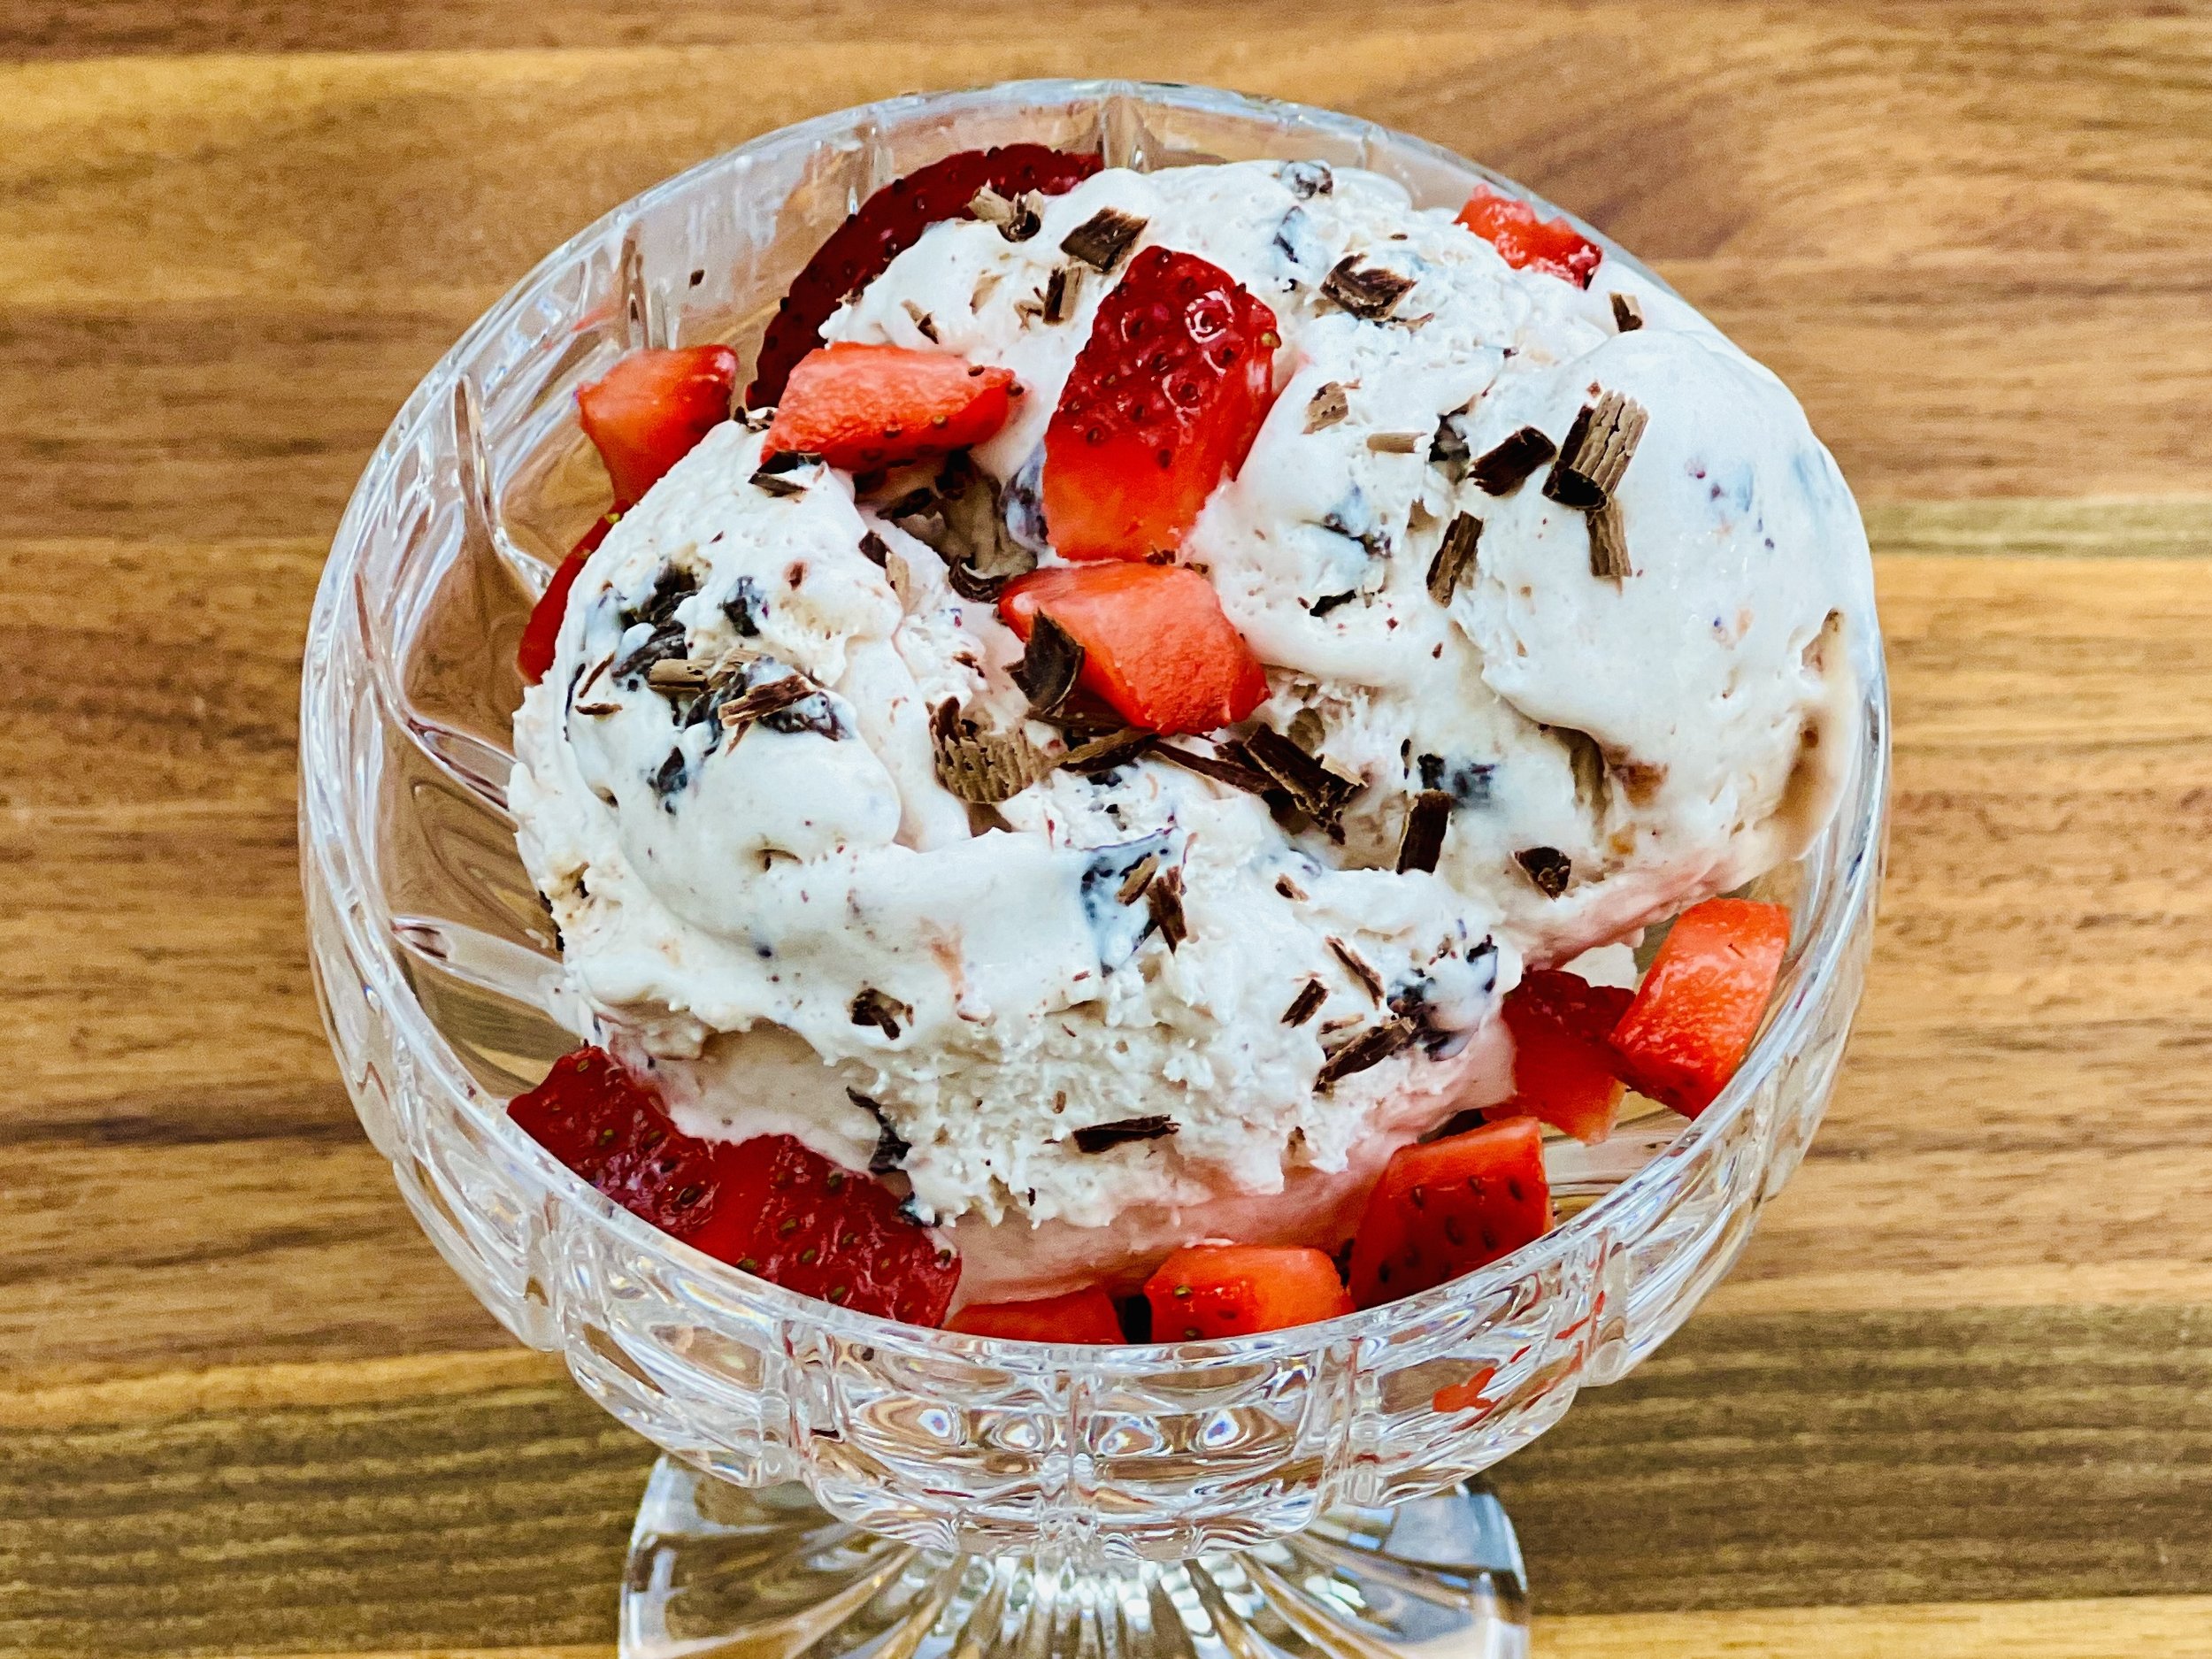
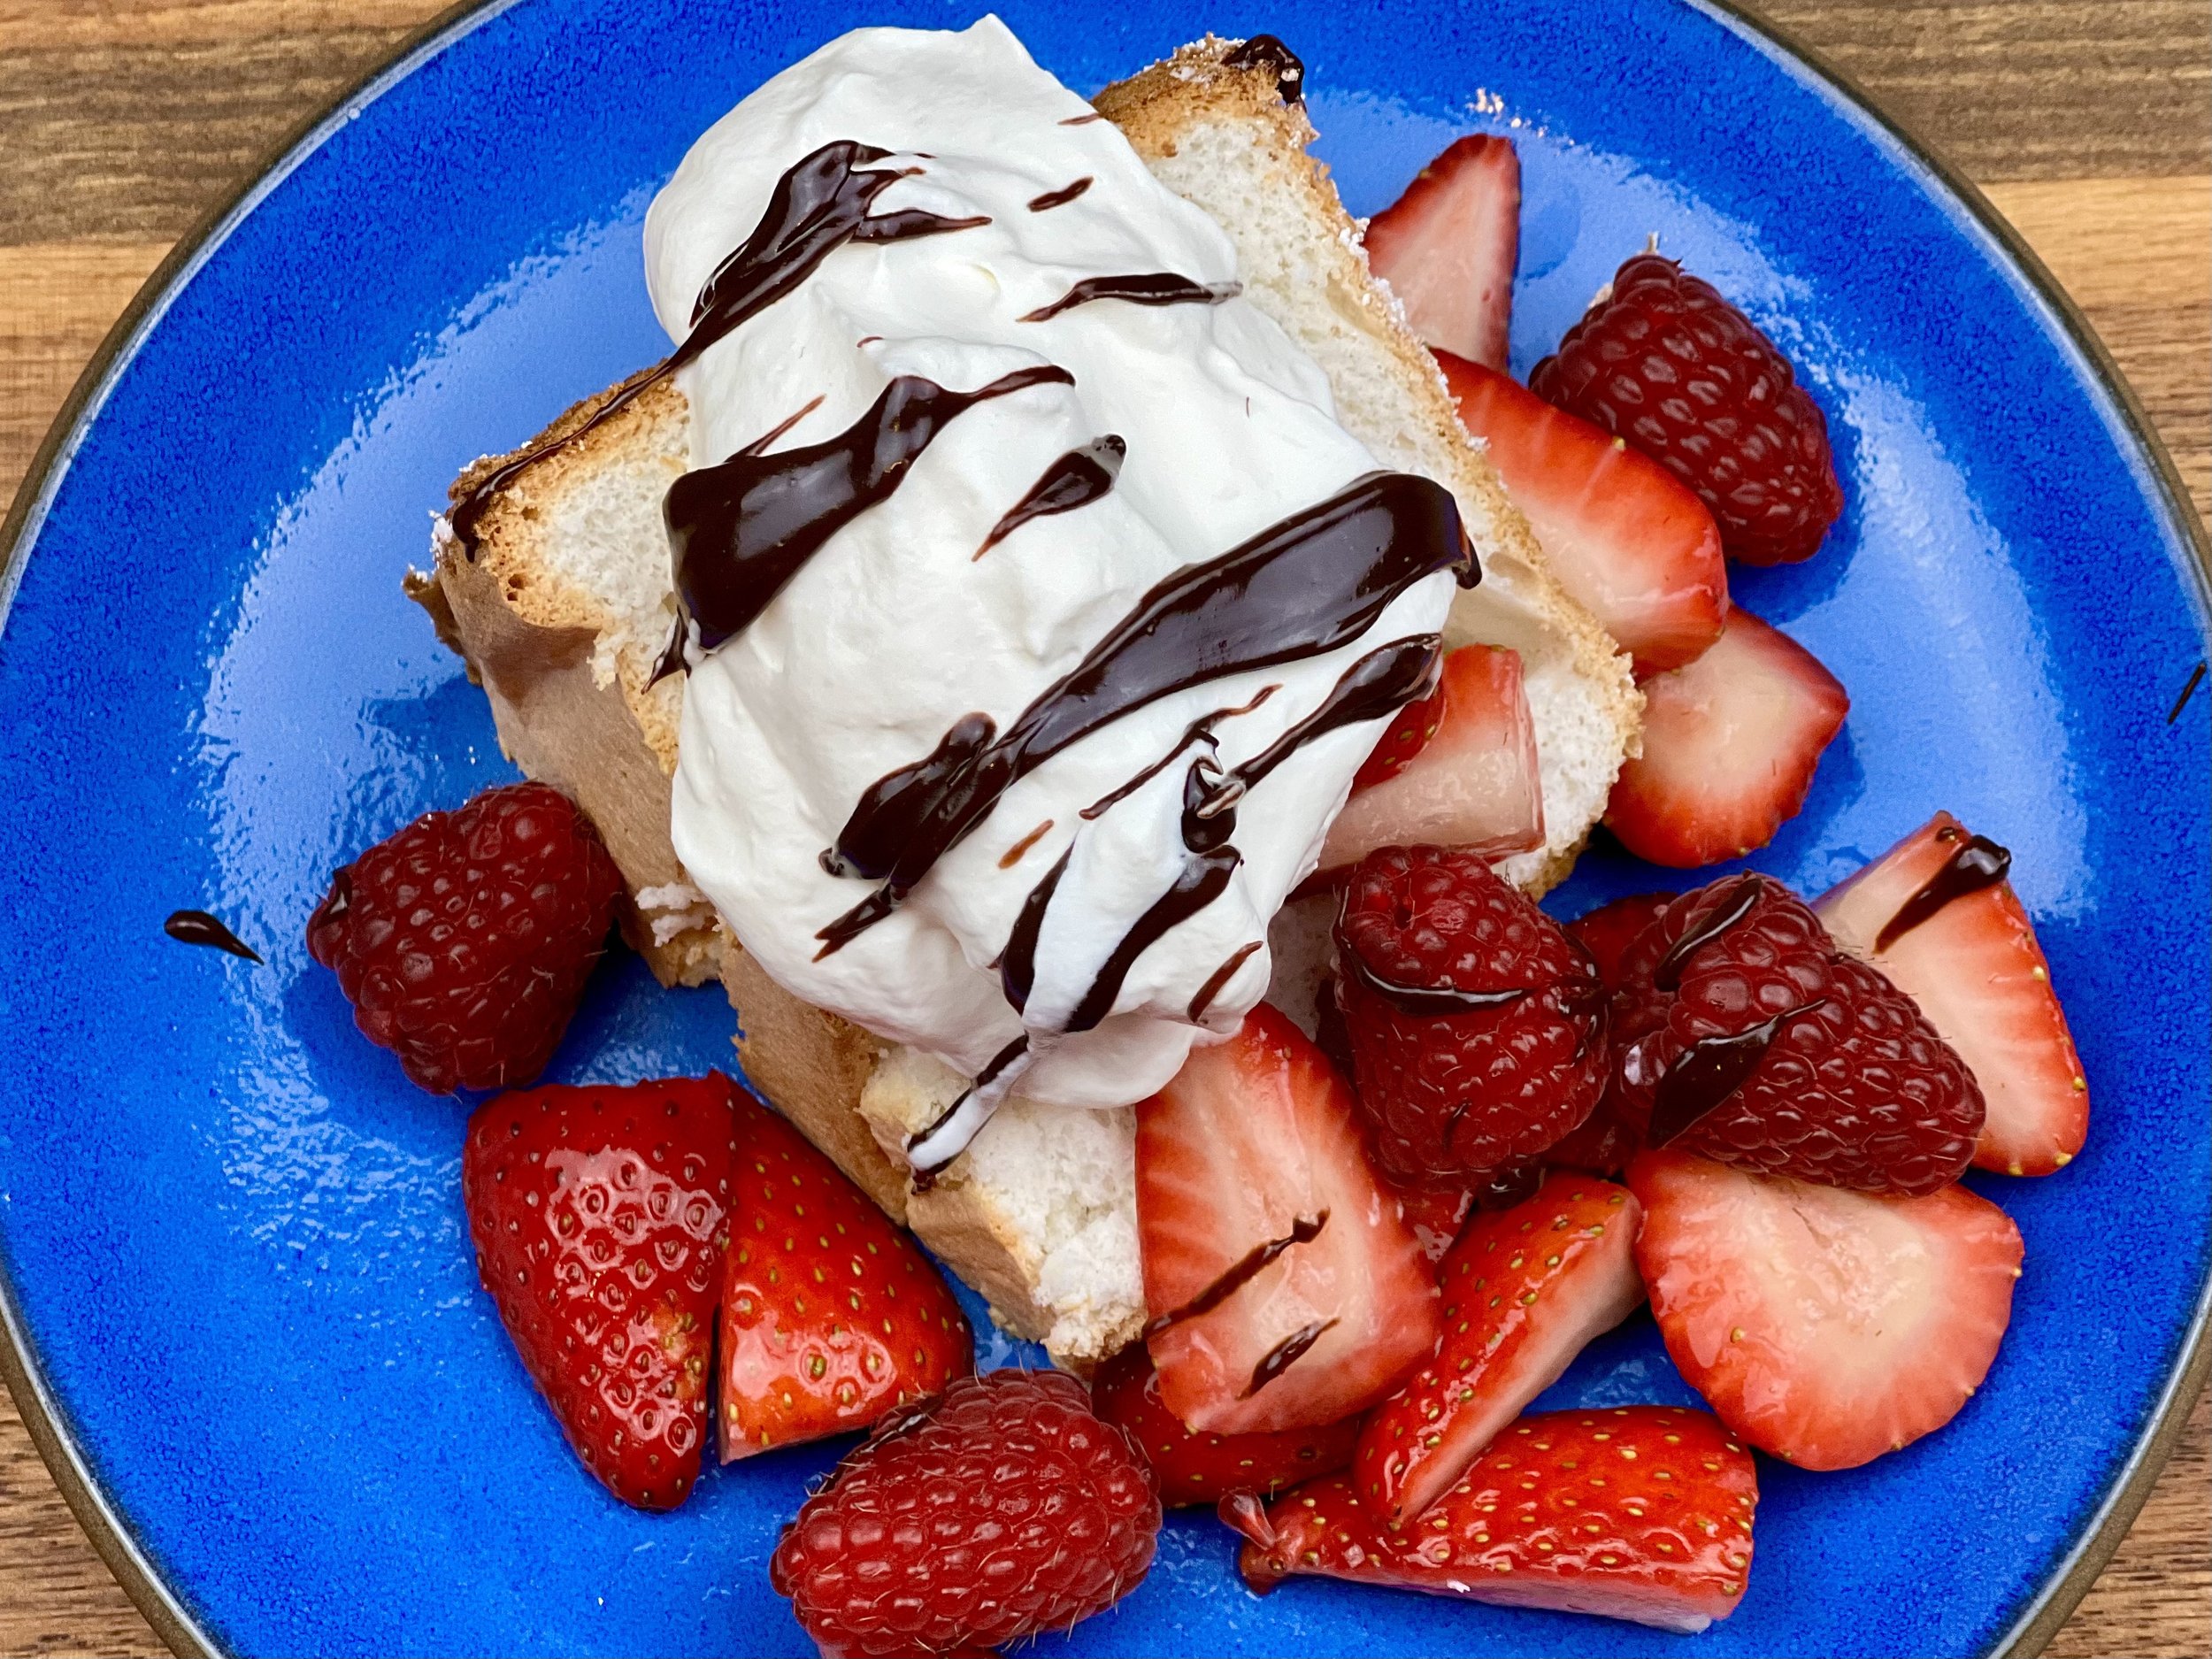
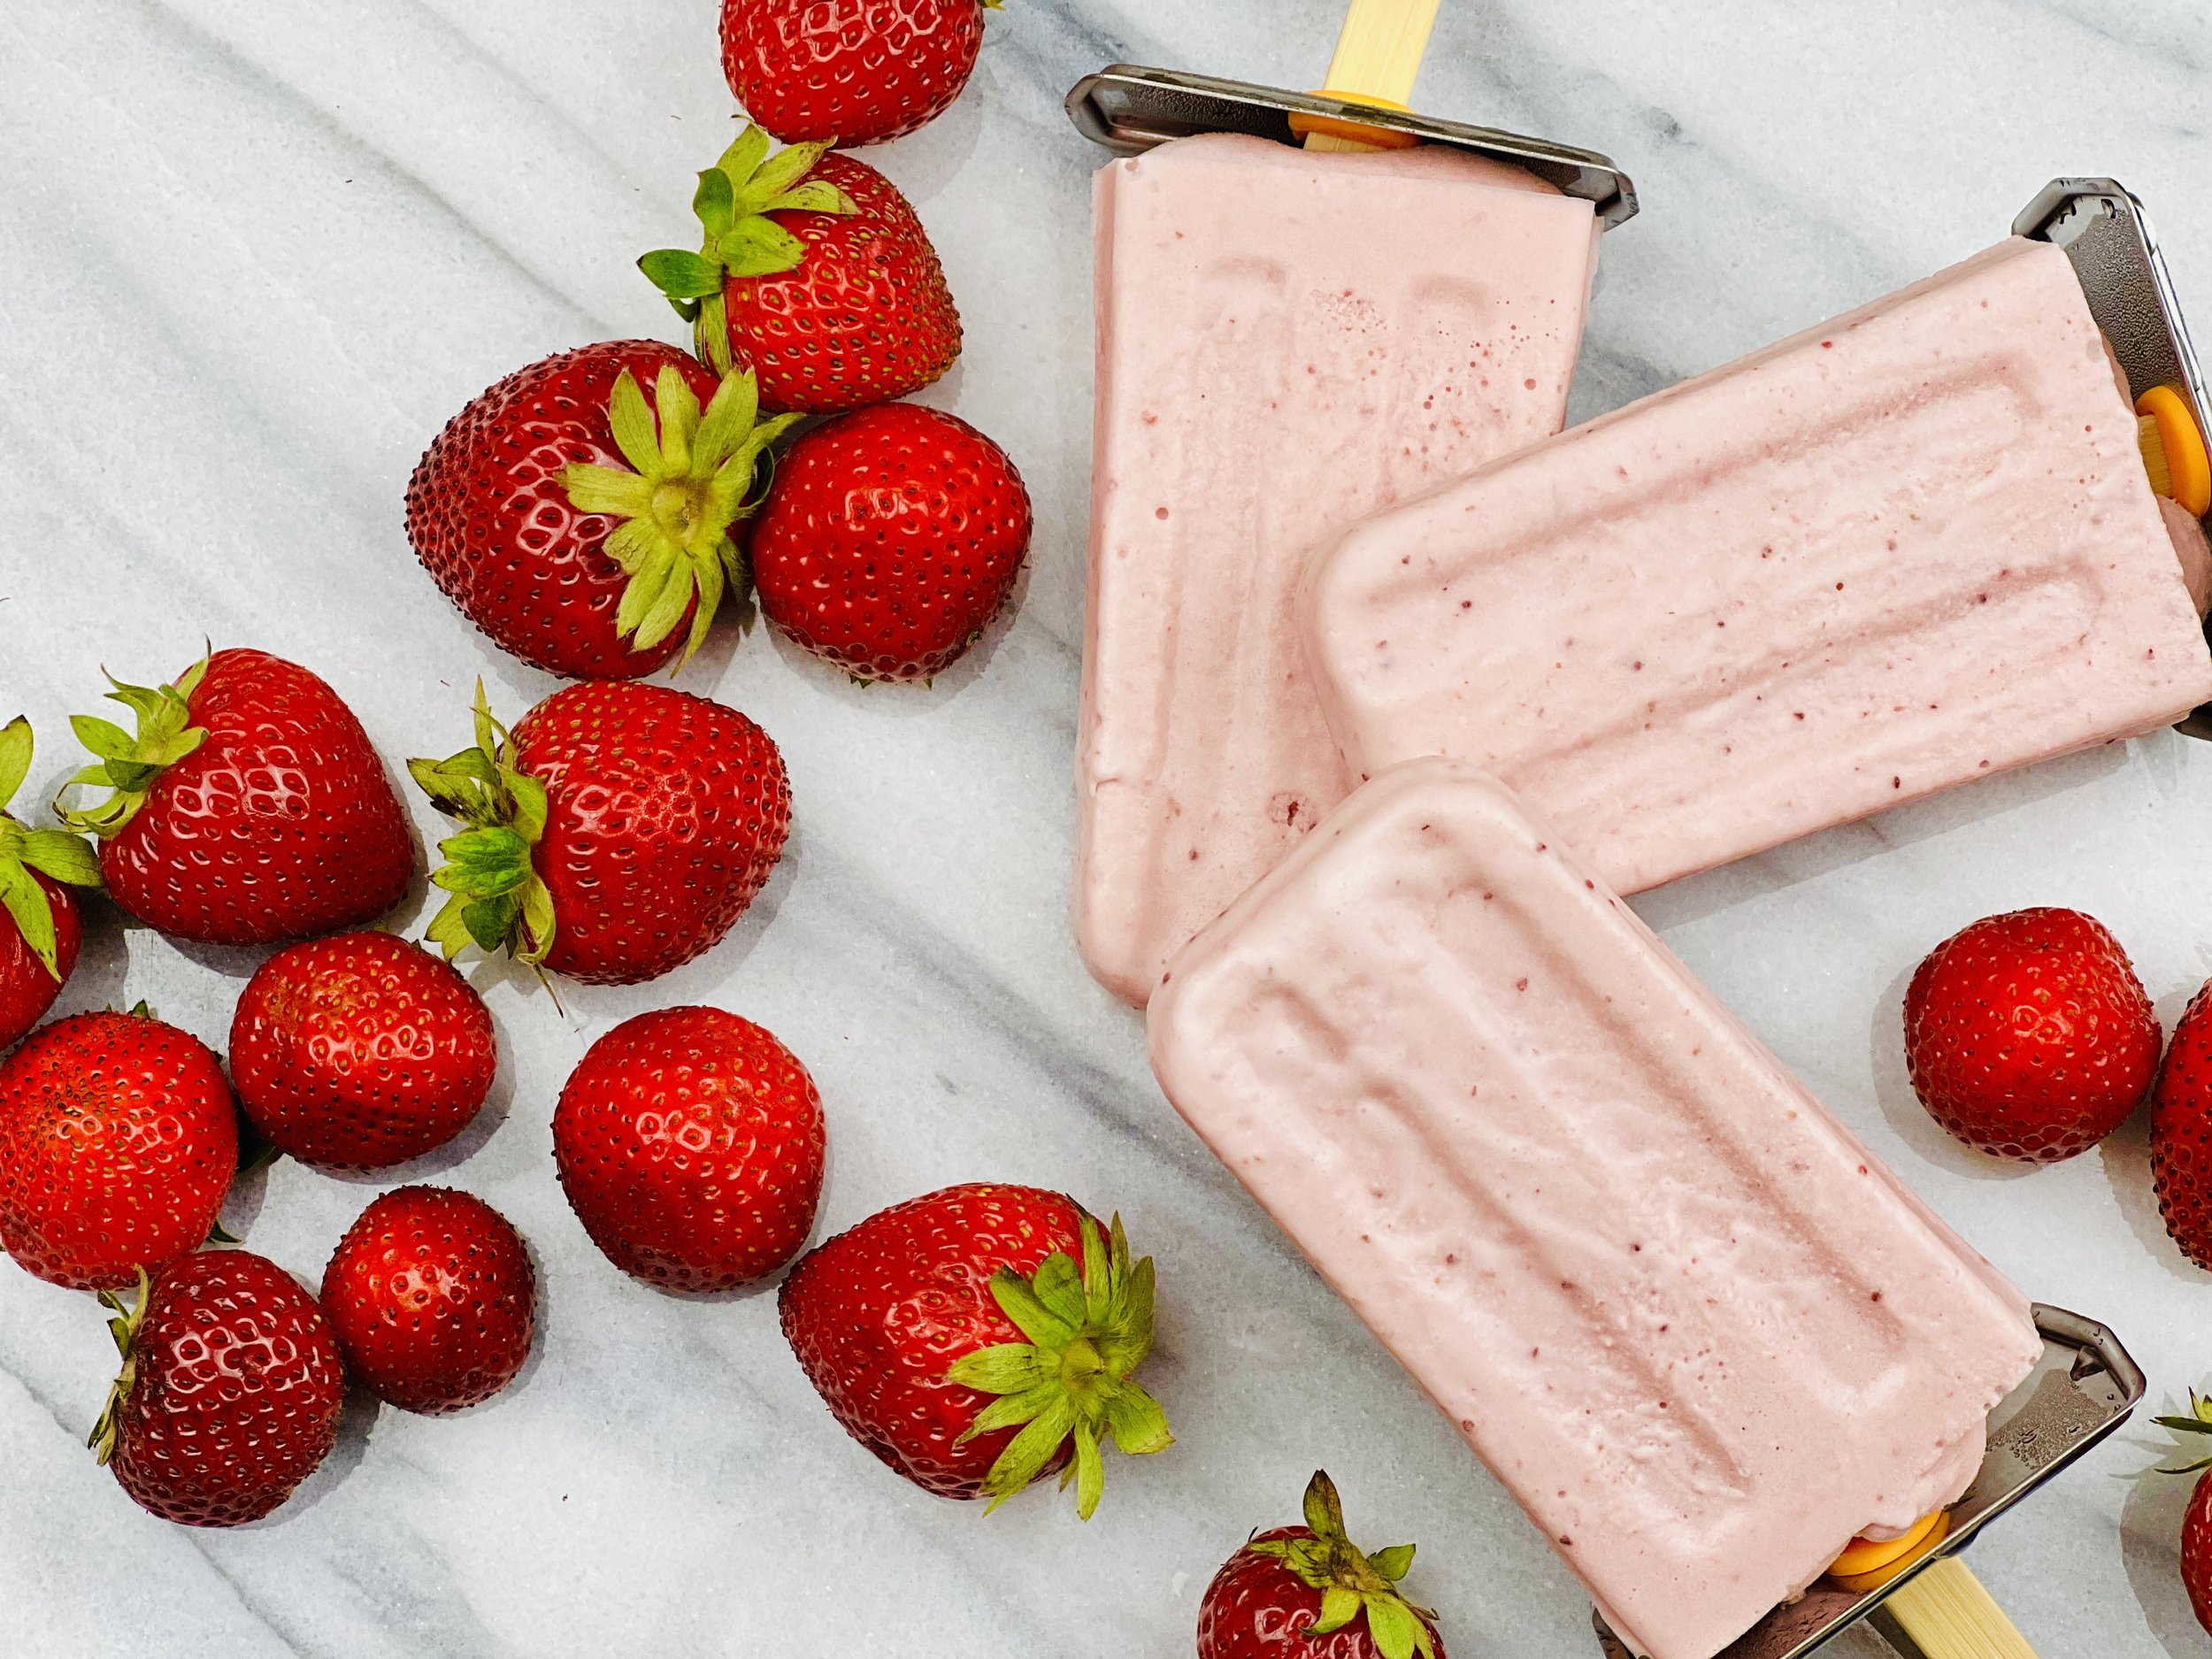
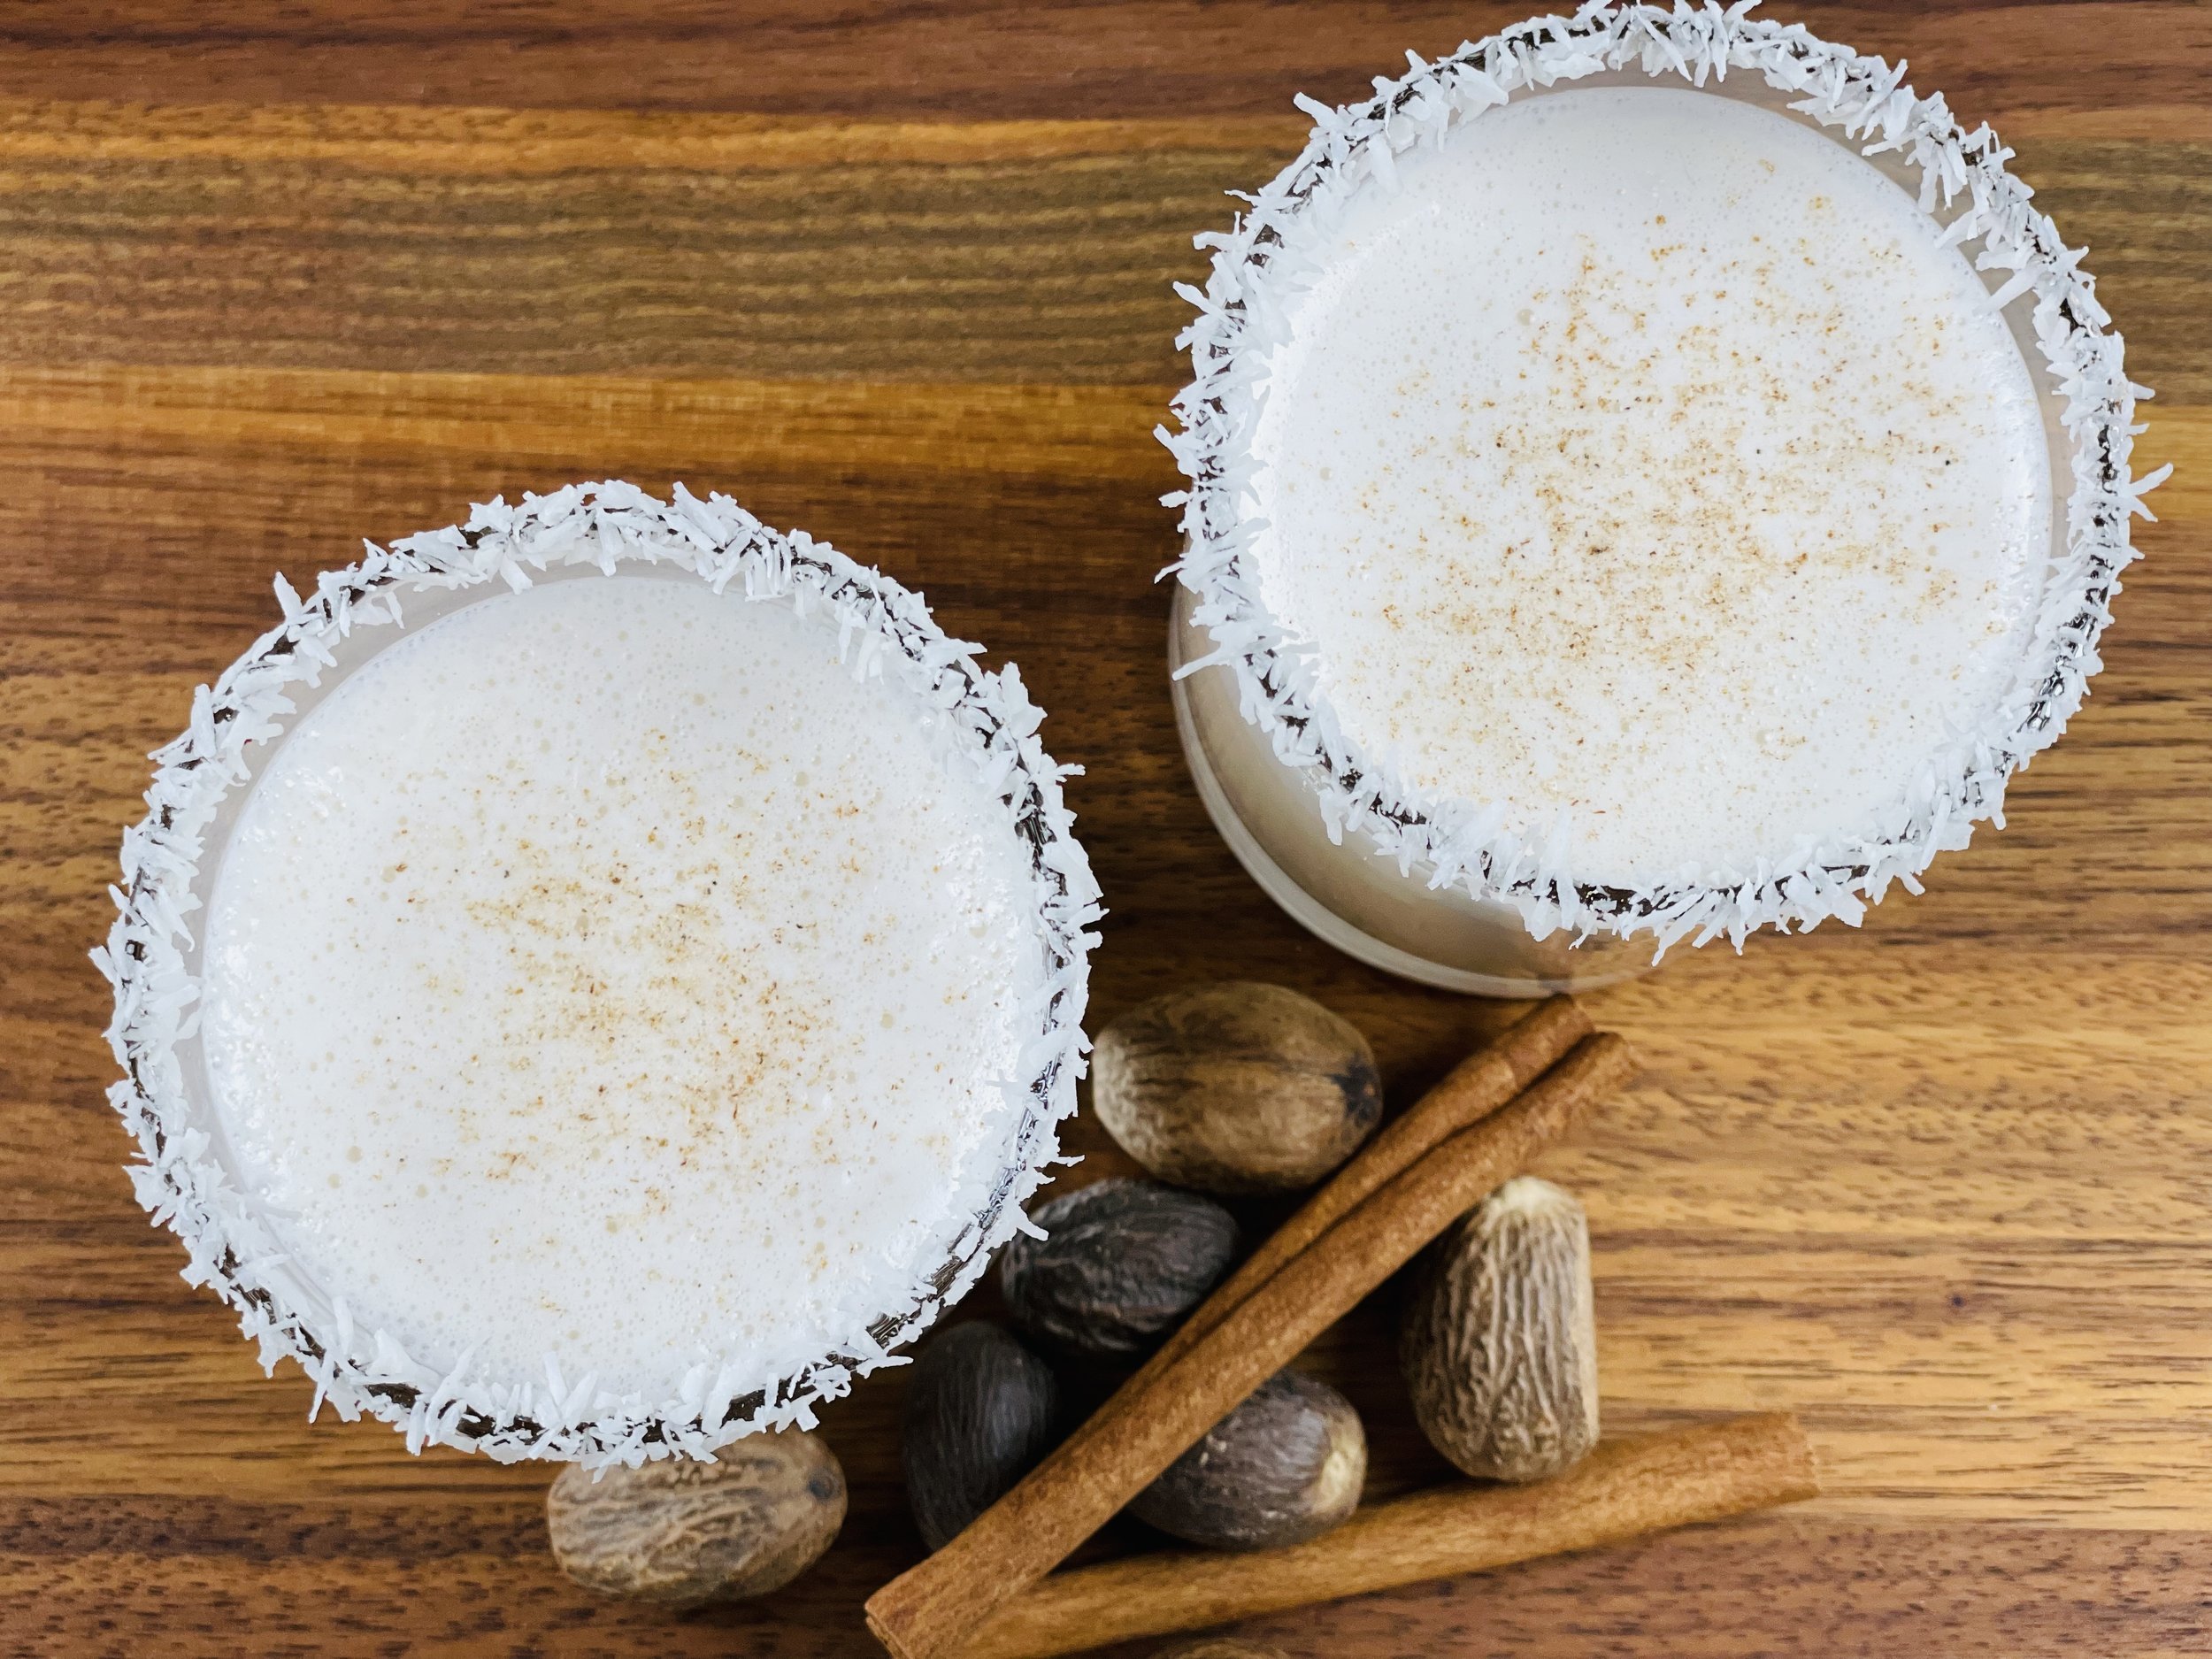
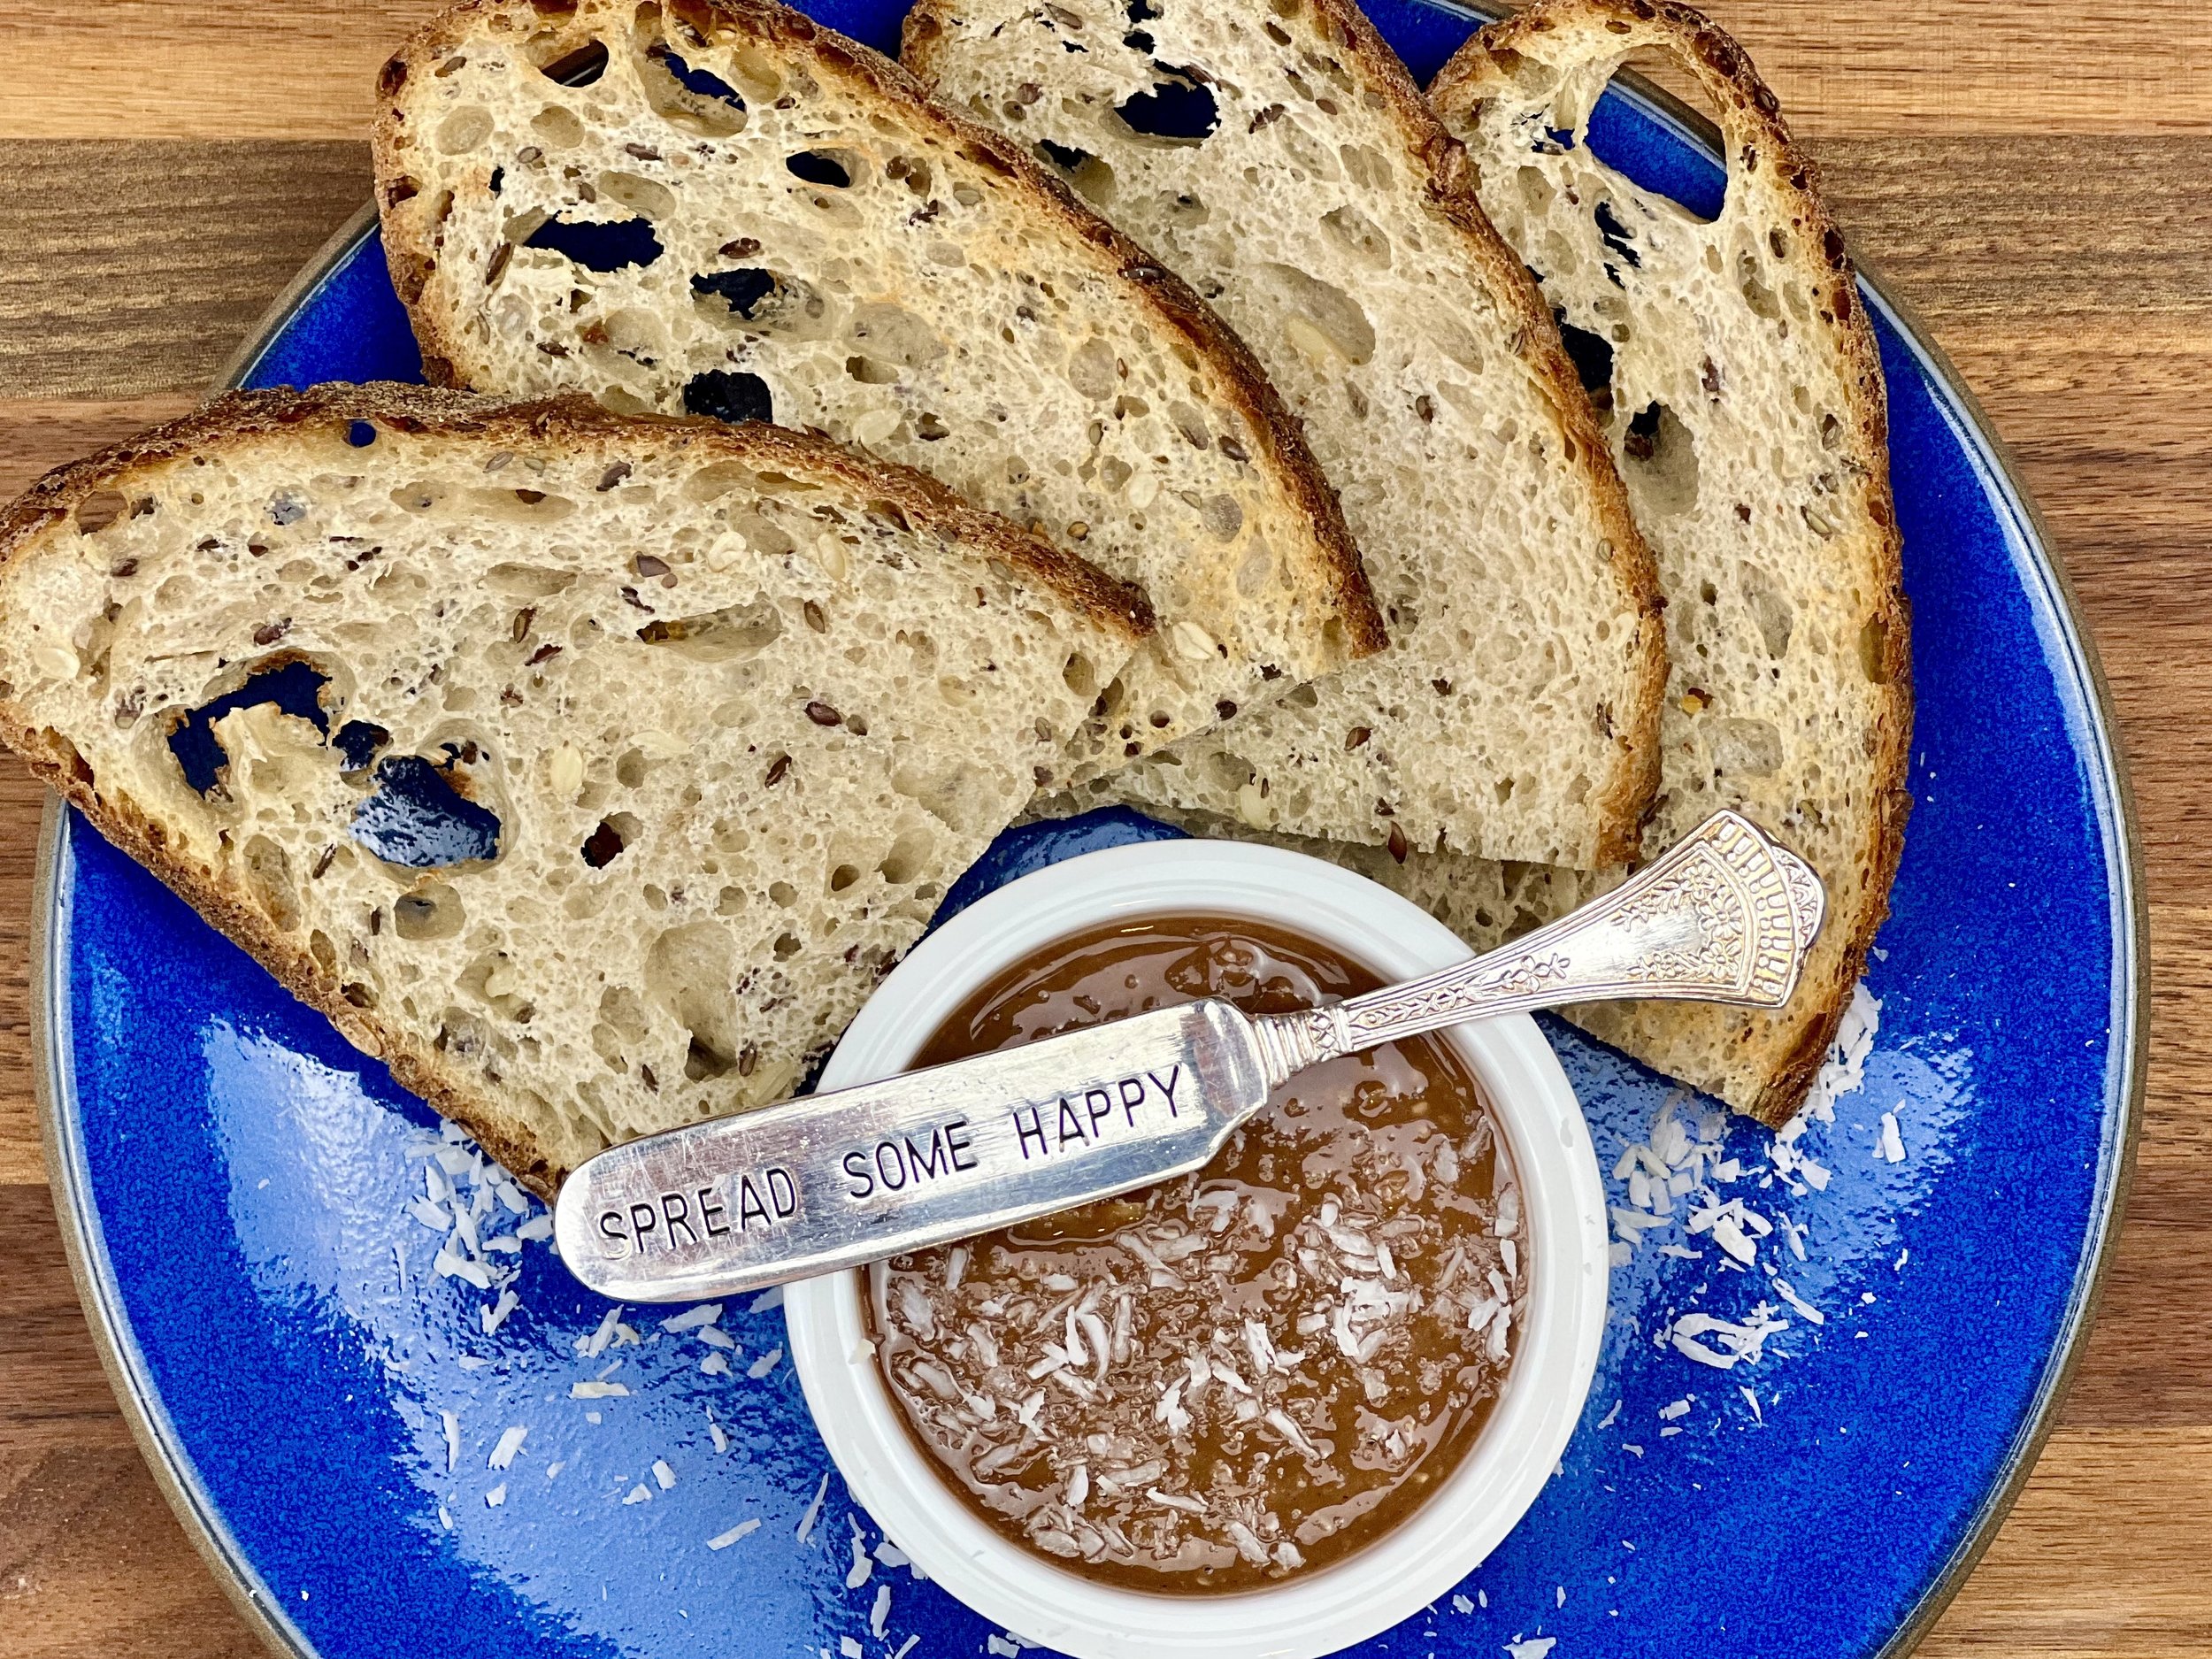
Strawberries and Creamsicles (low FODMAP)
10 Minutes prep • 5-8 Hours freeze • Low FODMAP • Gluten-free • Makes 6
10 Minutes prep • 5-8 Hours freeze • Low FODMAP • Gluten-free • Makes 6 • Ok to make ahead: Steps 1-2
Strawberry creamsicles are a wonderful summer treat. They’re easy to make and the simple ingredients mean the flavors are wonderfully intense. The quick strawberry compote is a great way to use up strawberries that are past their picture-perfect prime so don’t toss them out, give them new life! This compote is a wonderful topping for toast, ice cream, or yogurt too. Get ready to cool down and delight your palate with strawberries and creamsicles!
This is an exclusive recipe just for recipe club members.
In addition to the two free recipes I create each week I am creating and delivering one very special recipe just for my recipe club members. If you’re not yet a member, I encourage you to join! Membership in the club includes access to the complete archive of recipes with filters so it can become your virtual low FODMAP cookbook plus, I am creating and delivering one special NEW recipe every week ONLY for recipe club members. And, for my true fans, I’ll be sharing behind-the-scenes content, and updates on the progress of the new cookbook.
Your membership in the club helps me continue creating new, delicious, easy-to-make, low FODMAP recipes just for you.
As always, all recipes will emphasize simple ingredients, easy preparation, and delicious low FODMAP results. Recipes will be for everything from main courses, salads, soups, side dishes, appetizers, desserts, sauces, breakfast and lunch, and even mocktails and cocktails. Everything you need to prepare fantastic low FODMAP meals everyone will love.
Join the club. Become a Patron. Let’s keep making delicious Low FODMAP meals together.
More Deliciously Low FODMAP™ dessert recipes
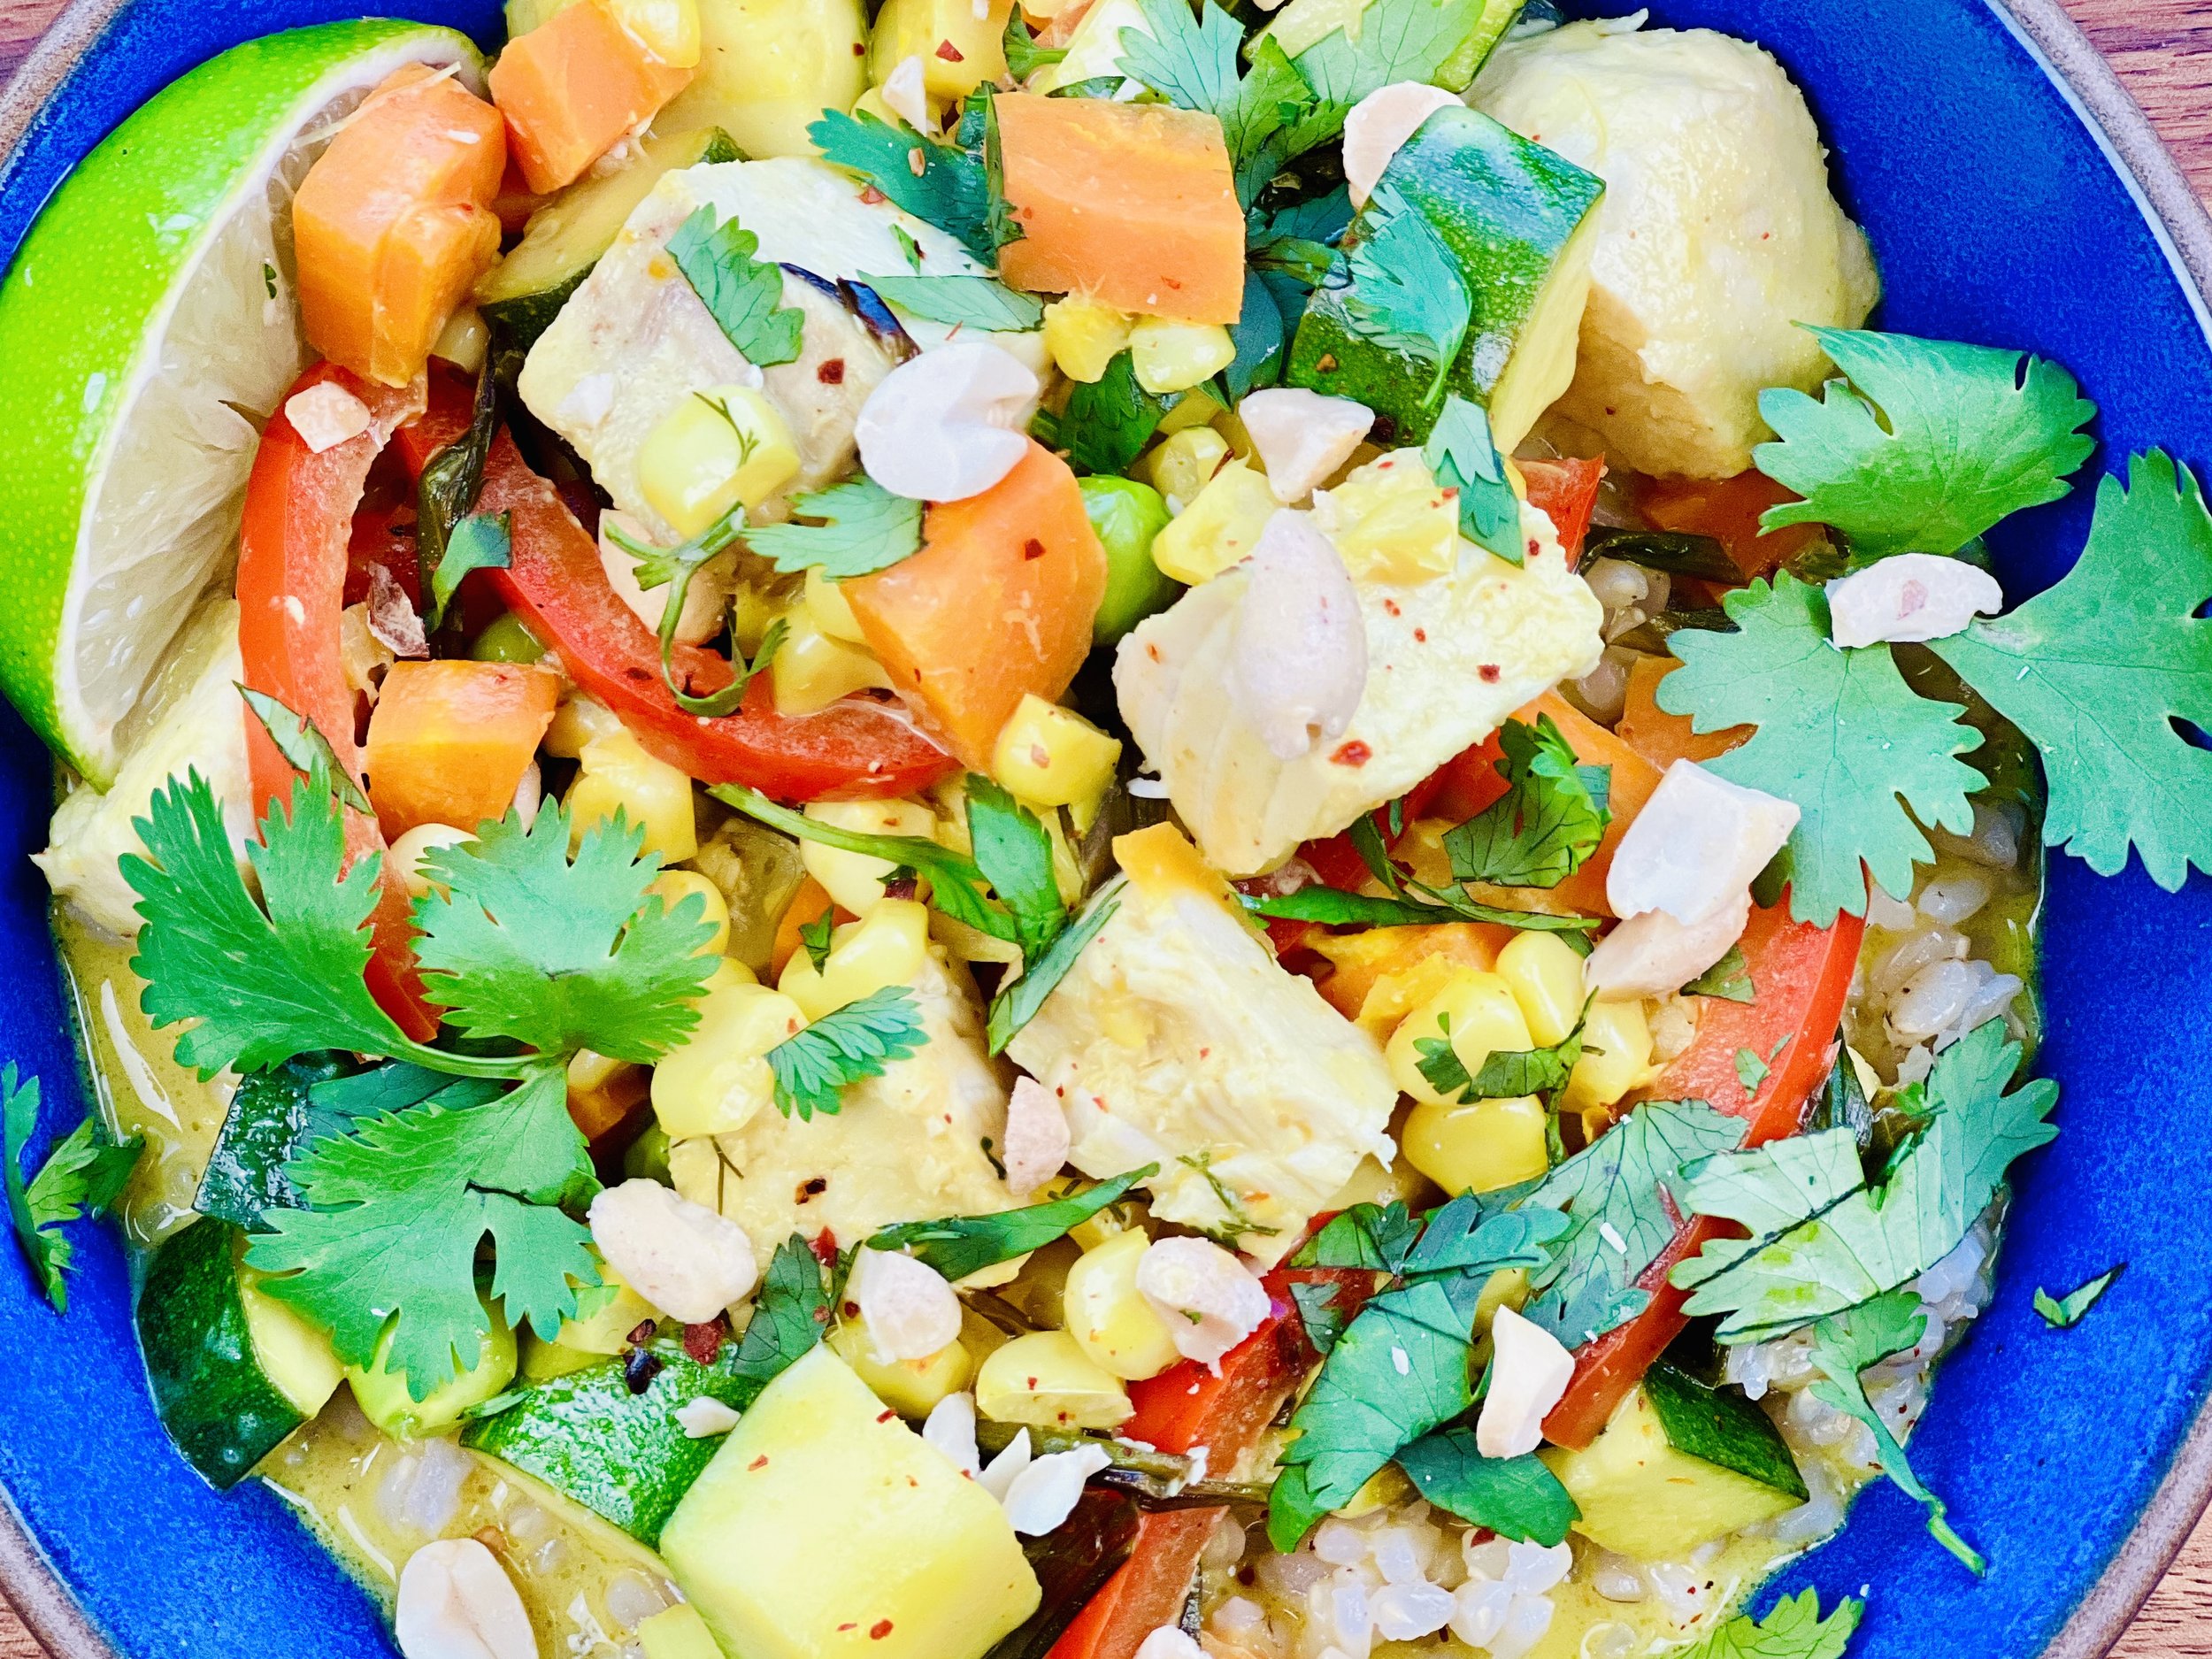
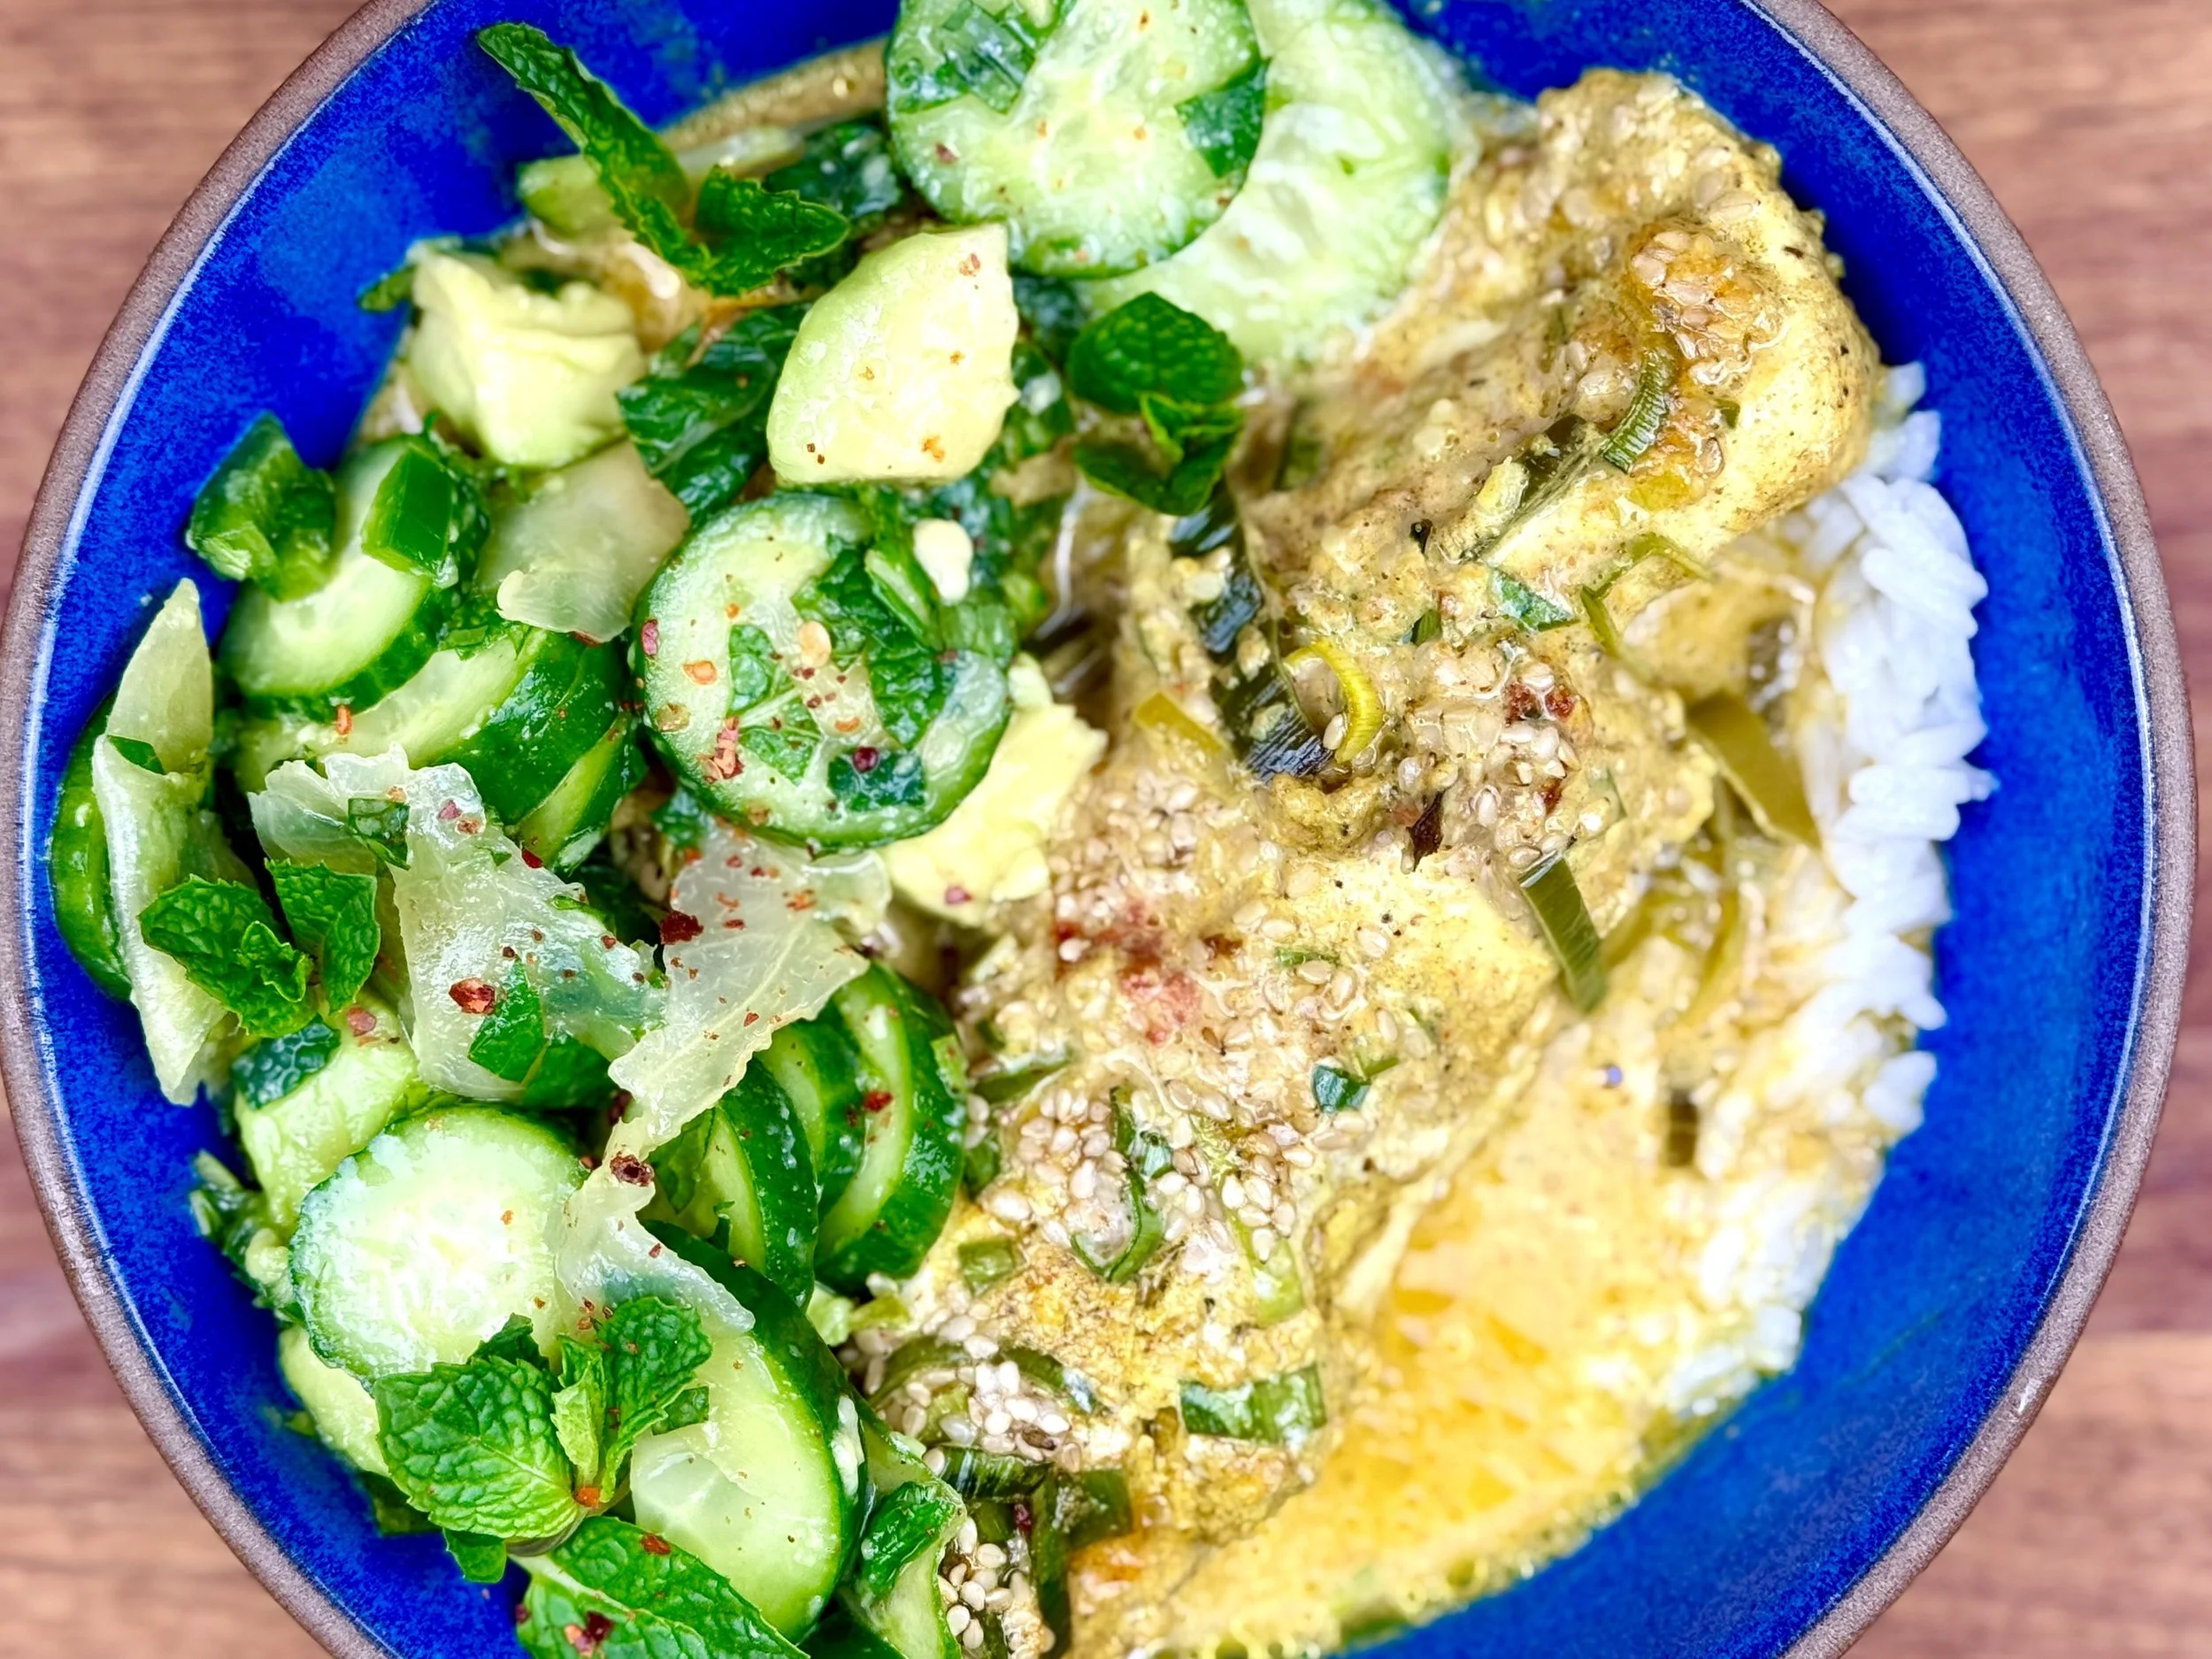
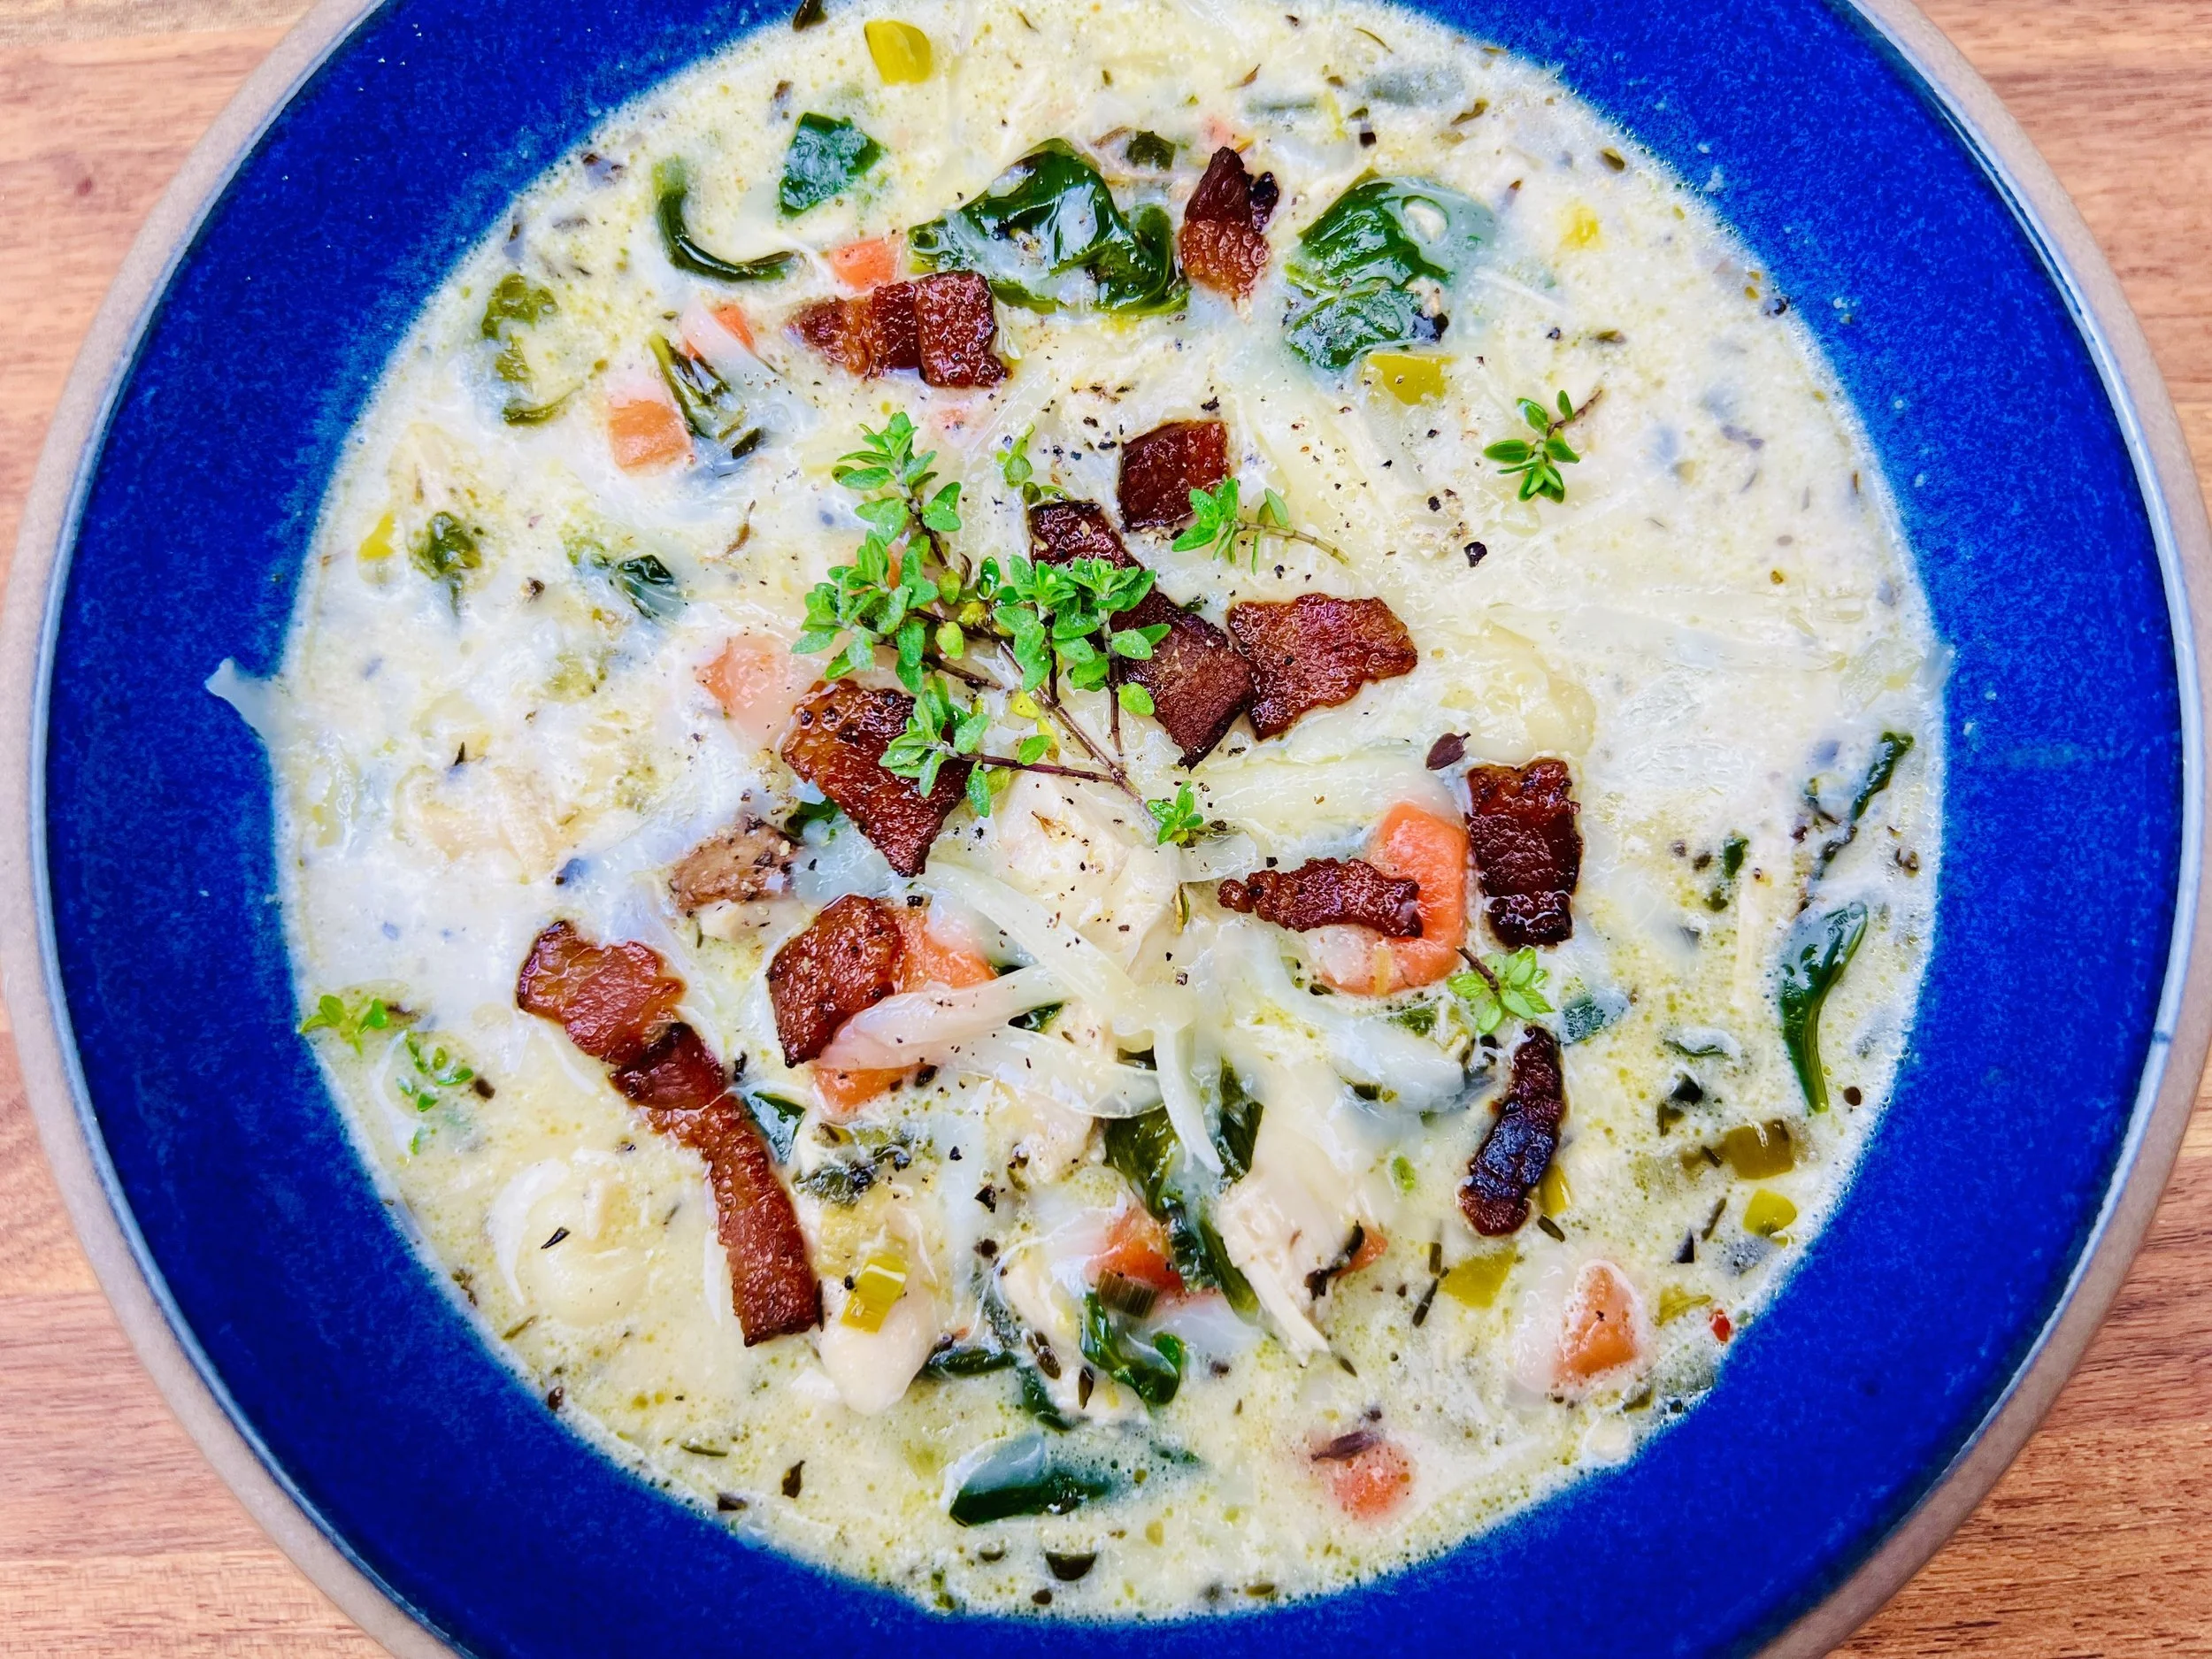
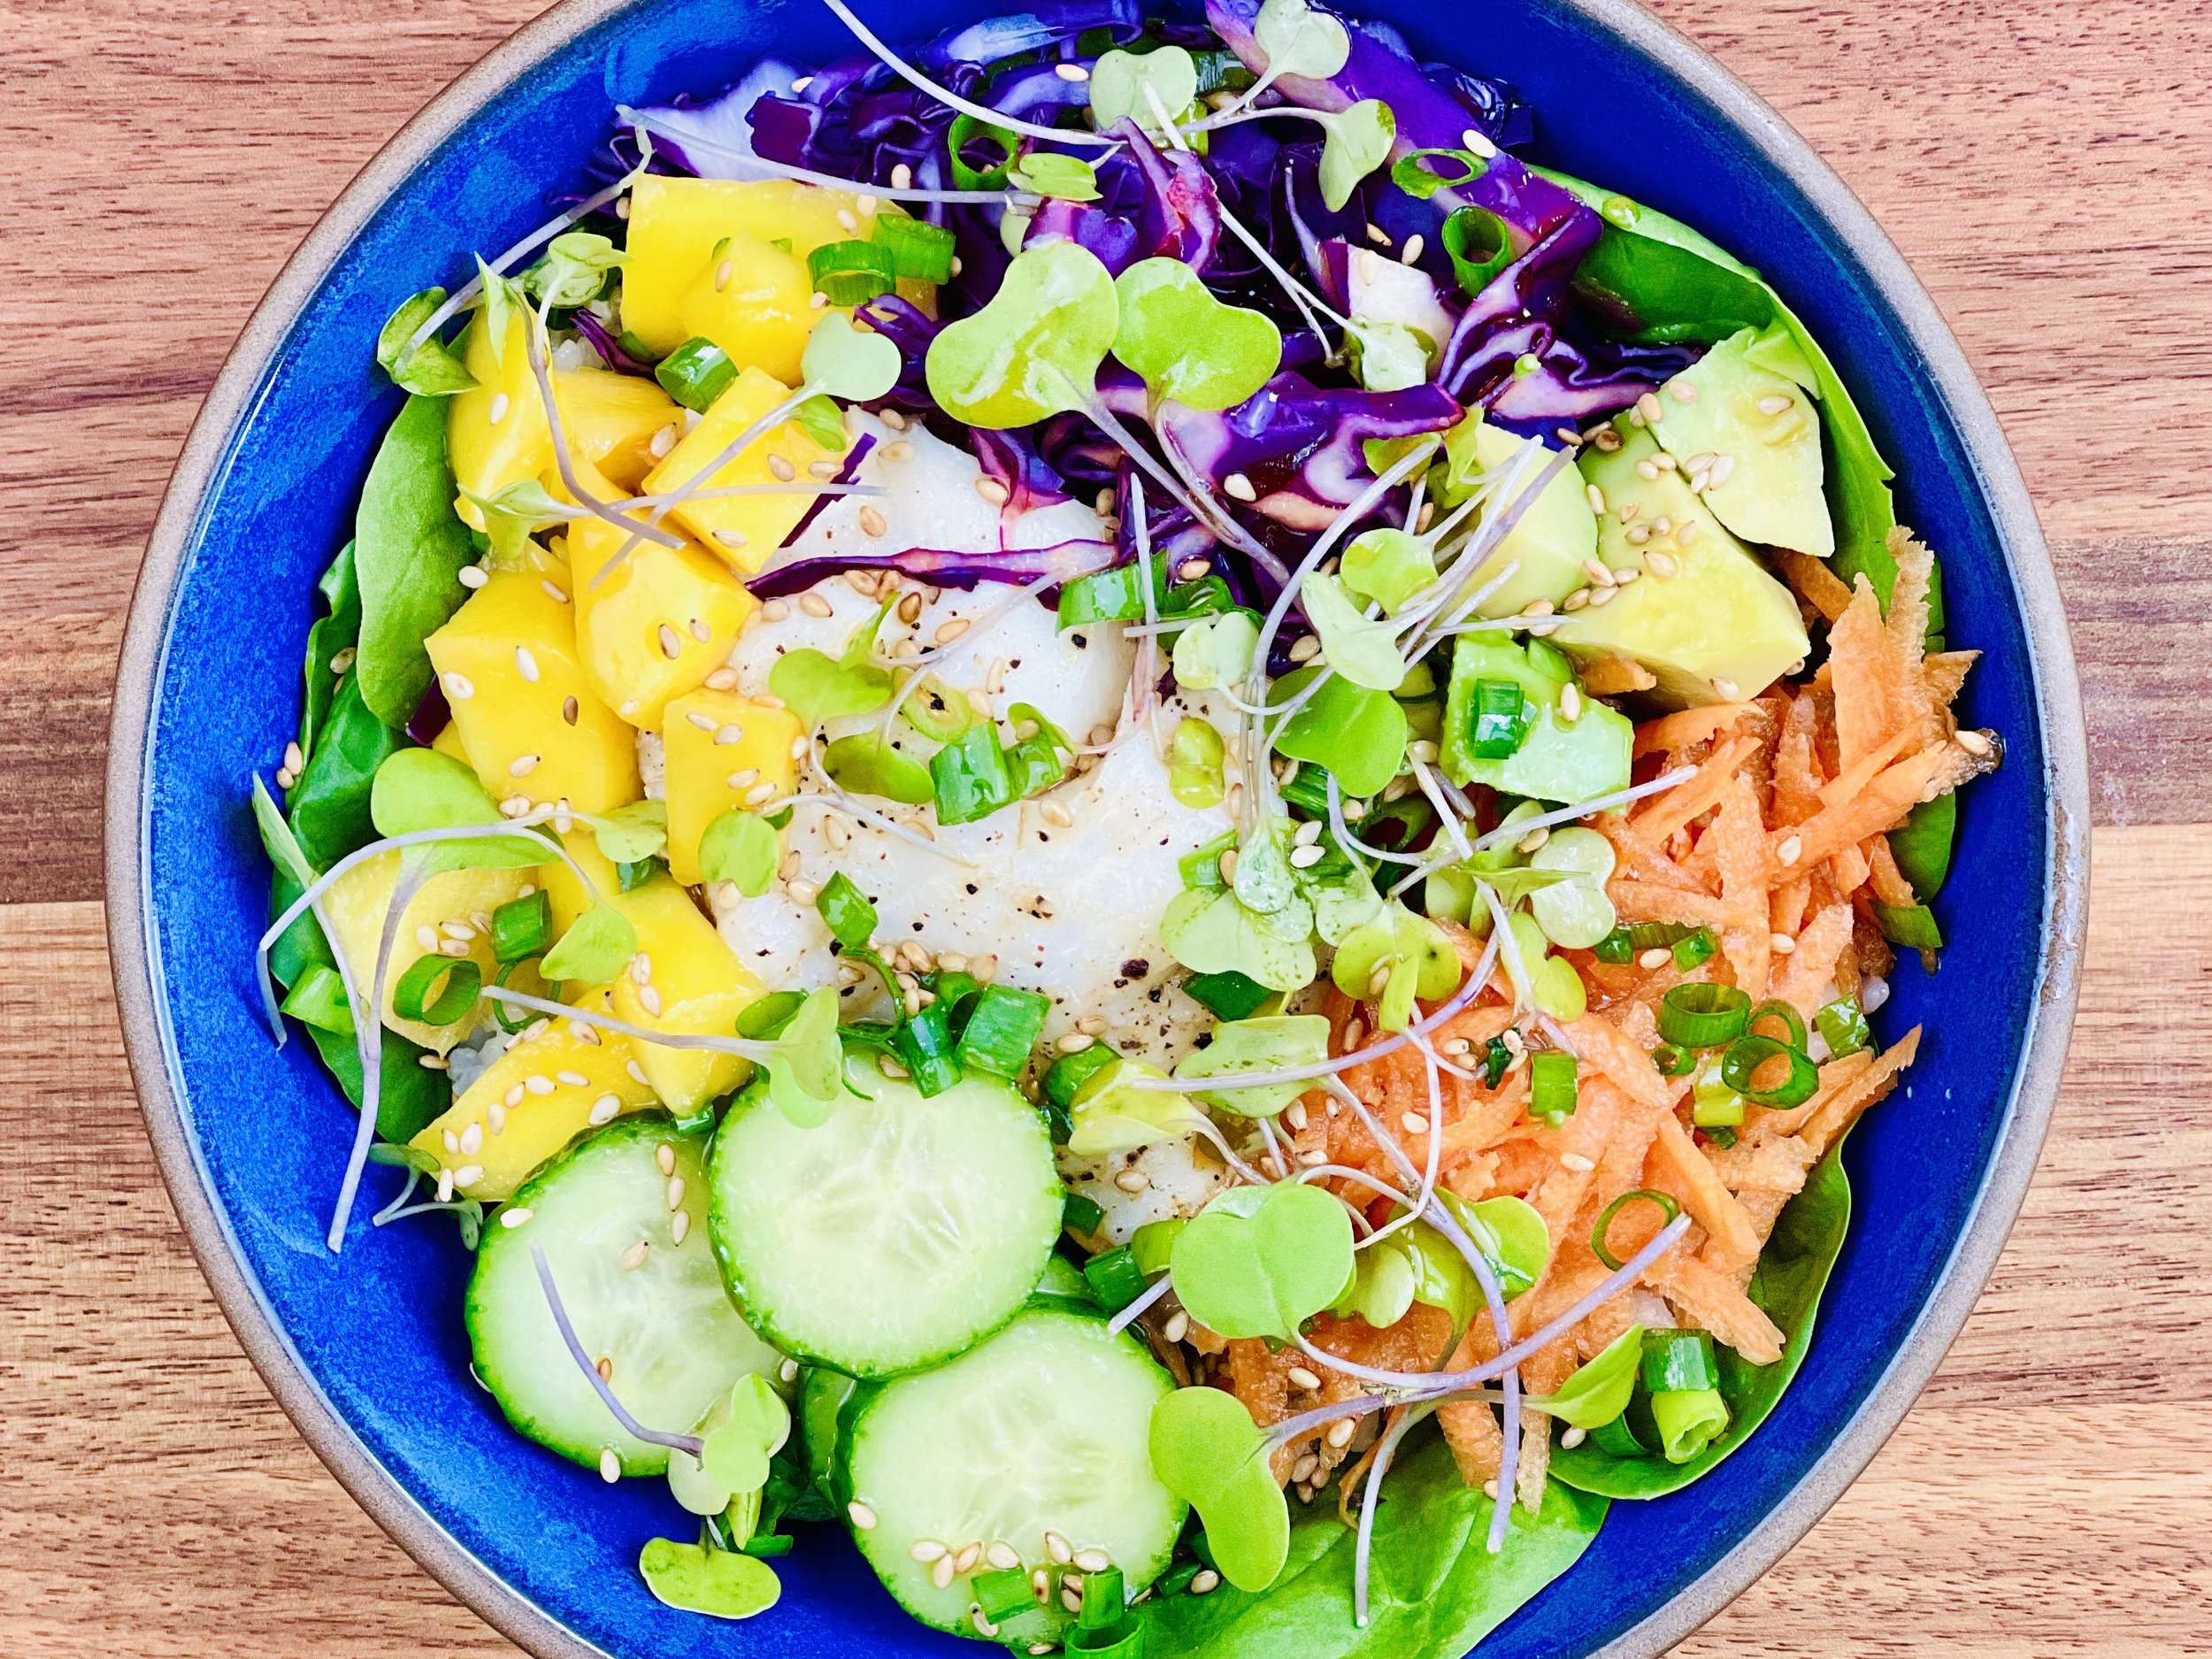
Creamy Coconut Curry with Vegetables and Halibut (low FODMAP)
10 Minutes prep • 20 Minutes cook • Low FODMAP • Gluten-free • Serves 4
10 Minutes prep • 20 Minutes cook • Low FODMAP • Gluten-free • Serves 4 • Ok to make ahead: Step 1
This recipe combines a full selection of vegetables with delicate halibut and a creamy coconut curry sauce to deliver a perfect one-bowl meal. The flavors and colors are wonderful together and you’ll find a total of 15 different plants in this recipe — so your gut biome will thank you! This dish could also be made with tofu for a vegetarian version, shrimp, or chicken if you prefer. To make it even easier, I used halibut that I had cooked the day before. I cut it into chunks and added it to the sauce to warm. It was delicious!
Ingredients
1 tablespoon garlic-infused olive oil
4 scallions (green part only, sliced thinly on the diagonal)
1 tablespoon fresh ginger, finely chopped
1 1/2 teaspoons dried turmeric
1/2 teaspoon curry powder
1 carrot (cut into small cubes or matchsticks)
1/4 cup English peas (or frozen peas)
1/2 red bell pepper (cut into matchsticks)
2 zucchini (cut into small cubes)
1 ear of corn, kernels removed
1 (14-ounce) can coconut milk (full fat)
1/4 cup cream (optional to thicken sauce if needed)
1/2 - 1 teaspoon red pepper flakes (or to taste)
1 tablespoon lime juice (or to taste)
1 tablespoon gluten-free, low sodium soy sauce (or to taste)
2 halibut fillets (8 to 12 ounces each)
1 1/2 cups brown rice or white rice, cooked per package instructions (or use Asian rice noodles)
Cilantro and dry roasted peanuts, chopped, for serving
Directions
(1) Prepare: Heat the oven to 400 degrees F. Wash and chop all vegetables. Put the rice on to cook.
Make-ahead note: At this point, you can set the rice aside and keep the vegetables in the refrigerator. You may also cook the fish ahead (step 5), then refrigerate until ready to use.
(2) Cook the vegetables: Heat the olive oil in a skillet or medium saucepan over medium heat. Add the scallions and cook for 1 minute, stirring frequently so they don’t burn. Add the ginger, turmeric, and curry and cook, stirring, for 1 minute longer. Add the carrots, corn, peas, and zucchini to the skillet and cook for another 2 minutes. Add the bell pepper and cook for 2 minutes longer. Remove the vegetables to a plate and set aside.
(3) Prepare the sauce: To the same pan, add the coconut milk, lime juice, and red pepper flakes. Stir to blend and bring to a simmer. Reduce the heat to low and simmer for about 5 minutes. Taste and adjust the seasonings and lime juice, as desired. Add the soy sauce, taste, and add a bit more if you think it needs it. If the sauce needs to be thicker/creamier, add the cream. Stir and simmer to heat. Add salt and pepper to taste.
(4) Combine sauce and vegetables: Add the vegetables back to the sauce and set aside.
(5) Cook the fish: Spray a baking sheet with nonstick cooking spray. Arrange the halibut fillets on the baking sheet; sprinkle with kosher salt and pepper. Bake the halibut for about 14 to 17 minutes, or until the fish flakes easily with a fork. (Target the minimum safe internal temperature for fish: 145 degrees F.) Cut the fish into bite-size chunks, or leave the pieces whole, whatever you prefer.
(6) Plate and serve: To plate, reheat the sauce. Add a mound of hot rice or noodles to a plate or wide bowl. Place the halibut on the rice or noodles and spoon the vegetables and sauce over the fish. Garnish with fresh chopped cilantro and chopped peanuts (if using).
Eat and enjoy every bite because you can!
Recipe note: I use Diamond Crystal Kosher salt in all my recipes because it has a wonderful flat and crisp flake that tastes delicious. It is also the least salty salt available so you can use it more liberally as a seasoning than you can table salt or sea salt. If you use another type of salt, you may need to reduce the amount so it is not over-salted.
Link note: This post contains links for you to easily purchase items listed on the page. In some cases, we have provided a special discount code for IBS Game Changers so be sure to use it when you purchase an item to get the discount that has been arranged just for you! As an Amazon Associate, I earn a commission from qualifying Amazon purchases.
More Deliciously Low FODMAP™ main course recipes


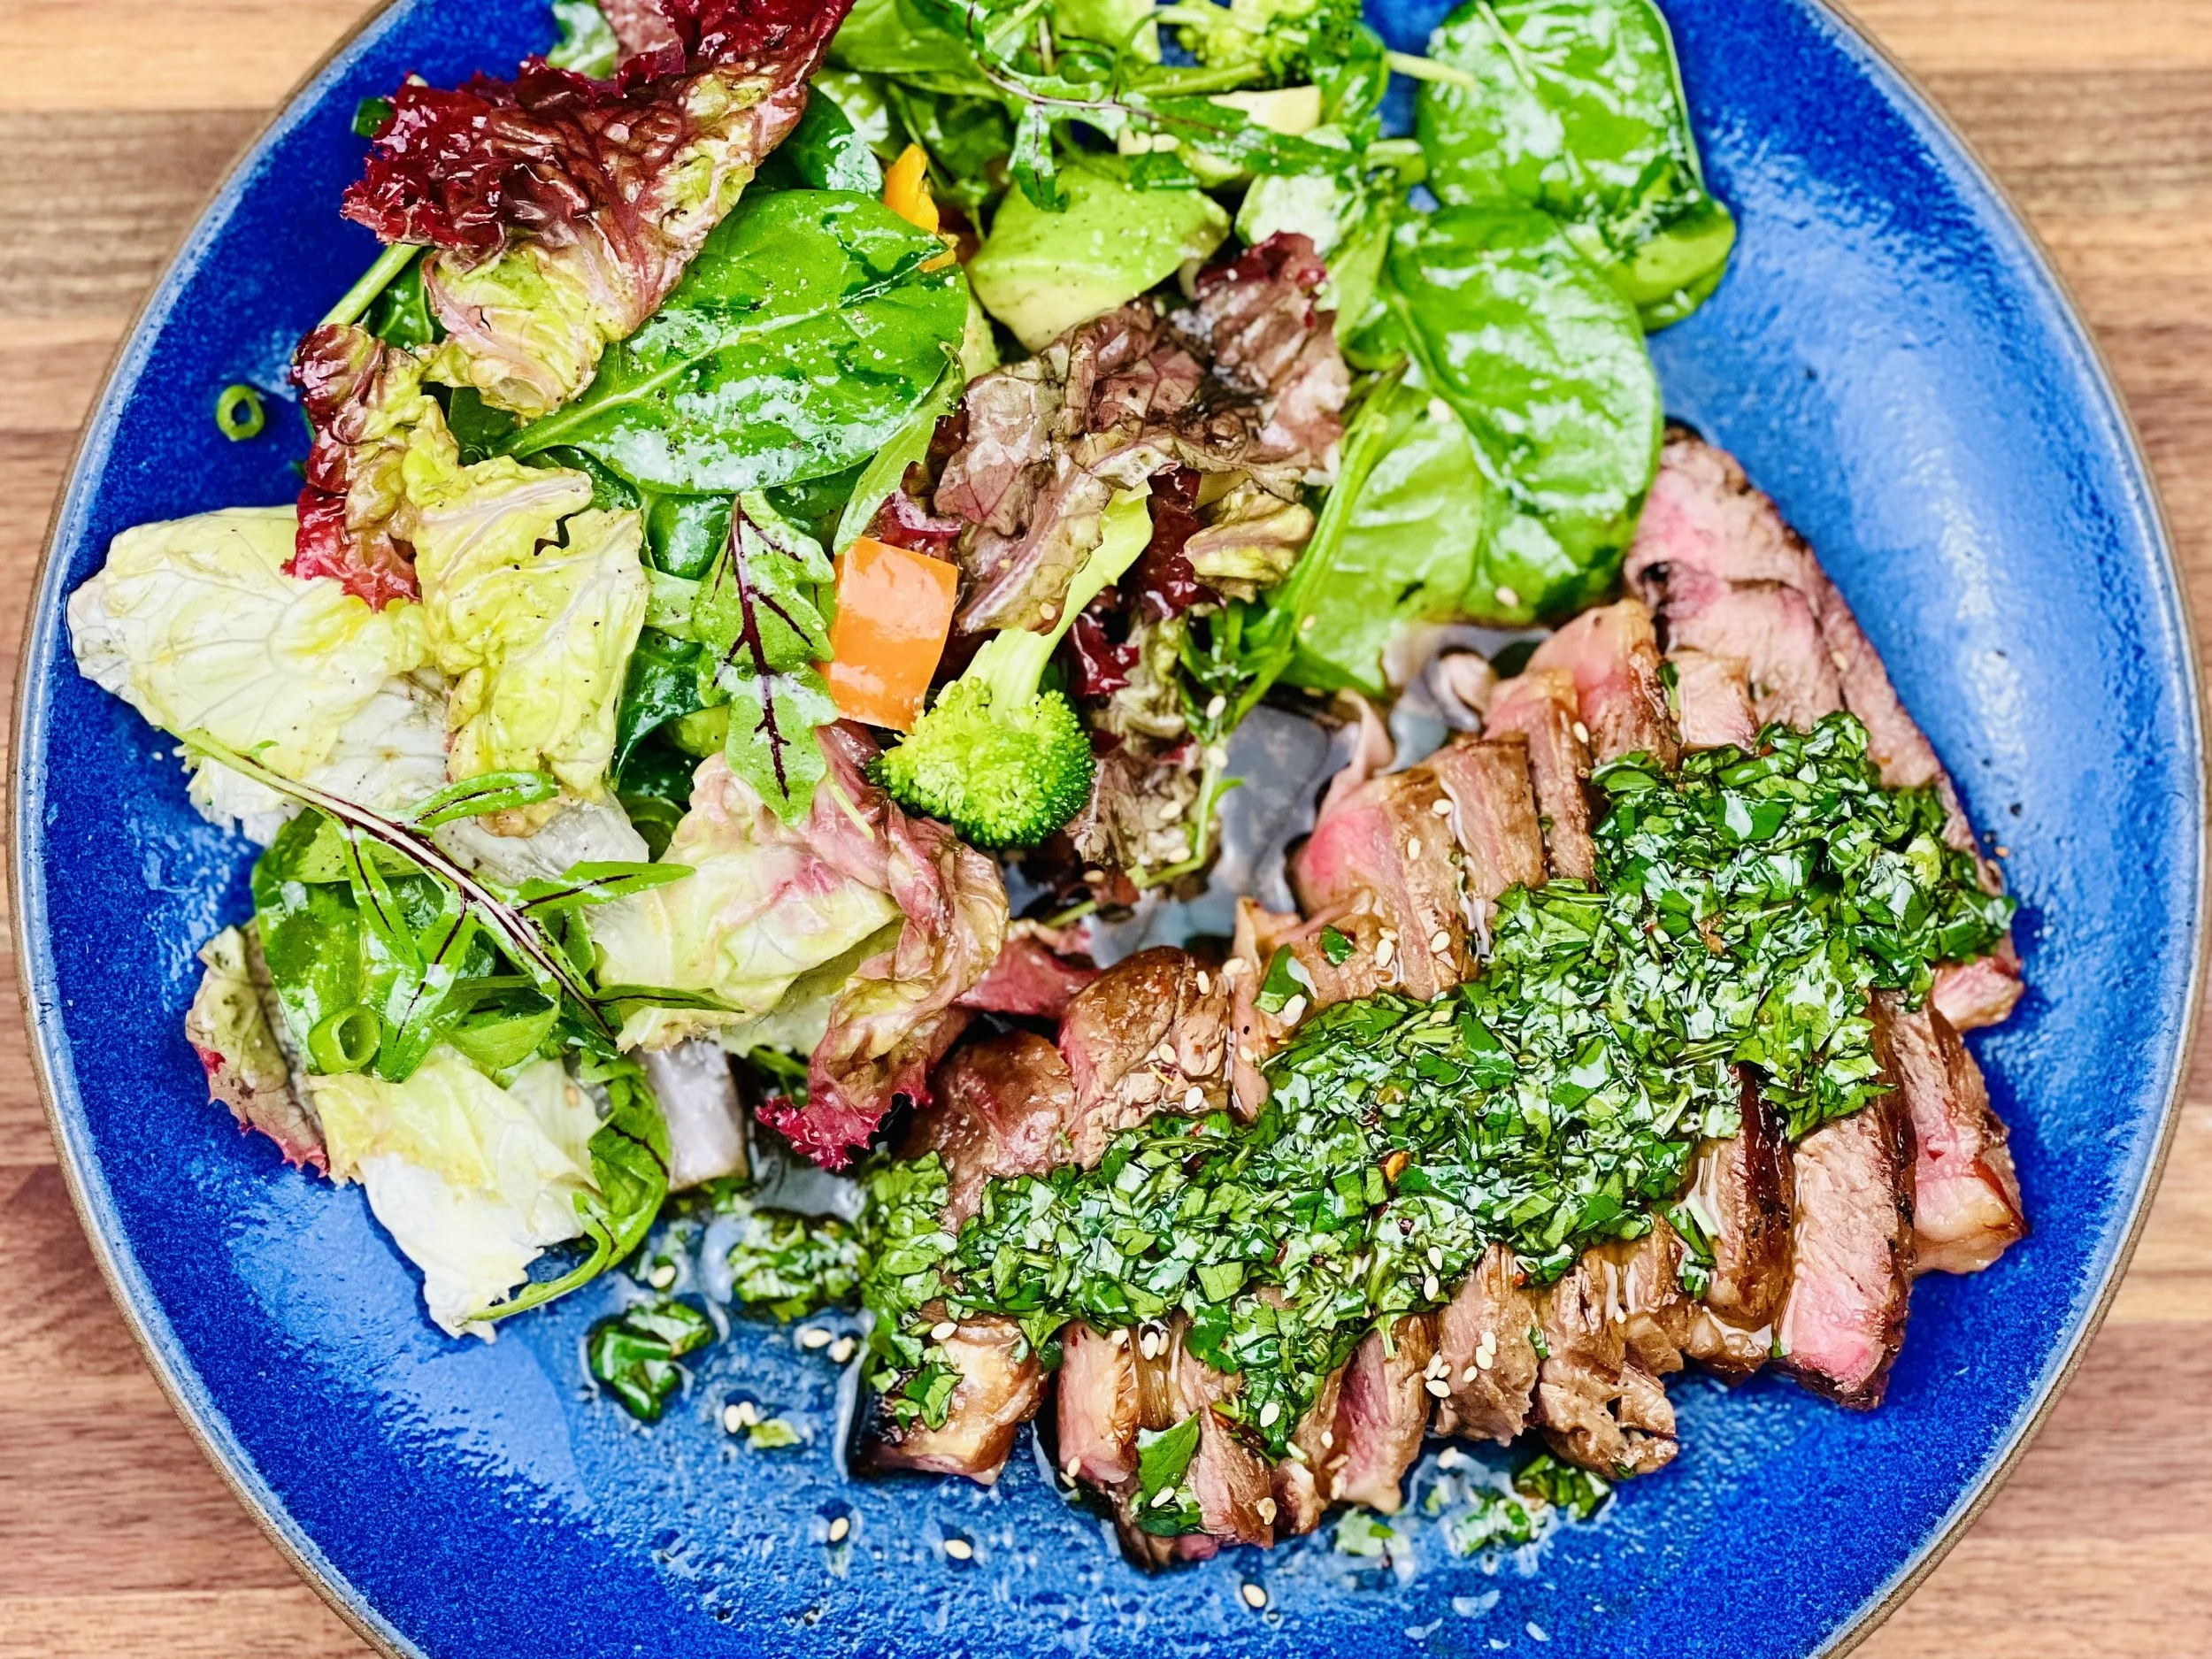


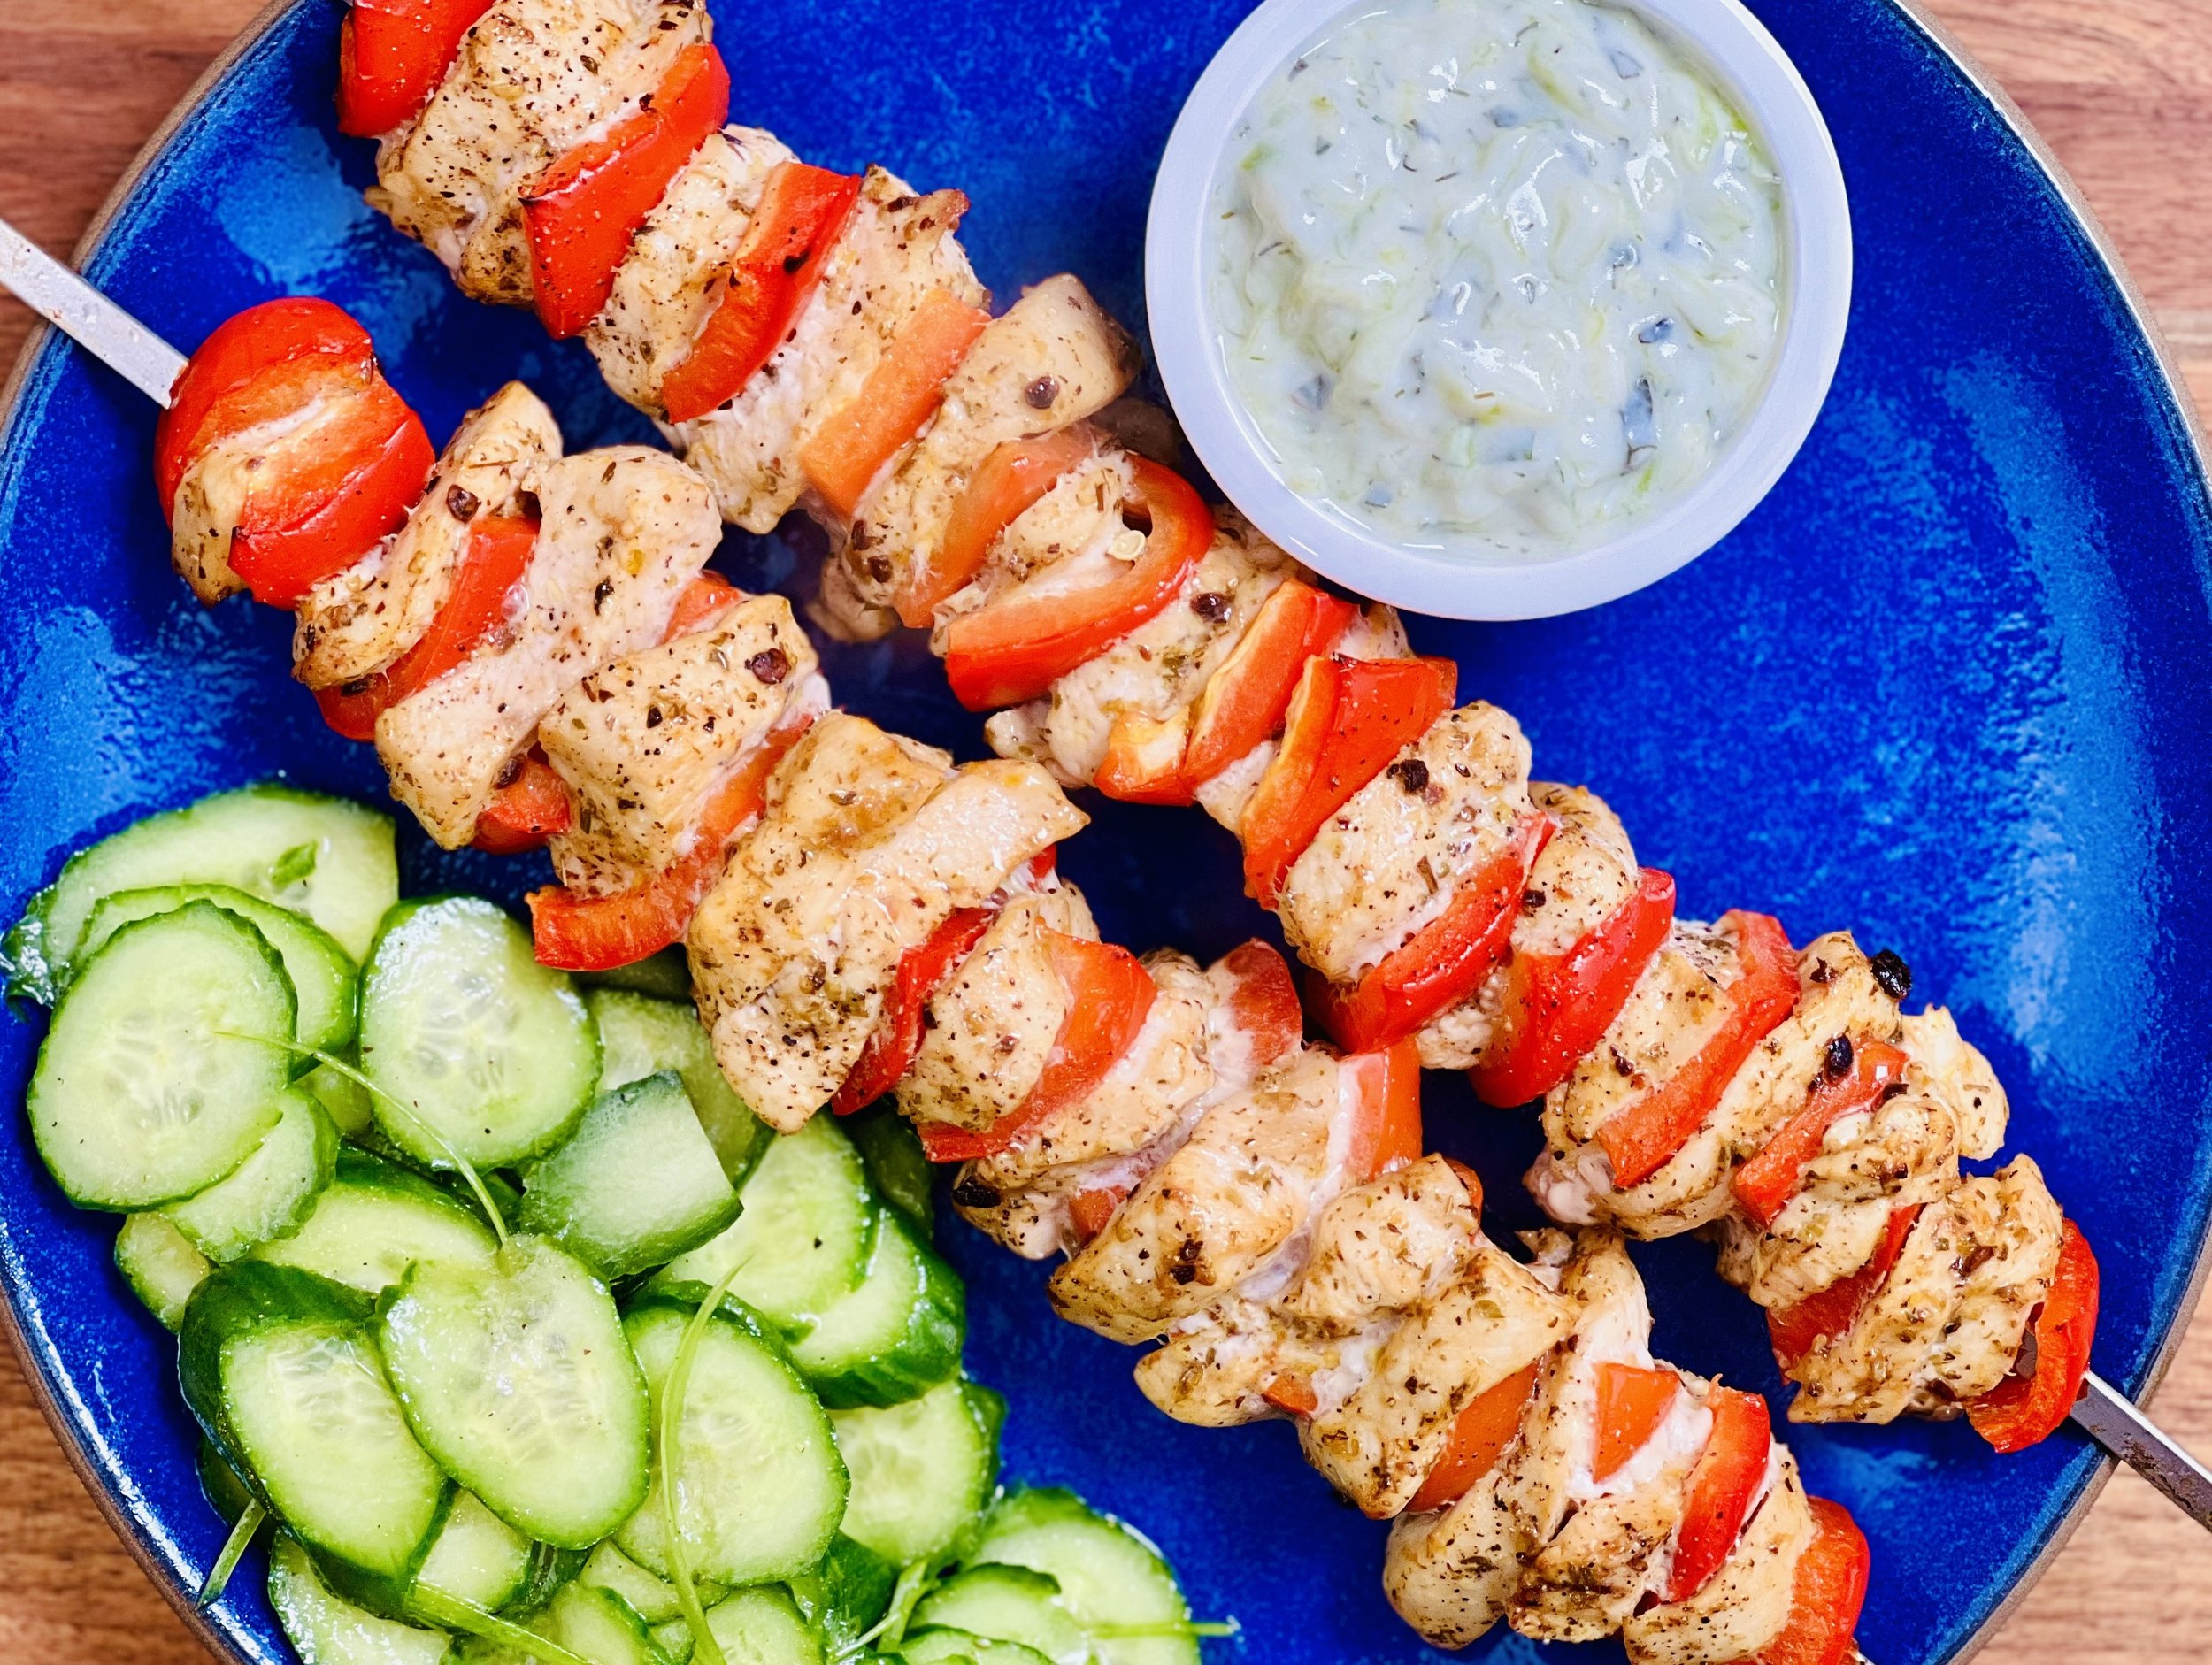
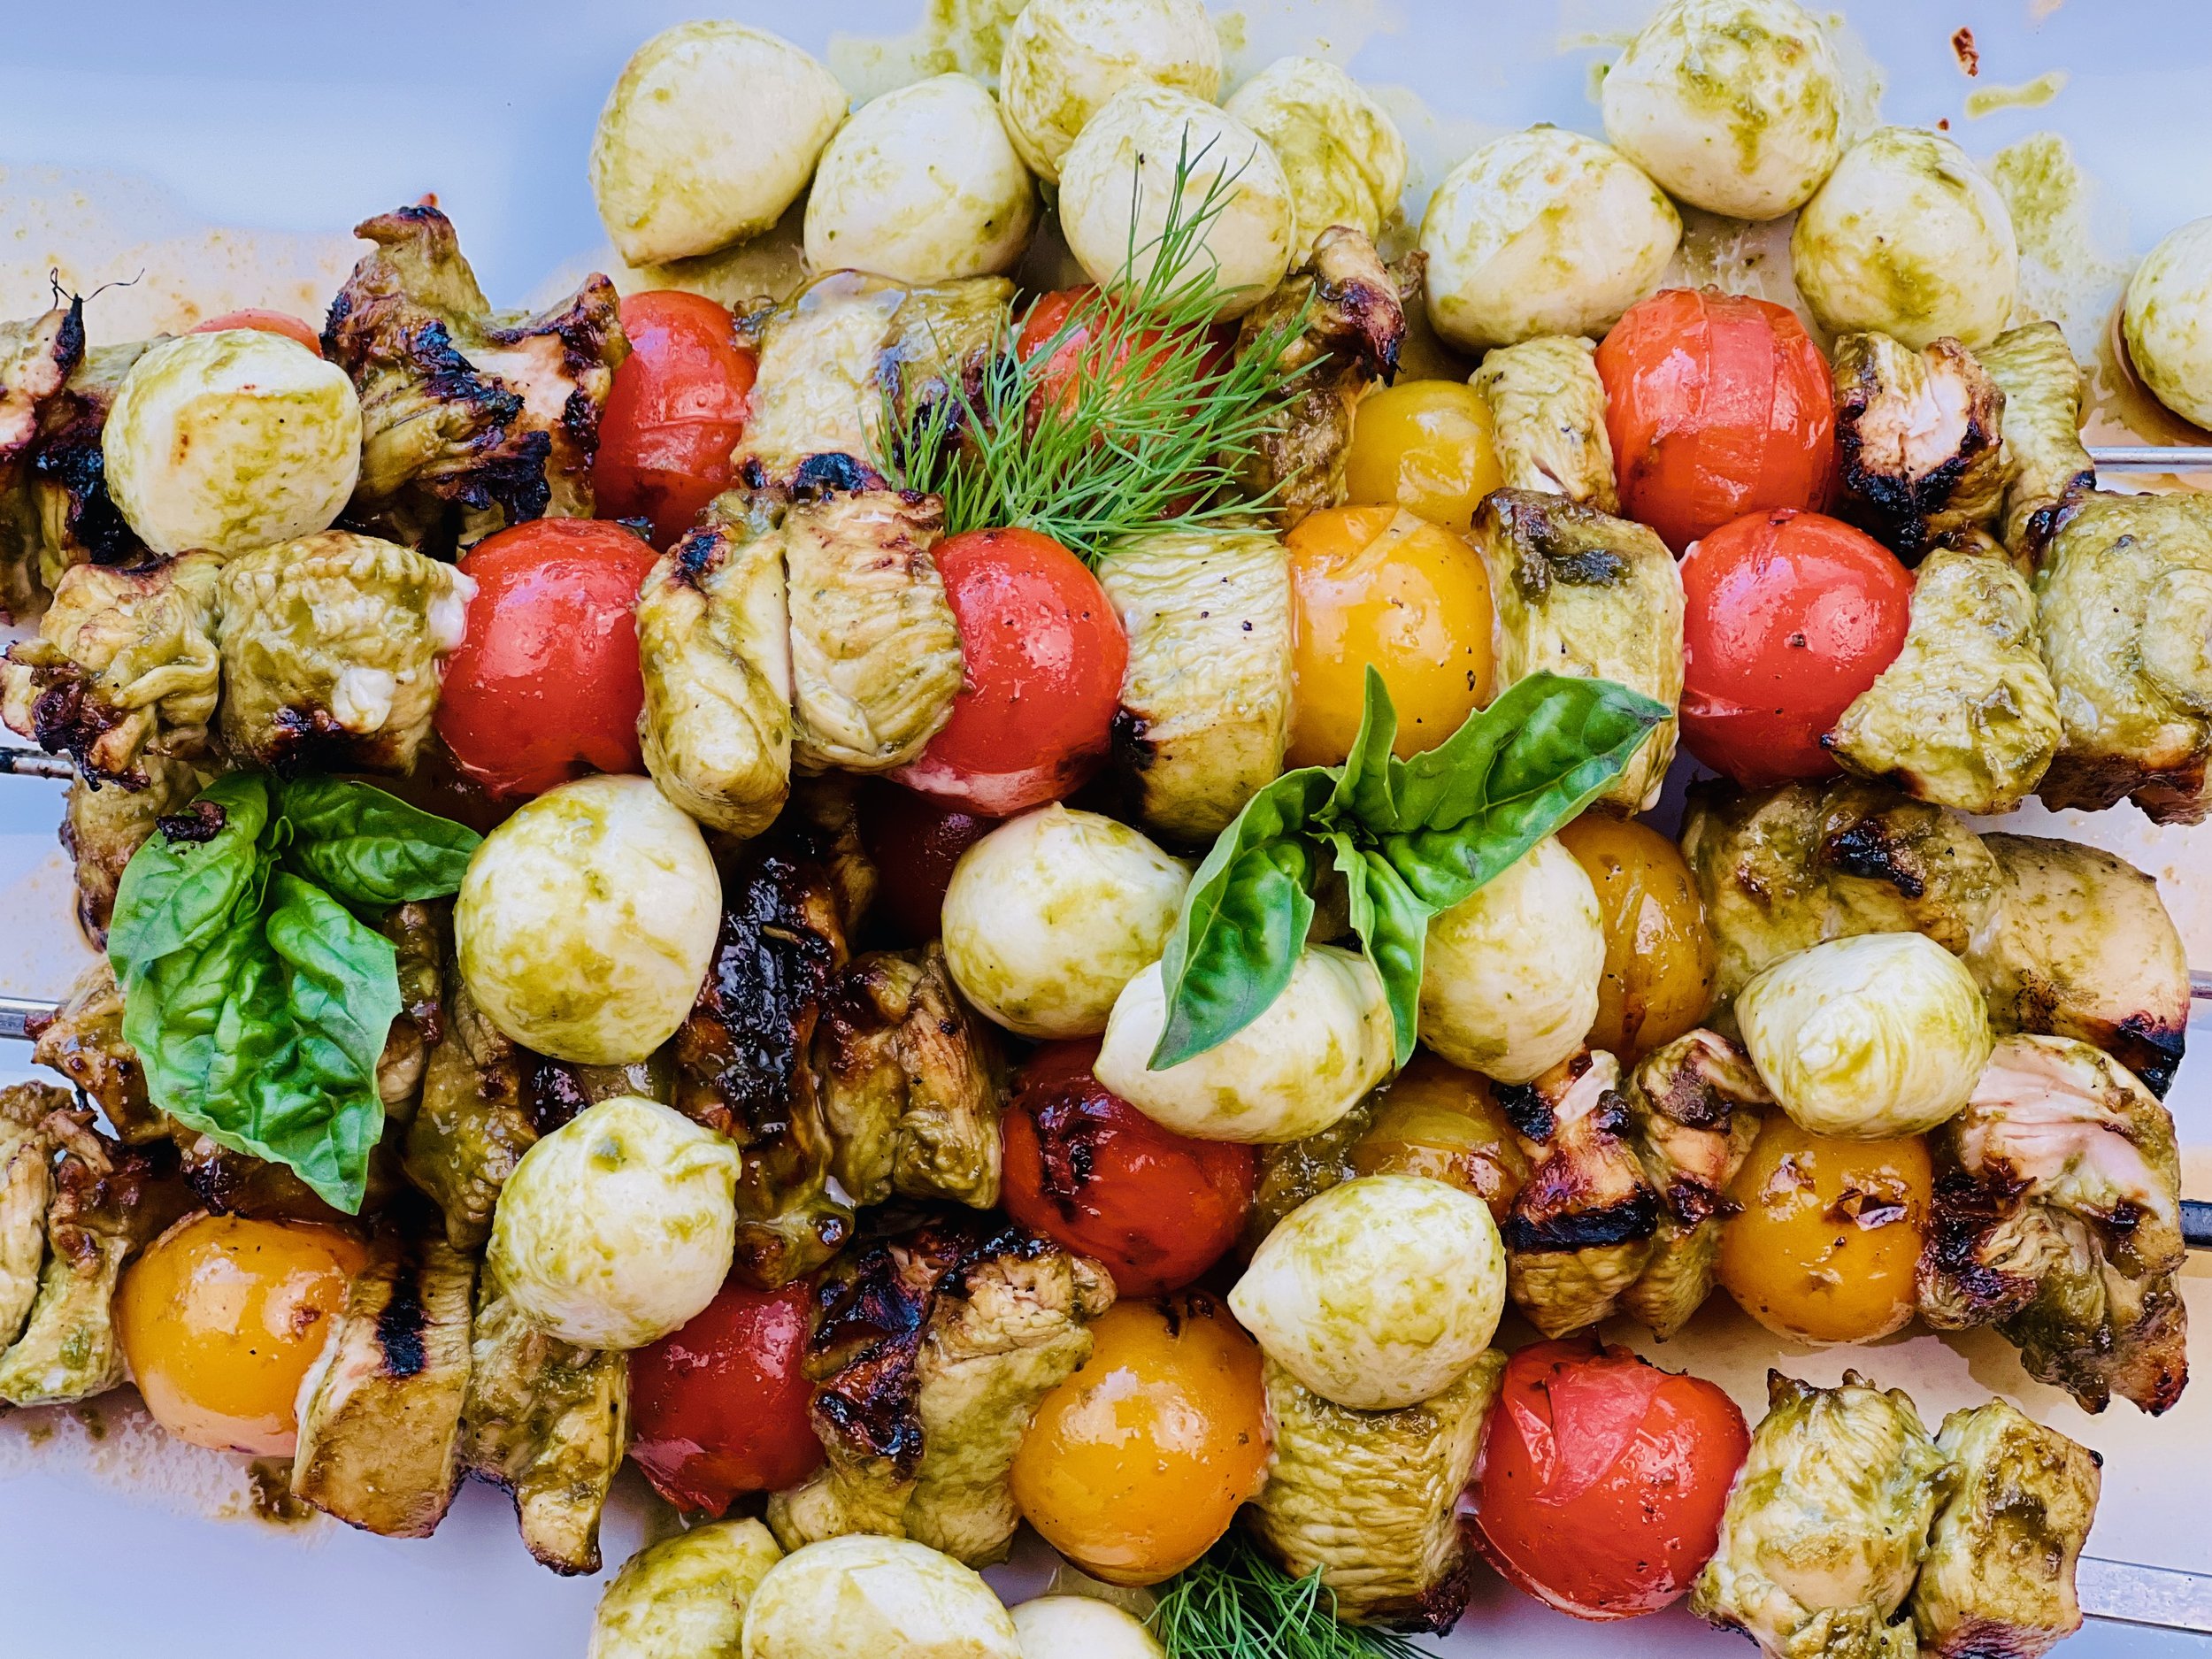
Caprese Chicken Skewers (low FODMAP)
15 Minutes prep • 15 Minutes cook • Low FODMAP • Gluten-free • Serves 4
15 Minutes prep • 15 Minutes cook • Low FODMAP • Gluten-free • Serves 4 • Ok to make ahead: Steps 1-3
These Caprese chicken skewers are a perfect summer meal. The pesto-marinated chicken combined with vine-ripened cherry tomatoes makes a delicious and colorful combination. Serve as an appetizer in small portions, or as a main course, combined with one of my crisp green salads and some fresh sourdough bread. They are easy to make so you can serve them as a weeknight dinner or Sunday barbecue.
Ingredients
2/3 cup of my low FODMAP Lemon Basil Pesto
1/3 cup balsamic vinegar
3 tablespoons maple syrup
2 tablespoons lemon juice
2 pounds boneless skinless chicken breasts, cut into bite-size chunks
2 cups cherry tomatoes, whole
1 tablespoon extra virgin olive oil
1 cup mozzarella balls (whole or cut in half)
Fresh basil leaves, chopped, for serving
Directions
(1) Prepare the chicken: This step is optional but results in a more flavorful and tender chicken. Remove chicken from the package and put it in one layer on a rimmed plate or baking dish. Season both sides of each piece lightly with Kosher salt. Cover the dish with plastic wrap and refrigerate until ready to use, ideally about 4 hours before cooking or overnight.
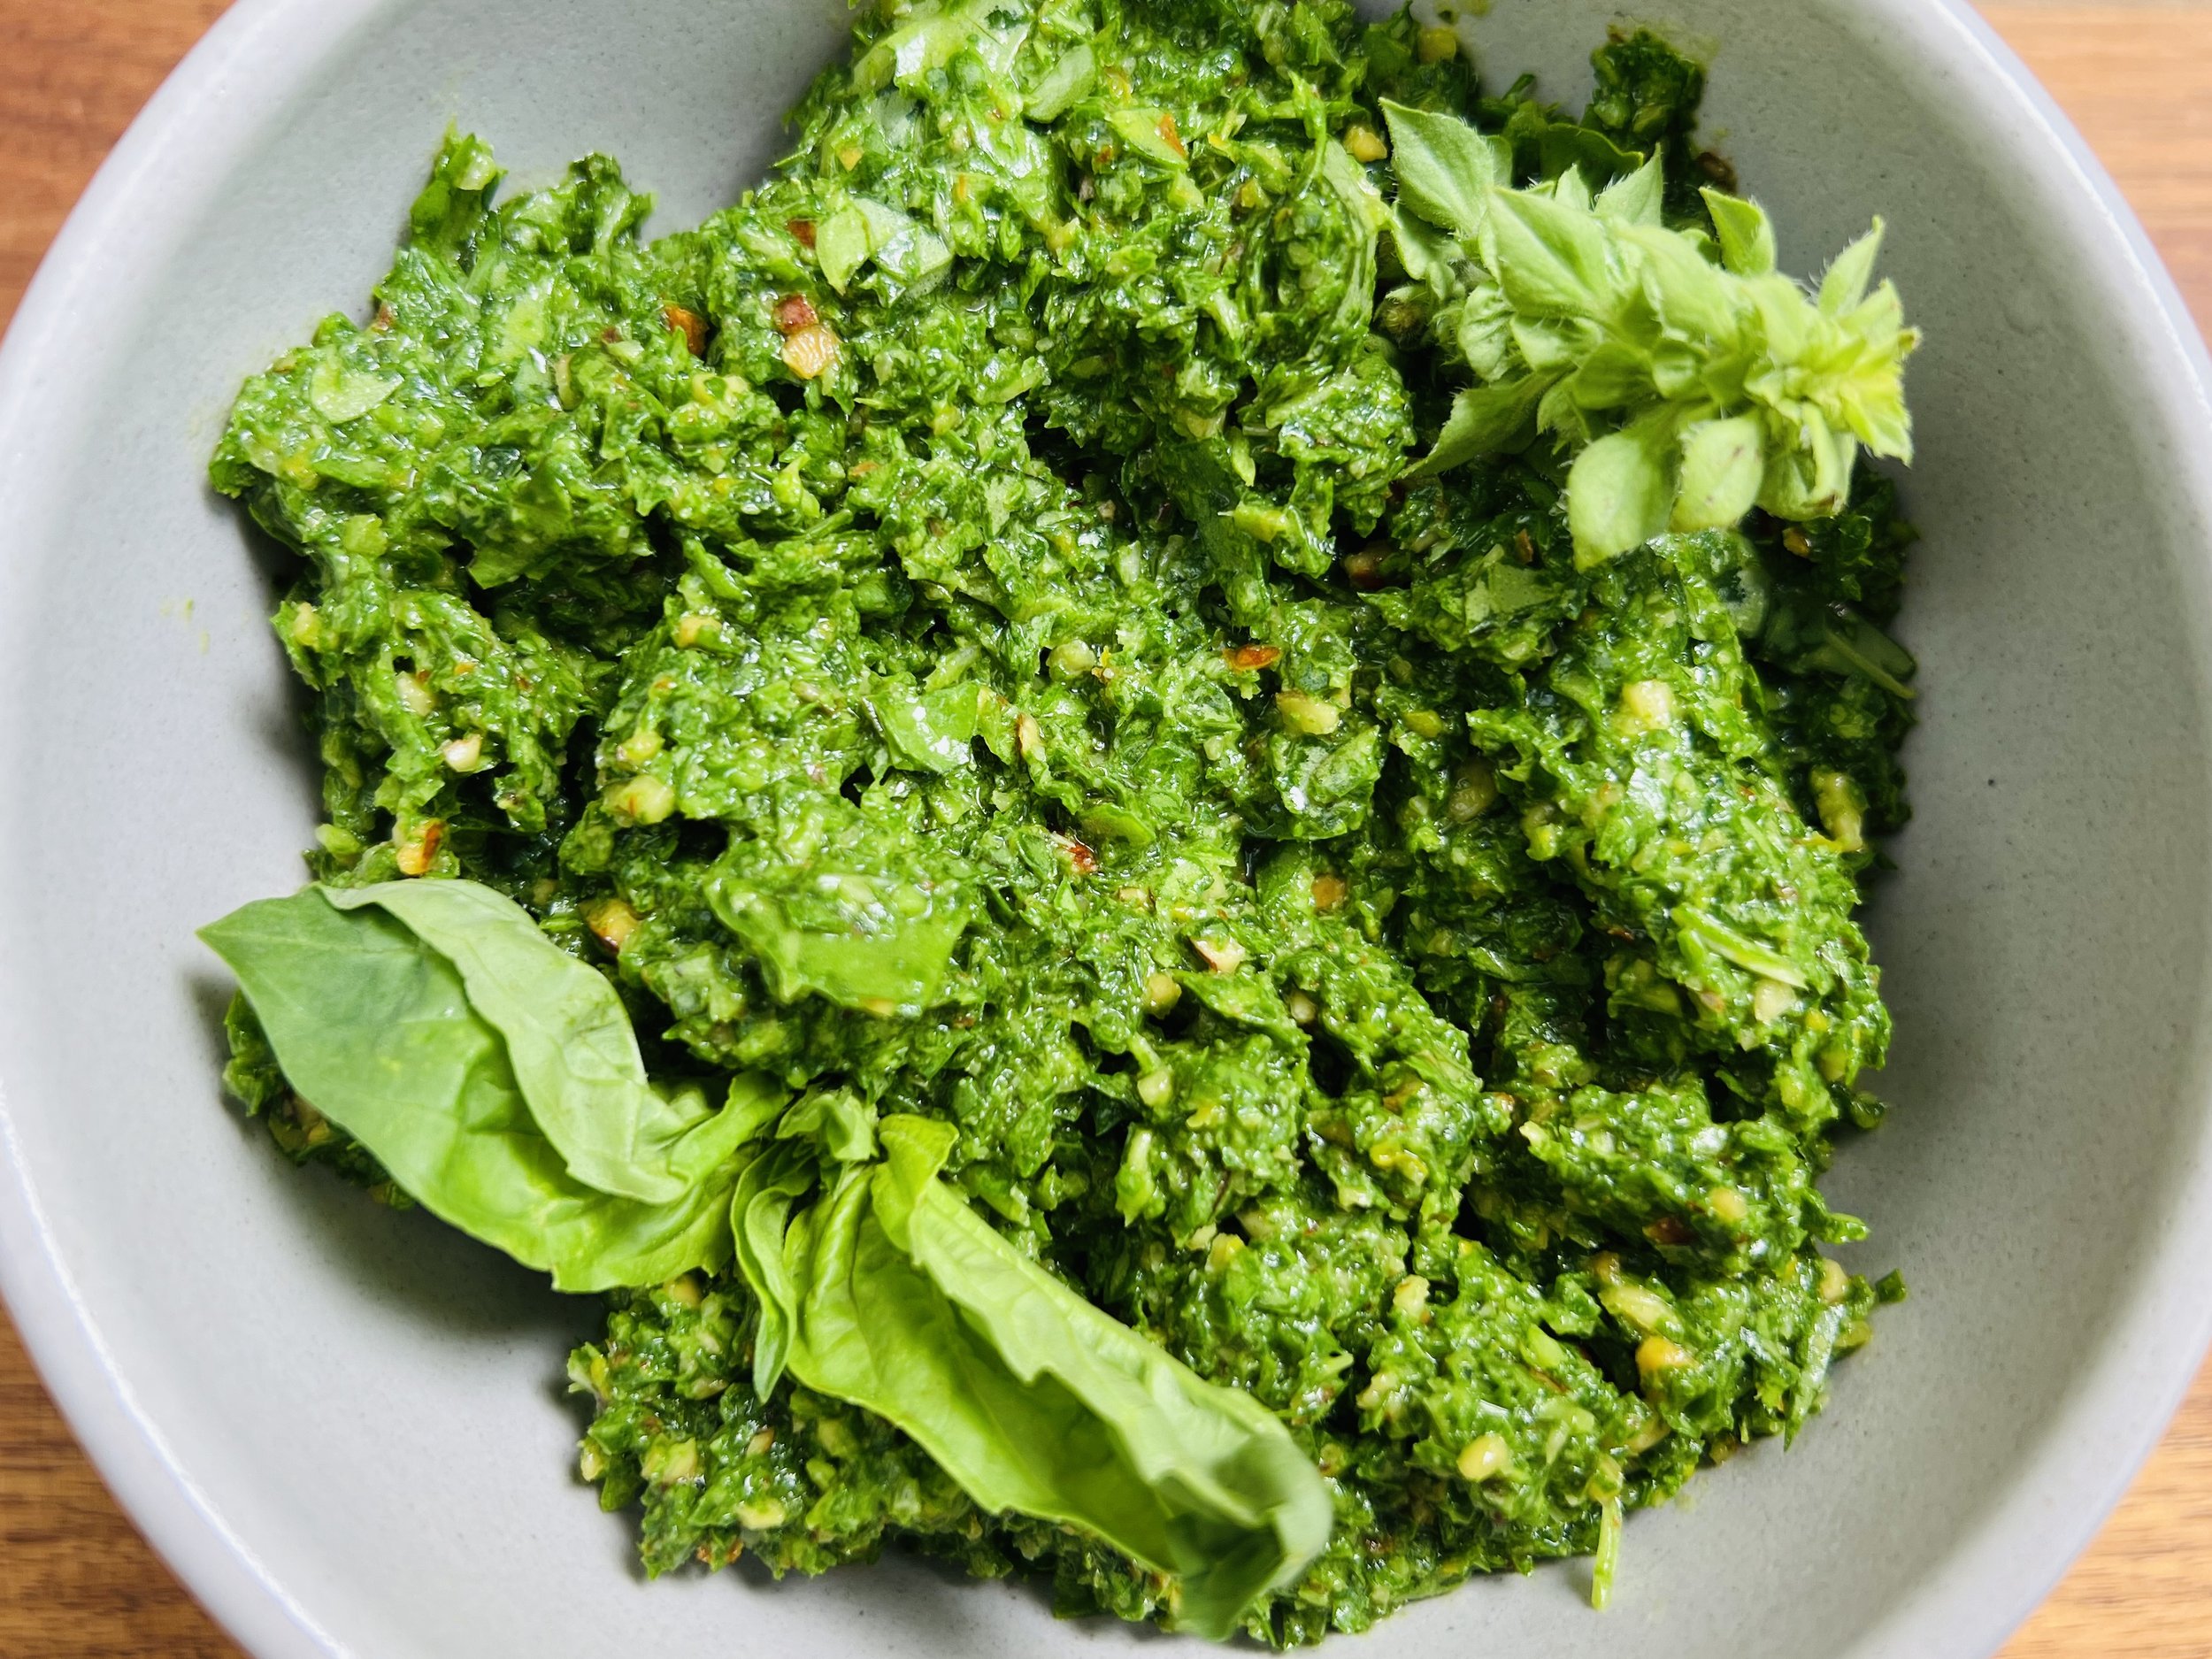
(2) Make the pesto: Use my recipe for low FODMAP Lemon Basil Pesto or use store-bought if you can find a low FODMAP basil pesto.
(3) Make the marinade/sauce: In a glass jar, combine the pesto, balsamic vinegar, maple syrup, and lemon juice. Season with 1/2 teaspoon Kosher salt, and 1/4 teaspoon black pepper (or to your taste).
Make-ahead note: At this point, you may leave the chicken and the sauces in the refrigerator for a few hours until you’re ready to cook the chicken.
(4) Marinate the chicken and tomatoes: In a bowl, toss the chicken with half of the marinade/sauce. Meanwhile, in a separate bowl, toss the tomatoes with 1 tablespoon olive oil, 1/4 teaspoon salt, and a few grinds of black pepper.
(5) Prepare the skewers: Set your grill or smoker to medium-high heat and preheat for 10-15 minutes. Thread the chicken, alternating with the tomatoes, on metal or wood skewers (if using wood, soak them in water before using so they don’t burn).
(6) Cook the skewers: Grill the skewers until lightly charred and cooked through (about 5 minutes per side), turning them once halfway through cooking, about 10 to 12 minutes total.
(7) Plate and serve: To serve, toss the mozzarella balls with a couple of tablespoons of the marinade. Arrange the skewers on a serving plate and put the mozzarella balls around the skewers. Drizzle more of the remaining marinade over everything. Sprinkle lightly with Kosher salt and additional fresh basil.
Eat and enjoy every bite because you can!
Recipe note: I use Diamond Crystal Kosher salt in all my recipes because it has a wonderful flat and crisp flake that tastes delicious. It is also the least salty salt available so you can use it more liberally as a seasoning than you can table salt or sea salt. If you use another type of salt, you may need to reduce the amount so it is not over-salted.
Link note: This post contains links for you to easily purchase items listed on the page. In some cases, we have provided a special discount code for IBS Game Changers so be sure to use it when you purchase an item to get the discount that has been arranged just for you! As an Amazon Associate, I earn a commission from qualifying Amazon purchases.
More Deliciously Low FODMAP™ main course recipes
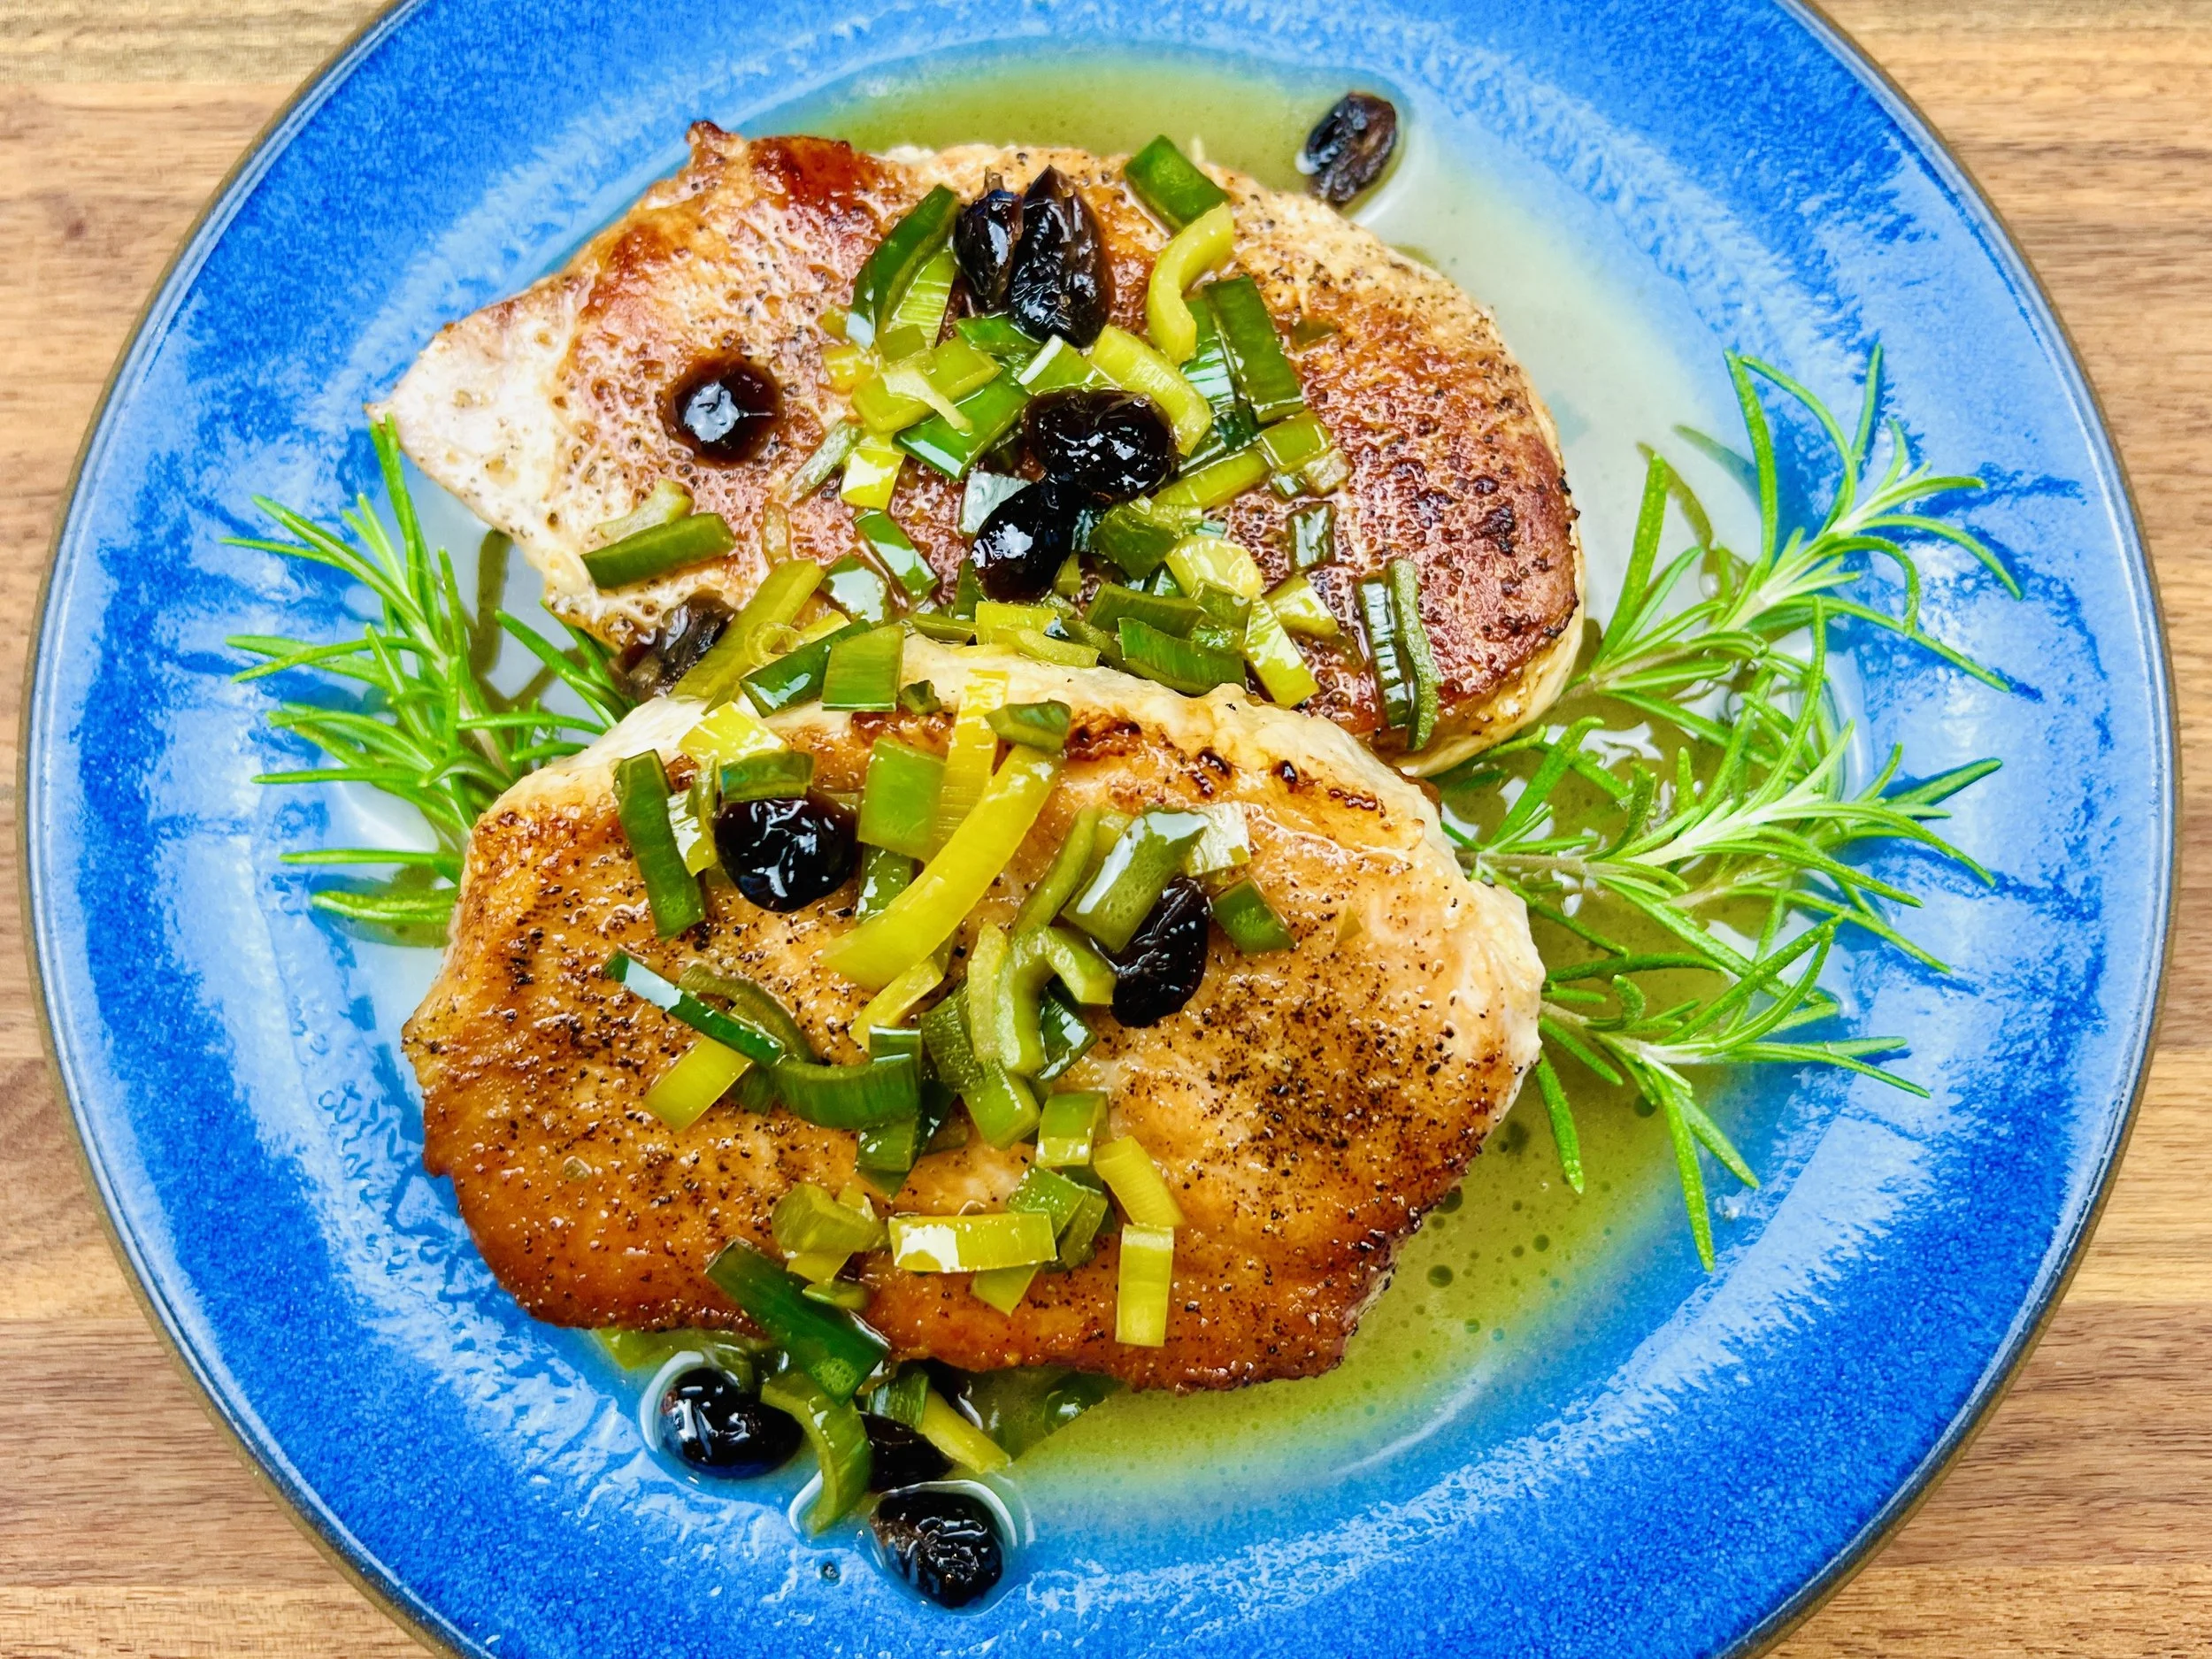
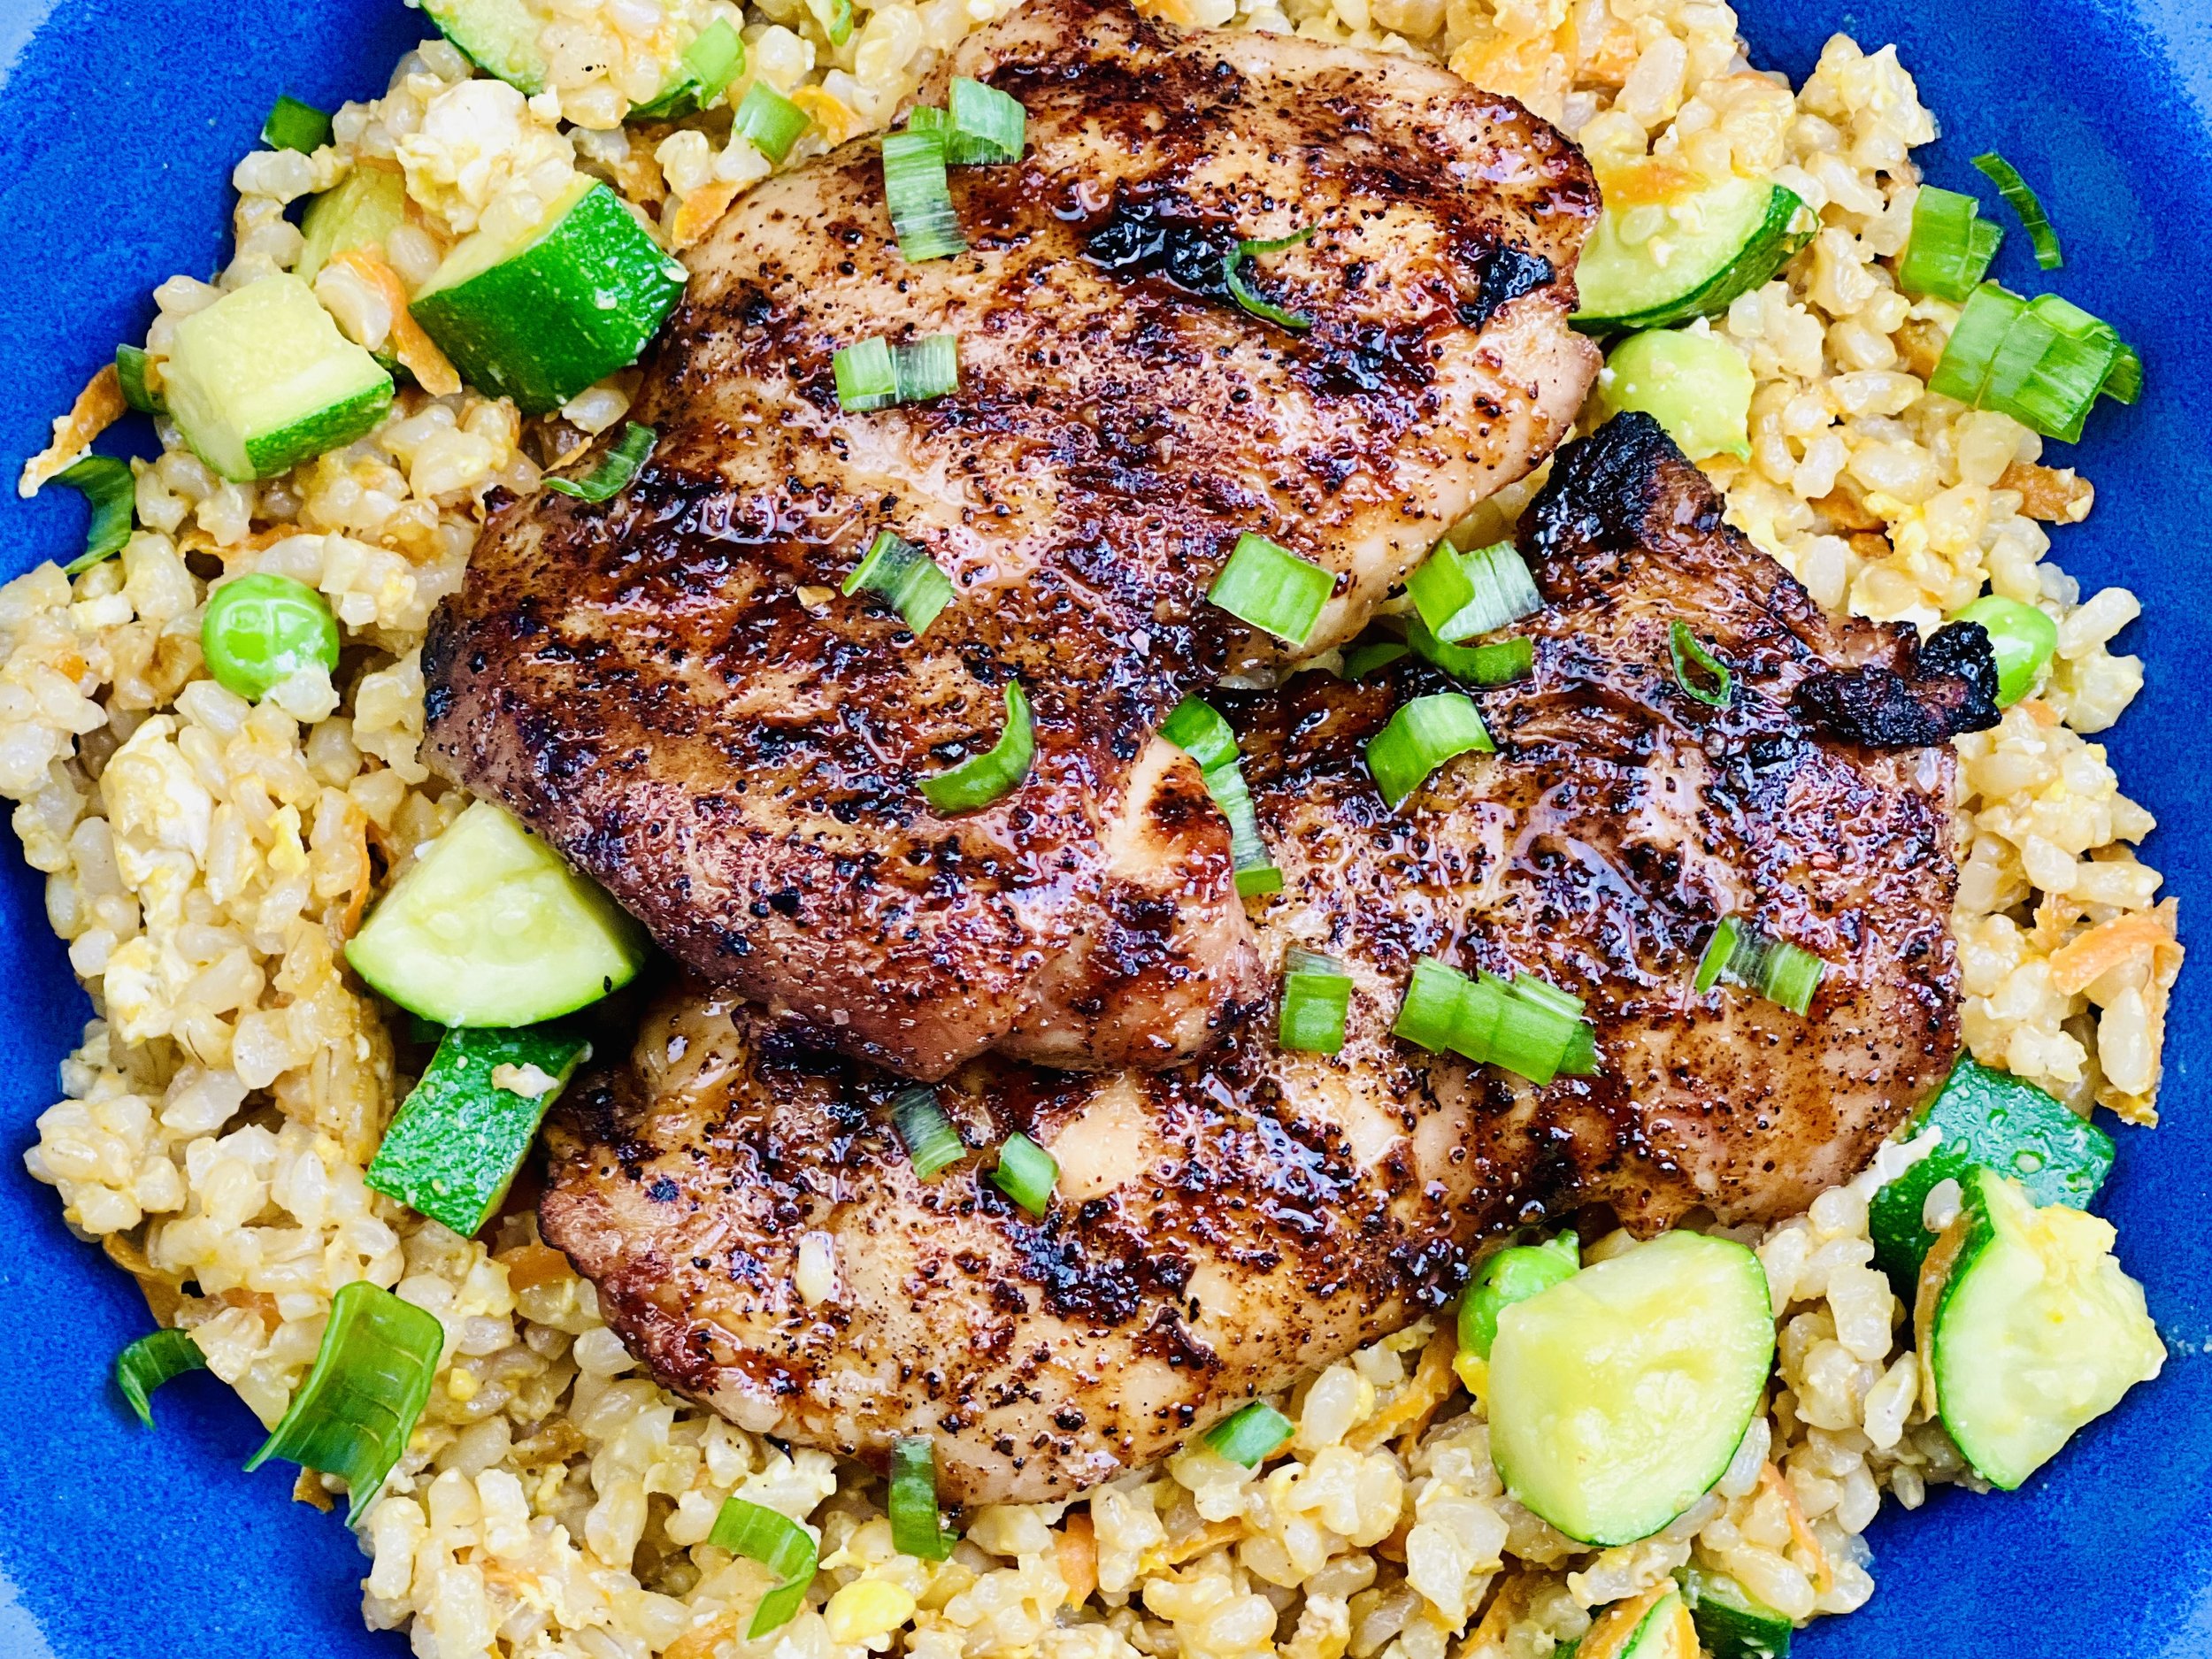
Maple Glazed Grilled Chicken (low FODMAP)
5 Minutes prep • 25 Minutes cook • Low FODMAP • Gluten-free • Lactose-free • Serves 4
5 Minutes prep • 25 Minutes cook • Low FODMAP • Gluten-free • Lactose-free • Serves 4 • Ok to make ahead: Steps 1-3
Tender and flavorful, sweet and savory, this grilled chicken is easy to make and comes out moist and quite delicious. Pair it with some vegetable fried rice and you’ll have a perfect one-dish meal. Or, cool, then refrigerate for a delicious cold chicken, perfect for a picnic or salad.
This is an exclusive recipe just for recipe club members.
In addition to the two free recipes I create each week I am creating and delivering one very special recipe just for my recipe club members. If you’re not yet a member, I encourage you to join! Membership in the club includes access to the complete archive of recipes with filters so it can become your virtual low FODMAP cookbook plus, I am creating and delivering one special NEW recipe every week ONLY for recipe club members. And, for my true fans, I’ll be sharing behind-the-scenes content, and updates on the progress of the new cookbook.
Your membership in the club helps me continue creating new, delicious, easy-to-make, low FODMAP recipes just for you.
As always, all recipes will emphasize simple ingredients, easy preparation, and delicious low FODMAP results. Recipes will be for everything from main courses, salads, soups, side dishes, appetizers, desserts, sauces, breakfast and lunch, and even mocktails and cocktails. Everything you need to prepare fantastic low FODMAP meals everyone will love.
Join the club. Become a Patron. Let’s keep making delicious Low FODMAP meals together.
More Deliciously Low FODMAP™ main course recipes
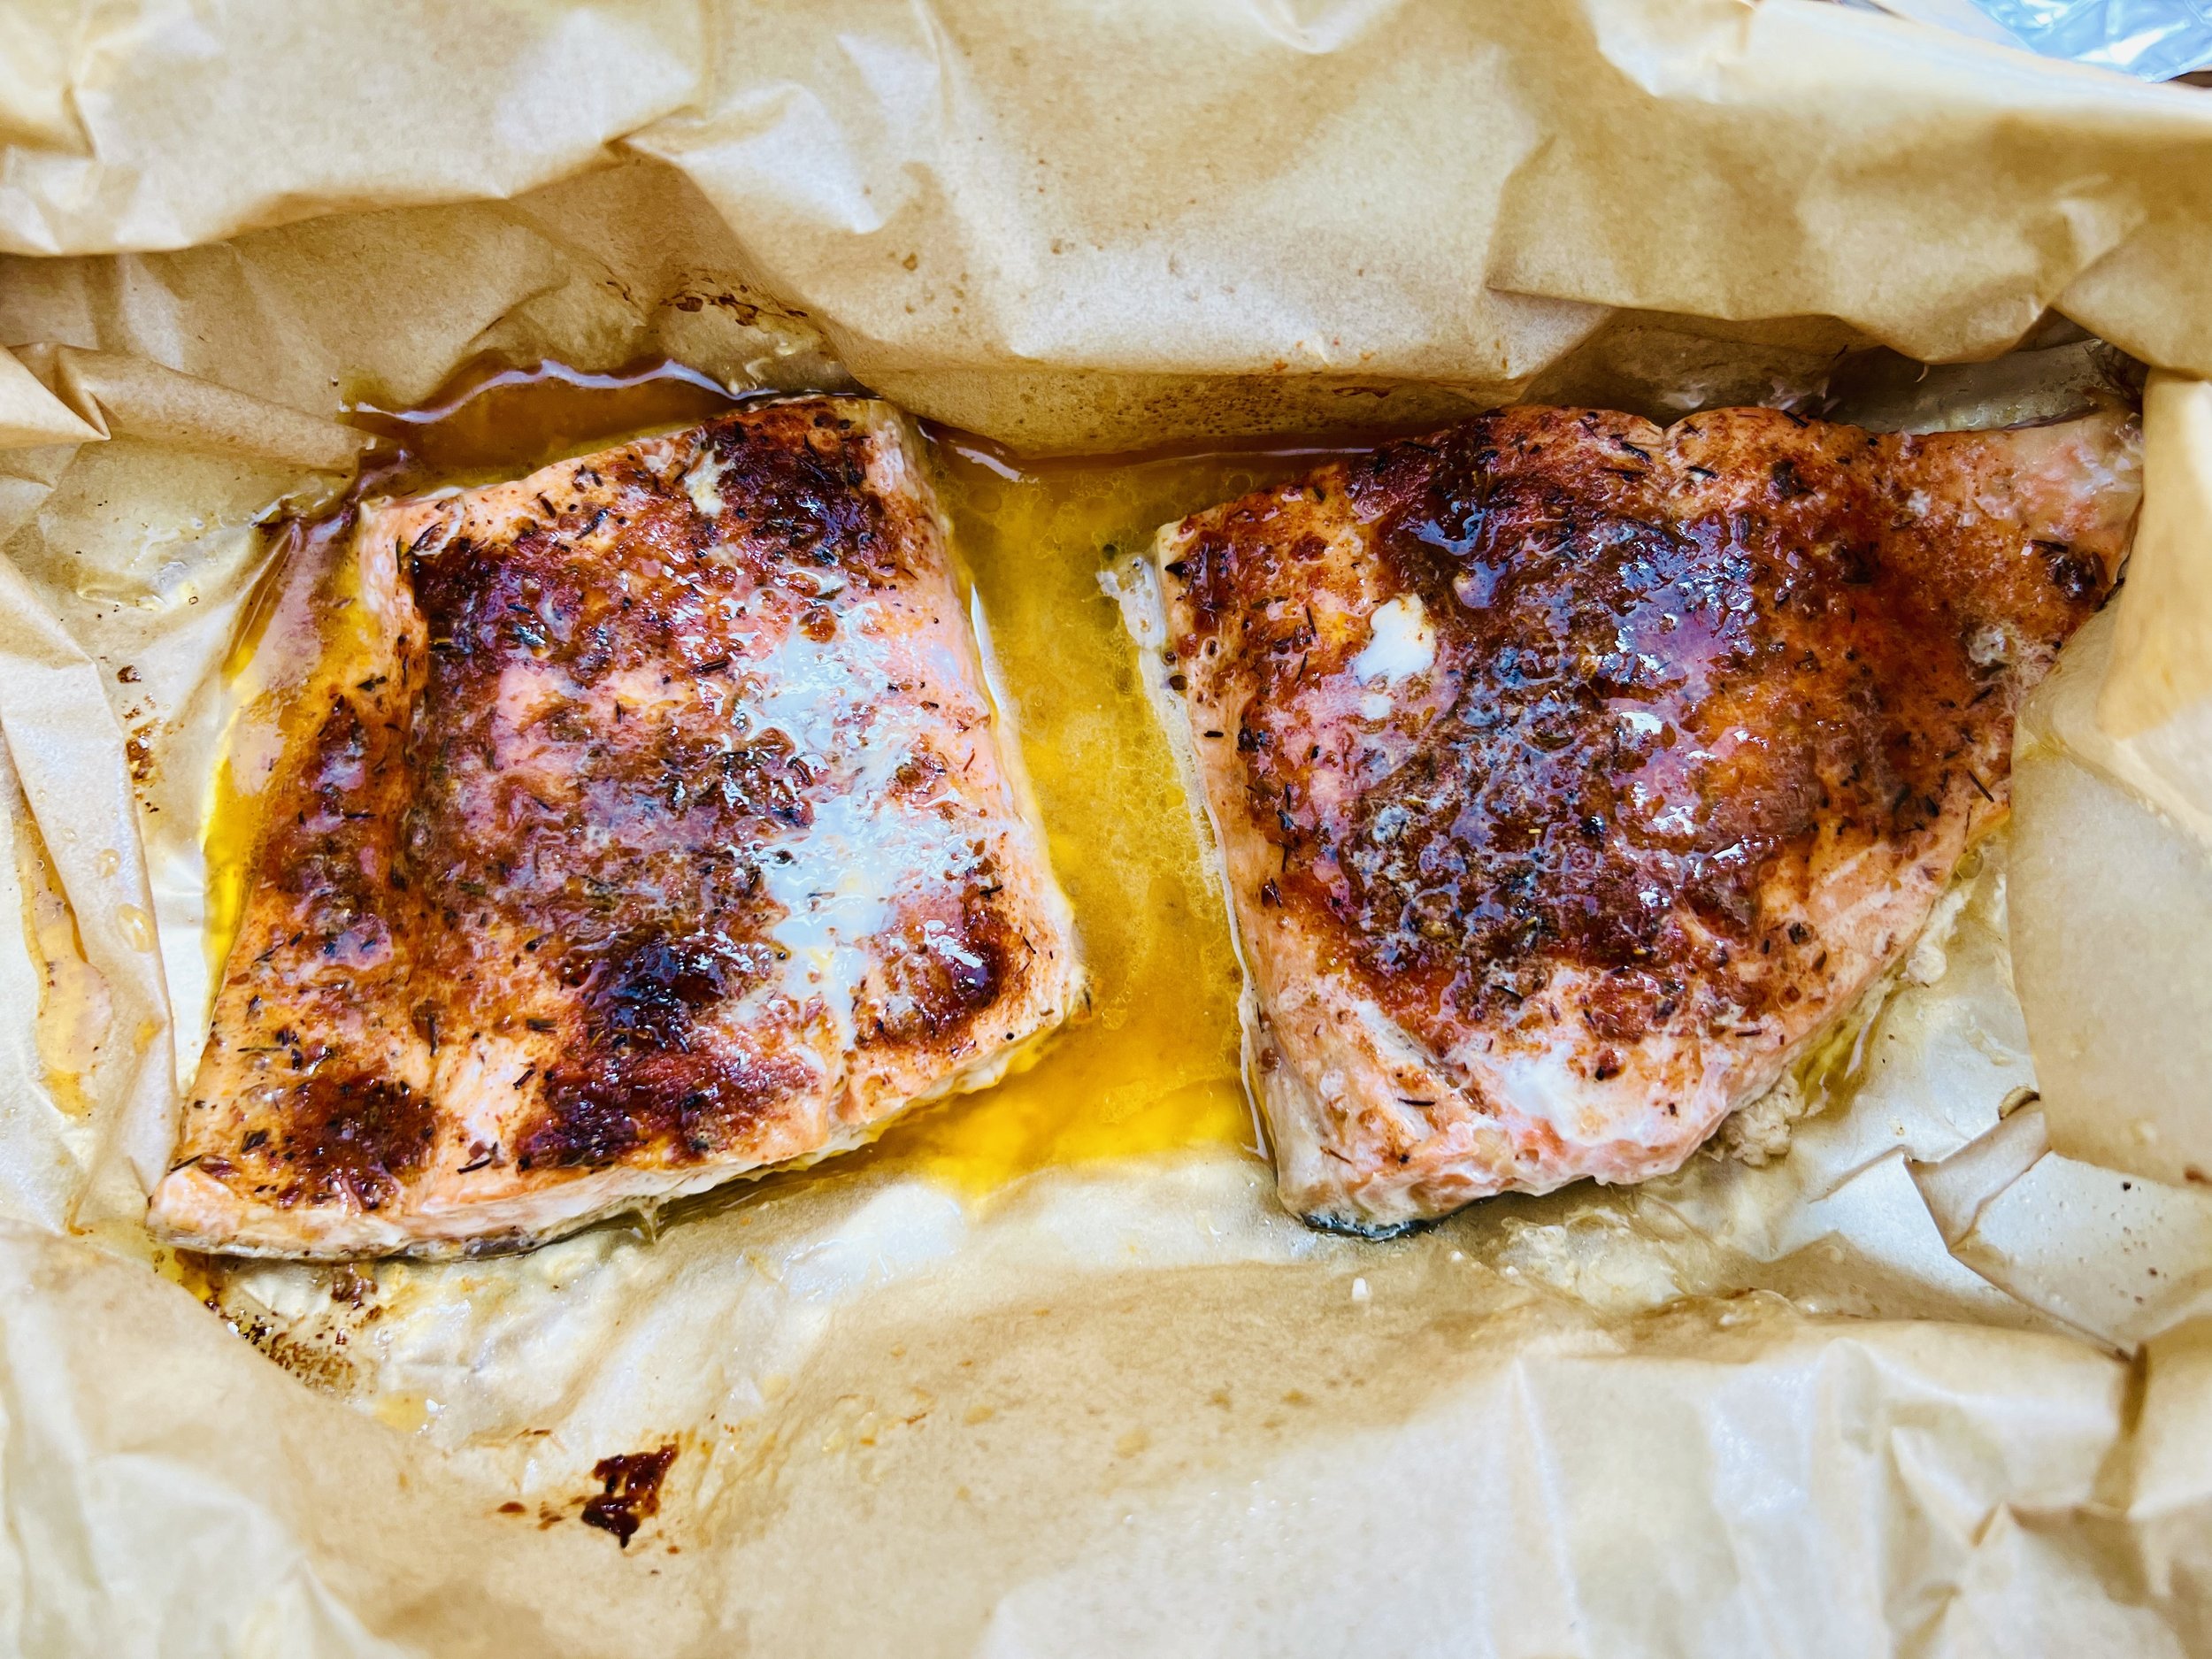
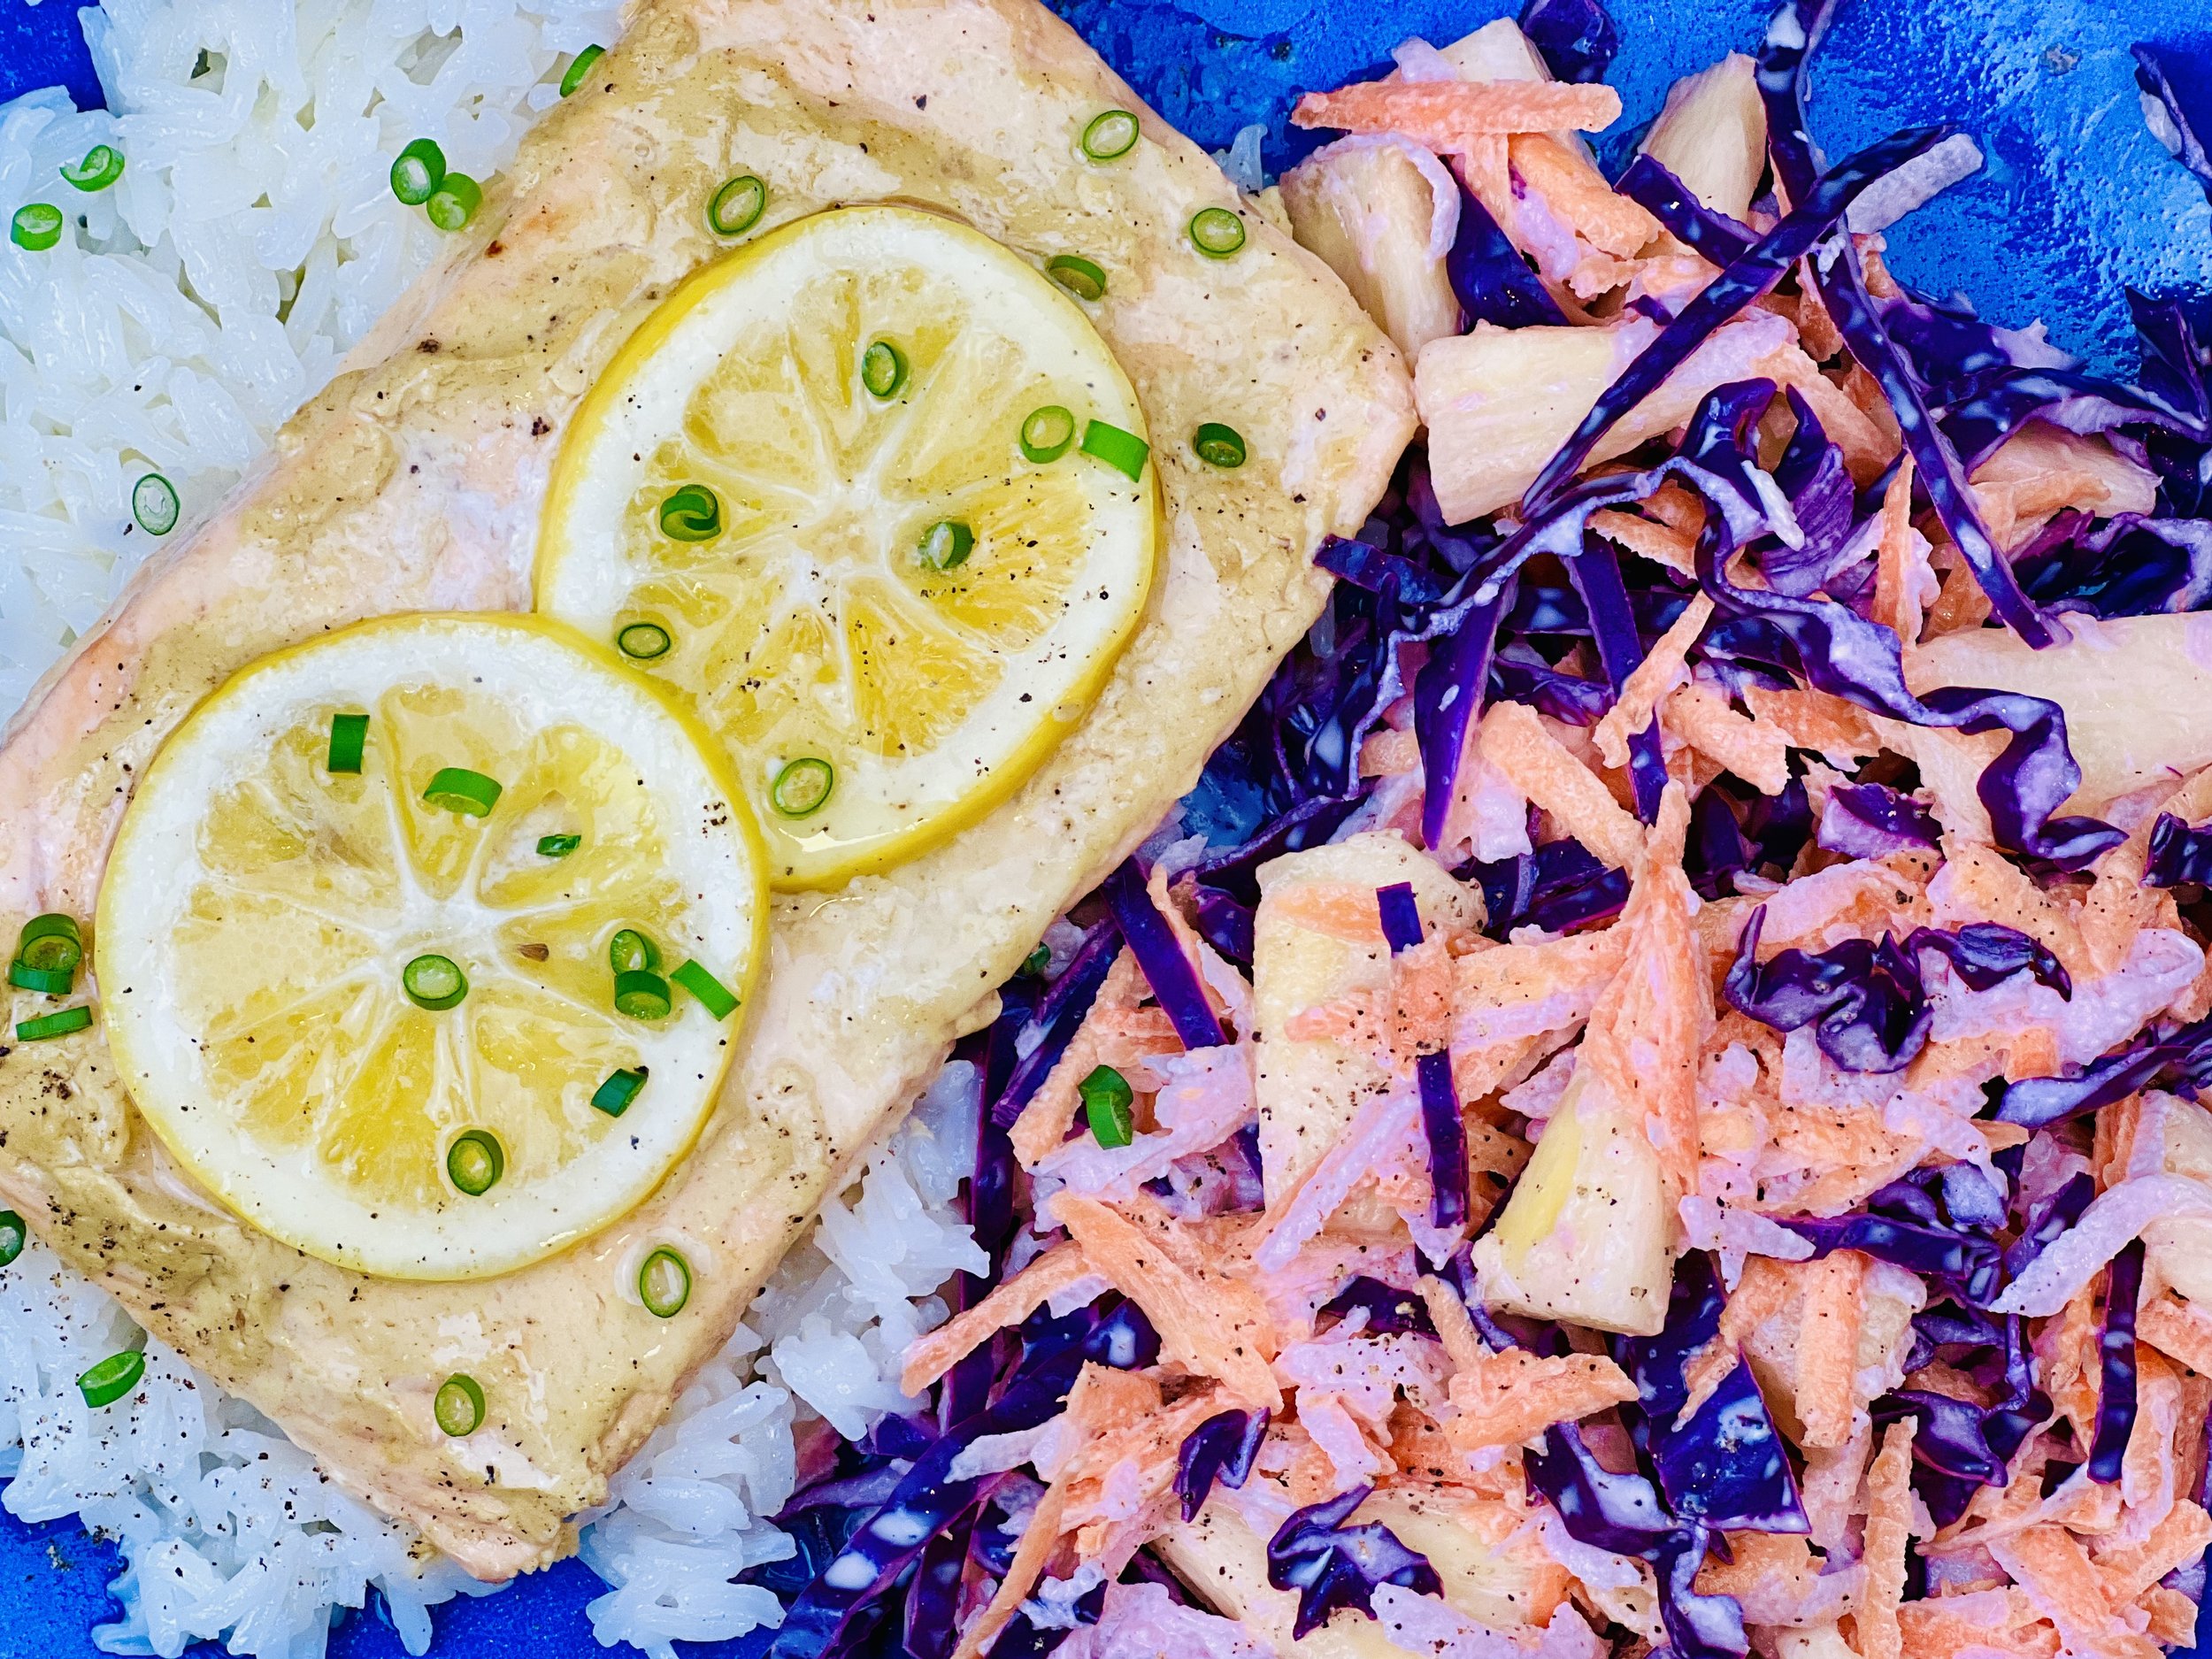
Lemon Butter Halibut (Low FODMAP)
5 Minutes prep • 15 Minutes cook • Low FODMAP • Gluten-free • Serves 2
5 Minutes prep • 15 Minutes cook • Low FODMAP • Gluten-free • Serves 2 • Ok to make ahead: Step 1
Fresh Halibut is one of my favorite fish to cook and eat. It has a beautiful texture that makes it easy to work with, and it has a delicate flavor so it pairs wonderfully with fresh herbs and seasonings. This recipe is simple and very good. It’s quick to make so it’s perfect for a weeknight dinner. Pair it with a salad for an excellent low-carb meal or layer it on a bed of buttered steamed rice. Either way, it’s delicious.

Ingredients
2 Halibut steaks
1 tablespoon garlic-infused olive oil
4 tablespoons salted butter
2 tablespoons fresh dill, chopped, plus more for serving
Two lemons, one juiced and one cut into wedges for serving
Directions
(1) Prepare: Squeeze the lemon, and wash and dry the dill if needed.
(2) Sear the fish: Heat a medium-size frying pan over nearly high heat. When the pan is warm, add the garlic-infused olive oil. When the oil is hot, spread it around the pan, then, lay the halibut steaks in the pan to sear. You want the oil to sizzle when you add the fish. If it doesn’t sizzle, it’s not hot enough. Cook for about 2 minutes, or until the fish starts to brown on the bottom. Then flip it and sear the fish on the other side.
(3) Add the lemon and dill: Pour the lemon juice over the halibut steaks, then put a pat of butter (about a tablespoon) on top of each steak. sprinkle with the chopped dill, a good grinding of black pepper, and about 1/4 - 1/2 teaspoon of salt. Cover the pan, turn the heat down to medium and let cook for about 5 minutes until the fish is just cooked through.
(4) Finish: Remove the fish from the pan. Put the remaining 2 tablespoons of butter in the pan with the juices. Melt the butter and whisk or stir with a wooden spoon. Pour the sauce over the fish. Serve with lemon wedges.
(5) Plate and serve: Pour the sauce over the fish. Serve with lemon wedges.
Eat and enjoy every bite because you can!
Recipe note: I use Diamond Crystal Kosher salt in all my recipes because it has a wonderful flat and crisp flake that tastes delicious. It is also the least salty salt available so you can use it more liberally as a seasoning than you can table salt or sea salt. If you use another type of salt, you may need to reduce the amount so it is not over-salted.
Link note: This post contains links for you to easily purchase items listed on the page. In some cases, we have provided a special discount code for IBS Game Changers so be sure to use it when you purchase an item to get the discount that has been arranged just for you! As an Amazon Associate, I earn a commission from qualifying Amazon purchases.
More Deliciously Low FODMAP™ main course recipes
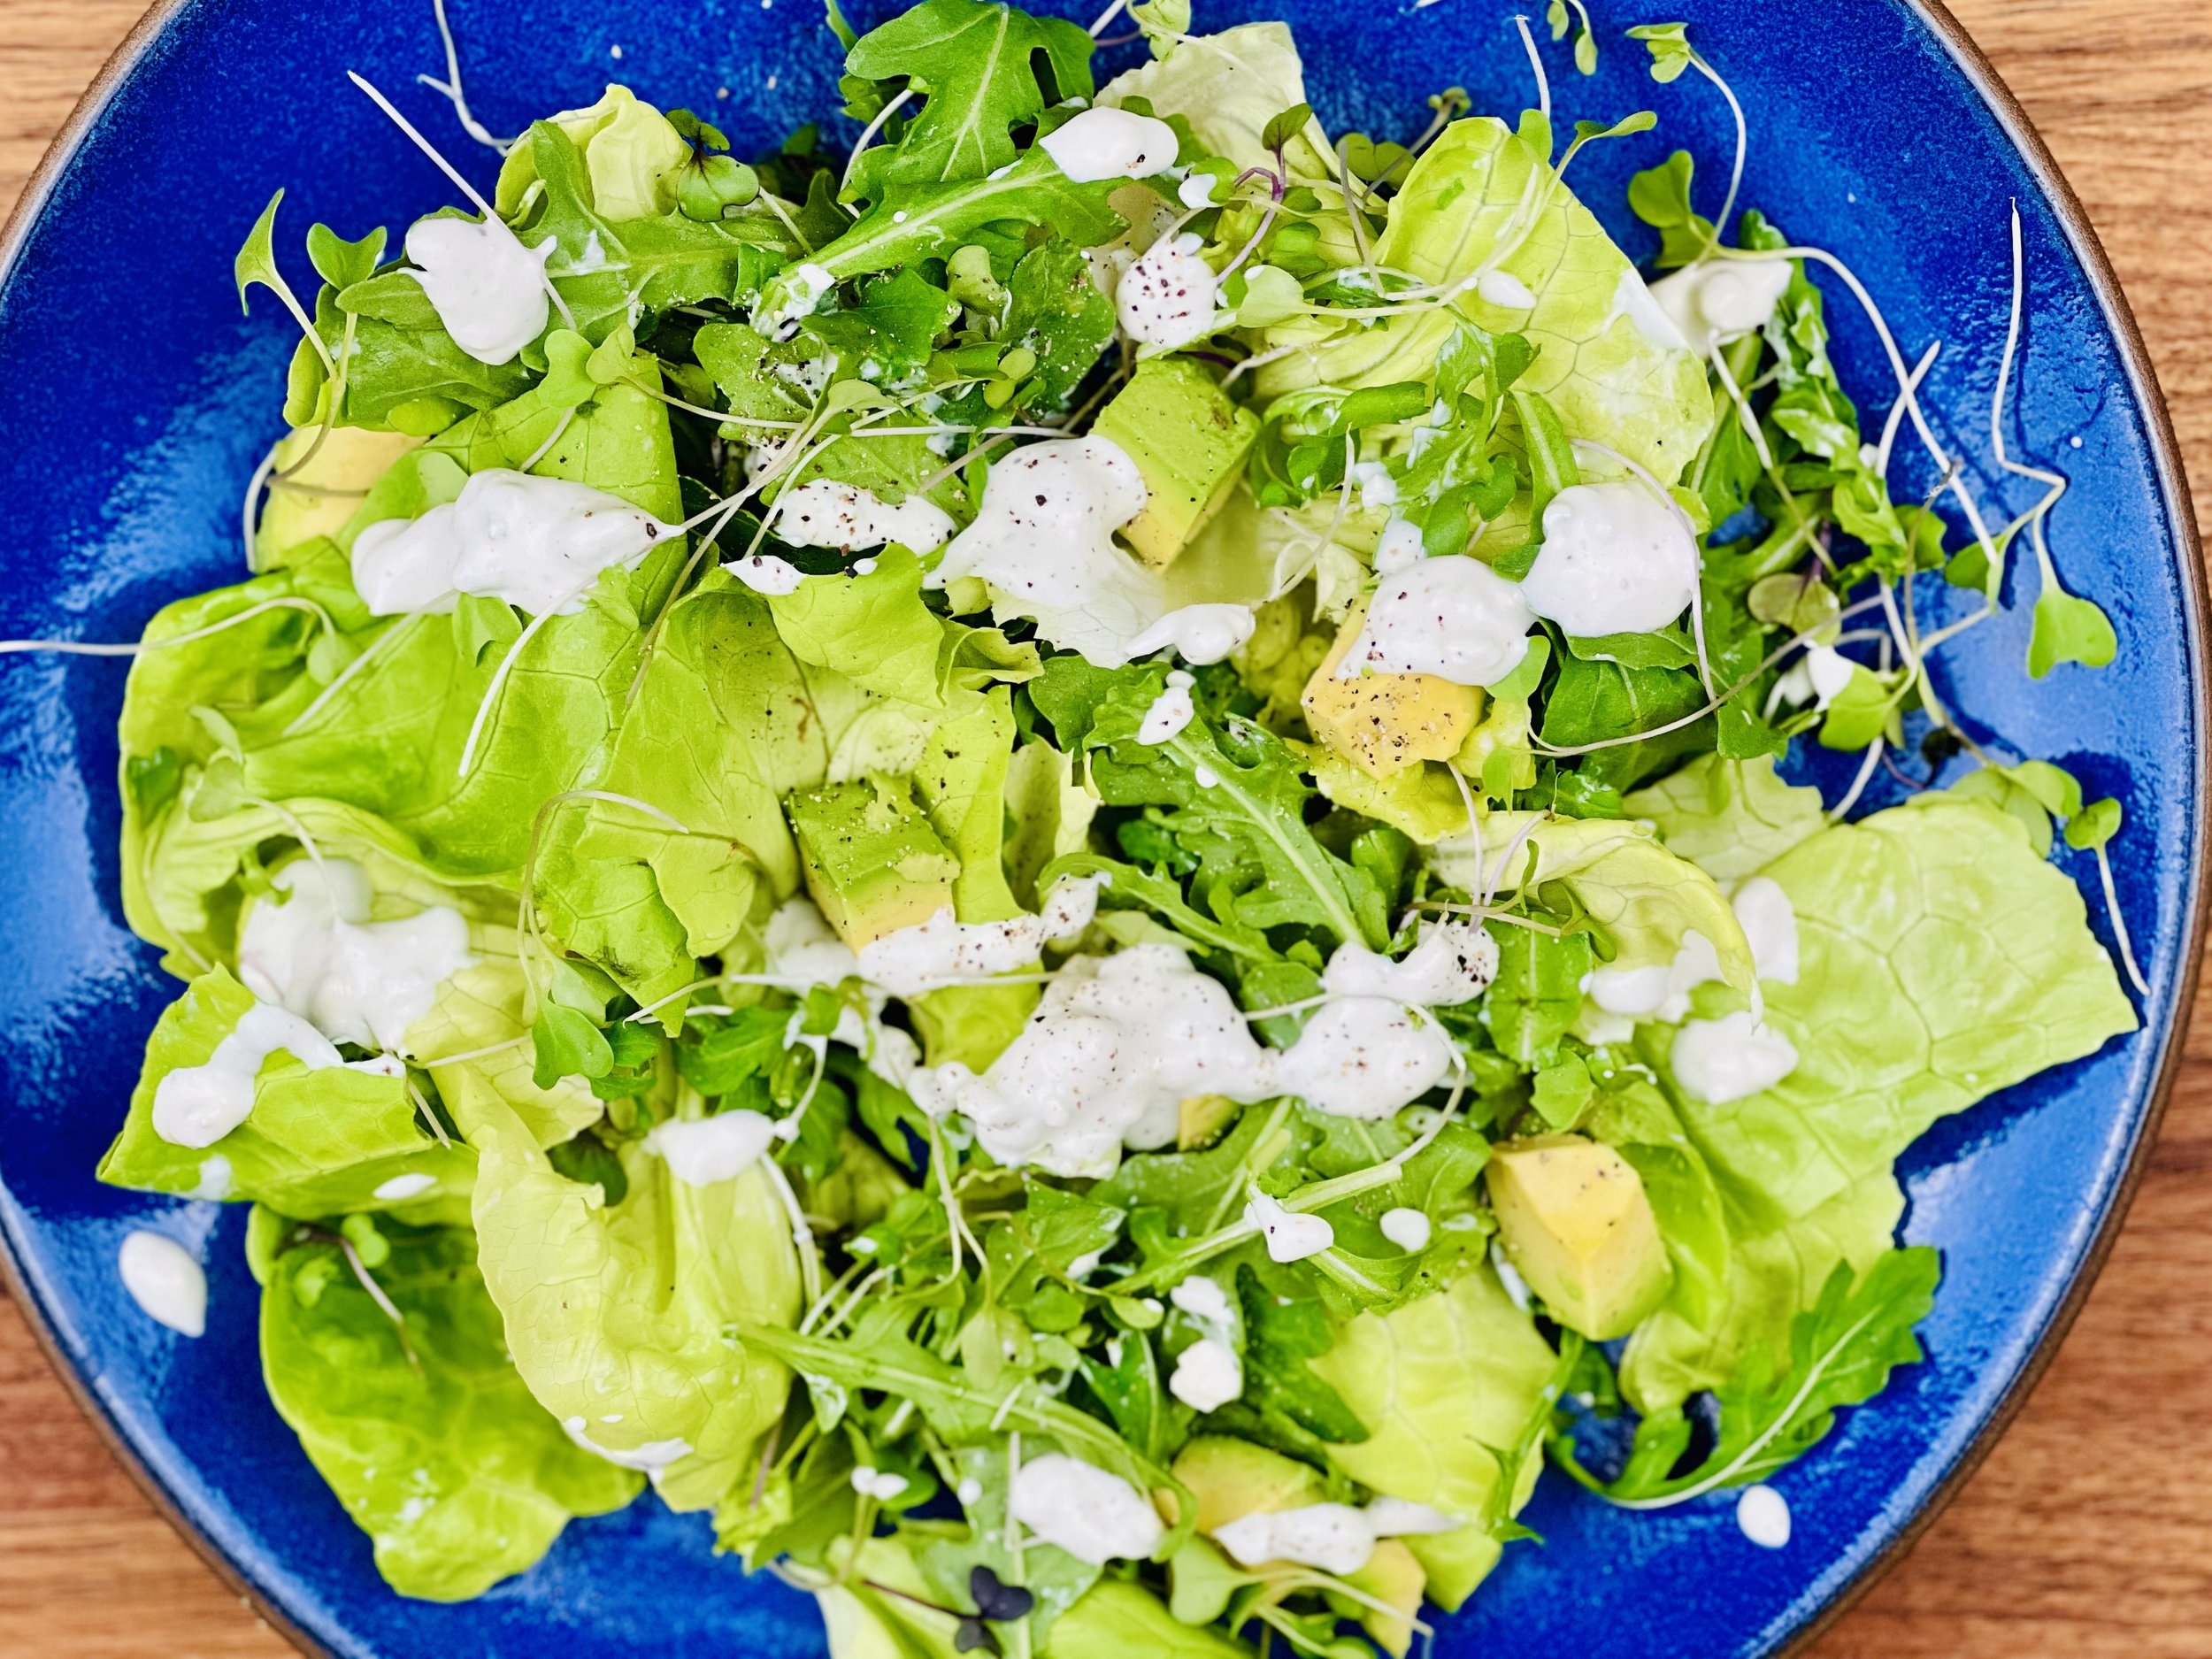
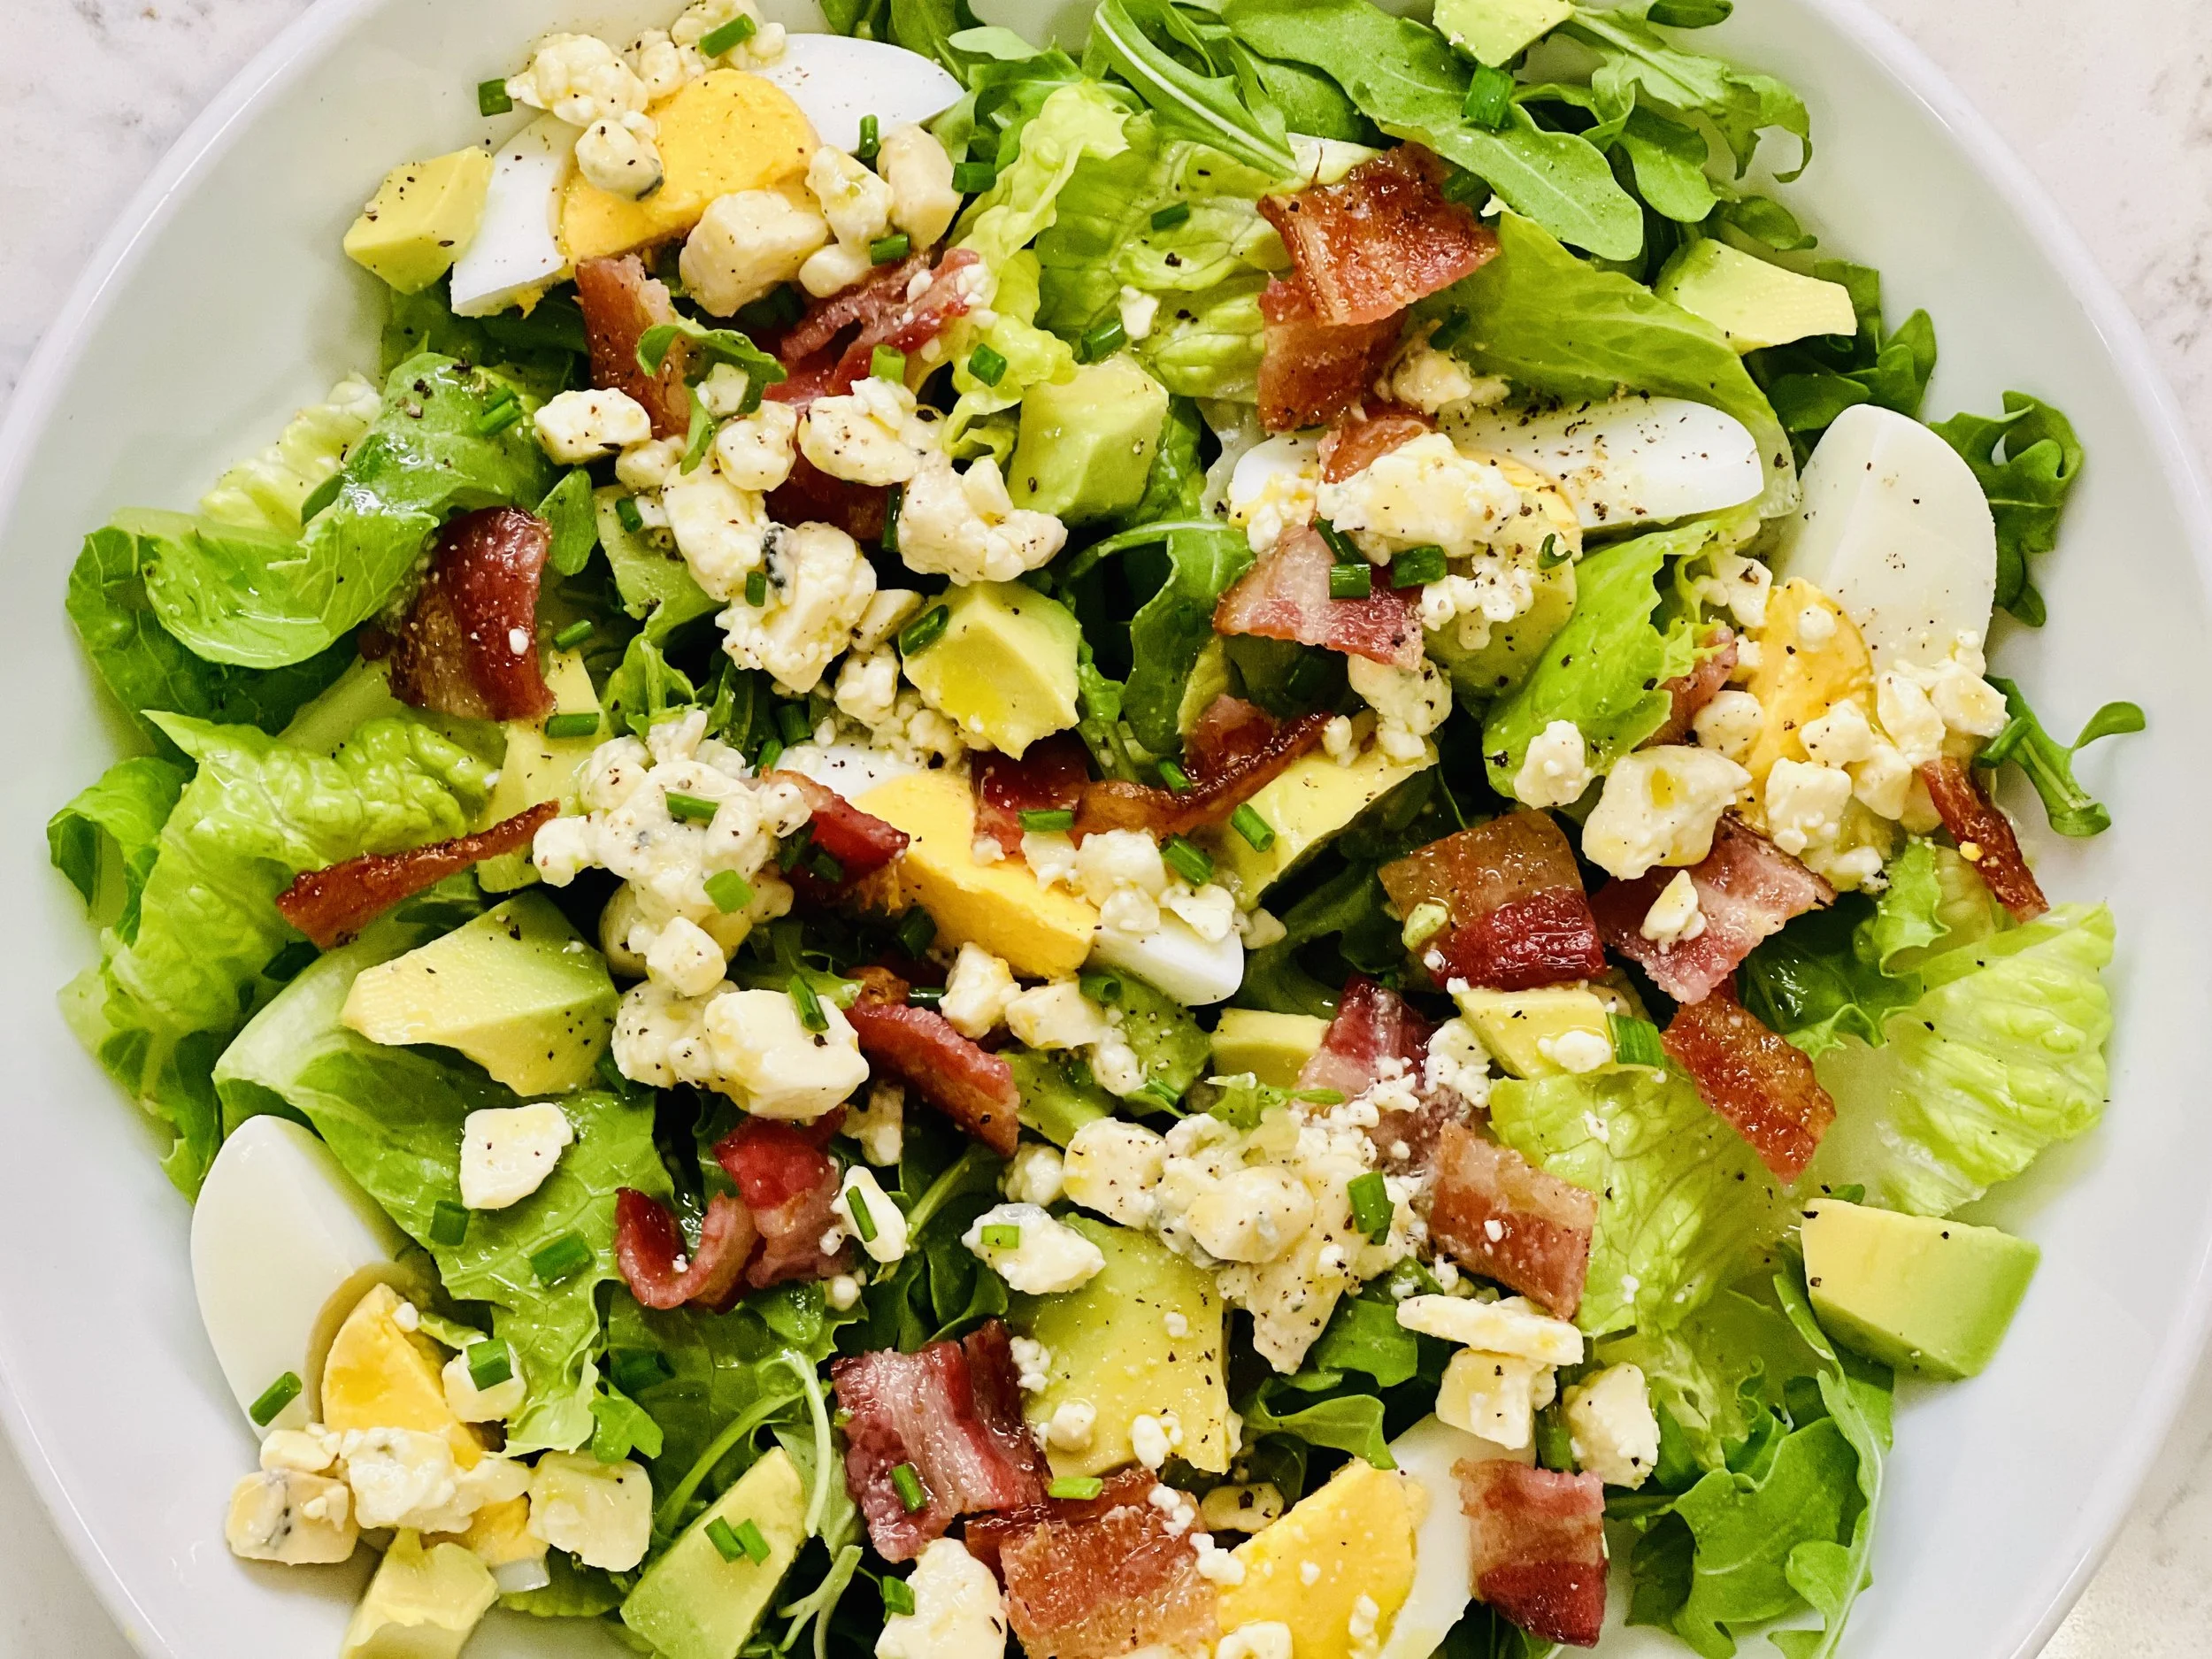
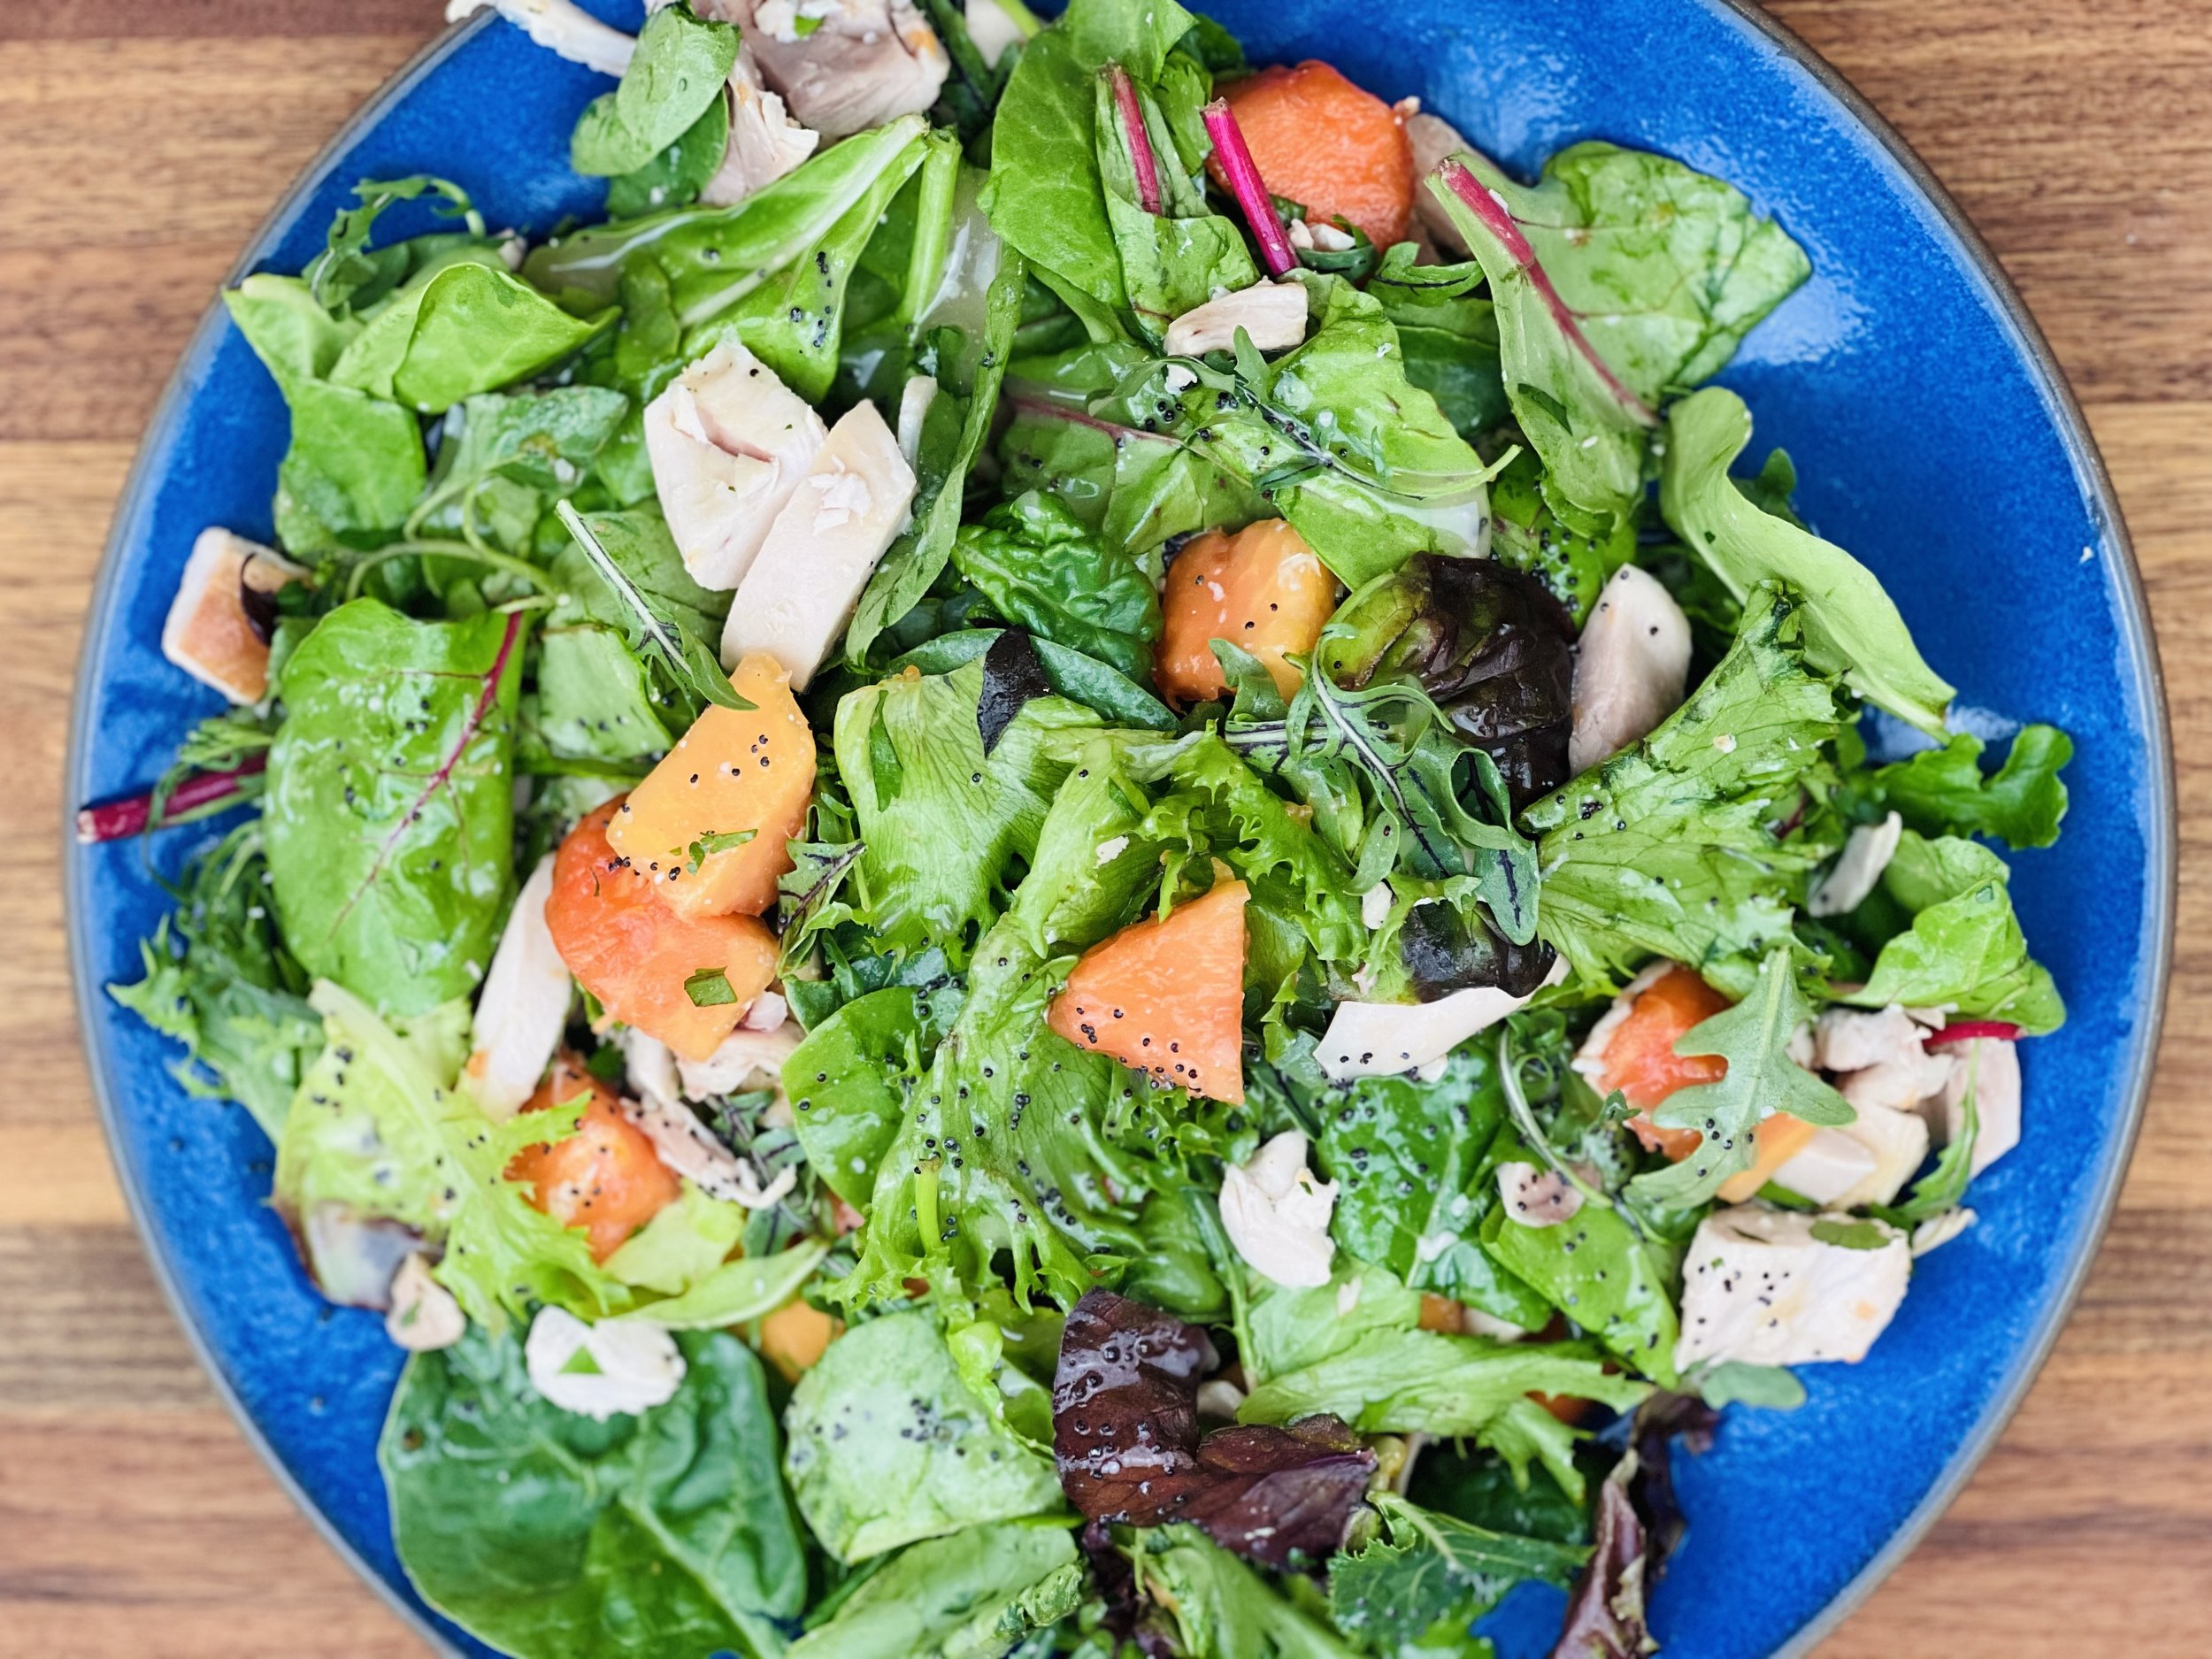
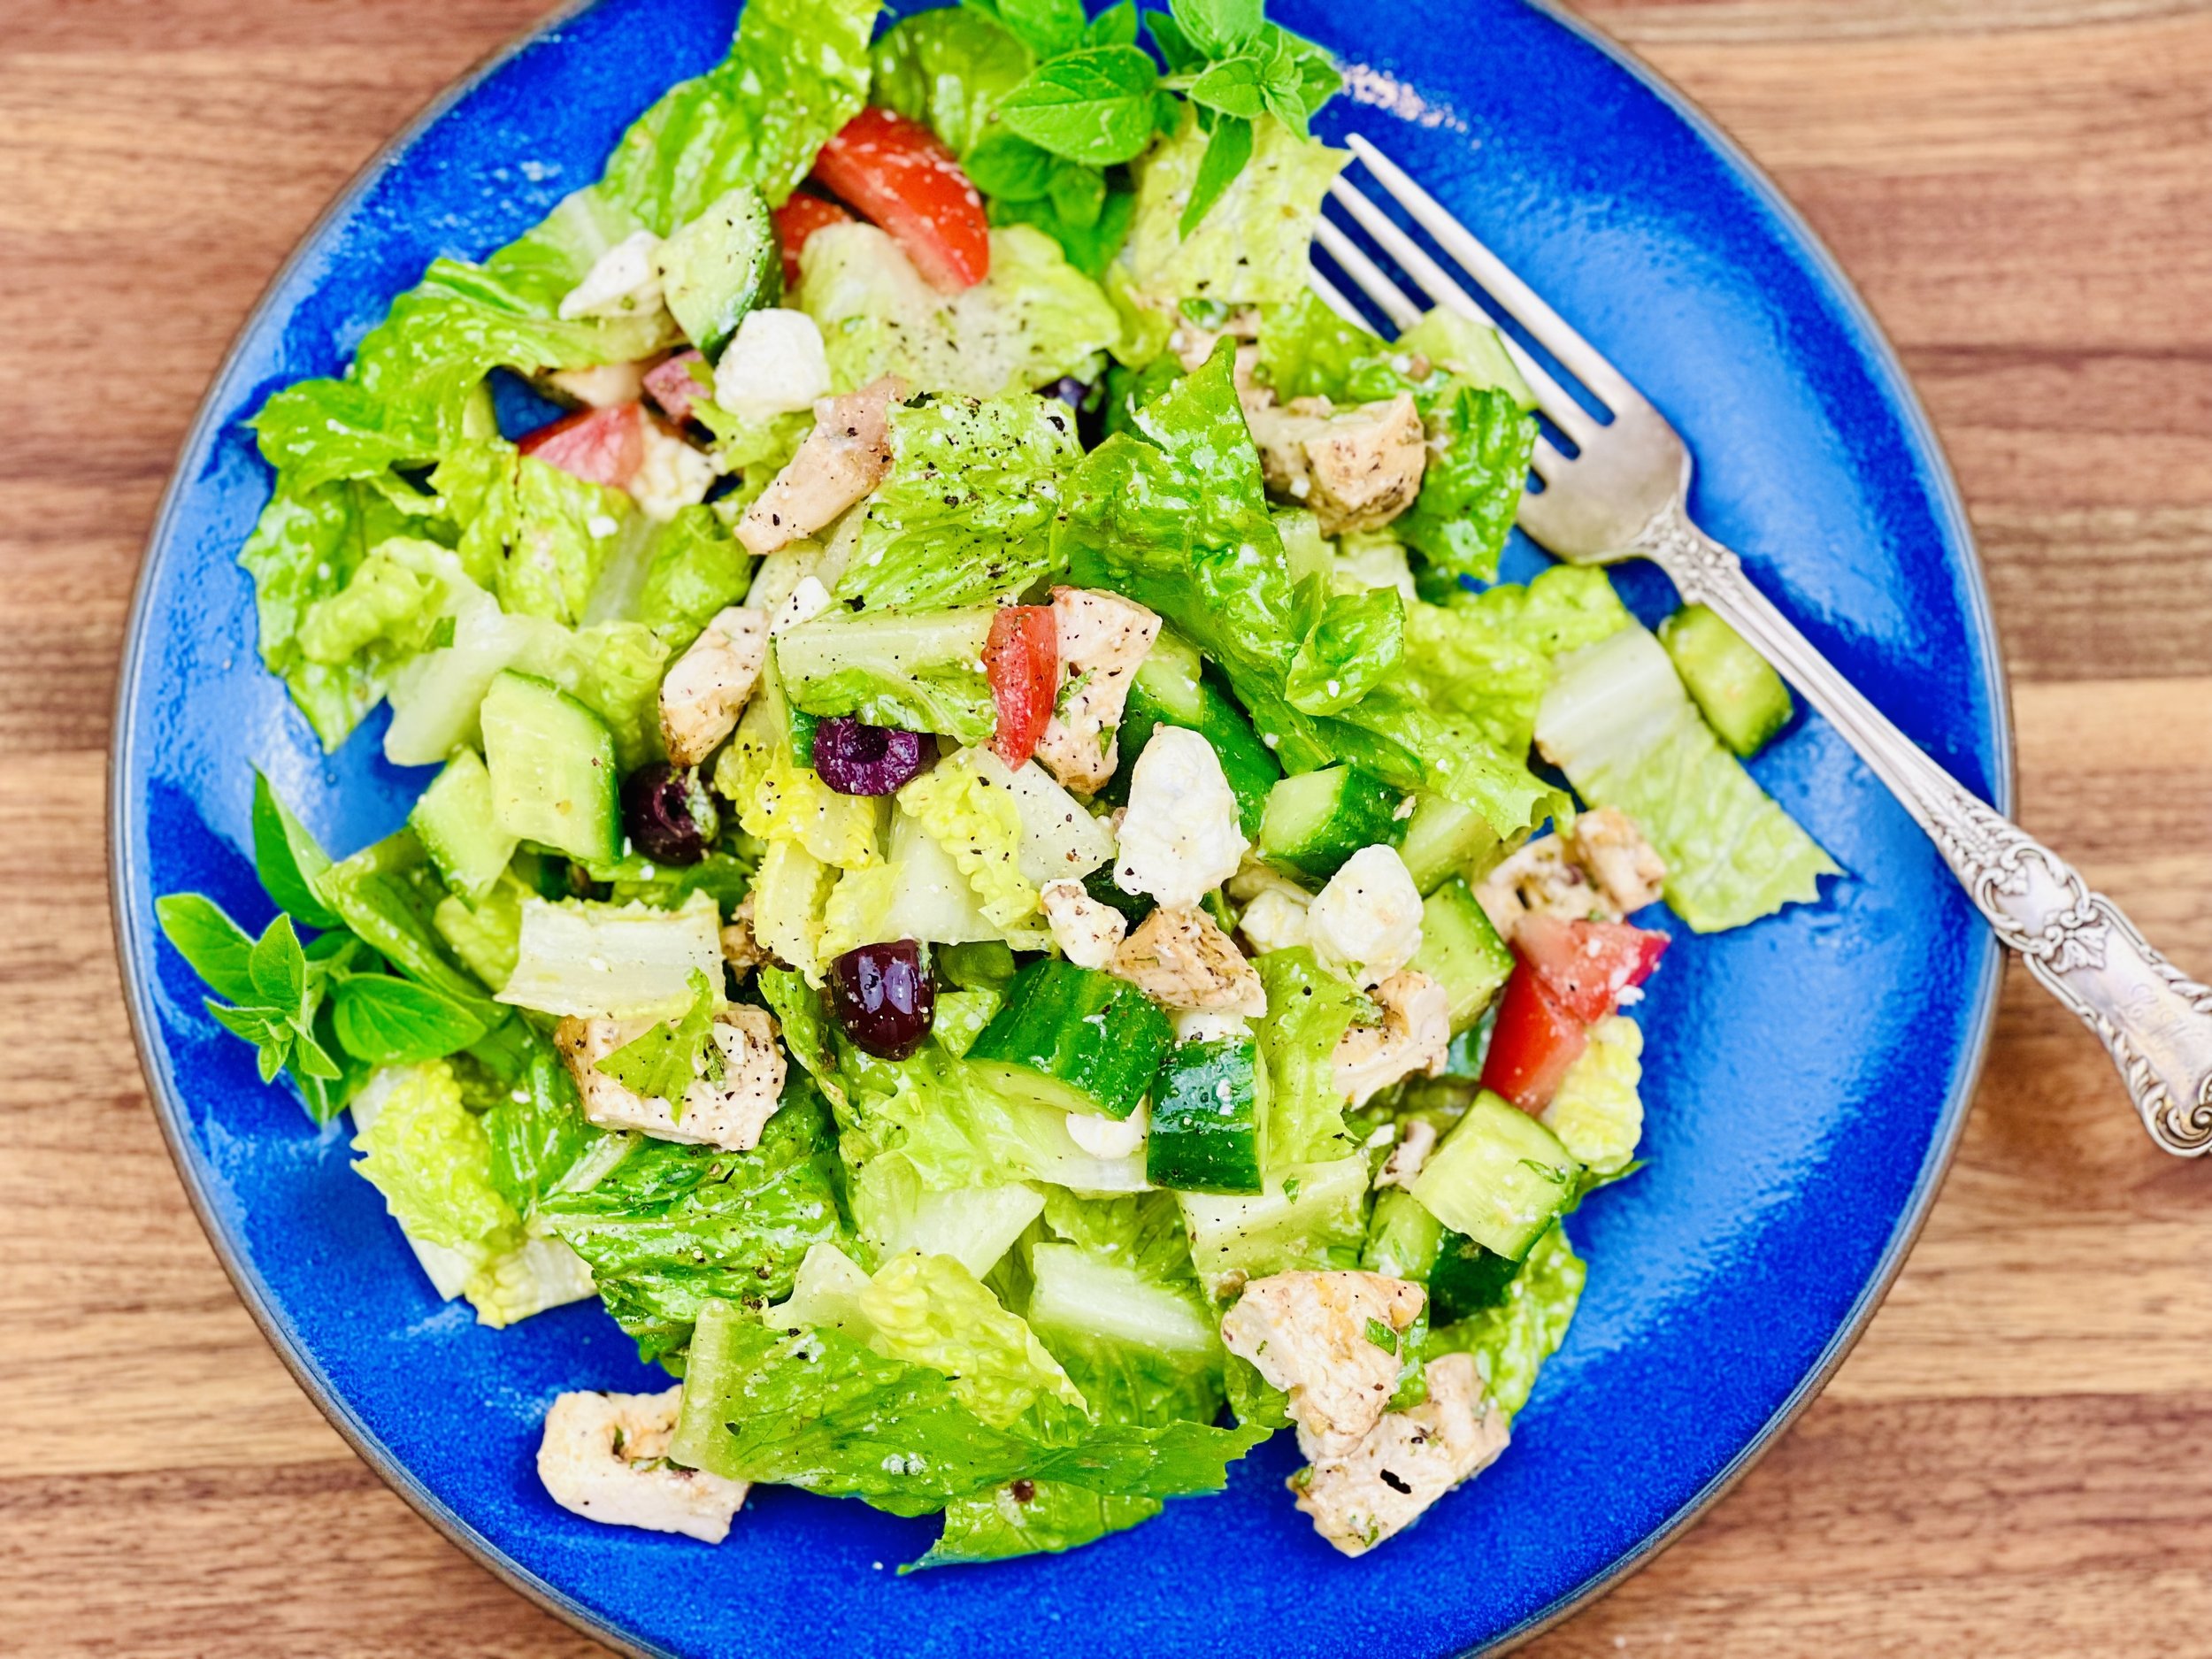
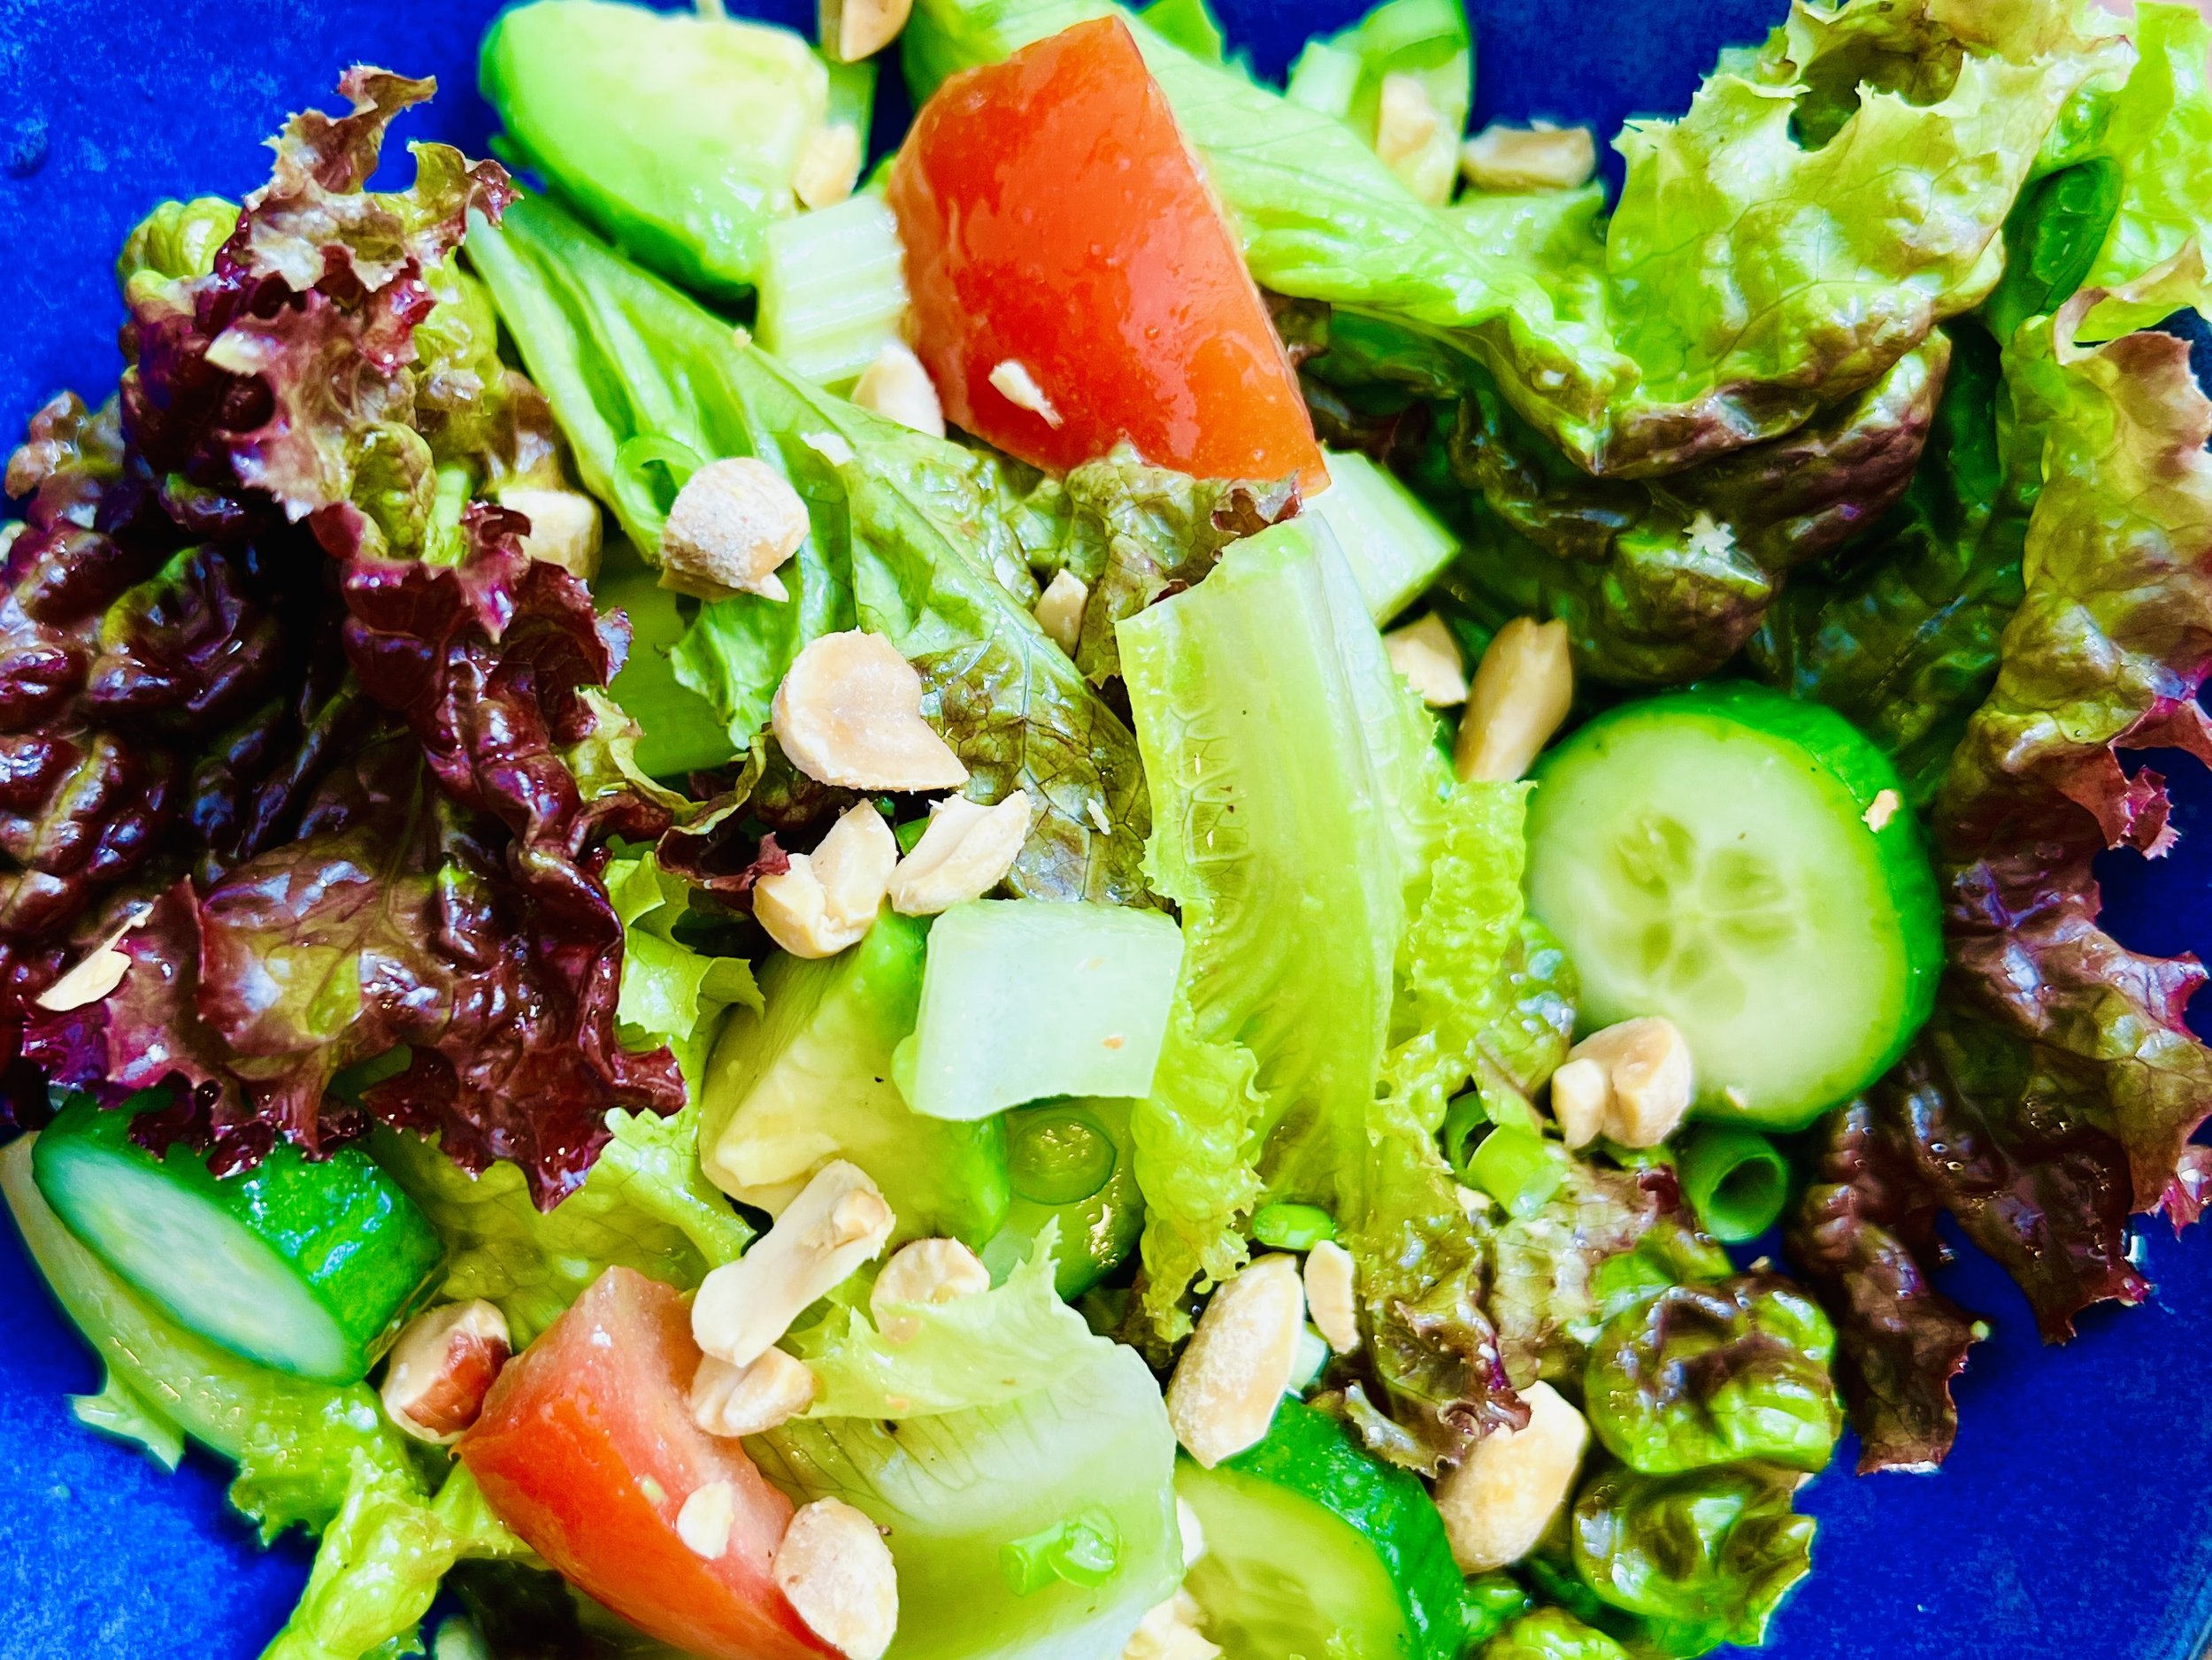
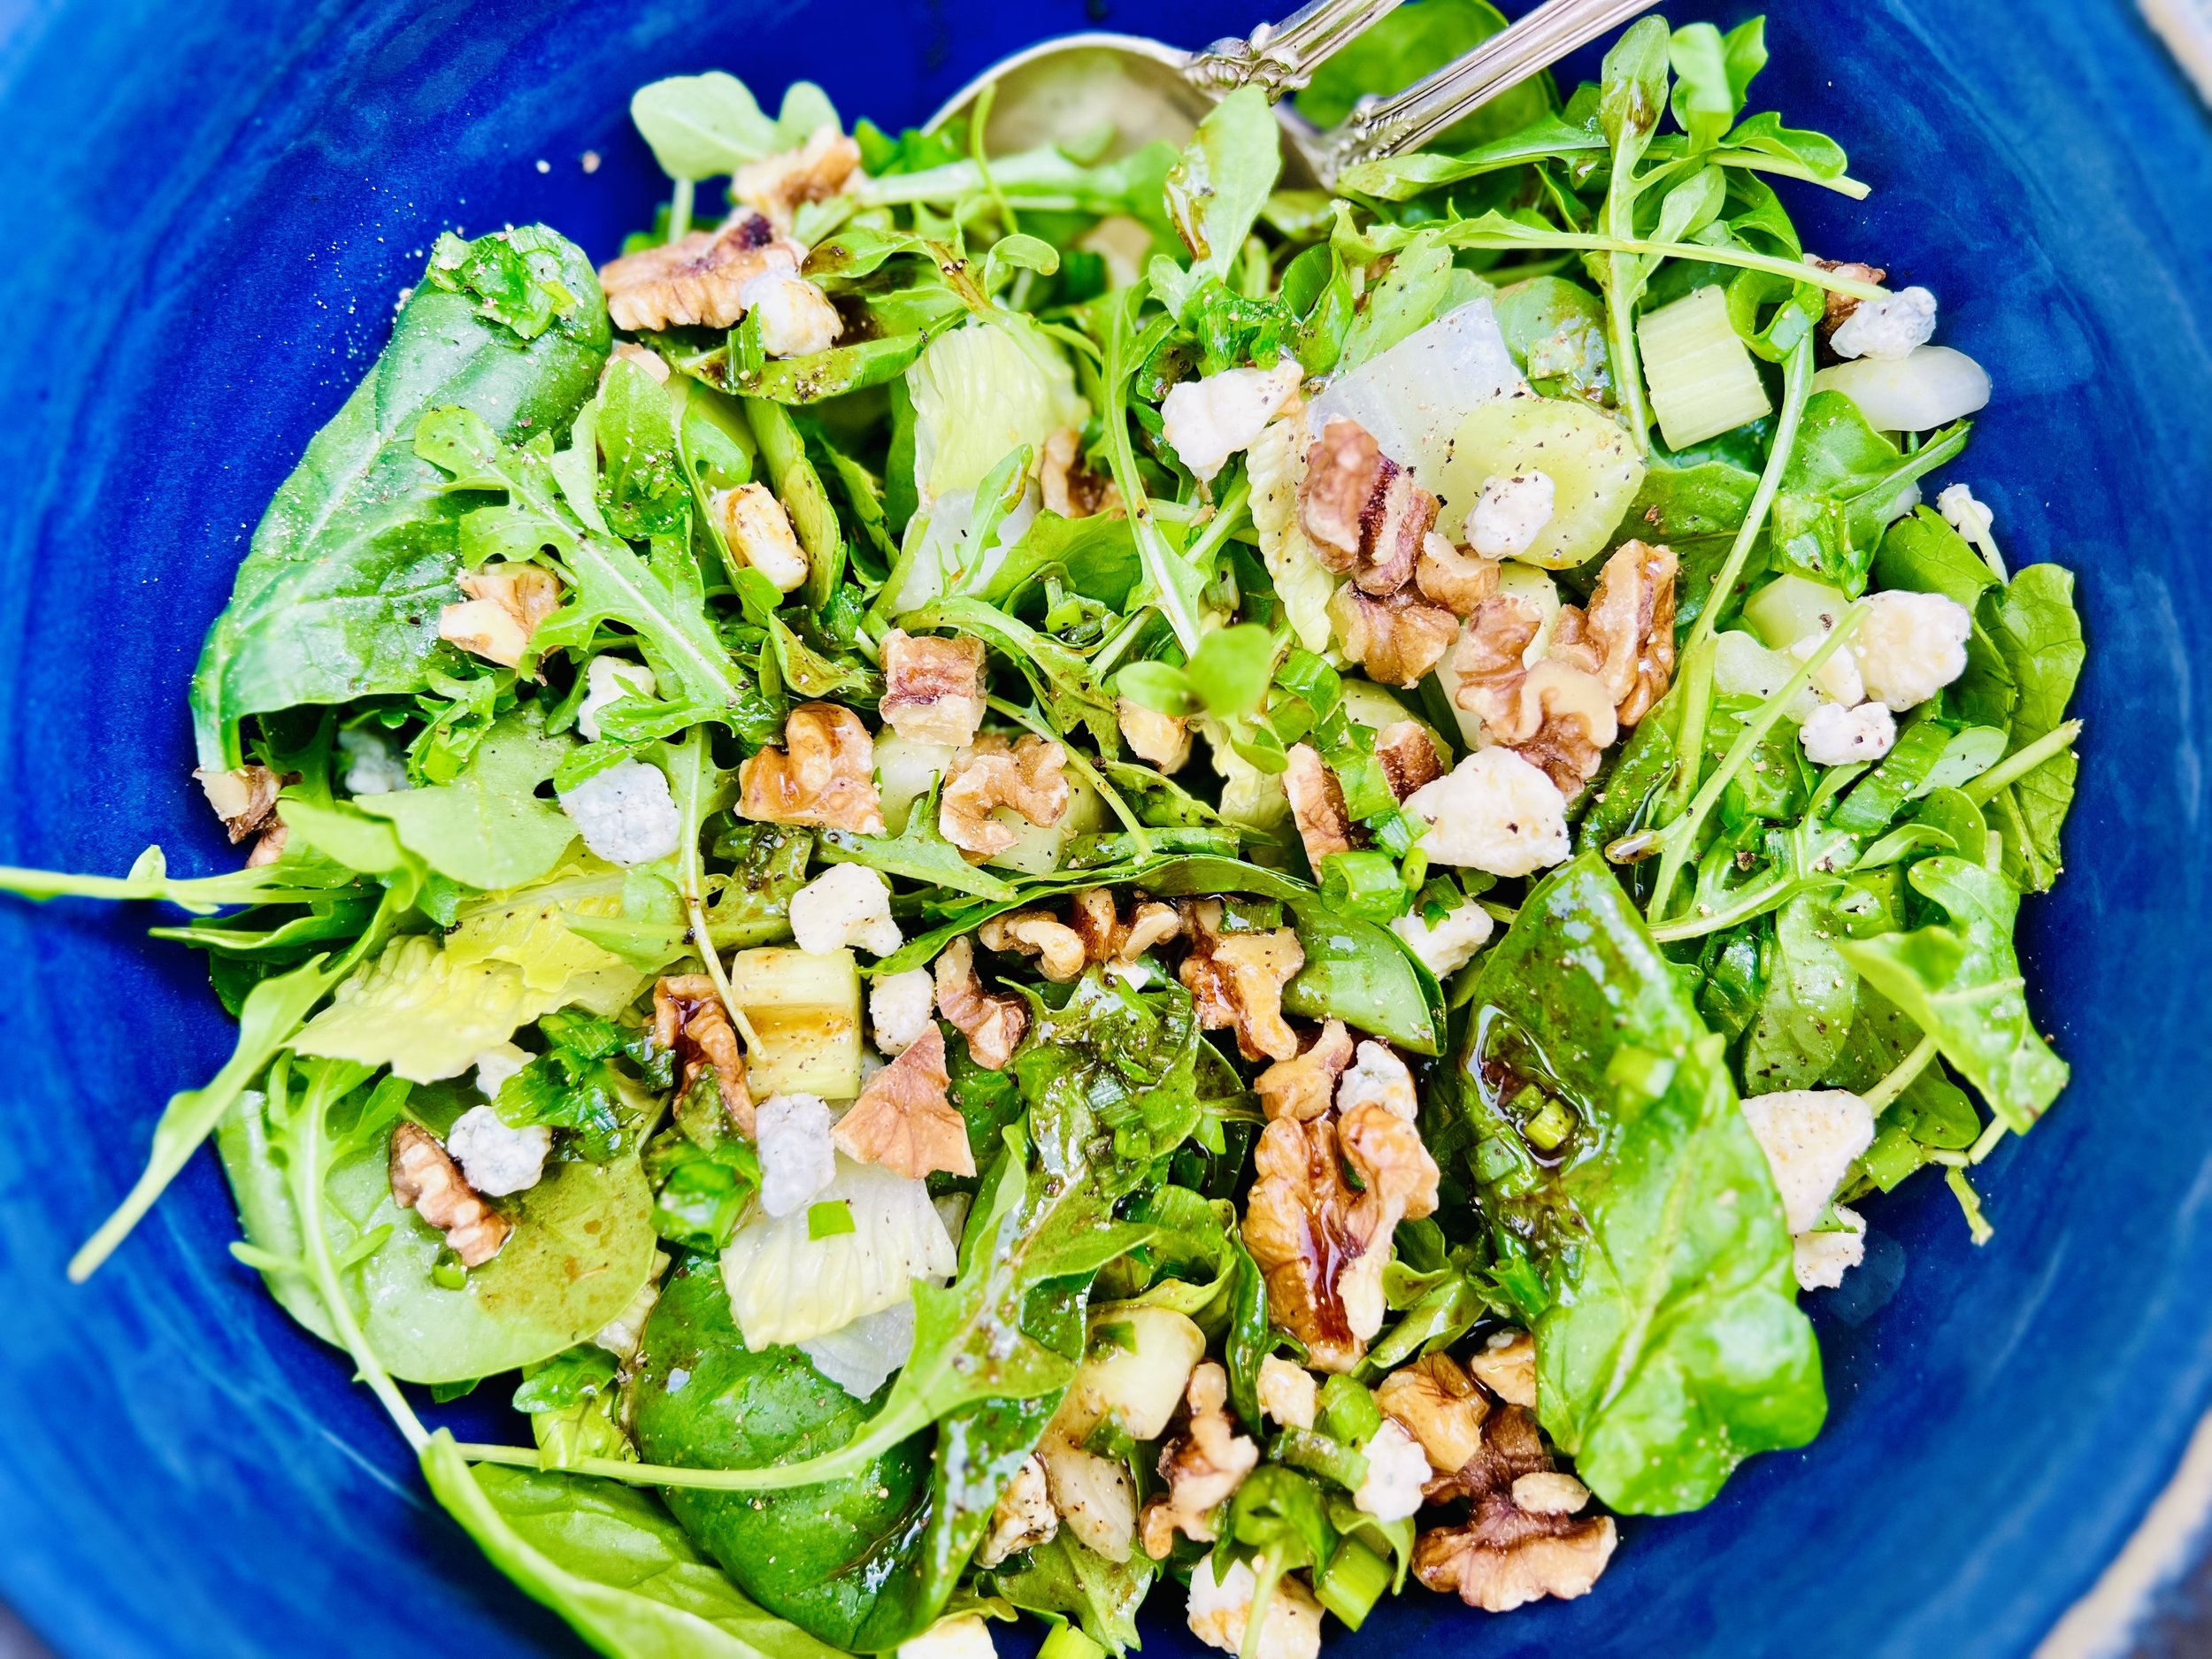
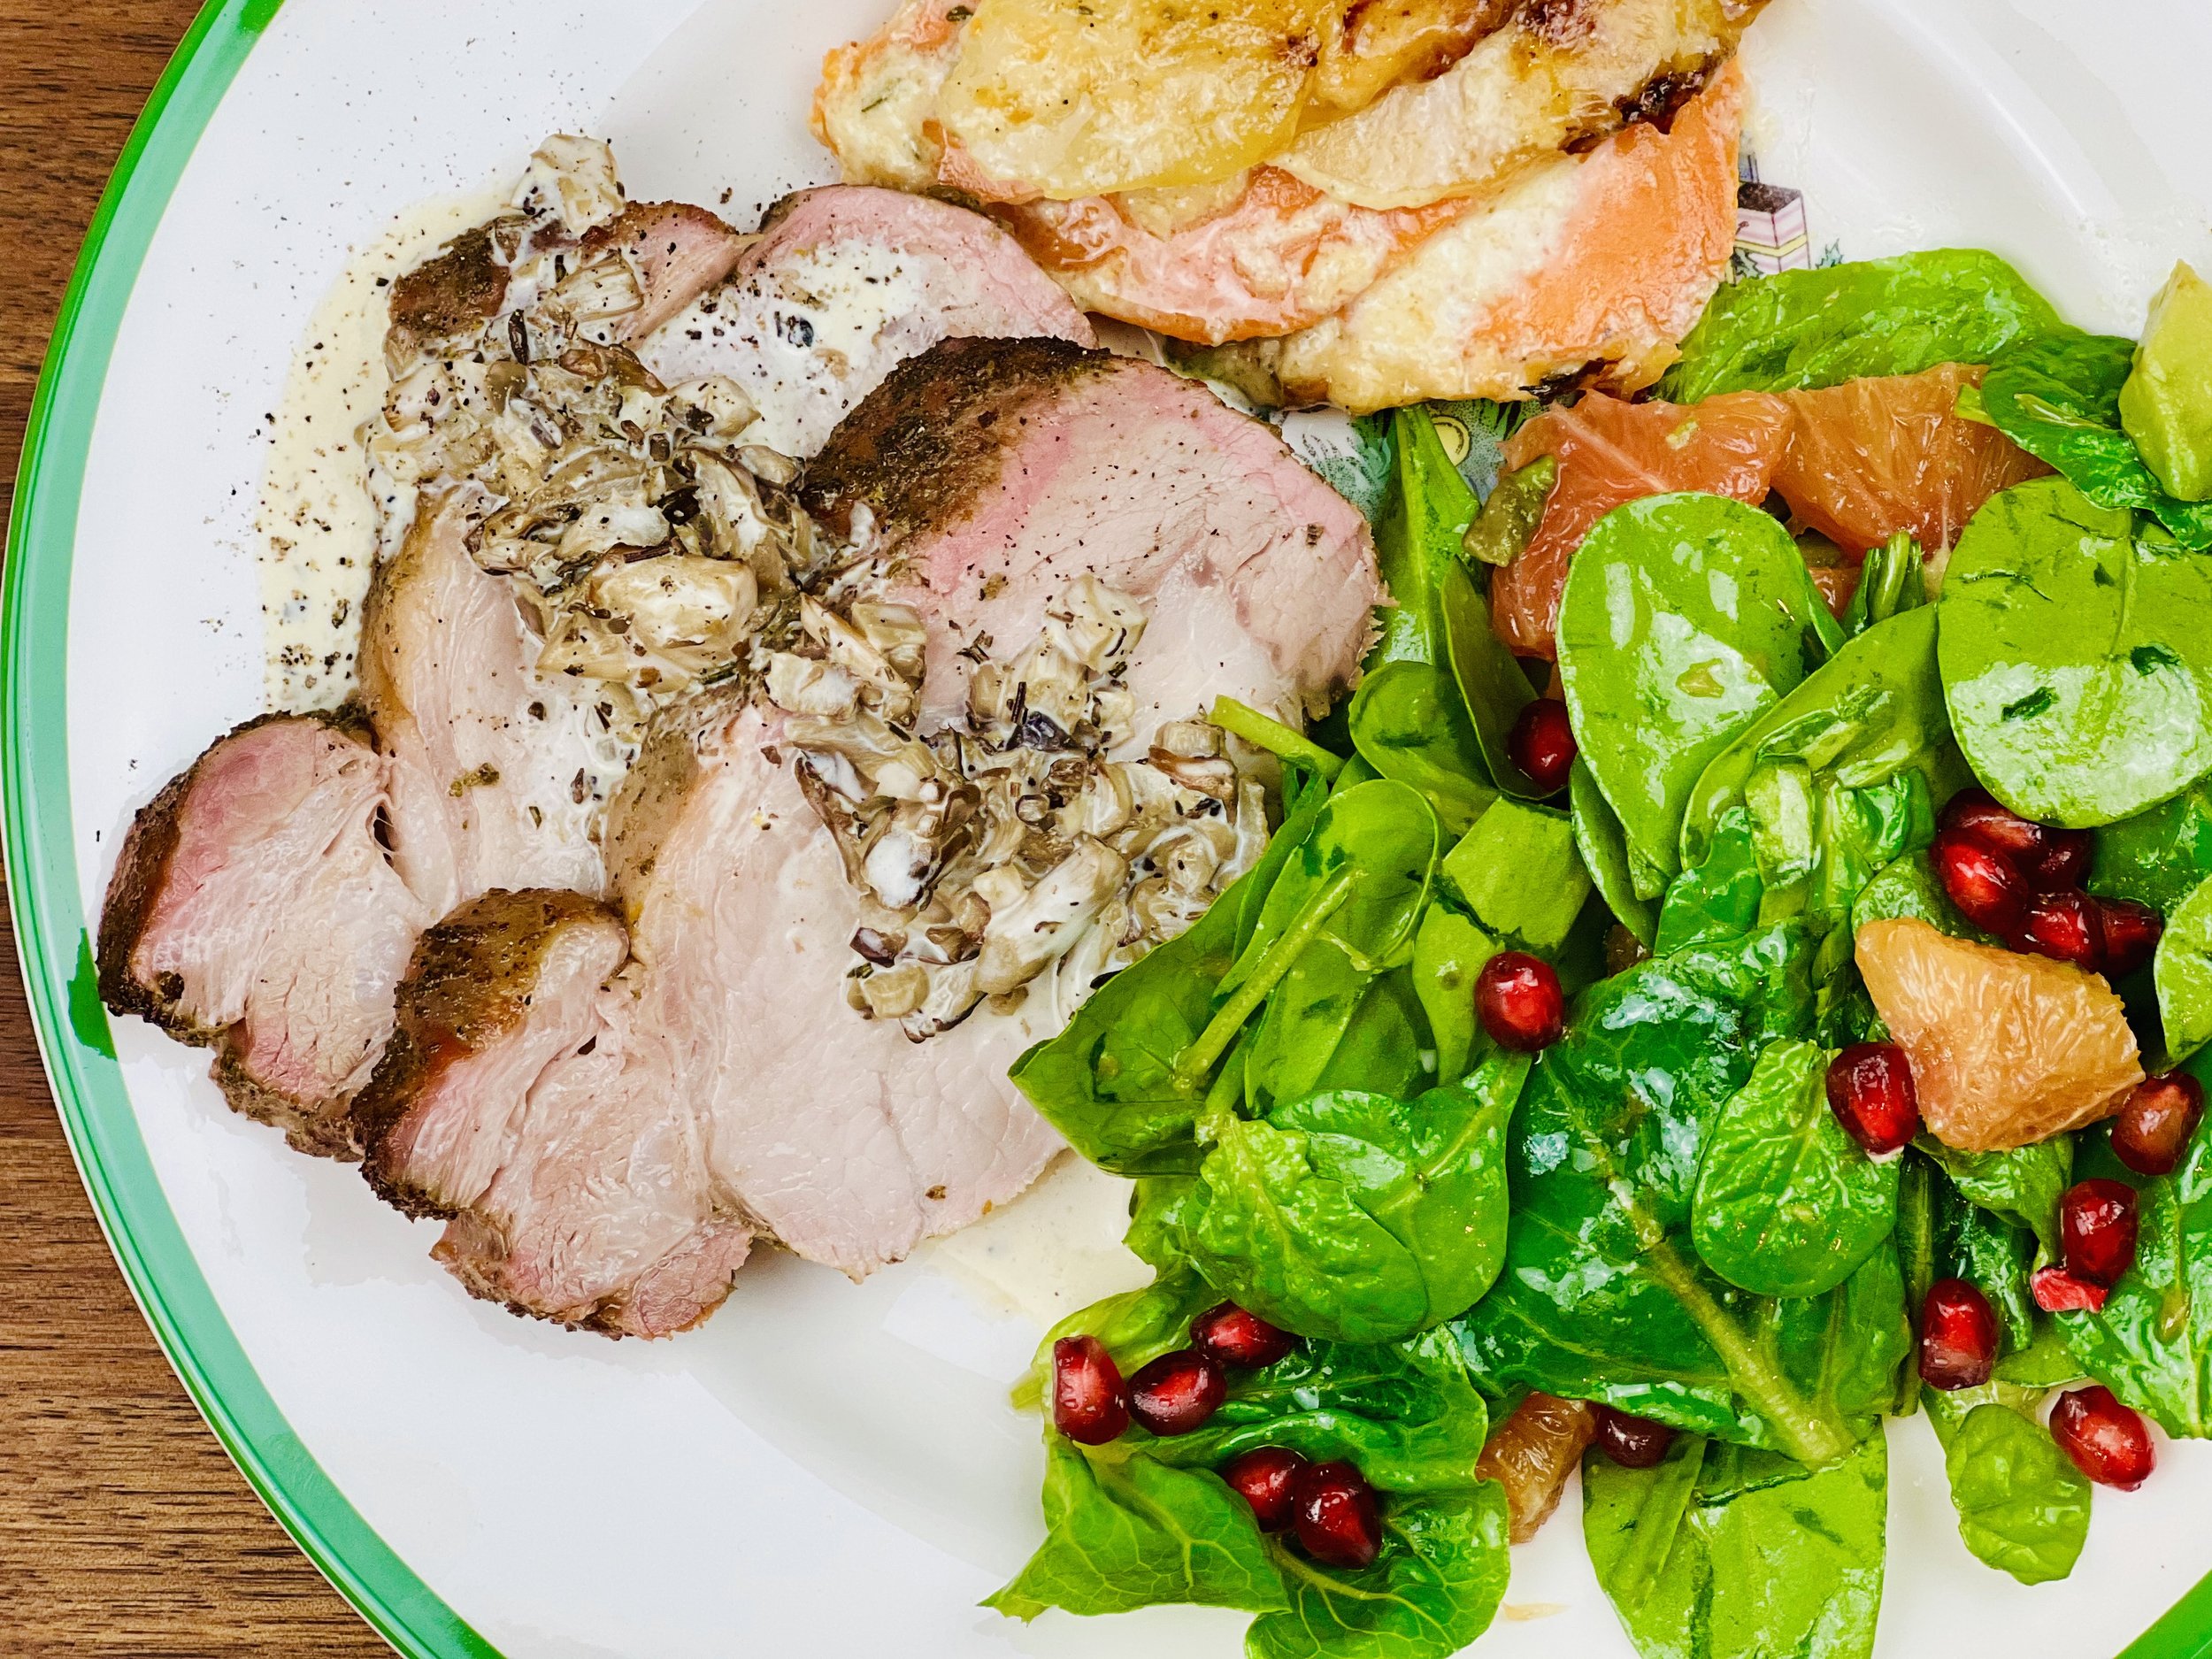
Spring Green Salad (low FODMAP)
15 Minutes prep • Low FODMAP • Gluten-free • Vegetarian • Serves 2 - 4
15 Minutes prep • Low FODMAP • Gluten-free • Vegetarian • Serves 2 - 4 • Ok to make ahead: Steps 1-2
If you know me at all, you know I love salad. And this salad is a wonderful change of pace! Mint and dill spring forward, nuts and seeds add crunch, and the feta adds a nice saltiness to the combination of flavors that is just wonderful. The sheer greenness of the salad itself is pleasing to look at. Did you know the human eye can see the color green better than any other color? Green is a color that conveys calm and peace. It stands for hope, positive change, and new life. It may even lower your blood pressure! So take a good look at this salad and then eat and enjoy every bite. Your whole body will thank you!
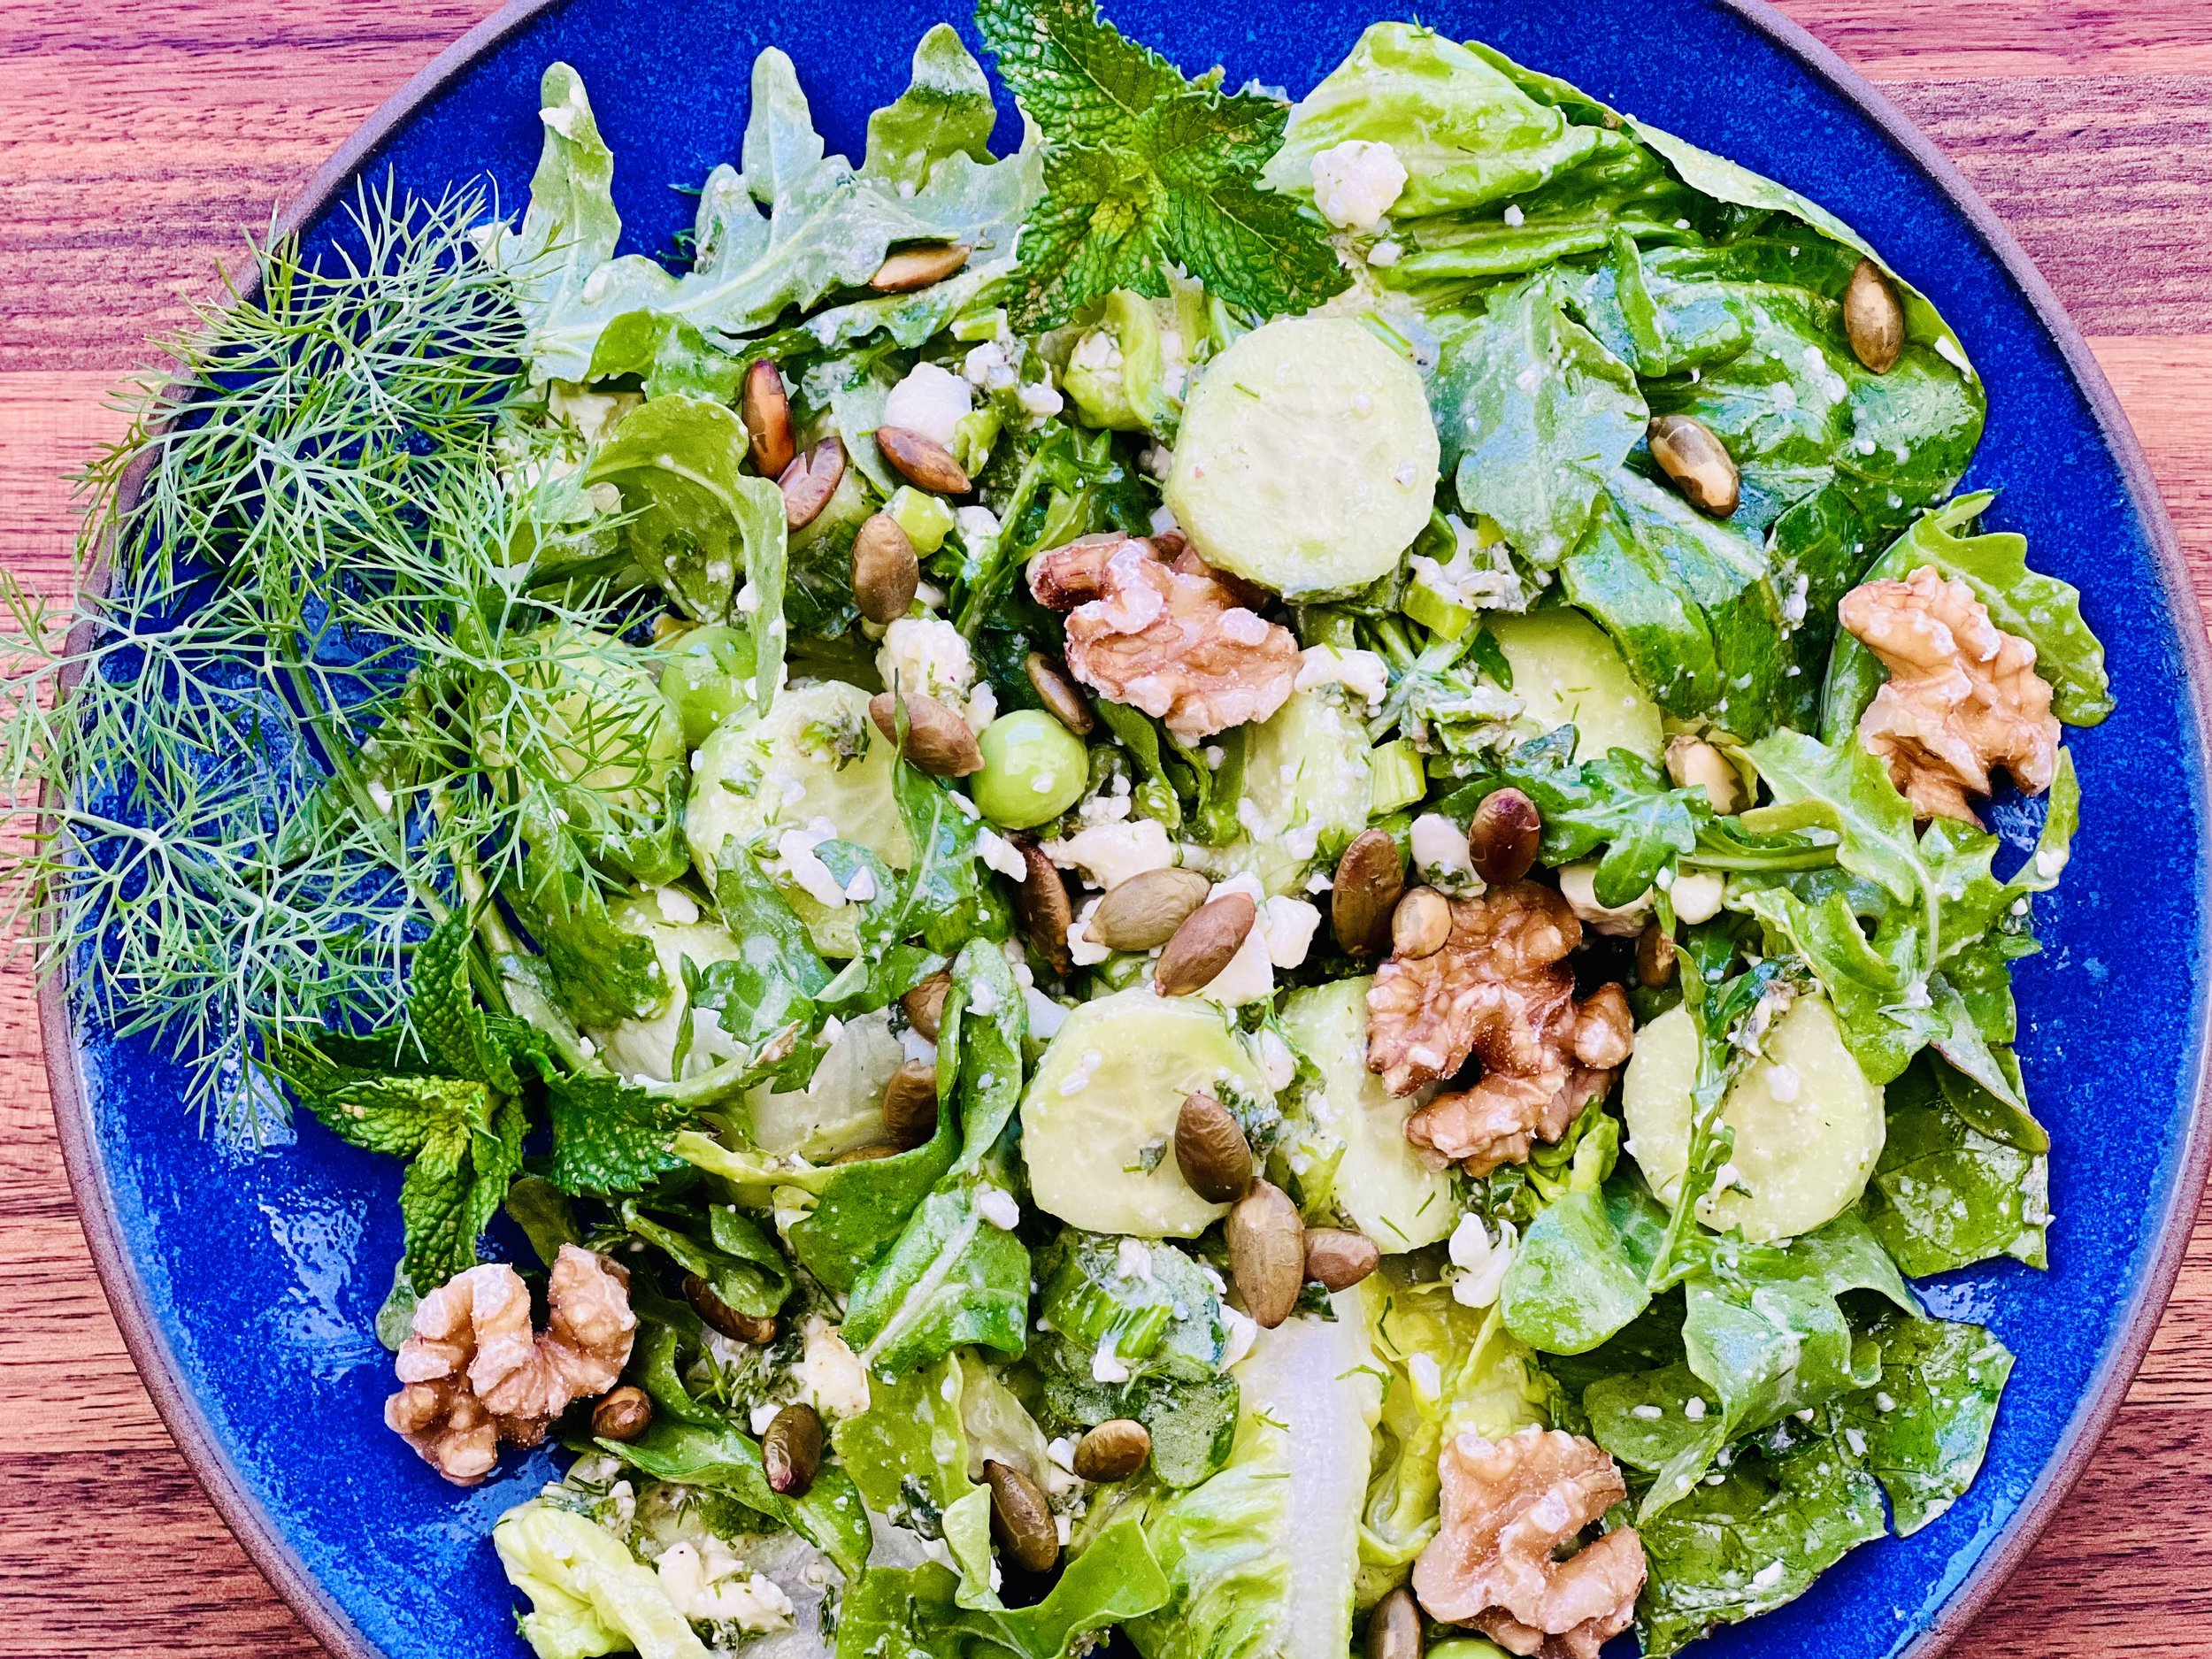
Ingredients: Salad
3 Persian cucumbers, peeled and sliced
2 green onions, green part only, chopped
2 tablespoons English peas
1/4 cup fresh mint leaves
1/4 cup fresh dill sprigs
1 1/2 cups baby arugula
1 1/2 cups gem lettuce, or any other preferred lettuce
2-4 ounces feta cheese, crumbled
1/2 cup roasted or raw pumpkin seeds (optional)
1/2 cup walnuts (optional)
Ingredients: Dressing
1/4 cup garlic-infused olive oil
3 tablespoons lemon juice
1 tablespoon Dijon mustard
1/2 teaspoon Kosher salt (or to taste)
1/4 teaspoon freshly ground black pepper
Directions
(1) Prepare the dressing: Put all of the ingredients into a jar, close the lid and shake until combined.
(2) Prepare the vegetables: Wash, peel and chop all vegetables.
Make-ahead note: At this point, you may keep the prepared vegetables in the refrigerator for a few hours until you’re ready to toss things together. You may want to hold off on chopping the mint and the dill so they don’t discolor. Just chop them and add them whenever you’re ready to assemble your salad.
(3) Assemble the salad: Put the salad ingredients in a large bowl (and chop and add the mint and dill if you haven’t done it already). Drizzle with about half the dressing. Toss, taste, and add more dressing to your liking.
(4) Plate and serve: Put salad on plates and sprinkle very lightly with Kosher salt. Serve as a side or main course for lunch or dinner.
Eat and enjoy every bite because you can!
Recipe note: I use Diamond Crystal Kosher salt in all my recipes because it has a wonderful flat and crisp flake that tastes delicious. It is also the least salty salt available so you can use it more liberally as a seasoning than you can table salt or sea salt. If you use another type of salt, you may need to reduce the amount so it is not over-salted.
Link note: This post contains links for you to easily purchase items listed on the page. In some cases, we have provided a special discount code for IBS Game Changers so be sure to use it when you purchase an item to get the discount that has been arranged just for you! As an Amazon Associate, I earn a commission from qualifying Amazon purchases.
More Deliciously Low FODMAP™ salad recipes
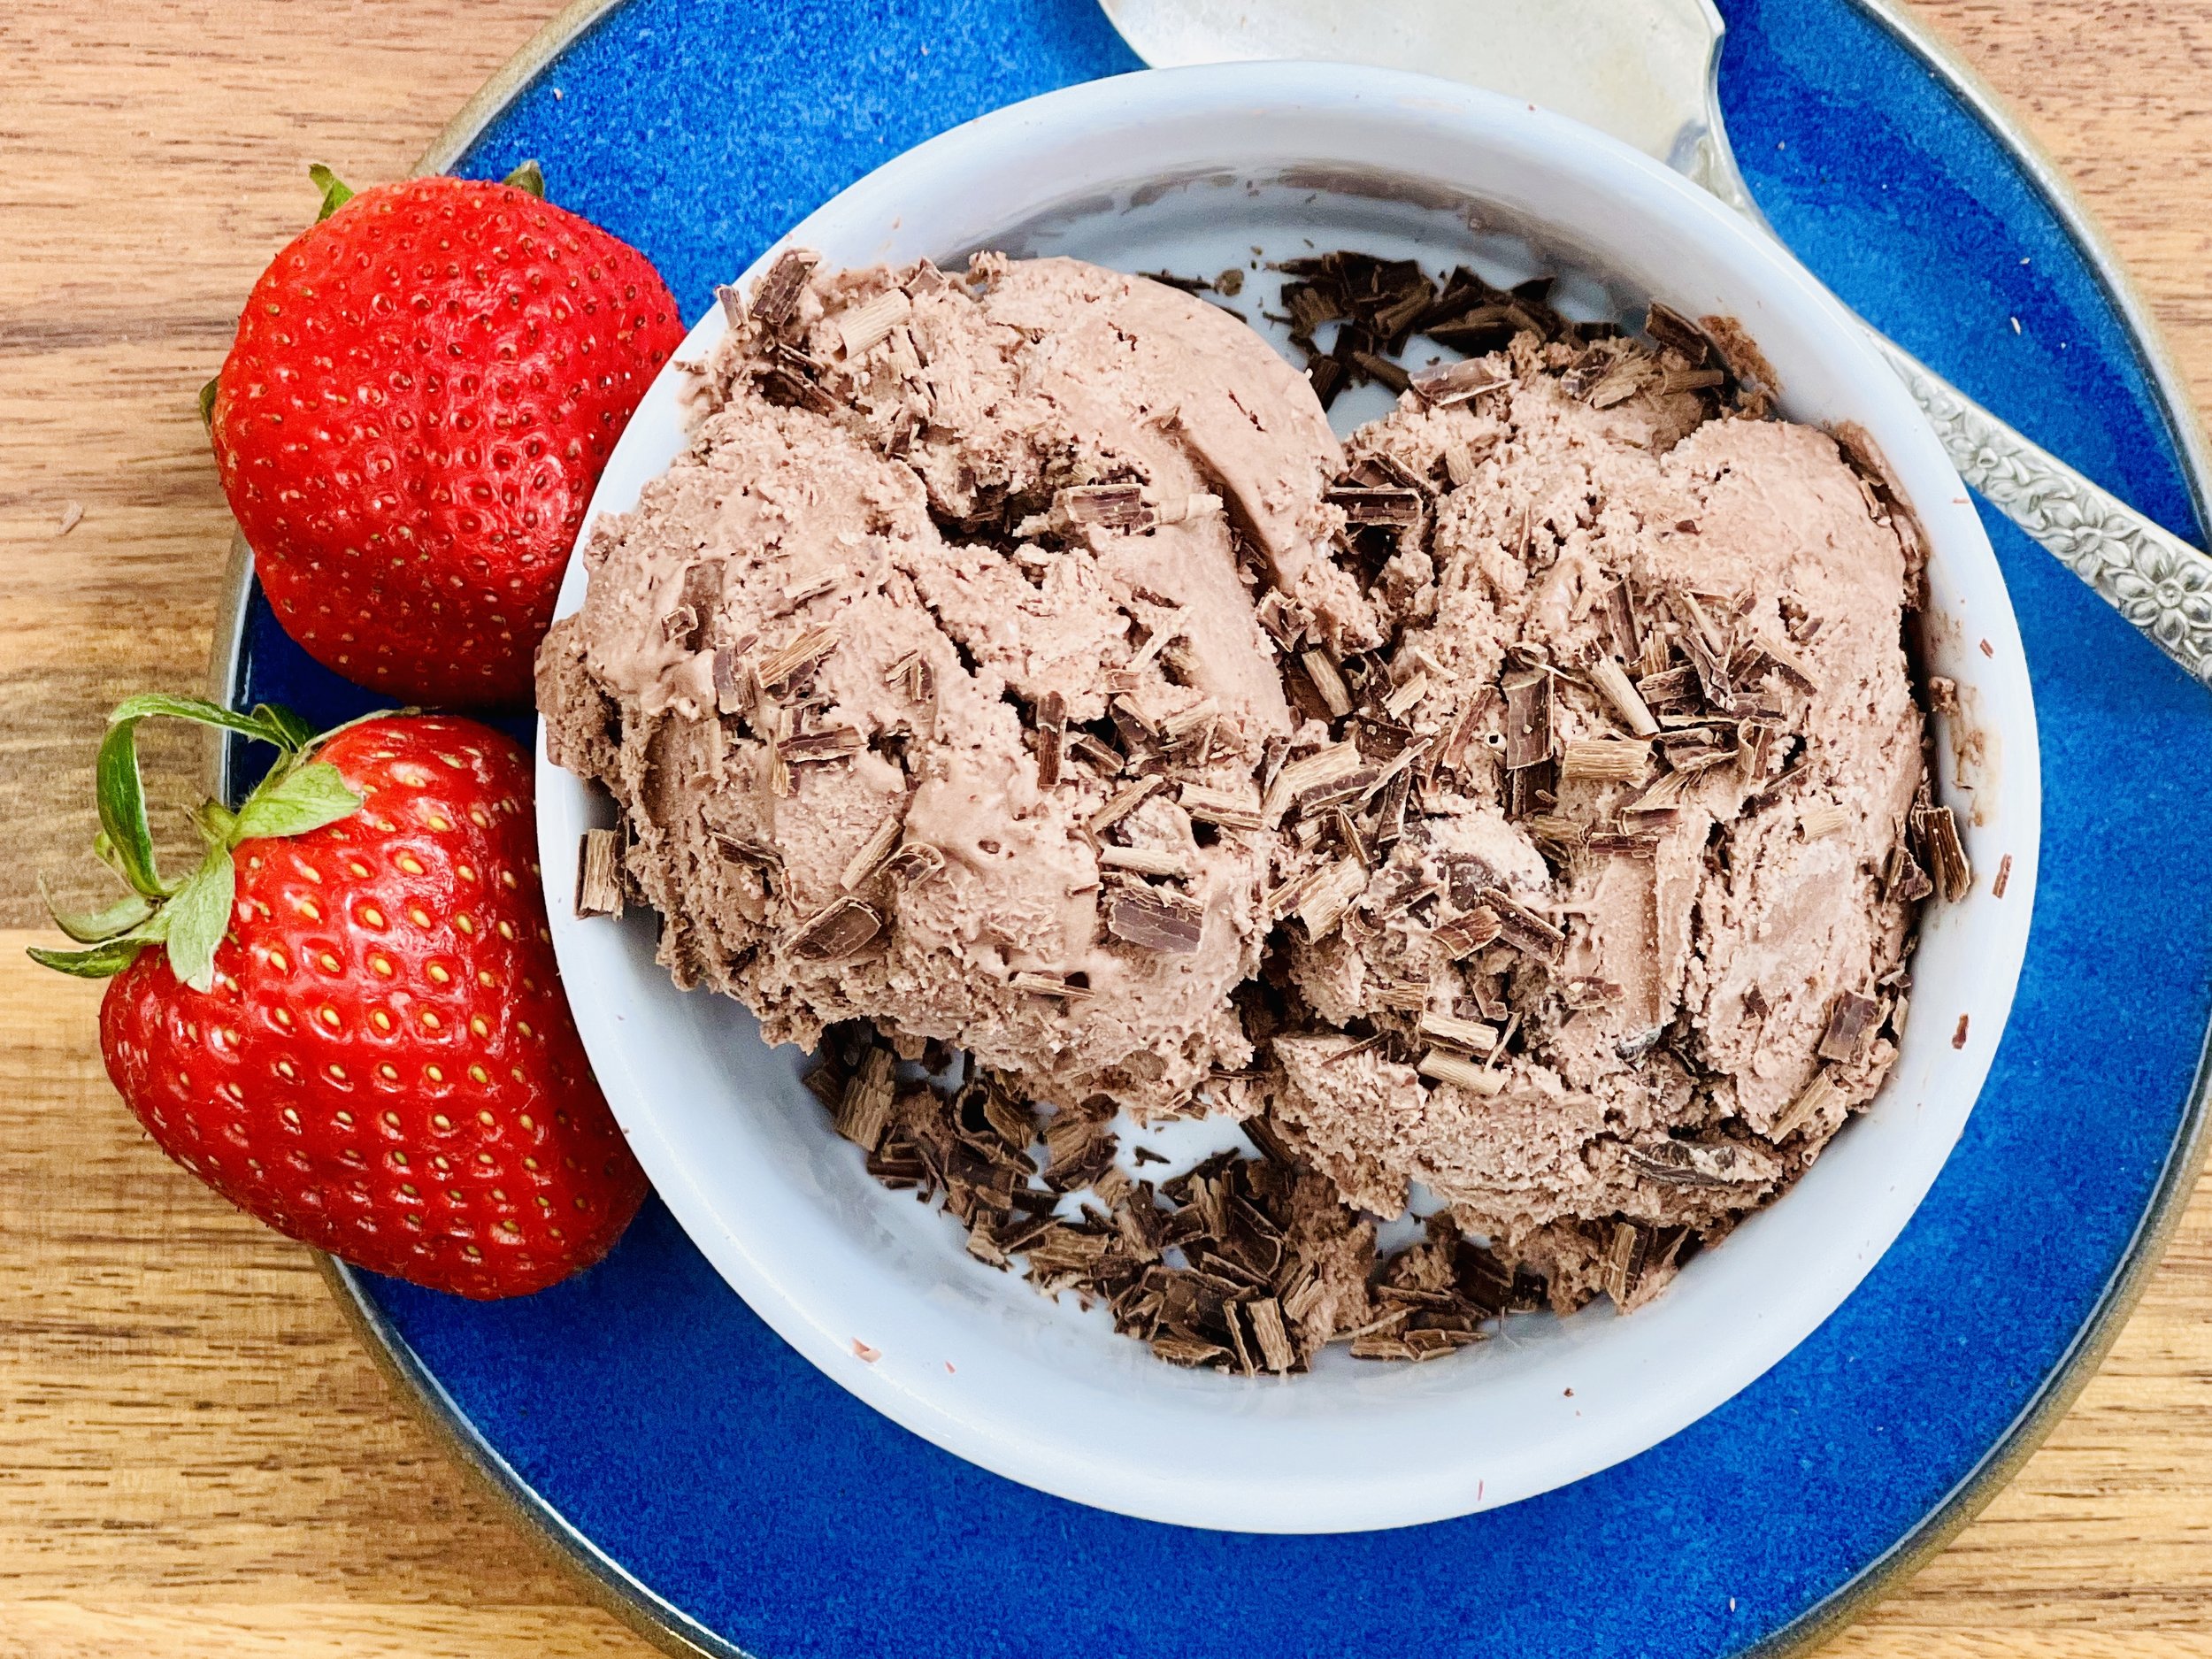
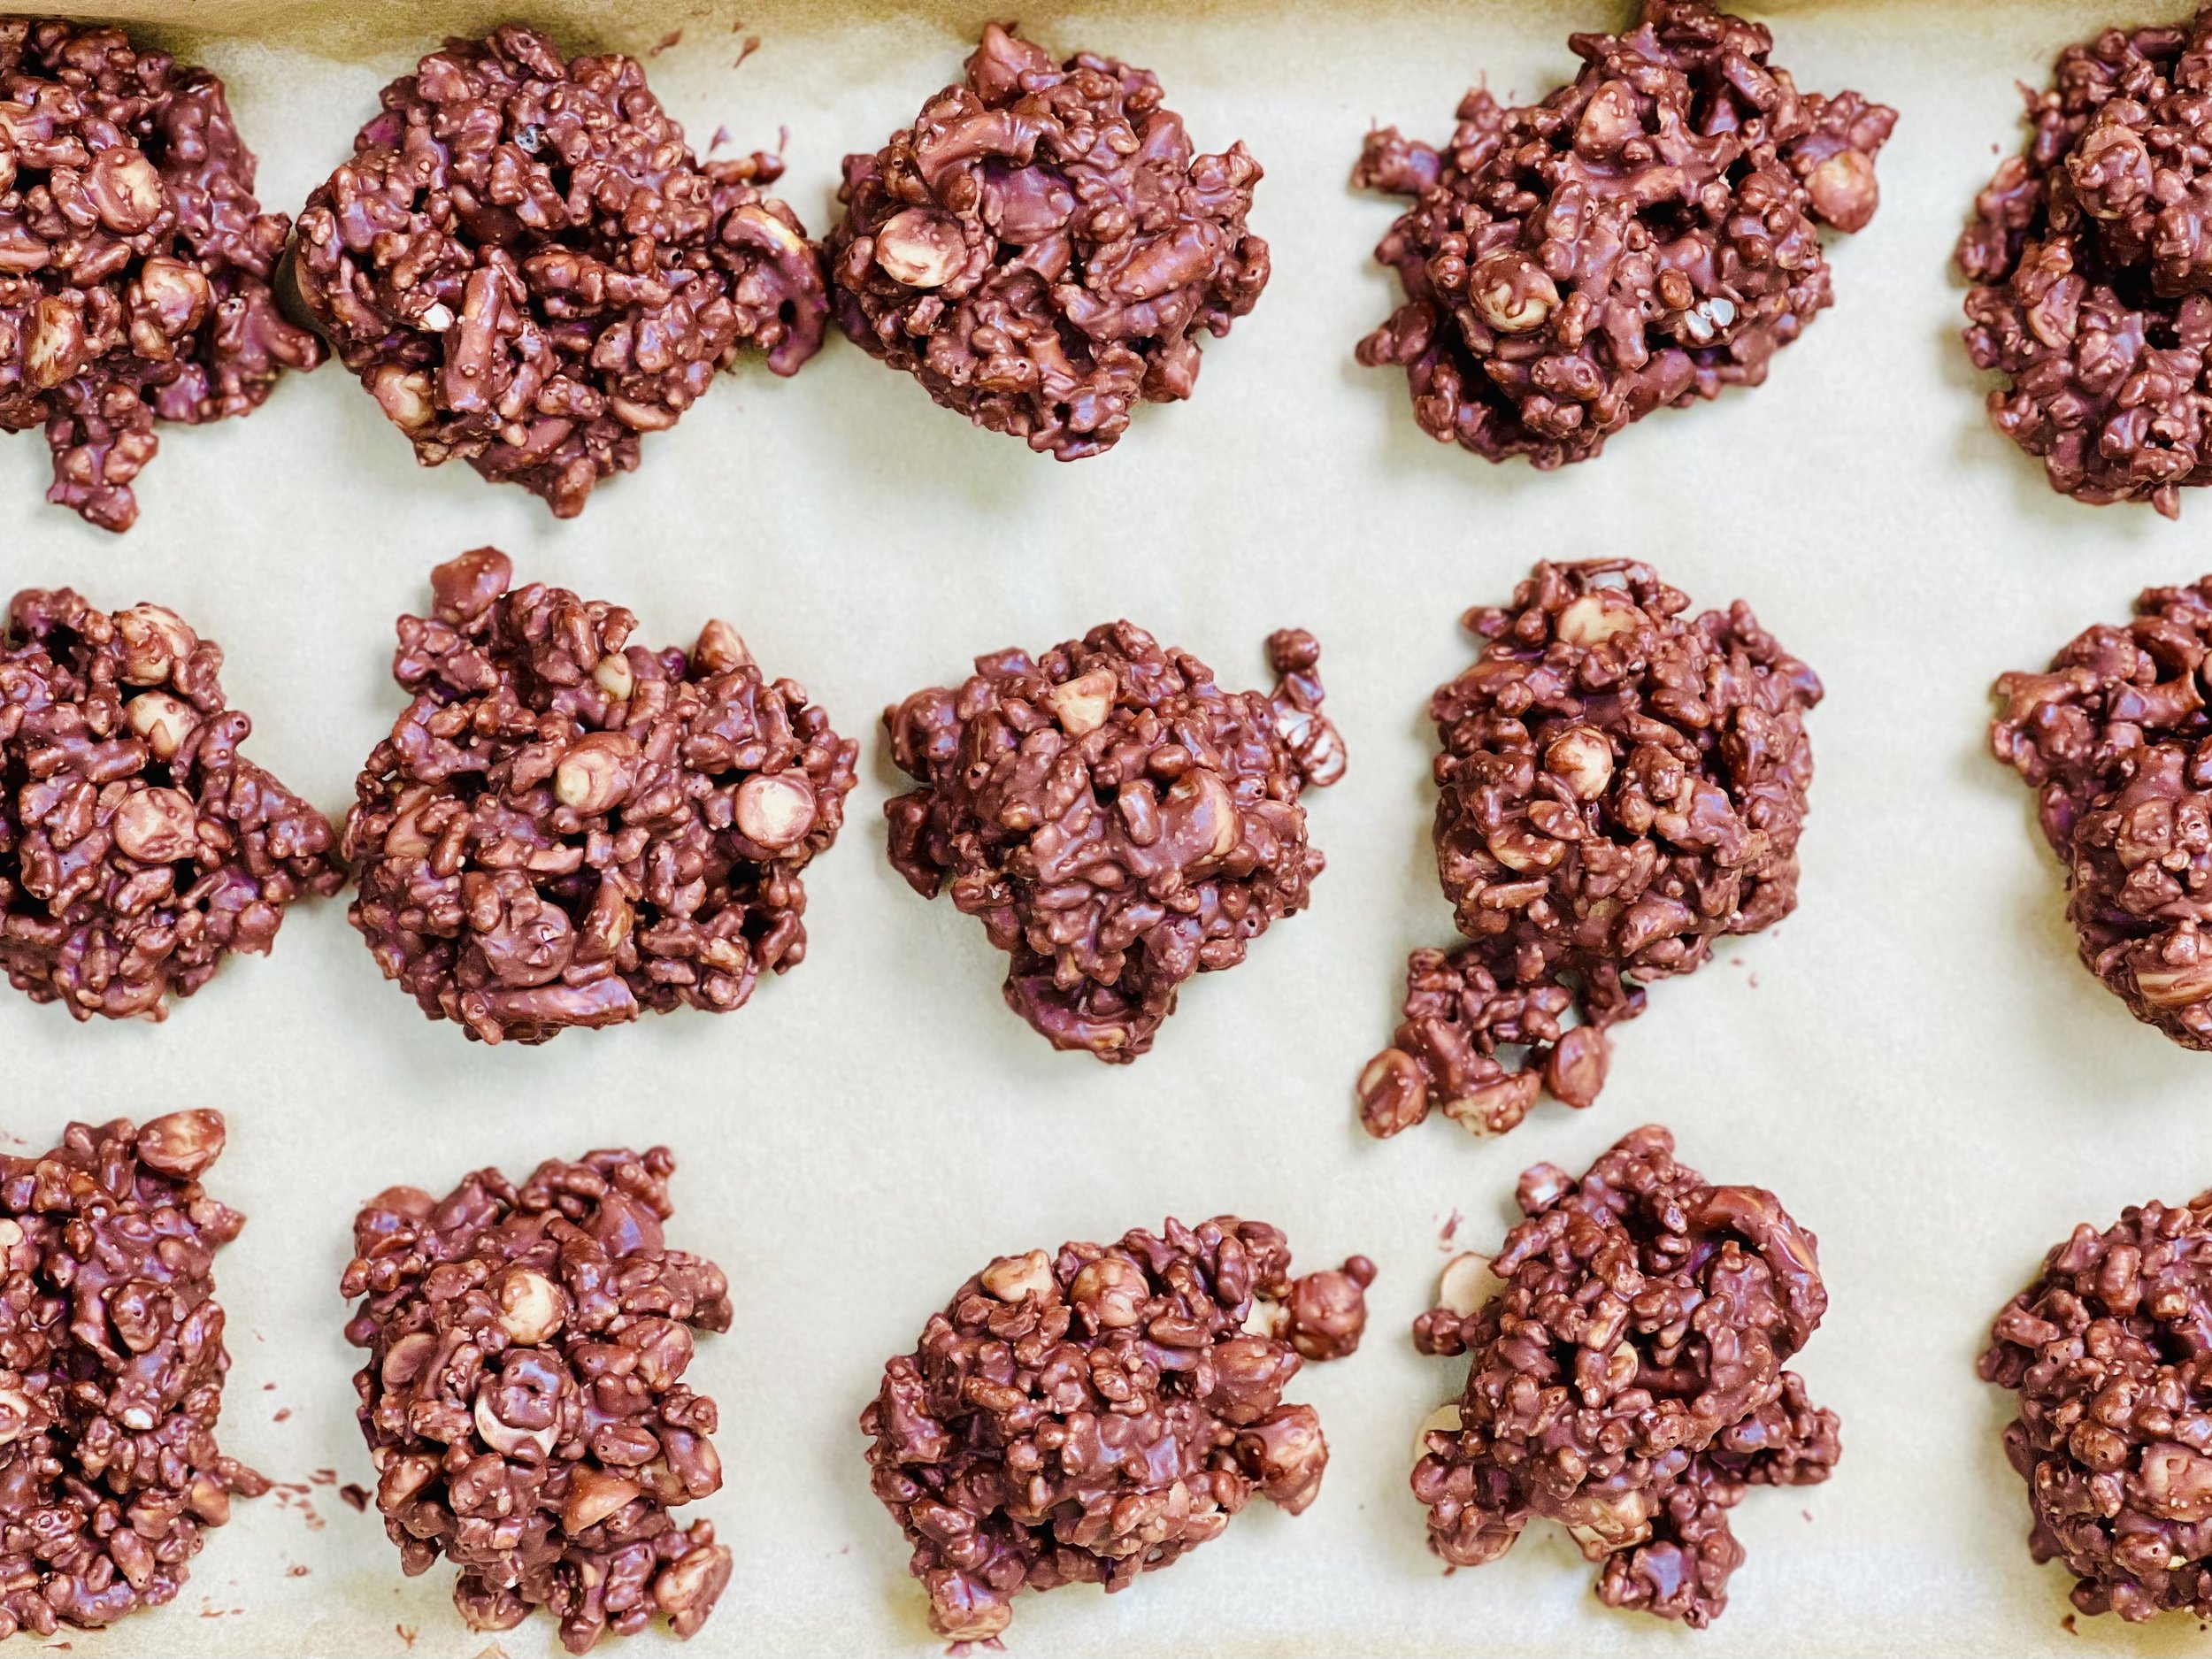
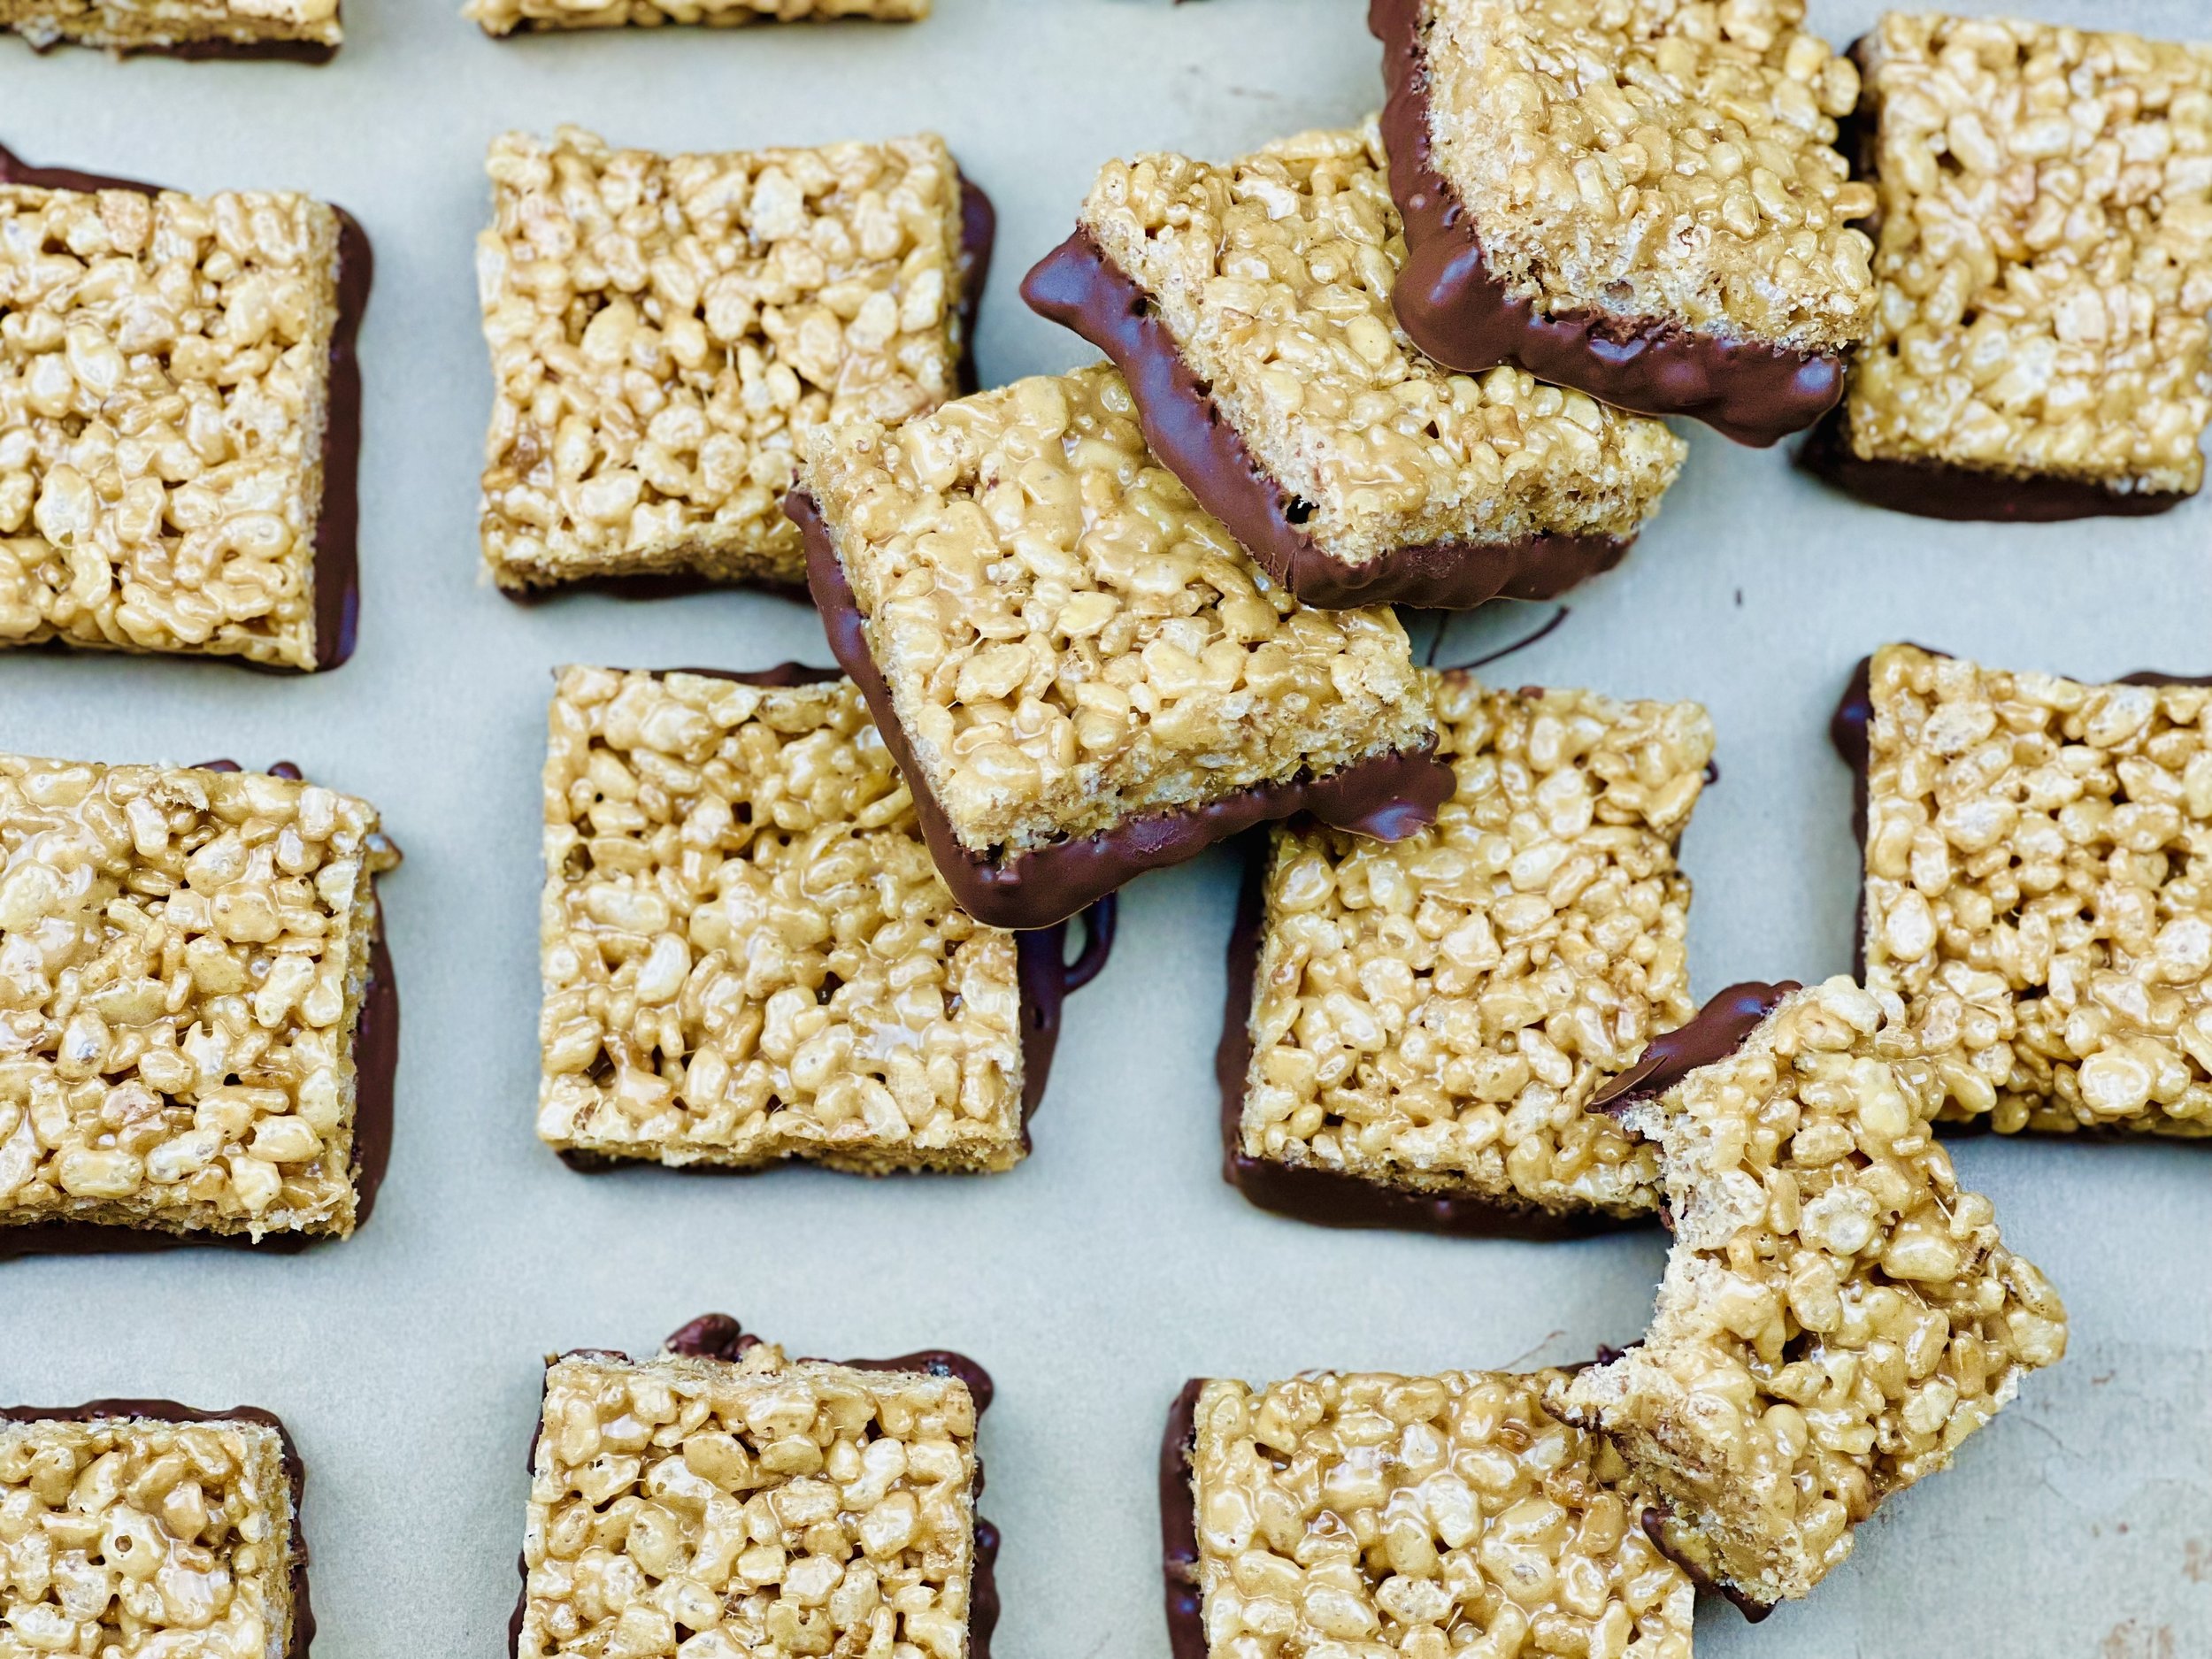
Chocolate Dipped Peanut Butter Rice Crispie Treats (low FODMAP)
5 Minutes prep • 30 Minutes cook/cool • Low FODMAP • Gluten-free • Makes 20 • Serving size: 1 - 2
5 Minutes prep • 30 Minutes cook/cool • Low FODMAP • Gluten-free • Makes 20 • Serving size: 1 - 2
Rice Crispie treats are one of those desserts I just love. They make me feel like I’m a kid at a bake sale with all kinds of goodies to choose from. And I always choose the Rice Crispie treat! This recipe brings together two of my favorite flavors, chocolate, and peanut butter, with the crisp rice cereal and marshmallows, to make the perfect (if a bit decadent) extra special treat! It’s chewy and chocolatey and peanut buttery—all at once.
This is an exclusive recipe just for recipe club members.
In addition to the two free recipes I create each week I am creating and delivering one very special recipe just for my recipe club members. If you’re not yet a member, I encourage you to join! Membership in the club includes access to the complete archive of recipes with filters so it can become your virtual low FODMAP cookbook plus, I am creating and delivering one special NEW recipe every week ONLY for recipe club members. And, for my true fans, I’ll be sharing behind-the-scenes content, and updates on the progress of the new cookbook.
Your membership in the club helps me continue creating new, delicious, easy-to-make, low FODMAP recipes just for you.
As always, all recipes will emphasize simple ingredients, easy preparation, and delicious low FODMAP results. Recipes will be for everything from main courses, salads, soups, side dishes, appetizers, desserts, sauces, breakfast and lunch, and even mocktails and cocktails. Everything you need to prepare fantastic low FODMAP meals everyone will love.
Join the club. Become a Patron. Let’s keep making delicious Low FODMAP meals together.
Link note: This post contains links for you to easily purchase items listed on the page. In some cases, we have provided a special discount code for IBS Game Changers so be sure to use it when you purchase an item to get the discount that has been arranged just for you! As an Amazon Associate, I earn a commission from qualifying Amazon purchases.
More Deliciously Low FODMAP™ dessert recipes
Pain and Inflammation: What it is, Why it Matters, How to Prevent it
Most of us with IBS have some degree of pain and inflammation in our bodies at any point in time — even if we have our IBS symptoms under excellent control. This article provides an explanation of what inflammation does to us along with a run down of very practical ways we can decrease inflammation in our bodies.
Most of us with IBS have some degree of pain and inflammation in our bodies at any point in time — even if we have our IBS symptoms under excellent control. This article, written by my amazing sister, Sarah Aitken, RN, MS, WHNP/FNP, and featured in her program, Diabetes Game Changer, is an excellent explanation of what inflammation does to us along with a run down of very practical ways we can decrease inflammation in our bodies. After reading this article, I learned some important things I will incorporate into my life and my practice and I wanted to share it with you so you can benefit from her teaching as well.

Let’s Talk Pain and Inflammation!
By Sarah Aitken, RN, MS, WHNP/FNP, Diabetes Game Changer Program
I have been a Nurse Practitioner for many years, and during that time I would guess that I have diagnosed hundreds of people with various chronic inflammatory conditions, including Fibromyalgia, Celiac Disease, Rheumatoid Arthritis, Lupus, inflammatory bowel disease, multiple sclerosis, and more. These diseases can affect almost any organ in the body, and in most cases more than one organ.
Classic signs of inflammation include joint stiffness, muscle pain, trigger point pain, bowel problems, rashes, sleep problems, fatigue, fevers, confusion, and memory loss.
But little known to the lay person are the diseases CAUSED by chronic inflammation, including cancer, heart disease, diabetes, Alzheimer’s, depression, and more.
In the medical community, we refer to inflammation as “the secret killer.”
In 1891 American oncologist William Coley noticed a connection between bacterial infections and cancer tumor regression, and he developed extracts of bacteria that he used to try to intentionally reduce tumor size in humans. He called them “Coley’s toxins.”
Eventually, further research isolated the beneficial component in the “toxin” as a lipopolysaccharide created by the bacteria used by Coley, and researcher M. Shear was the first to demonstrate its ability to reduce tumors in animal studies.
Today we know that TNF (Tumor Necrosis Factor) is an extremely important component of our immune system and is critical for protection against infection.
In addition, we have developed medical therapies that use TNF to reduce tumor size.
However, TNF is a double-edged sword.
More IBS Game Changer Tips and Tools


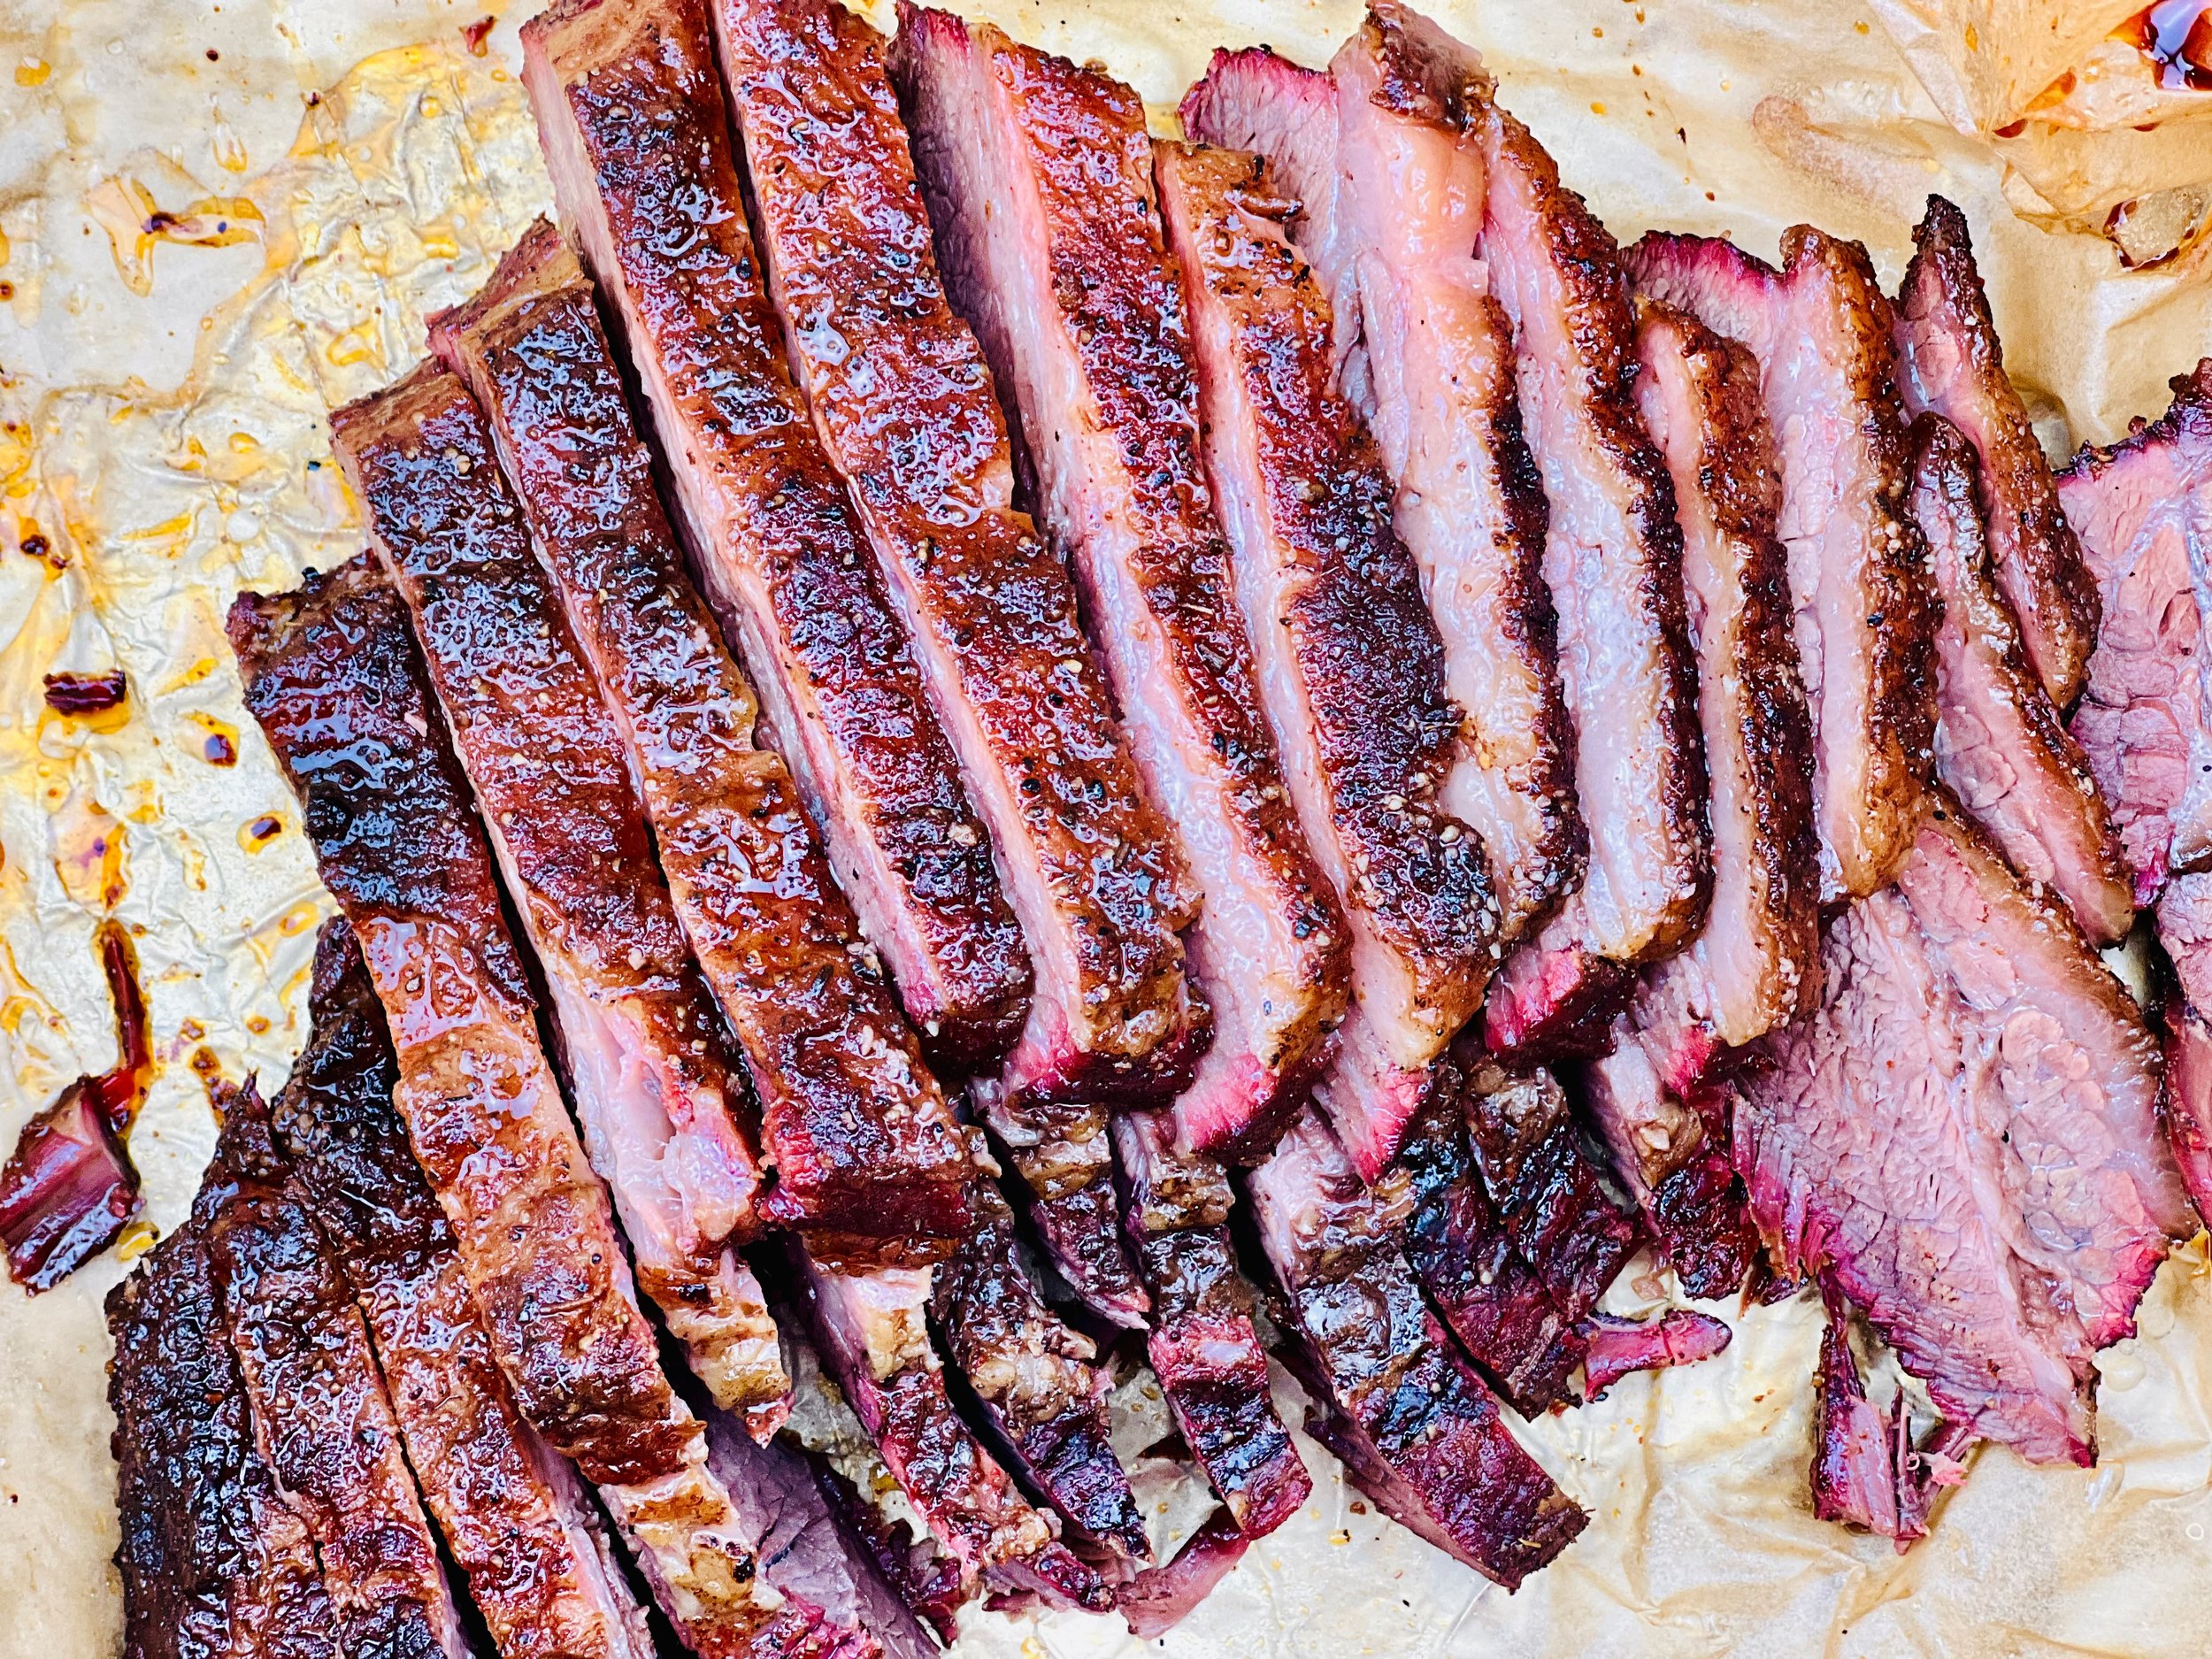
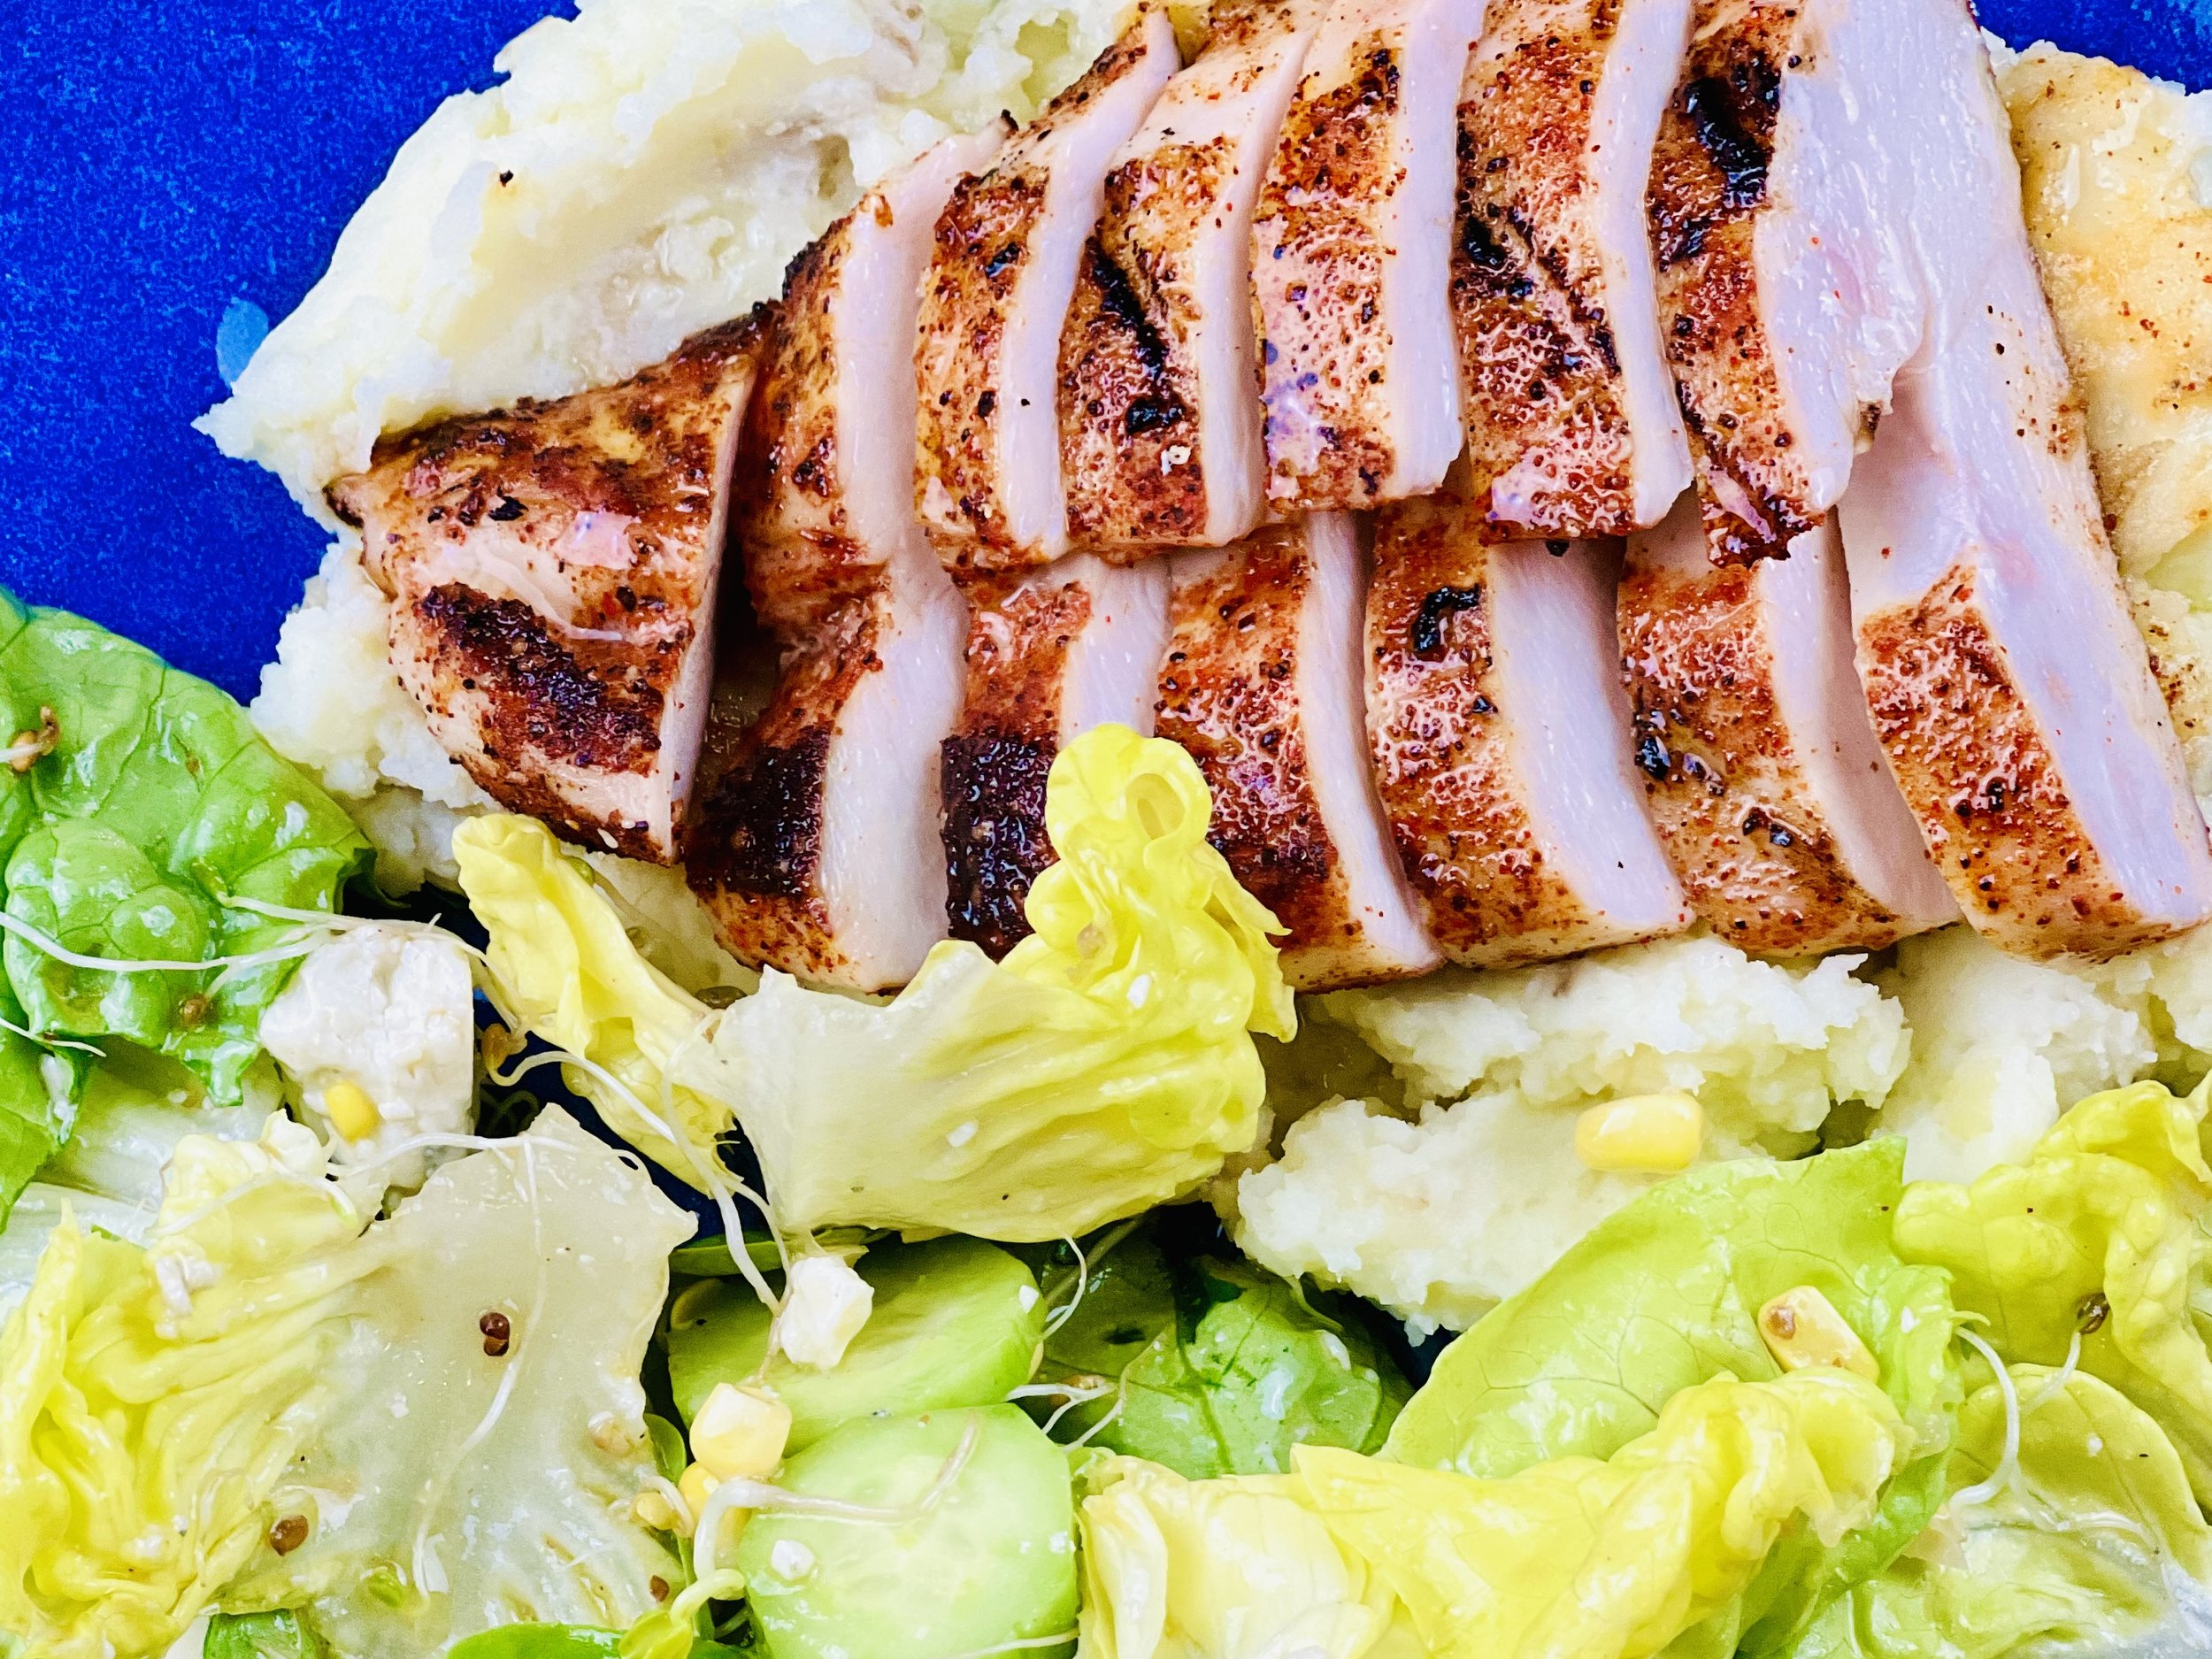
Perfectly Tender Grilled Chicken (low FODMAP)
10 Minutes prep • 20 Minutes cook • Low FODMAP • Gluten-free • Serves 2
10 Minutes prep • 20 Minutes cook • Low FODMAP • Gluten-free • Serves 2 • Ok to make-ahead: Step 1
Tender, juicy chicken breasts are not impossible. It’s all in the seasoning, timing, and temperature. Pair them up with a crisp green salad, some mashed Yukon Gold potatoes, and a bit of melted butter and you’ve got a wonderful low FODMAP meal the whole family will enjoy.
Ingredients
2 boneless skinless chicken breasts
3 tablespoons low FODMAP all purpose seasoning (I used Smoke N Sanity Triple S All Purpose Seasoning use code IBSGC10 for a 10% discount)
2 tablespoons salted butter, melted
Directions
(1) Prepare the chicken: This step is optional but results in a more flavorful and tender chicken. Remove chicken from the package and put it in one layer on a rimmed plate or baking dish. Season both sides of each piece lightly with Kosher salt. Cover the dish with plastic wrap and refrigerate until ready to use, ideally about 4 hours before cooking or overnight.
(2) Season the chicken: Sprinkle the Triple S seasoning evenly over both sides of each chicken breast.
(3) Cook the chicken: Preheat your smoker or barbecue to 350 degrees F. After about 10 minutes, when the grill is hot, place the chicken directly on the grill grates. Close the lid and cook for 10 - 15 minutes (20 minutes if the breasts are quite large). Cook only until the internal temperature of the thickest part of the chicken breast is 165 degrees F. Check every few minutes so you don’t overcook them.
(4) Prepare the sides: Meanwhile, make the mashed potatoes or rice and salad
(5) Finish: Remove chicken from the grill, cover with foil, and let rest for 5 minutes before slicing and serving.
(6) Plate and serve: Slice the chicken and serve on a bed of mashed Yukon Gold potatoes. Drizzle the chicken and potatoes with the melted butter. Serve alongside a nice green salad for a perfect meal.
Recipe note: I use Diamond Crystal Kosher salt in all my recipes because it has a wonderful flat and crisp flake that tastes delicious. It is also the least salty salt available so you can use it more liberally as a seasoning than you can table salt or sea salt. If you use another type of salt, you may need to reduce the amount so it is not over-salted.
Link note: This post contains links for you to easily purchase items listed on the page. In some cases, we have provided a special discount code for IBS Game Changers so be sure to use it when you purchase an item to get the discount that has been arranged just for you! As an Amazon Associate, I earn a commission from qualifying Amazon purchases.
More Deliciously Low FODMAP™ main course recipes
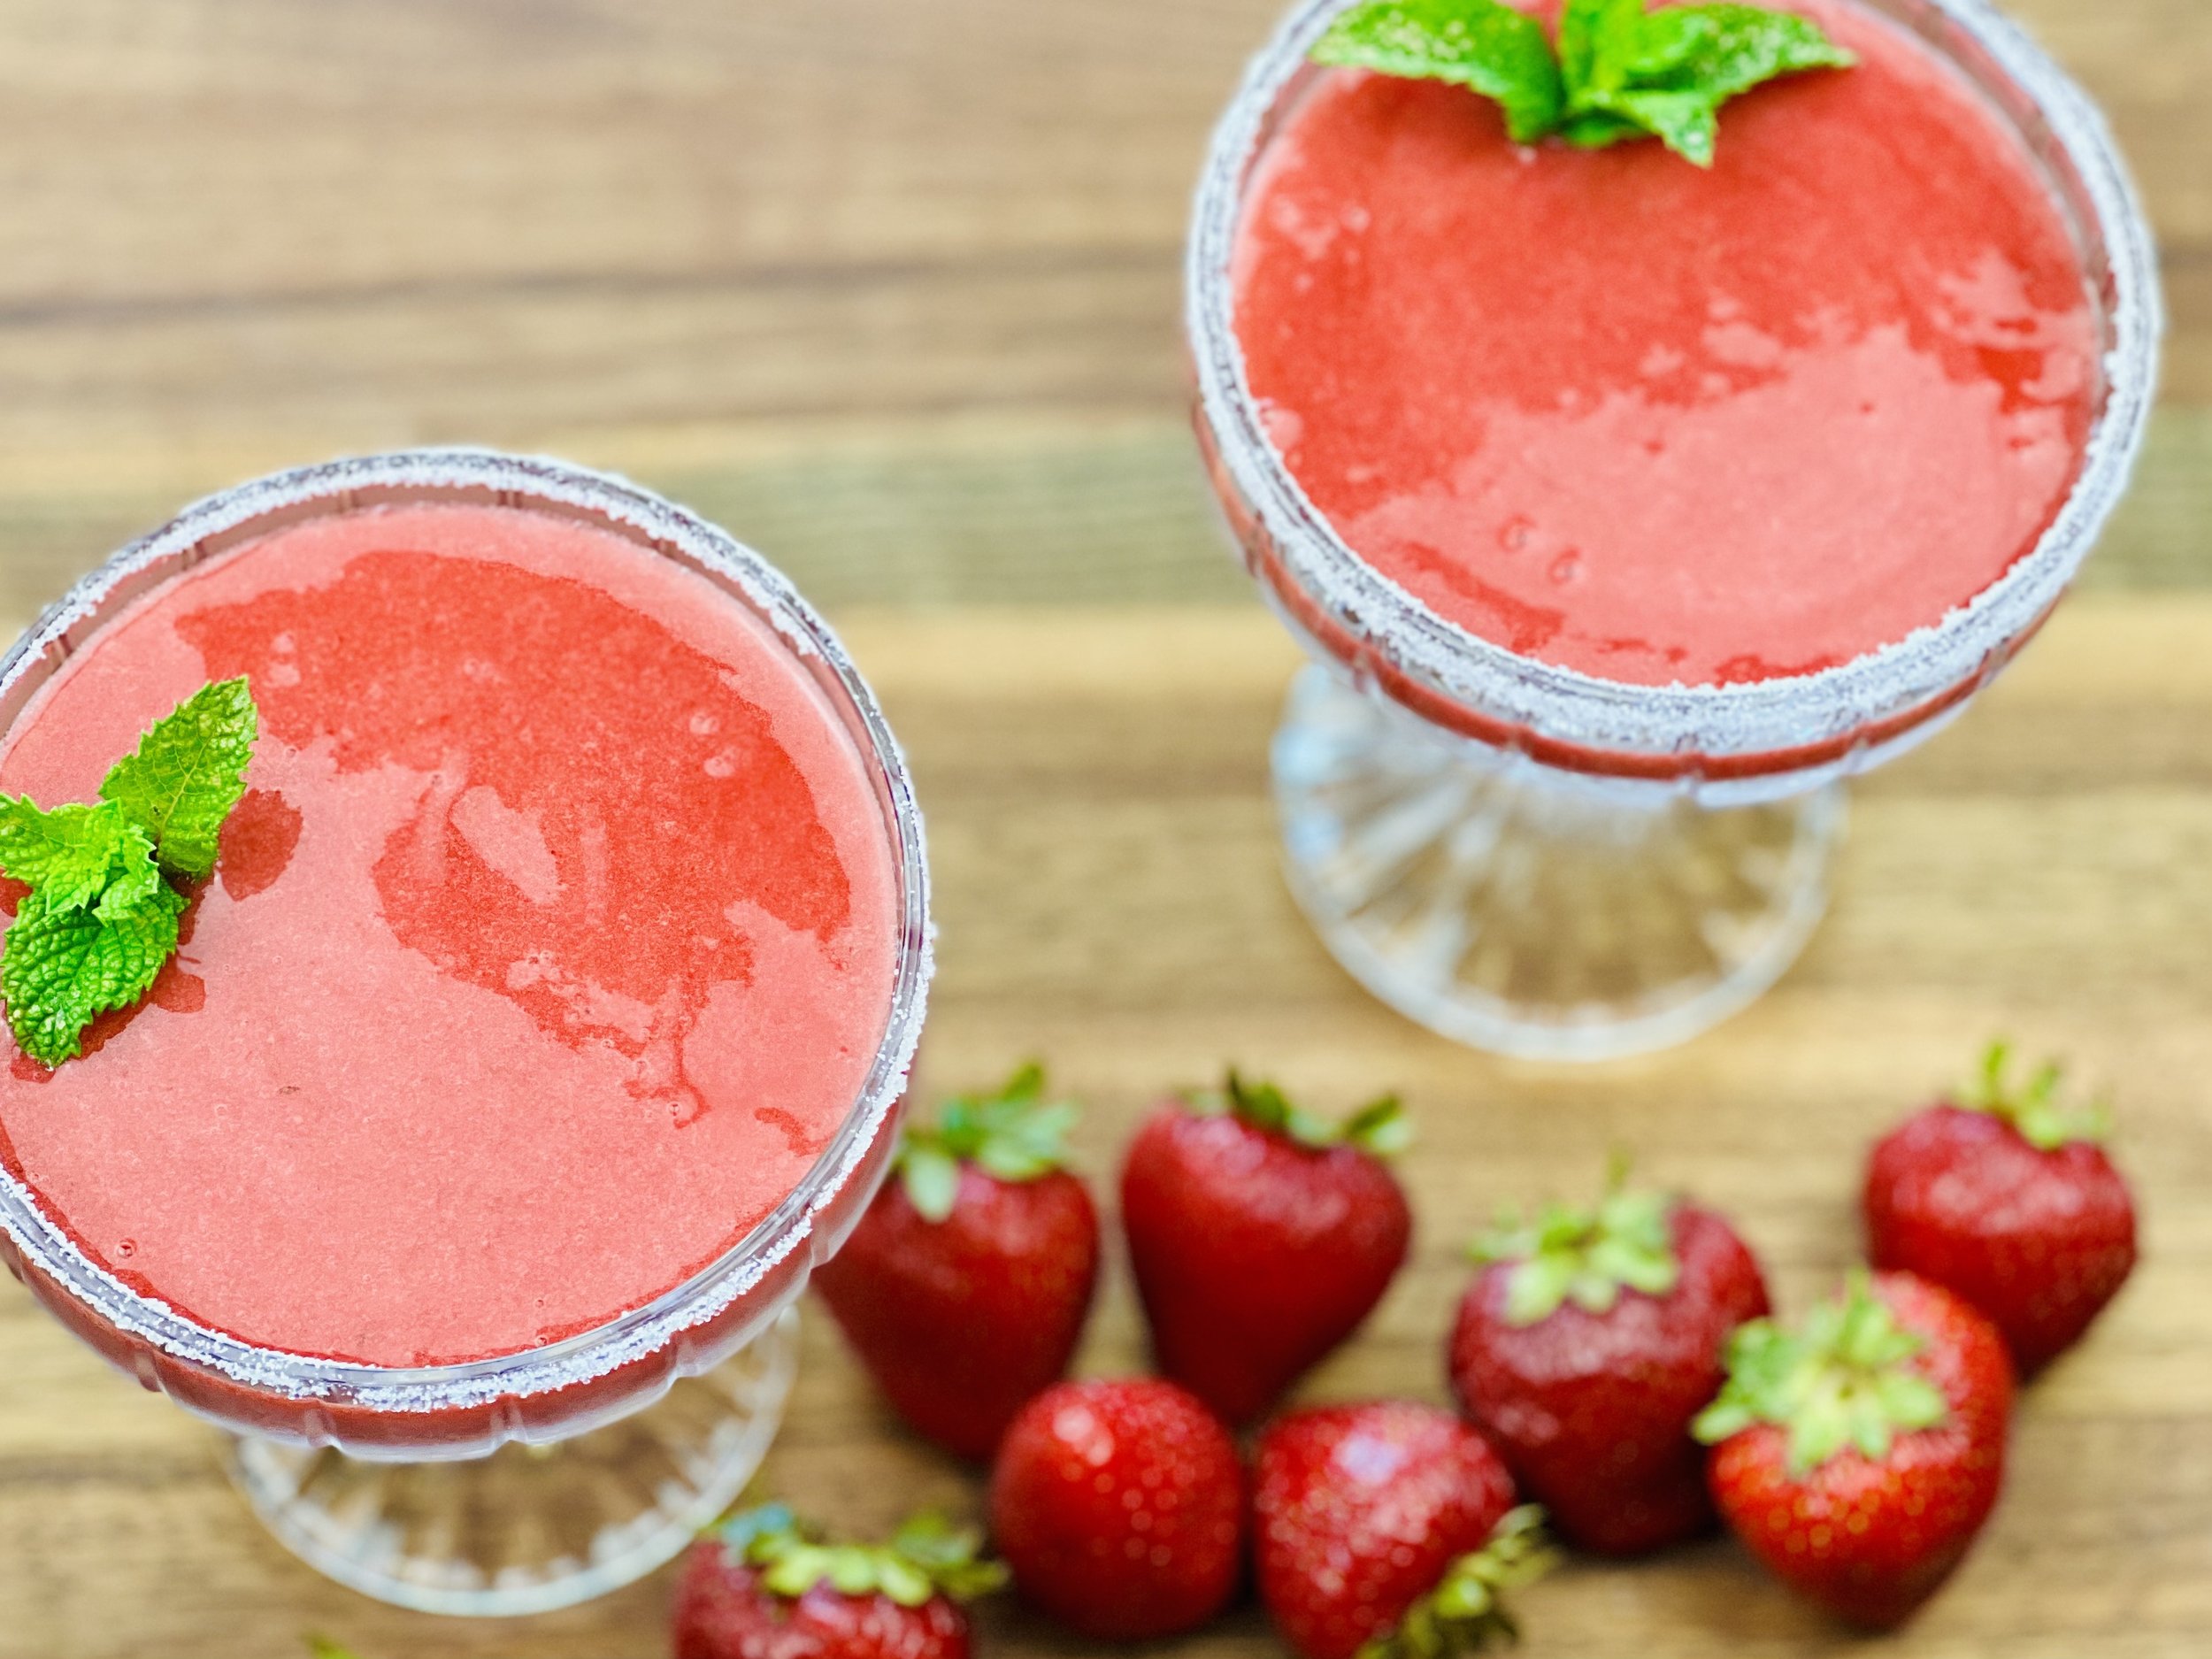
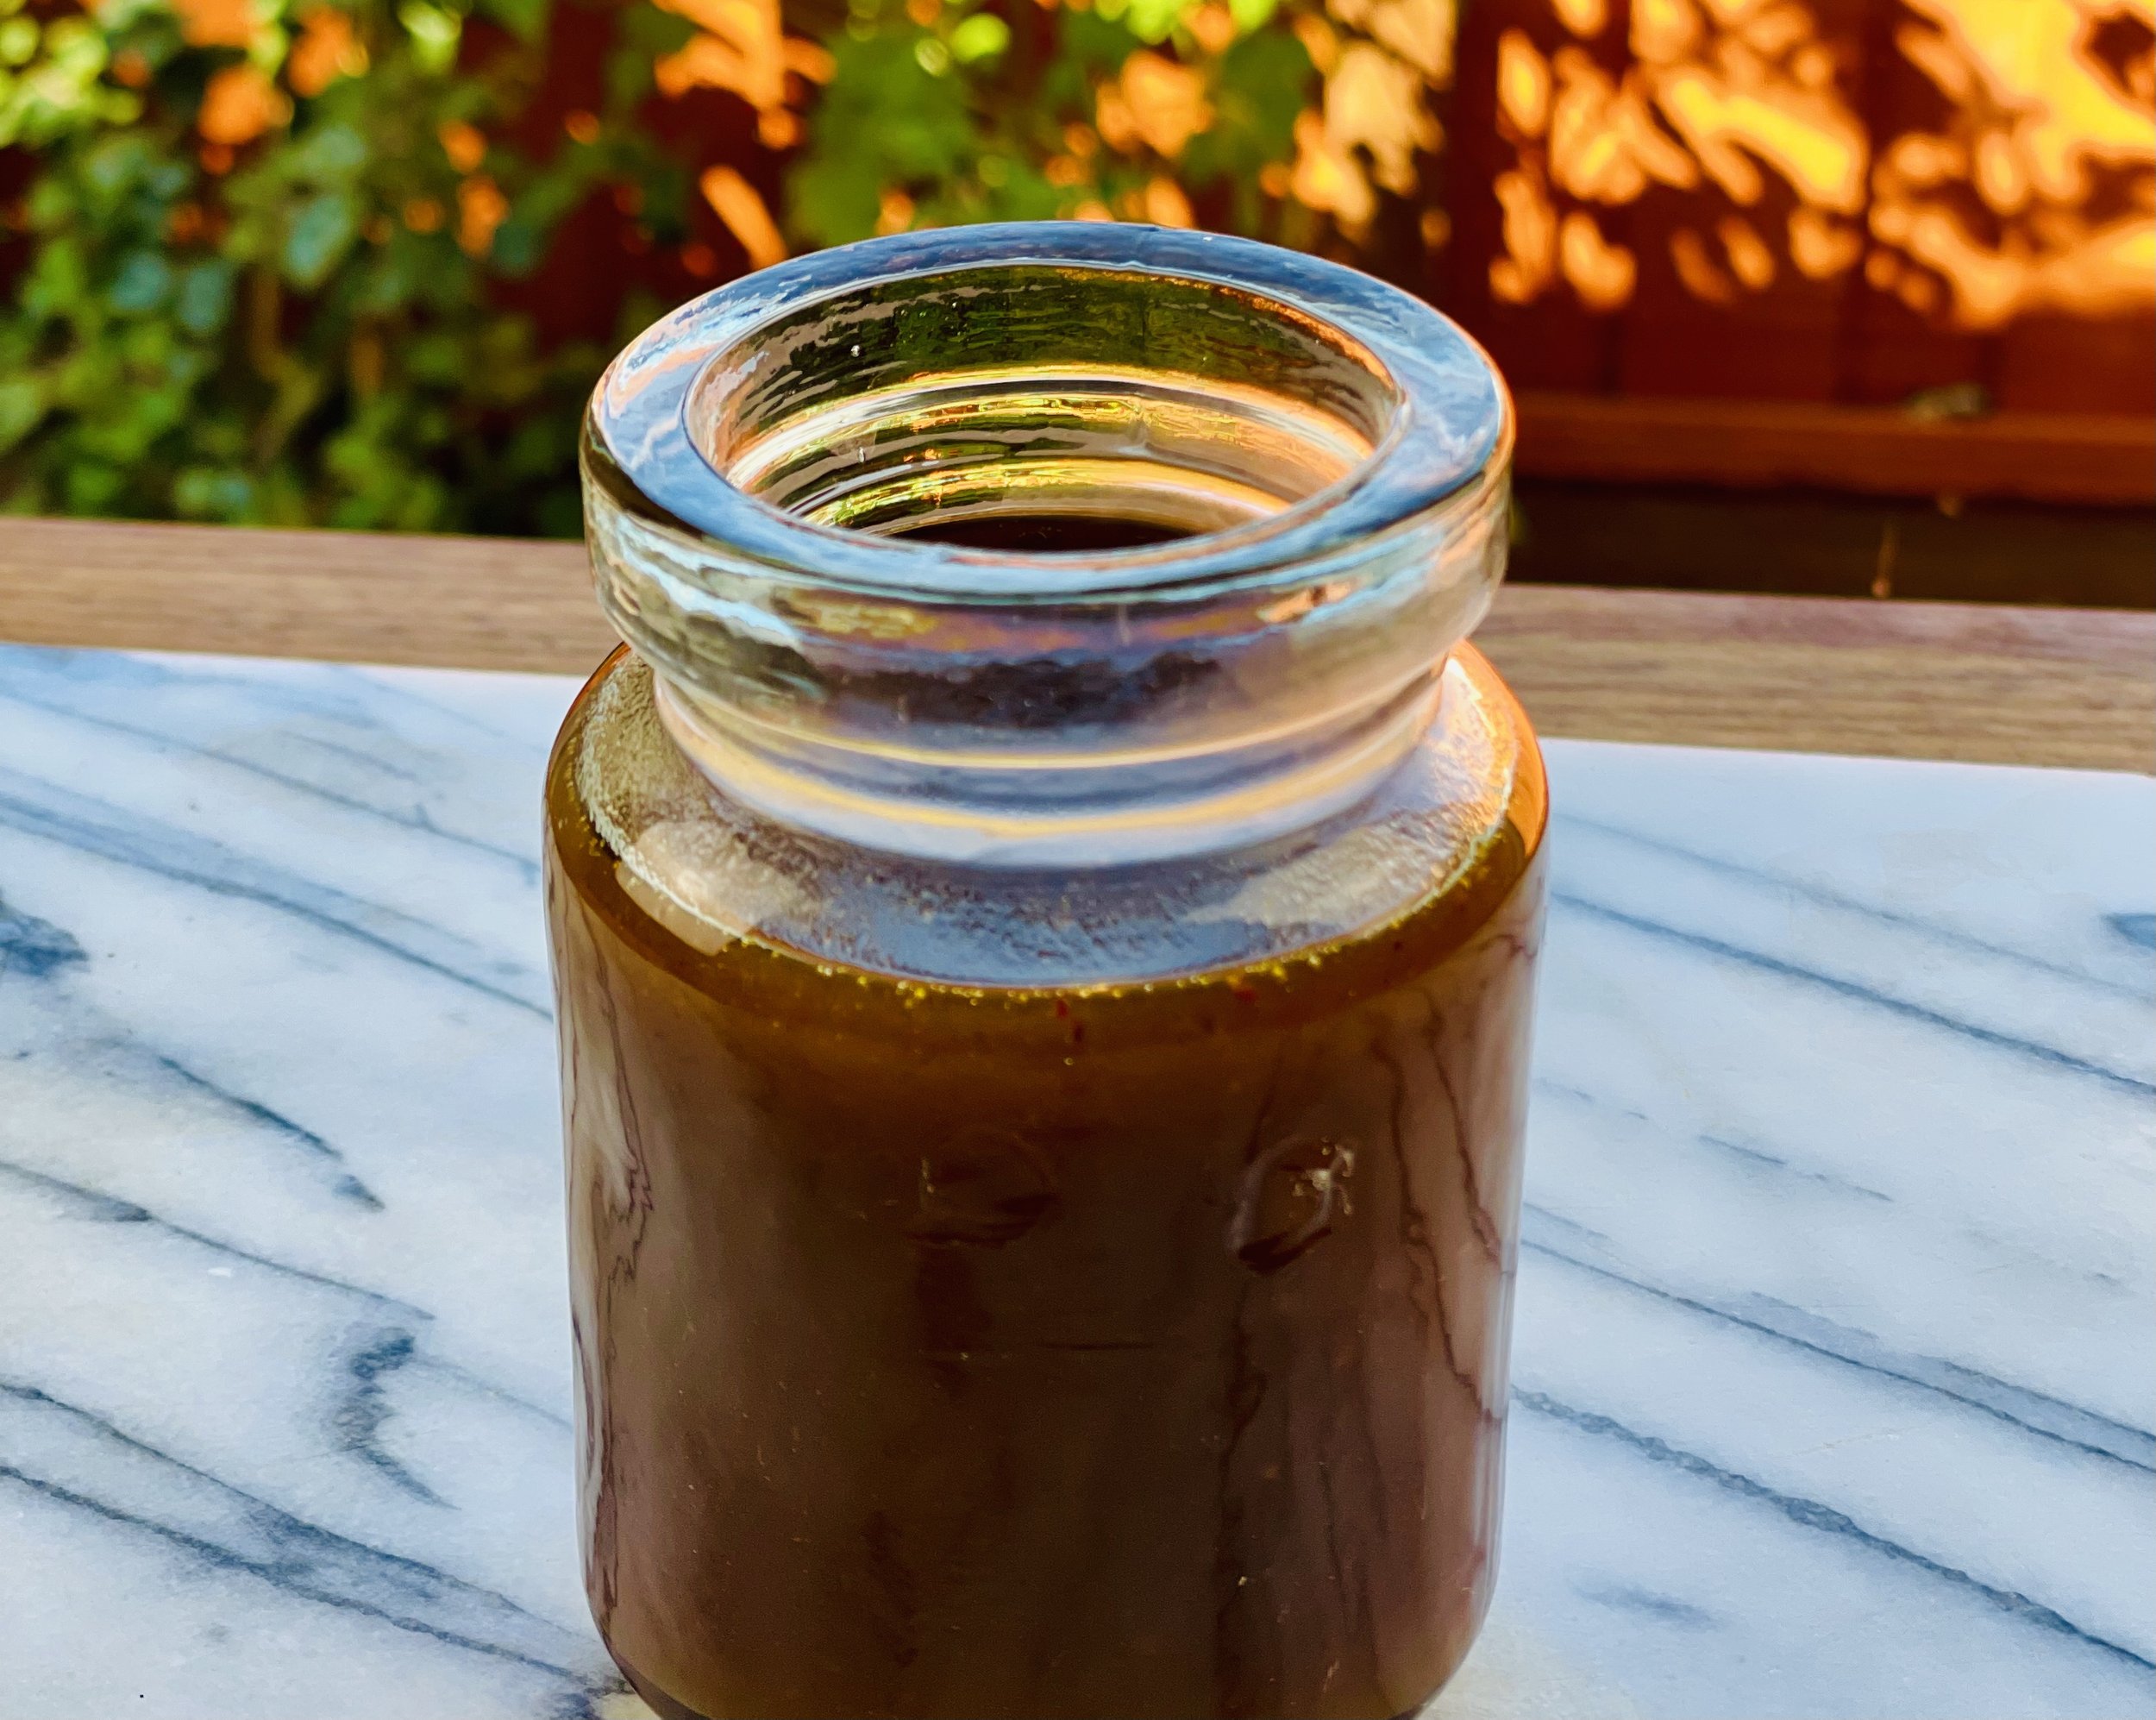
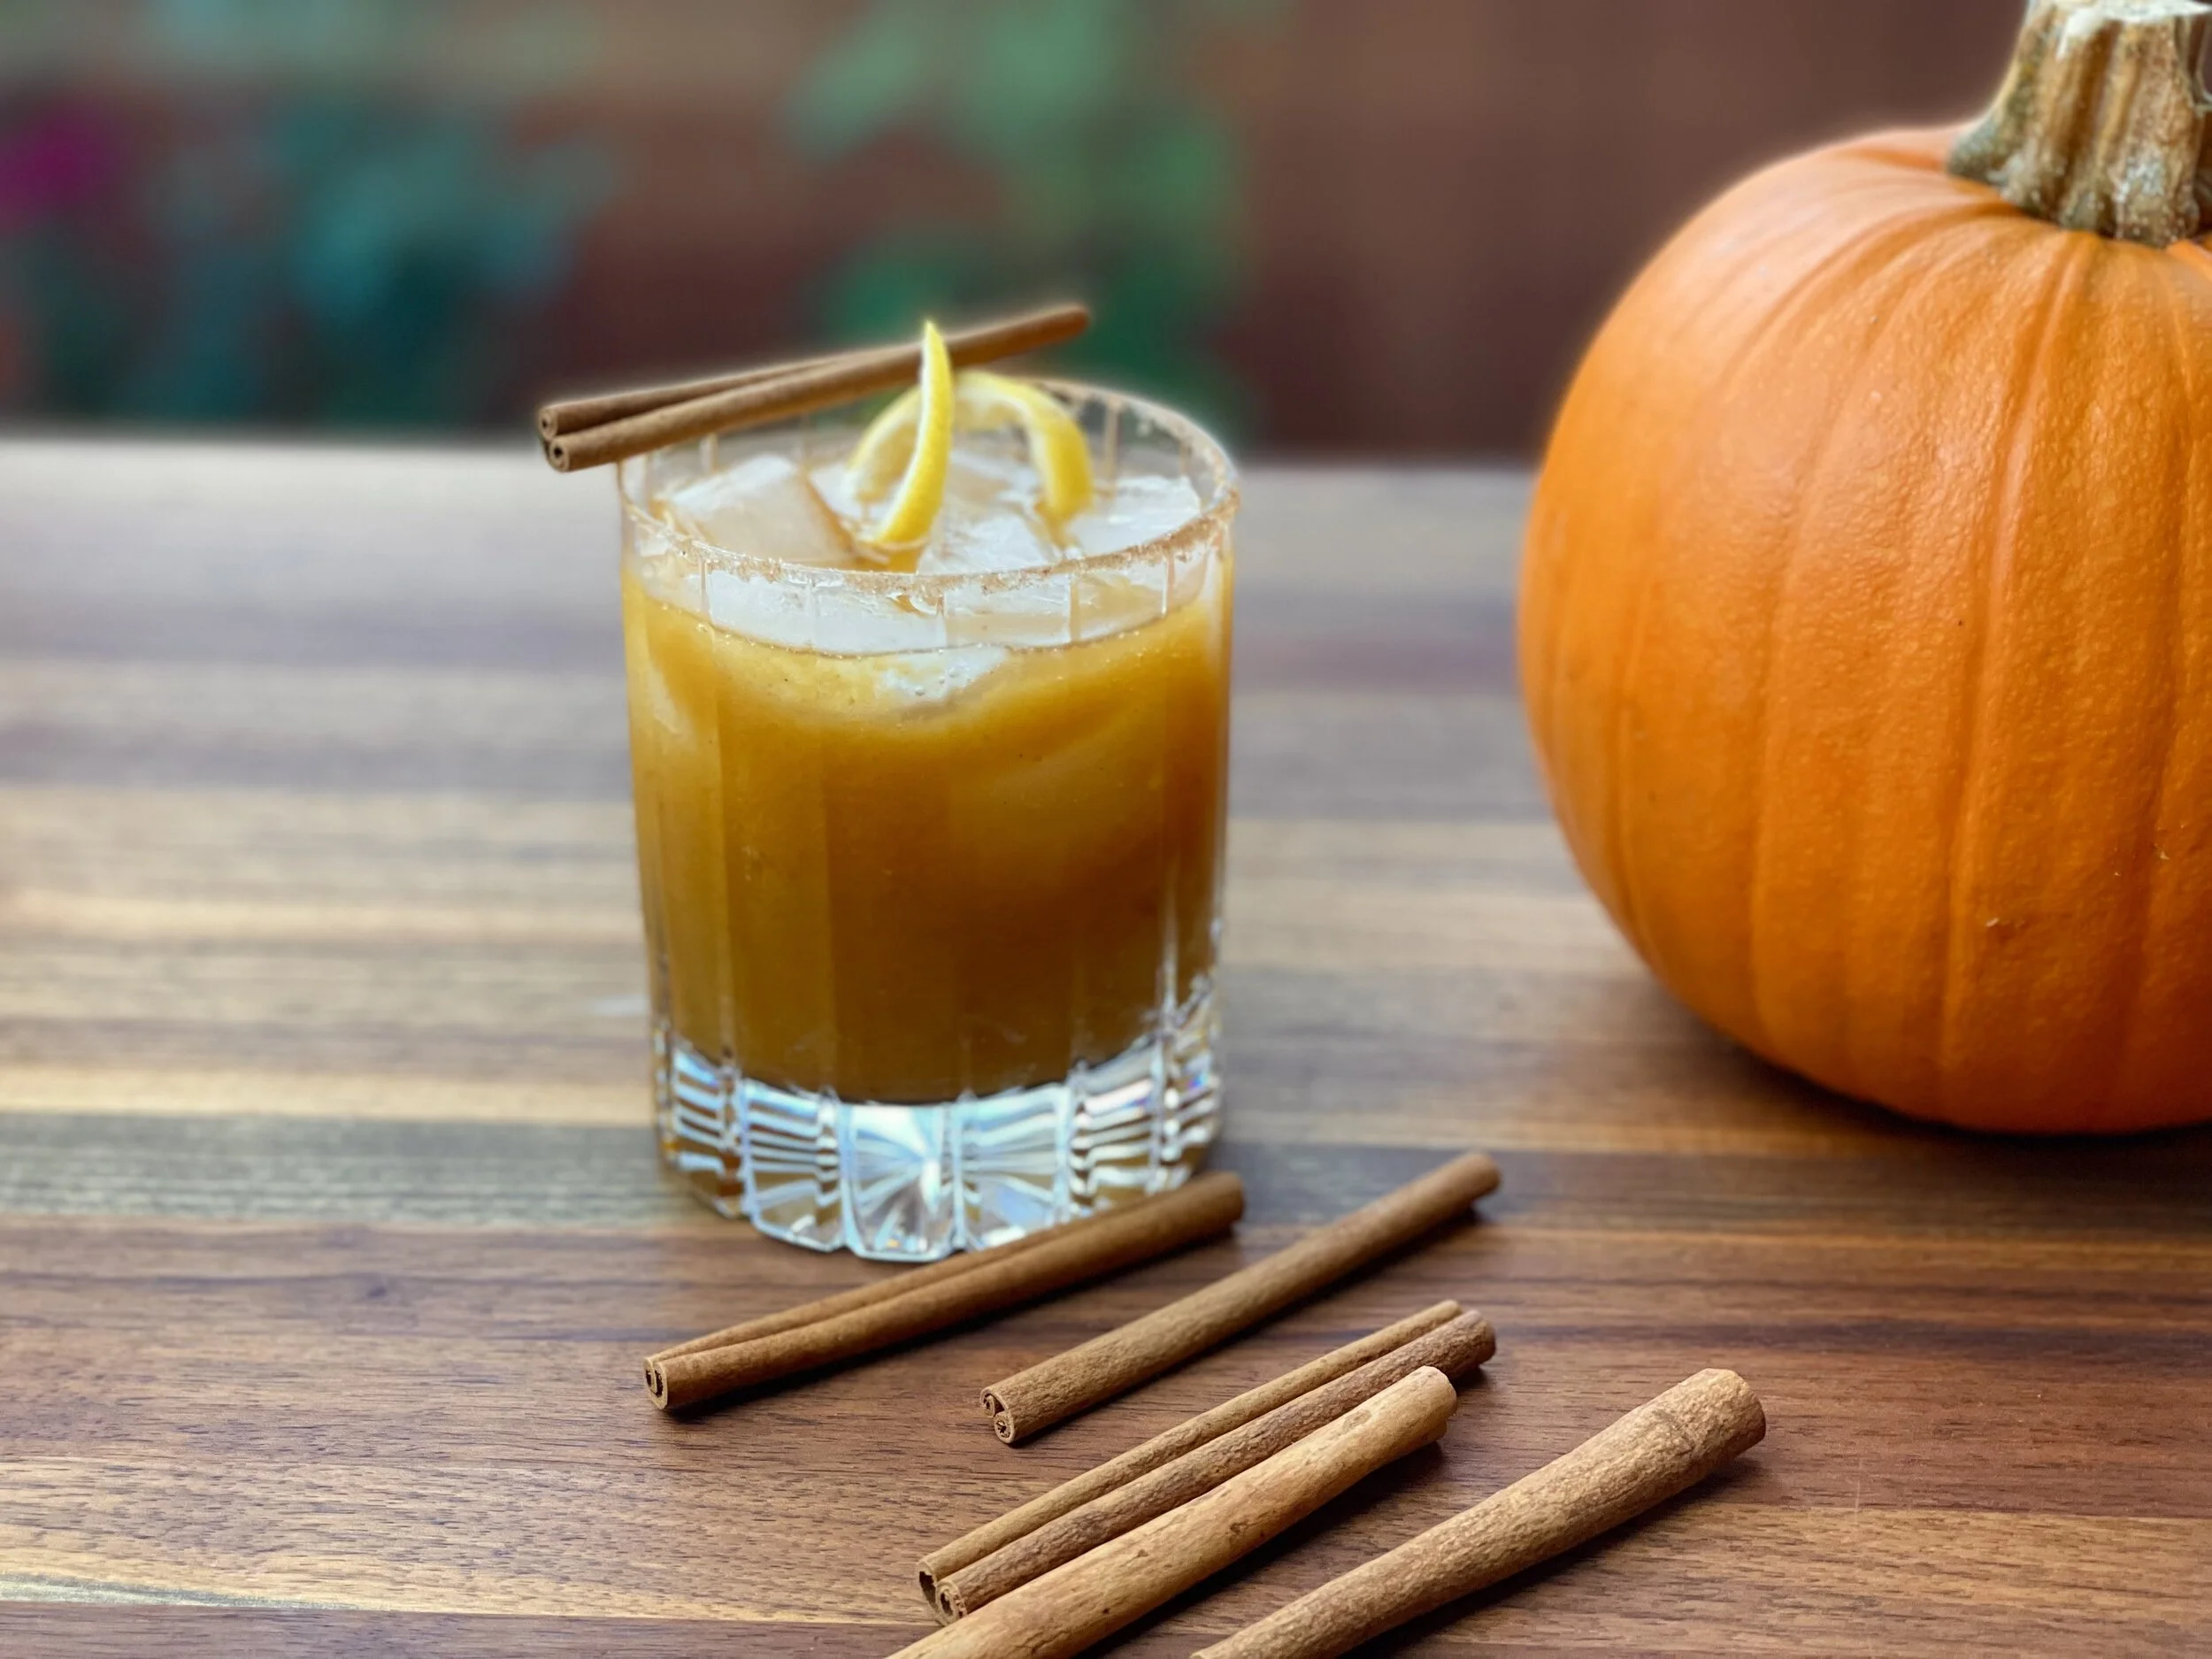
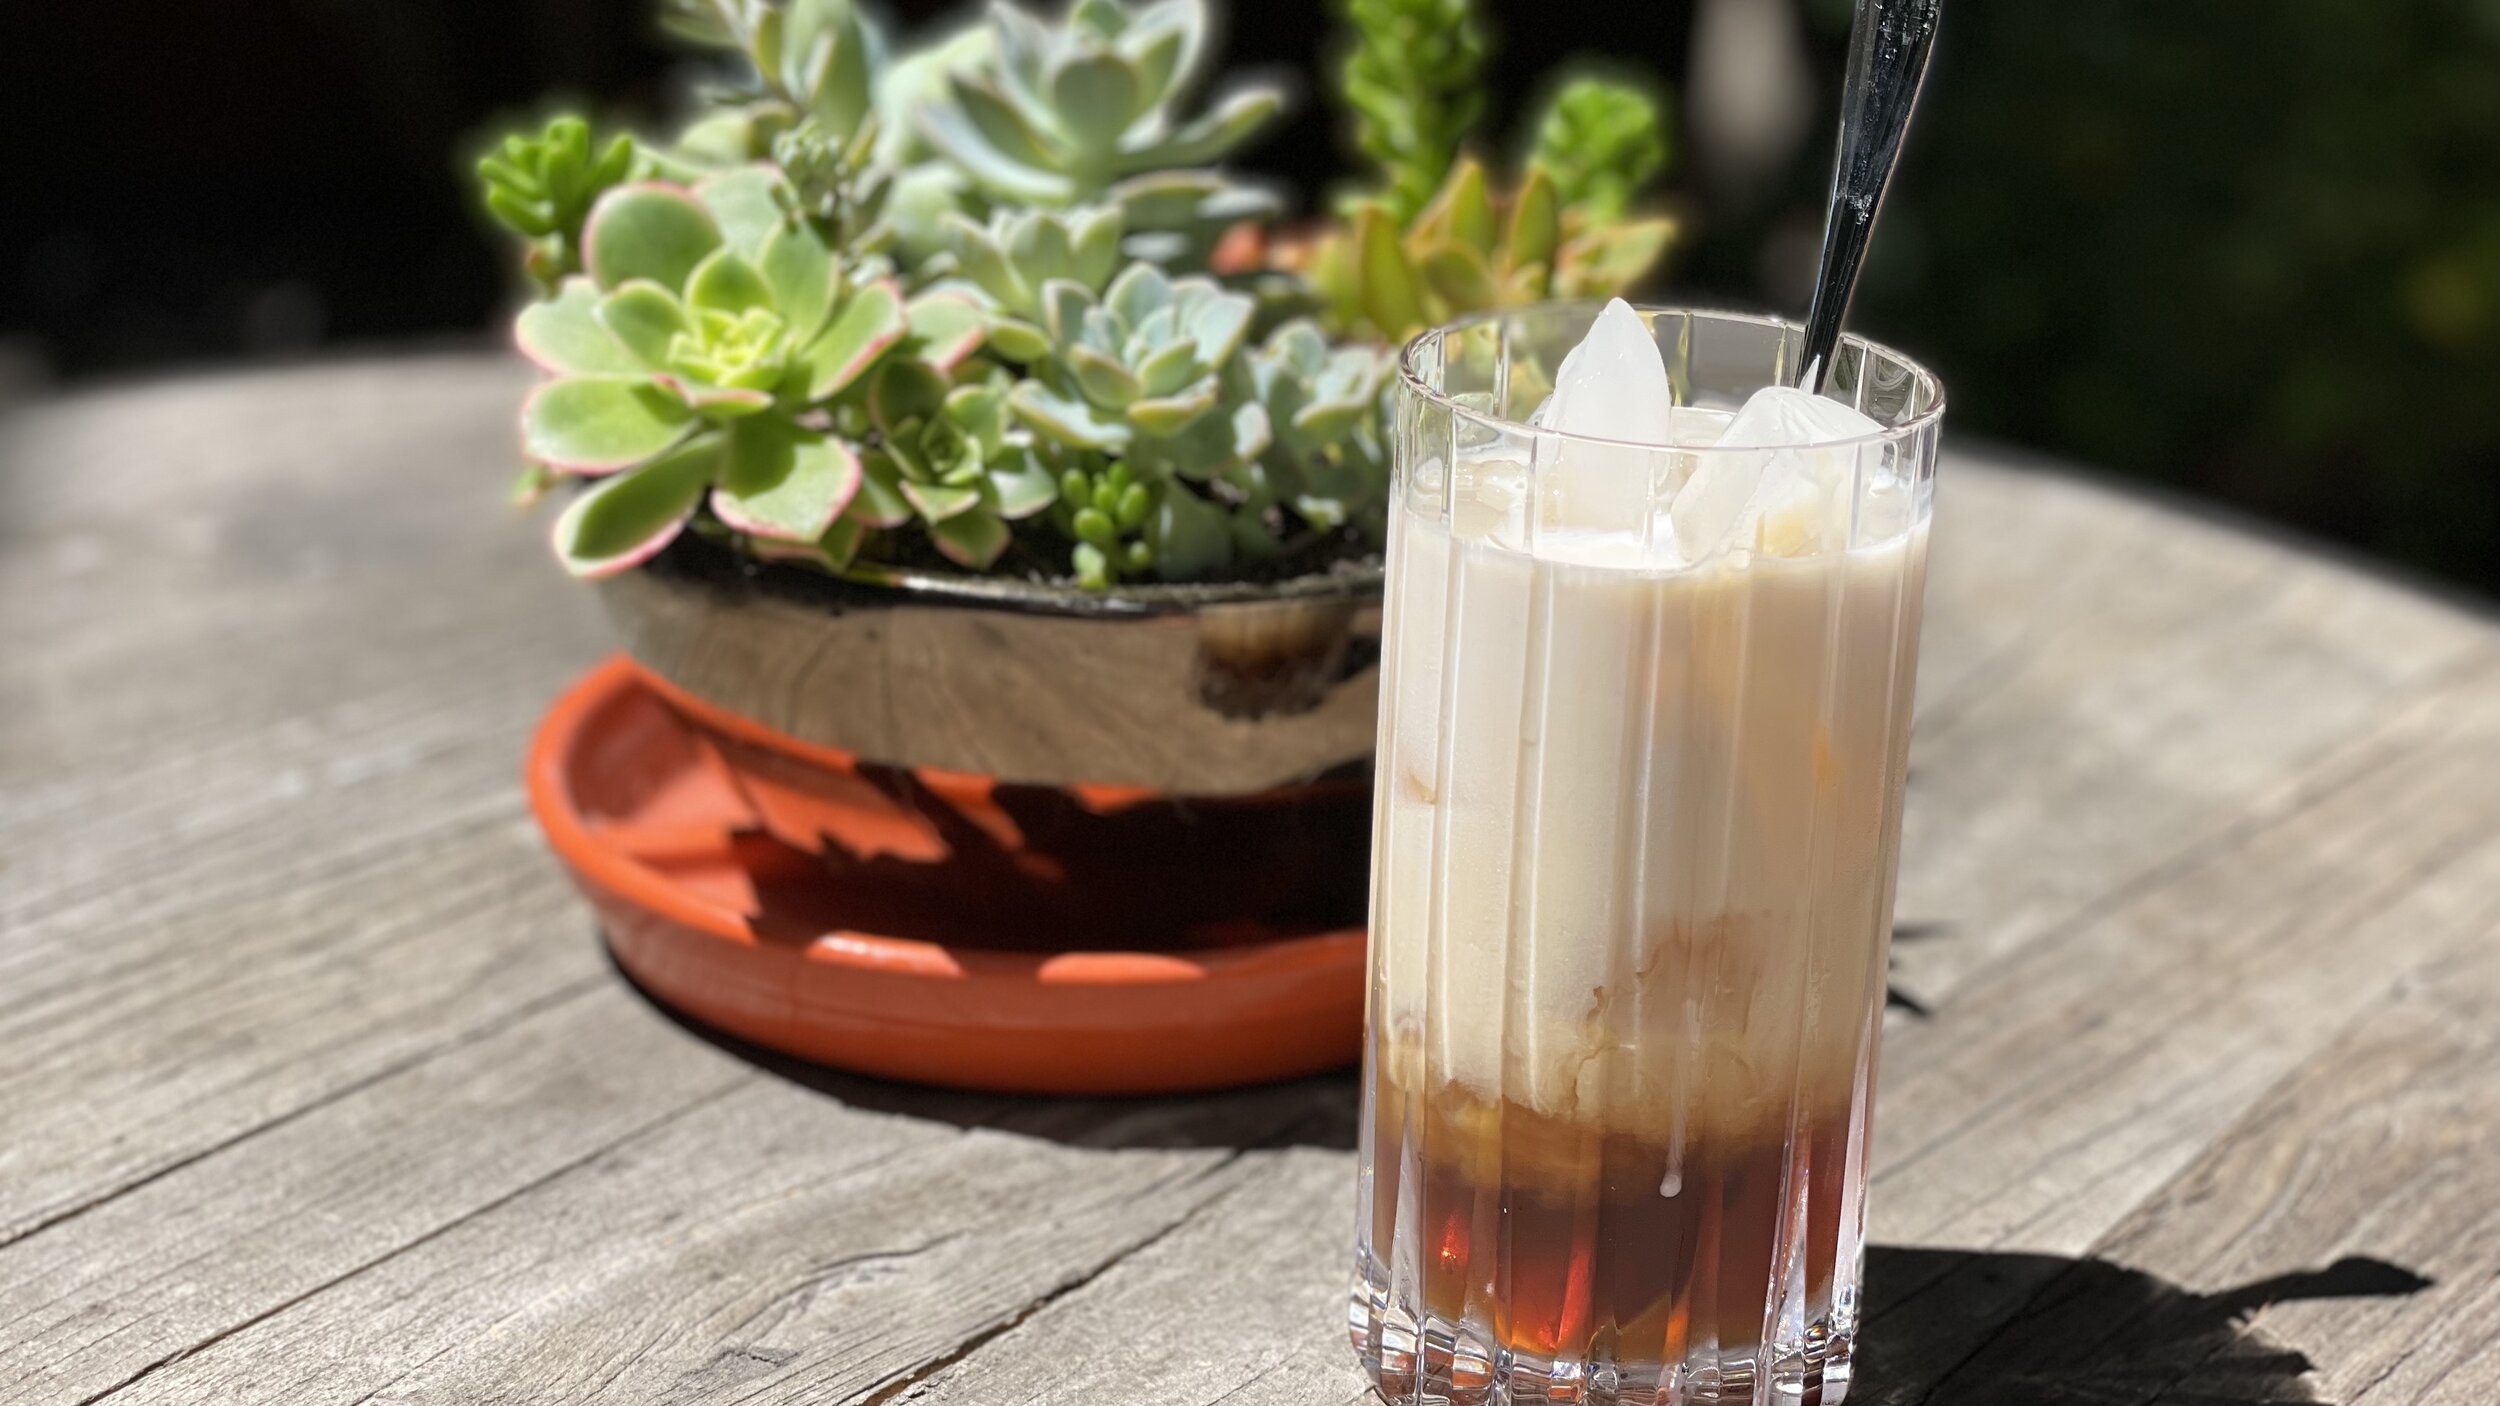
Strawberry Mint Margarita (low FODMAP)
10 Minutes prep • 30 Minutes cook • Low FODMAP • Serves 2
10 Minutes prep • 30 Minutes cook • Low FODMAP • Serves 2 • Ok to make ahead: Steps 1-3
It’s strawberry season, so I’m whipping up a few low FODMAP strawberry treats for you to enjoy. The strawberry syrup in this recipe makes the perfect base for a fancy margarita but it would be equally good over vanilla ice cream for dessert! Make this margarita as a cocktail or a mocktail and enjoy the intense strawberry flavor and vivid color.
Ingredients: Strawberry Syrup
1 pint (about 3 cups) fresh strawberries, quartered
1/2 cup granulated sugar
1 teaspoon lemon juice
6 fresh mint leaves
Ingredients: Margarita
3/4 cup strawberry syrup
3/4 cup crushed ice
2 ounces tequila (I used Don Julio Blanco) - OK to leave this out for a “mocktail” version
2 tablespoons sugar (for rimming the glasses with sugar)
Directions
(1) Prepare: Wash and quarter the strawberries.
(2) Make the strawberry syrup: In a medium saucepan combine the strawberries, sugar, mint leaves, and lemon juice. Stir to combine and bring the mixture to a simmer. Simmer uncovered, over medium-low heat, for 30 minutes, stirring often. Remove from the heat and let cool completely (put it in the refrigerator if you’re in a hurry).
(3) Rim the glasses with sugar: Spread the 2 tablespoons of sugar on a shallow plate. Use one of the quartered strawberries to moisten the rim of each of your glasses. Dip the moistened rim in the sugar a few times until the entire rim is sugared. Set the glasses aside until you’re ready to fill them.
(4) Blend the margarita: In a blender, combine 3/4 cup of the strawberry syrup with 3/4 cup crushed ice. Add 2 ounces of tequila (if using). Blend until smooth. If it’s too thick, add a bit more strawberry syrup. If it’s too thin, add a bit more ice. Blend until smooth.
(5) Finish: Pour into prepared glasses and garnish with mint leaves.
Sip and enjoy every bit because you can!
Link note: This post contains links for you to easily purchase items listed on the page. In some cases, we have provided a special discount code for IBS Game Changers so be sure to use it when you purchase an item to get the discount that has been arranged just for you! As an Amazon Associate, I earn a commission from qualifying Amazon purchases.
More Deliciously Low FODMAP™ drink recipes


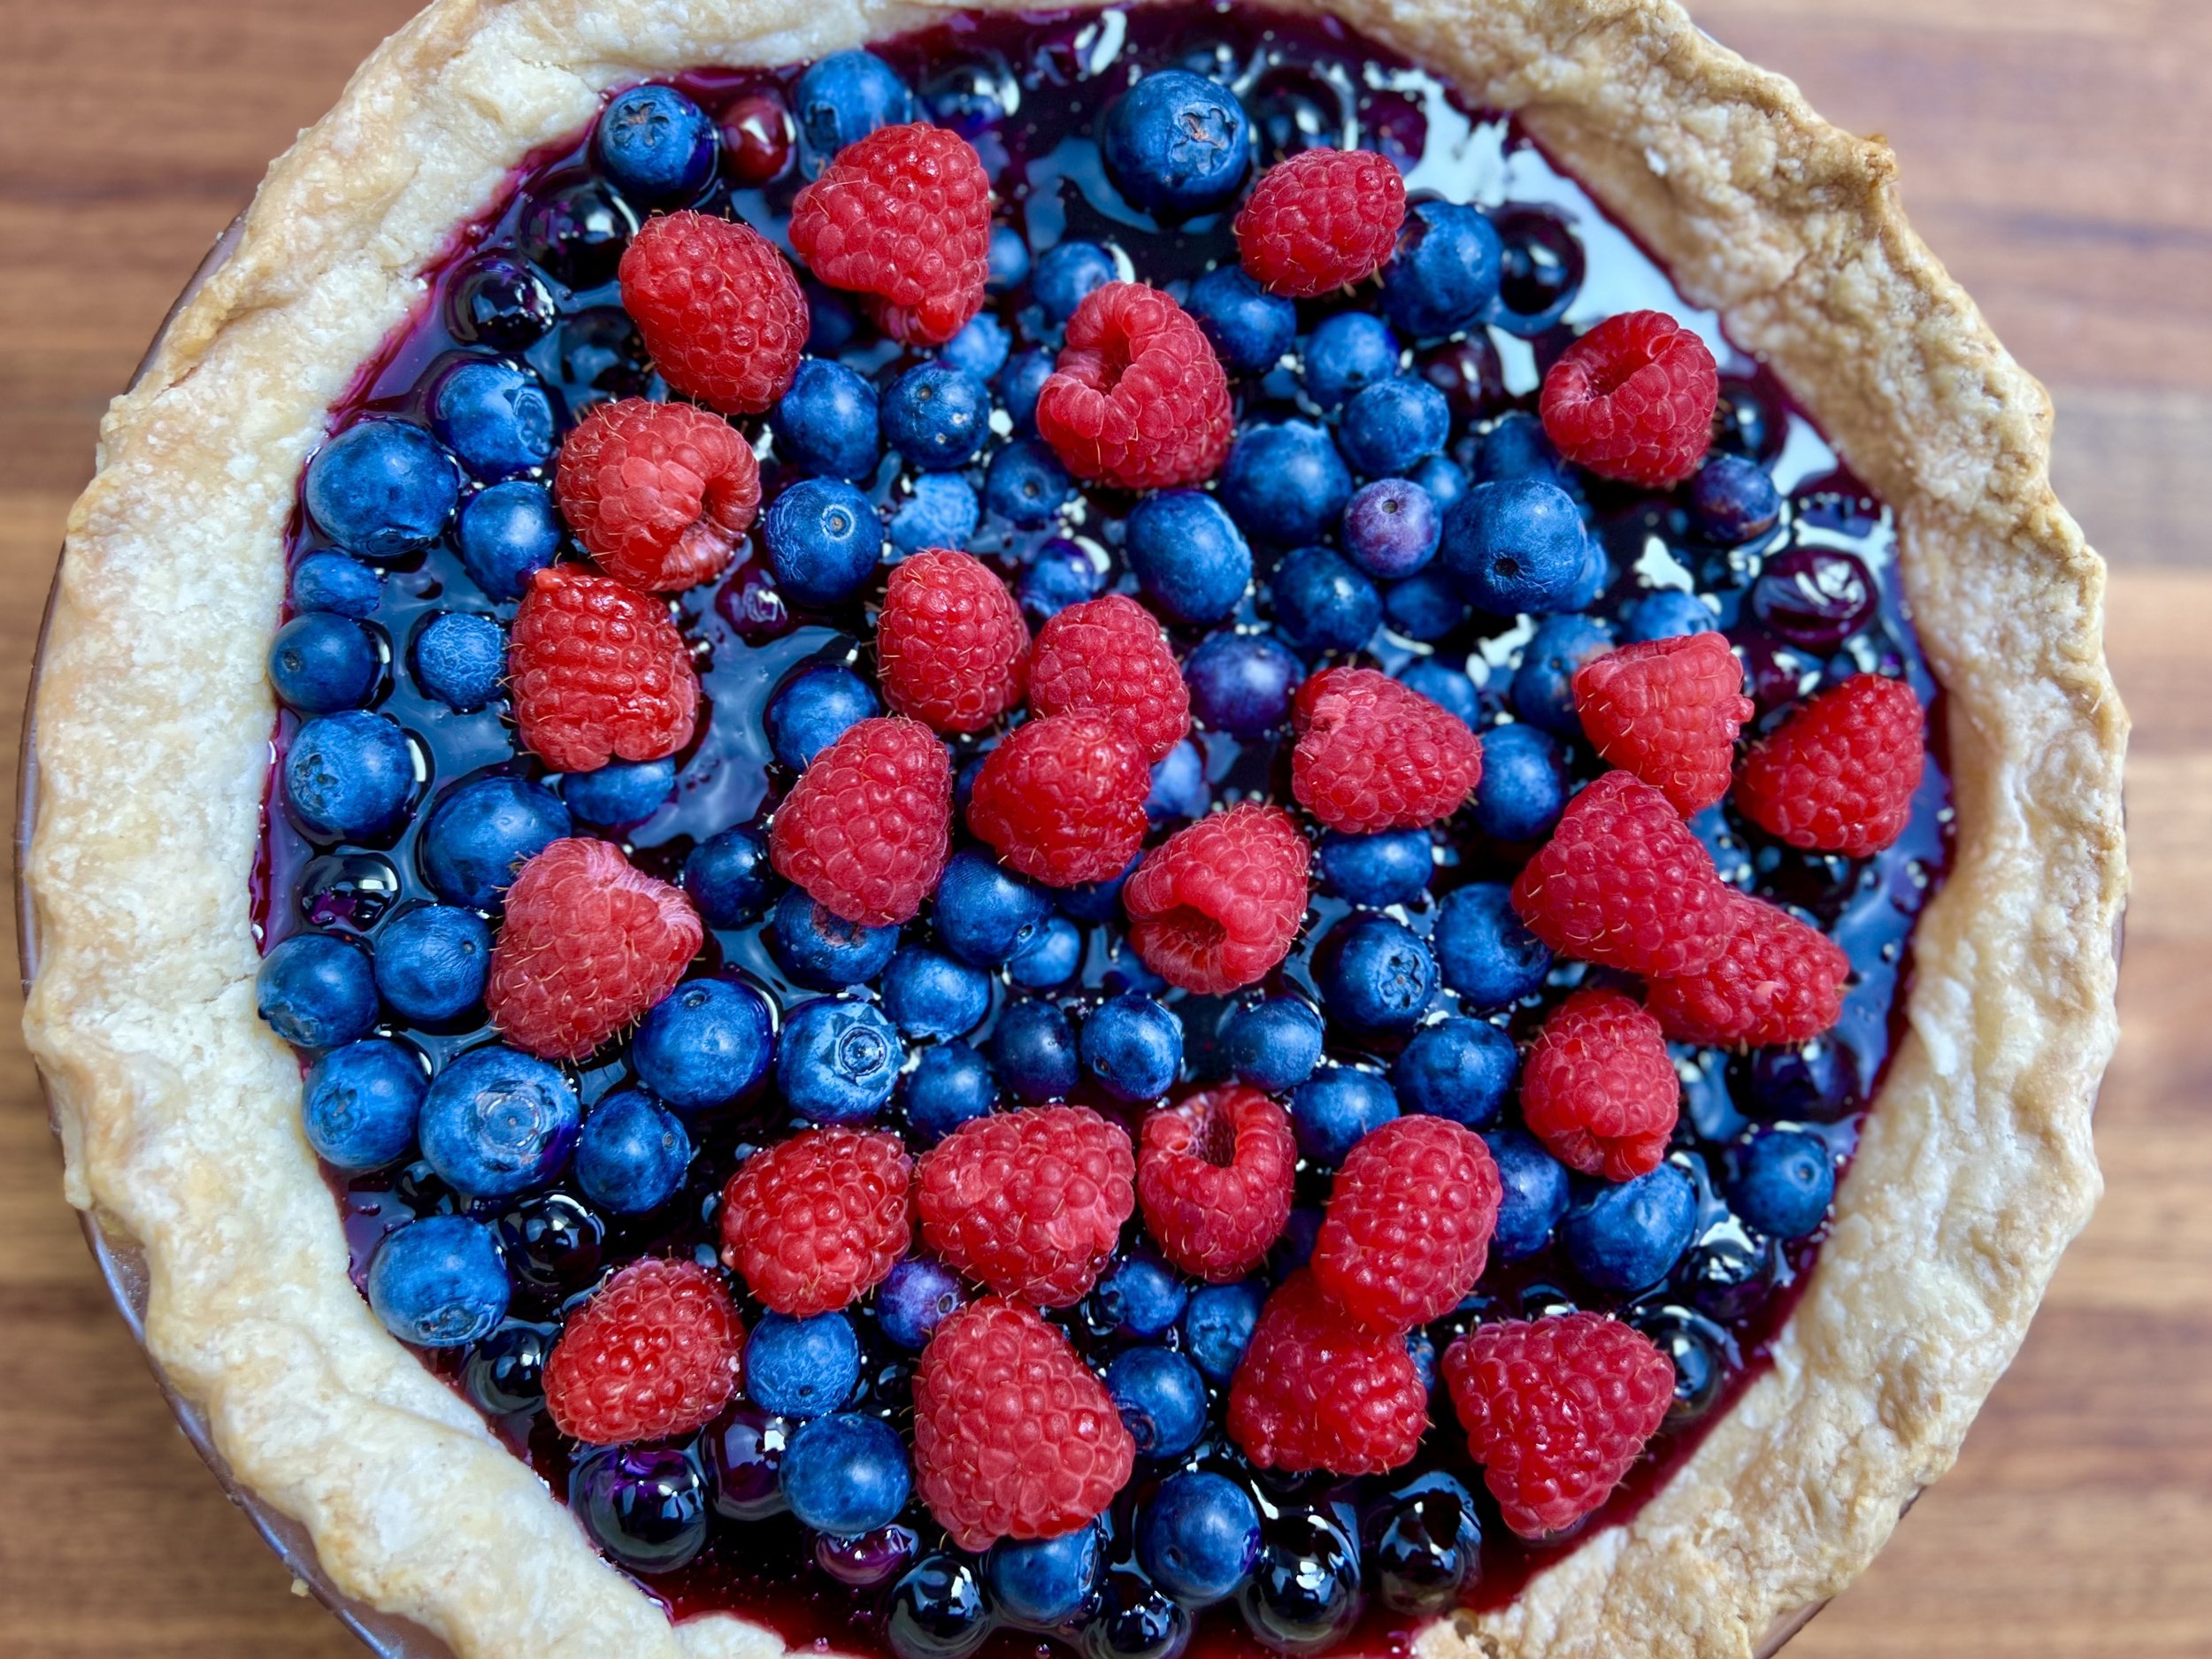
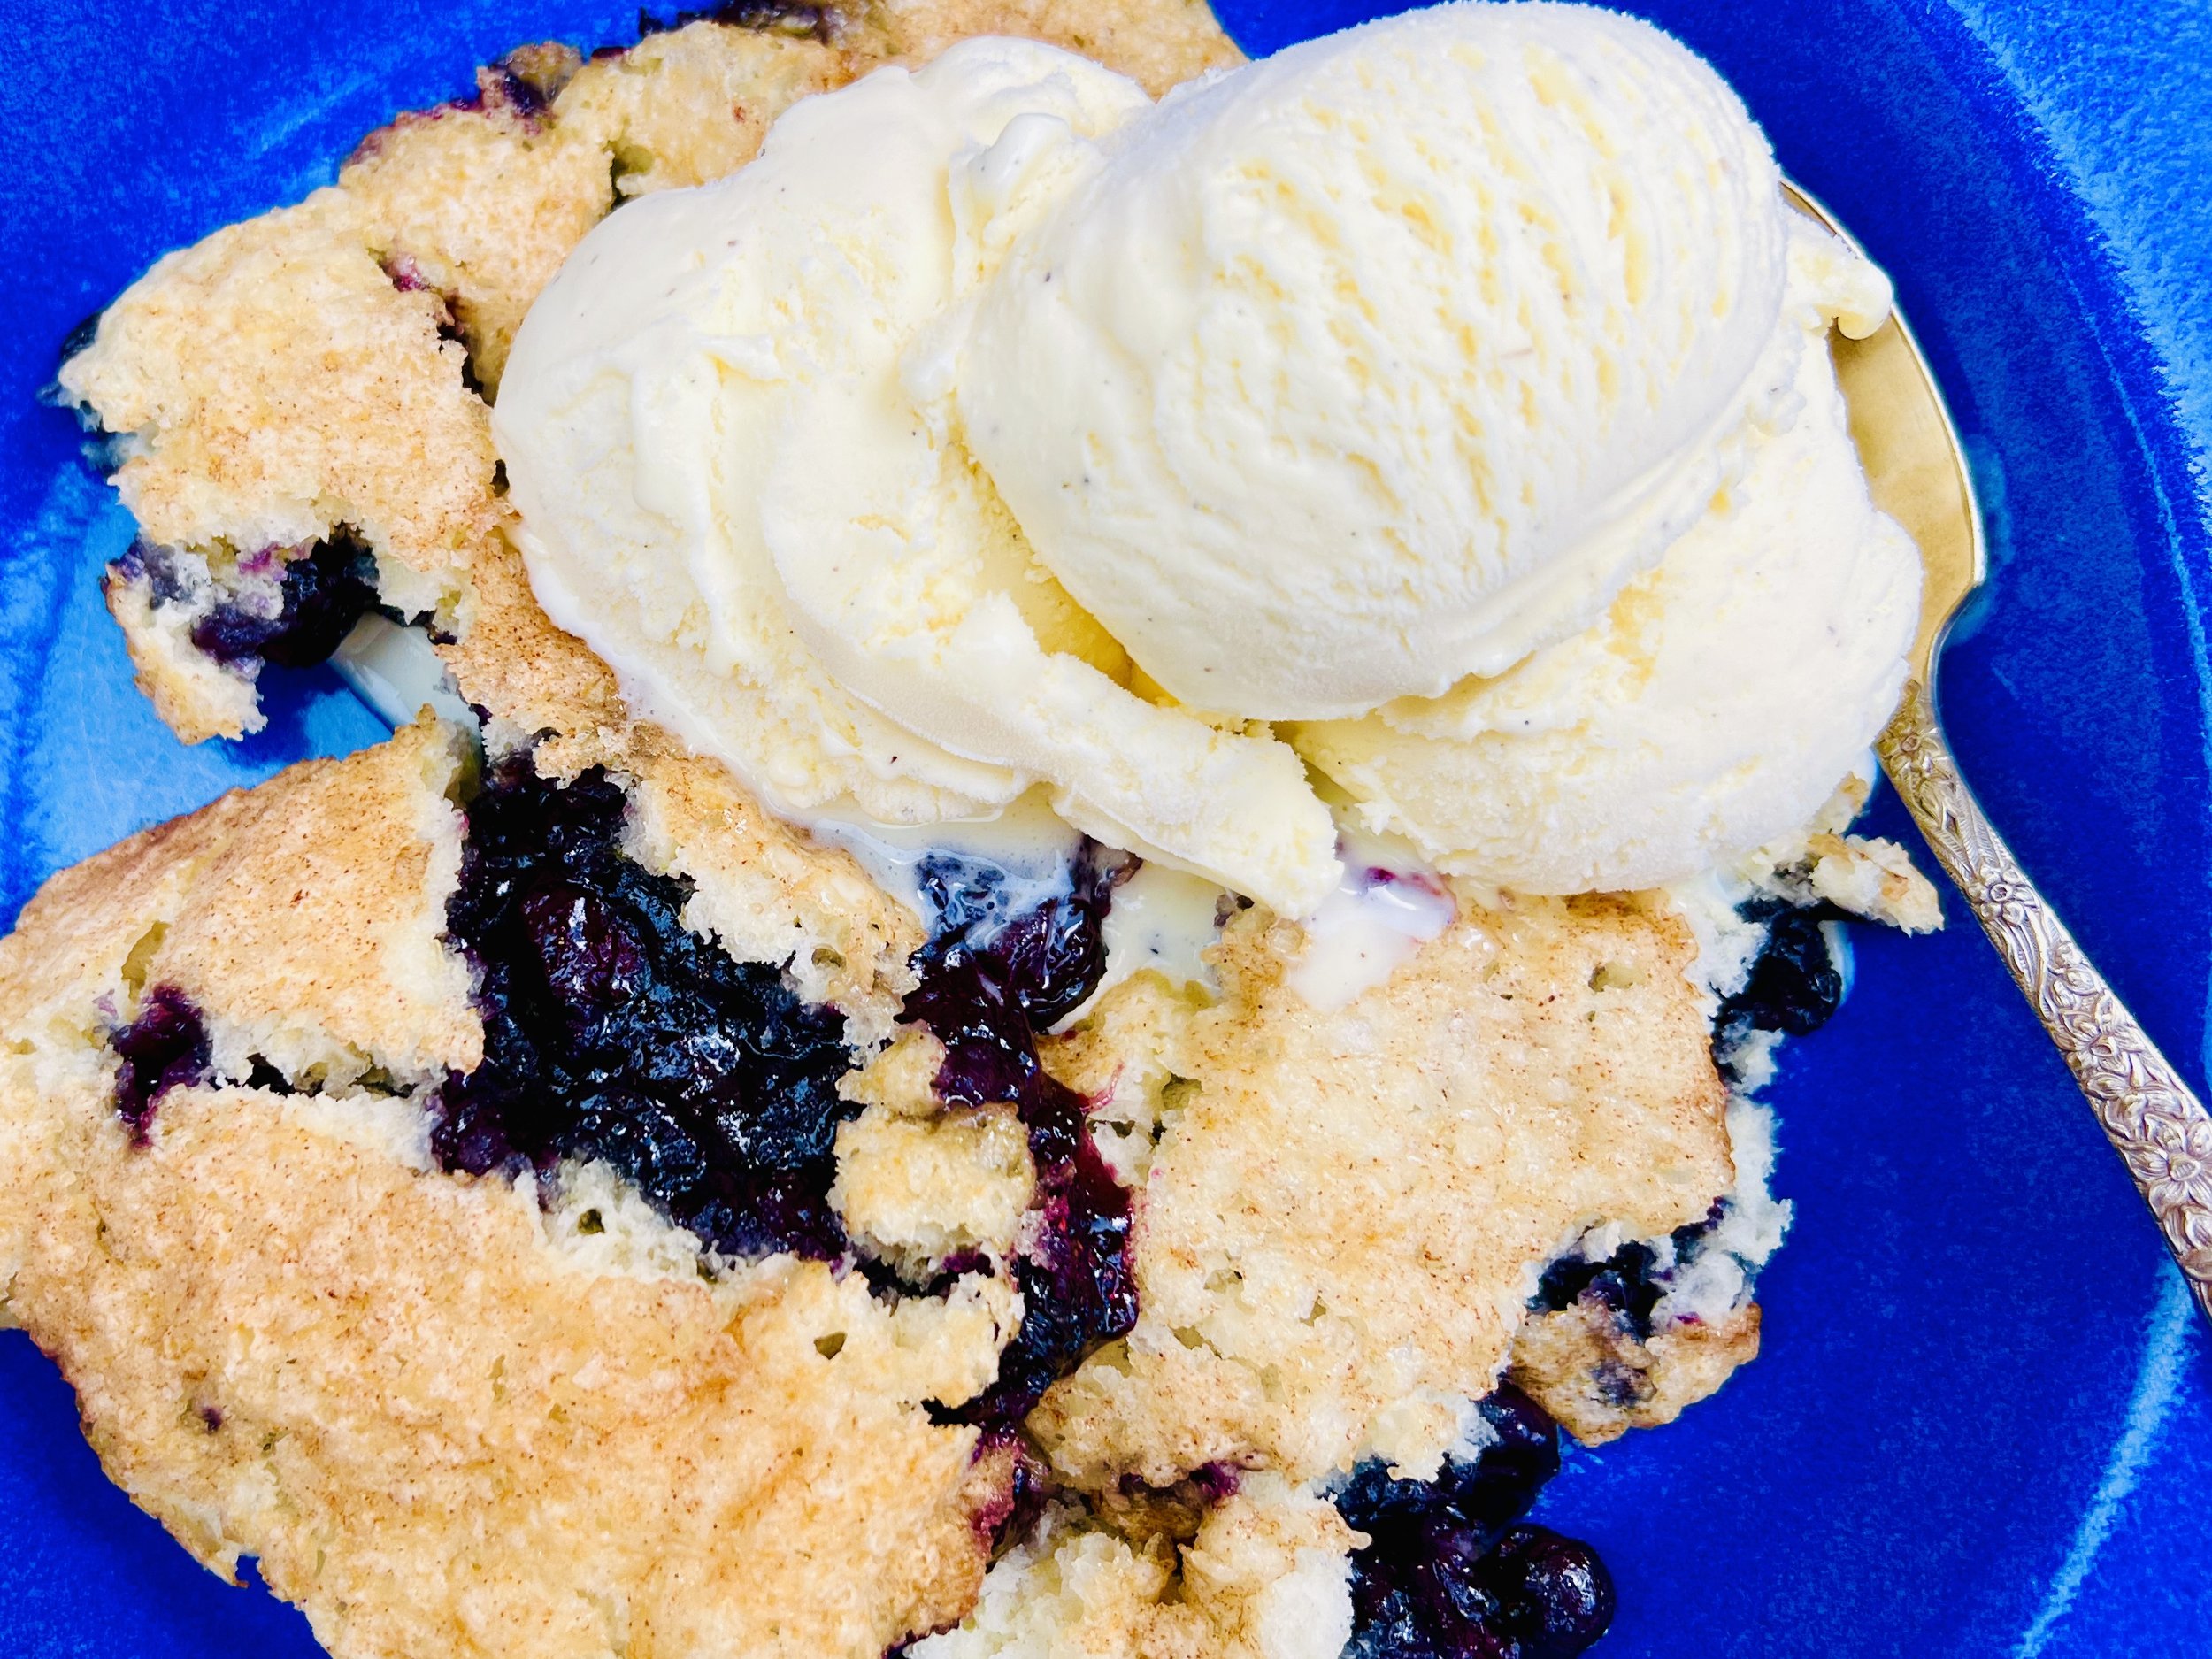
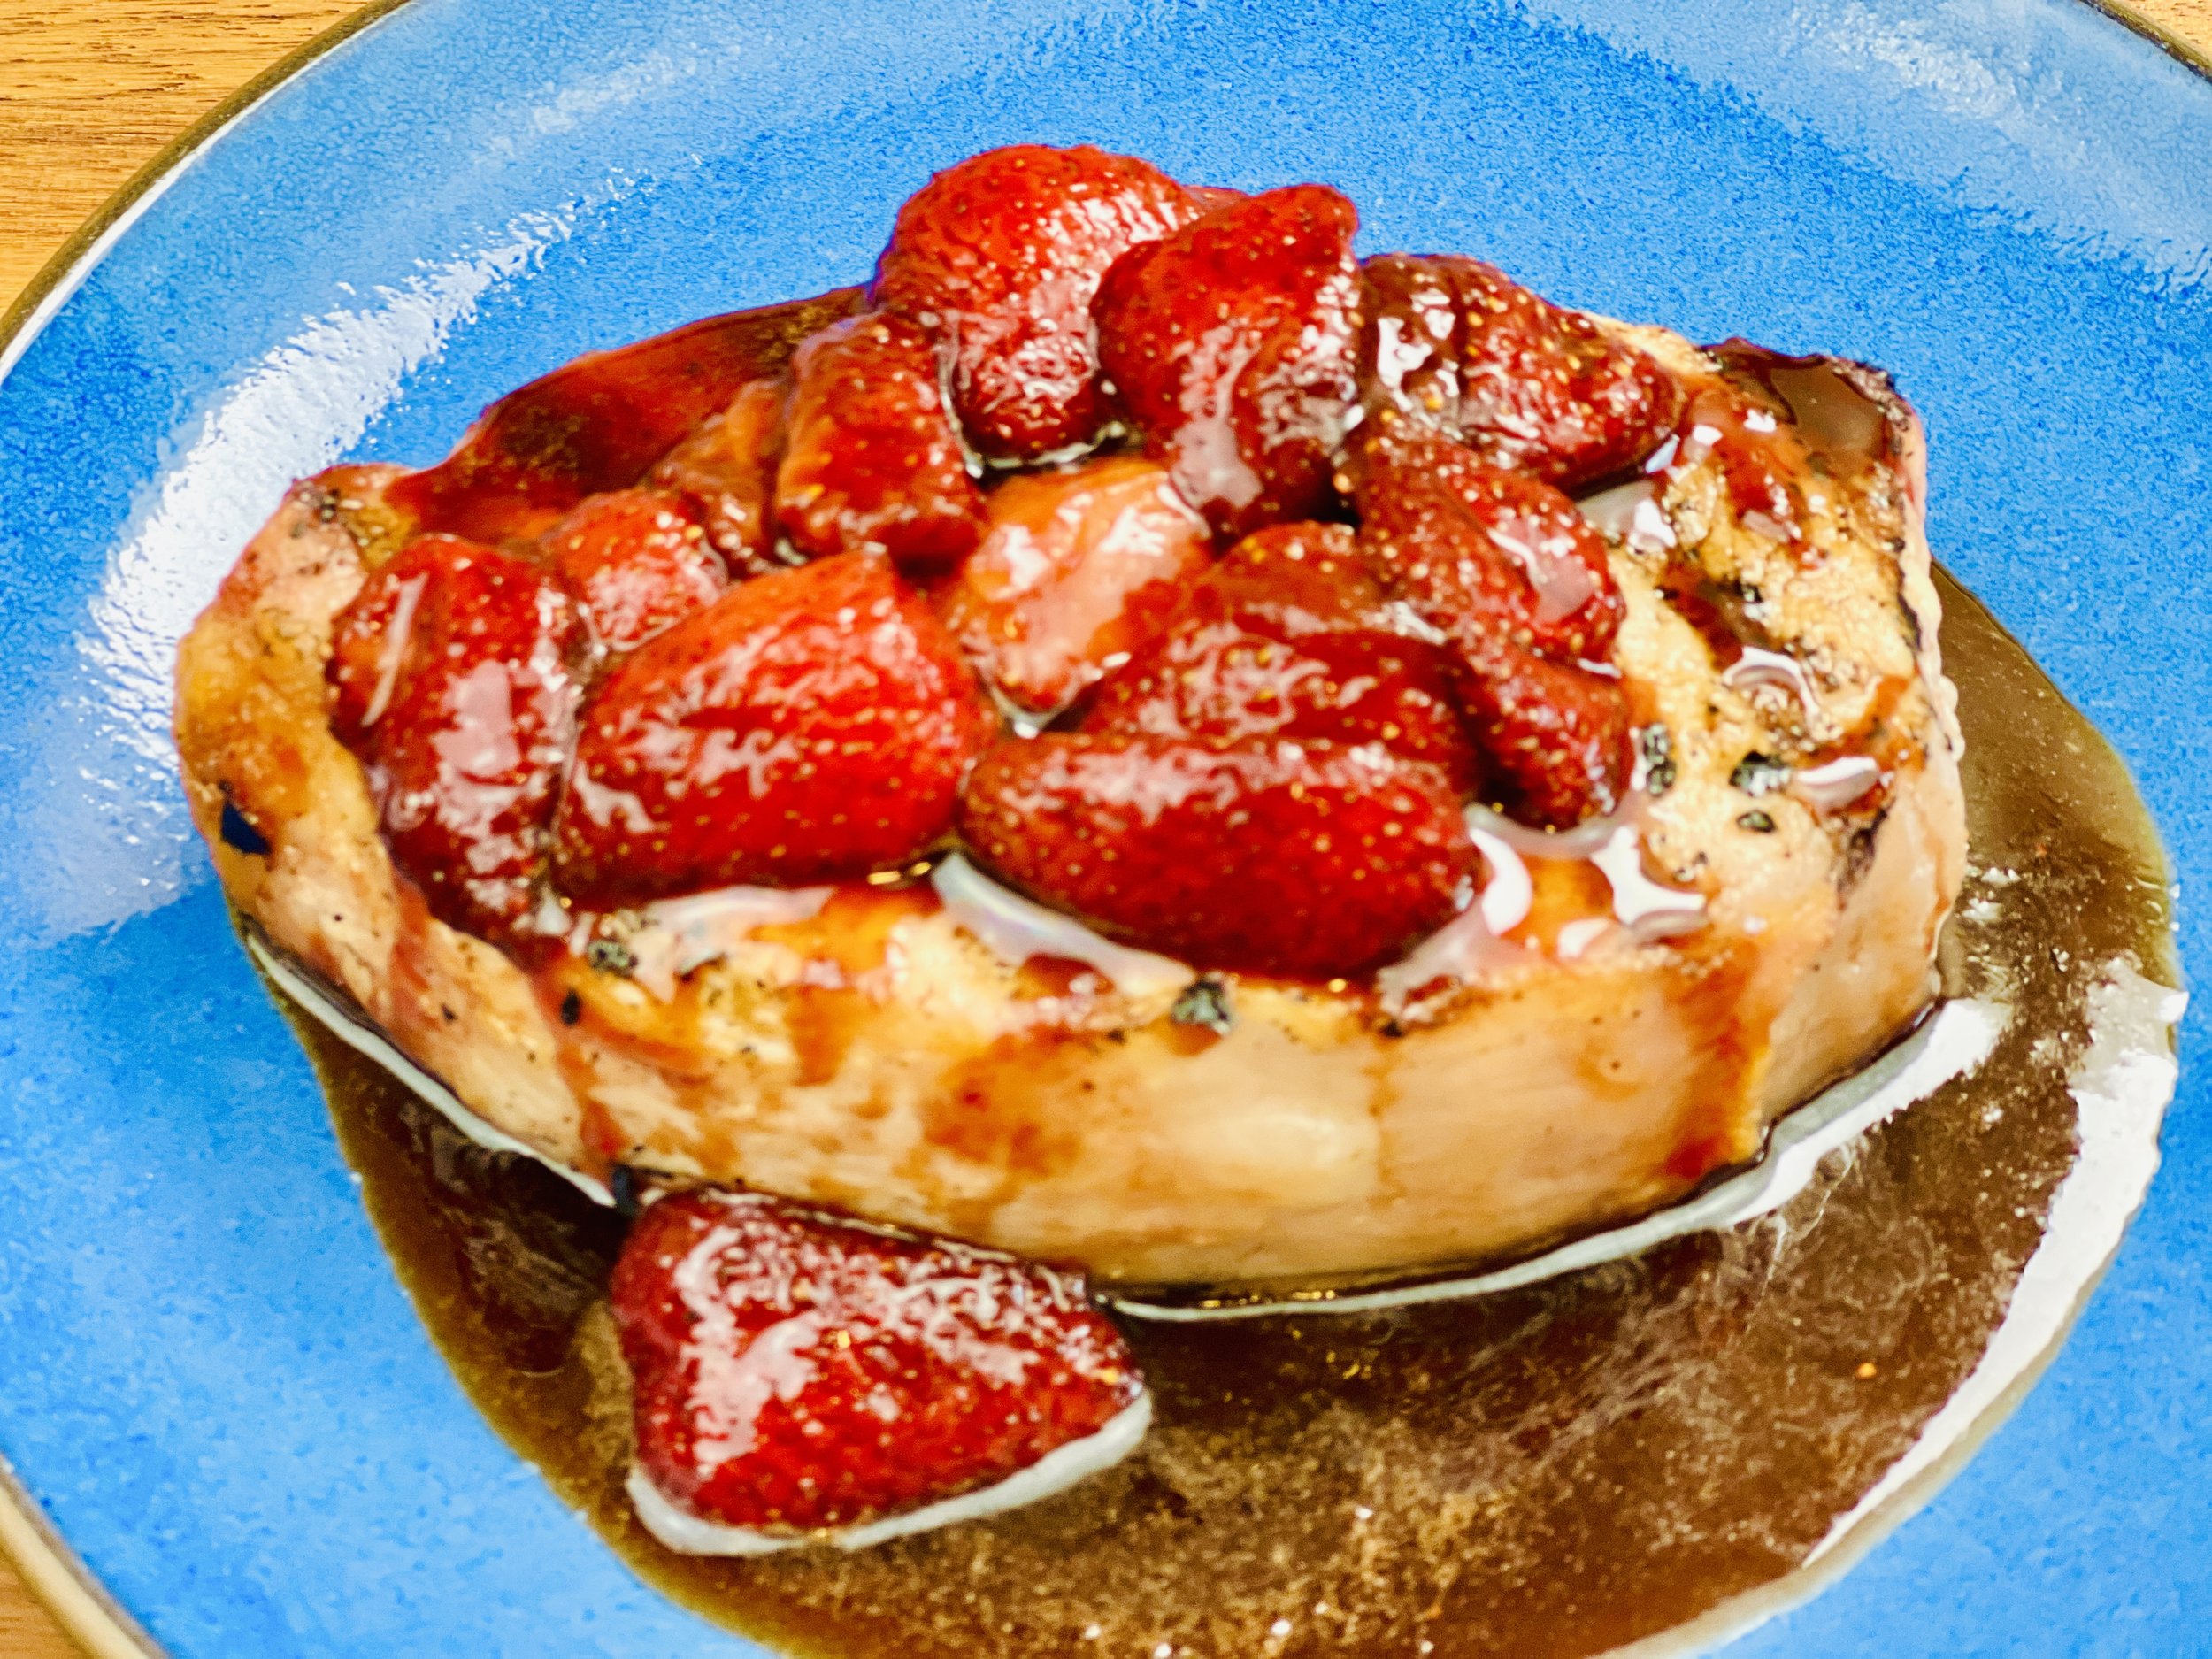
Strawberry Grand Marnier Crisp (low FODMAP)
15 Minutes prep • 50 Minutes cook • Low FODMAP • Gluten-free • Serves 8
15 Minutes prep • 50 Minutes cook • Low FODMAP • Gluten-free • Serves 8 • Ok to make ahead: Steps 1-4
Strawberry season means you can get beautiful strawberries that taste extra delicious so grab some for this easy make-ahead dessert. Five or six strawberries is a low FODMAP serving and this recipe brings out the best flavor of your strawberries so it makes a few strawberries go a long way! Serve it with vanilla ice cream, whipped cream, or whipped coconut cream for the perfect summer dessert.

This is an exclusive recipe just for recipe club members.
In addition to the two free recipes I create each week I am creating and delivering one very special recipe just for my recipe club members. If you’re not yet a member, I encourage you to join! Membership in the club includes access to the complete archive of recipes with filters so it can become your virtual low FODMAP cookbook plus, I am creating and delivering one special NEW recipe every week ONLY for recipe club members. And, for my true fans, I’ll be sharing behind-the-scenes content, and updates on the progress of the new cookbook.
Your membership in the club helps me continue creating new, delicious, easy-to-make, low FODMAP recipes just for you.
As always, all recipes will emphasize simple ingredients, easy preparation, and delicious low FODMAP results. Recipes will be for everything from main courses, salads, soups, side dishes, appetizers, desserts, sauces, breakfast and lunch, and even mocktails and cocktails. Everything you need to prepare fantastic low FODMAP meals everyone will love.
Join the club. Become a Patron. Let’s keep making delicious Low FODMAP meals together.
More Deliciously Low FODMAP™ dessert recipes
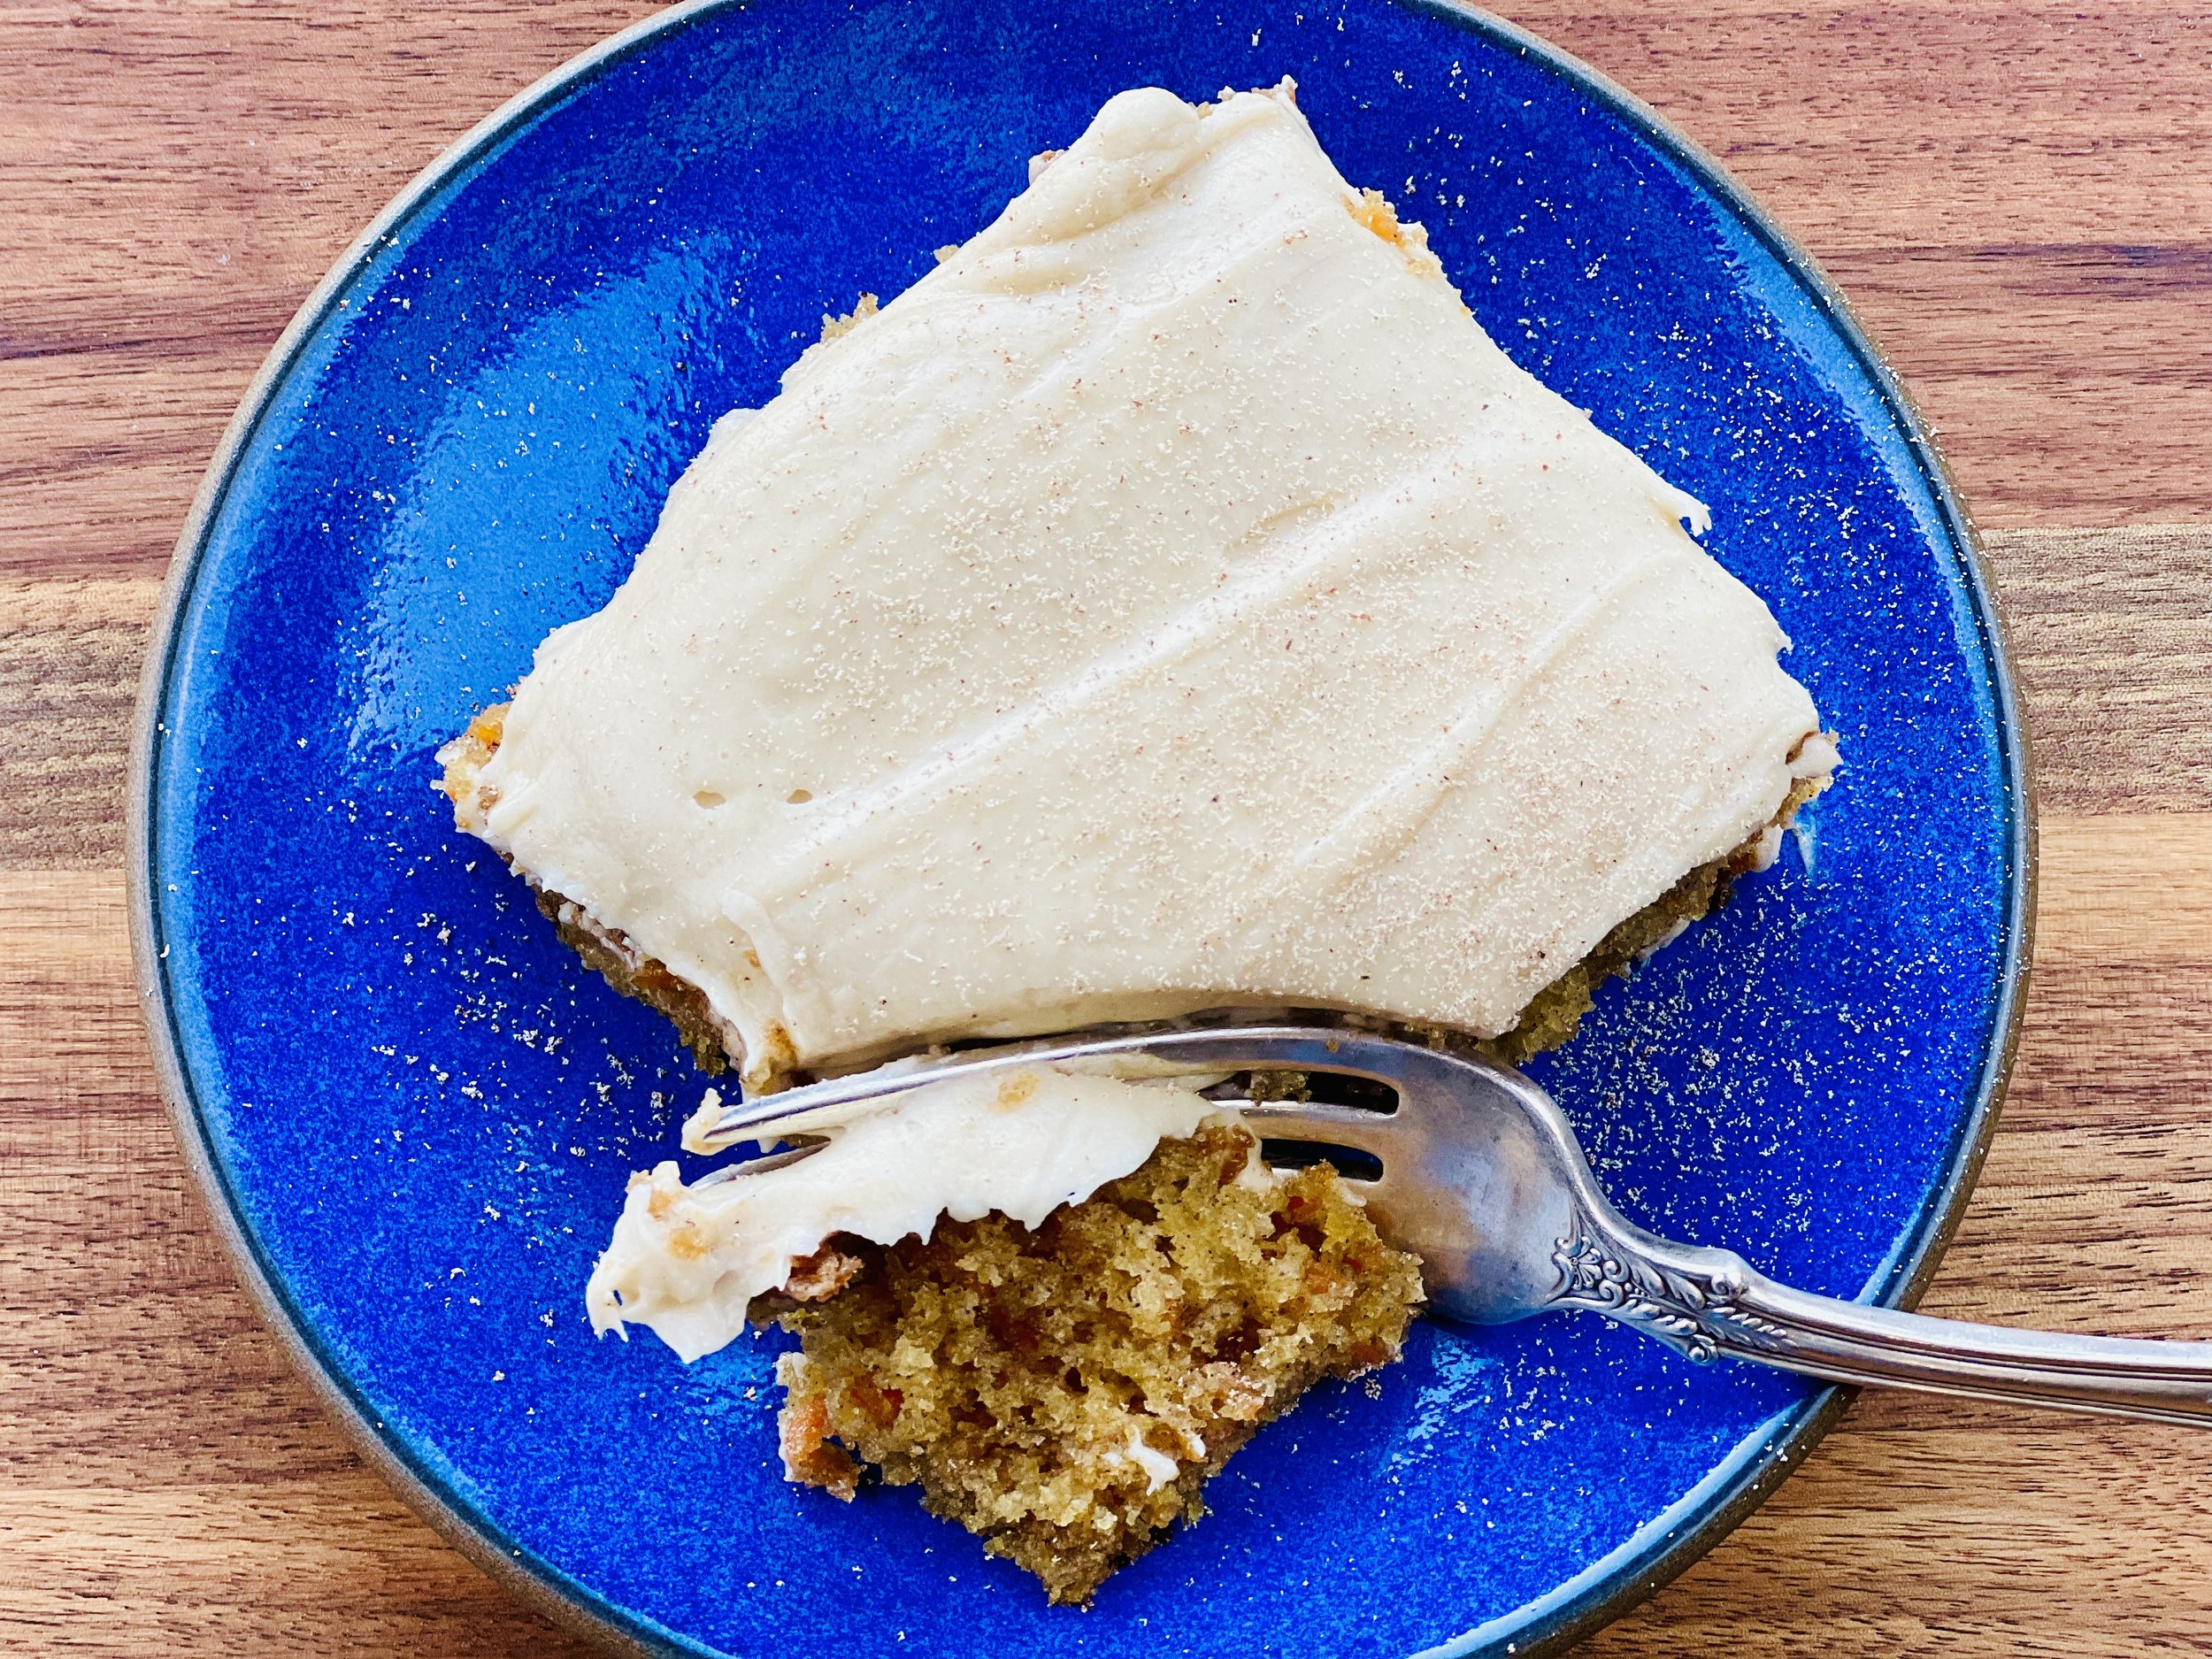
Carrot Cake with Brown Butter Caramel Cream Cheese Frosting (low FODMAP)
15 Minutes prep • 45 Minutes cook • Low FODMAP • Gluten-free • Serves 12
15 Minutes prep • 45 Minutes cook • Low FODMAP • Gluten-free • Serves 12 • Ok to make ahead: Steps 1 - 5
I used to think classic cream cheese frosting is what made carrot cake so good. And then I tried browning the butter and adding some heavy cream to the frosting — and it changed the game. This extra-special carrot cake is easy to make and you can be certain the whole table will love it. This cake is best on the second day so it’s a good one to make ahead and refrigerate overnight before serving. Perfect for a party, potluck, or picnic!
Ingredients: Cake
2 cups sifted gluten-free all-purpose flour
2 teaspoons baking soda
2 teaspoons baking powder
2 teaspoons cinnamon
1 teaspoon salt
3 cups grated carrots
1 and 1/3 cups vegetable oil
4 slightly beaten eggs
2 cups granulated sugar
1/2 cup drained crushed pineapple or finely-diced fresh pineapple
1/2 cup walnuts, chopped (optional)
Ingredients: Frosting
1/2 cup salted butter, at room temperature
1/4 cup heavy cream
3 ounces lactose-free cream cheese, at room temperature
1/12 - 2 cups powdered sugar, sifted
2 teaspoons vanilla extract
Directions: Cake
(1) Prepare: Preheat oven to 350 degrees F. Butter and flour a 9'‘ x 13” baking pan or two 9” round pans if you prefer. Line the bottom of each round pan with parchment to ensure cake layers come out of the pan cleanly.
(2) Combine dry ingredients: Measure flour, baking soda, baking powder, cinnamon, and salt in a sifter.
(3) Combine wet ingredients: Mix grated carrots, chopped pineapple, vegetable oil, and eggs in a mixing bowl and stir well to combine.
(4) Add remaining dry ingredients: Add sugar and stir in. Finally, add sifted dry ingredients and stir in.
(5) Bake: Pour batter into prepared baking pan(s). Bake at 350 degrees F for 45 minutes or until a toothpick inserted in the center comes out clean. Let cool and frost with brown butter caramel cream cheese frosting.
Directions: Frosting
(6) Make the caramel: Melt the butter together with the brown sugar and heavy cream in a saucepan. Bring to a boil and cook 2 minutes or until the sugar has dissolved. Add a pinch of salt and stir to mix in. Remove from the heat and add to the bowl of a stand mixer. Let cool completely.
(7) Add the remaining ingredients: Add the cream cheese and beat until creamy. Sift in the powdered sugar, then add the vanilla. Beat until well combined. The frosting should be creamy, if it’s too thin, put the frosting in the refrigerator for 10-15 minutes.
(8) Finish: Frost the cake and refrigerate overnight if possible for the best flavor. Serve at room temperature the next day with a dusting of fresh-grated nutmeg.
Eat and enjoy every bite because you can!
Recipe note: I use Diamond Crystal Kosher salt in all my recipes because it has a wonderful flat and crisp flake that tastes delicious. It is also the least salty salt available so you can use it more liberally as a seasoning than you can table salt or sea salt. If you use another type of salt, you may need to reduce the amount so it is not over-salted.
Link note: This post contains links for you to easily purchase items listed on the page. In some cases, we have provided a special discount code for IBS Game Changers so be sure to use it when you purchase an item to get the discount that has been arranged just for you! As an Amazon Associate, I earn a commission from qualifying Amazon purchases.
More Deliciously Low FODMAP™ dessert recipes
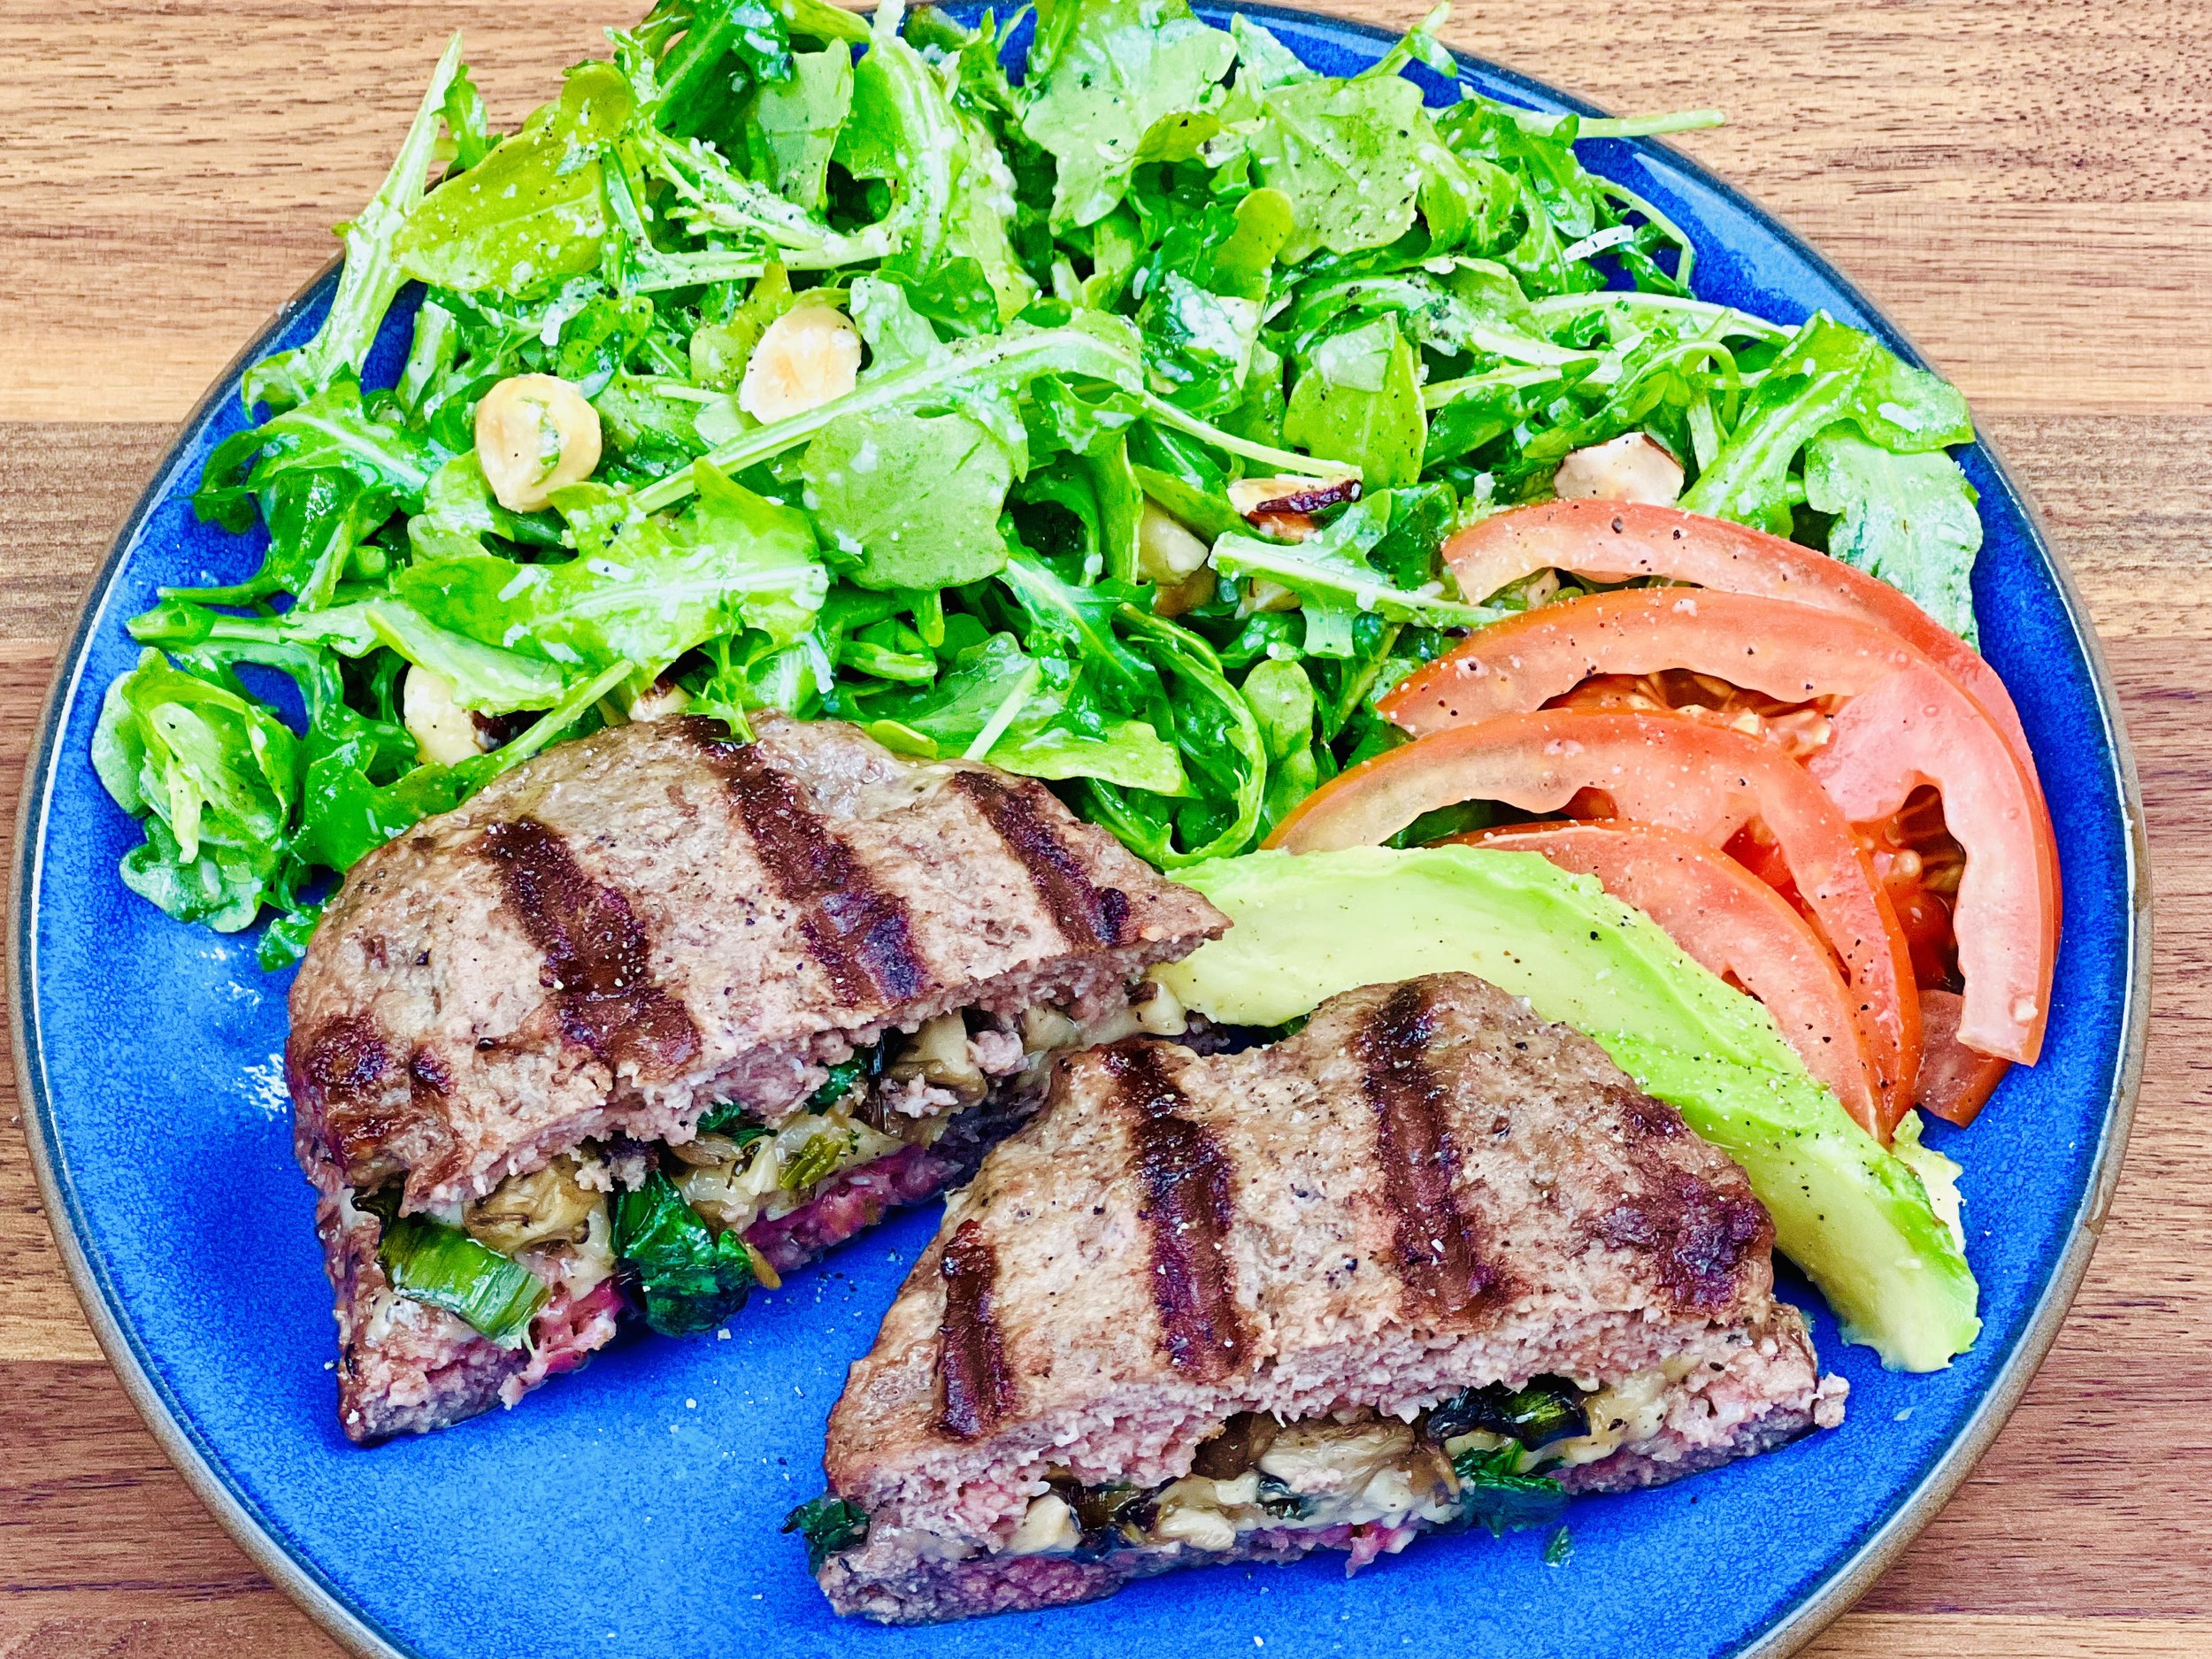
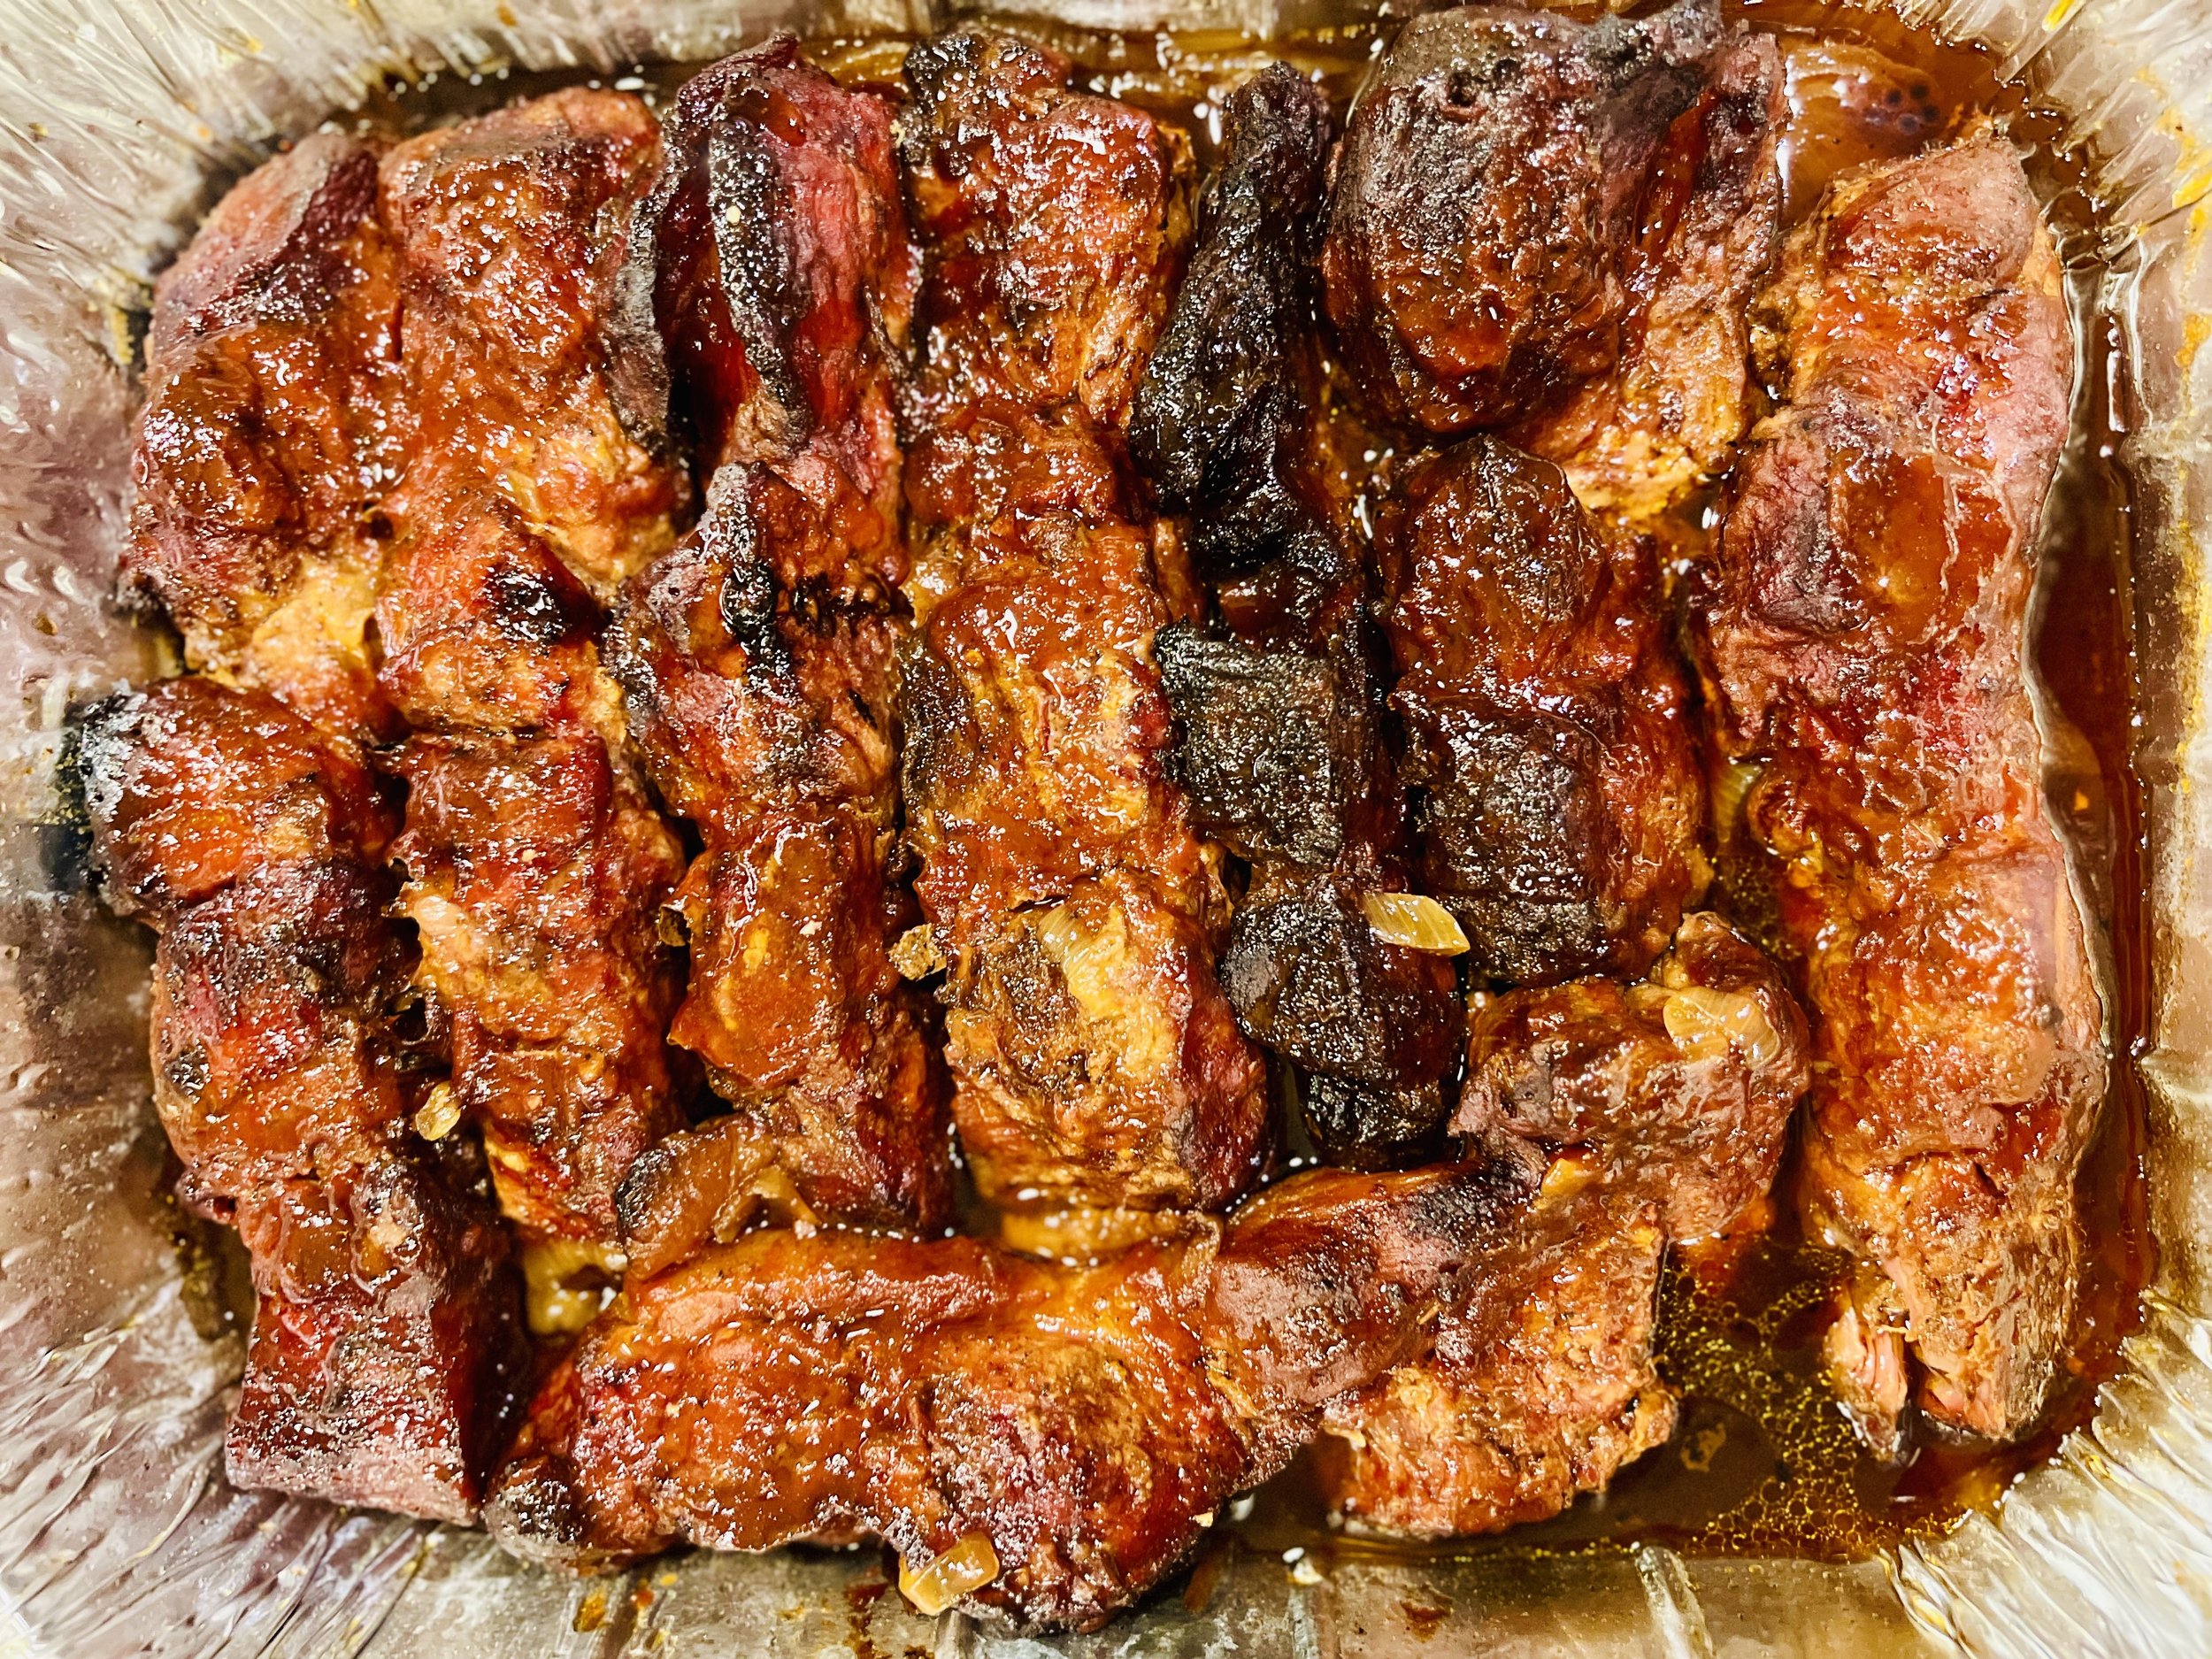
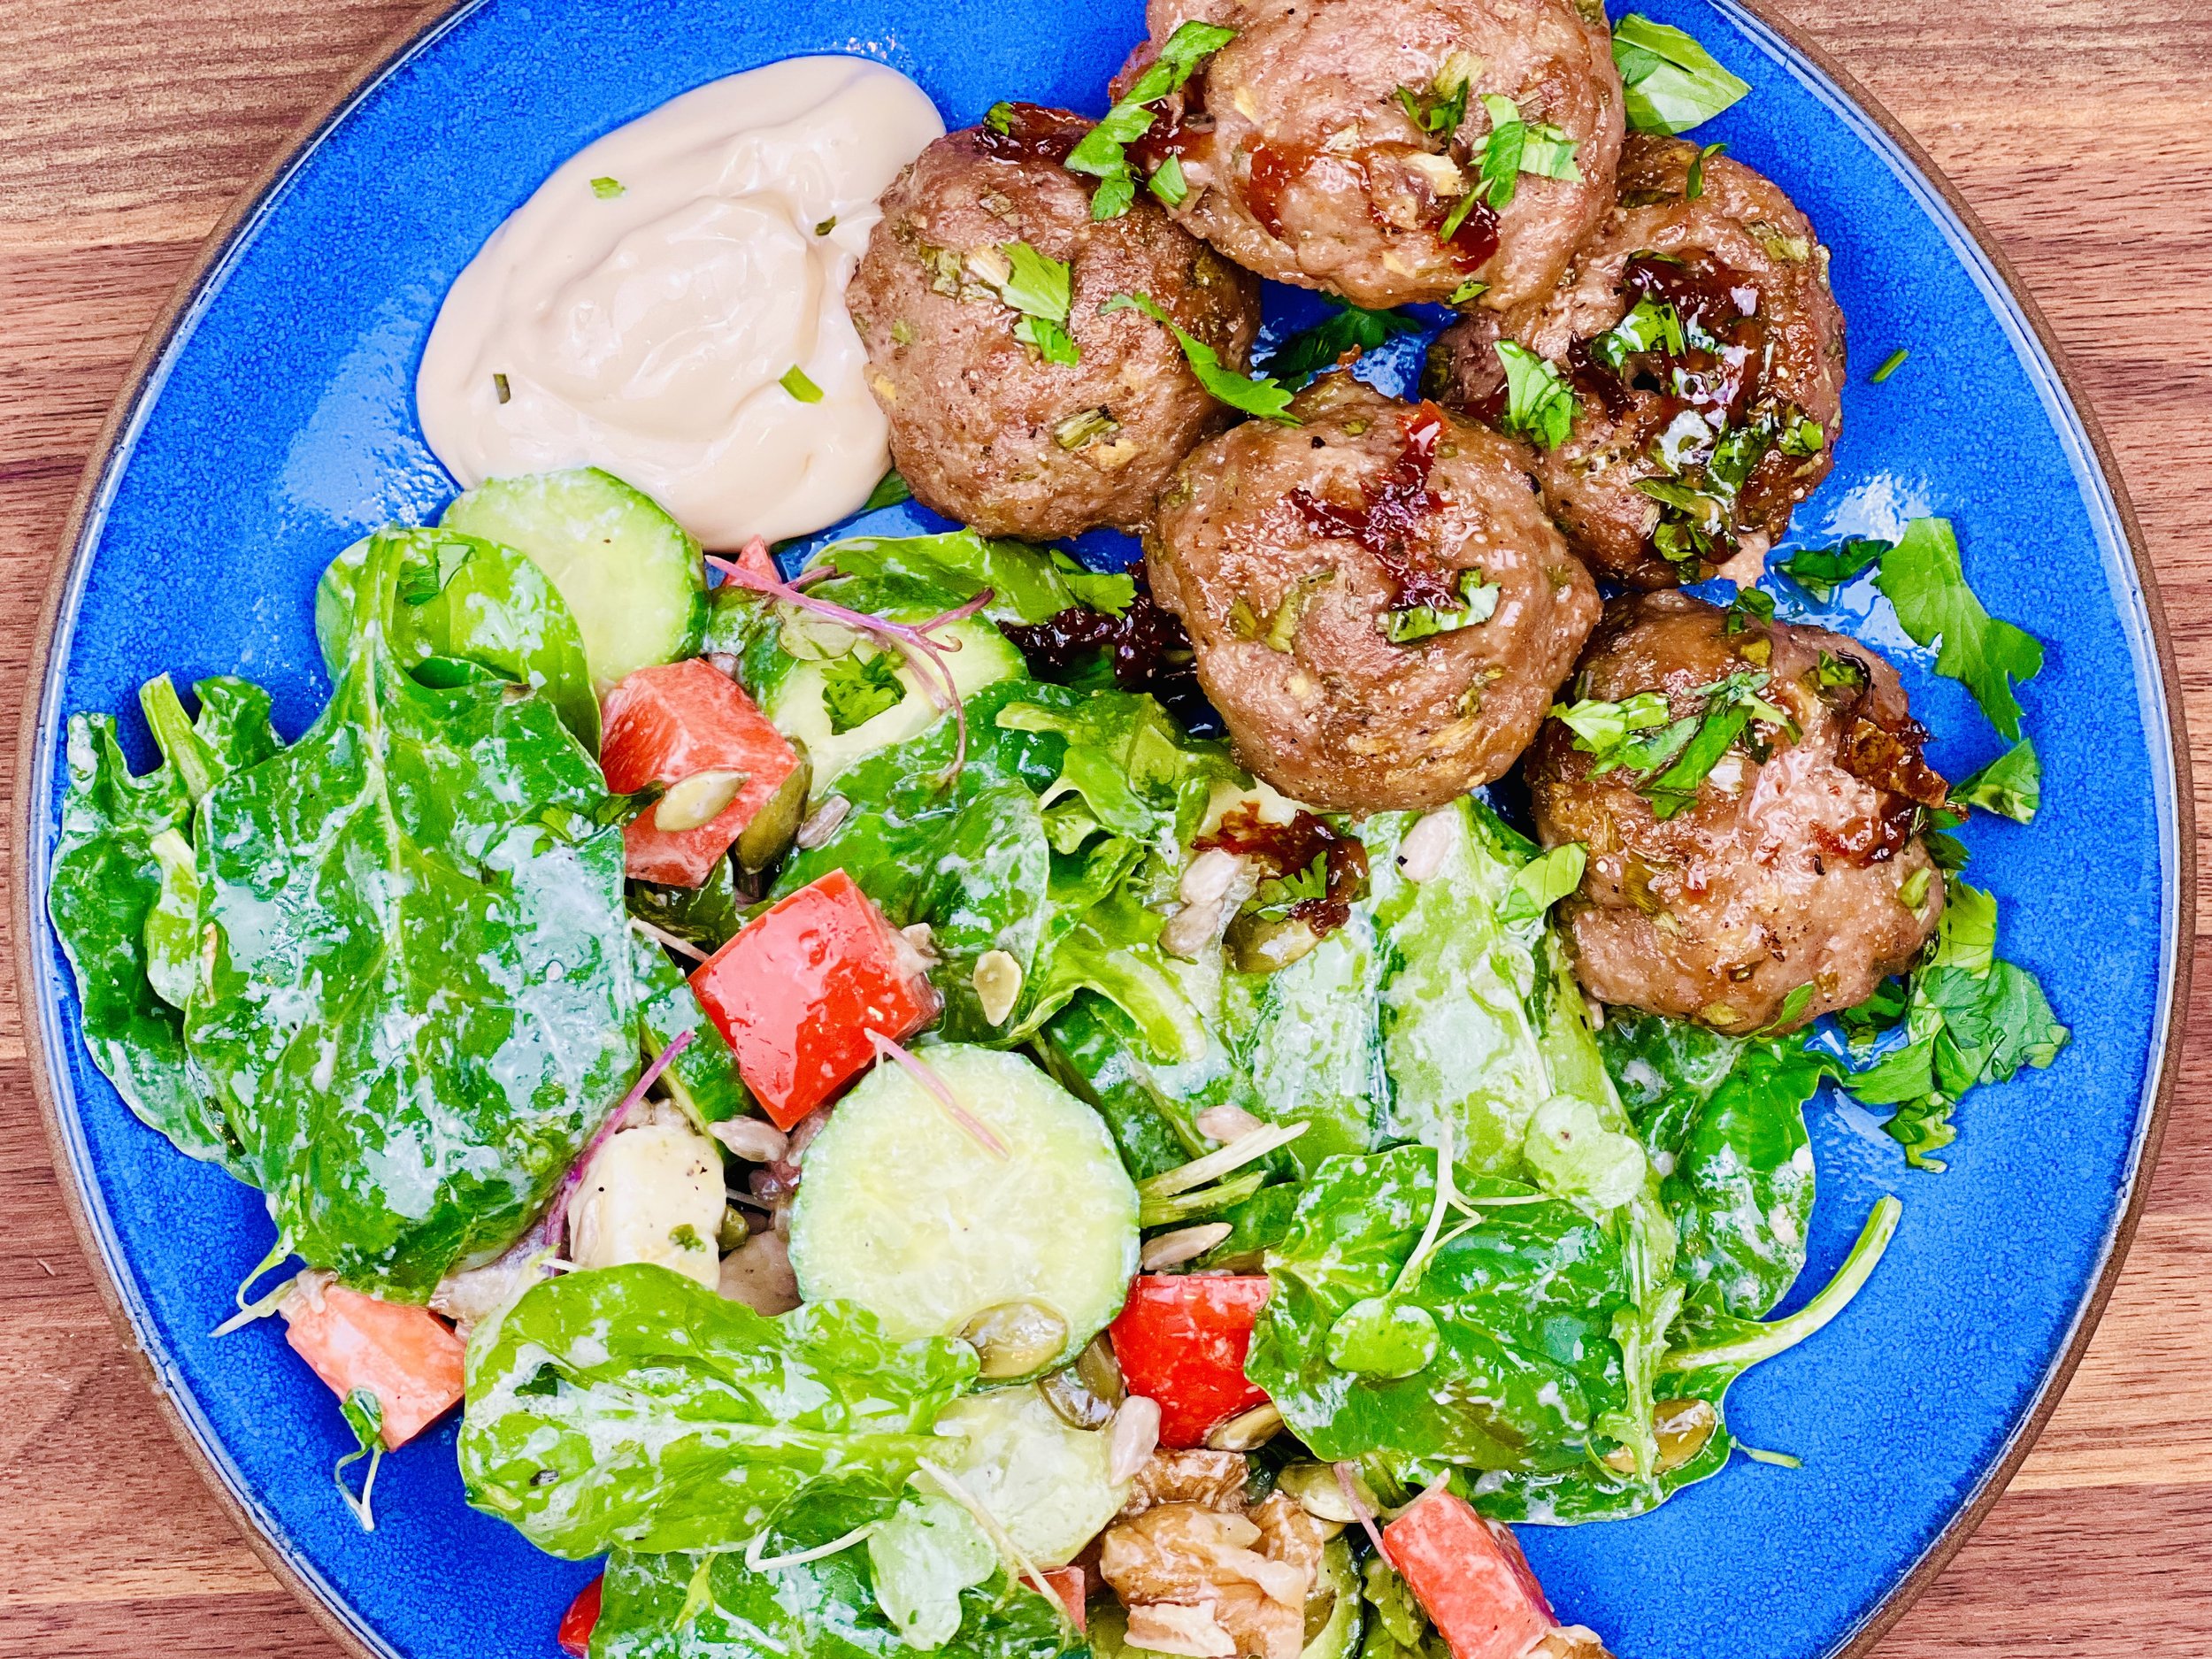
Herbed Turkey Burgers with Lemon Aioli (low FODMAP)
20 Minutes prep • 20 Minutes cook • Low FODMAP • Gluten-free • Serves 4
20 Minutes prep • 20 Minutes cook • Low FODMAP • Gluten-free • Serves 4 • Ok to make-ahead: Steps 1-4
Best turkey burgers ever! I tucked some cooked bacon in with the turkey meat to add some extra pizzazz and, combined with the flavorful herbs and a slice of extra sharp cheddar, these burgers are delicious. Serve with plenty of lemon aioli, sliced tomatoes, and a crisp salad on the side, such as my Classic Caesar salad, and you’ll have a delicious meal. Gluten-free buns are optional and really not needed at all.
Ingredients: Turkey Burgers
1 pound bacon
2 pounds ground turkey
1 bunch green onions, green part only (finely chopped)
1 jalapeno pepper, seeded and finely chopped
3 tablespoons garlic-infused olive oil, plus more for brushing burgers before grilling
1 tablespoon flat-leaf parsley, finely chopped
1 tablespoon fresh oregano, finely chopped
1 tablespoon fresh rosemary, finely chopped
1/2 teaspoon Kosher salt and 1/2 teaspoon black pepper (or to your preference)
8 slices extra sharp cheddar cheese
Ingredients: Lemon Aioli
1 cup mayonnaise
1 tablespoon lemon zest
2 tablespoons fresh-squeezed lemon juice
1/2 teaspoon Kosher salt
1/2 teaspoon Smoke N Sanity Essence of Garlic Salt (use code IBSGC10 for 10% discount)
Directions: Lemon Aioli
(1) Make the lemon aioli: Combine all ingredients in a small mixing bowl. Whisk until smooth. Transfer the aioli to a small serving bowl and keep chilled in the refrigerator until ready to serve.
Directions: Turkey Burgers
(2) Cook the bacon: Preheat the oven to 400 degrees F. Put the bacon on a rimmed baking sheet lined with foil. Put the bacon in the hot oven and cook for 10 minutes. Turn off the oven and leave the bacon in the oven with the door closed for another 10 minutes. Remove from the oven, drain on paper towels. Chop the cooked bacon and set it aside to cool.
(3) Prepare the turkey meat: Combine ground turkey with the cooked and chopped bacon, green onions, fresh herbs, salt, and pepper. Add 2 tablespoons of garlic-infused olive oil and blend well (I use my hands to blend the meat as it ensures you really blend everything together evenly).
(4) Make the patties: Dip your fingers in olive oil to prevent the meat from sticking to your hands and form into 8 equally-sized patties. Brush the top of each patty with olive oil.
Make-ahead note: At this point, you may keep the formed patties on a plate in the refrigerator until you’re ready to cook them.
(5) Cook the burgers: Preheat your BBQ grill to medium-high (about 400 degrees F). Once the grill is preheated (about 15 minutes), put the burgers, oil side down, on the hot grill. Brush the second side of each burger quickly with olive oil, then cook for 5 - 7 minutes. Flip the burgers and cook on the other side until almost done (about 3 minutes). Then add the slice of cheese and cook another minute or two until the cheese is melted.
(6) Plate and serve: Serve with plenty of lemon aioli, sliced tomatoes, and a crisp salad on the side, such as my Classic Caesar salad. Gluten-free buns are optional and really not needed at all—especially if you make the sourdough croutons in with my Caesar salad.
Eat and enjoy every bite because you can!
Recipe note: I use Diamond Crystal Kosher salt in all my recipes because it has a wonderful flat and crisp flake that tastes delicious. It is also the least salty salt available so you can use it more liberally as a seasoning than you can table salt or sea salt. If you use another type of salt, you may need to reduce the amount so it is not over-salted.
Link note: This post contains links for you to easily purchase items listed on the page. In some cases, we have provided a special discount code for IBS Game Changers so be sure to use it when you purchase an item to get the discount that has been arranged just for you! As an Amazon Associate, I earn a commission from qualifying Amazon purchases.
More Deliciously Low FODMAP™ BBQ recipes you might enjoy


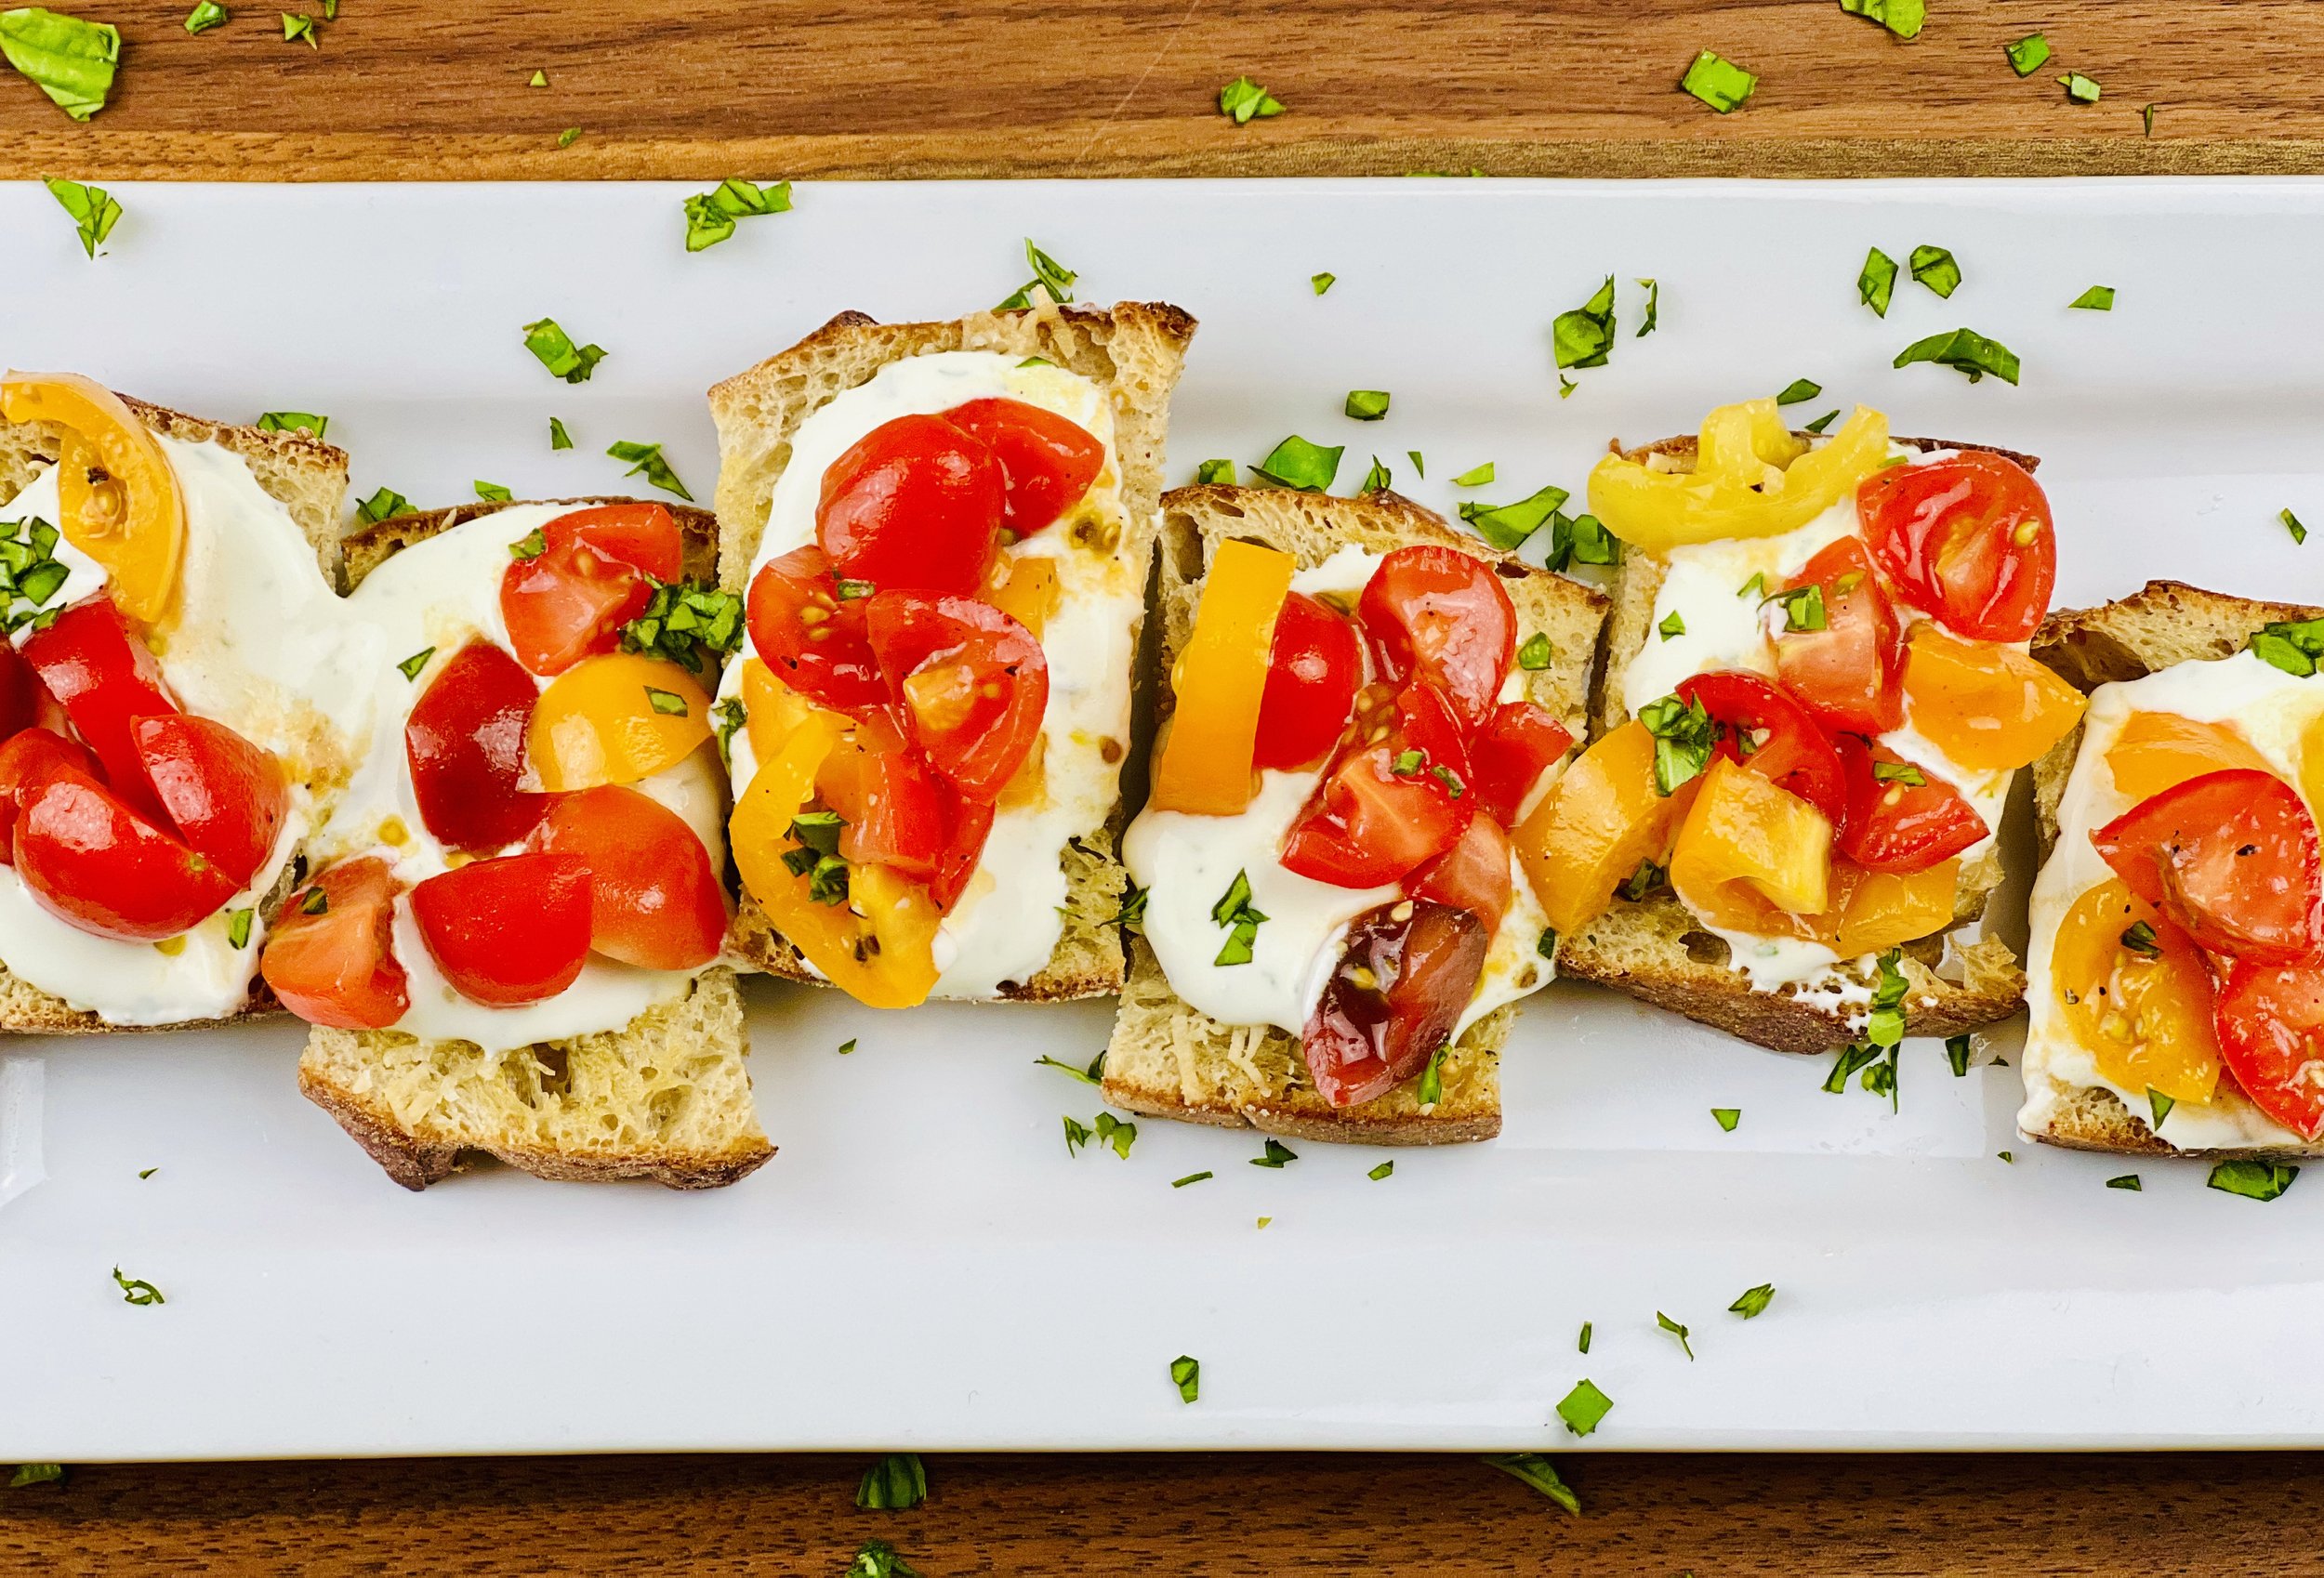
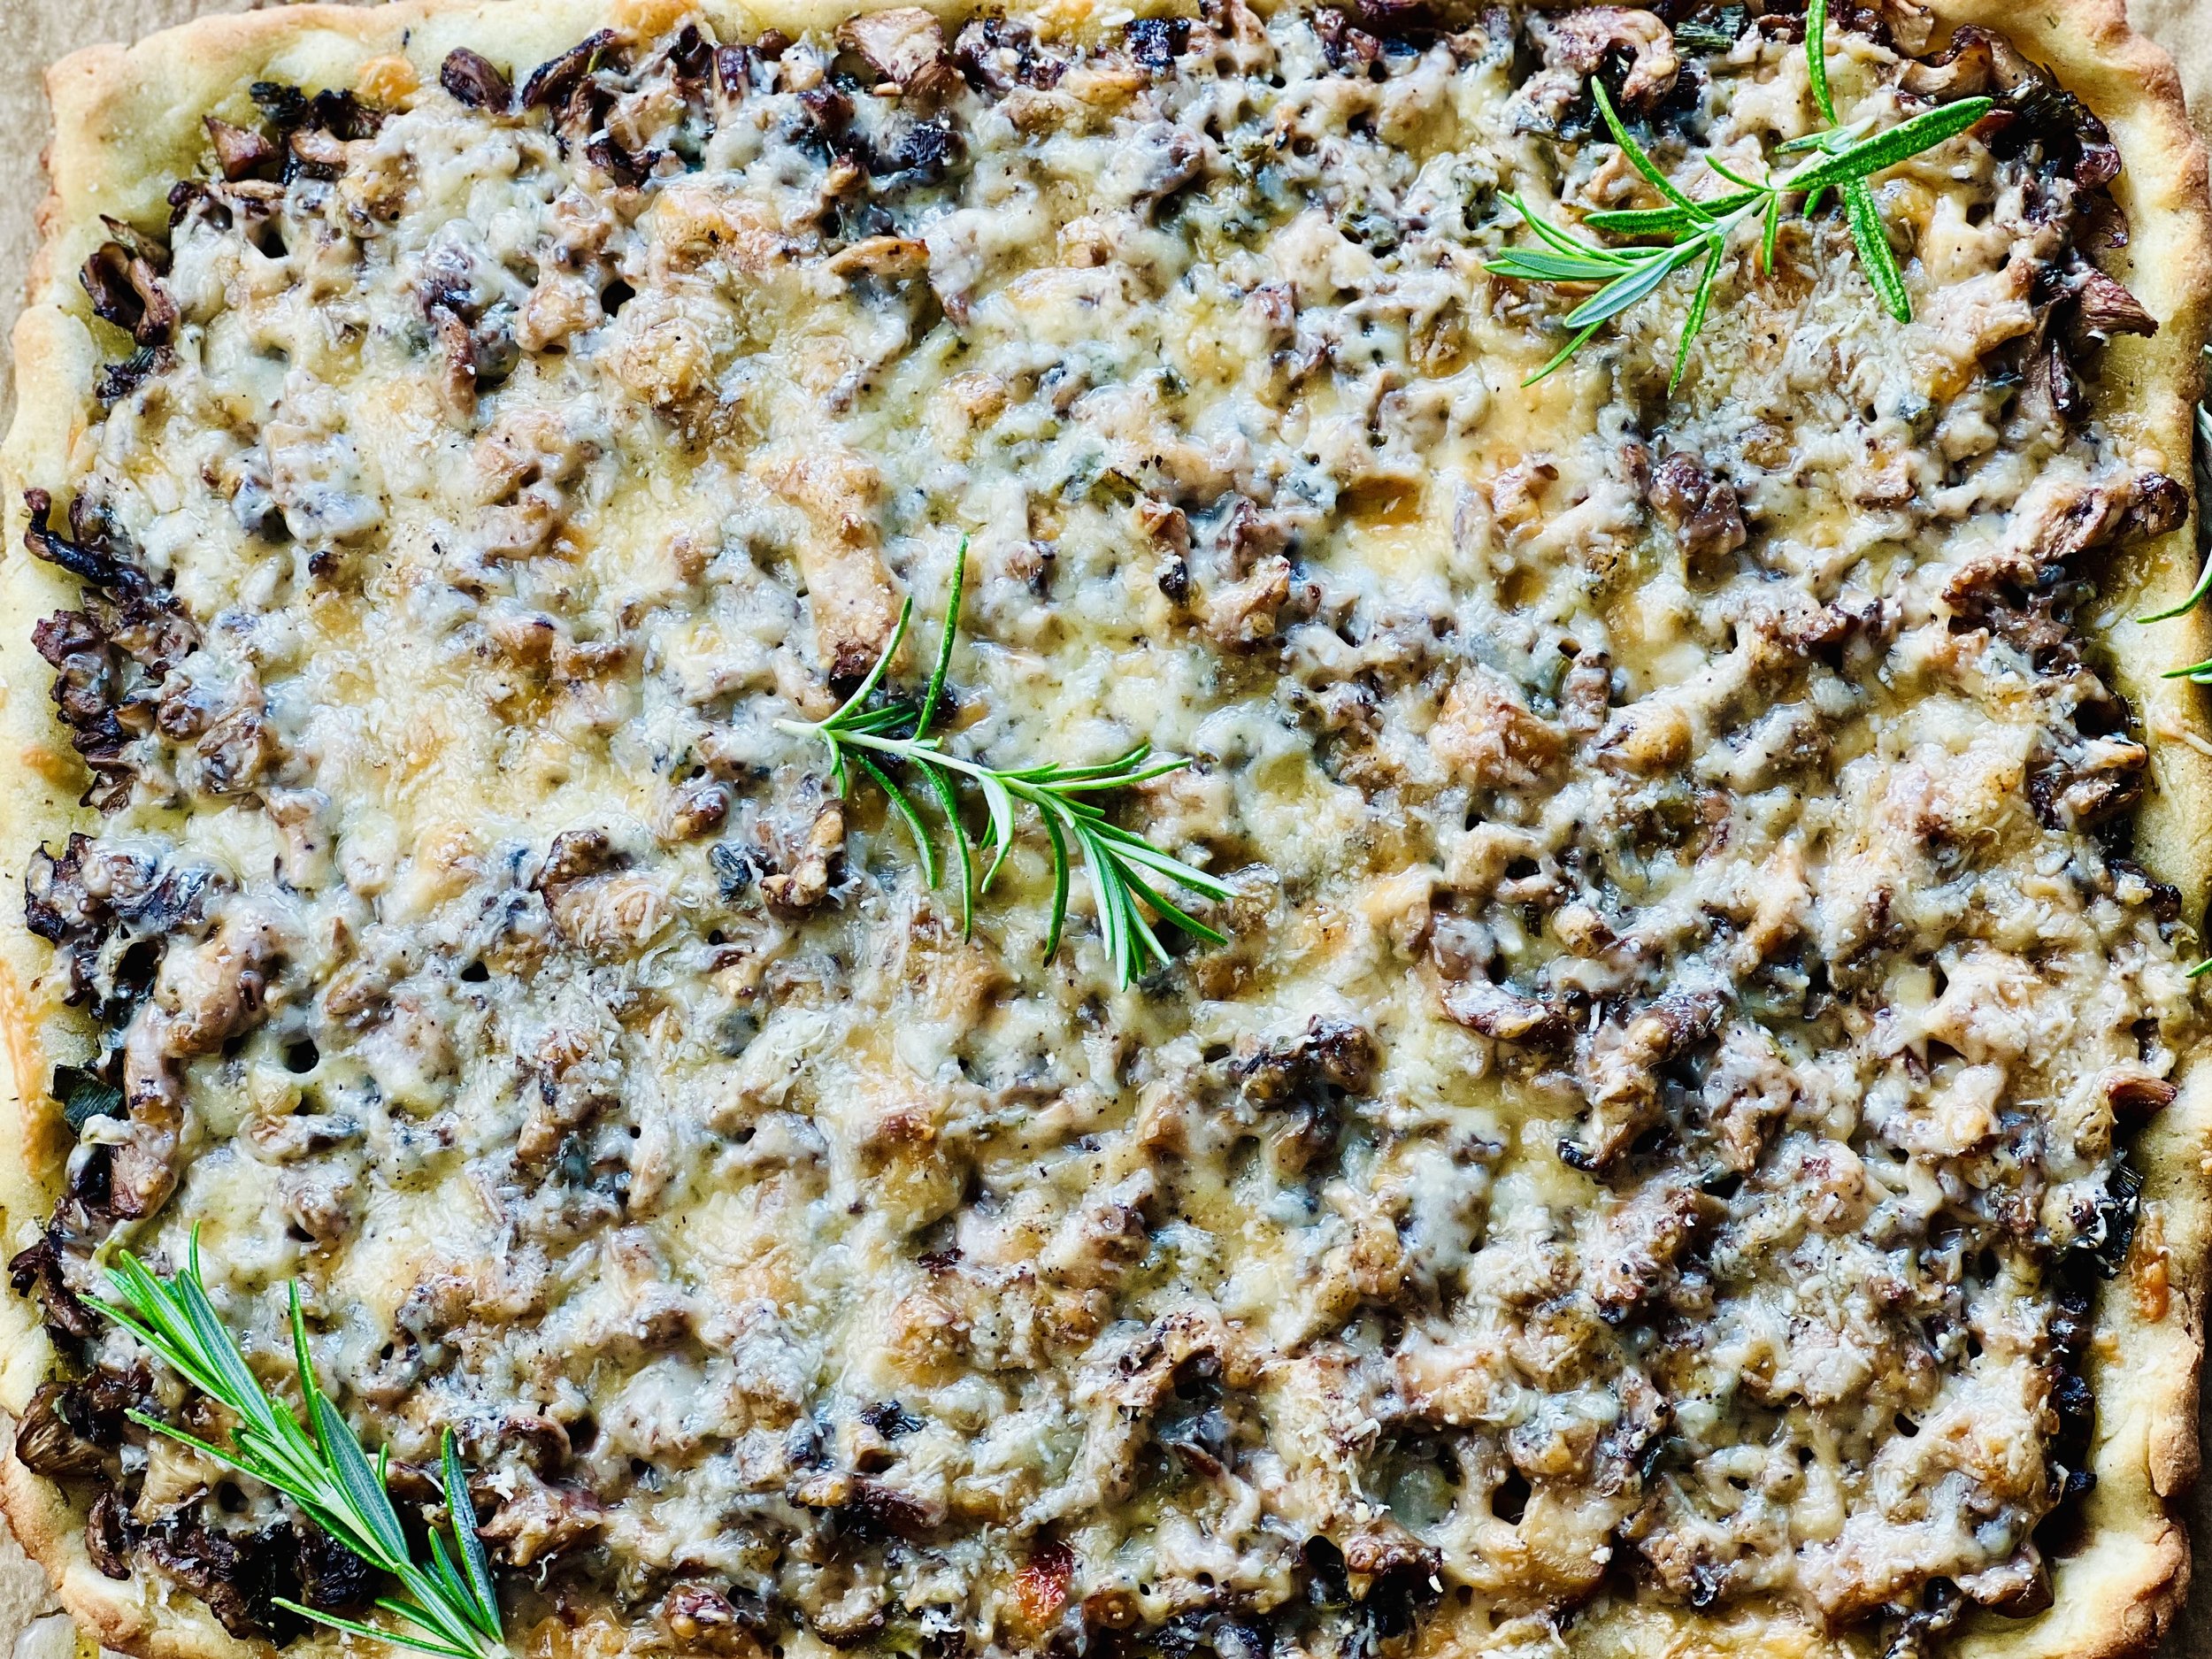
Sourdough Bruschetta with Herbed Ricotta Cream (low FODMAP)
20 Minutes prep • 16 Minutes cook • Low FODMAP • Vegetarian • Serves 8 • Ok to make-ahead: Steps 1-5
20 Minutes prep • 16 Minutes cook • Low FODMAP • Vegetarian • Serves 8 • Ok to make-ahead: Steps 1-5
Perfect for your next family gathering, this delicious bruschetta is crisp, creamy, beautiful, and low FODMAP too! My recipe for a lactose-free ricotta equivalent will make you certain you’re eating the real thing. And, you will swear there is garlic in this flavorful combination of herbs and spices, but no. It’s free of FODMAPs so you can eat and enjoy every bite.
This is an exclusive recipe just for recipe club members.
In addition to the two free recipes I create each week I am creating and delivering one very special recipe just for my recipe club members. If you’re not yet a member, I encourage you to join! Membership in the club includes access to the complete archive of recipes with filters so it can become your virtual low FODMAP cookbook plus, I am creating and delivering one special NEW recipe every week ONLY for recipe club members. And, for my true fans, I’ll be sharing behind-the-scenes content, and updates on the progress of the new cookbook.
Your membership in the club helps me continue creating new, delicious, easy-to-make, low FODMAP recipes just for you.
As always, all recipes will emphasize simple ingredients, easy preparation, and delicious low FODMAP results. Recipes will be for everything from main courses, salads, soups, side dishes, appetizers, desserts, sauces, breakfast and lunch, and even mocktails and cocktails. Everything you need to prepare fantastic low FODMAP meals everyone will love.
Join the club. Become a Patron. Let’s keep making delicious Low FODMAP meals together.
More Deliciously Low FODMAP™ appetizer recipes you might enjoy


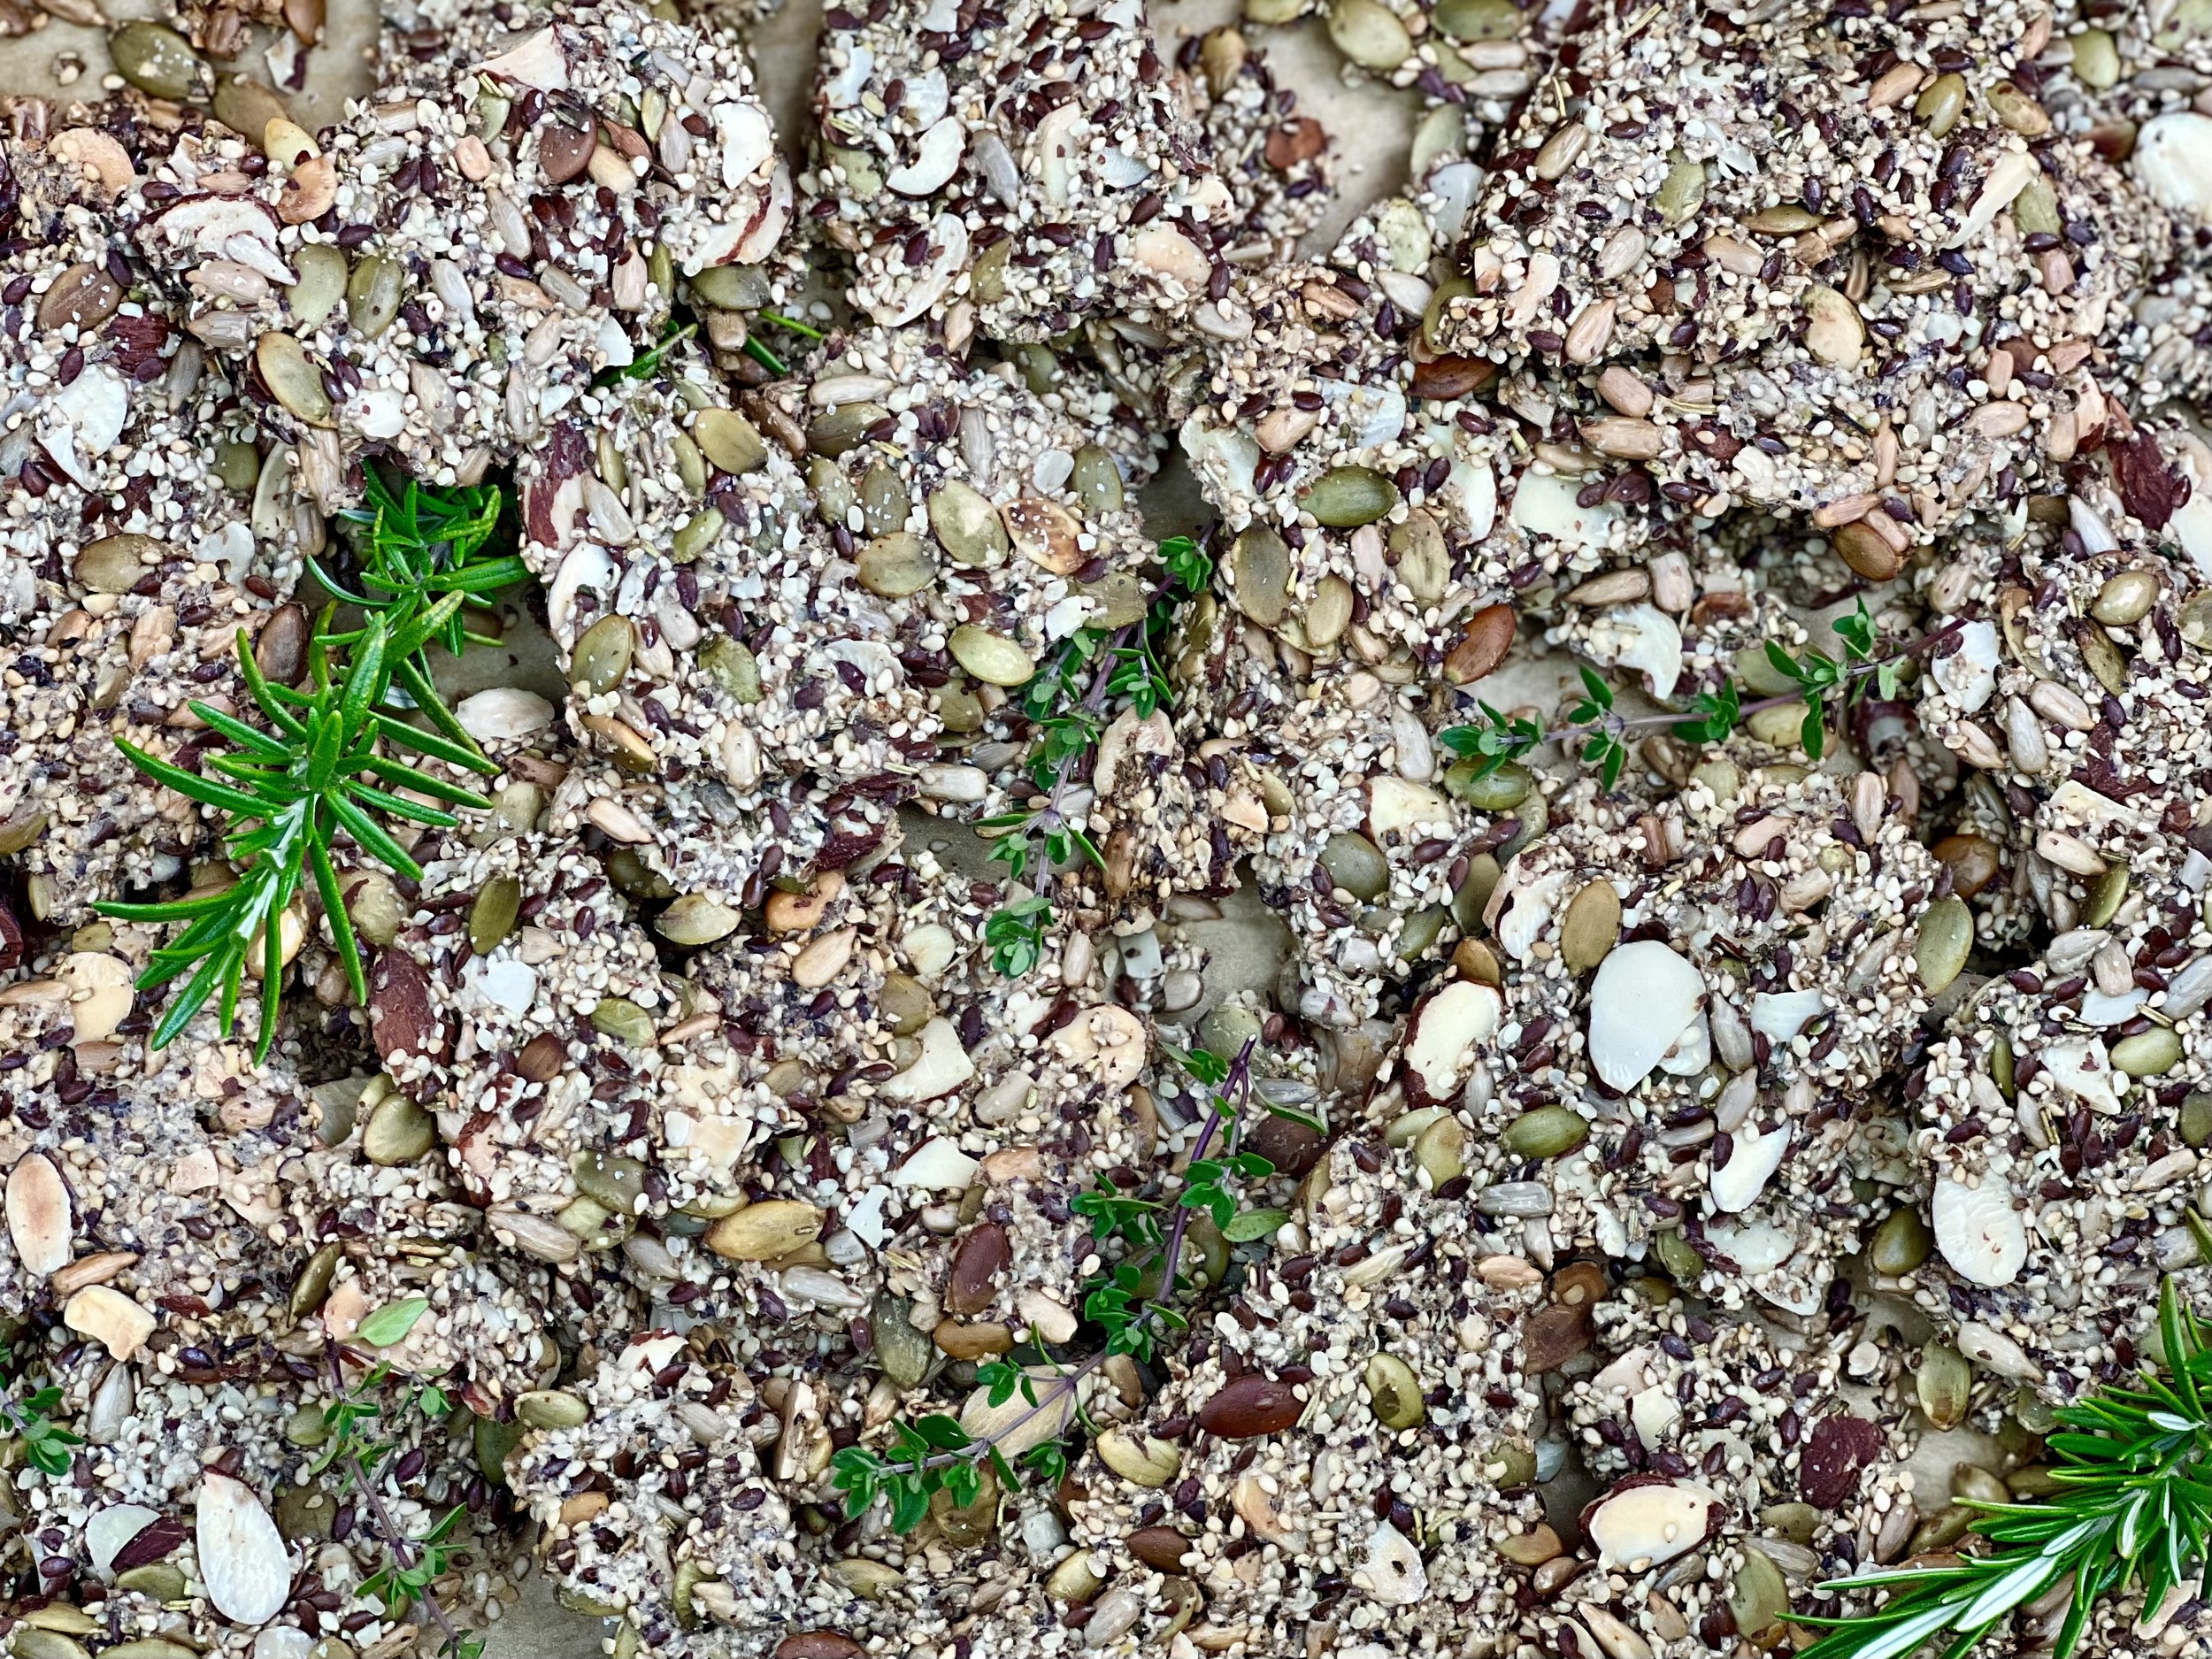

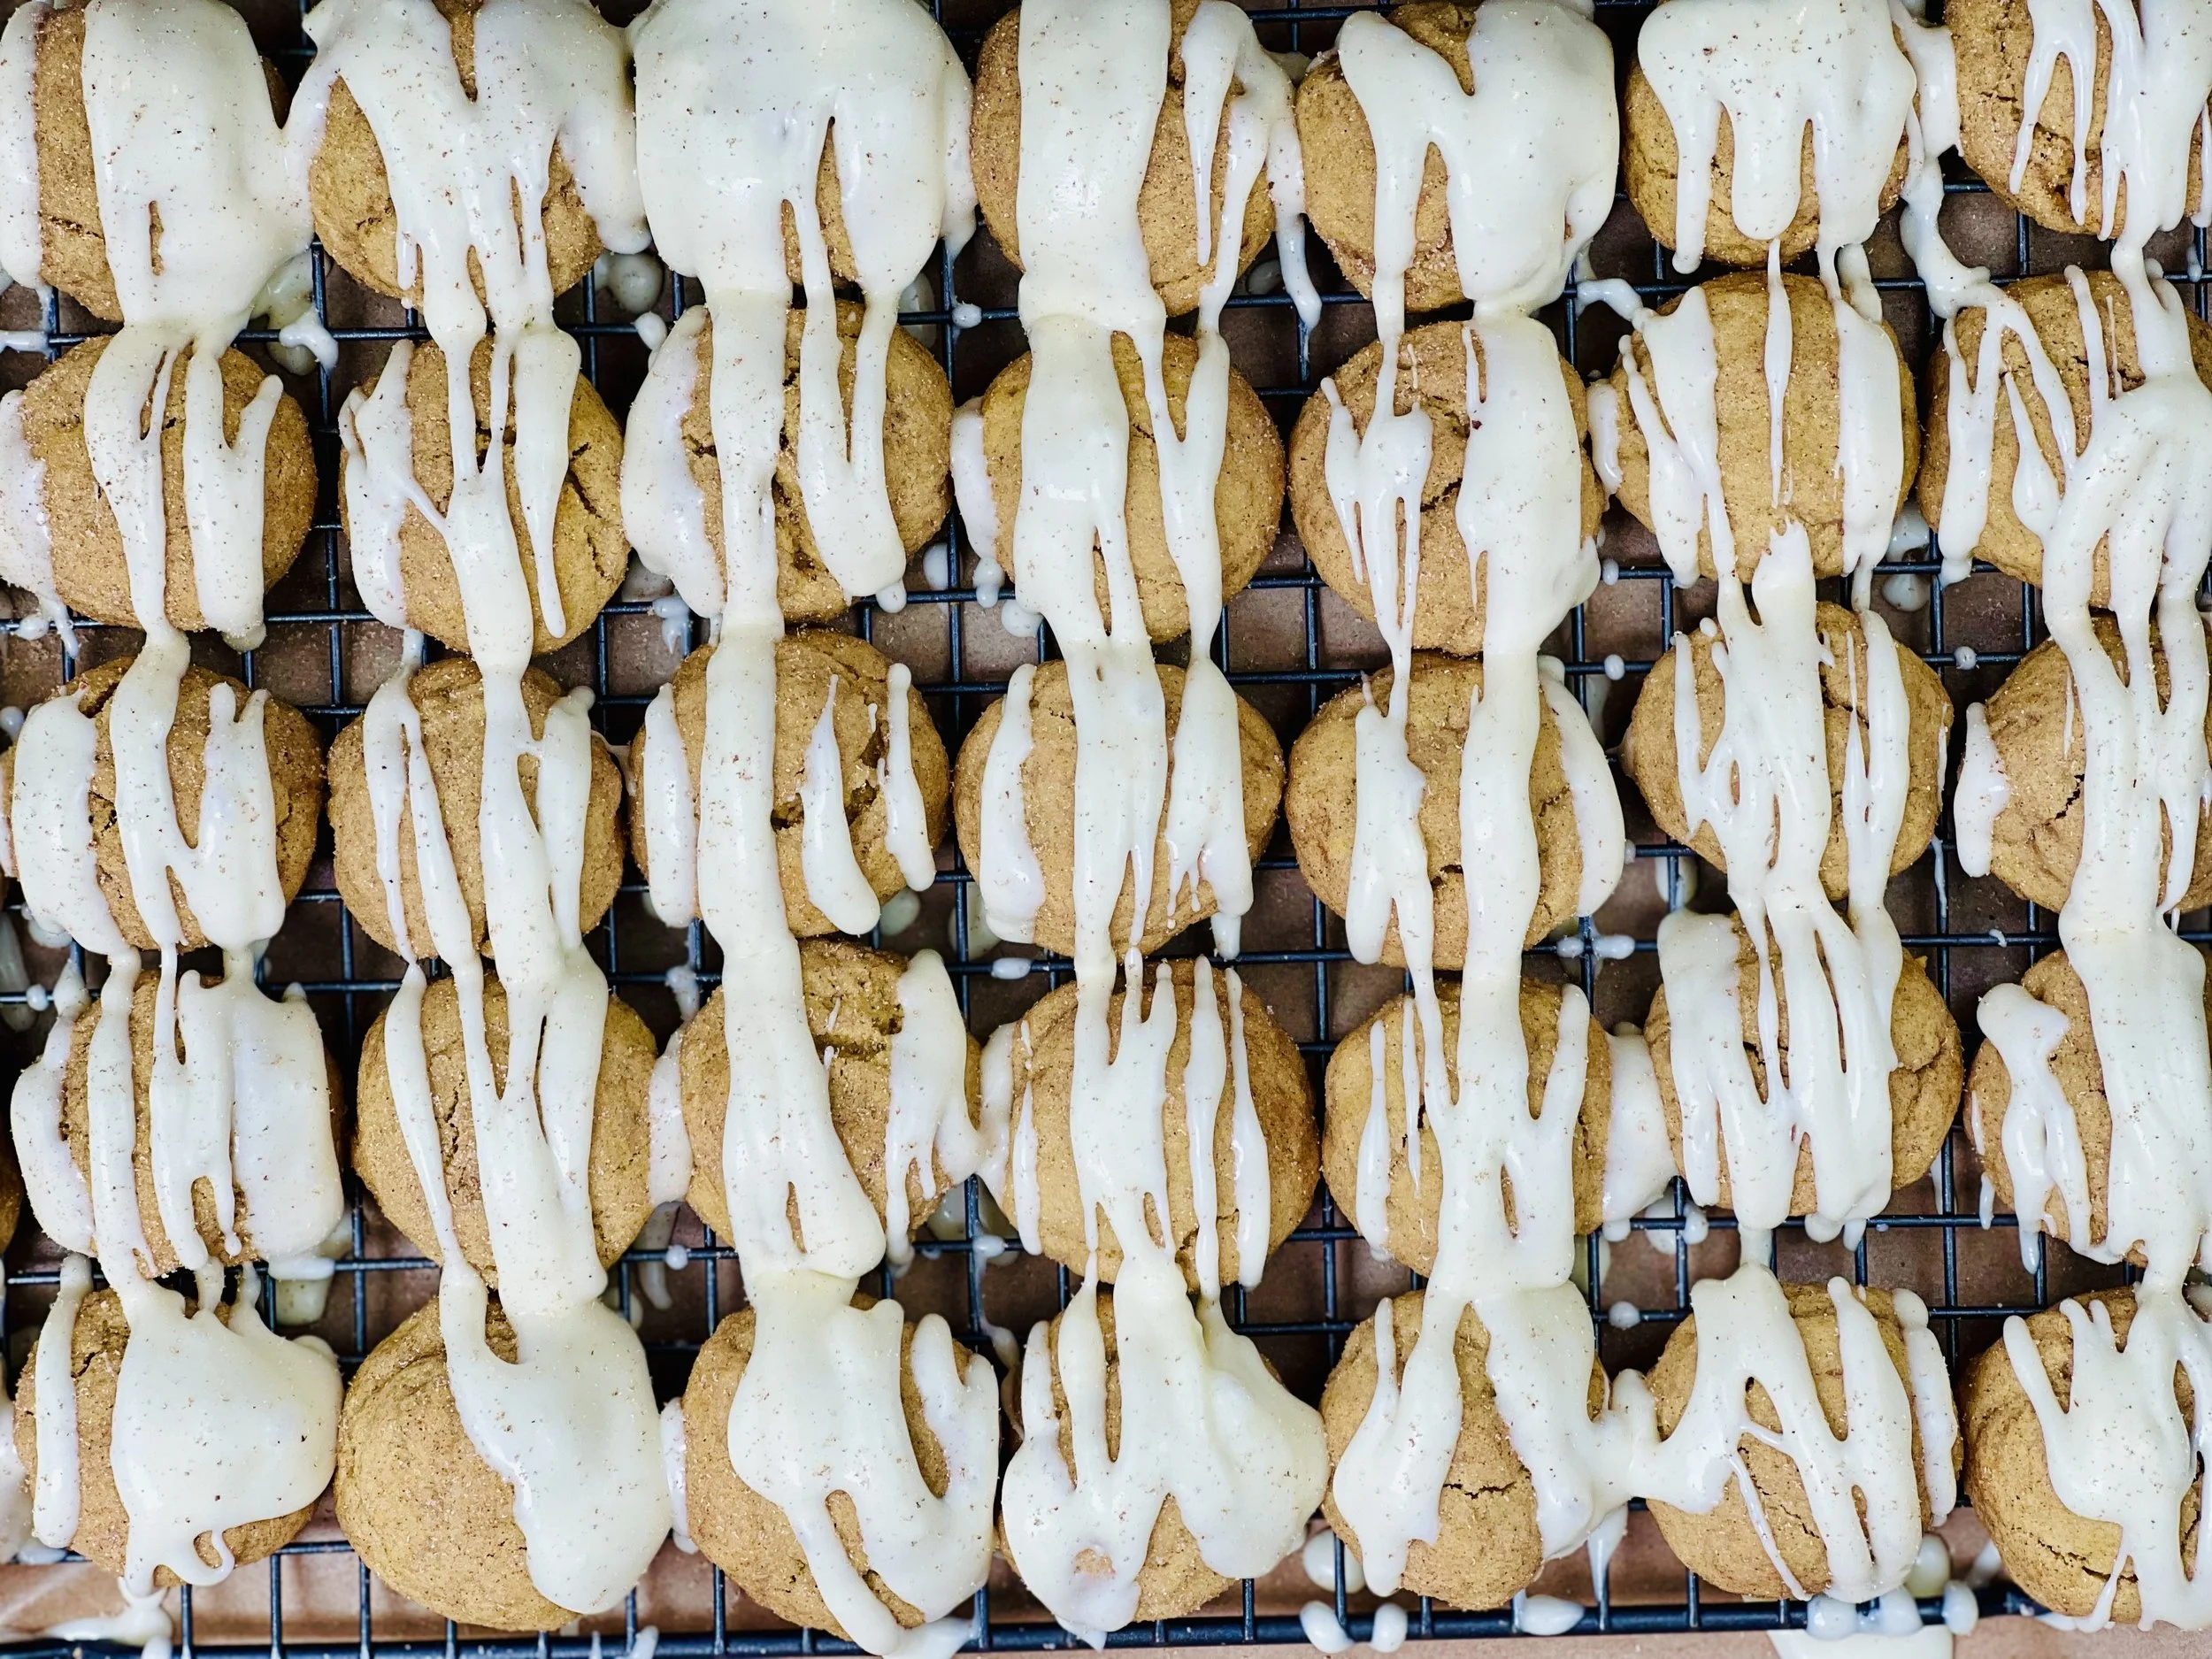
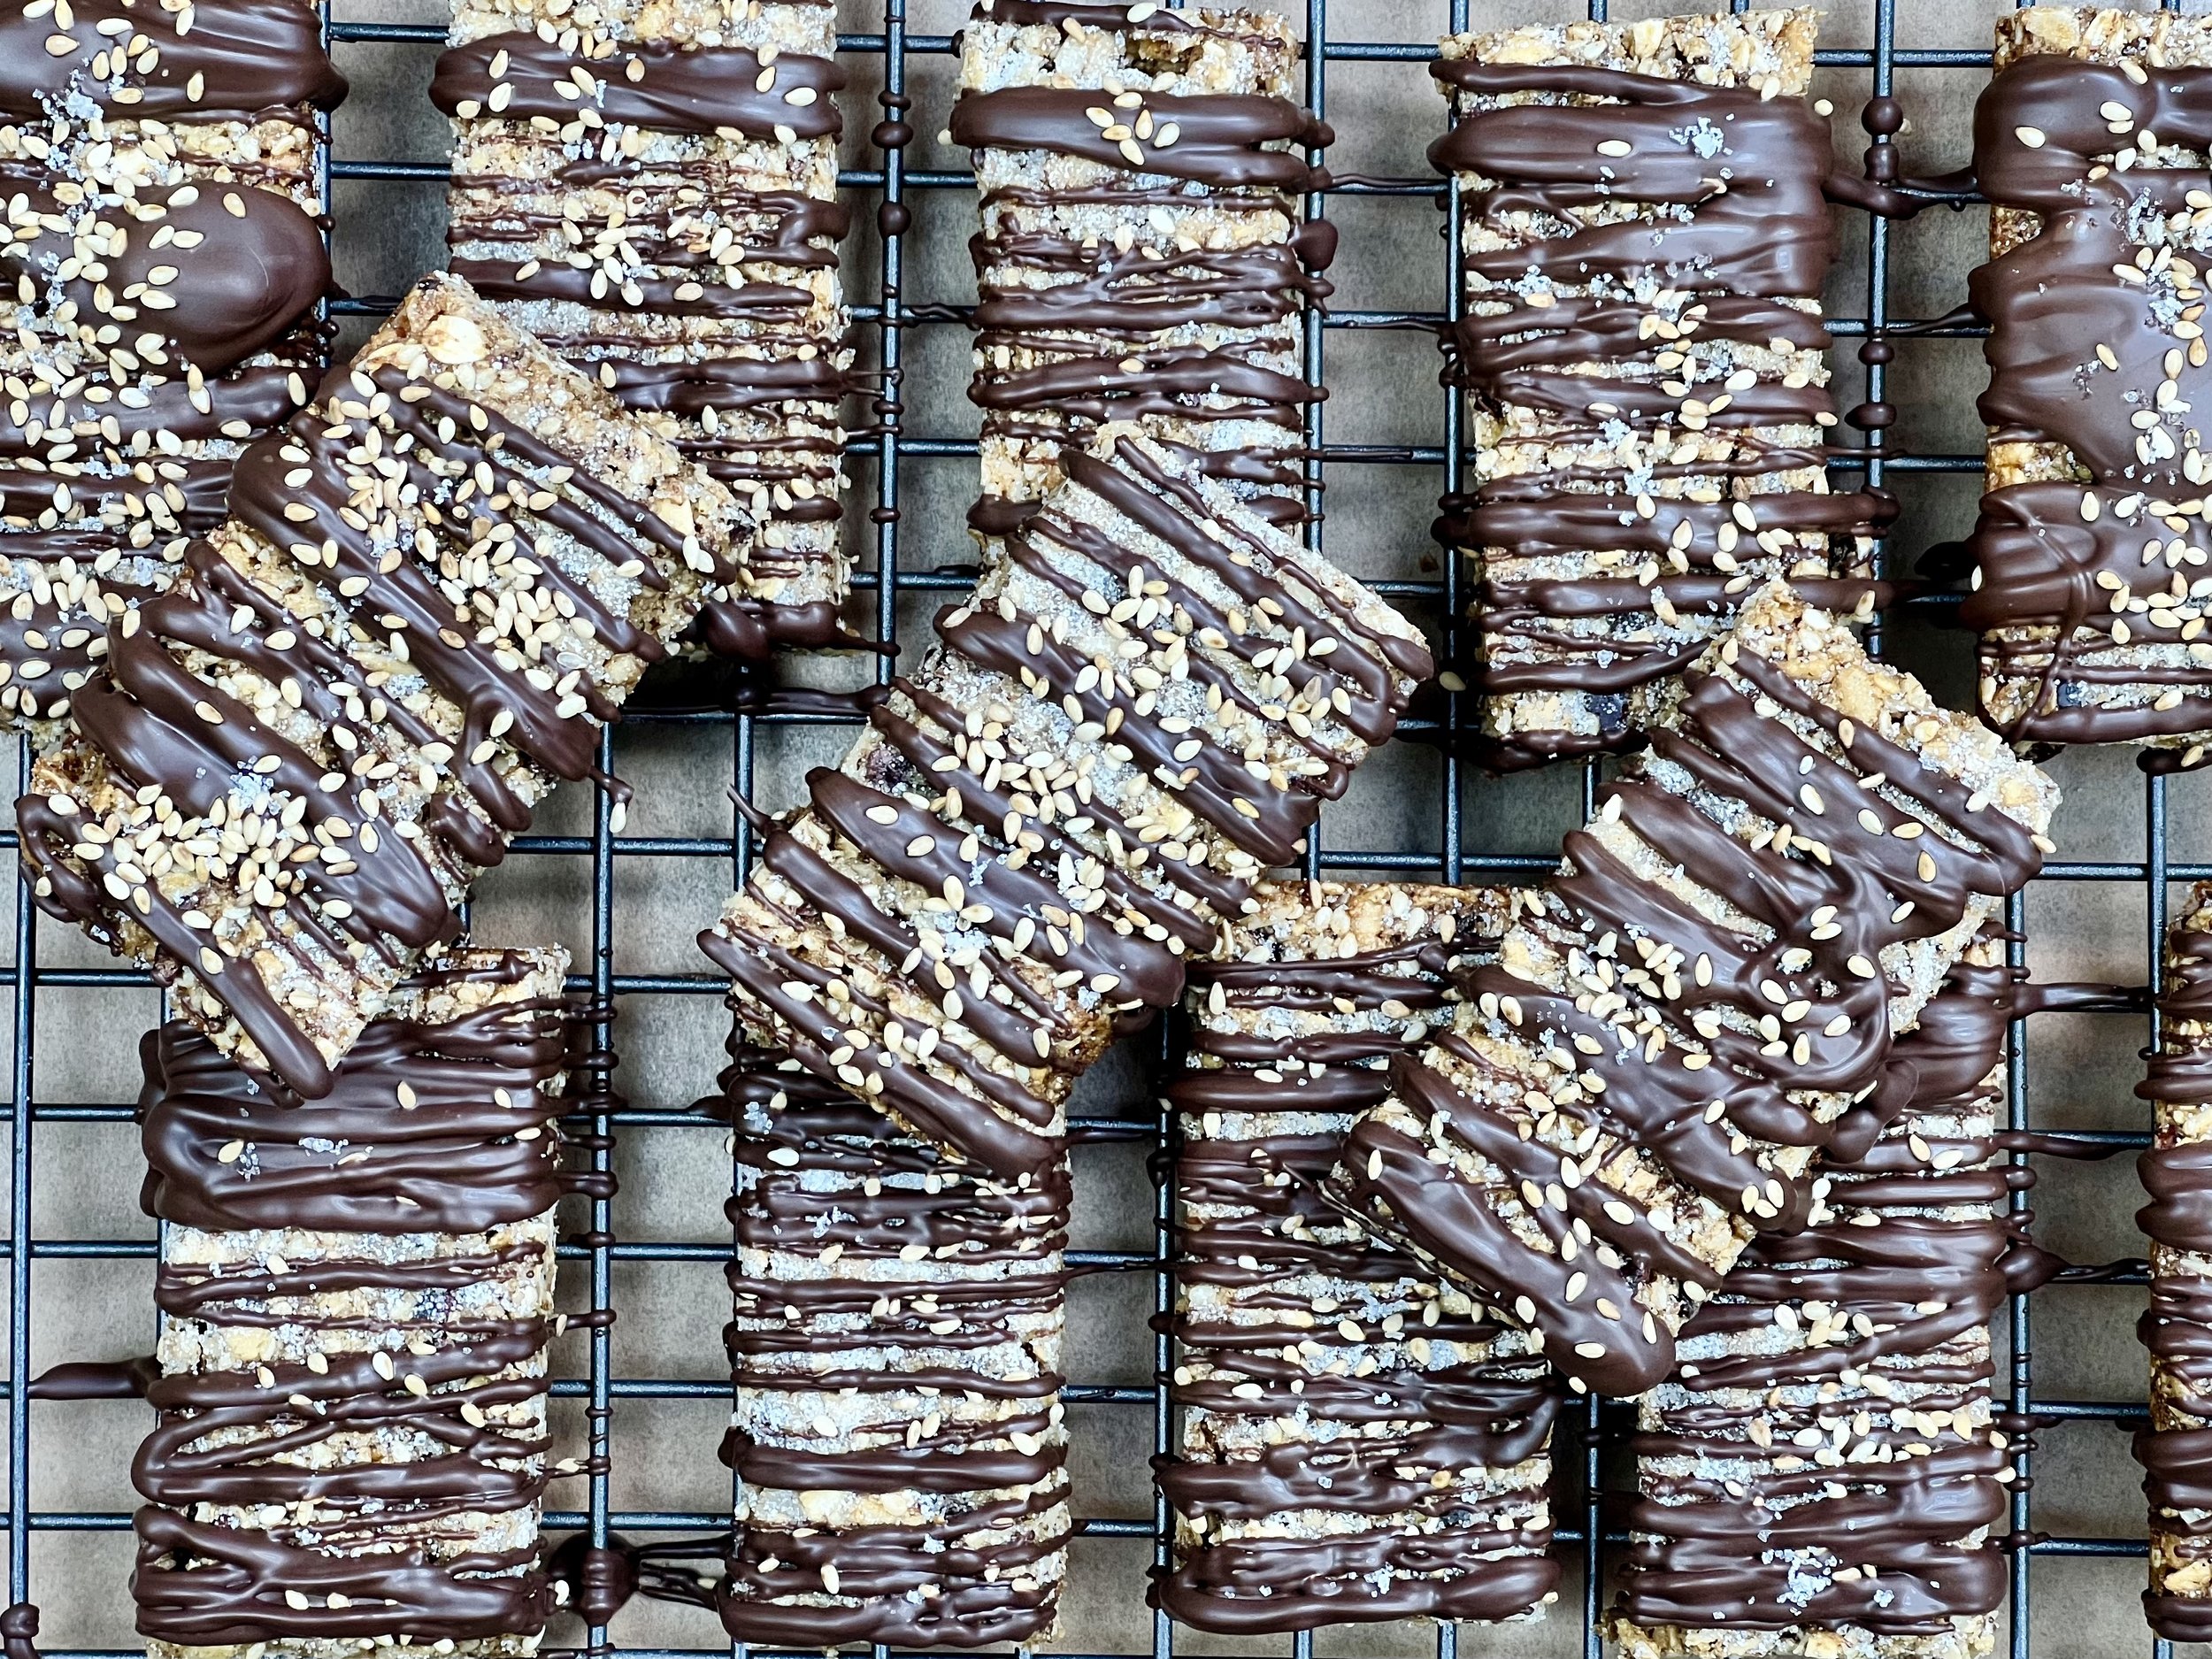
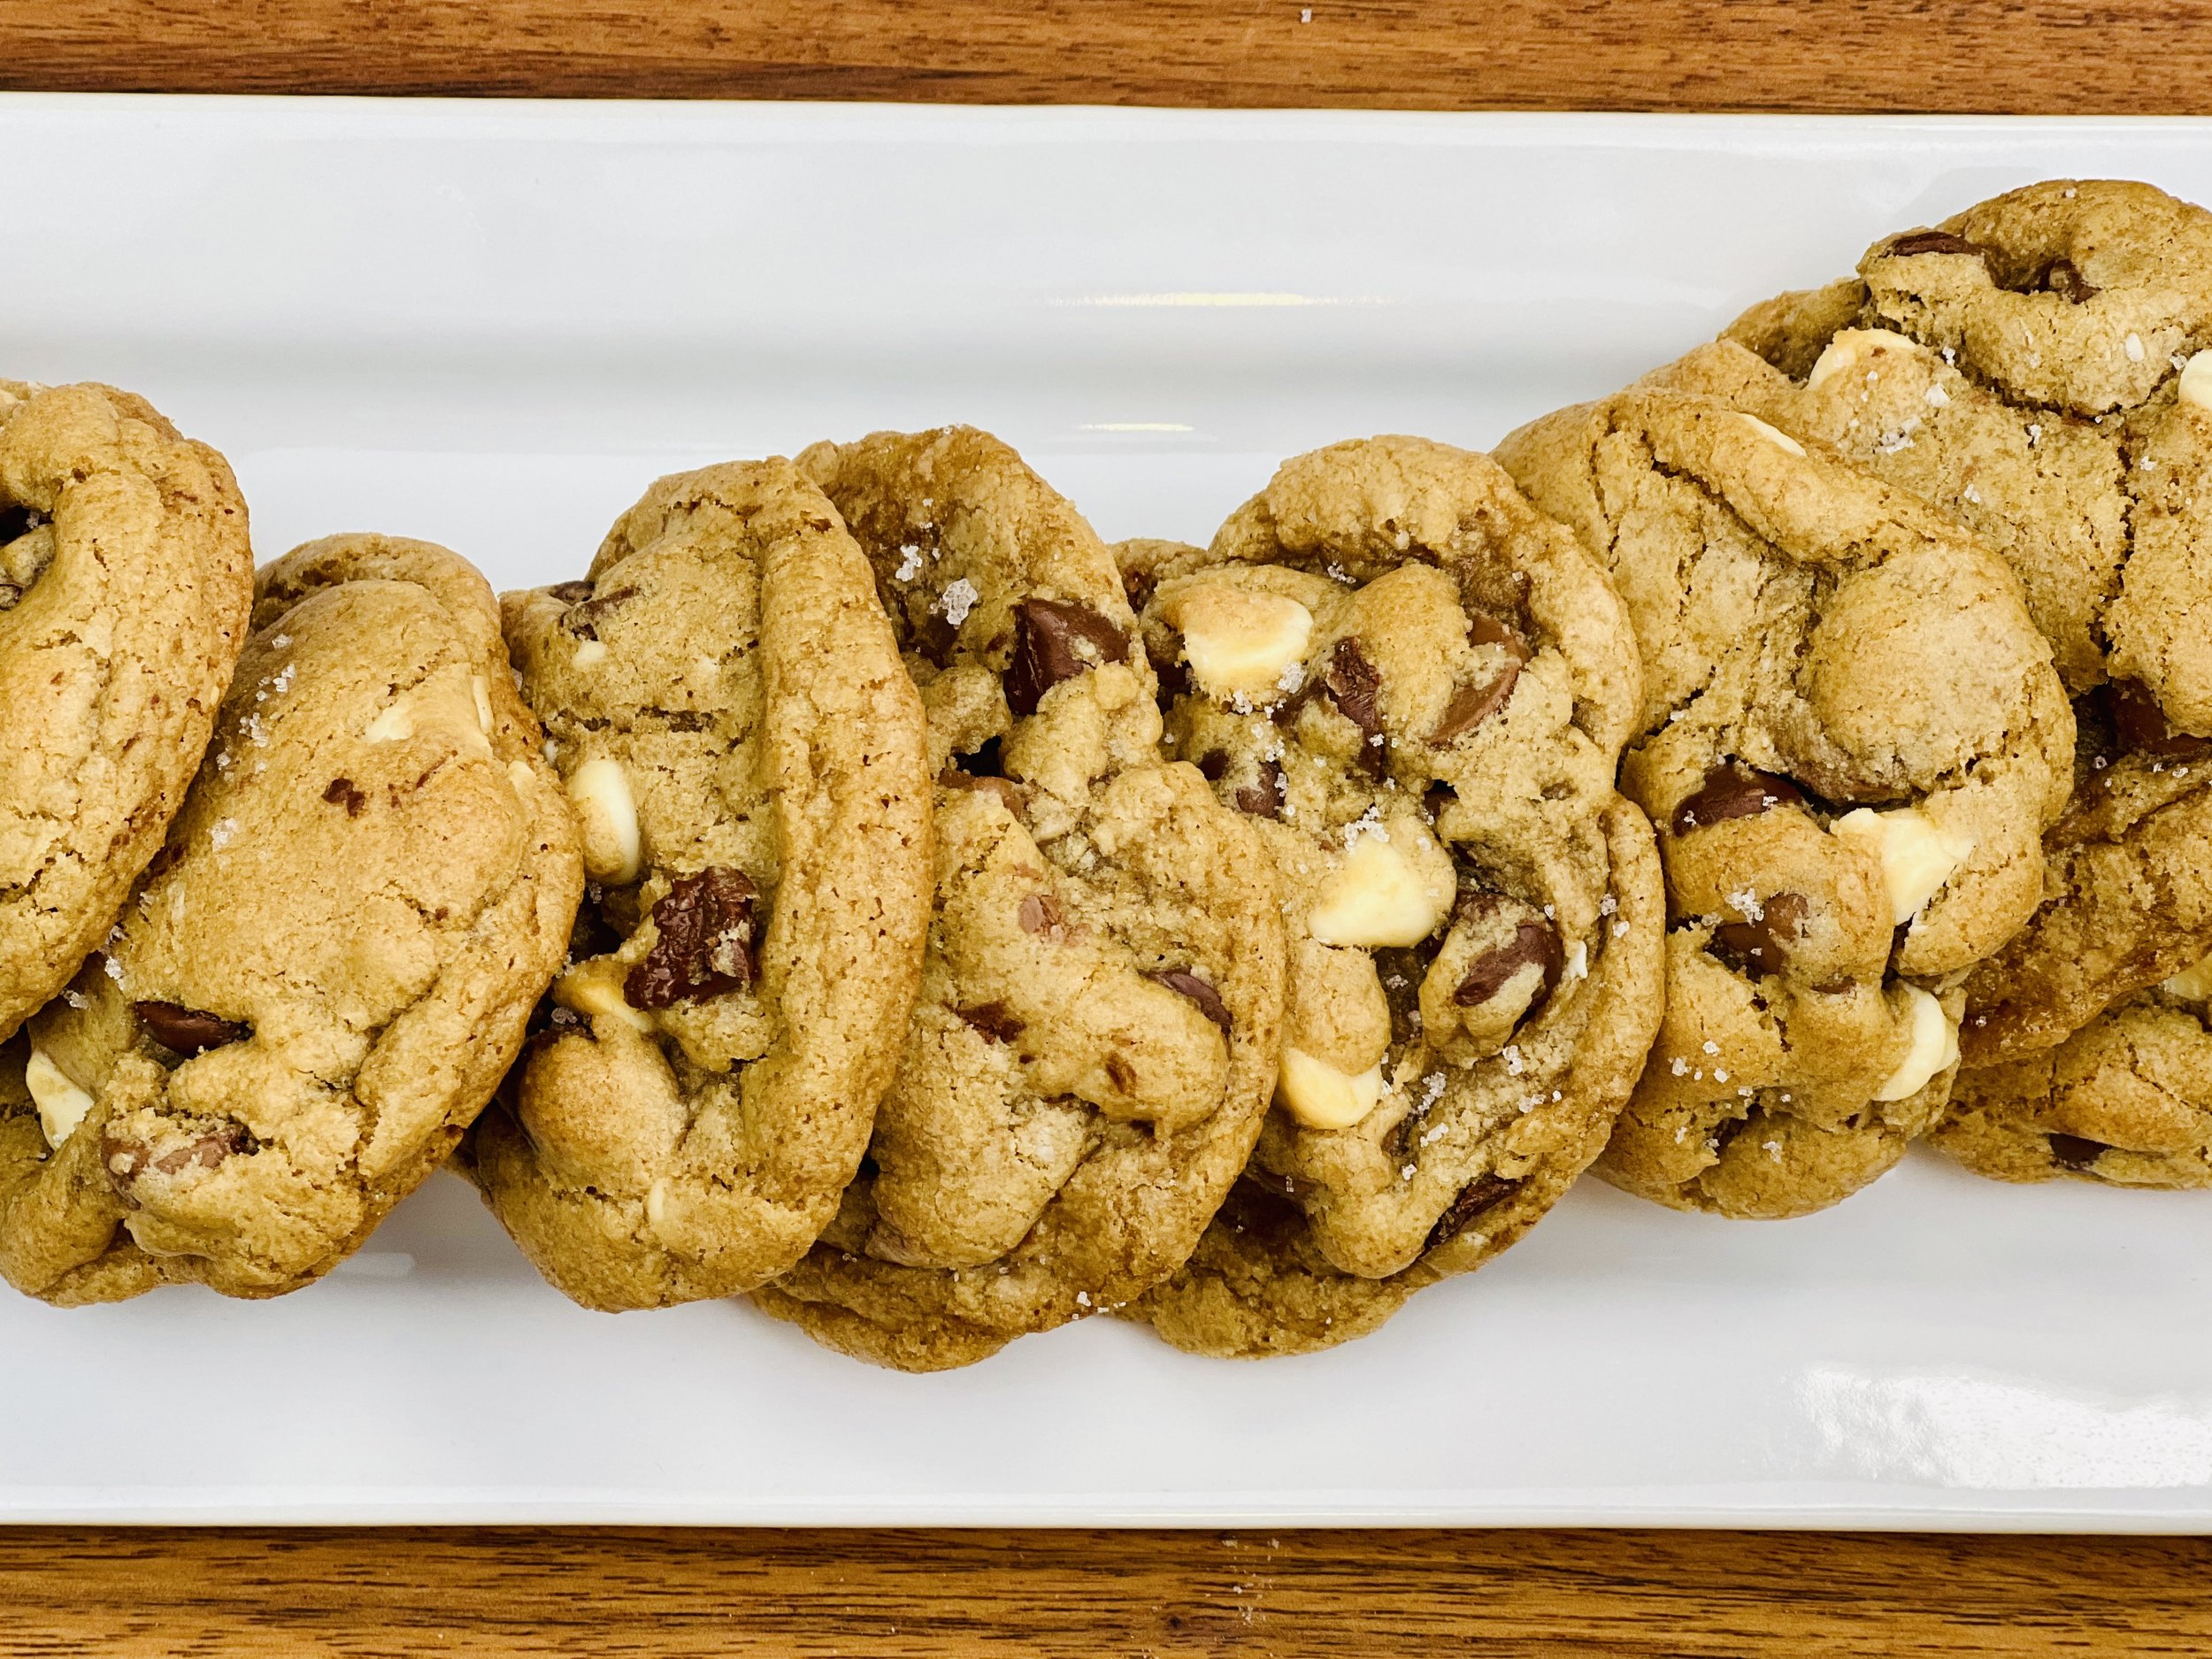
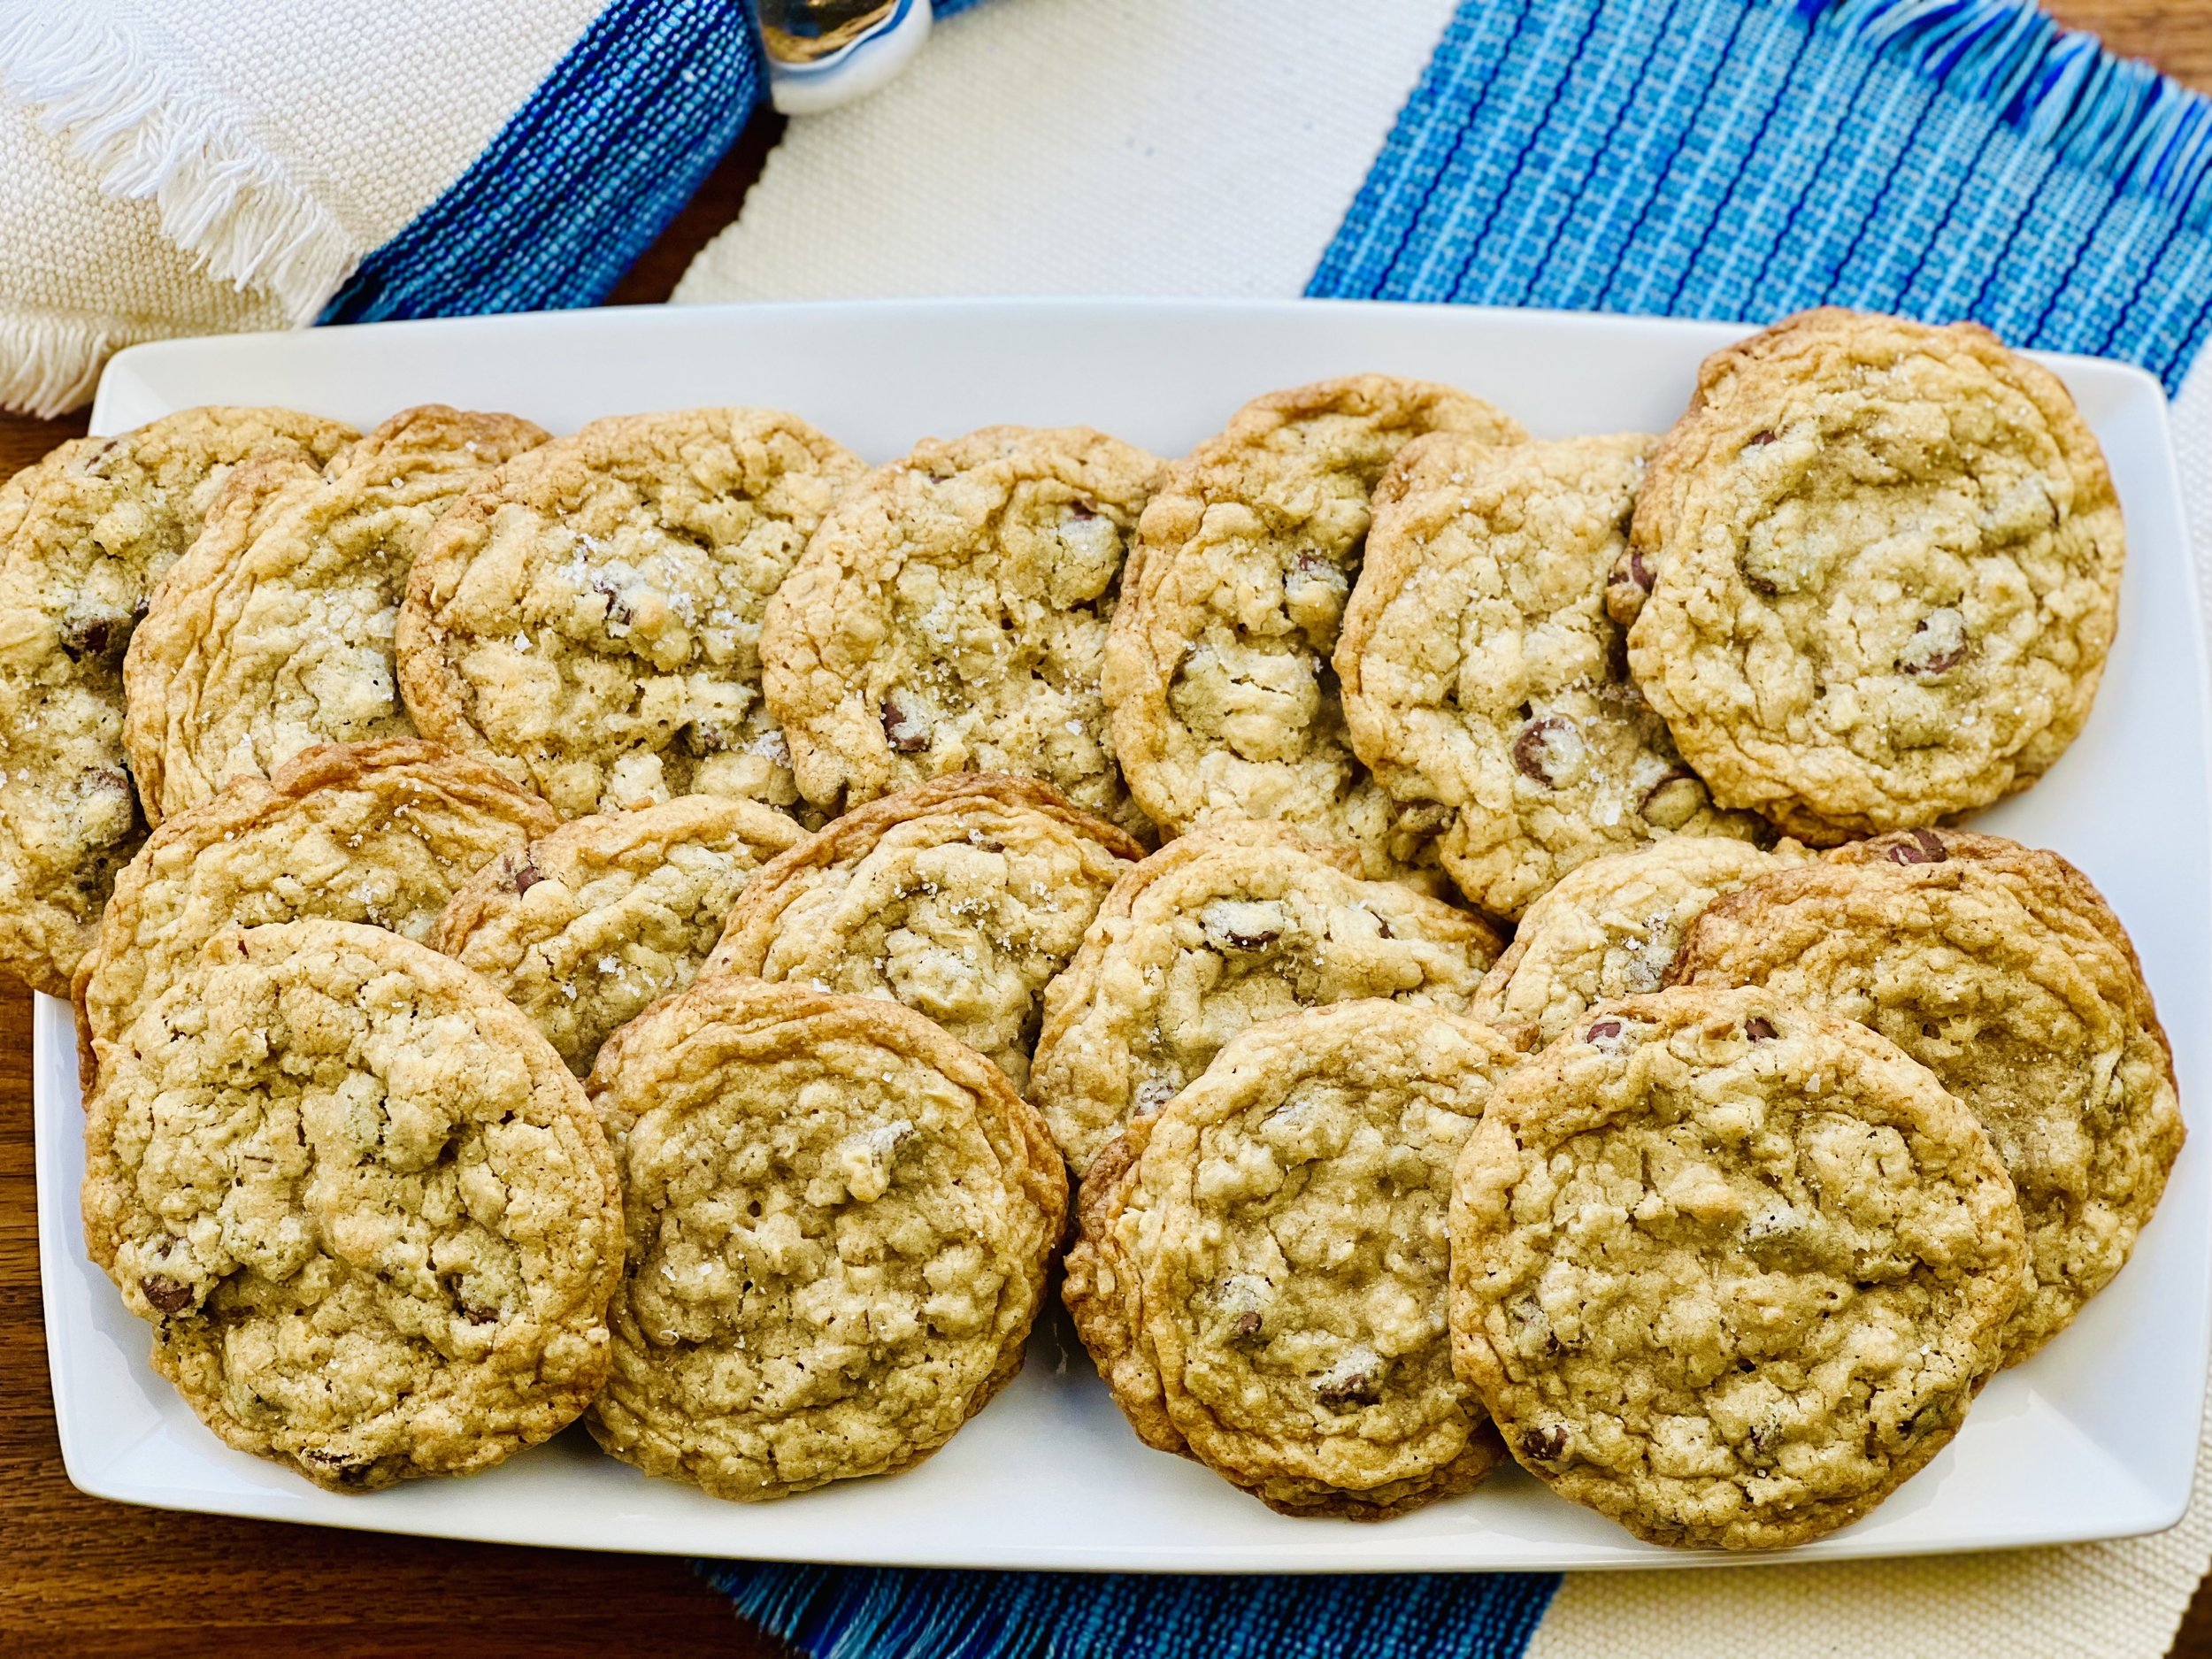
Salted Brown Butter Oatmeal Chocolate Chip Cookies (low FODMAP)
25 Minutes prep • 15 Minutes cook • Low FODMAP • Gluten-free • Makes 24 • Serving size 2
25 Minutes prep • 15 Minutes cook • Low FODMAP • Gluten-free • Makes 24 • Serving size 2
Another chocolate chip cookie recipe? Yup. And this one’s a keeper! These cookies have got it all. Brown butter. Oatmeal. Chocolate. And a dusting of flaky salt to finish them off. They’re chewy, and buttery, and the whole family will love them. Planning a potluck or picnic? These cookies should have a place on the menu!
Ingredients
2 sticks (1 cup) salted butter, at room temperature
3/4 cup light brown sugar
3/4 cup white sugar
1/4 cup lactose-free sour cream
1 egg, at room temperature
2 teaspoons vanilla extract
2 cups gluten-free flour
1 1/2 cups gluten-free rolled oats
1 teaspoon baking soda
1/2 teaspoon kosher salt
1 cup semi-sweet chocolate chips
Flaky salt to sprinkle on top
Directions
(1) Brown the butter: Add 1 stick (8 tablespoons) butter to a skillet set over medium heat, cooking until the butter begins to brown, about 3-4 minutes. Remove from the heat and transfer to the bowl of your stand mixer. If you’re in a hurry to cool it off, put it in the freezer to chill, 10 minutes, but no longer. You don’t want it to freeze.
(2) Prepare: Preheat the oven to 350 degrees F. Line a baking sheet with parchment paper. Combine flour, oats, baking soda, and salt in a bowl and whisk to combine. Then set aside.
(3) Make the dough: In the bowl of your stand mixer, beat together the remaining 1 stick of butter, the cooled browned butter, and the sugar on medium-high speed until light and fluffy (2 - 3 minutes). Beat in the sour cream, egg, and vanilla, until well combined. Add the flour, oatmeal, baking soda, and salt mixture in two parts, beating on medium-high for 1 minute and scraping down the sides of the bowl in between. Fold in the chocolate chips.
(4) Shape the dough: Use a large cookie scoop or spoon and roll the dough into 2 tablespoon size balls and place them 3 inches apart on the prepared baking sheet. No more than 6 cookies per sheet as they spread.
(5) Bake: Bake for 7 minutes, then rotate the pan and bake another 3-5 minutes, the cookies will begin to brown around the edges, but still be doughy in the center.
(6) Finish: Remove from the oven and let the cookies cool on the baking sheet (they will continue to cook slightly as they sit on the baking sheet). Sprinkle with flaky salt if desired while they are still hot.
(7) Serve: Eat warm or let them cool first. Store in an airtight container for up to 3 days if they last that long!
Eat and enjoy every bite because you can!
Recipe note: I use Diamond Crystal Kosher salt in all my recipes because it has a wonderful flat and crisp flake that tastes delicious. It is also the least salty salt available so you can use it more liberally as a seasoning than you can table salt or sea salt. If you use another type of salt, you may need to reduce the amount so it is not over-salted.
Link note: This post contains links for you to easily purchase items listed on the page. In some cases, we have provided a special discount code for IBS Game Changers so be sure to use it when you purchase an item to get the discount that has been arranged just for you! As an Amazon Associate, I earn a commission from qualifying Amazon purchases.
More Deliciously Low FODMAP™ dessert recipes
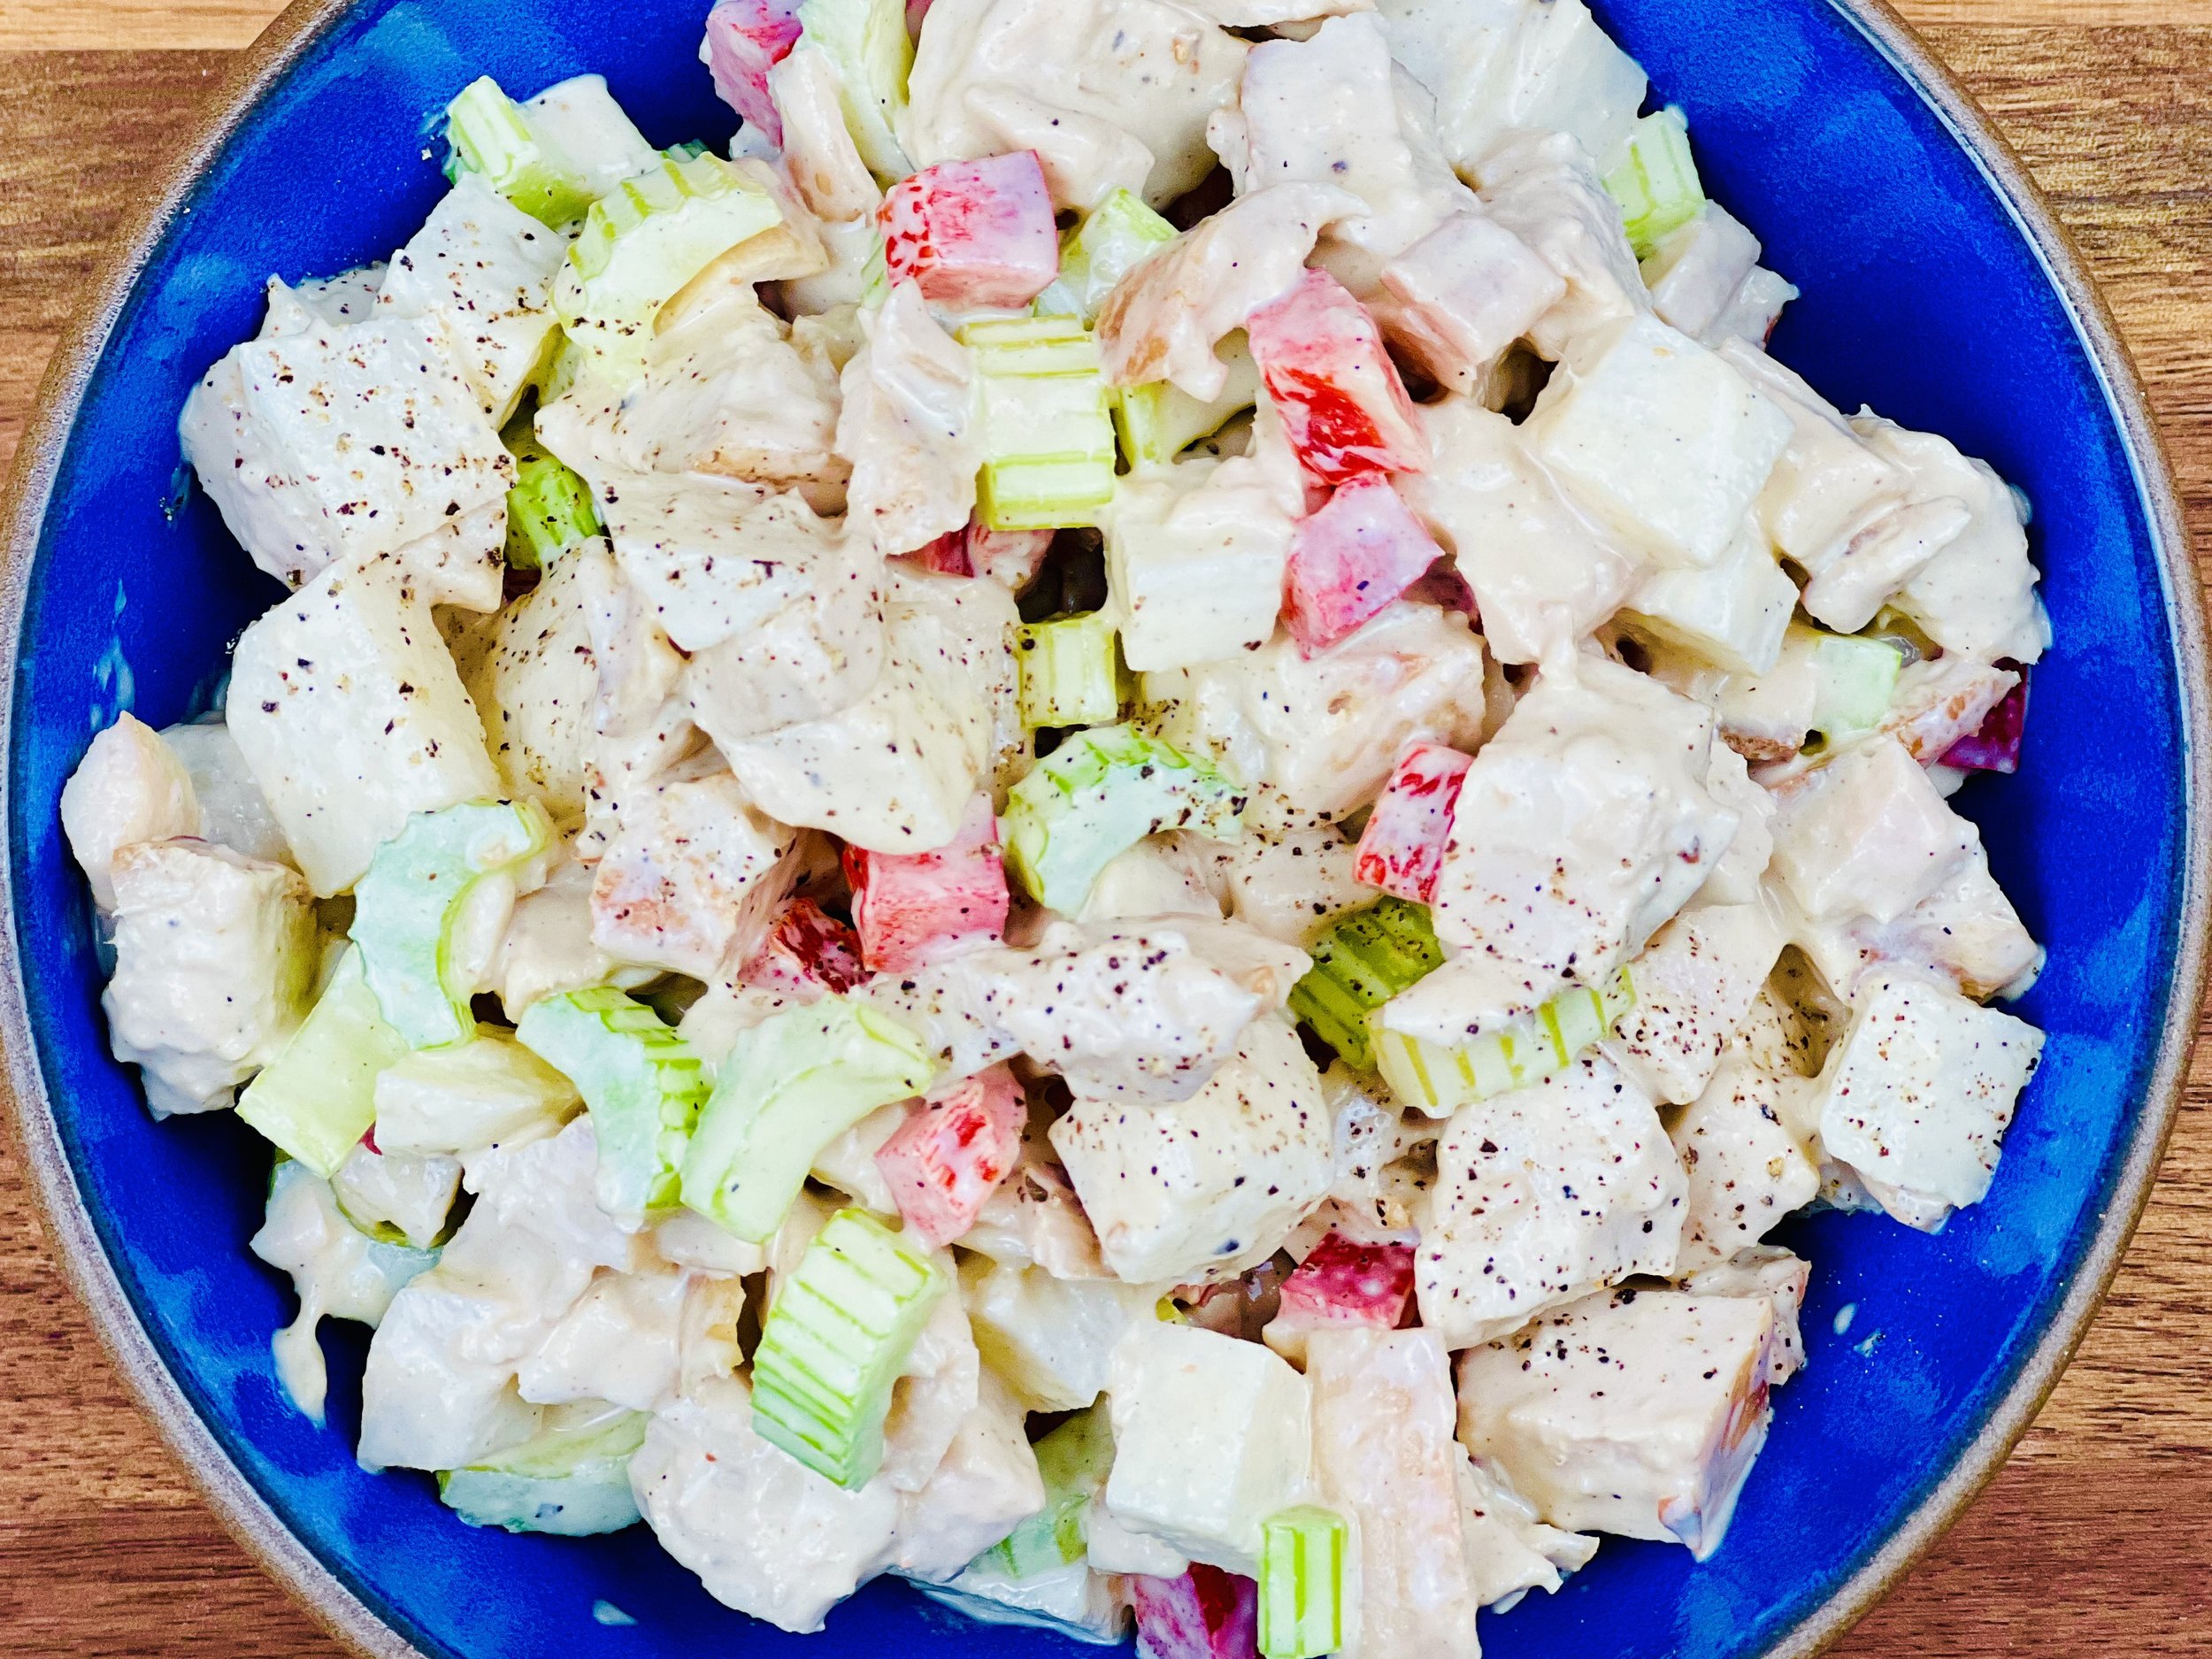
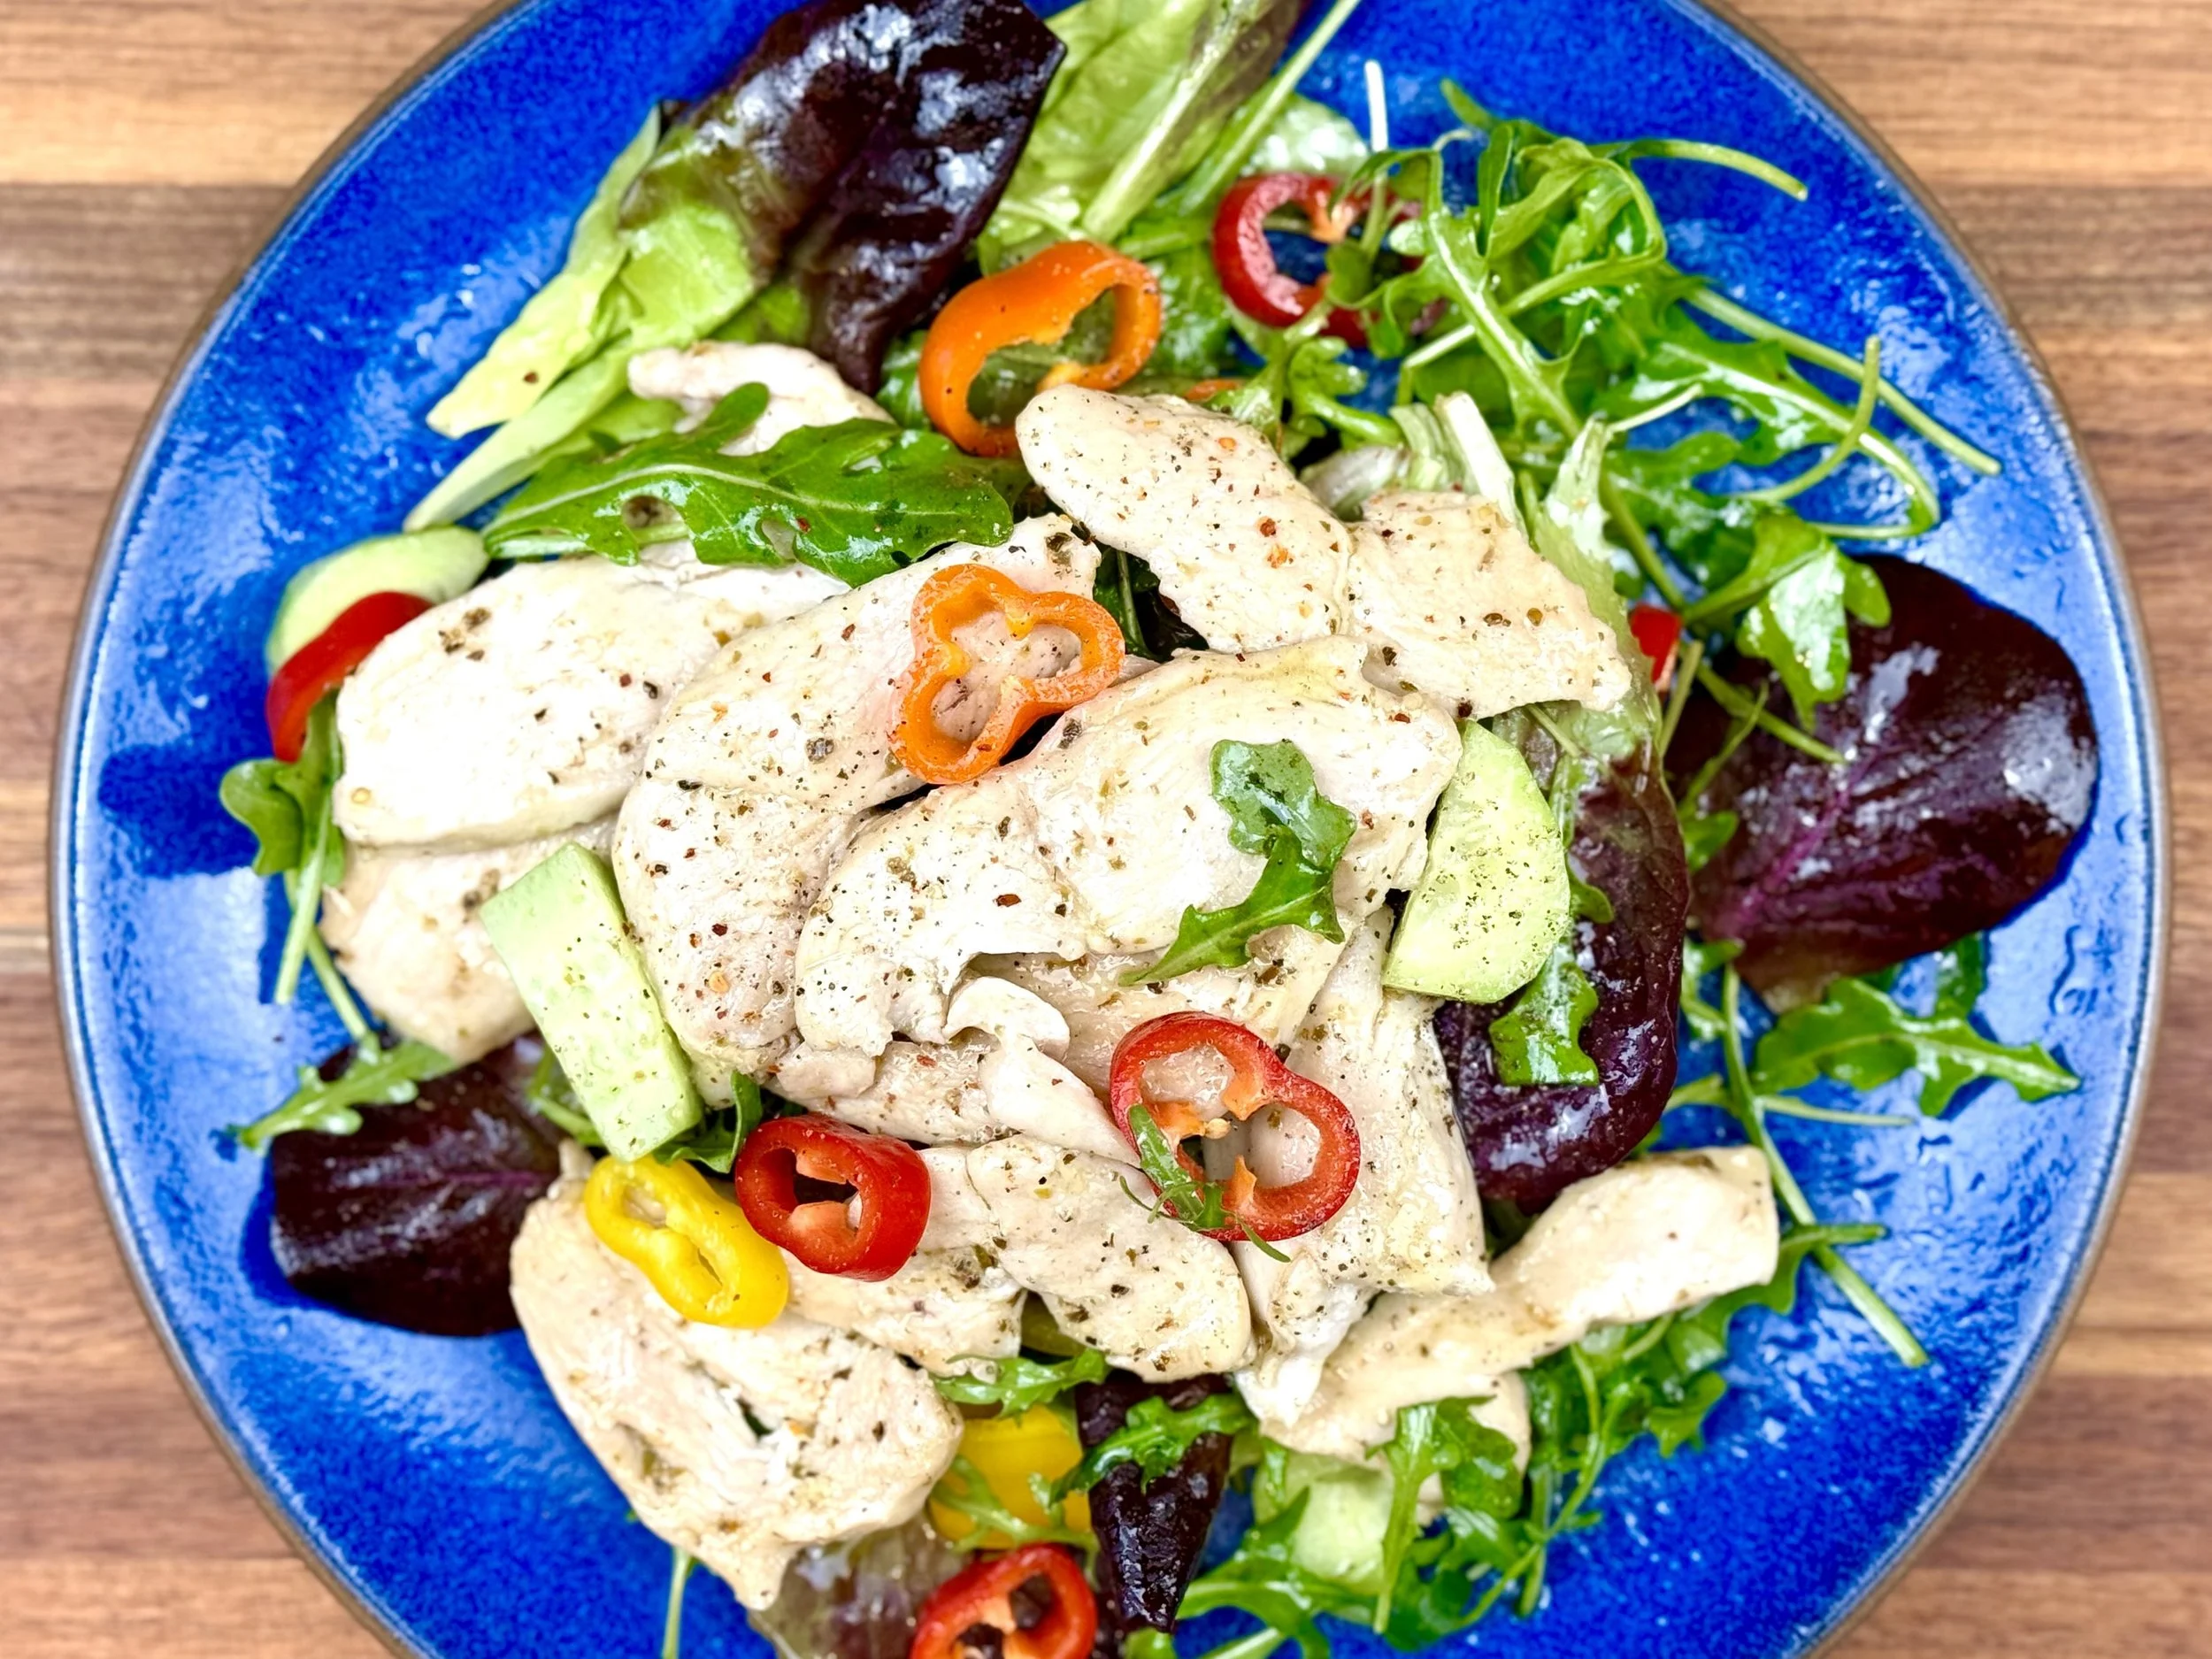
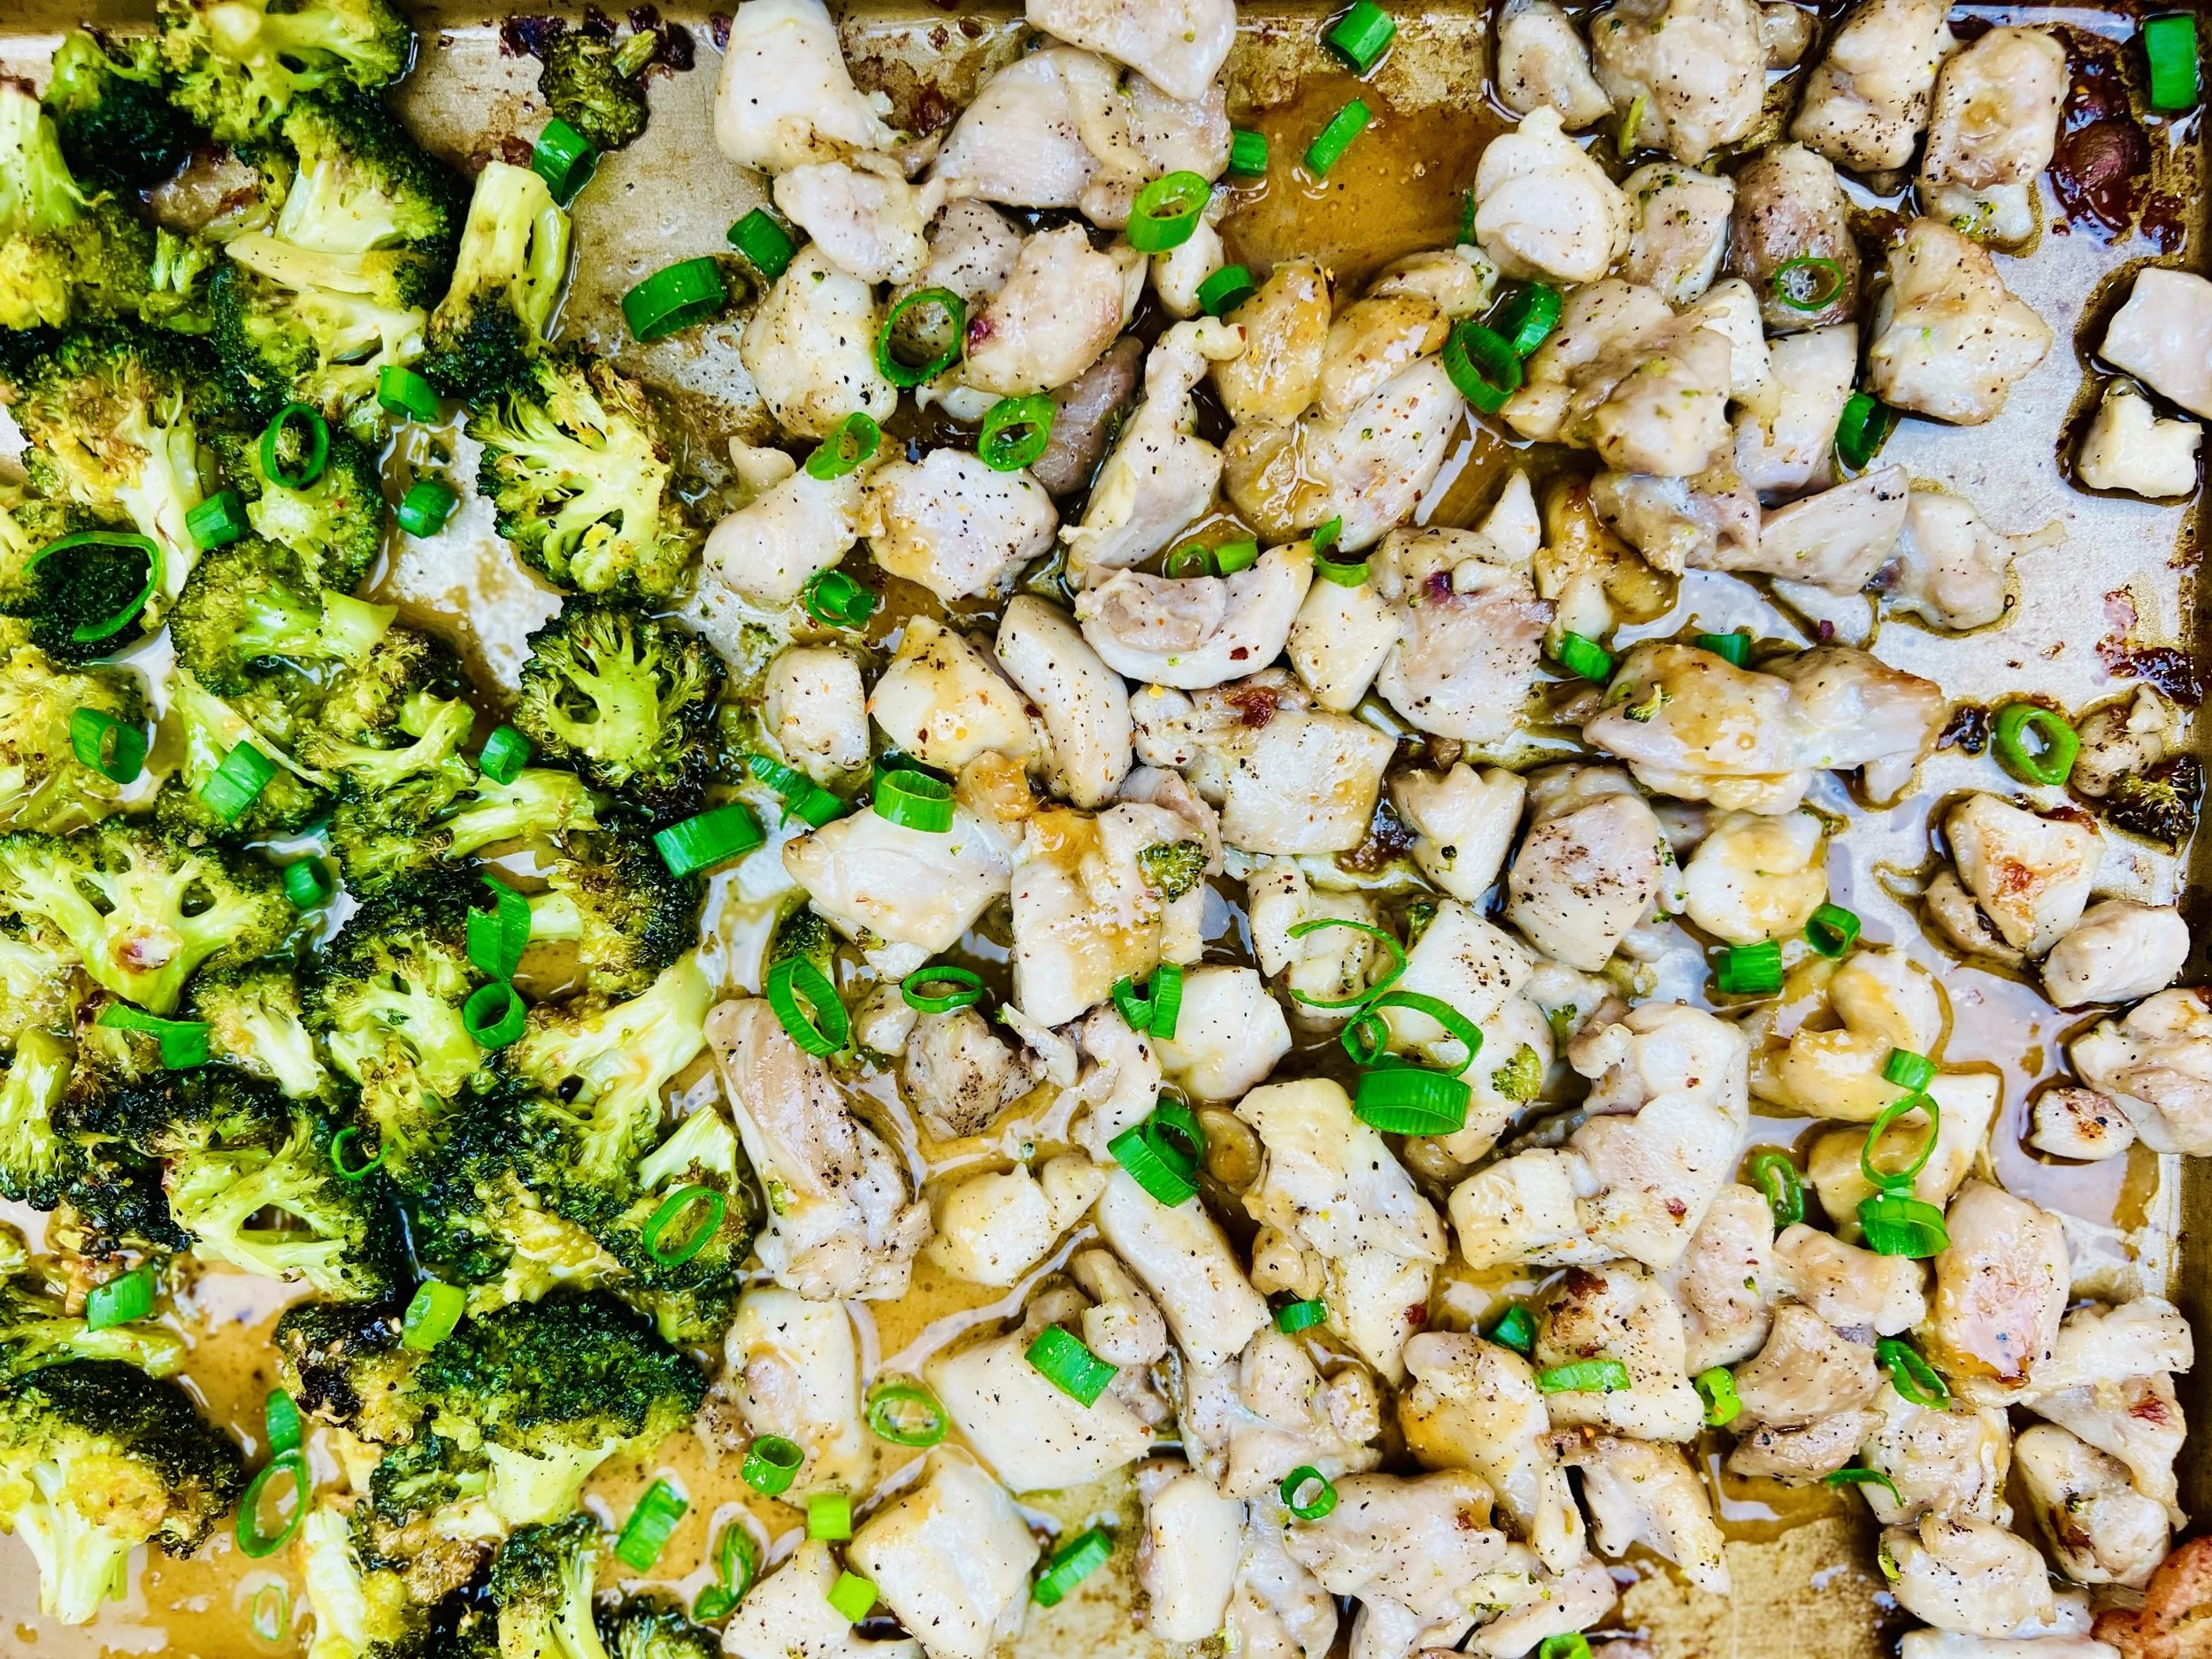
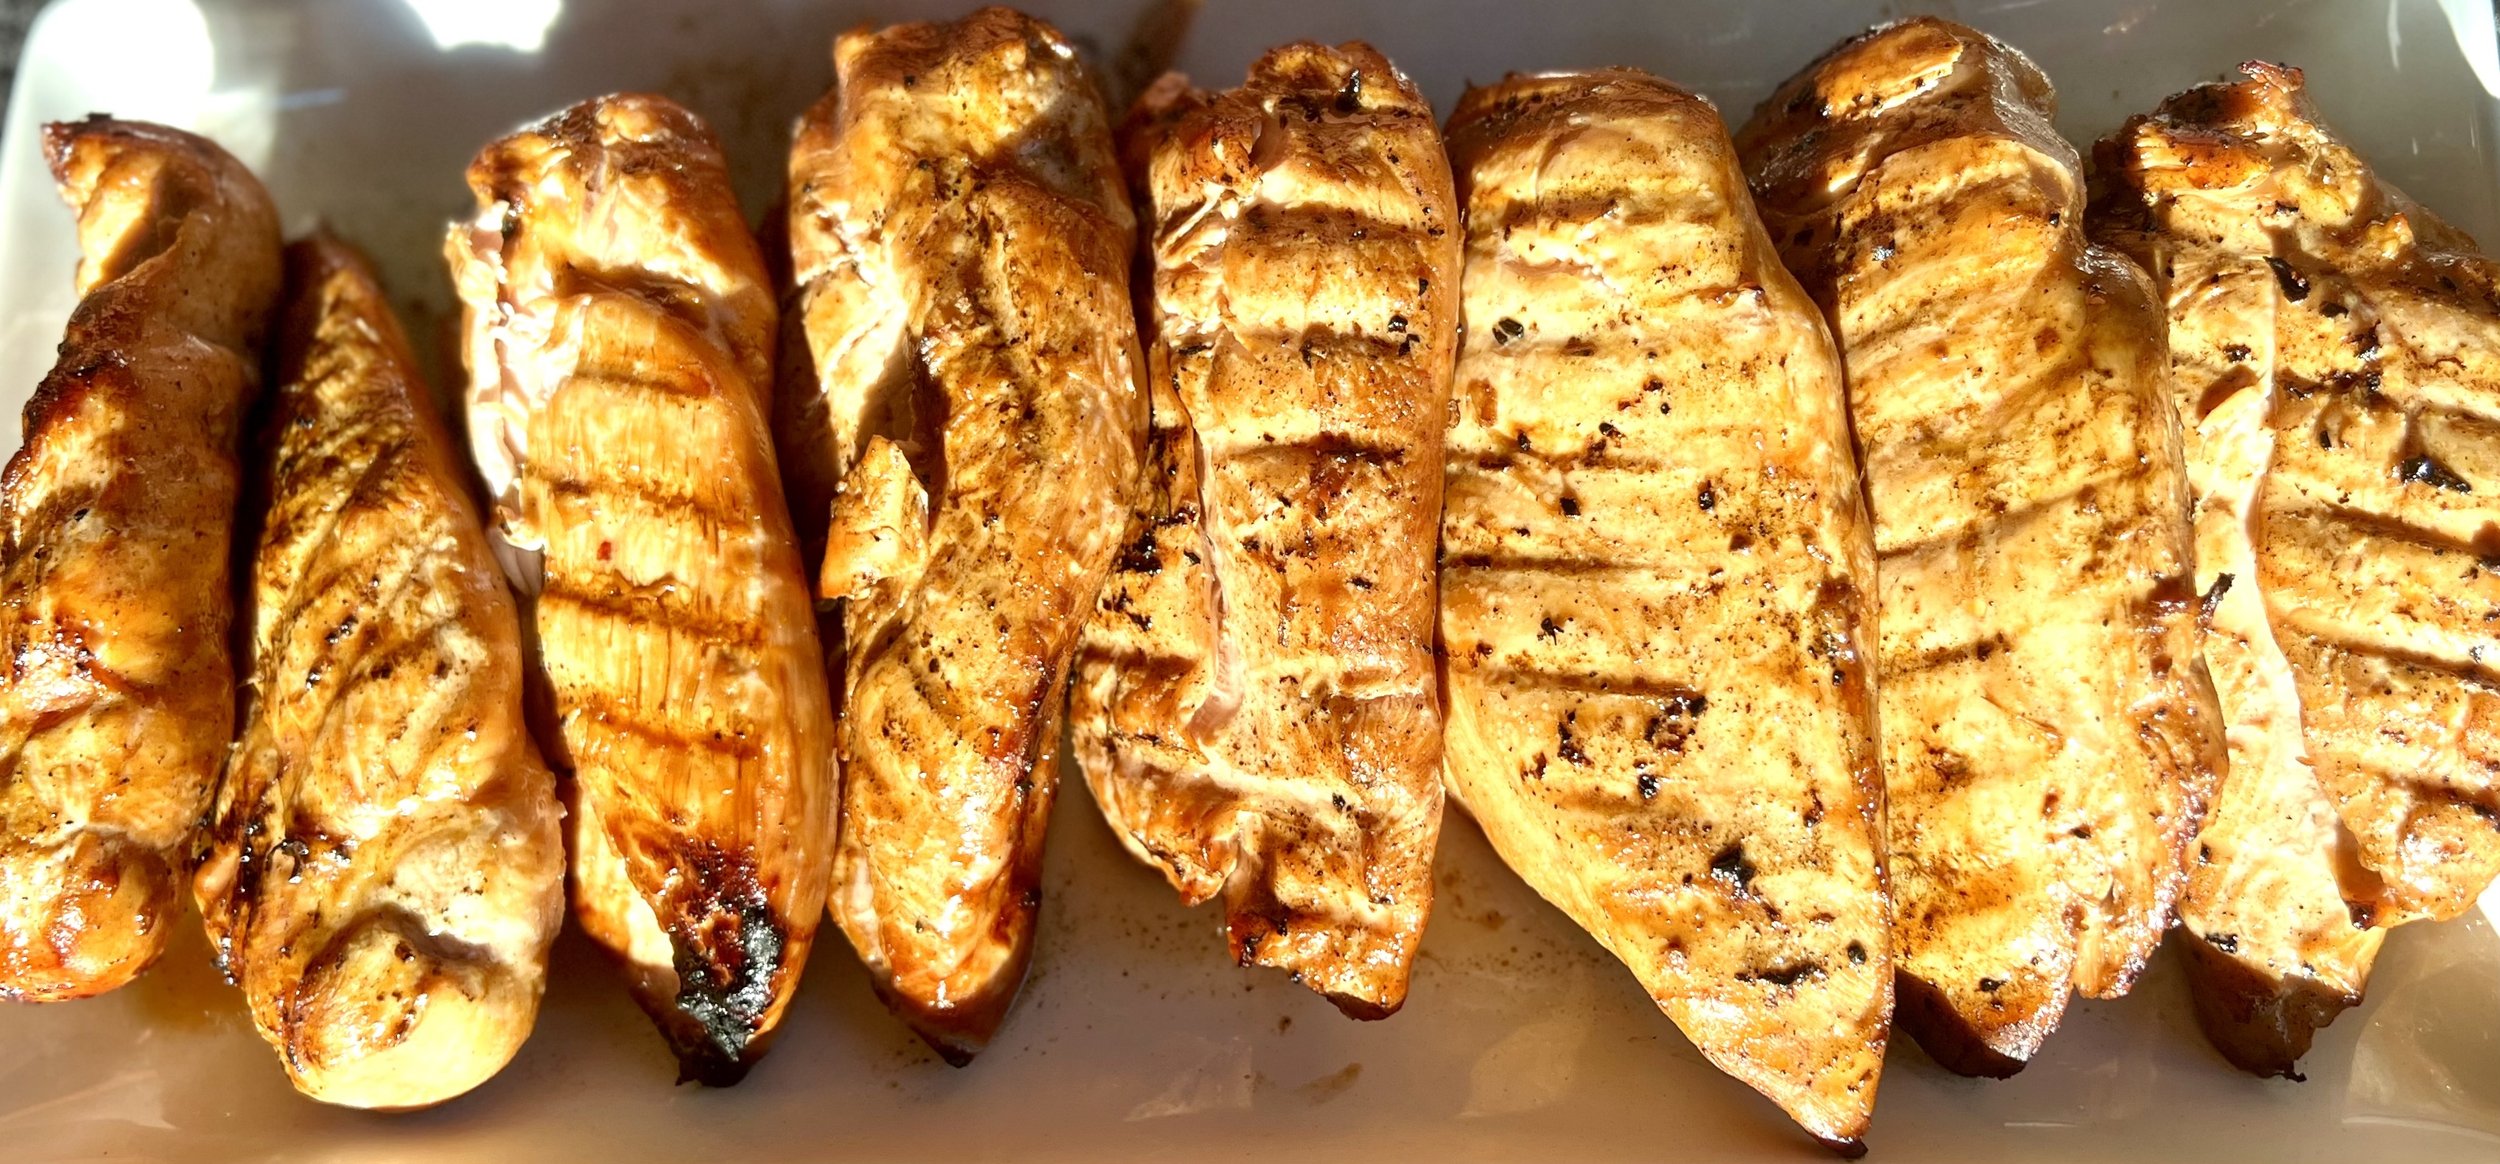
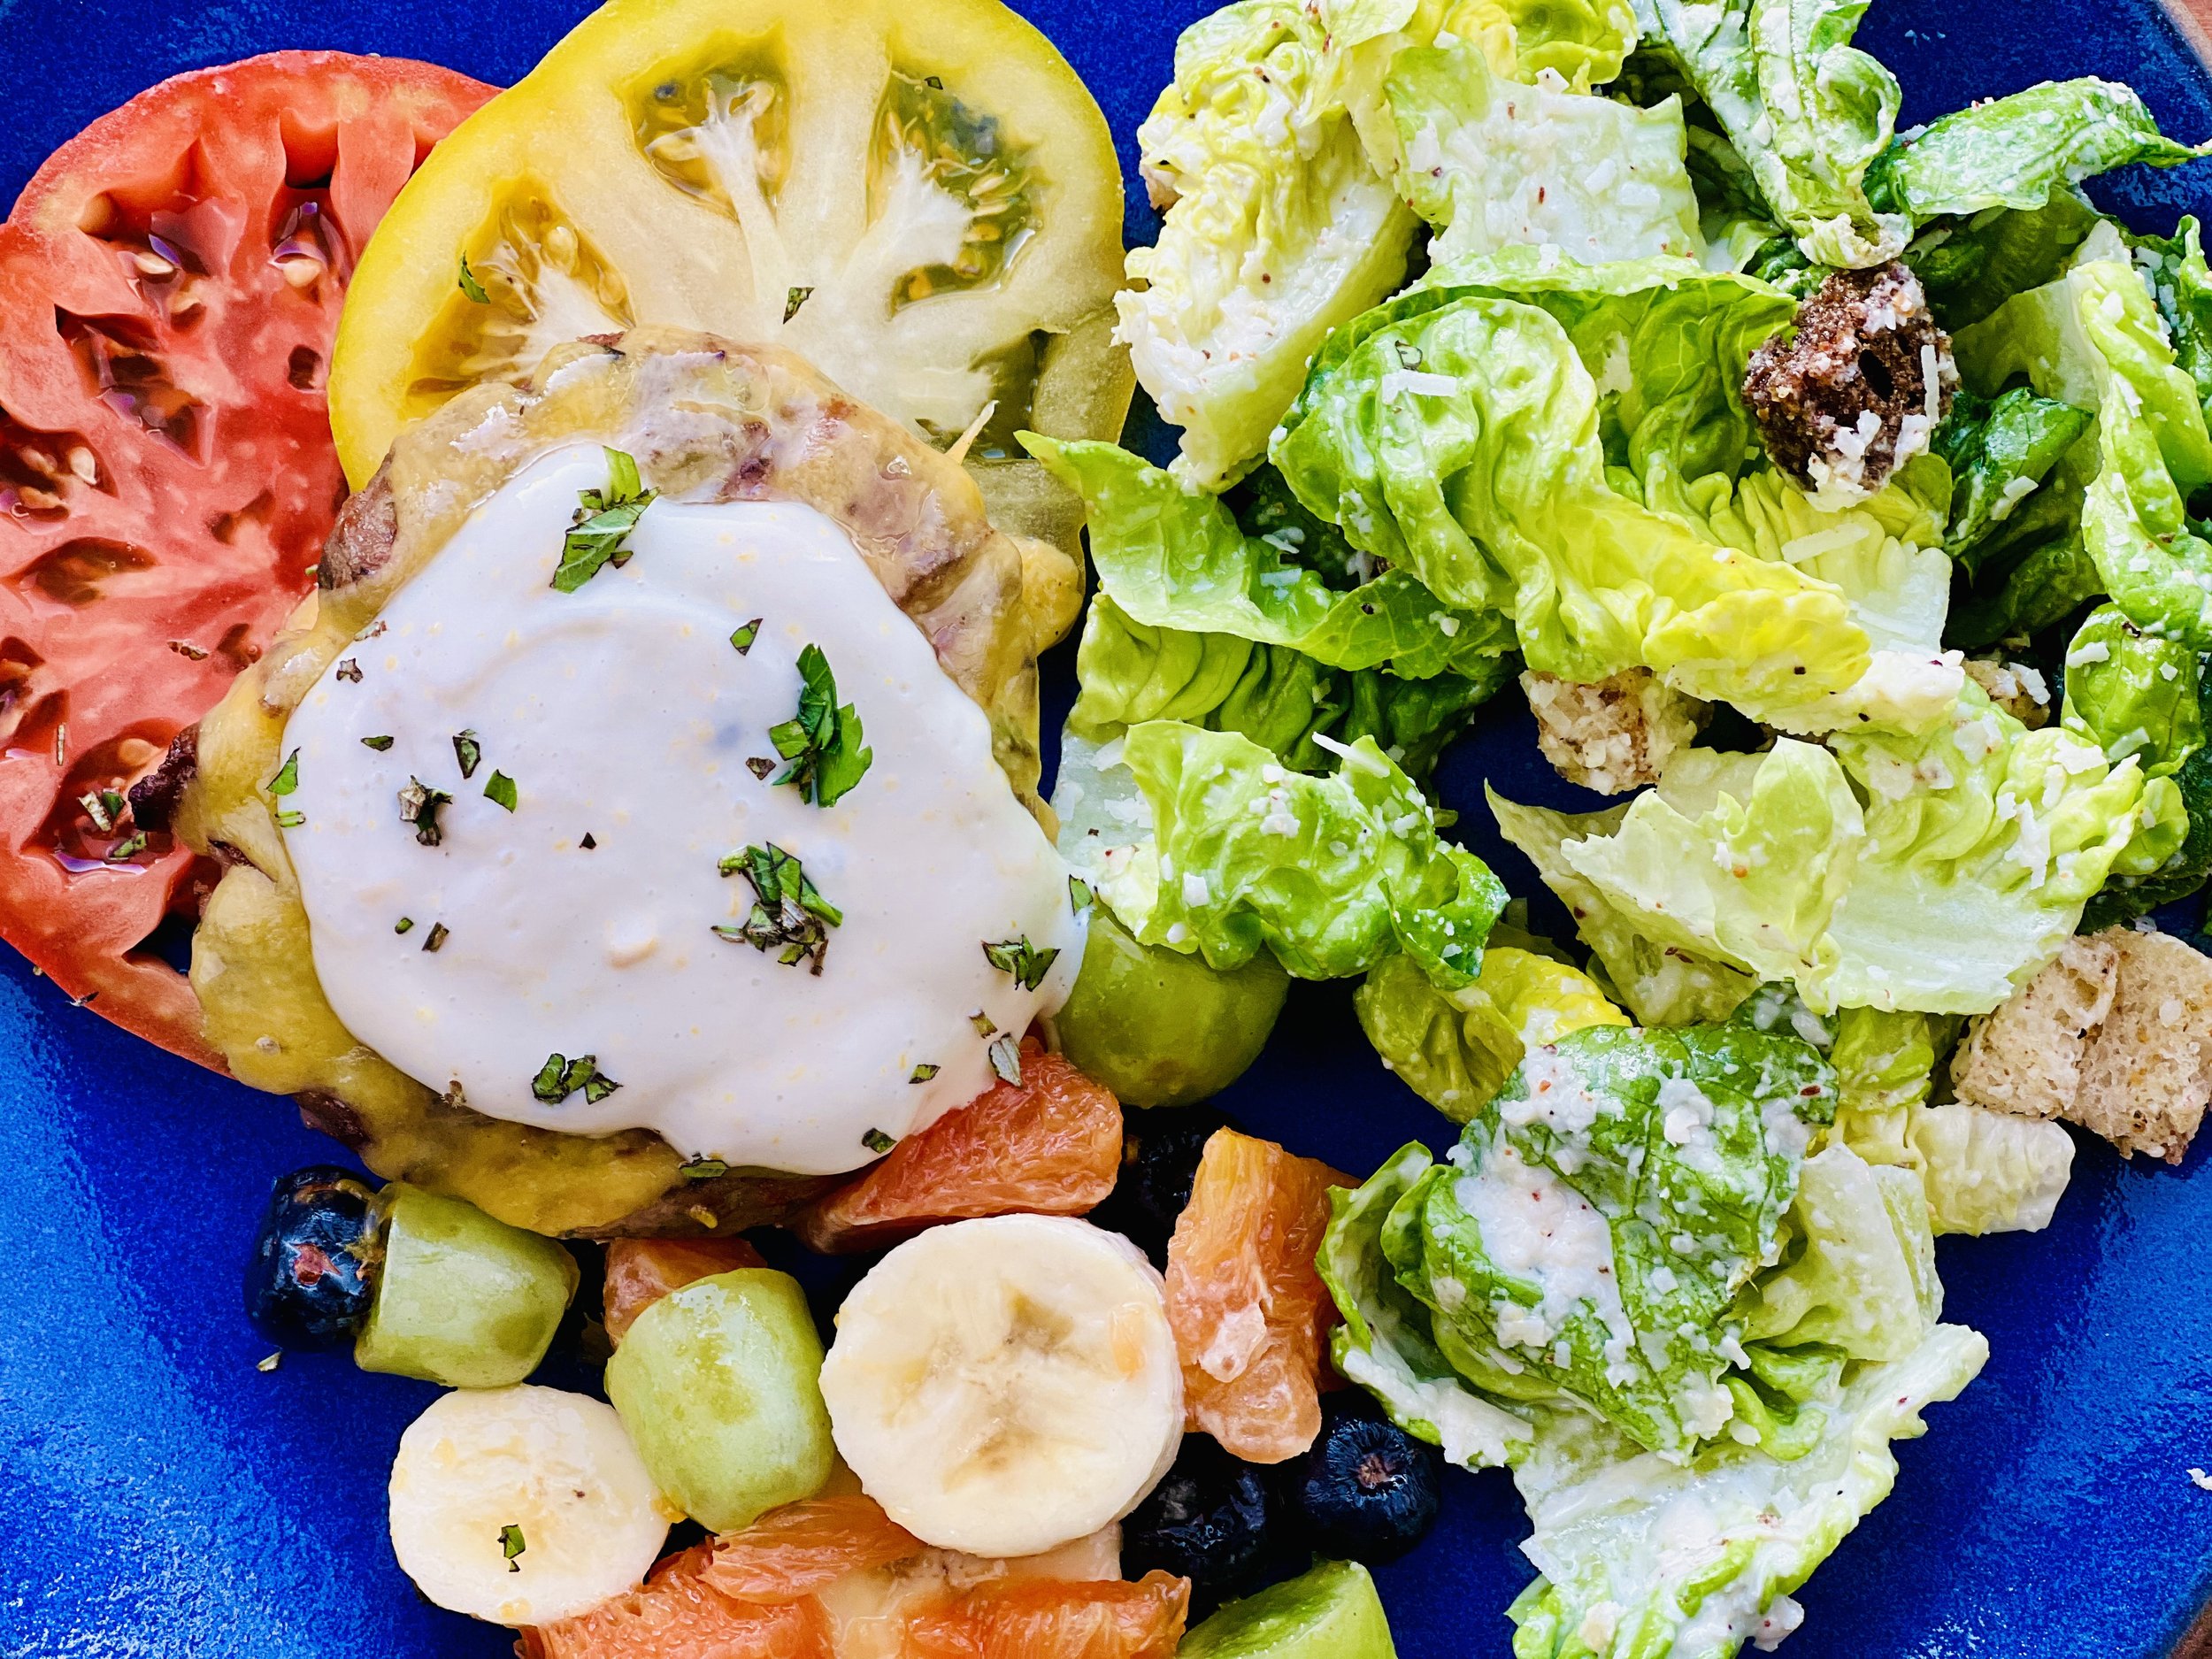
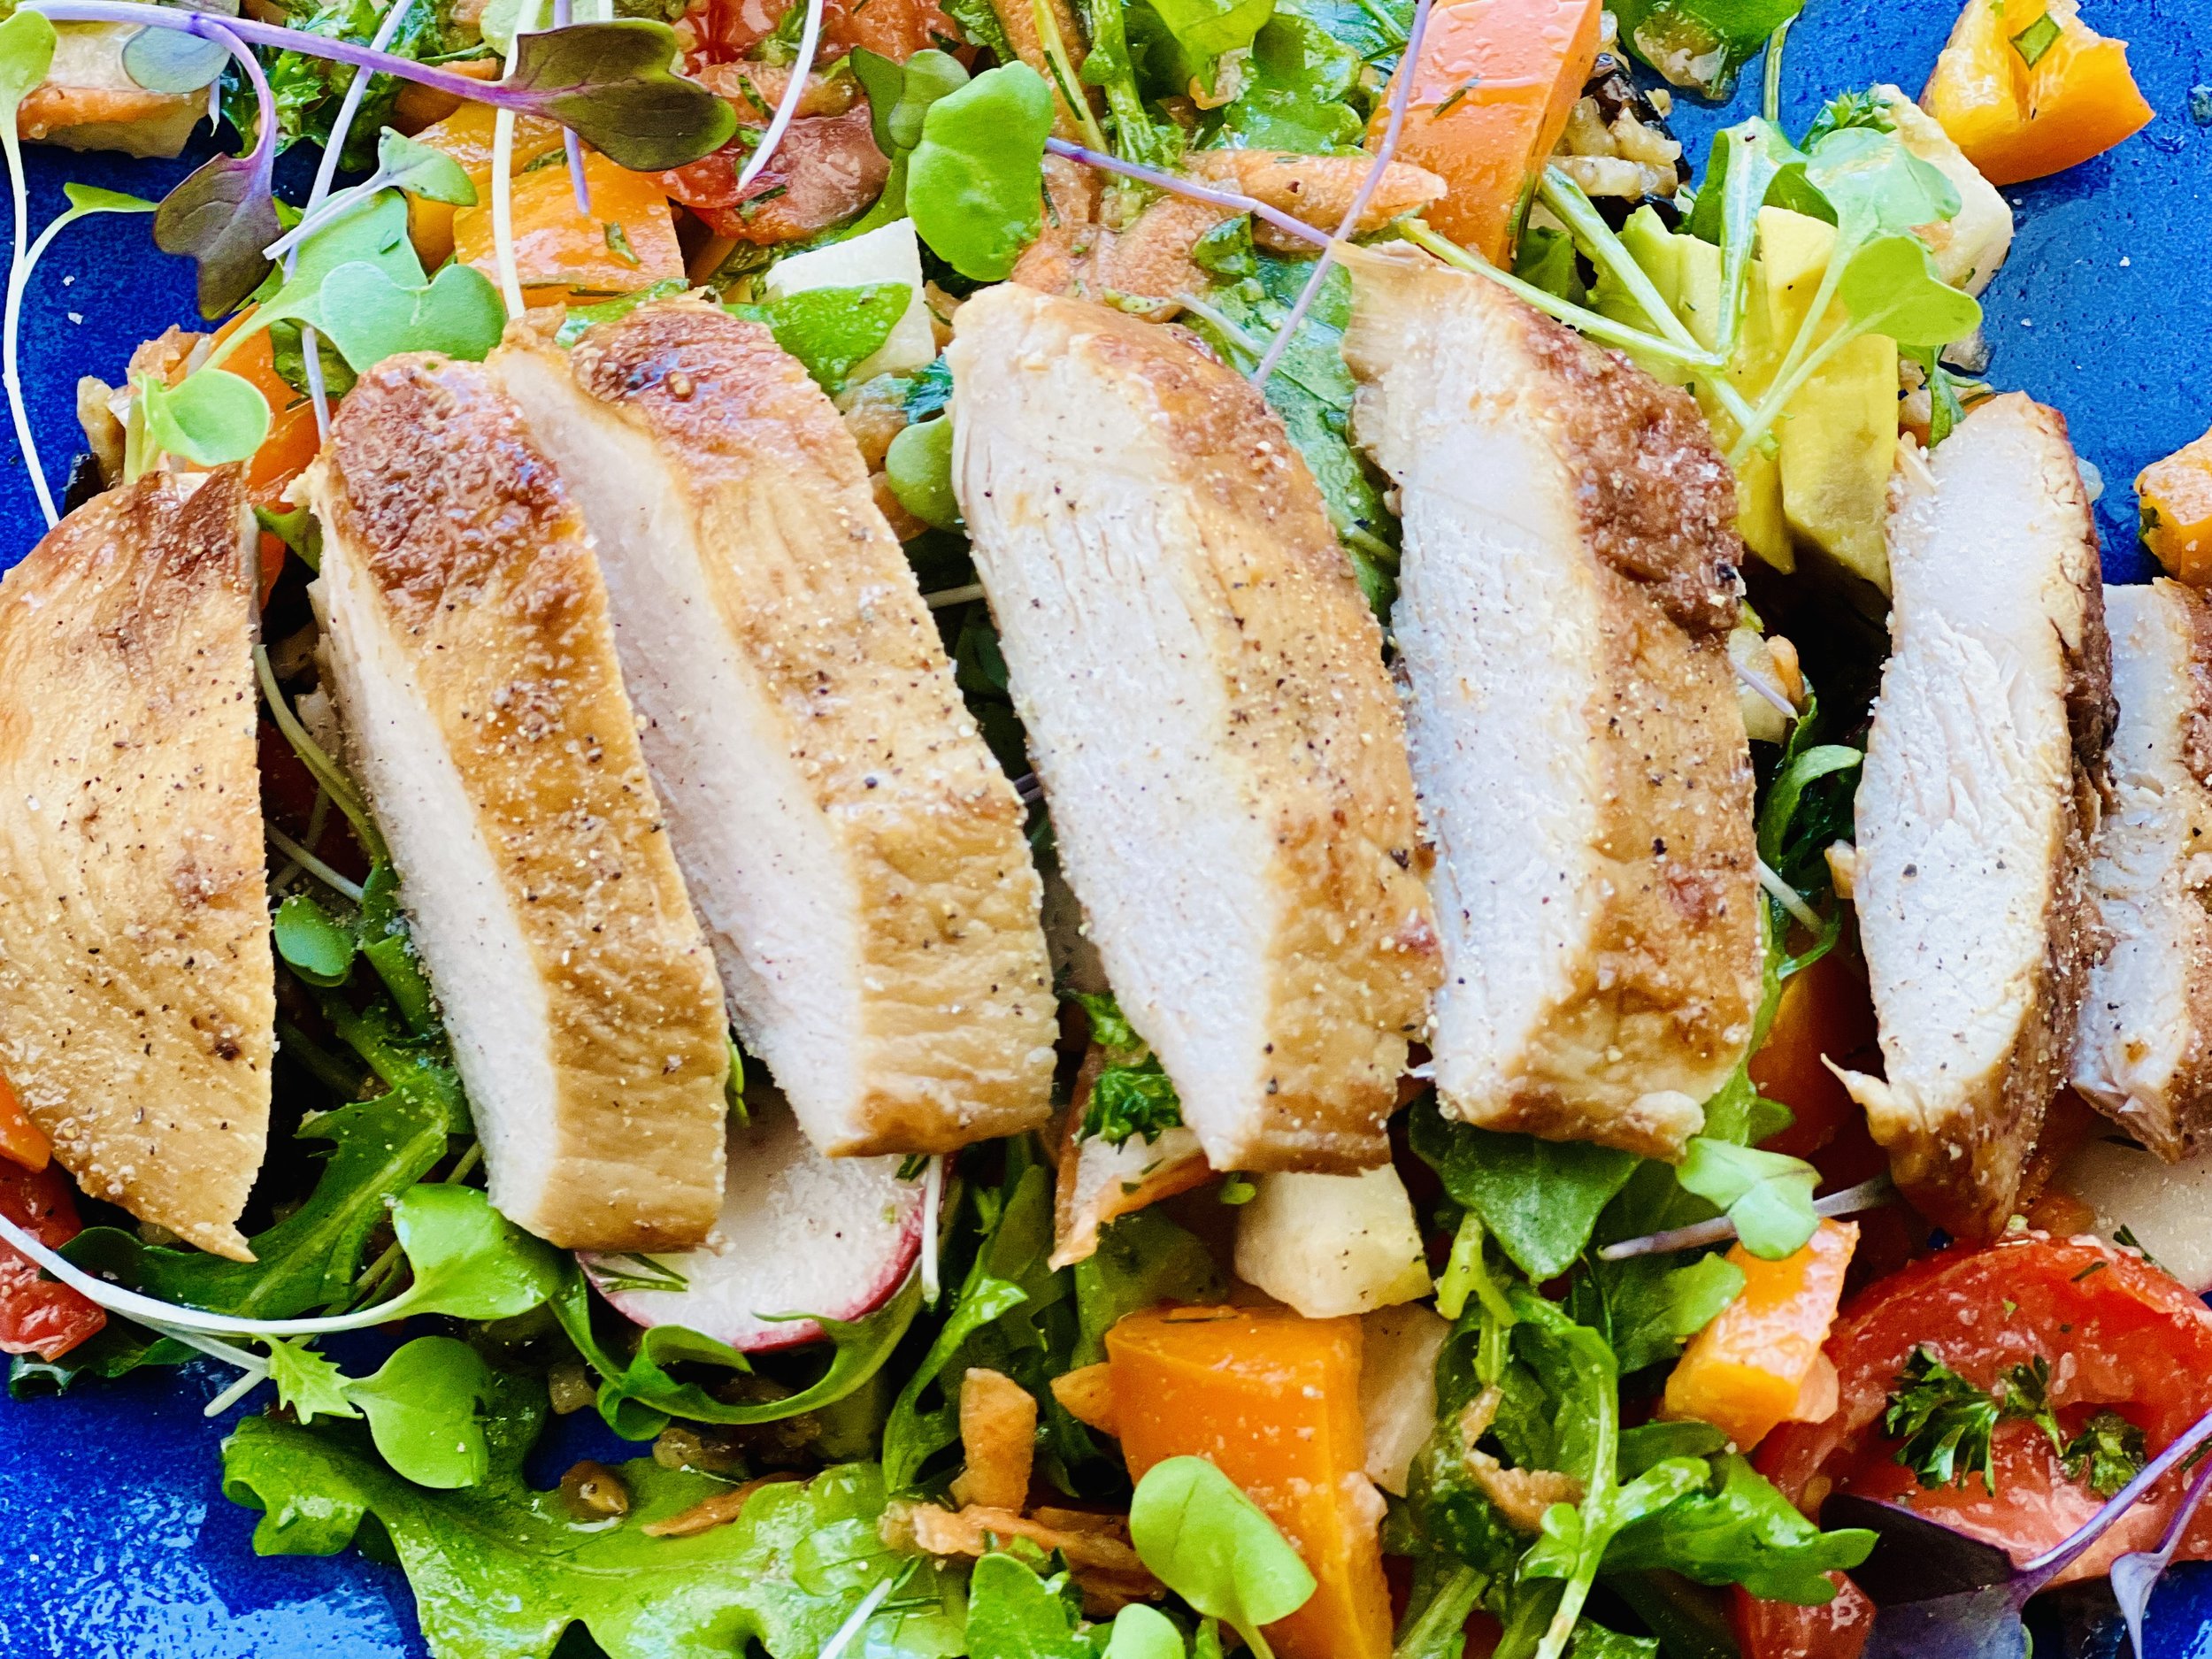
Easy Teriyaki Chicken Salad (low FODMAP)
15 Minutes prep • 15 Minutes cook • Low FODMAP • Gluten-Free • Lactose-Free • Serves 4
15 Minutes prep • 15 Minutes cook • Low FODMAP • Gluten-Free • Lactose-Free • Serves 4 • Ok to make ahead: Steps 1-2
This super simple salad is a great one to serve for a picnic, potluck, or when you have a variety of preferences at the table. The salad is hearty and full of variety so your gut biome will thank you, and the chicken is quick to fix and can be added separately so your veggie family/friends with thank you. It’s a win-win. And, it’s delicious!
Ingredients: Salad
4 cups mixed salad greens of your choice
2 Persian cucumbers, sliced
1 red or orange bell pepper, seeded and chopped
2 carrots grated
1 heirloom tomato or 3/4 cup cherry tomatoes, sliced
1/2 cup jicama, peeled and chopped (optional)
1/2 cup blueberries, washed (optional)
1/2 cup microgreens (optional)
2 tablespoons parsley, chopped (optional)
Ingredients: Dressing
1/3 cup olive oil
1/4 cup balsamic vinegar
2 tablespoons white balsamic vinegar
1/2 teaspoon Kosher salt and 1/4 teaspoon black pepper (or to taste)
Ingredients: Chicken
4 small or 2 large chicken breasts, boneless, skinless
2 tablespoons garlic-infused olive oil
2 tablespoons Smoke N Sanity Teriyaki seasoning (this seasoning is low FODMAP and very low sodium)
2 tablespoons of parsley, chopped
Directions
(1) Salt the chicken: This step is optional but results in more flavorful and tender meat. Remove the chicken from the packaging and lay the meat on a rimmed plate or baking dish. If the breasts are very thick, slice them in half horizontally. Season both sides of each piece of chicken lightly and evenly with Kosher salt. Cover with plastic wrap and refrigerate for 4 hours, overnight, or until ready to cook. (I like to salt meat when I bring it home from the market then carefully re-wrap it and keep it in the refrigerator for a day or two until I’m ready to do something with it.)
(2) Cook the chicken: Put the oil in the frying pan and warm over medium-high heat. Sprinkle the chicken on one side with 1 tablespoon Smoke N Sanity Teriyaki seasoning and, once the oil is hot in the frying pan, lay the chicken breasts seasoned side down in one layer in the pan. Cook them in two batches if needed to prevent crowding (adding a bit more oil before adding the second batch). The oil should sizzle but not smoke when you put the chicken in.
Sprinkle the top side of the chicken with 1 tablespoon Smoke N Sanity Teriyaki seasoning as it cooks. Cook for about 5 minutes until it’s nicely browned on the bottom. Flip the chicken and cook for another 3 - 5 minutes until nicely browned and just done in the middle. When the chicken is cooked, remove it to a plate and let cool, or keep it warm if you like, until ready to serve. Let the chicken rest at least 5 minutes before cutting it into thick slices before adding it to the salad. If there’s any juice from the cooked chicken on the plate, drizzle it over the chicken so you don’t miss a drop of flavor.
(3) Make the salad: Meanwhile, wash, peel, chop, grate, and combine all the salad ingredients in a bowl. Make the dressing. Toss the dressing with the salad.
(4) Plate and serve: Put a generous helping of salad on each plate and lay the chicken on top of the salad. Sprinkle with chopped parsley. Serve with some fresh (real) sourdough bread.
Eat and enjoy every bite because you can!
Recipe note: I use Diamond Crystal Kosher salt in all my recipes because it has a wonderful flat and crisp flake that tastes delicious. It is also the least salty salt available so you can use it more liberally as a seasoning than you can table salt or sea salt. If you use another type of salt, you may need to reduce the amount so it is not over-salted.
Link note: This post contains links for you to easily purchase items listed on the page. In some cases, we have provided a special discount code for IBS Game Changers so be sure to use it when you purchase an item to get the discount that has been arranged just for you! As an Amazon Associate, I earn a commission from qualifying Amazon purchases.
More Deliciously Low FODMAP™ salad recipes
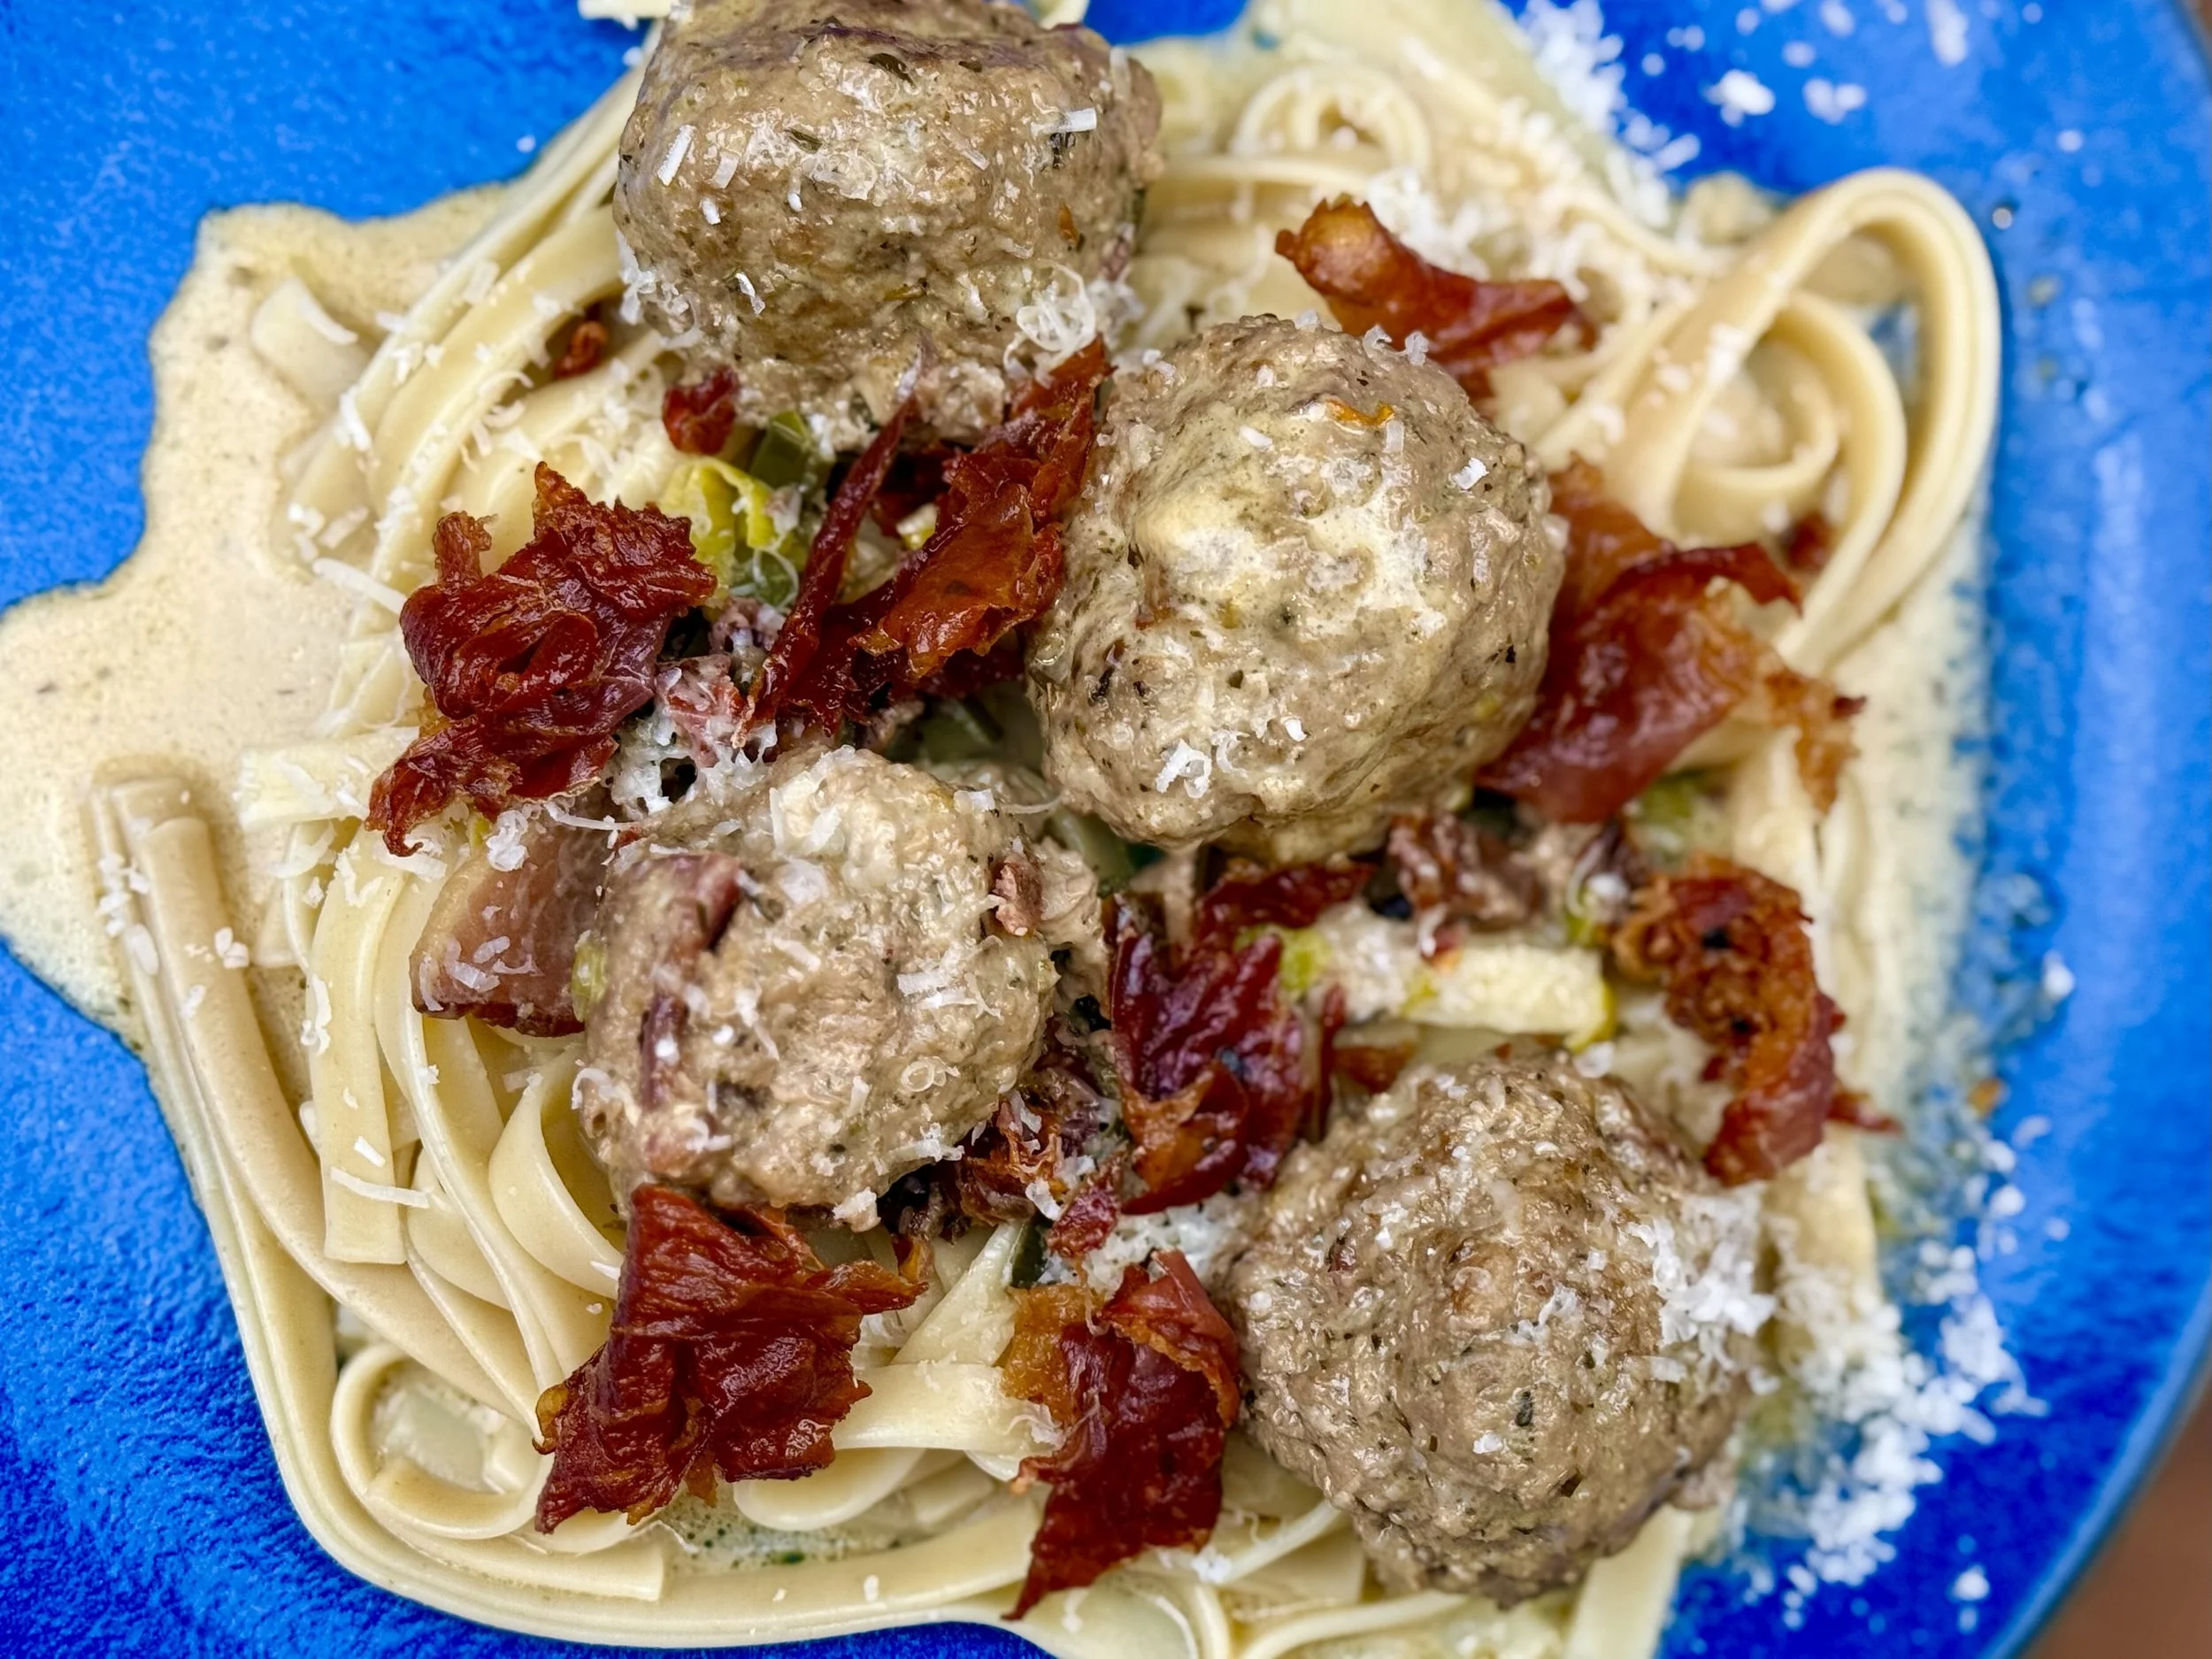
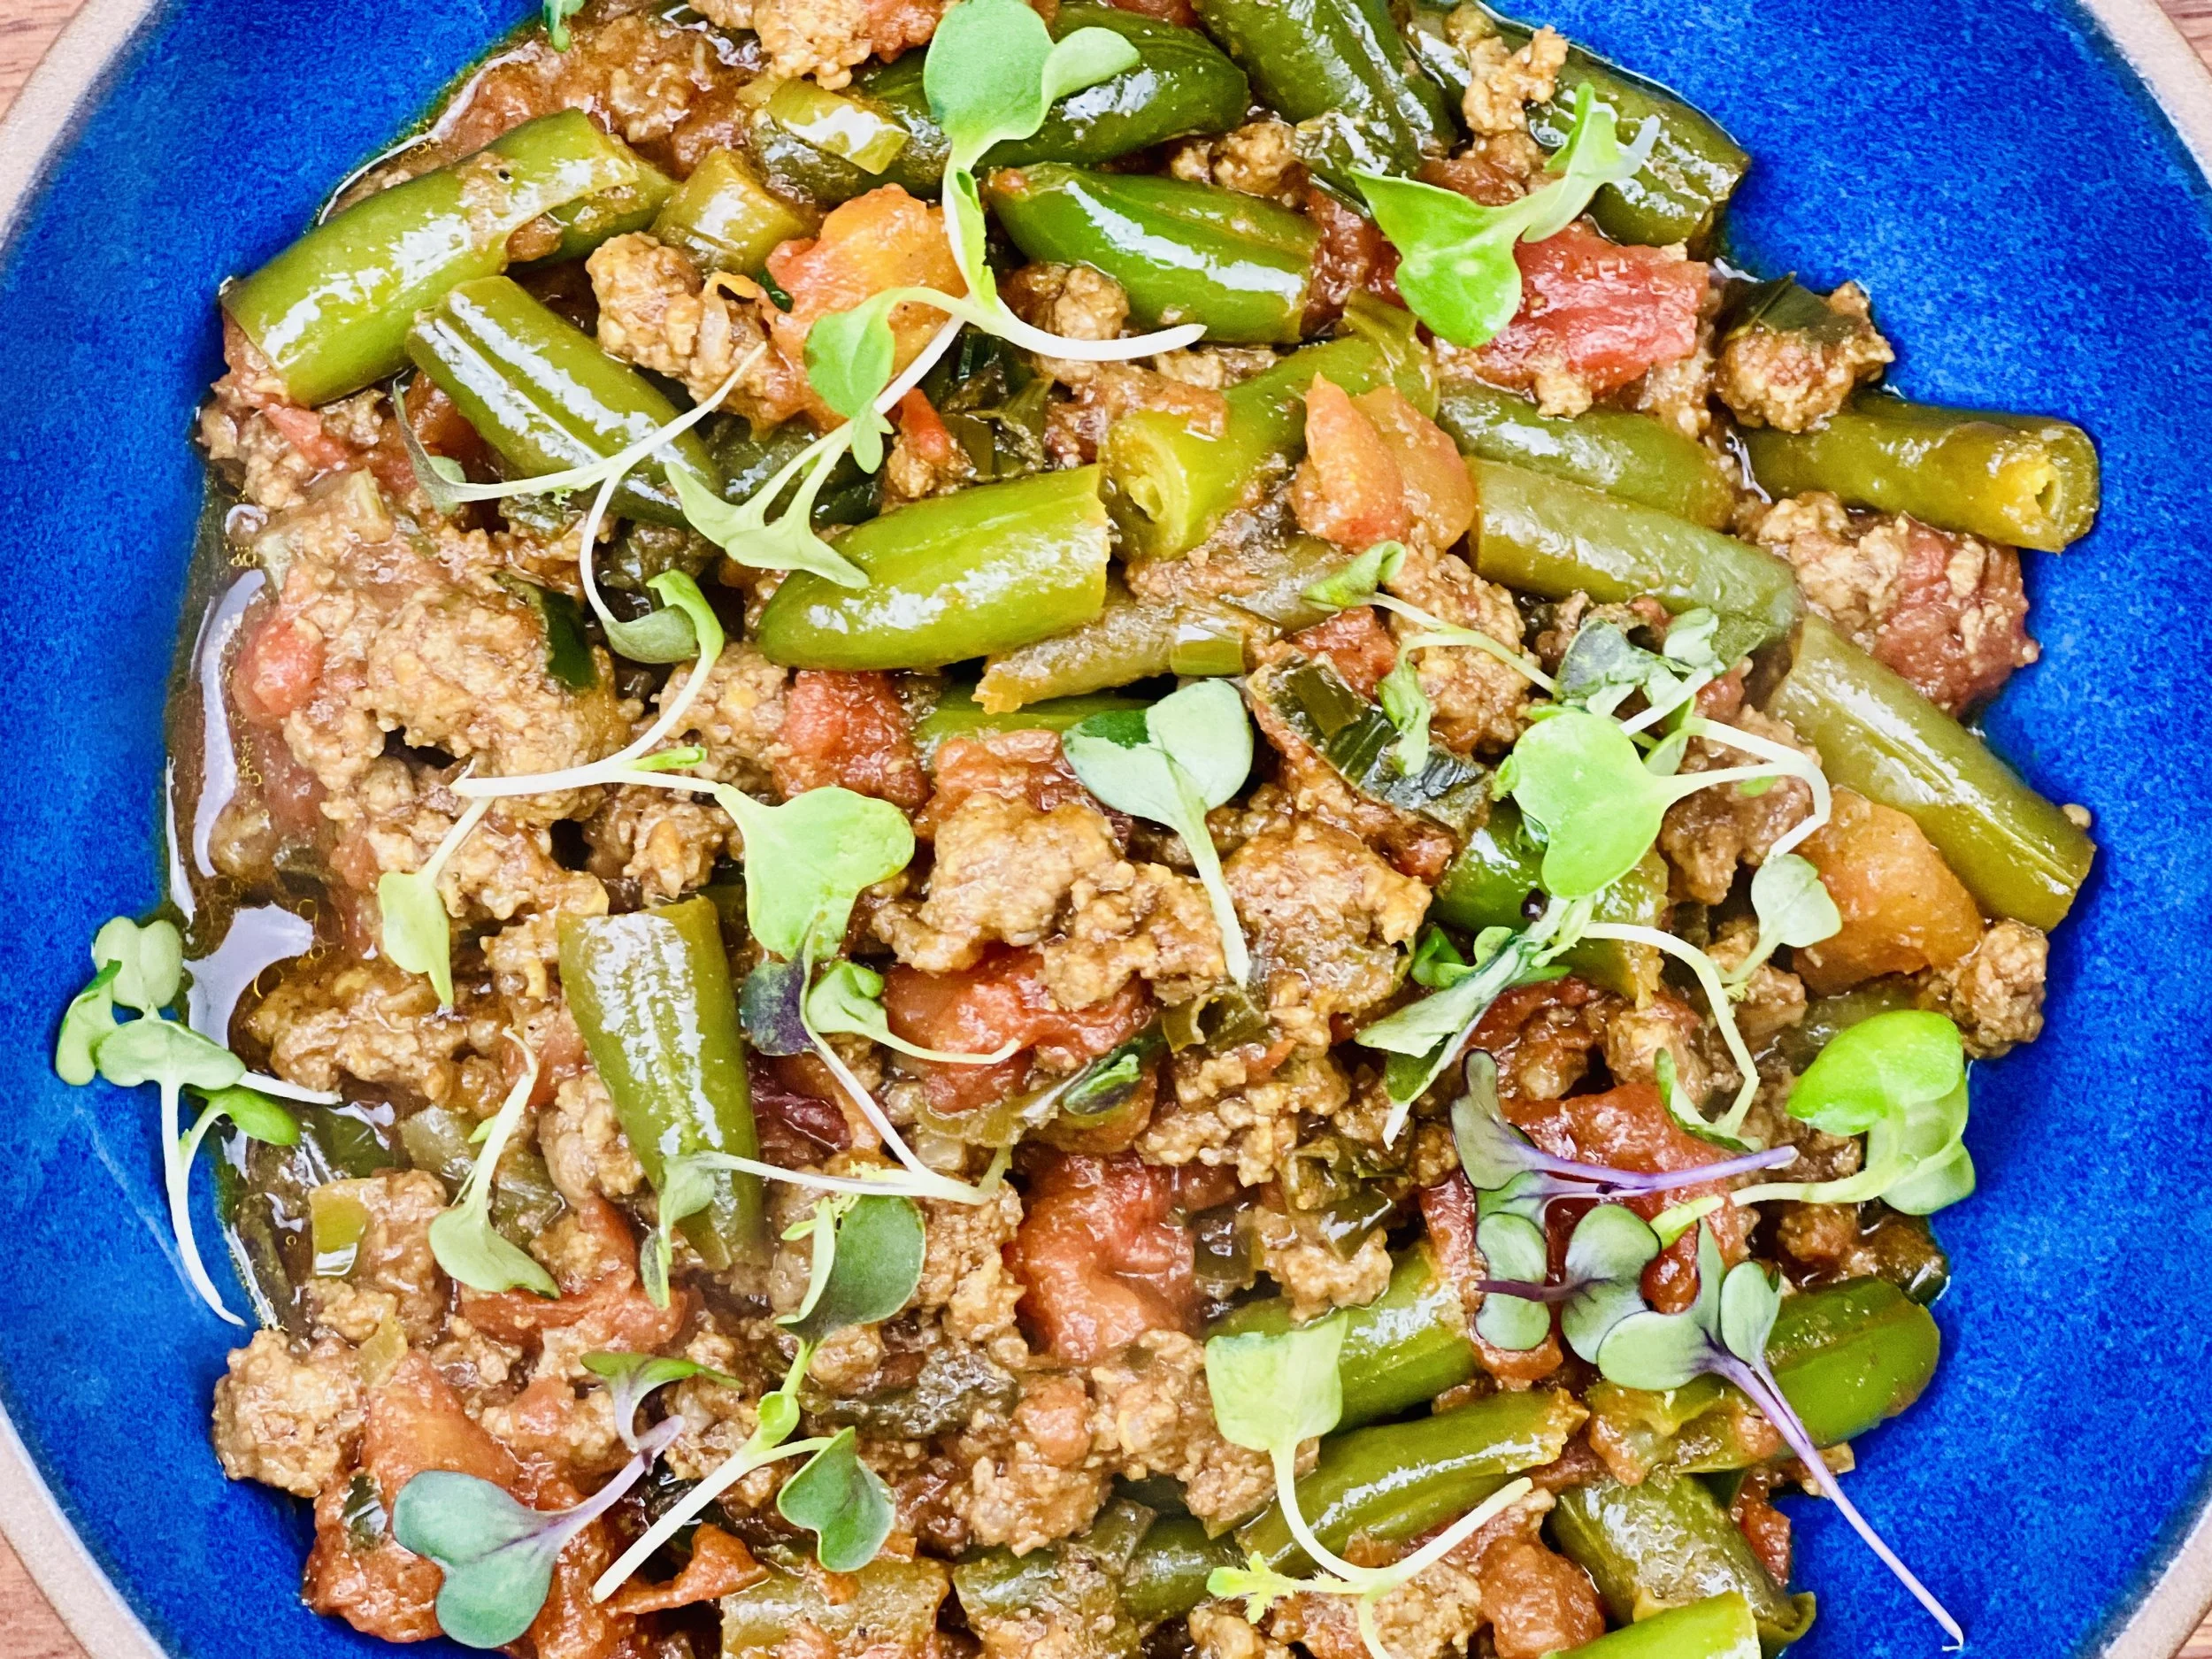
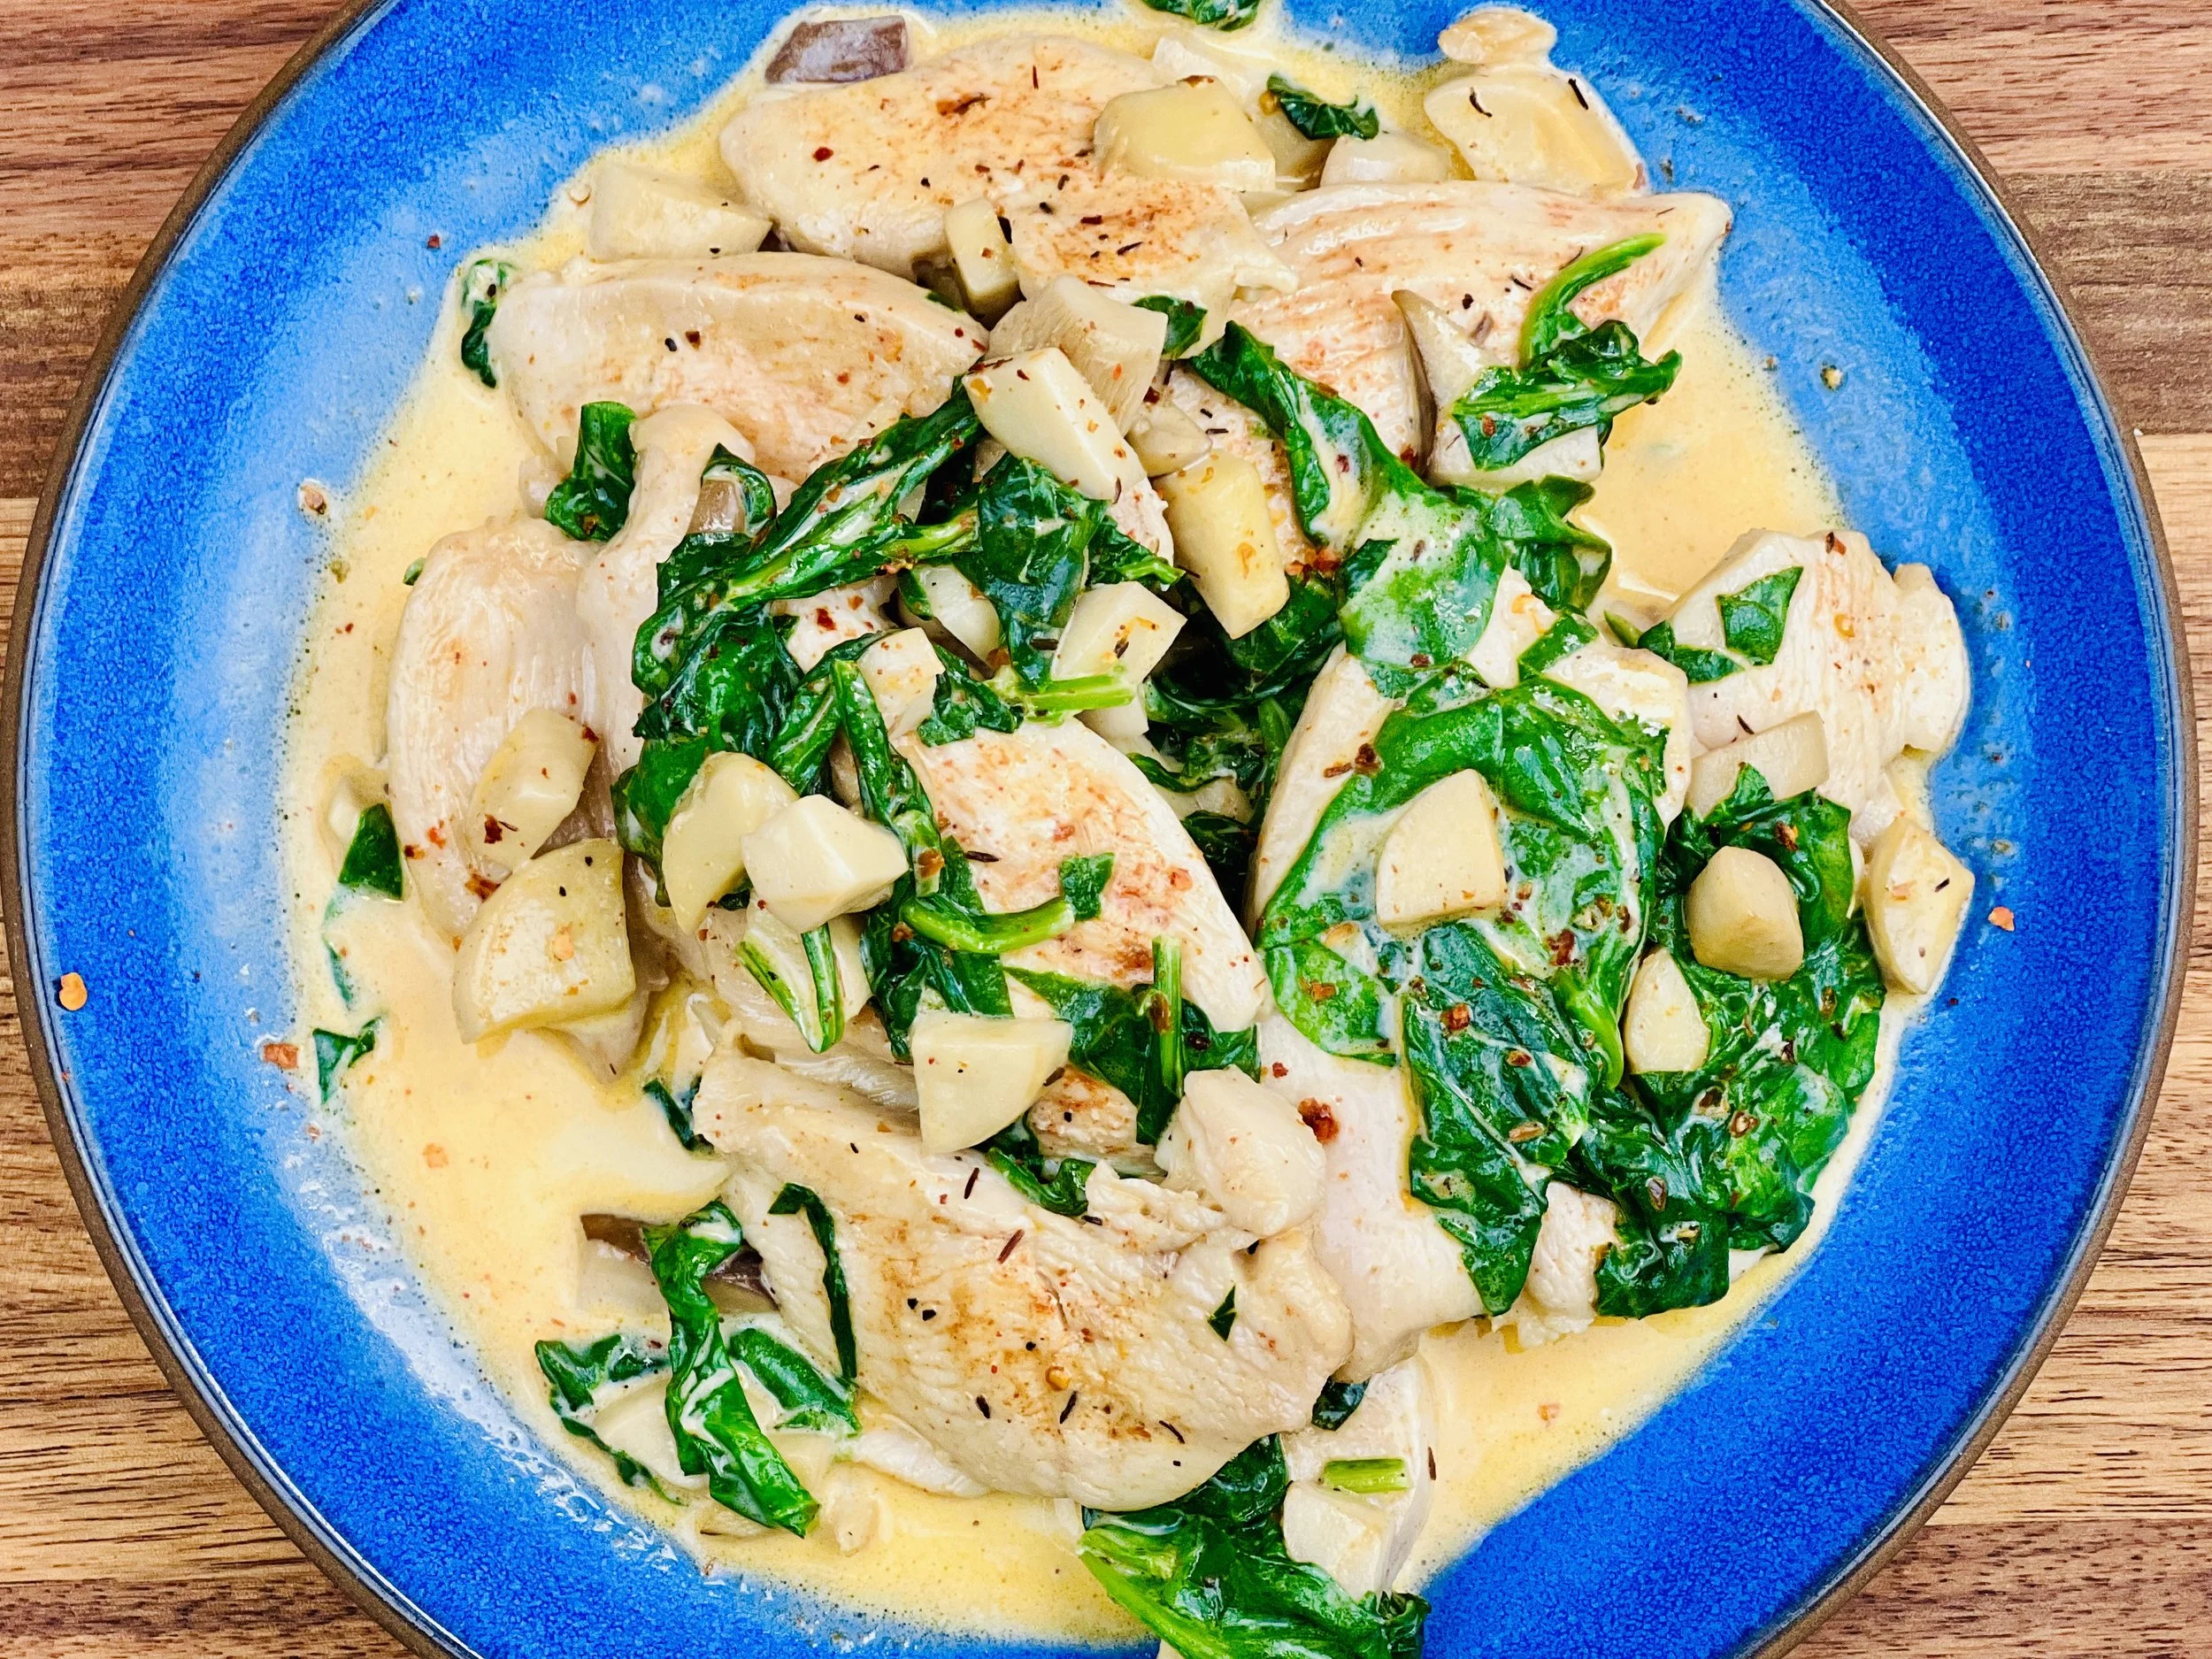
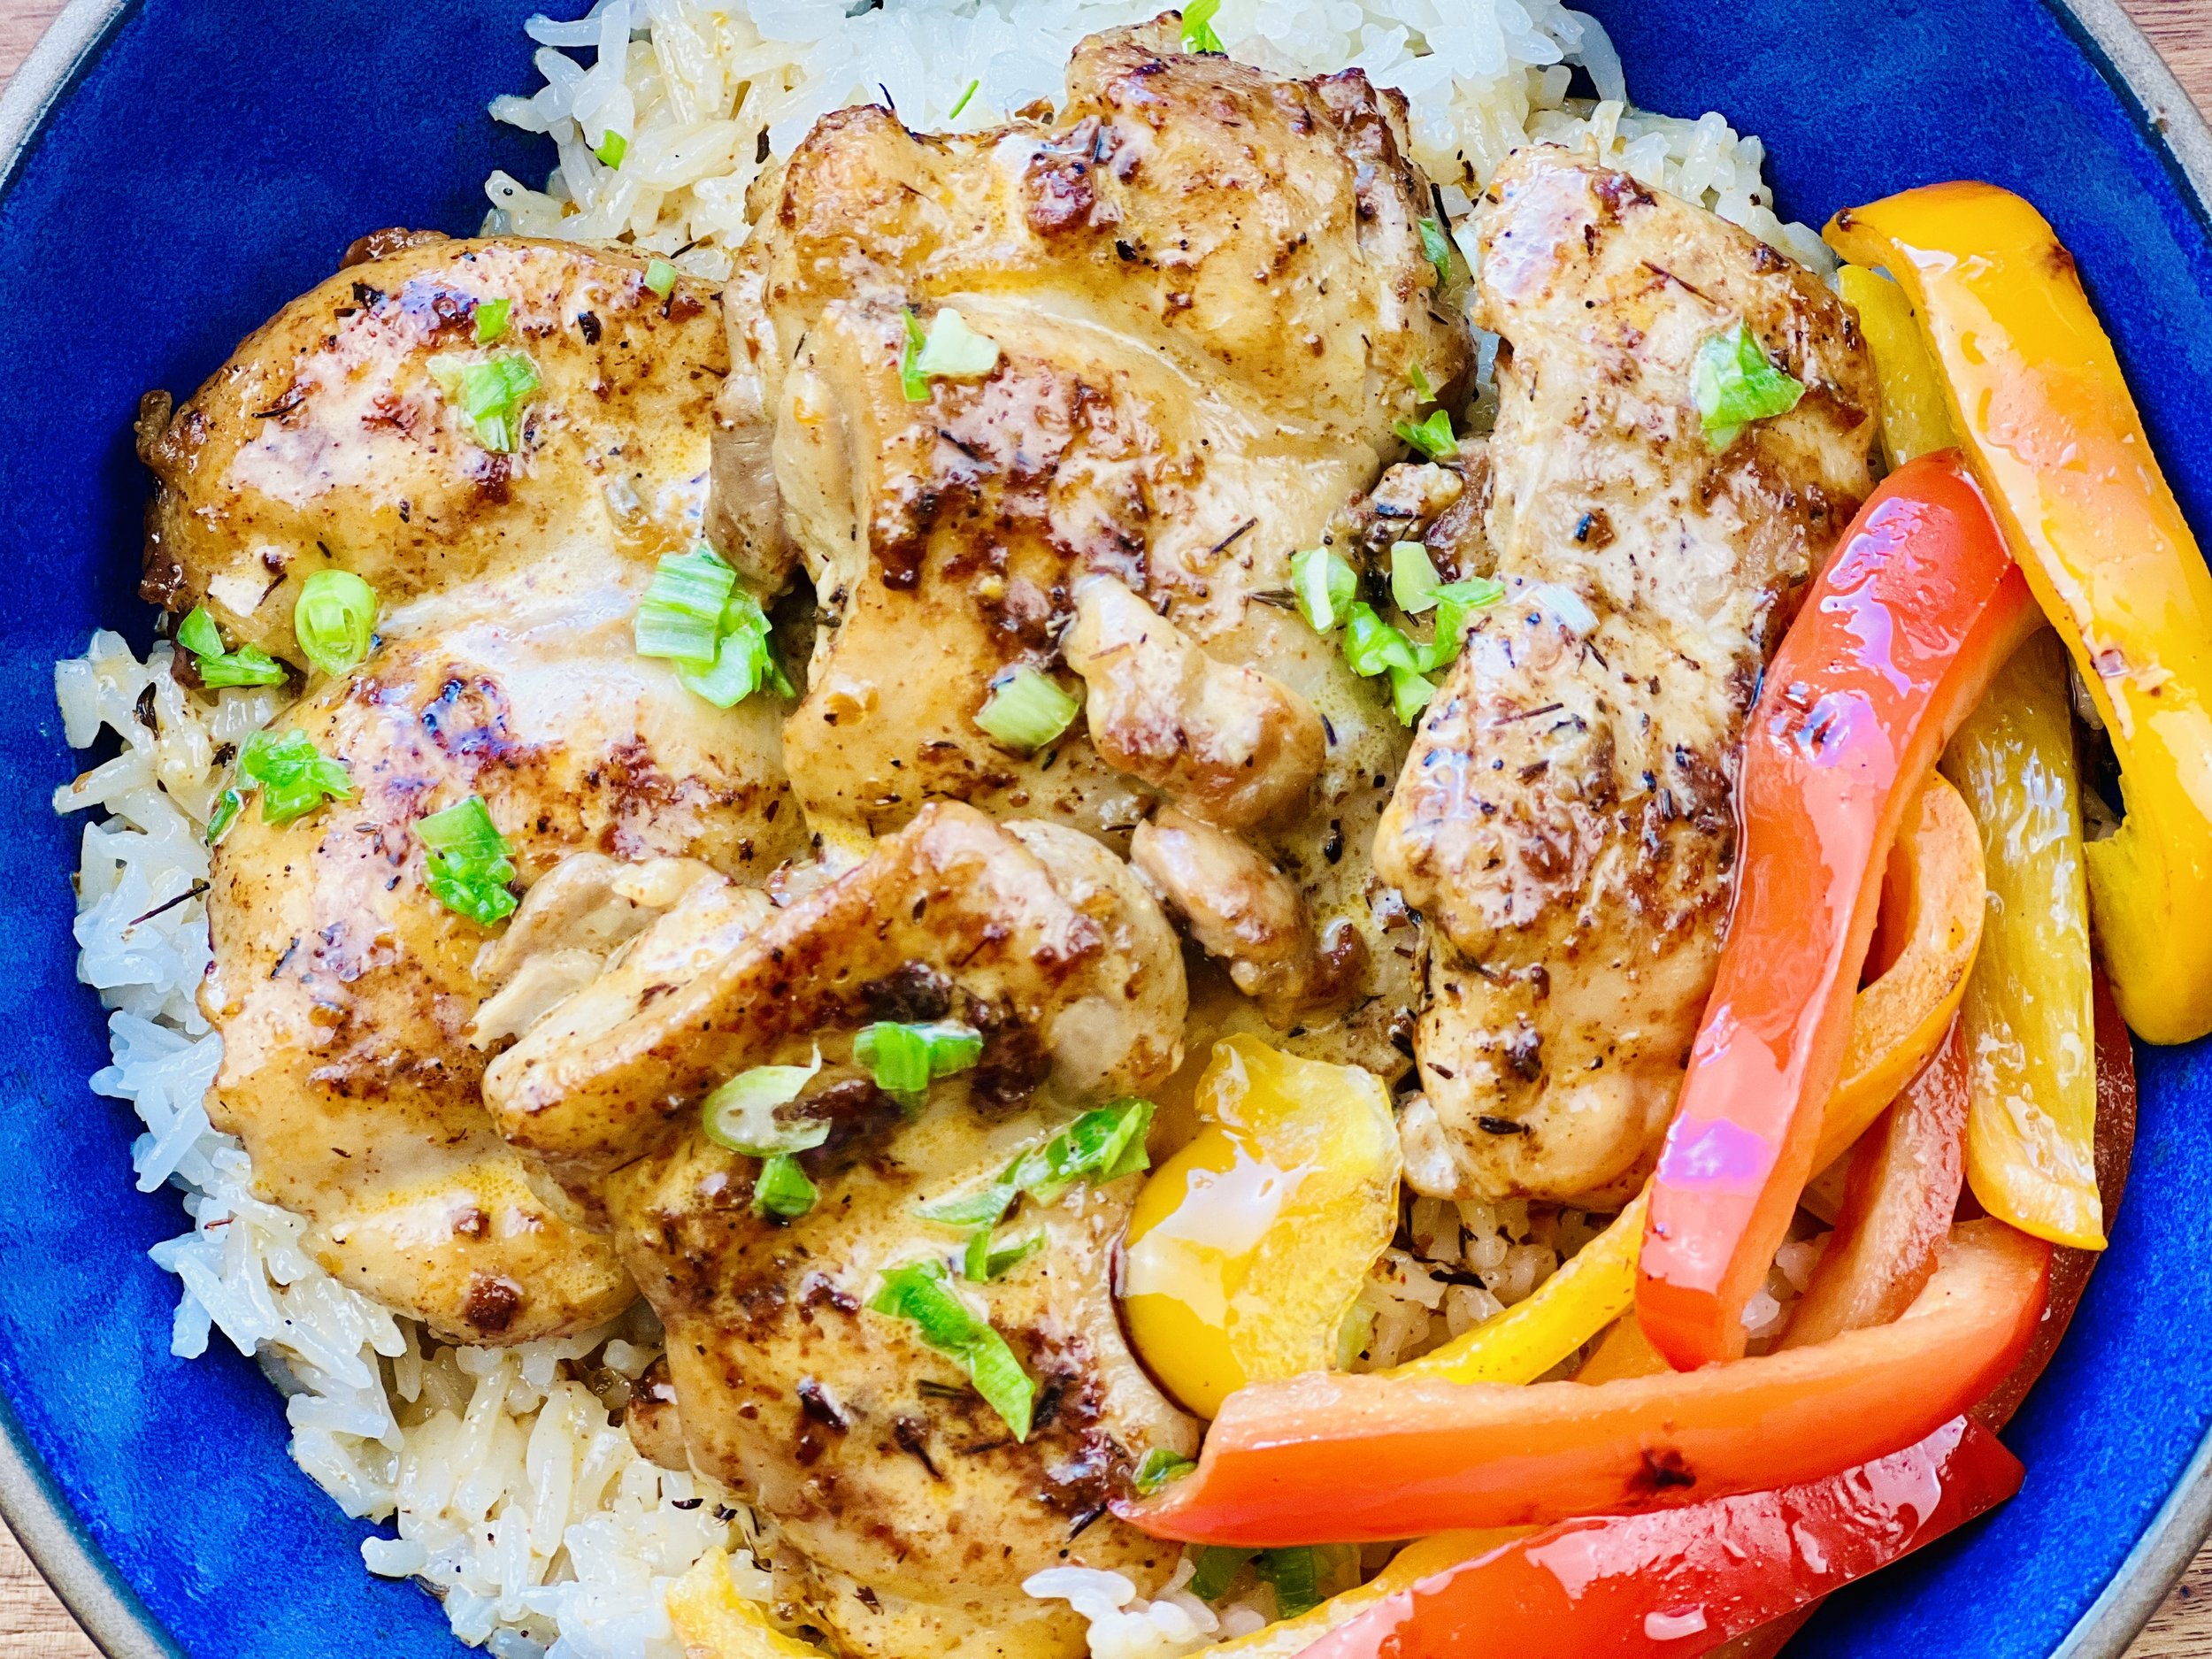
Creamy Cajun Creole Chicken and Sweet Peppers (low FODMAP)
10 Minutes prep • 20 Minutes cook • Low FODMAP • Gluten-free • Serves 4
10 Minutes prep • 20 Minutes cook • Low FODMAP • Gluten-free • Serves 4 • Ok to make ahead: Step 1
This is one of those recipes you can prepare in the time it takes to cook the rice. This means it’s quick and simple and perfect for a weeknight dinner. Best of all, it’s delicious! The creamy sauce poured over the chicken and rice is a perfect combination. The seared peppers that cook in the same pan as the chicken, stay crisp and colorful and complement the chicken and rice perfectly.
This is an exclusive recipe just for recipe club members.
In addition to the two free recipes I create each week I am creating and delivering one very special recipe just for my recipe club members. If you’re not yet a member, I encourage you to join! Membership in the club includes access to the complete archive of recipes with filters so it can become your virtual low FODMAP cookbook plus, I am creating and delivering one special NEW recipe every week ONLY for recipe club members. And, for my true fans, I’ll be sharing behind-the-scenes content, and updates on the progress of the new cookbook.
Your membership in the club helps me continue creating new, delicious, easy-to-make, low FODMAP recipes just for you.
As always, all recipes will emphasize simple ingredients, easy preparation, and delicious low FODMAP results. Recipes will be for everything from main courses, salads, soups, side dishes, appetizers, desserts, sauces, breakfast and lunch, and even mocktails and cocktails. Everything you need to prepare fantastic low FODMAP meals everyone will love.
Join the club. Become a Patron. Let’s keep making delicious Low FODMAP meals together.
More Deliciously Low FODMAP™ main course recipes
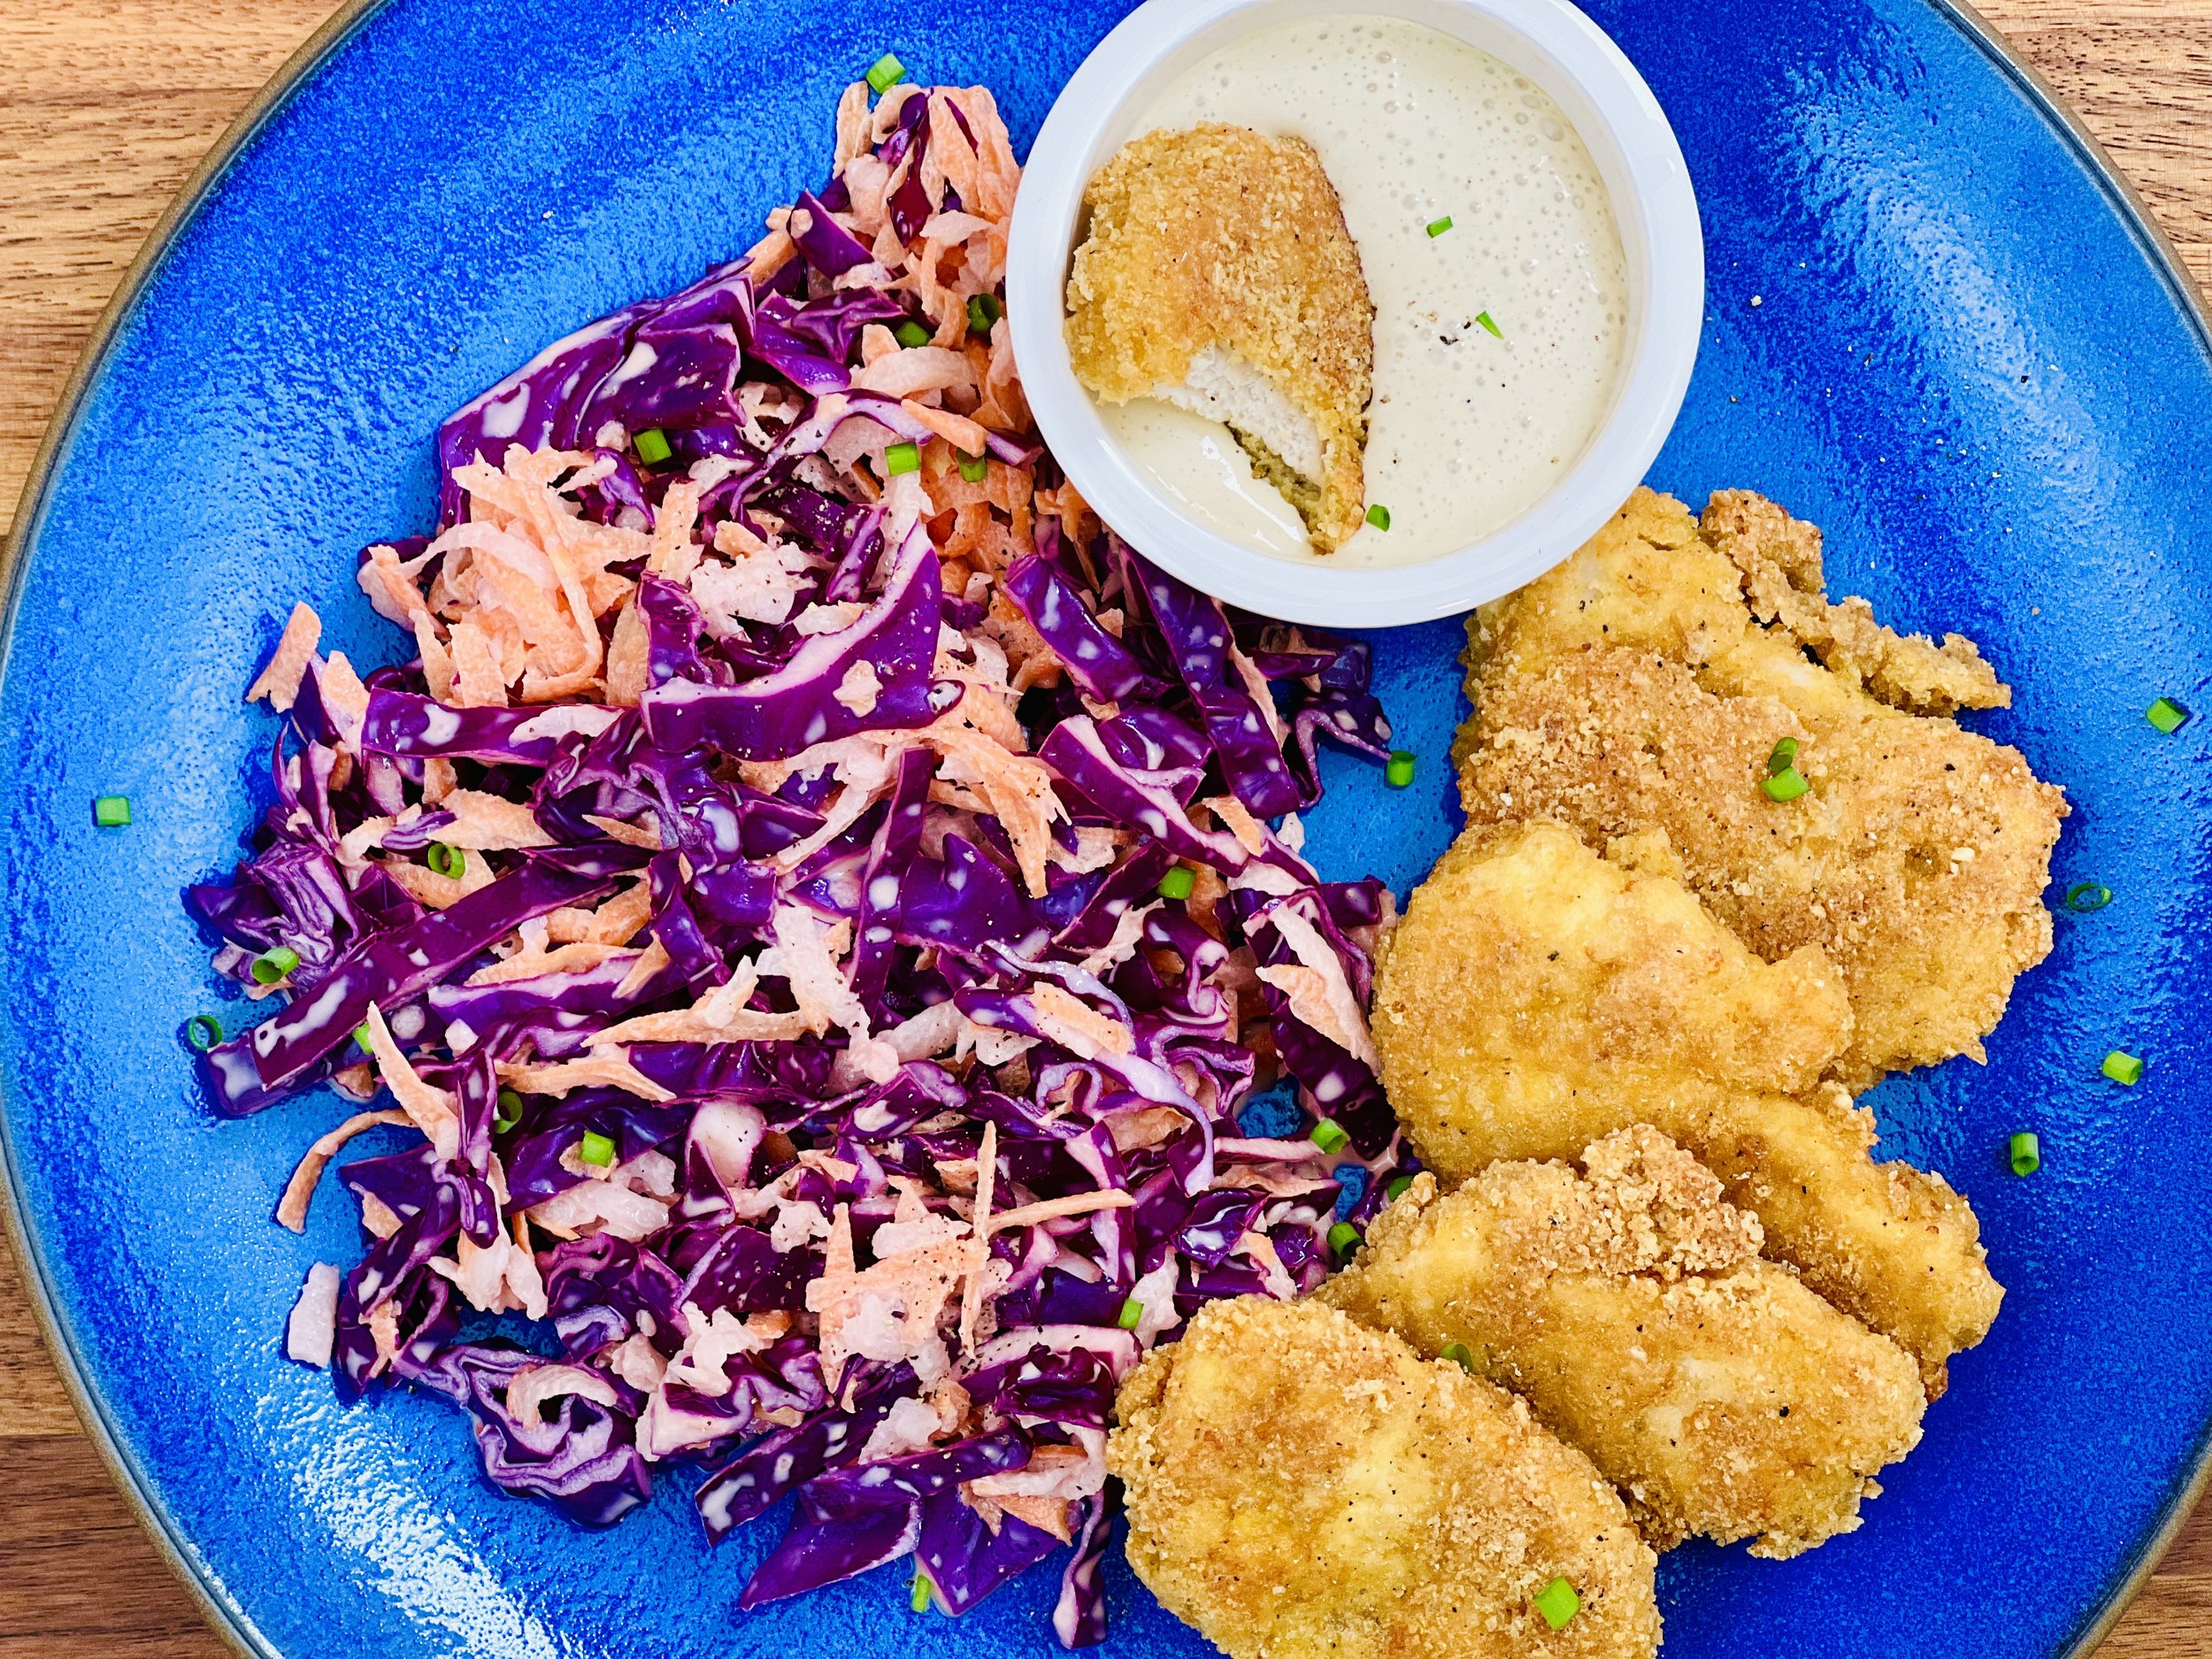
Chicken Katsu and Coconut Rice (low FODMAP)
20 Minutes prep • 20 Minutes cook • Low FODMAP • Gluten-Free • Lactose-Free • Serves 4
20 Minutes prep • 20 Minutes cook • Low FODMAP • Gluten-Free • Lactose-Free • Serves 4 • Ok to make ahead: Steps 1-5
A wonderful blend of creamy rice and crispy chicken, this bowl is simple, satisfying, and delicious. Adding coconut milk instead of water when cooking rice is one of my favorite ways to give plain rice a new flavor and texture. Toasting the rice in sesame oil before cooking it adds yet another delightful element of flavor. In this recipe, the smooth creaminess of the coconut rice offsets the crisp saltiness of the chicken Katsu very nicely.
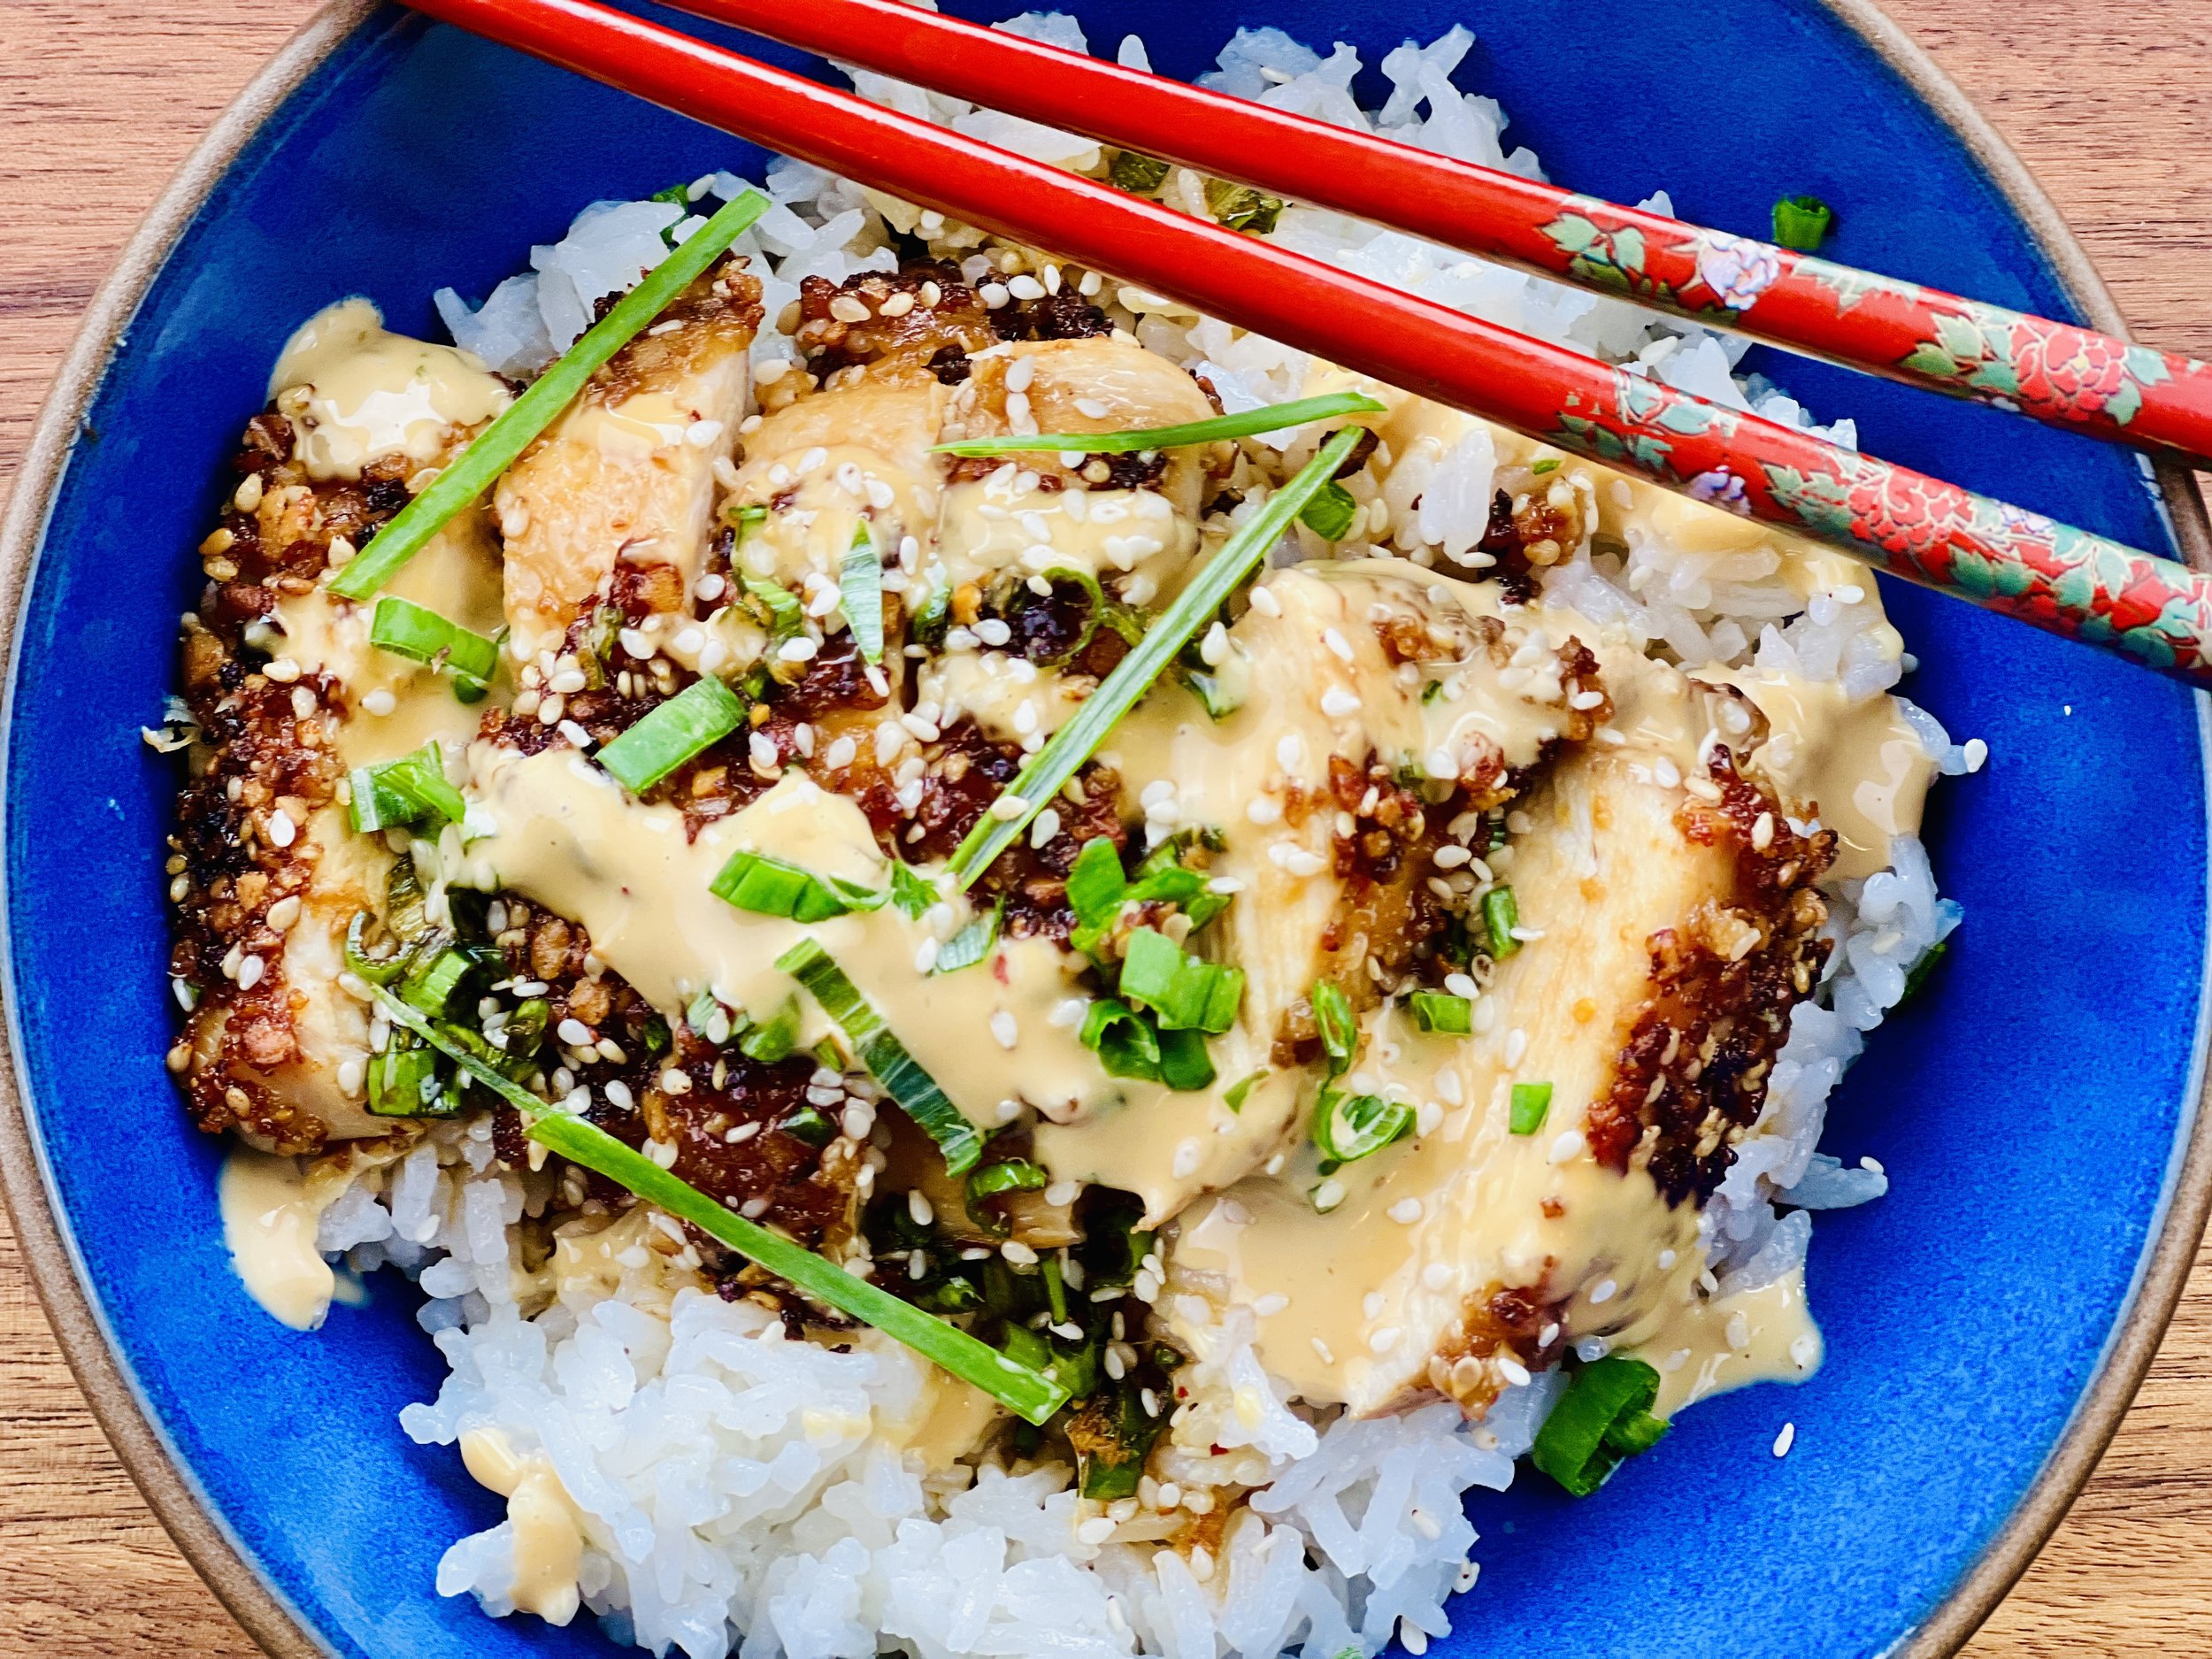
Ingredients: Chicken Katsu
2/3 cup, plus 2 tablespoons gluten-free low sodium soy sauce
2 tablespoons toasted sesame oil, divided
1 tablespoon maple syrup
1 tablespoon fresh ginger, grated
2 tablespoons green onions (green part only), chopped
1 teaspoon, plus 3 tablespoons sesame seeds, plus more for serving
2 boneless chicken breasts, sliced in half horizontally
3/4 cup gluten-free Panko crumbs
Green onions, green part only, chopped, for serving
Ingredients: Coconut Rice
1 1/2 cups jasmine rice
1 tablespoon toasted sesame oil
1 (14 ounce) can (1 3/4 cup) unsweetened coconut milk
1 1/4 cup water (or you can use all coconut milk if you prefer)
1/2 teaspoon Kosher salt
Ingredients: Soy Mayonnaise
1/3 cup mayonnaise
1 tablespoon gluten-free soy sauce
1 teaspoon rice vinegar
Red pepper flakes (to taste)
Directions
(1) Salt the chicken: This step is optional but results in more flavorful and tender meat. Cut chicken breasts horizontally and trim off any fat or skin. Season both sides of each piece of chicken evenly with Kosher salt and lay the meat on a rimmed plate or baking dish. Cover with plastic wrap and refrigerate 4 hours, overnight, or until ready to cook. (I like to salt meat when I bring it home from the market then re-wrap it and keep it in the refrigerator until I’m ready to do something with it.)
(2) Make the sauce/marinade: In a medium bowl, combine 2/3 cup tamari/soy sauce, sesame oil, maple syrup, ginger, green onion, 1 teaspoon sesame seeds, and chili flakes.
(3) Make the rice: In a saucepan, heat 1 tablespoon of toasted sesame oil until hot but not smoking. Rinse the rice in a sieve until the water runs clear. Drain and add the rice to the hot oil and let it toast for about 2 minutes. Next, add the coconut milk or coconut milk and water plus the salt. Stir to blend. Cover, bring to a gentle boil, then reduce the heat to low and keep covered while simmering for 20 minutes. Turn the heat off and let sit for another 5 - 10 minutes.
(4) Marinate the chicken: Place the chicken in a bowl and pour about 1/2 cup of the sauce over the chicken, save the rest for serving. Let the chicken sit 10 minutes or more until ready to cook.
(5) Make the soy mayonnaise: Combine all ingredients in a small bowl and stir with a fork or whisk to combine. Taste and add red pepper flakes to your liking.
Make-ahead note: At this point, you may set everything aside in the refrigerator until you are ready to cook the chicken.
(6) Dredge the chicken: Place the Panko and 3 tablespoons of sesame seeds in a shallow bowl. Dredge both sides of the chicken through the Panko mixture, pressing to adhere. Set the chicken aside on a plate.
(6) Cook the chicken: Heat a few tablespoons of toasted sesame oil in a large skillet over medium-high. Add the chicken and cook until golden brown, 3-4 minutes. Flip the chicken and cook until golden brown on the other side, about 3-4 minutes. Transfer to a cutting board. Let sit for a couple of minutes, then use a sharp knife to cut the meat into strips.
(7) Plate and serve: Add the rice to bowls, top with chicken and green onions. Drizzle with the soy mayonnaise and the reserved soy sauce mixture.
Eat and enjoy every bite because you can!
Recipe note: I use Diamond Crystal Kosher salt in all my recipes because it has a wonderful flat and crisp flake that tastes delicious. It is also the least salty salt available so you can use it more liberally as a seasoning than you can table salt or sea salt. If you use another type of salt, you may need to reduce the amount so it is not over-salted.
Link note: This post contains links for you to easily purchase items listed on the page. In some cases, we have provided a special discount code for IBS Game Changers so be sure to use it when you purchase an item to get the discount that has been arranged just for you! As an Amazon Associate, I earn a commission from qualifying Amazon purchases.
More Deliciously Low FODMAP™ main course recipes
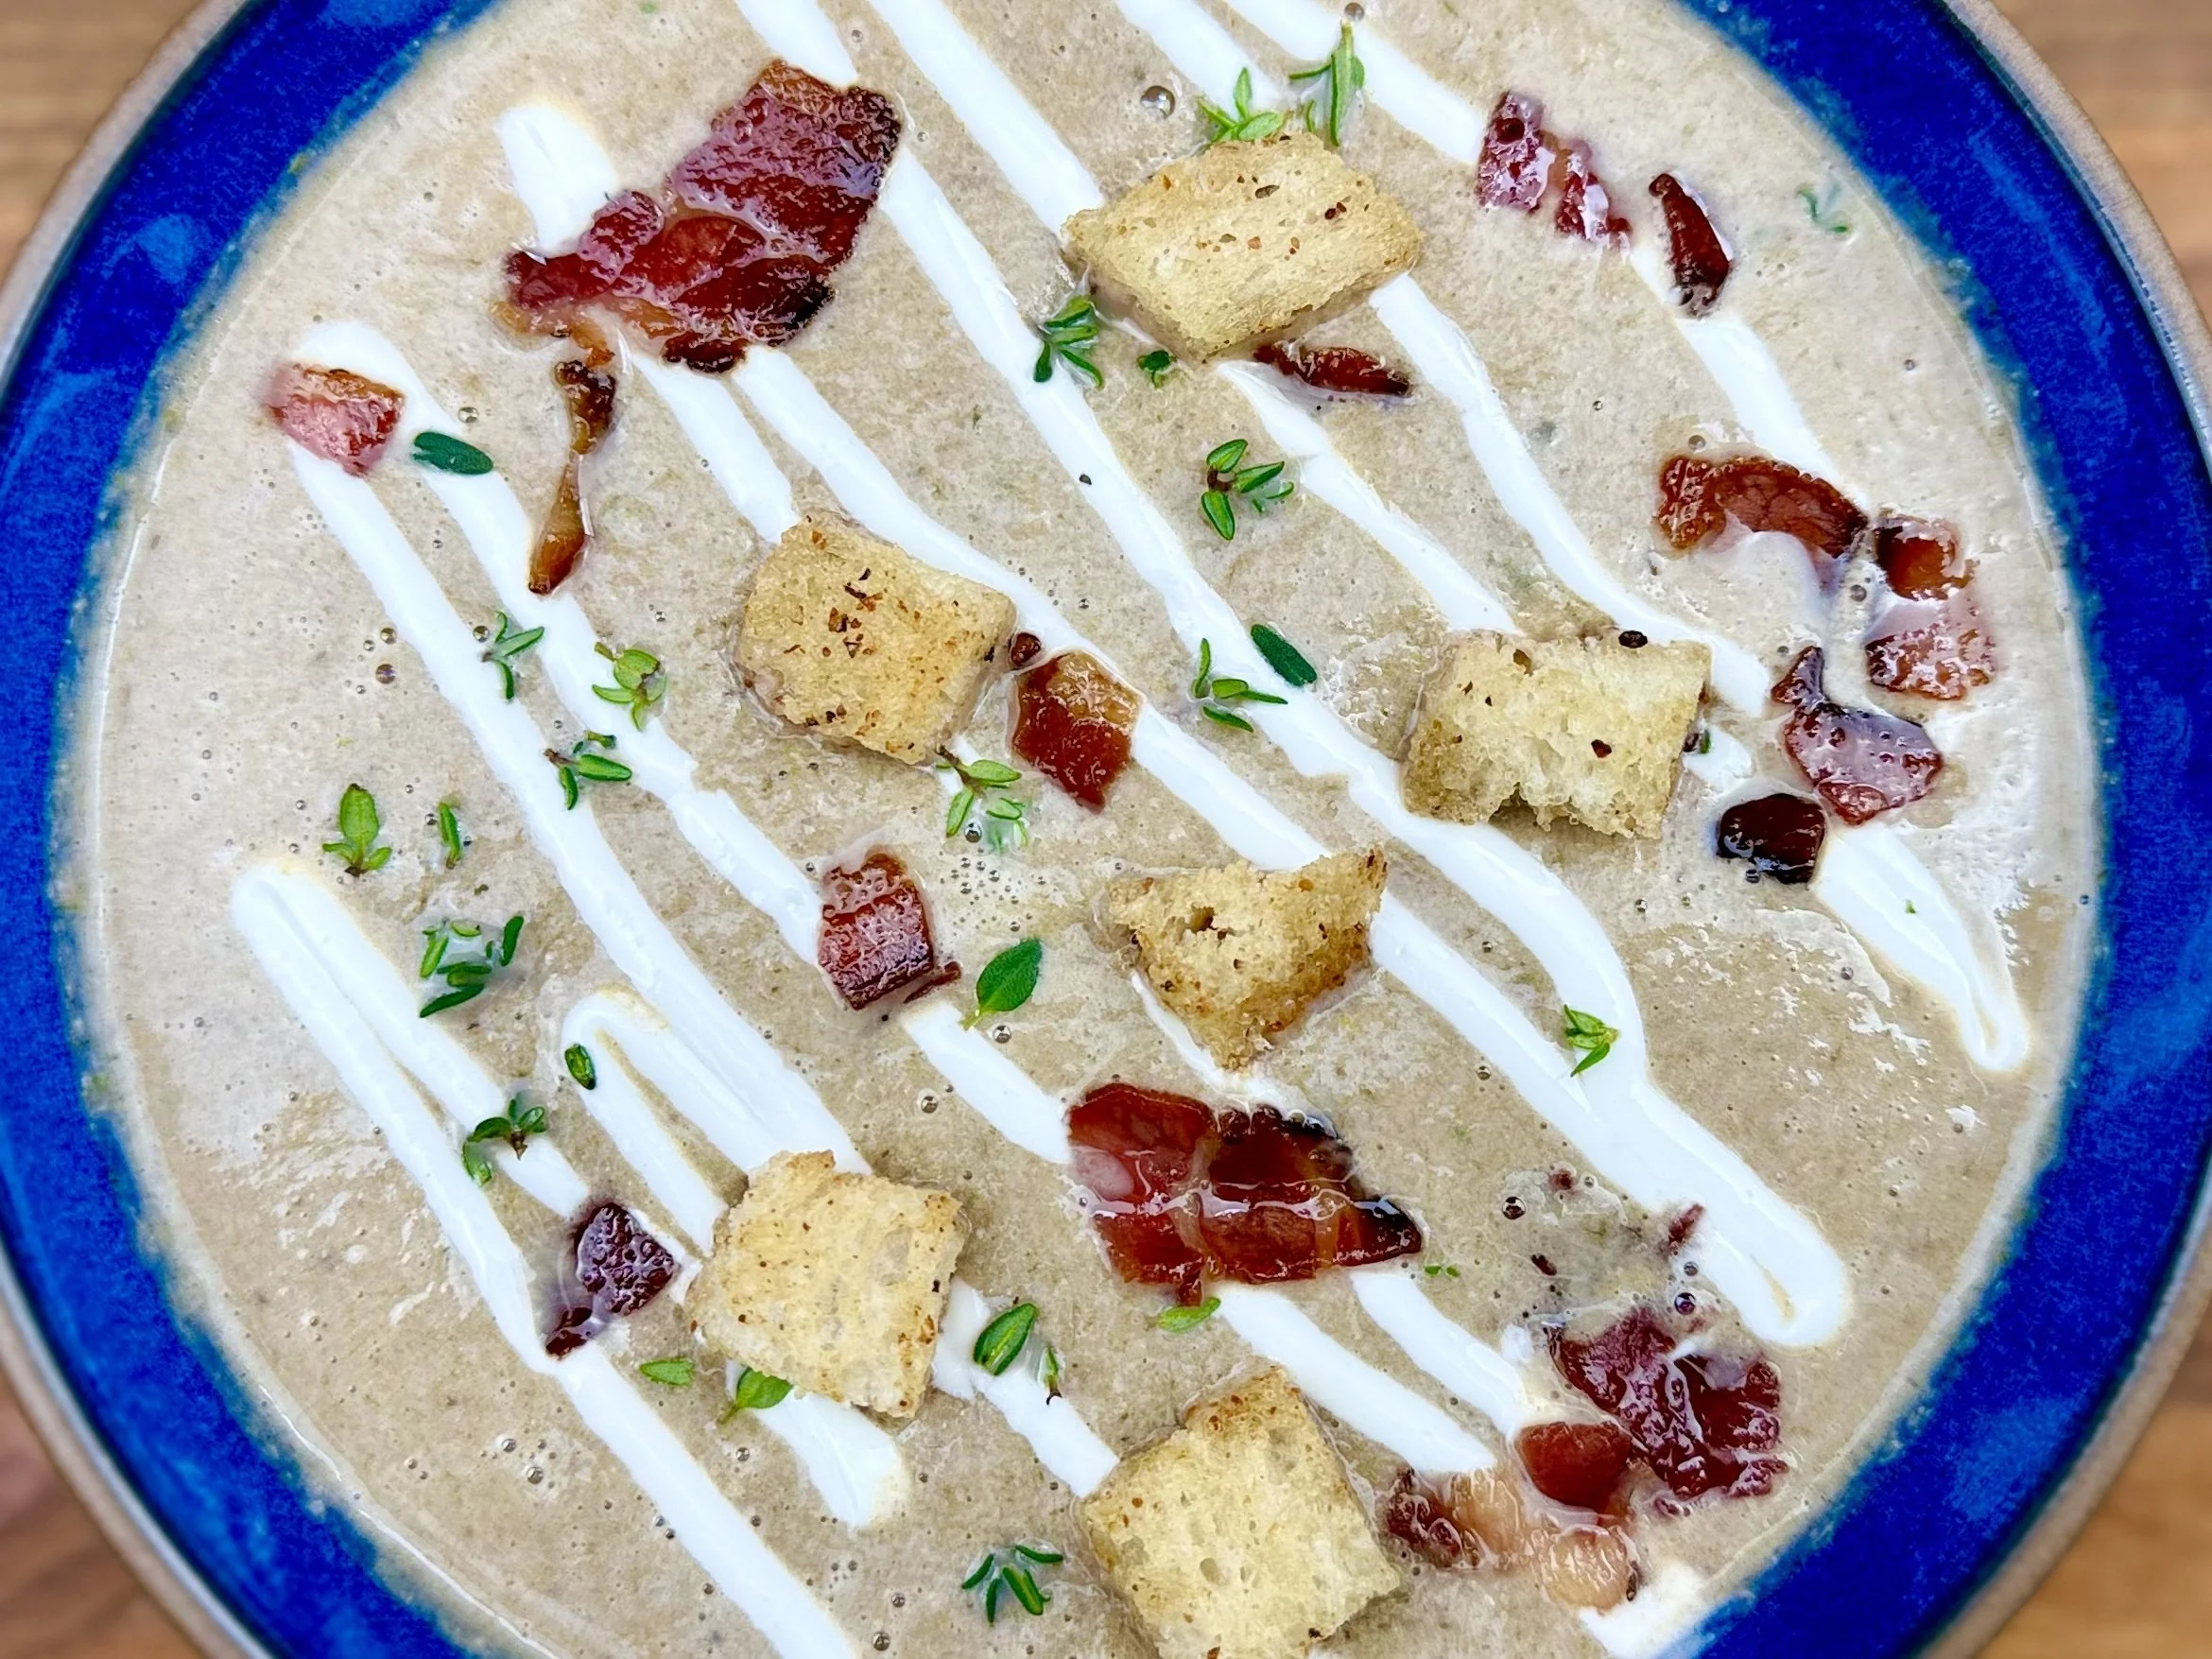
10 Minutes • Gluten-free • Low FODMAP • Serves 2 - 3