Deliciously Low FODMAP

Inspire yourself with hundreds of delicious low FODMAP recipes, tips, and tools, and enjoy the abundance that is yours even when you have IBS.
Use the buttons and filters to find something specific or browse the complete collection for inspiration.
Discover a treasure trove of recipes with my FREE recipe club! Get new ideas delivered straight to your inbox every week.
Deliciously Low FODMAP is a trademark of IBS Game Changer, LLC
Filter to find Recipes and Tools
More Filtering Options
- All 728
- Appetizer 50
- BBQ 46
- Bowl 32
- Breakfast 58
- Cocktails 13
- Collection 1 58
- Collection 10 27
- Collection 11 30
- Collection 12 27
- Collection 13 31
- Collection 14 29
- Collection 15 31
- Collection 16 34
- Collection 17 31
- Collection 18 33
- Collection 19 36
- Collection 2 32
- Collection 20 33
- Collection 21 33
- Collection 22 40
- Collection 23 10
- Collection 24 1
- Collection 3 28
- Collection 4 29
- Collection 5 30
- Collection 6 32
- Collection 7 31
- Collection 8 31
- Collection 9 32
- Condiments 6
- Crock Pot 4
- Dessert 107
- Diabetes Game Changer Exception Protocol Contains Alcohol 11
- Diabetes Game Changer Exception Protocol Contains Flour 108
- Diabetes Game Changer Exception Protocol Contains Flour AND Sugar 77
- Diabetes Game Changer Exception Protocol Contains Sugar 49
- Diabetes Game Changer First Four Weeks 363
- Dinner 330
- Drink 8
- Free Guide 17
- Gluten-free 590
- Gut Microbiome 2
- Guthealth 3
- Holidays 68
- IBS Triggers 4
- Keto Friendly 124
- Lactose-Free 175
- Low FODMAP Diet 714
- Low Net Carb 138
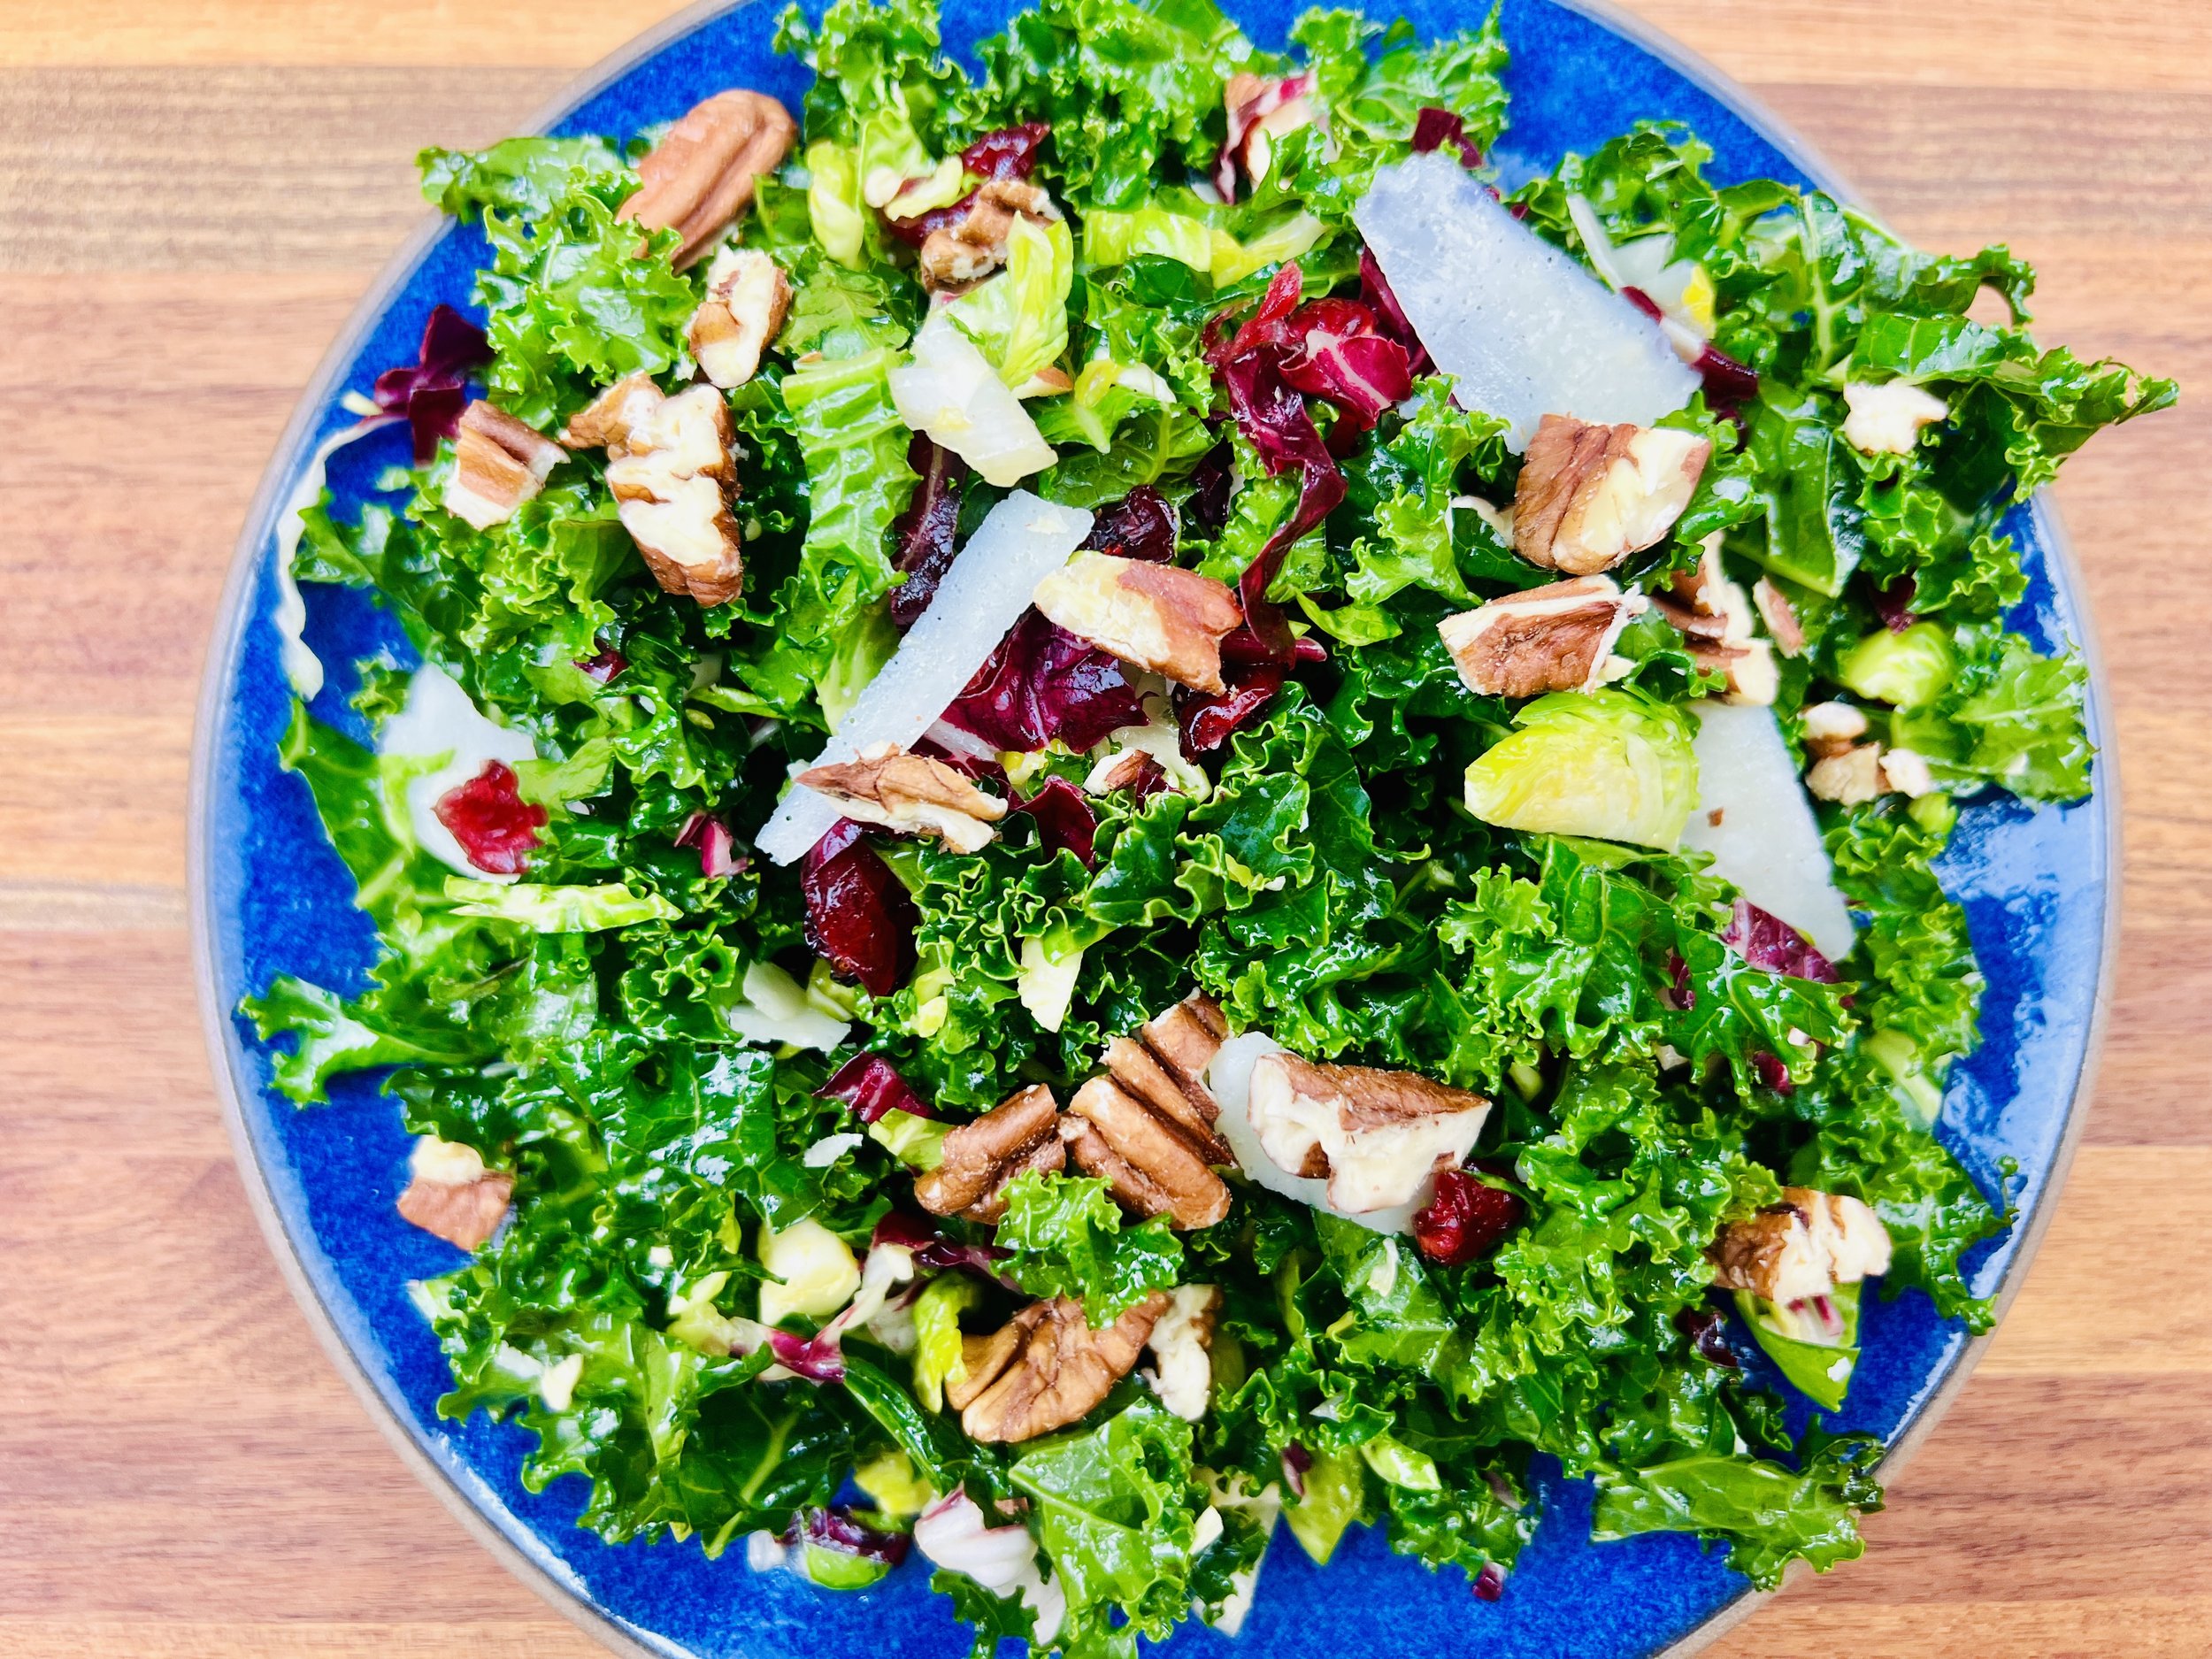
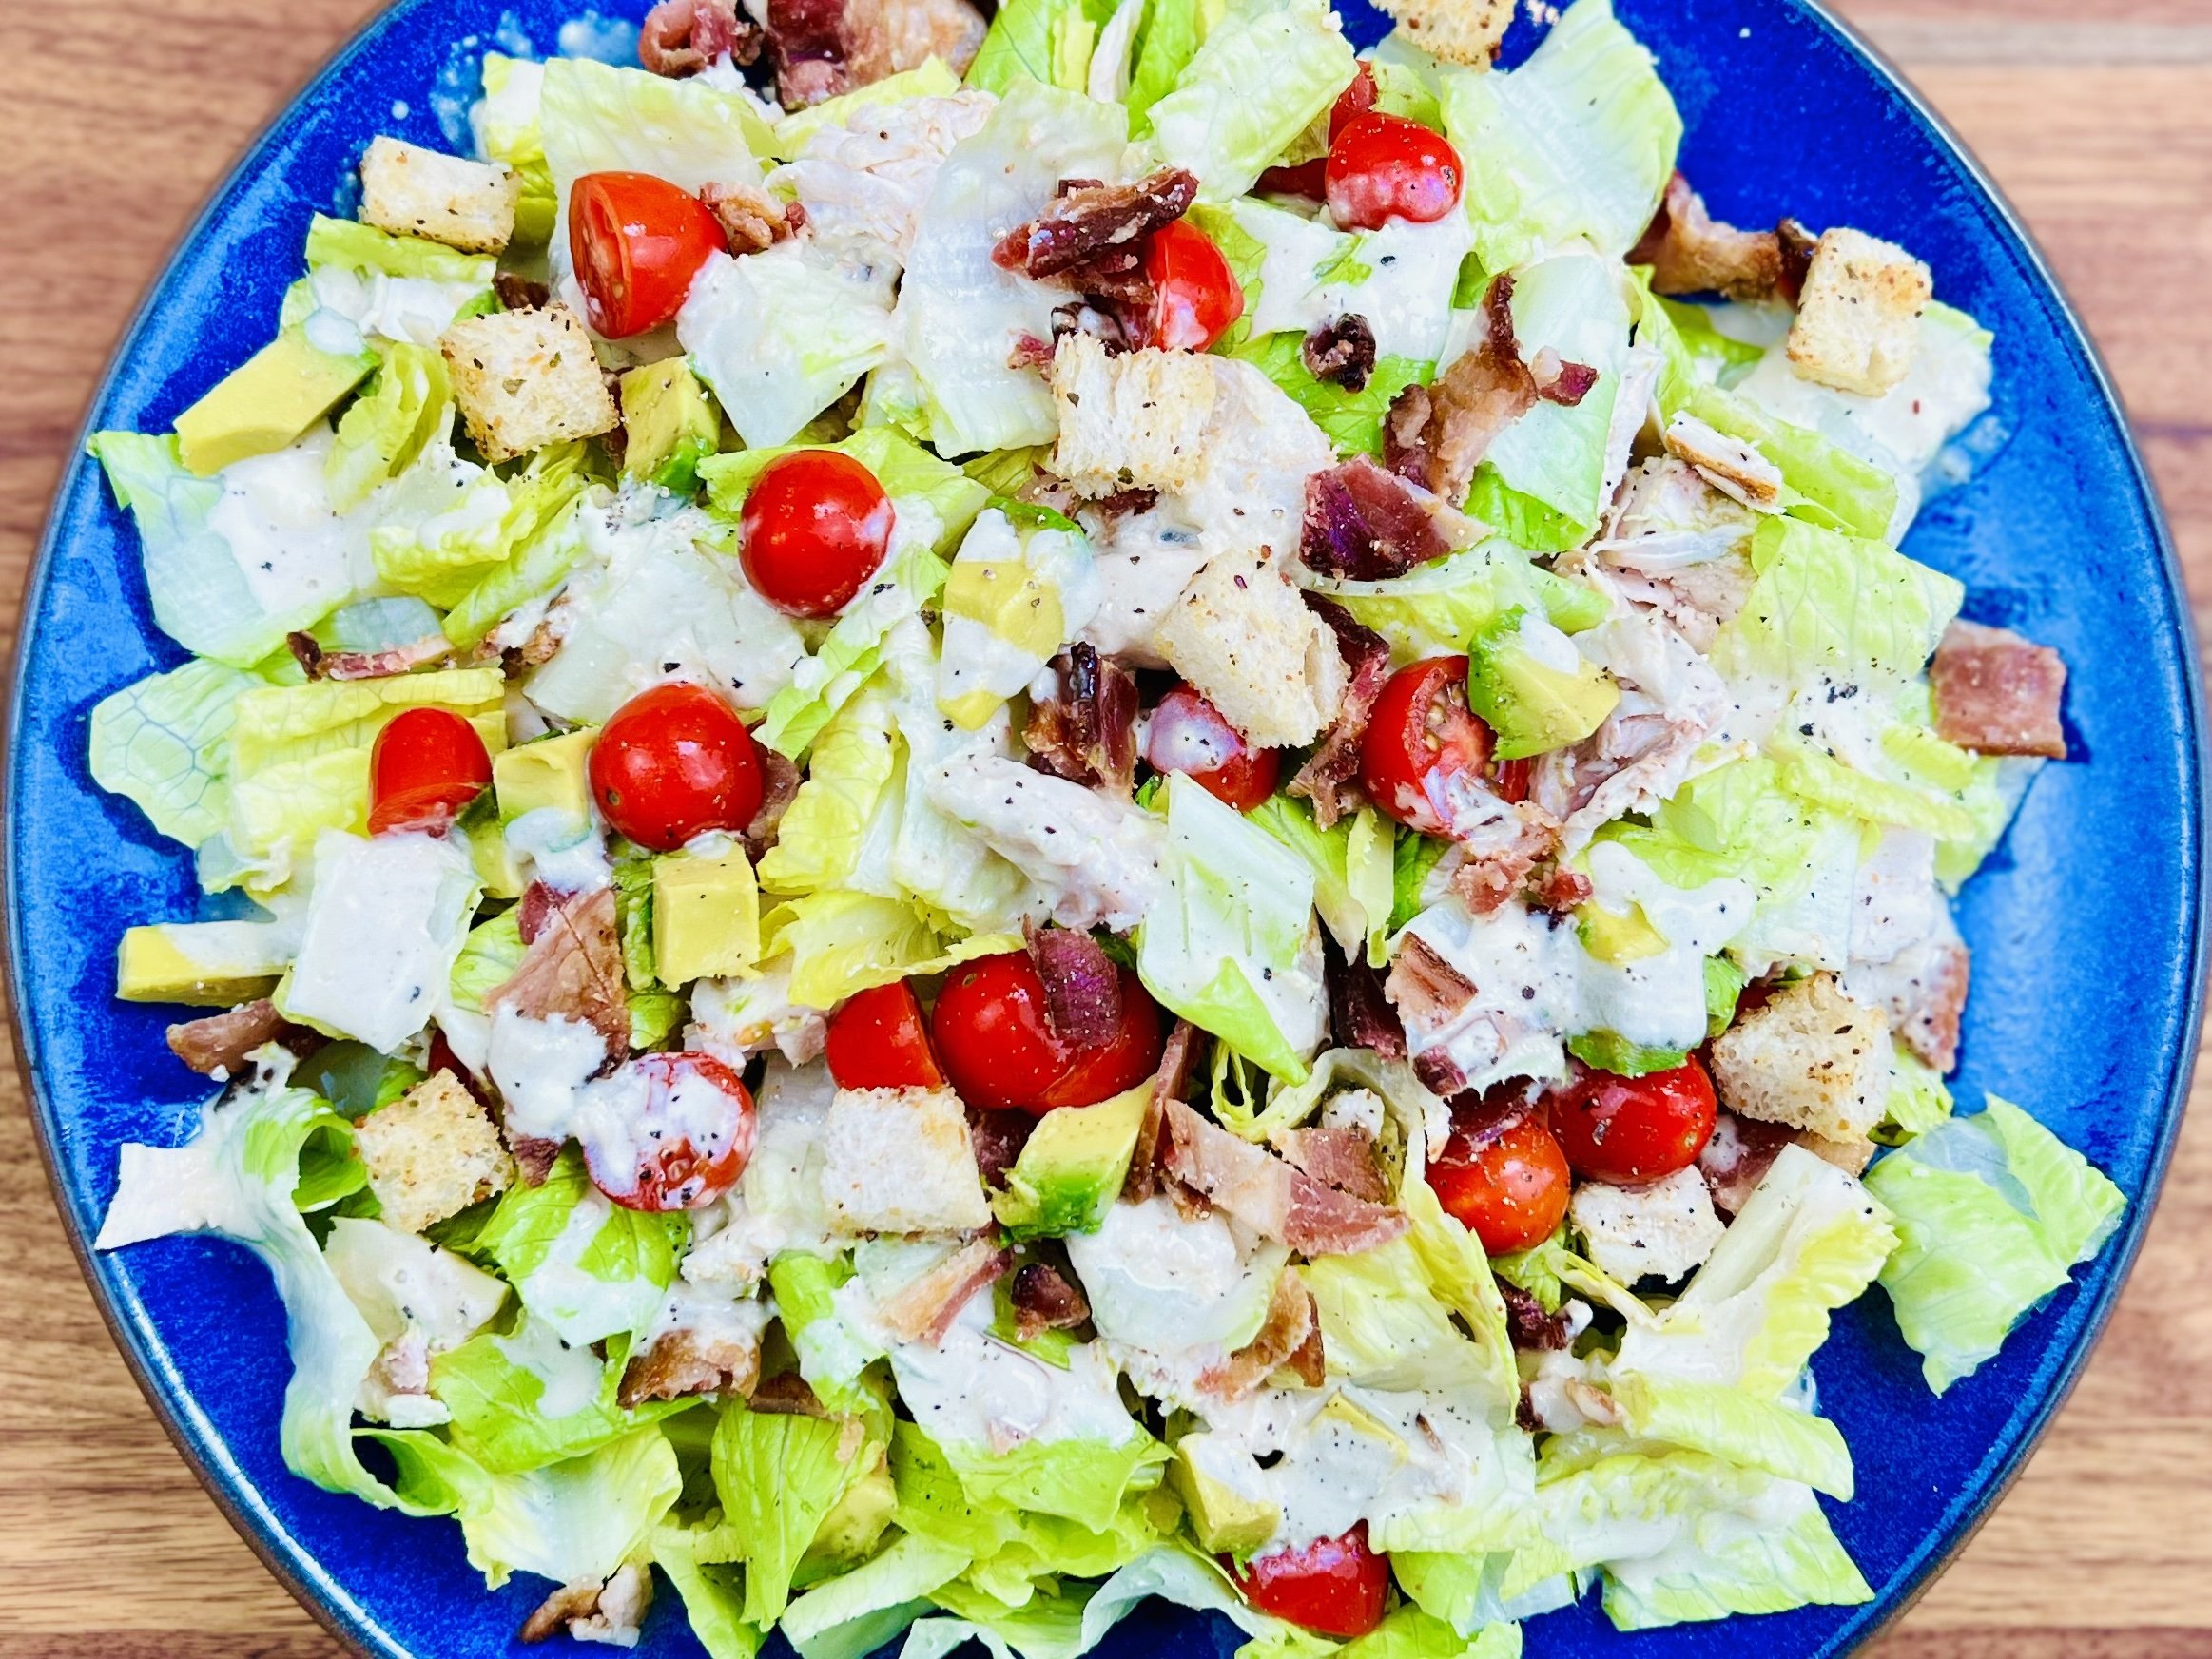
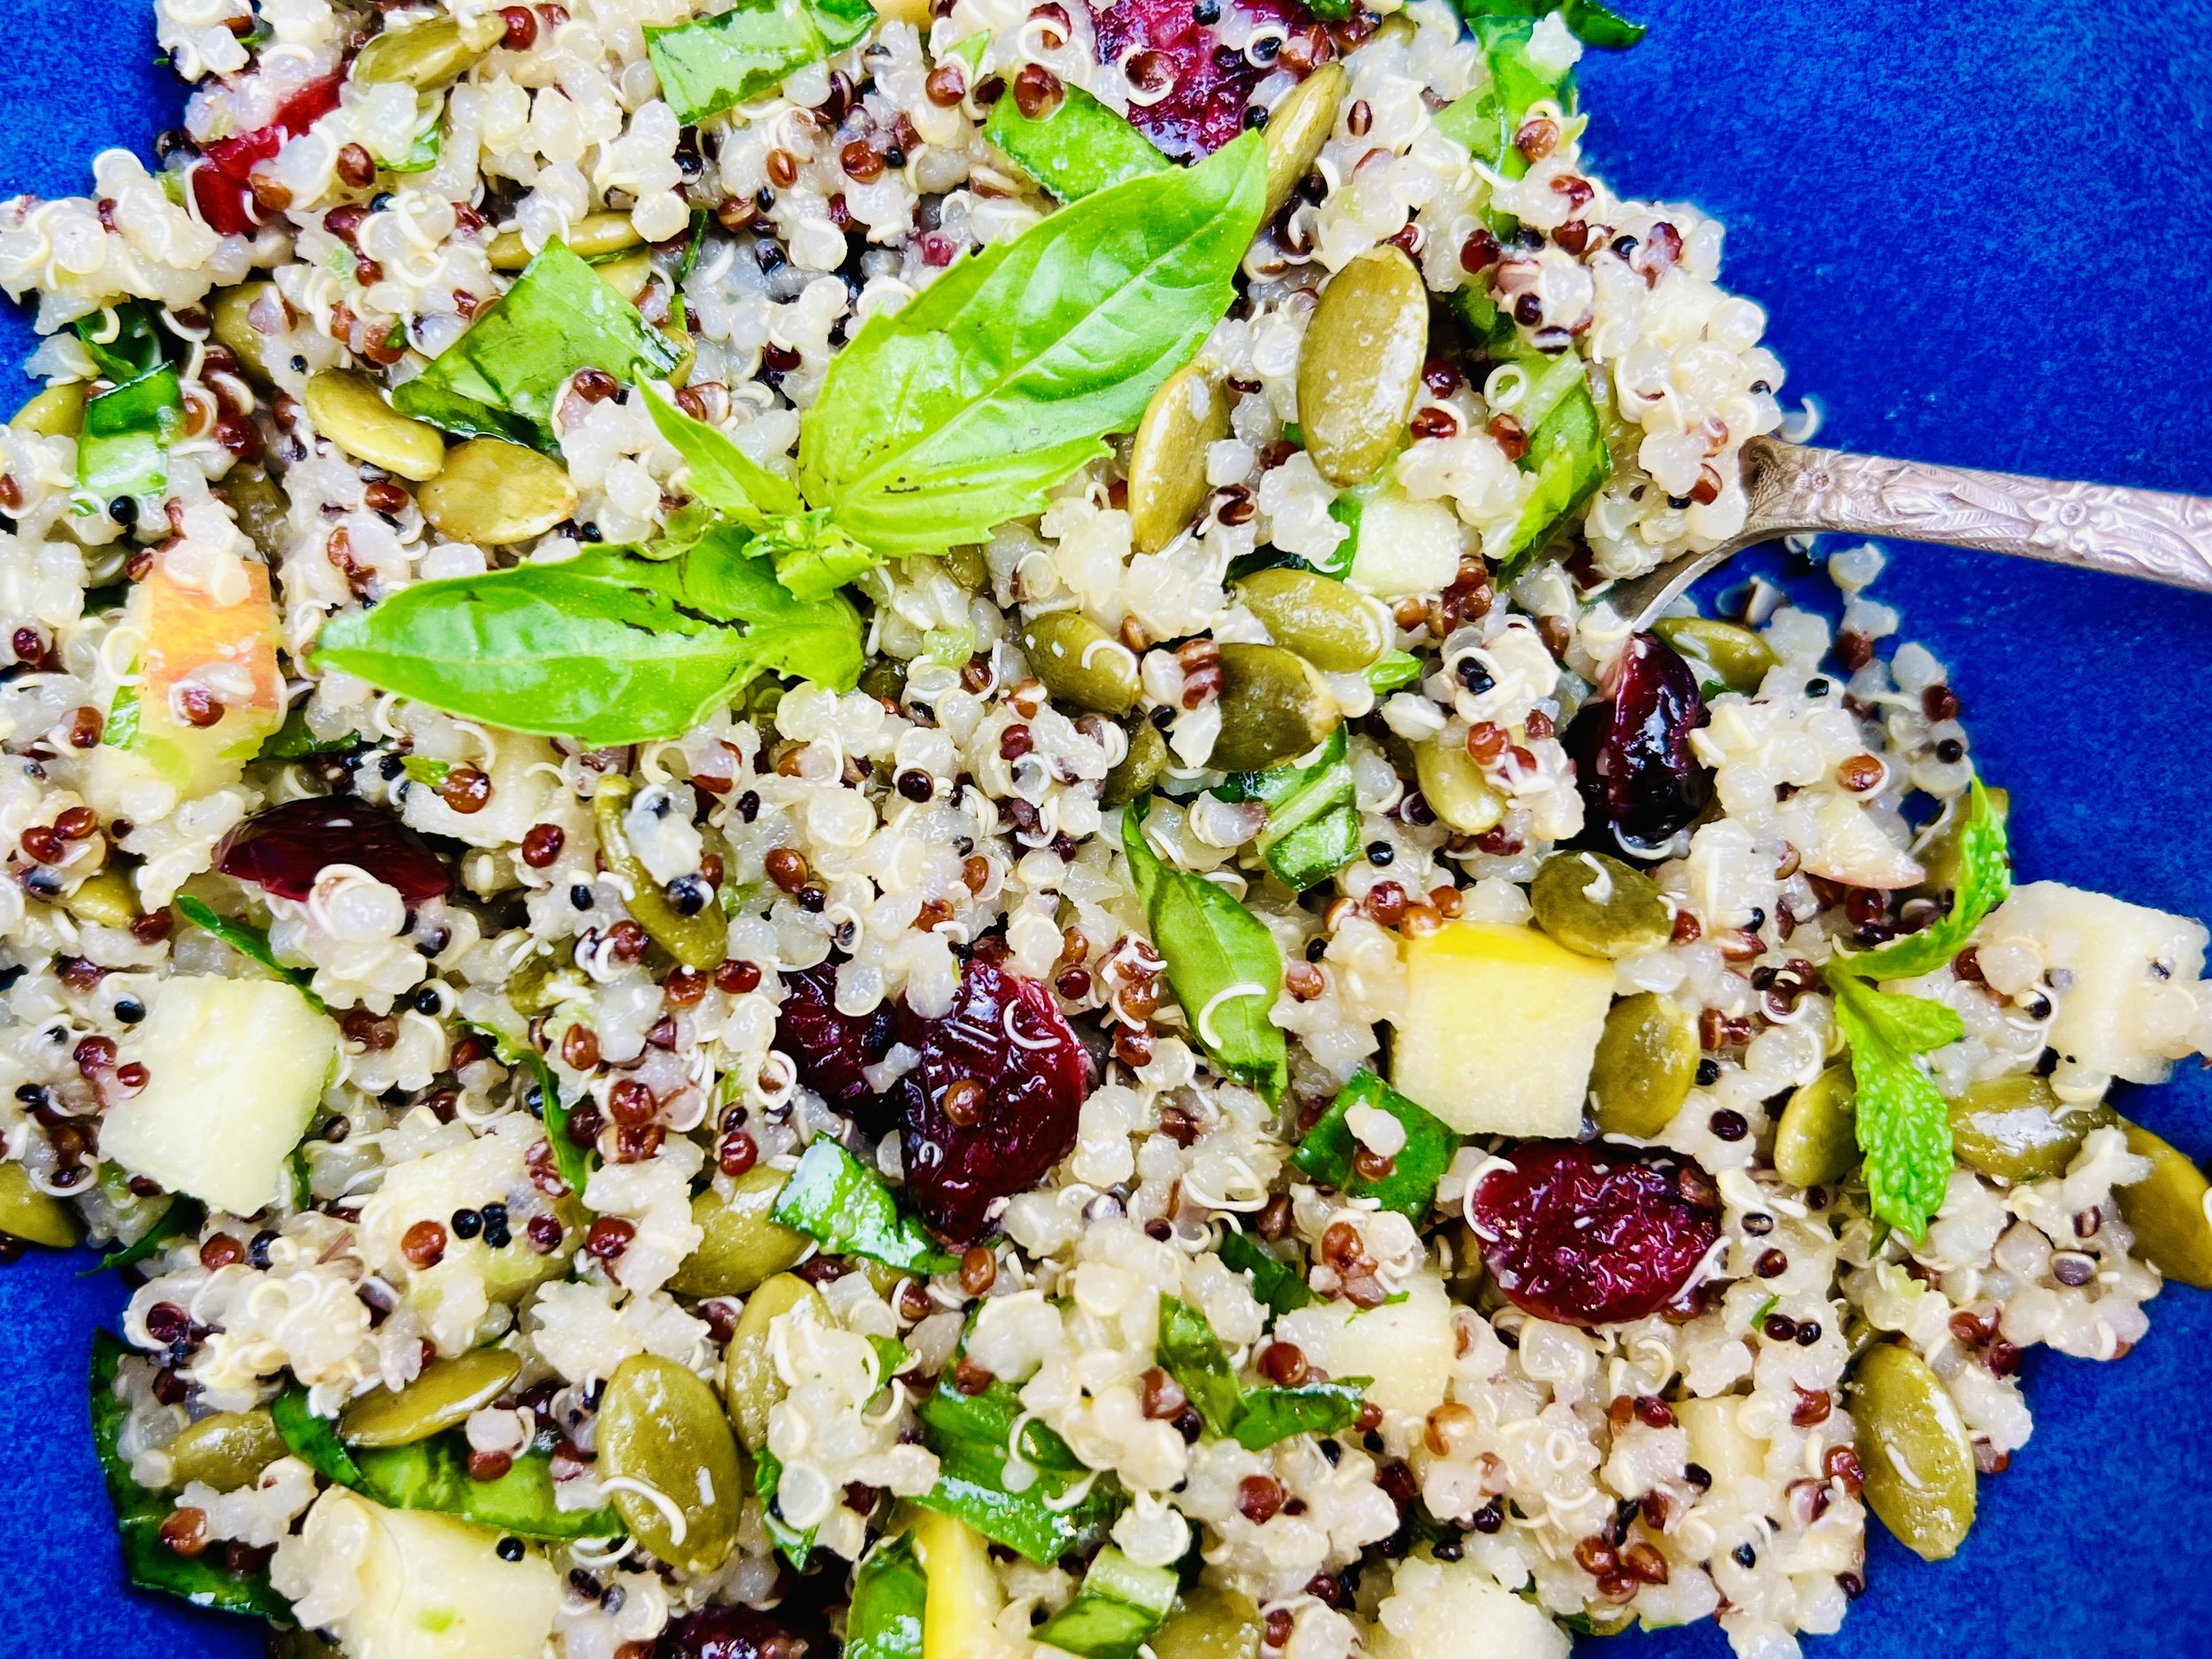
Cranberry Apple Quinoa Salad (Low FODMAP)
20 Minutes prep • 15 Minutes cook • Low FODMAP • Gluten-free • Serves 4 - 6
20 Minutes prep • 15 Minutes cook • Low FODMAP • Gluten-free • Serves 4 - 6 • Ok to make ahead: Steps 1-5
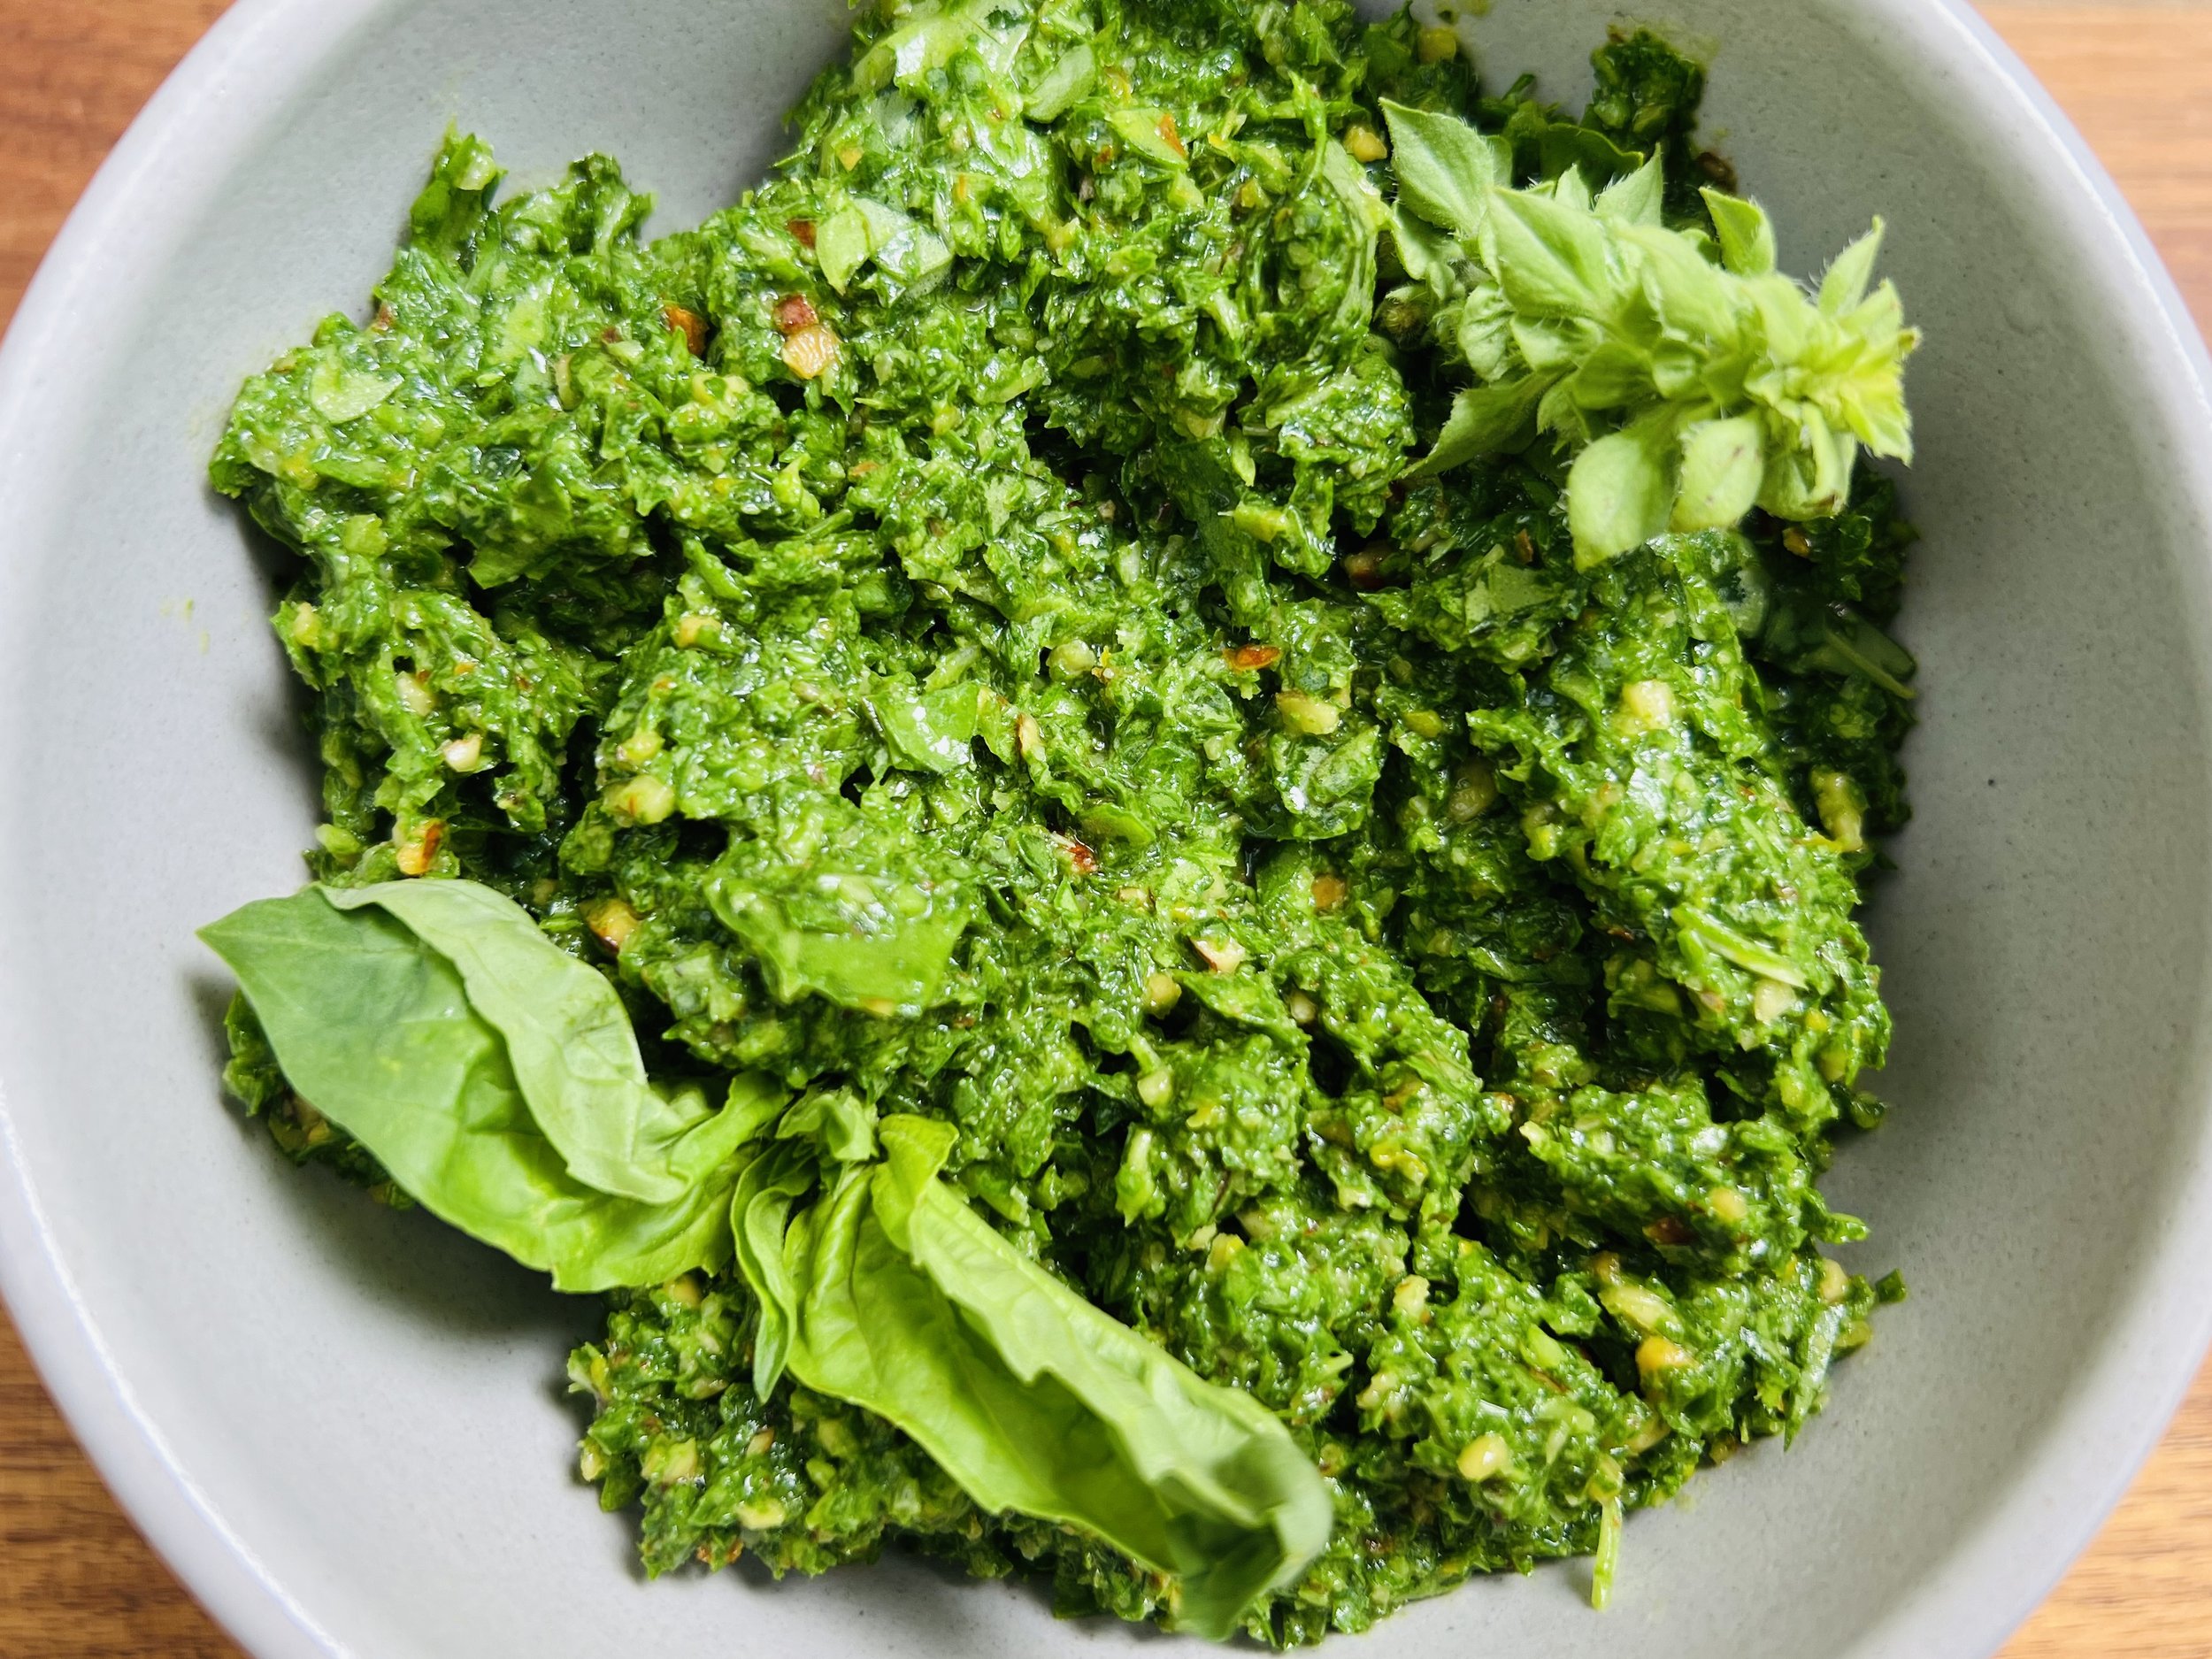
Apples you say? And it’s low FODMAP? Yes! If you manage your serving sizes, you can (and should!) eat everything possible. For some foods I really love, I think of them more like a seasoning than a main course and I add just enough to get a taste but not so much as to trigger symptoms. Sitting down to eat less than 1/8 of an apple would definitely not be satisfying, but encountering small pieces of apple in a salad is quite wonderful. Hence this cranberry apple quinoa salad! I hope you enjoy this simple salad as much as I do. And, if you’re counting, this salad contains 11 different plants so your gut biome will be happy too.
Ingredients: Salad
1 cup quinoa (uncooked), rinsed well
3 tablespoons basil, roughly chopped
2. tablespoons mint, roughly chopped
1/2 apple, cored and chopped into small pieces
1/2 cup pumpkin seeds (raw)
1/2 cup walnuts, roughly chopped
3/4 cup crumbled feta cheese
1/2 cup dried cranberries
Ingredients: Dressing
1 lemon, juiced
1/2 lime, juiced
1 tablespoon maple syrup
1/4 cup olive oil
1/2 teaspoon Kosher salt and 1/4 teaspoon black pepper
Directions
(1) Cook quinoa: Rinse and cook quinoa per package instructions and let cool. (Be sure to rinse it very well before cooking.)
(2) Prepare: Chop the walnuts, basil, mint, and apple.
(3) Prepare salad: In a large bowl combine the quinoa, basil, mint, apple, pumpkin seeds, walnuts, and feta.
(4) Make the dressing: In a small jar or bowl, combine all dressing ingredients. Shake or whisk to combine.
(5) Dress the salad: Drizzle the dressing over the salad. Toss to combine.
Make-ahead note: At this point, you may keep the salad in the refrigerator until you’re ready to serve. The flavors improve with time so keep right on enjoying this salad and don’t be afraid to make it ahead.
(6) Plate and serve: Serve right away, or chill in the refrigerator and serve for up to 3 days.
Eat and enjoy every bite because you can!
Recipe note: I use Diamond Crystal Kosher salt in all my recipes because it has a wonderful flat and crisp flake that tastes delicious. It is also the least salty salt available so you can use it more liberally as a seasoning than you can table salt or sea salt. If you use another type of salt, you may need to reduce the amount so it is not over-salted.
Have a question you’d like to have answered? Email me at hello@ibsgamechanger.com
Link note: This post contains links for you to easily purchase items listed on the page. In some cases, we have provided a special discount code for IBS Game Changers so be sure to use it when you purchase an item to get the discount that has been arranged just for you! As an Amazon Associate, I earn a commission from qualifying Amazon purchases.
More Deliciously Low FODMAP™ salad recipes


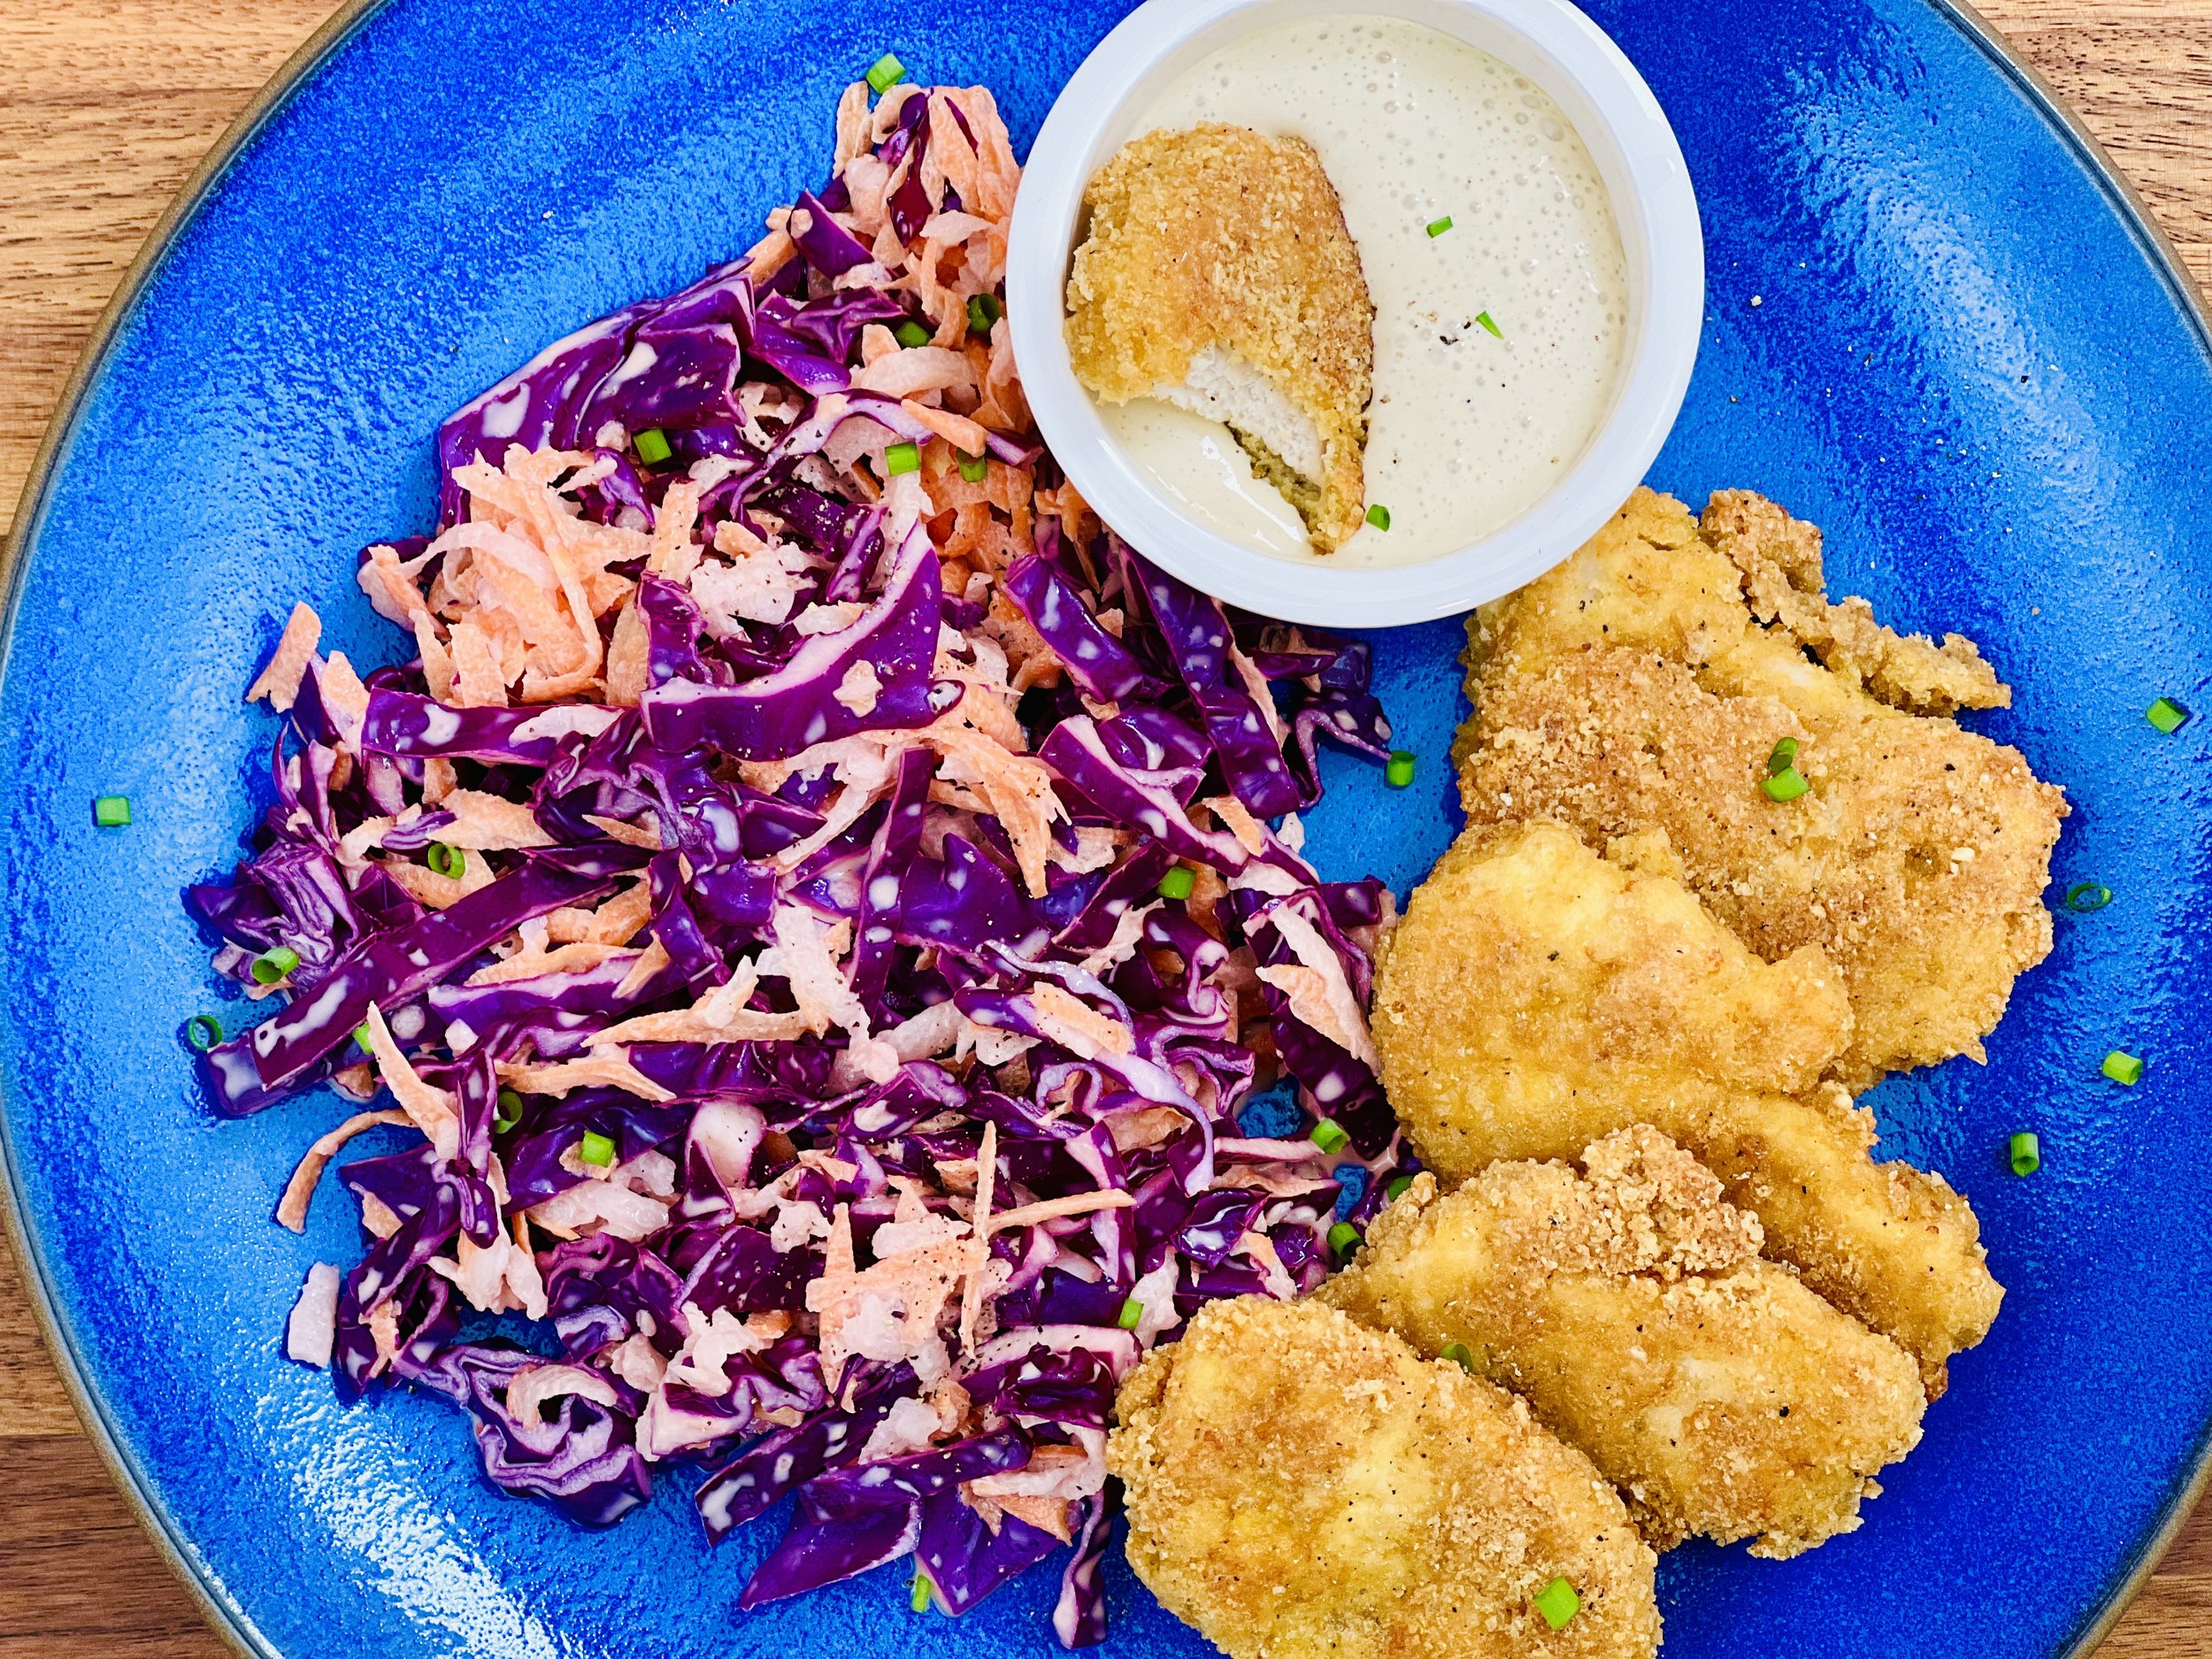
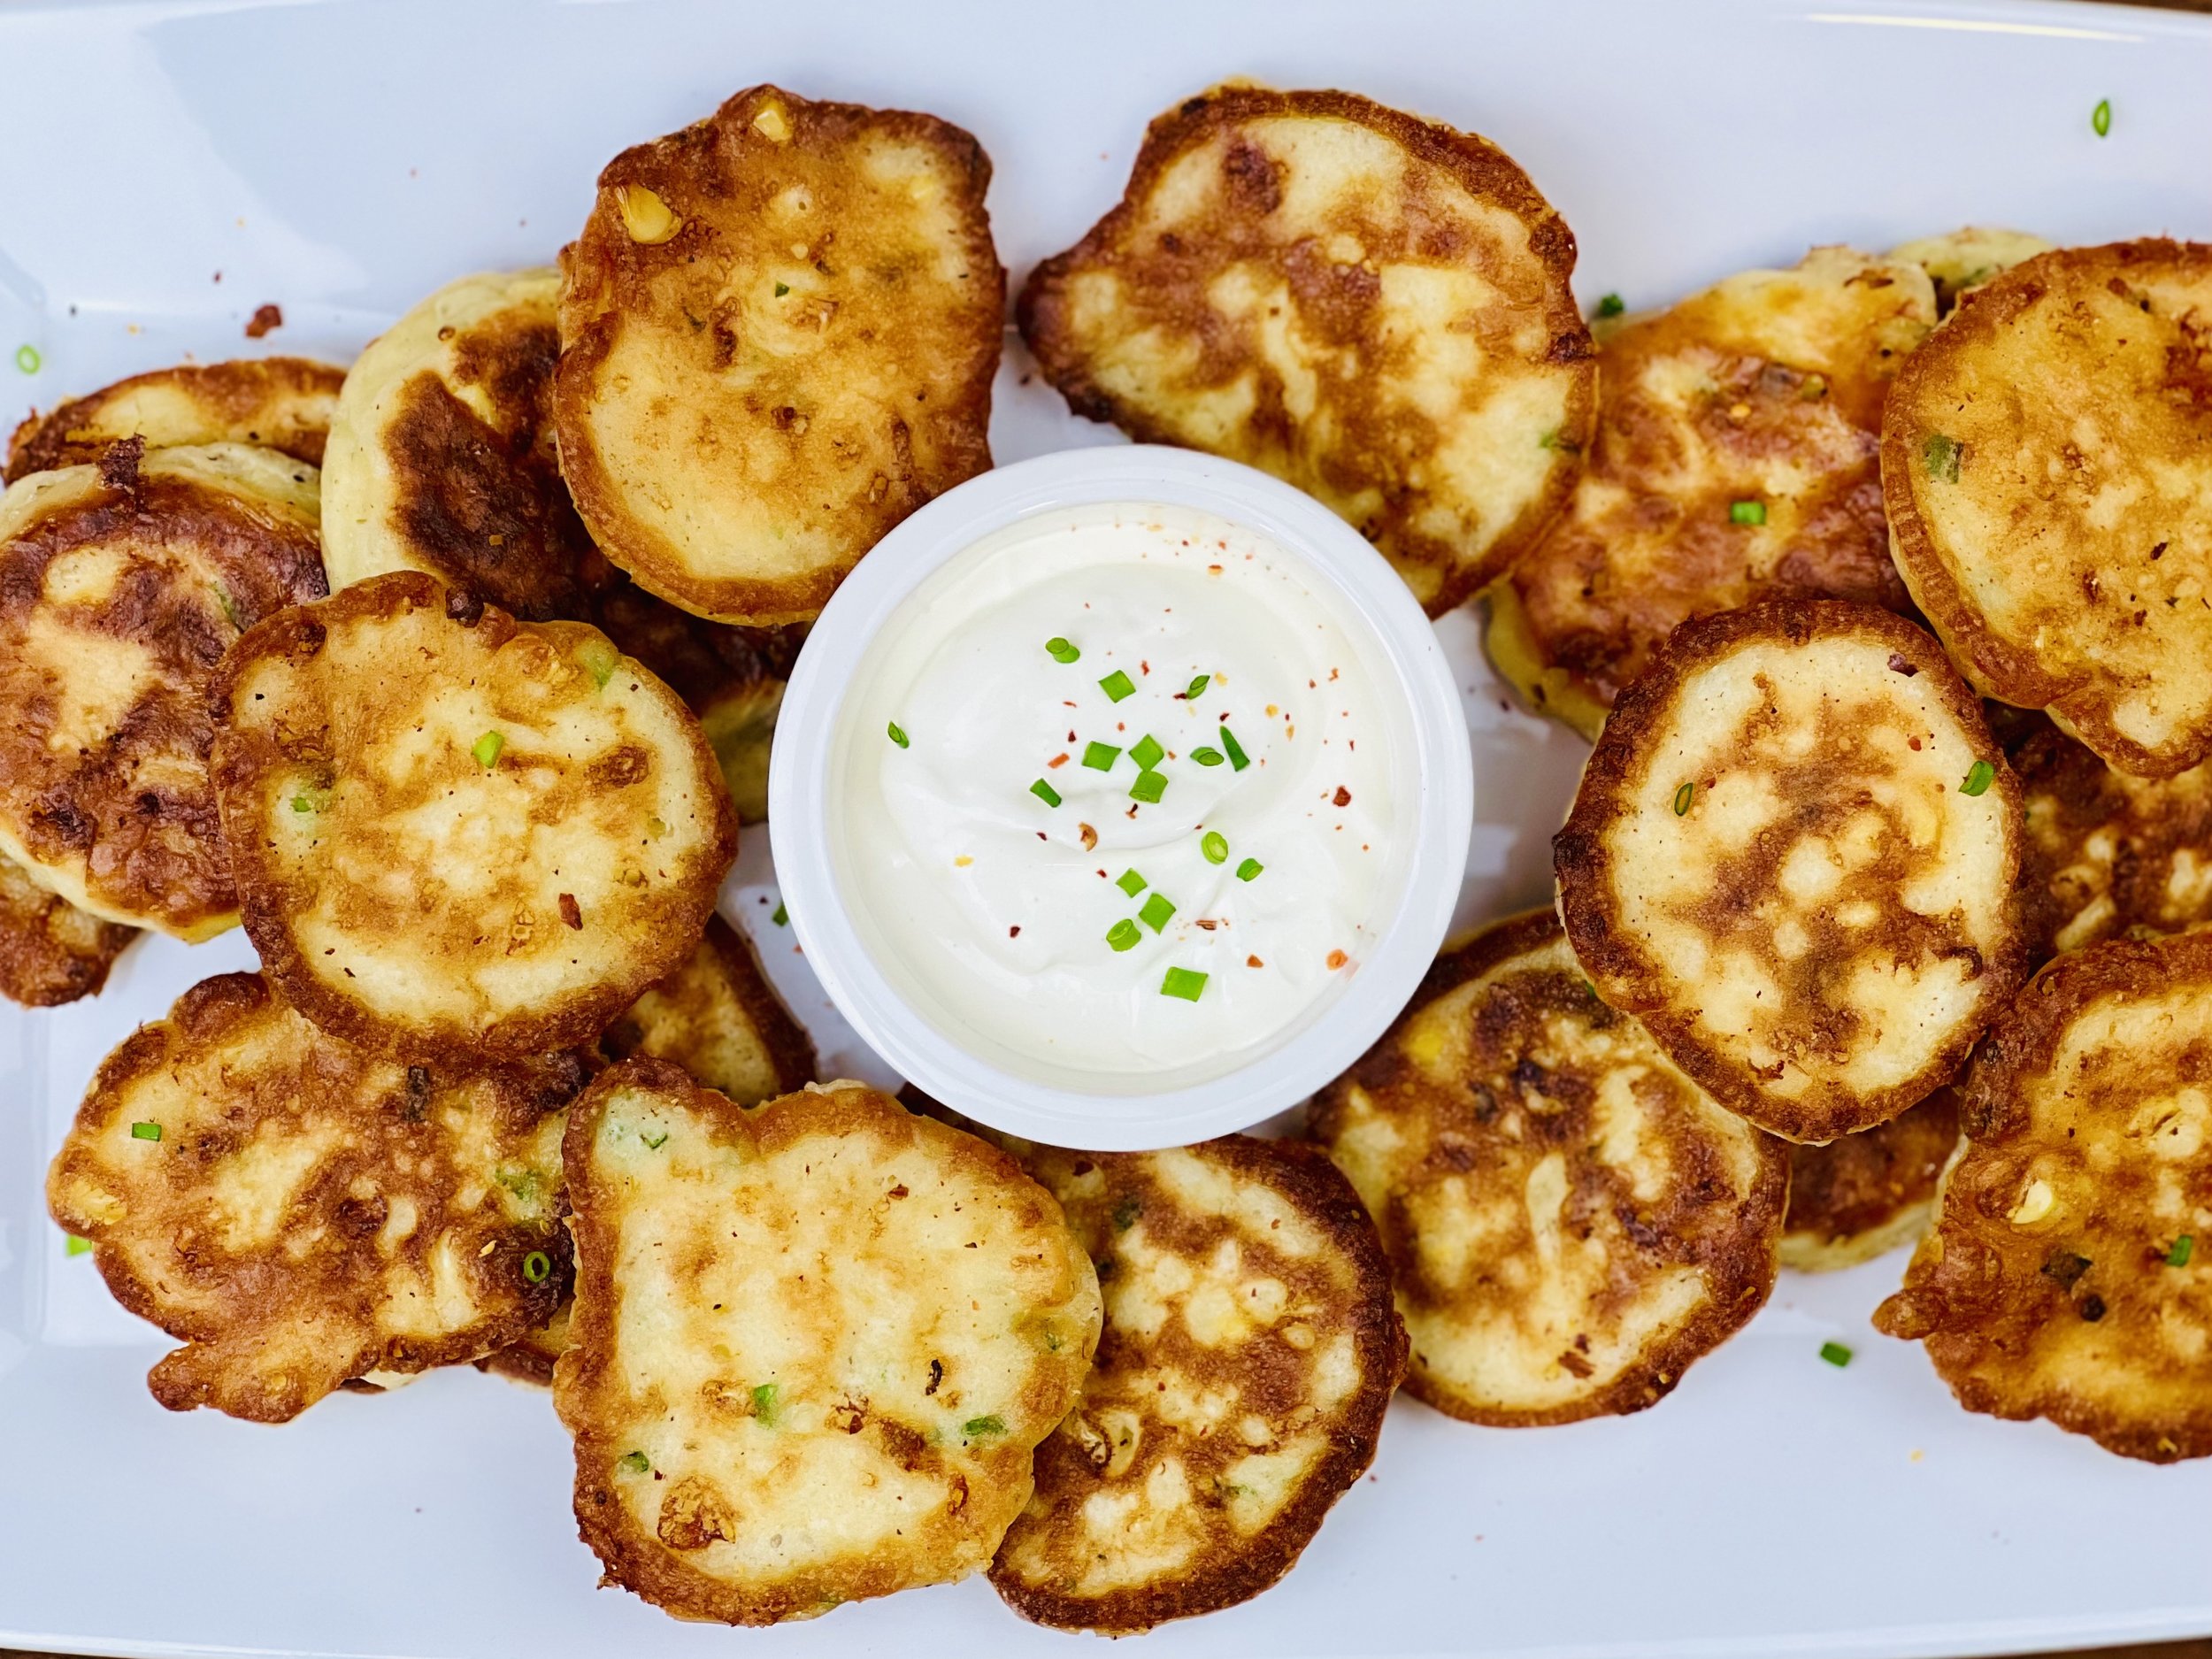
Crispy Corn Fritters (Low FODMAP)
15 Minutes prep • 30 Minutes cook • Low FODMAP • Gluten-free • Makes 2 dozen
15 Minutes prep • 30 Minutes cook • Low FODMAP • Gluten-free • Lactose-free • Vegetarian • Makes 2 dozen • Ok to make ahead: Steps 1-5
When my client told me she liked corn fritters, I had to try them out to see if I liked them too. I decided a savory version would be good since corn is already on the sweet side. These corn fritters have a delightful savory crunch that is complemented by the sweetness of the corn. They make a wonderful appetizer that can be made with fresh or frozen corn—so don’t wait for summer to add these to your appetizer selection. Delicious with sour cream or simply on their own. You can serve them hot or at room temperature—so they are a great make-ahead appetizer.
This is an exclusive recipe just for recipe club members.
In addition to the two free recipes I create each week I am creating and delivering one very special recipe just for my recipe club members. If you’re not yet a member, I encourage you to join! Membership in the club includes access to the complete archive of recipes with filters so it can become your virtual low FODMAP cookbook plus, I am creating and delivering one special NEW recipe every week ONLY for recipe club members. And, for my true fans, I’ll be sharing behind-the-scenes content, and updates on the progress of the new cookbook.
Your membership in the club helps me continue creating new, delicious, easy-to-make, low FODMAP recipes just for you.
As always, all recipes will emphasize simple ingredients, easy preparation, and delicious low FODMAP results. Recipes will be for everything from main courses, salads, soups, side dishes, appetizers, desserts, sauces, breakfast and lunch, and even mocktails and cocktails. Everything you need to prepare fantastic low FODMAP meals everyone will love.
Join the club. Become a Patron. Let’s keep making delicious Low FODMAP meals together.
More Deliciously Low FODMAP™ appetizer recipes


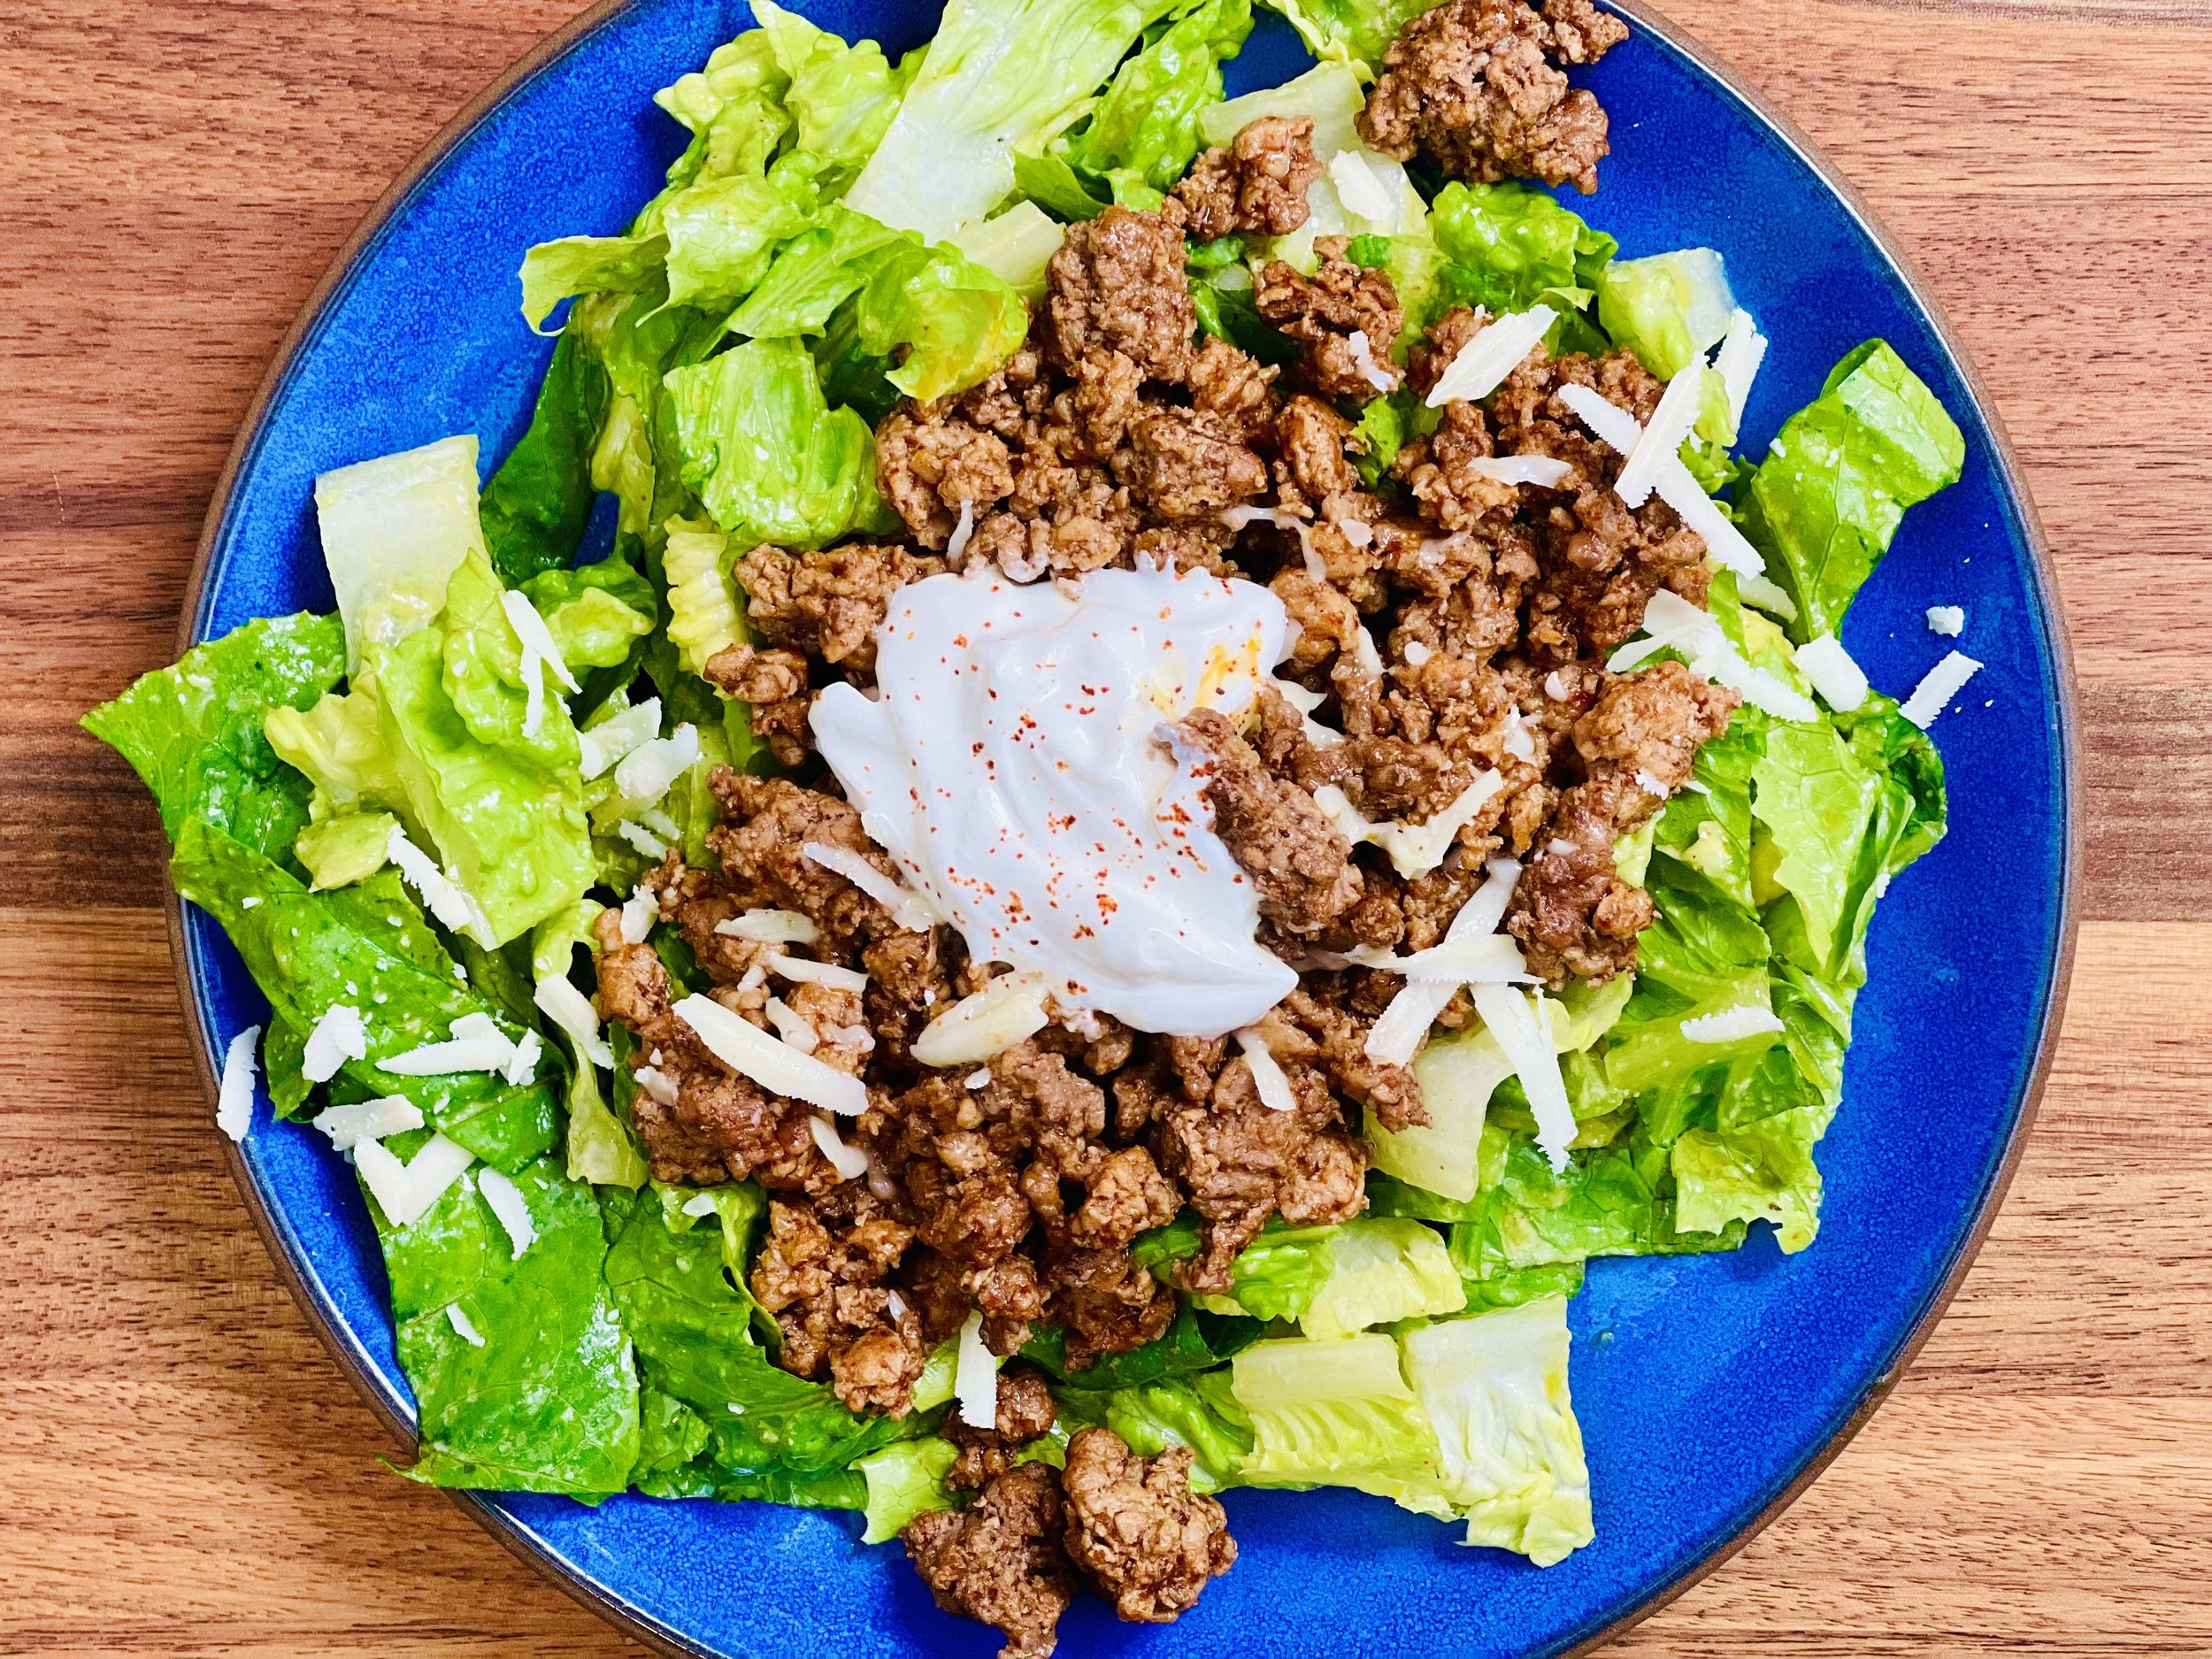
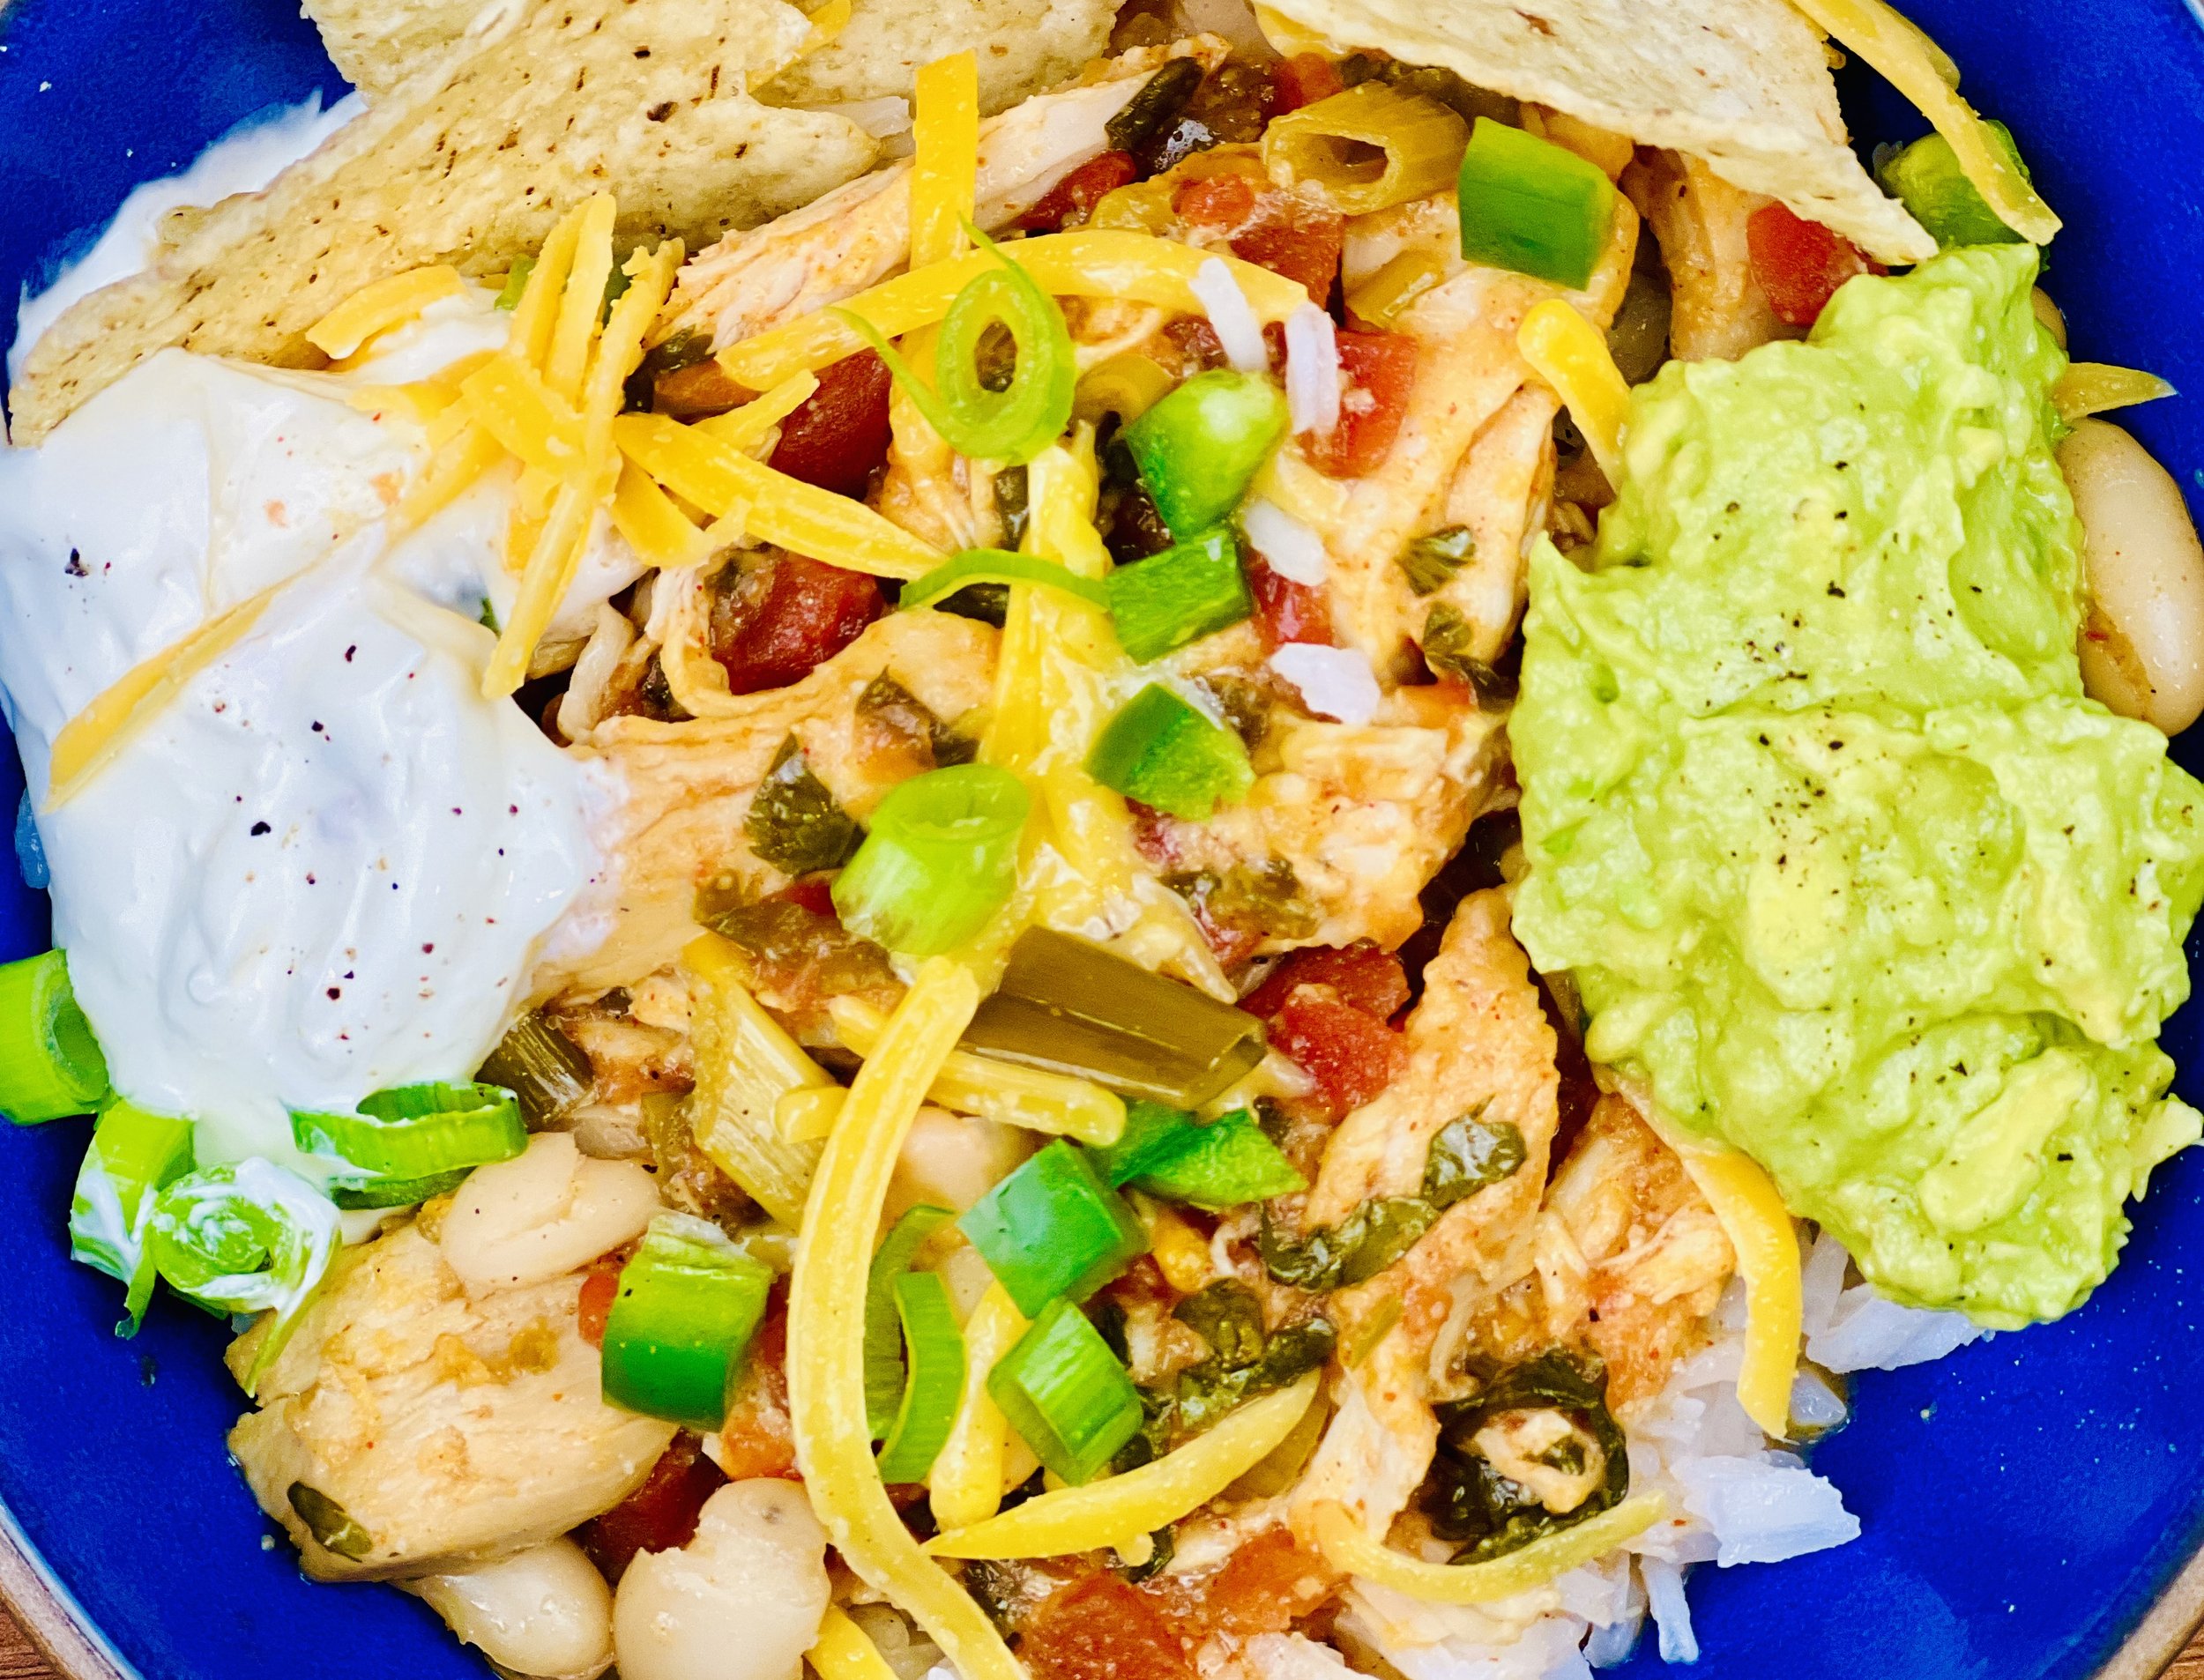
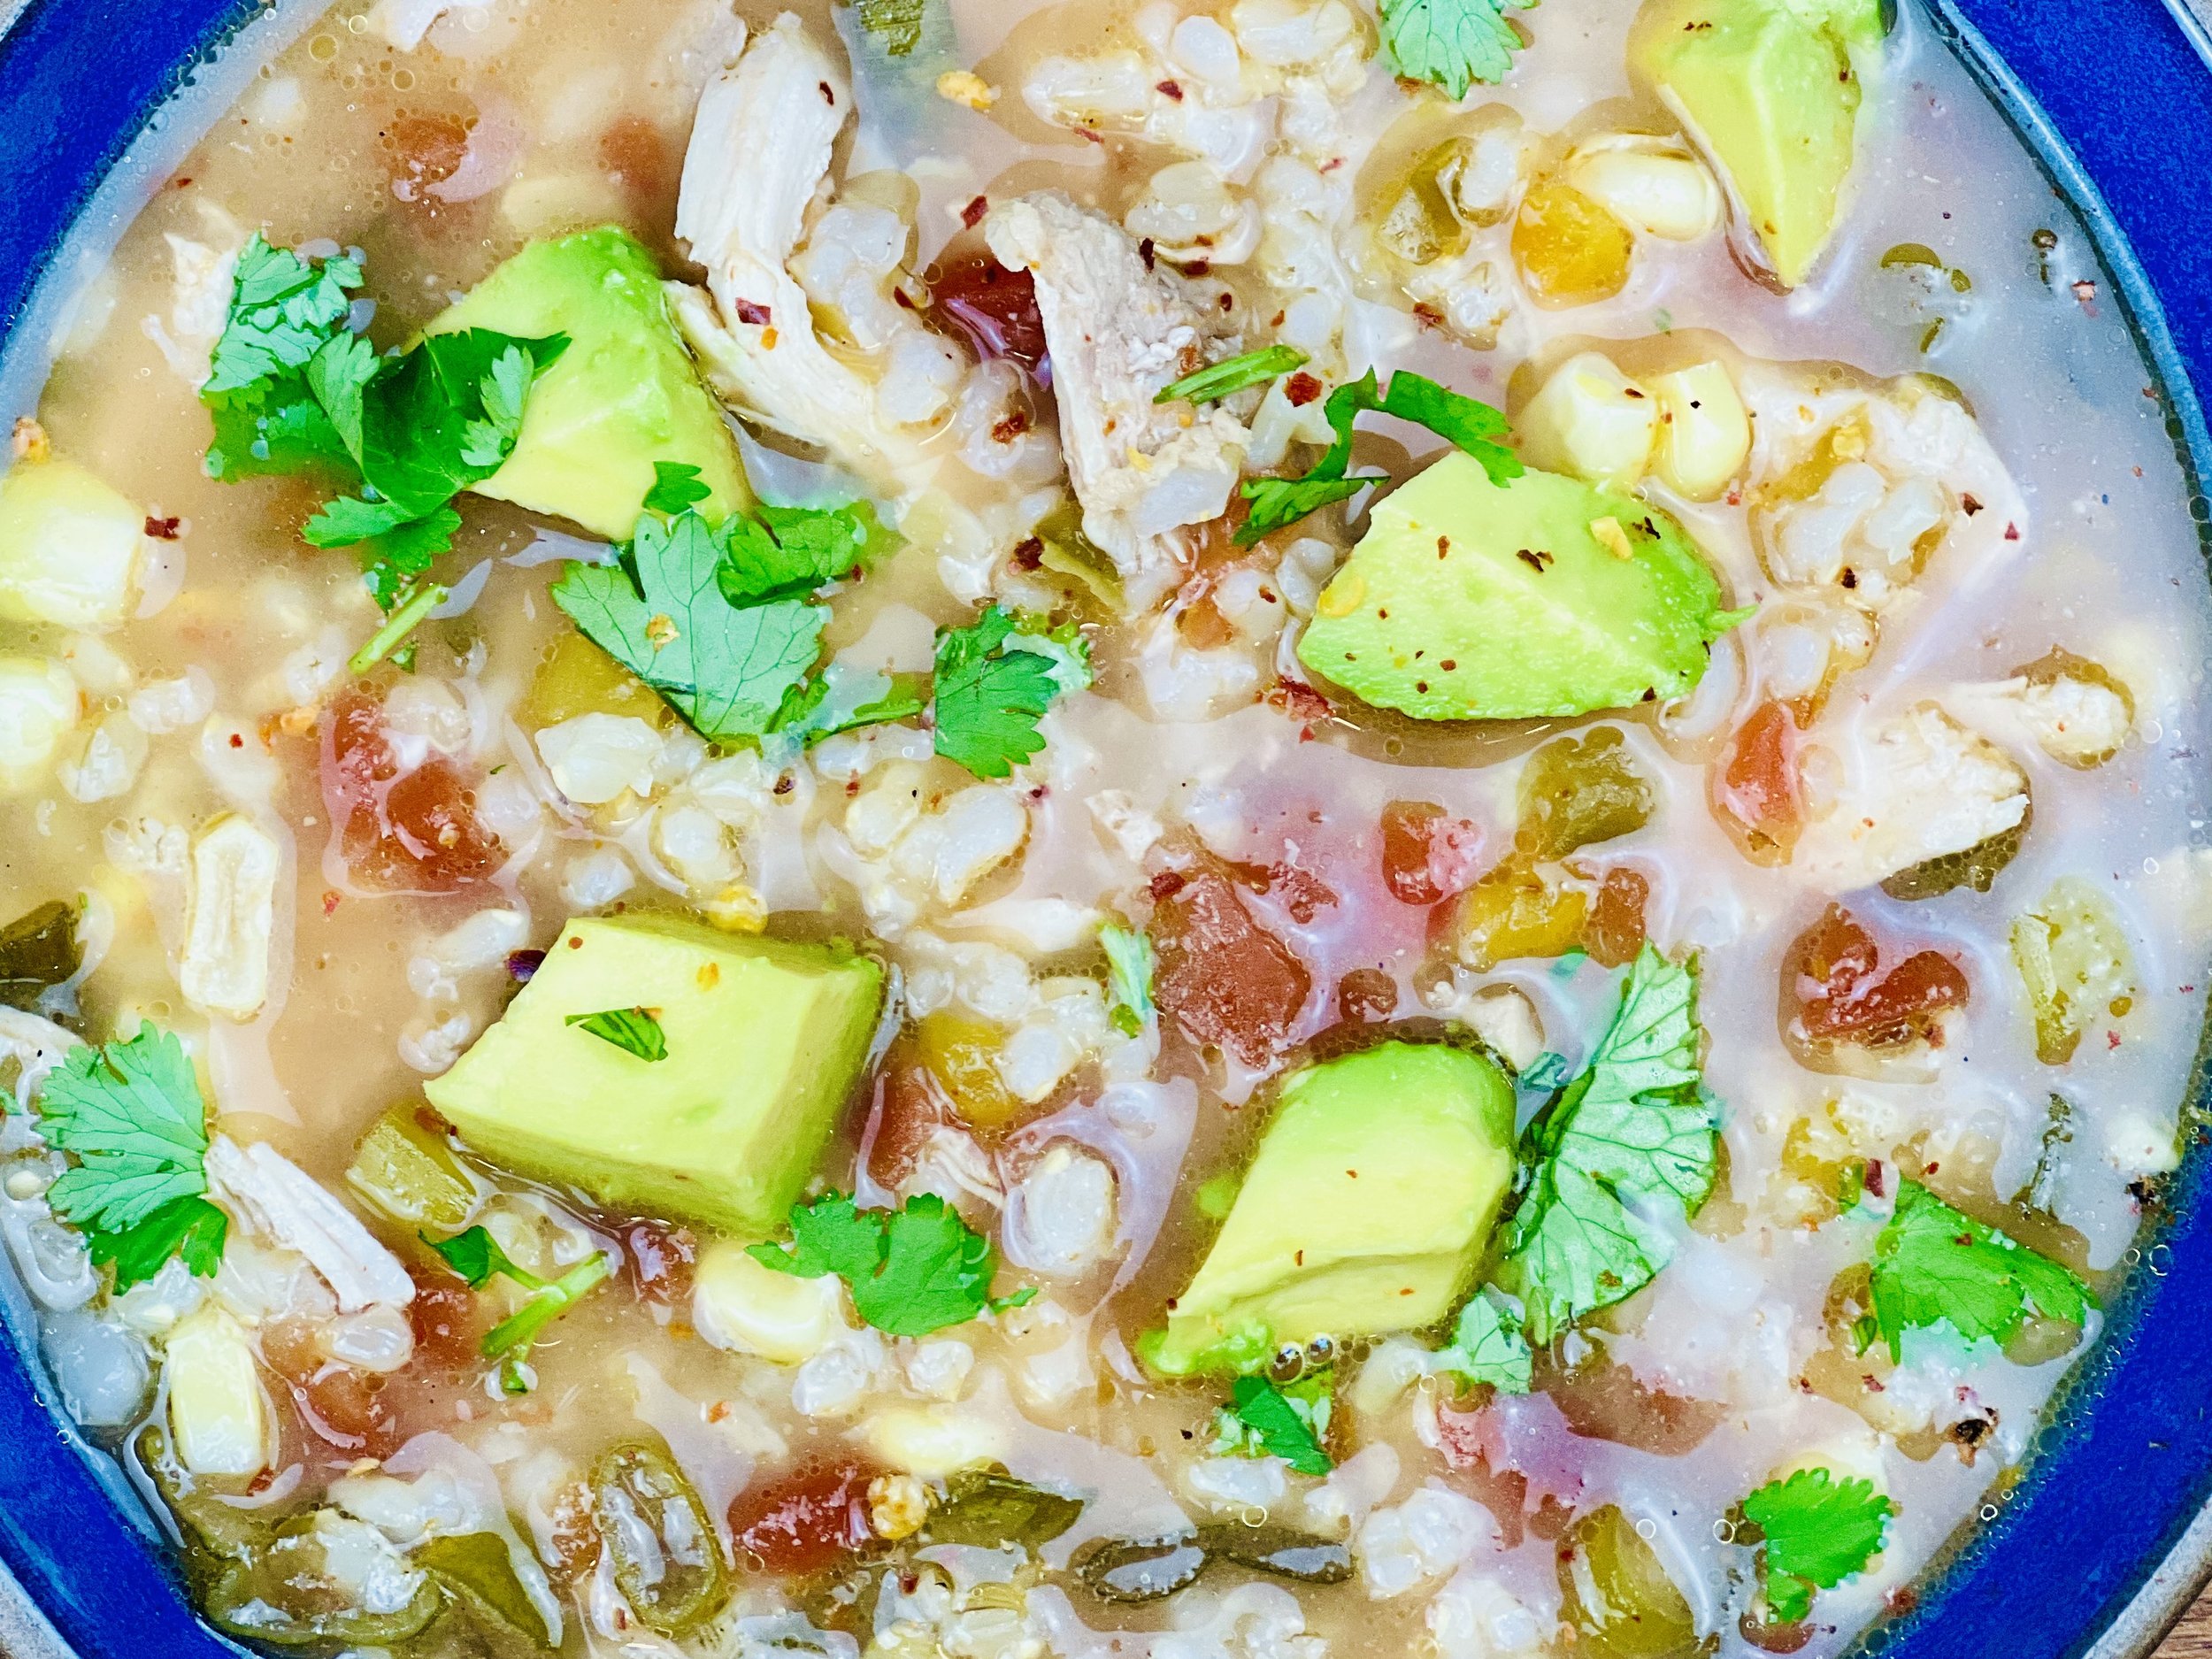
Slow-Cooked Chicken Chili Burrito Bowls (Low FODMAP)
20 Minutes prep • 4 hours cook (in the crockpot) • Low FODMAP • Gluten-free • Serves 6
20 Minutes prep • 4 hours cook (in the crockpot) • Low FODMAP • Gluten-free • Serves 6 • Ok to make ahead: Steps 1-4
This delicious chicken chili has all the flavor of traditional chicken chili—while still being low FODMAP. Slow-cooked in the crockpot, the flavors have time to blend and build and make your house smell wonderful as you simmer the meat to perfection. Serve it as a burrito bowl “bar” with rice and all the toppings so everyone can choose exactly what they want. There will be something to please everyone!
Ingredients
1 1/2 pounds boneless, skinless chicken breasts or thighs
1 bunch green onions, green part only, chopped
1 jalapeño pepper, seeded and chopped
2 teaspoons ground cumin
1 teaspoon chili powder
1 teaspoon smoked paprika
1 teaspoon Kosher salt and 1/2 teaspoon black pepper
1 1/2 cups mild low FODMAP salsa (I used Smoke N Sanity Mild Salsa - Use code IBSGC15 for 15% discount)
1 1/2 cups low FODMAP chicken broth (I used Whole Foods Organic 365 chicken broth)
1 cup canned butter beans, drained and rinsed
1 cup shredded extra sharp cheddar cheese, plus more for serving
1/2 cup fresh cilantro, chopped
4 cups cooked short-grain brown rice or Jasmine white rice
1 jalapeño pepper, chopped (for serving)
Tortilla chips, lactose-free sour cream, guacamole, chopped green onions, cilantro, jalapenos, and lime wedges for serving
Directions: Crockpot
(1) Prepare the chicken: This step is optional but results in a more flavorful and tender chicken. Remove chicken from the package, and put it in one layer on a rimmed plate or baking dish. Season both sides of each piece lightly with Kosher salt (about 1/4 - 1/2 teaspoon per side). Cover the dish with plastic wrap and refrigerate until ready to use, ideally about 4 hours before cooking or overnight.
(2) Prepare: Cook the rice per package instructions. Chop the green onions and jalapenos.
(3) Cook the chicken: In the bowl of your crockpot, combine the chicken, green onions, jalapeno pepper, cumin, chili powder, smoked paprika, salt, and pepper. Pour over the salsa and the chicken broth. Cover and cook on low for 5-6 hours or on high for 3-4 hours.
(4) Finish: Remove the chicken from the crockpot and lightly shred with two forks. Return the shredded chicken to the crockpot. Stir in the beans, cheddar cheese, and cilantro. Heat until the cheese melts, 5 minutes. Keep warm until ready to serve.
(5) Serve: Serve the chicken along with the simmering sauce over bowls of rice. Top, as desired, with Tortilla chips, lactose-free sour cream, shredded cheddar cheese, guacamole, chopped green onions, jalapenos, and cilantro. Squeeze a lime wedge over each bowl.
Directions: Stove
Cook the chicken: In a Dutch oven or large soup pot, combine the chicken, green onions, jalapeno pepper, cumin, chili powder, smoked paprika, and salt and pepper. Pour over the salsa and the chicken broth. Reduce the heat to low. Simmer 30 minutes, until the chicken is cooked through.
Finish and serve: As directed above.
Eat and enjoy every bite because you can!
Recipe note: I use Diamond Crystal Kosher salt in all my recipes because it has a wonderful flat and crisp flake that tastes delicious. It is also the least salty salt available so you can use it more liberally as a seasoning than you can table salt or sea salt. If you use another type of salt, you may need to reduce the amount so it is not over-salted.
Have a question you’d like to have answered? Email me at hello@ibsgamechanger.com
Link note: This post contains links for you to easily purchase items listed on the page. In some cases, we have provided a special discount code for IBS Game Changers so be sure to use it when you purchase an item to get the discount that has been arranged just for you! As an Amazon Associate, I earn a commission from qualifying Amazon purchases.
More Deliciously Low FODMAP™ main course recipes


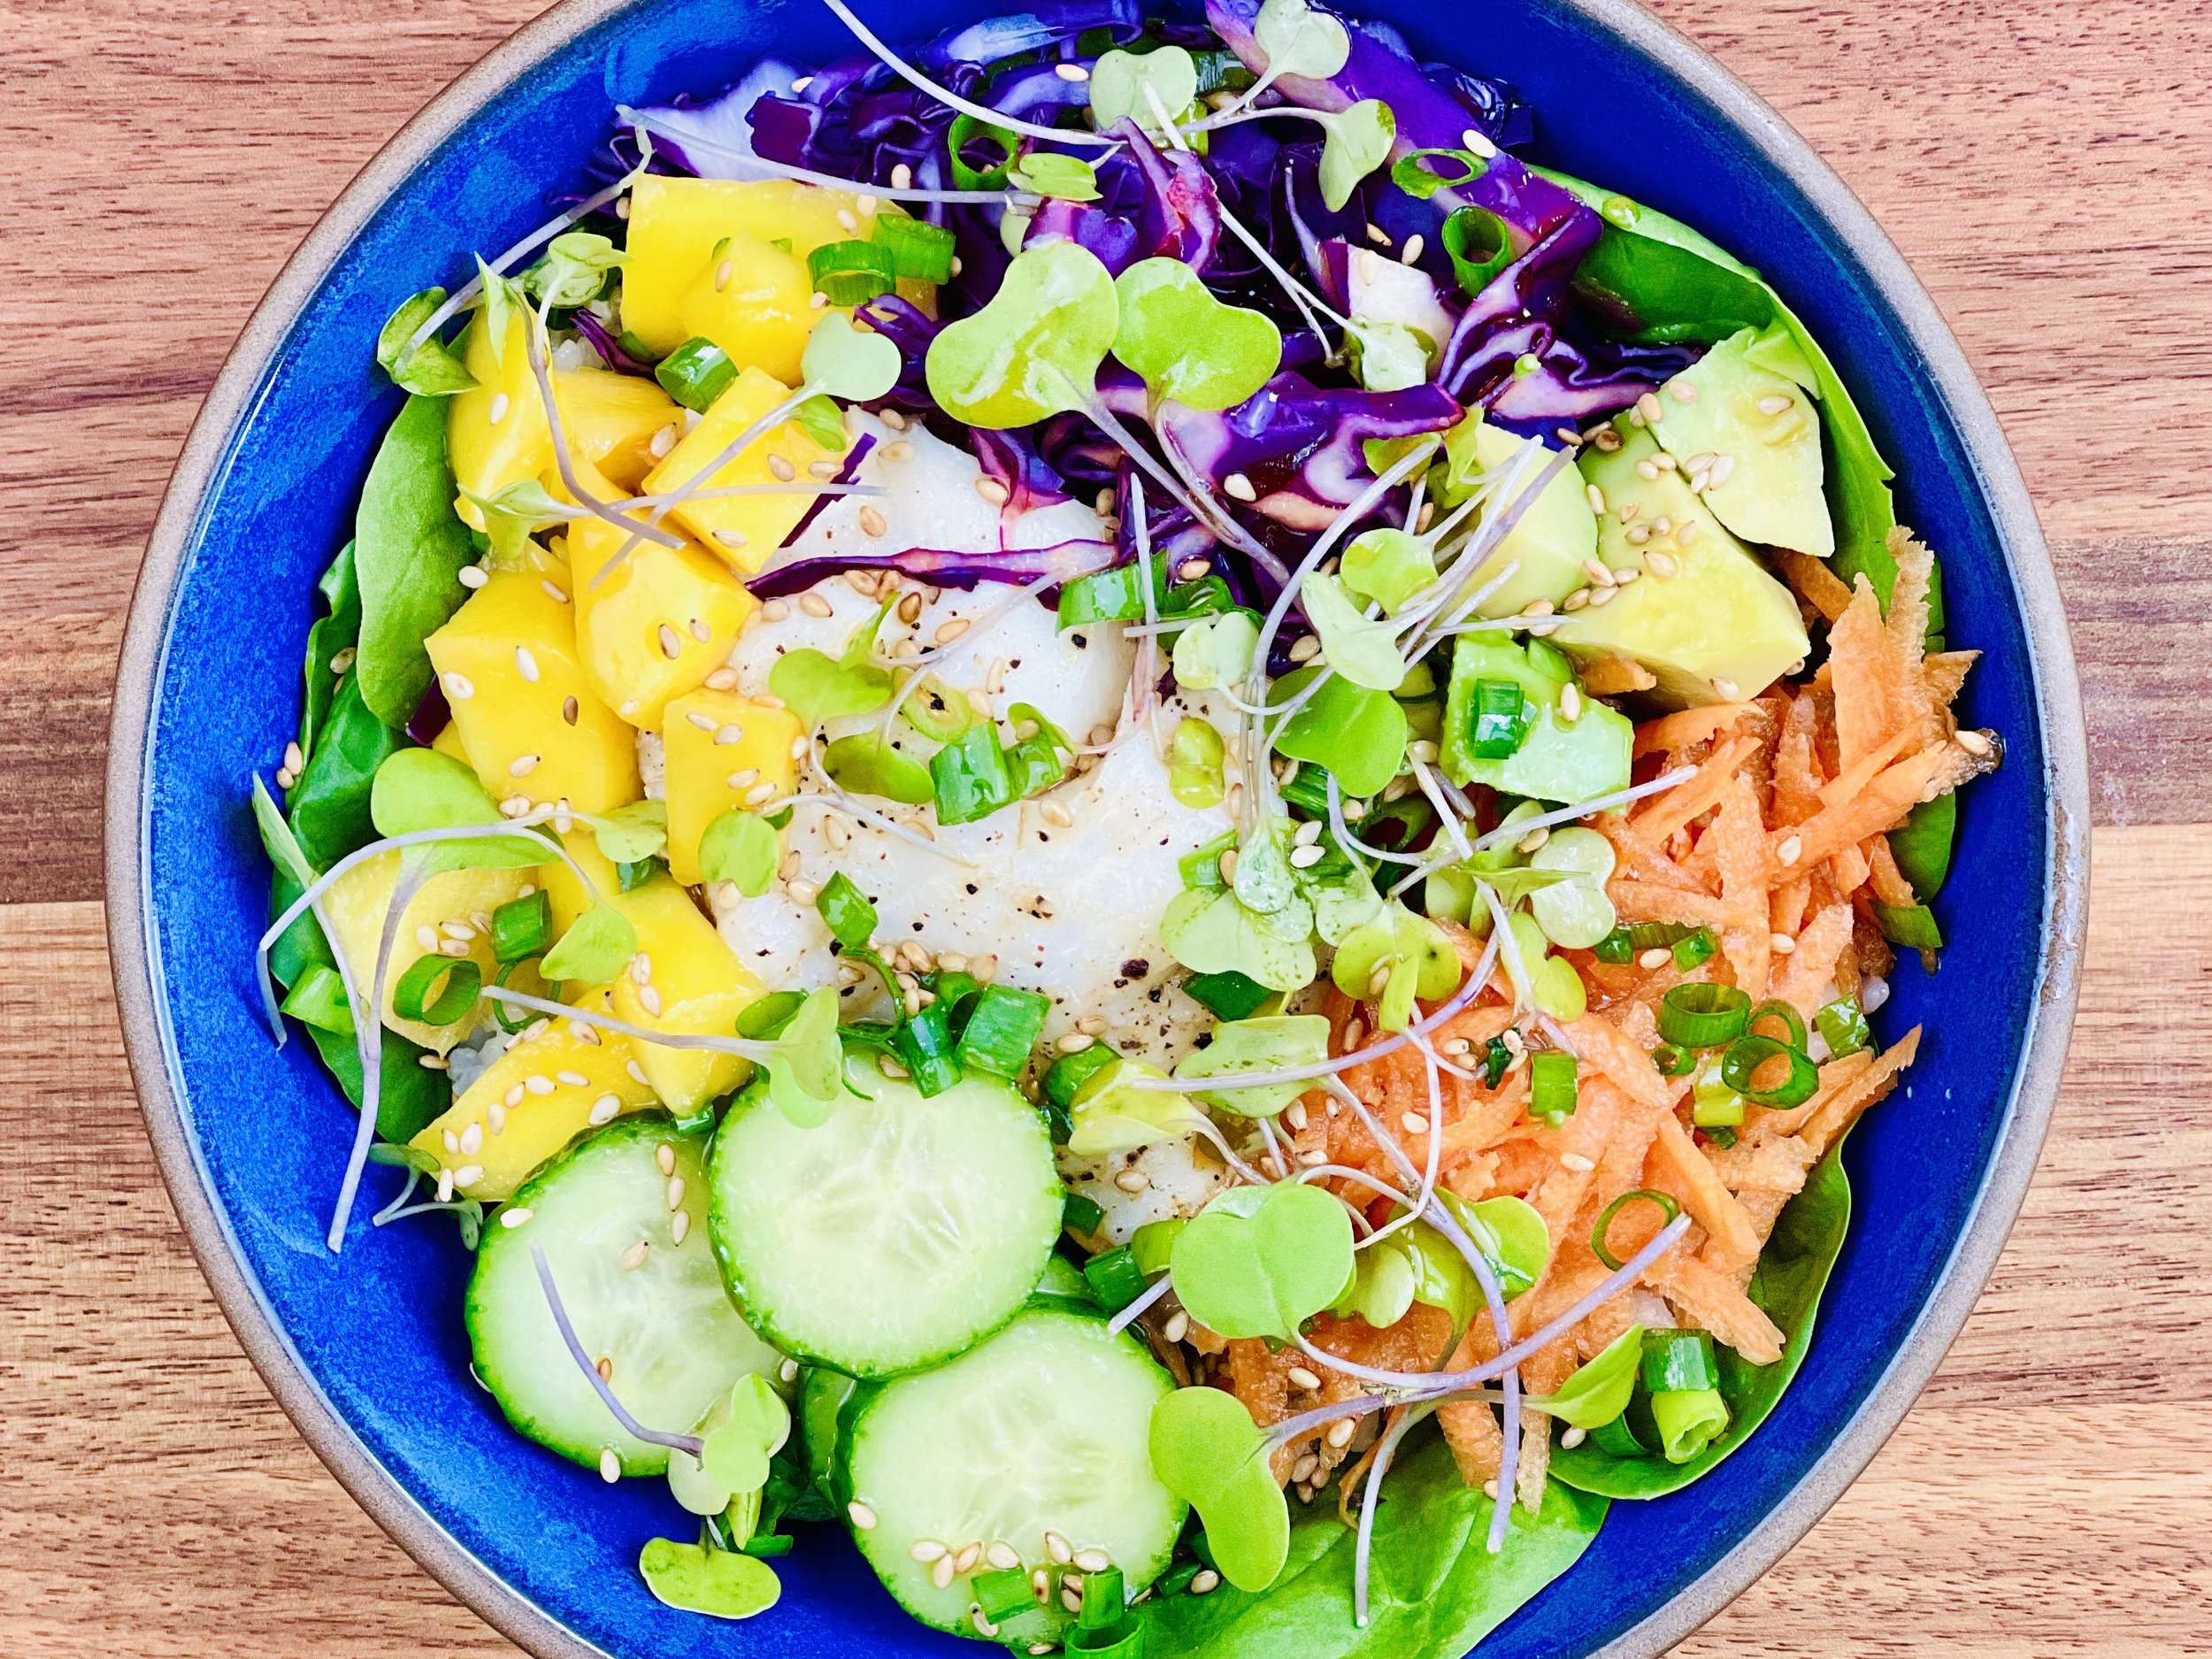
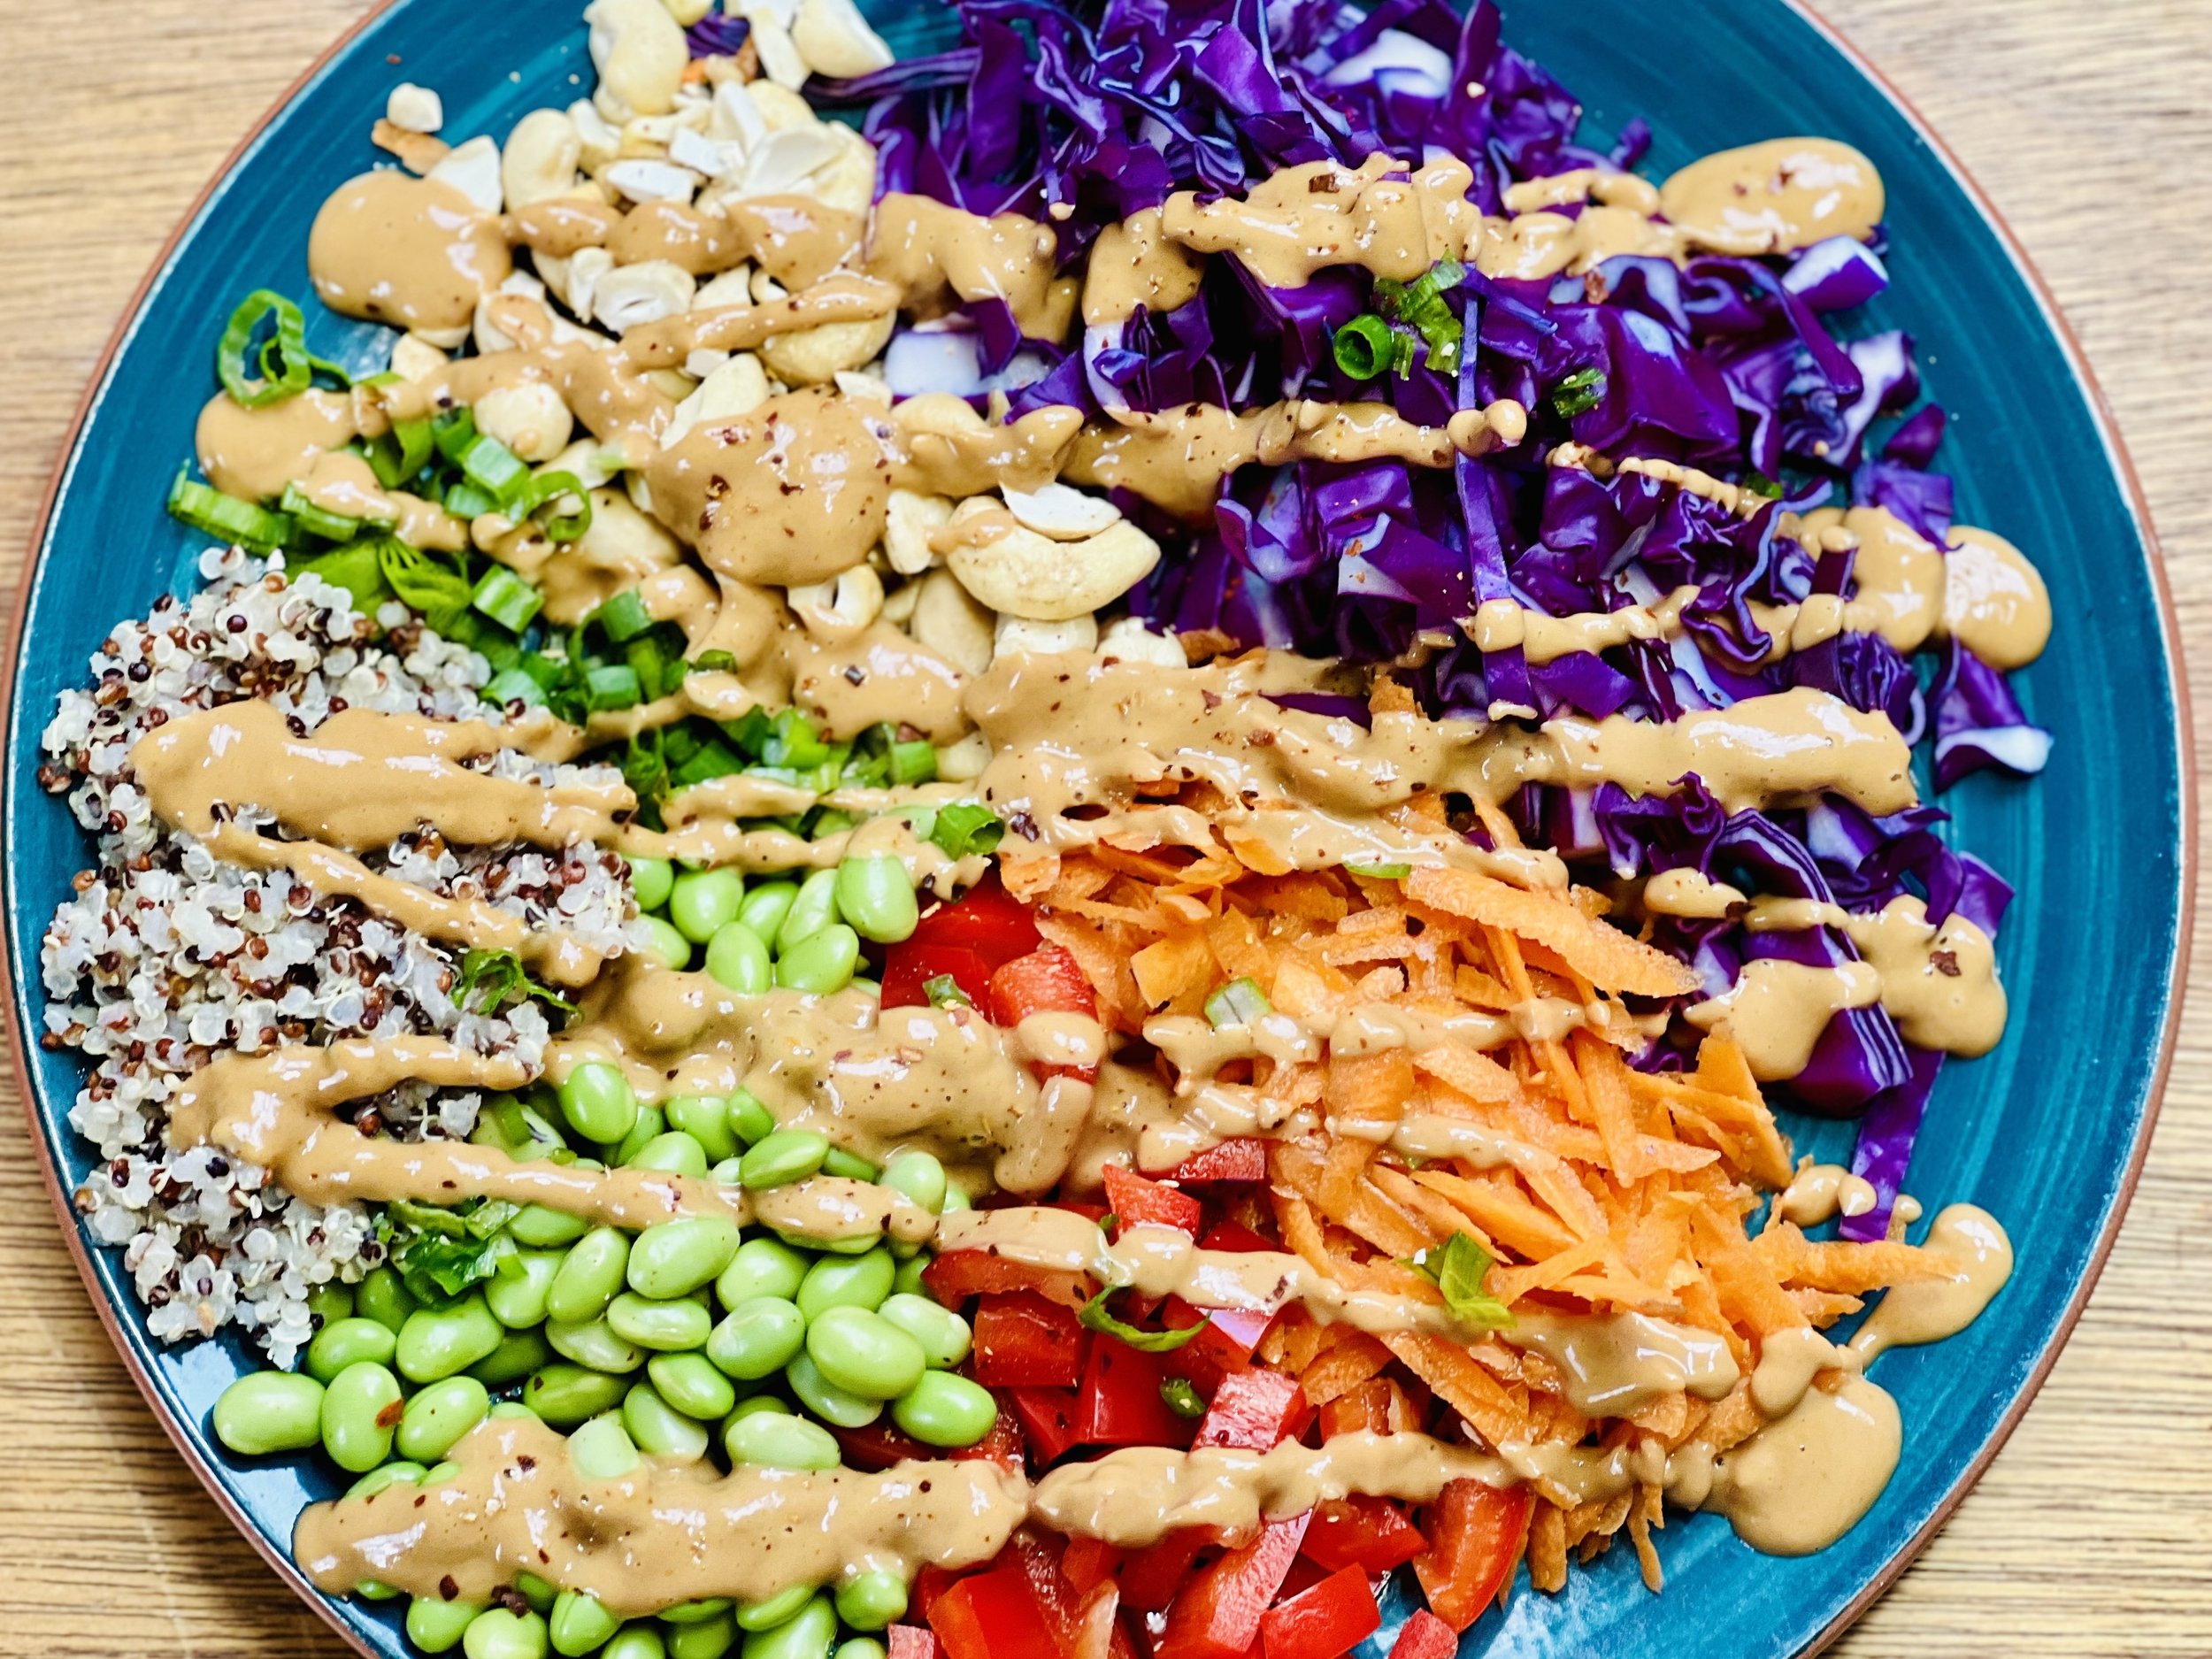
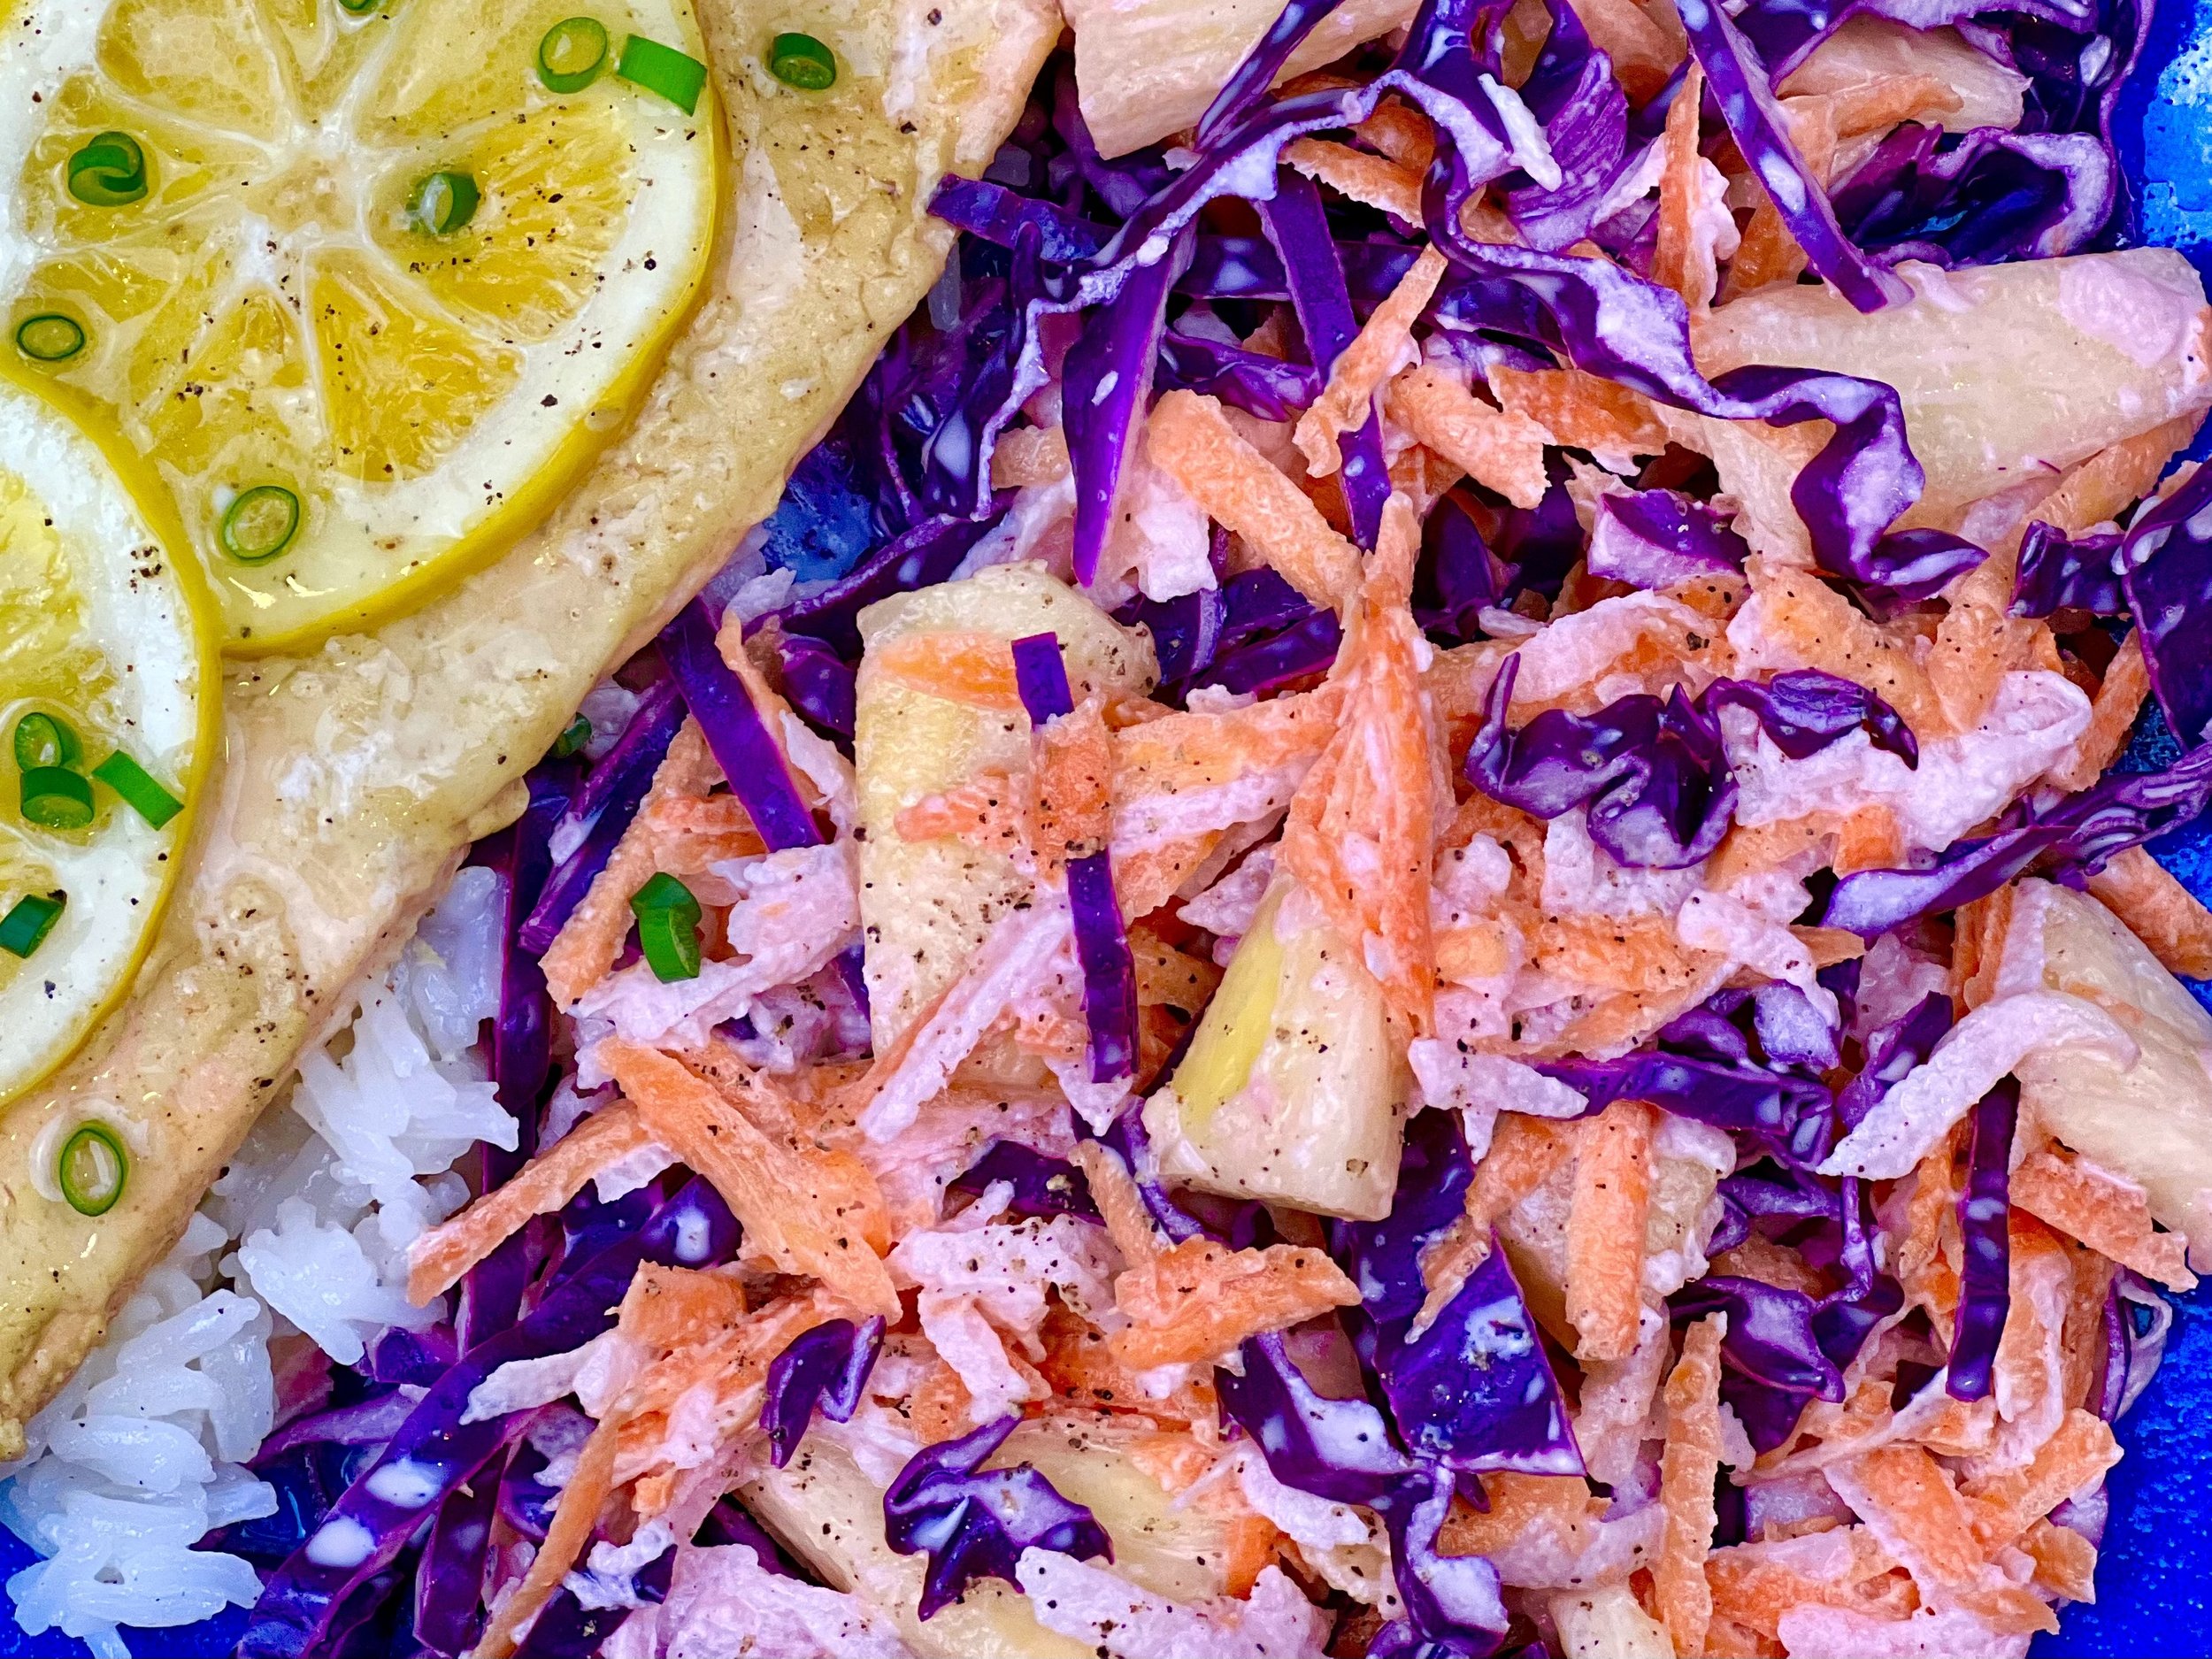
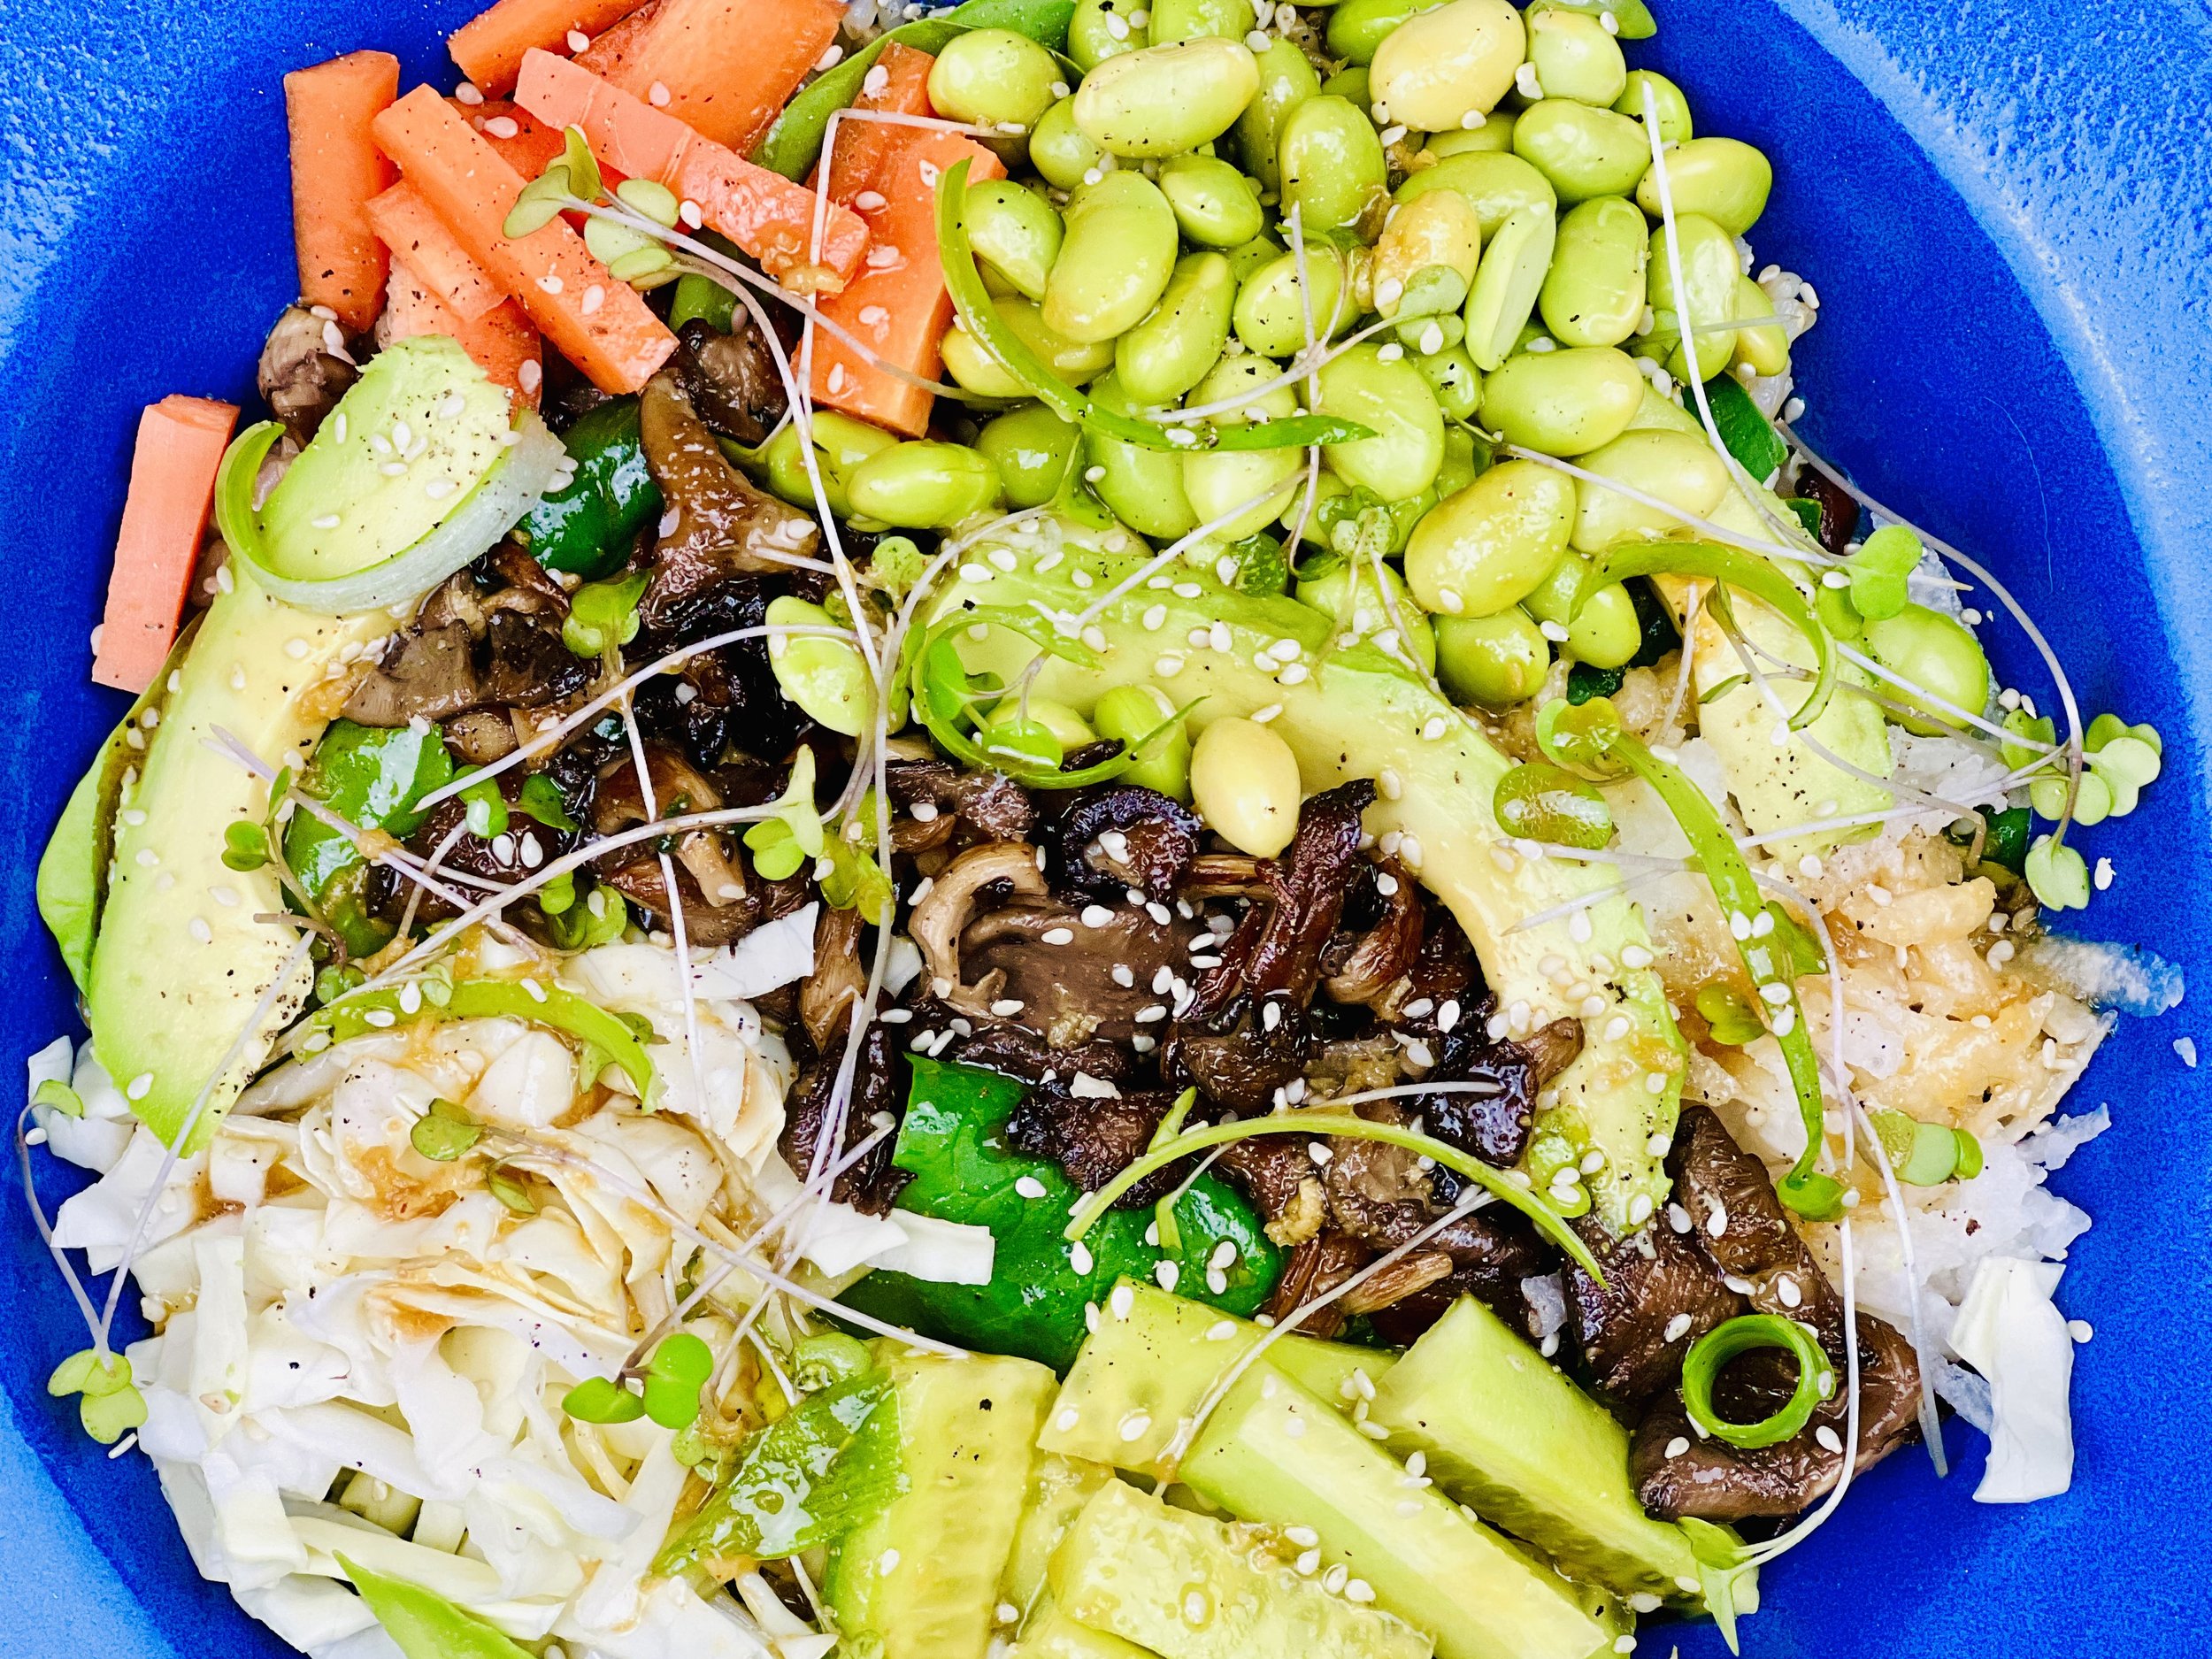
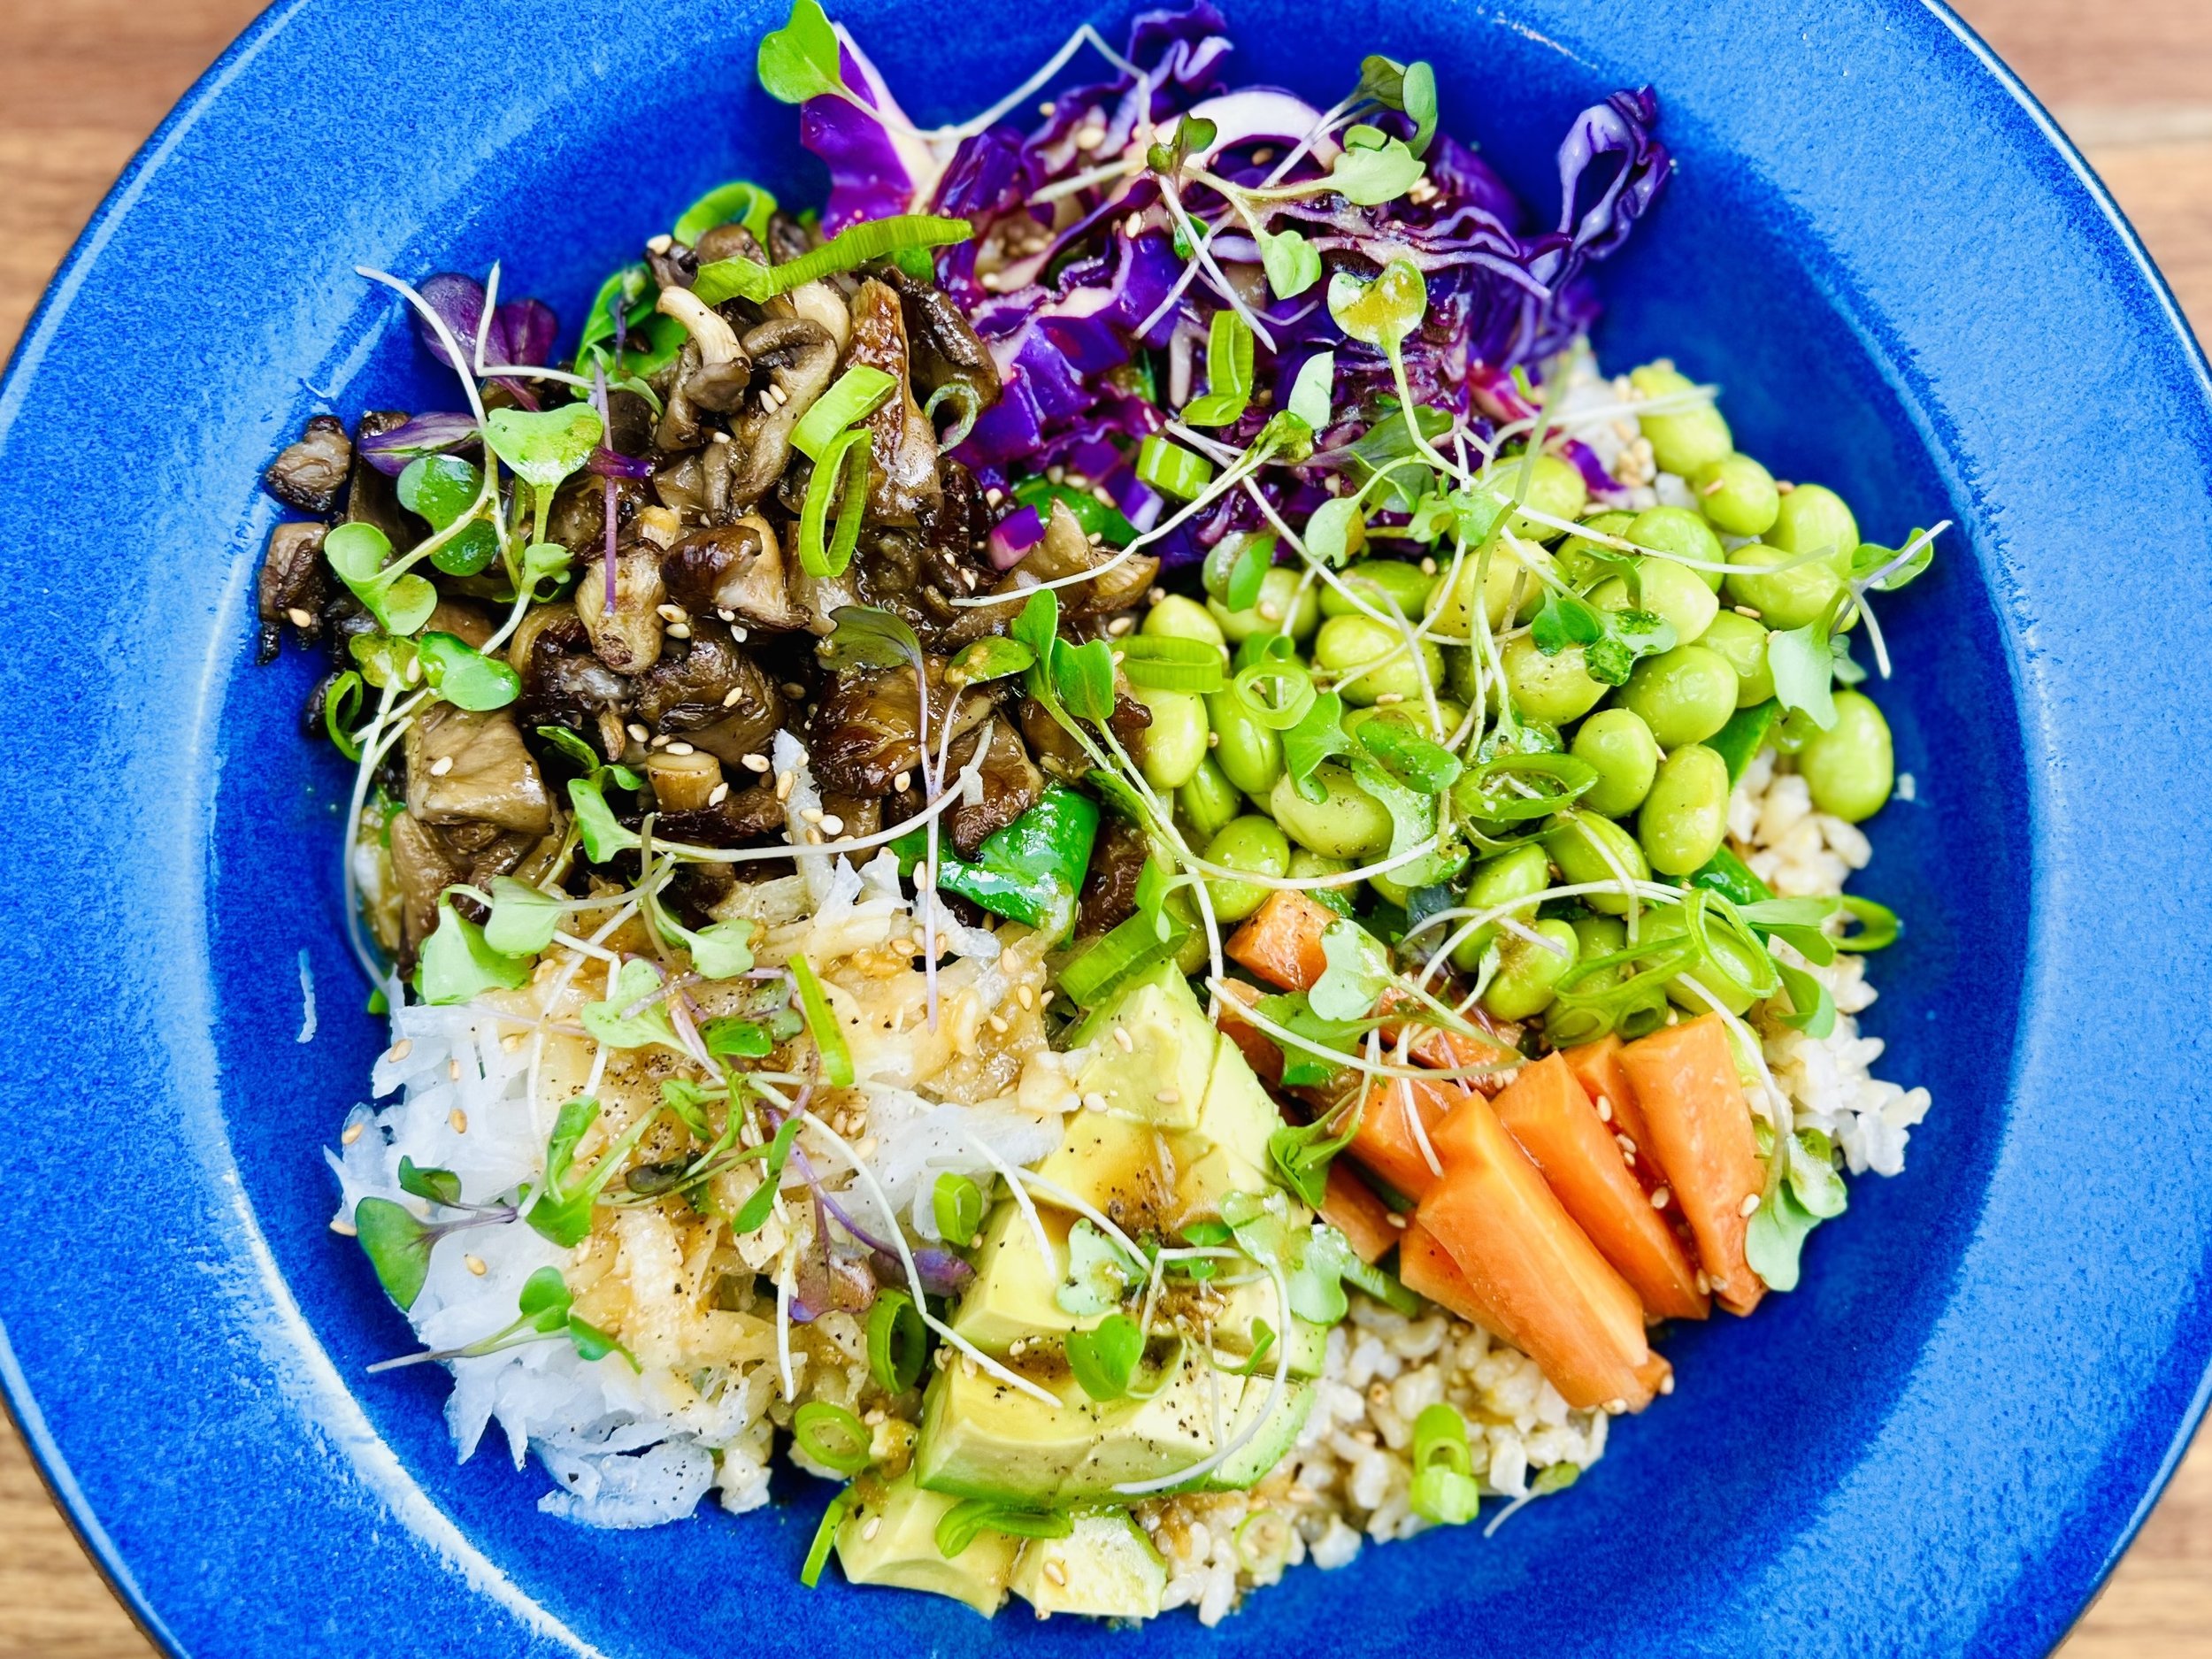
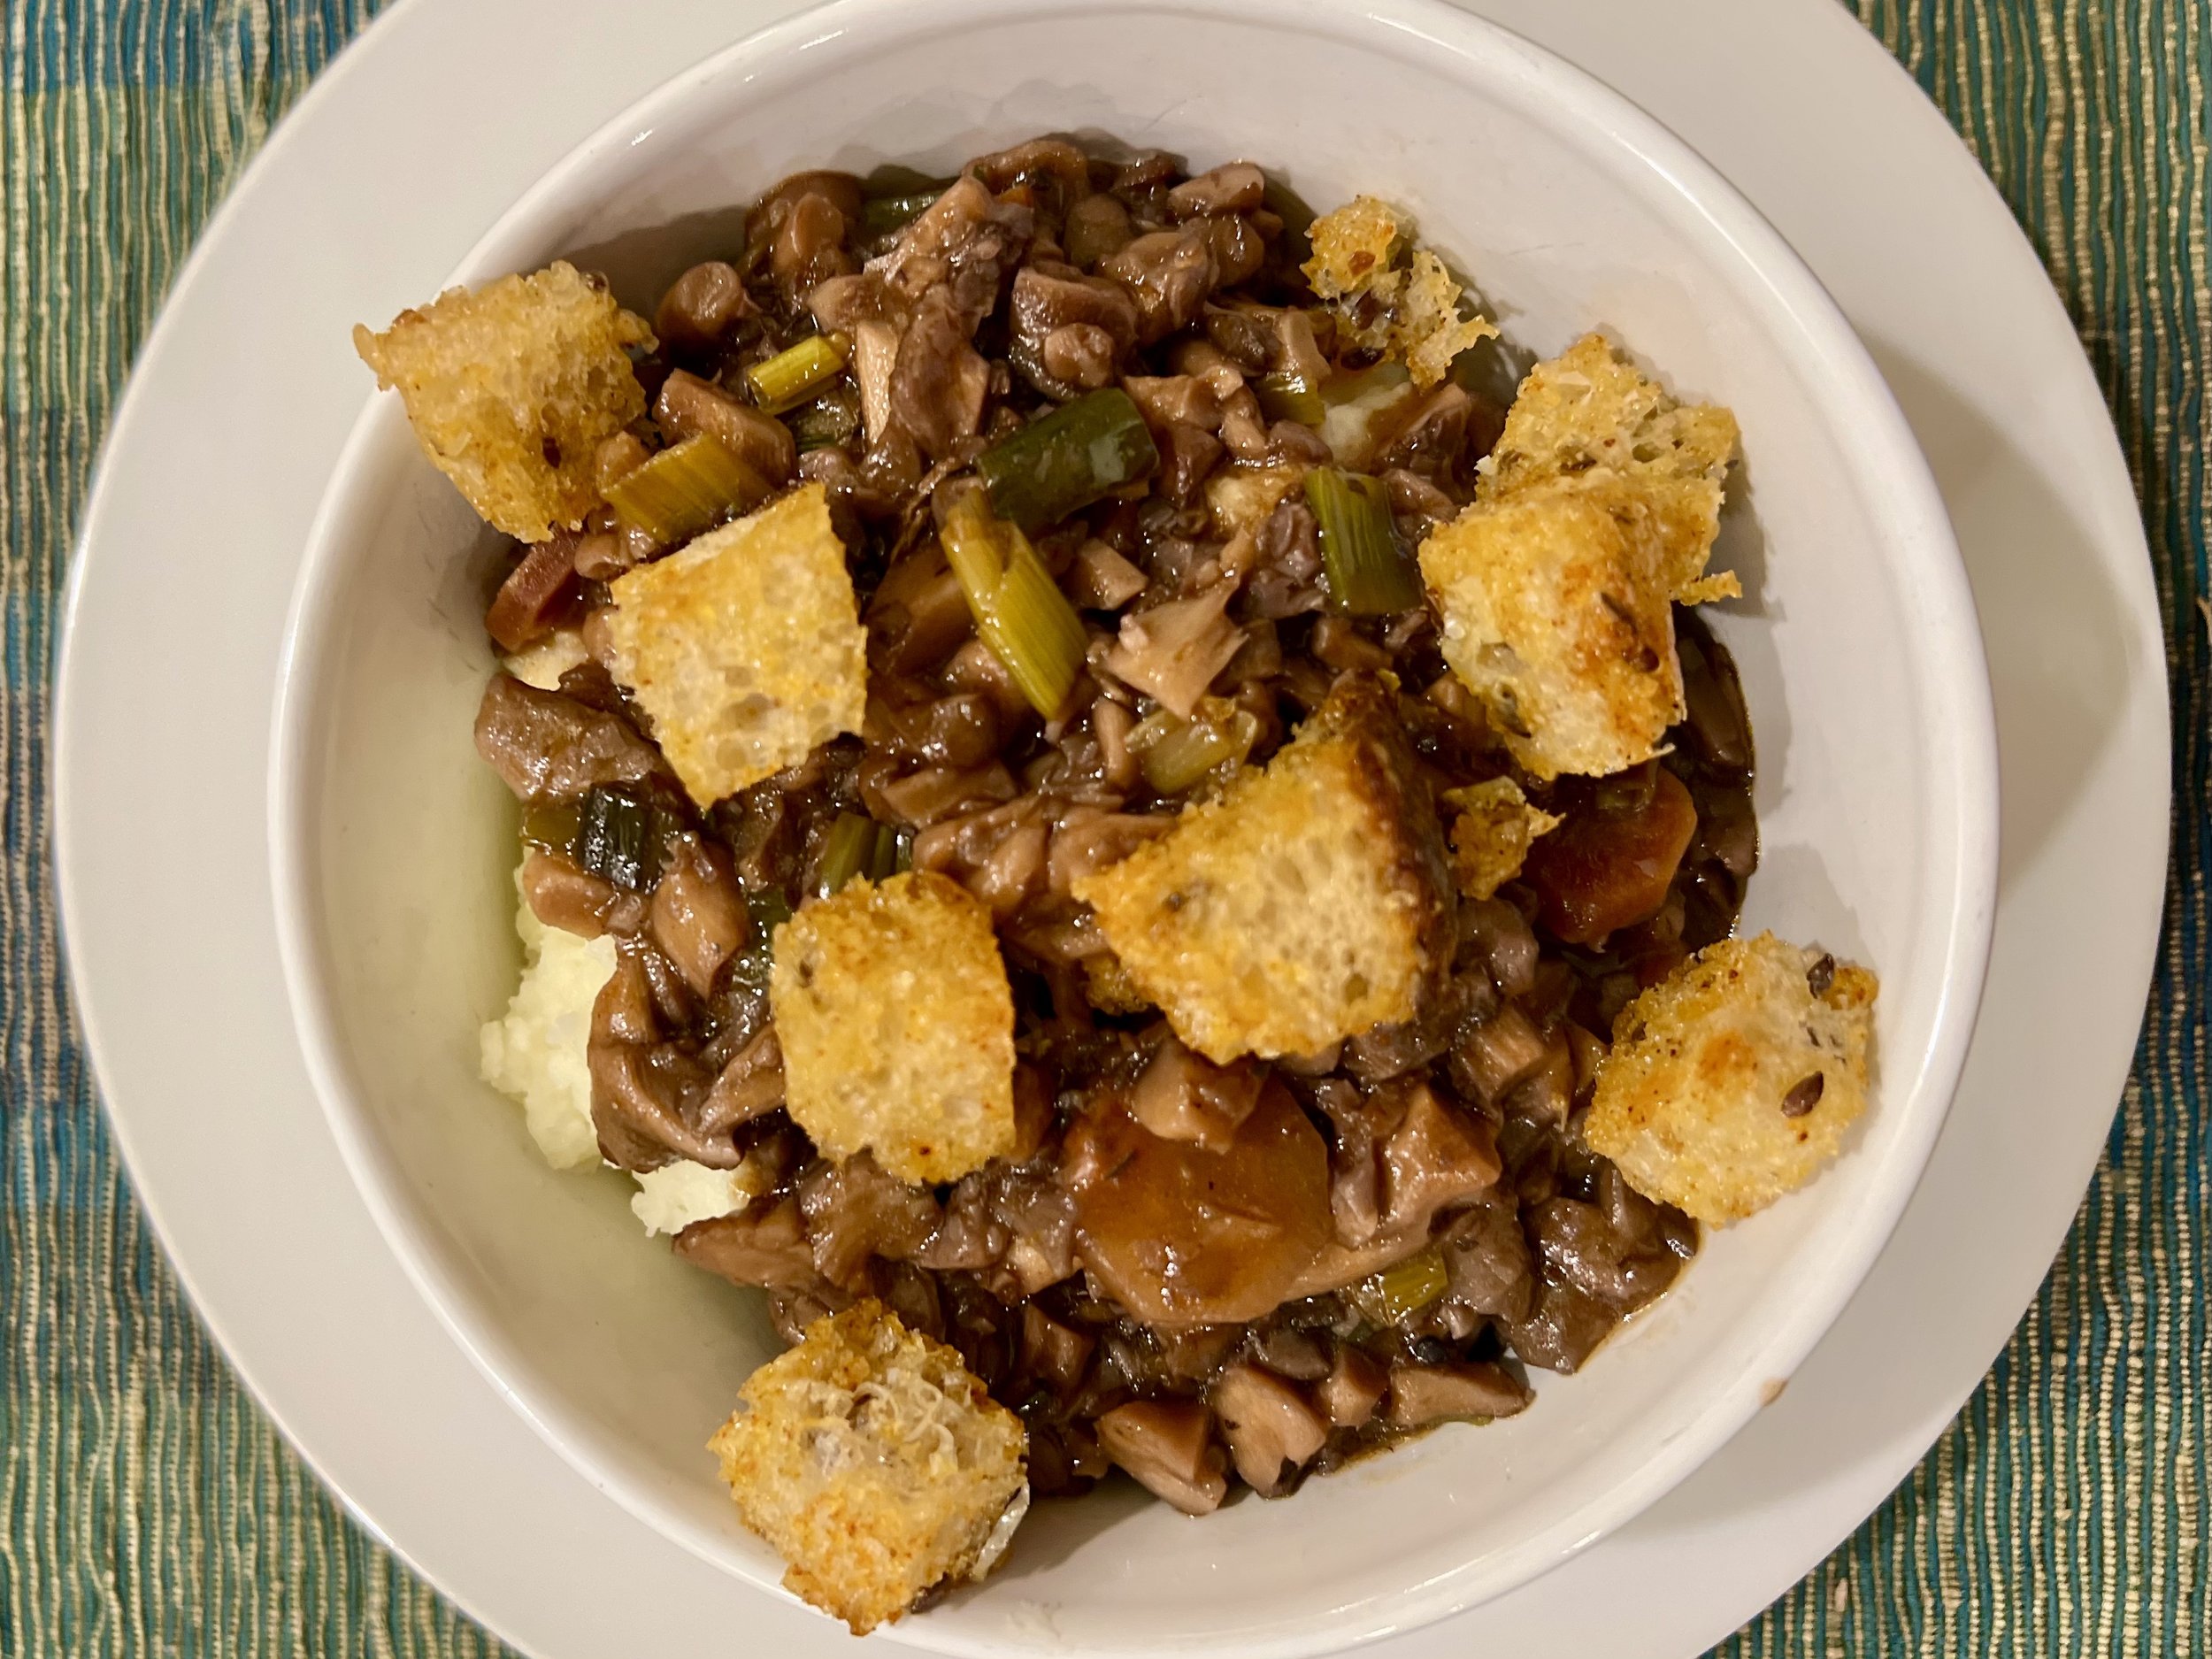
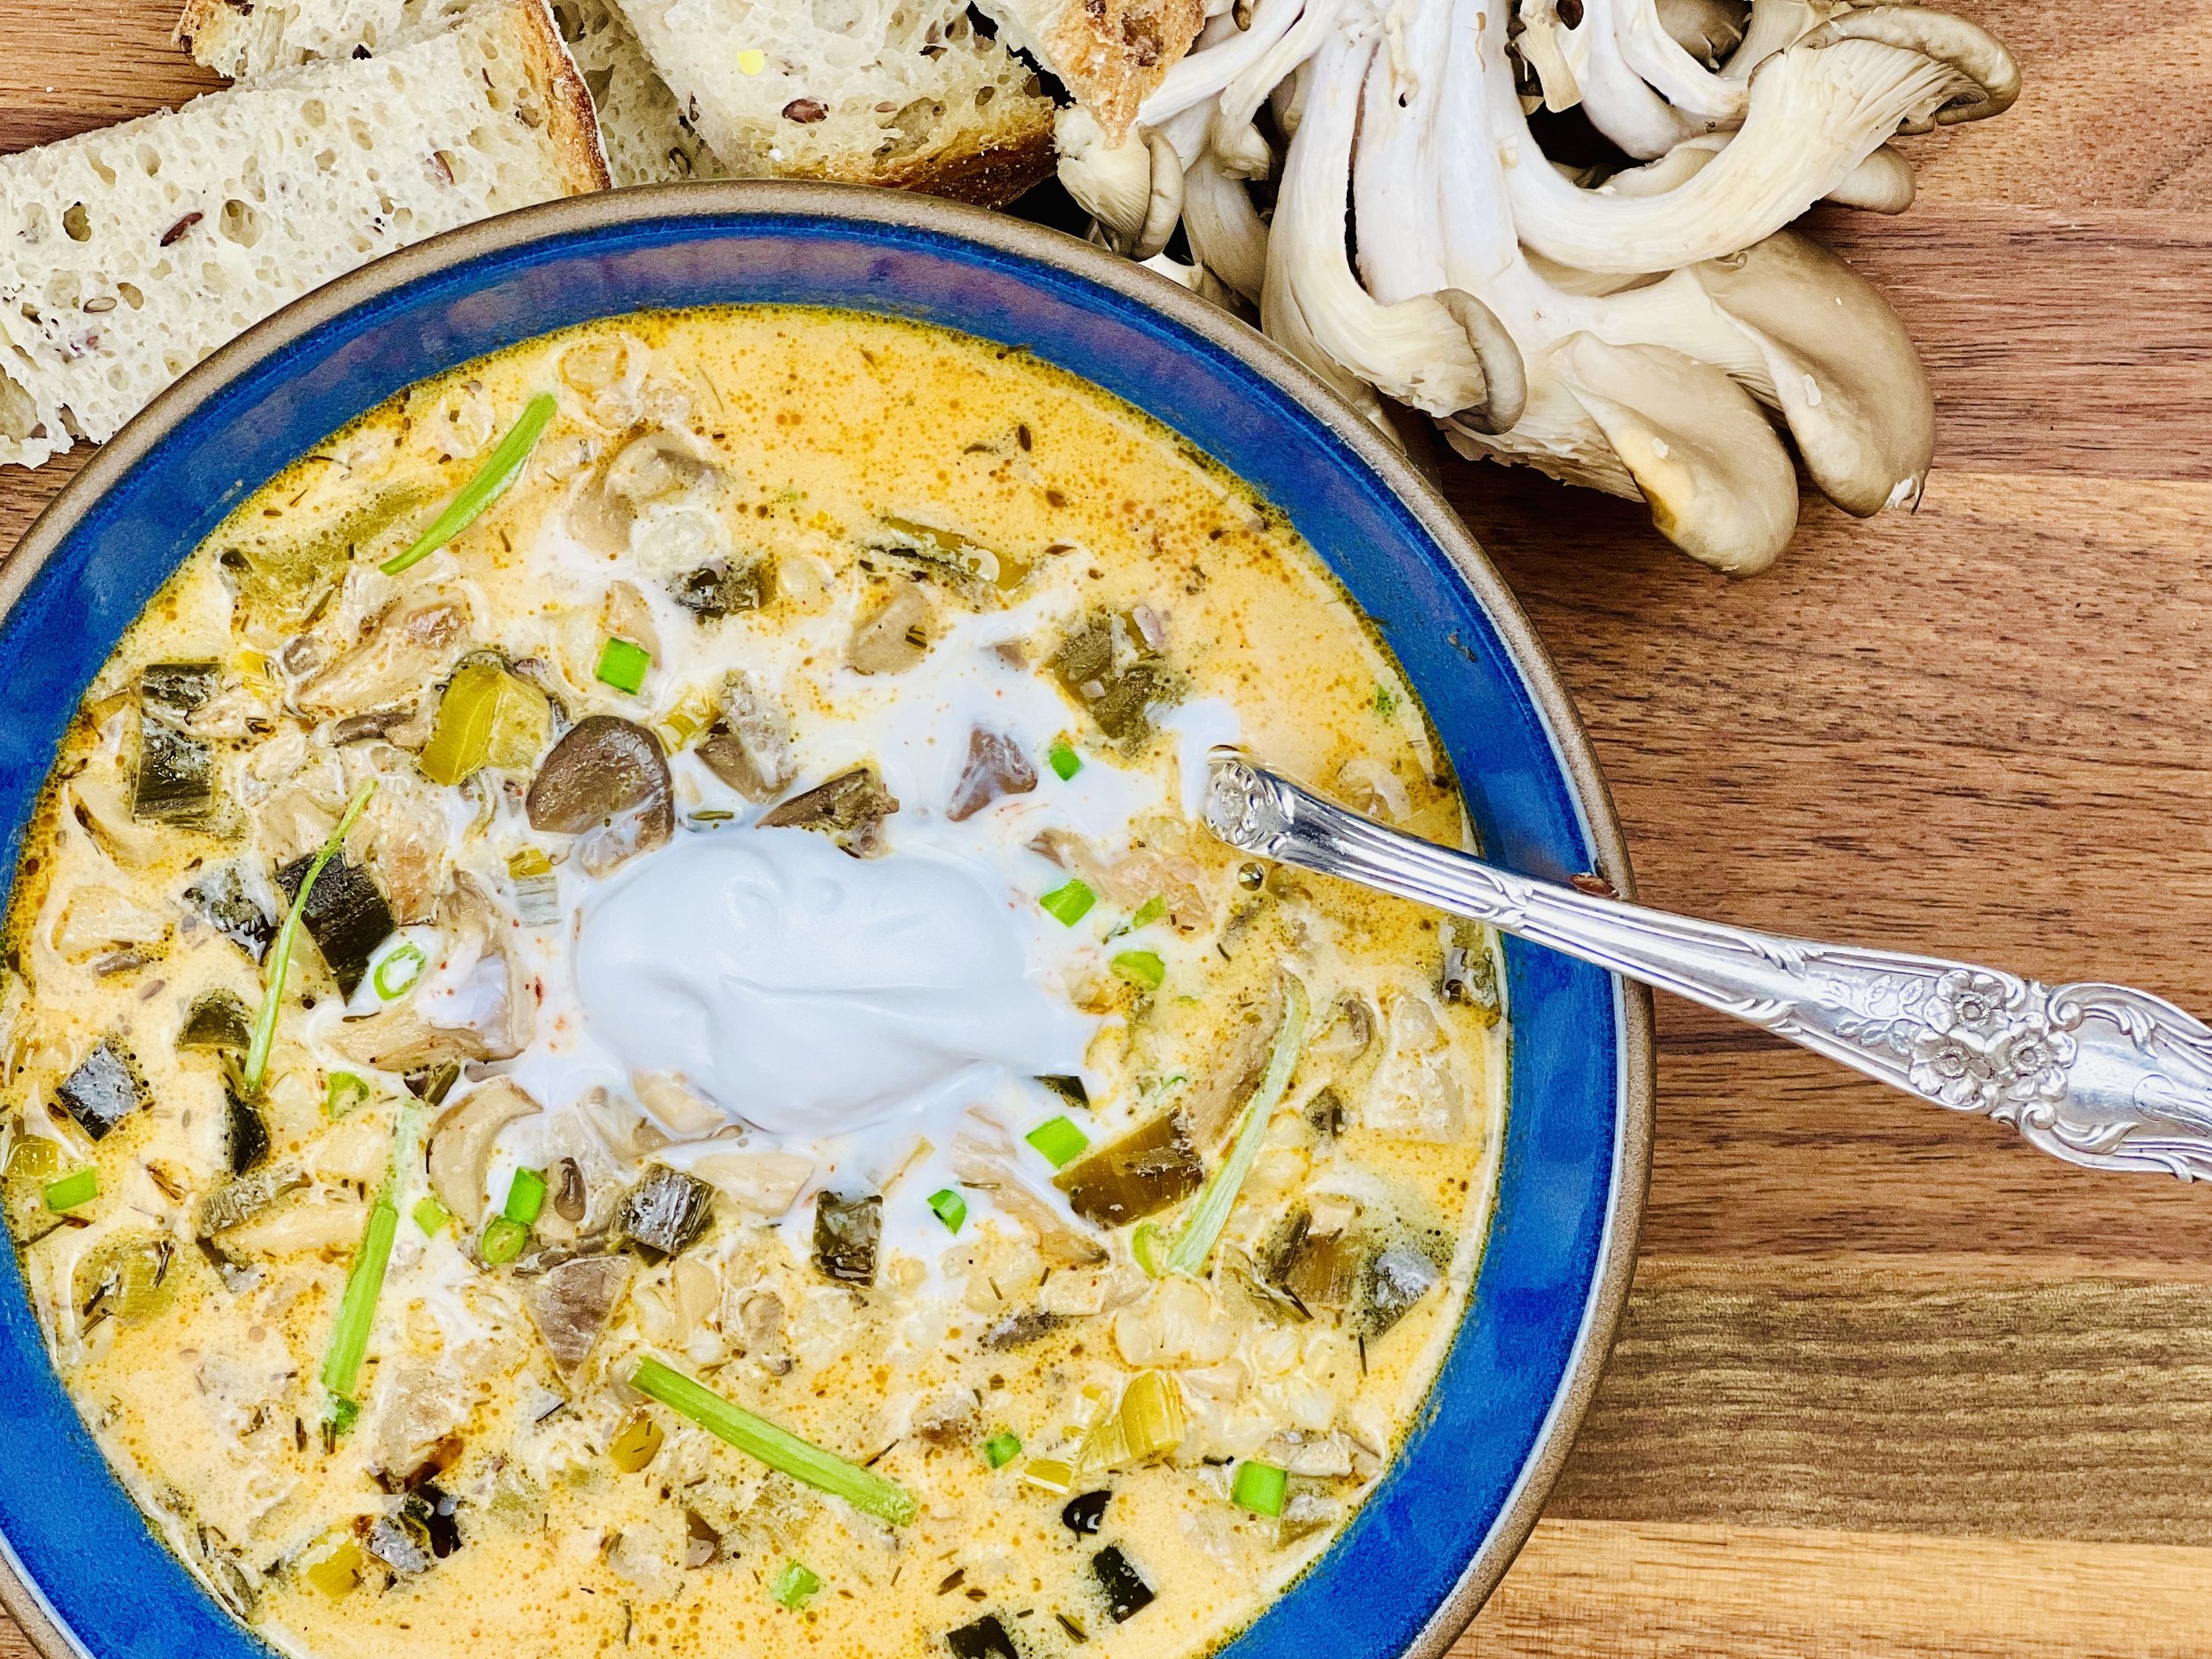
Mushroom Veggie Bowl (Low FODMAP)
15 Minutes prep • 50 Minutes cook • Low FODMAP • Gluten-free • Lactose-free • Serves 4
15 Minutes prep • 50 Minutes cook • Low FODMAP • Gluten-free • Lactose-free • Serves 4 • Ok to make ahead: Steps 1-4
So many fabulous veggies on a base of brown rice with the most delicious sauce to bring it all together. Who wouldn’t think this was a perfect meal? The sauteed oyster mushrooms add a ton of flavor and nutritional value. Serve it as shown, or mix it together and serve more like a salad. Either way it will be delicious, nutritious, and low FODMAP too.
Ingredients
1 cup short-grain brown rice, uncooked
2 tablespoons toasted sesame oil
2 cups (or more) oyster mushrooms, chopped
1/2 teaspoon Kosher salt
1/4 teaspoon black pepper
2 cups shredded cabbage
1 cup matchstick or grated carrots
1 cup shredded cucumbers (peeled)
1 cup shredded Jicama (peeled)
1/2 avocado, chopped
1 cup frozen edamame
4 cups baby spinach, stemmed
Green onion greens, microgreens, and sesame seeds, for serving
Ingredients: Dressing
1/4 cup olive oil
3 tablespoons toasted sesame oil
3 tablespoons seasoned rice vinegar
2-3 tablespoons maple syrup (according to your taste)
2 tablespoons miso
2 tablespoons gluten-free, low-sodium soy sauce
2 teaspoons fresh ginger, peeled and grated
1 teaspoon Smoke N Sanity Essence of Garlic Salt
Pinch cayenne pepper
Directions
(1) Prepare: Put the rice on to cook per package instructions. Chop the mushrooms.
(2) Cook the mushrooms: In a large skillet over medium heat, heat the oil. When hot, add the mushrooms. Toss in the hot oil and cook, stirring them around frequency, until starting to brown—which should take about 10 minutes.
(3) Prepare vegetables: While the mushrooms are browning, prep the remaining veggies. Cook/heat the edamame in hot water per package instructions.
(4) Make the dressing: place everything in a glass jar or blender and shake or blend until smooth.
(5) Plate and serve: Put a scope of warm rice in each bowl. Top with a handful of baby spinach. Divide the rest of the vegetables and arrange them over the top of the spinach layer. Top with scallions, microgreens, and sesame seeds. Drizzle the whole thing with dressing. Add a grind or two of black pepper if you like.
Eat and enjoy every bite because you can!
Recipe note: I use Diamond Crystal Kosher salt in all my recipes because it has a wonderful flat and crisp flake that tastes delicious. It is also the least salty salt available so you can use it more liberally as a seasoning than you can table salt or sea salt. If you use another type of salt, you may need to reduce the amount so it is not over-salted.
Have a question you’d like to have answered? Email me at hello@ibsgamechanger.com
Link note: This post contains links for you to easily purchase items listed on the page. In some cases, we have provided a special discount code for IBS Game Changers so be sure to use it when you purchase an item to get the discount that has been arranged just for you! As an Amazon Associate, I earn a commission from qualifying Amazon purchases.
More Deliciously Low FODMAP™ vegetarian recipes

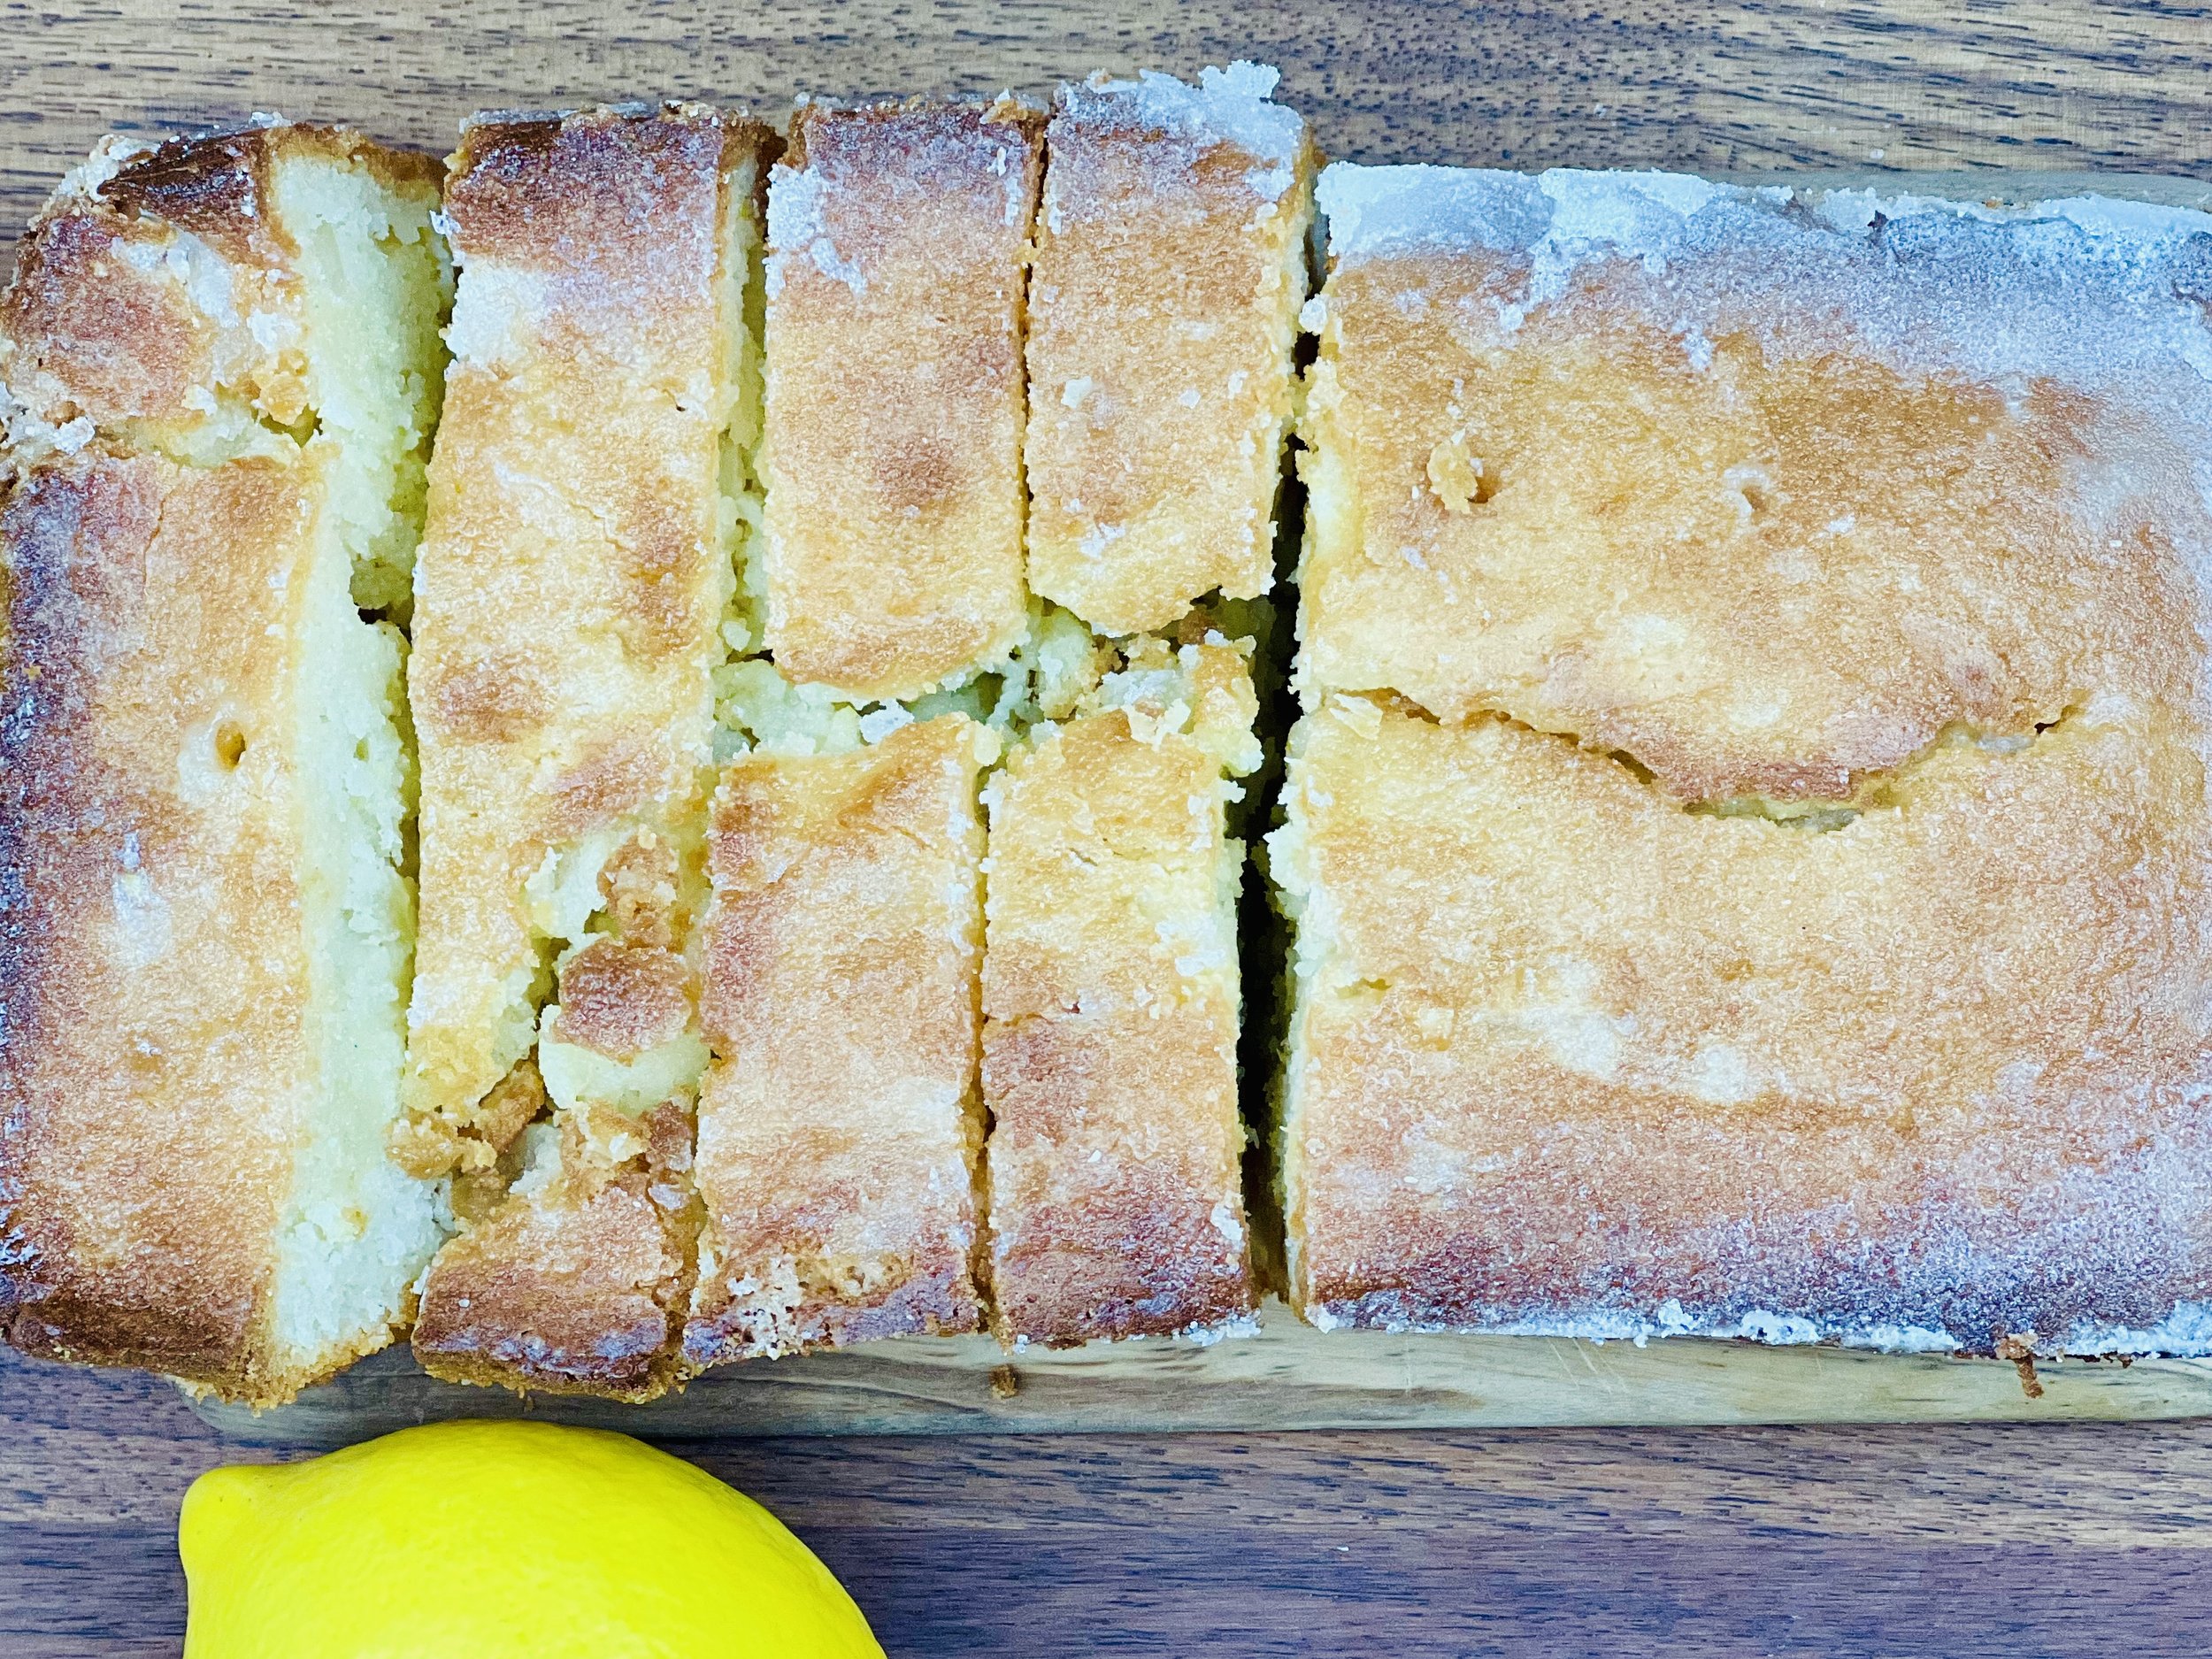
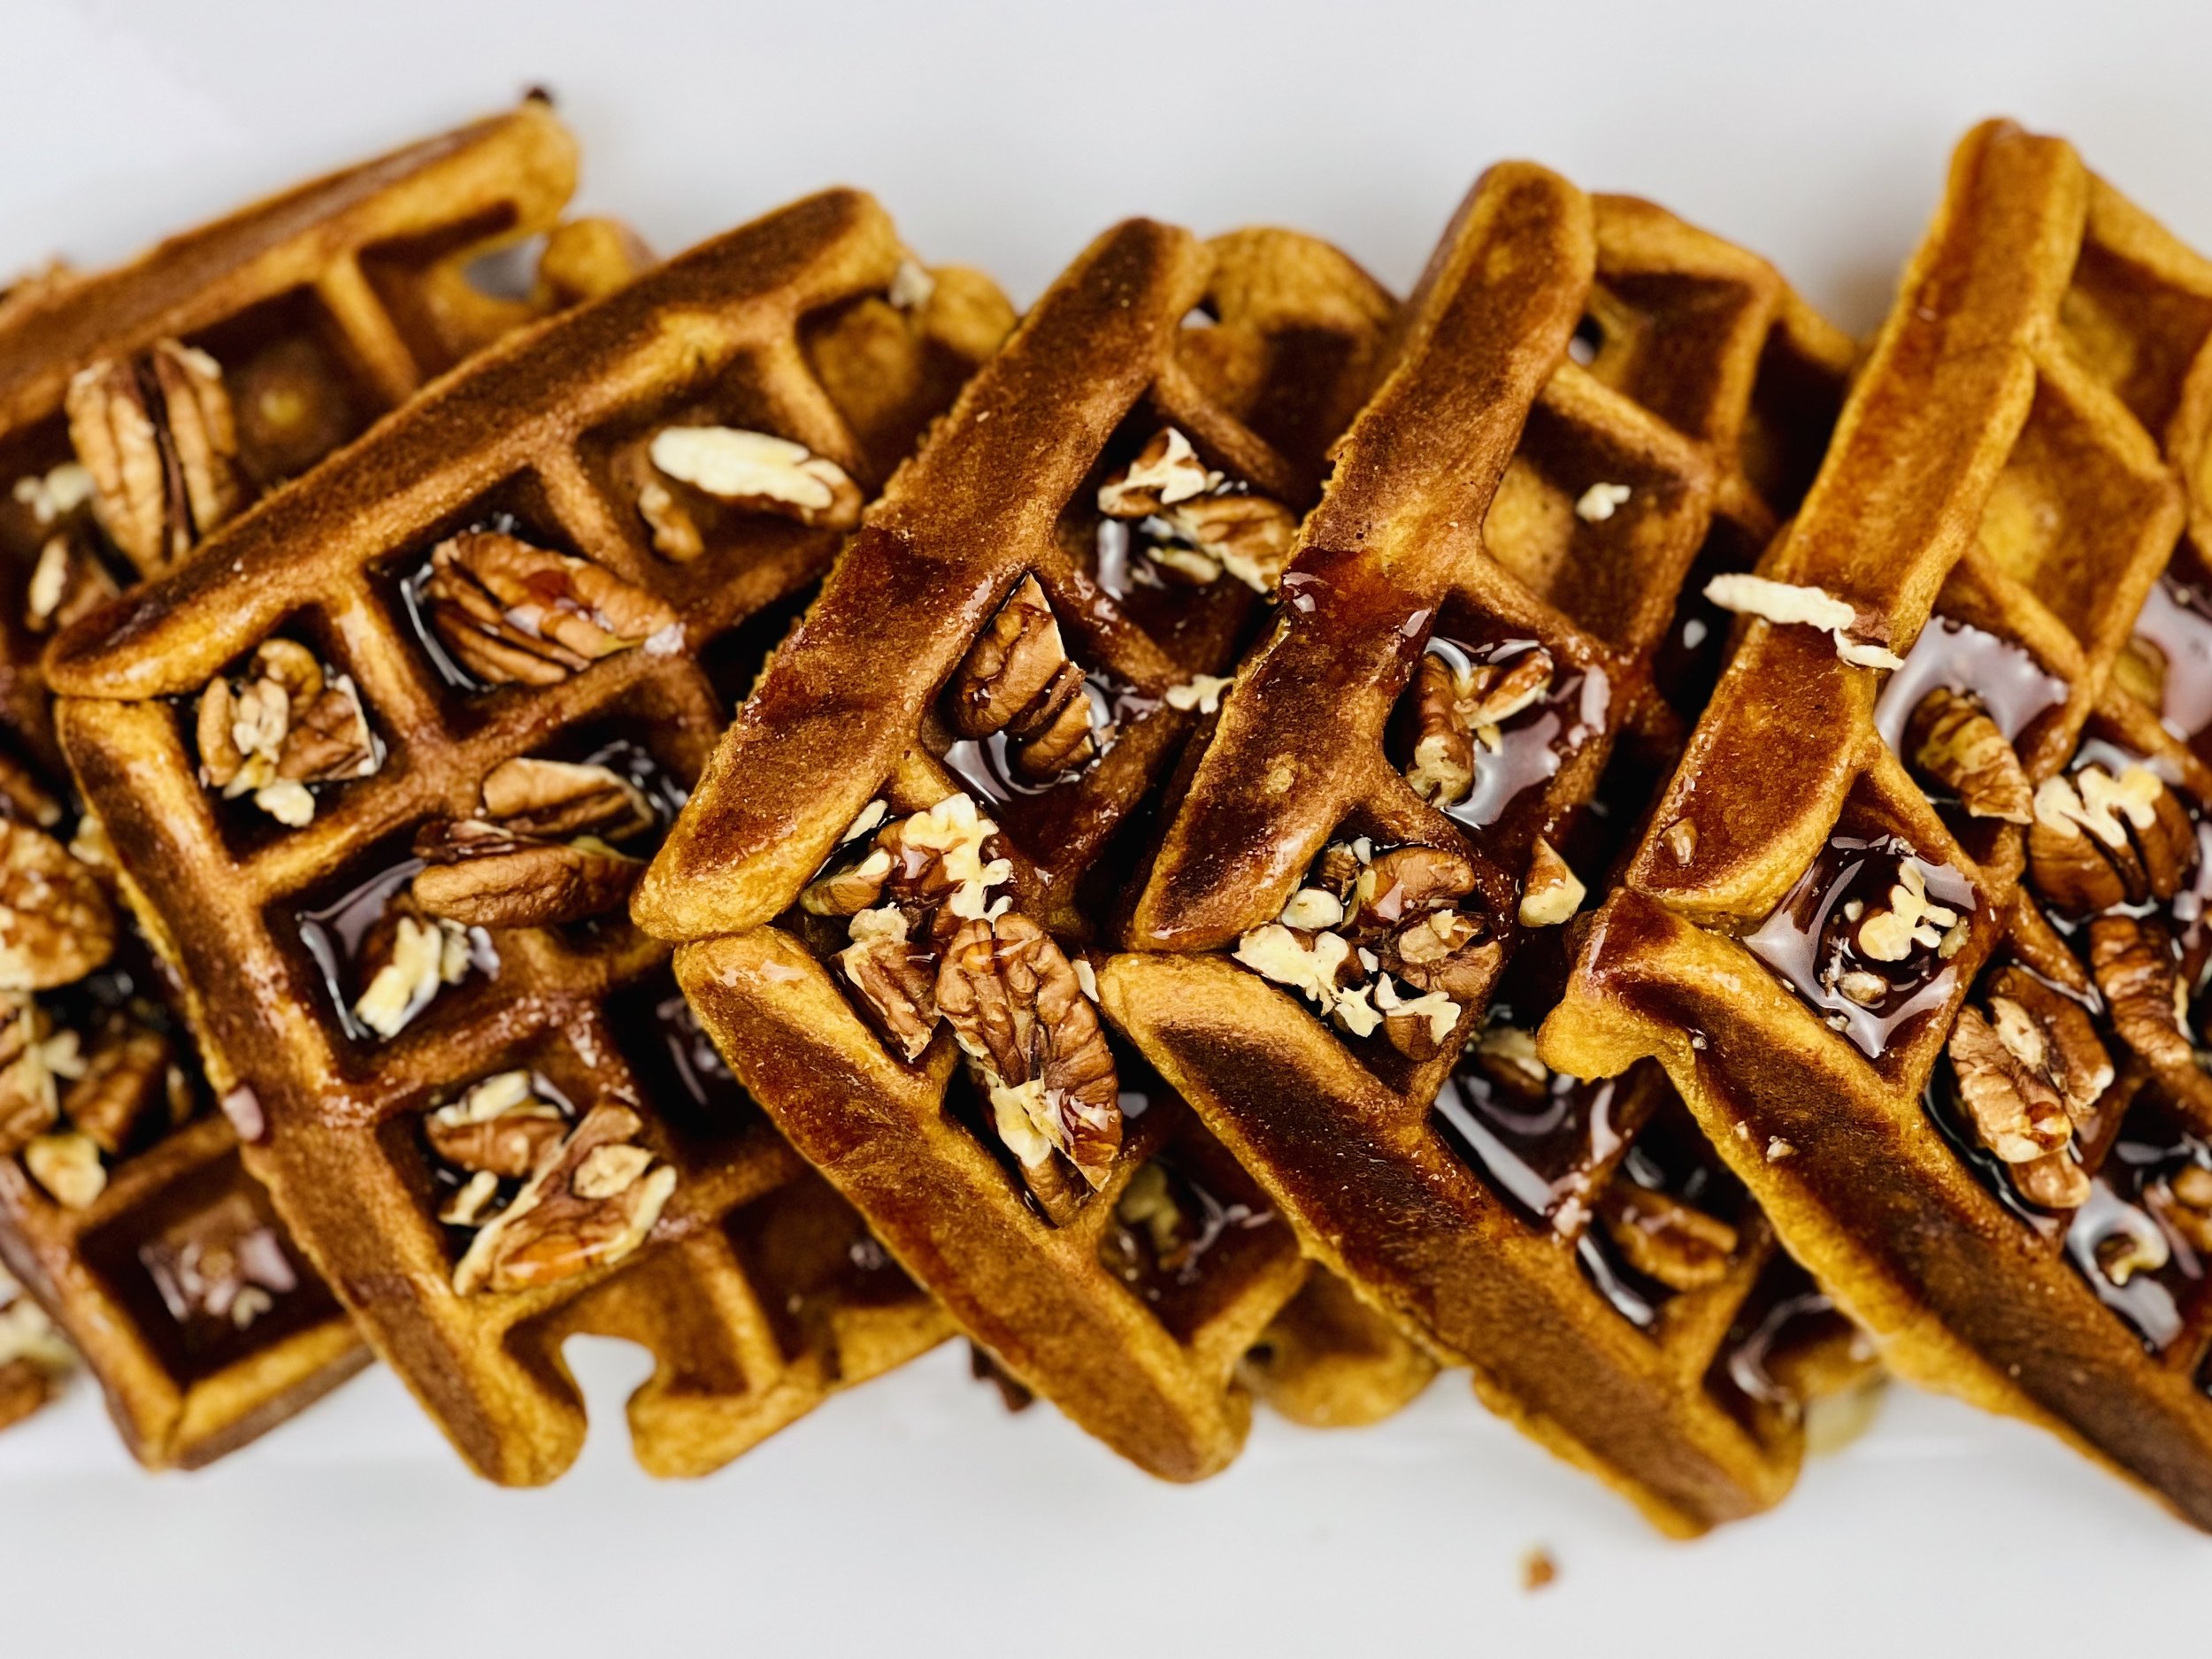
Sweet Potato Pecan Waffles (Low FODMAP)
10 Minutes prep • 20 Minutes cook • Low FODMAP • Gluten-free • Makes 8-10 Waffles
10 Minutes prep • 20 Minutes cook • Low FODMAP • Gluten-free • Makes 8-10 Waffles • Ok to make ahead: Steps 1-2
Oh, these waffles are good! And what a beautiful color you get with that rich sweet potato in the batter. While these waffles are a great way to use up leftover sweet potatoes, it’s totally worth the effort to roast some just for this recipe. Add a few pecans and some syrup and you have a truly special breakfast or brunch. Leftovers can be frozen and reheated in the oven or toaster until crisp.
This is an exclusive recipe just for recipe club members.
In addition to the two free recipes I create each week I am creating and delivering one very special recipe just for my recipe club members. If you’re not yet a member, I encourage you to join! Membership in the club includes access to the complete archive of recipes with filters so it can become your virtual low FODMAP cookbook plus, I am creating and delivering one special NEW recipe every week ONLY for recipe club members. And, for my true fans, I’ll be sharing behind-the-scenes content, and updates on the progress of the new cookbook.
Your membership in the club helps me continue creating new, delicious, easy-to-make, low FODMAP recipes just for you.
As always, all recipes will emphasize simple ingredients, easy preparation, and delicious low FODMAP results. Recipes will be for everything from main courses, salads, soups, side dishes, appetizers, desserts, sauces, breakfast and lunch, and even mocktails and cocktails. Everything you need to prepare fantastic low FODMAP meals everyone will love.
Join the club. Become a Patron. Let’s keep making delicious Low FODMAP meals together.
My Latest Deliciously Low FODMAP™ Recipes


Bringing the experts to you - Free Virtual Speaker Series: IBS Secrets Revealed
I am honored to be a part of this digestive health summit and I have a complimentary ticket for you to attend totally free.
One of the biggest challenges when struggling with gut issues is finding answers. It should be easy, but you and I both know it’s not.
My friend and colleague, Kelly Cleveringa of Clever Body Wellness, hosted a speaker series she called IBS Secrets Revealed that brought together a group of experts from all areas of the gut health spectrum to offer all sorts of advice for improving your digestion and enhancing your life. I was honored to be a part of this digestive health summit and I’m sharing the on-demand link so you can watch the entire series, or just pick the topics that interest you most.
There were 15 expert speakers in this virtual summit talking about different areas of living with and treating IBS.
These amazing experts included…
Katherine Aitken-Young from IBS Game Changer
Heather Van Vorous from Help for IBS
DeDe Wilson from Fodmap Everyday
Helen Brooks from The Tummy Whisperer
Amy Laura from FODify It
And many more!
When you’re at the right table with the right people, you heal faster than you ever could on your own. This is the right table which is why I’m thrilled to have been included as a speaker and I want to share the content with you!
Have a question you’d like to have answered? Email me at hello@ibsgamechanger.com
Check out my latest Deliciously Low FODMAP™ recipes
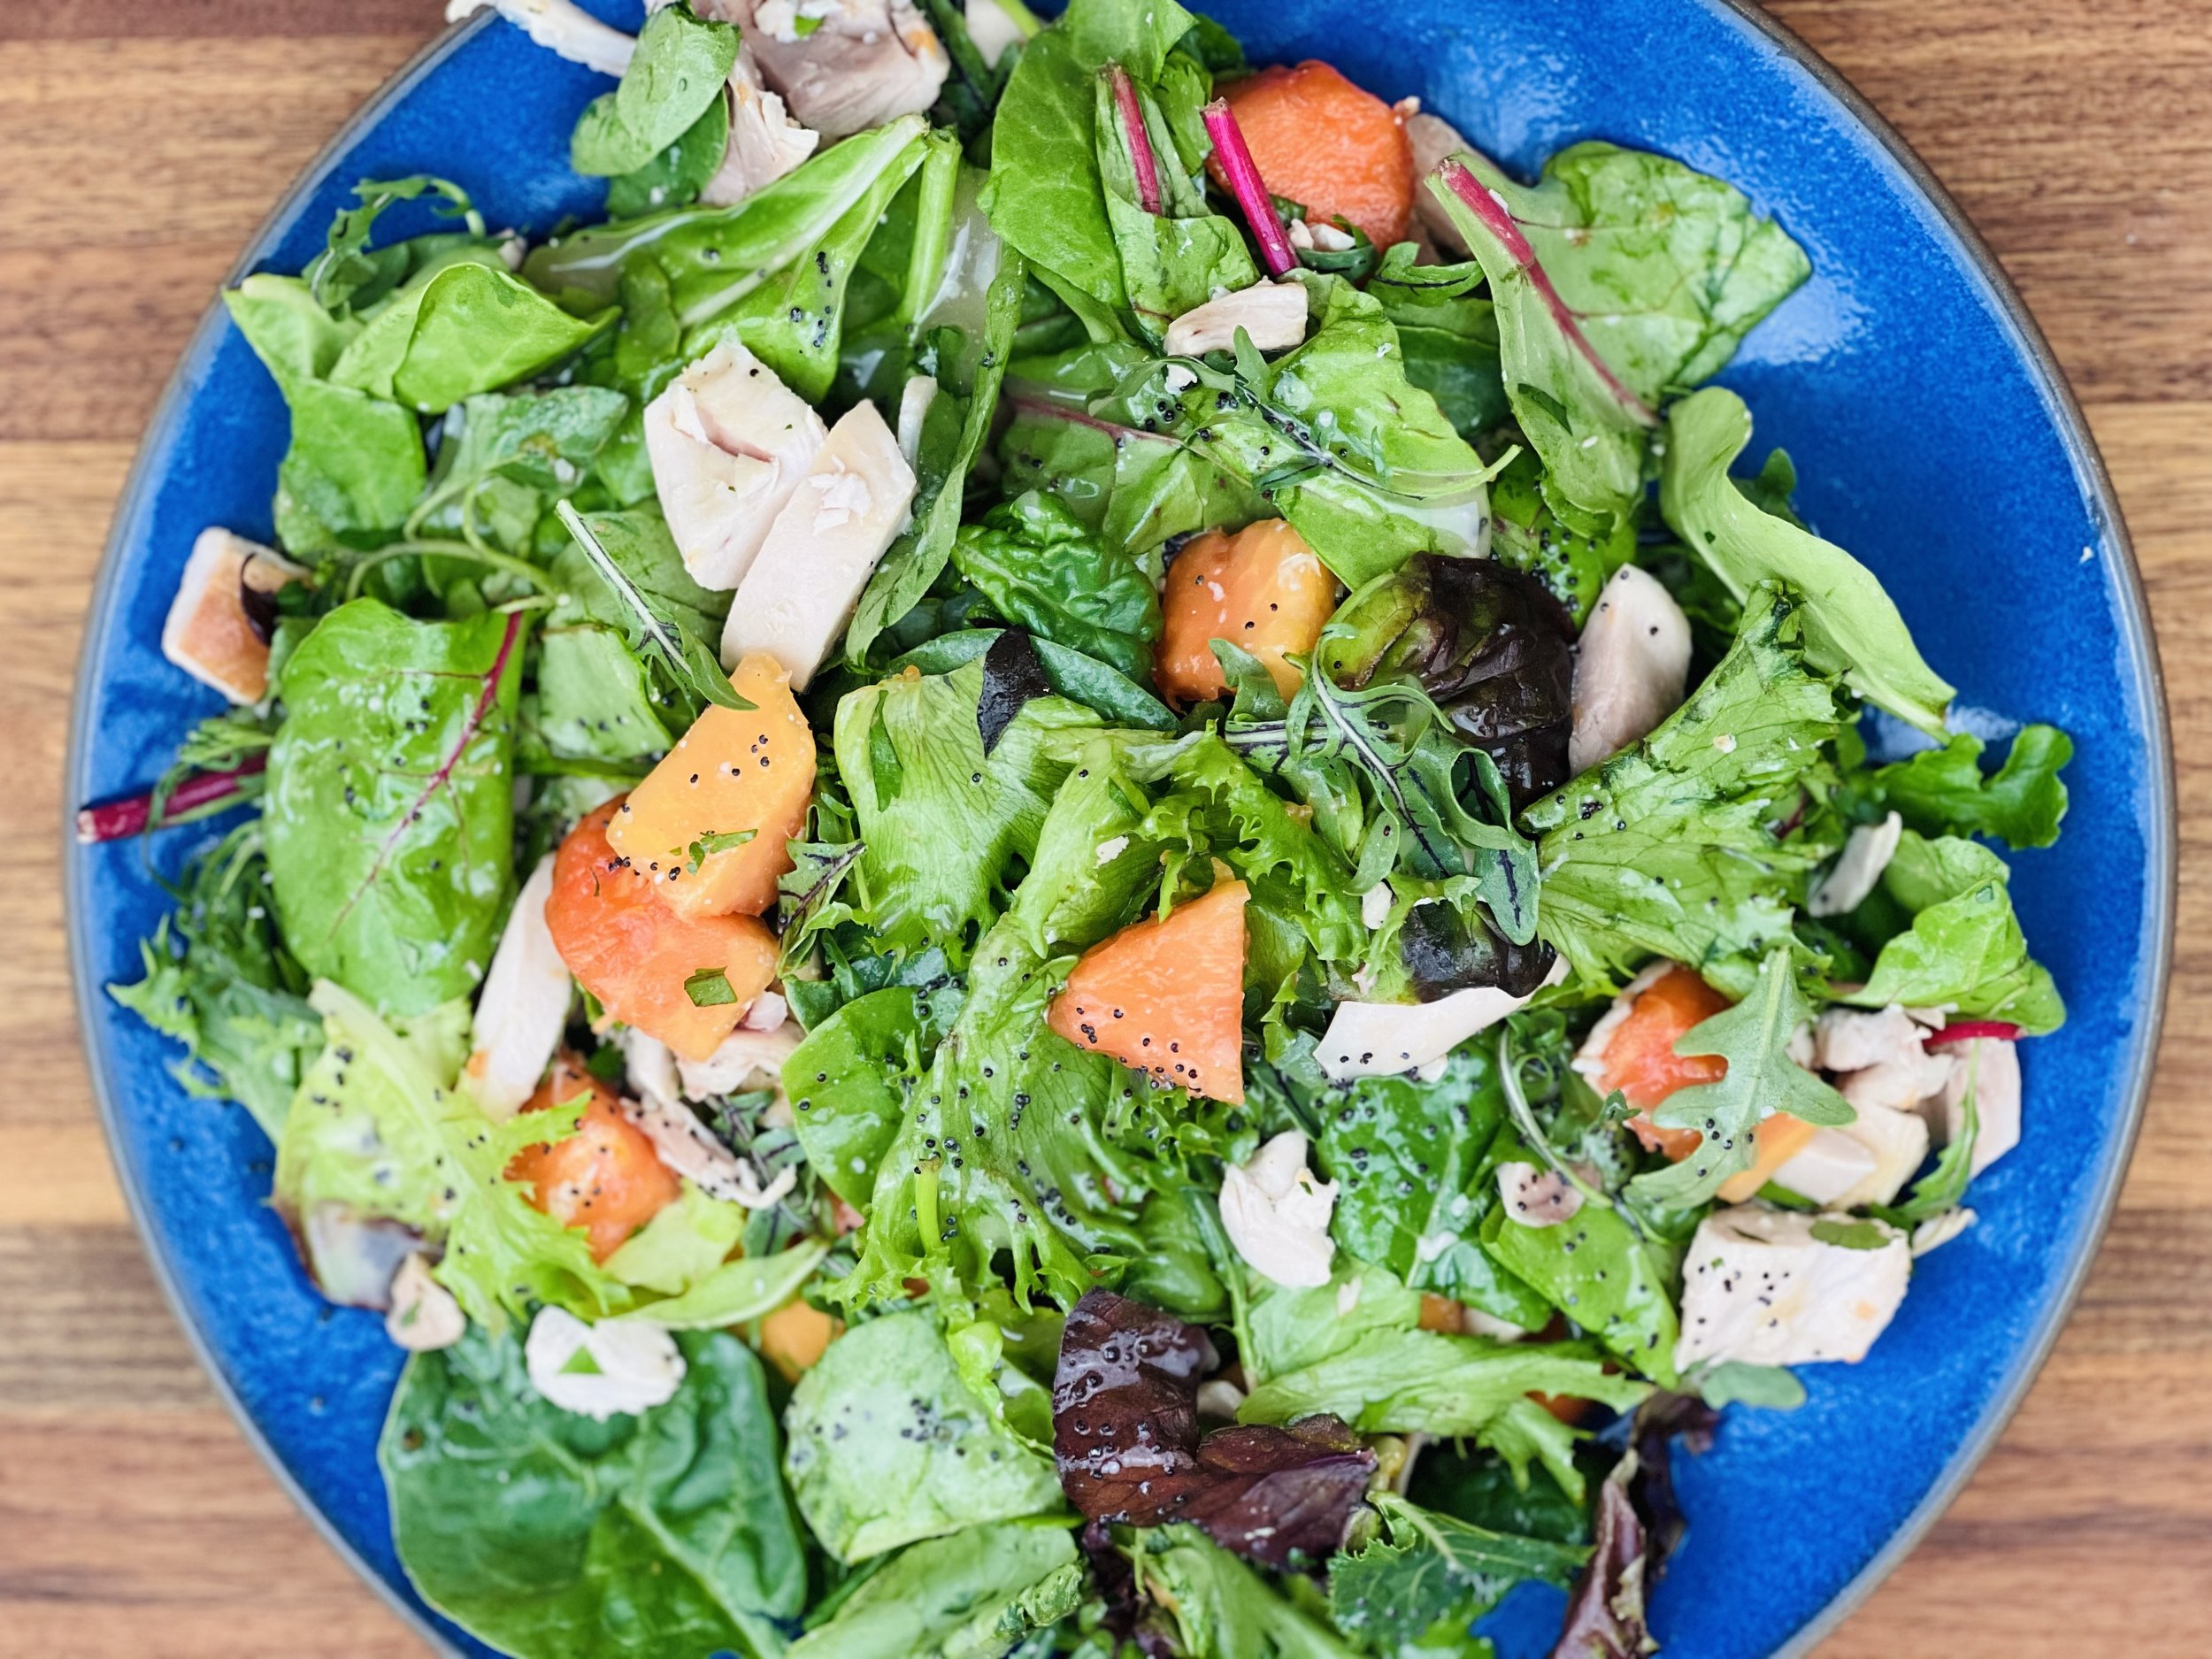
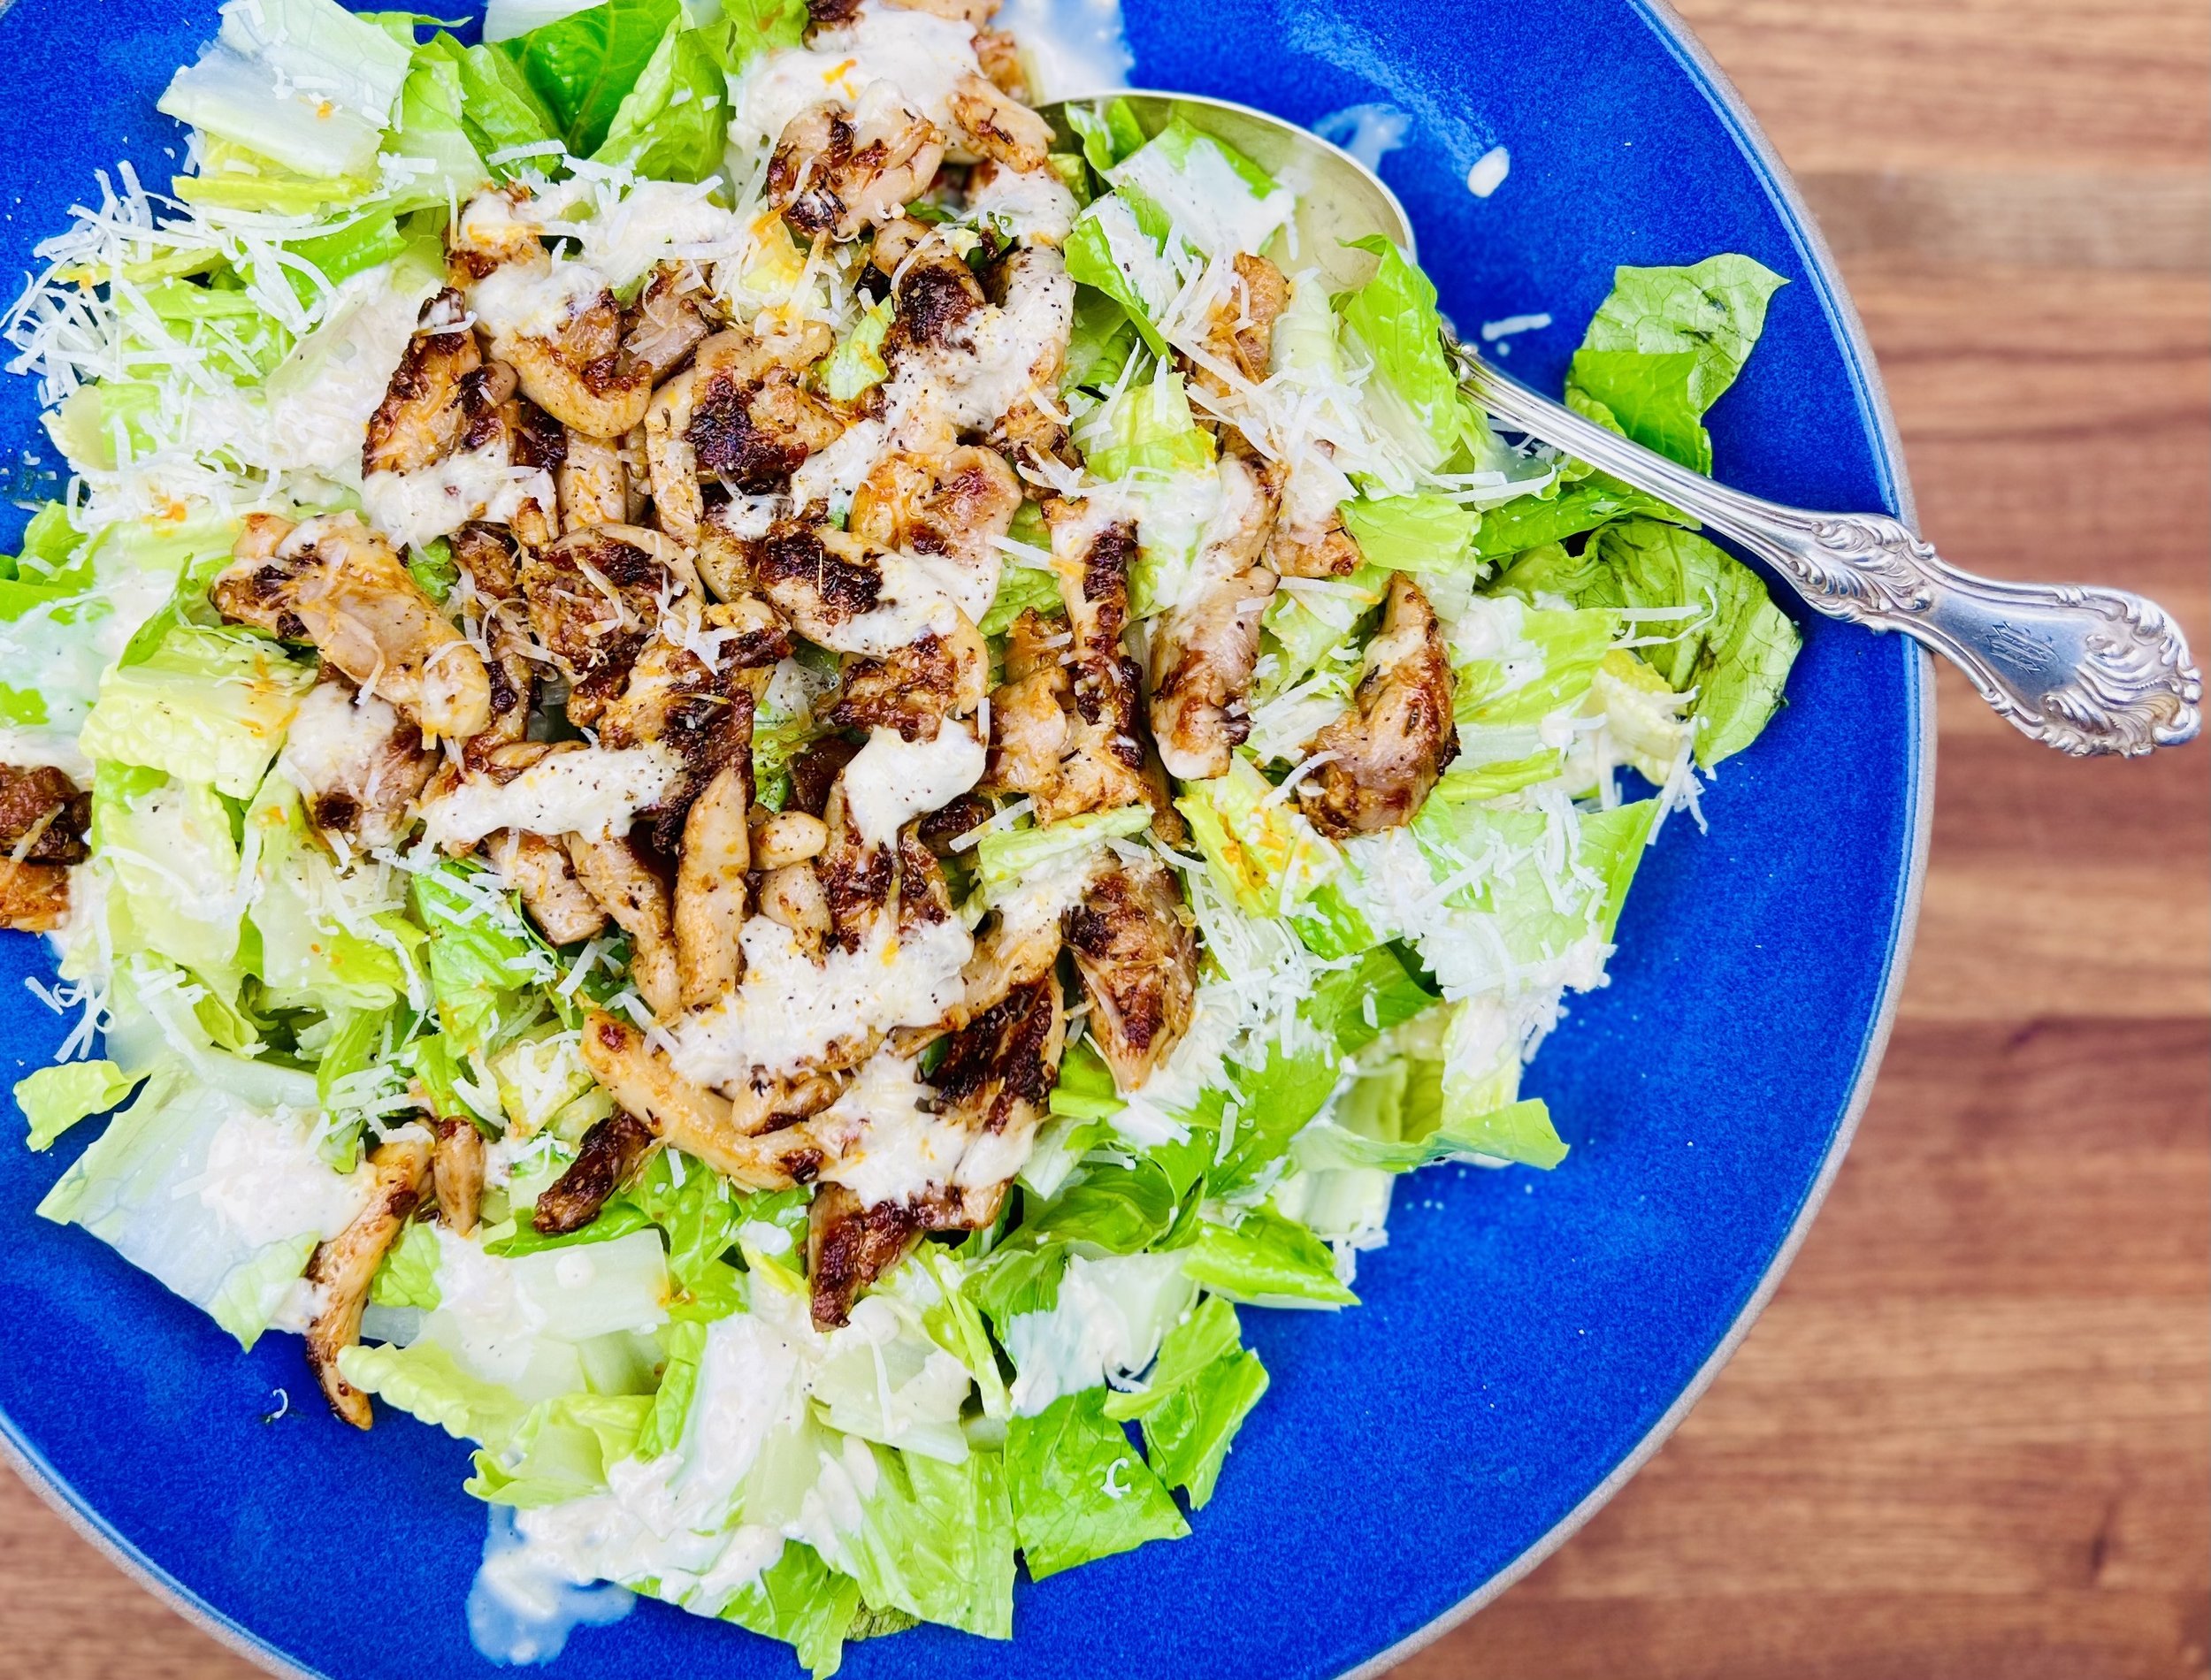
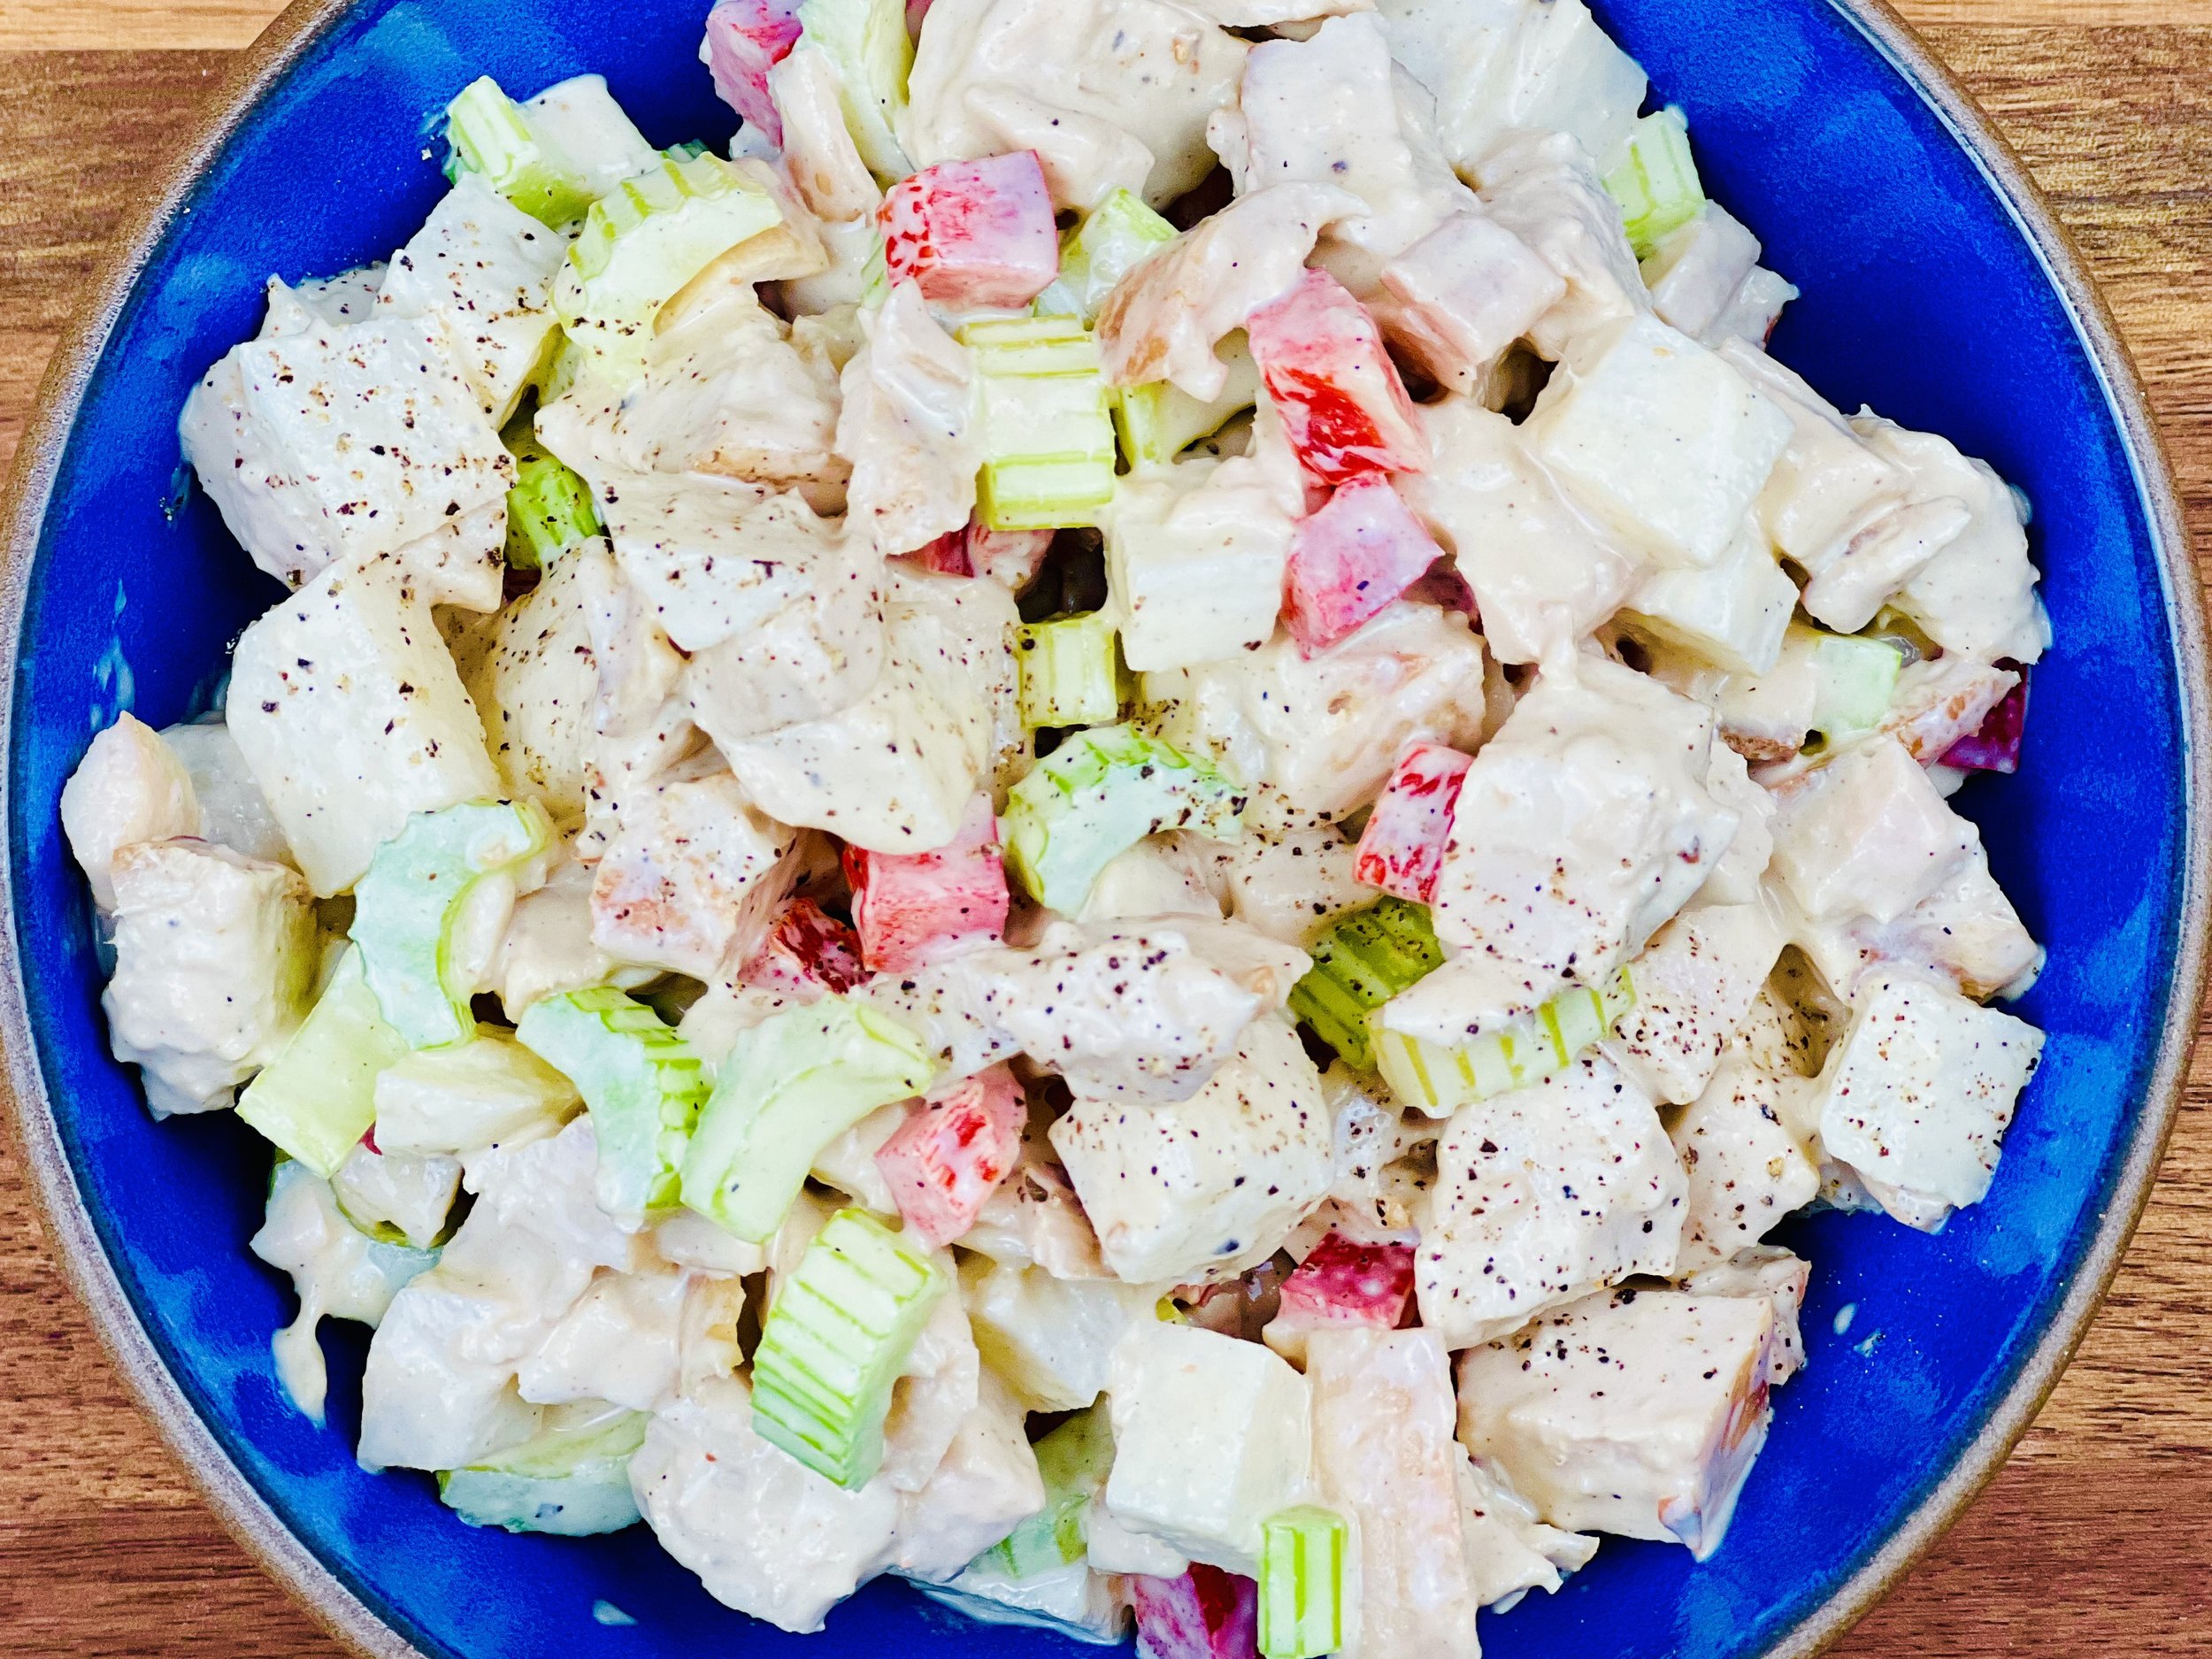
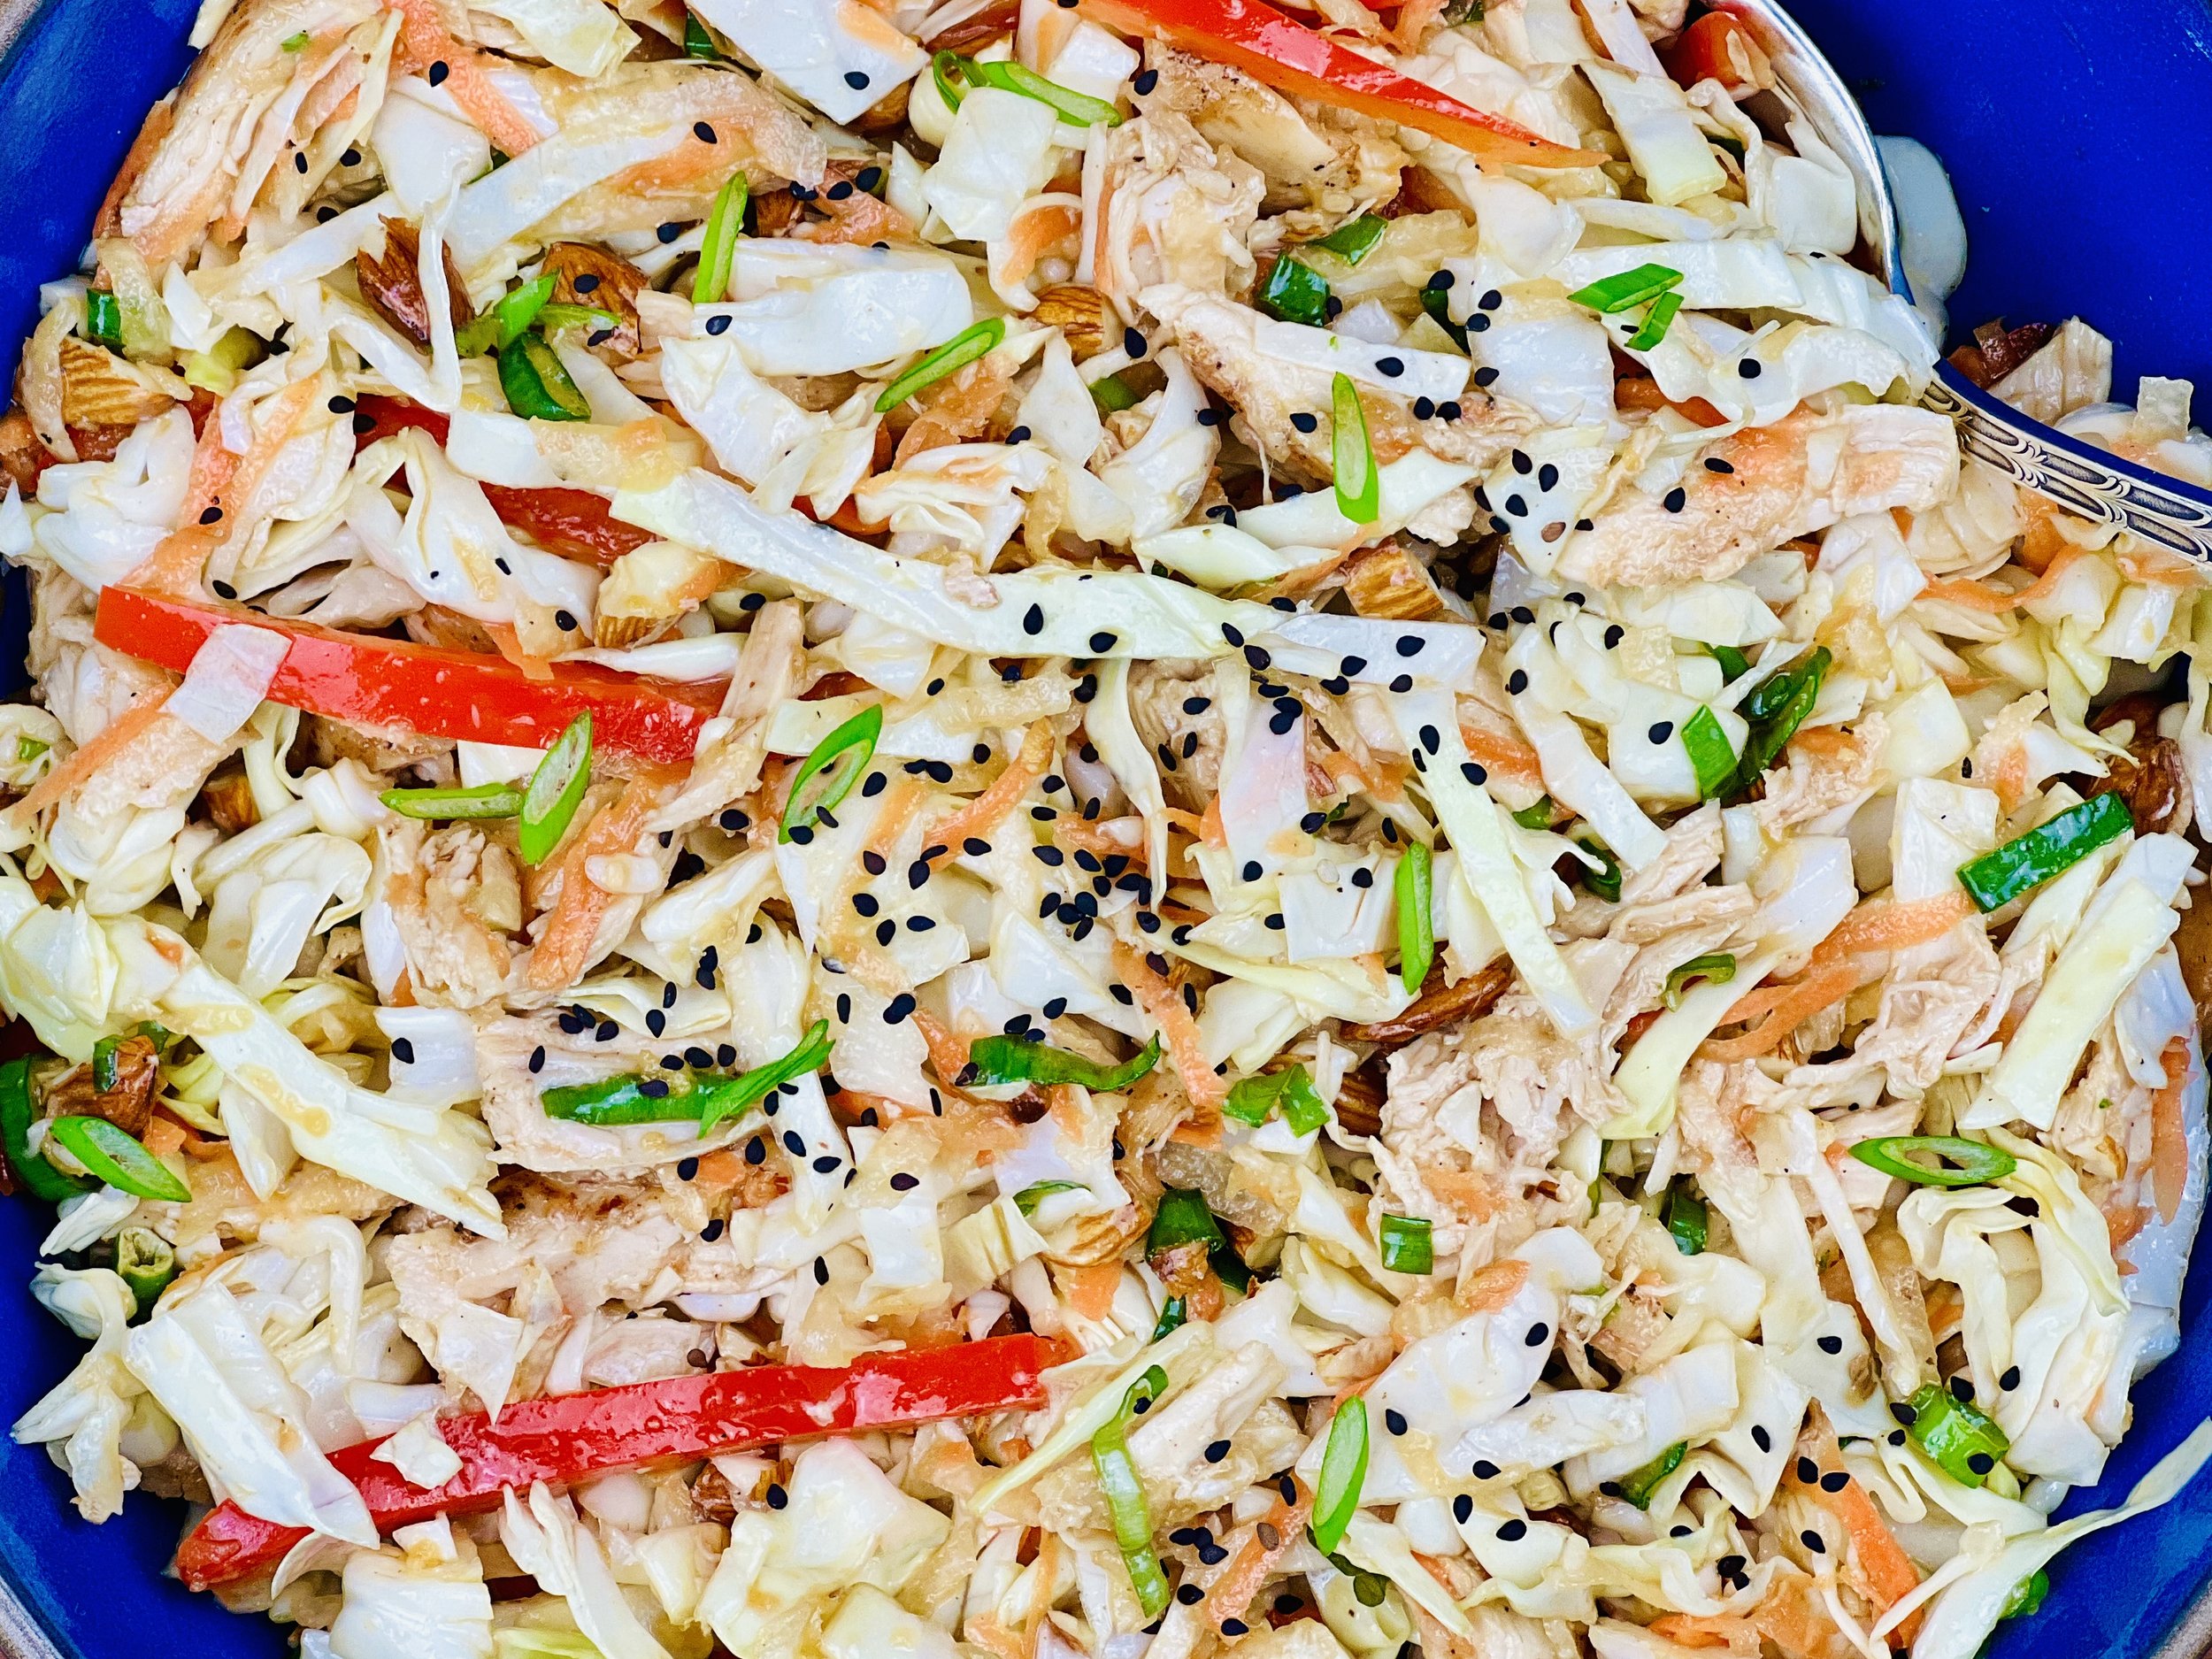
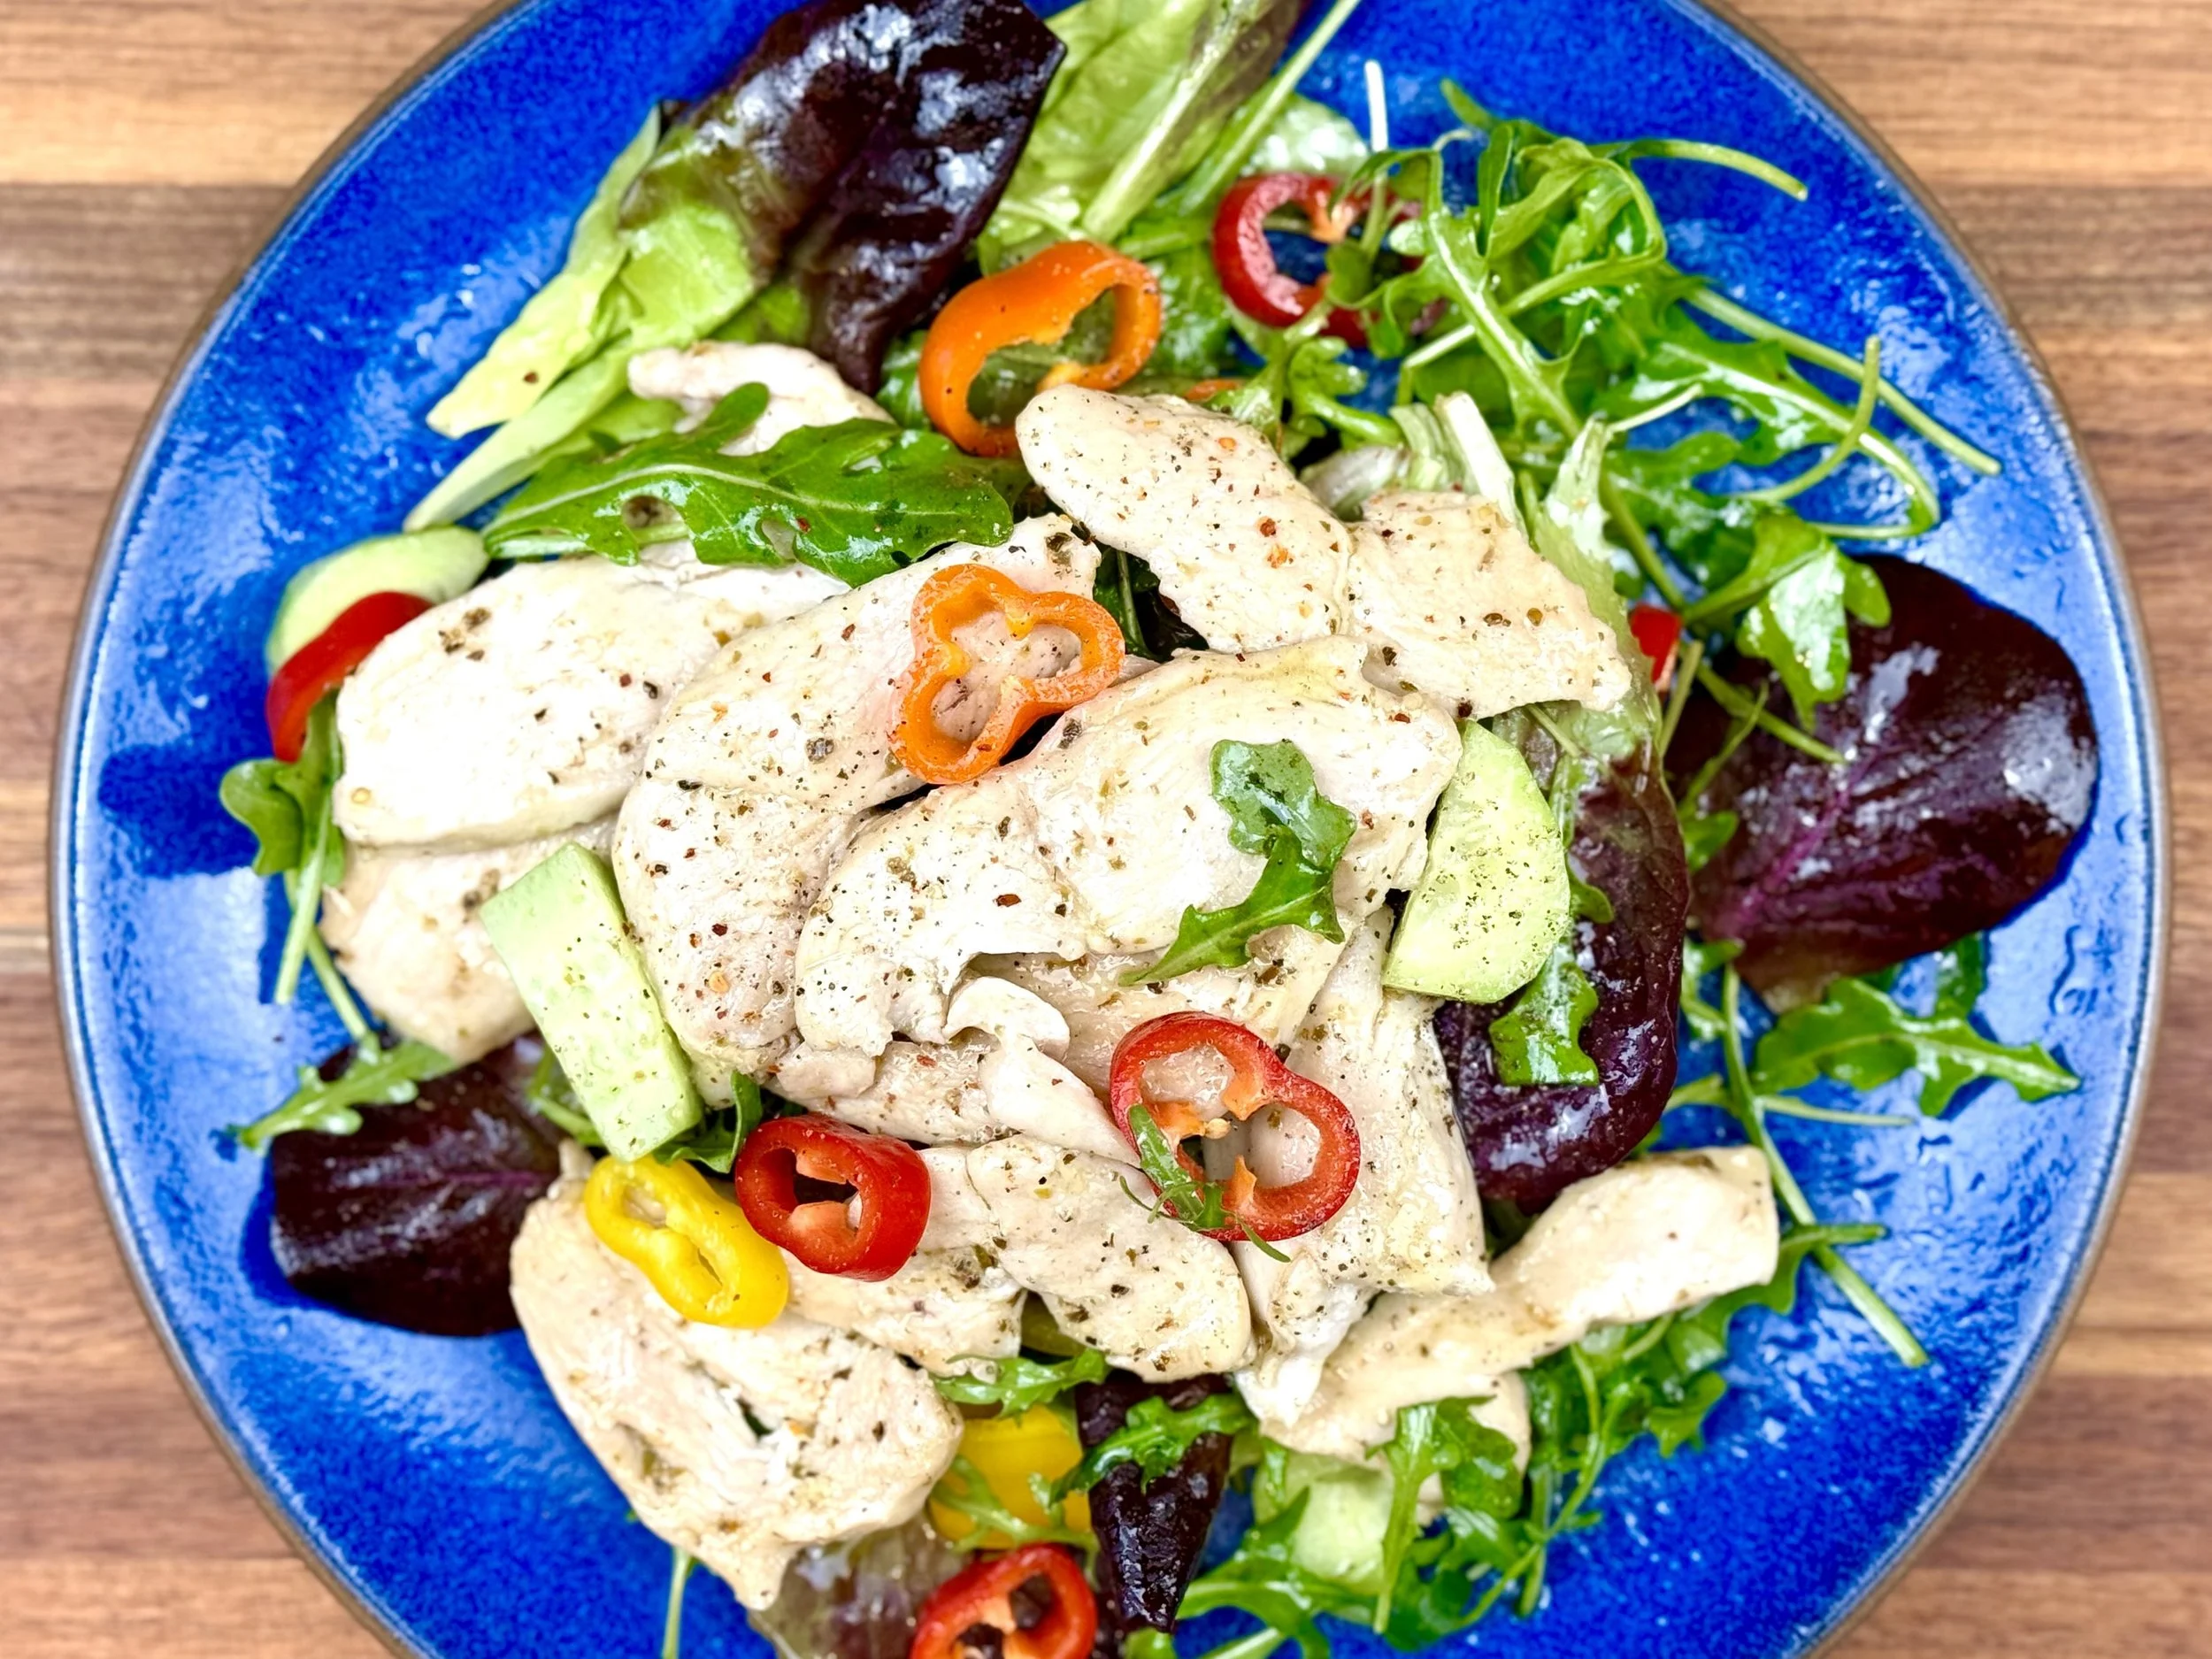
Chinese New Year Chicken Salad (Low FODMAP)
15 Minutes prep • 30 Minutes cook • Low FODMAP • Gluten-free • Lactose-free • Serves 4-6
15 Minutes prep • 30 Minutes cook • Low FODMAP • Gluten-free • Lactose-free • Serves 4-6 • Ok to make ahead: Steps 1-3
In honor of Chinese New Year, I created a recipe for a delicious, low FODMAP Chinese chicken salad that is heavy on the vegetables and flavor and light on the effort to make! This salad is crispy, crunchy, and everything you want a Chinese chicken salad to be. It’s a great way to use up leftover chicken, but if you need to cook some just for the recipe, I’ve provided an easy recipe that turns out perfectly-cooked chicken every time.
Ingredients: Dressing
3 tablespoons gluten-free soy sauce
3 tablespoons seasoned rice vinegar
2 tablespoons toasted sesame oil
2 tablespoons butter
2 teaspoons fresh ginger, grated
1/2 teaspoon black pepper
Ingredients: Salad
4 cups cabbage, thinly chopped/shredded
1 cup carrot, grated (swap in additional cabbage or bell pepper for lower-carb version)
1 red bell pepper, julienned (finely sliced)
1 cup Jicama, grated (or use sliced water chestnuts) - swap in additional cabbage or bell pepper for lower-carb version
1 cup raw almonds, chopped or sliced
2 cups cooked chicken, shredded (see recipe below)
1/2 cup green onions, green part only, finely sliced on the diagonal
1 - 2 tsp black sesame seeds, optional for garnish
Directions
(1) Cook the chicken: Don’t have cooked chicken? Cook some up using this quick and foolproof method:
Heat 1 tablespoon each butter and toasted sesame oil in a frying pan over medium-high heat. Season each chicken breast with a sprinkle of salt and pepper. Add a few slices of fresh ginger to the pan. Put the chicken in the pan in one layer. Cook for 2 -3 minutes until browned on the bottom. Flip the chicken breast(s), cook for 2-3 minutes on the second side, until browned. Reduce heat to low. Cover the pan and cook for 12 minutes. Leave cover in place. Turn the heat off. Leave for another 12 minutes. Voila! Perfectly cooked chicken. (If the chicken breasts are very thick, then slice them in half horizontally before cooking them in this manner.)
(2) Prepare: Chop the almonds, shred the cabbage, carrot (if using), and jicama (if using). Slice the bell pepper and chop the green onions.
(3) Make the dressing: Combine the dressing ingredients in a jar and shake. Let sit for about 10 minutes before tossing with the salad to allow flavors to blend.
(4) Make the salad: Place the Salad ingredients in a large bowl. Drizzle the dressing over the salad and then toss it all together.
Make-ahead note: Keep salad, dressing, and garnish separate until ready to serve. Without dressing, this salad will keep for 2 -3 days in an airtight container in the refrigerator. Keep the dressing in the refrigerator too.
(5) Plate and serve: Divide between serving plates or bowls. Top with a sprinkle of sesame seeds.
Eat and enjoy every bite because you can!
Recipe note: I use Diamond Crystal Kosher salt in all my recipes because it has a wonderful flat and crisp flake that tastes delicious. It is also the least salty salt available so you can use it more liberally as a seasoning than you can table salt or sea salt. If you use another type of salt, you may need to reduce the amount so it is not over-salted.
Have a question you’d like to have answered? Email me at hello@ibsgamechanger.com
Link note: This post contains links for you to easily purchase items listed on the page. In some cases, we have provided a special discount code for IBS Game Changers so be sure to use it when you purchase an item to get the discount that has been arranged just for you! As an Amazon Associate, I earn a commission from qualifying Amazon purchases.
More Deliciously Low FODMAP™ main course recipes
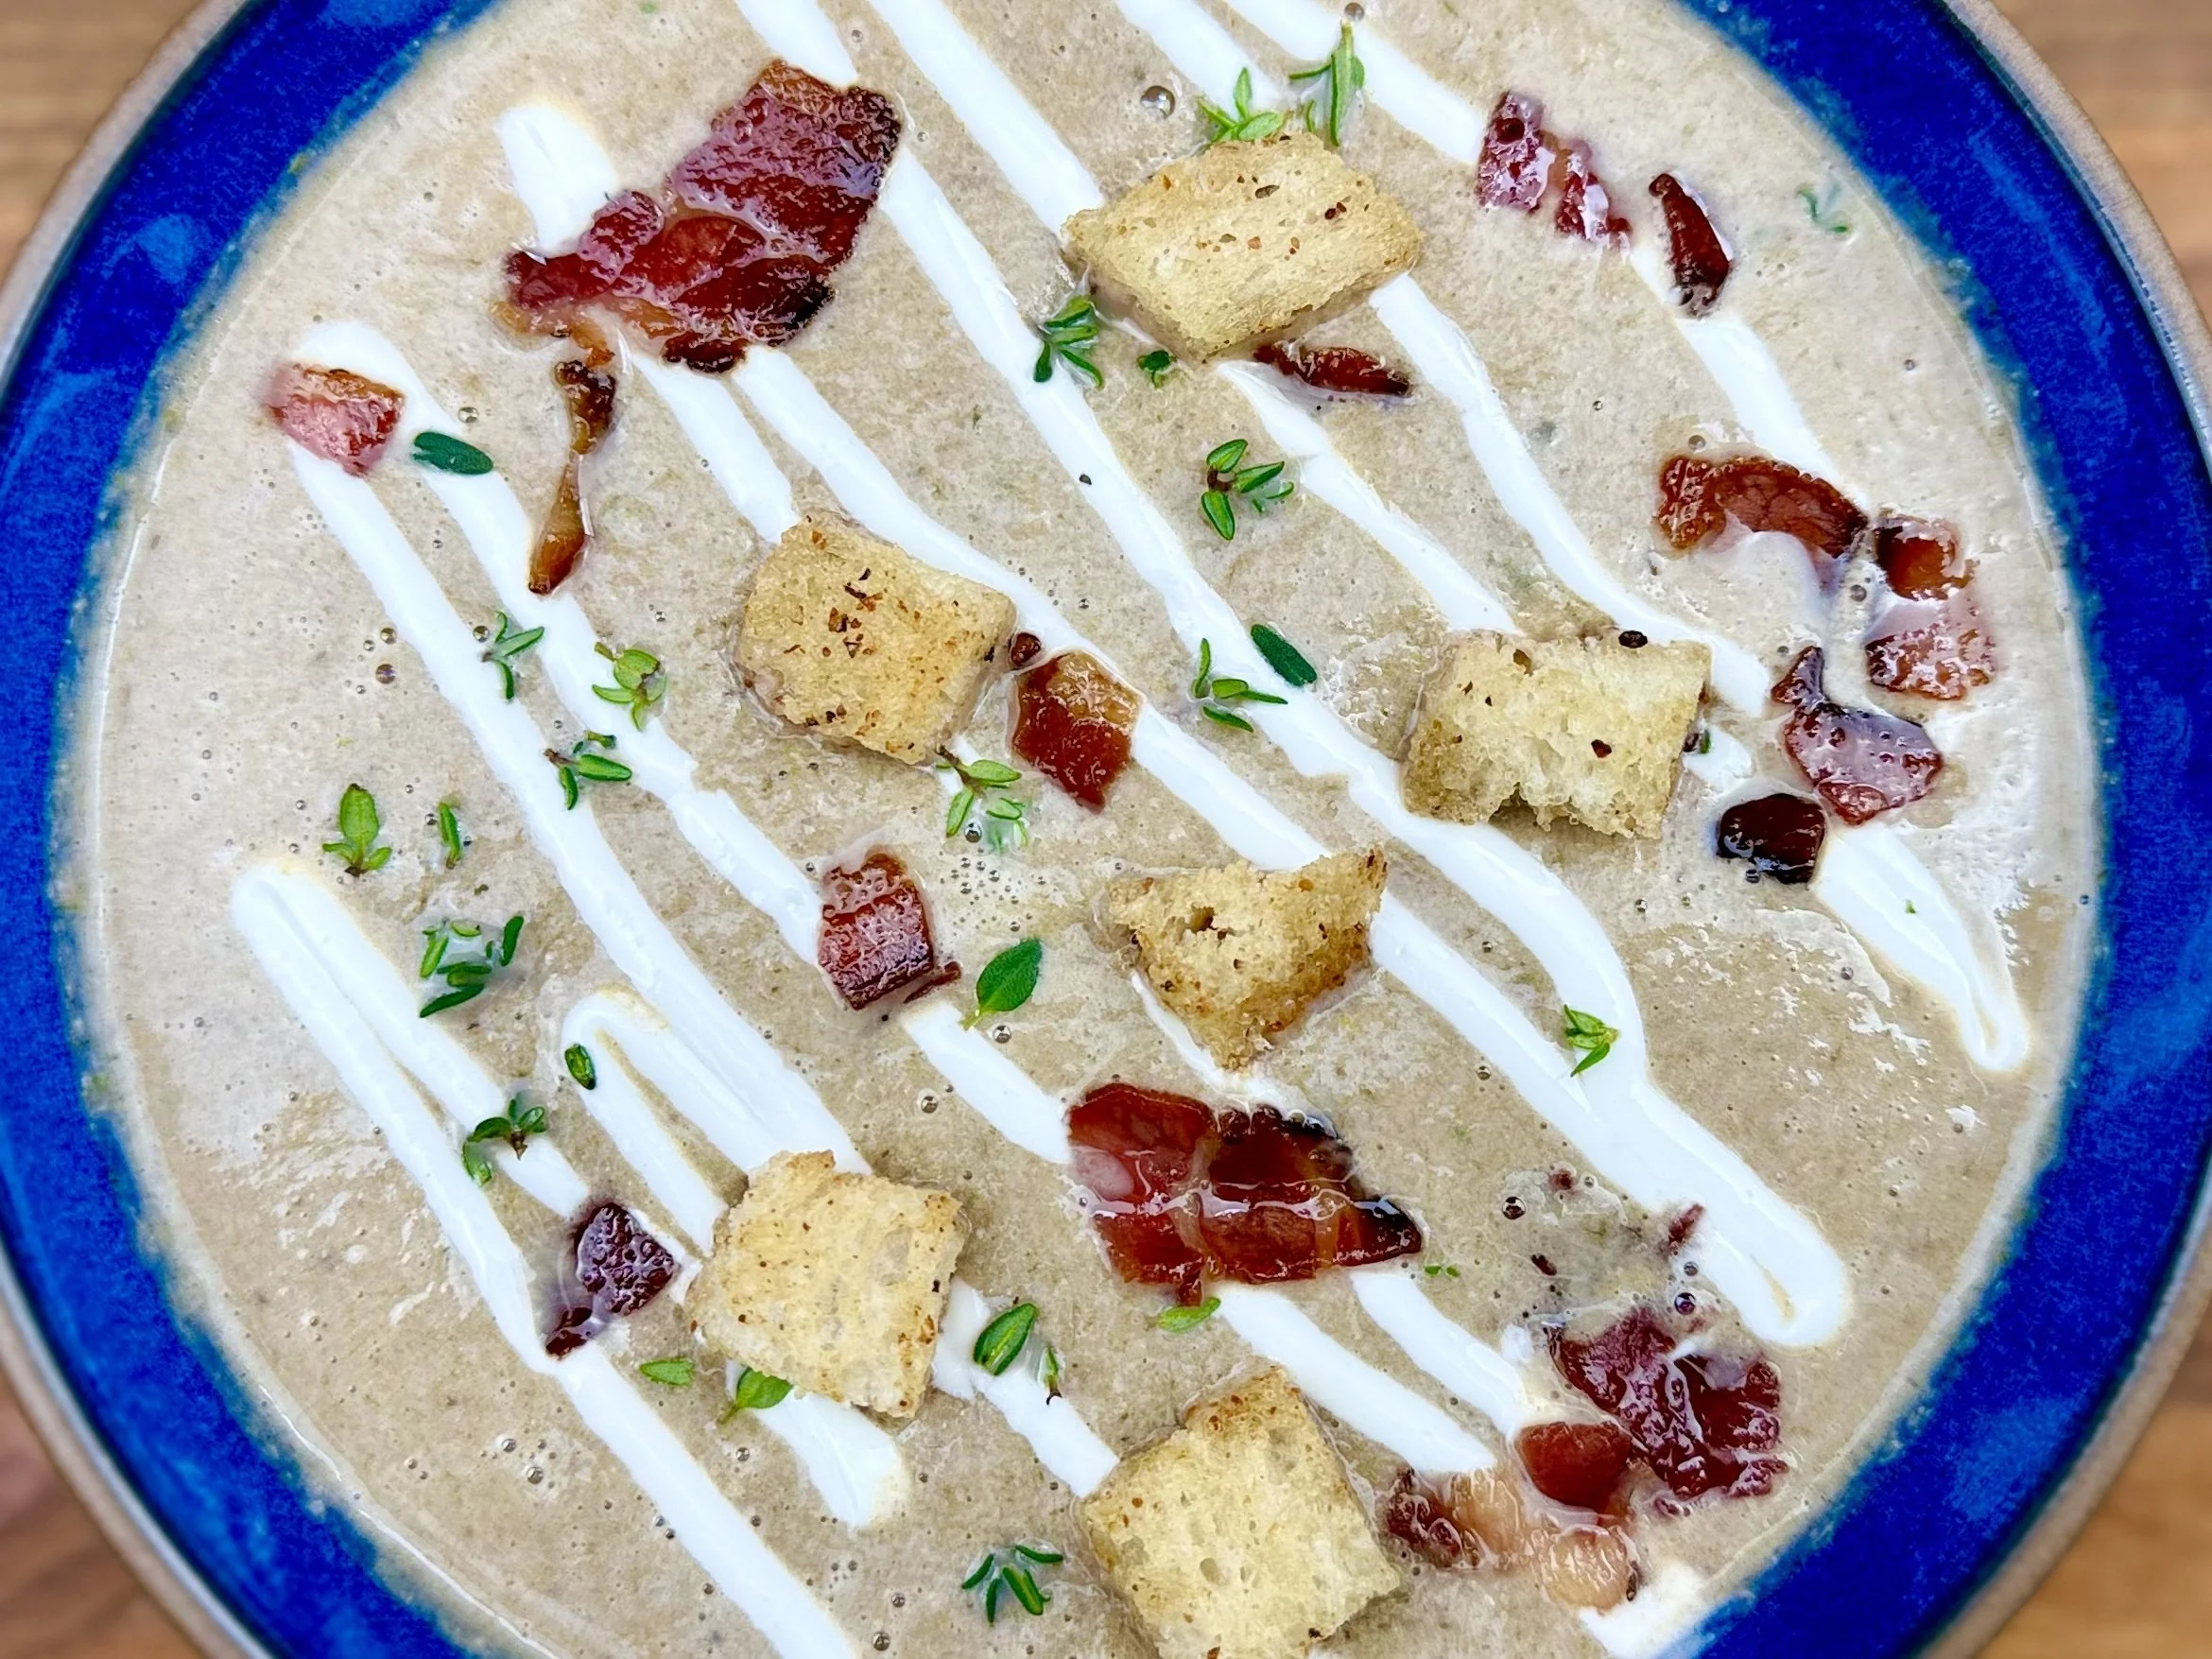
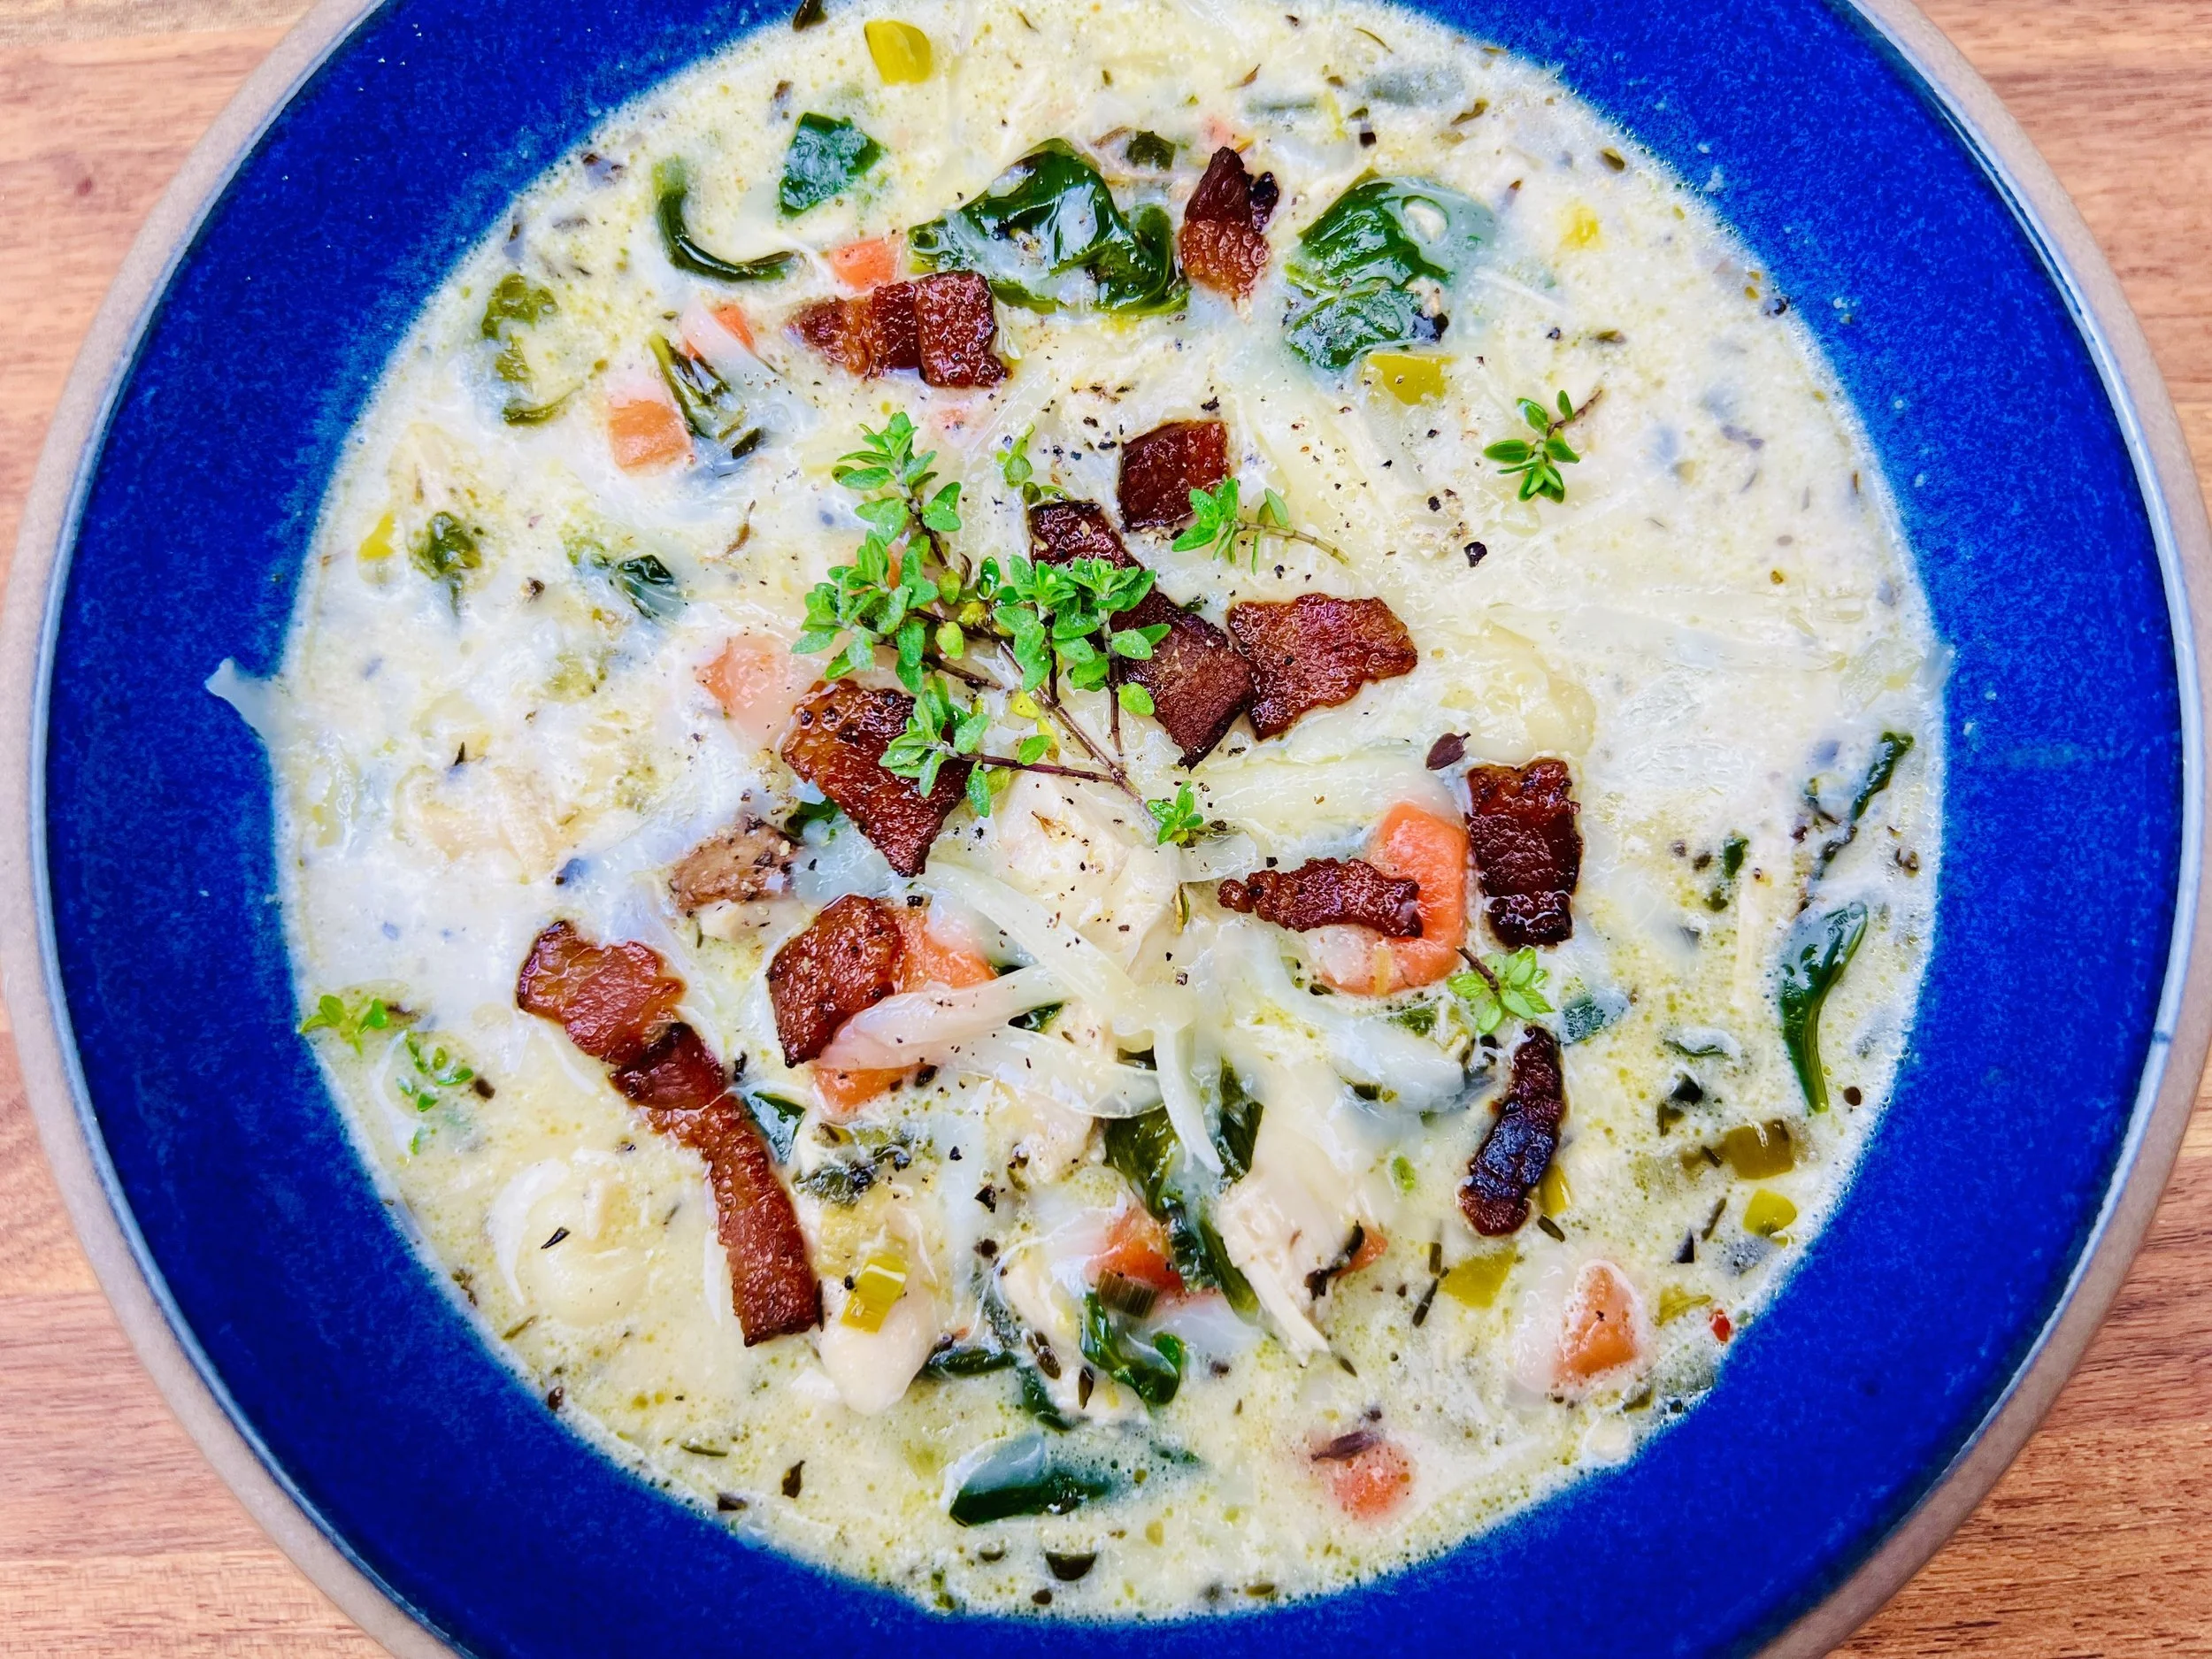
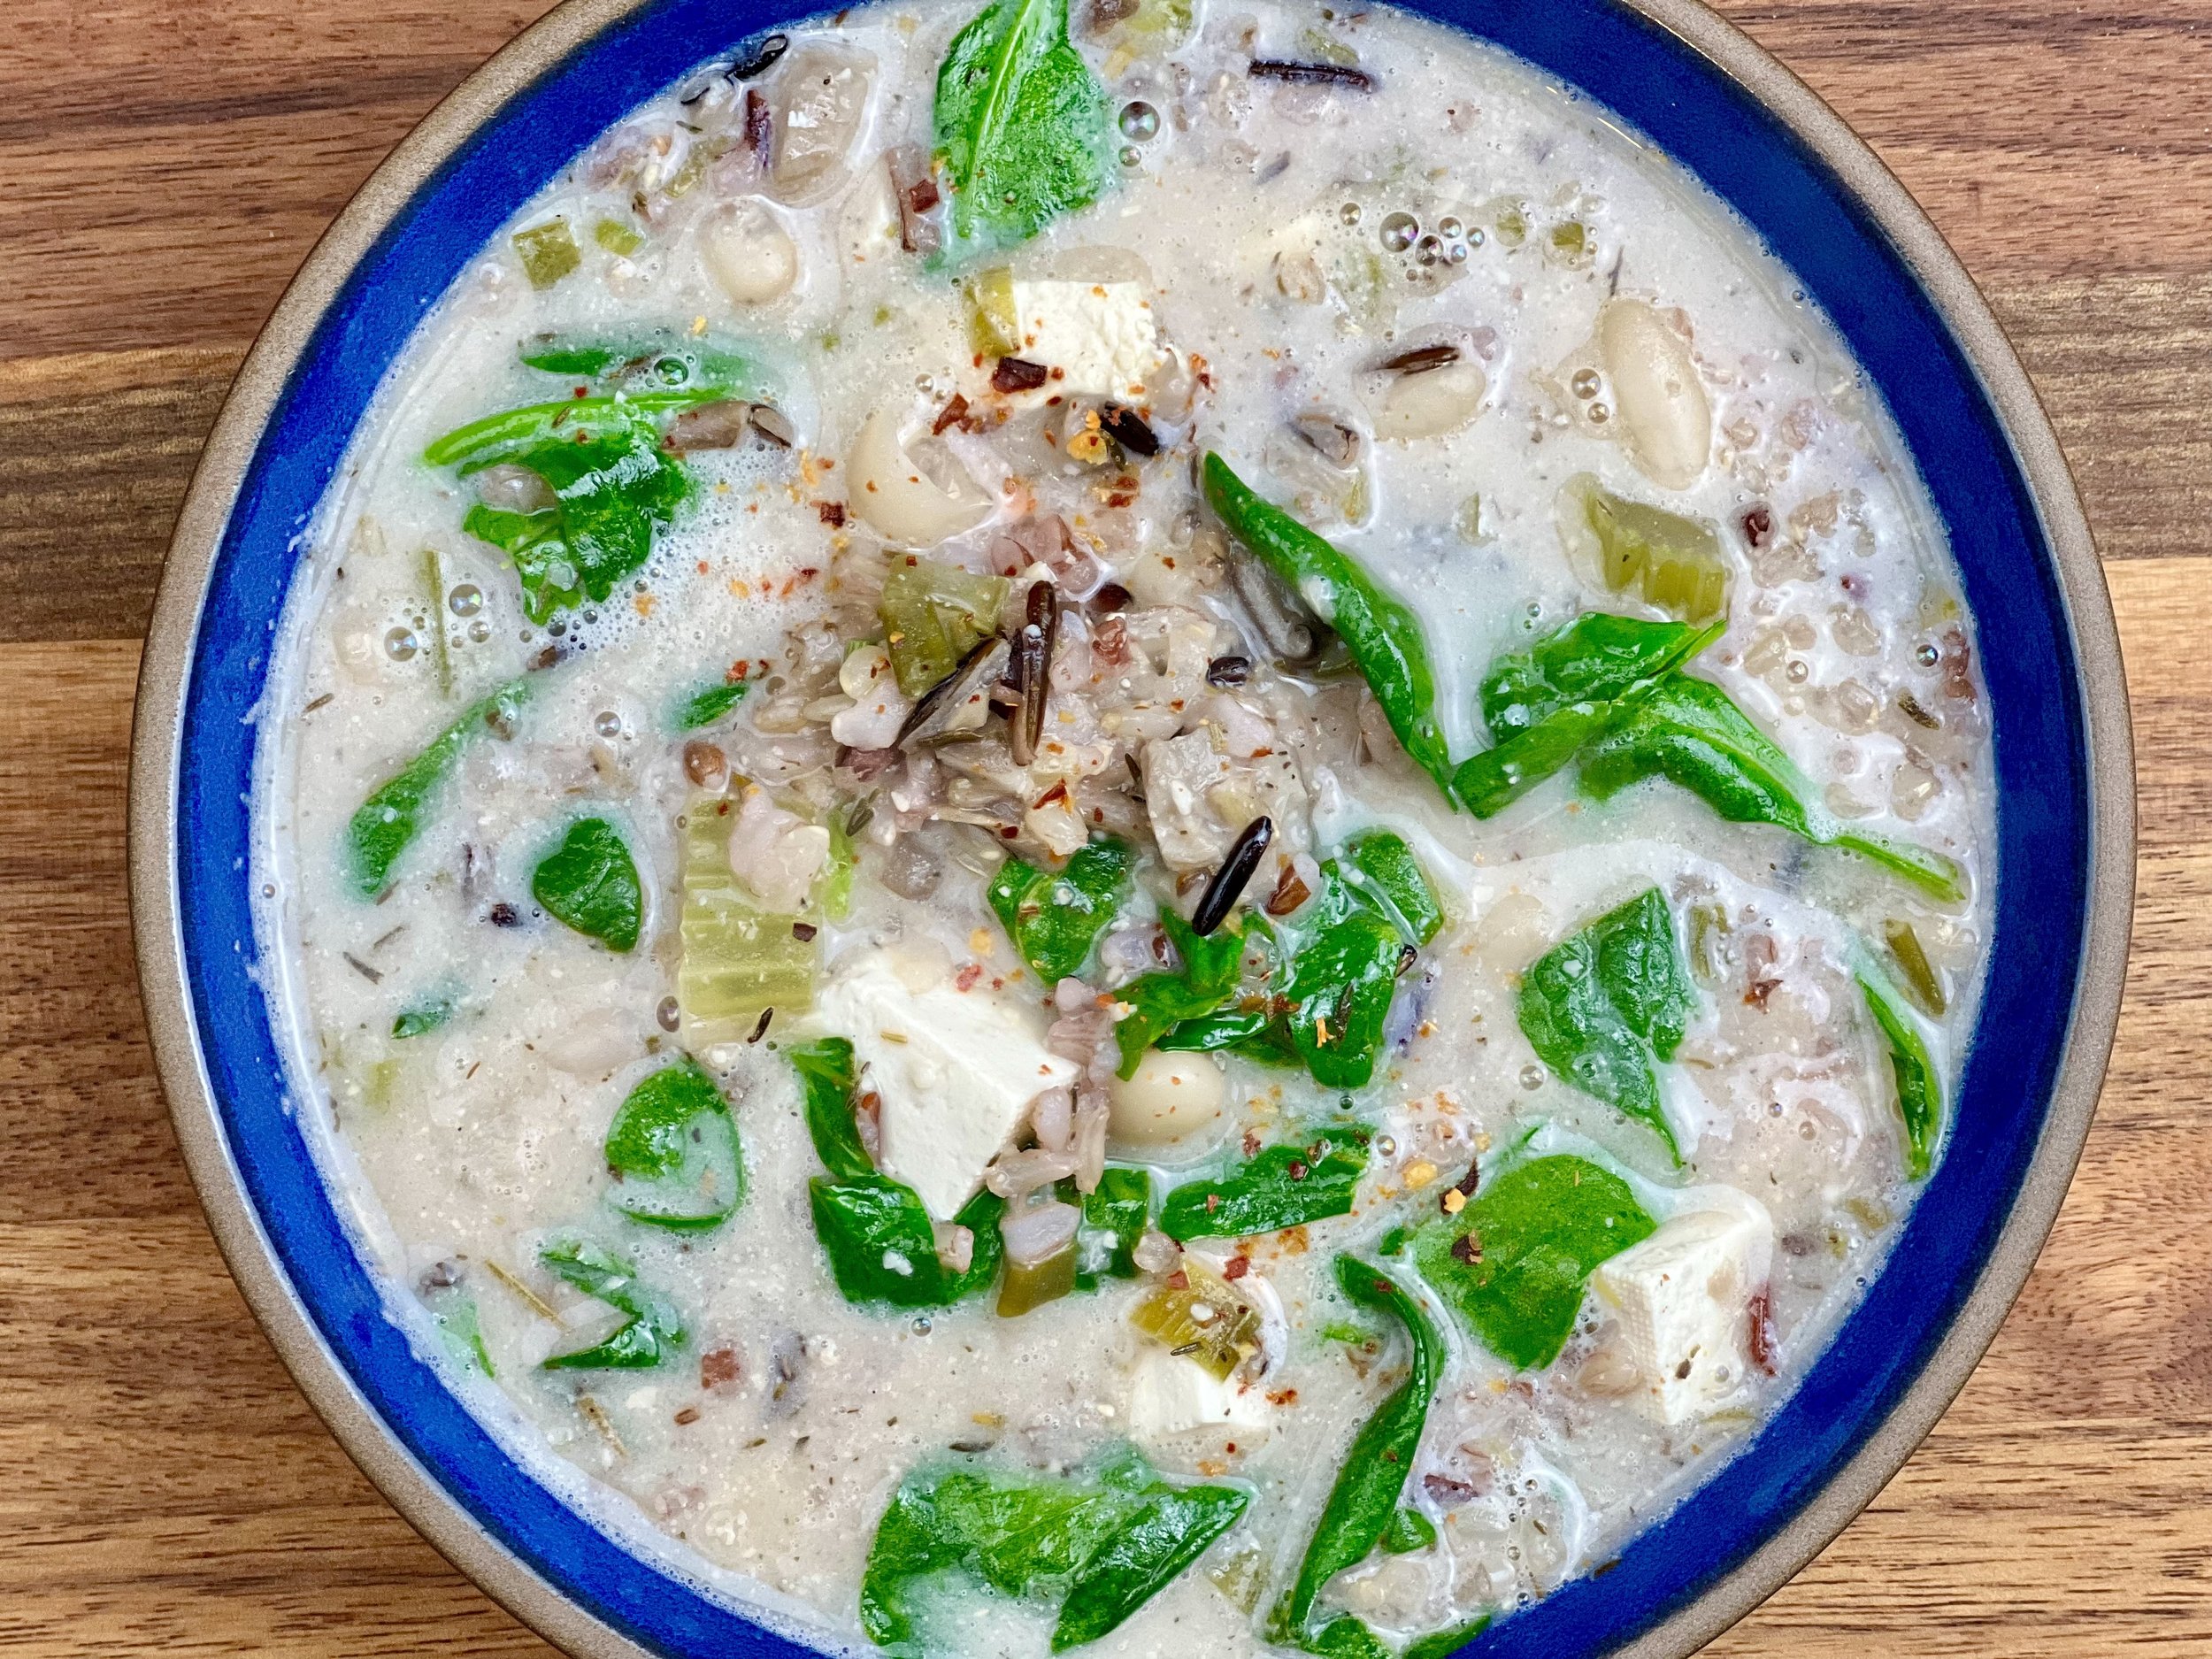
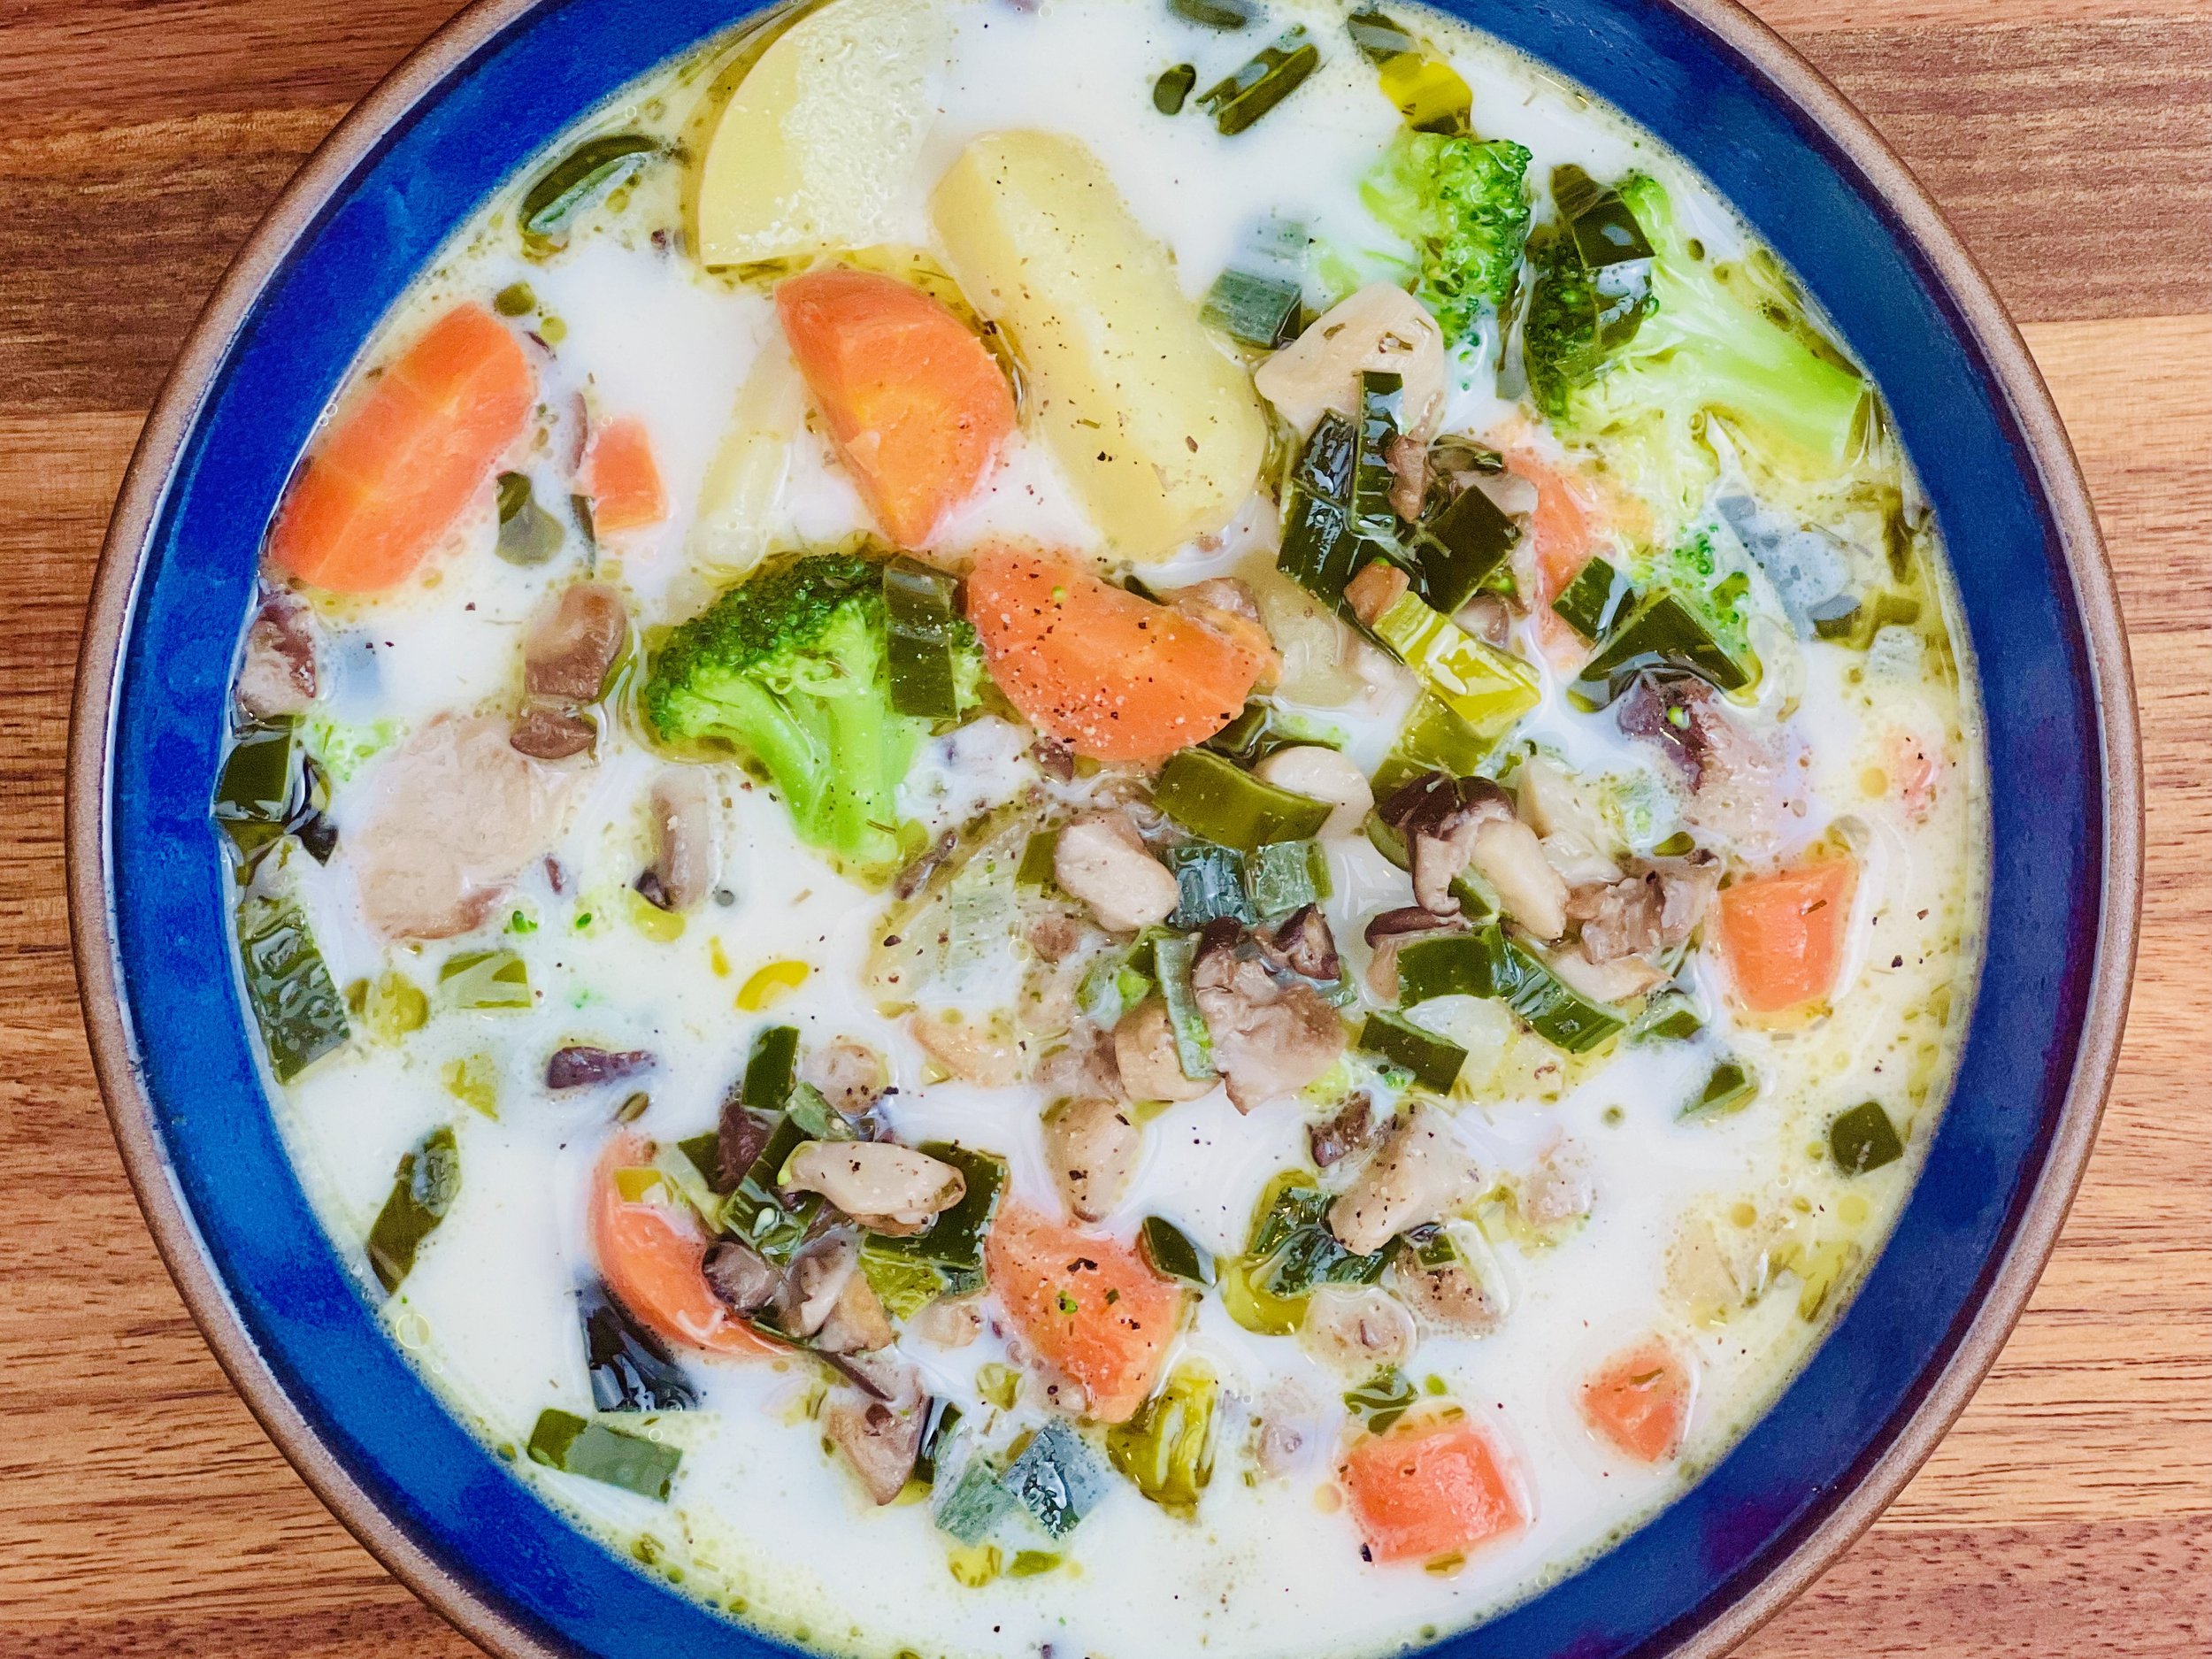
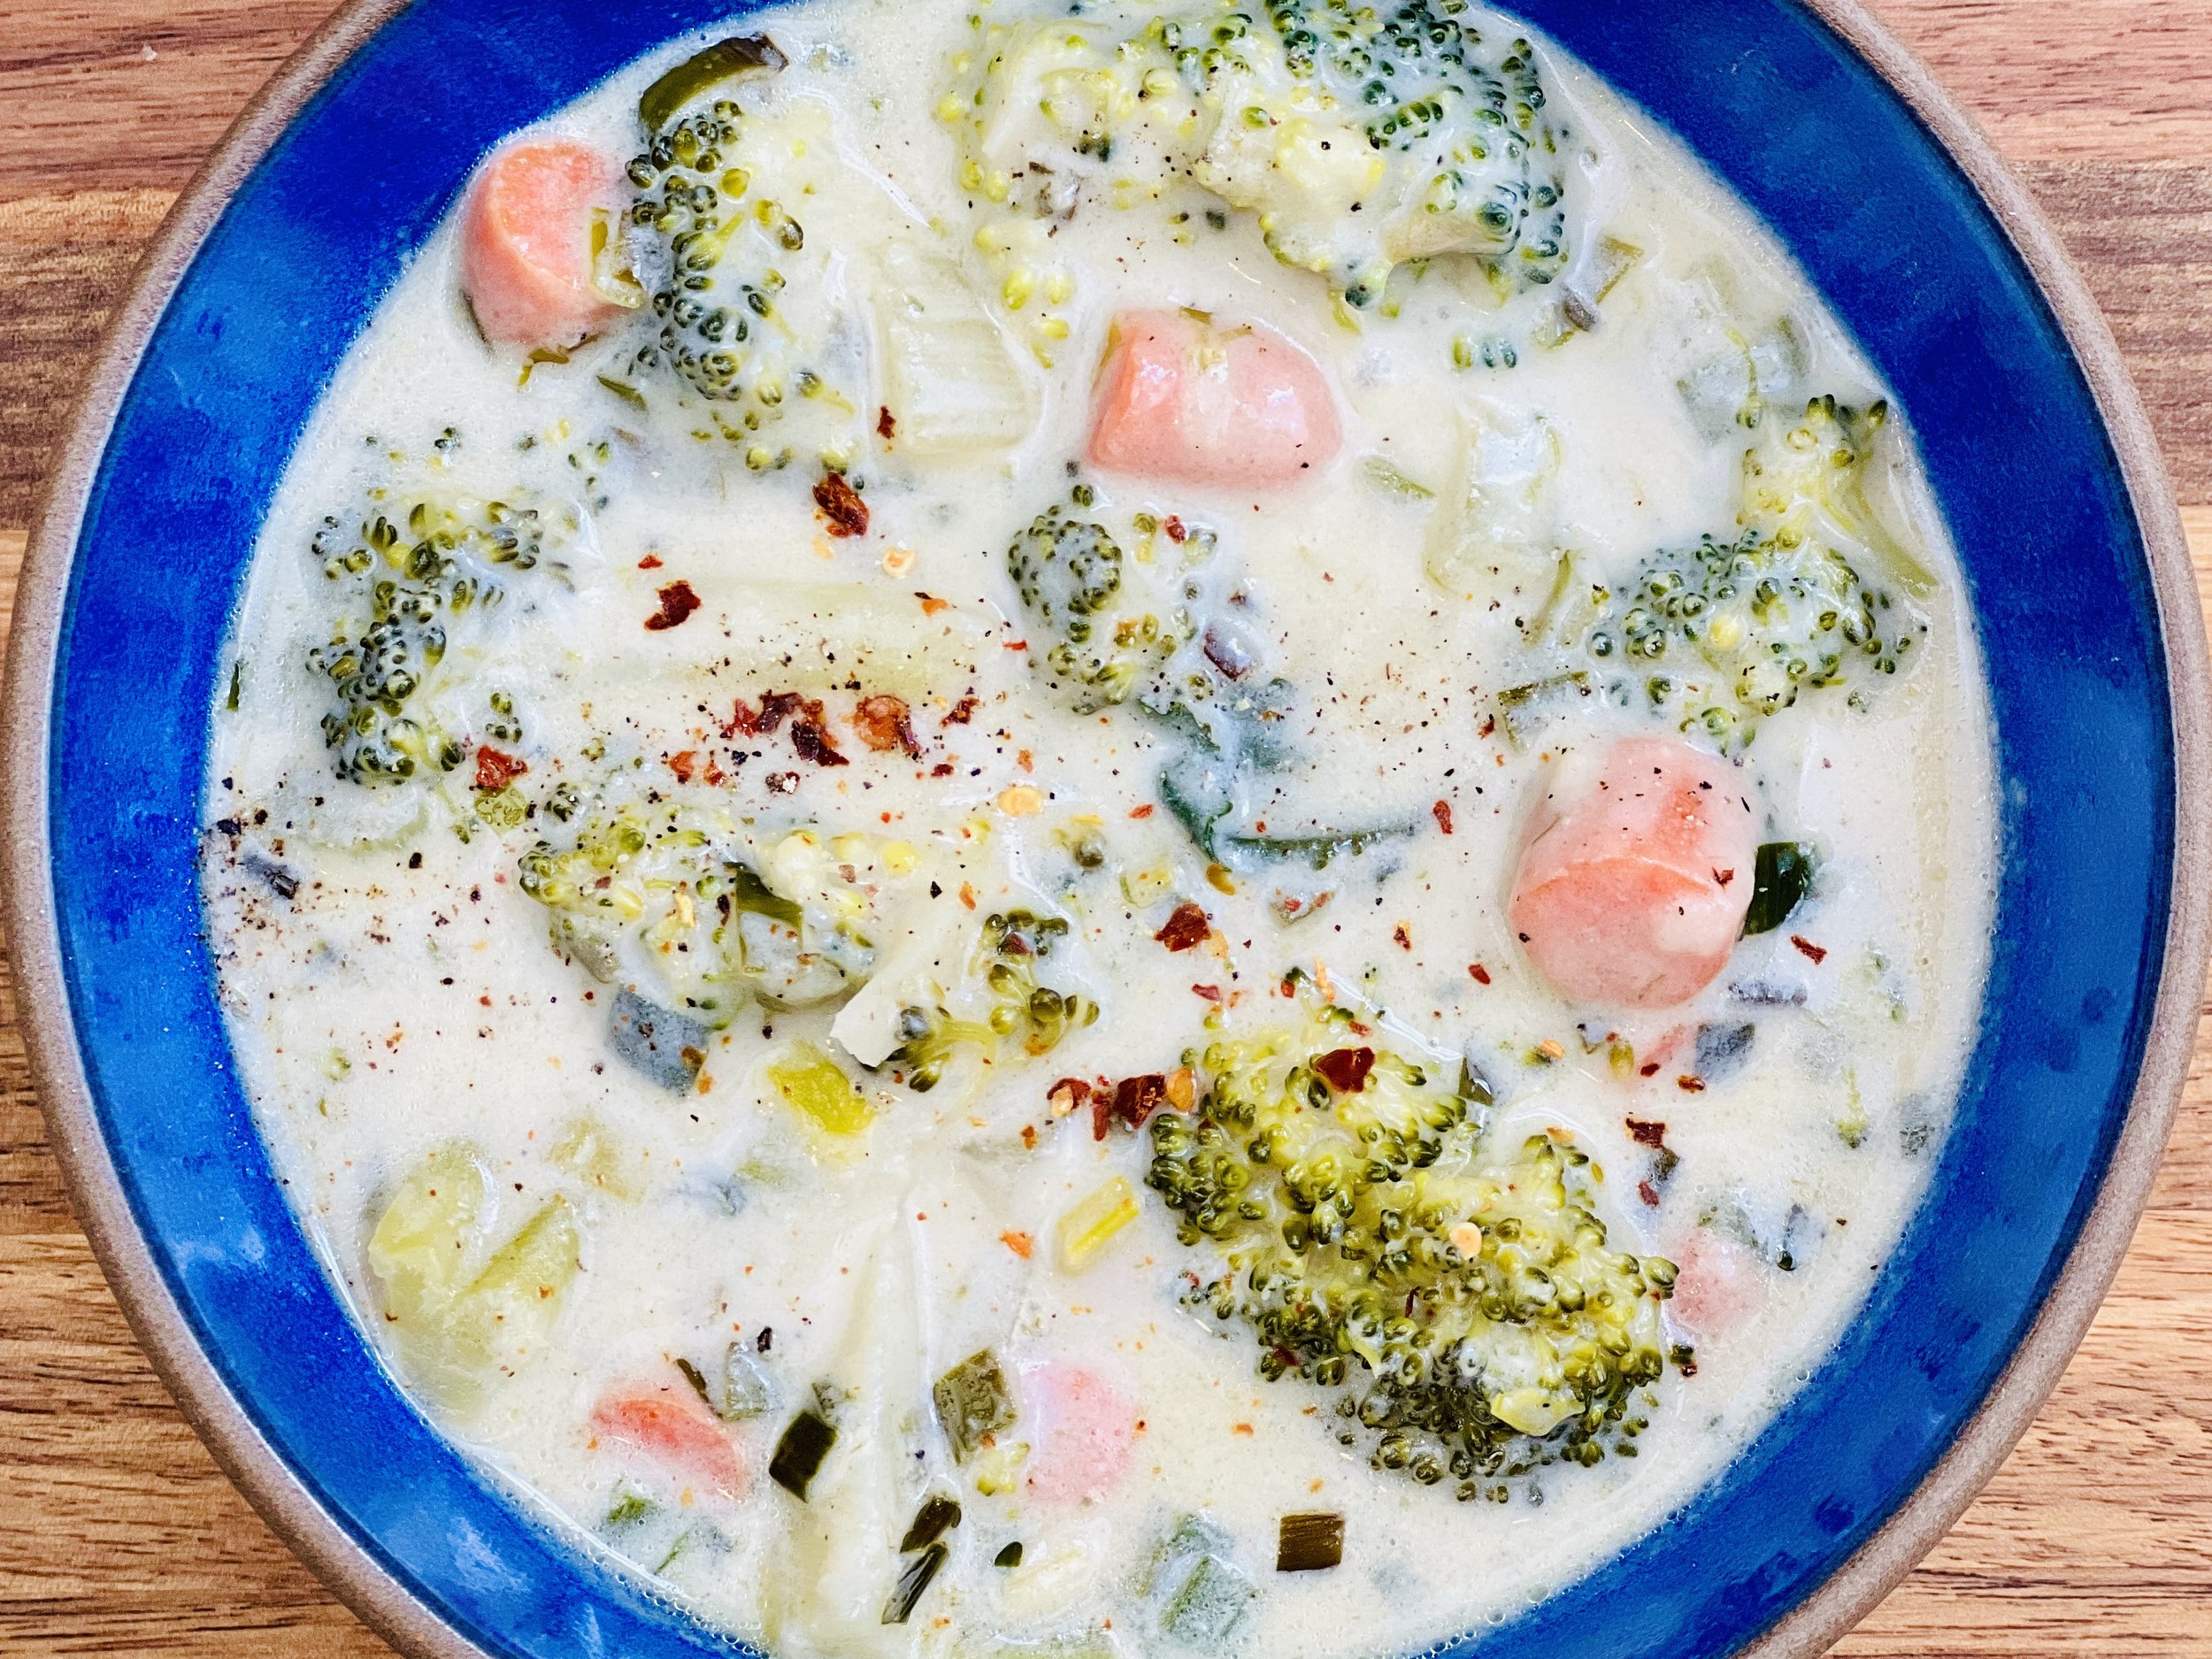
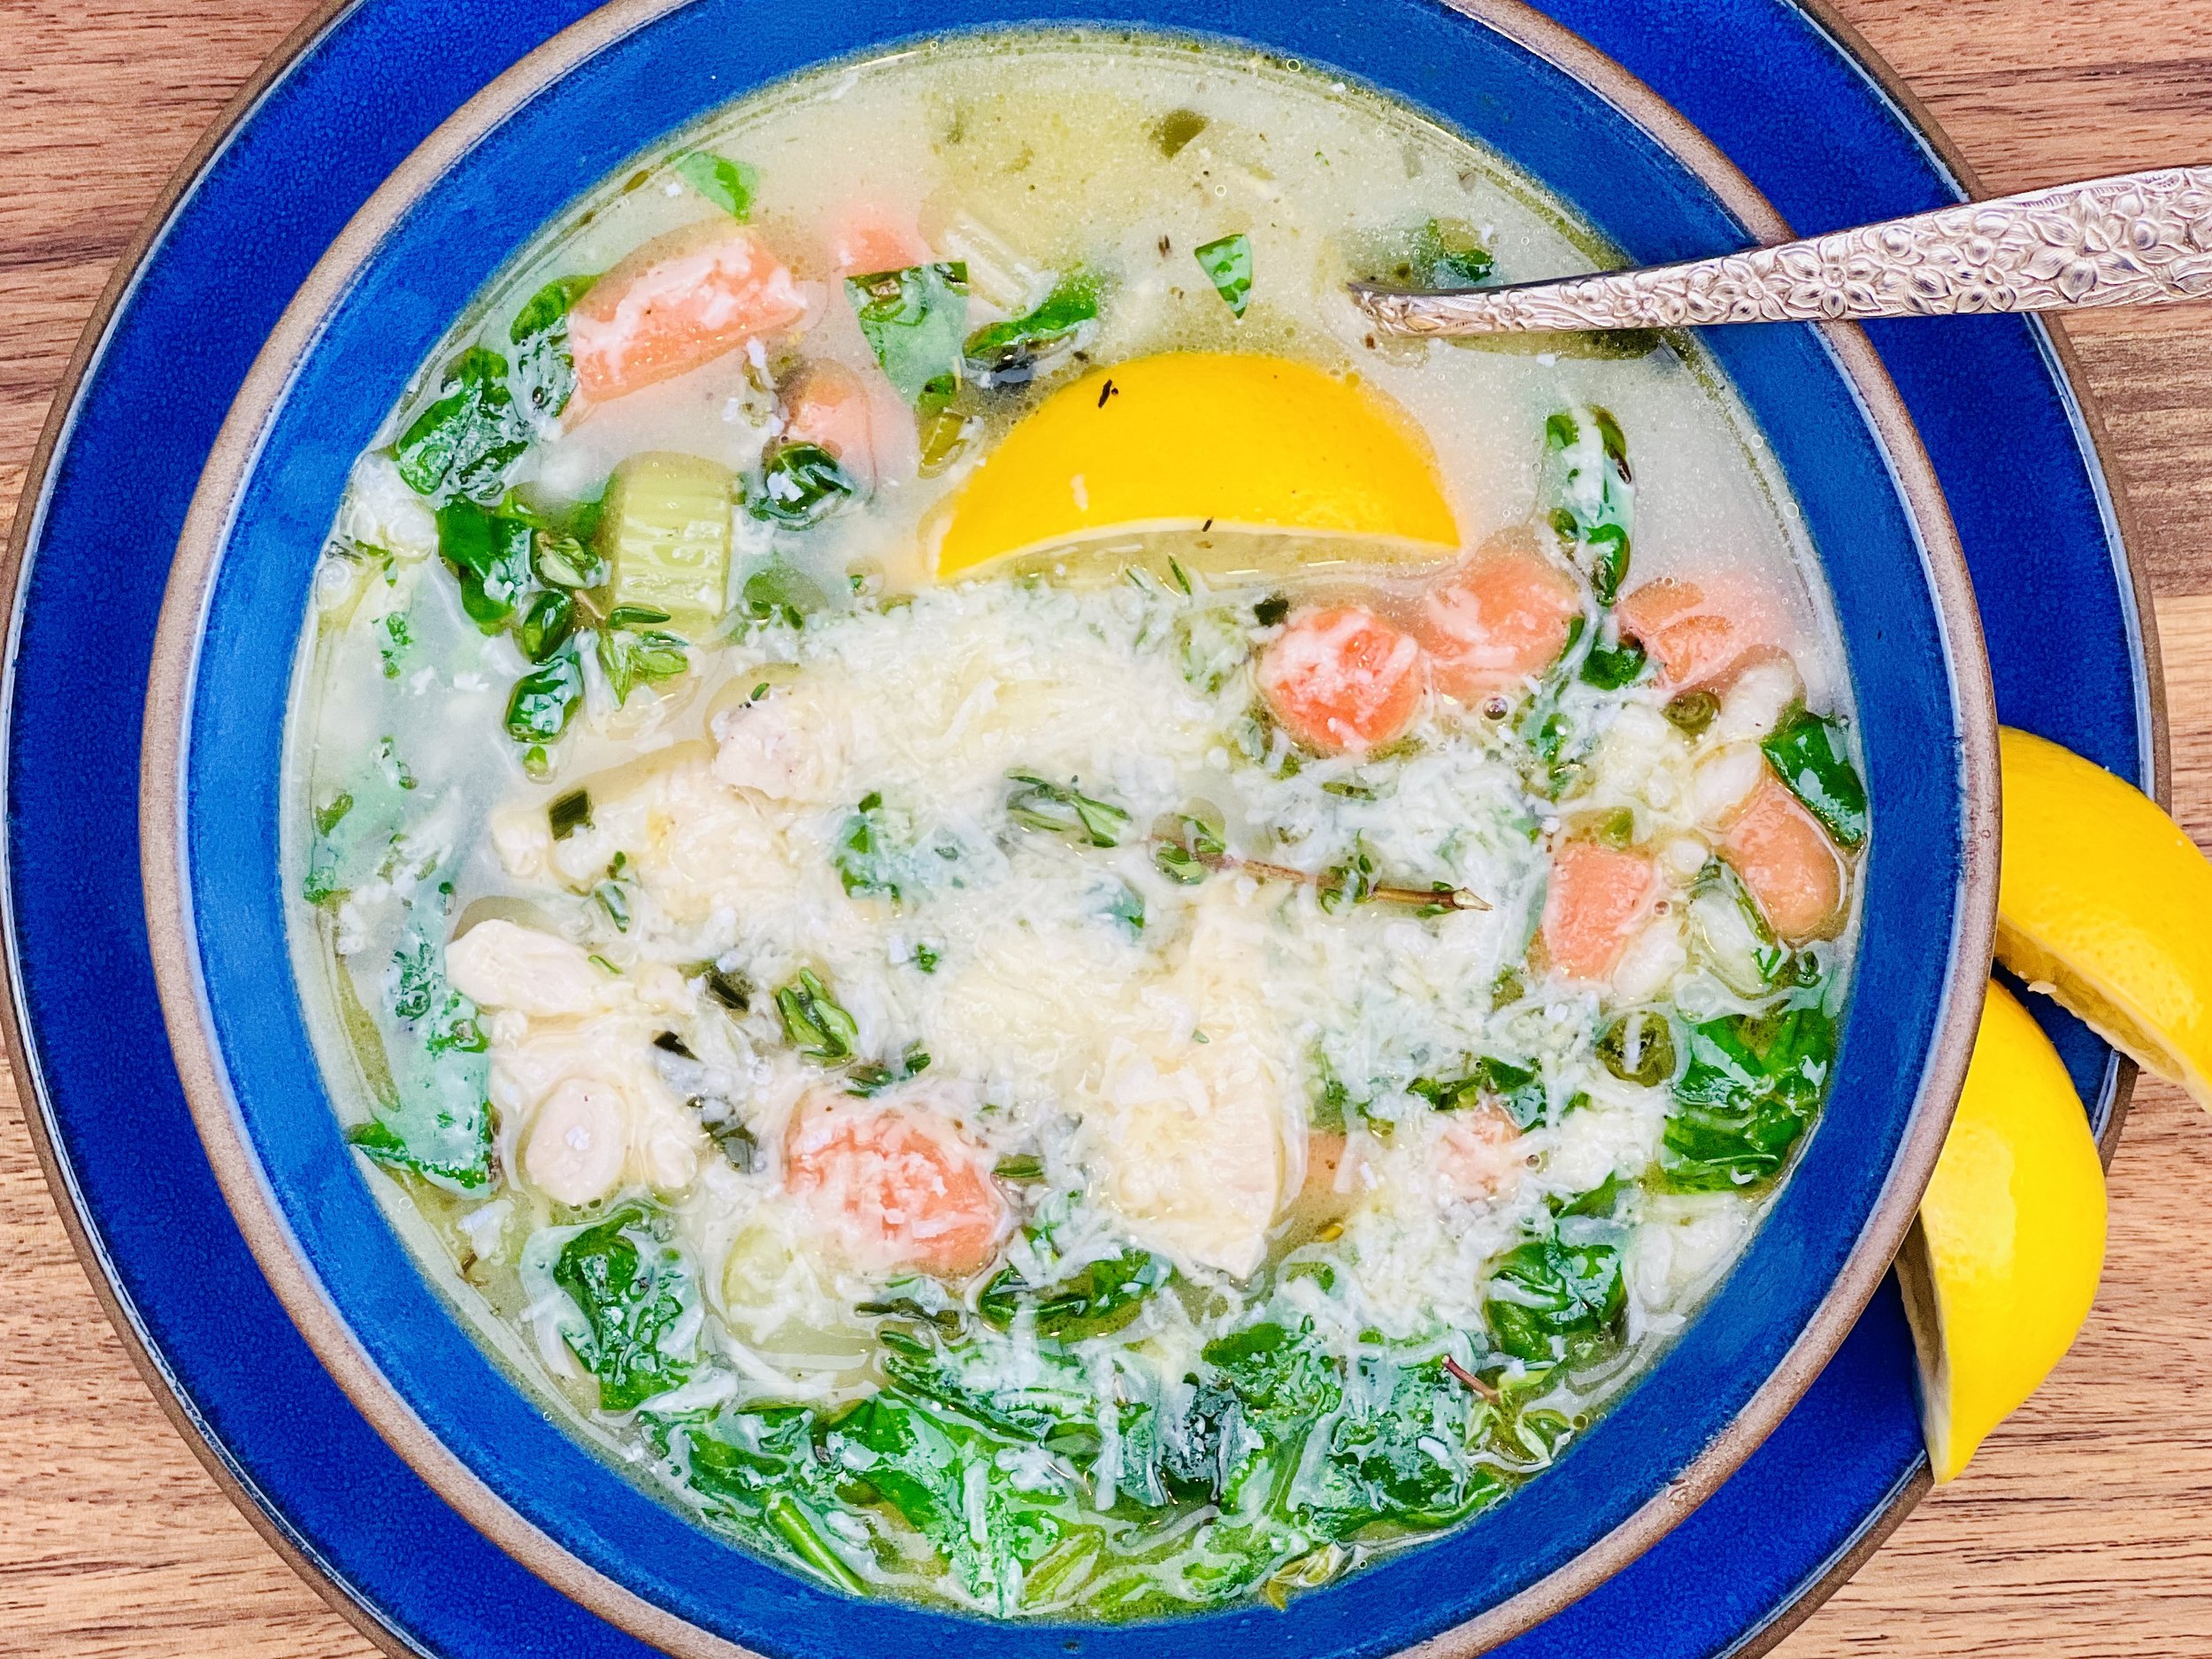
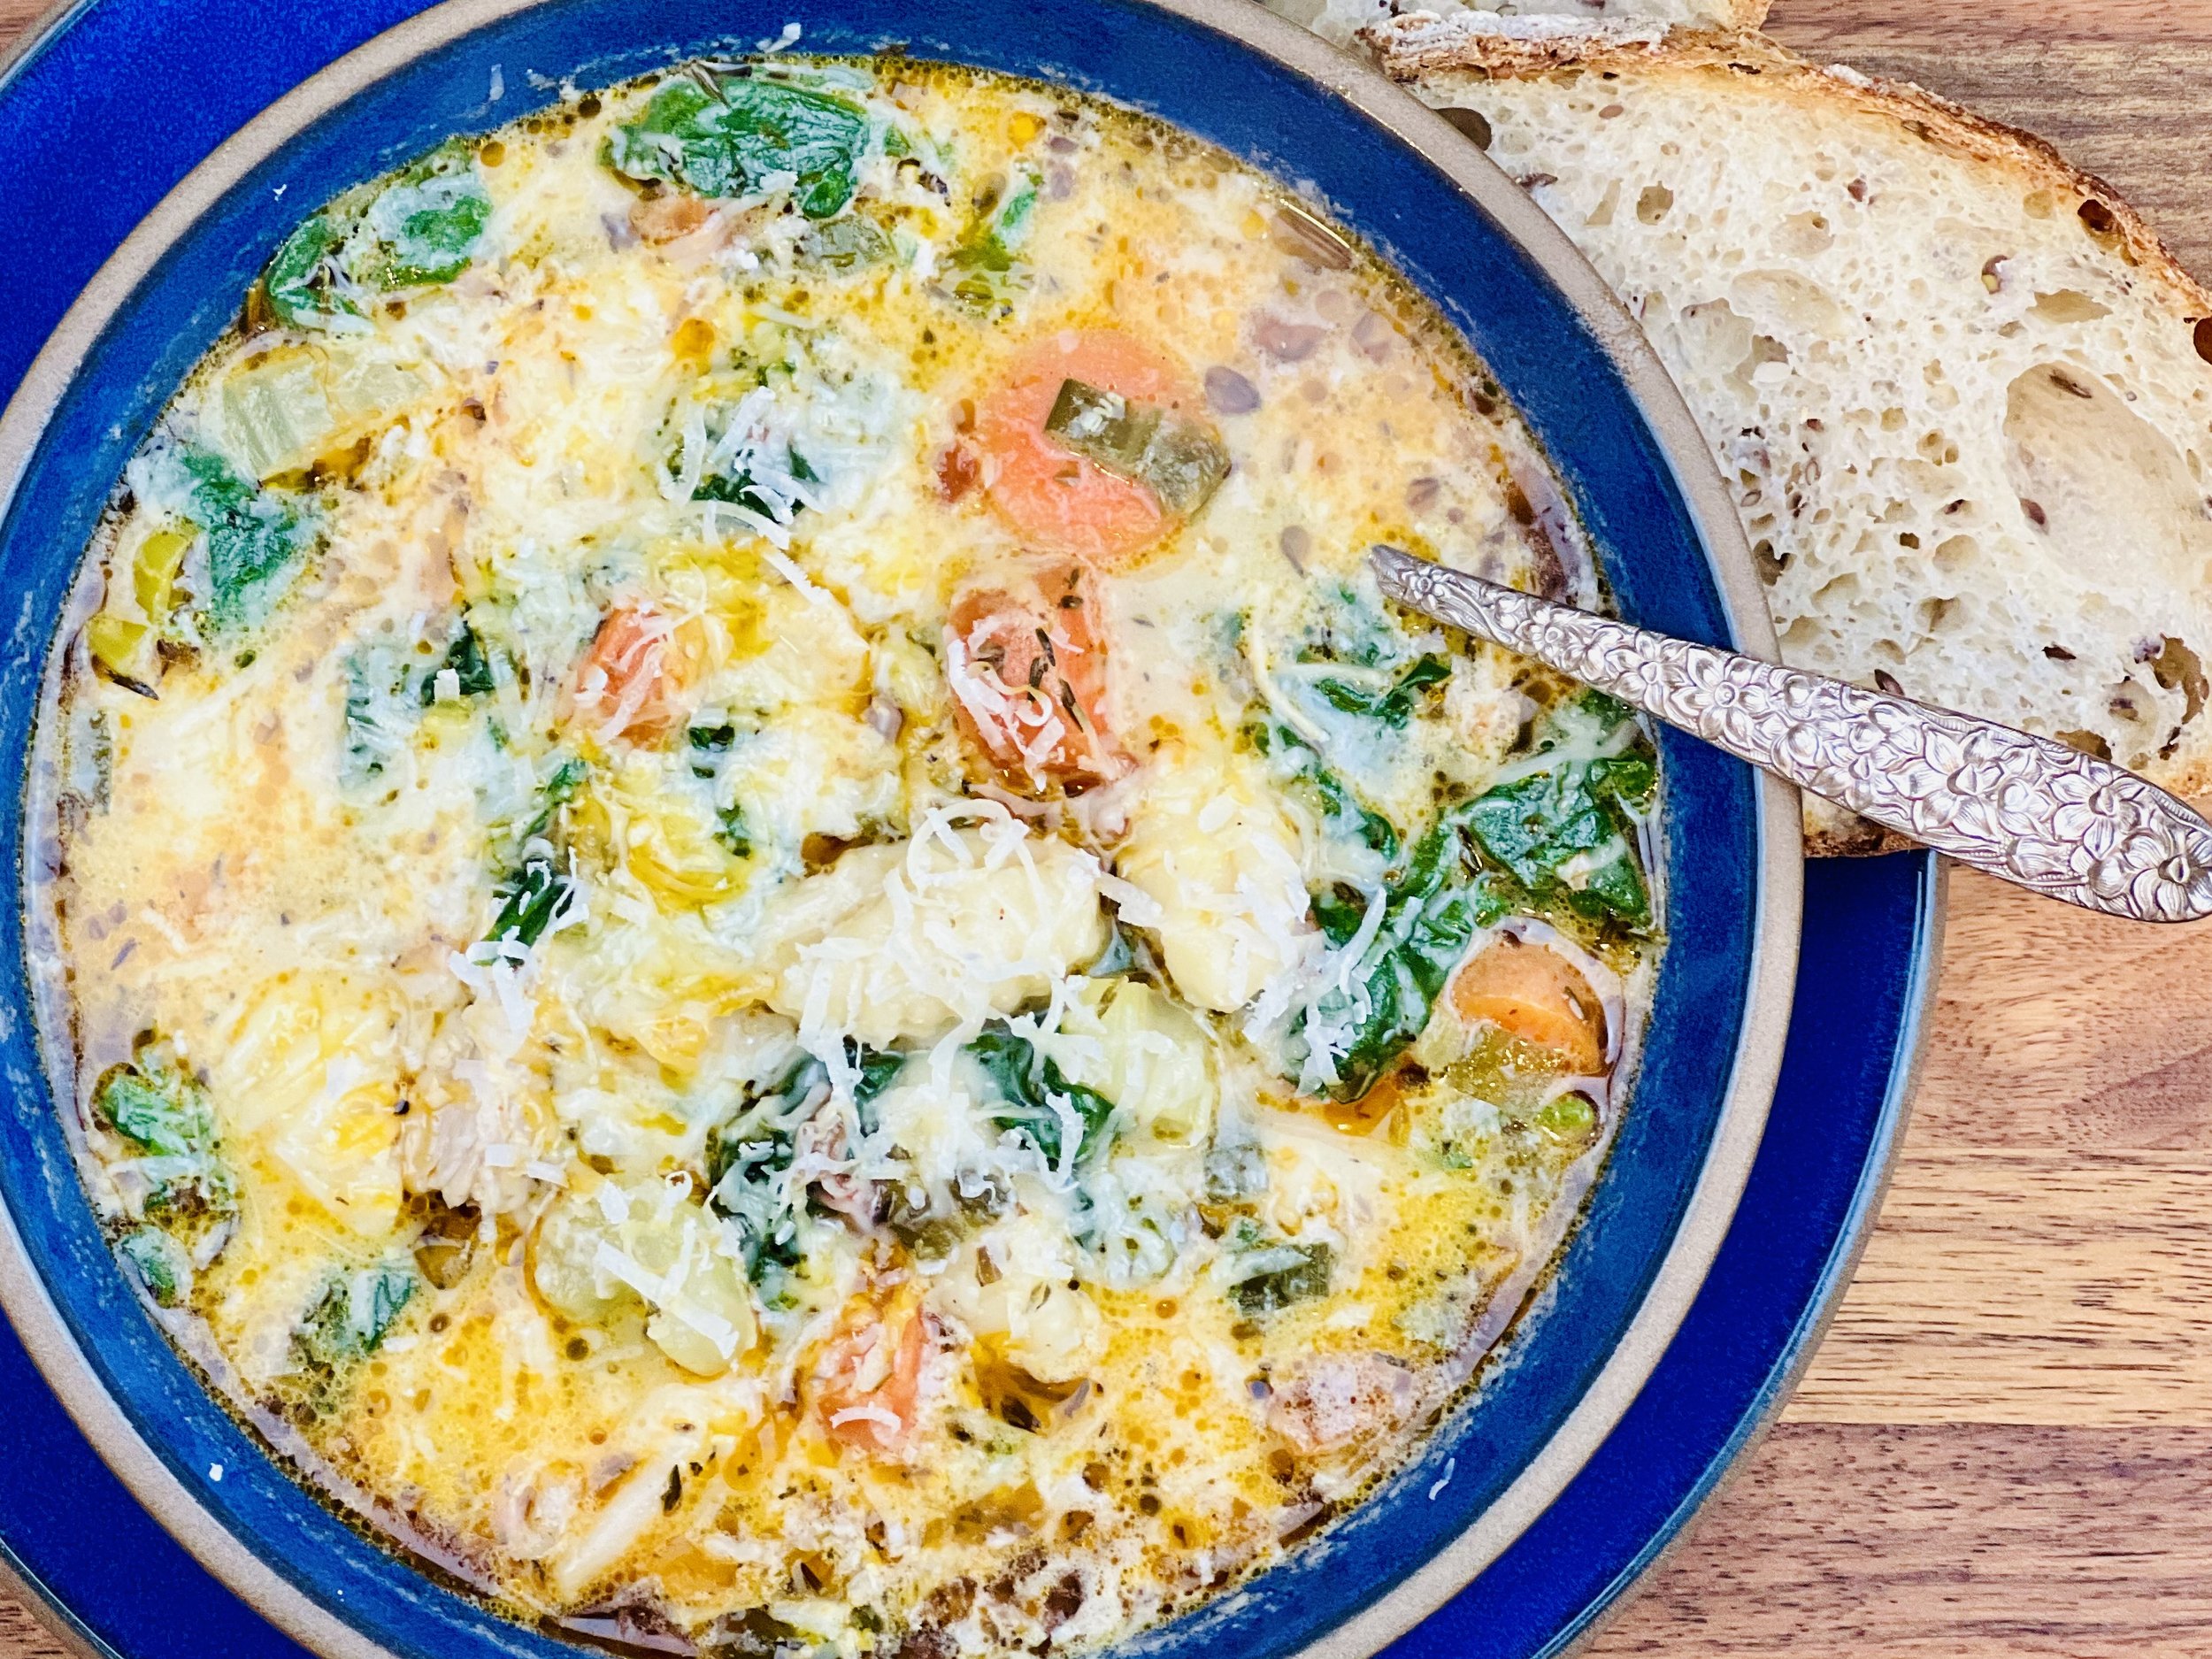
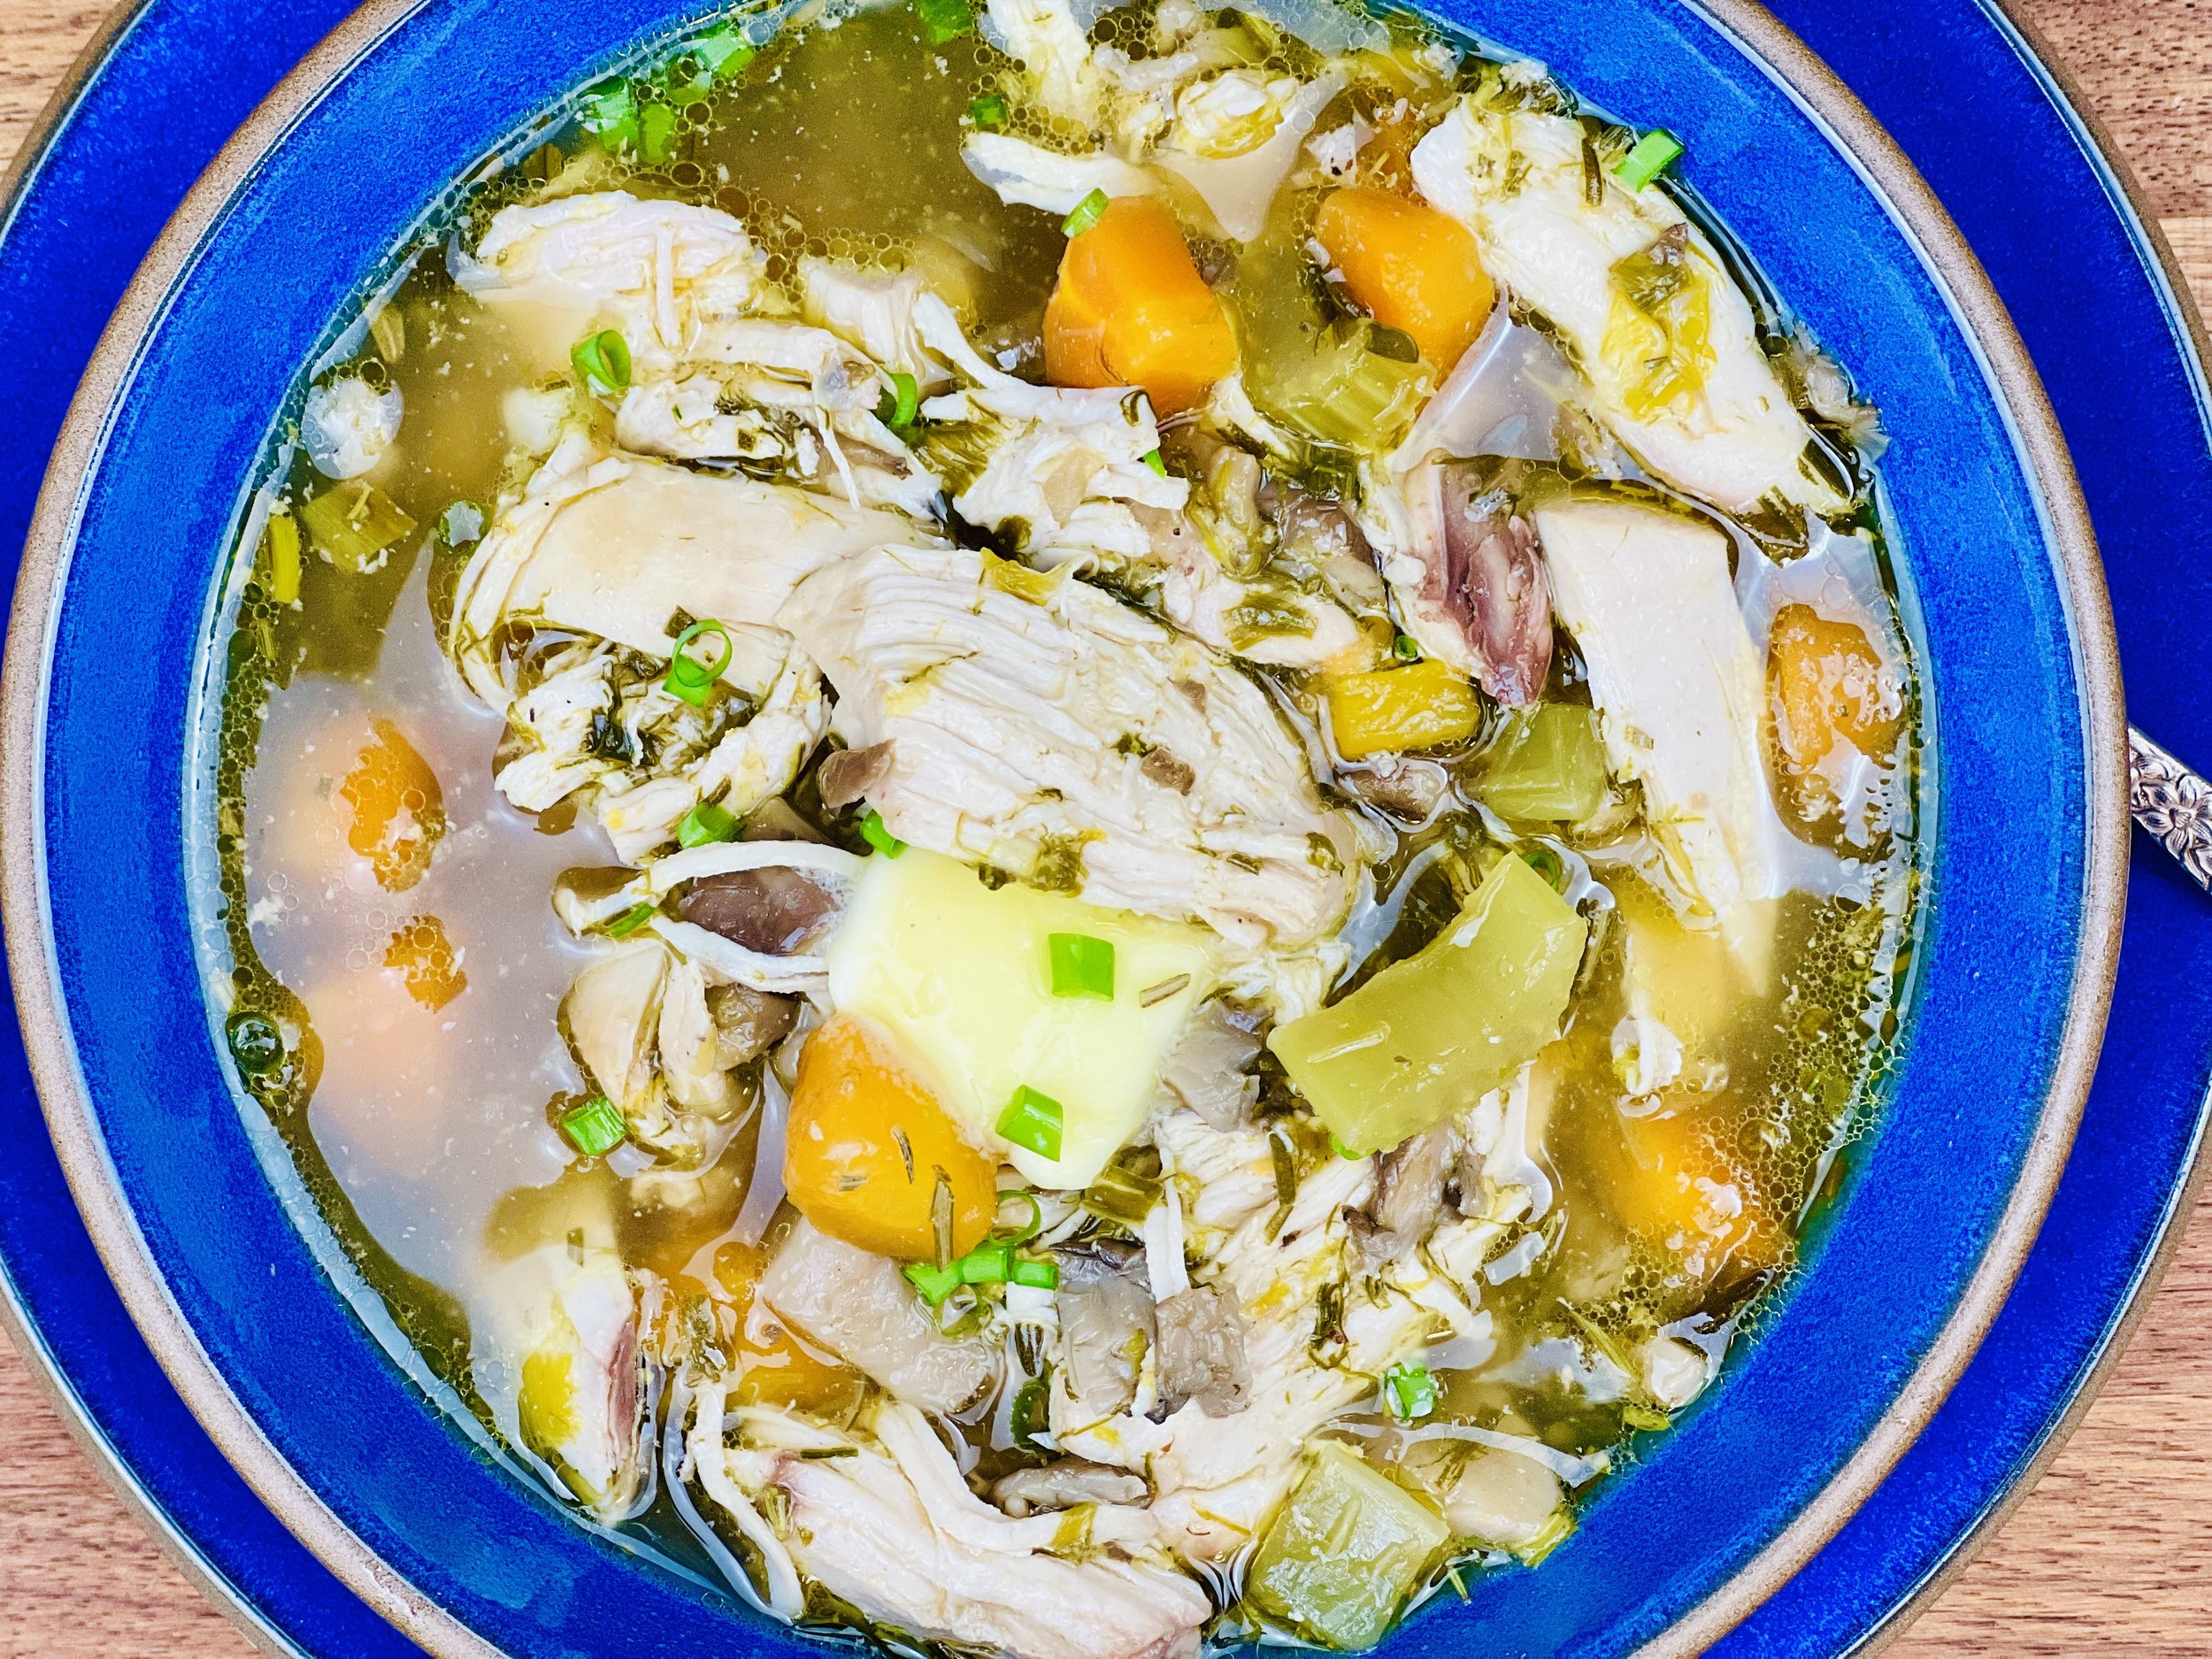
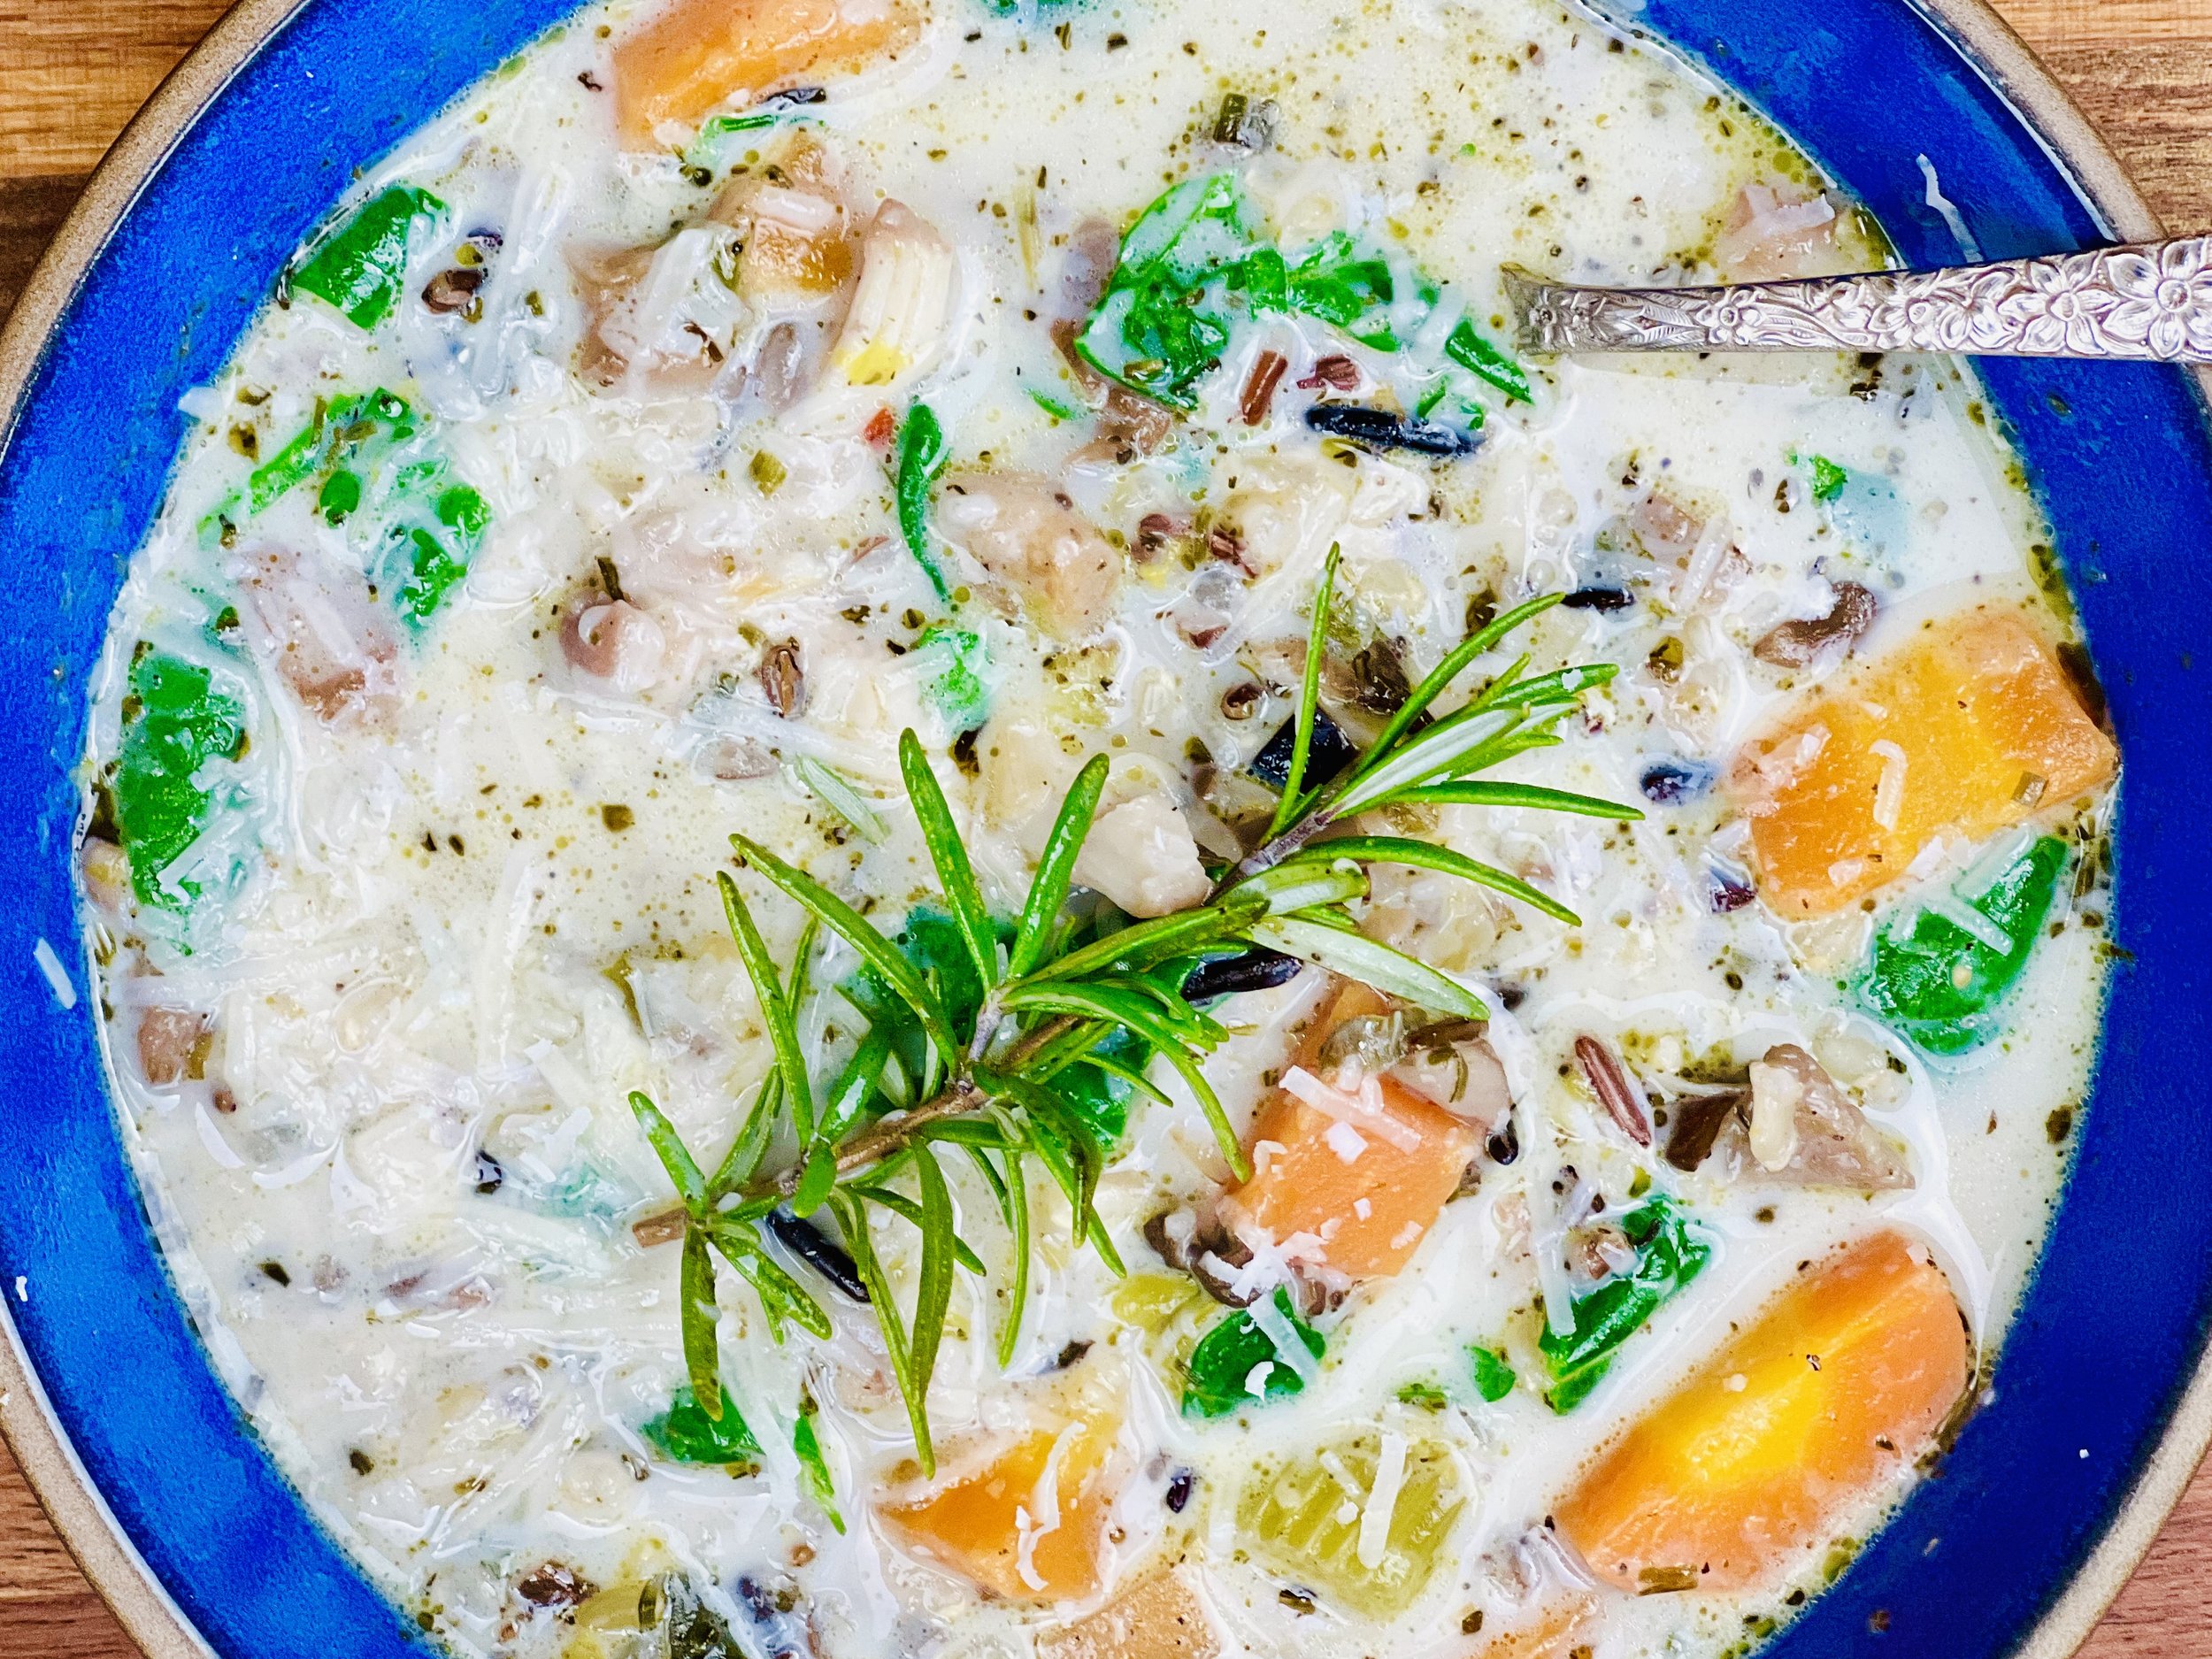
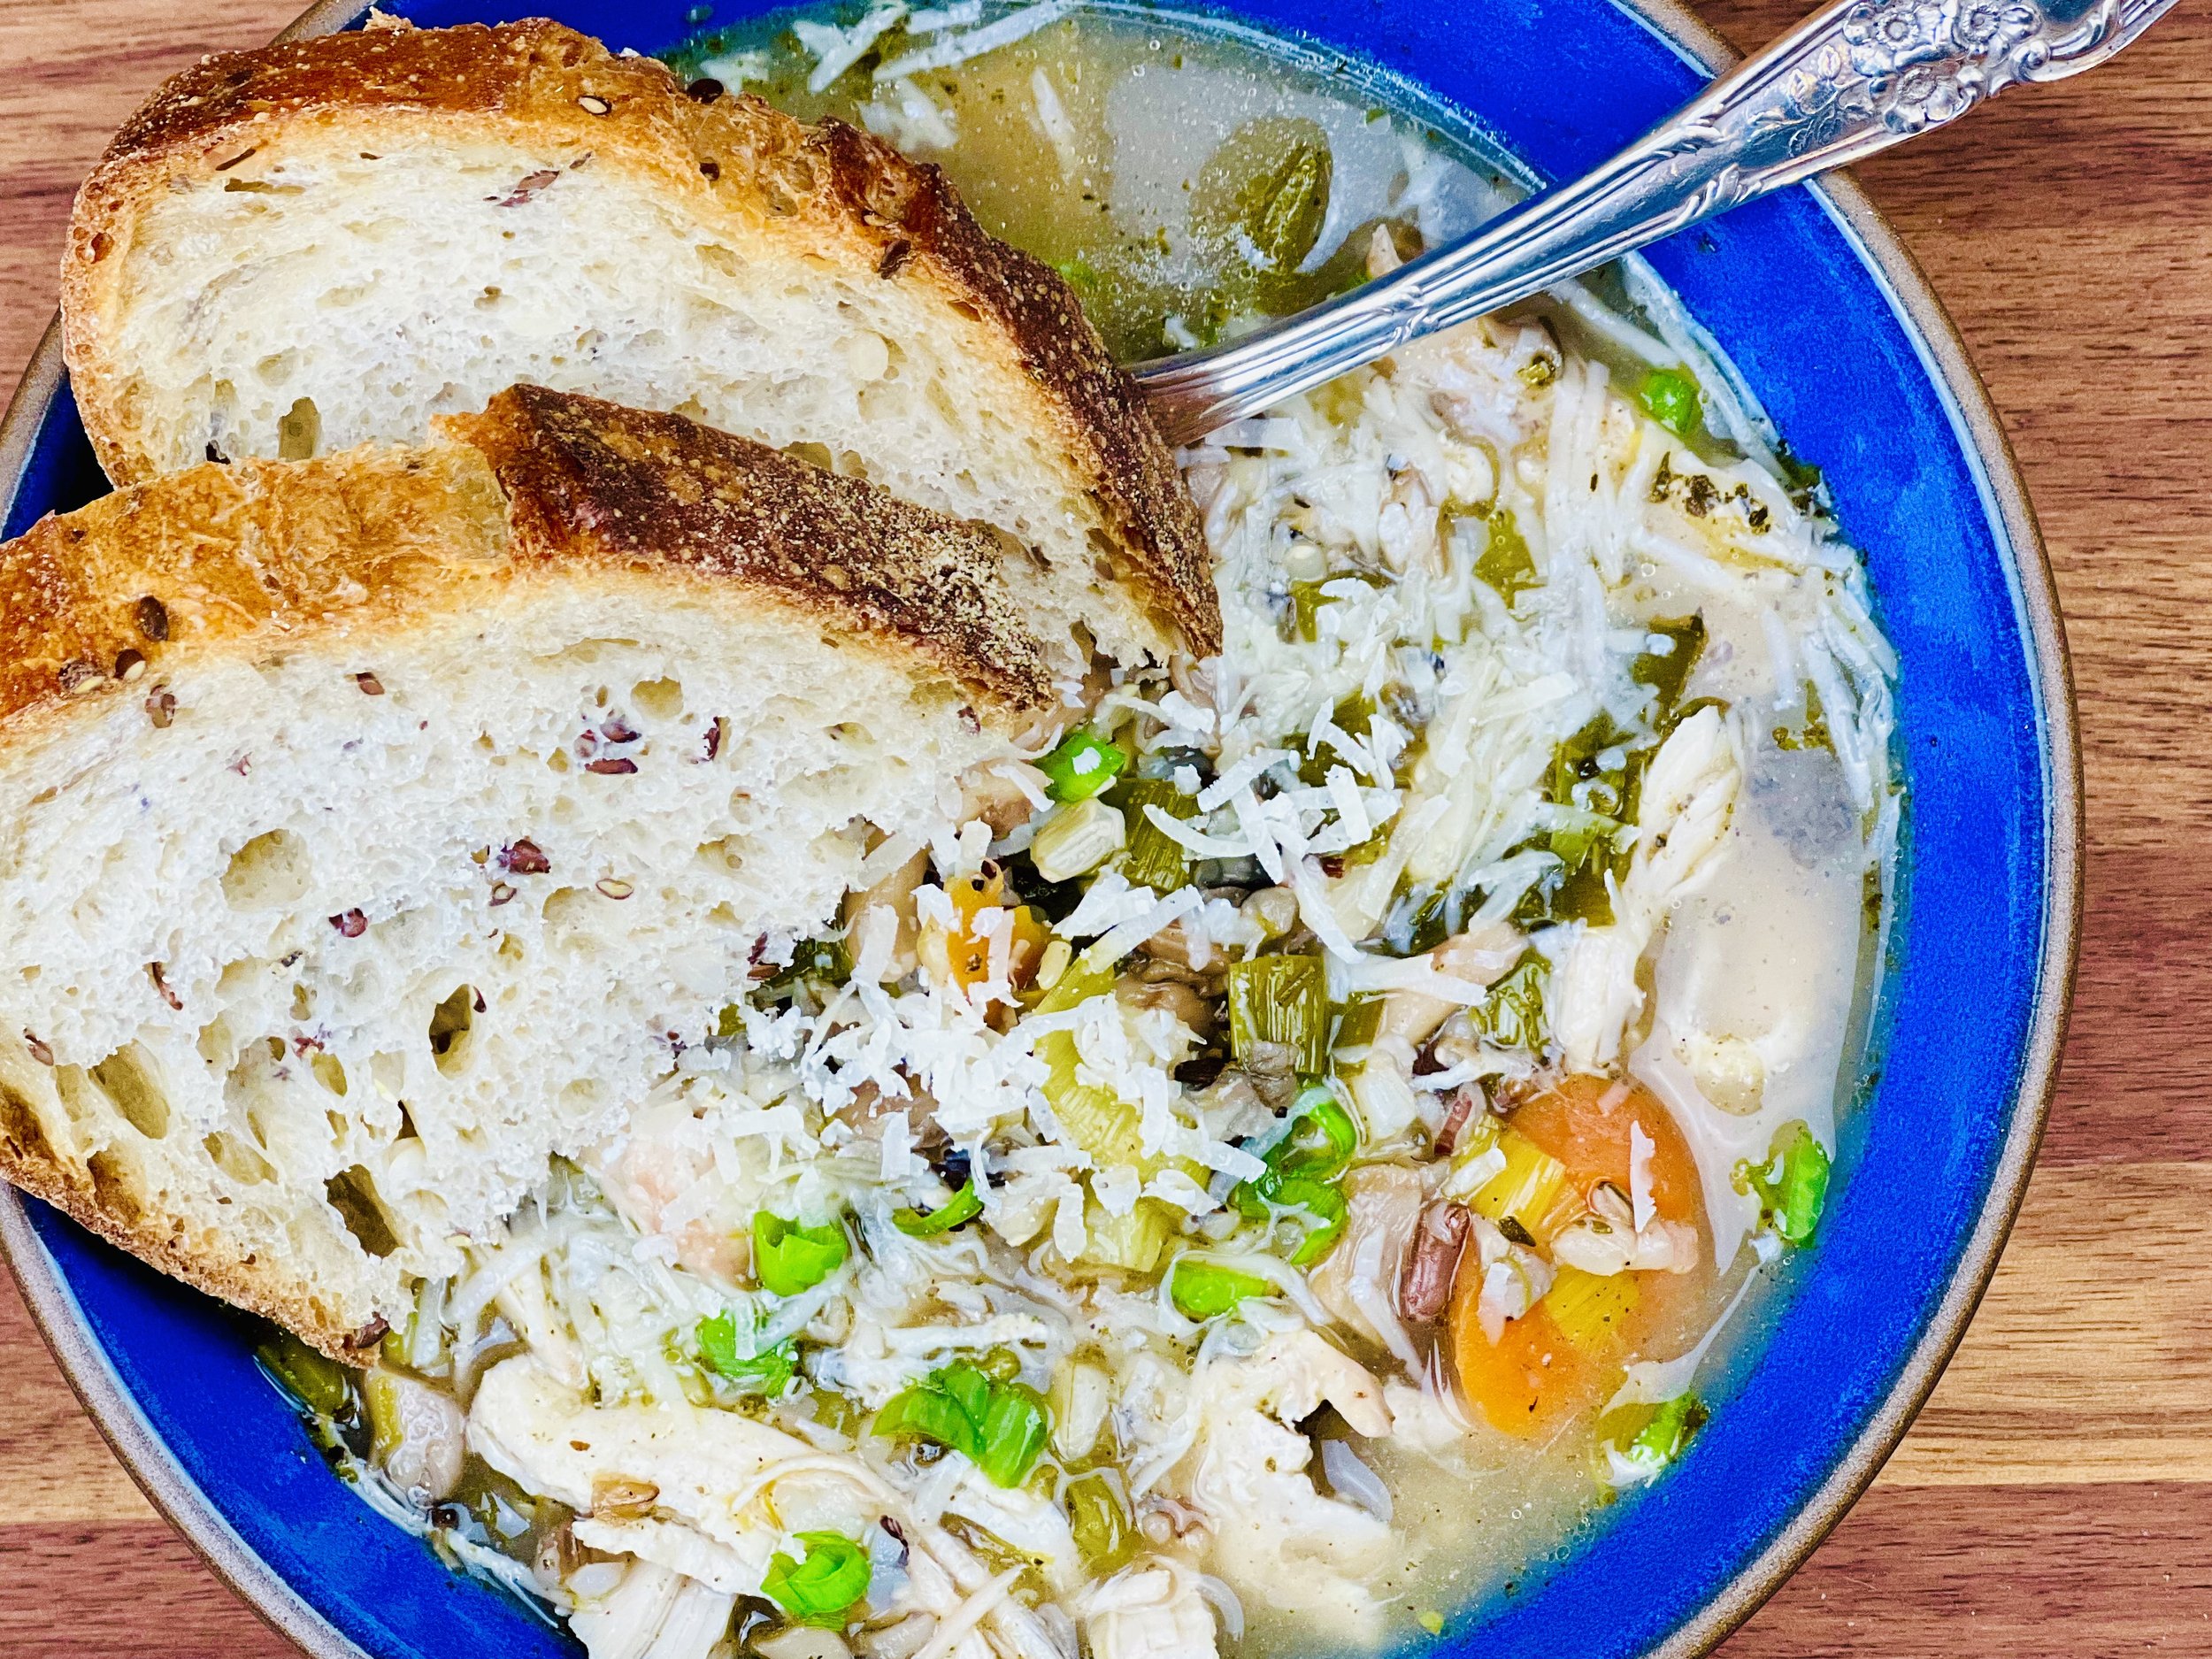
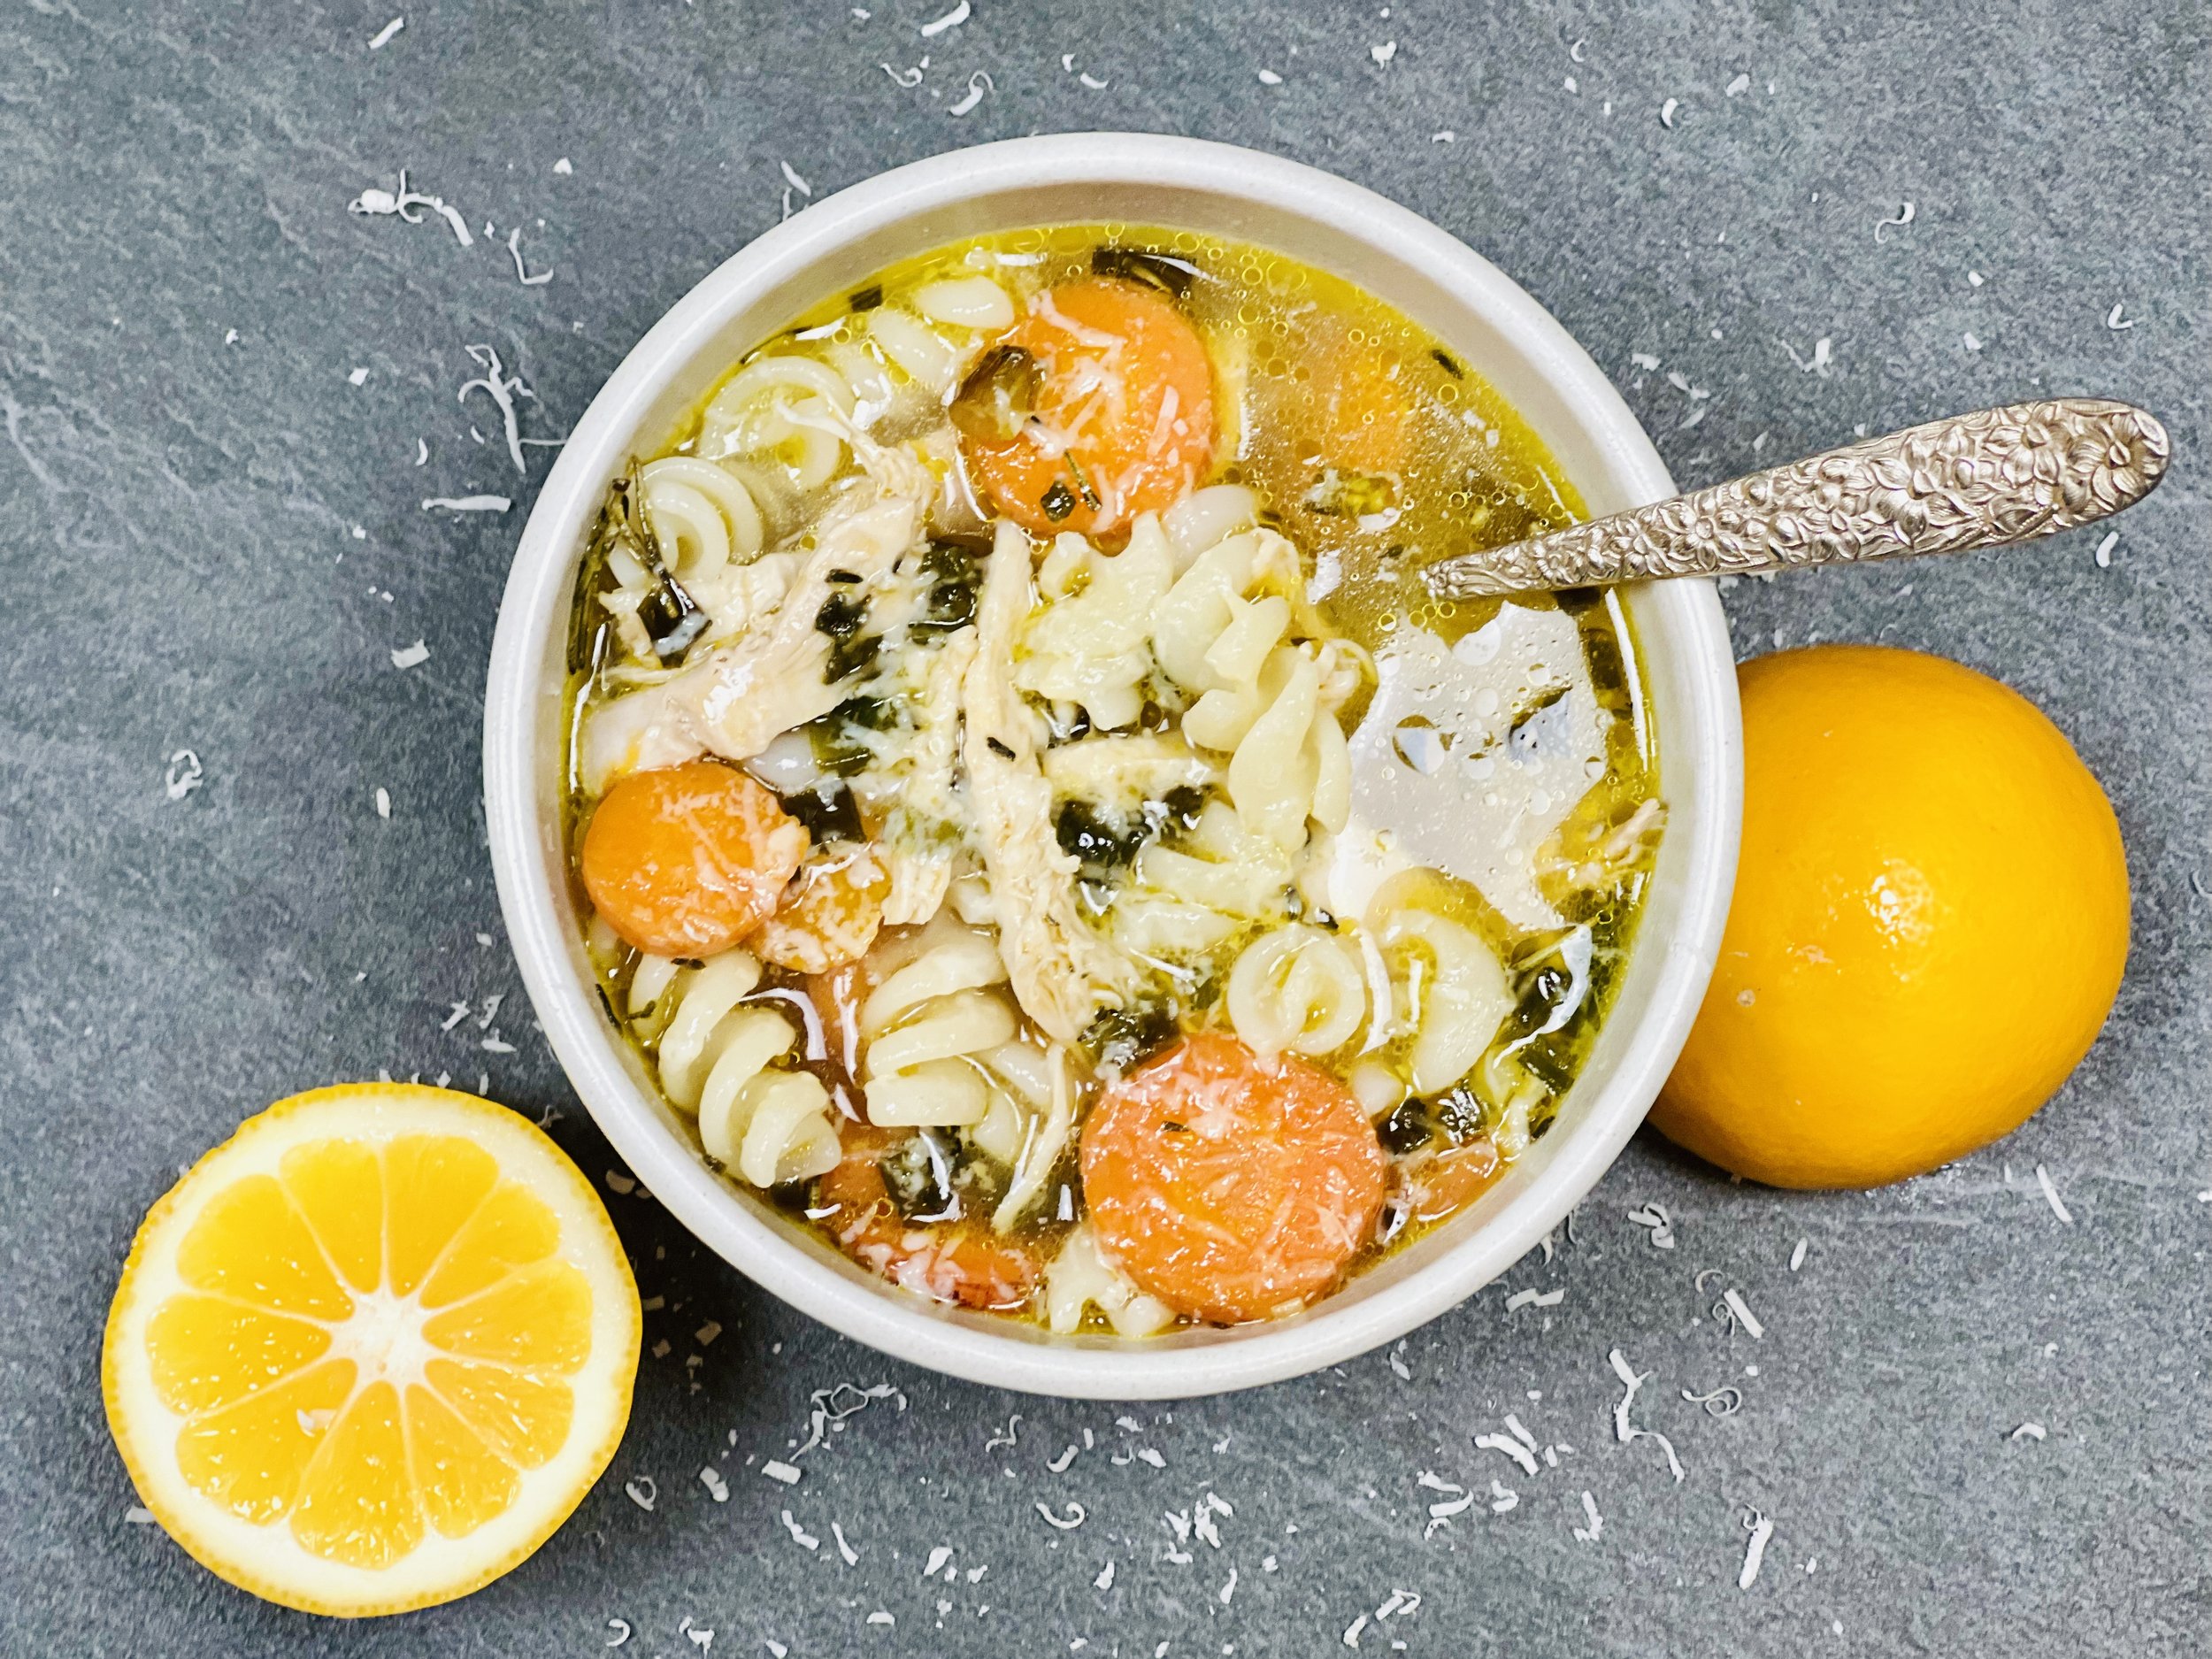
Creamy Chicken, Vegetable, and Wild Rice Soup (Low FODMAP)
15 Minutes prep • 55 Minutes cook • Low FODMAP • Gluten-free • Lactose-free • Serves 4-6
15 Minutes prep • 55 Minutes cook • Low FODMAP • Gluten-free • Lactose-free • Serves 4-6 • Ok to make ahead: Steps 1 - 6
If you’re looking for a delicious, hearty chicken soup that is packed full of vegetables, you’ve found it with this recipe. Carrots, mushrooms, sage, and thyme blend together with the chicken and the rice to make for an extremely delicious and satisfying meal. Cooked all in one pot, this soup is easy to make, easy to clean up, and easy to love! It’s even better on day 2 so make up a big batch so you can enjoy it more than once.
Ingredients
2 tablespoons garlic-infused olive oil
2 teaspoons dried thyme
1 teaspoon dried sage
1 bunch green onions (green part only), chopped
1 leek (green part only), chopped
1 cup wild rice blend (omit for lower carb version)
4 medium-size carrots, chopped (omit for lower carb version)
2 stalks of celery, with leaves if possible, chopped
2 cups oyster mushrooms, chopped
1/2 teaspoon crushed red pepper flakes (or to taste) - here’s a nifty red pepper flake grinder
4 cups chicken broth (I use Whole Foods Organic 365 chicken broth)
1 1/2 pounds boneless, skinless chicken thighs (or breasts if you prefer)
1/2 teaspoon Kosher salt and 1/4 teaspoon black pepper
2 cups fresh baby spinach, (long stems removed) roughly chopped
1 cup lactose-free whole milk (use coconut milk for lower carb/dairy-free option)
1/2 cup grated parmesan cheese (plus more for serving) - Omit for dairy free option
4 small sprigs fresh rosemary, for serving (optional)
Directions
(1) Prepare the chicken: This step is optional but results in a more flavorful and tender chicken. Remove chicken from the package, and put it in one layer on a rimmed plate or baking dish. Season both sides of each piece lightly with Kosher salt (about 1/4 - 1/2 teaspoon per side). Cover the dish with plastic wrap and refrigerate until ready to use, ideally about 4 hours before cooking or overnight.
(2) Prepare: Chop the leeks, the green onion greens, the carrots, the celery, and the mushrooms.
(3) Cook the vegetables: Heat the olive oil in a large soup pot or Dutch oven over medium-high heat. When the oil shimmers, add the thyme and sage and let it sizzle and bloom in the hot oil. After about 30 seconds, add the green onion and leek greens, carrots, celery, mushrooms, red pepper flakes, and a pinch each of salt and pepper. Cook until the vegetables begin to soften, about 3-5 minutes.
(4) Add the broth: Stir in the chicken broth, chicken, wild rice, bay leaves, and salt and pepper. Bring to a boil over medium-high heat. Once boiling, reduce the heat to low, cover, and cook for 20-30 minutes until the chicken is cooked through.
(5) Shred the chicken: Remove the chicken from the pot and use two forks to shred it, then set it aside. Continue to cook the soup and rice for another 20 minutes, until the rice is tender.
(6) Finish: Add the chicken back to the soup along with the milk, parmesan cheese, and spinach. Cook over medium heat until warmed through. Remove the bay leaves.
Make-ahead note: At this point, you can keep the soup warm until you’re ready to serve. Or, cool and refrigerate if more than a couple of hours. Reheat on the stove over medium heat and bring just to a simmer without boiling.
(7) Plate and serve: Divide the soup between bowls and top with the rosemary sprig and additional parmesan cheese.
Eat and enjoy every bite because you can!
Recipe note: I use Diamond Crystal Kosher salt in all my recipes because it has a wonderful flat and crisp flake that tastes delicious. It is also the least salty salt available so you can use it more liberally as a seasoning than you can table salt or sea salt. If you use another type of salt, you may need to reduce the amount so it is not over-salted.
Have a question you’d like to have answered? Email me at hello@ibsgamechanger.com
Link note: This post contains links for you to easily purchase items listed on the page. In some cases, we have provided a special discount code for IBS Game Changers so be sure to use it when you purchase an item to get the discount that has been arranged just for you! As an Amazon Associate, I earn a commission from qualifying Amazon purchases.
More Deliciously Low FODMAP™ soup recipes


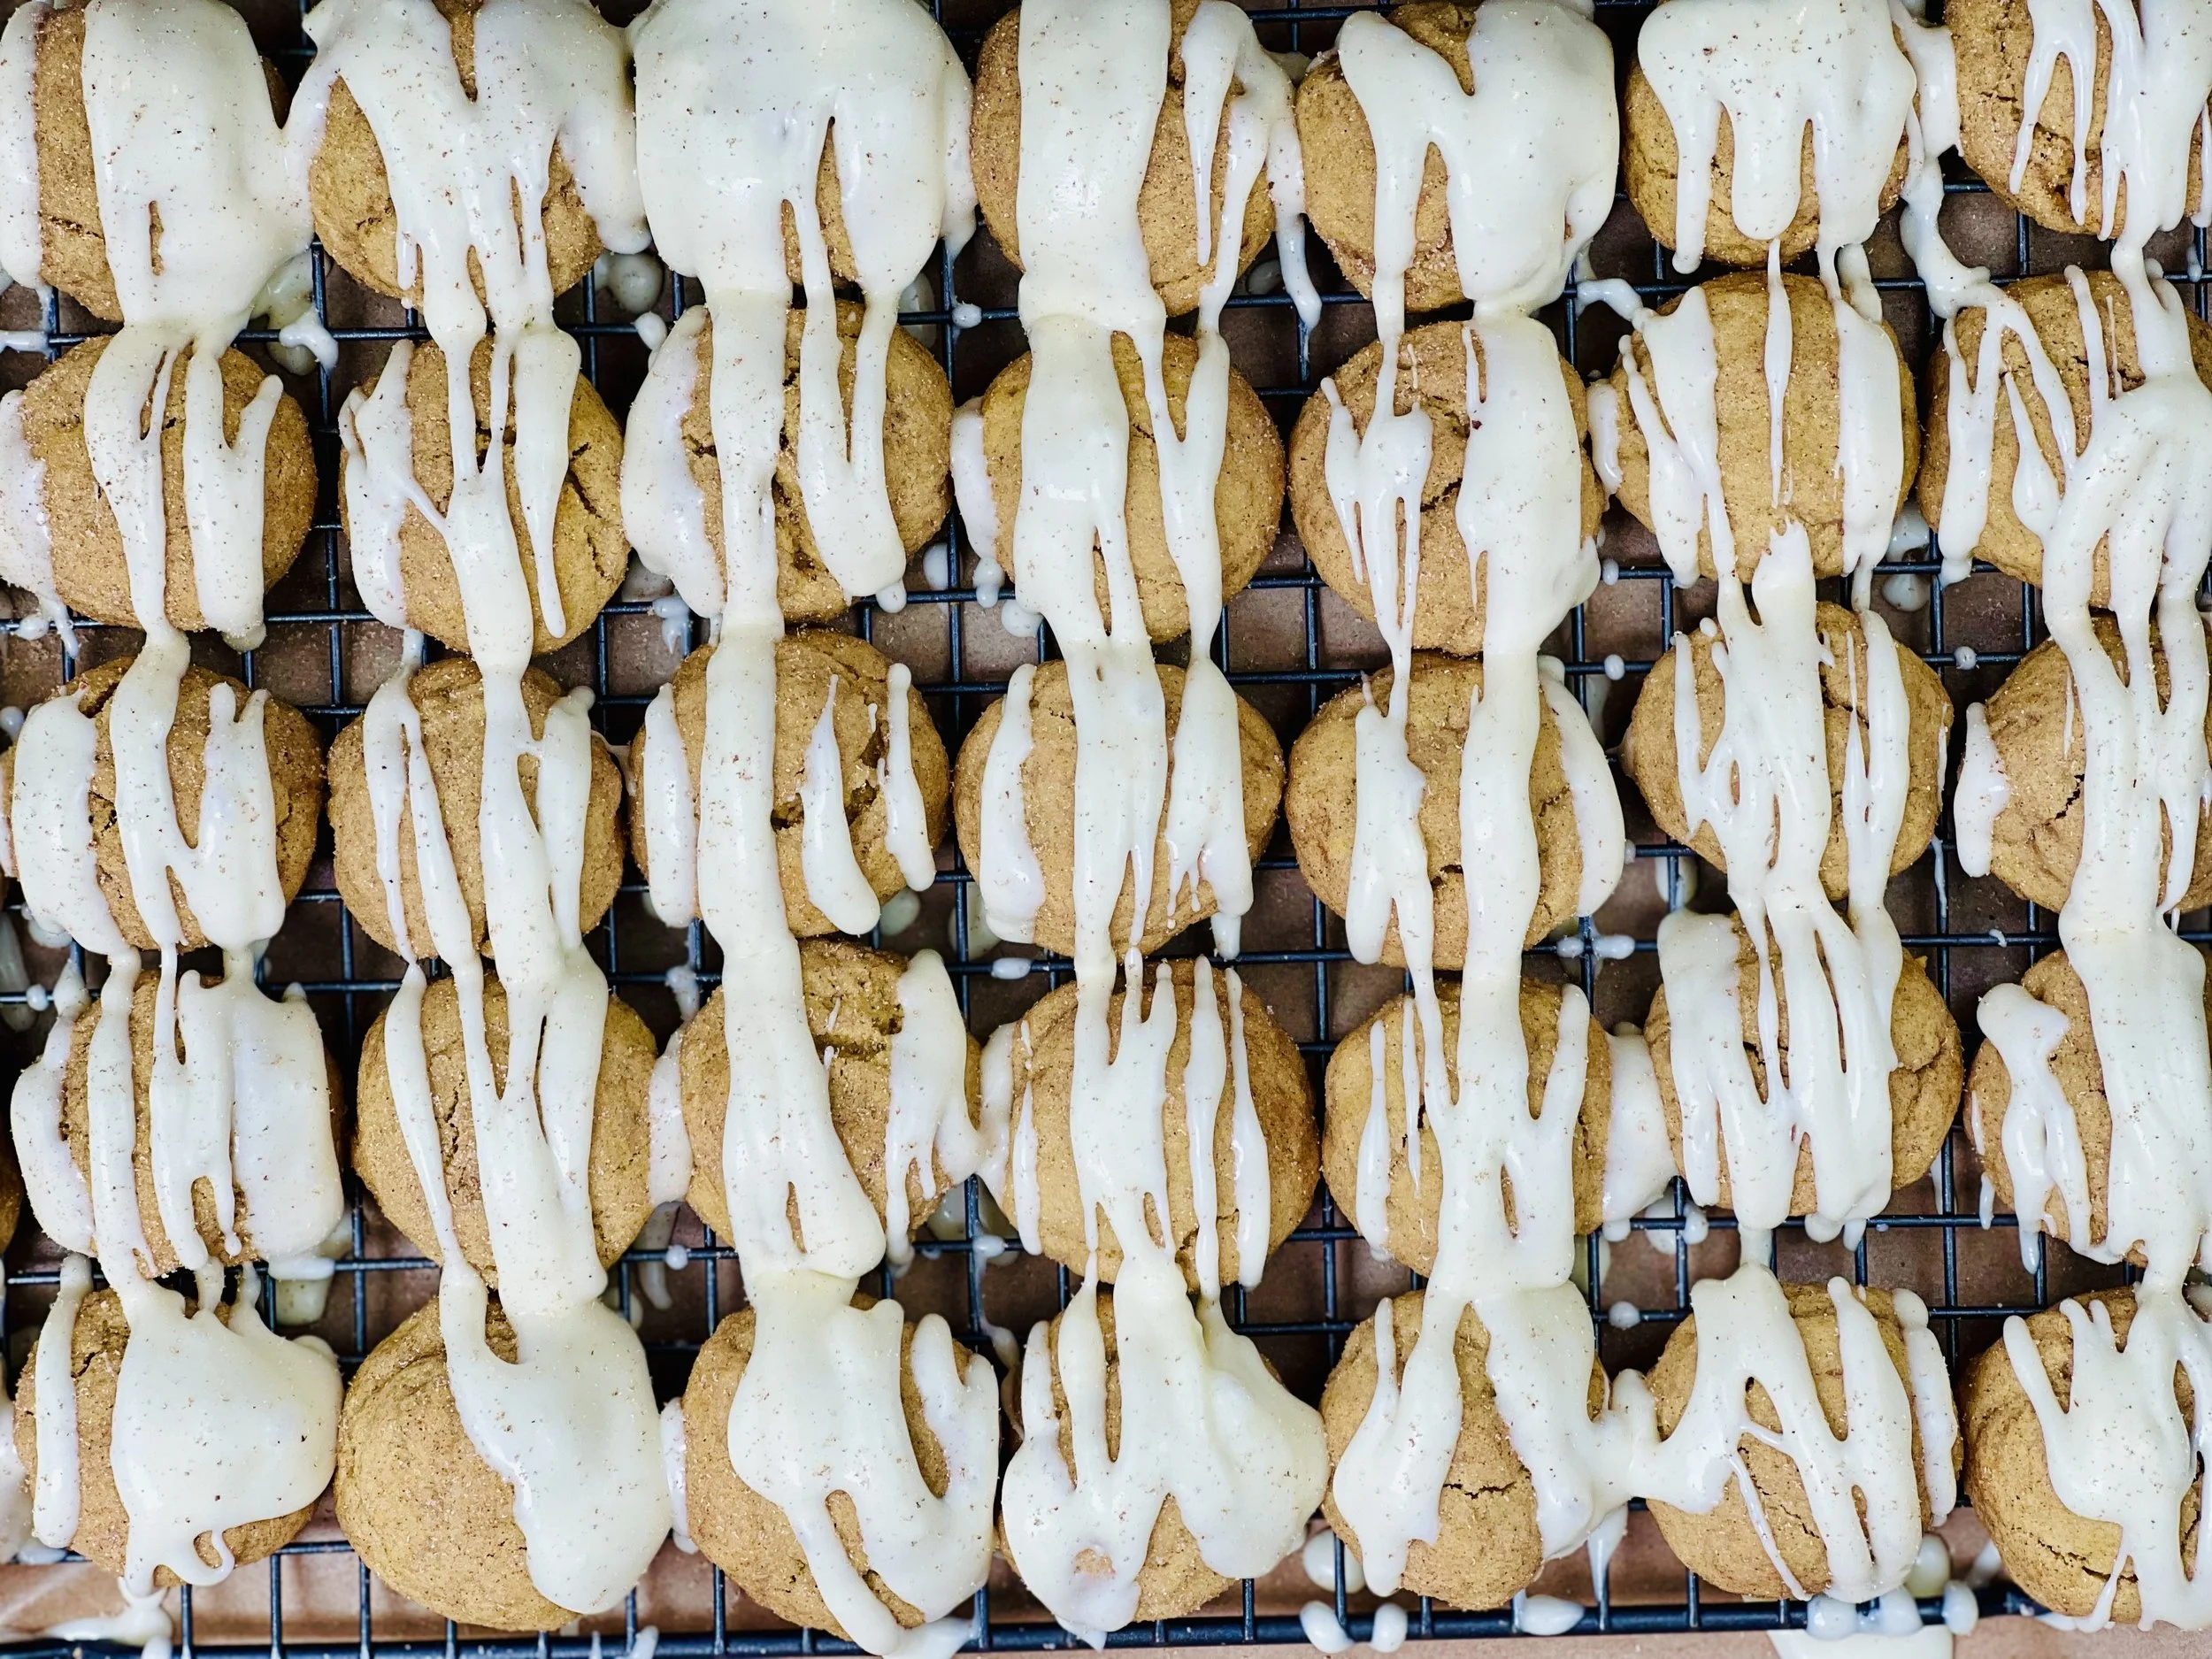
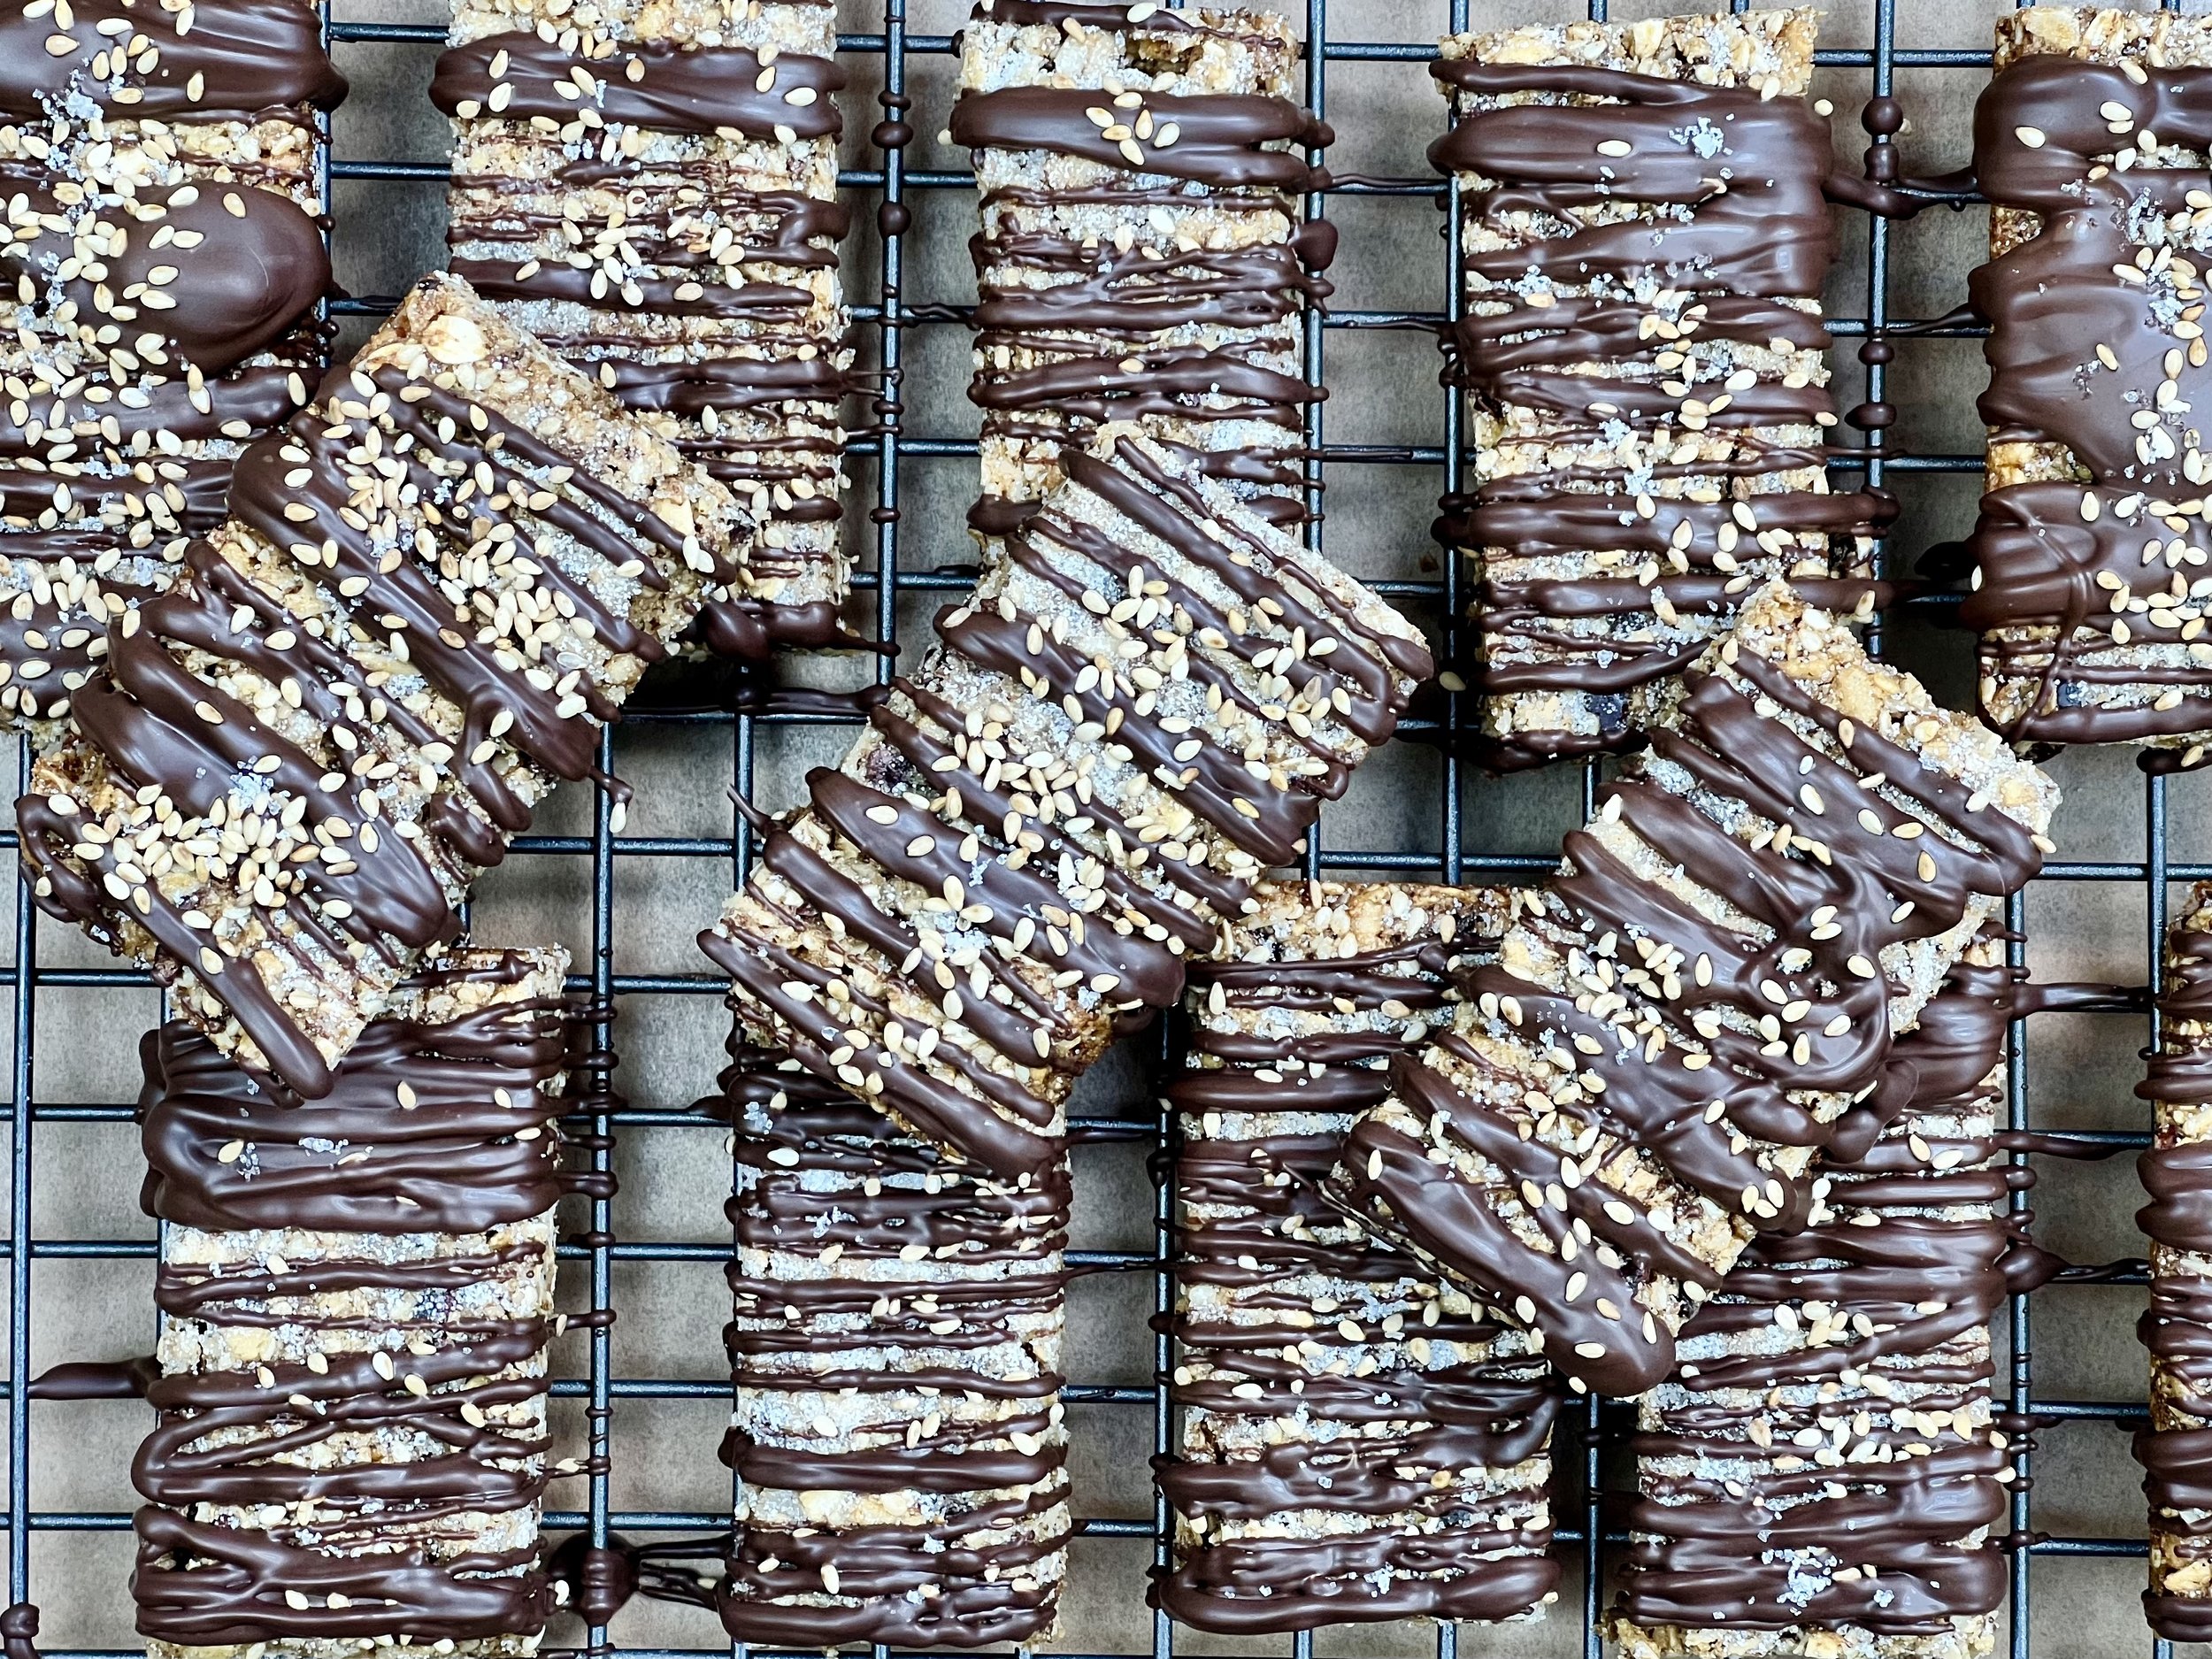
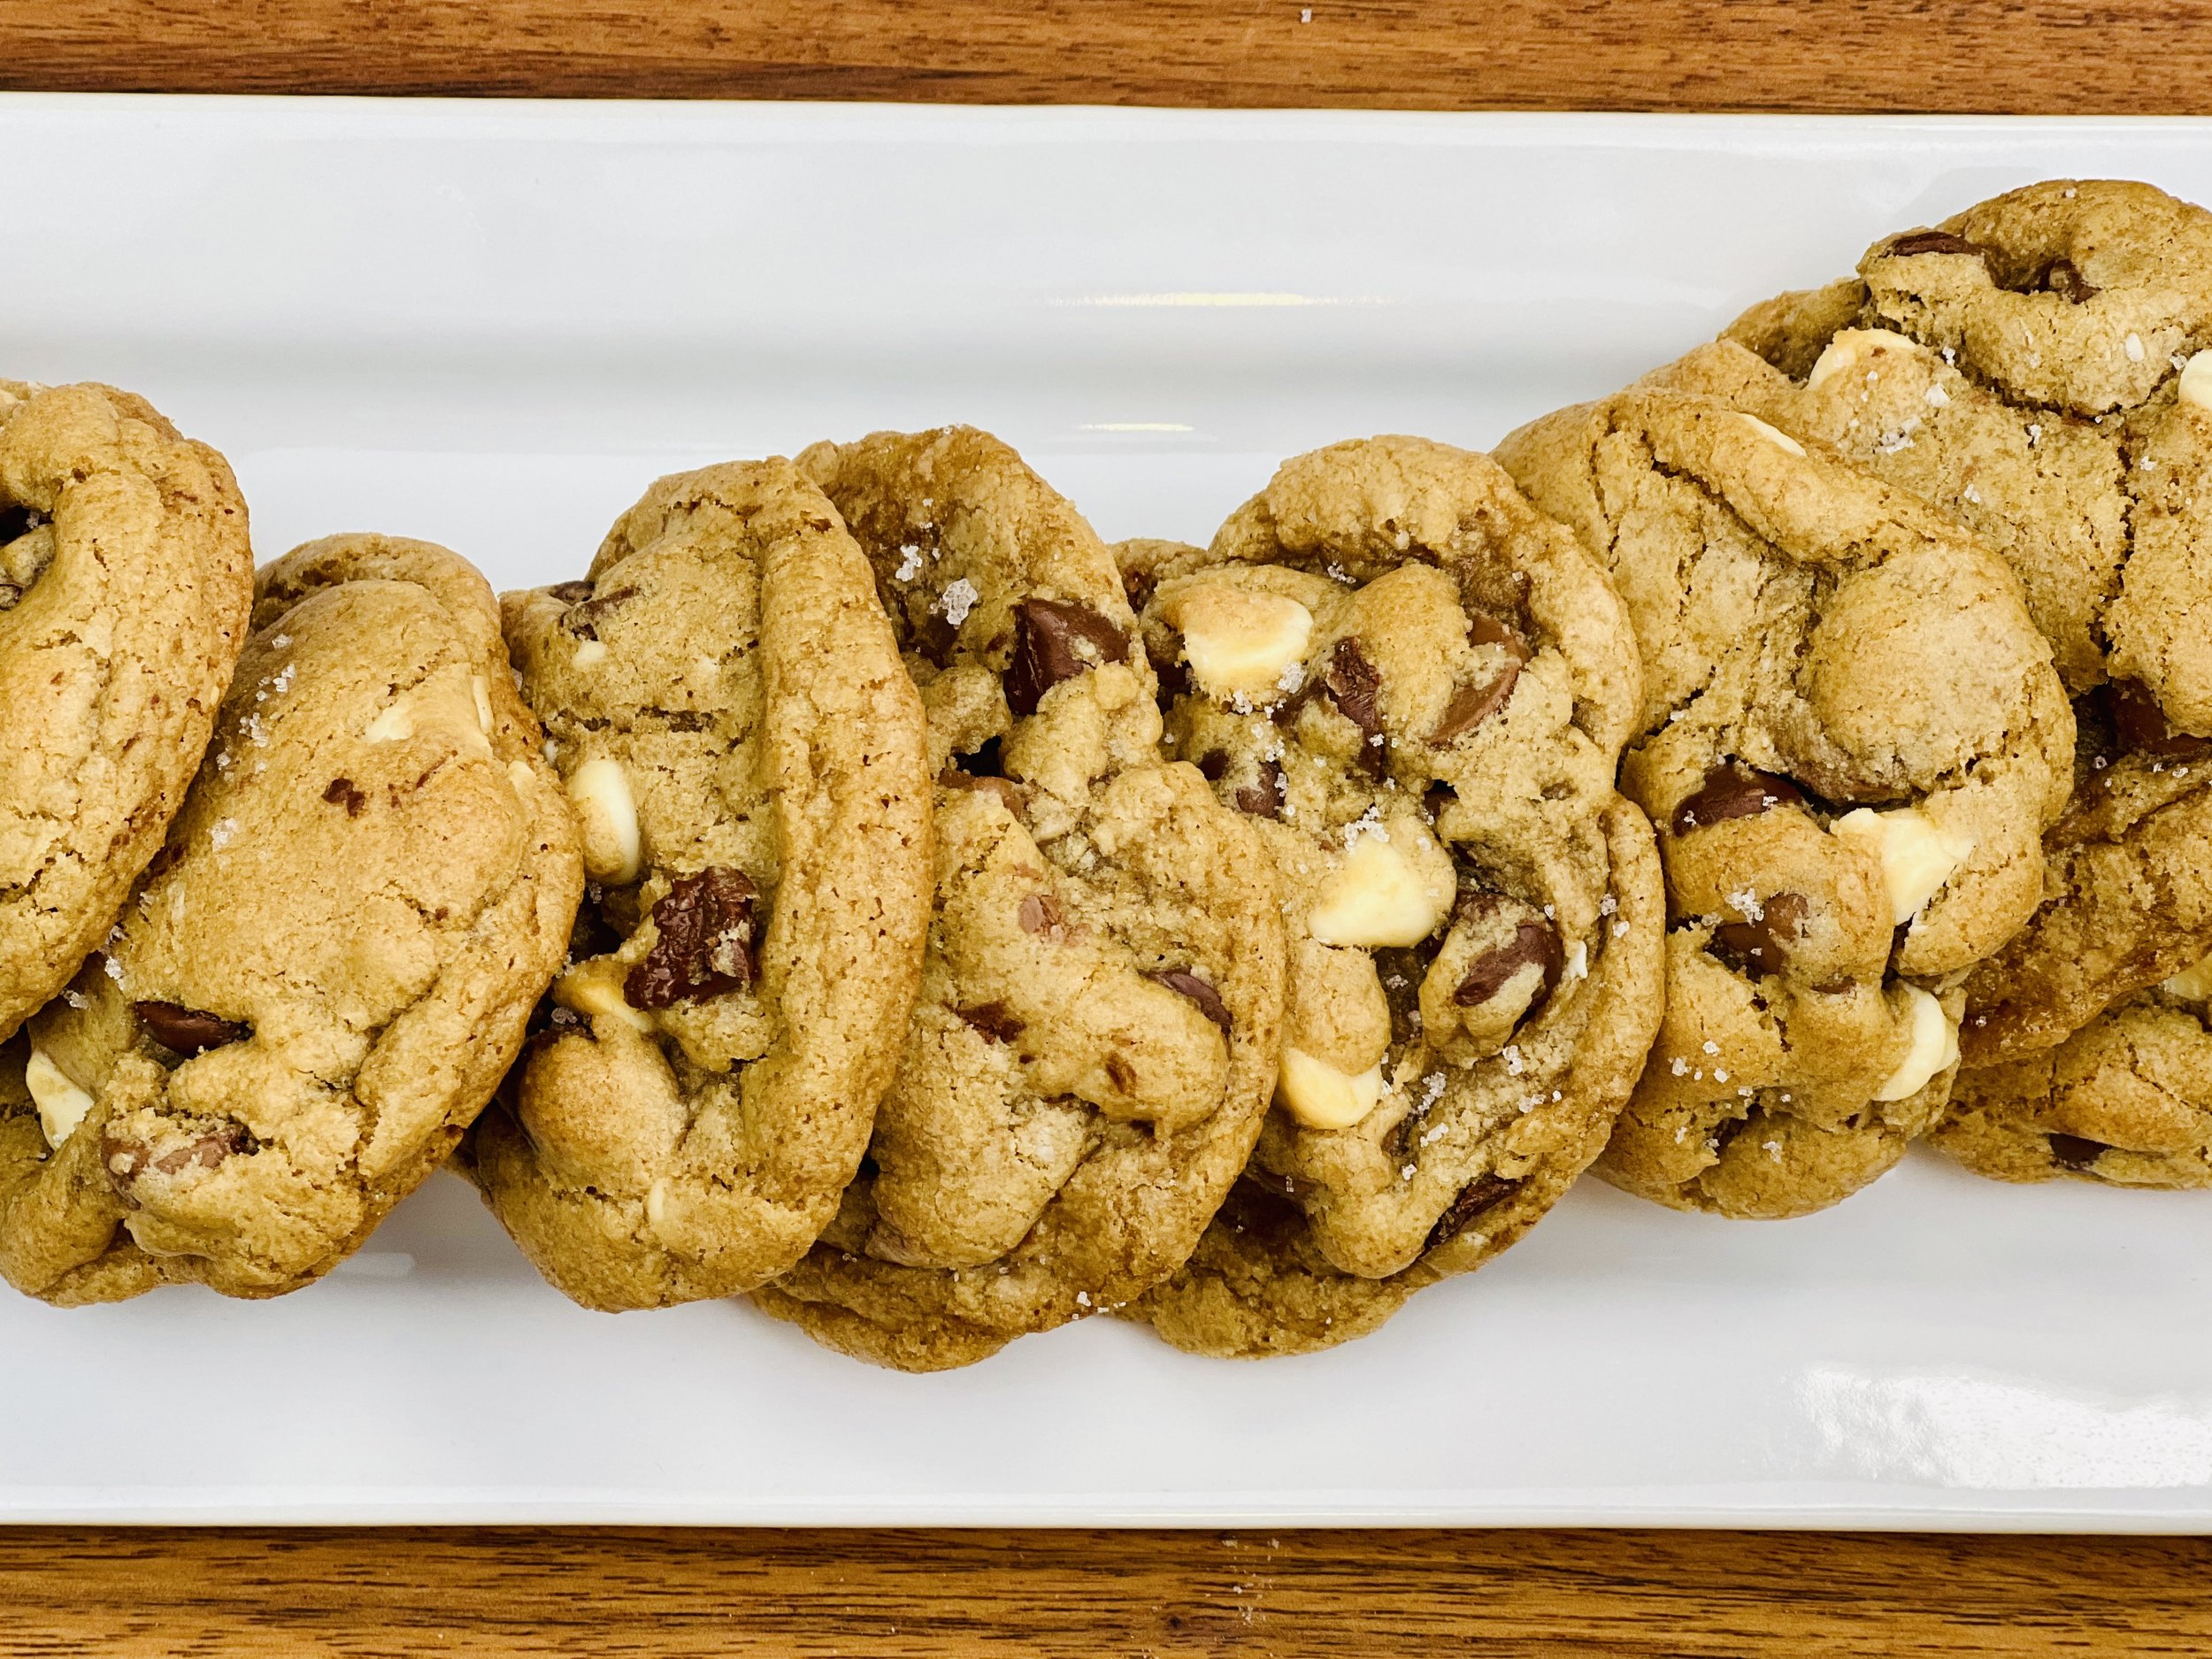
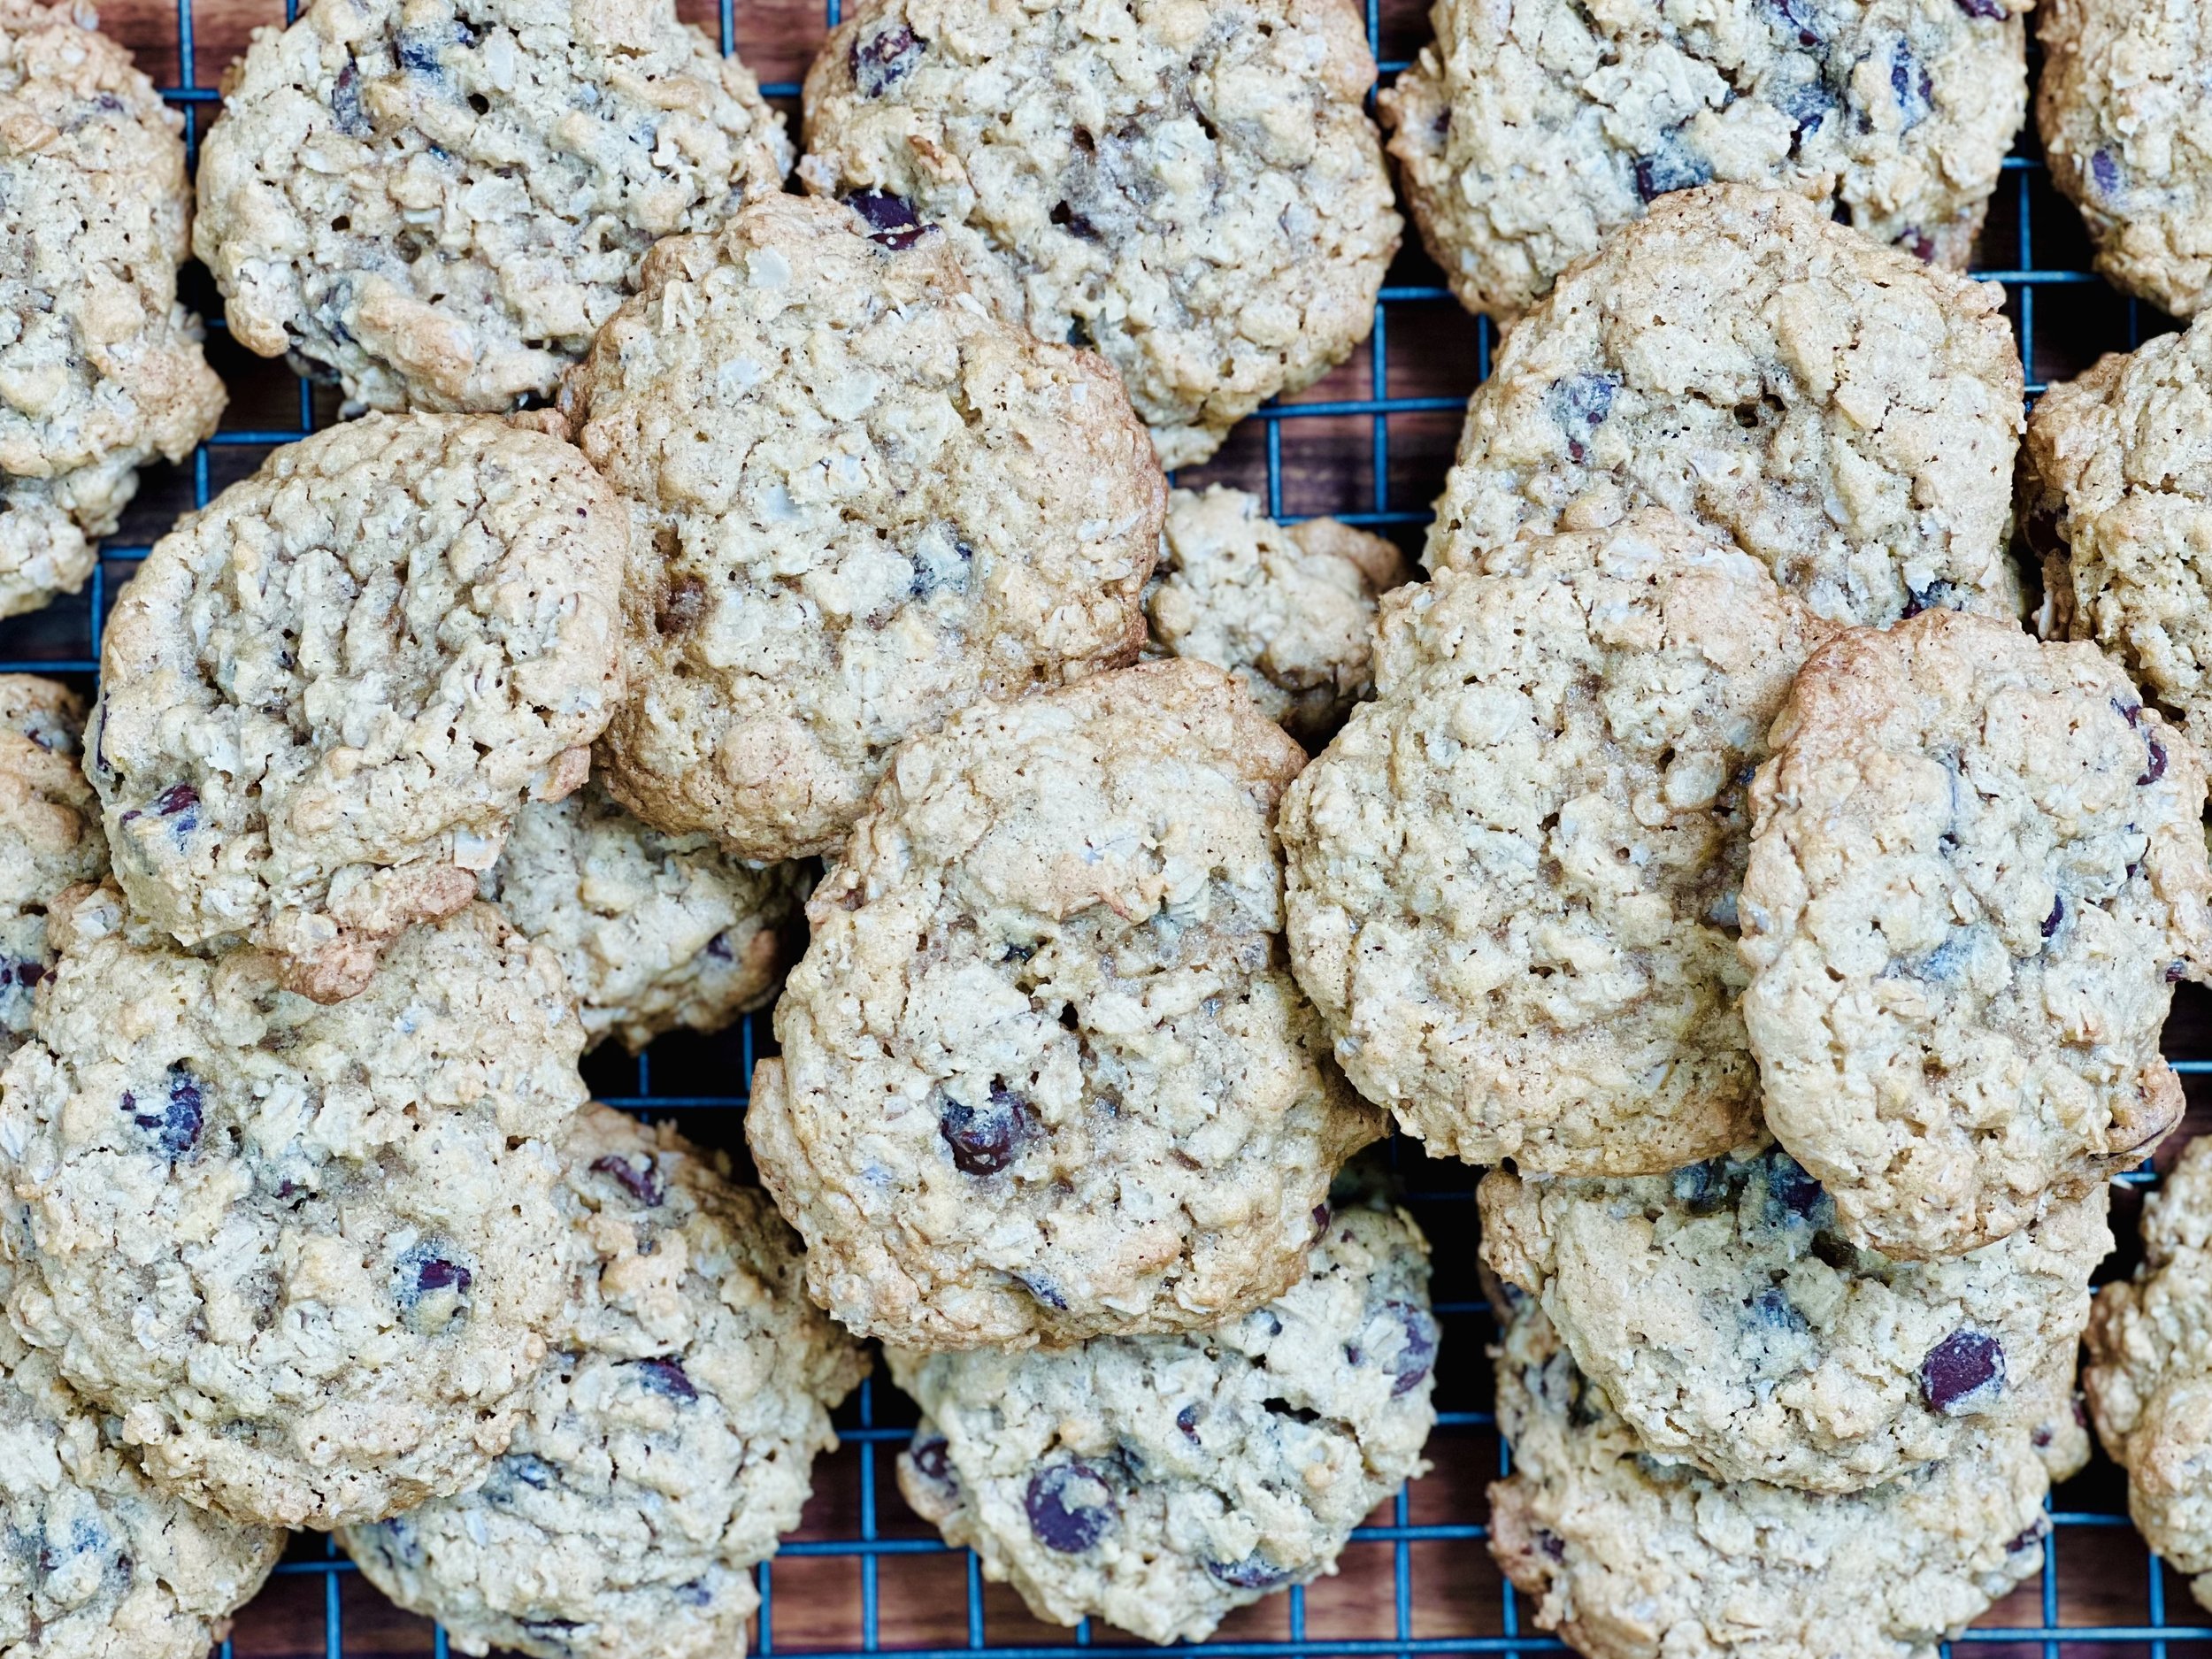
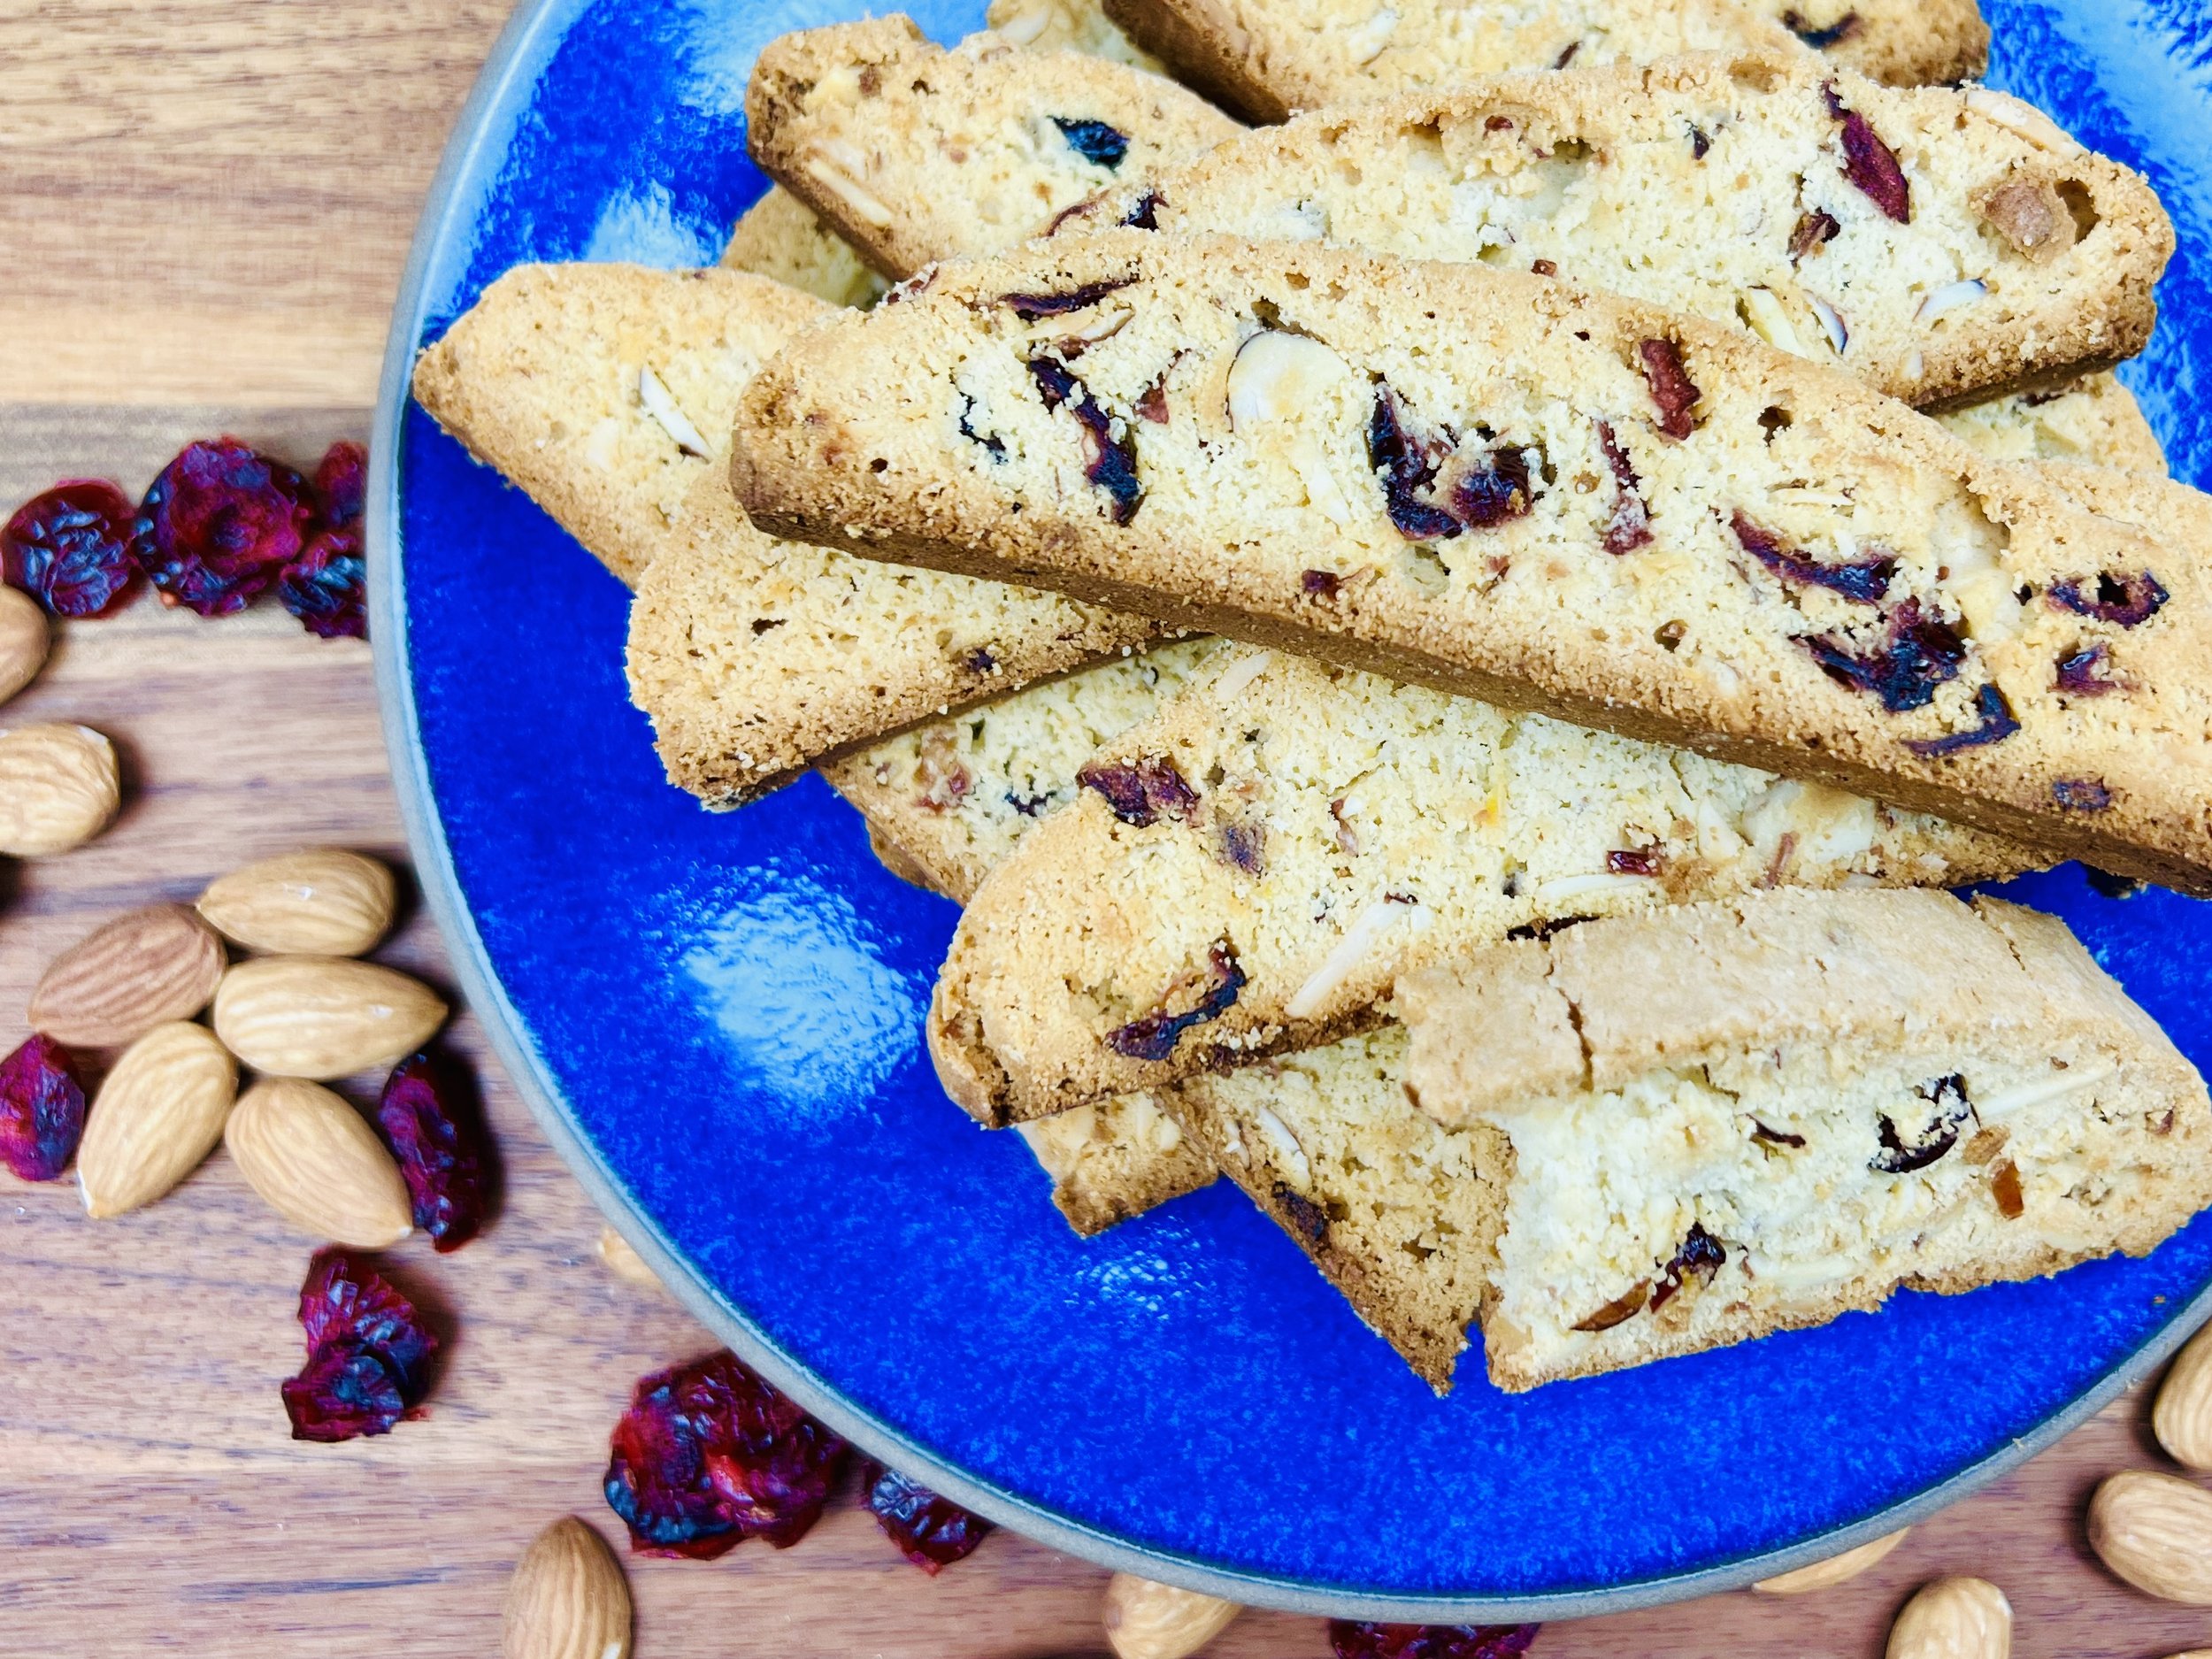
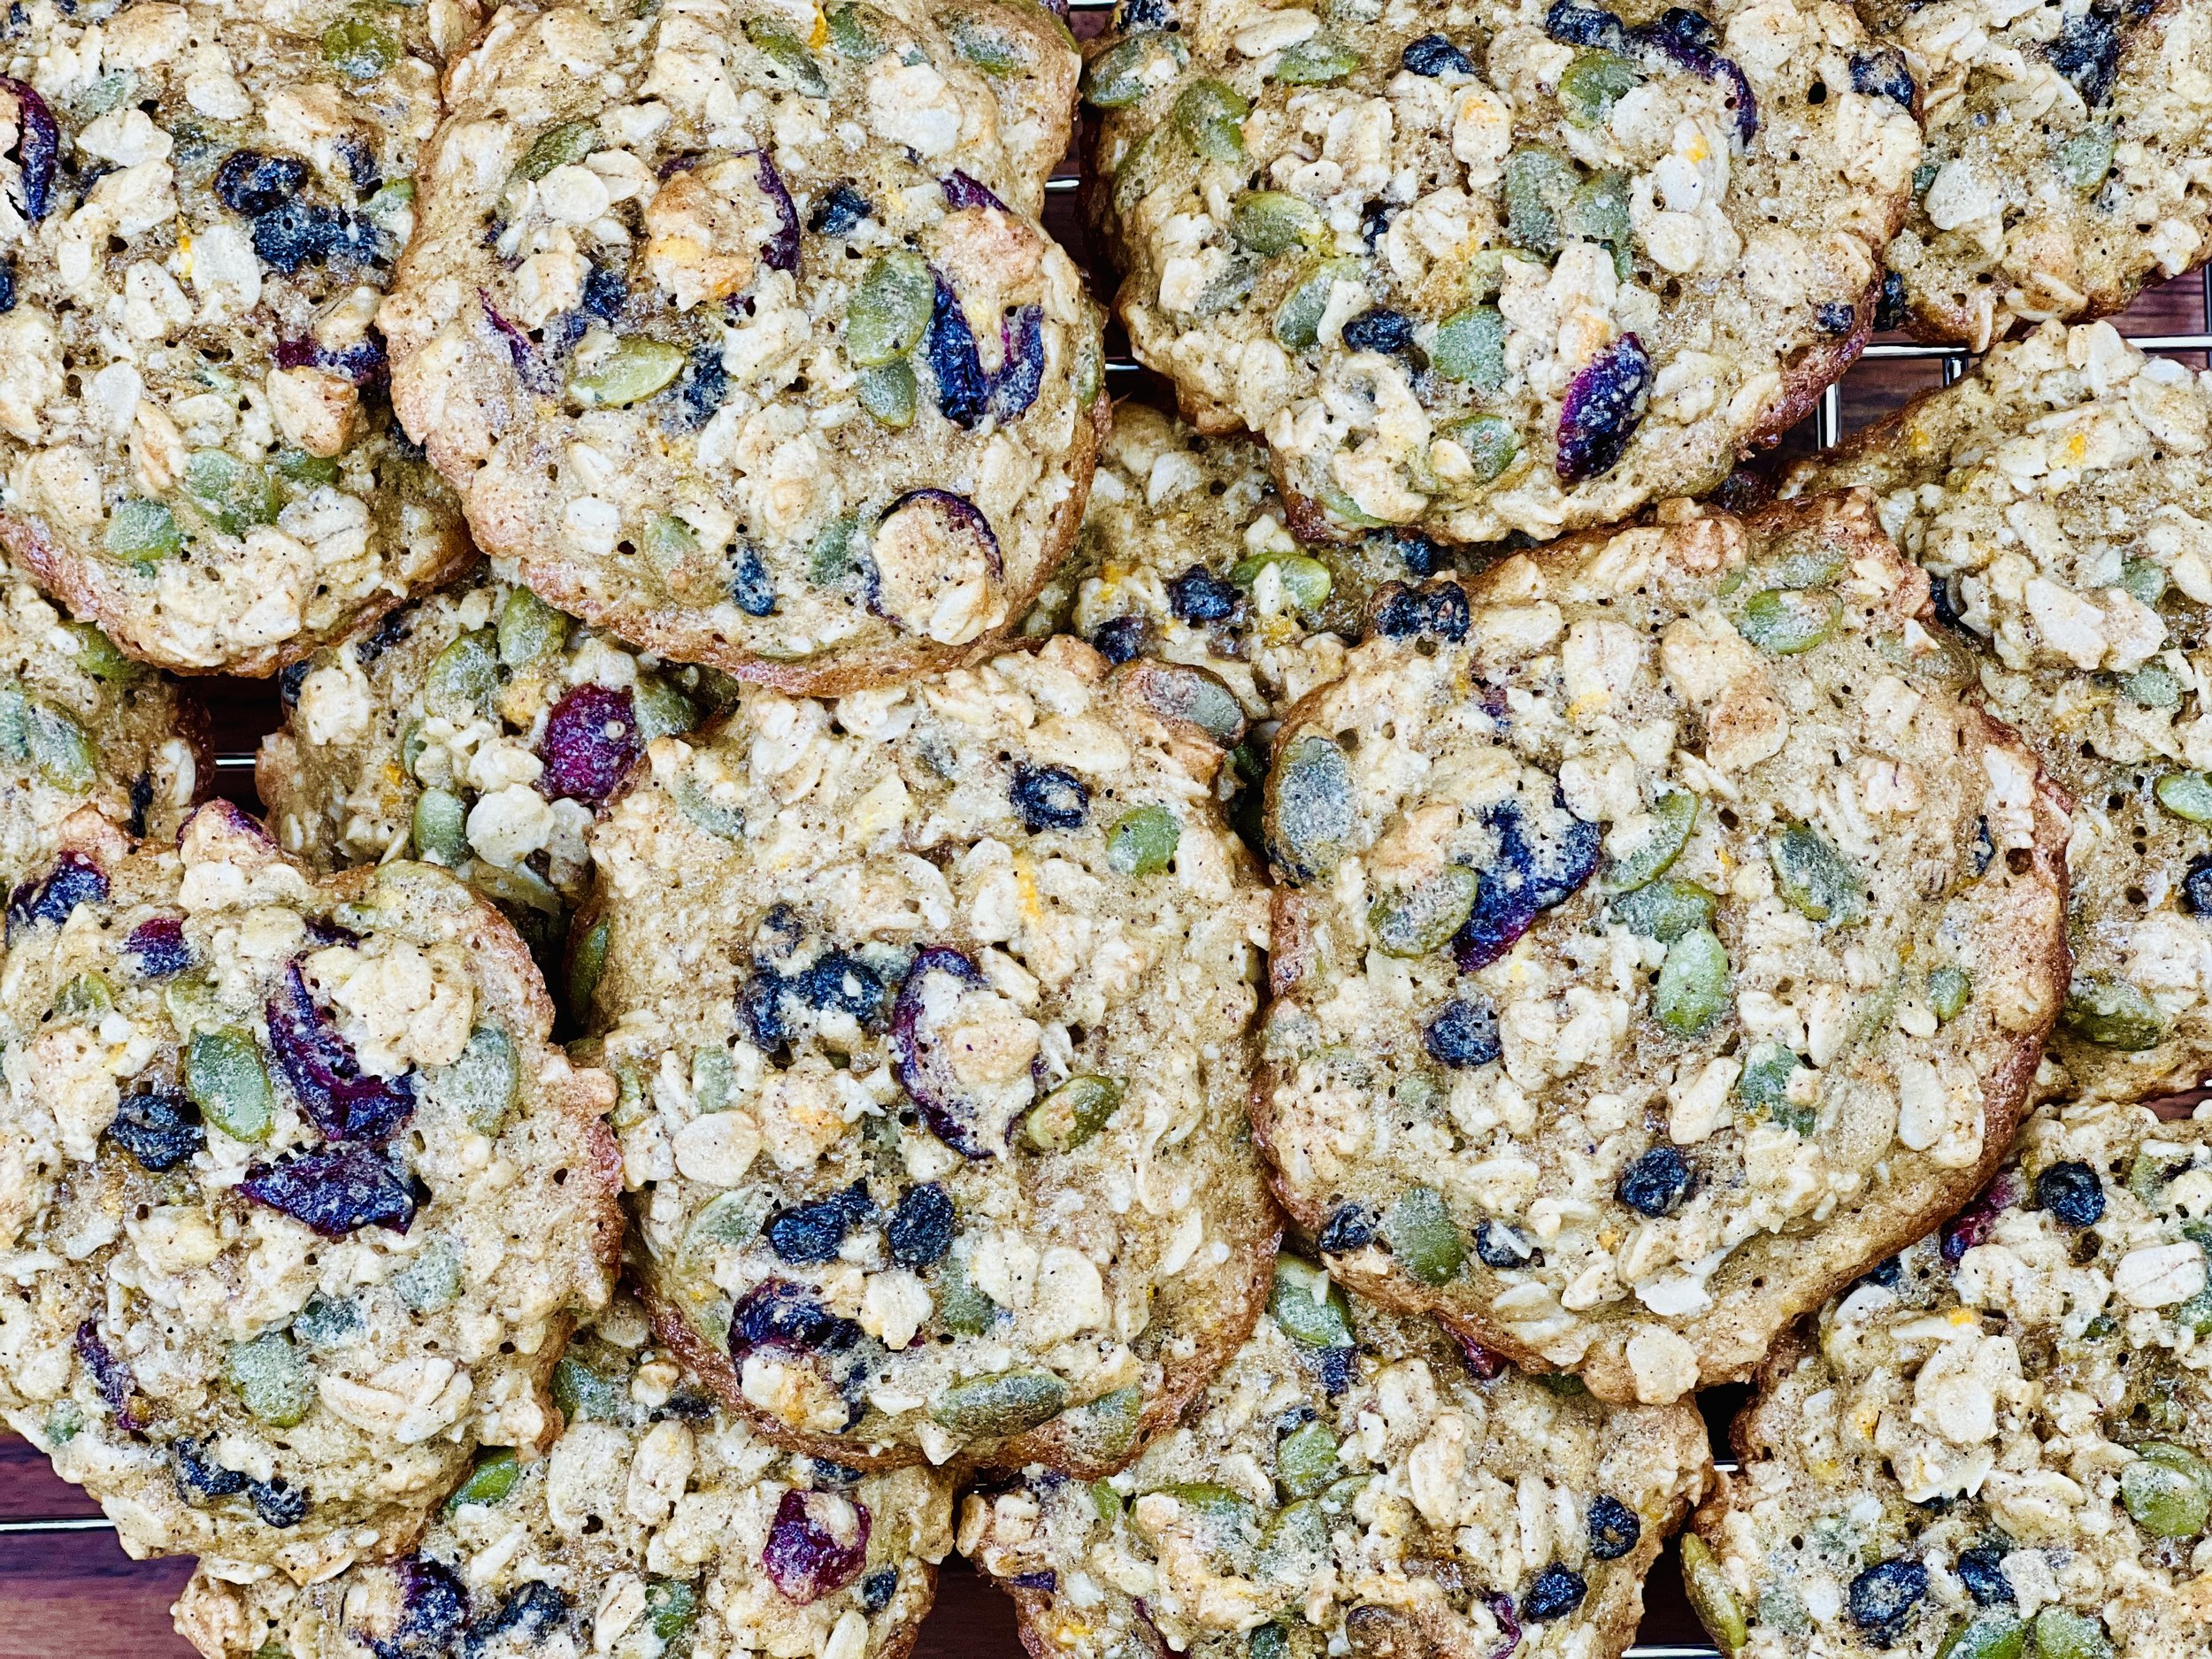
“Ski Cake” Cookies (Low FODMAP)
15 Minutes prep • 15 Minutes cook • Low FODMAP • Gluten-free • Makes 12 - 16 cookies
15 Minutes prep • 15 Minutes cook • Low FODMAP • Gluten-free • Makes 12 - 16 cookies • Ok to make ahead: Steps 1-5
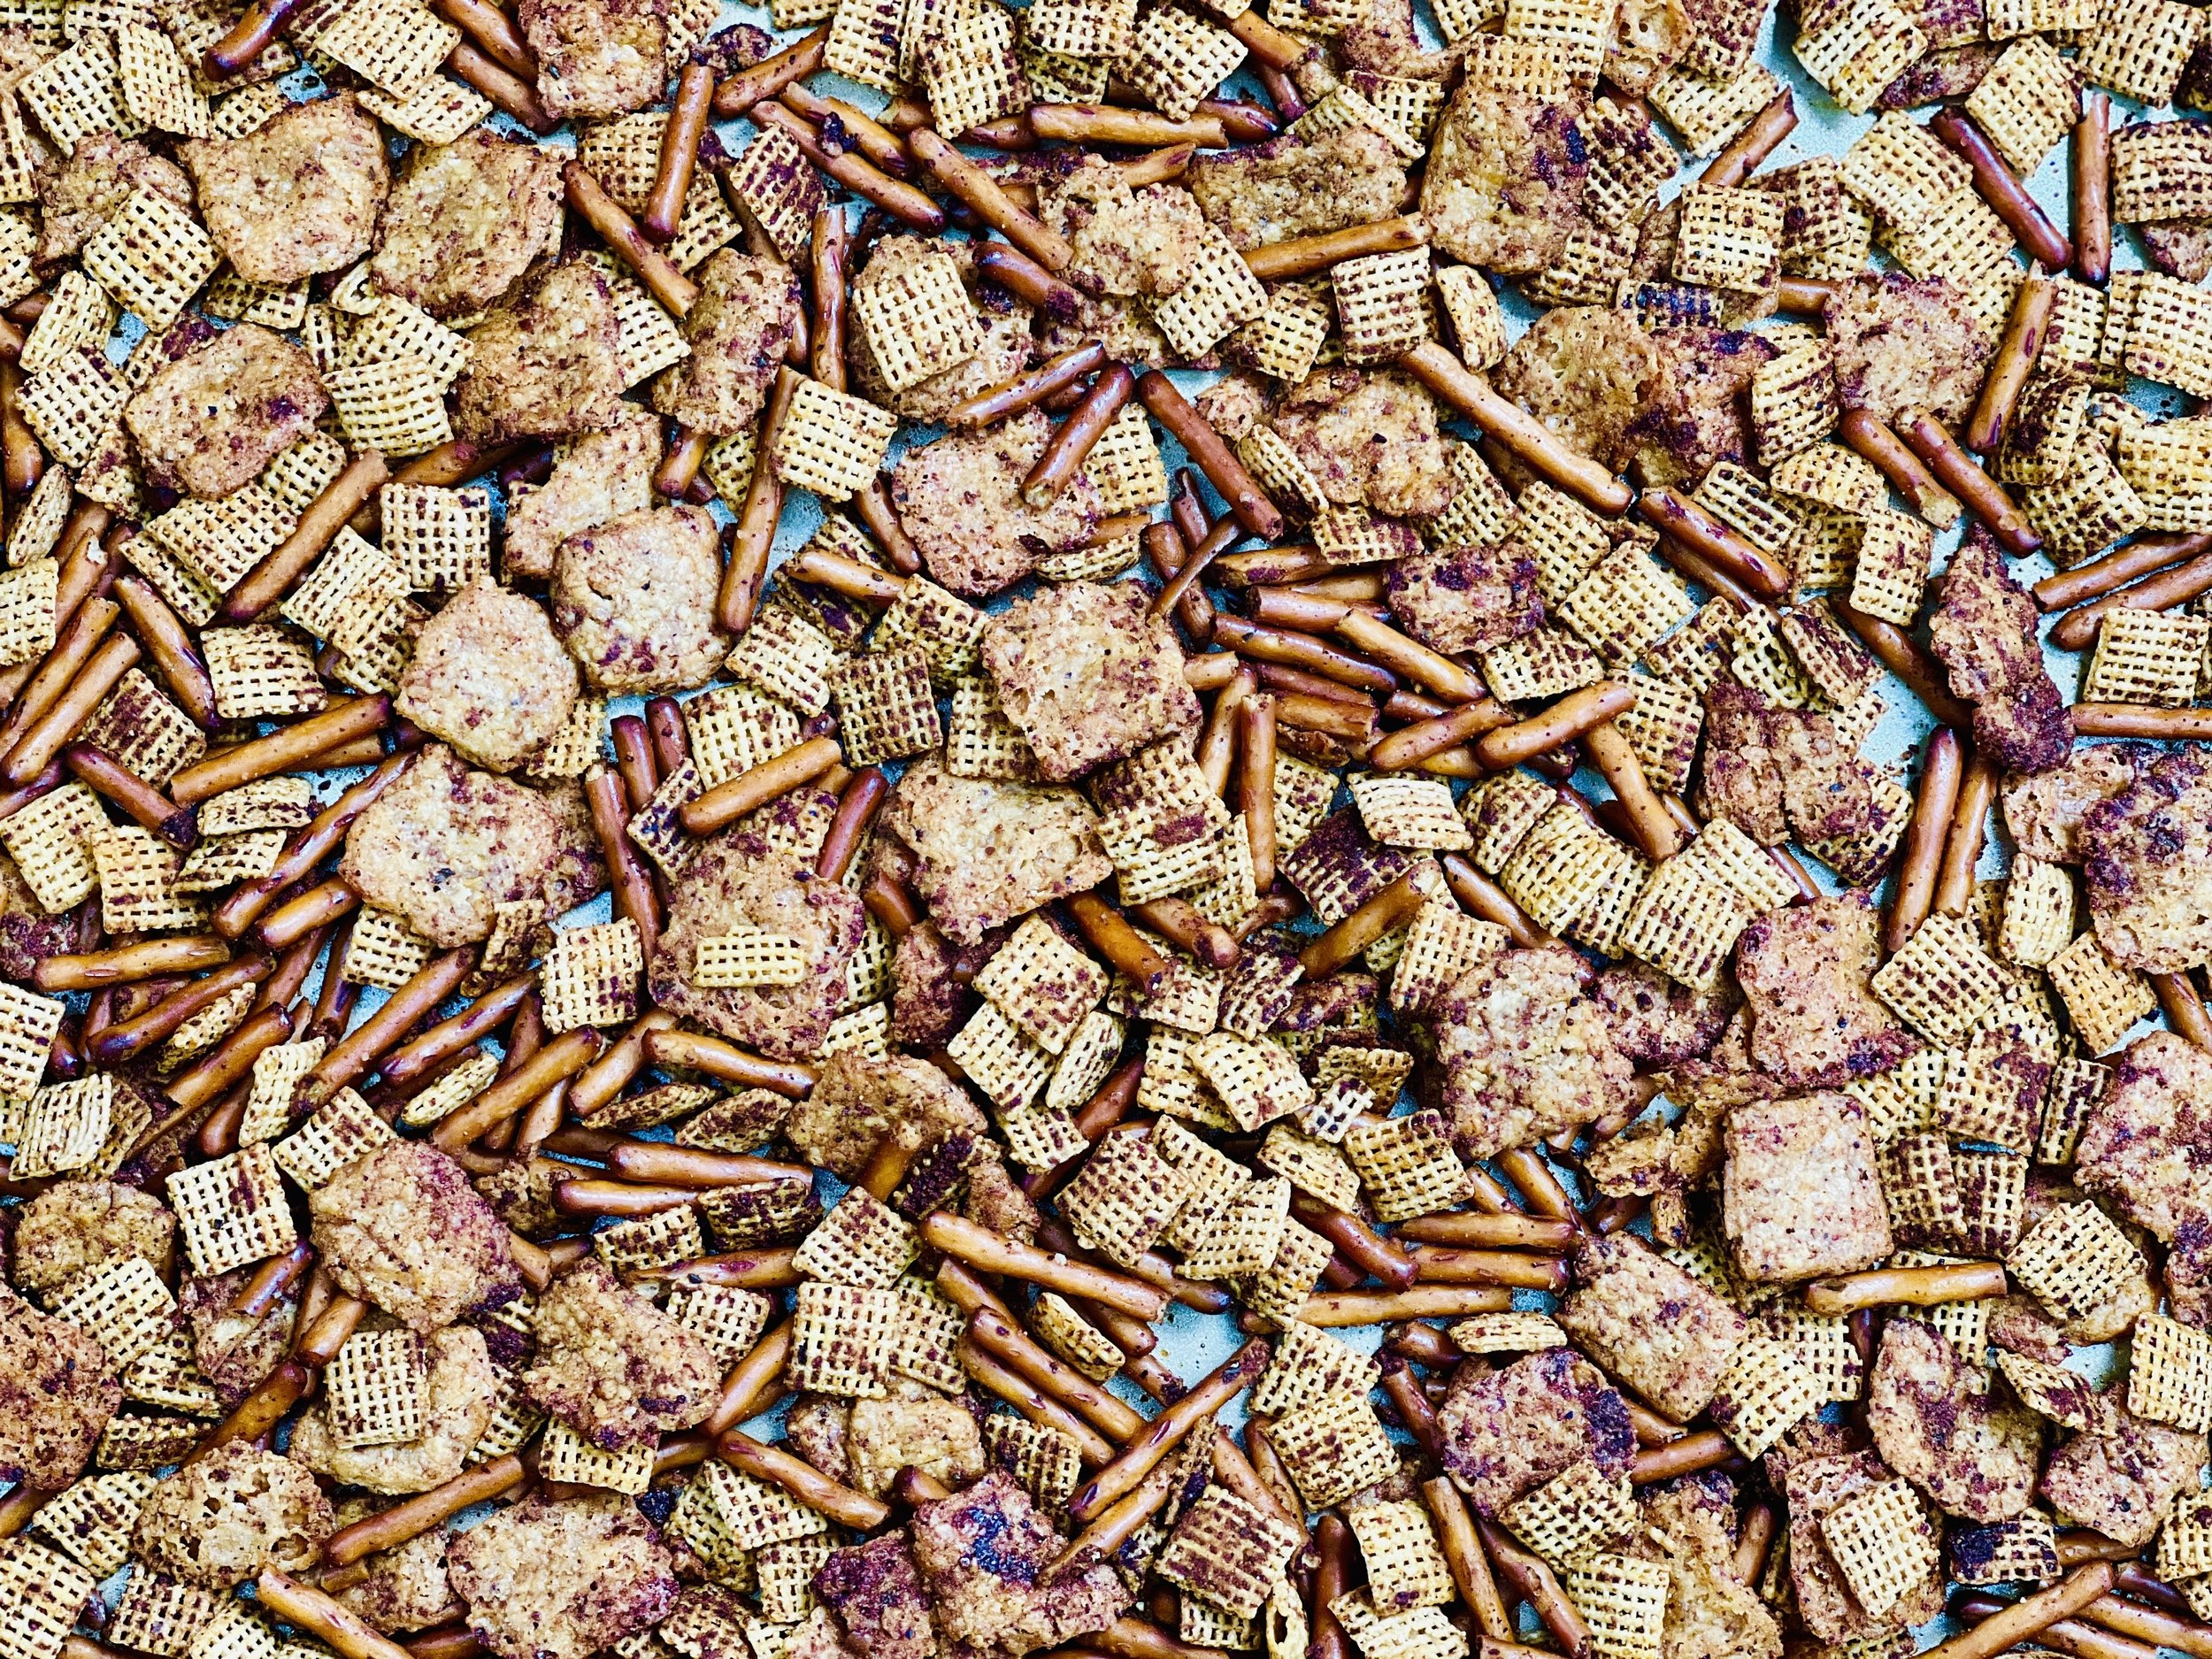
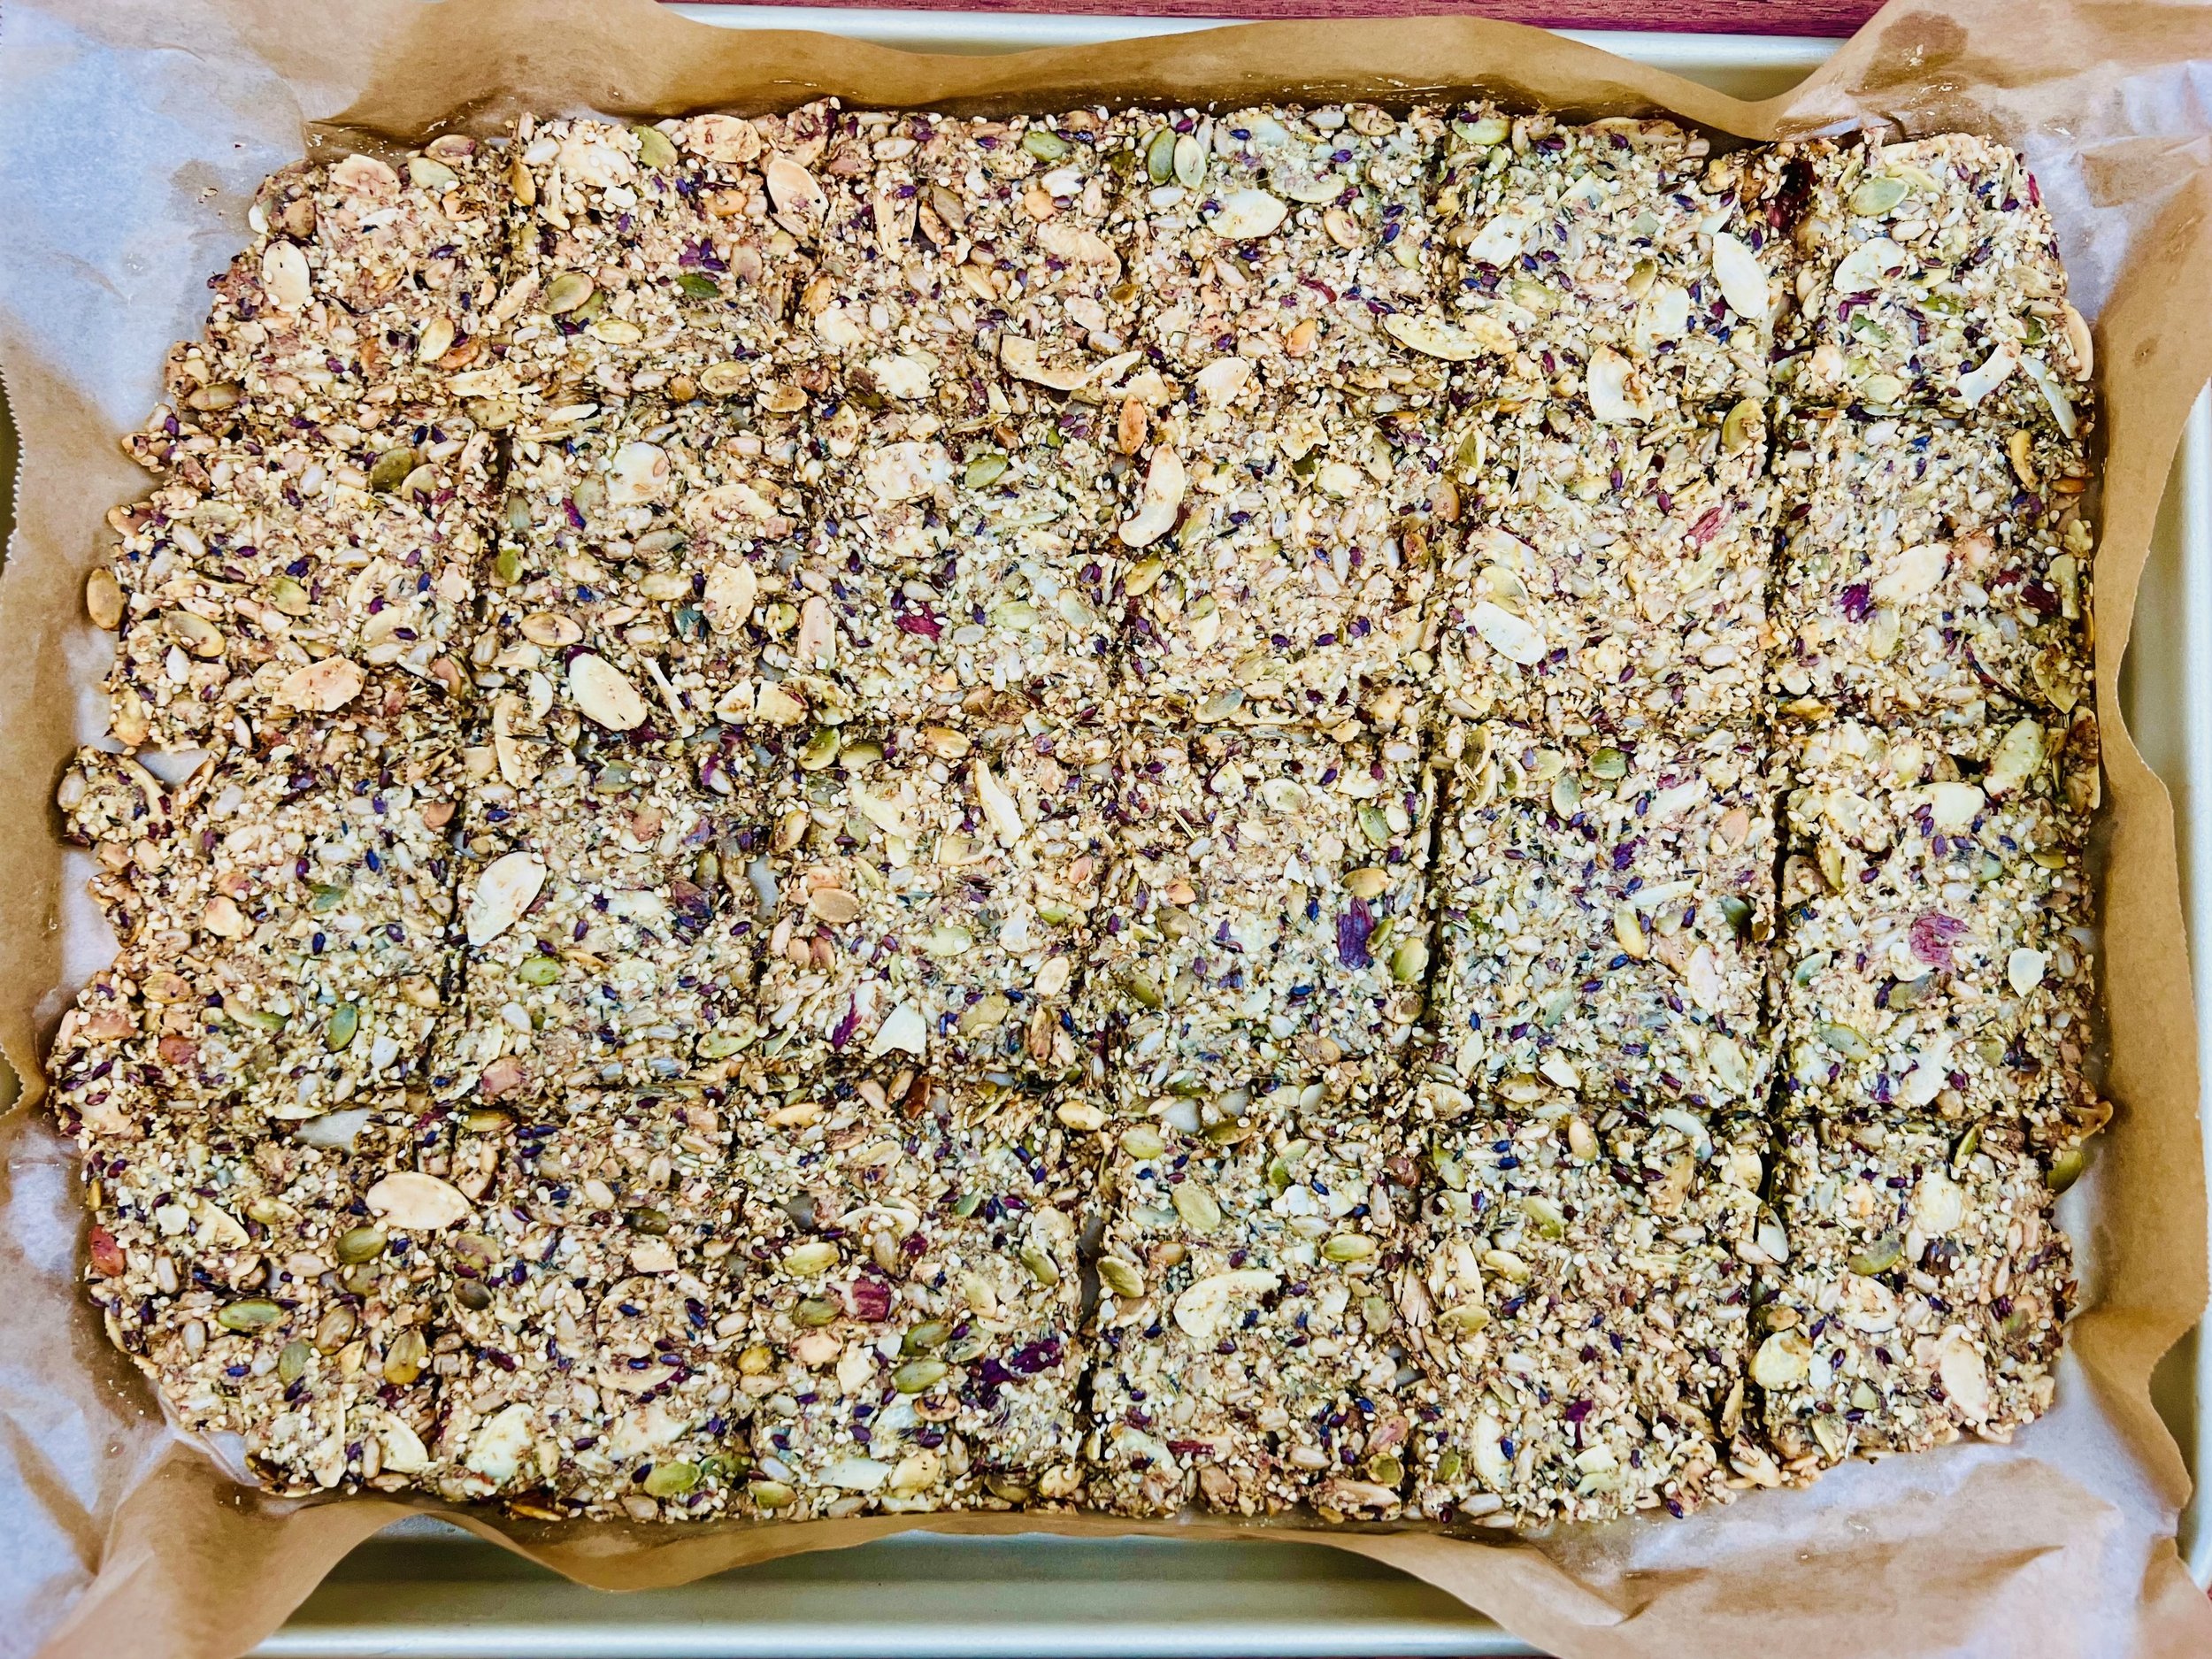
Reminiscent of what we used to call “Ski Cake,” these cookies are not only deliciously Christmas-spiced, they are a bonanza of good stuff! Rolled oats, pumpkin seeds, dried cranberries, and currents make them the perfect cookie to tuck into your pockets for your next hike or ski day. Or, pack them in your bag for a quick breakfast or lunch on the go. They remind me of Christmas and skiing and they taste wonderfully good. (And you can pass them off as oatmeal cookies and get your kids to eat some good healthy grains and seeds.)
This is an exclusive recipe just for recipe club members.
In addition to the two free recipes I create each week I am creating and delivering one very special recipe just for my recipe club members. If you’re not yet a member, I encourage you to join! Membership in the club includes access to the complete archive of recipes with filters so it can become your virtual low FODMAP cookbook plus, I am creating and delivering one special NEW recipe every week ONLY for recipe club members. And, for my true fans, I’ll be sharing behind-the-scenes content, and updates on the progress of the new cookbook.
Your membership in the club helps me continue creating new, delicious, easy-to-make, low FODMAP recipes just for you.
As always, all recipes will emphasize simple ingredients, easy preparation, and delicious low FODMAP results. Recipes will be for everything from main courses, salads, soups, side dishes, appetizers, desserts, sauces, breakfast and lunch, and even mocktails and cocktails. Everything you need to prepare fantastic low FODMAP meals everyone will love.
Join the club. Become a Patron. Let’s keep making delicious Low FODMAP meals together.
More Deliciously Low FODMAP™ dessert recipes


Manage Your IBS Symptoms with Yoga—Poses to Calm Your Belly and Your Mind
When a recent clinical study confirmed, “Yoga may be as effective as pharmacotherapy, cognitive-behavioral therapy, exercise, and the low FODMAP diet to reduce IBS symptoms, symptoms of anxiety and depression, and stress in patients with IBS,” I was convinced yoga should be considered an important part of managing IBS.
When I eat the wrong thing, eat too much, or feel extra stressed, my IBS Symptoms flare up. And, over the holidays, I did a lot of all of those things. This year, however, instead of taking to my bed or curling up on the bathroom floor, I had an awesome new tool in my toolbox—yoga! I discovered yoga thanks to my amazing daughter and, since I started practicing yoga regularly, I have seen many benefits to my overall health and well-being—including significant benefits to my IBS symptoms in particular. When a recent clinical study confirmed, “Yoga may be as effective as pharmacotherapy, cognitive-behavioral therapy, exercise, and the low FODMAP diet to reduce IBS symptoms, symptoms of anxiety and depression, and stress in patients with IBS,” I was convinced yoga should be considered an important part of managing IBS.
There are a few yoga poses, in particular, that are calming to your gut and that’s what I’m sharing with you here. Don’t worry, you don’t have to find a yoga studio and sign up for classes right away, just follow the guidance in this article to add some yoga moves to your day and you might just find you feel the benefits—and you’re hooked!
My friend Alexandra Edwards is an amazing human being and practitioner of movement medicine and owner of Monterey Bay Contrology in Monterey, California. Ali was kind enough to sit for pictures of some of the poses that are good for your gut so you can see exactly what you’re going for. Whether you’re having IBS symptoms or not, I hope this article inspires you to give yoga a try.

Seated side twist (Parivrtta Sukhasana)
Sit down on the floor and cross your legs. Take a deep breath in and lengthen your spine and the sides of the body, then turn and put your right hand on your left knee, and steady yourself with your other hand behind you. Breathe out and gently twist while looking over your left shoulder.
Hold this pose for five slow breaths, then release and repeat on the opposite side.
Focus on drawing your navel towards your spine at the end of each exhalation.

Seated side bend (Parsva Sukhasana)
Sit down on the floor and cross your legs. Start your side stretch by taking a deep breath in and raising your left arm, then exhale and stretch the left arm over to the right, bending into a side stretch and supporting yourself with your right arm. Think of elevating on the left side of your body not collapsing on the right. Hold for five breaths. Repeat on the other side. Look up to the ceiling as shown for a greater stretch.

Cat-cow (Chakravakasana): Cow
Make your way to your hands and knees with your hands under your shoulders and your knees under your hips.
Take a deep breath in, draw your navel to the floor, look up to the ceiling, and exhale. This is the "cow” part of Cat-Cow.
Then go to the “cat” part of Cat-Cow and repeat 5-10 times.
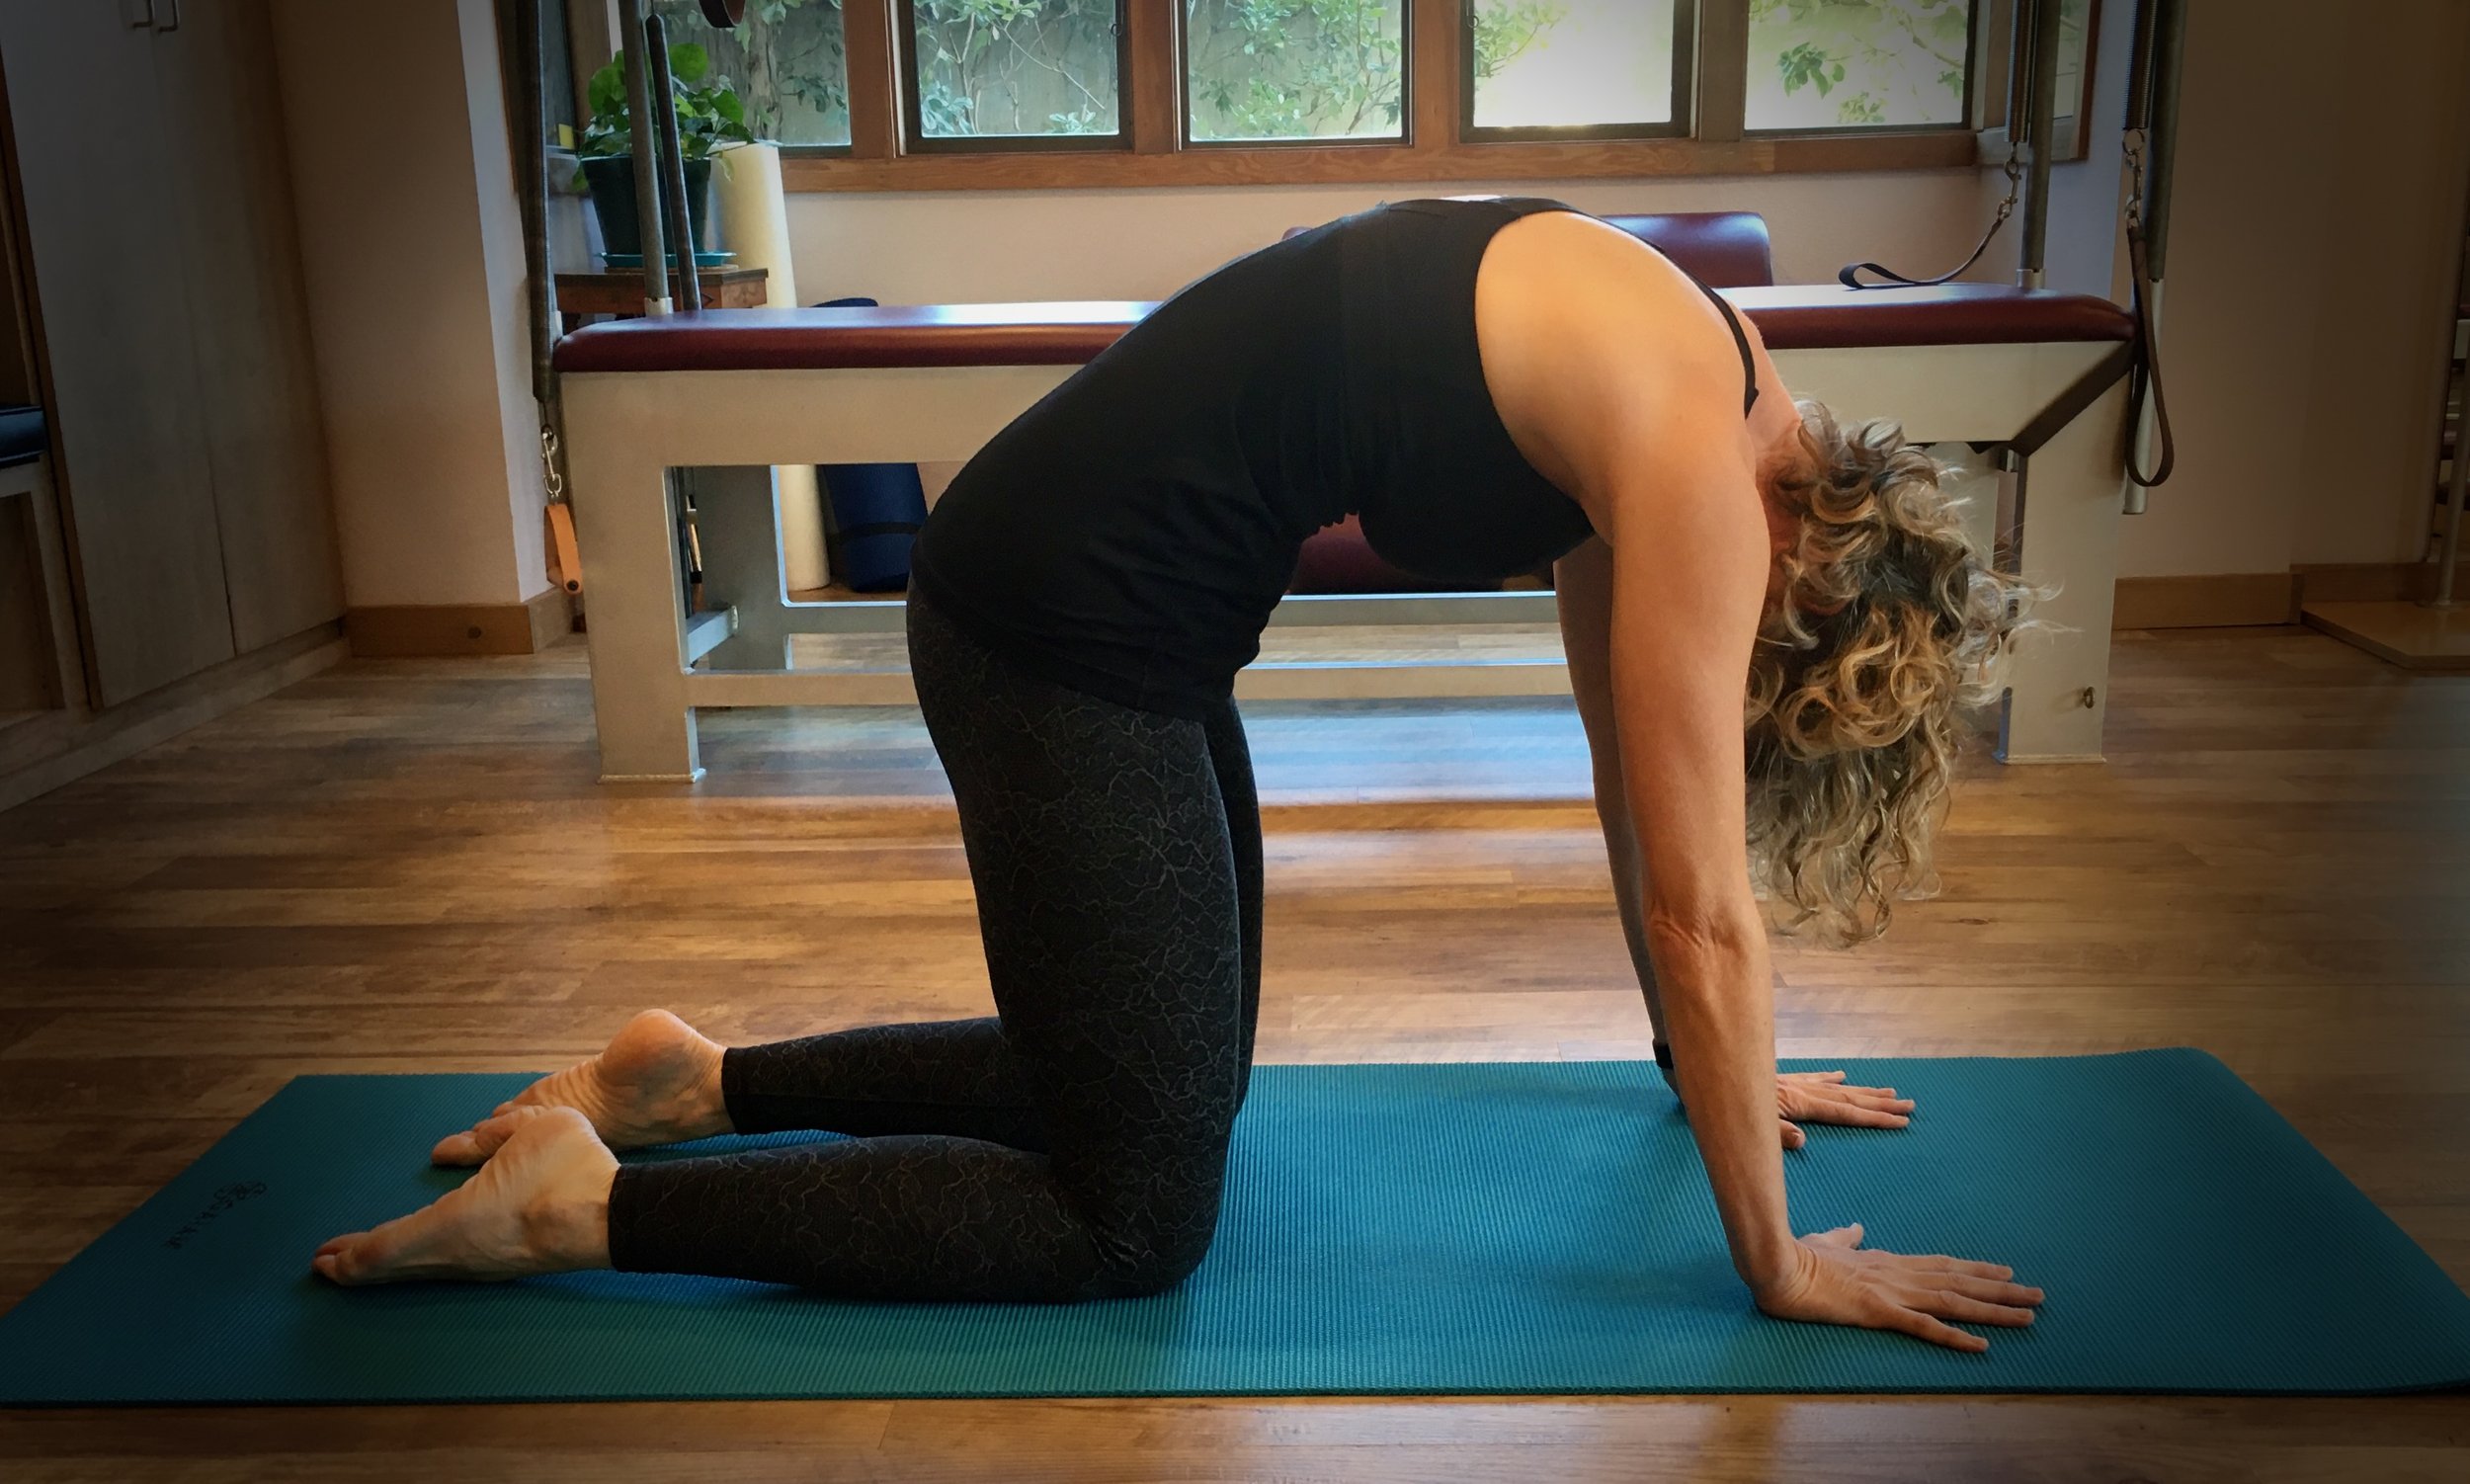
Cat-cow (Chakravakasana): Cat
From the “cow” position, take a deep breath in as you arch your back to the ceiling like a cat stretching. Think of drawing your navel toward your spine as you do this, tuck your tailbone down, open the space between your shoulder blades, and let your head drop. Then go back to the “cow” part of Cat-Cow and repeat 5-10 times. Align the movements of Cat-Cow with your breath: in for cat and out for cow.
Sun salutation (Surya Namaskar)
Sun Salutation is a series of yoga poses performed in a sequence to create a flow of movement. Watch the video below to see the combination of movements that make up the complete sequence.
Start standing up with your toes touching and your heels slightly apart. Take a breath in and raise your arms to the ceiling, exhale, and fold forward touching your hands to the floor
Take another breath in and raise up halfway with your fingertips on the floor or lightly touching your shins. Exhale, and return to forward fold.
Bend your knees, place your hands on the floor below your shoulders, and then step your left leg back into high lunge. Next, step your right leg back so you are in a plank position. Hold this pose for a breath or two or flow right through it to the next part of the sequence.
Bend your knees and go through the following Chaturanga sequence (Chaturanga: from plank position, exhale, lower yourself down to the mat evenly as though doing a push-up, as you breathe in, straighten your arms while leaving your hips on the floor to move into upward facing dog; breath out and move into downward facing dog) hold for a breath, step your left leg forward into a lunge, then step your right leg forward to meet your hands in forward fold at the top of the mat, inhale and stand up lifting your arms toward the ceiling, bring your hands to heart center (prayer) to finish.
Do this same sequence on the opposite side, then do each side again once more. Two full sequences are a great way to stretch and massage your belly.
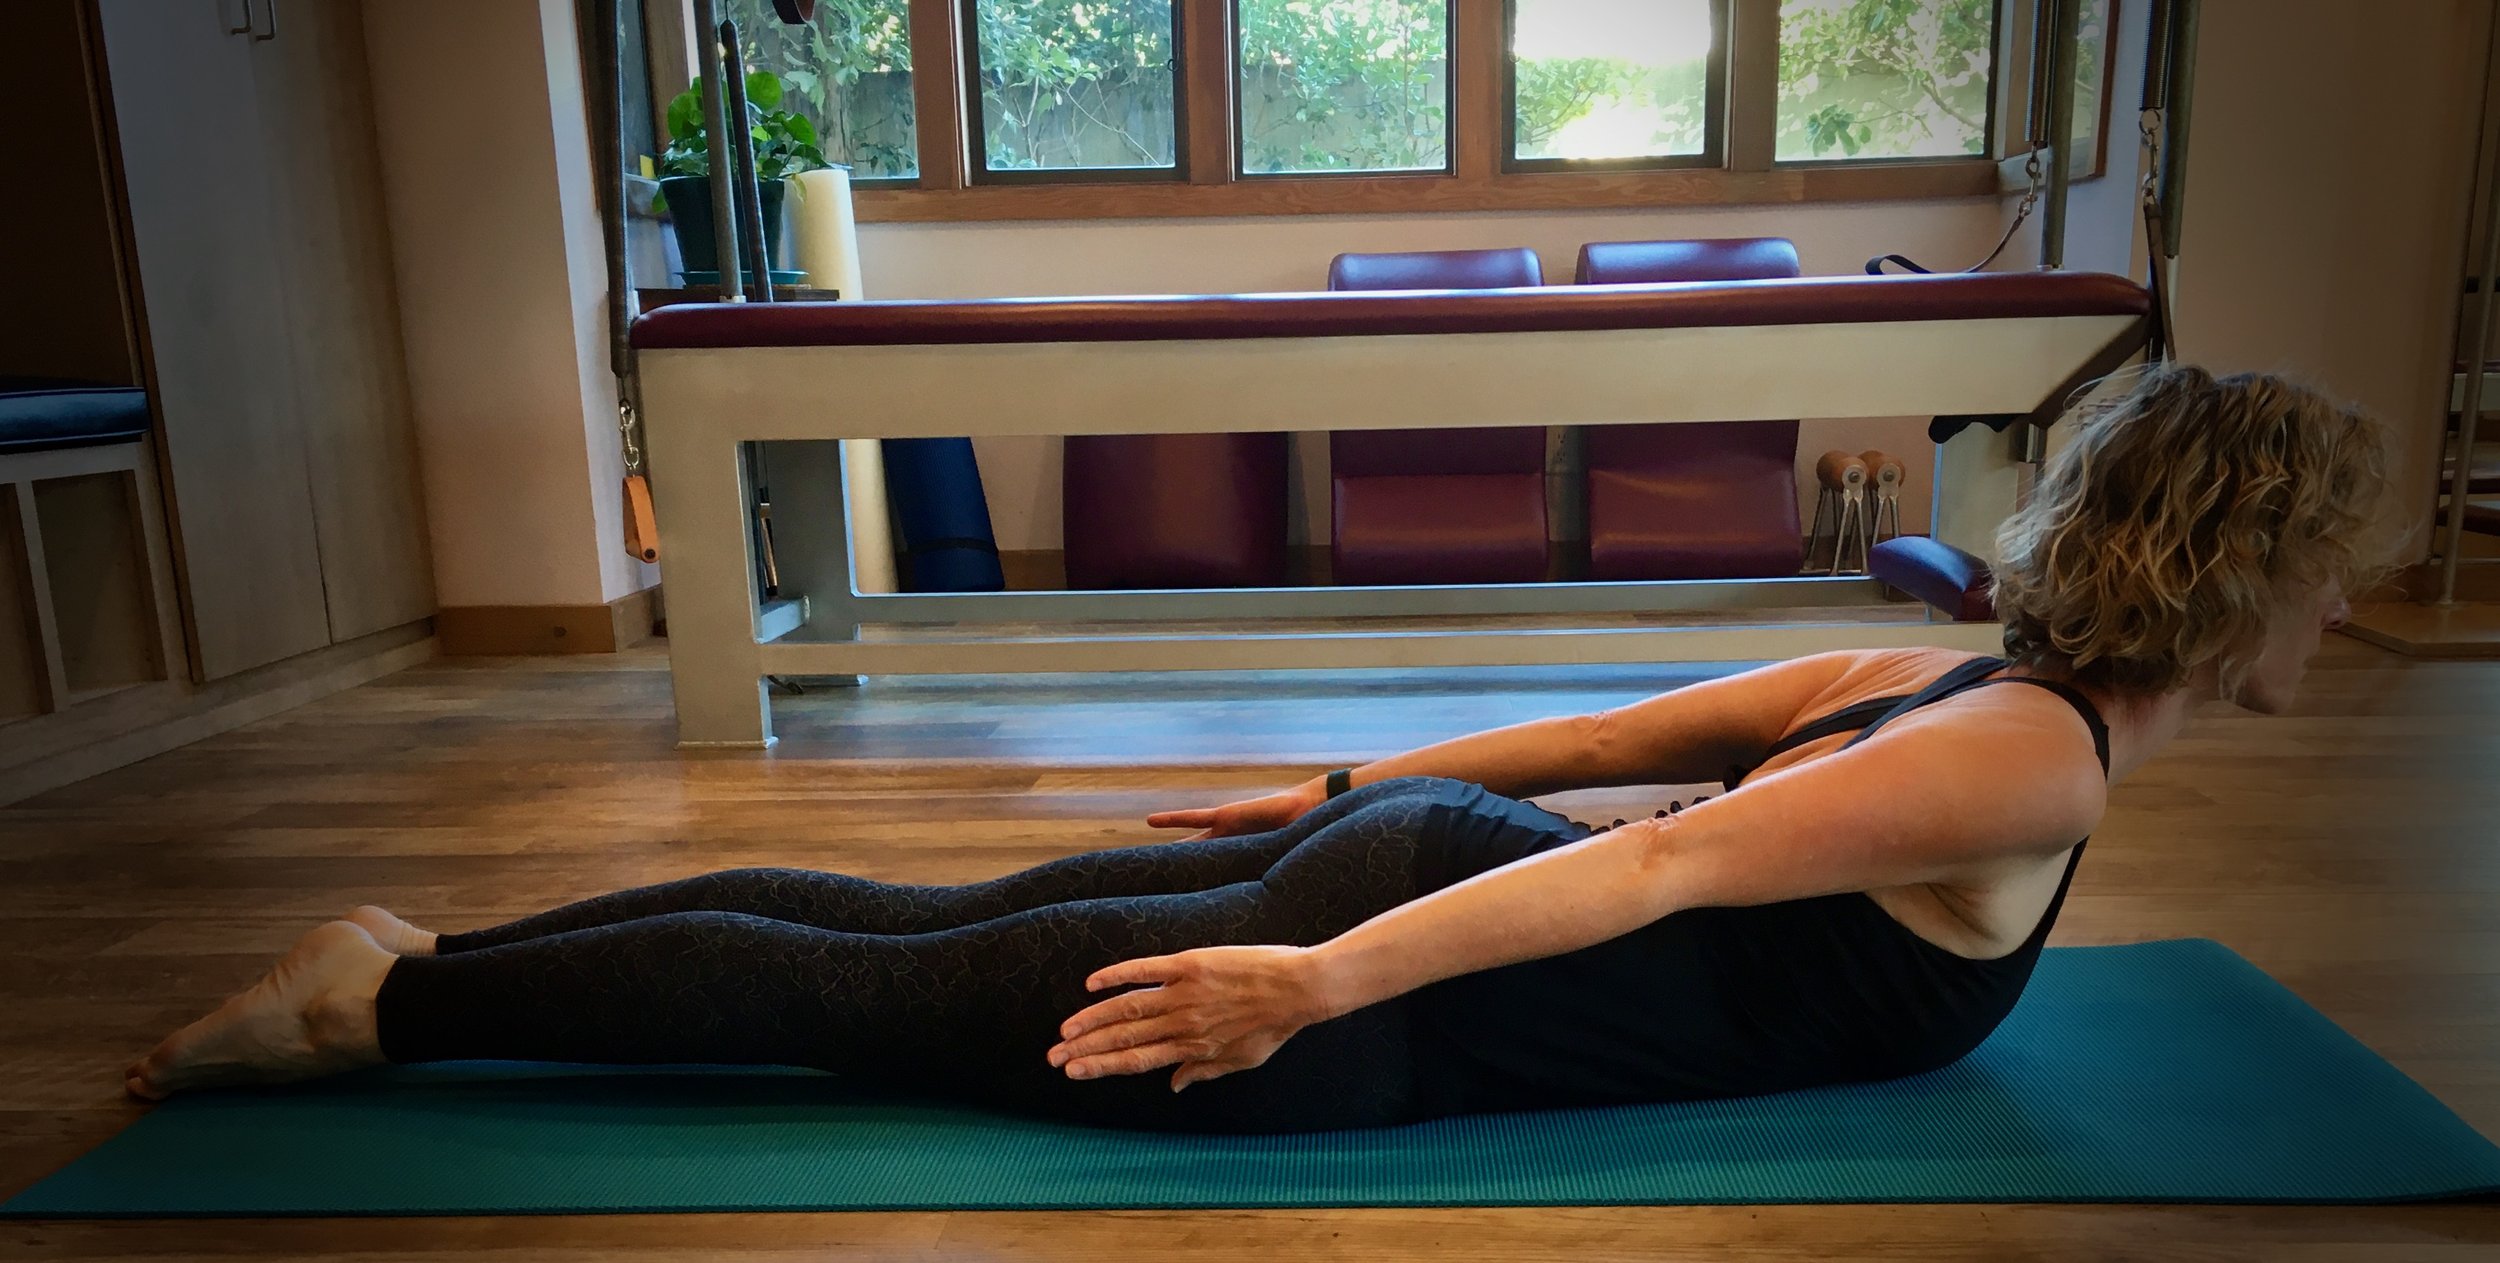
Locust pose (Salabhasana)
Lie on your stomach with your arms by your sides. Engage your gluteal (butt) muscles and, as you take a breath in, lift your head, upper torso, arms, and legs away from the floor. Don’t lift so high that you feel a pinch in your low back and be sure to tuck your pubic bone/lower abs in.
Exhale and release to the ground. Repeat this pose five times and try to hold each time for five breaths in and out.
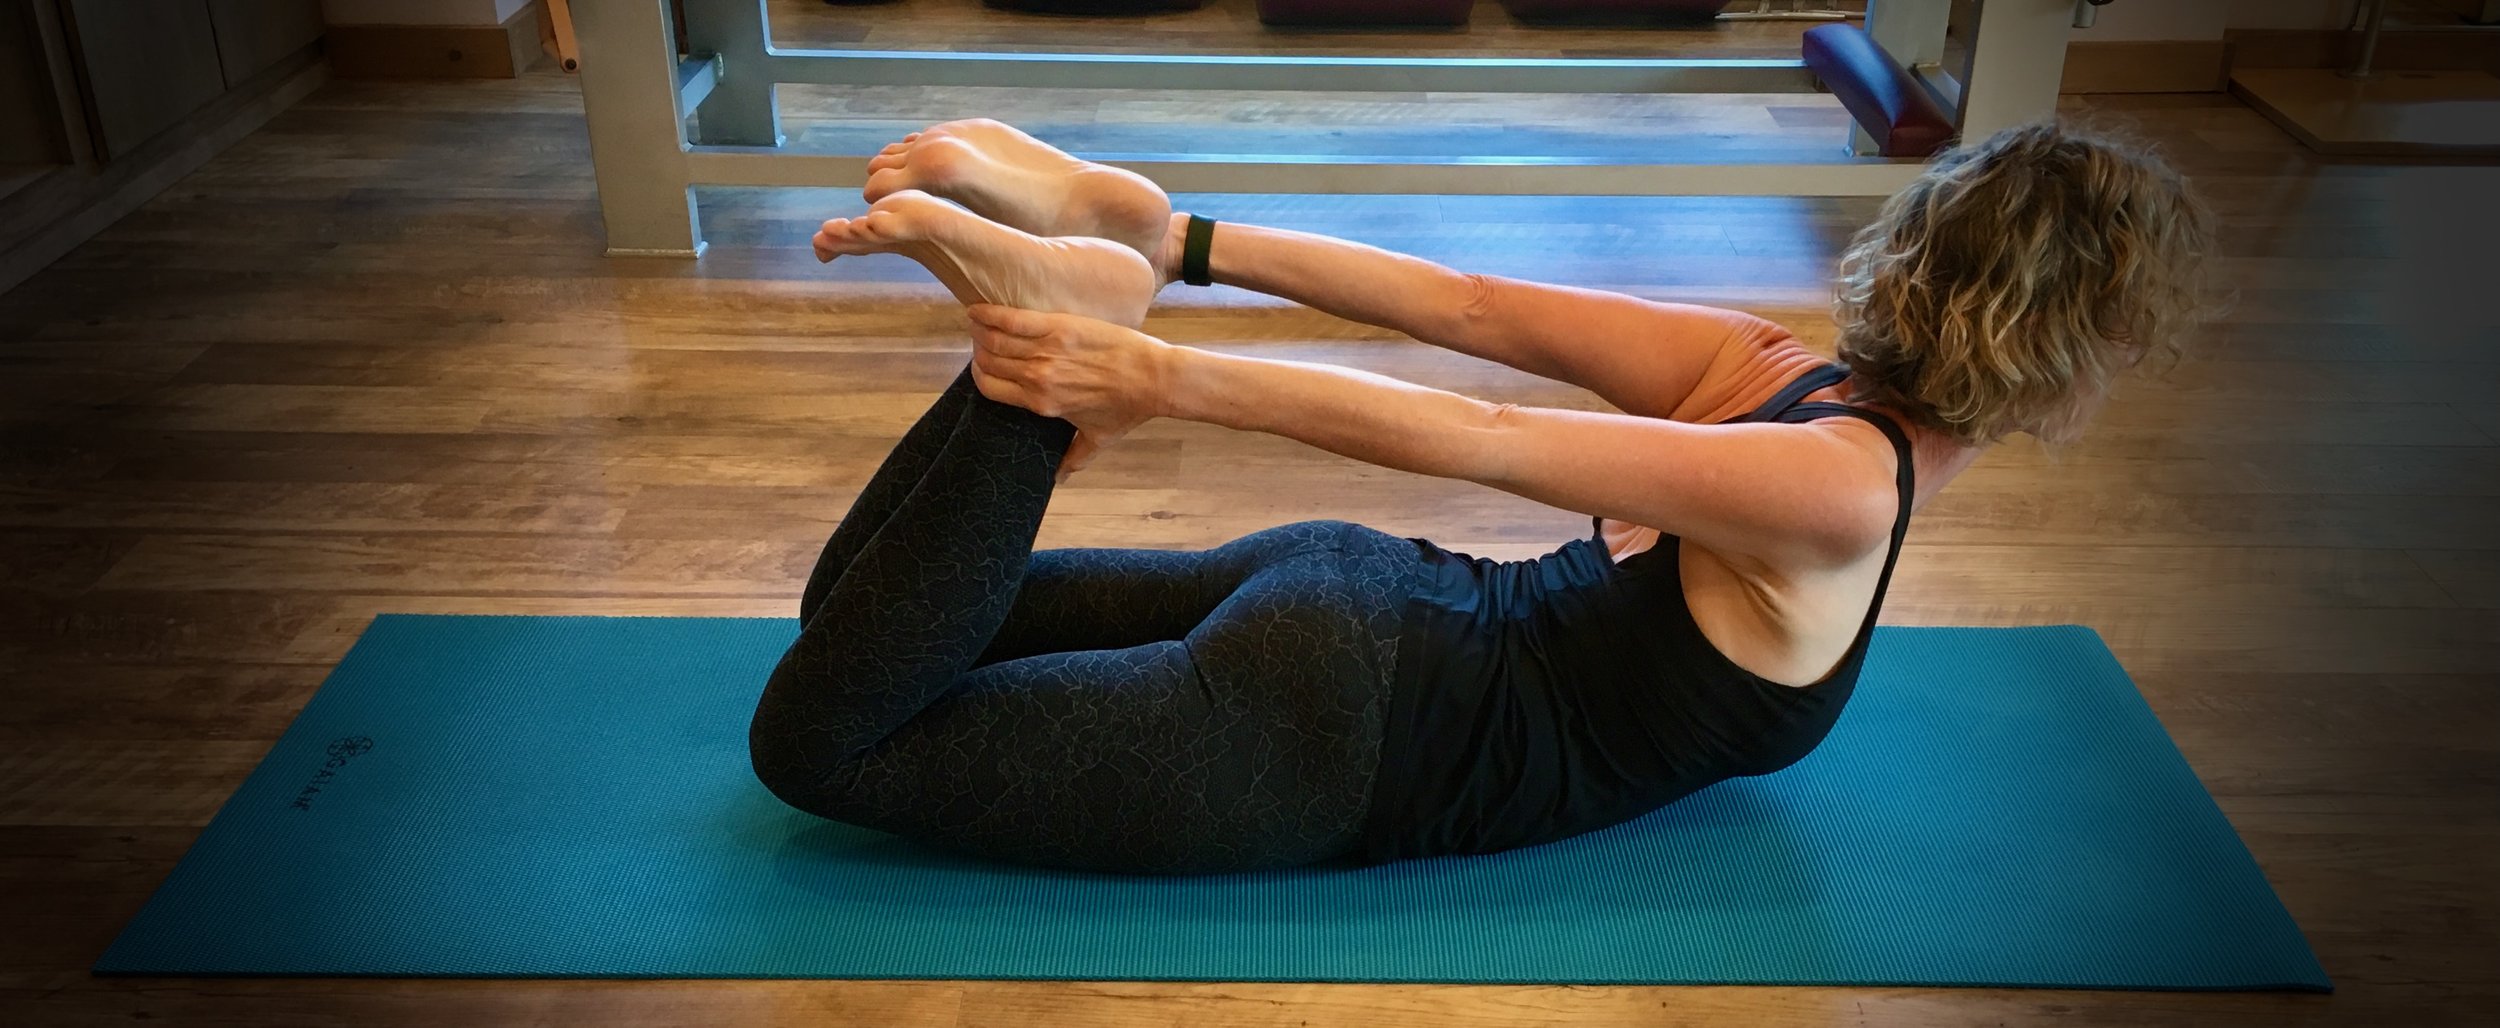
Bow pose (Dhanurasana)
Lie on your stomach with your arms by your sides. Bend your knees and take hold of your ankles or feet. (If you can't reach your ankles or feet, you may use a strap or towel.) Engage your back and gluteal (butt) muscles and as you take a breath in, lift your head, upper torso, arms, and legs away from the floor. With strong legs and arms, gently pull on your ankles/feet to create the shape of a bow (like a bow and arrow).
Once you’re in this position, use your breathing to create a rocking motion to stimulate your digestive tract. Inhale to let the upper abdomen expand and exhale to contract. After five inhalations and exhalations (or sooner if you have any discomfort) release to the ground.
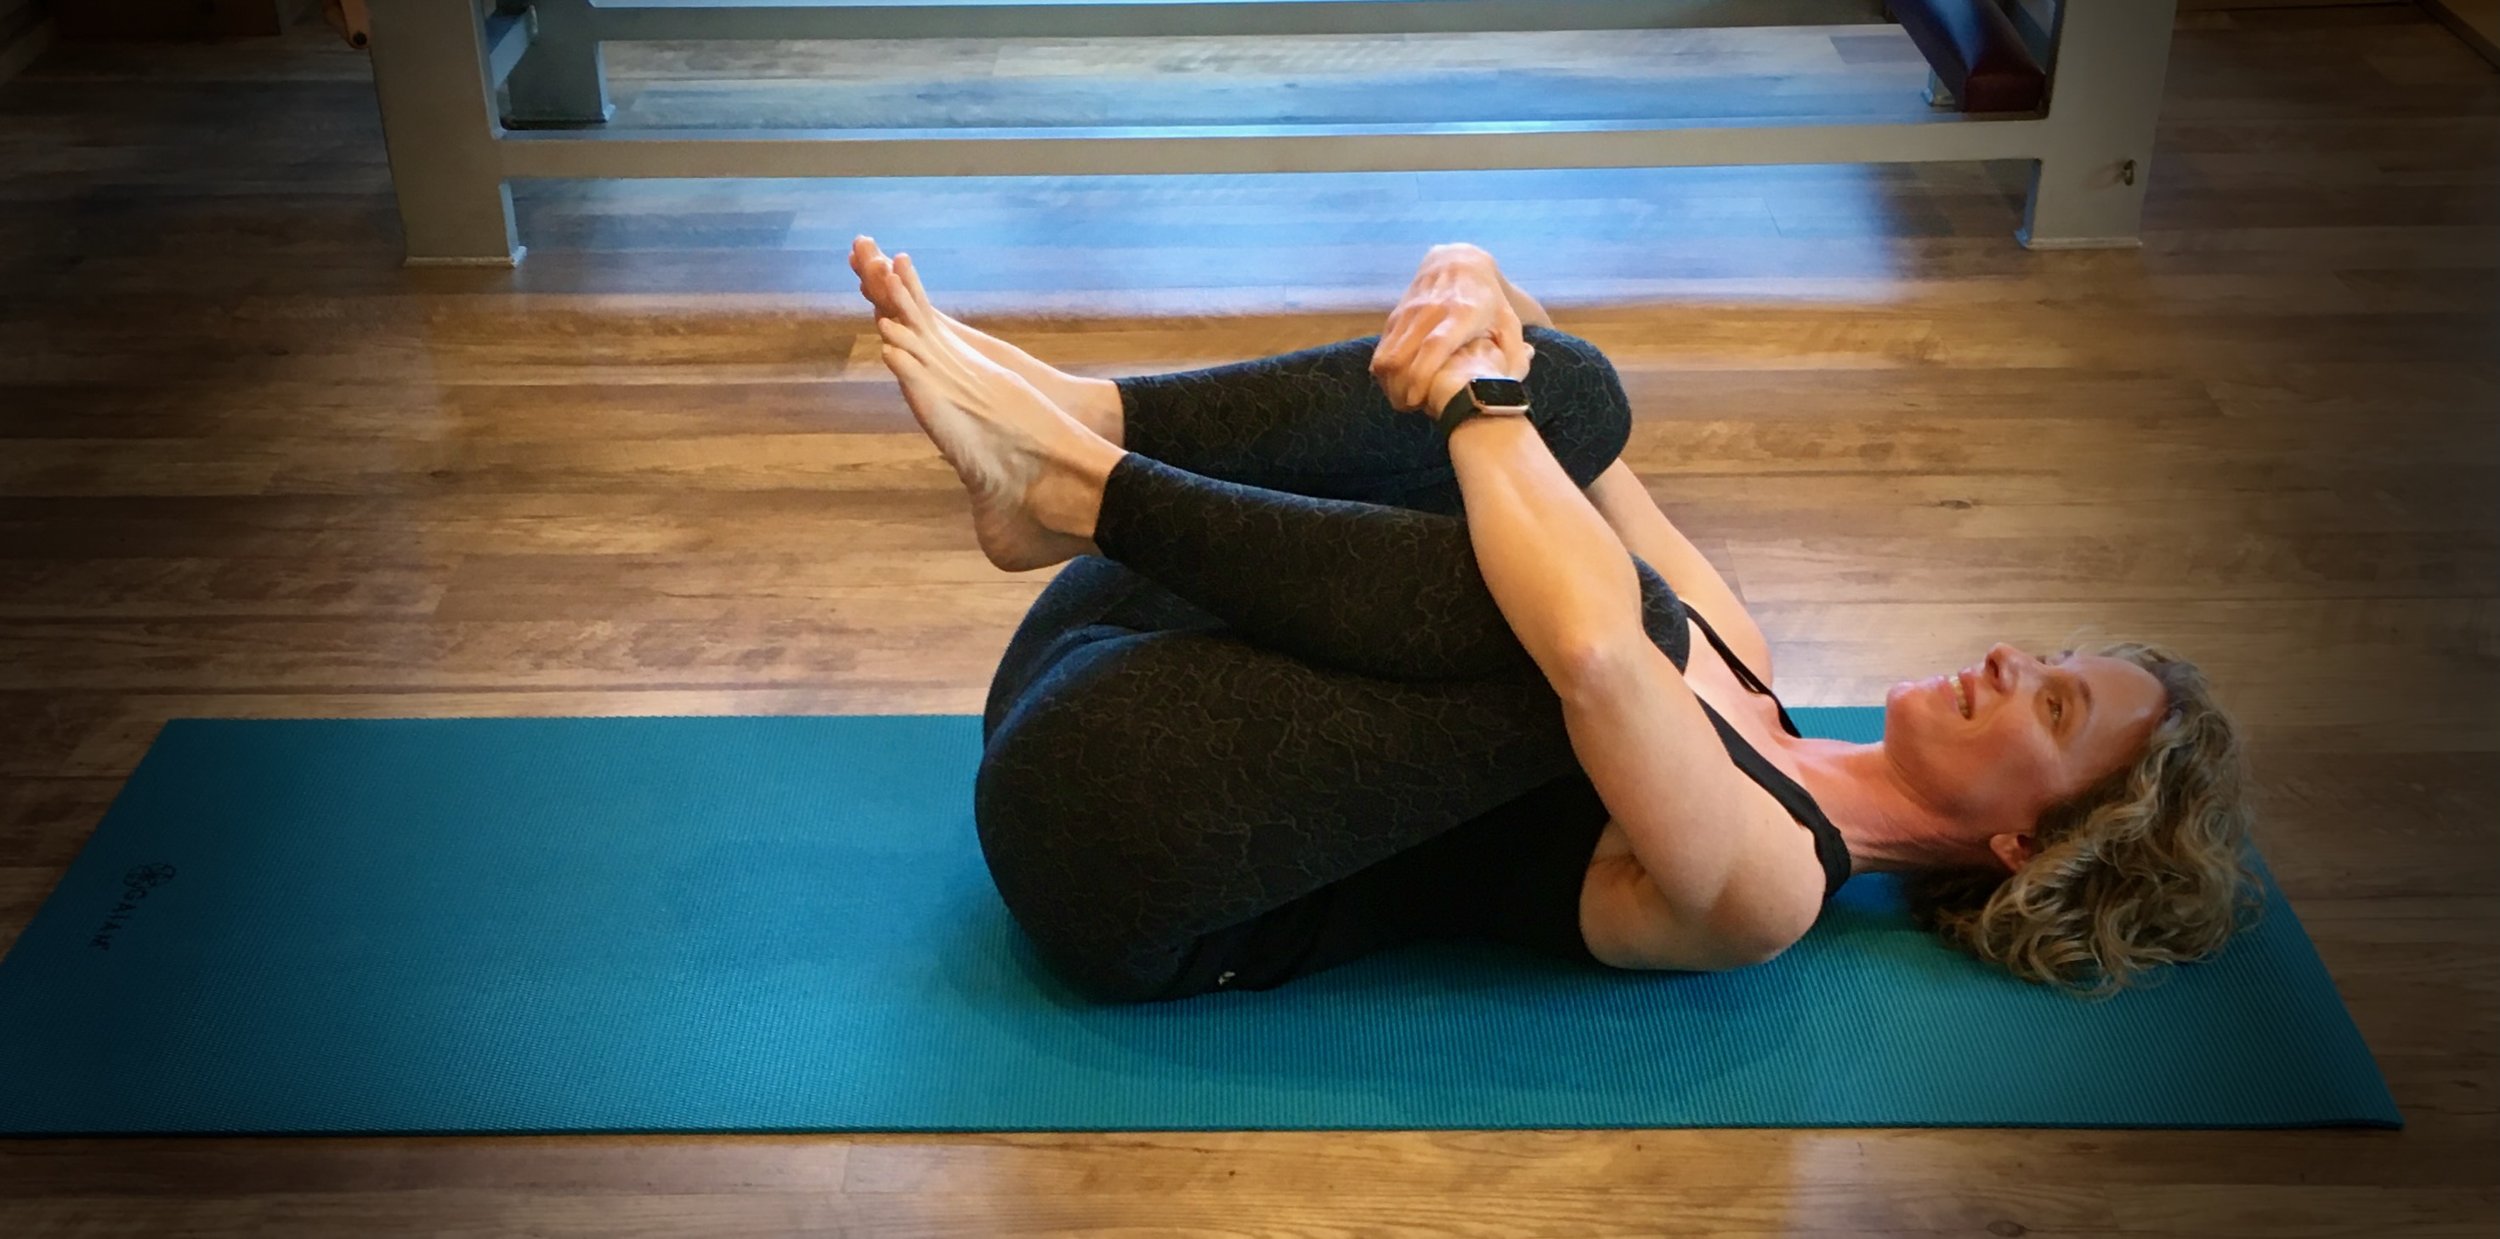
Knees-to-chest (Apanasana)
Lie on your back. As you take a breath in, slowly bring both knees to your chest and hug them into your body. You can grasp your wrists or your elbows, whatever is most comfortable. Try to keep your shoulders on the floor. Rock side to side if you like. Hold this position for five breaths.
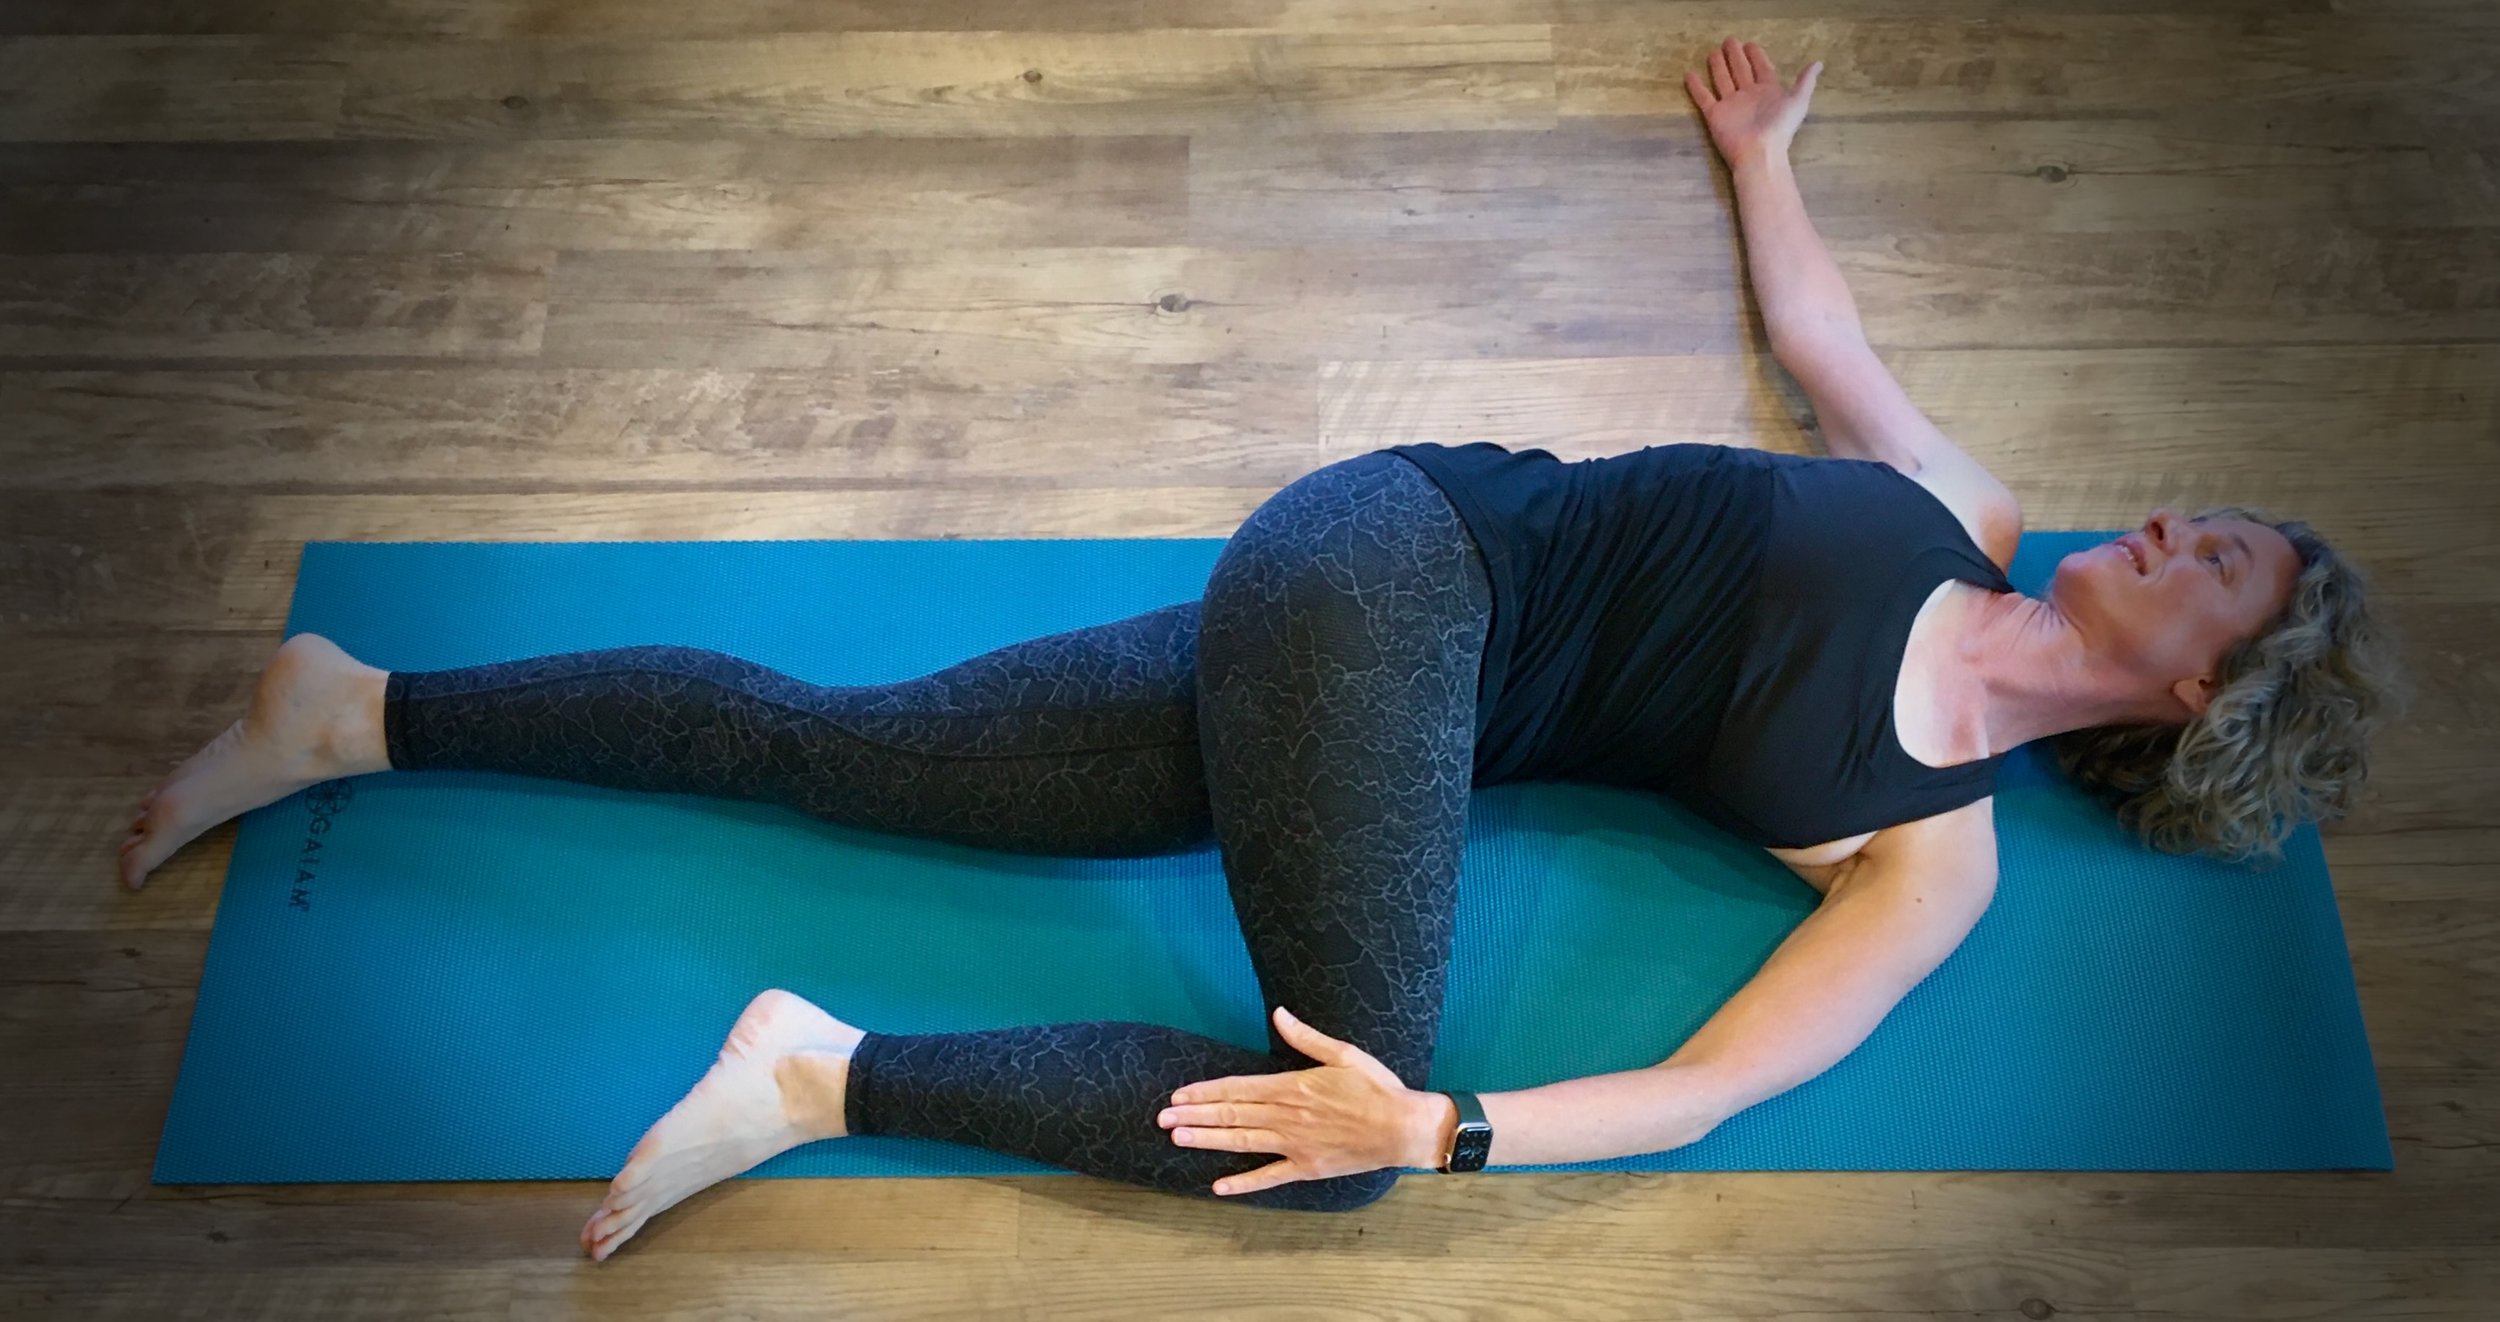
Reclined spinal twist (Supta Matsyendrasana)
Lie on your back and extend your legs. Take a breath in and, as you breathe out, hug both knees into your chest. Stretch your left leg out, keeping your right leg hugged in. Place your left hand on the outside of your right knee and gently pull it over to the left. Extend your right arm straight out to the right, turn your head to the right. Relax and hold the pose for at least 10 slow breaths. (You can adjust this pose by moving both legs to one side if that’s more comfortable.)
To switch to the other side, slowly come back to center, hug both knees into your chest and repeat on the other side.
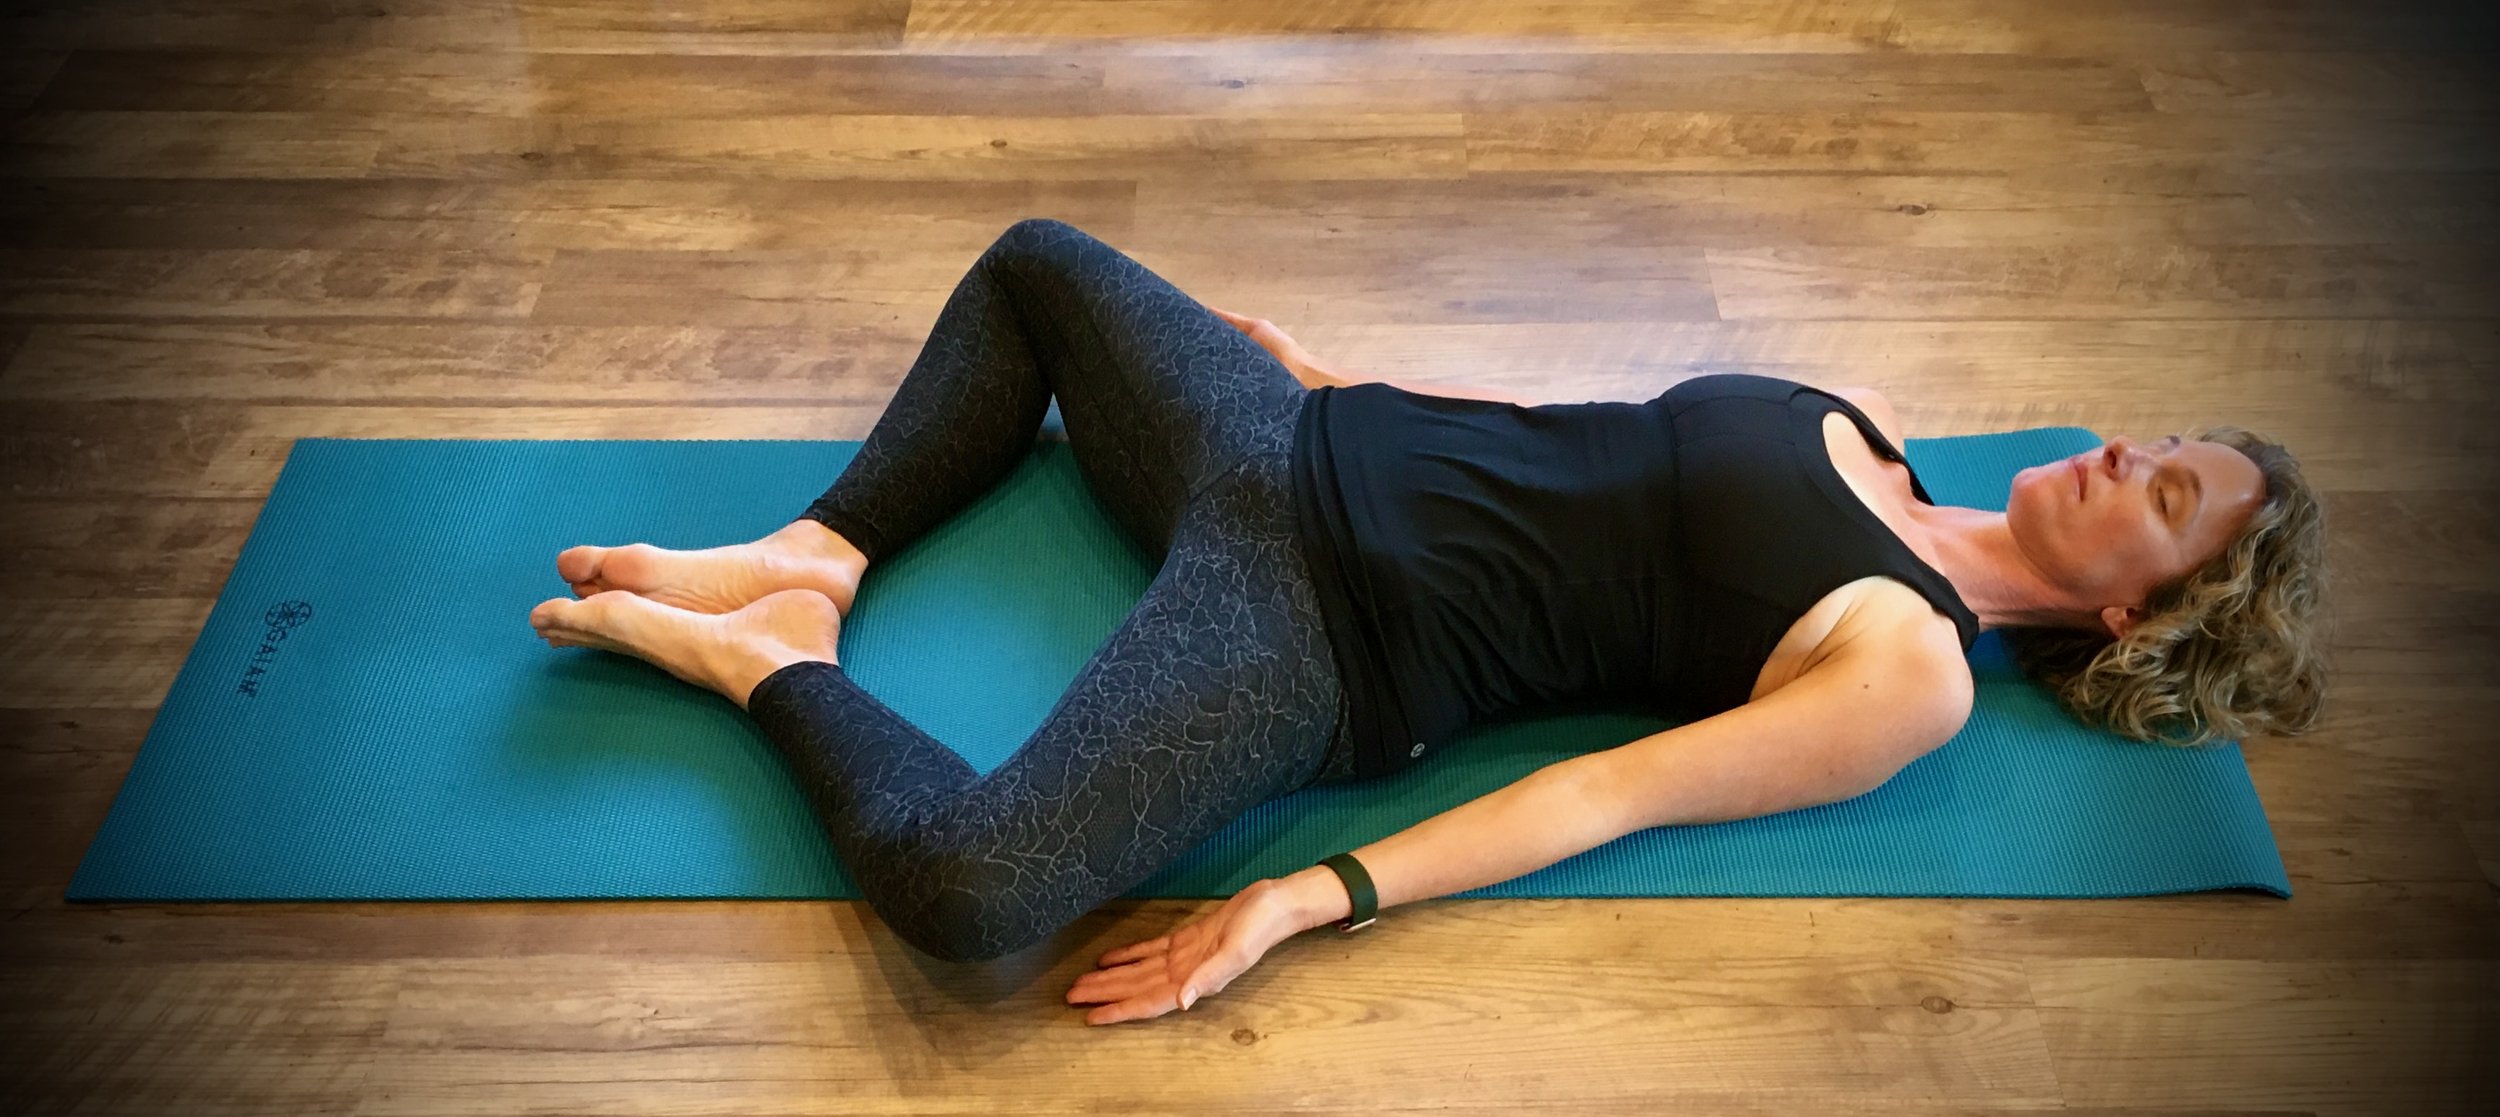
Reclining bound angle pose (Supta Baddha Konasana)
Lie down on your back. Place the soles of your feet together and allow your knees to gently fall apart. Focus on breathing from your belly, not your chest. To help with this, you can put one hand on your belly and the other hand on your chest and try to breathe so only the hand on your belly rises.
You may use blankets or pillows to support your knees and make yourself comfortable. Do slow, deep breathing and stay in this pose for five minutes or as long as you are comfortable.
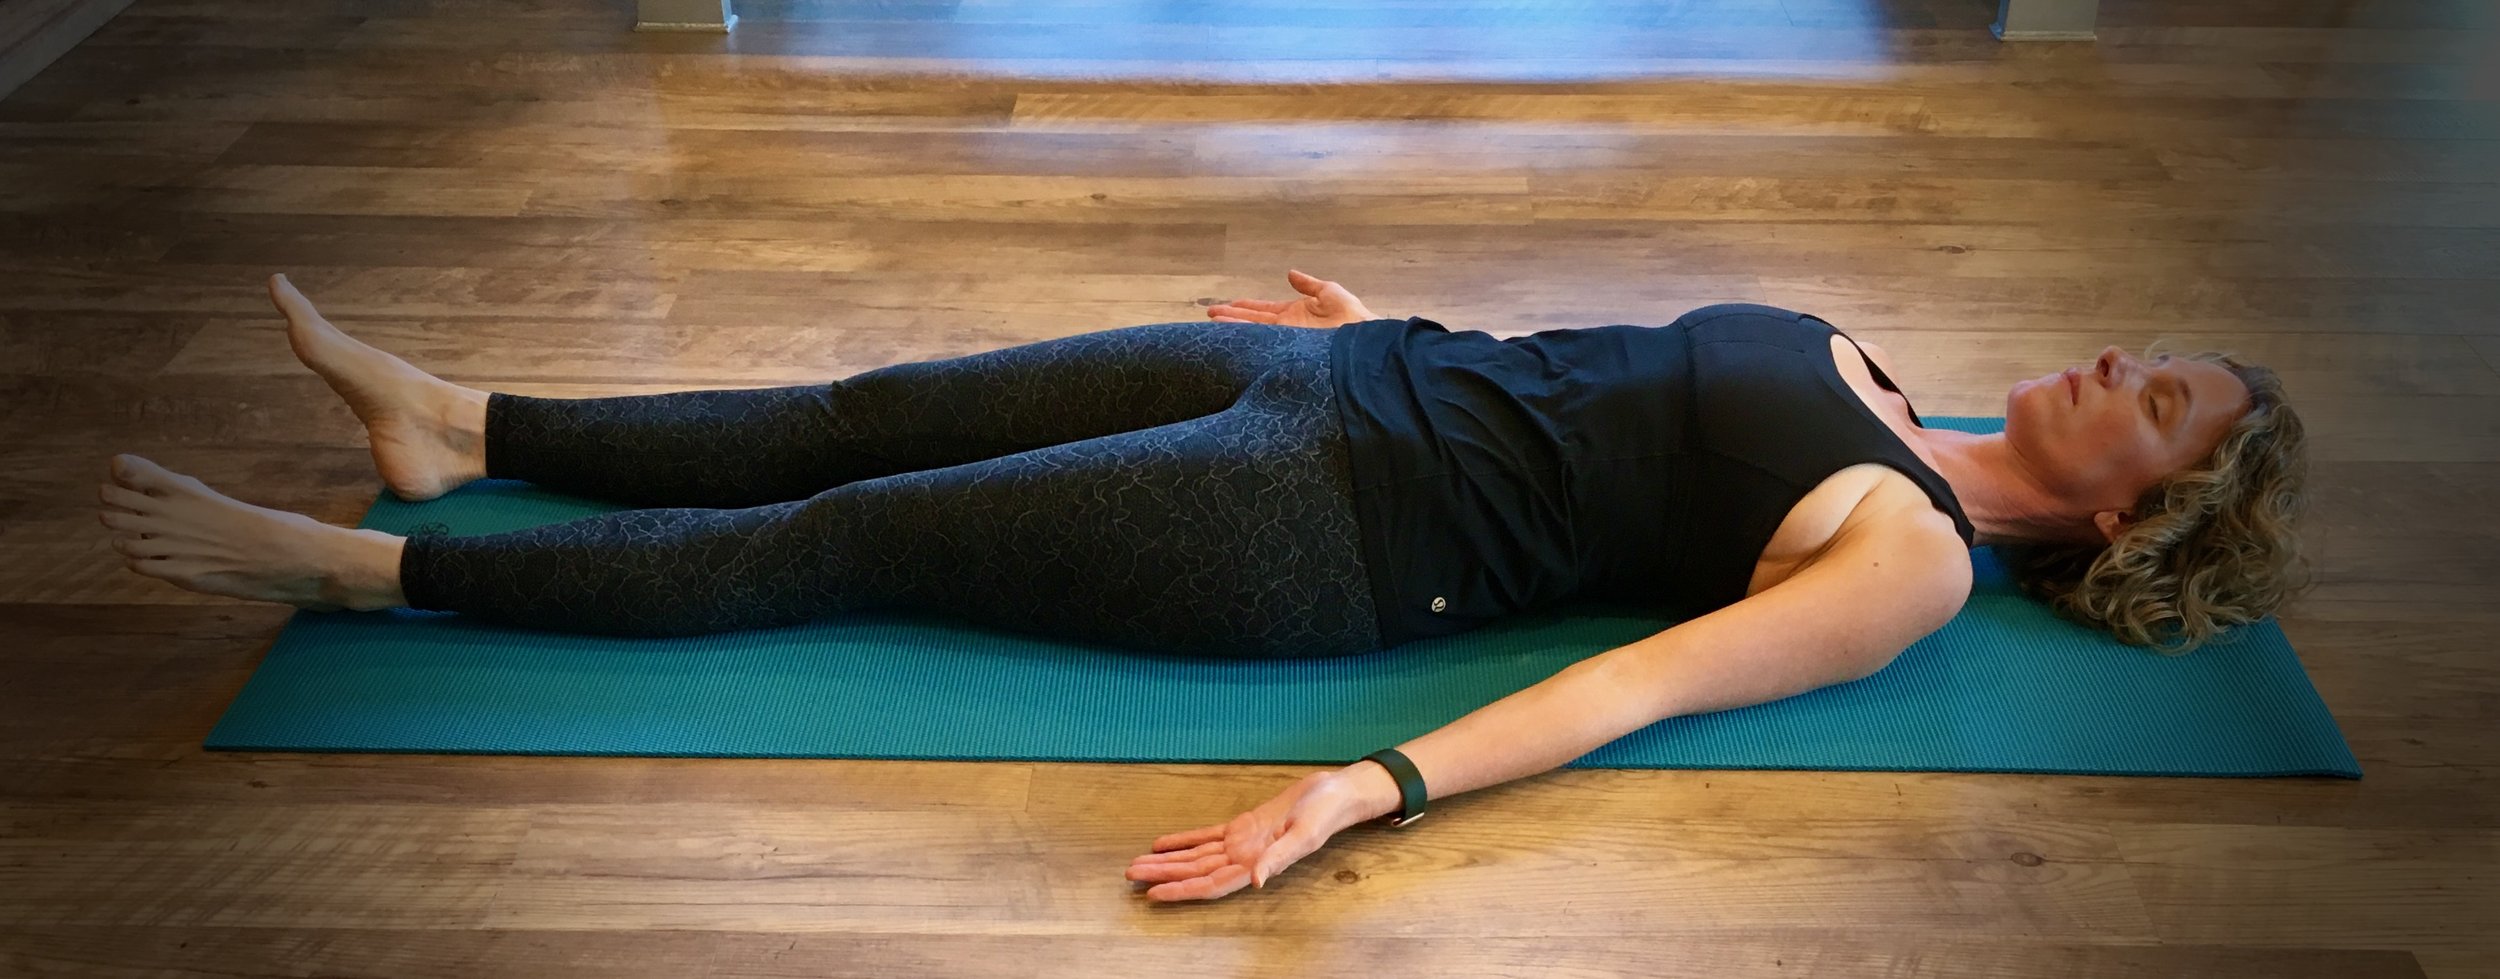
Corpse pose (Savasana)
This could be the best asana of all so don’t skip it!
Lie on your back with your legs and arms extended and slightly spread out. Allow your legs to relax and turn out to the side. Close your eyes. Focus on breathing from your belly, not your chest. To help with this, you can put one hand on your belly and the other hand on your chest and try to breathe so only the hand on your belly rises. Stay in this position for five minutes or more as you relax in this pose.
Come out of this pose slowly by rolling onto your side first and resting in fetal pose (Parsva garbhasana) for a few breaths before coming up to a seated cross-legged position. Rest for a few breaths before standing.
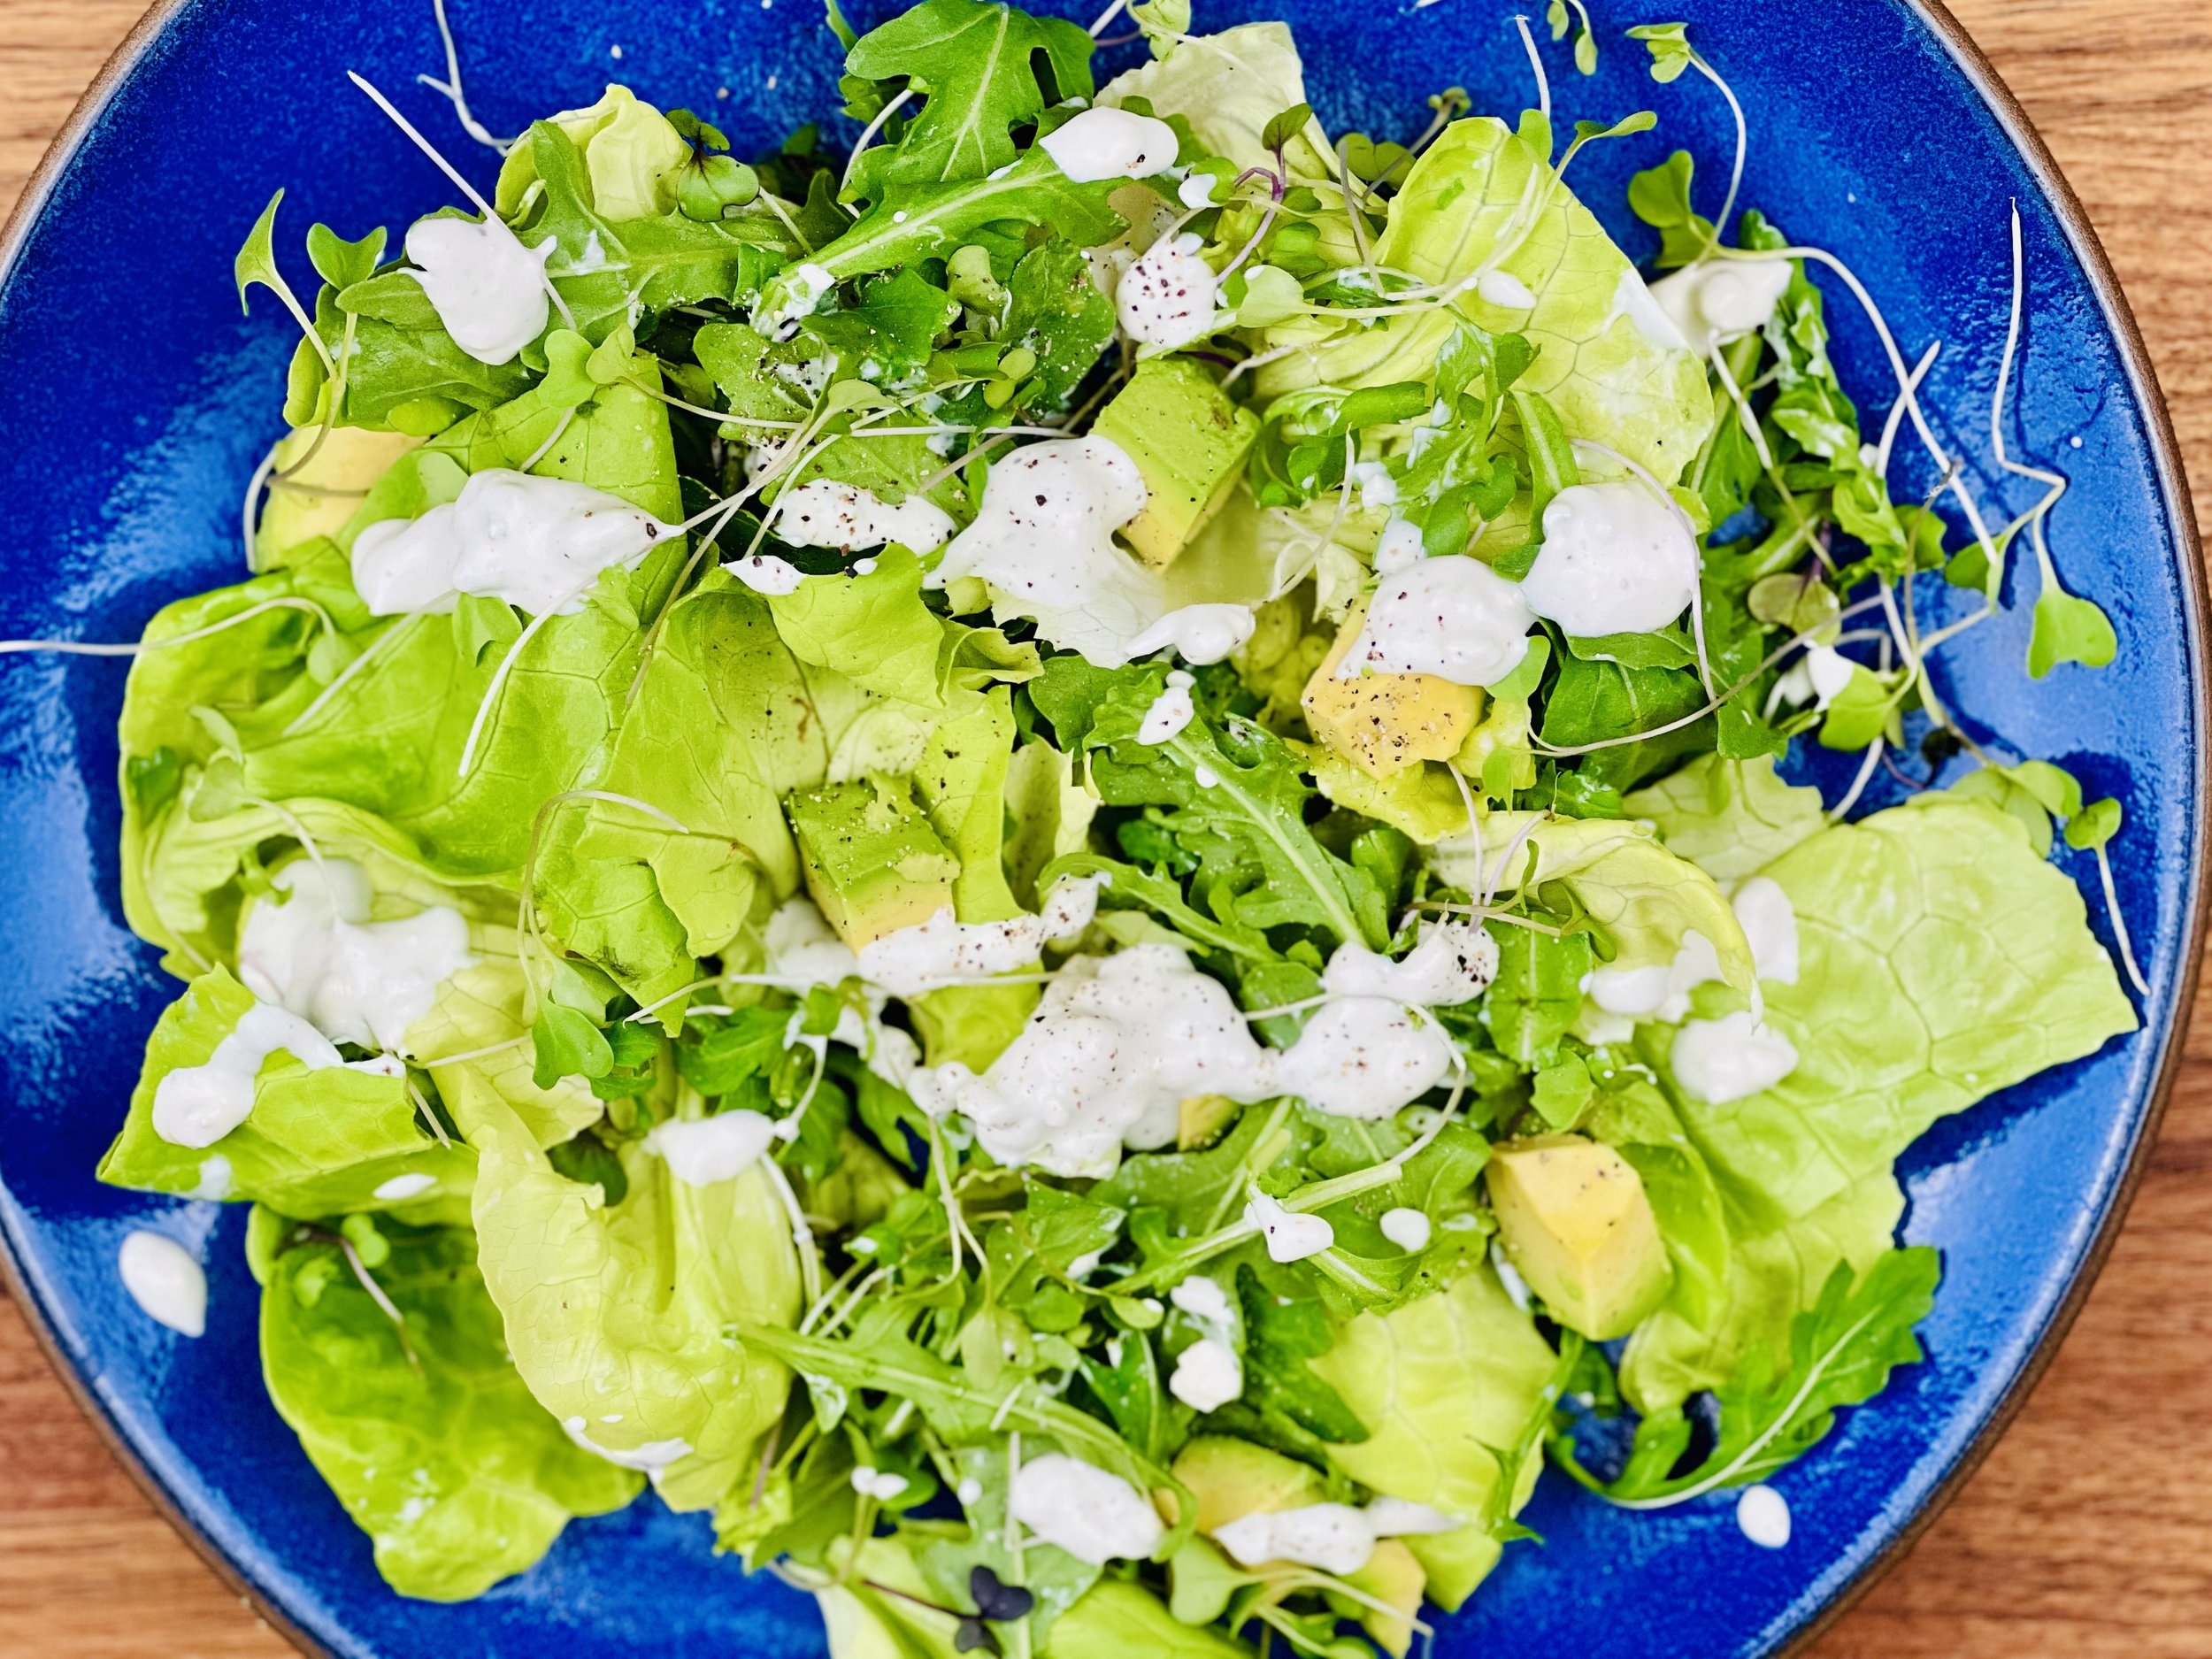
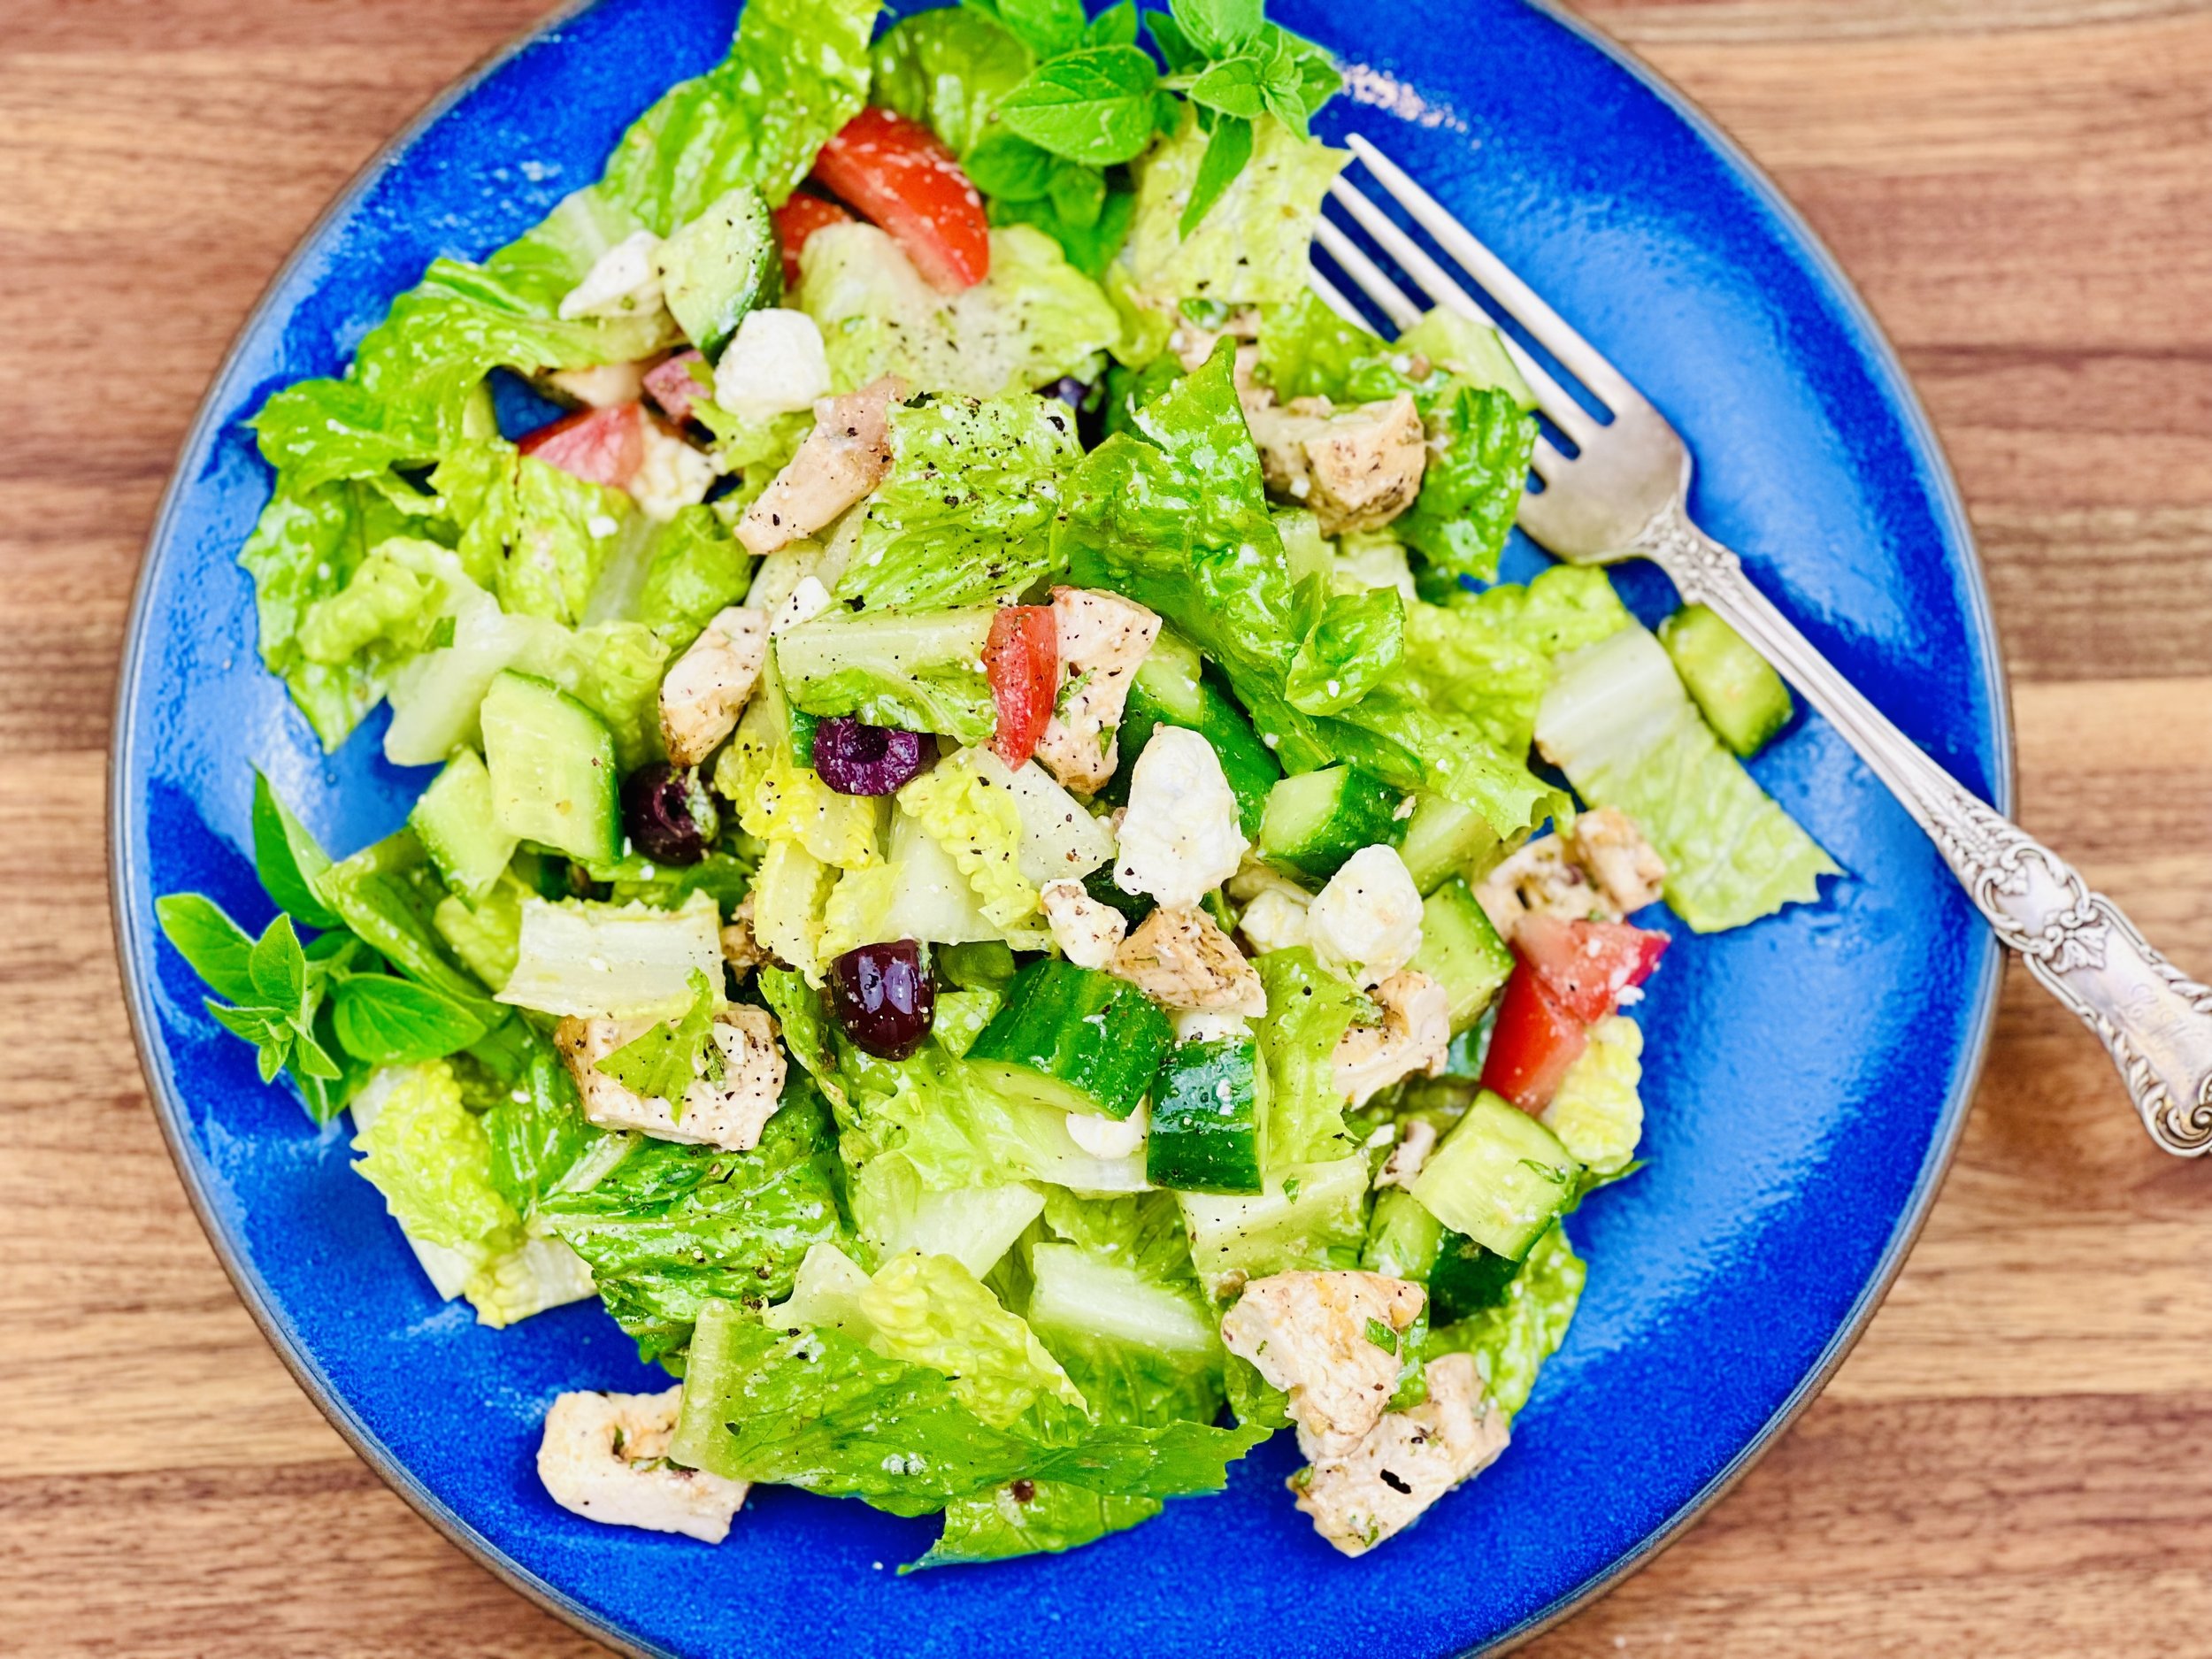
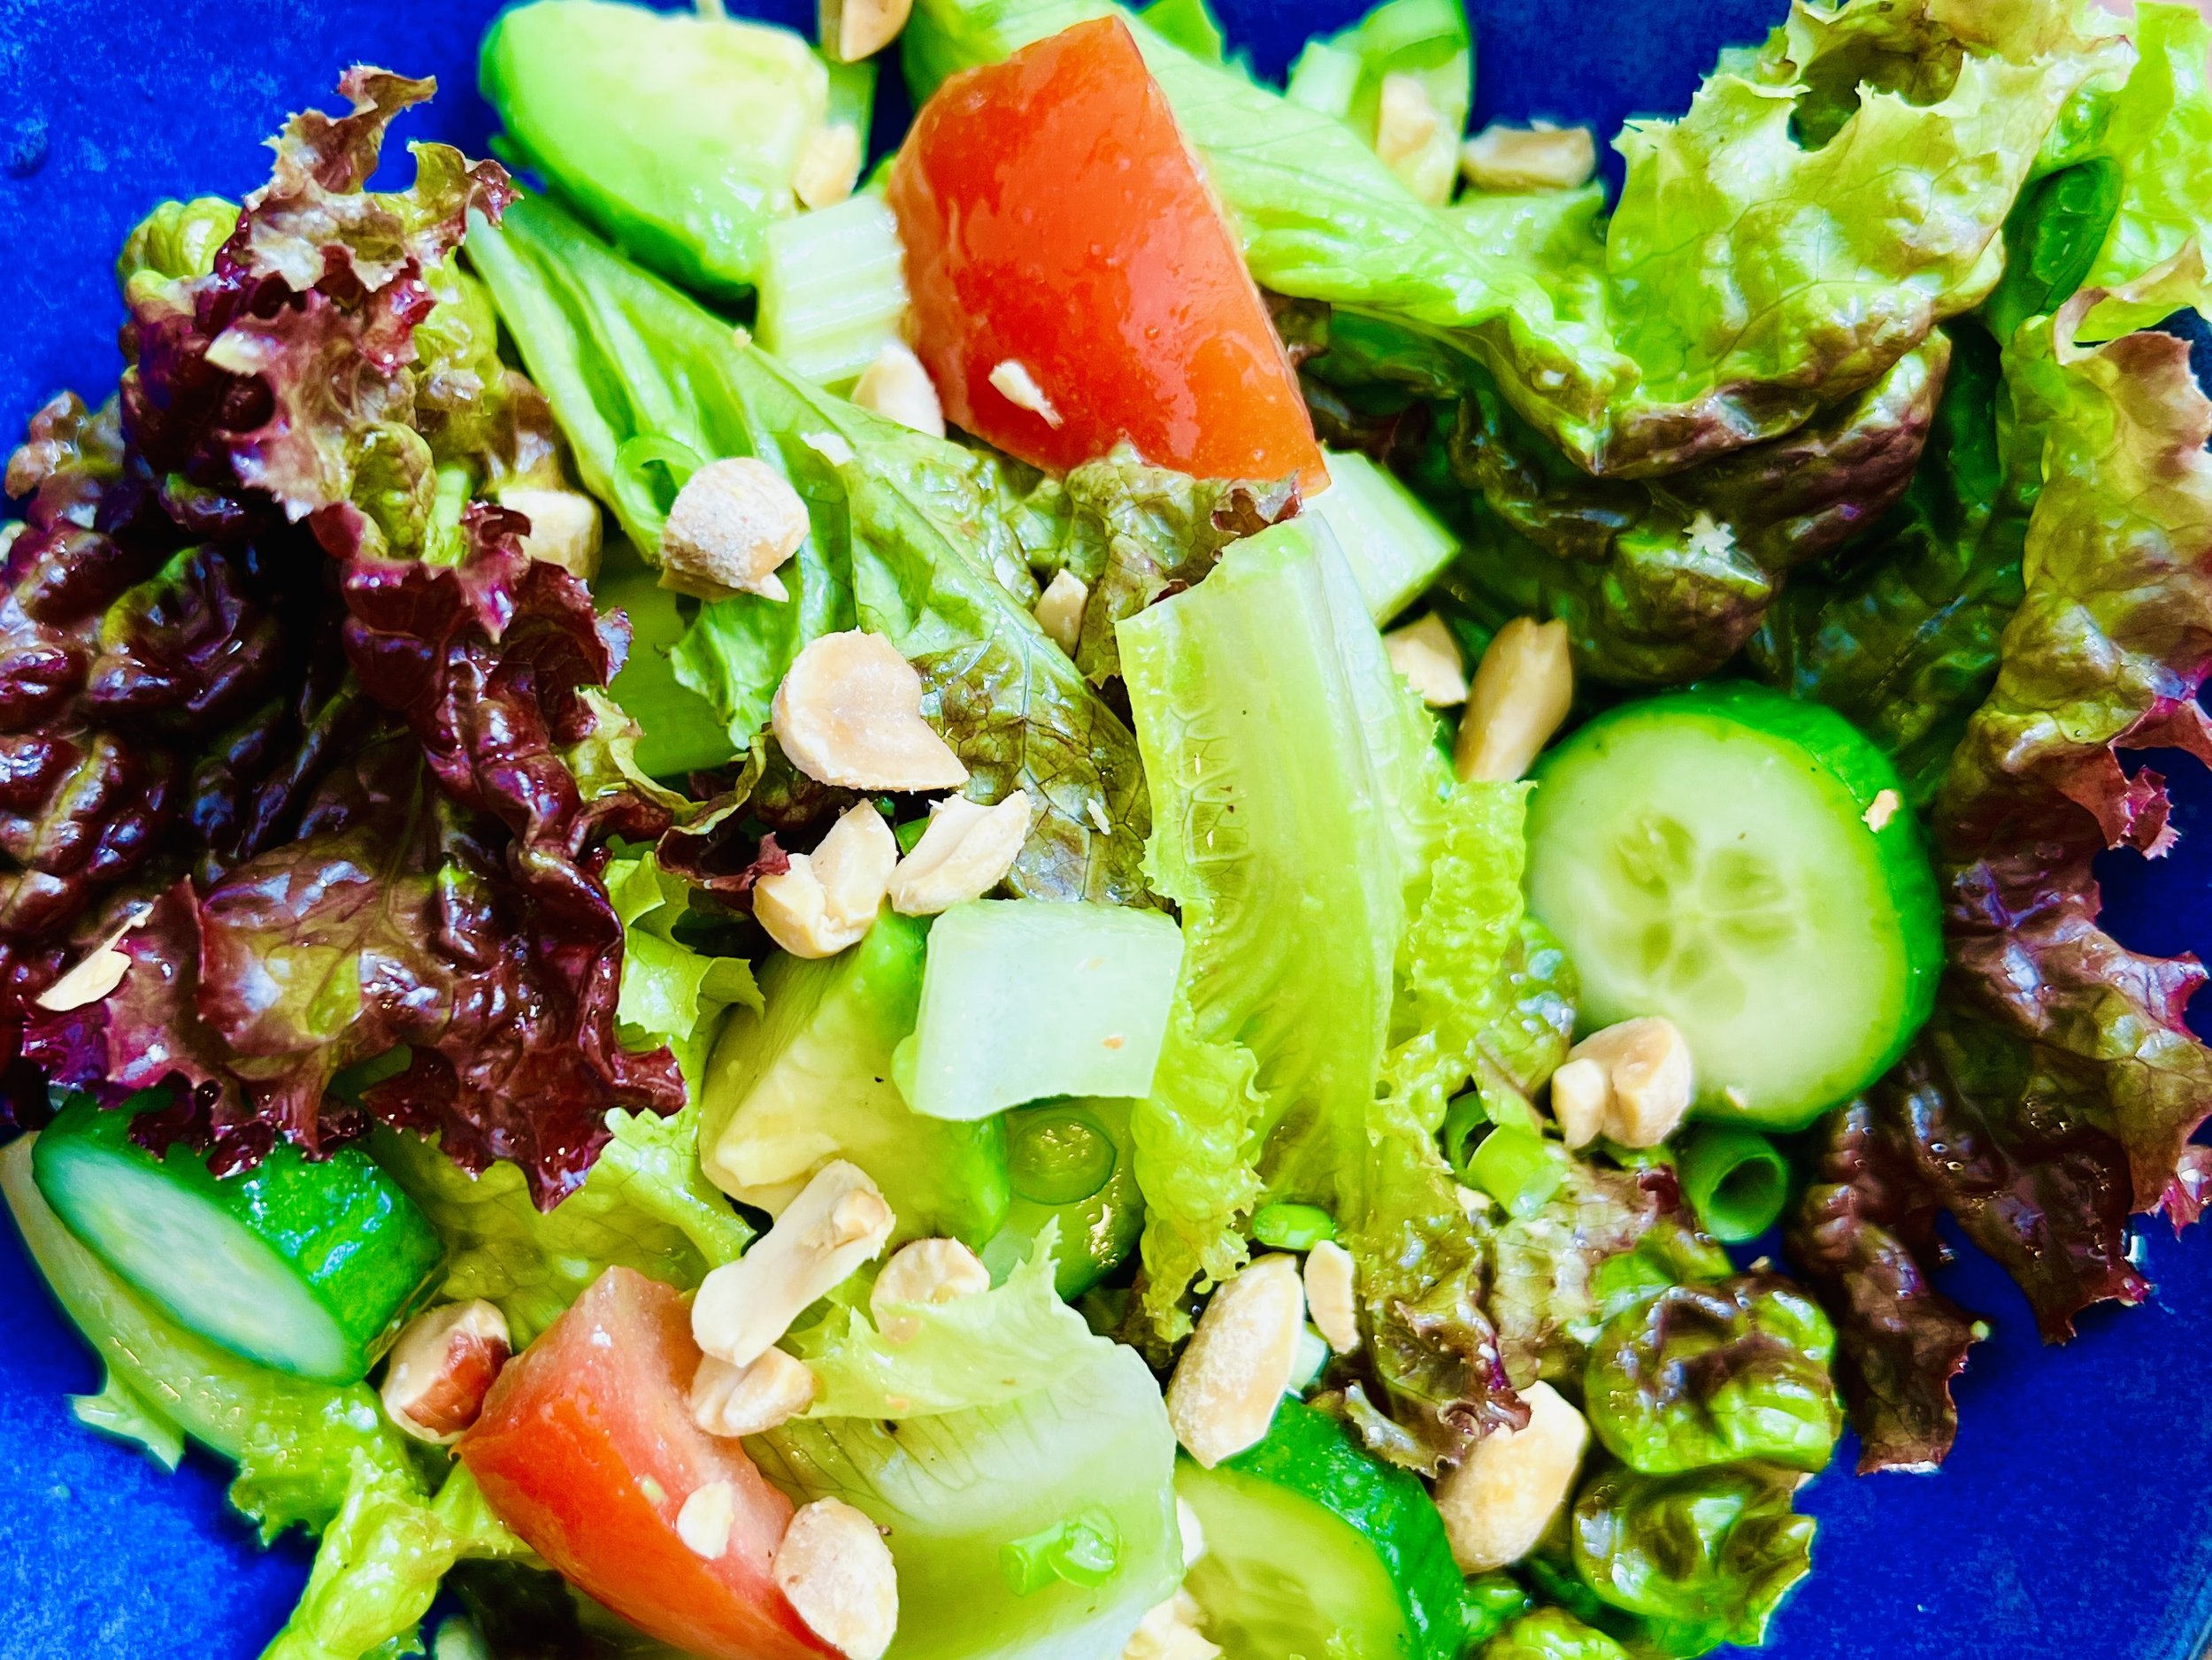
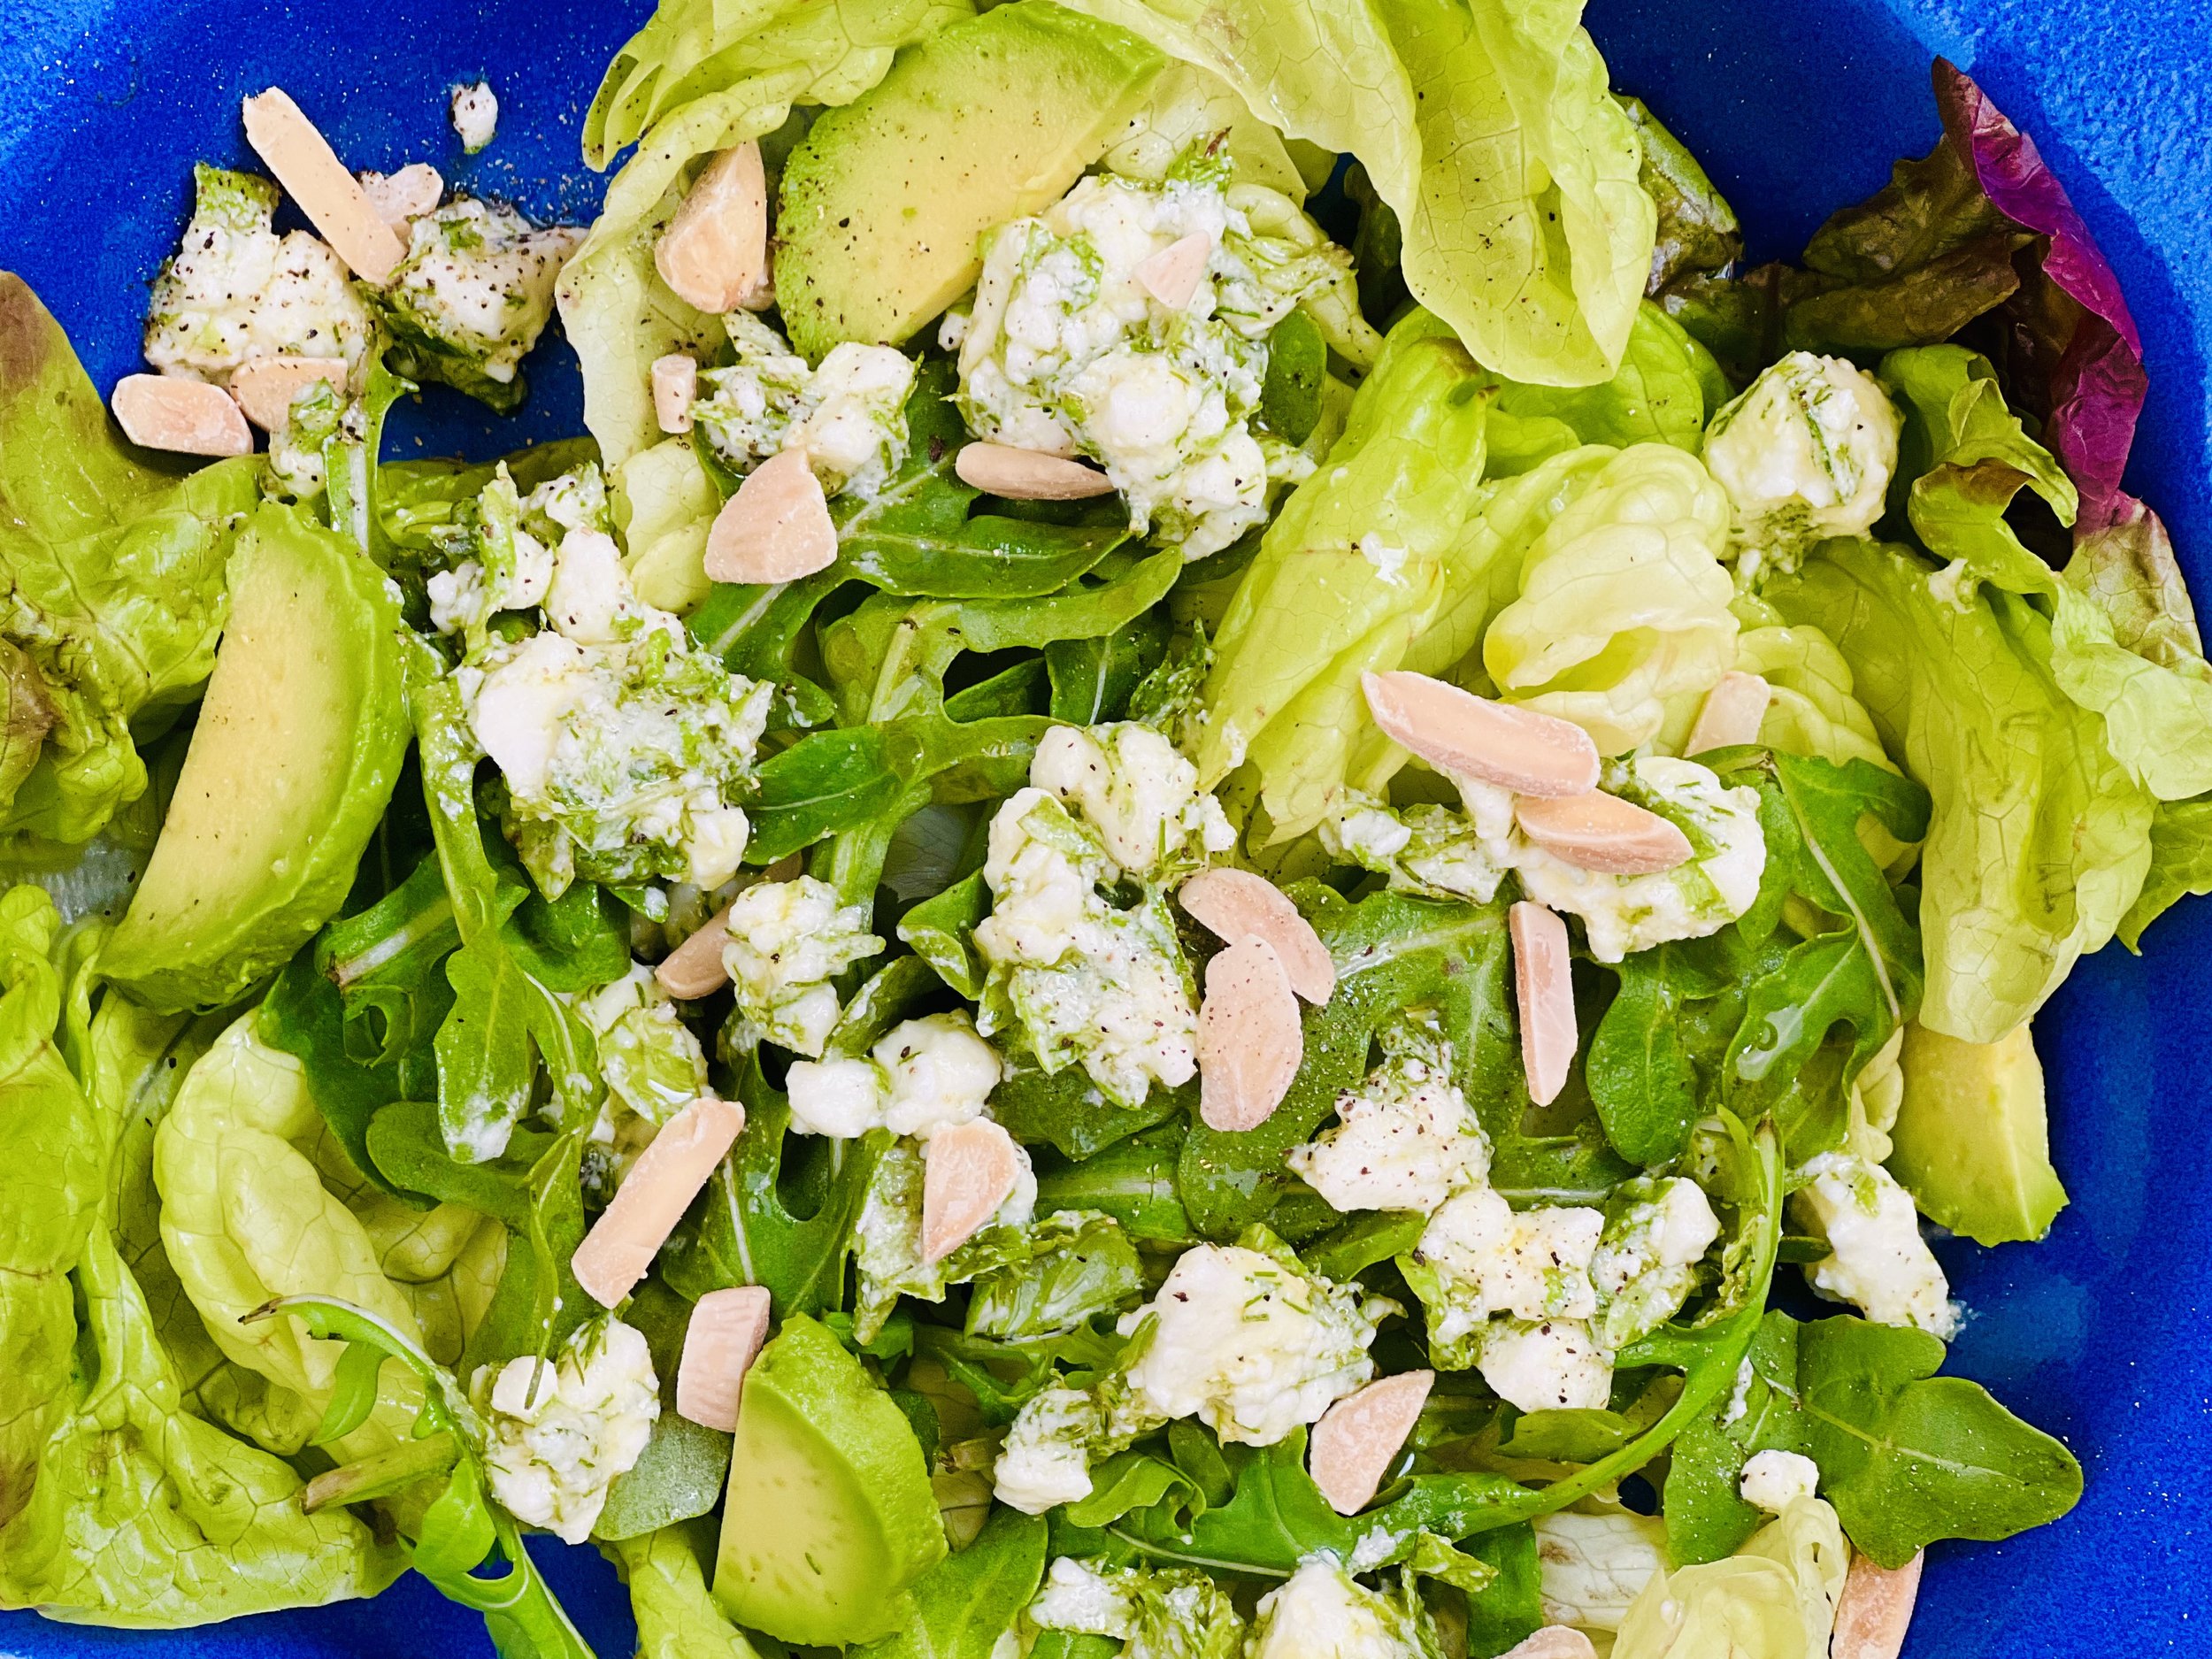
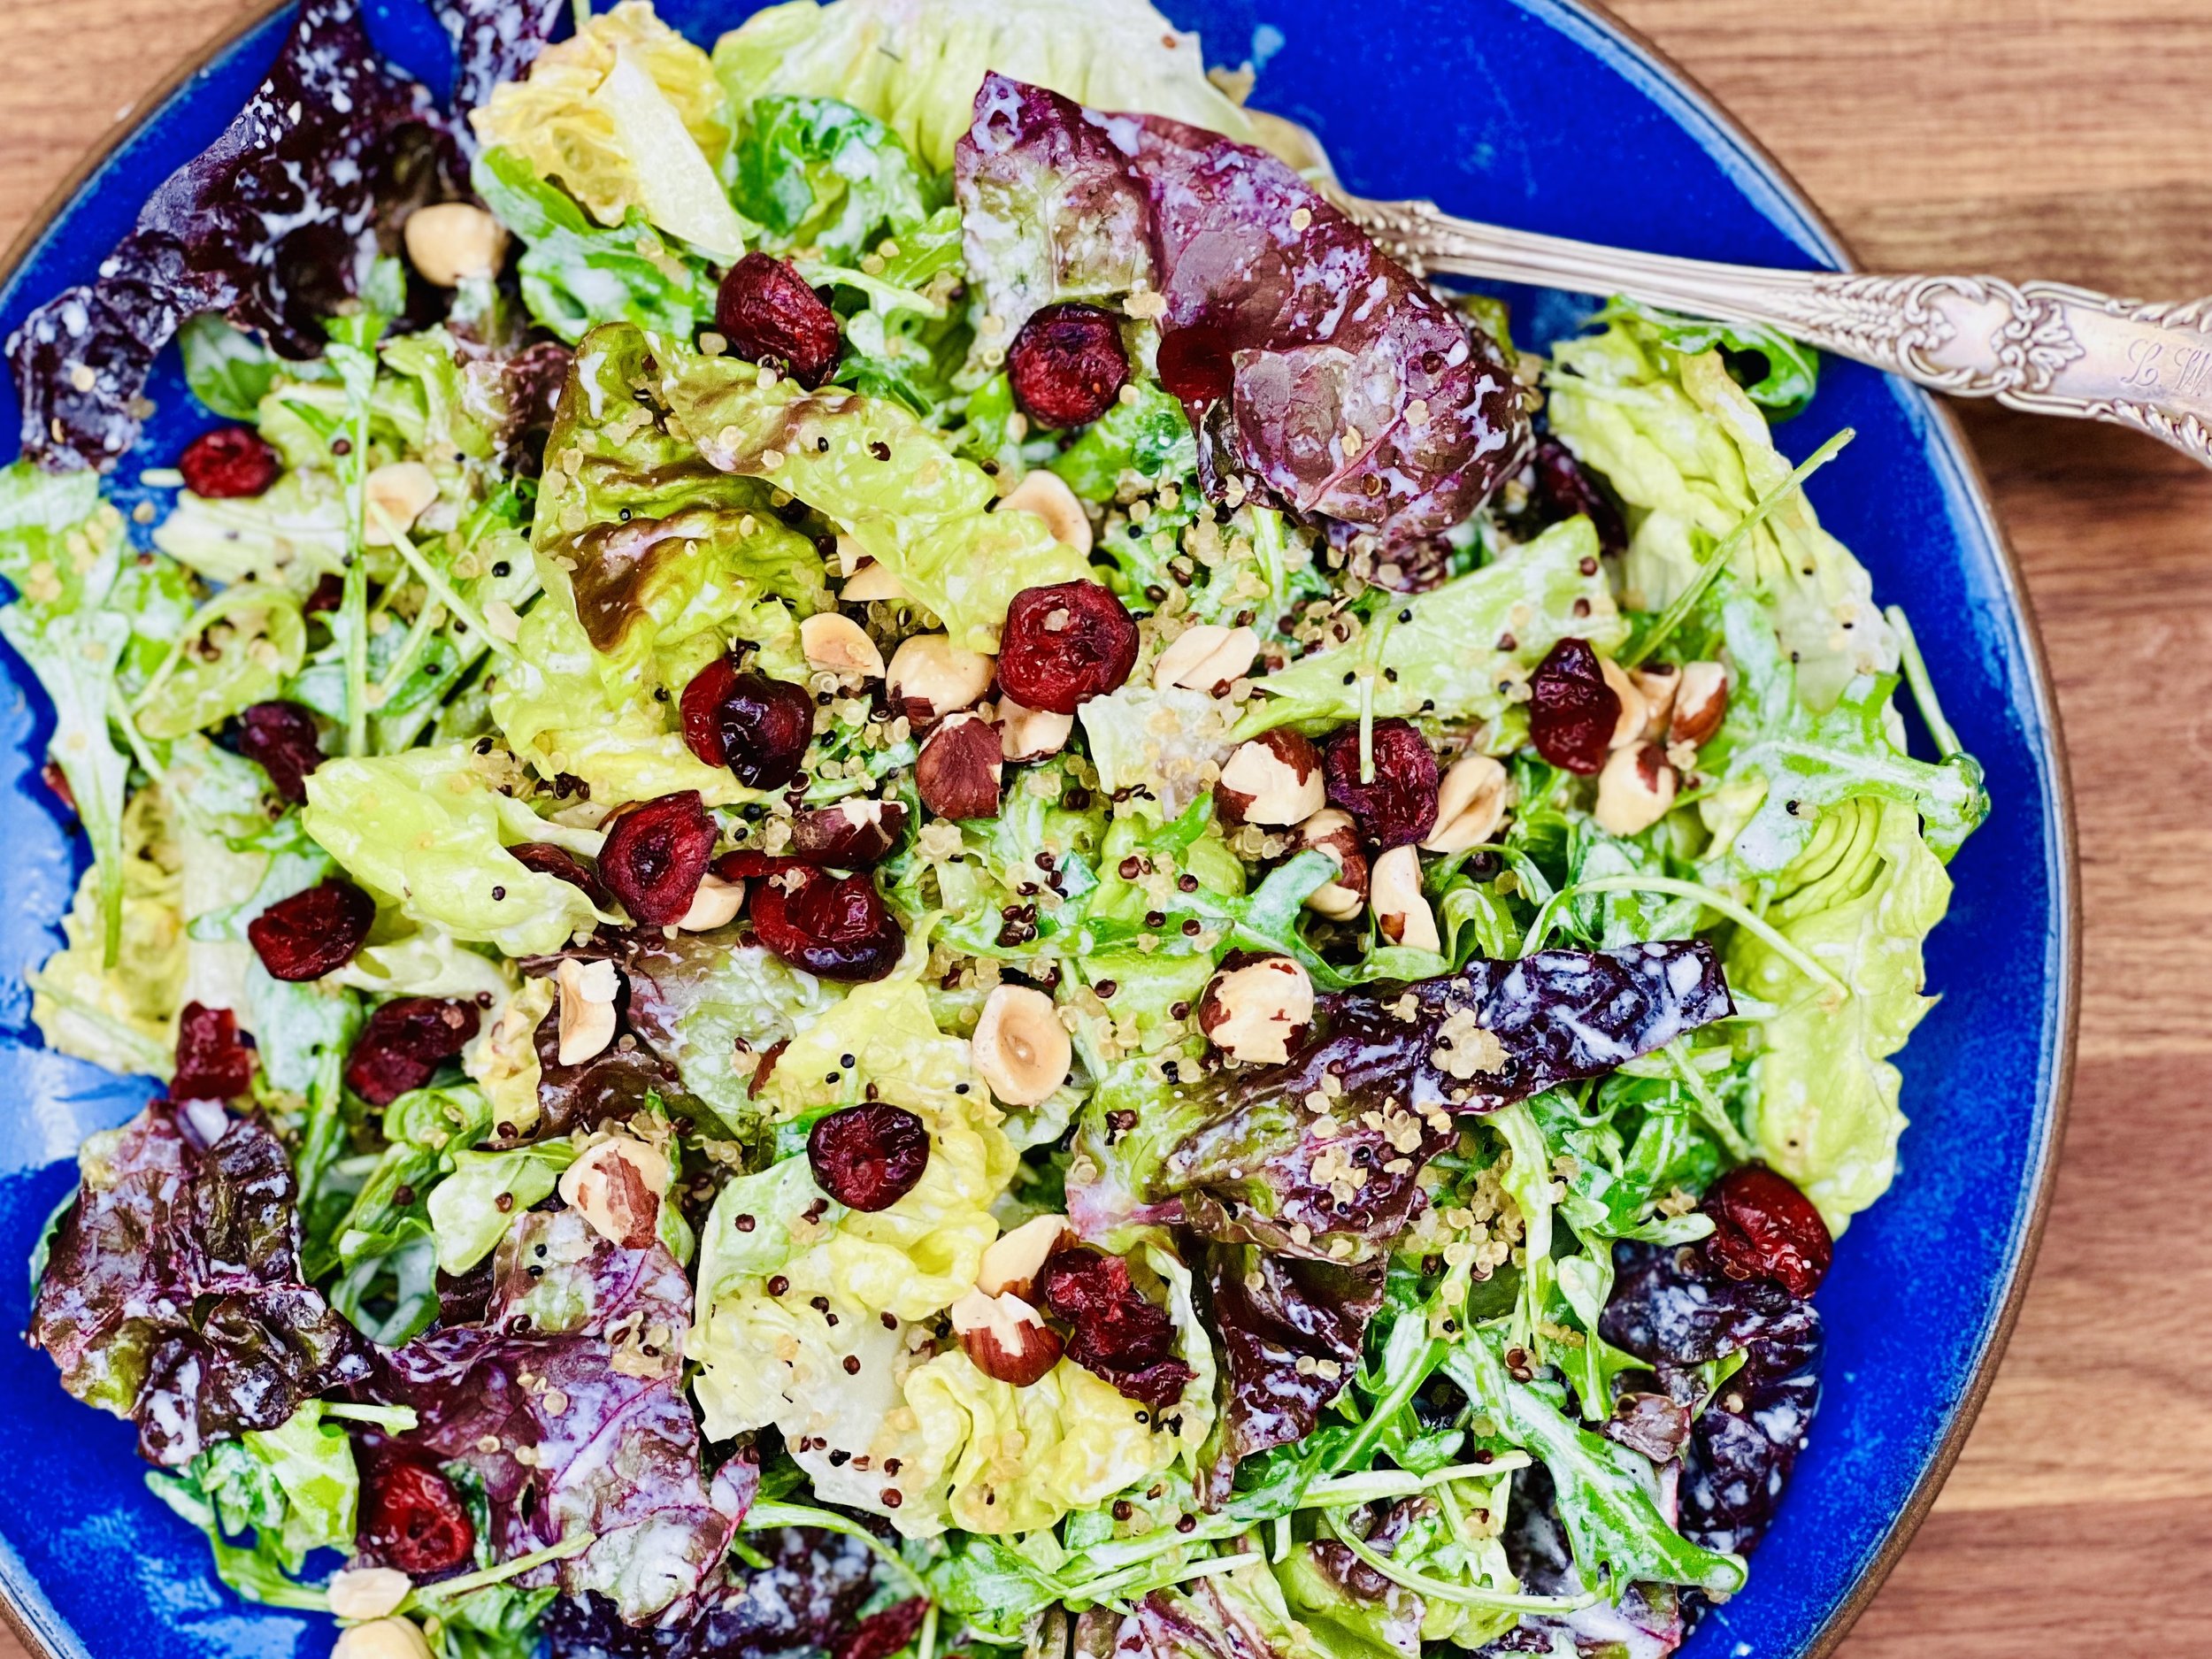
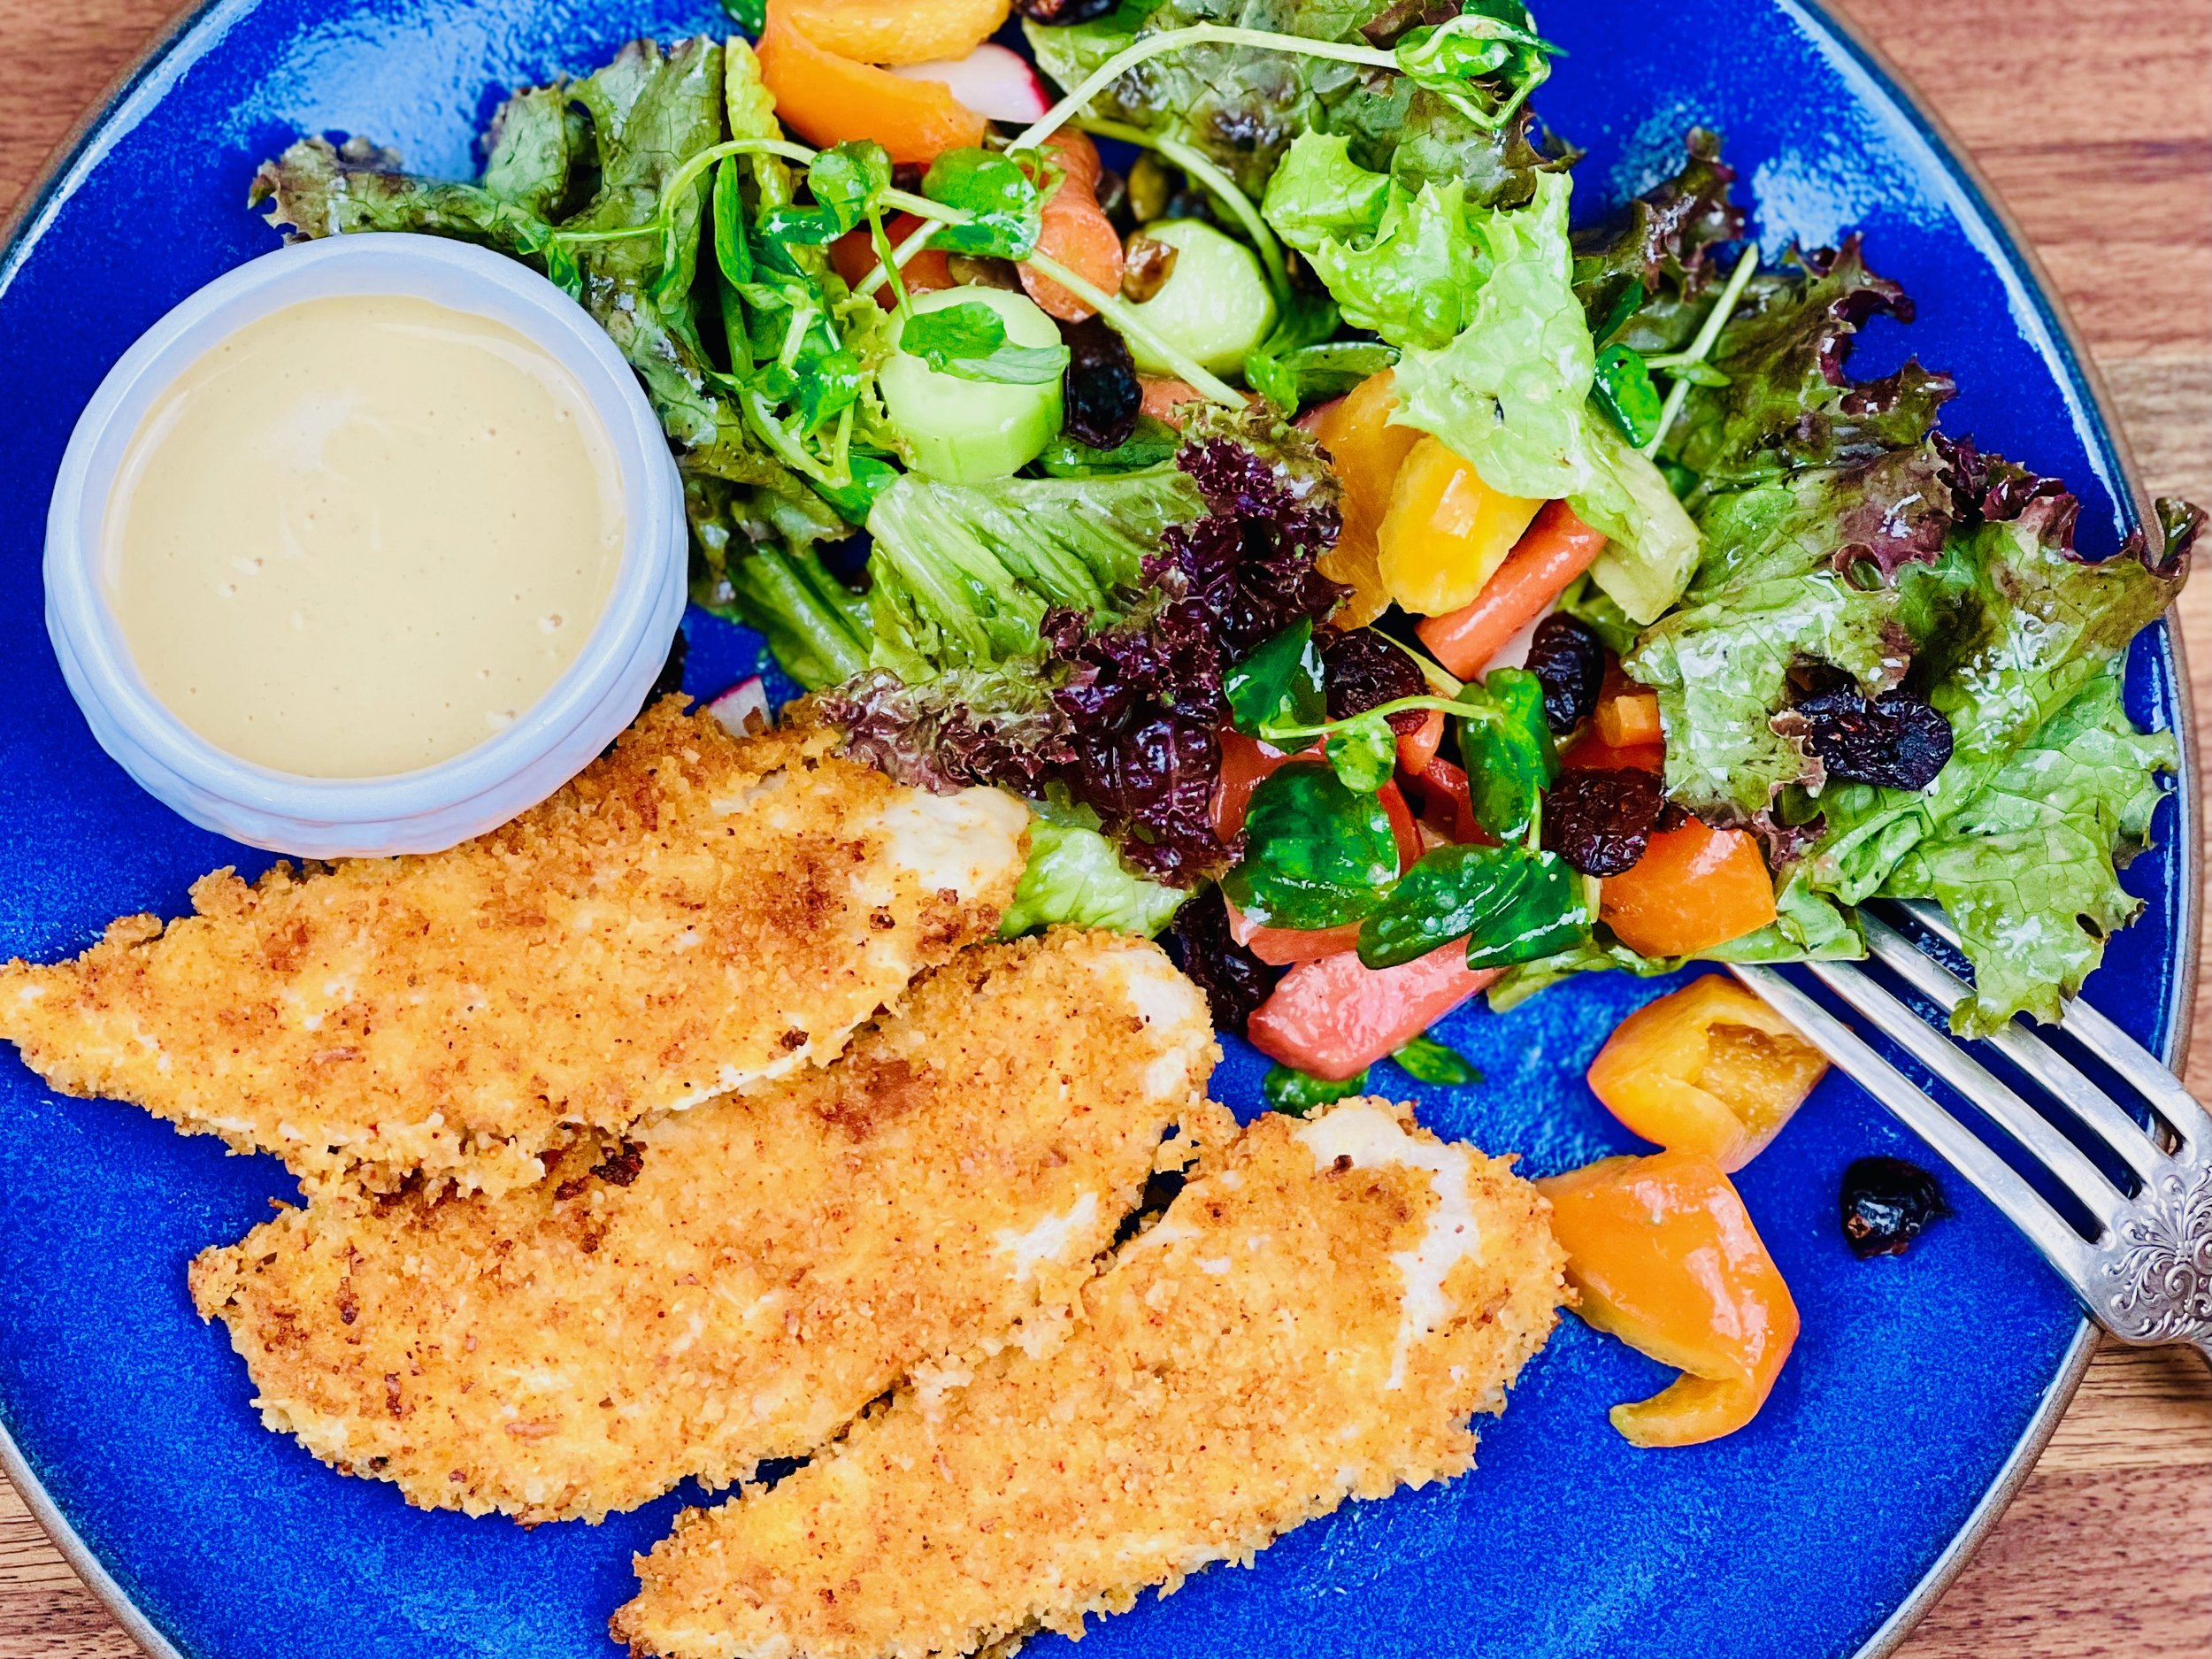
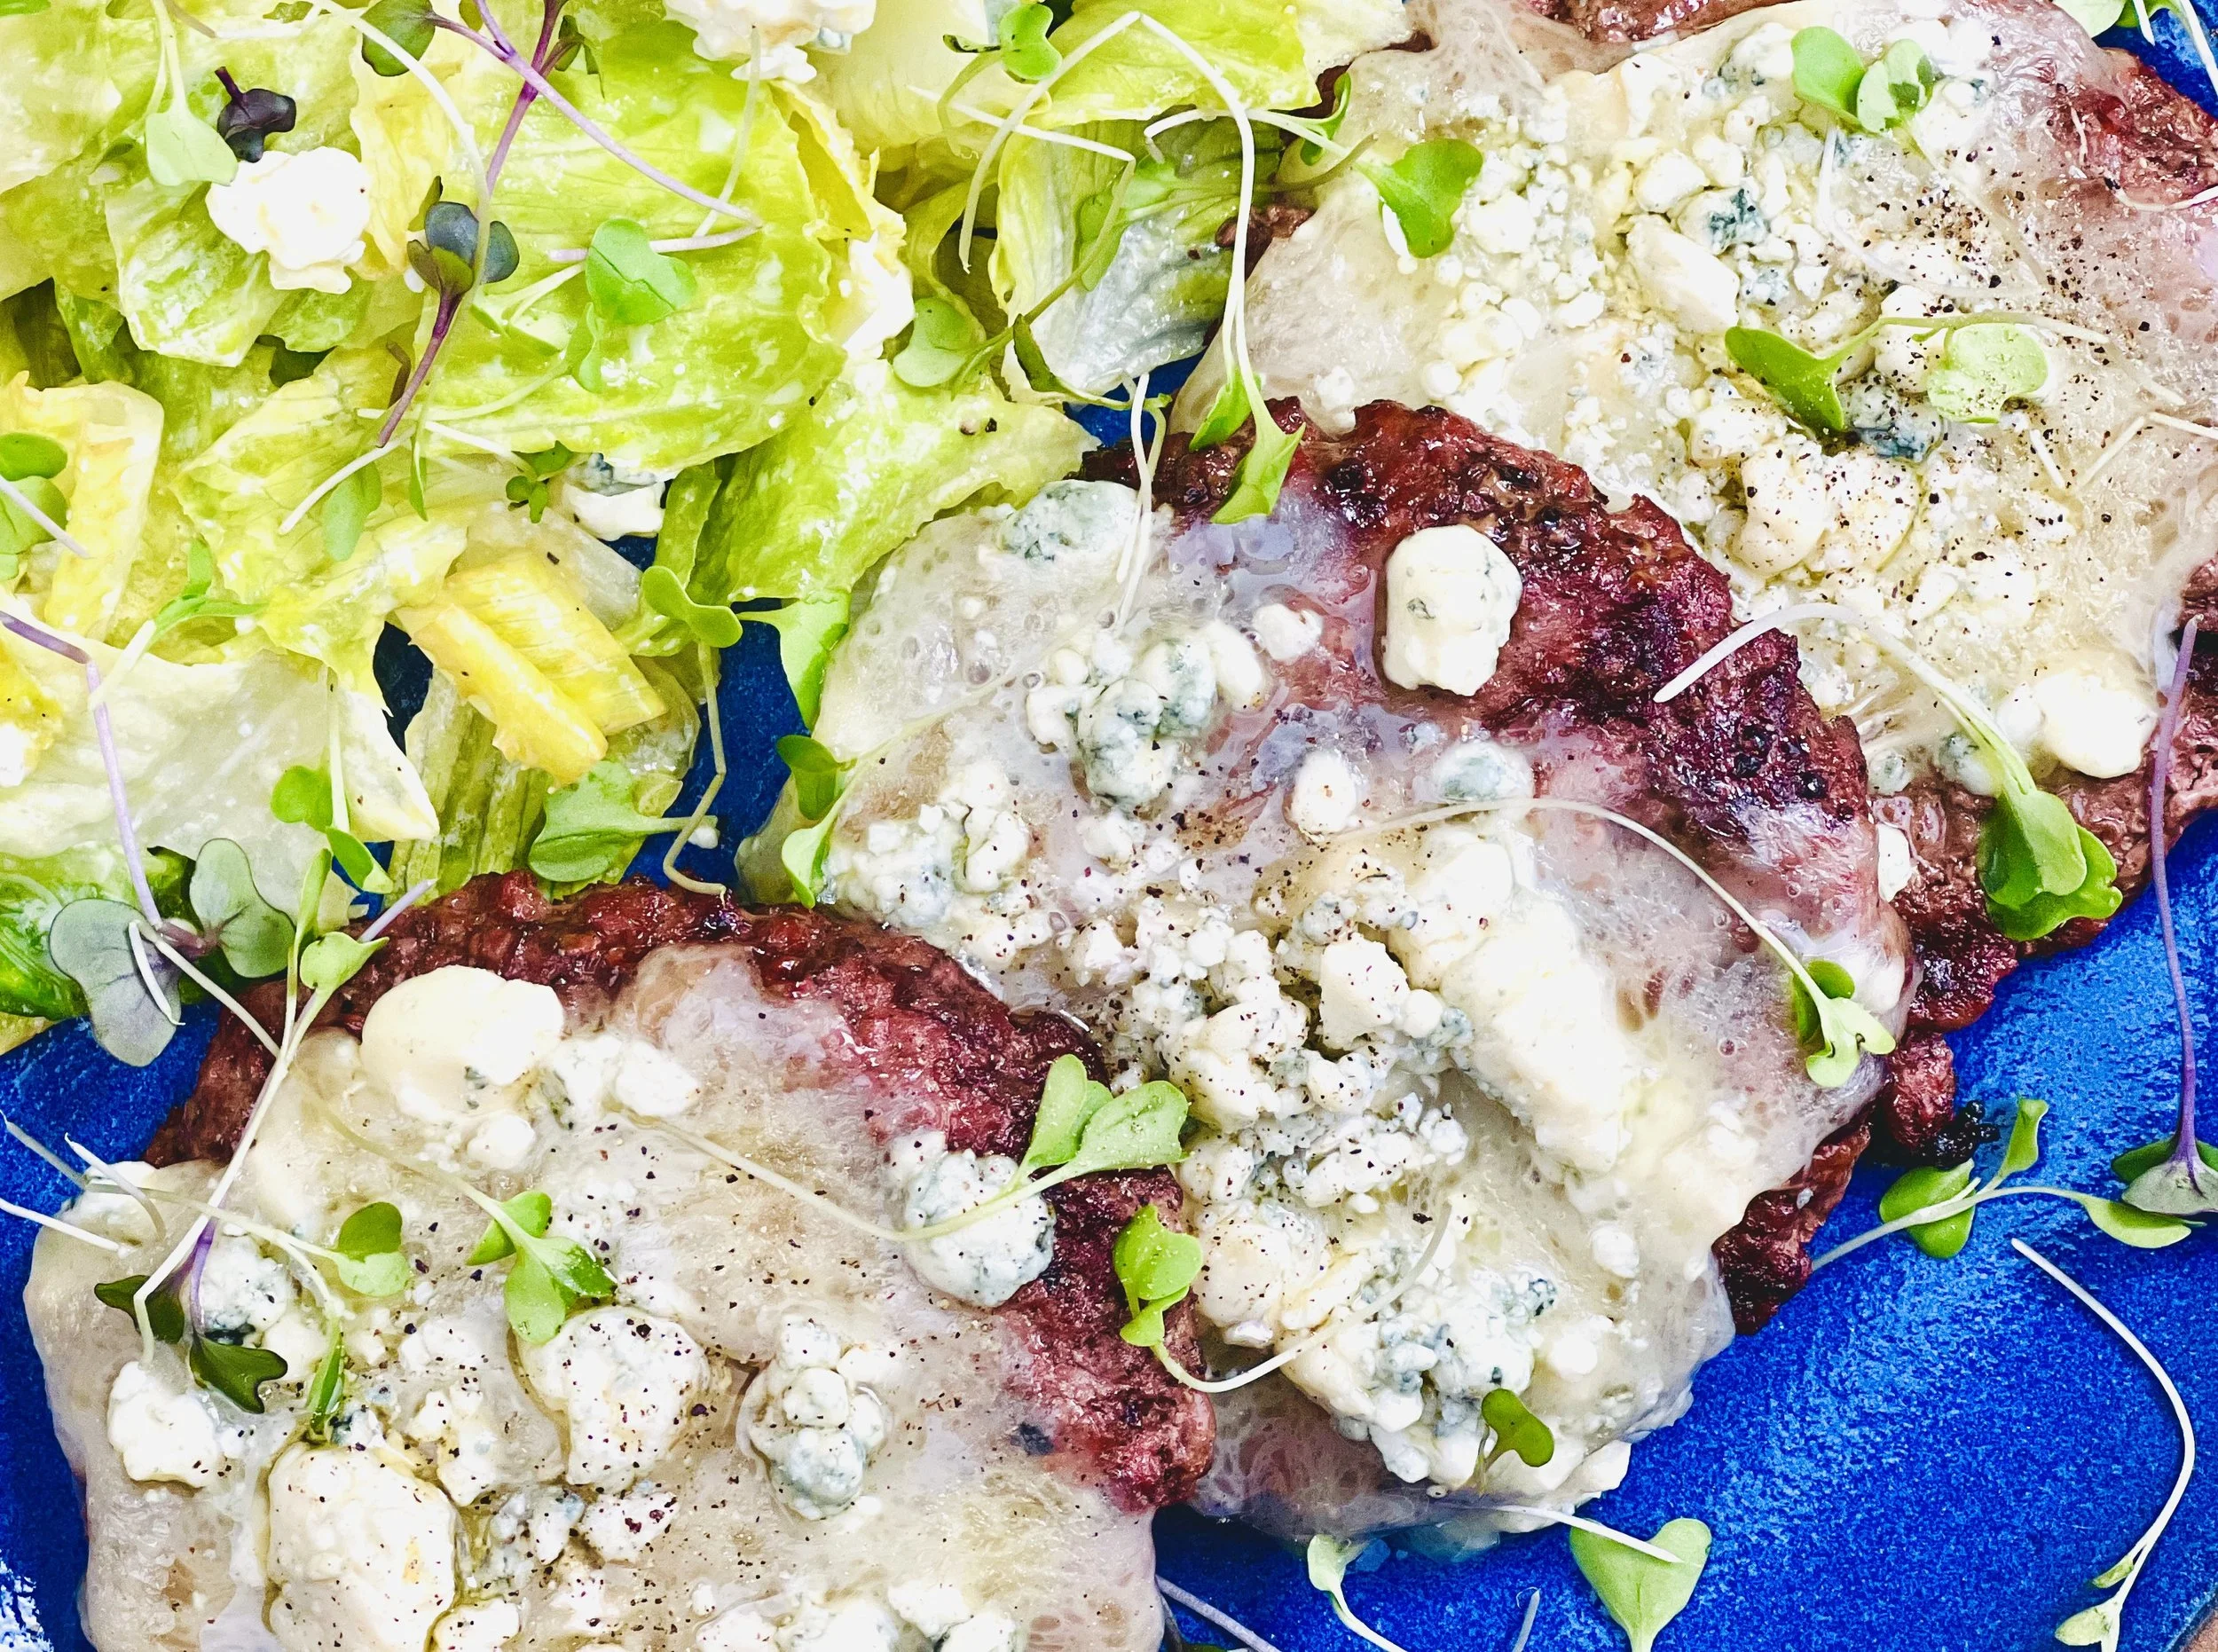
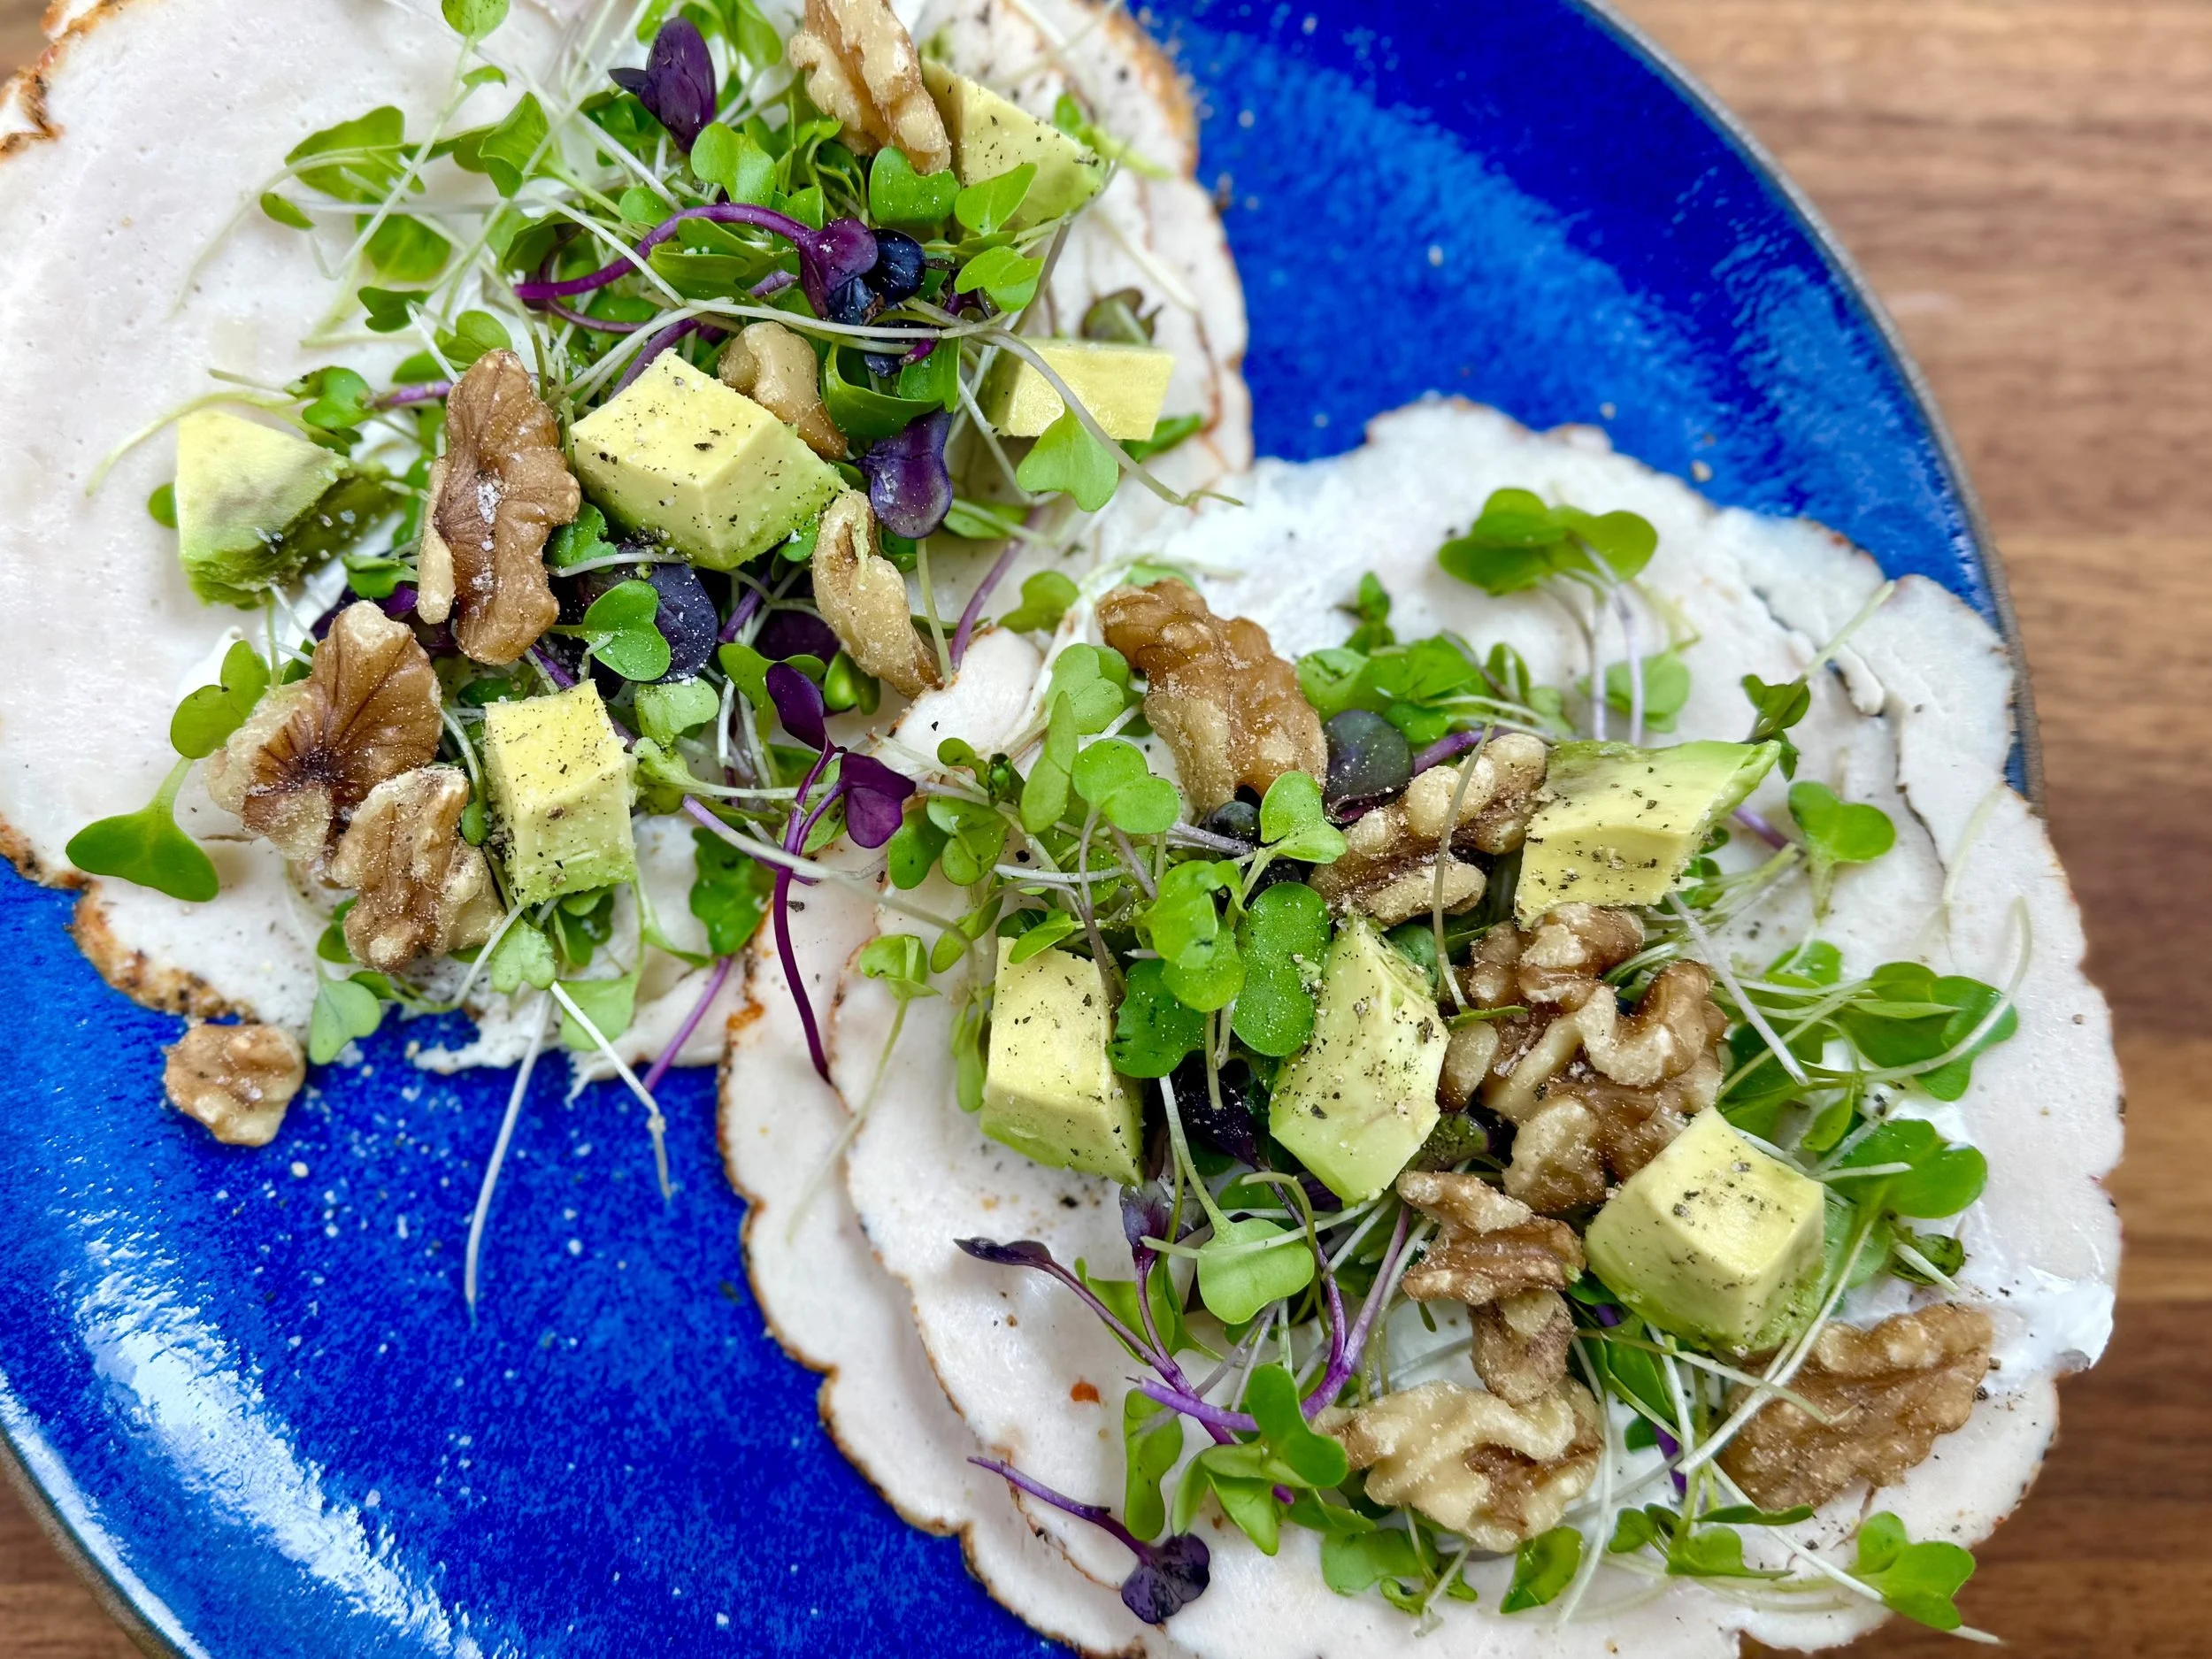
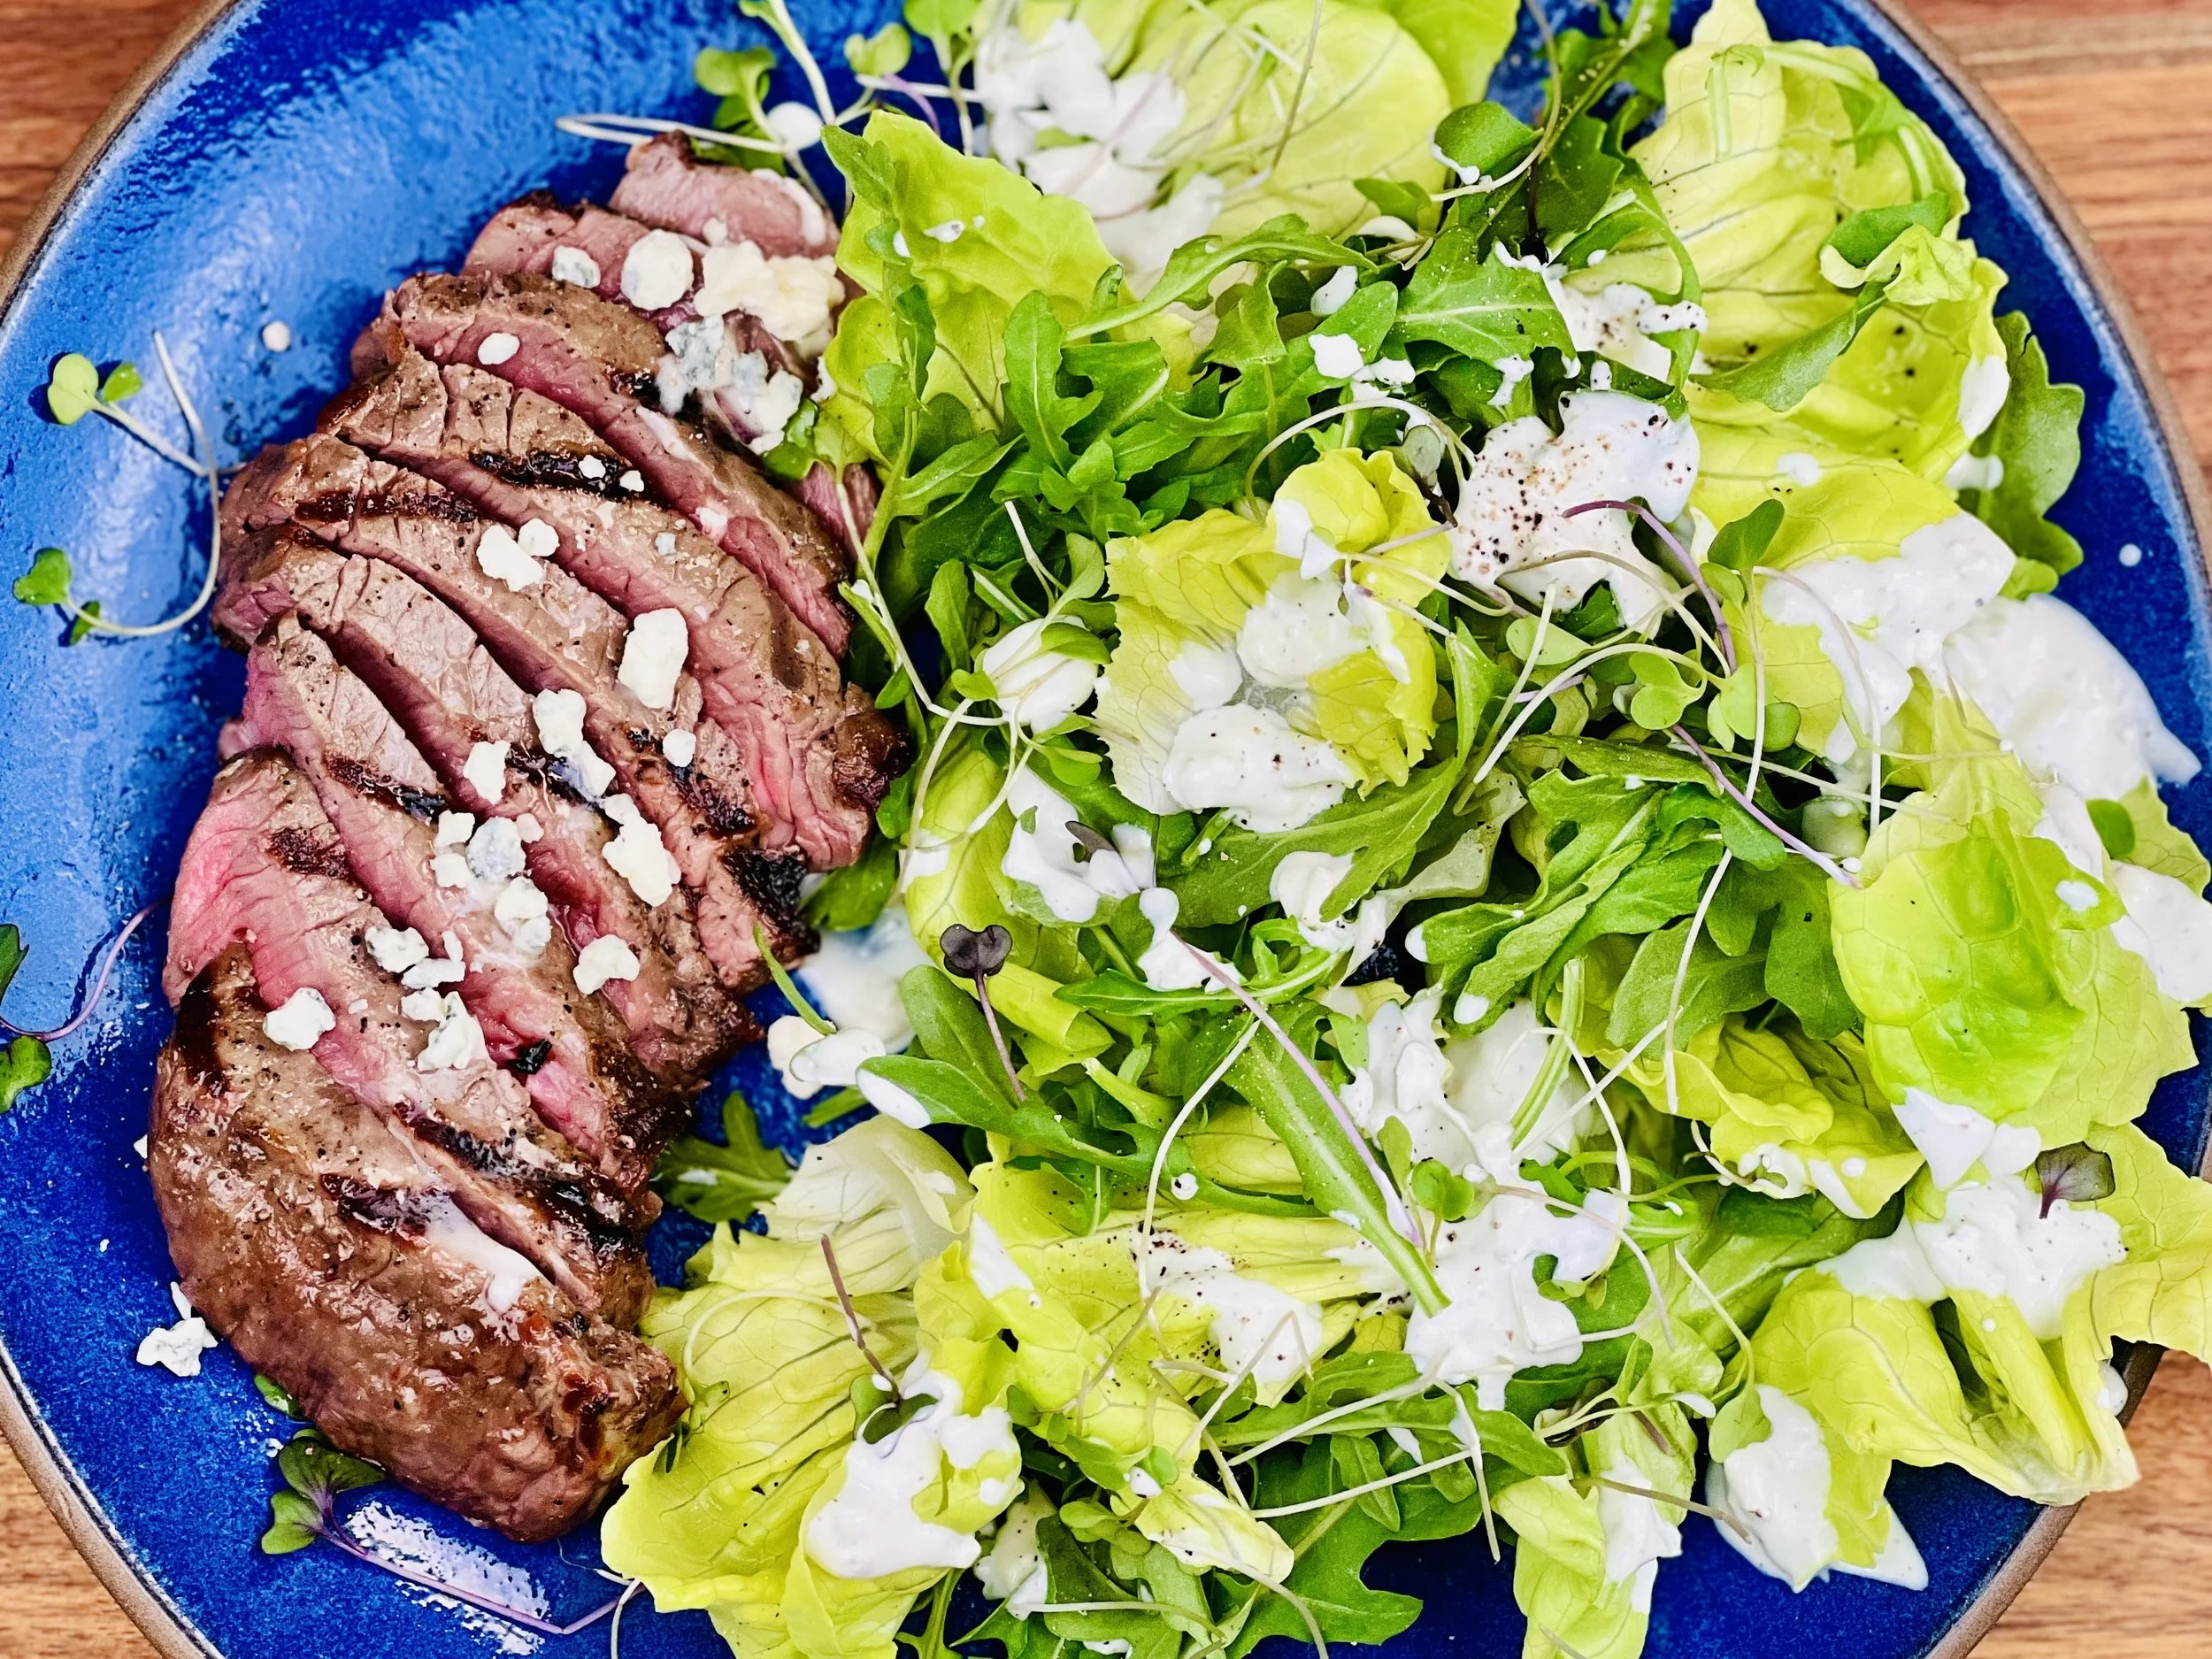
Butter Lettuce and Arugula Salad with Hazelnuts and Crispy Quinoa (Low FODMAP)
20 Minutes prep • 5 Minutes cook • Low FODMAP • Gluten-free • Serves 4
20 Minutes prep • 5 Minutes cook • Low FODMAP • Gluten-free • Serves 4 • Ok to make ahead: Steps 1-2
Creamy dressing, crispy quinoa, and crunchy hazelnuts come together to make this salad not only delicious but nutritious, beautiful, and decidedly different from the usual salad. Perfect on its own or as an accompaniment to your favorite main course, this salad is easy to prepare ahead and toss together at the last minute.
Ingredients: Salad
1 tablespoon coconut oil
1/2 cup cooked and cooled quinoa
1 head red or green butter lettuce
2 cups arugula
1/2 cup toasted hazelnuts, roughly chopped
1/2 cup dried cranberries
Ingredients: Dressing
1/4 cup Meyer lemon juice
2 tablespoons red wine vinegar
1 tablespoon maple syrup
1 teaspoon Smoke N Sanity Essence of Garlic Salt (use code IBSGC15 for 15% discount)
1 teaspoon equal parts dried oregano, basil, and parsley
Pinch each Kosher salt and black pepper
1/3 cup lactose-free sour cream
3 tablespoons extra virgin olive oil
Directions
(1) Toast the quinoa: Heat the coconut oil over high heat in a frying pan. Once it's hot, add the cooked quinoa and saute for about 2-3 minutes until dry and crisp. You will notice the steam will release and you will hear the quinoa crackling as it cooks. After about 3 minutes, set aside to cool completely.
(2) Make the dressing: In a small jar combine the lemon juice, vinegar, maple syrup, garlic salt, herbs, salt, pepper, sour cream, and olive oil. Shake to combine, taste for seasoning, and alter as you wish. This can be made up to a week in advance and kept refrigerated until you’re ready to use.
(3) Finish: Toss both types of lettuce together in the dressing to coat, top with the crispy quinoa, hazelnuts, and cranberries and serve immediately.
Eat and enjoy every bite because you can!
This recipe was inspired by a similar recipe published in 2013 by Sara Forte of the Sprouted Kitchen.
Have a question you’d like to have answered? Email me at hello@ibsgamechanger.com
Link note: This post contains links for you to easily purchase items listed on the page. In some cases, we have provided a special discount code for IBS Game Changers so be sure to use it when you purchase an item to get the discount that has been arranged just for you! As an Amazon Associate, I earn a commission from qualifying Amazon purchases.
More Deliciously Low FODMAP™ main course recipes
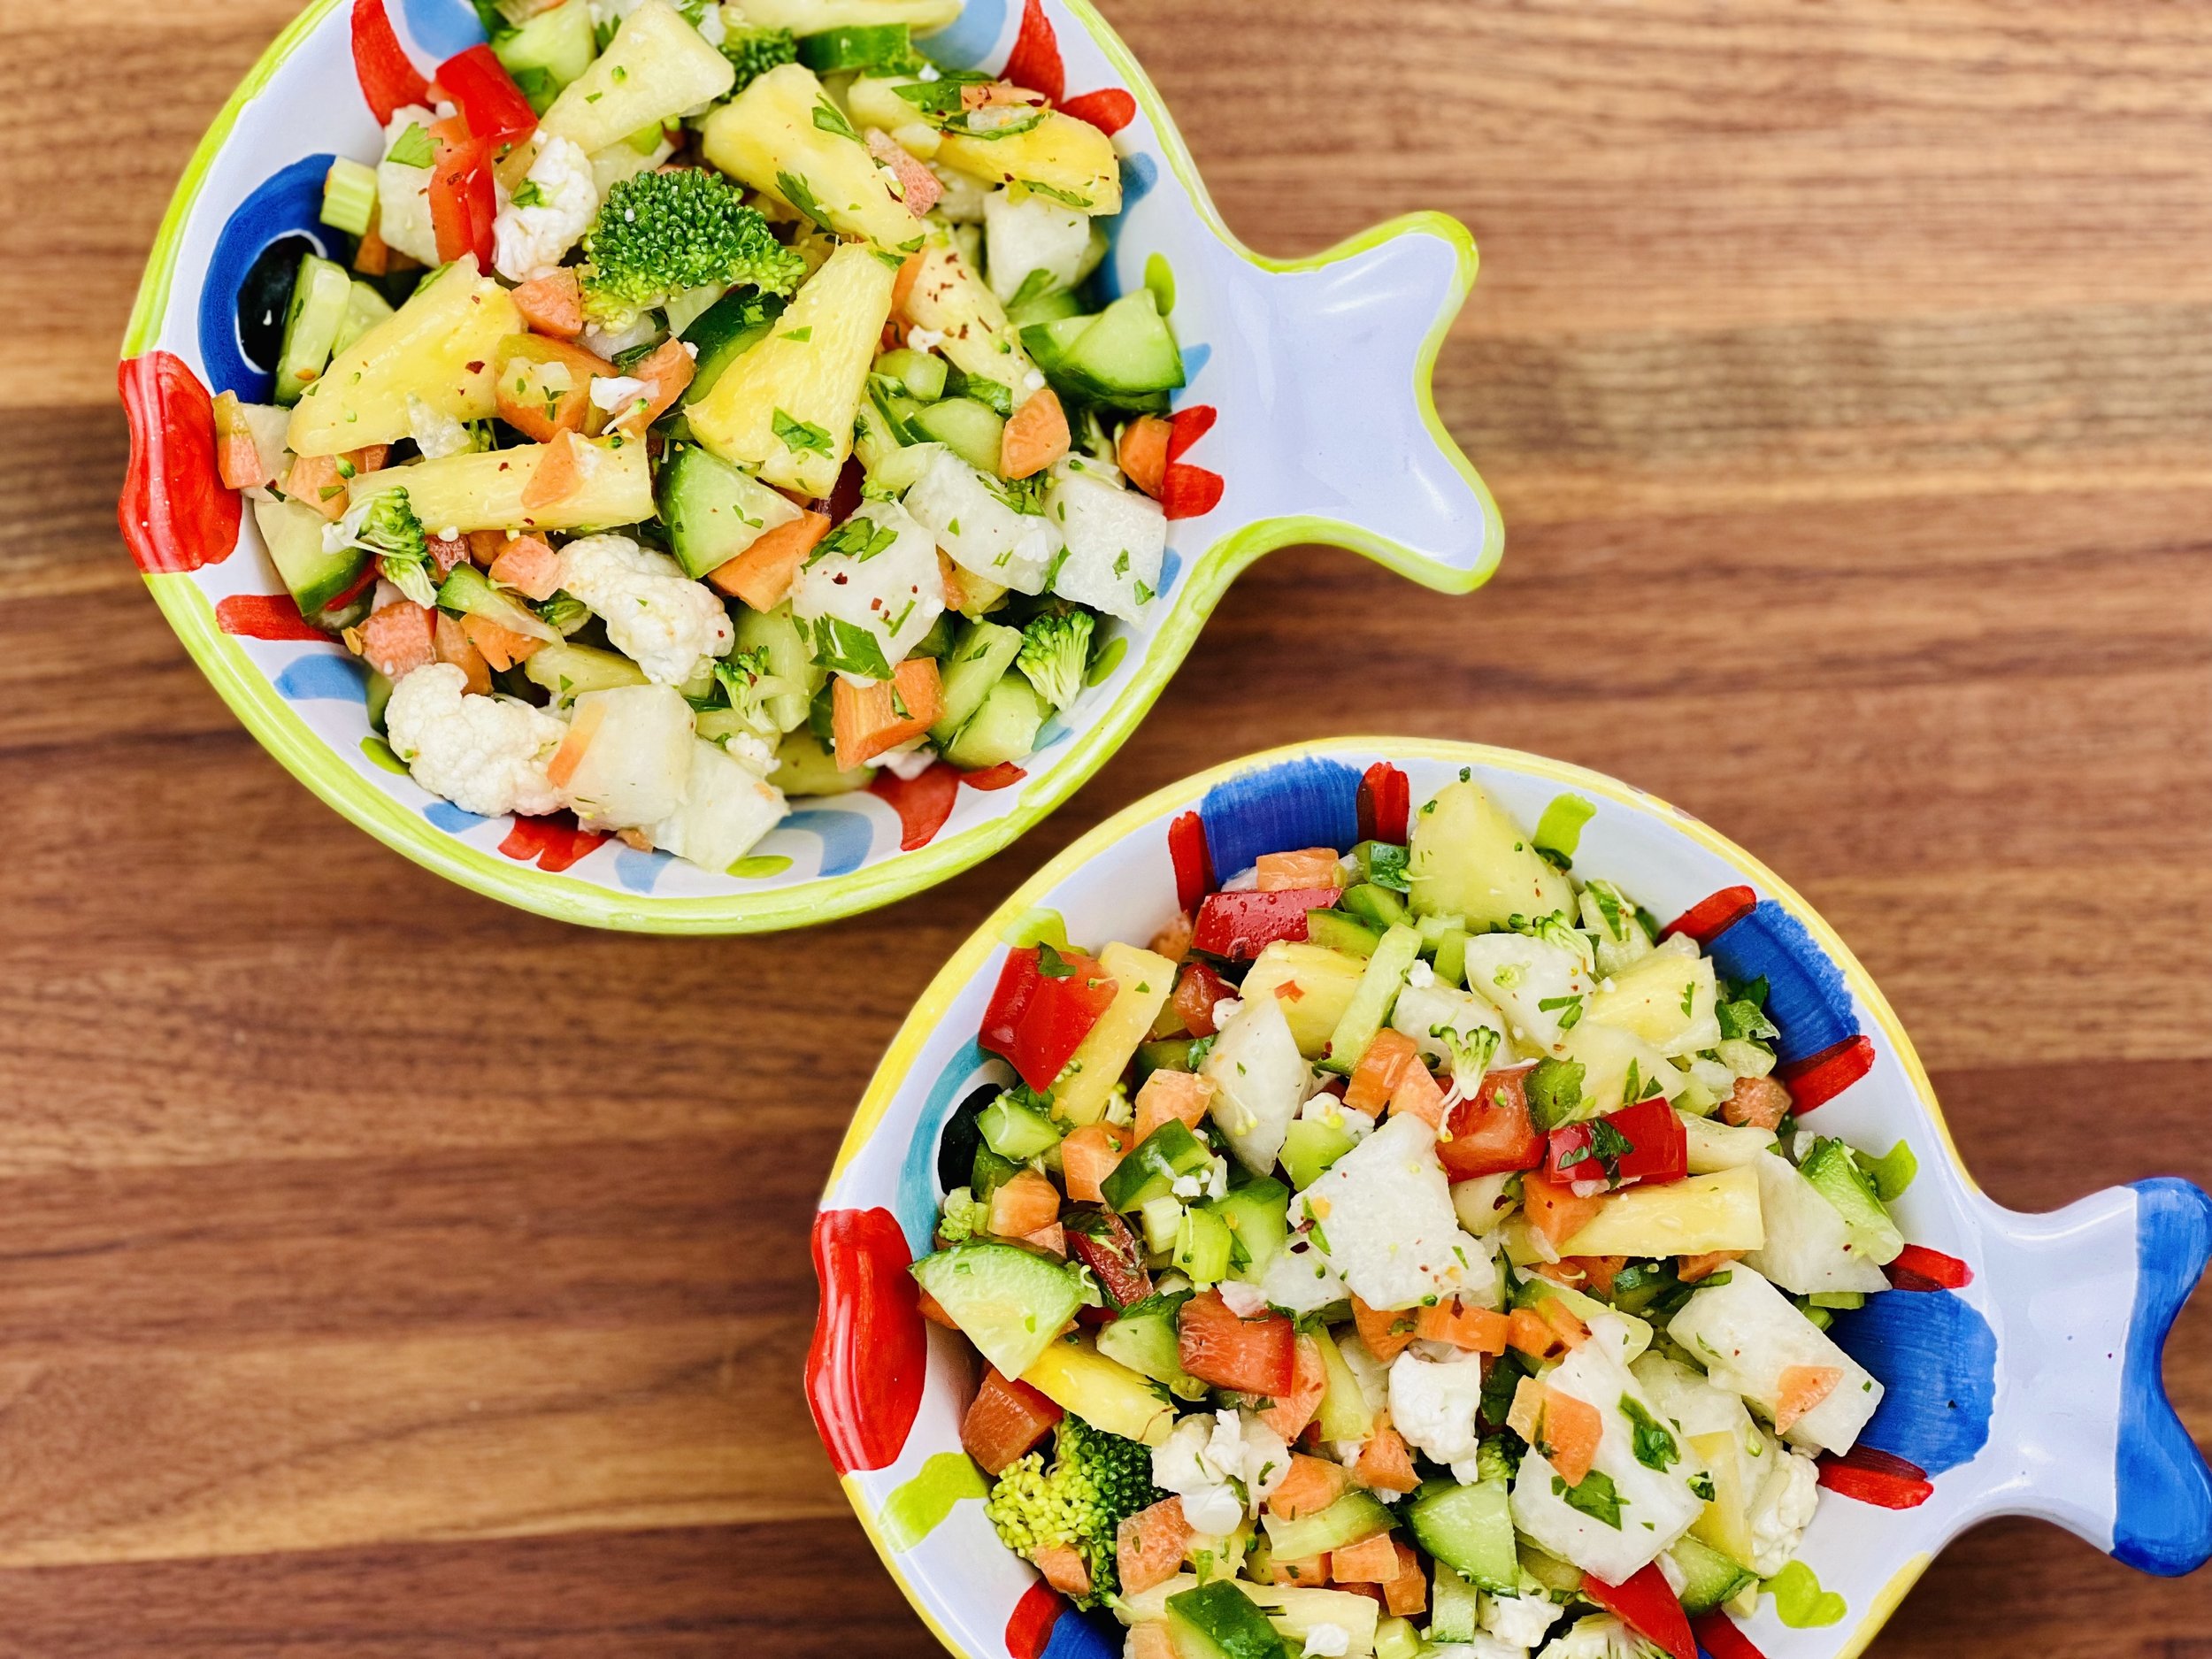
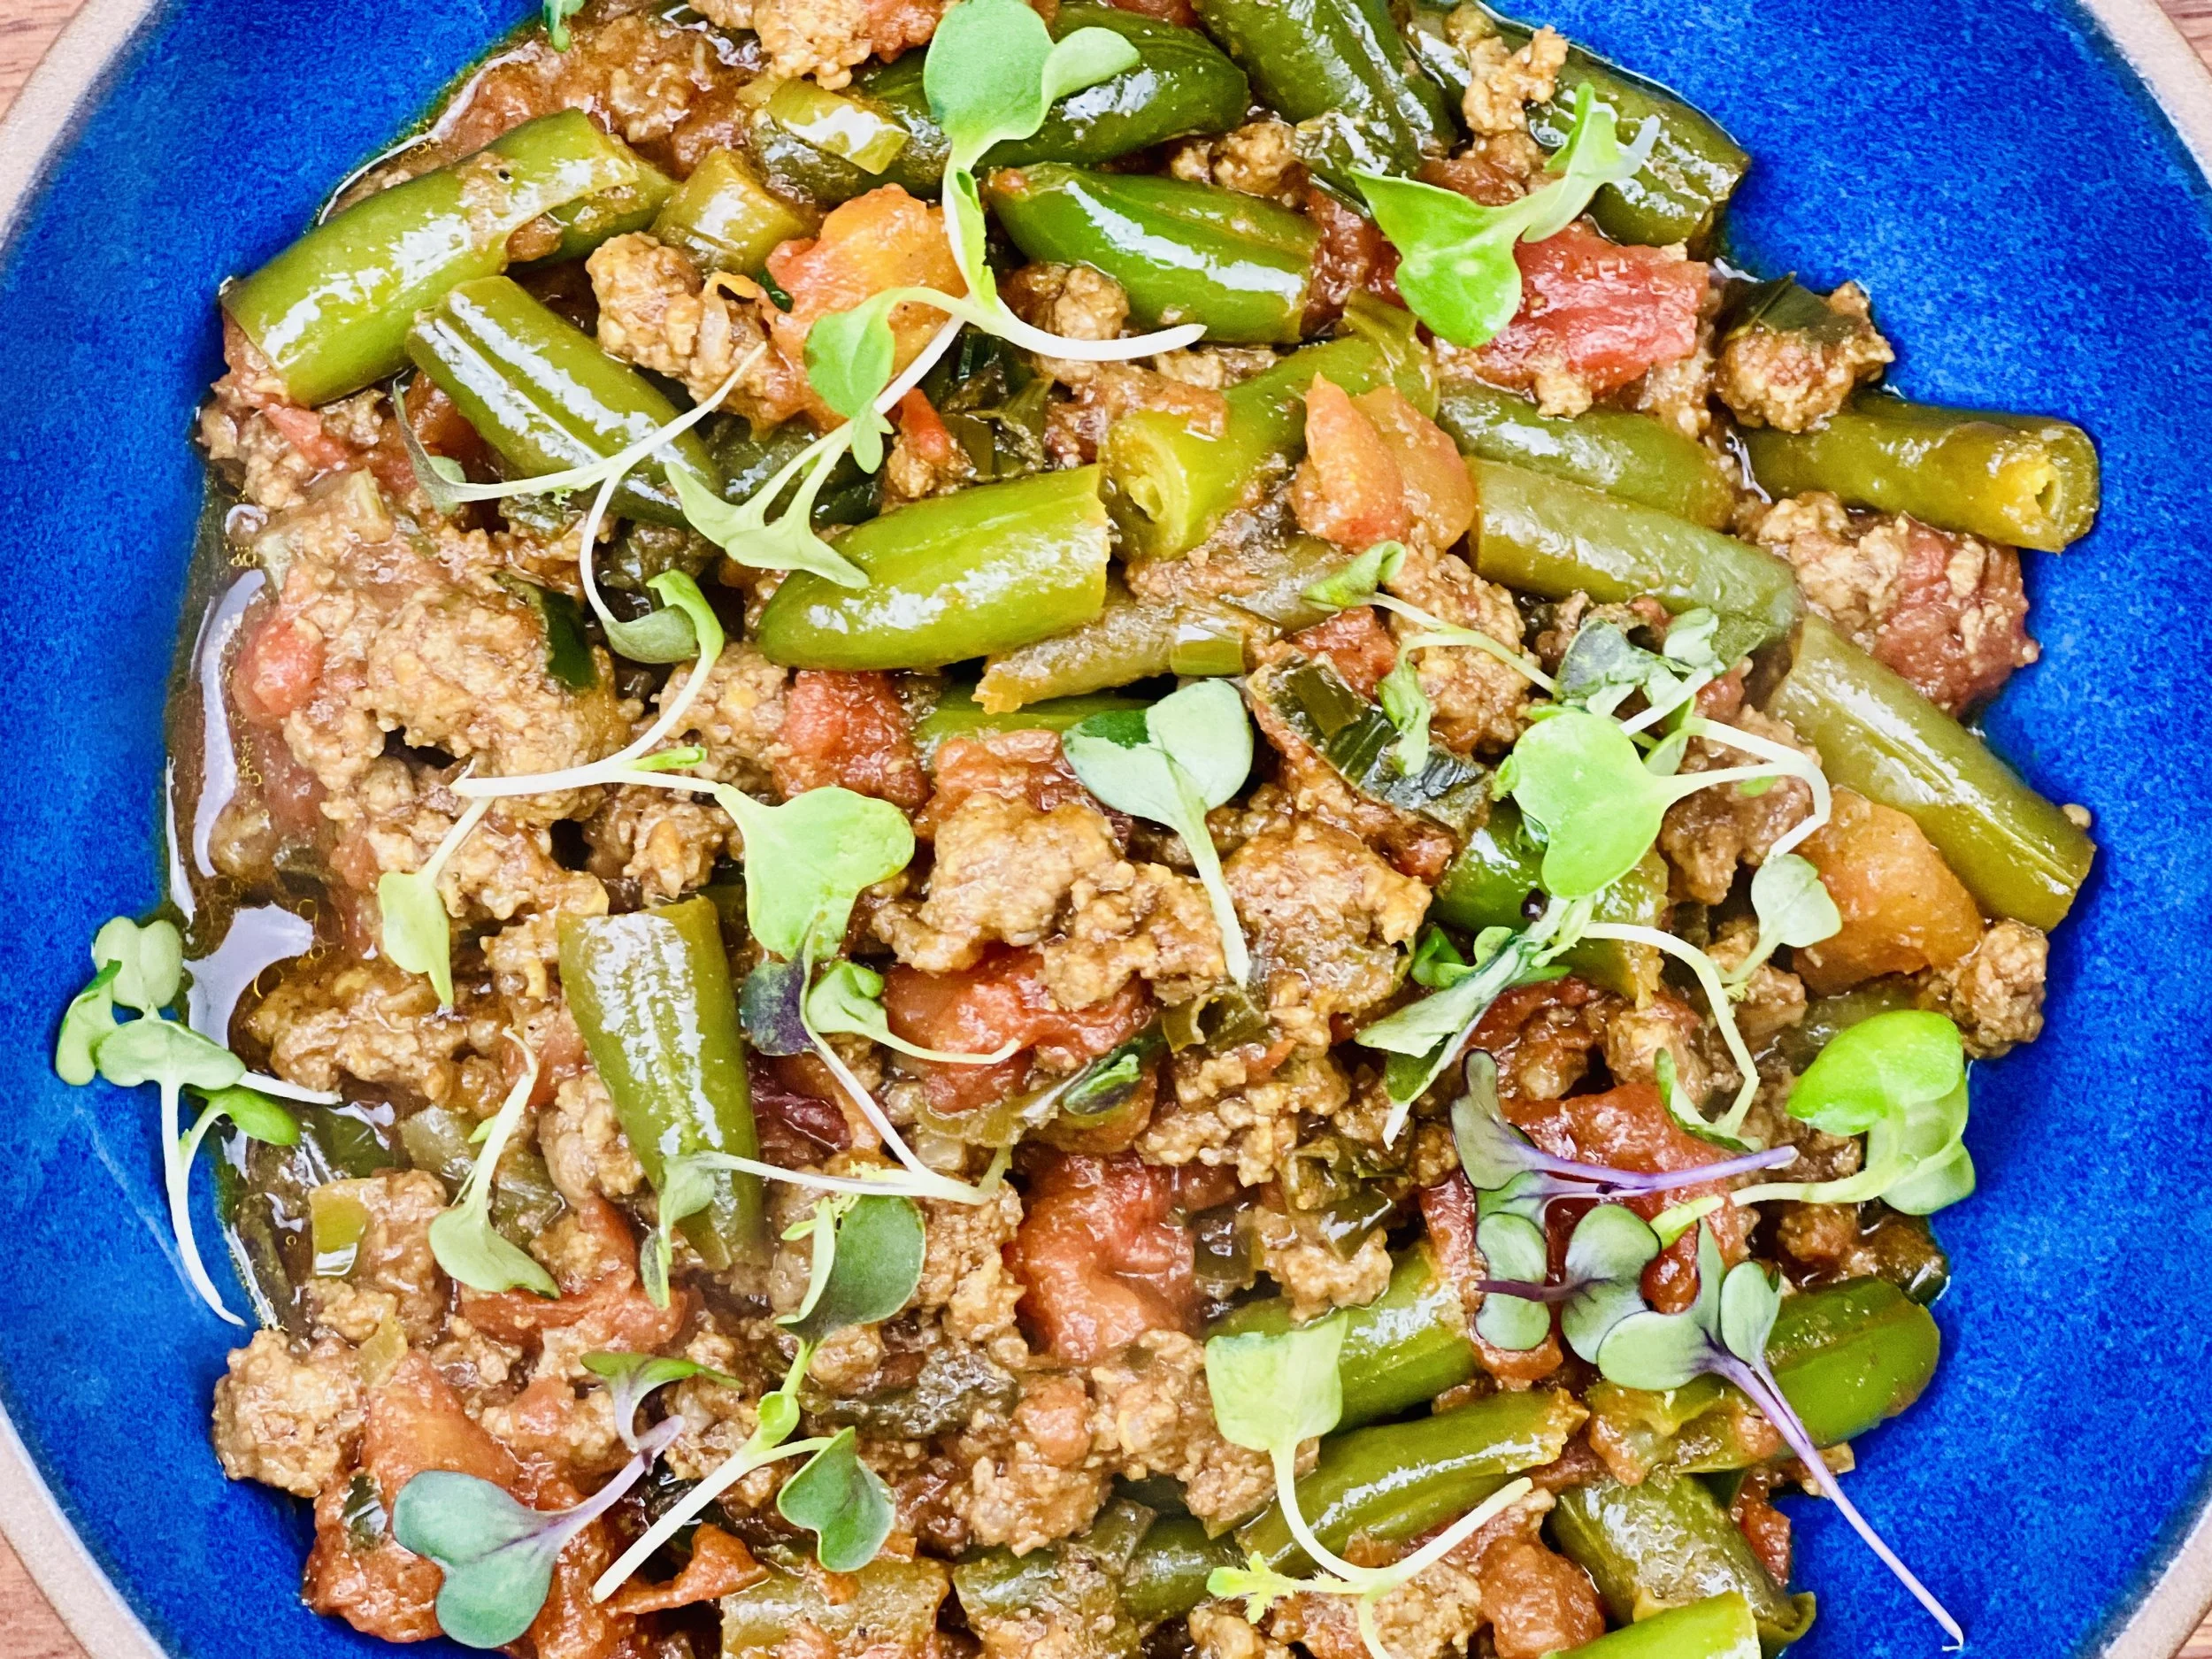
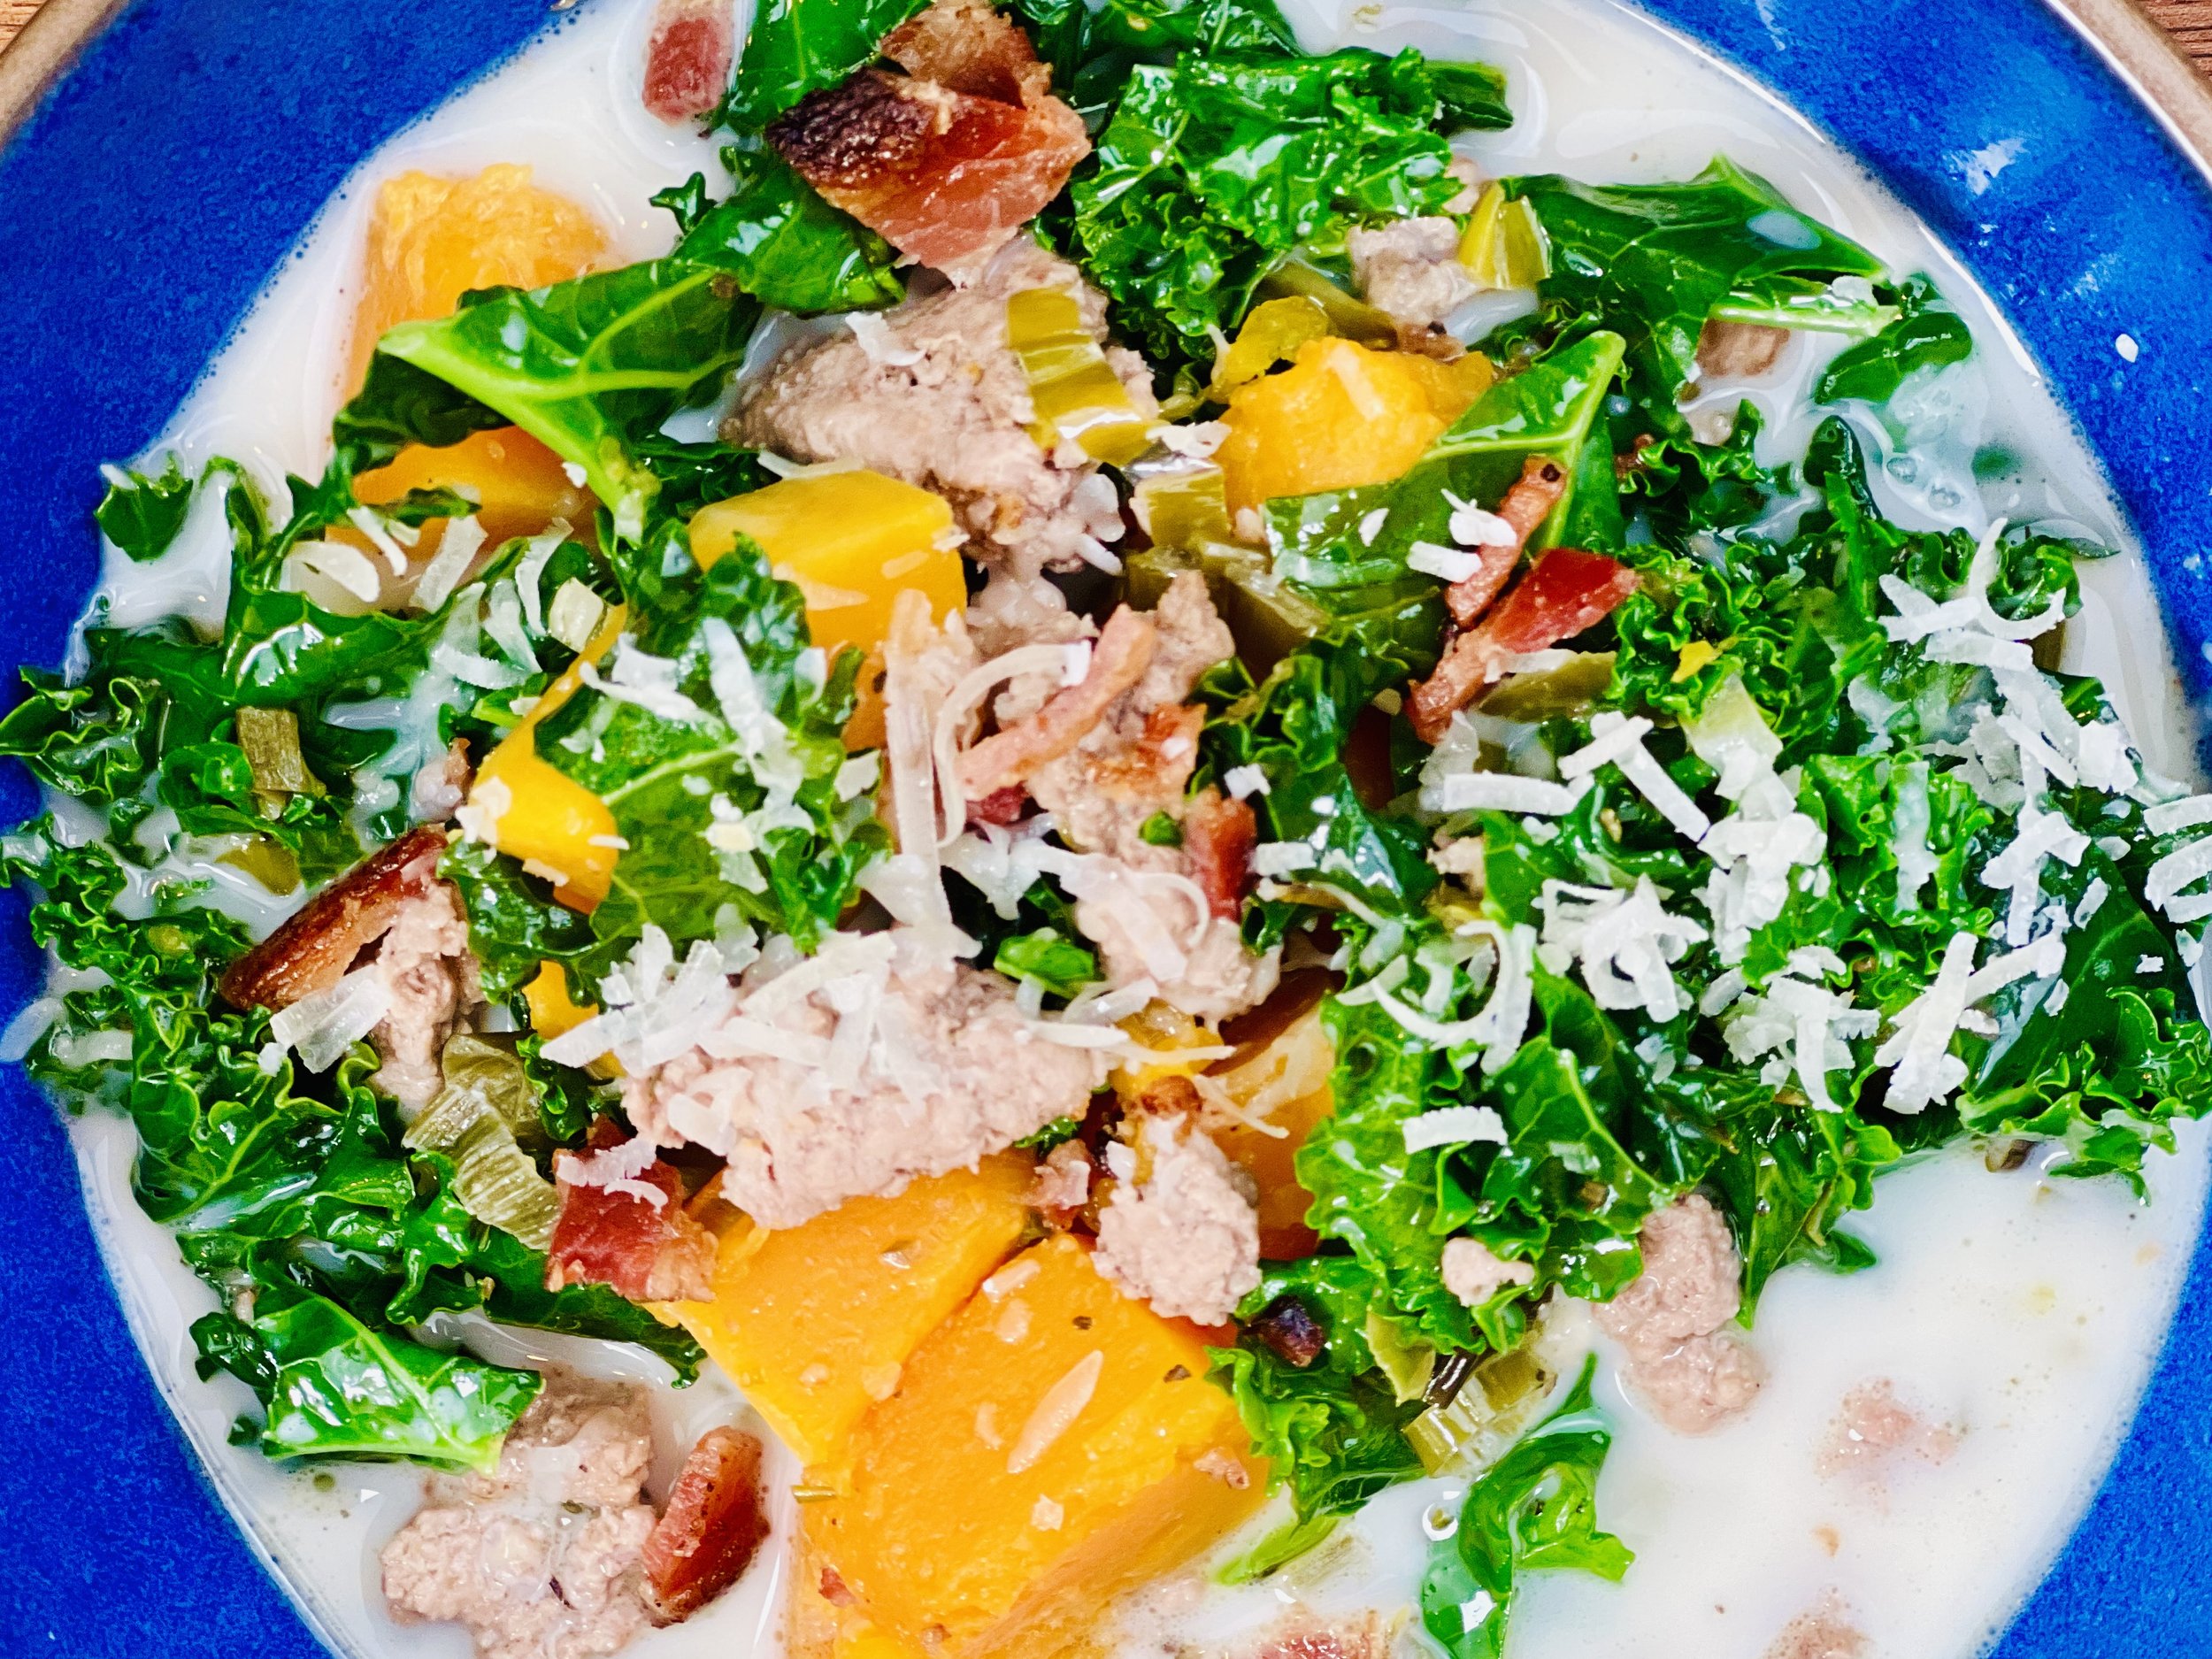
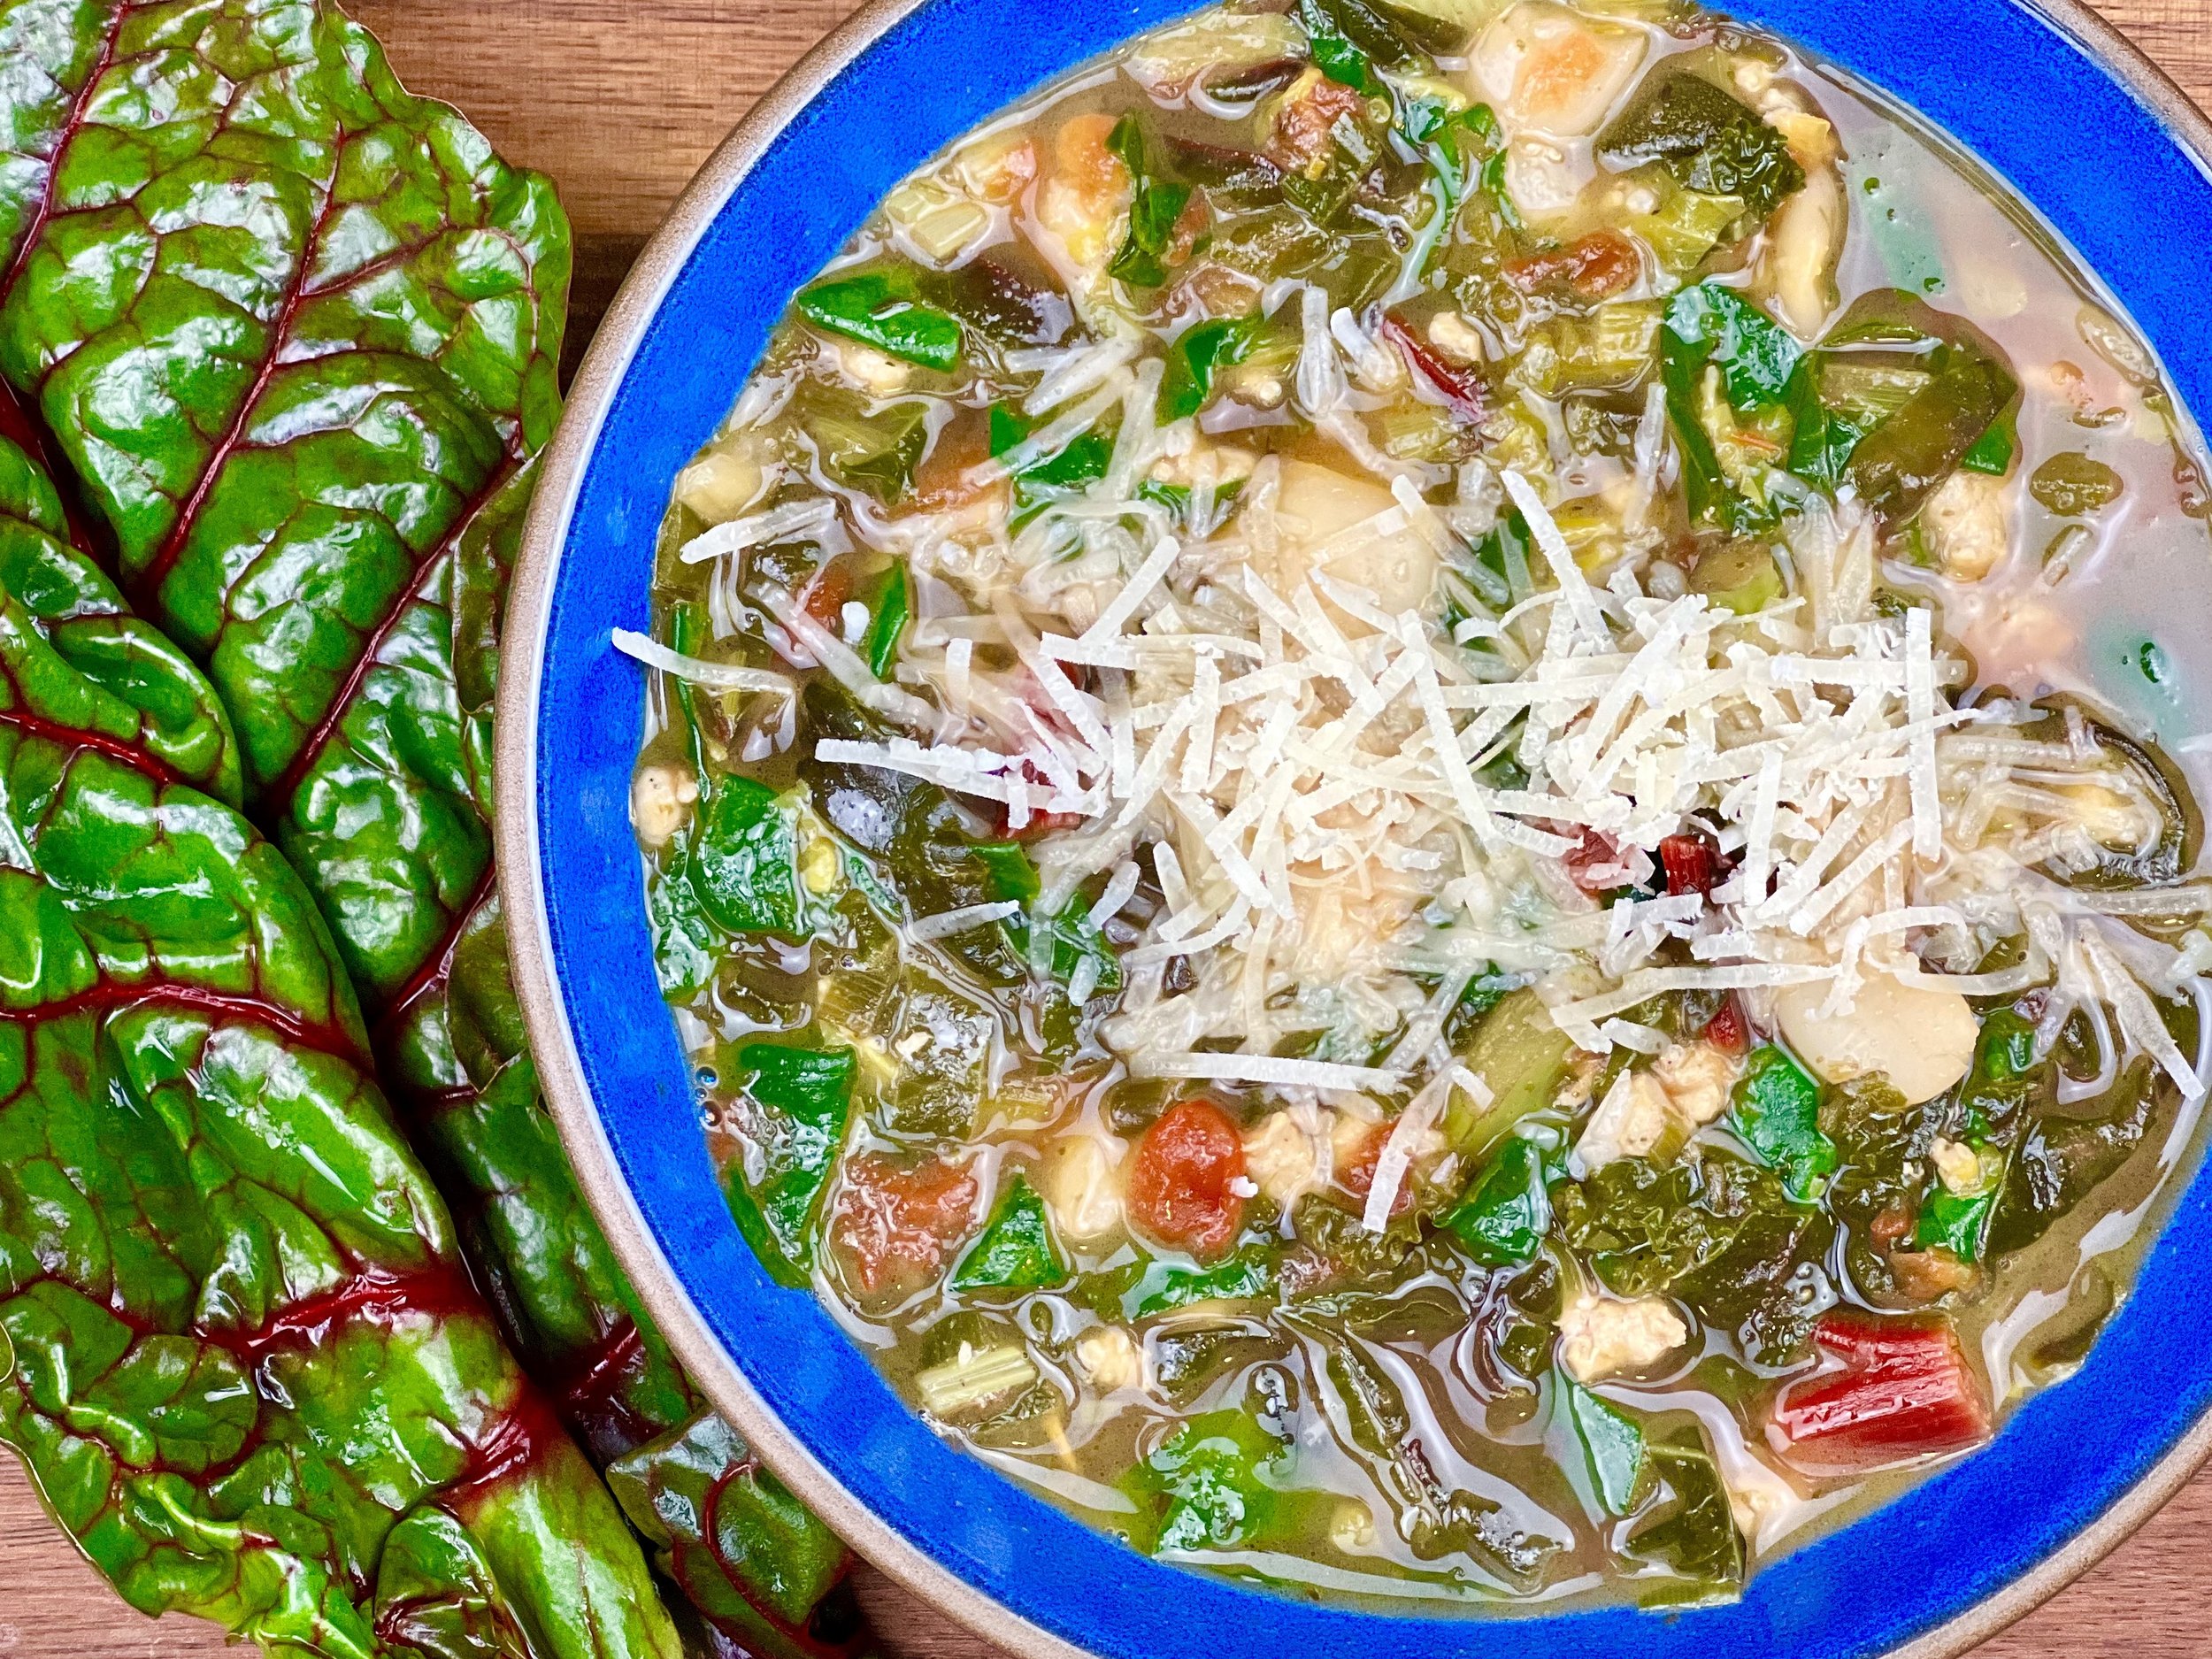
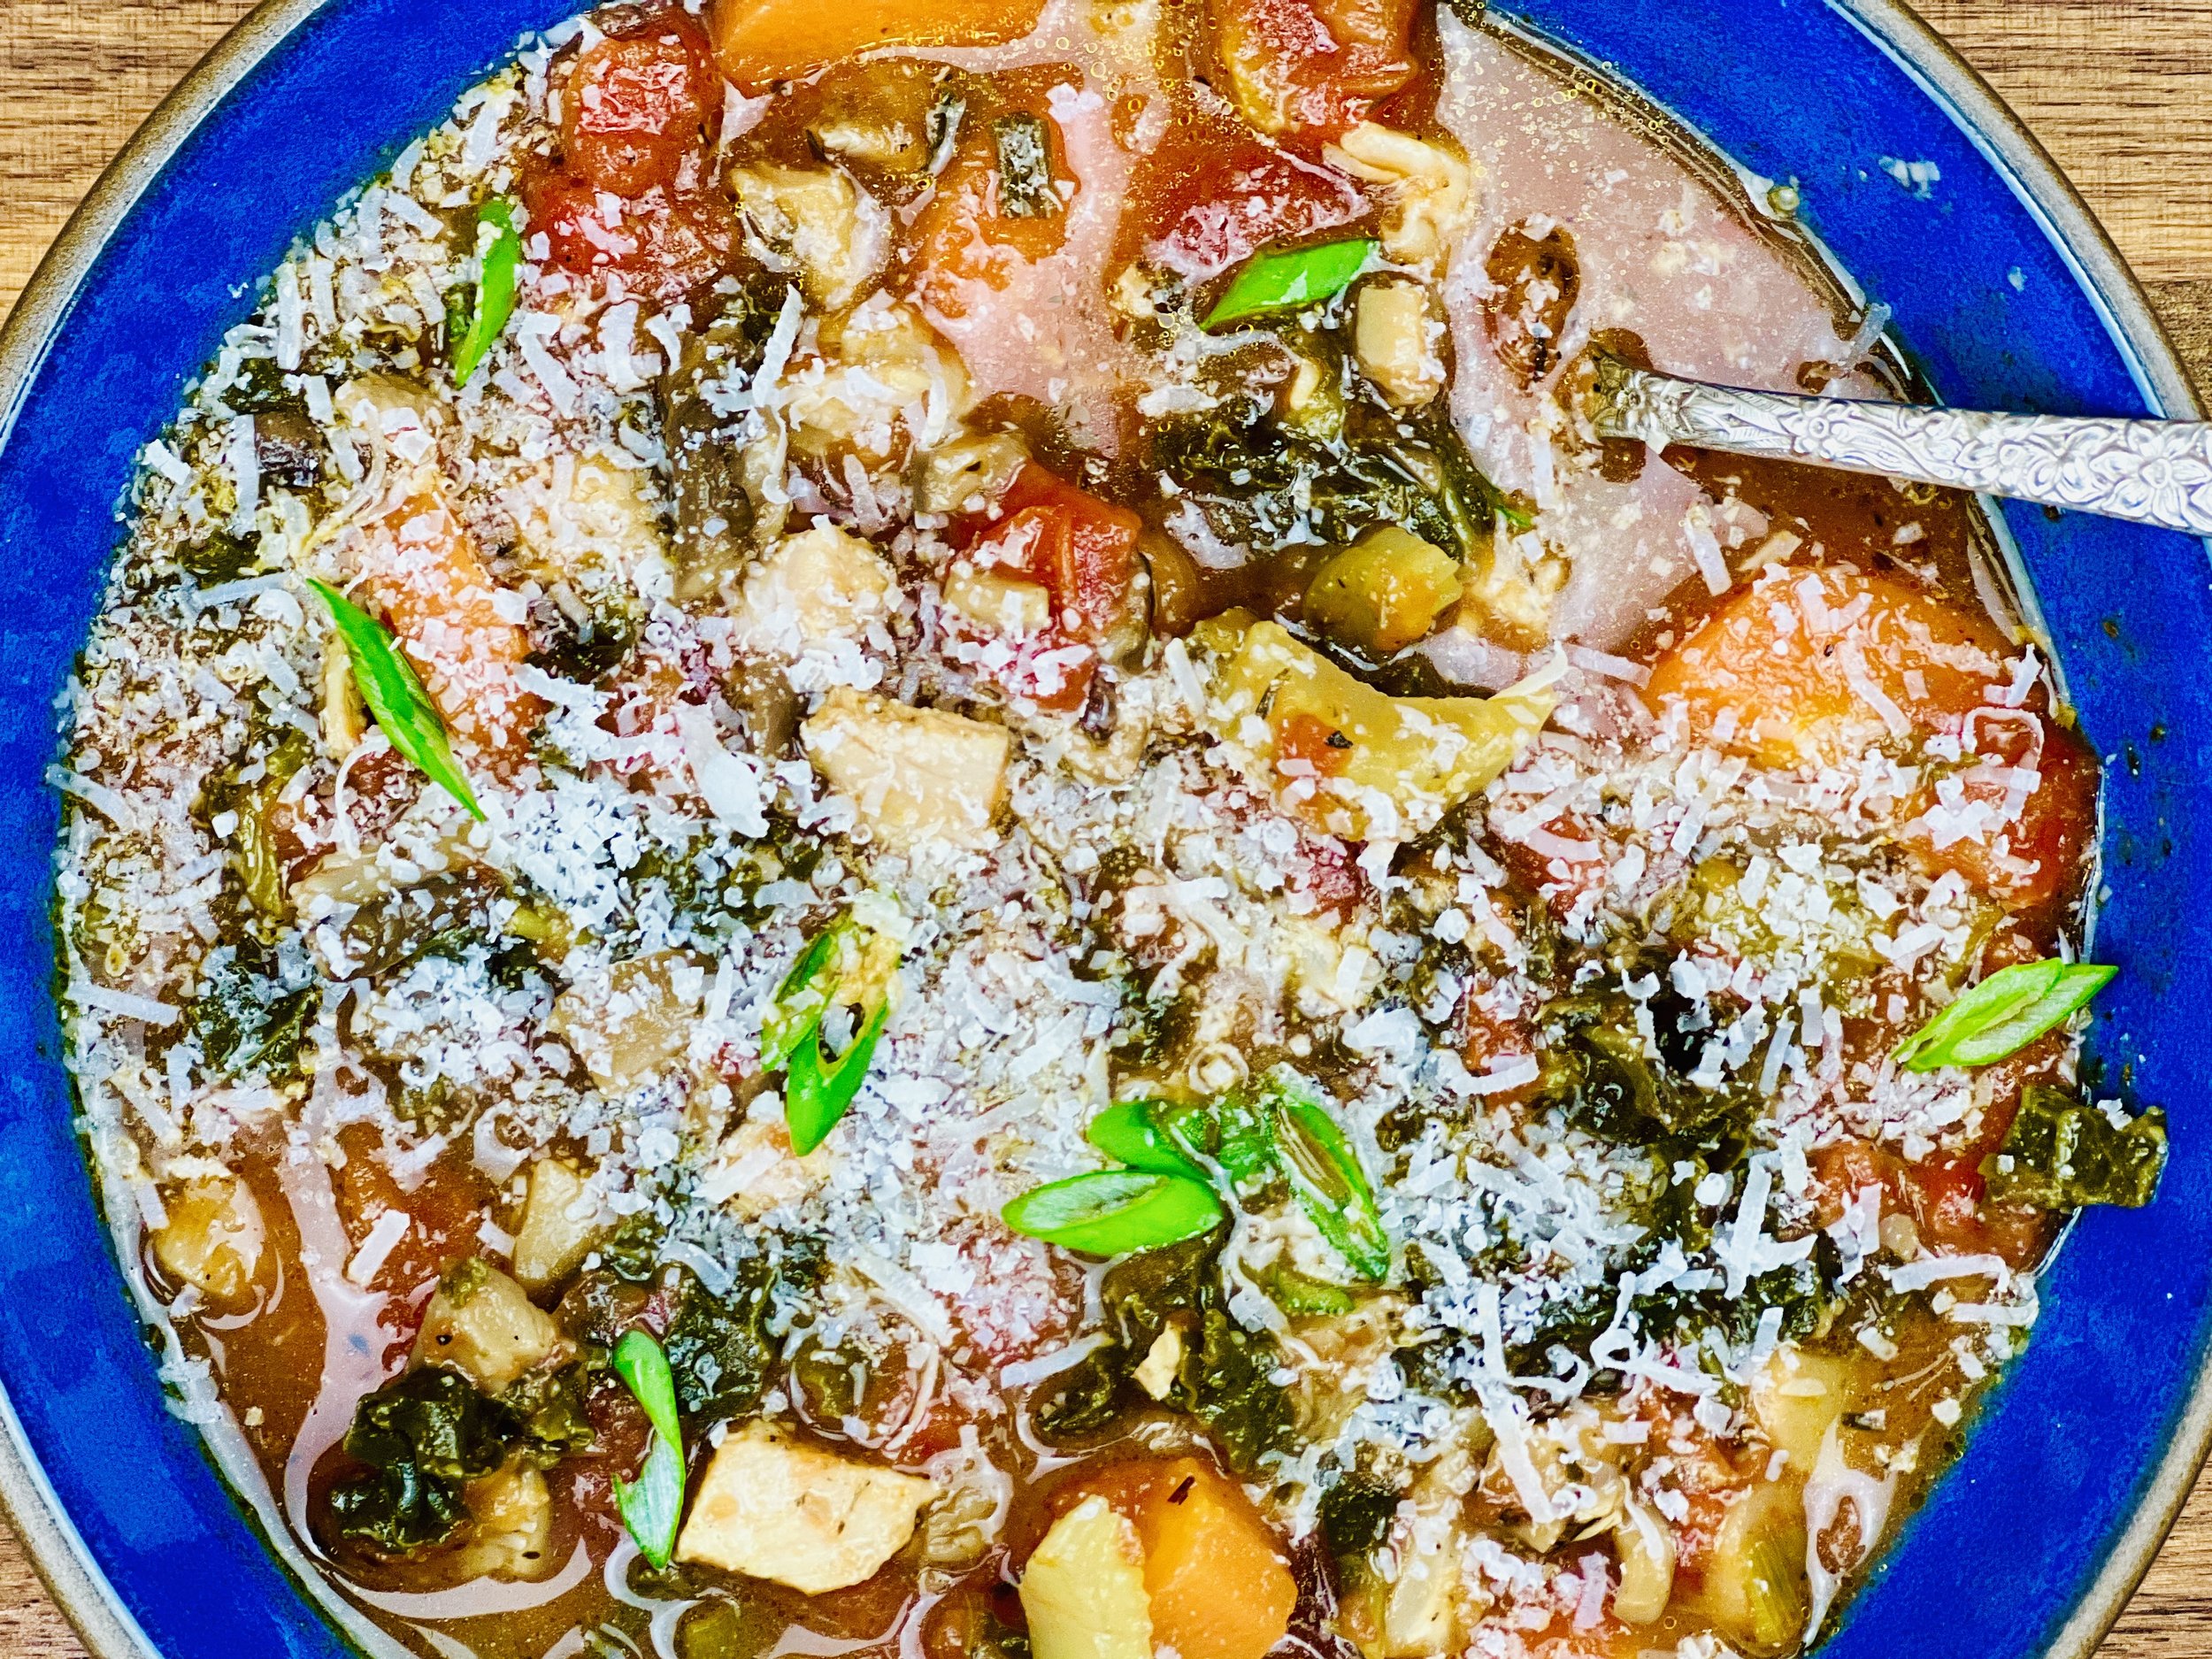
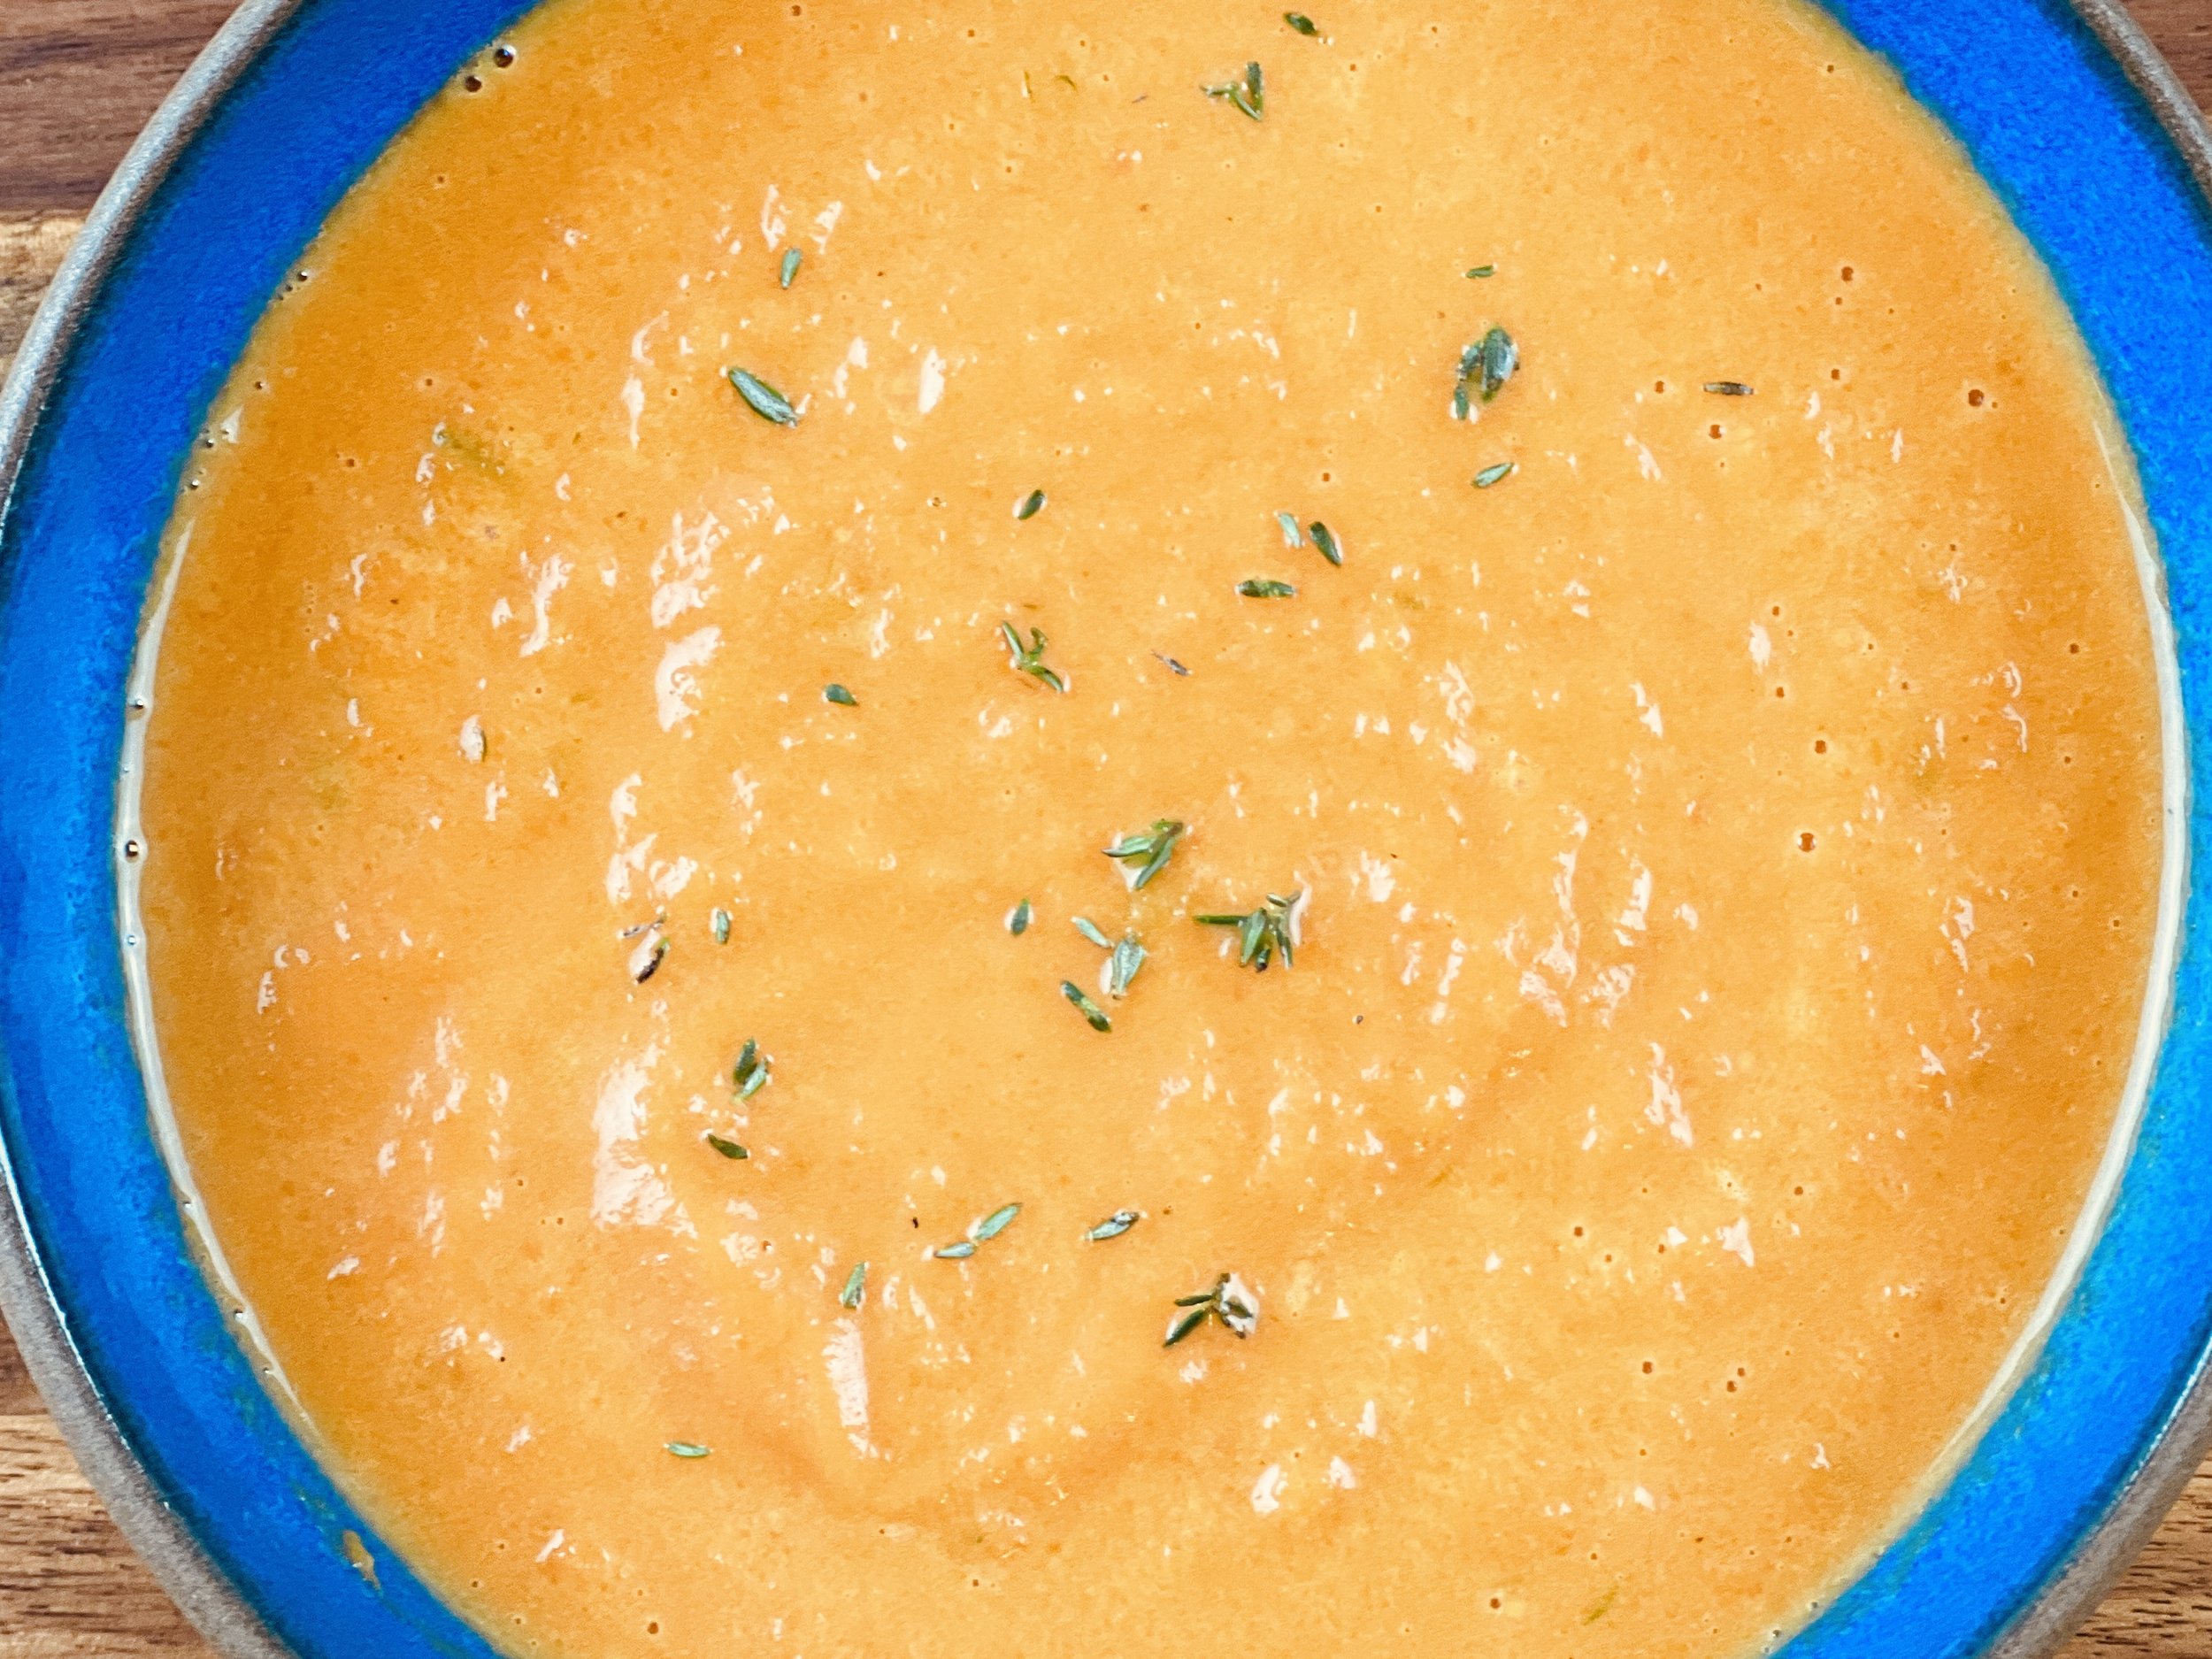
Tomato, Vegetable, and Chicken “Grandma Soup” (Low FODMAP)
15 Minutes prep • 50 Minutes cook • Low FODMAP • Gluten-free • Lactose-free version • Serves 6
15 Minutes prep • 50 Minutes cook • Low FODMAP • Gluten-free • Lactose-free version • Serves 6
The combination of chopped tomatoes, chicken broth, and assorted vegetables without added pasta or rice makes a richly flavorful soup that’s hearty and satisfying without being heavy. In my family, we used to call this kind of soup “Grandma Soup” because my grandma regularly made a version of this soup that we all loved. I created this recipe by taking what was in my refrigerator and pantry and putting it into my soup pot. The end result was so good, I had to share it!
This is an exclusive recipe just for recipe club members.
In addition to the two free recipes I create each week I am creating and delivering one very special recipe just for my recipe club members. If you’re not yet a member, I encourage you to join! Membership in the club includes access to the complete archive of recipes with filters so it can become your virtual low FODMAP cookbook plus, I am creating and delivering one special NEW recipe every week ONLY for recipe club members. And, for my true fans, I’ll be sharing behind-the-scenes content, and updates on the progress of the new cookbook.
Your membership in the club helps me continue creating new, delicious, easy-to-make, low FODMAP recipes just for you.
As always, all recipes will emphasize simple ingredients, easy preparation, and delicious low FODMAP results. Recipes will be for everything from main courses, salads, soups, side dishes, appetizers, desserts, sauces, breakfast and lunch, and even mocktails and cocktails. Everything you need to prepare fantastic low FODMAP meals everyone will love.
Join the club. Become a Patron. Let’s keep making delicious Low FODMAP meals together.
More Deliciously Low FODMAP™ soup recipes
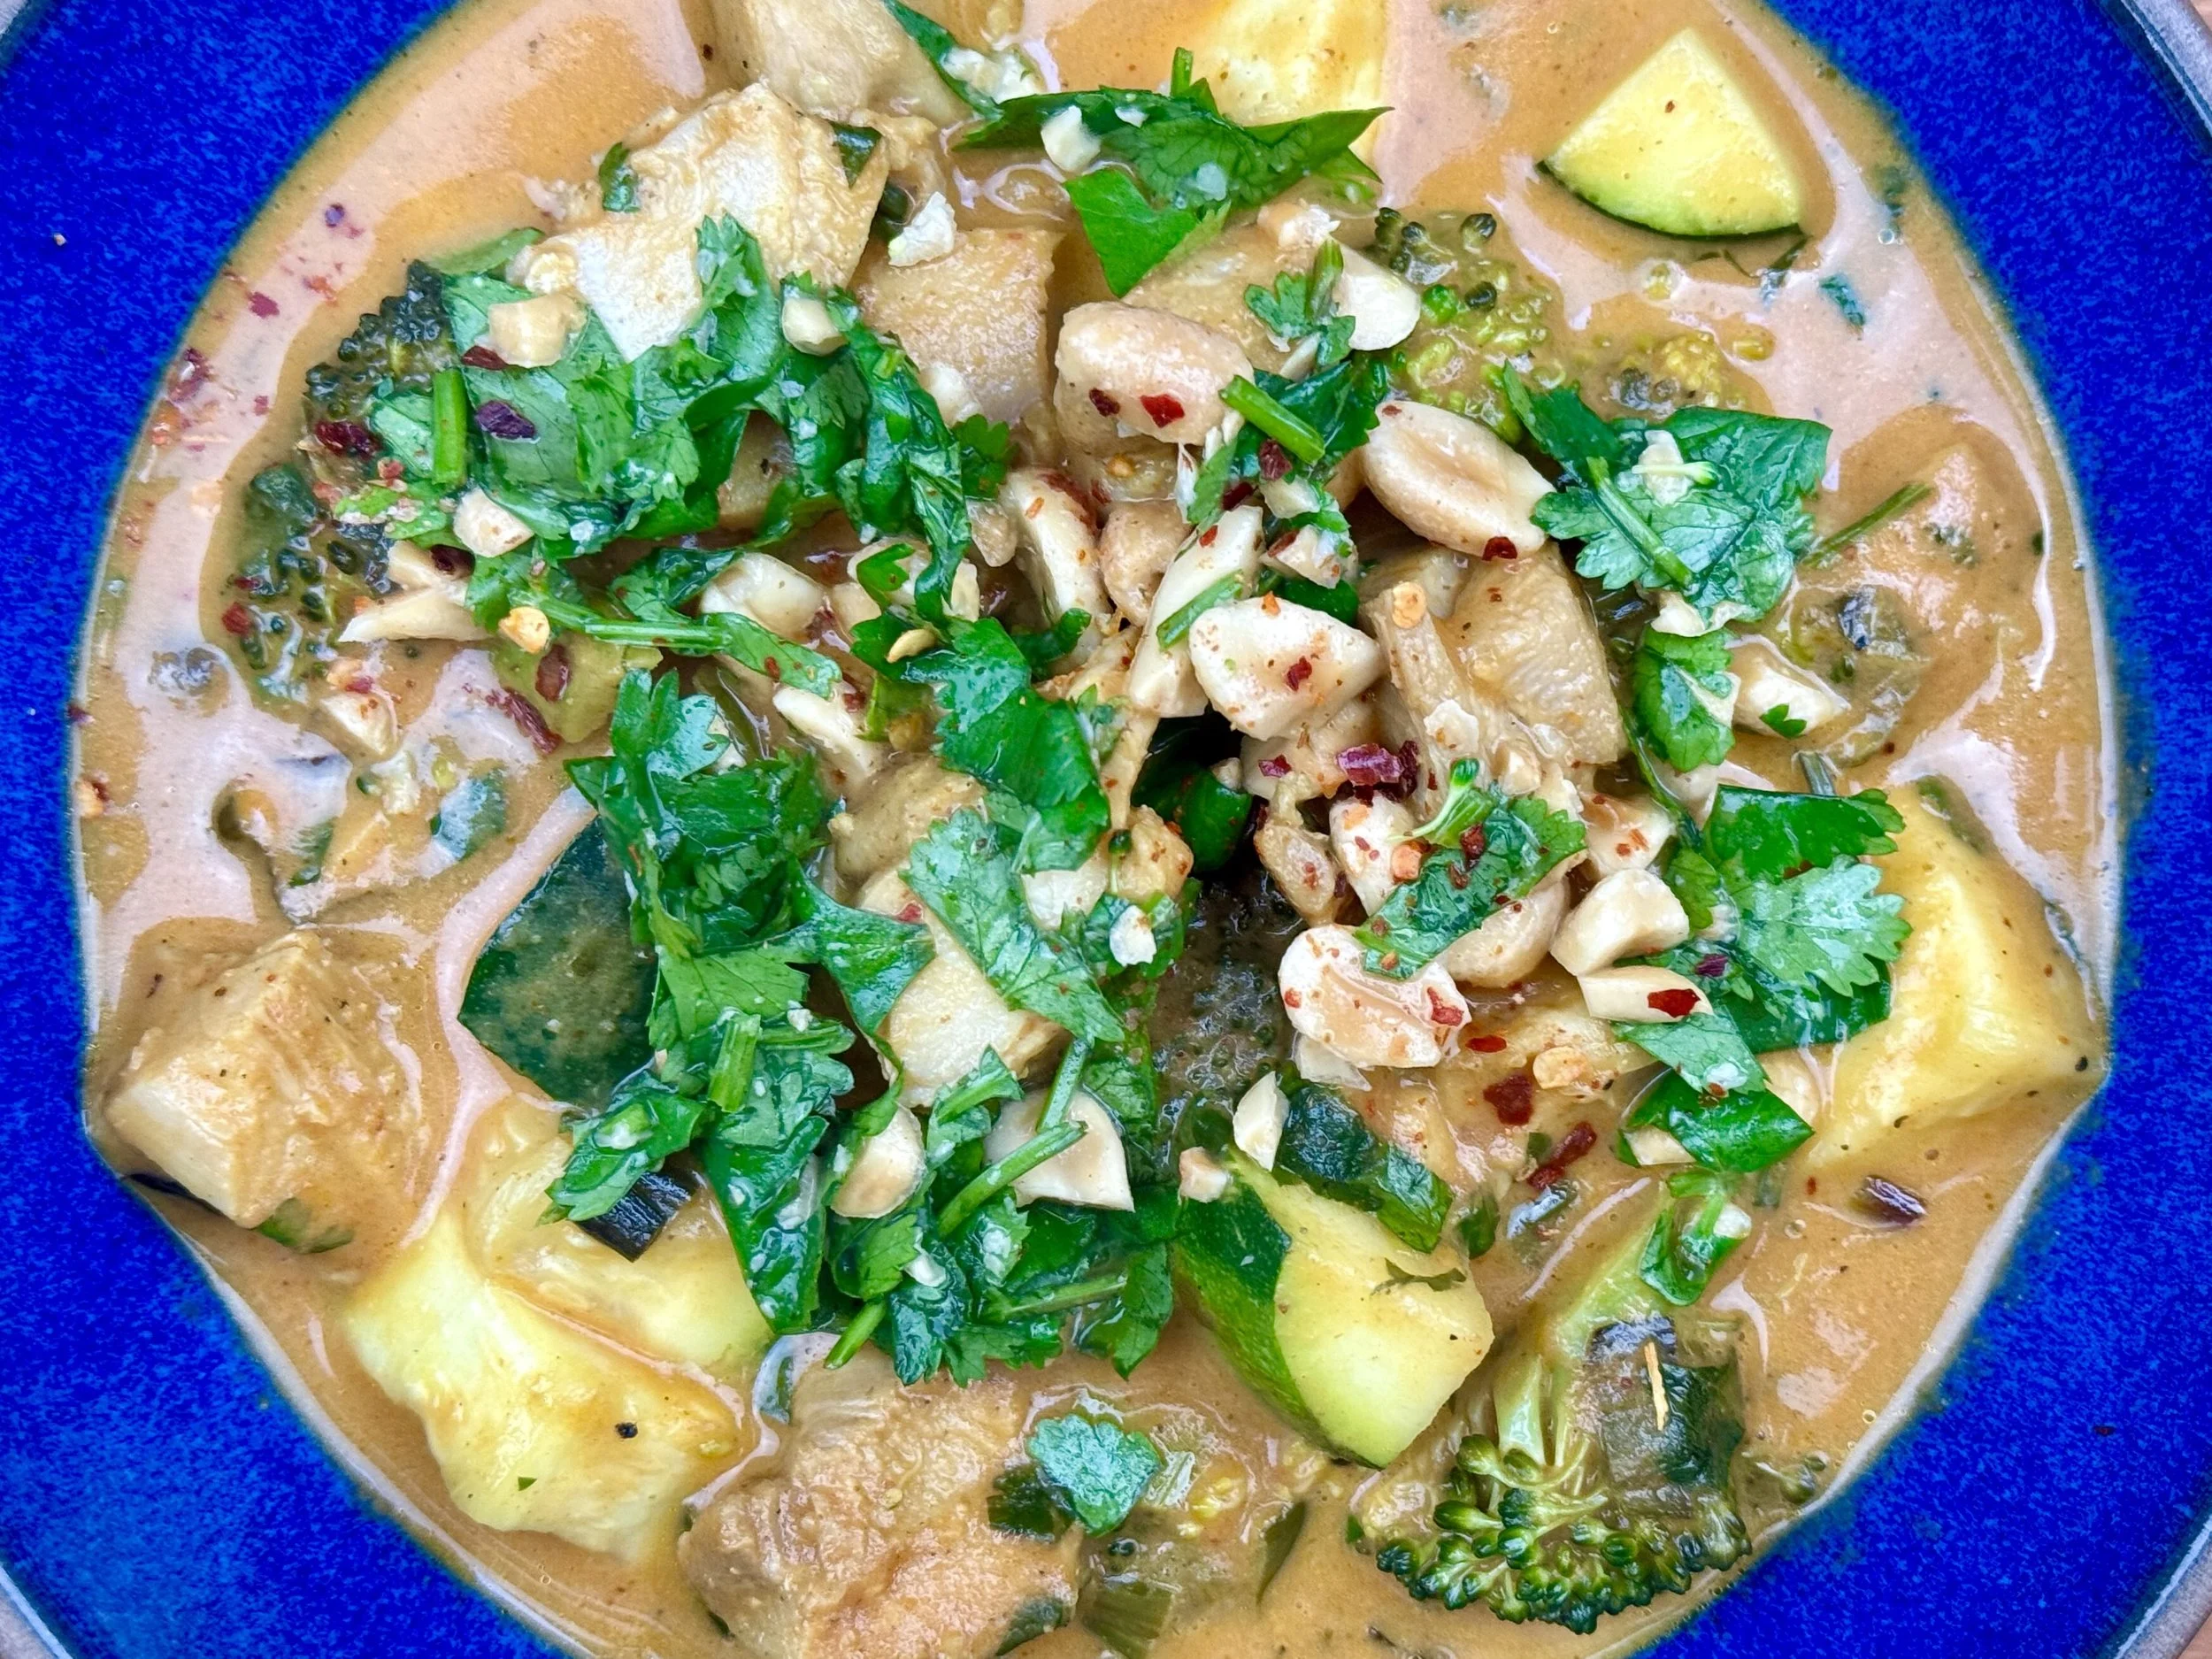
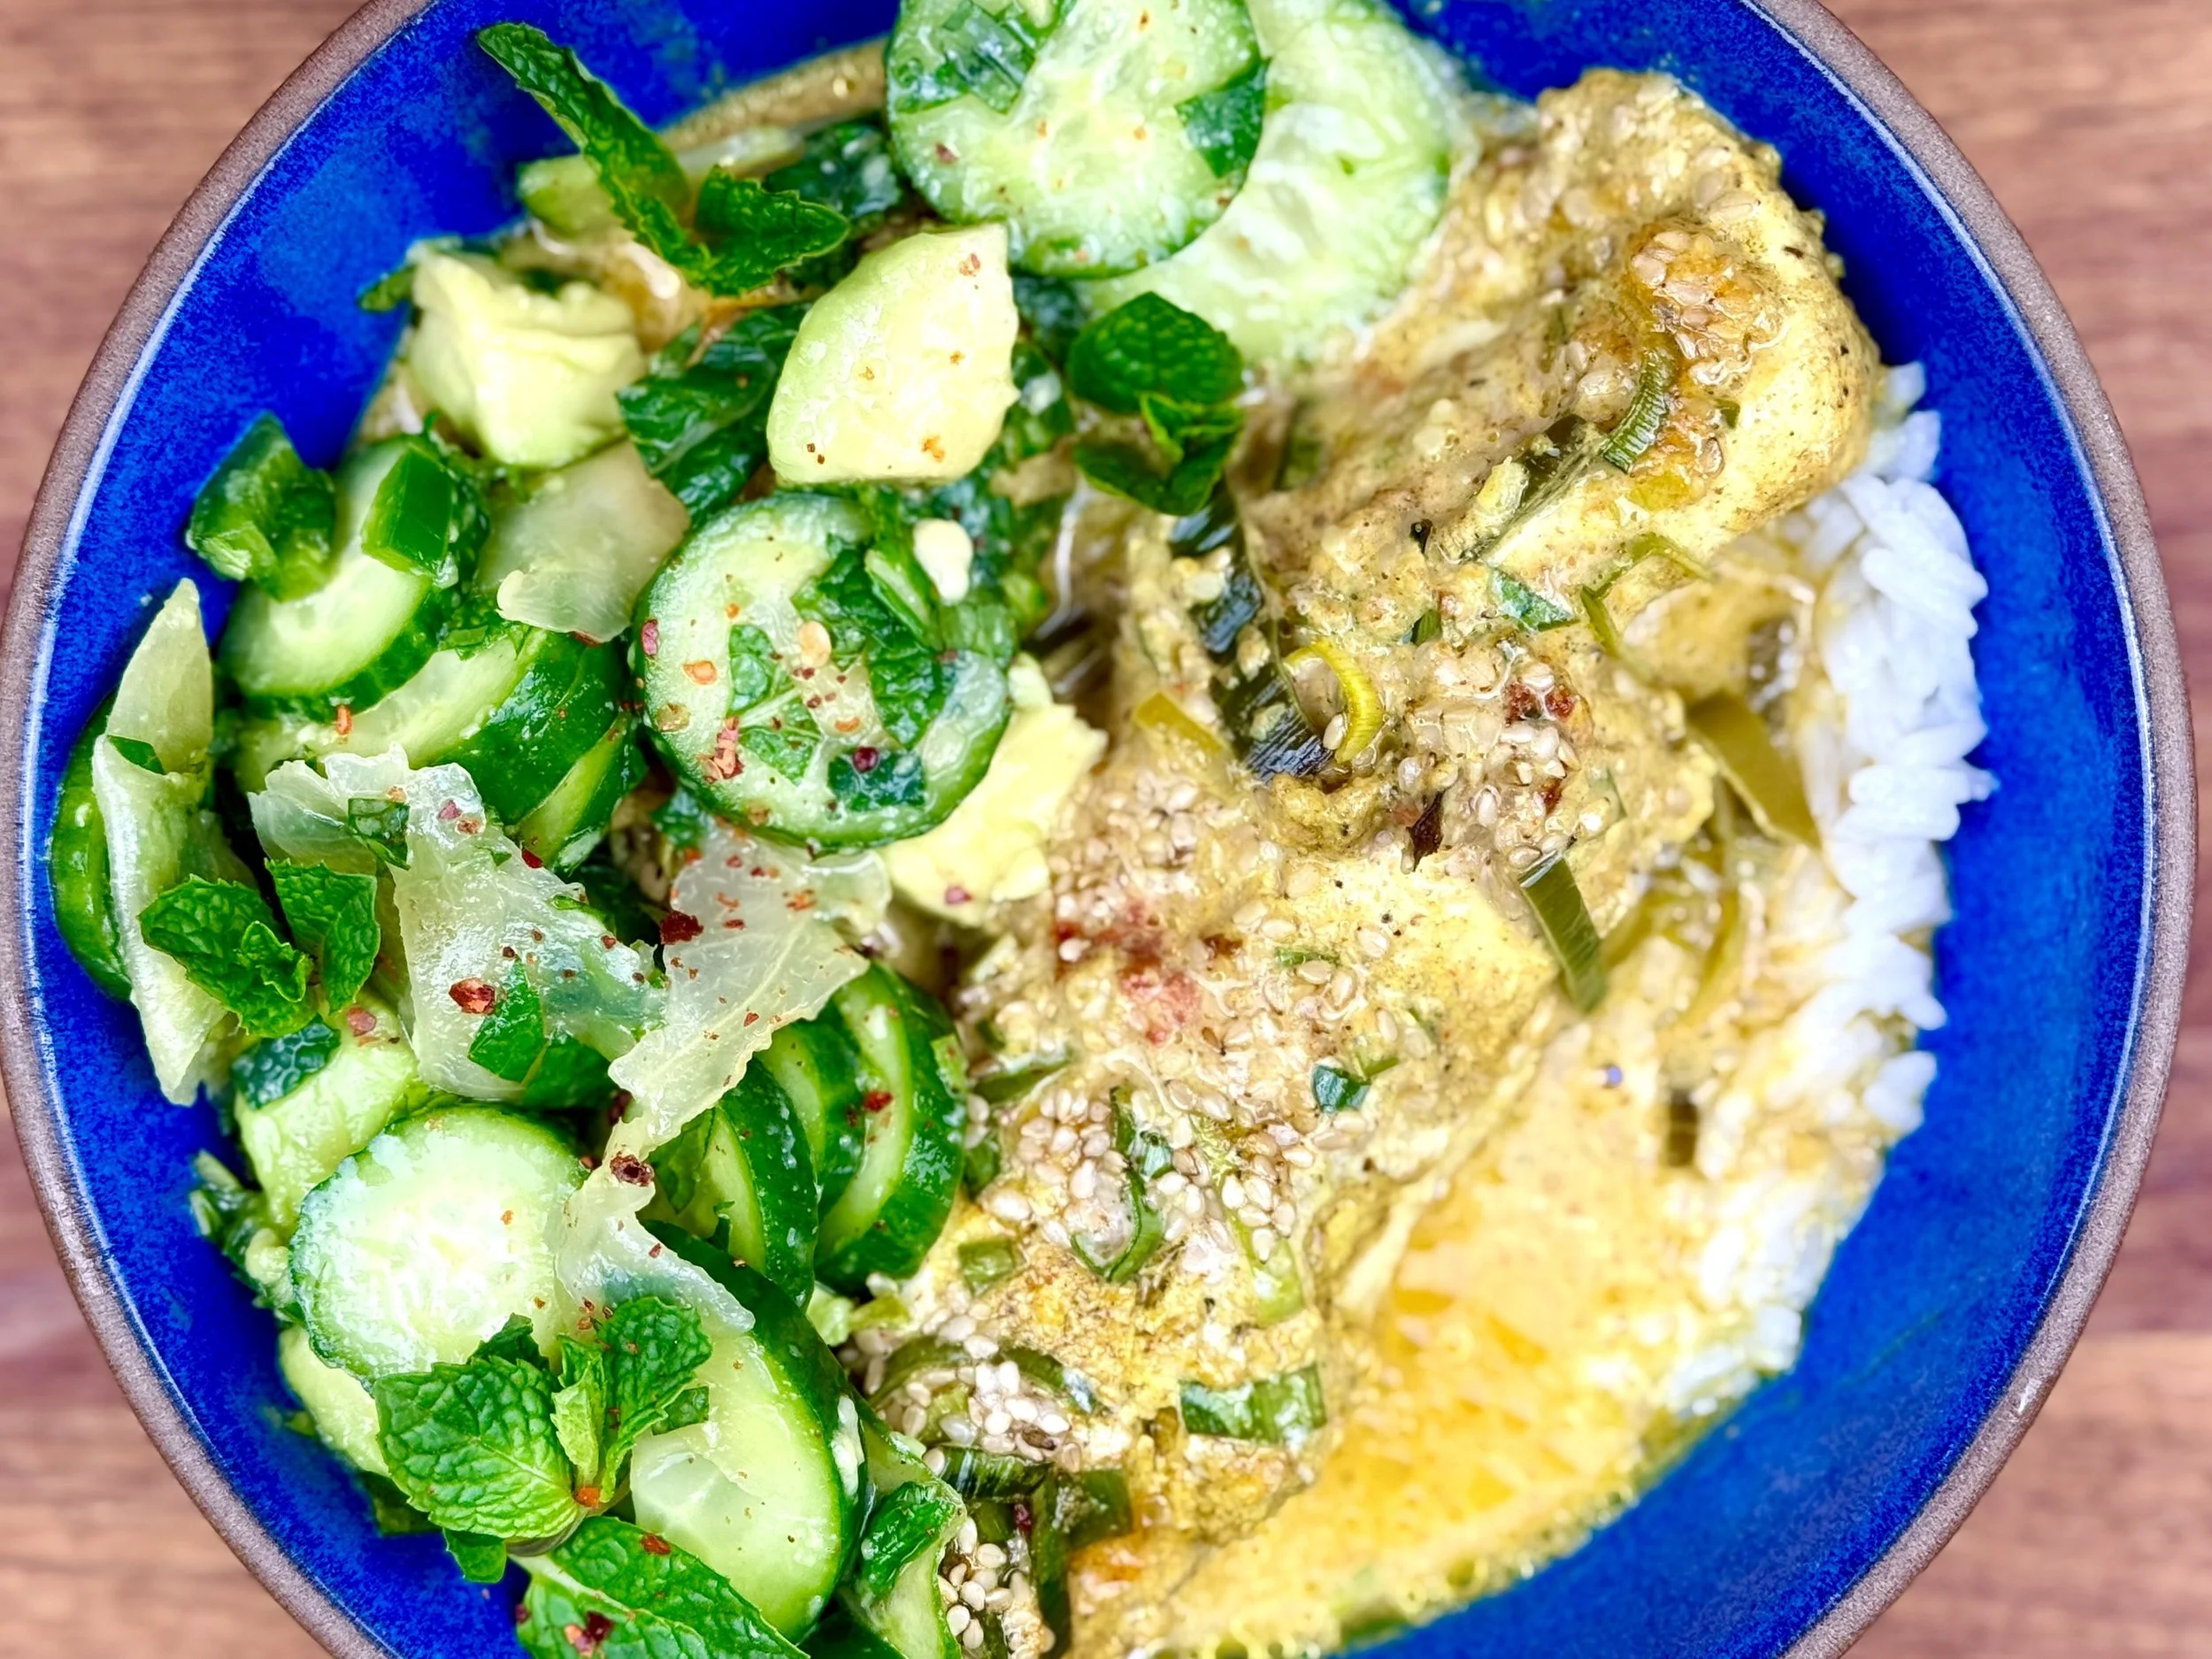
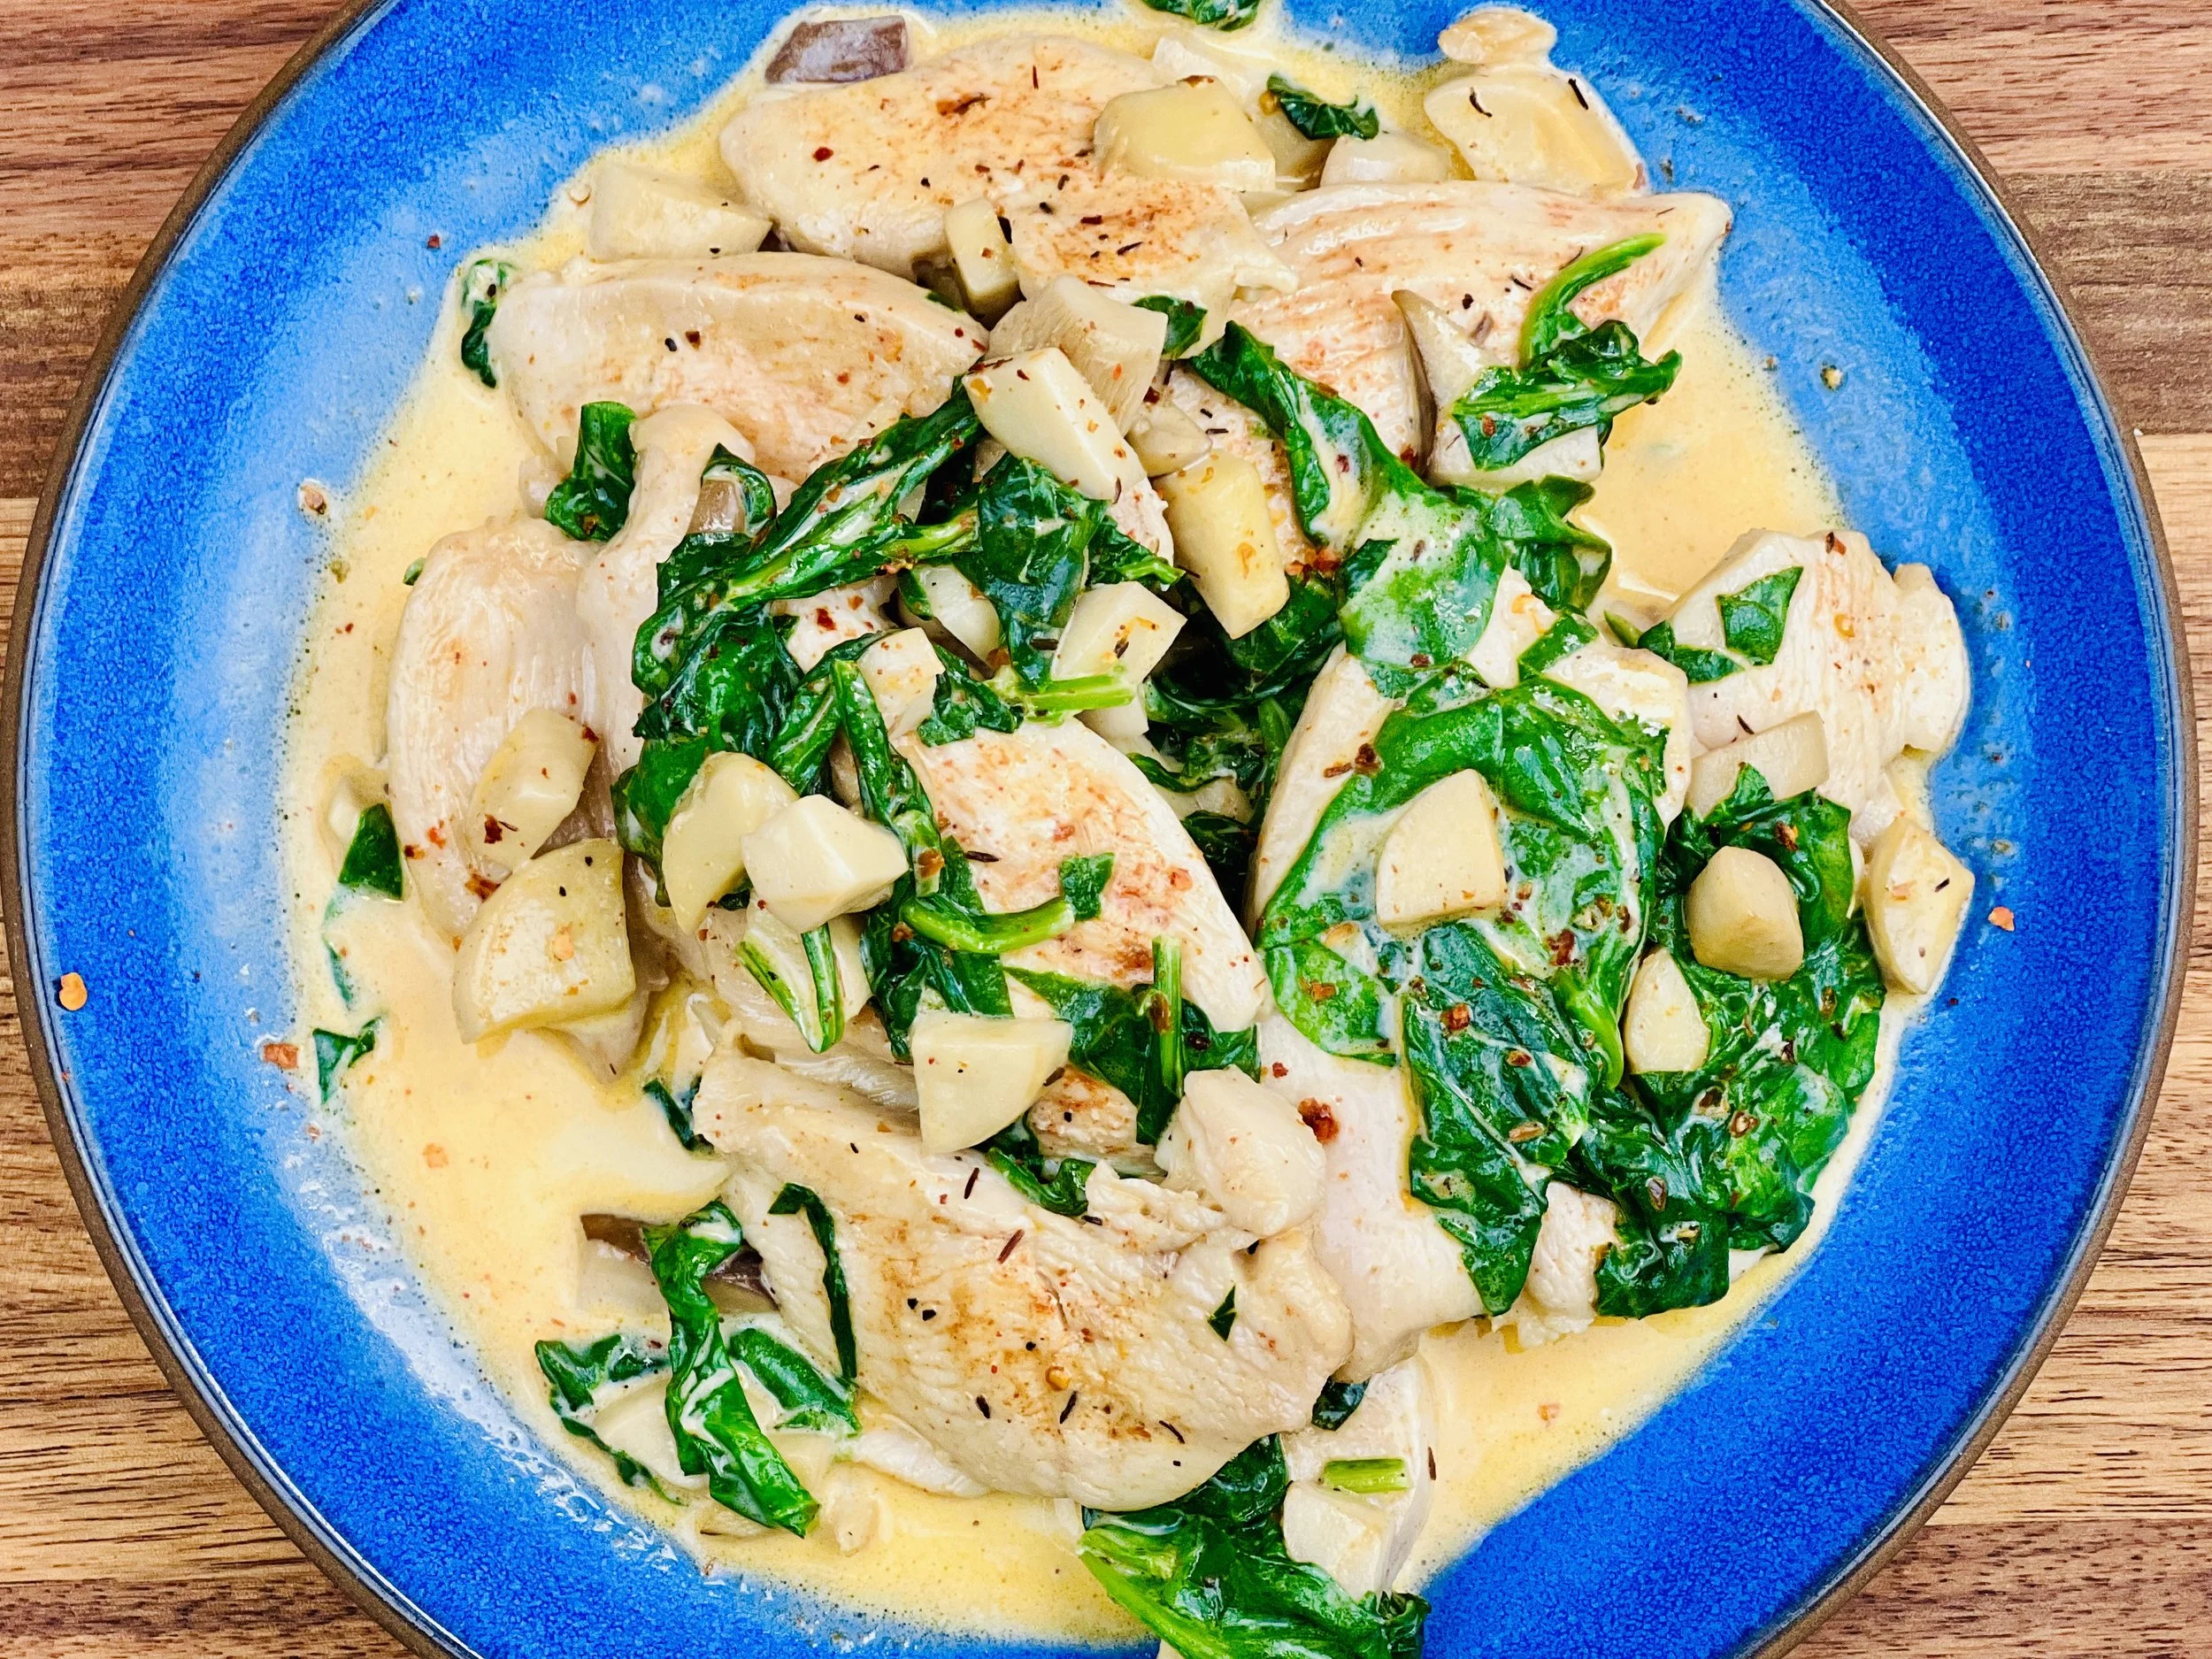
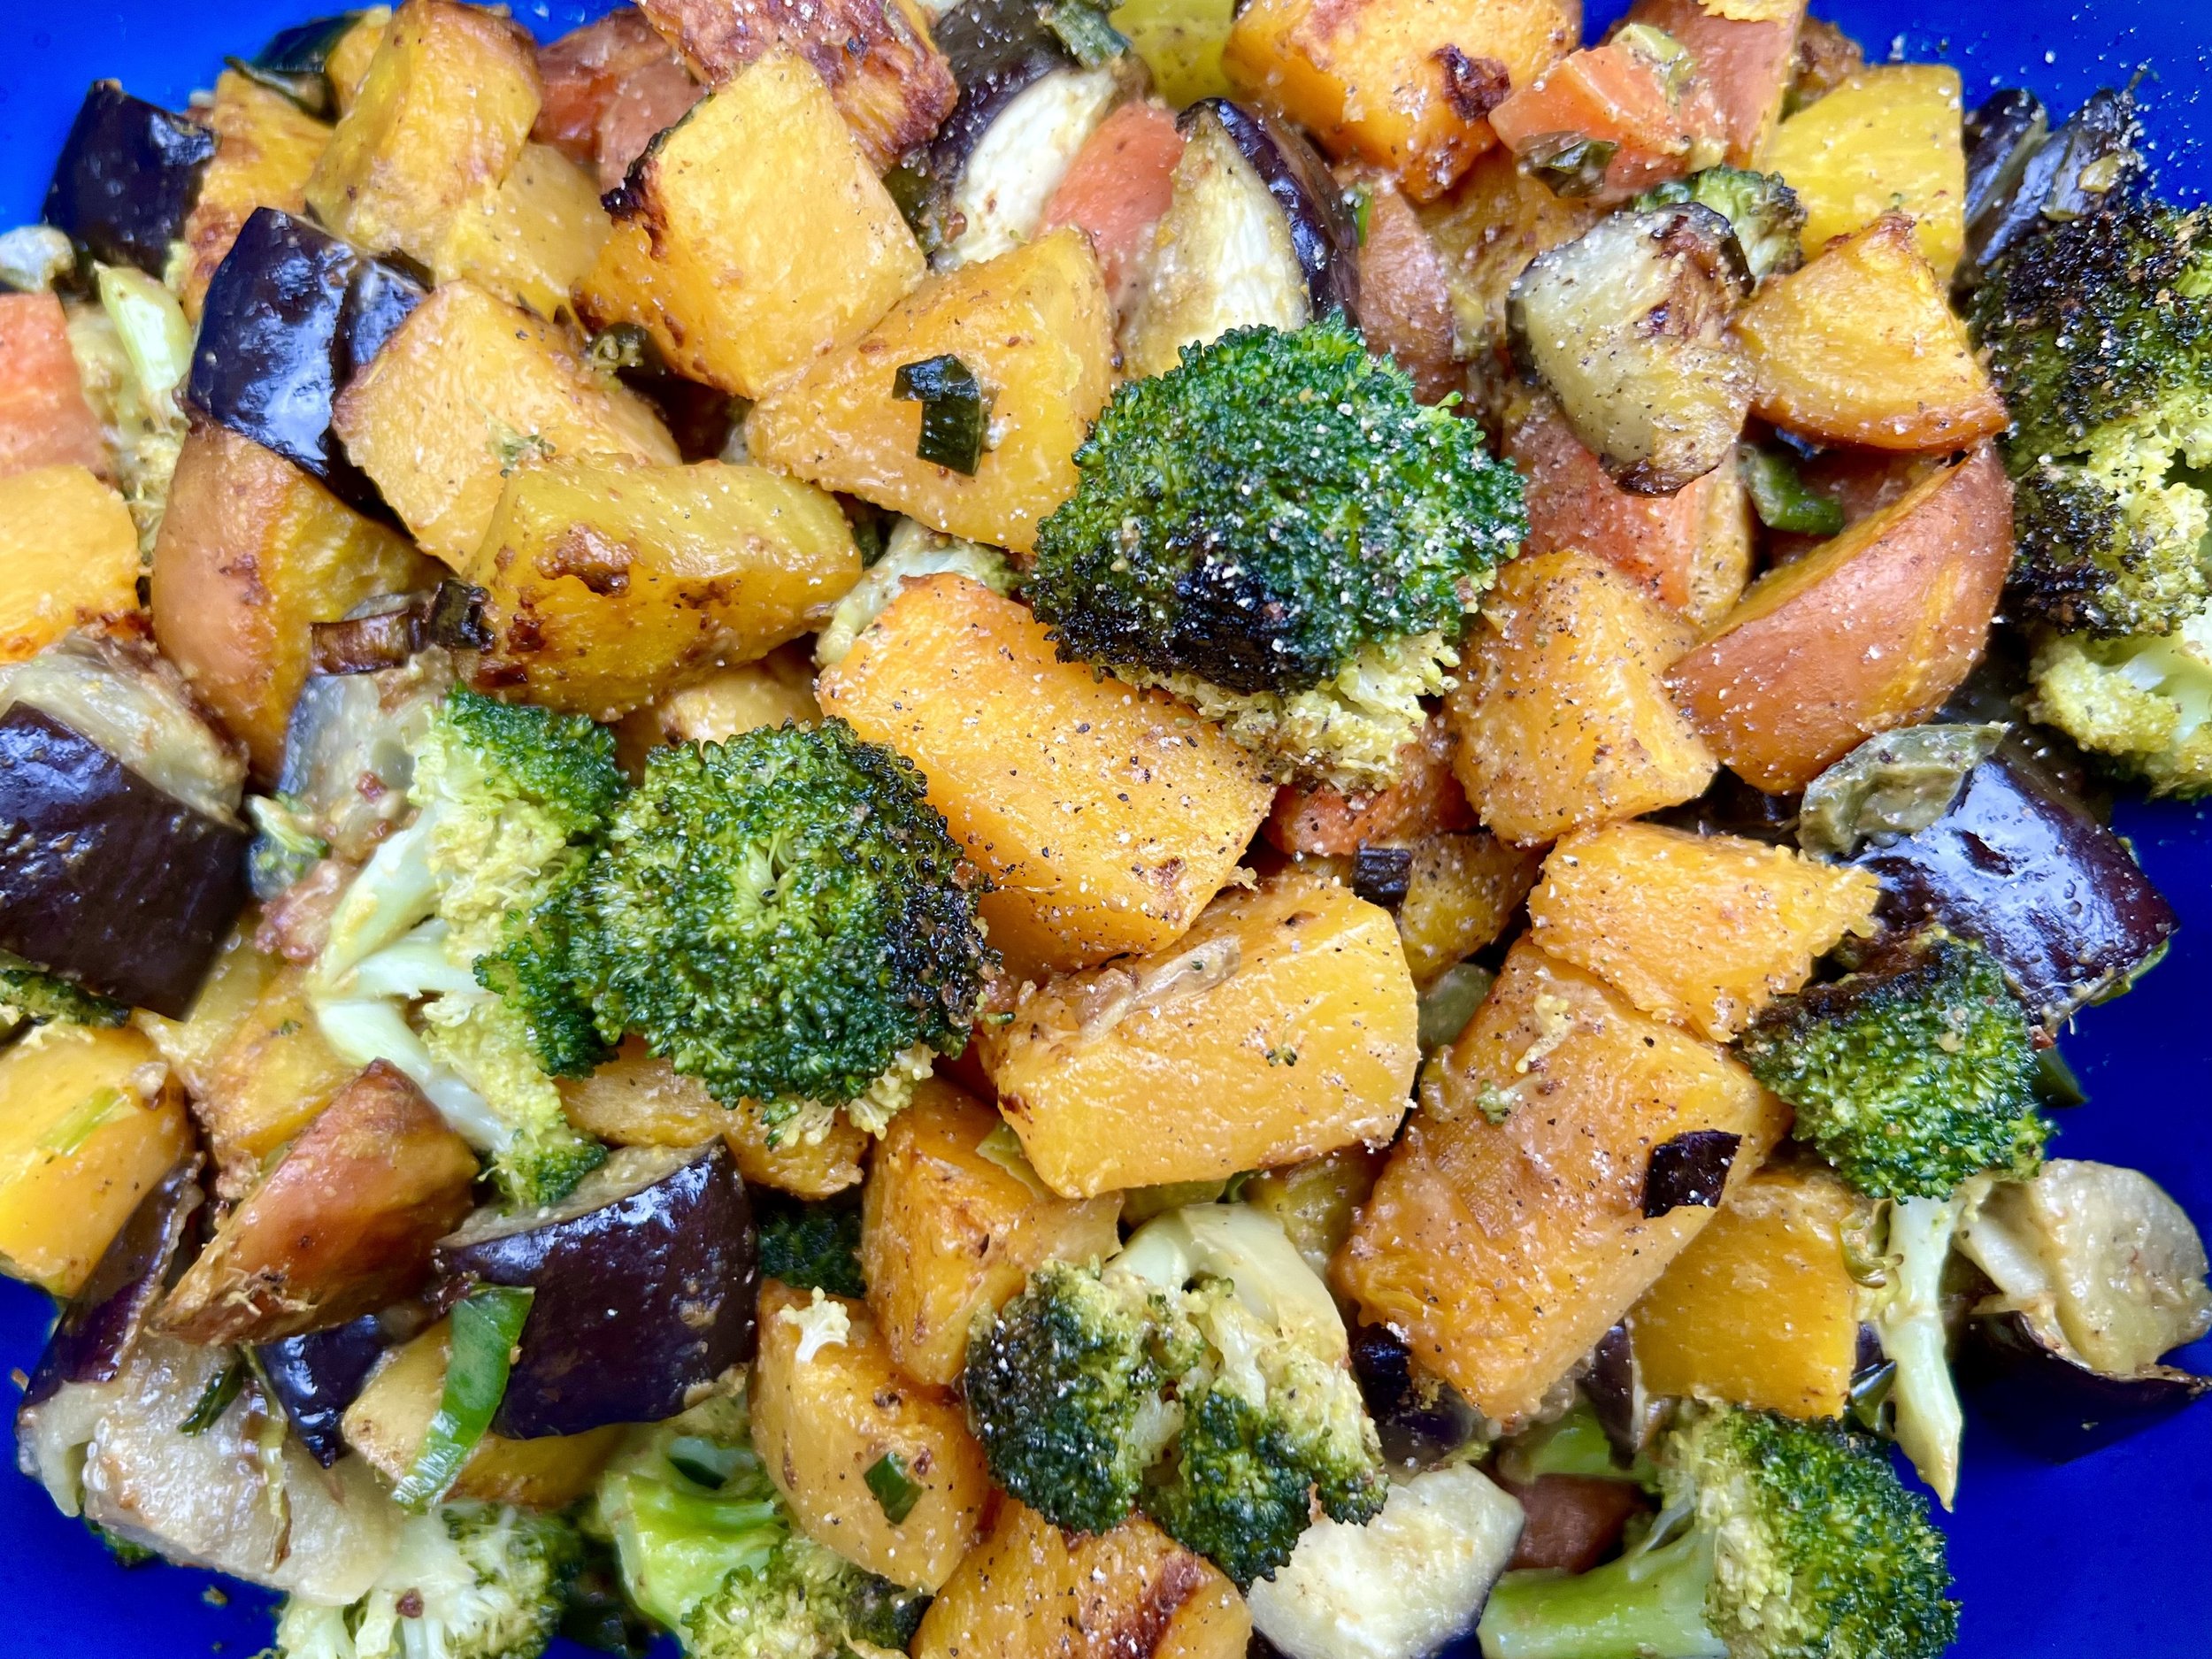
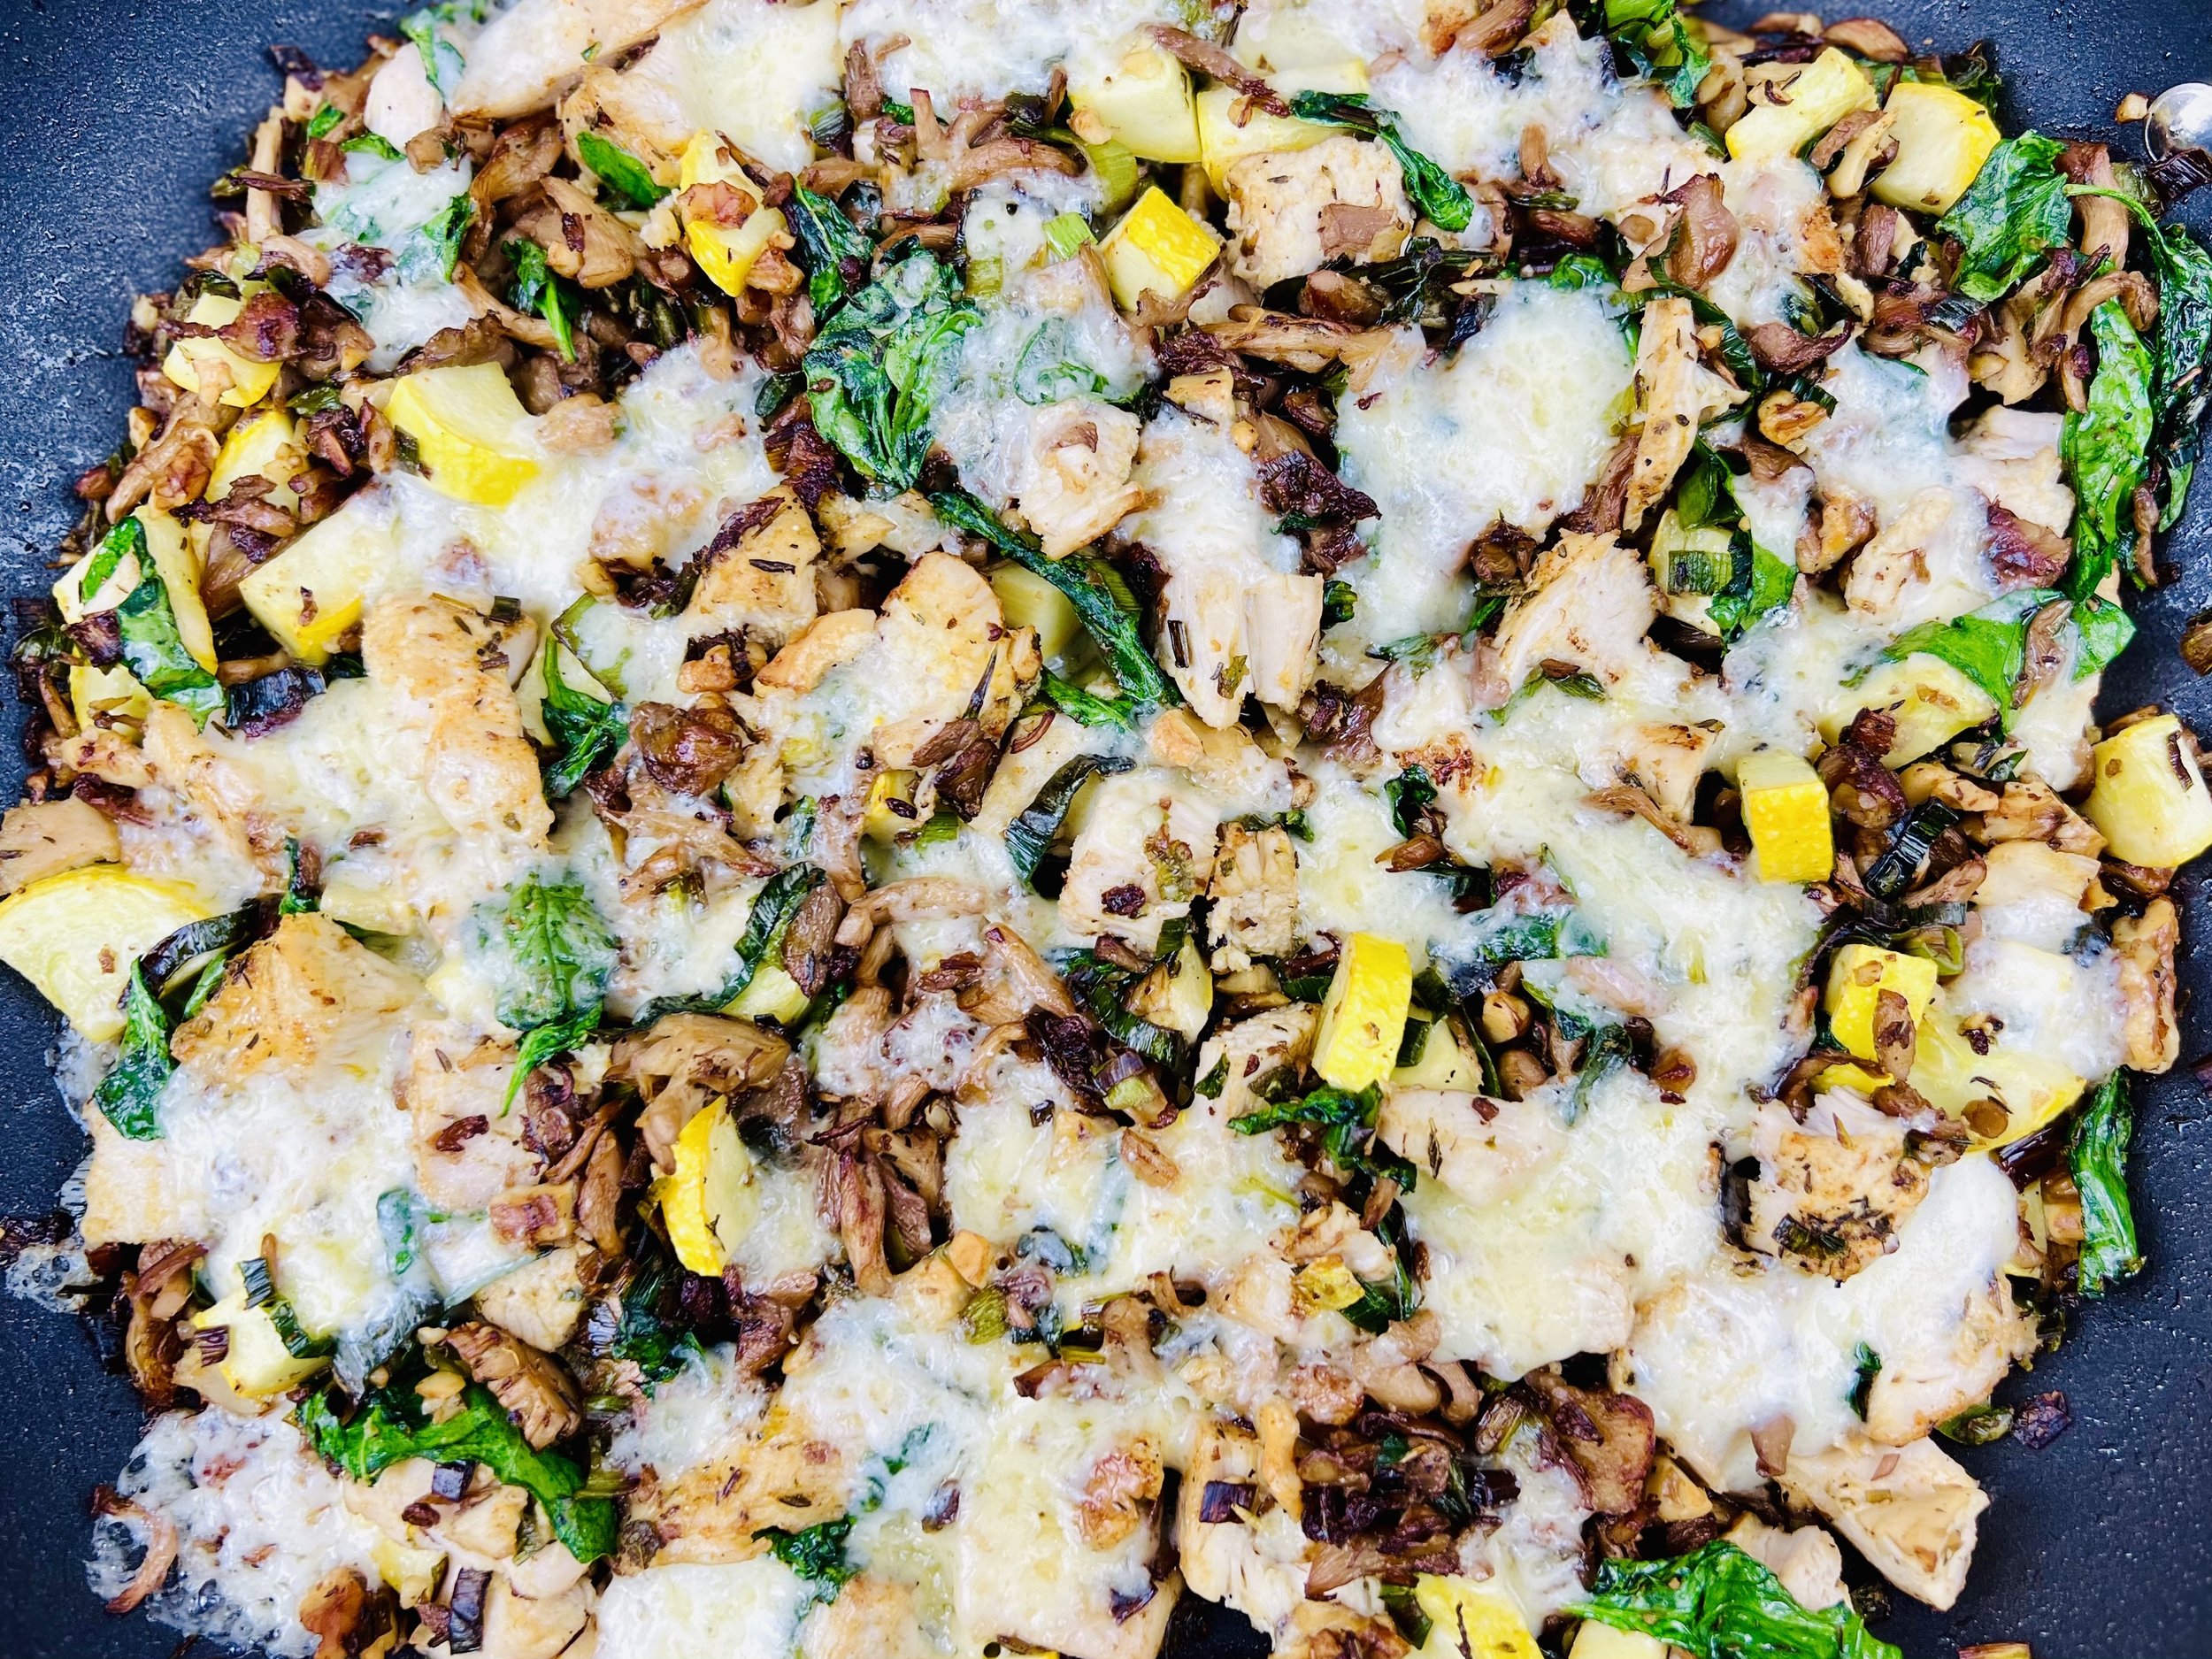
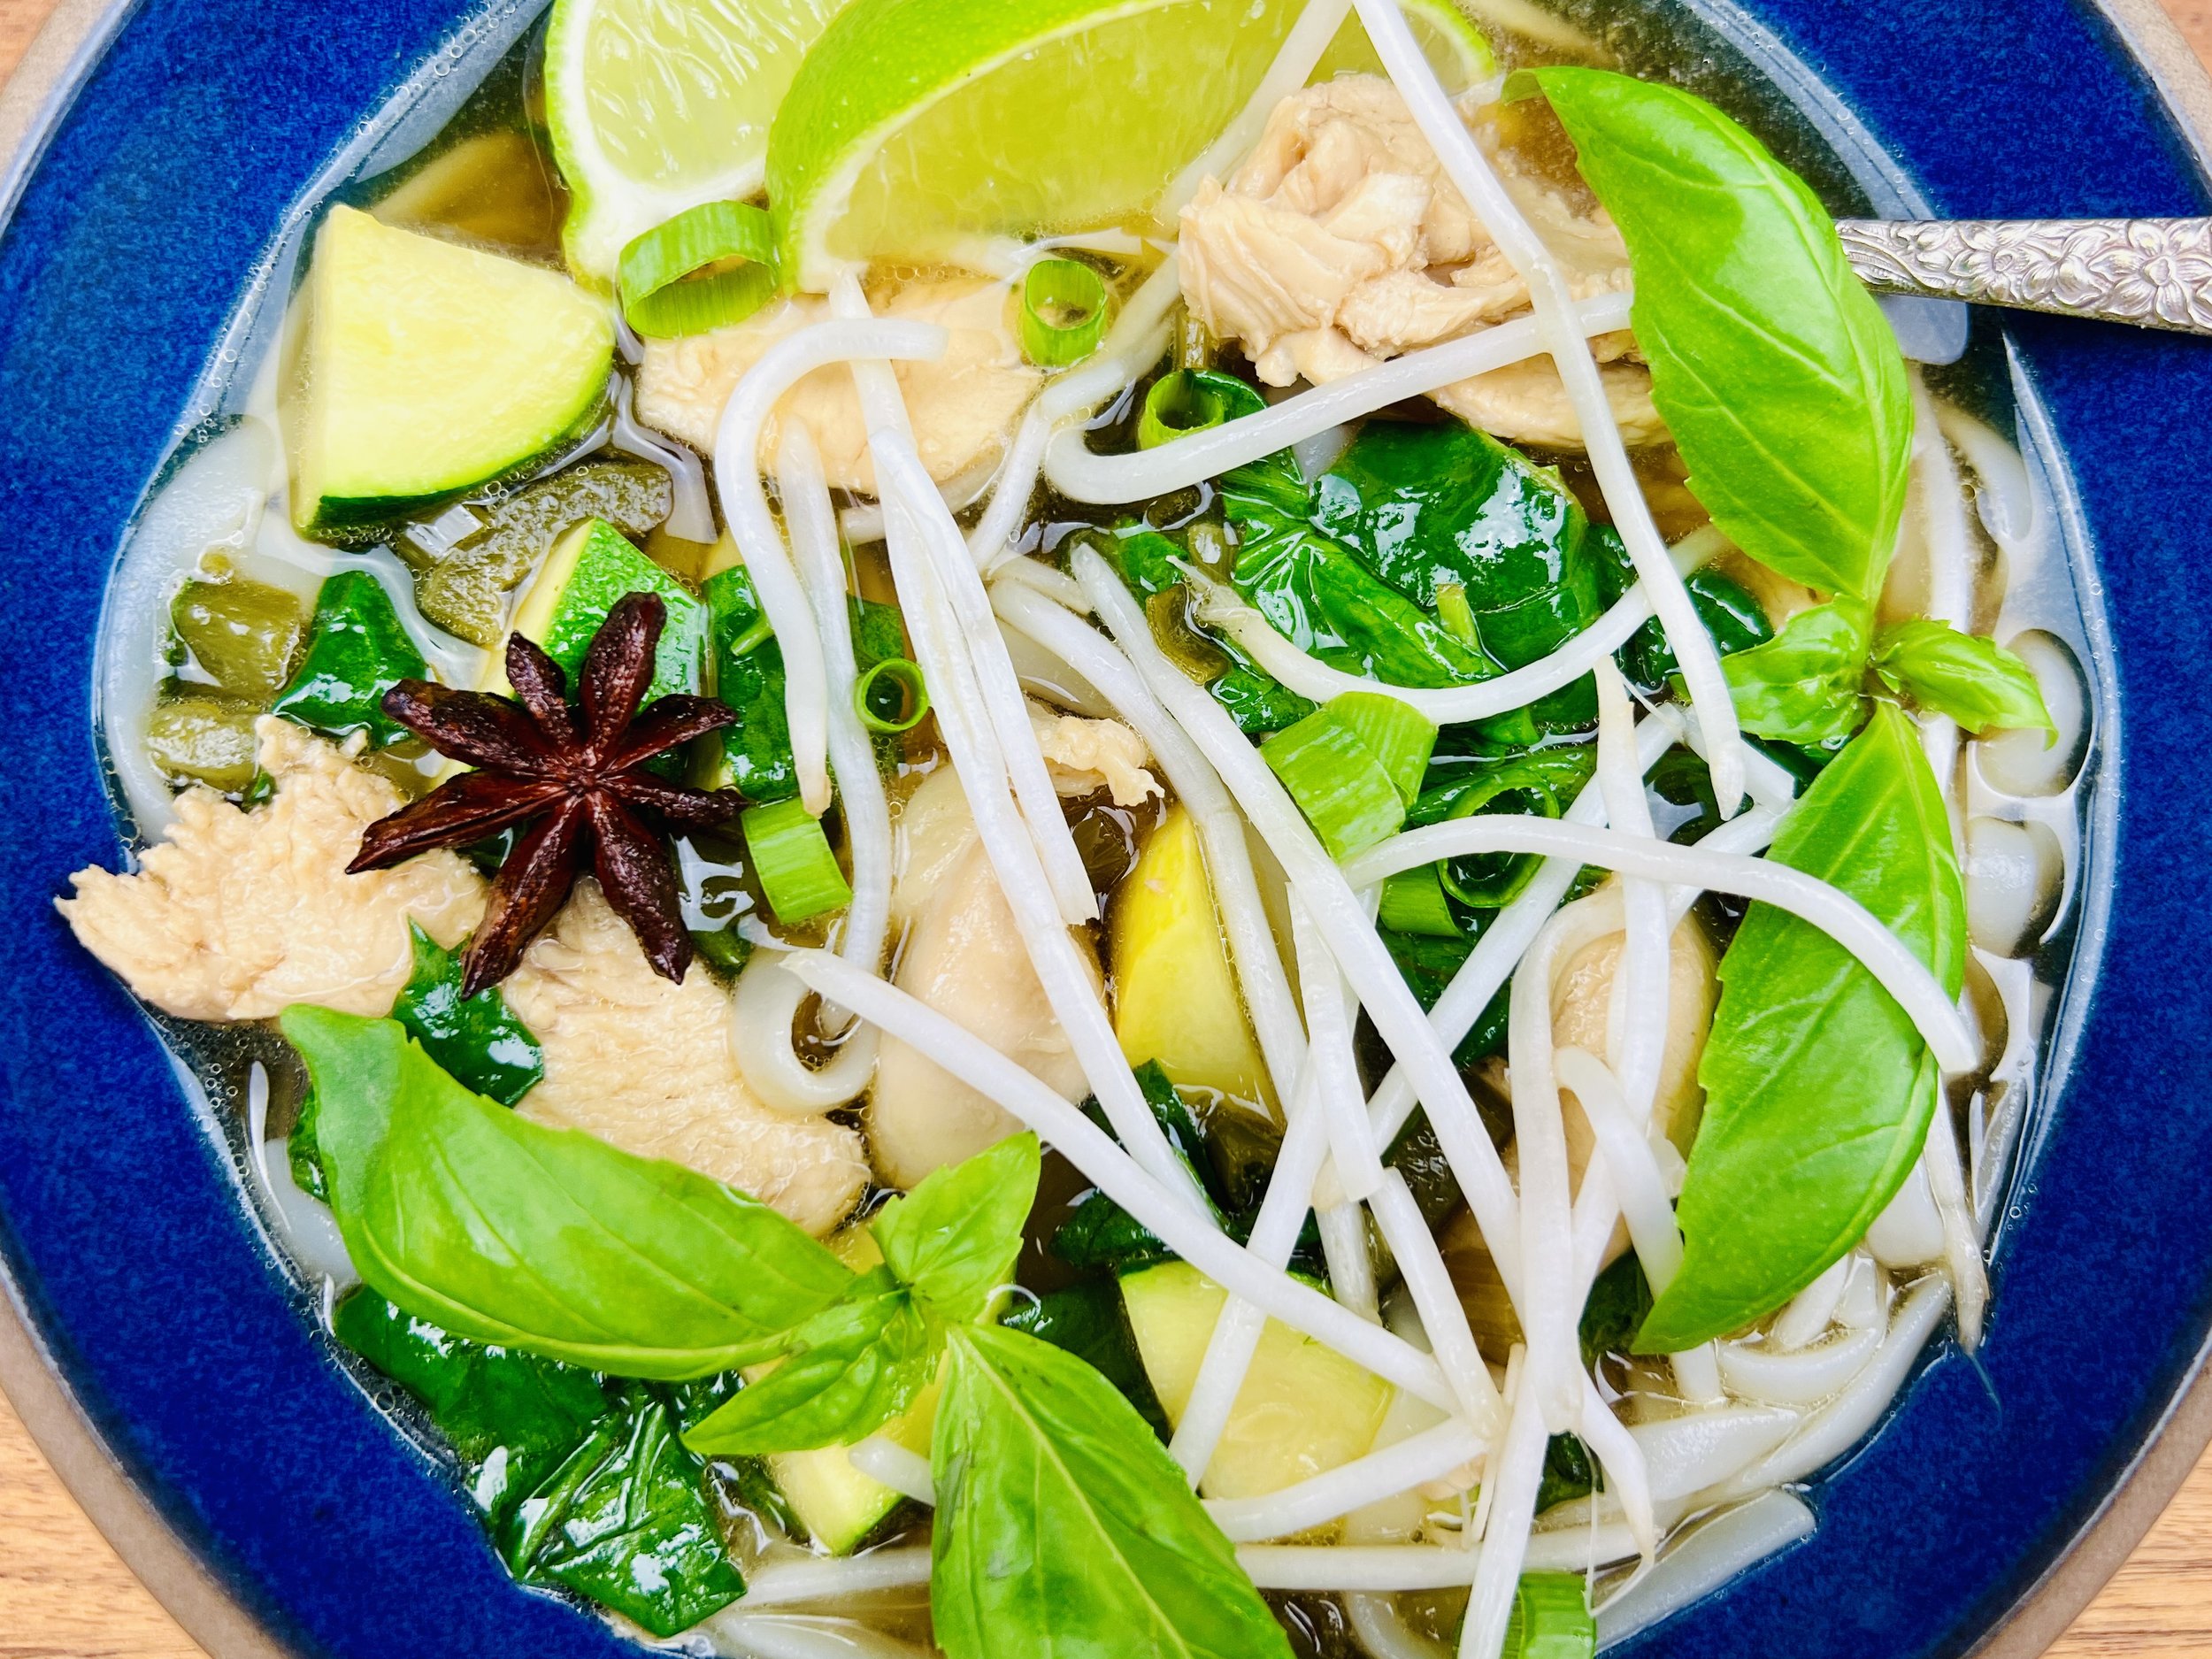
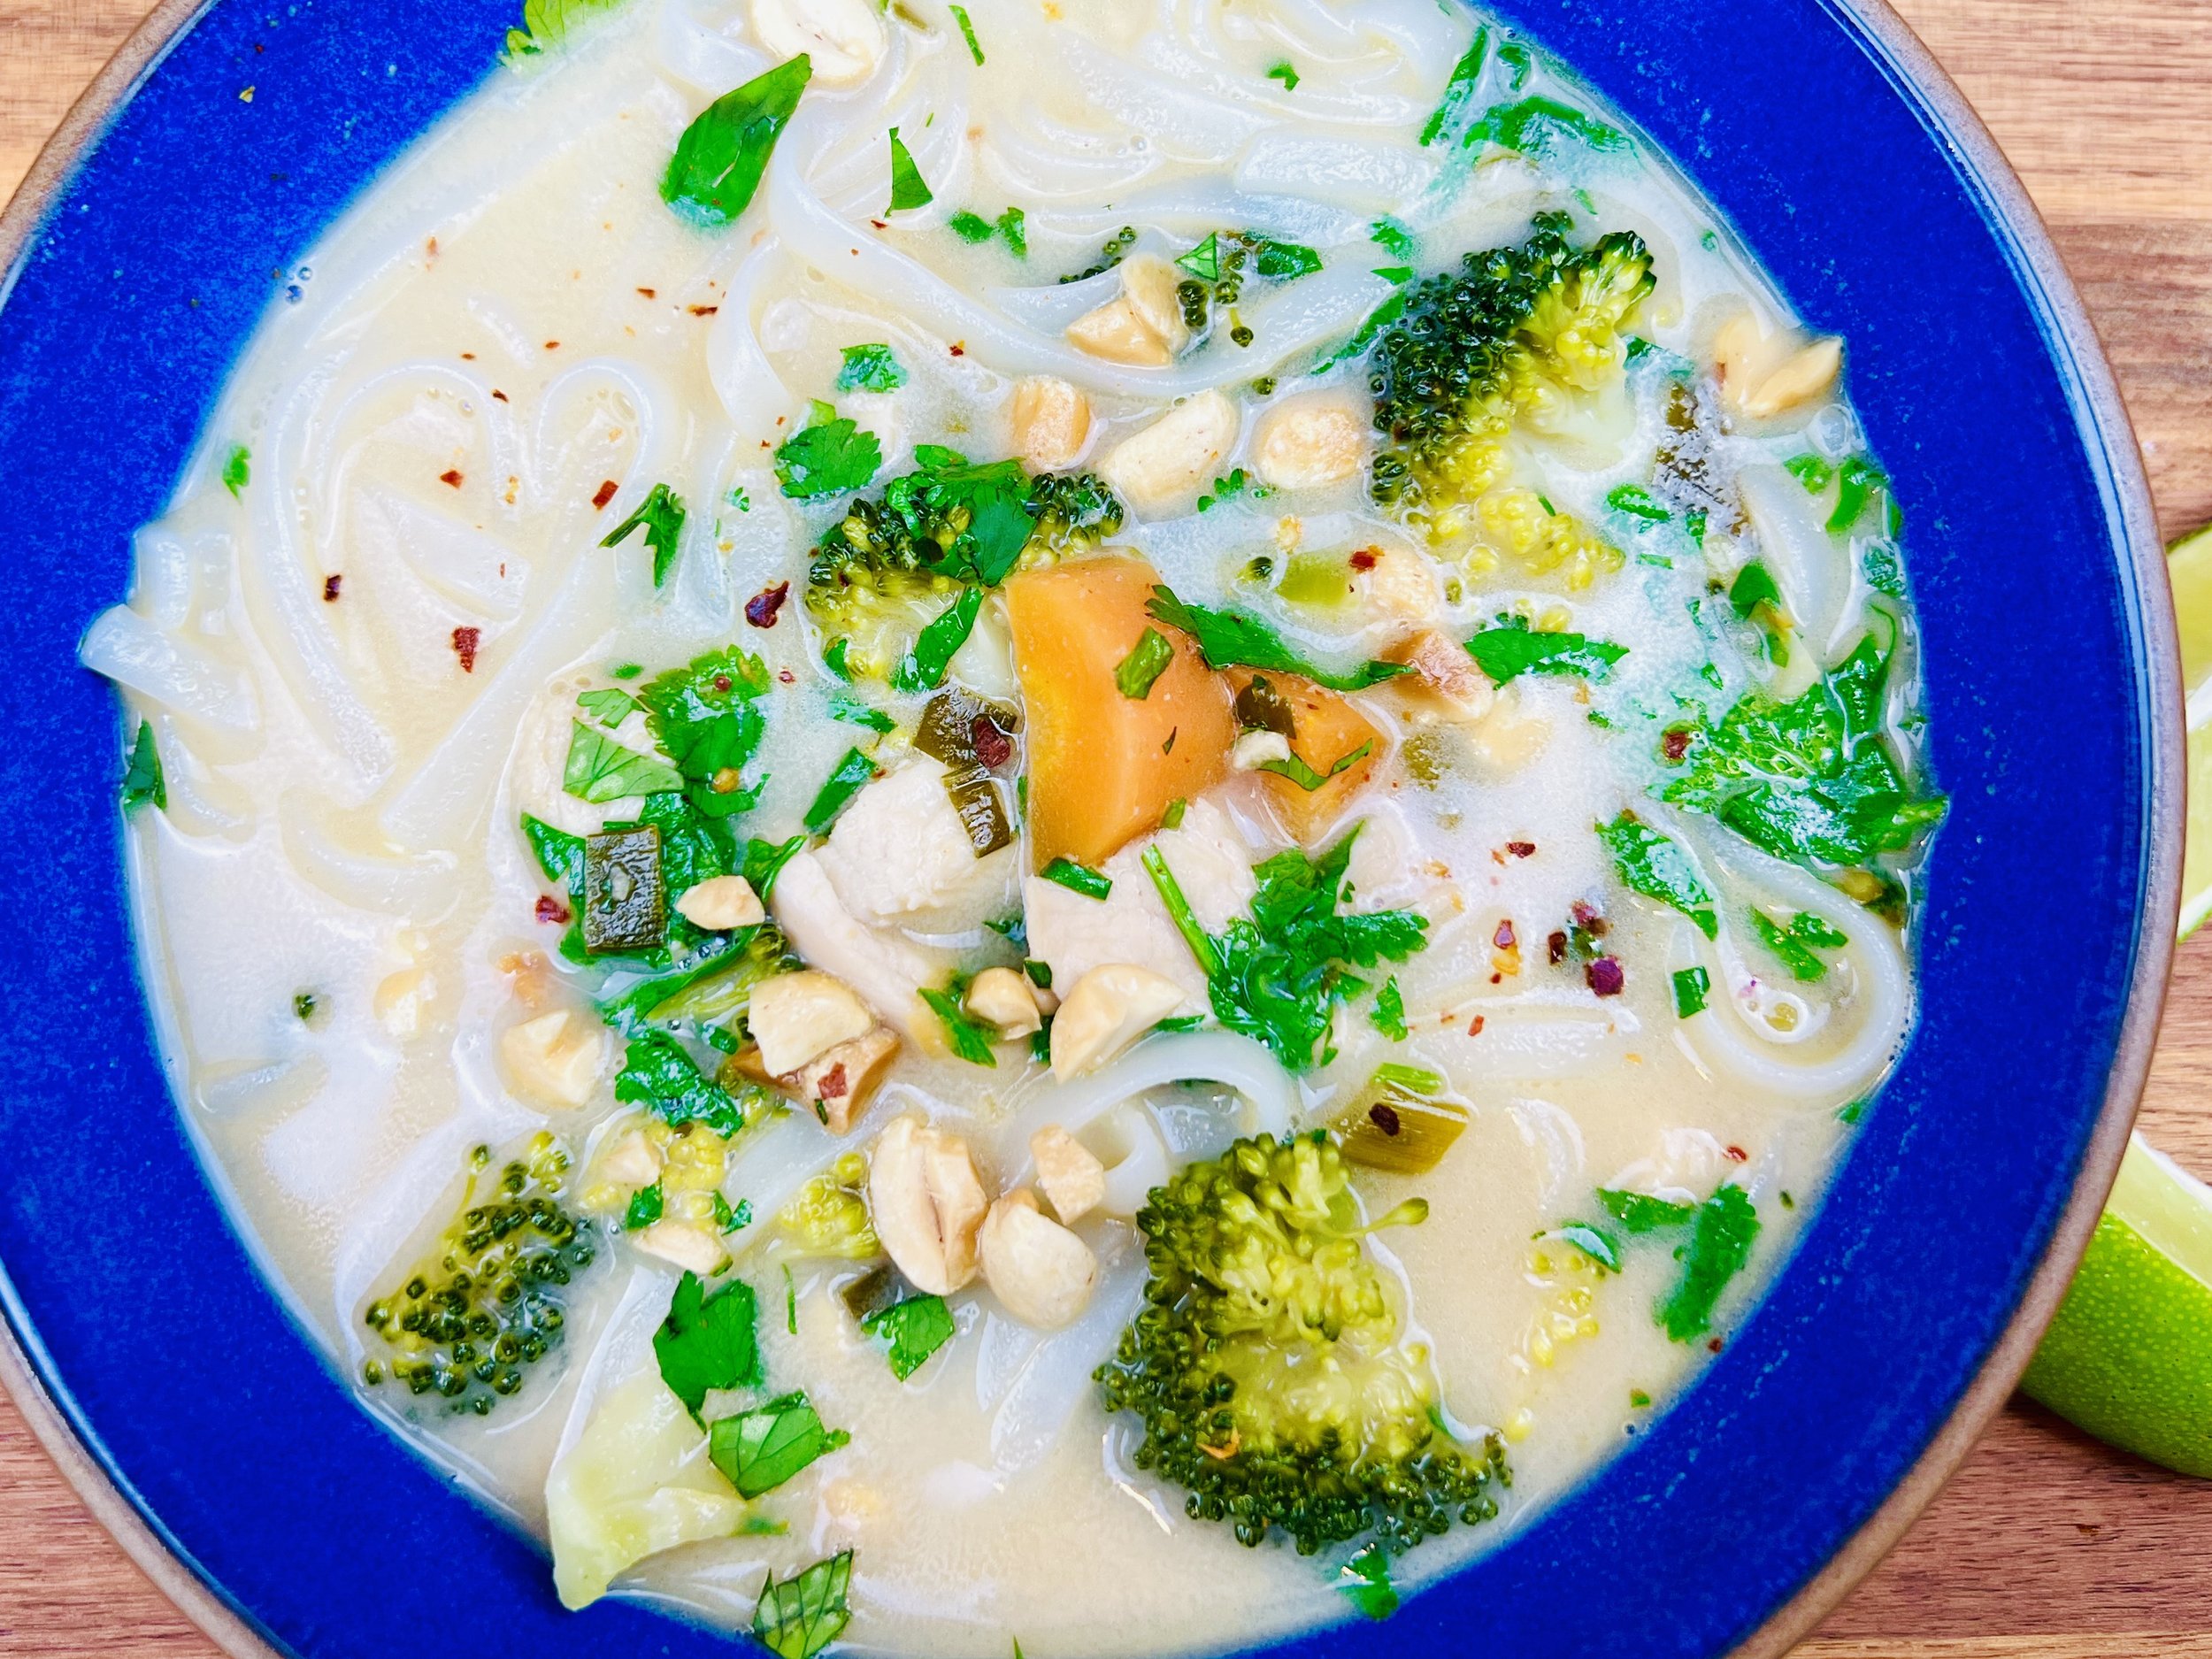
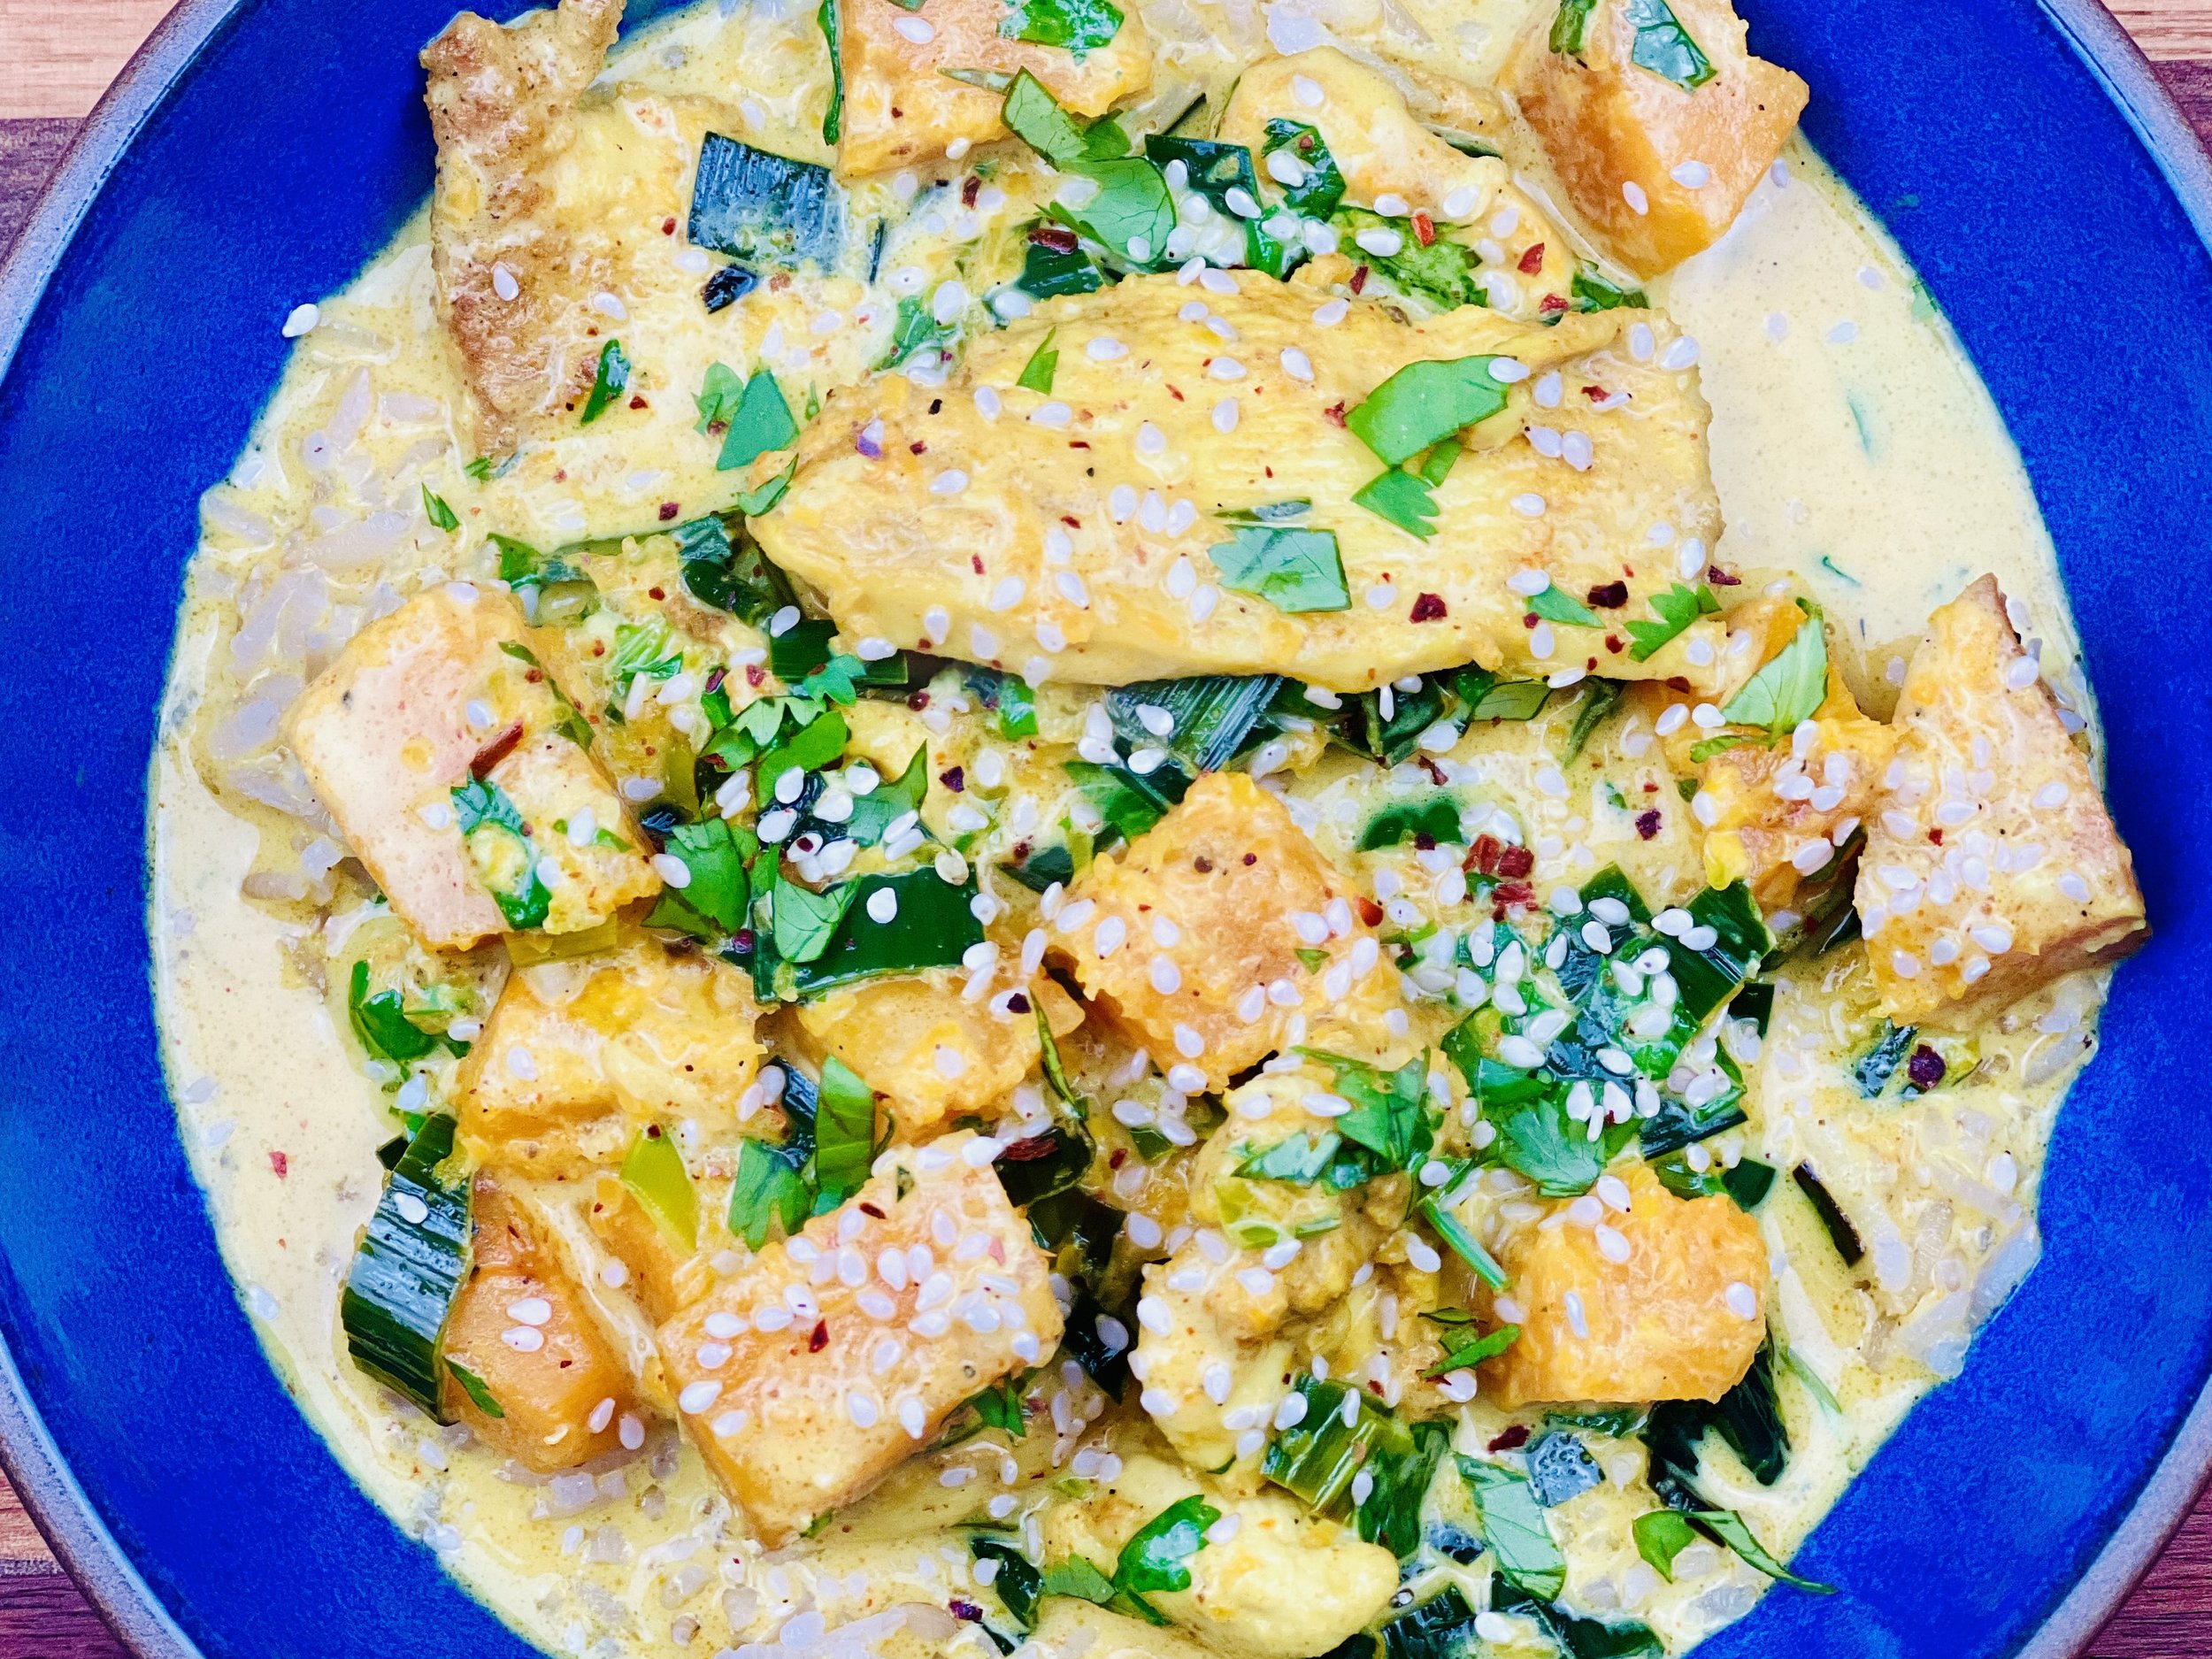
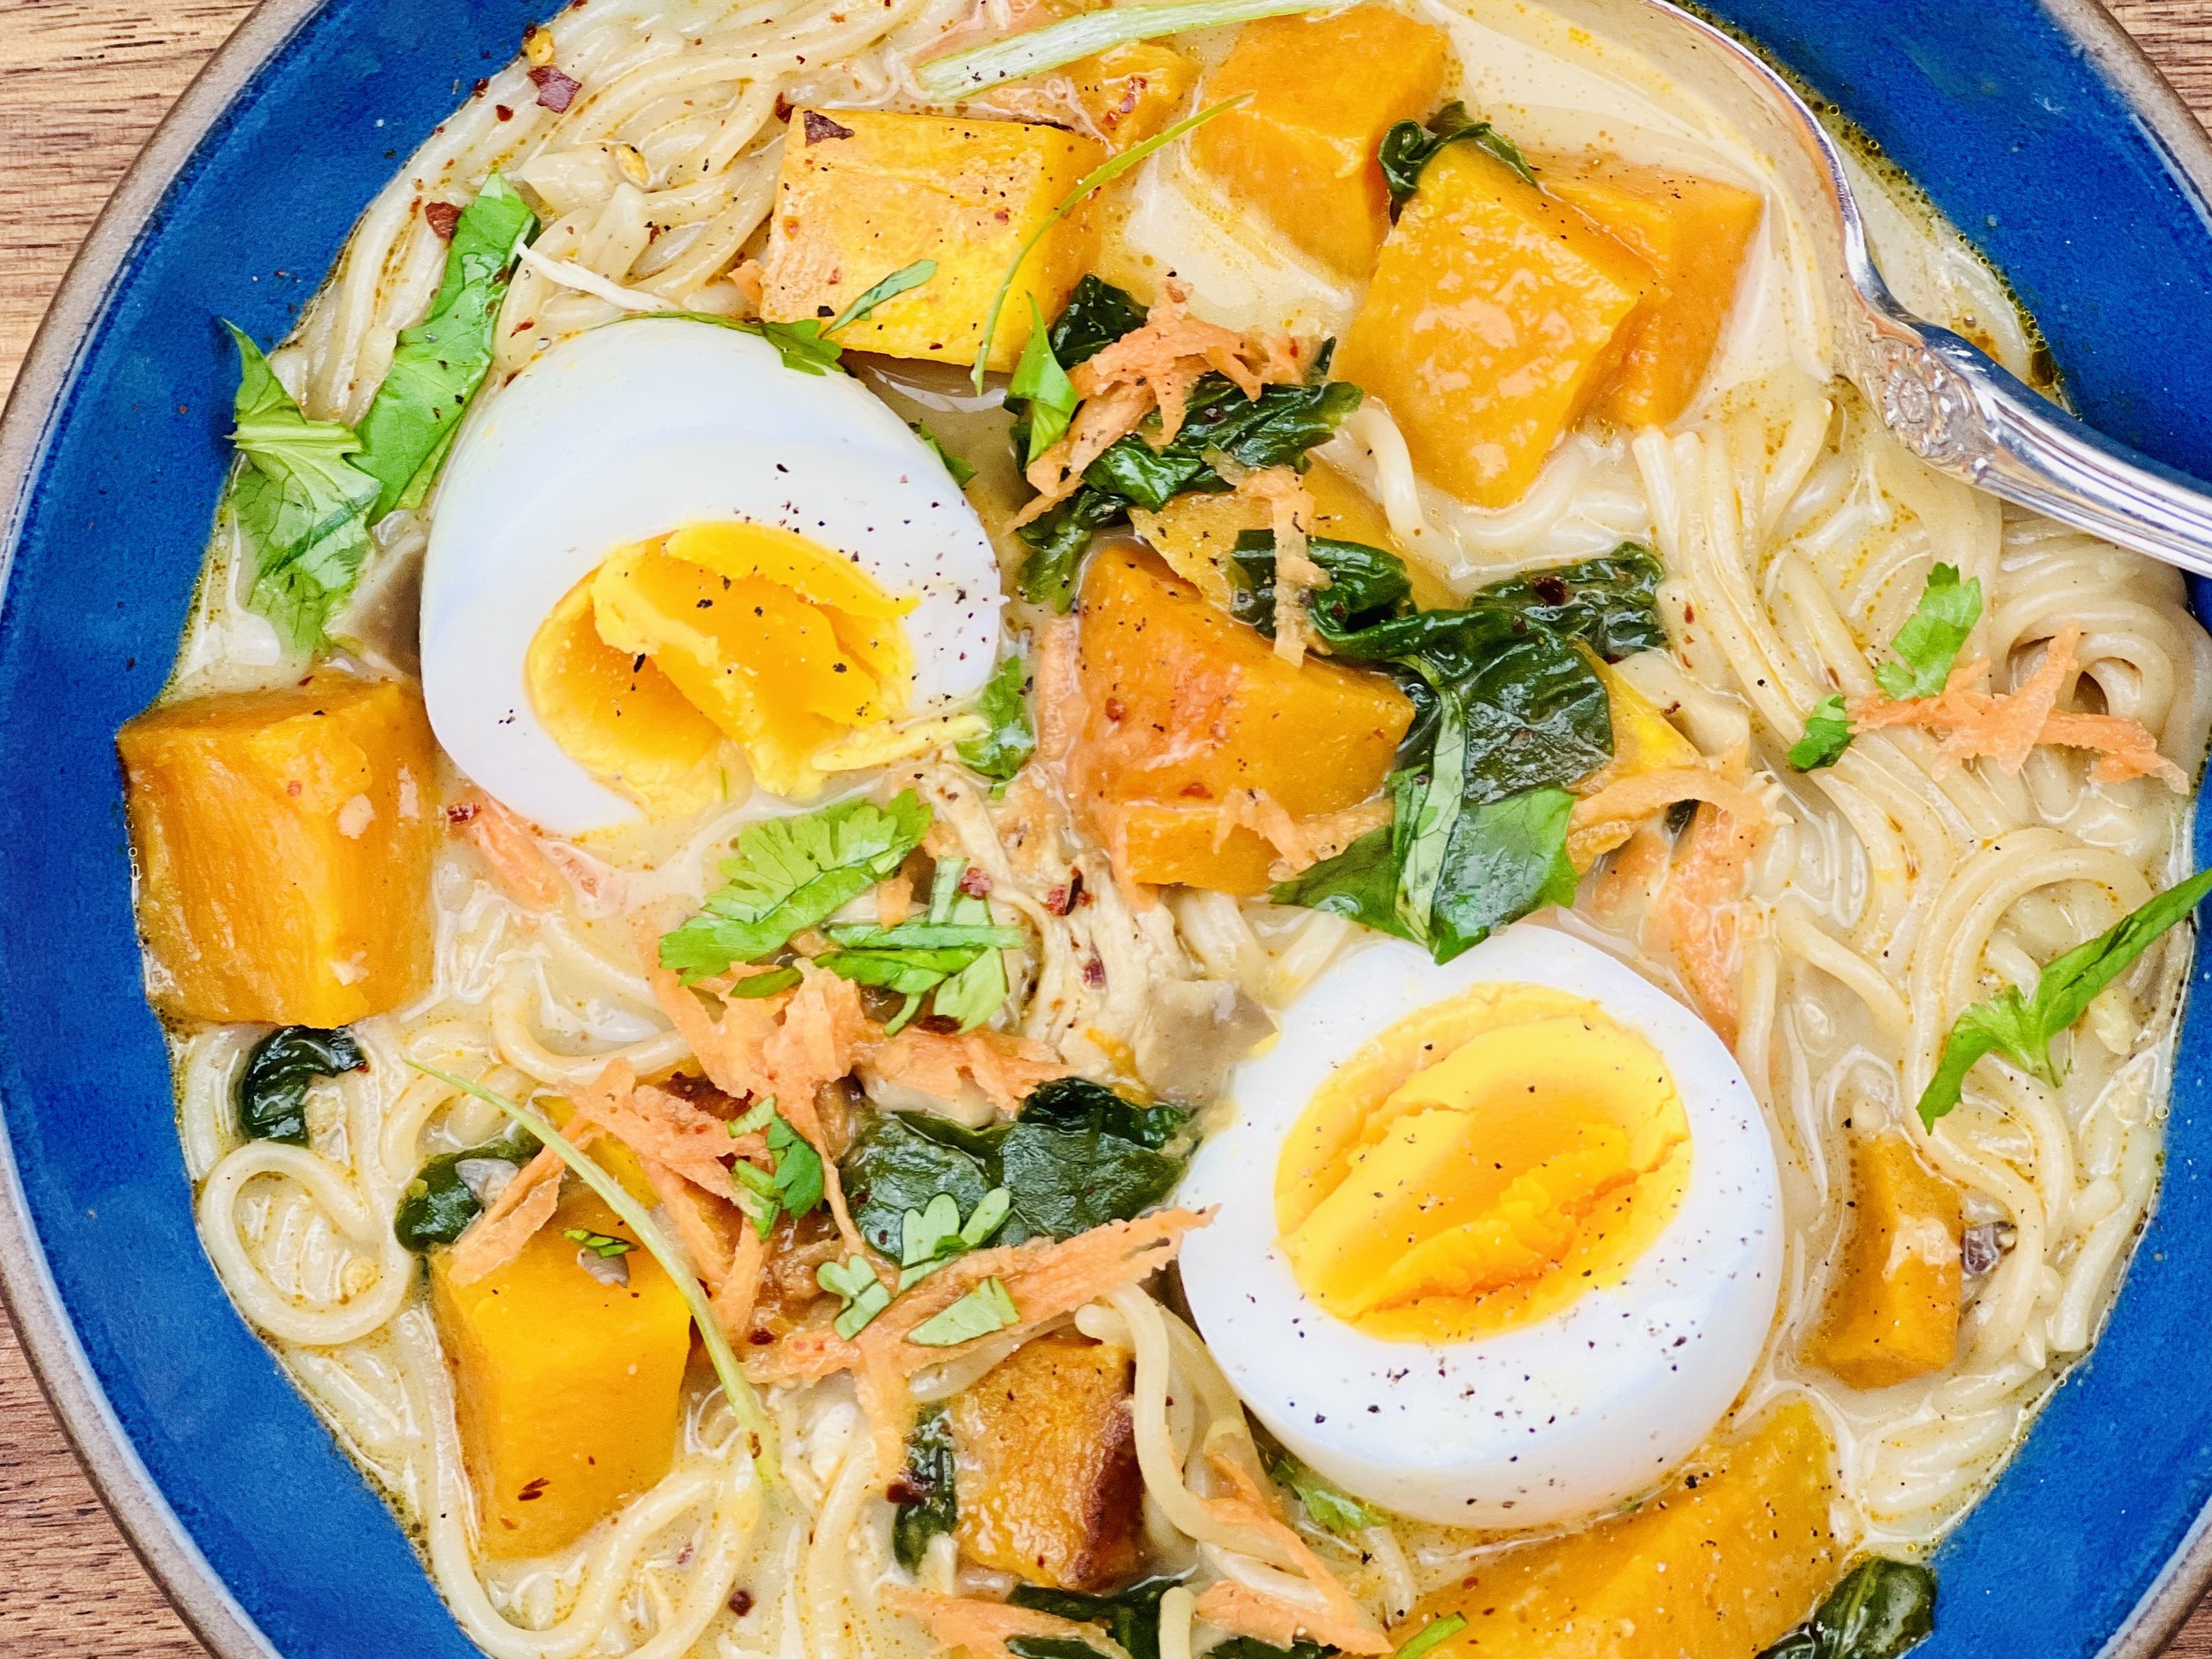
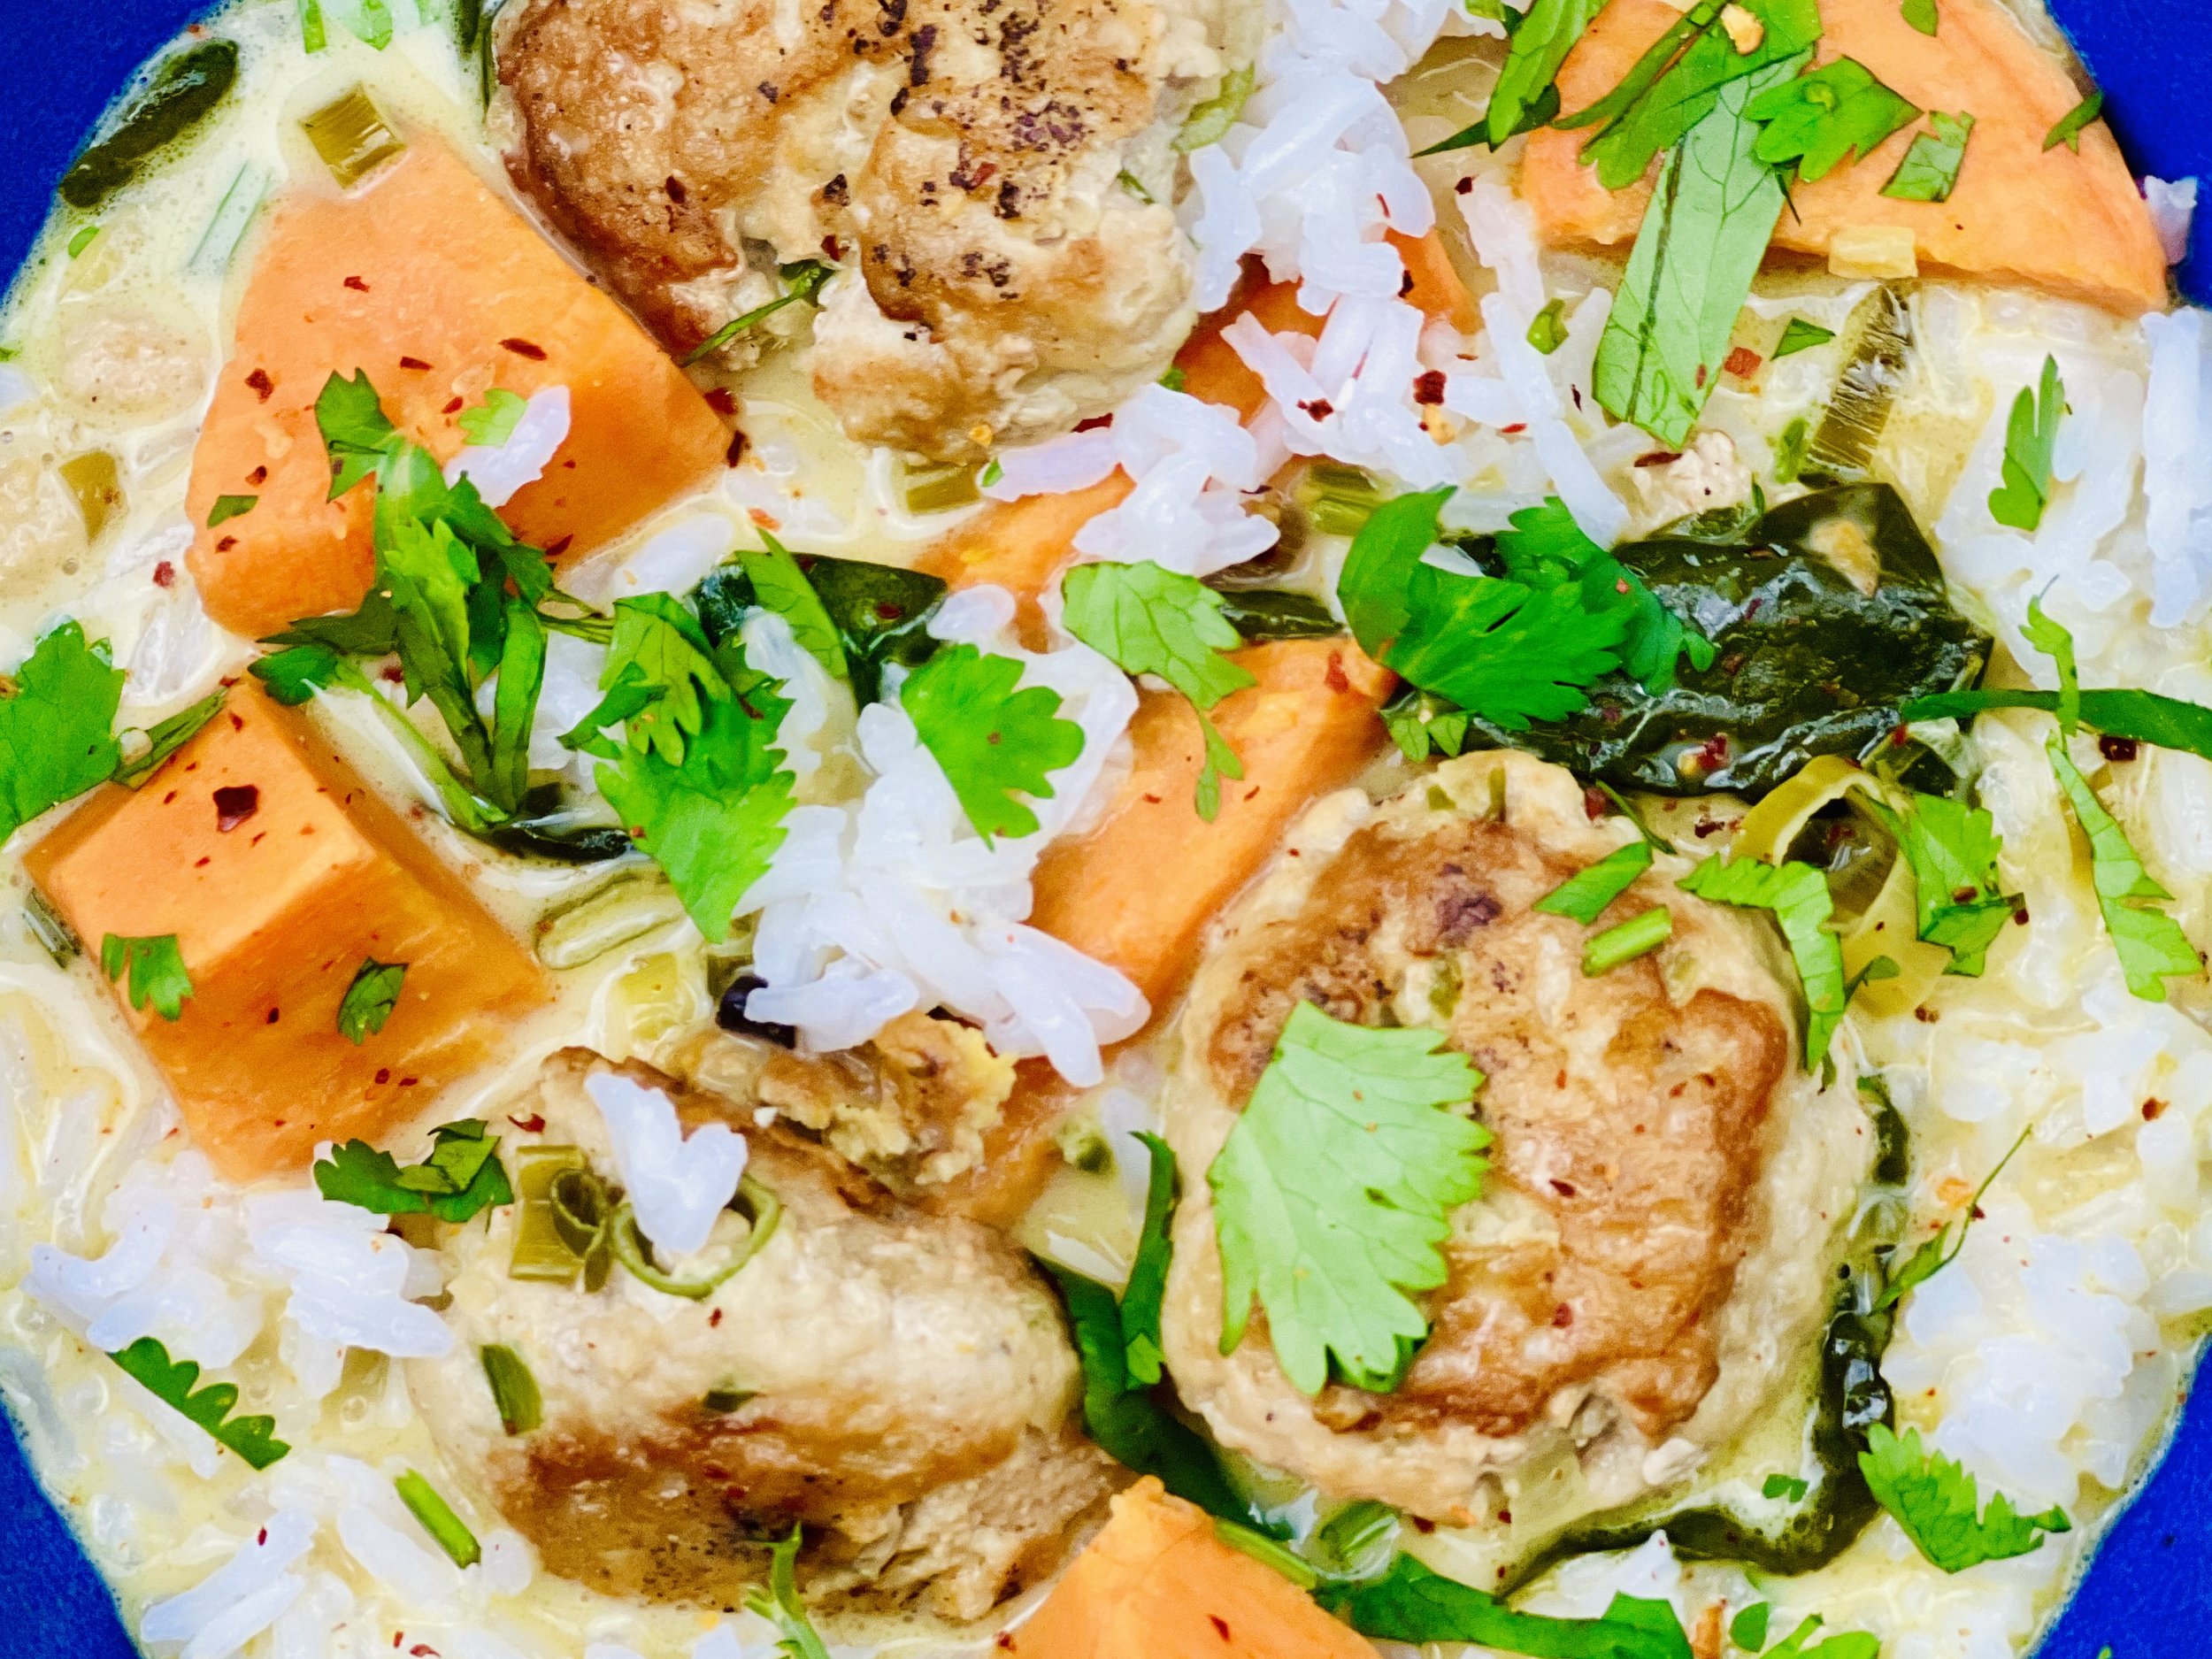
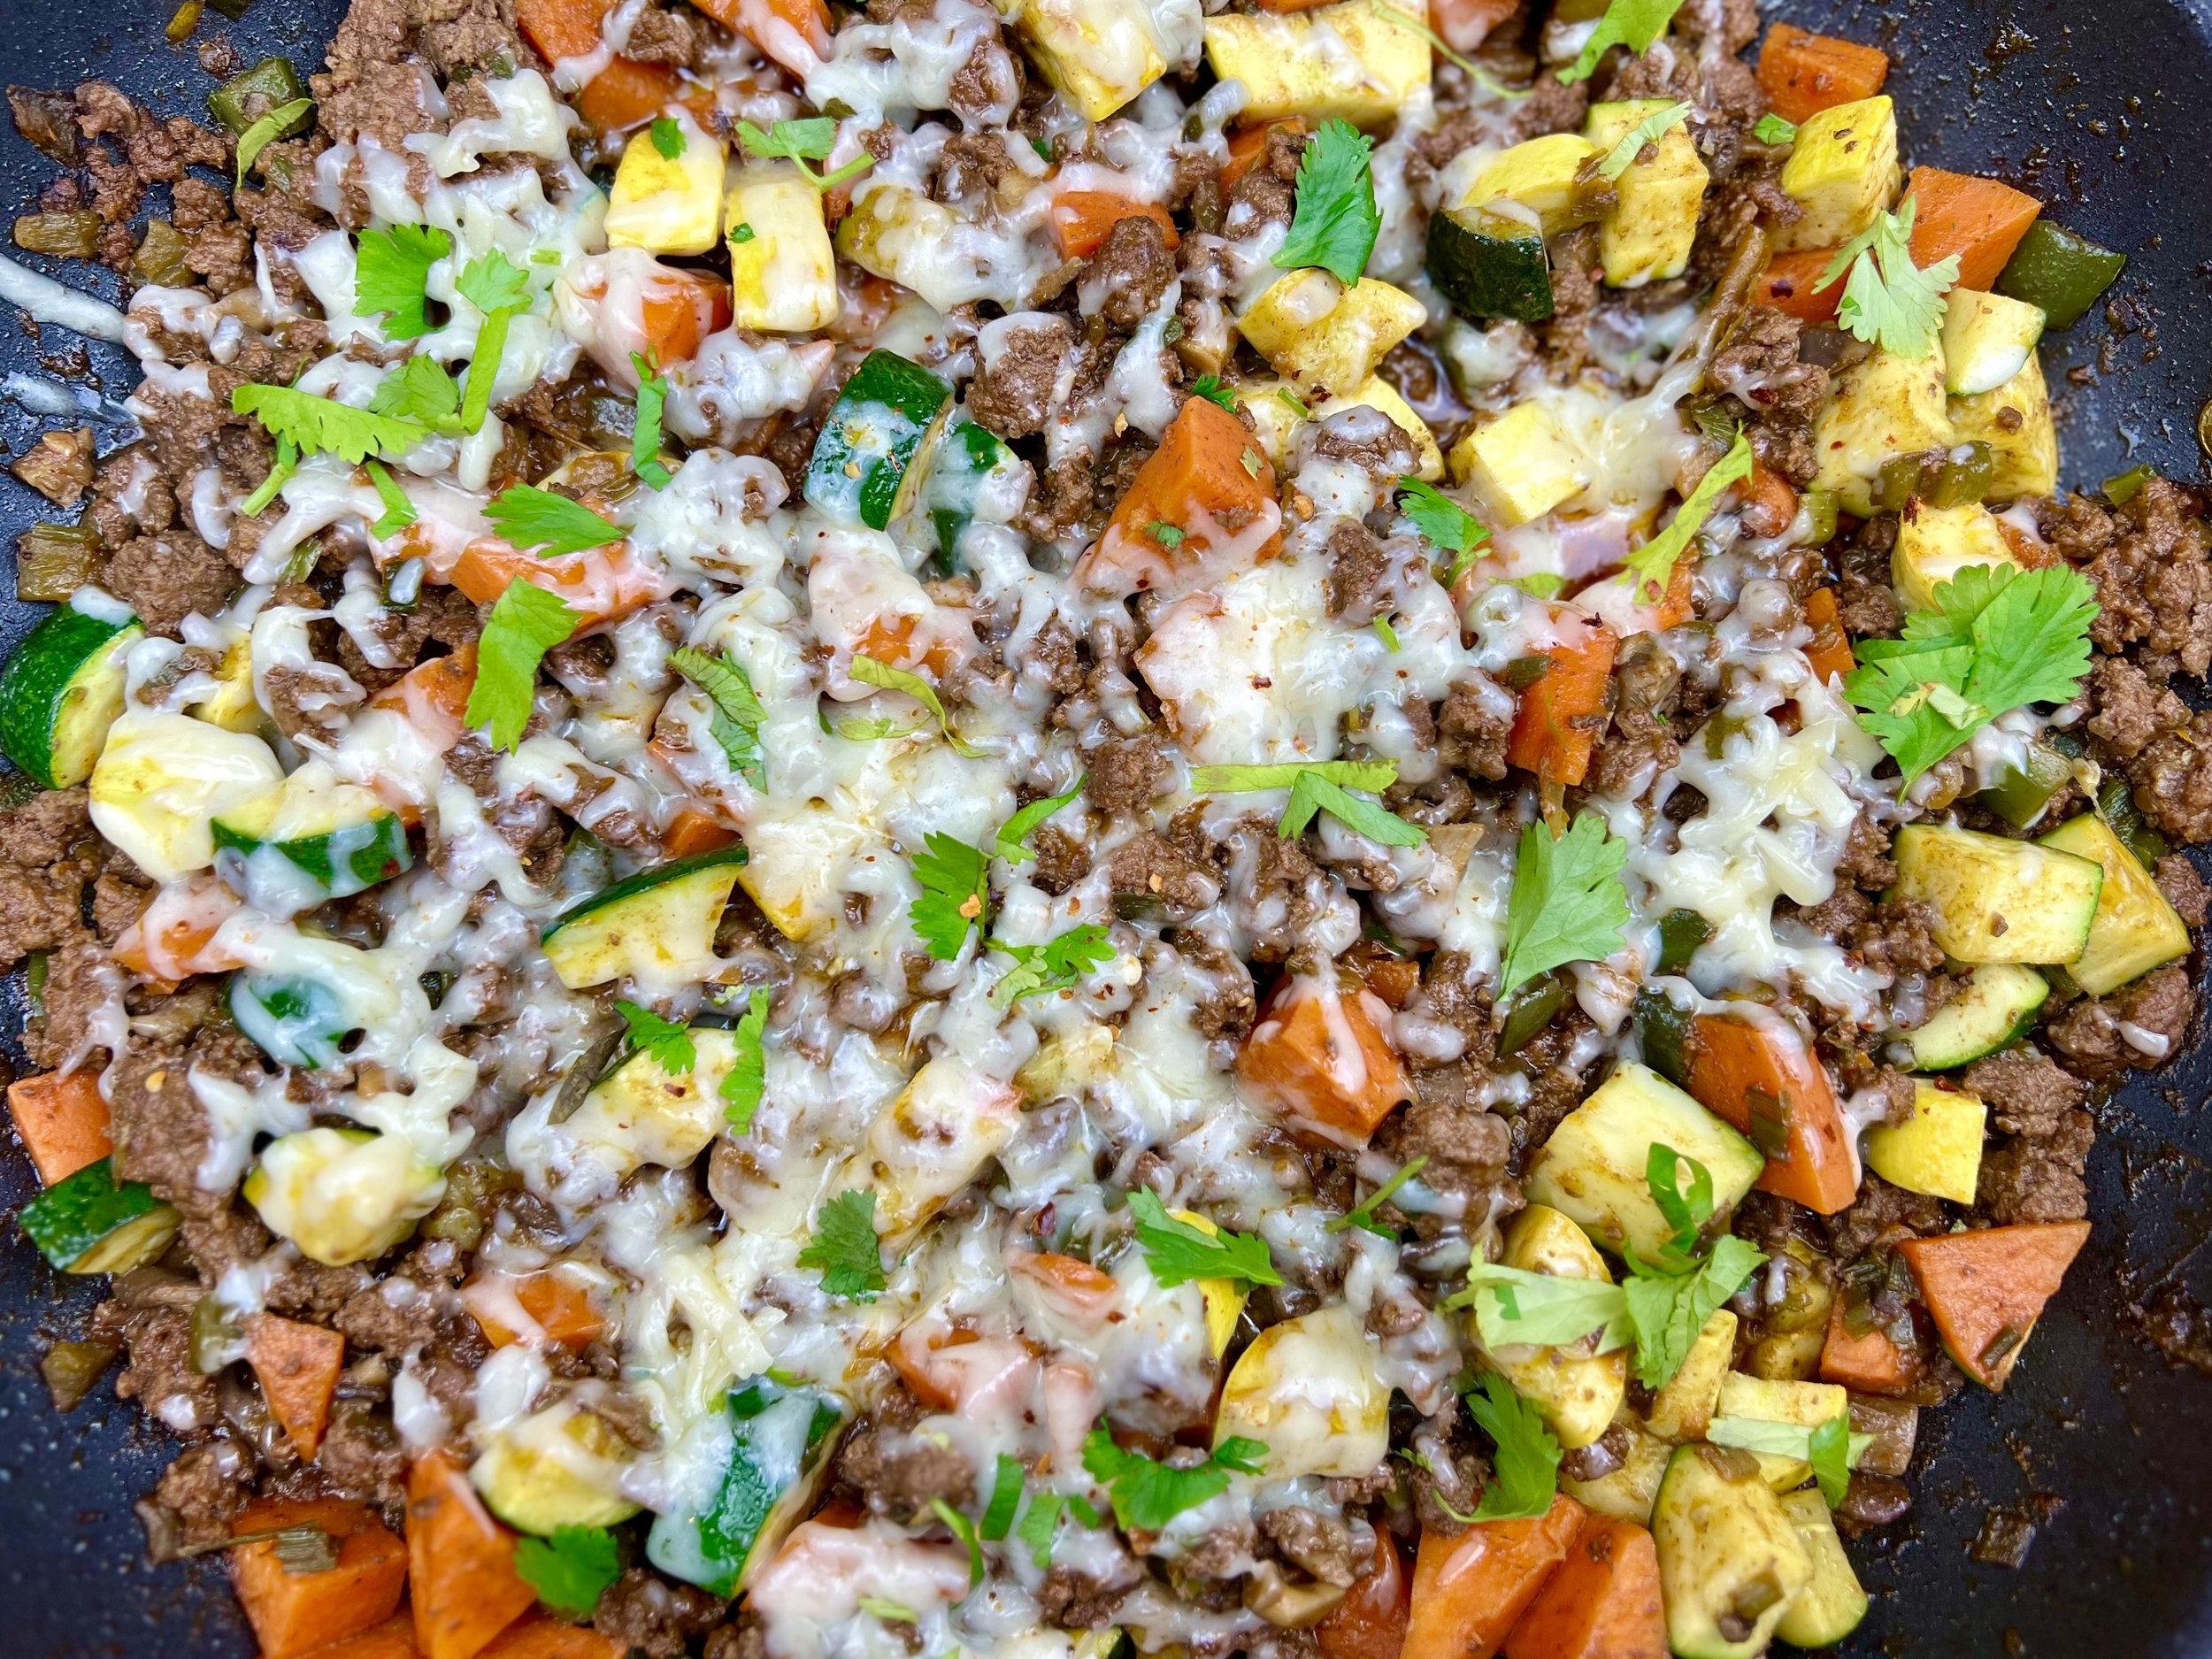
Coconut Chicken Curry and Vegetables (Low FODMAP)
10 Minutes prep • 25 Minutes cook • Low FODMAP • Gluten-free • Lactose-free • Serves 4
10 Minutes prep • 25 Minutes cook • Low FODMAP • Gluten-free • Dairy-free • Serves 4
This creamy dairy-free chicken curry is super easy to make and you can use whatever vegetables you have on hand. I made it with roasted butternut squash and summer squash but it would be delicious with oyster mushrooms, zucchini, corn, or all of them! It’s quick to make so get the rice cooking right away and everything will be done at once.
Ingredients
1 pound boneless skinless chicken thighs or breasts, thinly sliced
1 1/2 tablespoons yellow curry powder
1 teaspoon ground turmeric
1/4-1/2 teaspoon cayenne pepper (more or less to your taste)
3 tablespoons toasted sesame oil
Any combination of vegetables to make approximately 3 cups:
Zucchini or summer squash, diced
Roasted butternut squash
Oyster mushrooms, chopped
Up to 2 ears sweet corn, kernels removed from the cob
2-3 leeks (green part only), chopped
1 inch fresh ginger, grated
1 pinch crushed red pepper flakes
1 can (14 ounces) coconut milk
Zest and juice of 1/2 lemon
1/4 cup fresh cilantro, chopped (or use green onions or chives if you prefer)
1/2 cup fresh basil, chopped
2 cups cooked basmati rice
Sesame seeds for serving
Directions
(1) Prepare the chicken: This step is optional but results in a more flavorful and tender chicken. Remove chicken from the package, and put it in one layer on a rimmed plate or baking dish. Season both sides of each piece lightly with Kosher salt (about 1/4 - 1/2 teaspoon per side). Cover the dish with plastic wrap and refrigerate until ready to use, ideally about 4 hours before cooking or overnight.
(2) Put the rice on to cook: Cook brown or white rice per package instructions while you cook the rest of the meal. Leave covered to keep warm until ready to serve.
(3) Season the chicken: In a medium bowl, toss together the chicken, curry powder, turmeric, cayenne, 1 tablespoon of the sesame oil, and a pinch each of salt and pepper.
(4) Prepare the vegetables: Zest and juice the lemon. Chop the vegetables. Remove corn from the cob (if using).
(5) Cook the chicken: Heat the remaining 2 tablespoons of sesame oil in a large skillet over medium heat. When the oil shimmers, add the chicken in one layer and brown all over, about 5 minutes. Add the vegetables, leek greens, and ginger. Season with crushed red pepper flakes, salt, and pepper. Cook for about 5 minutes or until the veggies just begin to soften.
(6) Add the liquid: Stir in the coconut milk and 1/3-1/2 cup water. Stir to combine, bring the mixture to a simmer over medium heat, cook for about 5 minutes, or until the sauce thickens slightly. If the sauce gets too thick, add additional water as needed.
(7) Finish: Remove from the heat and stir in the lemon juice and zest, cilantro, and basil.
(8) Plate and serve: To serve, divide the rice among bowls and spoon the chicken and vegetables over the top. Top with sesame seeds and additional chopped cilantro, chives, or green onion greens.
Eat and enjoy every bite because you can!
Recipe note: I use Diamond Crystal Kosher salt in all my recipes because it has a wonderful flat and crisp flake that tastes delicious. It is also the least salty salt available so you can use it more liberally as a seasoning than you can table salt or sea salt. If you use another type of salt, you may need to reduce the amount so it is not over-salted.
Have a question you’d like to have answered? Email us at hello@ibsgamechanger.com
Link note: This post contains links for you to easily purchase items listed on the page. In some cases, we have provided a special discount code for IBS Game Changers so be sure to use it when you purchase an item to get the discount that has been arranged just for you! As an Amazon Associate, I earn a commission from qualifying Amazon purchases.
More Deliciously Low FODMAP™ soup recipes
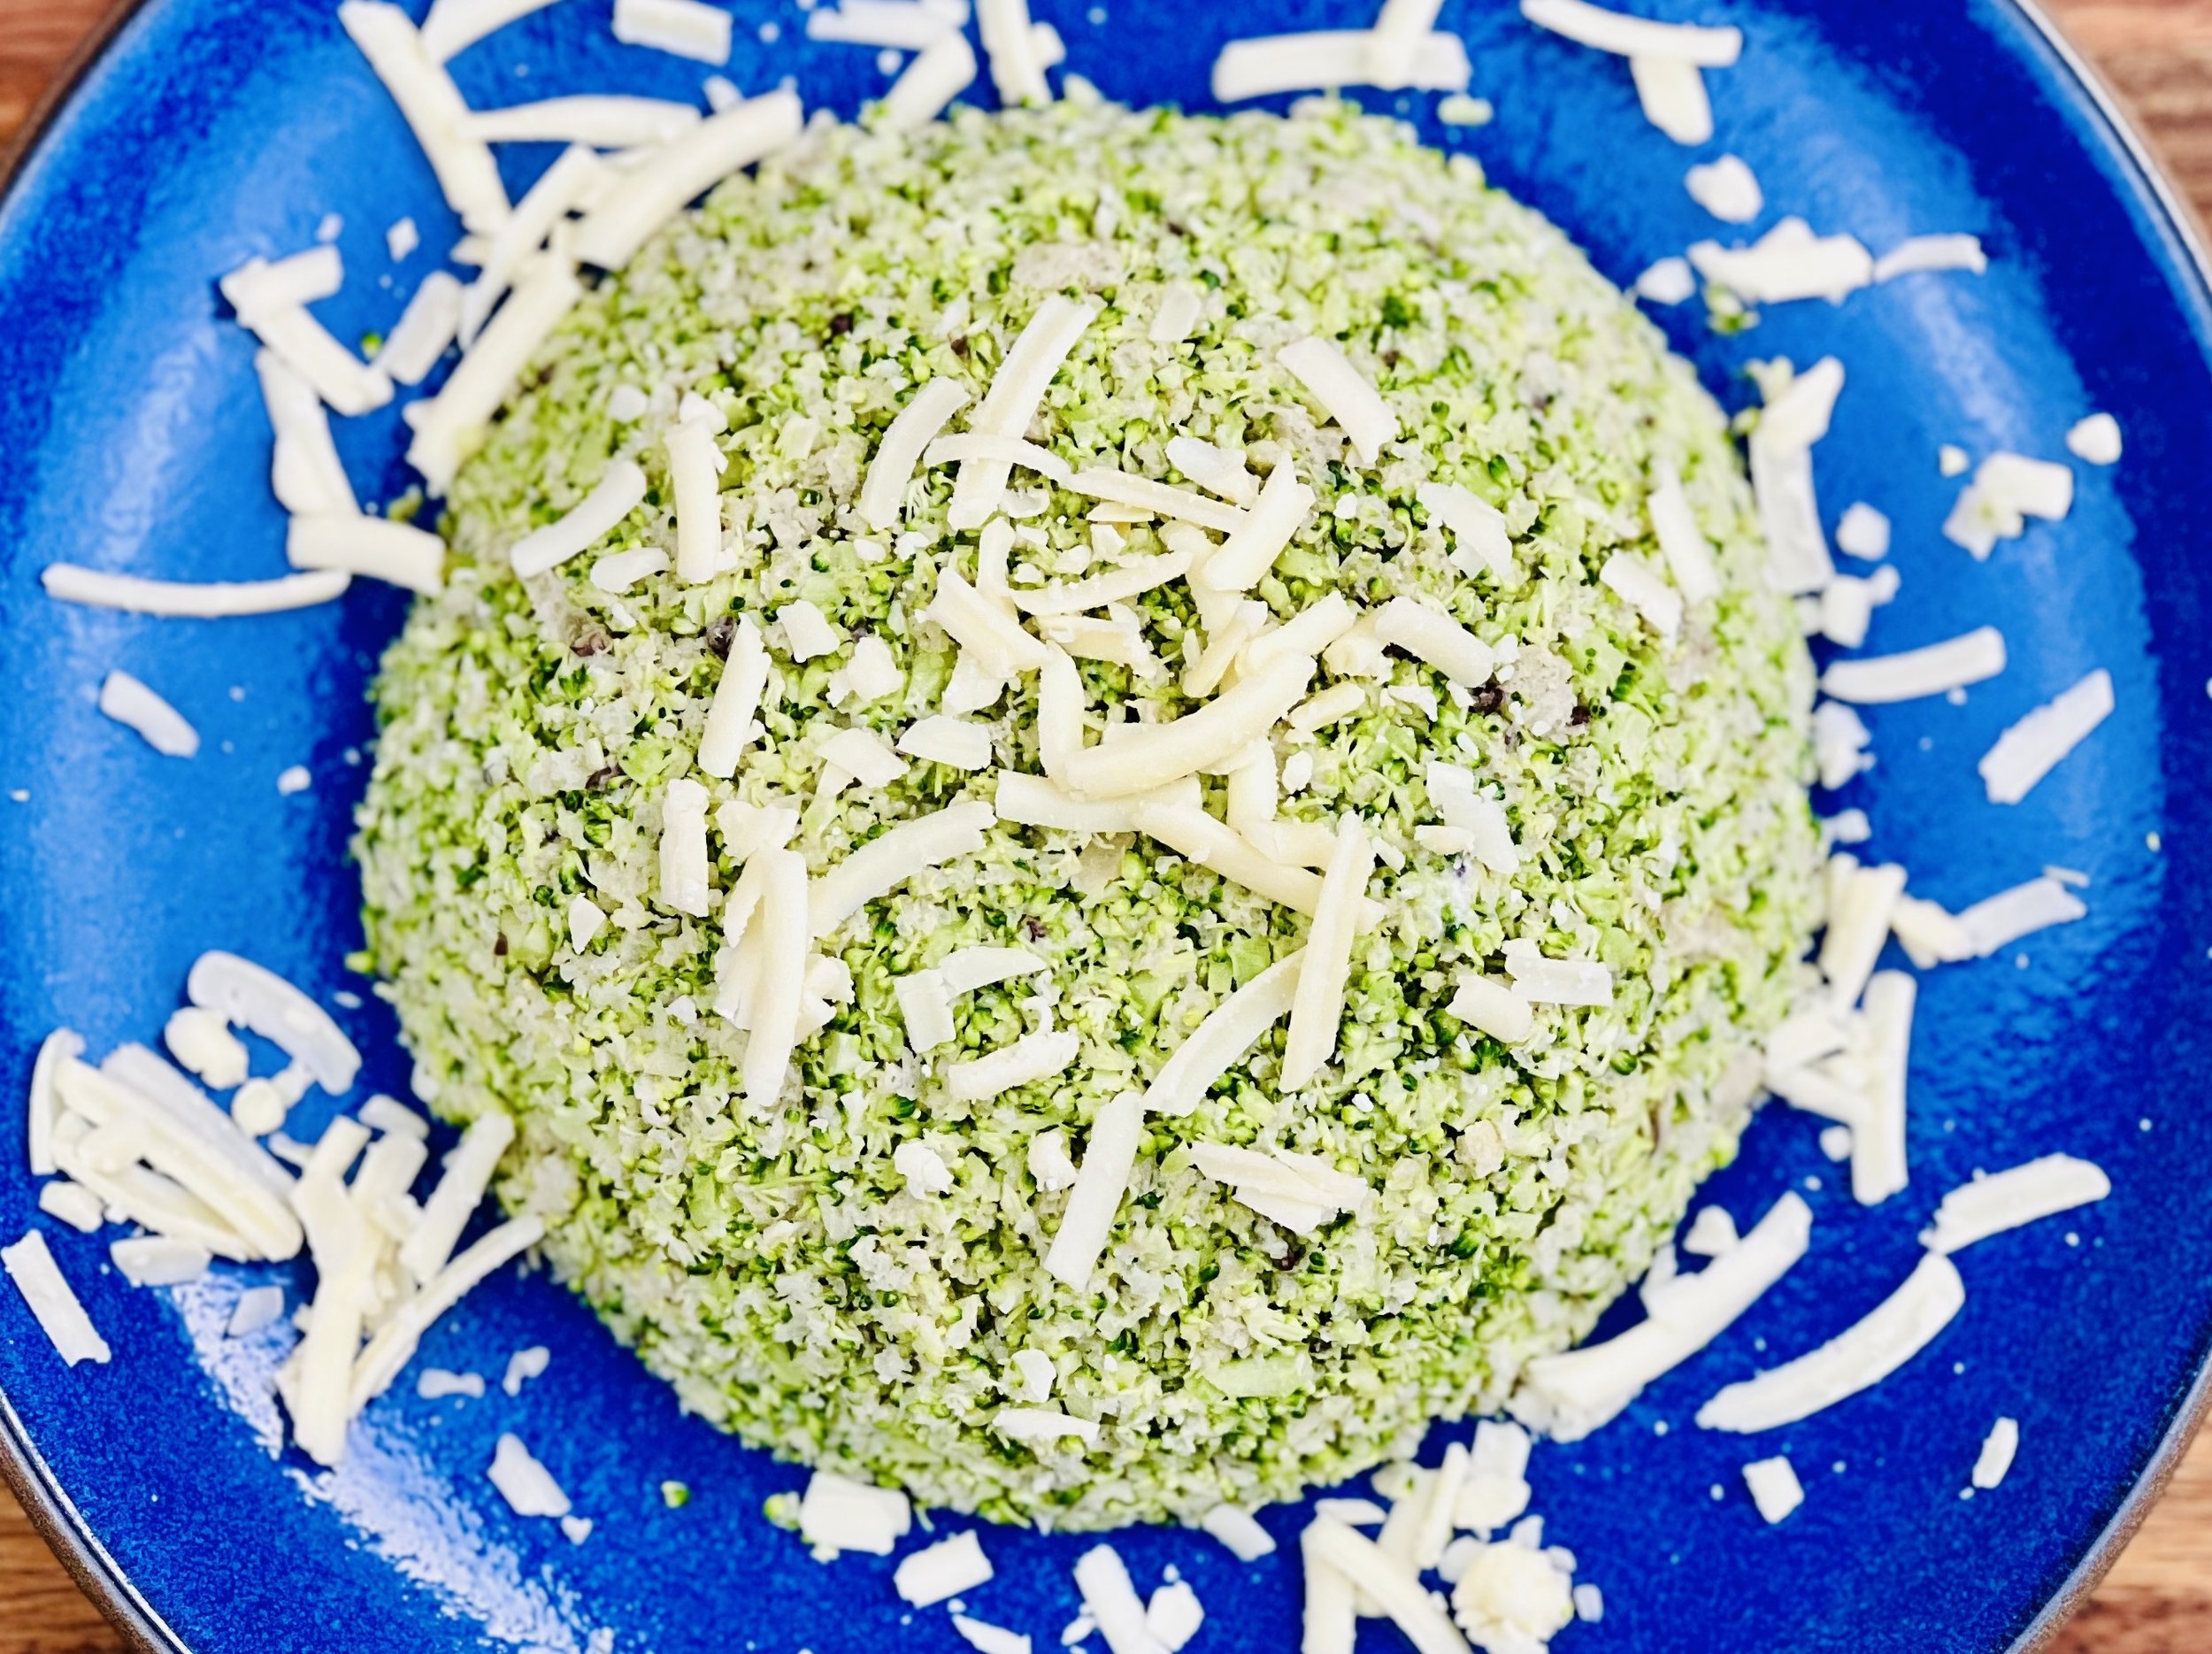
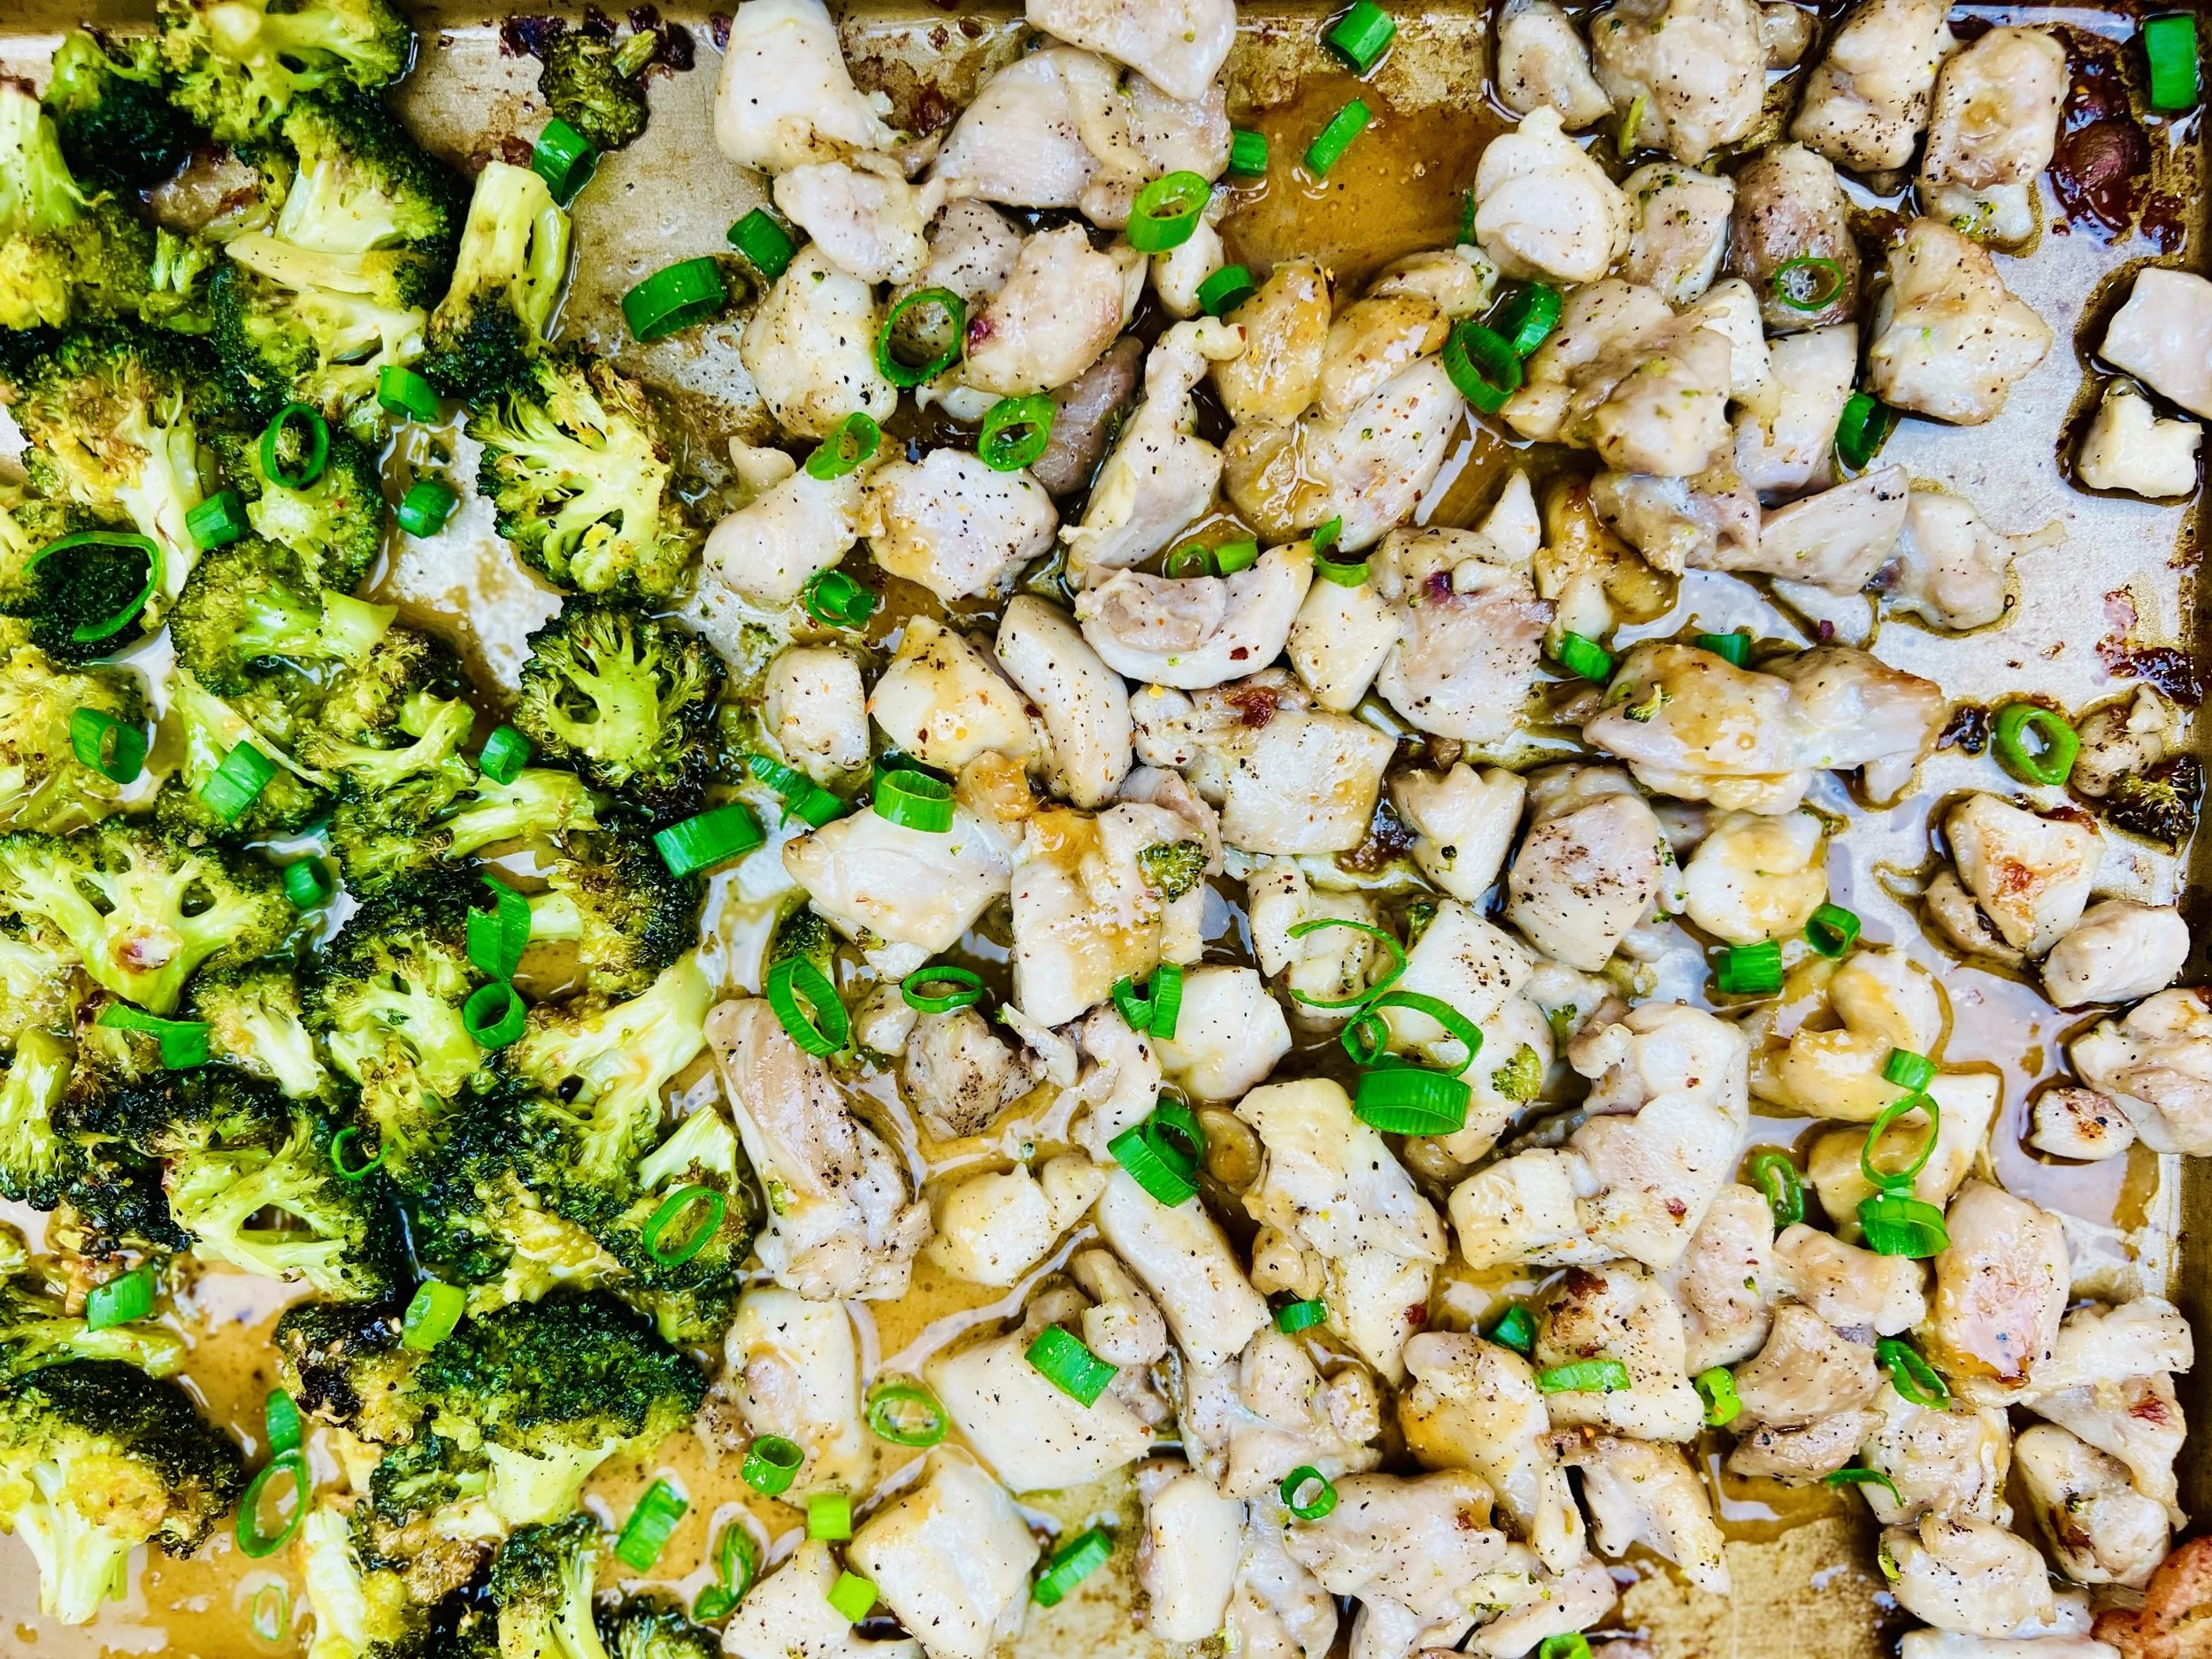
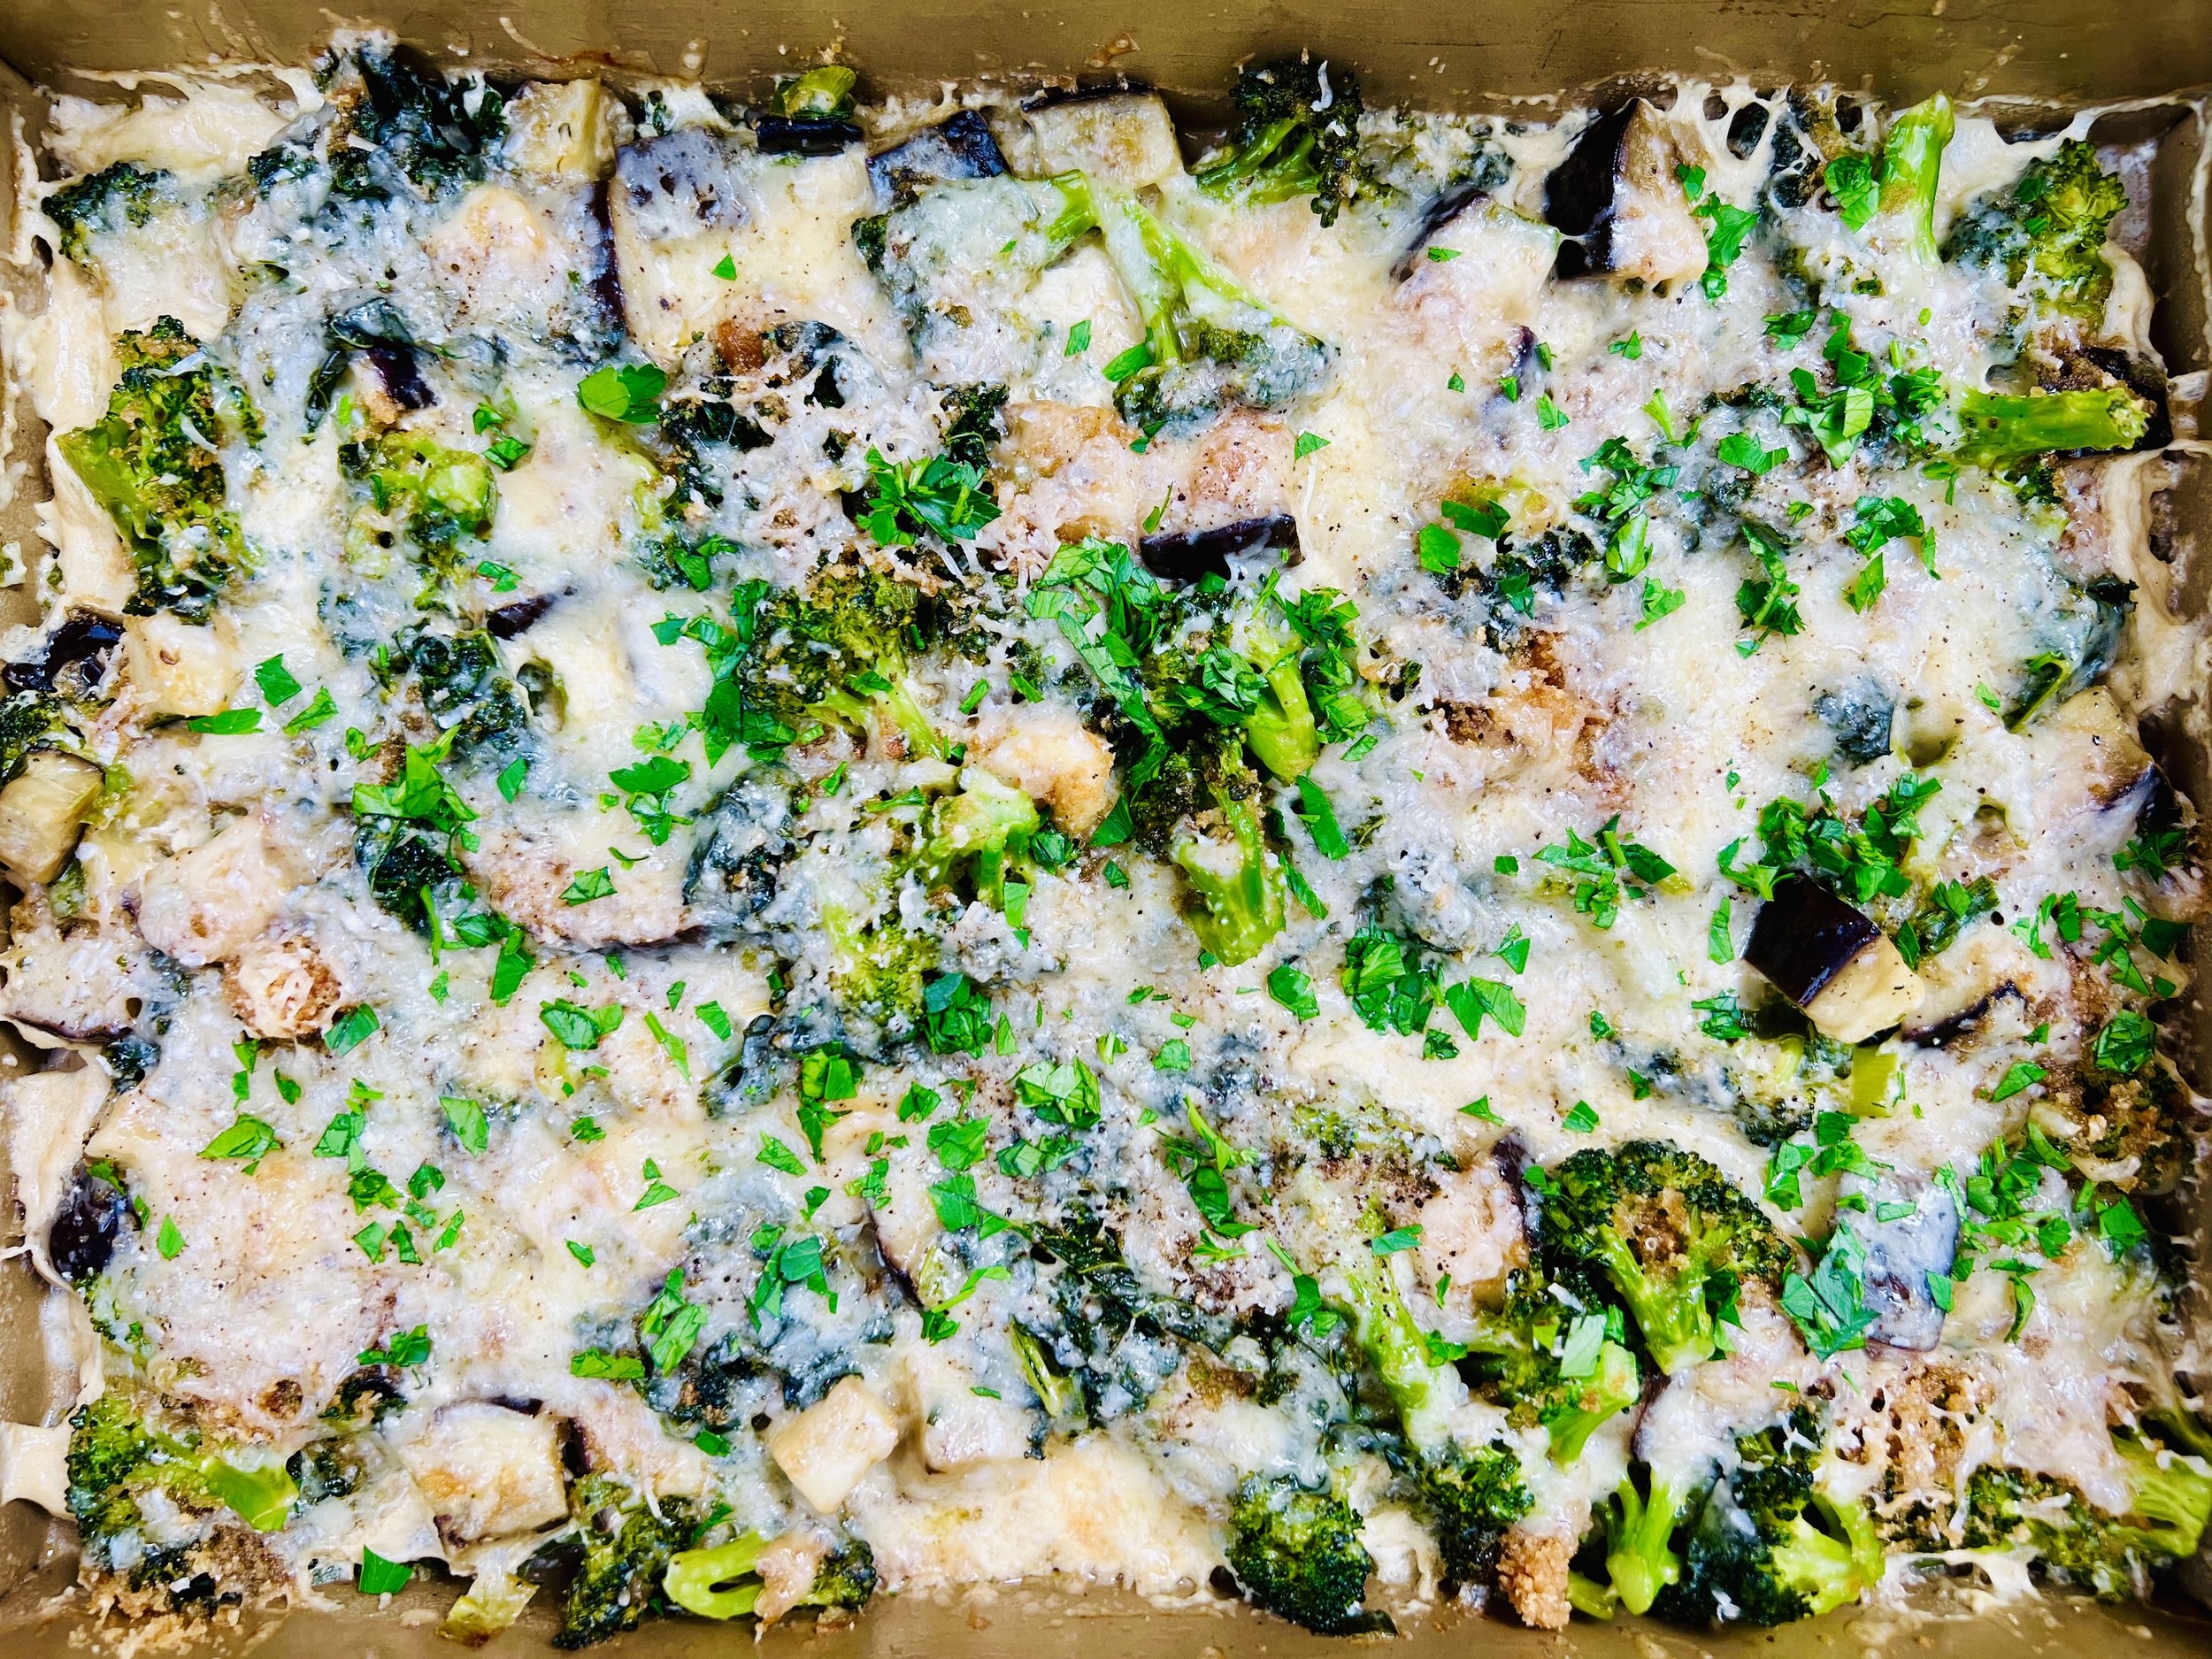
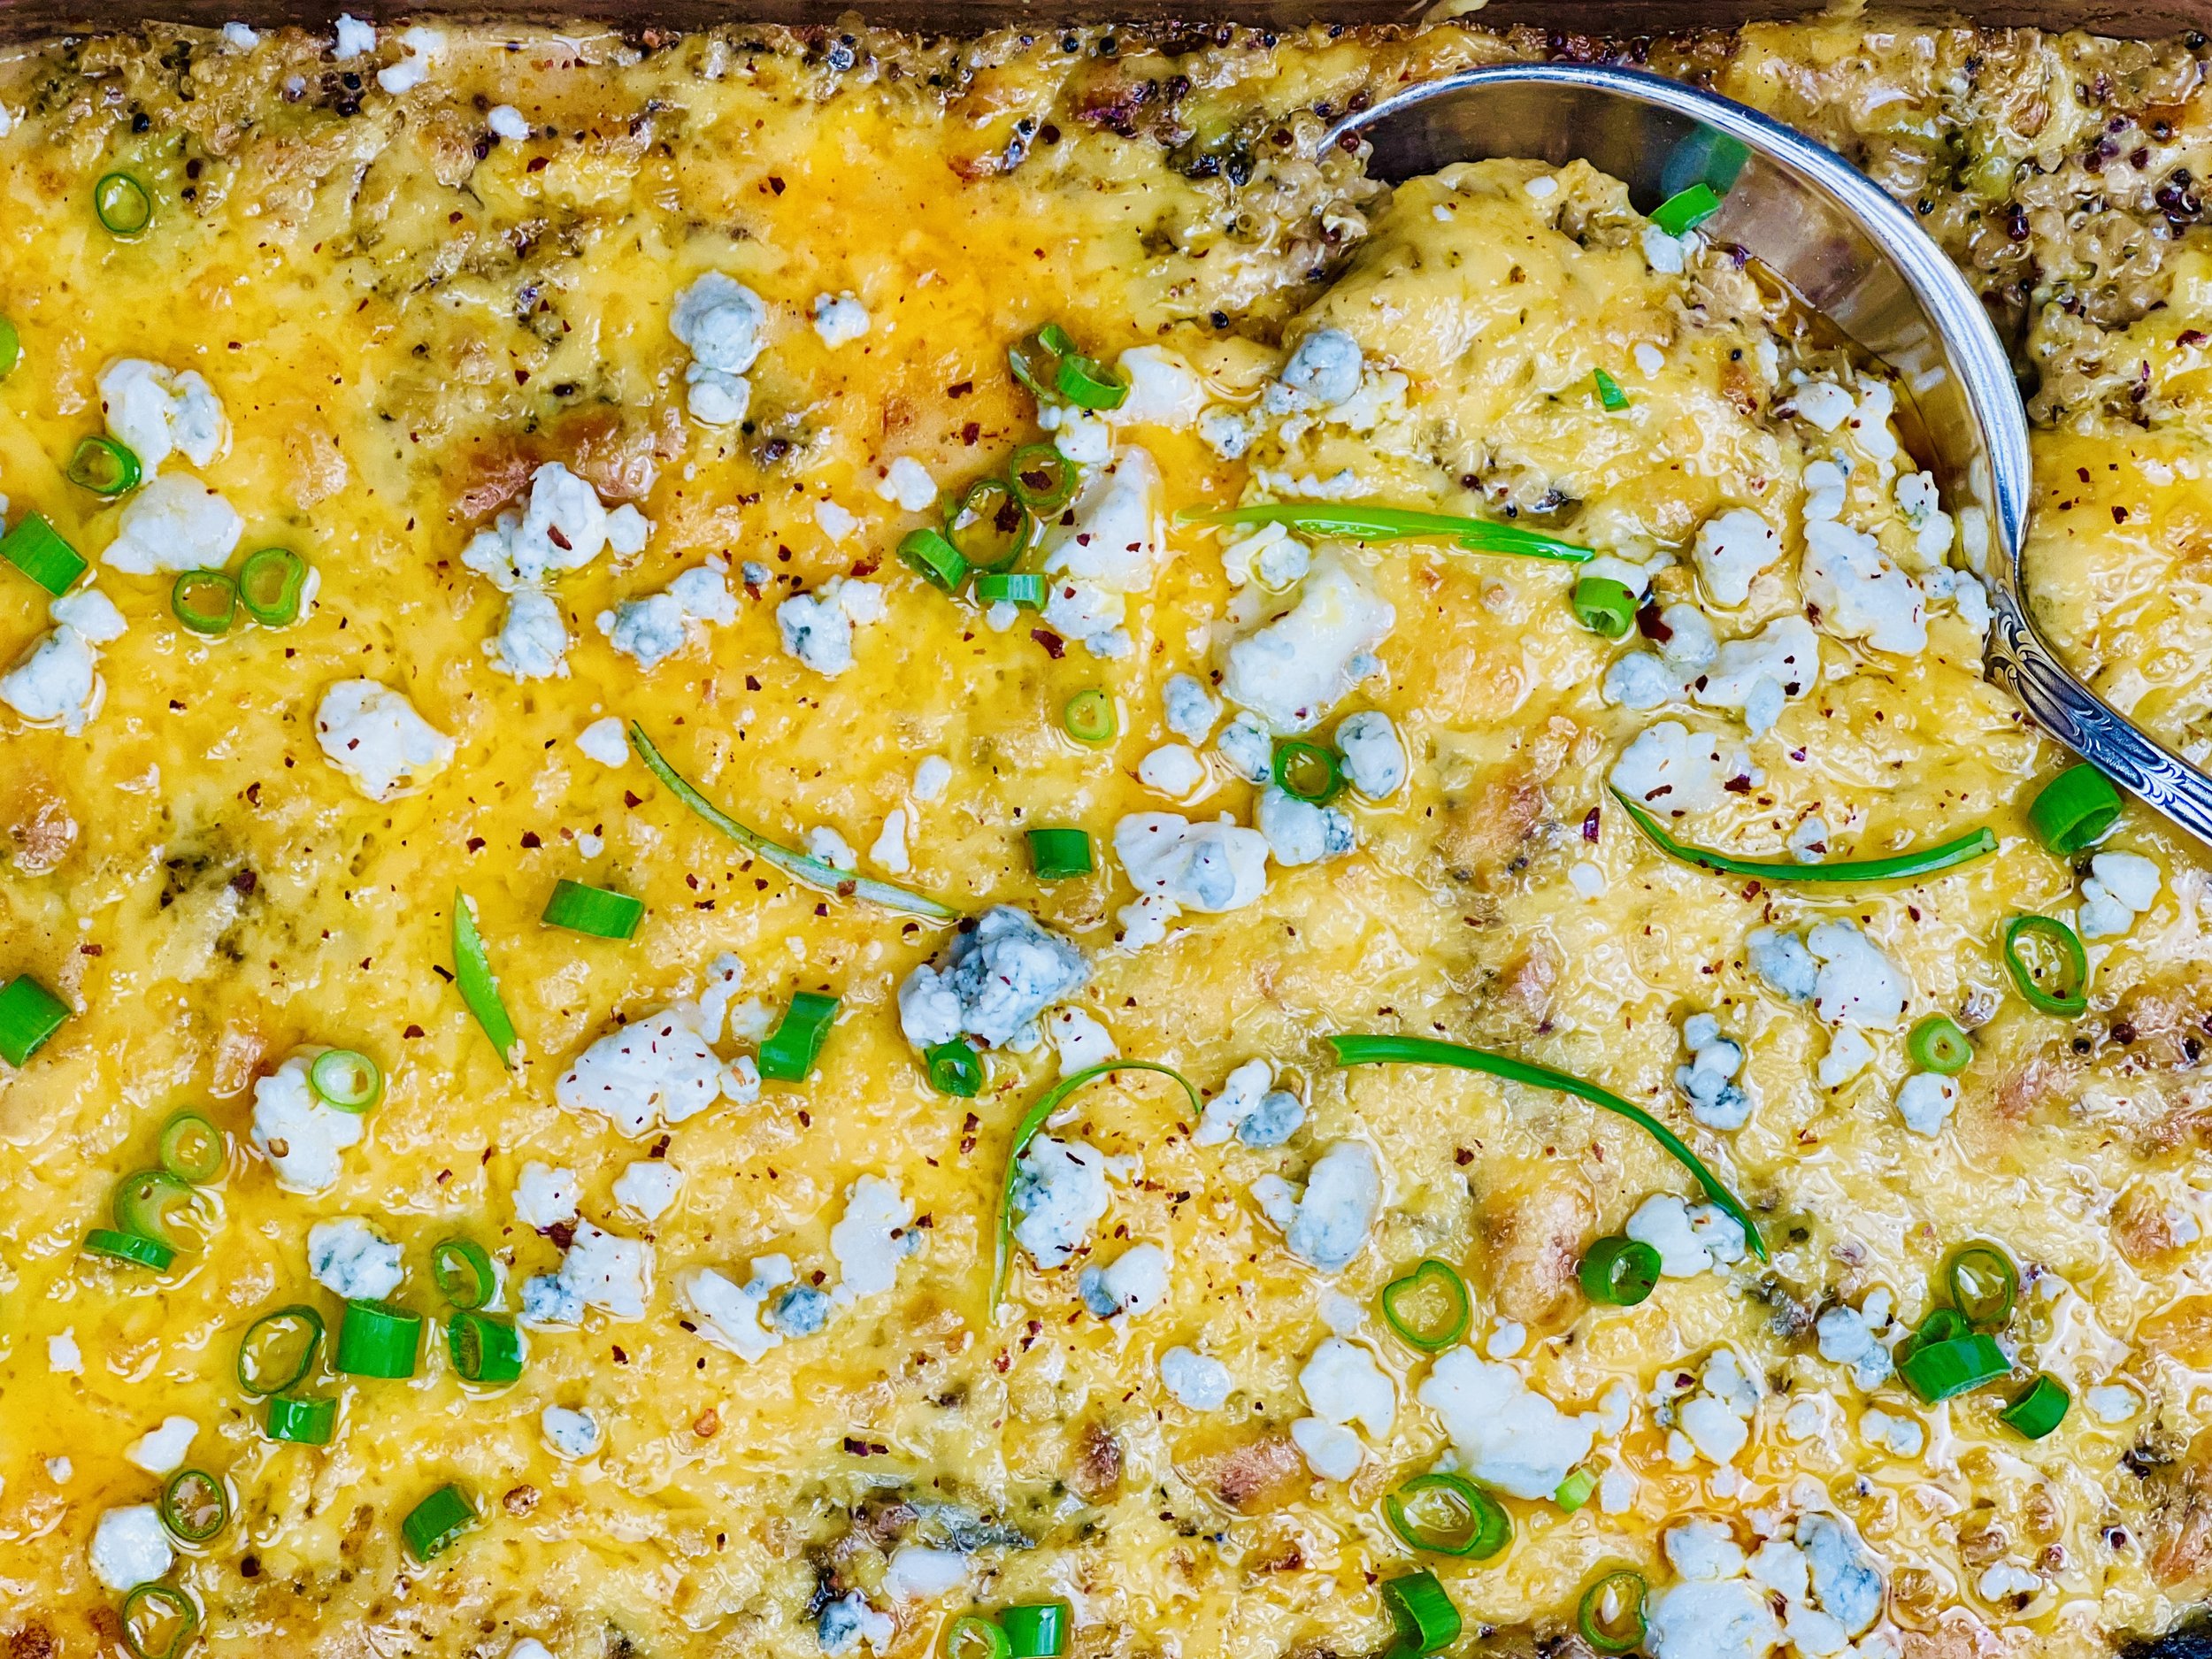
Buffalo Chicken Kale and Quinoa “Mac n Cheese” (Low FODMAP)
30 Minutes prep • 20 Minutes cook • Low FODMAP • Gluten-free • Serves 4 - 6
30 Minutes prep • 20 Minutes cook • Low FODMAP • Gluten-free • Serves 4 - 6 • Ok to make ahead: Steps 1-6
Craving something mac and cheesy that’s a little bit lower on the glycemic index and loaded with plants? This is it! Delicious, cheesy, hearty, and healthy. A great way to use extra chicken and to sneak some good veggies into your comfort food. It gets better the next day so don’t hesitate to make this a day ahead and then heat for a quick and delicious meal.
Ingredients
1 large or 2 small chicken breasts, cooked and chopped or shredded (recipe below)
2 cups chicken broth or water, (I use Whole Foods Organic 365 chicken broth or Gourmend low FODMAP Organic Chicken Broth - use code IBSGC15 for 15% discount)
1 cup uncooked quinoa
3 cups combined kale and broccoli (florets only), chopped (you can also do all broccoli or all kale)
1 tablespoon gluten-free flour
1 tablespoon salted butter
1 cup lactose-free milk (I used whole milk)
1 1/2 - 2 cups extra sharp cheddar cheese, shredded and divided
1/4 cup salted butter, melted
1/4 cup hot sauce, I used Whole Foods Organic Hot Sauce
1 teaspoon Smoke N Sanity Buffalo Marinade and Seasoning (use code IBSGC15 for 15% discount)
1/2 teaspoon Kosher salt
1/4 teaspoon black pepper
1/4 cup crumbled blue cheese
Green onions (green part only) chopped, for garnish
Directions
(1) Prepare the chicken: Don’t have cooked chicken? Cook some up using this quick and foolproof method:
Heat 1 tablespoon each butter and olive oil in a frying pan over medium-high heat. Season each chicken breast with a sprinkle of salt and pepper and 1 teaspoon of seasoning of your choice. For this recipe, I used Smoke N Sanity Buffalo Marinade and Seasoning. Put chicken breast(s) into the hot pan, seasoned side down. Cook for 2 -3 minutes until browned on the bottom. Season the top side, flip the chicken breast(s), cook for 2-3 minutes on the second side, until browned. Reduce heat to low. Cover the pan and cook for 12 minutes. Leave cover in place. Turn the heat off. Leave for another 12 minutes. Voila! Perfectly cooked chicken. If the chicken breasts are very thick, then slice them in half horizontally before cooking them in this manner.
(2) Cook the quinoa: Place quinoa in a fine-mesh strainer and rinse thoroughly under running water. Transfer quinoa to a medium saucepan. Add water or broth, and bring to a boil. Reduce heat to medium-low and add the chopped kale right on top of the water, do not stir. Cover and simmer for 15-20 minutes or until water is absorbed. Remove from heat and let sit, covered, for 5 minutes. Fluff quinoa with a fork and stir the vegetables into the quinoa.
(3) Prepare: Preheat oven to 350 degrees F. Spray a 9x9 or equivalent size baking dish with non-stick spray.
(4) Prepare the cream sauce: Heat a medium saucepan over medium heat. Add the 1 tablespoon of butter, once it’s melted and bubbly add the flour. Whisk together to create a roux and cook for 1-2 minutes until mixture gets a bit golden in color. Add milk, stir and turn down heat to low. Continue stirring until milk thickens. Add in half of the cheese and continue to stir until mixture is smooth. Remove from the heat and stir in the 1/4 cup melted butter, hot sauce, buffalo seasoning, and pepper.
(5) Combine ingredients: Pour the sauce over the quinoa mixture, add the cooked chicken, and stir to combine. Pour the entire quinoa mixture into the prepared baking dish. Top with remaining shredded cheddar cheese.
(6) Bake: Bake, uncovered, for 15 - 20 minutes and then turn the broiler on and broil for 1 to 2 minutes or until cheese is golden and bubbly.
(7) Plate and serve: Remove from the oven and top with blue cheese crumbles, and chopped green onions. Allow to sit for a few minutes before serving.
Eat and enjoy every bite because you can!
Recipe note: I use Diamond Crystal Kosher salt in all my recipes because it has a wonderful flat and crisp flake that tastes delicious. It is also the least salty salt available so you can use it more liberally as a seasoning than you can table salt or sea salt. If you use another type of salt, you may need to reduce the amount so it is not over-salted.
Have a question you’d like to have answered? Email me at hello@ibsgamechanger.com
Link note: This post contains links for you to easily purchase items listed on the page. In some cases, we have provided a special discount code for IBS Game Changers so be sure to use it when you purchase an item to get the discount that has been arranged just for you! As an Amazon Associate, I earn a commission from qualifying Amazon purchases.
More Deliciously Low FODMAP™ main course recipes
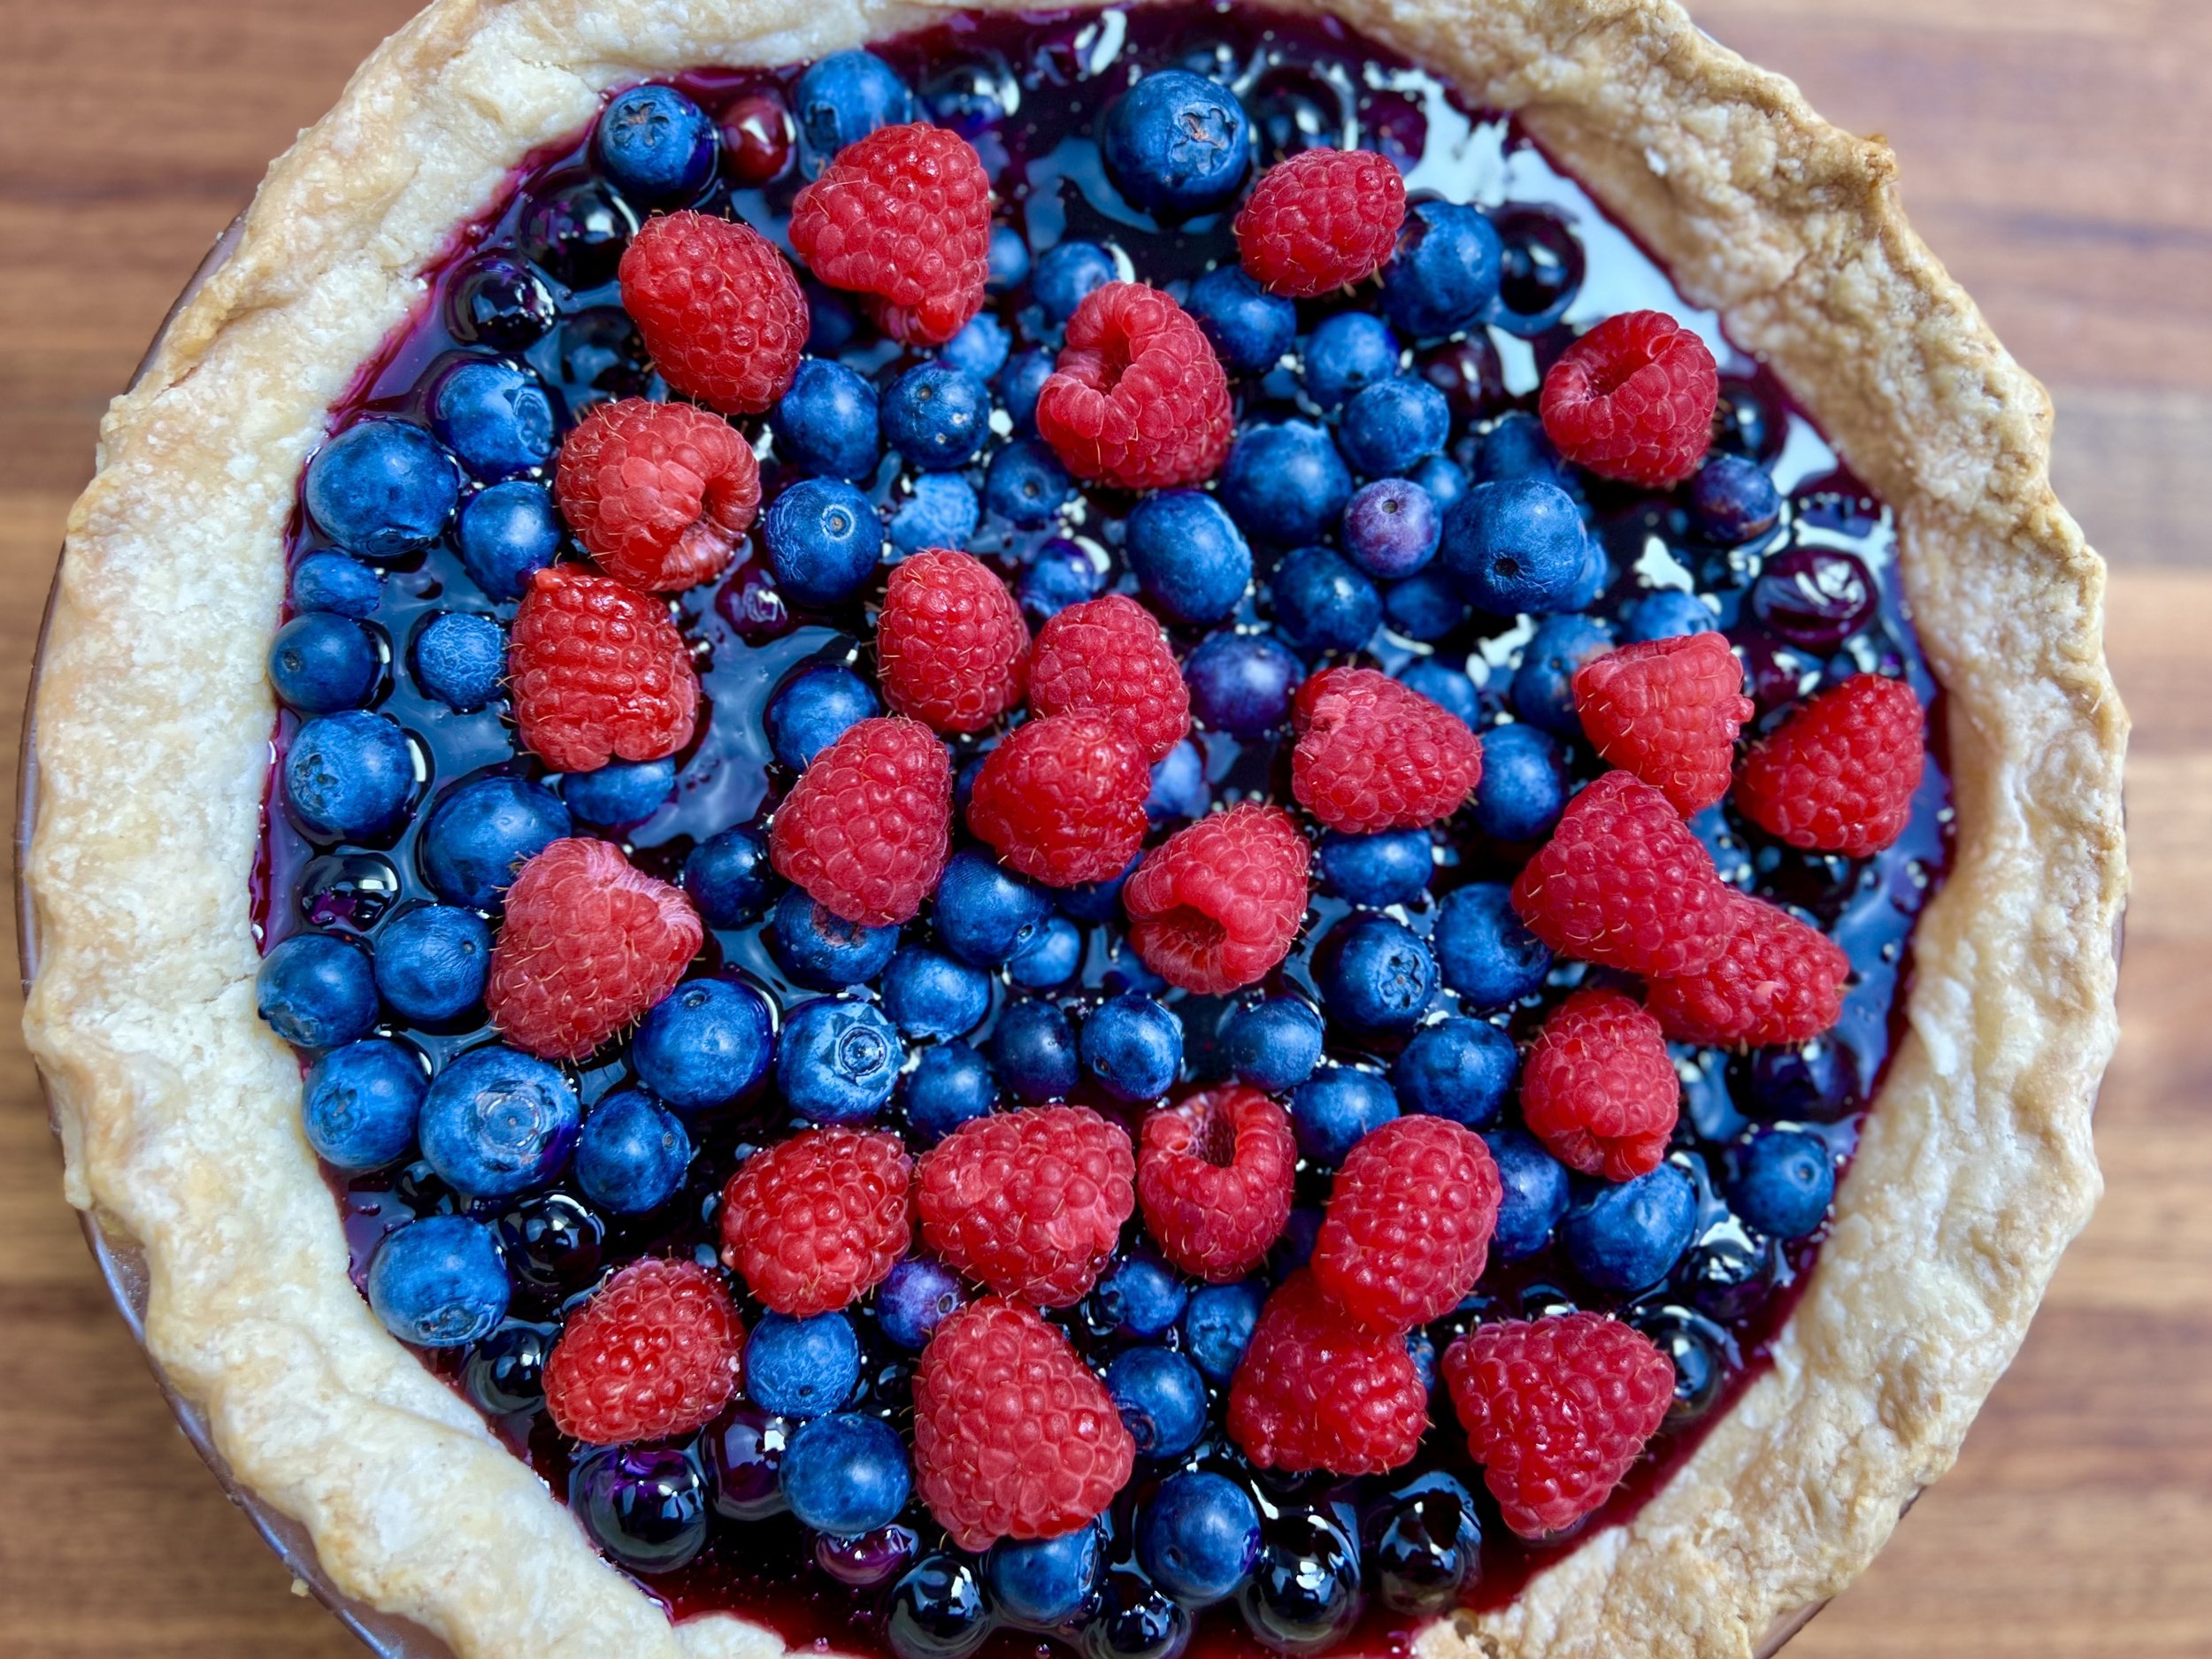
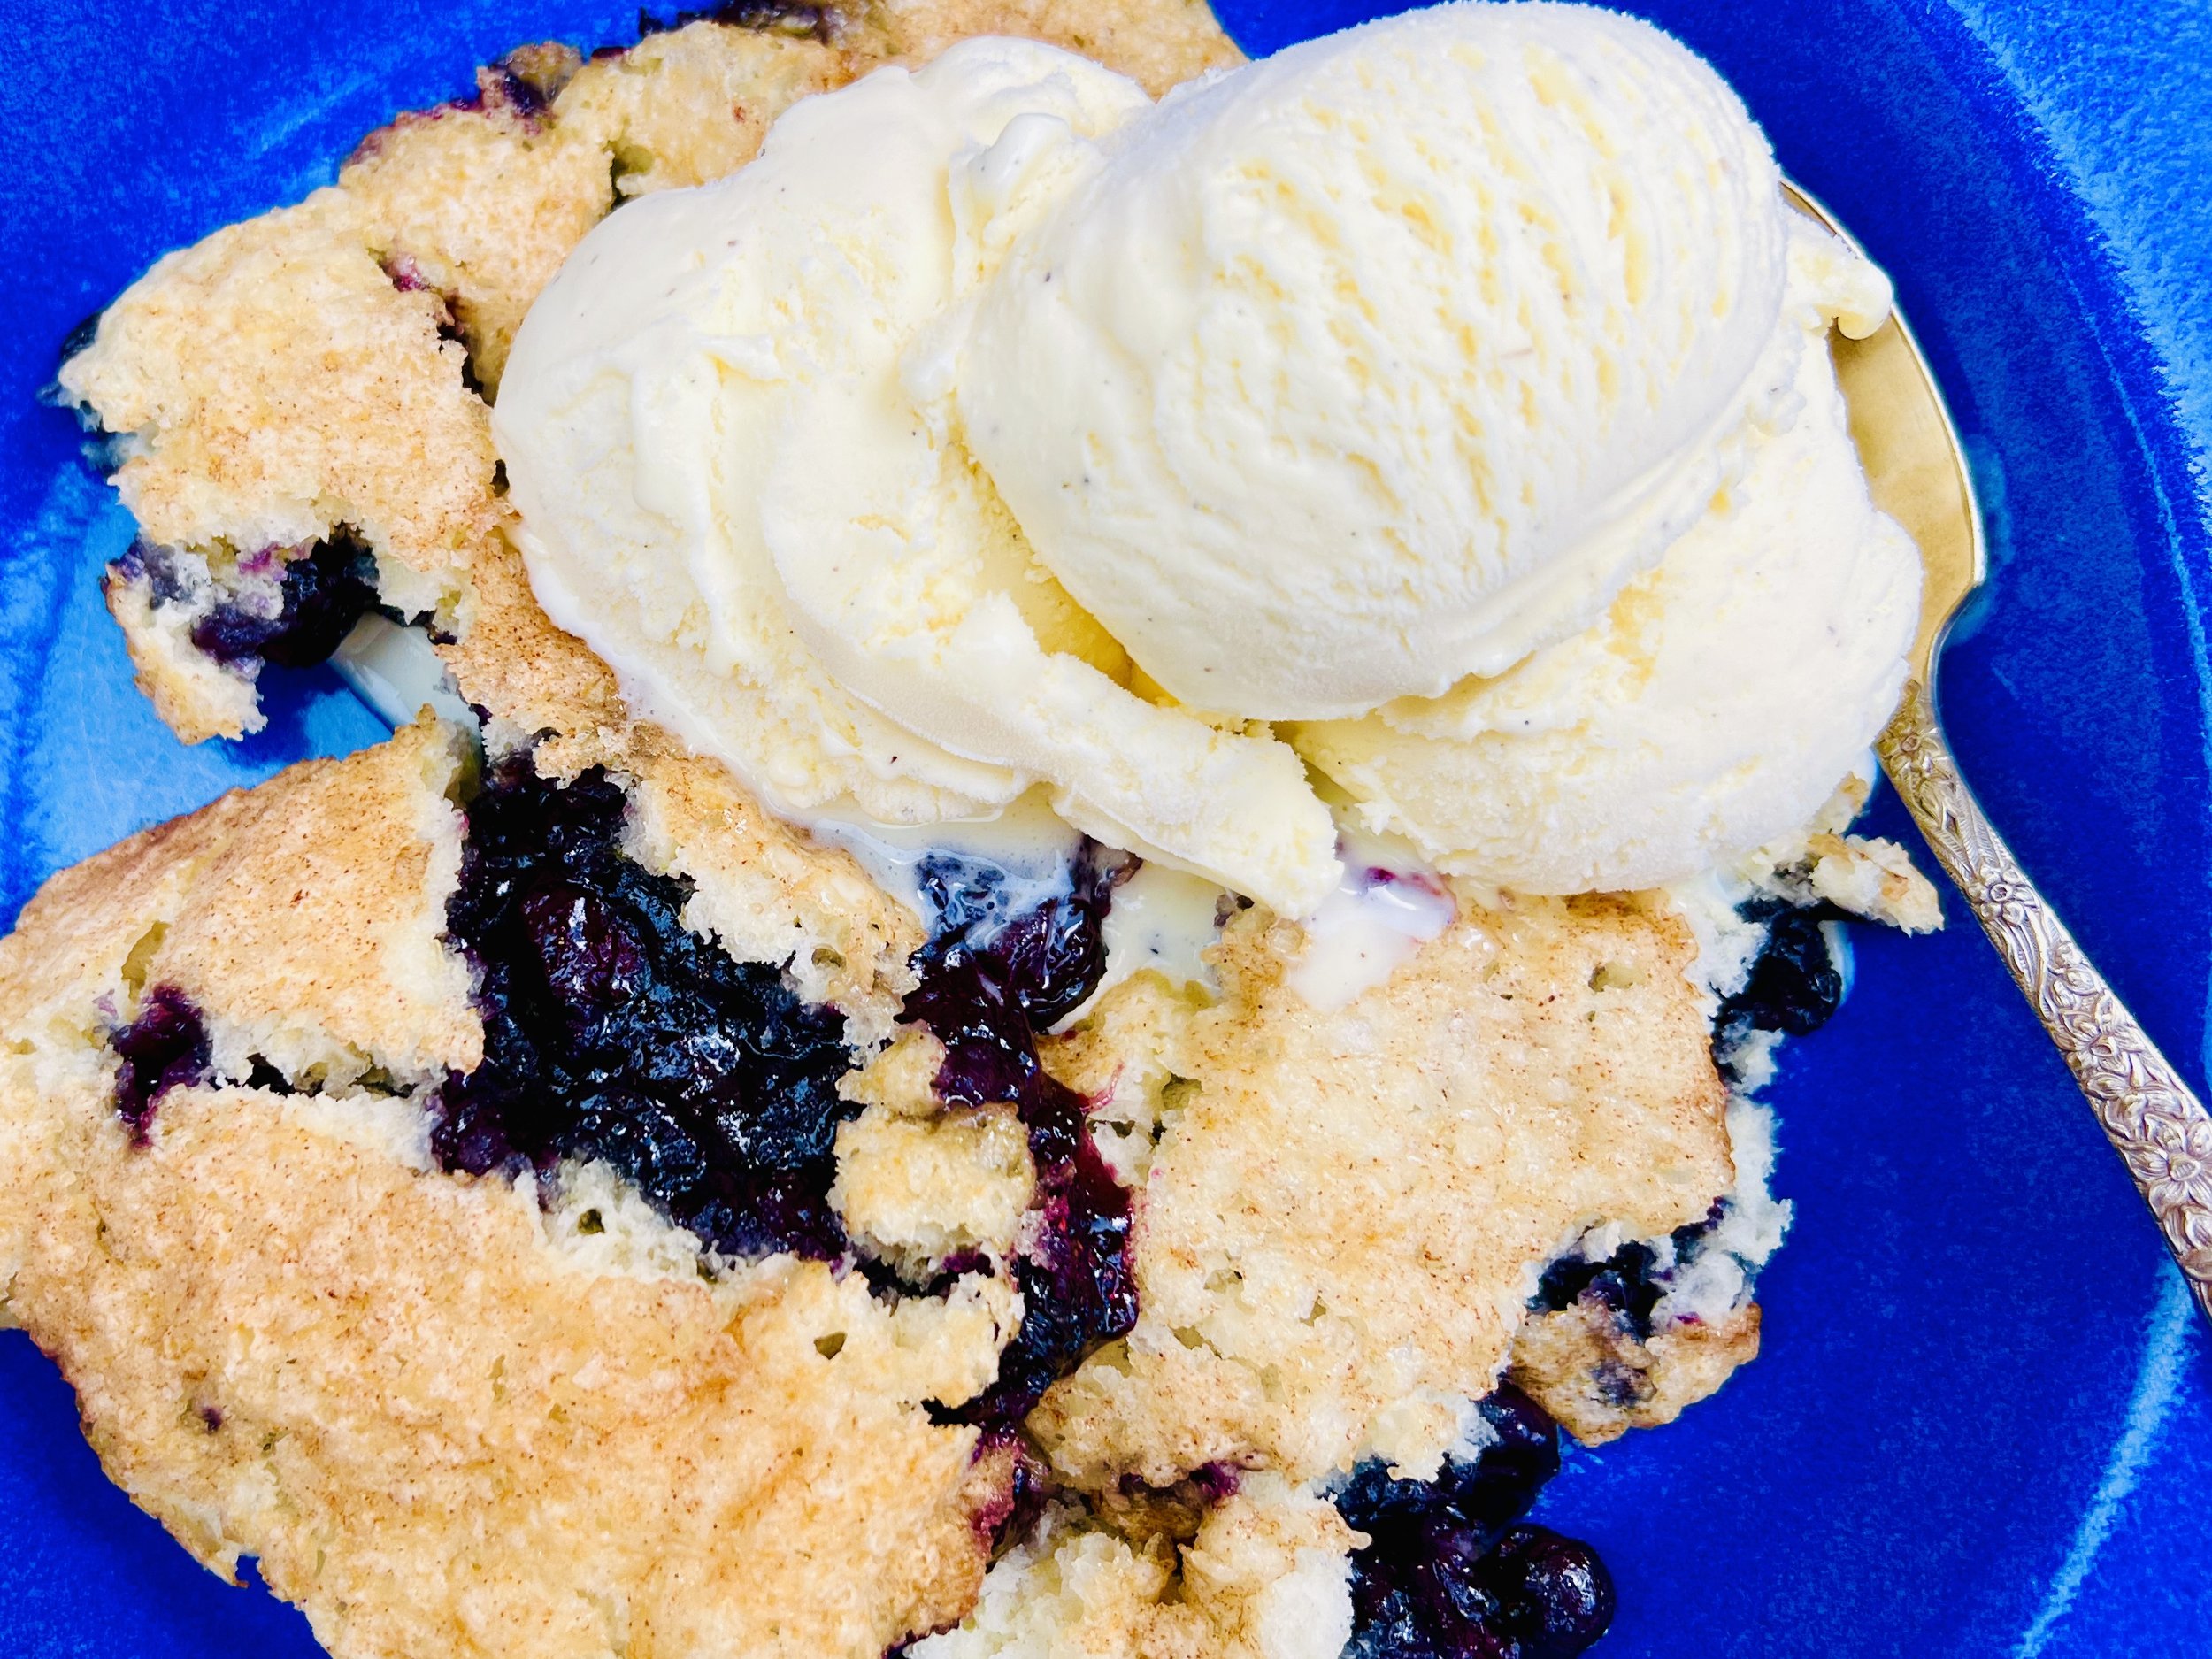
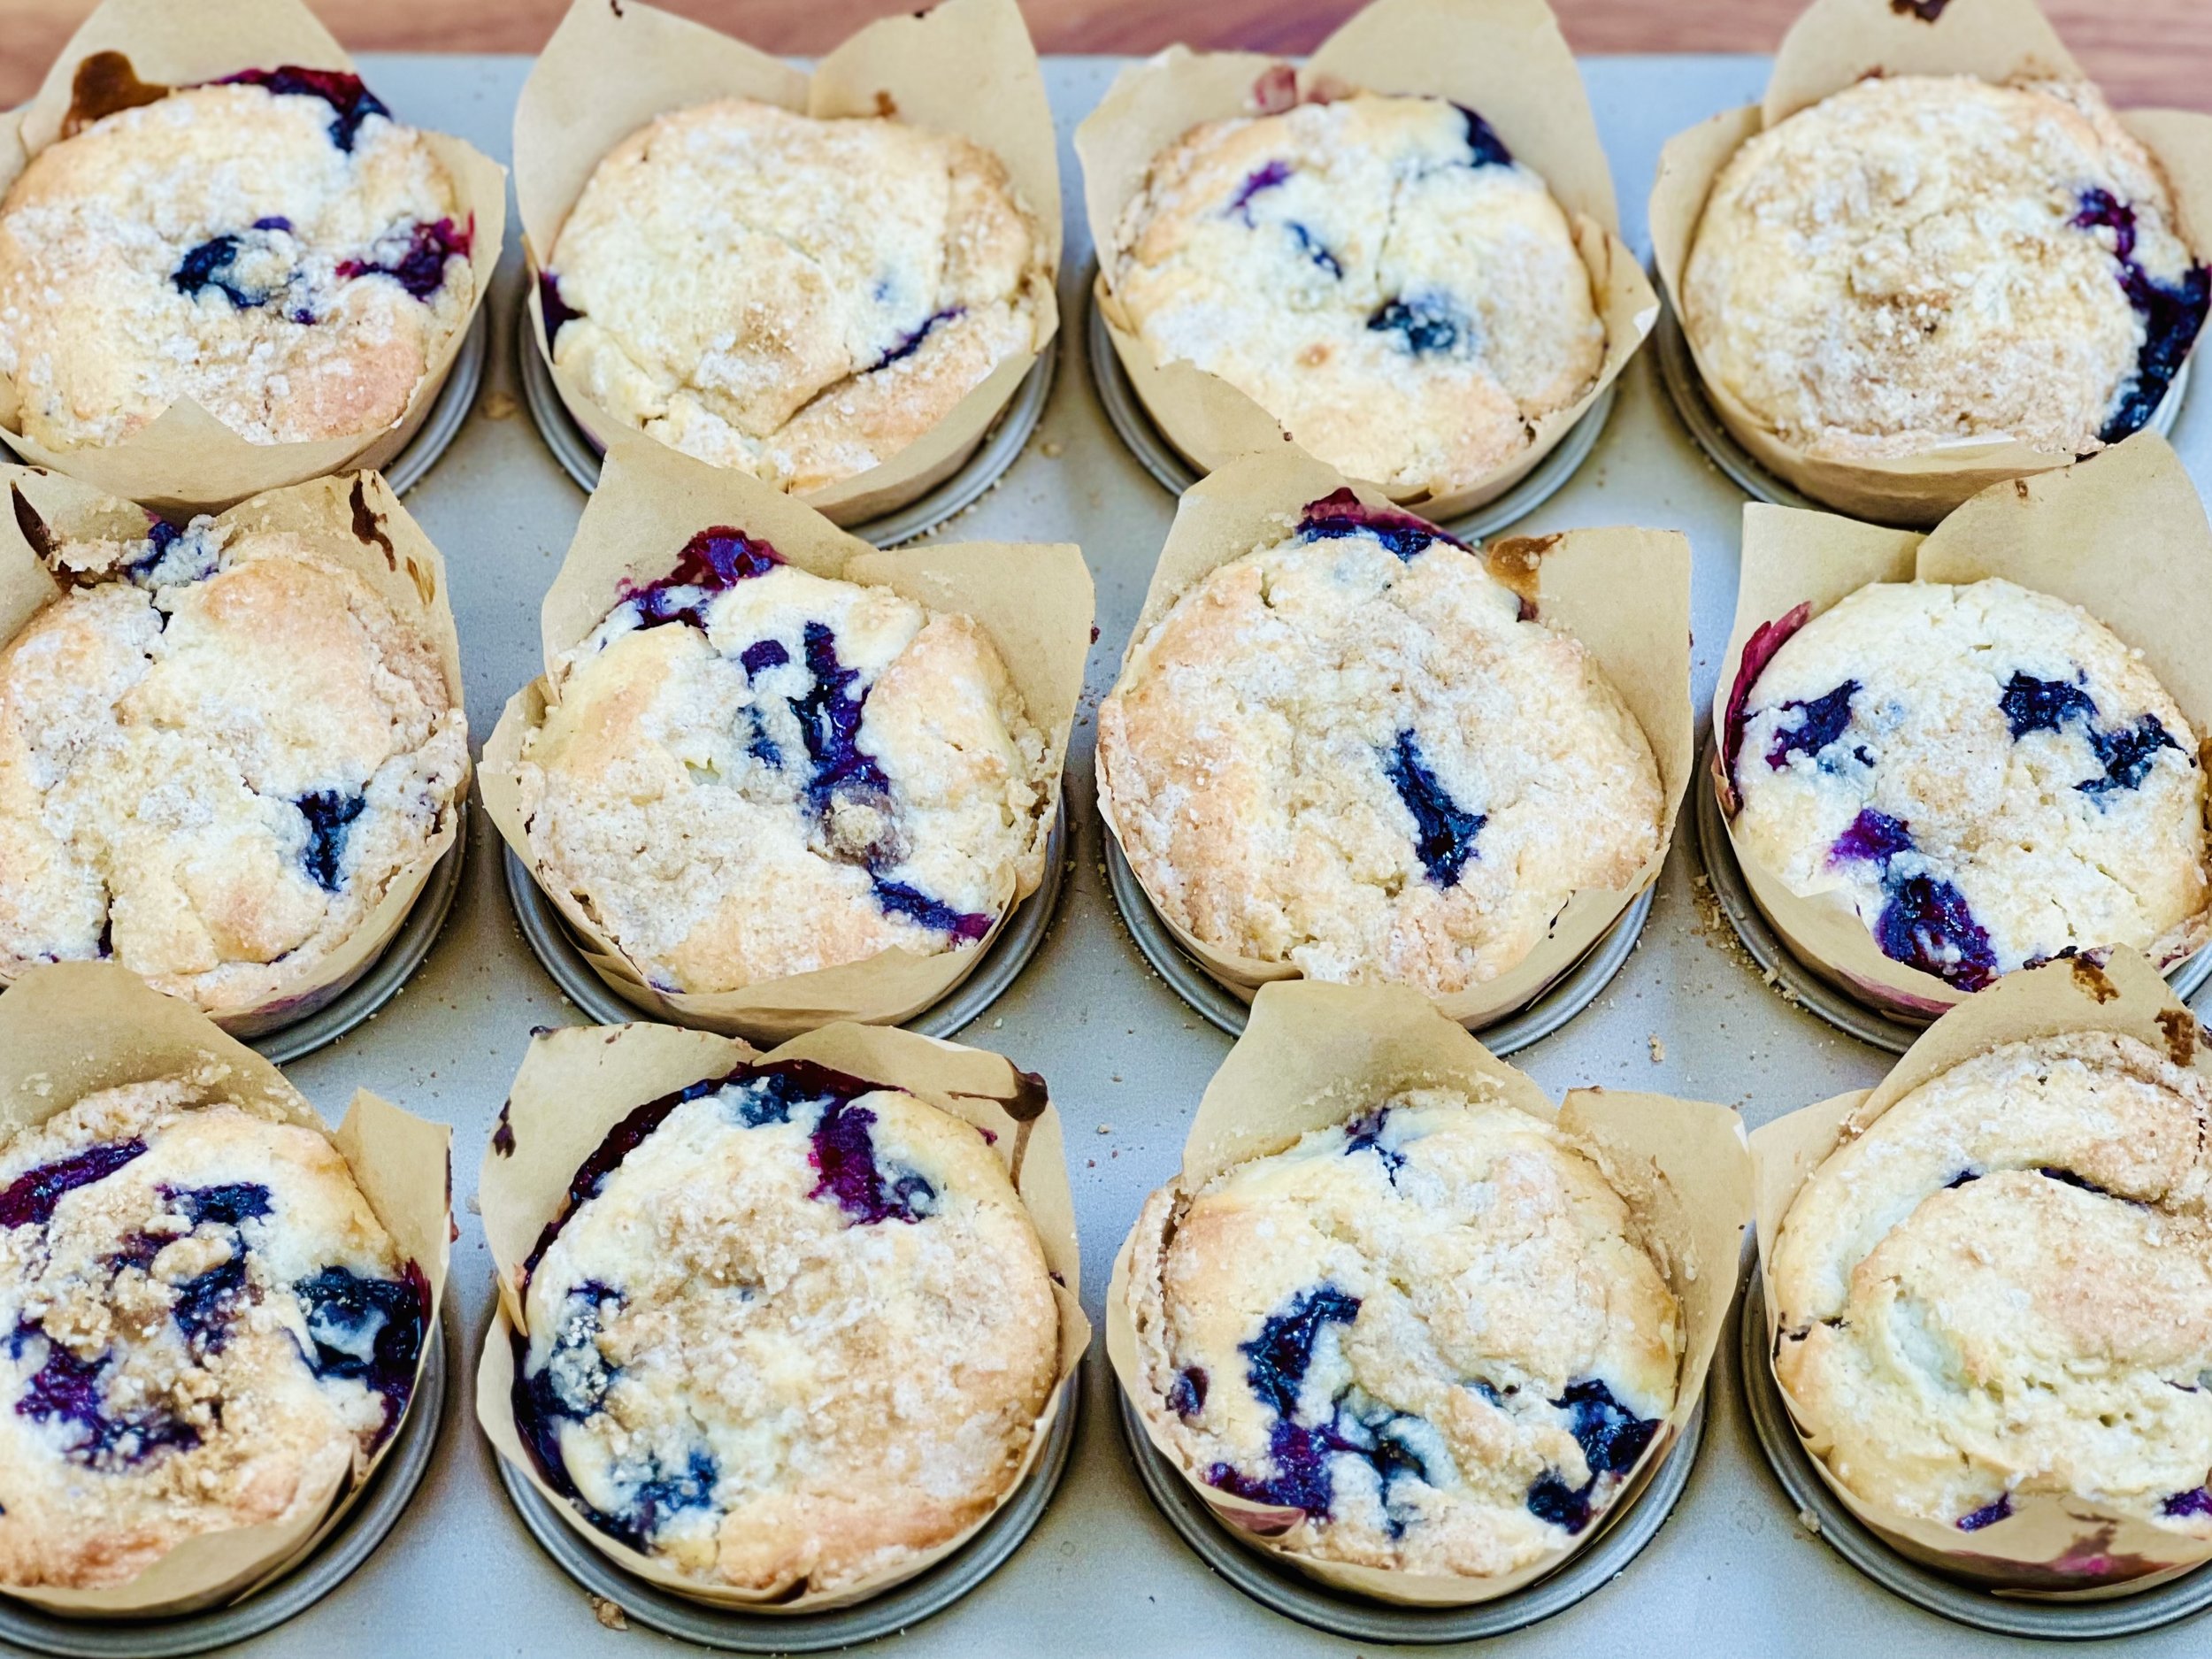
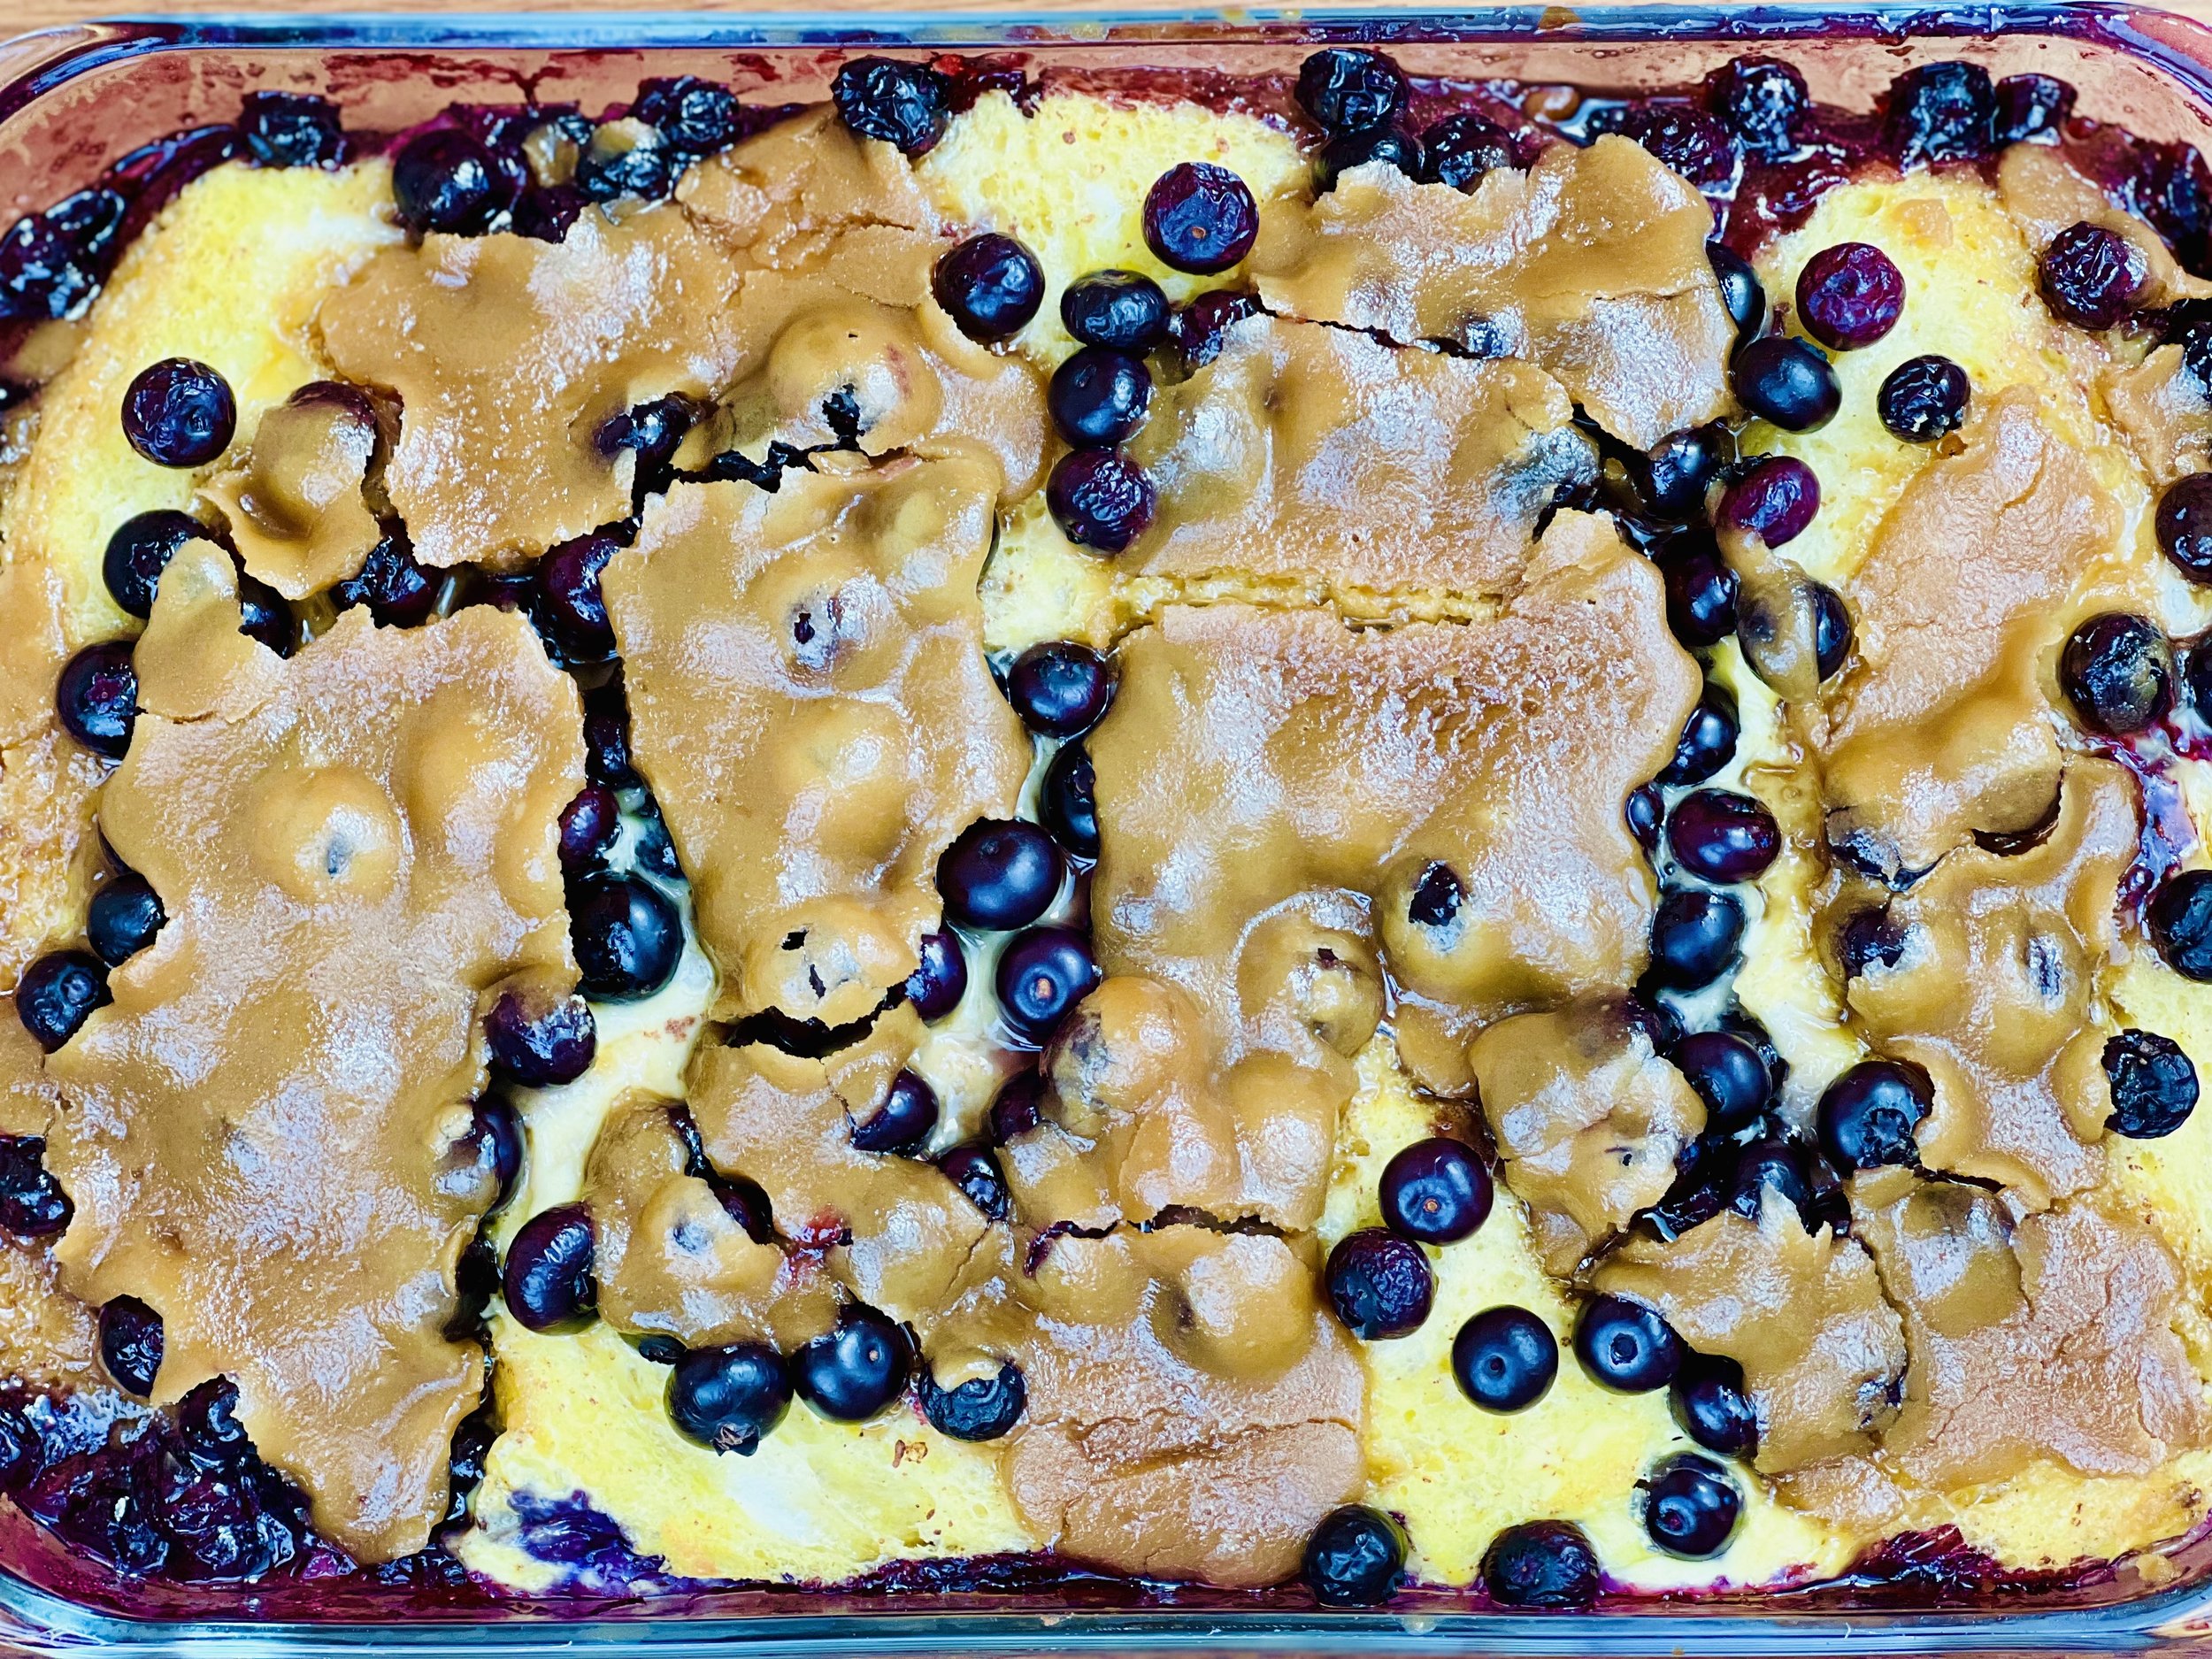
Baked Blueberry French Toast (Low FODMAP)
20 Minutes prep • Overnight rest • 40 Minutes cook • Low FODMAP • Serves 6 - 8
20 Minutes prep • Overnight rest • 40 Minutes cook • Low FODMAP • Serves 6 - 8 • Ok to make ahead: Steps 1-2
My sister shared this recipe with me many years ago and it has been a special breakfast favorite for our families ever since. I made a few changes for this low FODMAP version but it hasn’t lost a bit of its deliciousness! This baked blueberry French toast is so easy to make and so delicious, it will surely become a family favorite for you too. The eggs, bread, berries, and caramel topping blend perfectly together in one pan so there’s no need to add syrup or anything at all. And, because you let it sit overnight before cooking it, you’ll be free to enjoy the morning with the family instead of spending time in the kitchen. You can use fresh or frozen berries so don’t wait until blueberries are in season to enjoy this recipe. I like to buy fresh blueberries (when they’re in season), wash them and let them dry, then freeze them so I have perfect berries on hand when I need them.
This is an exclusive recipe just for recipe club members.
In addition to the two free recipes I create each week I am creating and delivering one very special recipe just for my recipe club members. If you’re not yet a member, I encourage you to join! Membership in the club includes access to the complete archive of recipes with filters so it can become your virtual low FODMAP cookbook plus, I am creating and delivering one special NEW recipe every week ONLY for recipe club members. And, for my true fans, I’ll be sharing behind-the-scenes content, and updates on the progress of the new cookbook.
Your membership in the club helps me continue creating new, delicious, easy-to-make, low FODMAP recipes just for you.
As always, all recipes will emphasize simple ingredients, easy preparation, and delicious low FODMAP results. Recipes will be for everything from main courses, salads, soups, side dishes, appetizers, desserts, sauces, breakfast and lunch, and even mocktails and cocktails. Everything you need to prepare fantastic low FODMAP meals everyone will love.
Join the club. Become a Patron. Let’s keep making delicious Low FODMAP meals together.
More Deliciously Low FODMAP™ breakfast recipes


Buffalo Chicken Enchiladas (Low FODMAP)
20 Minutes prep • 40 Minutes cook • Low FODMAP • Gluten-free • Serves 6
20 Minutes prep • 40 Minutes cook • Low FODMAP • Gluten-free • Serves 6 • Ok to make ahead: Steps 1-4
Smoke N Sanity has inspired me again with Low FODMAP Buffalo Seasoning and Salsa! Of course, I had to create a recipe that would feature them both—and I must say this one is quite delicious. Tangy Buffalo sauce tempered by lime sour cream smothering tortillas layered with super flavorful chicken and a creamy filling come together to deliver the perfect buffalo chicken enchiladas. And, since they’re made in one pan, they’re easy to make and easy to clean up too.

Ingredients: Enchiladas
2 tablespoons garlic-infused olive oil
1 bunch green onions (green part only), chopped
1 jalapeno pepper, seeded and chopped
1 pound ground chicken
1 tablespoon Smoke N Sanity Chili Seasoning (use code IBSGC15 for 15% discount)
1 cup water
1/2 - 3/4 cup buffalo sauce (recipe below)
1/2 cup Smoke N Sanity Mild Salsa (use code IBSGC15 for 15% discount)
1/2 cup chopped cilantro
4 ounces lactose-free cream cheese, room temp
1/4 cup lactose-free plain yogurt
1 tablespoon dried parsley
1 tablespoon dried chives
3/4 teaspoon dried dill
1 teaspoon smoked paprika
1 cup shredded extra sharp cheddar
1/2 cup shredded fontina, jack, or pepper jack cheese
Ingredients: Buffalo Sauce
1/2 cup (1 stick) salted butter, melted
1/8 - 1/4 cup low FODMAP hot sauce
2 teaspoons Smoke N Sanity Buffalo Seasoning and Marinade (use code IBSGC15 for 15% discount)
1/2 teaspoon salt
1/2 teaspoon black pepper
Ingredients: Lime Sour Cream
1/2 cup lactose-free sour cream
Juice of 1/2 lime
1/2 teaspoon of salt
Avocado, limes, and cilantro, for serving
Directions: Enchiladas
(1) Prepare: Preheat the oven to 400 degrees F. Grate the cheese. Chop the green onions and jalapenos. Make the buffalo sauce and lime sour cream.
(2) Cook the chicken: In a large oven-safe skillet, combine the garlic olive oil, chicken, green onions, and jalapeno pepper. Cook, breaking up the meat as it cooks, until browned, about 5 minutes. Add a tablespoon of chili seasoning, then pour in the water, the buffalo sauce, and the salsa. Simmer 5-8 minutes. Remove from the heat and stir in the cilantro.
(3) Make the filling: In a bowl, combine the cream cheese, yogurt, parsley, chives, dill, paprika, and a pinch each of salt and pepper. Stir in half of the shredded cheese.
(4) Assemble: Spoon the cream cheese mix down the center of each tortilla, roll the tortilla around the mixture and place the tortillas, seam side down, into the skillet on top of the chicken. Top with the remaining shredded cheese.
Make-ahead note: At this point, you may set the pan aside until you’re ready to bake. If you refrigerate, it will take a bit more time to heat through so plan to bake for 20-25 minutes.
(5) Bake: Put the whole pan in the oven and bake for about 15 minutes, until the cheese has melted.
(6) Plate and serve: Serve warm, topped with the lime sour cream, avocado, cilantro, and additional chopped jalapeños and salsa.
Directions: Buffalo Sauce
Combine all ingredients in a glass jar, measuring cup, or bowl. Shake or whisk together.
Directions: Lime Sour Cream
Combine all ingredients in a small bowl. Stir until smooth. Taste and adjust salt if needed.
Eat and enjoy every bite because you can!
Recipe note: I use Diamond Crystal Kosher salt in all my recipes because it has a wonderful flat and crisp flake that tastes delicious. It is also the least salty salt available so you can use it more liberally as a seasoning than you can table salt or sea salt. If you use another type of salt, you may need to reduce the amount so it is not over-salted.
Have a question you’d like to have answered? Email us at hello@ibsgamechanger.com
Link note: This post contains links for you to easily purchase items listed on the page. In some cases, we have provided a special discount code for IBS Game Changers so be sure to use it when you purchase an item to get the discount that has been arranged just for you! As an Amazon Associate, I earn a commission from qualifying Amazon purchases.
More Deliciously Low FODMAP™ main course recipes
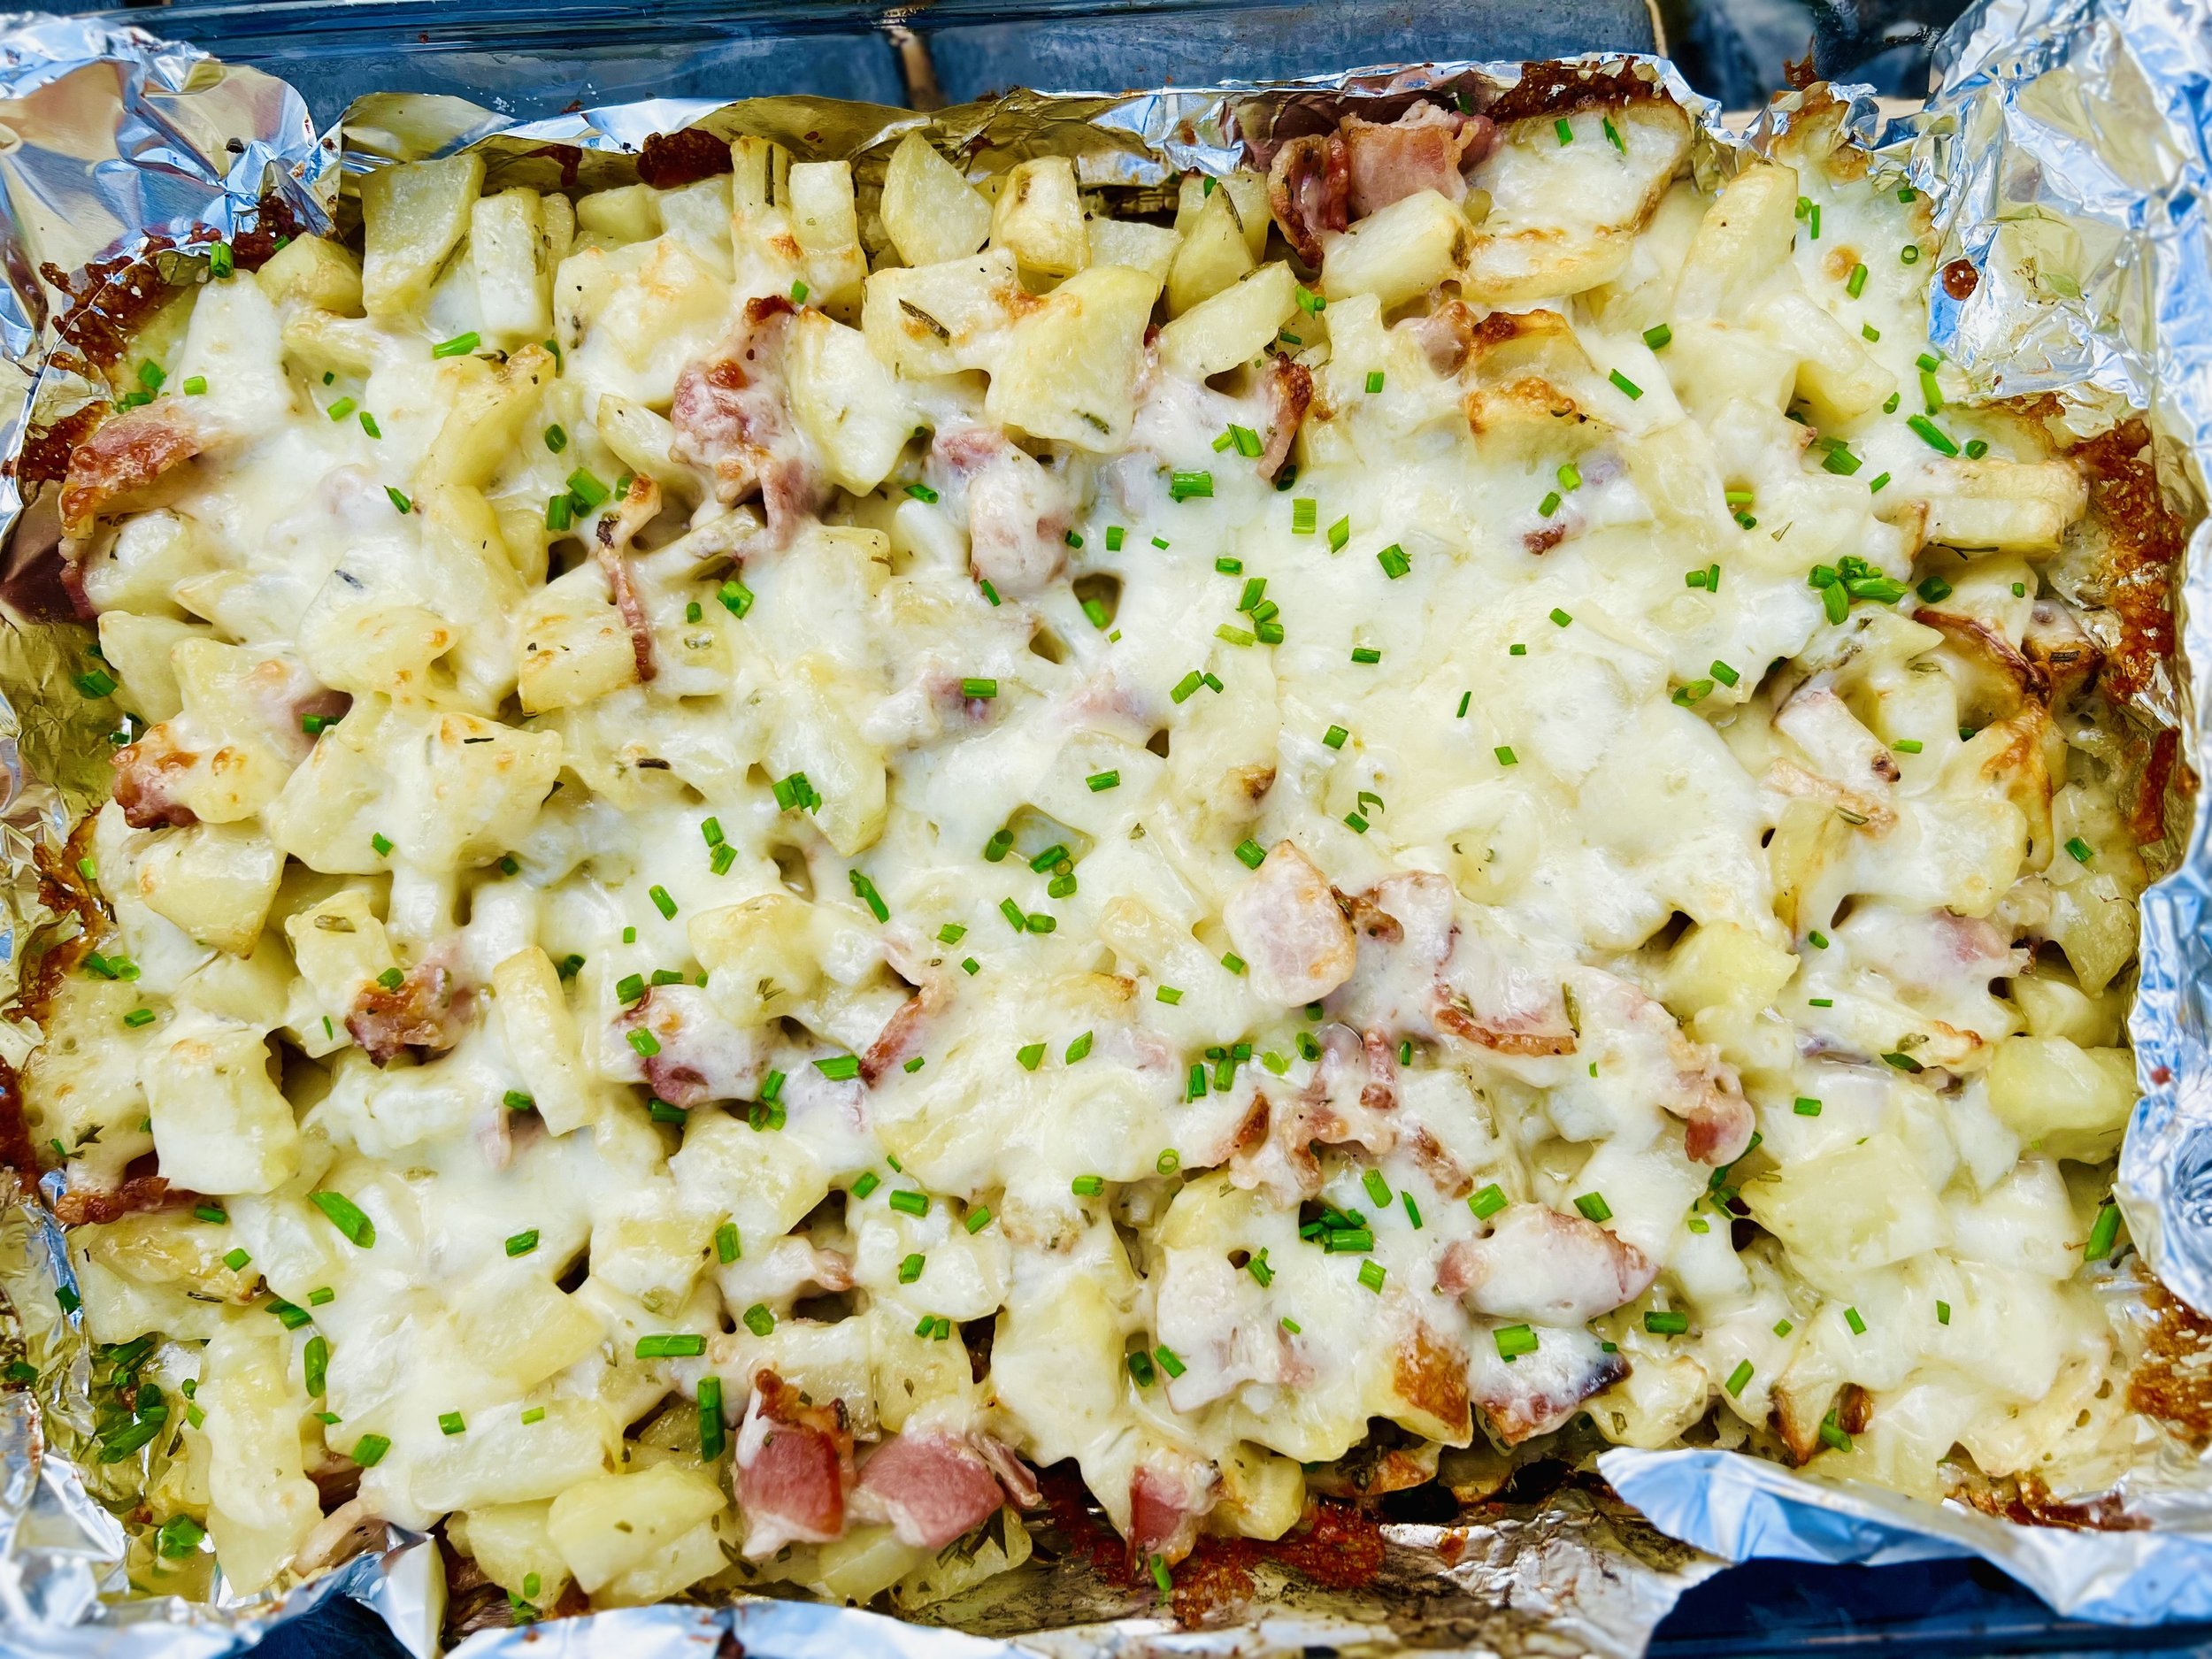
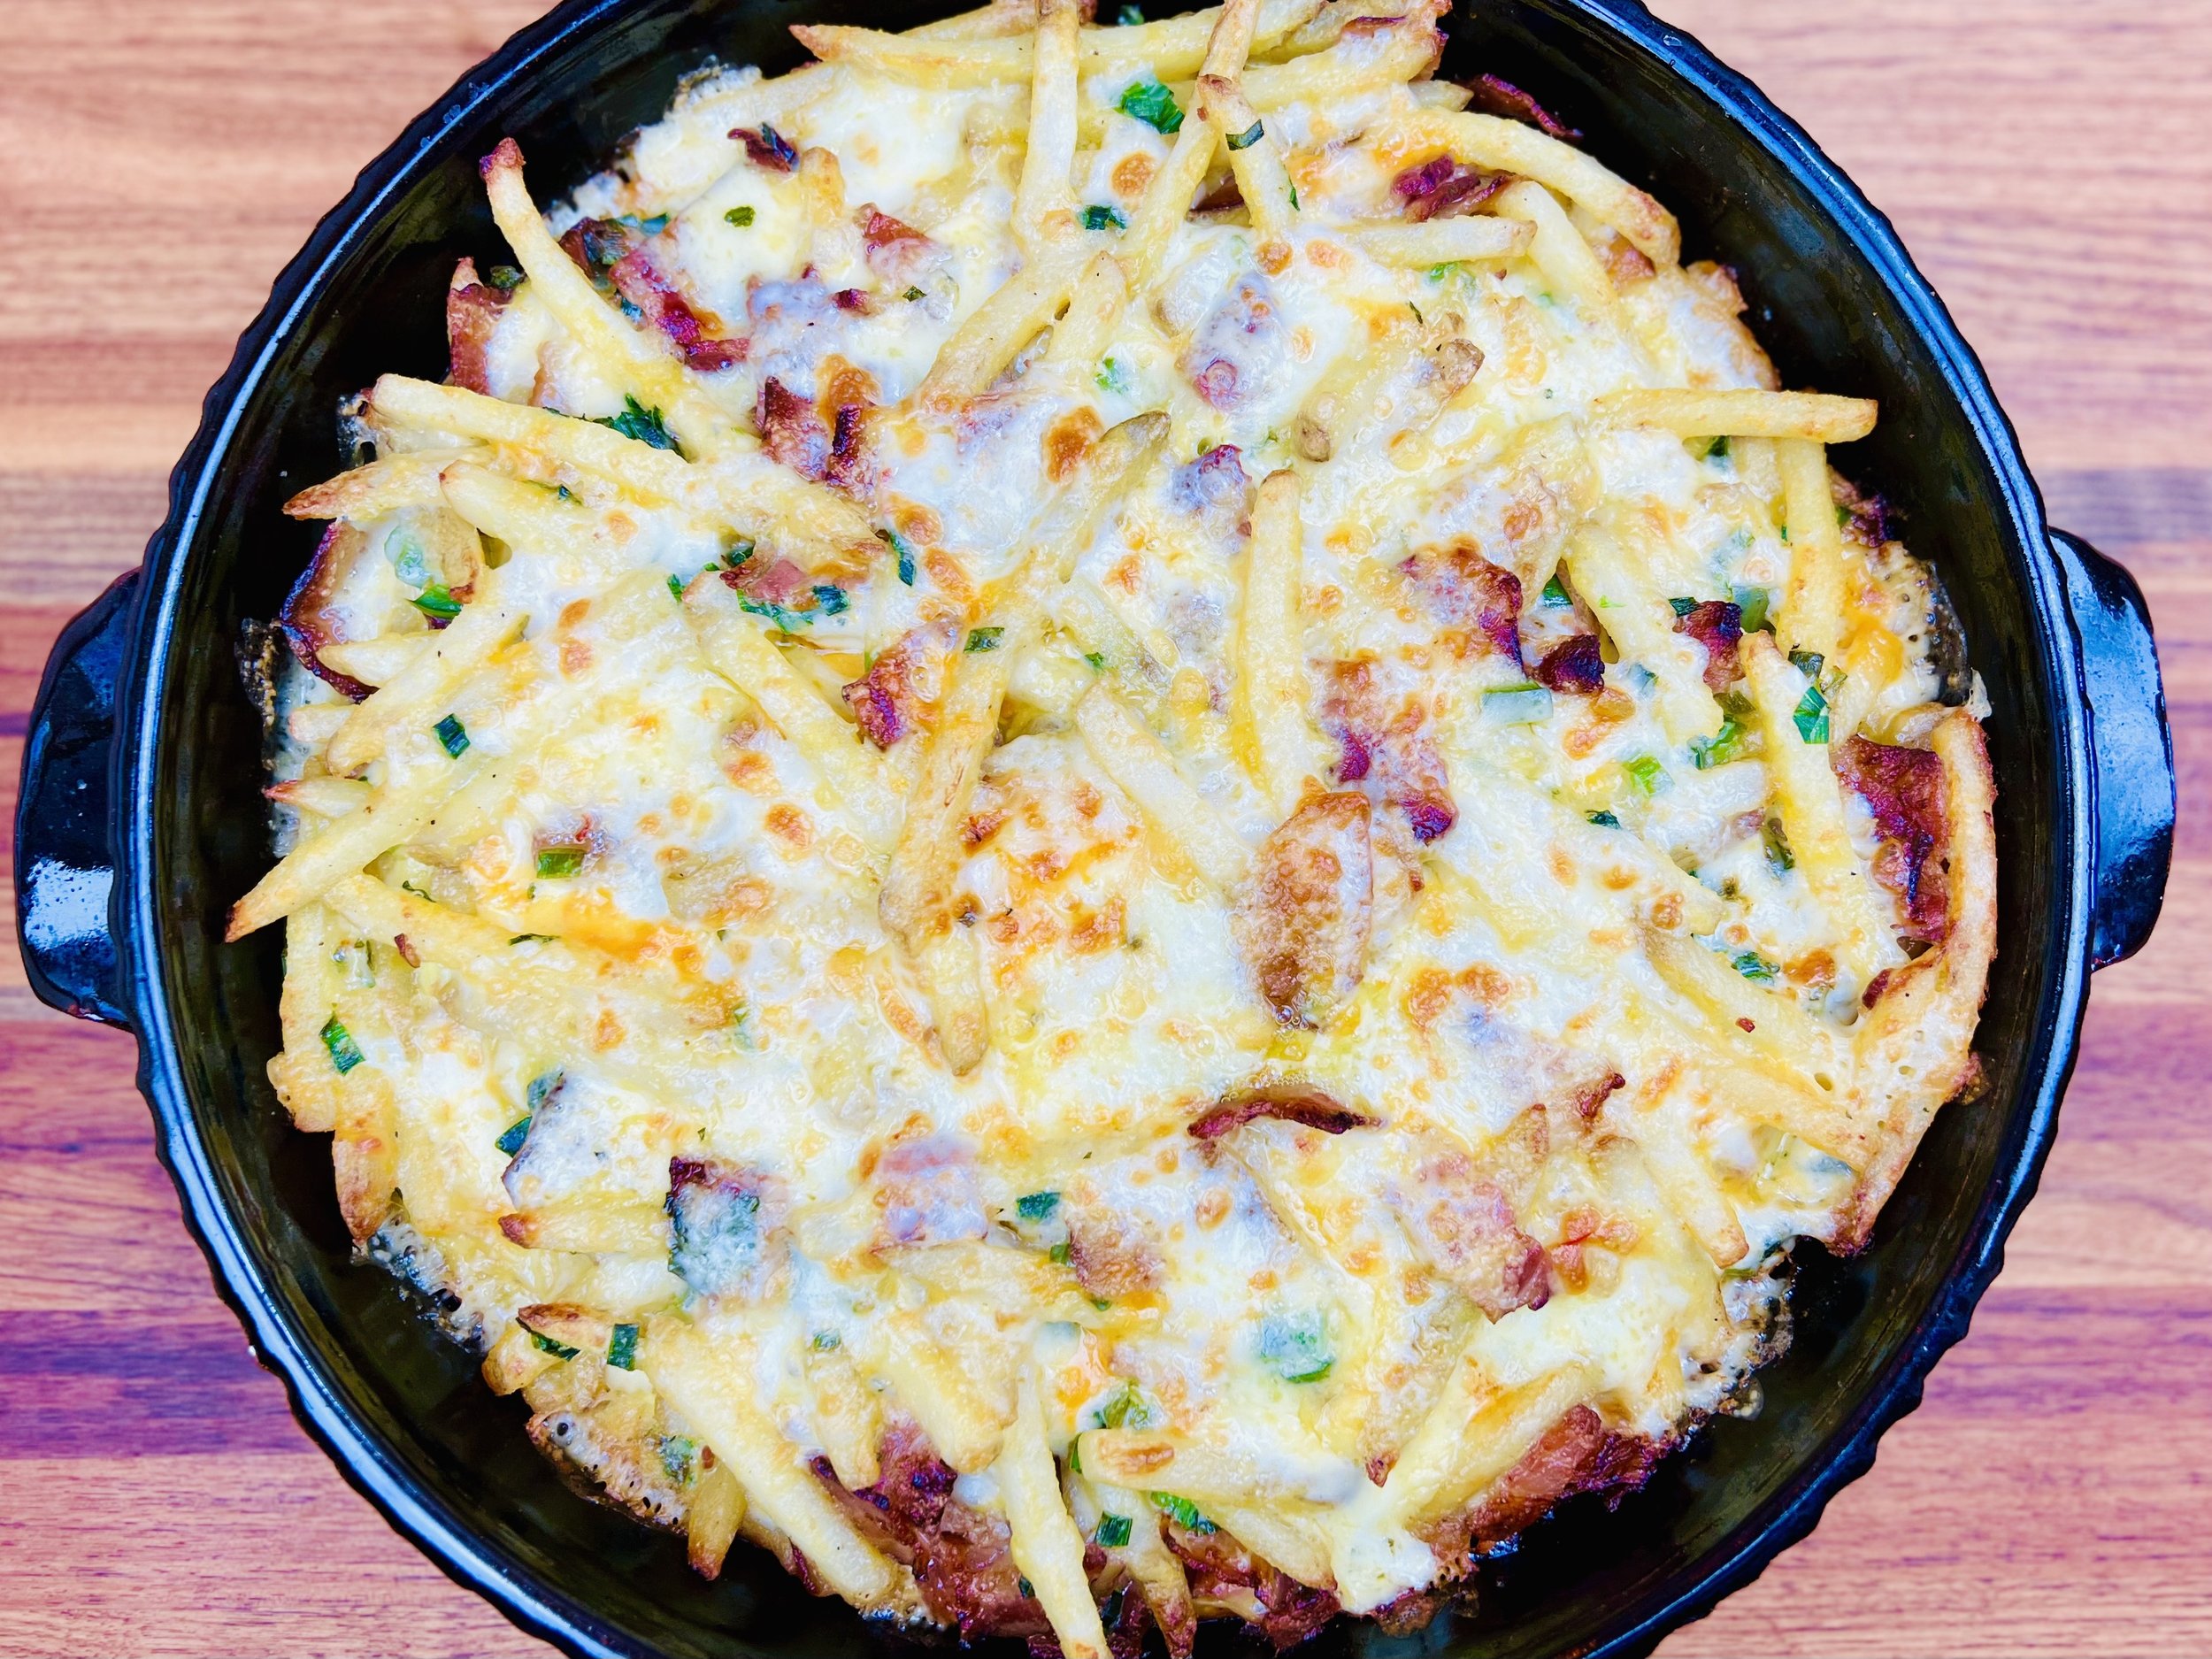
New Year’s Day Bacon, Eggs, and Potatoes Breakfast Bake (Low FODMAP)
15 Minutes prep • 55 Minutes cook • Low FODMAP • Gluten-free • Serves 6
15 Minutes prep • 55 Minutes cook • Low FODMAP • Gluten-free • Serves 6 • Ok to make ahead: Steps 1-3
Perfect for New Year’s Day morning (or any morning) to fortify you for the day’s nature hike, football games, or whatever you may be doing to welcome the New Year. This delicious breakfast dish with eggs, meat, and potatoes all baked in one pan is super easy to make and you can double the recipe to serve a crowd. Leftovers (if you should be lucky enough to have them) heat up very well in the microwave so don’t worry about having too much!
This is an exclusive recipe just for recipe club members.
In addition to the two free recipes I create each week I am creating and delivering one very special recipe just for my recipe club members. If you’re not yet a member, I encourage you to join! Membership in the club includes access to the complete archive of recipes with filters so it can become your virtual low FODMAP cookbook plus, I am creating and delivering one special NEW recipe every week ONLY for recipe club members. And, for my true fans, I’ll be sharing behind-the-scenes content, and updates on the progress of the new cookbook.
Your membership in the club helps me continue creating new, delicious, easy-to-make, low FODMAP recipes just for you.
As always, all recipes will emphasize simple ingredients, easy preparation, and delicious low FODMAP results. Recipes will be for everything from main courses, salads, soups, side dishes, appetizers, desserts, sauces, breakfast and lunch, and even mocktails and cocktails. Everything you need to prepare fantastic low FODMAP meals everyone will love.
Join the club. Become a Patron. Let’s keep making delicious Low FODMAP meals together.
More Deliciously Low FODMAP™ breakfast recipes
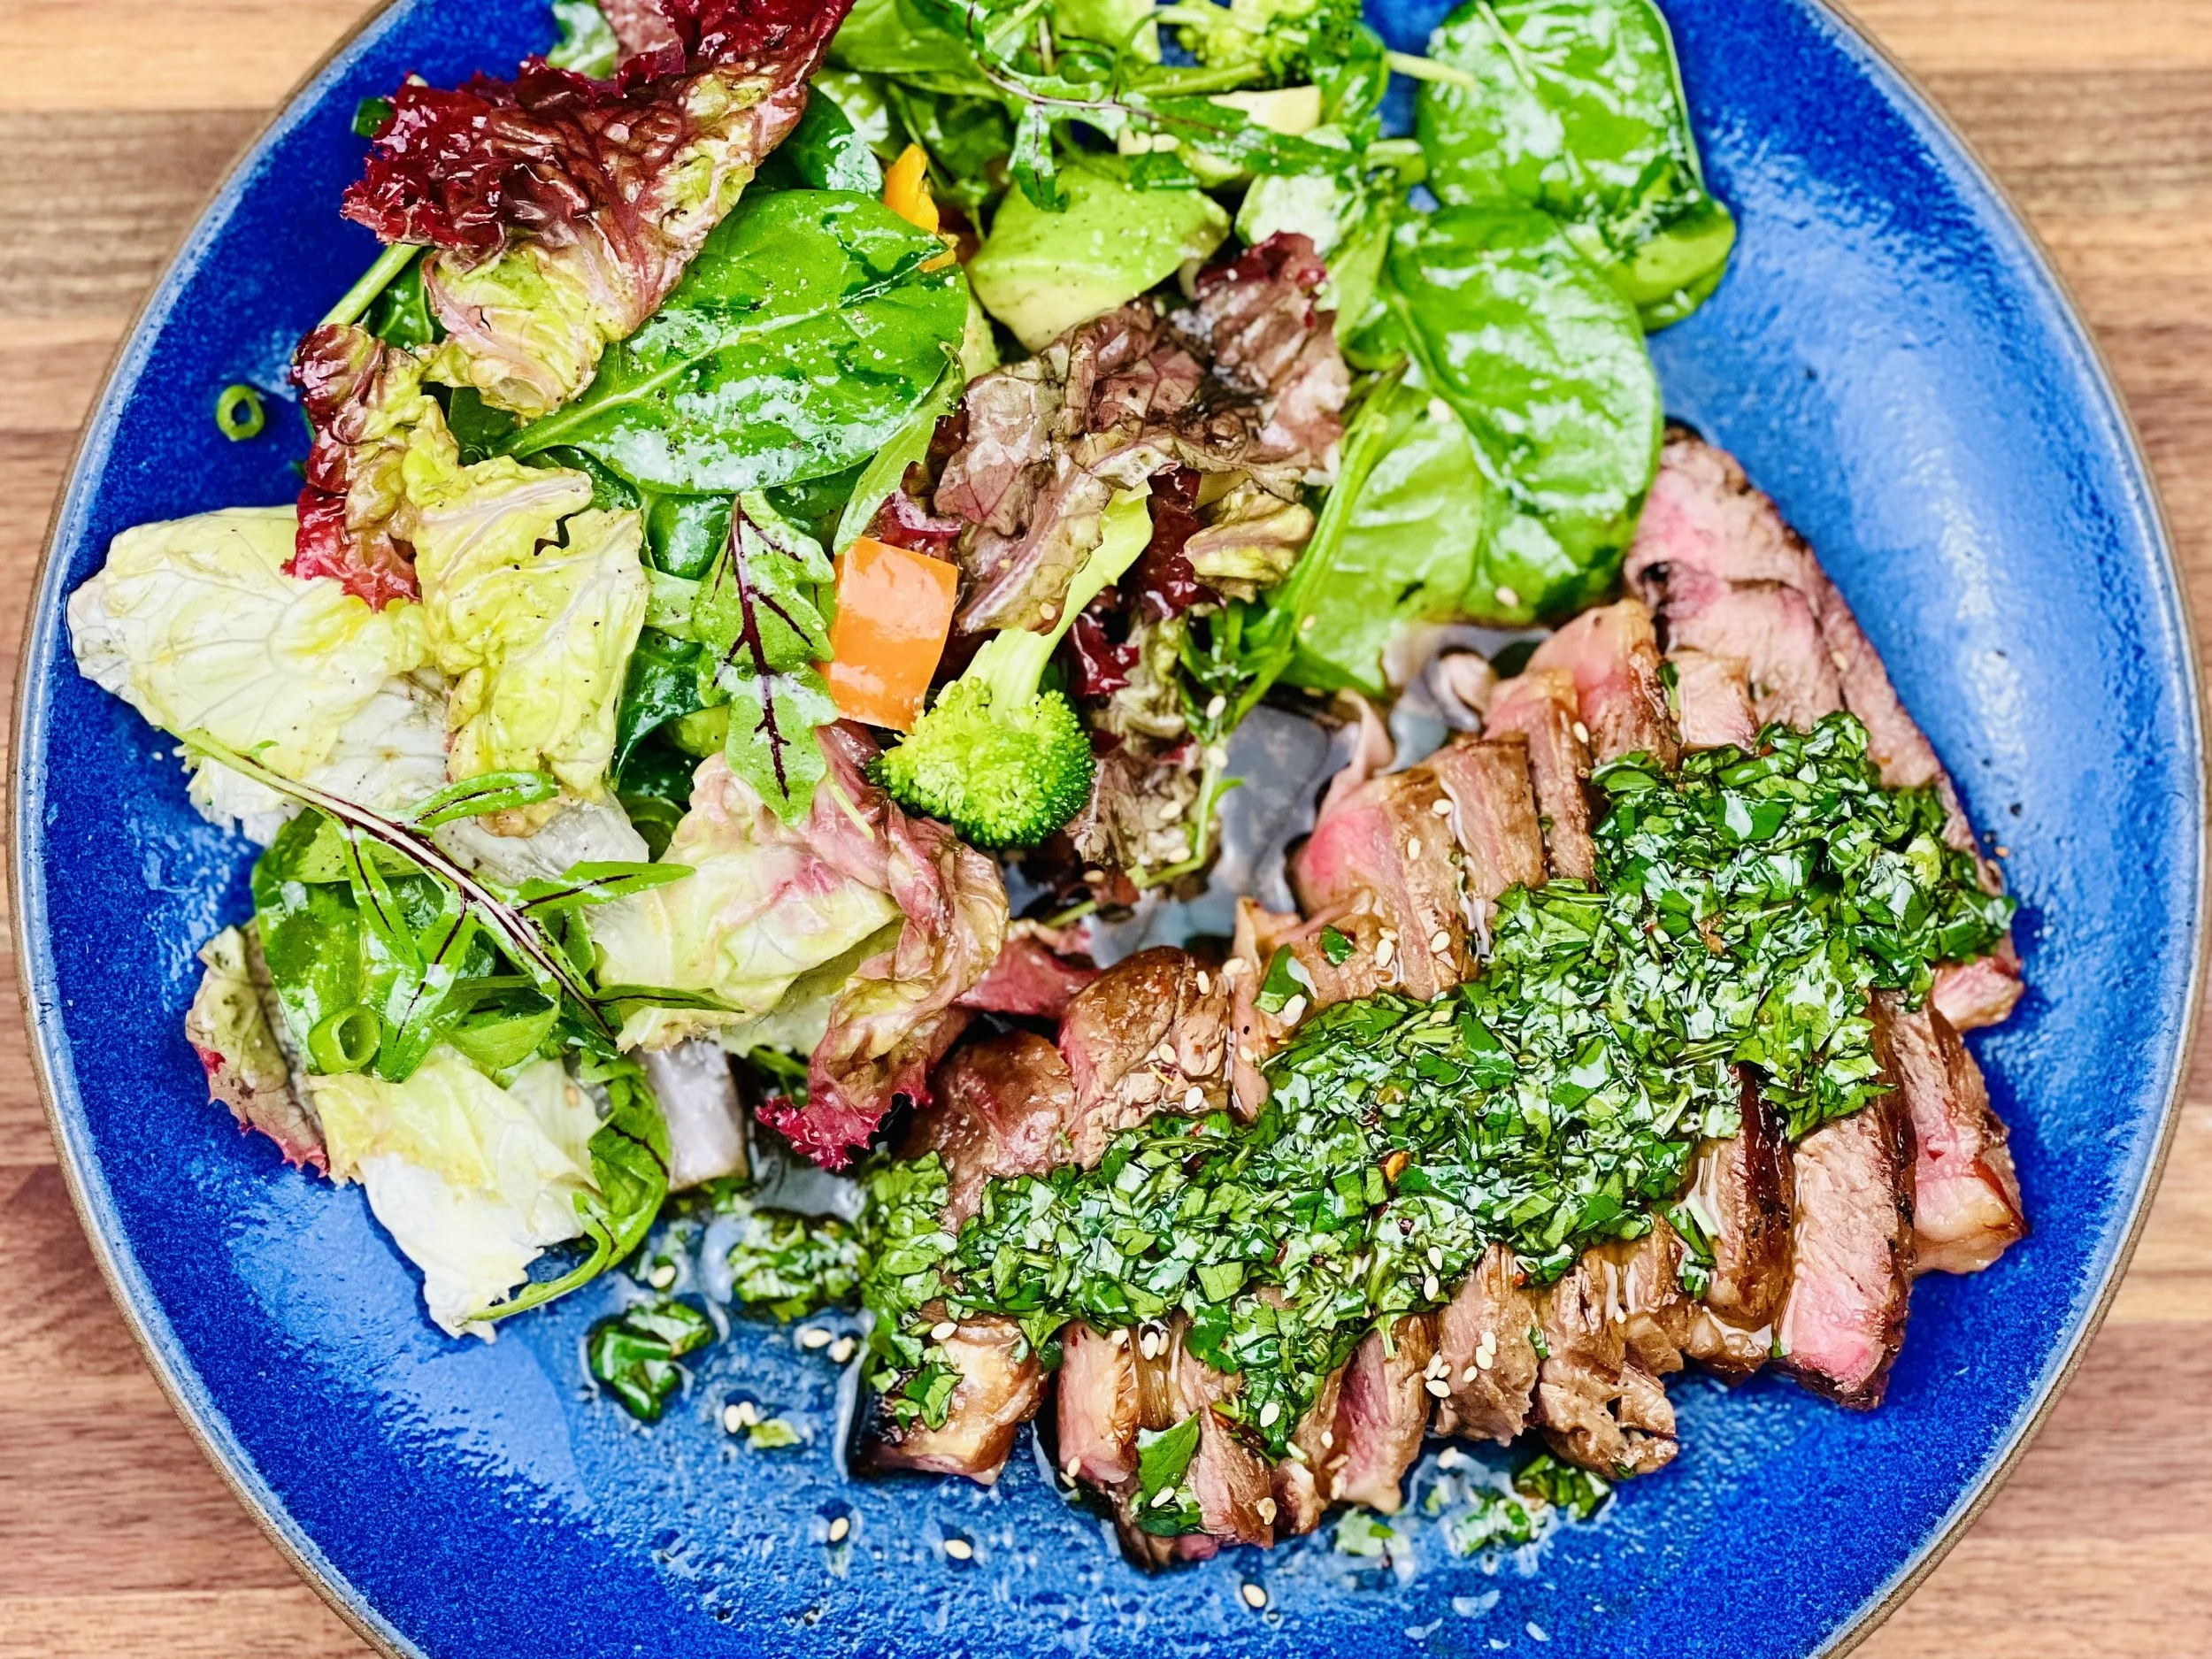
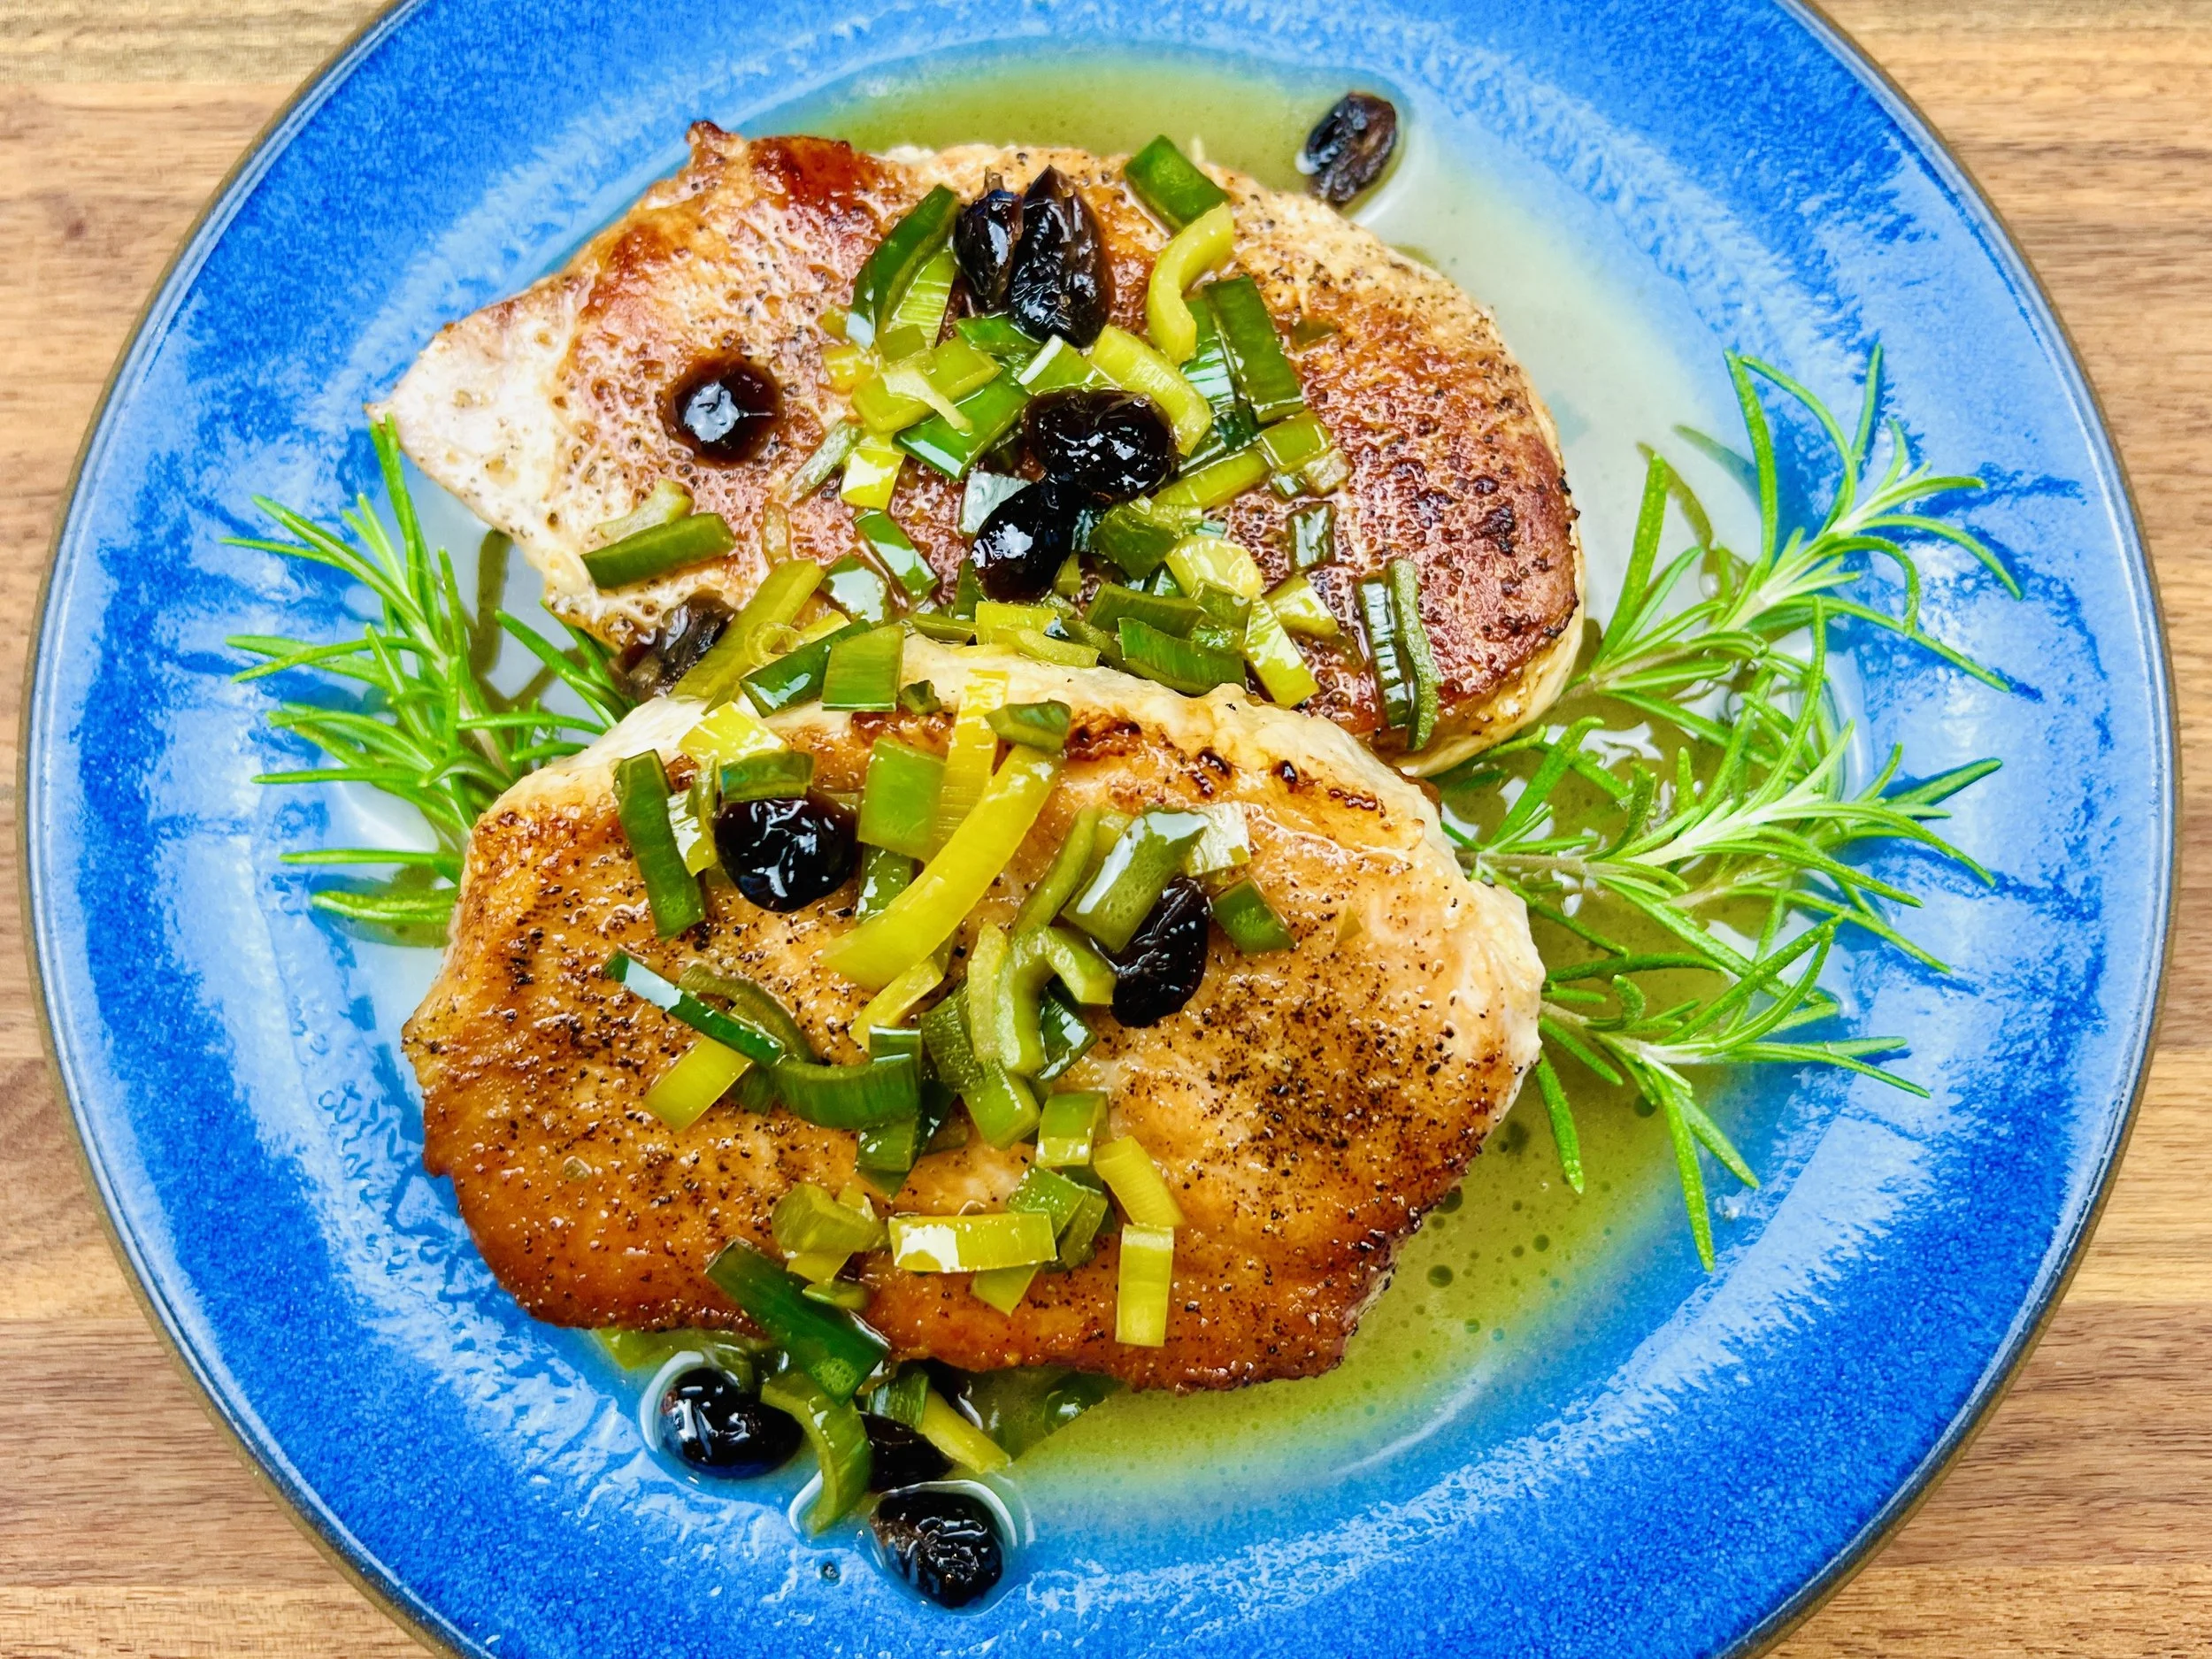
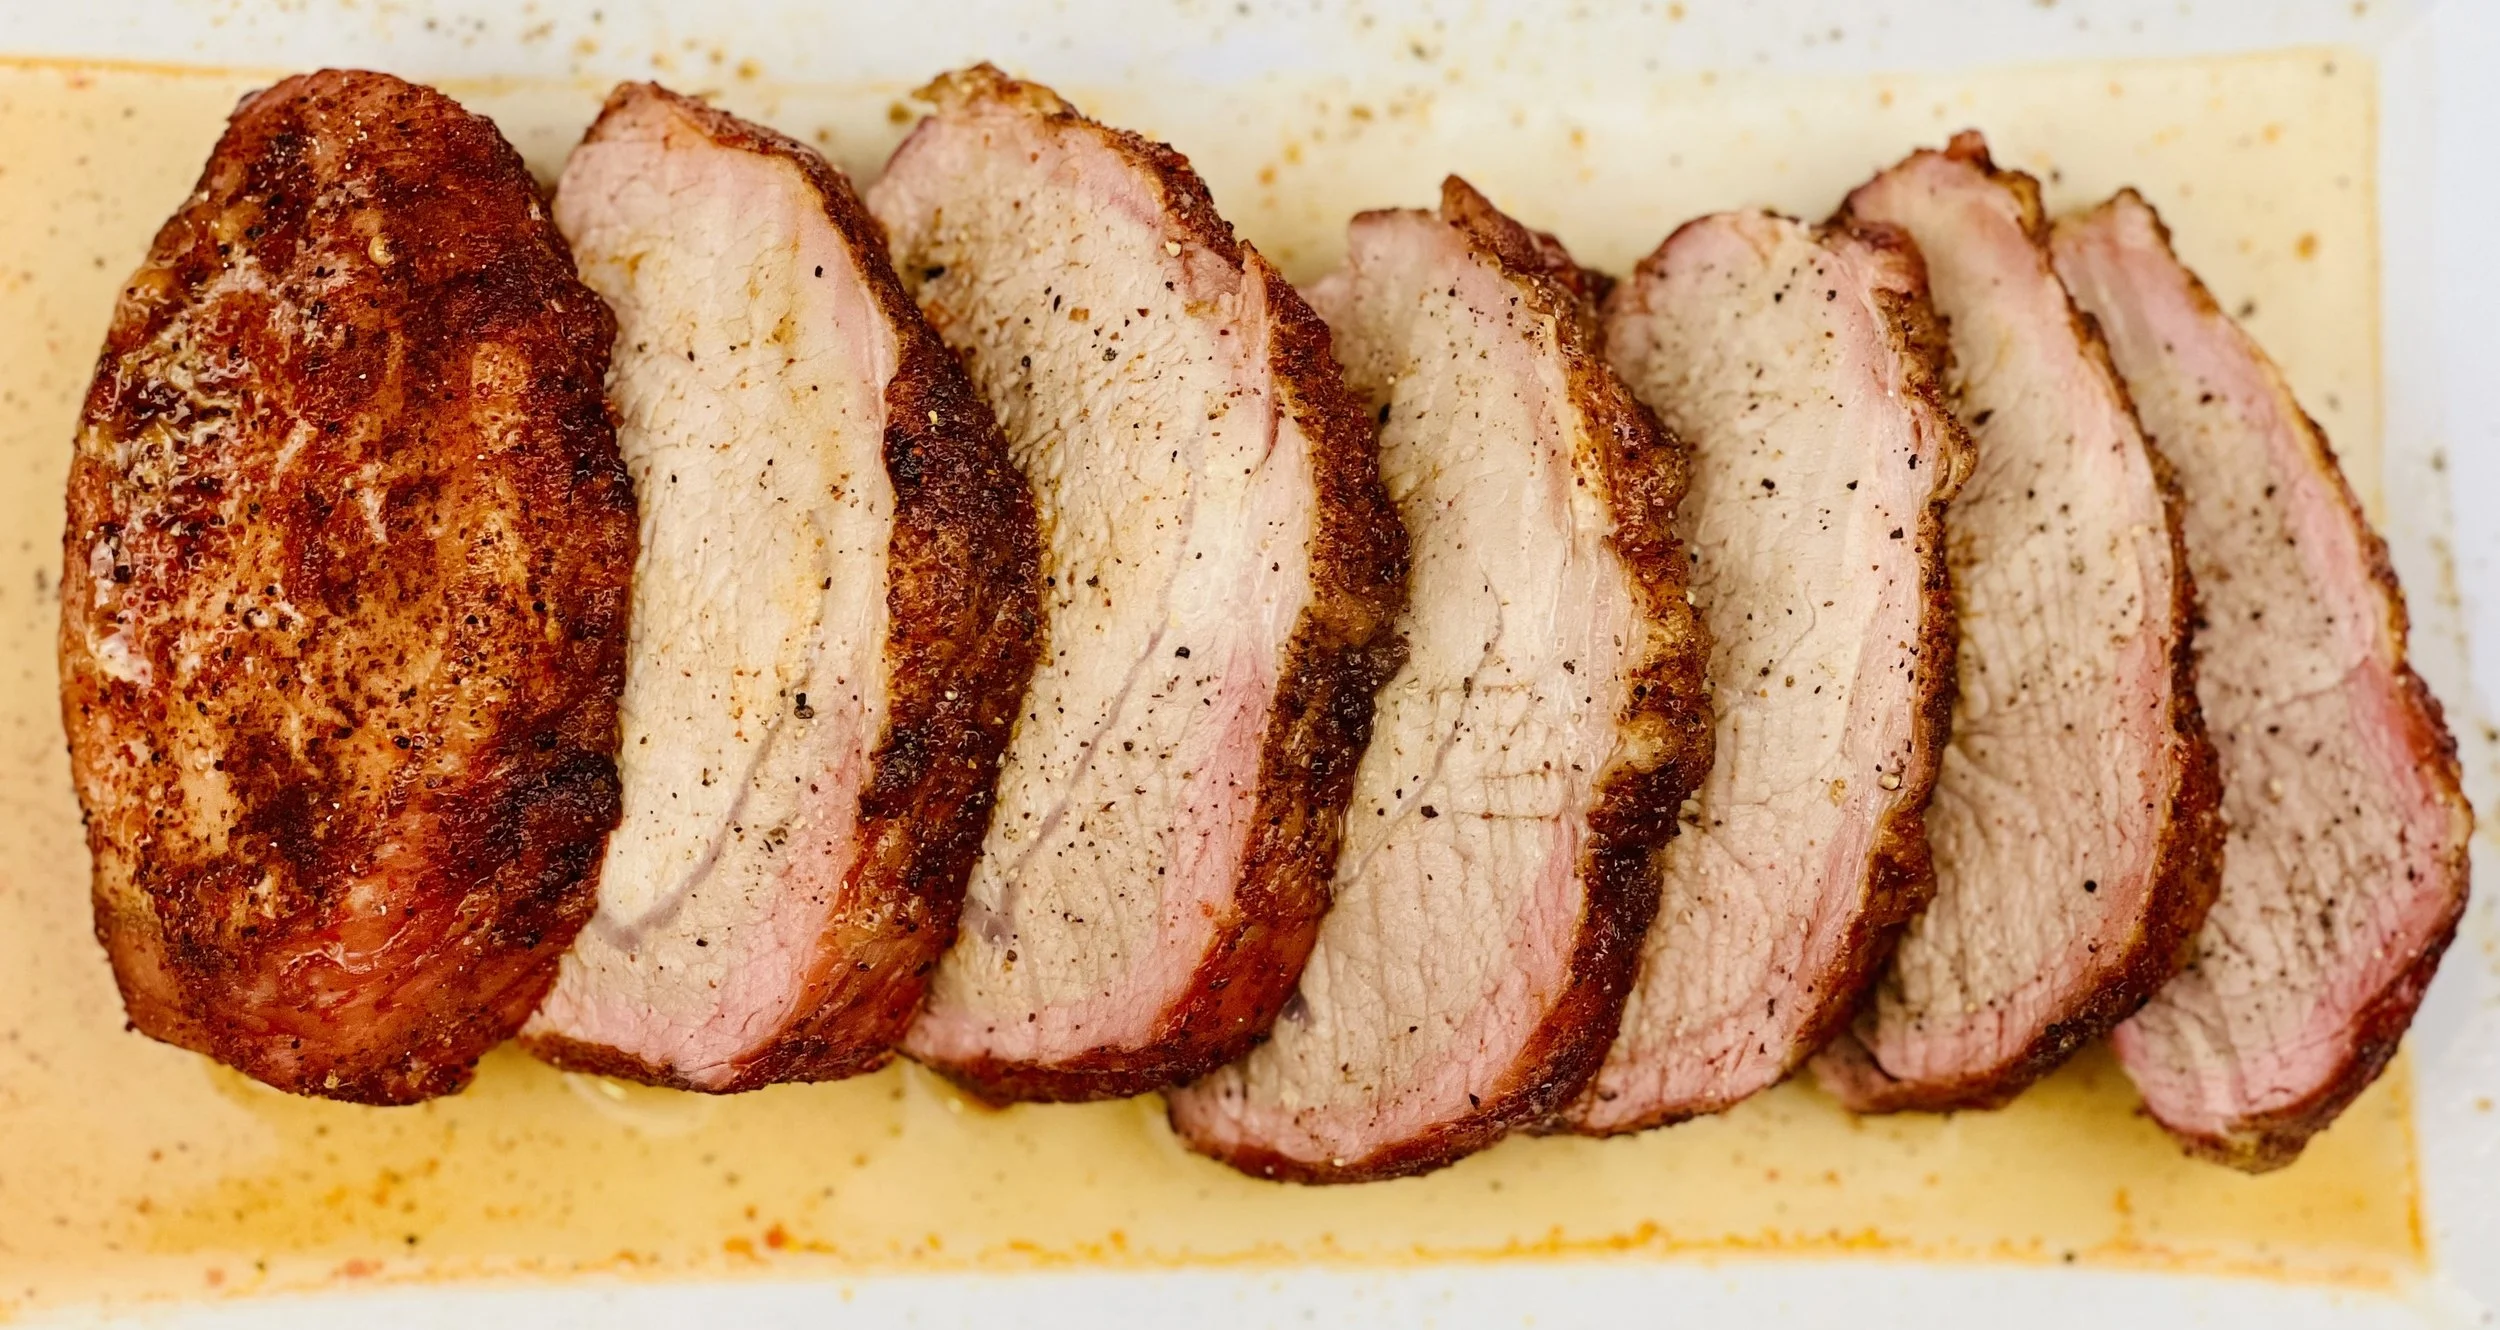
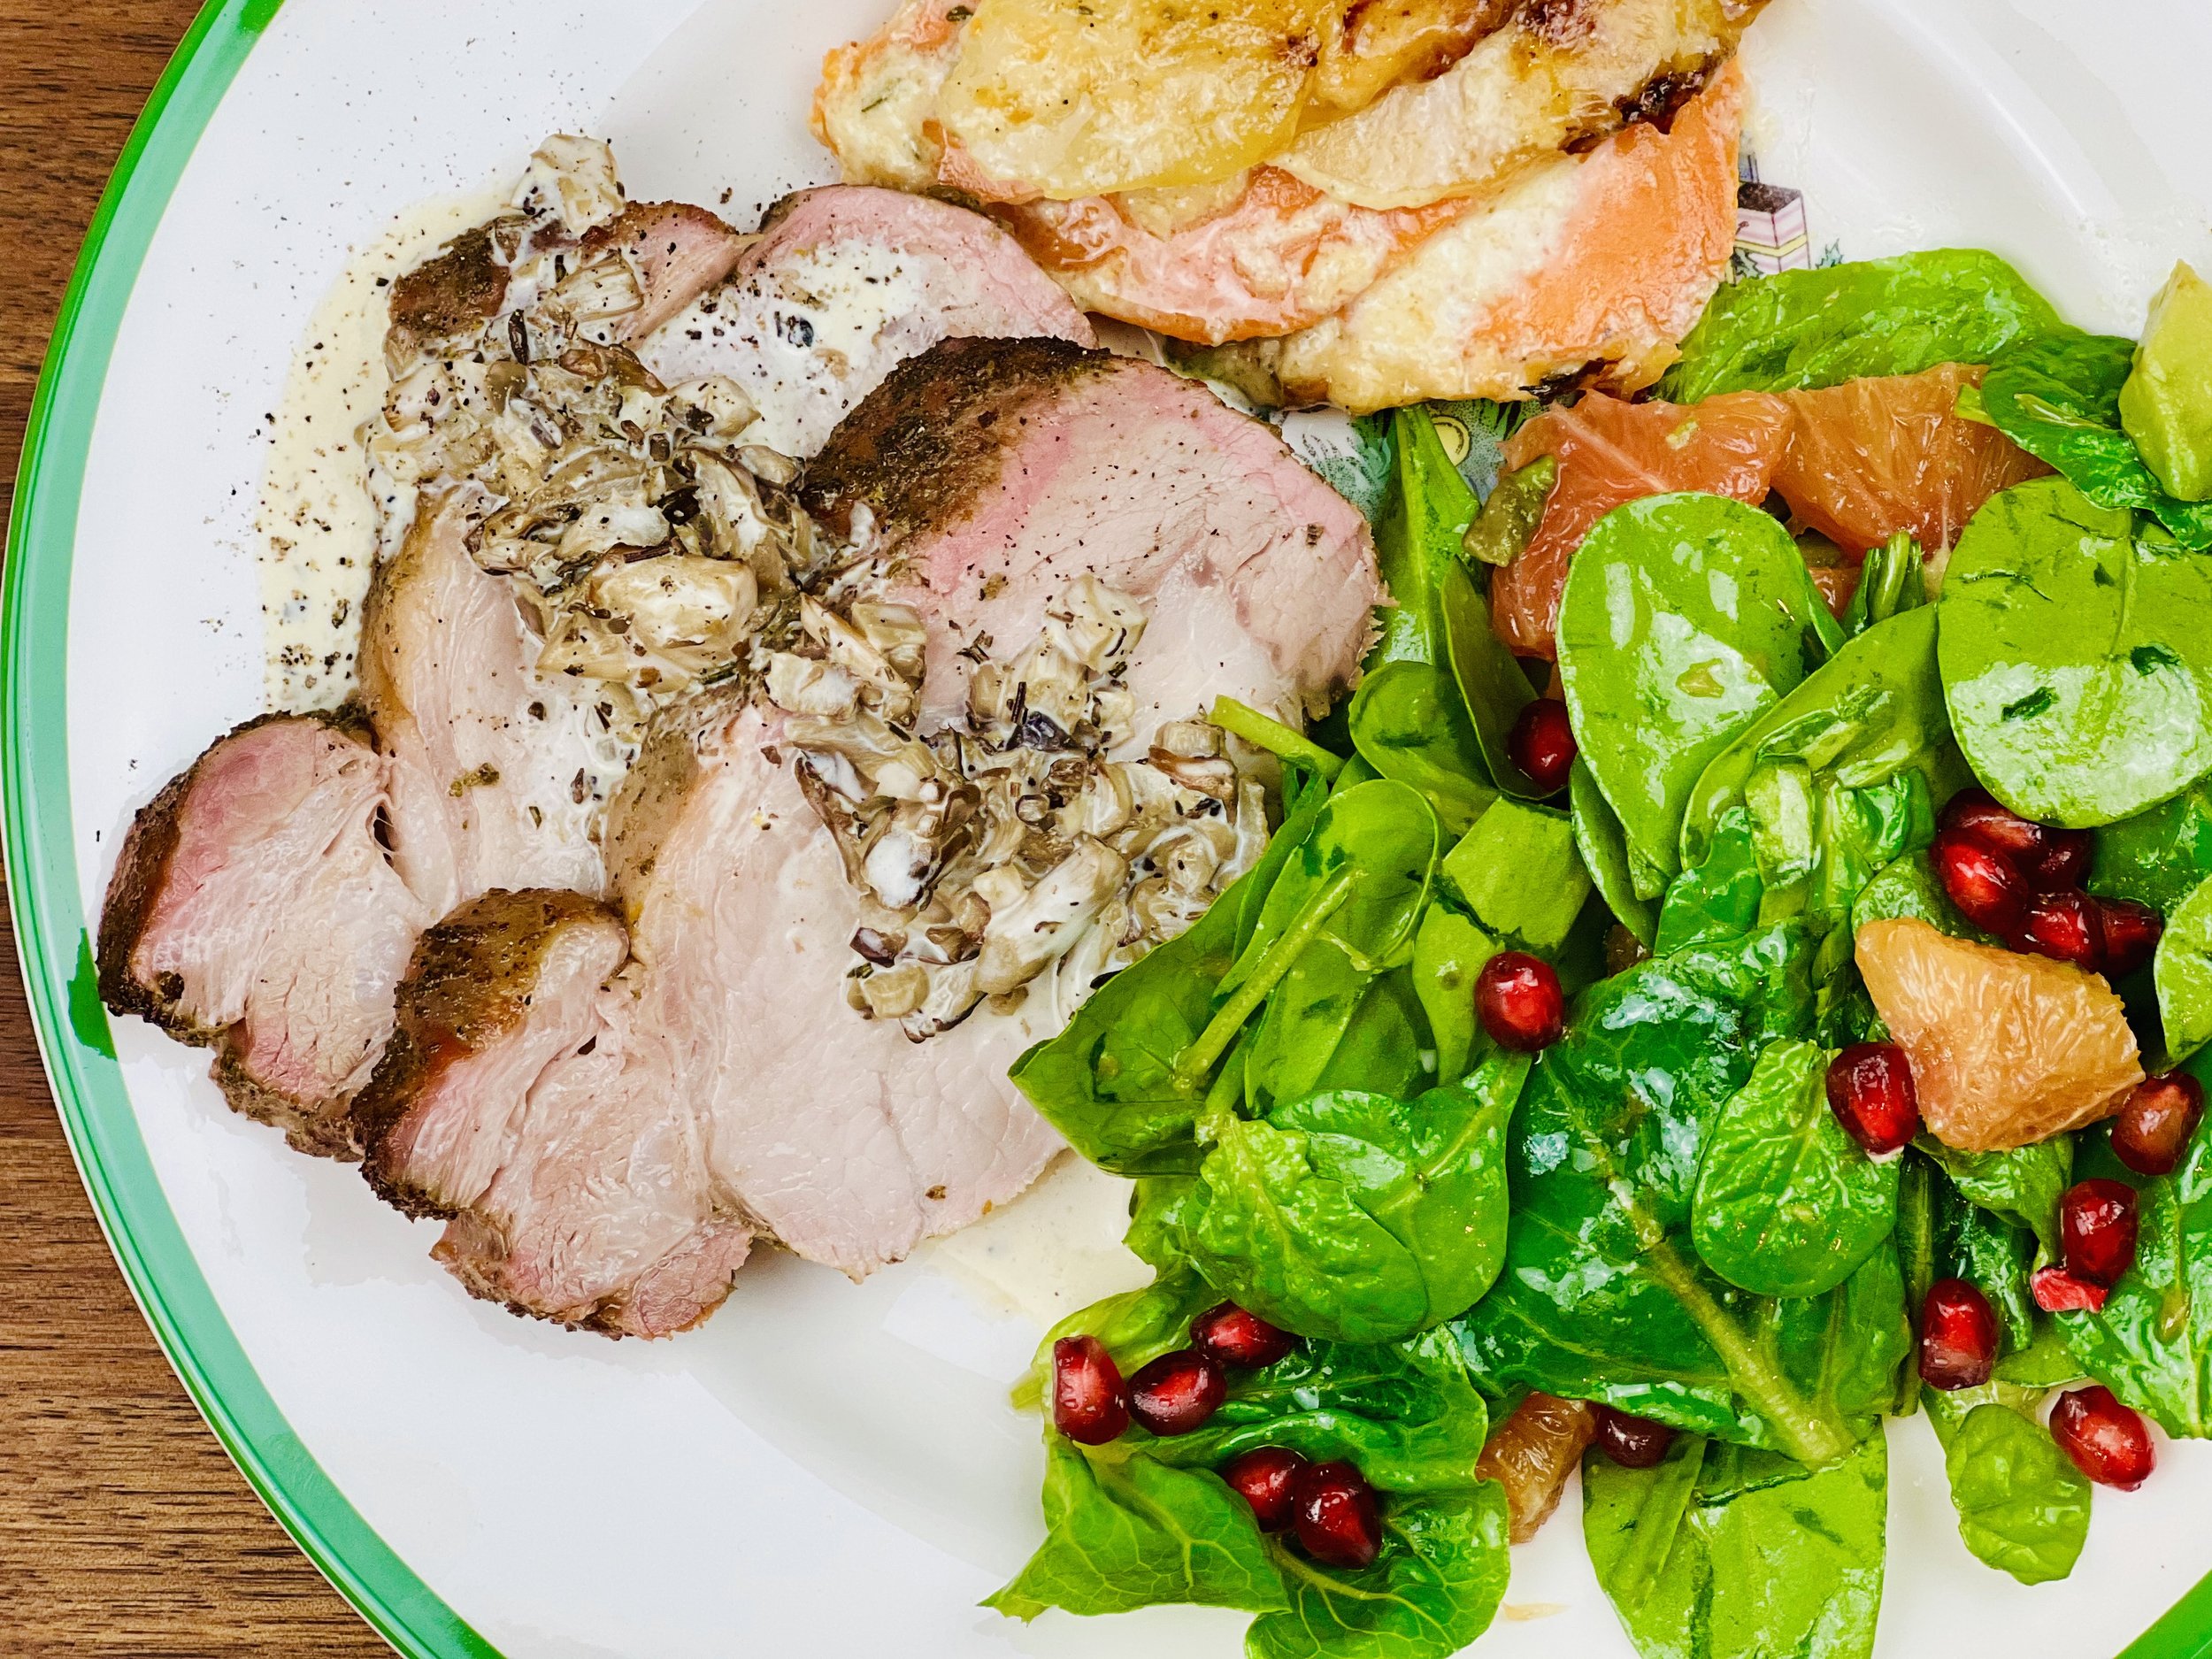
New Year's Eve Dinner Herbed Pork Loin (Low FODMAP)
15 Minutes prep • 4-8 Hours marinate • 2 Hours cook • Low FODMAP • Serves 6 - 8
15 Minutes prep • 4-8 Hours marinate • 2 Hours cook • Low FODMAP • Serves 6 - 8 • Ok to make ahead: Steps 1-3
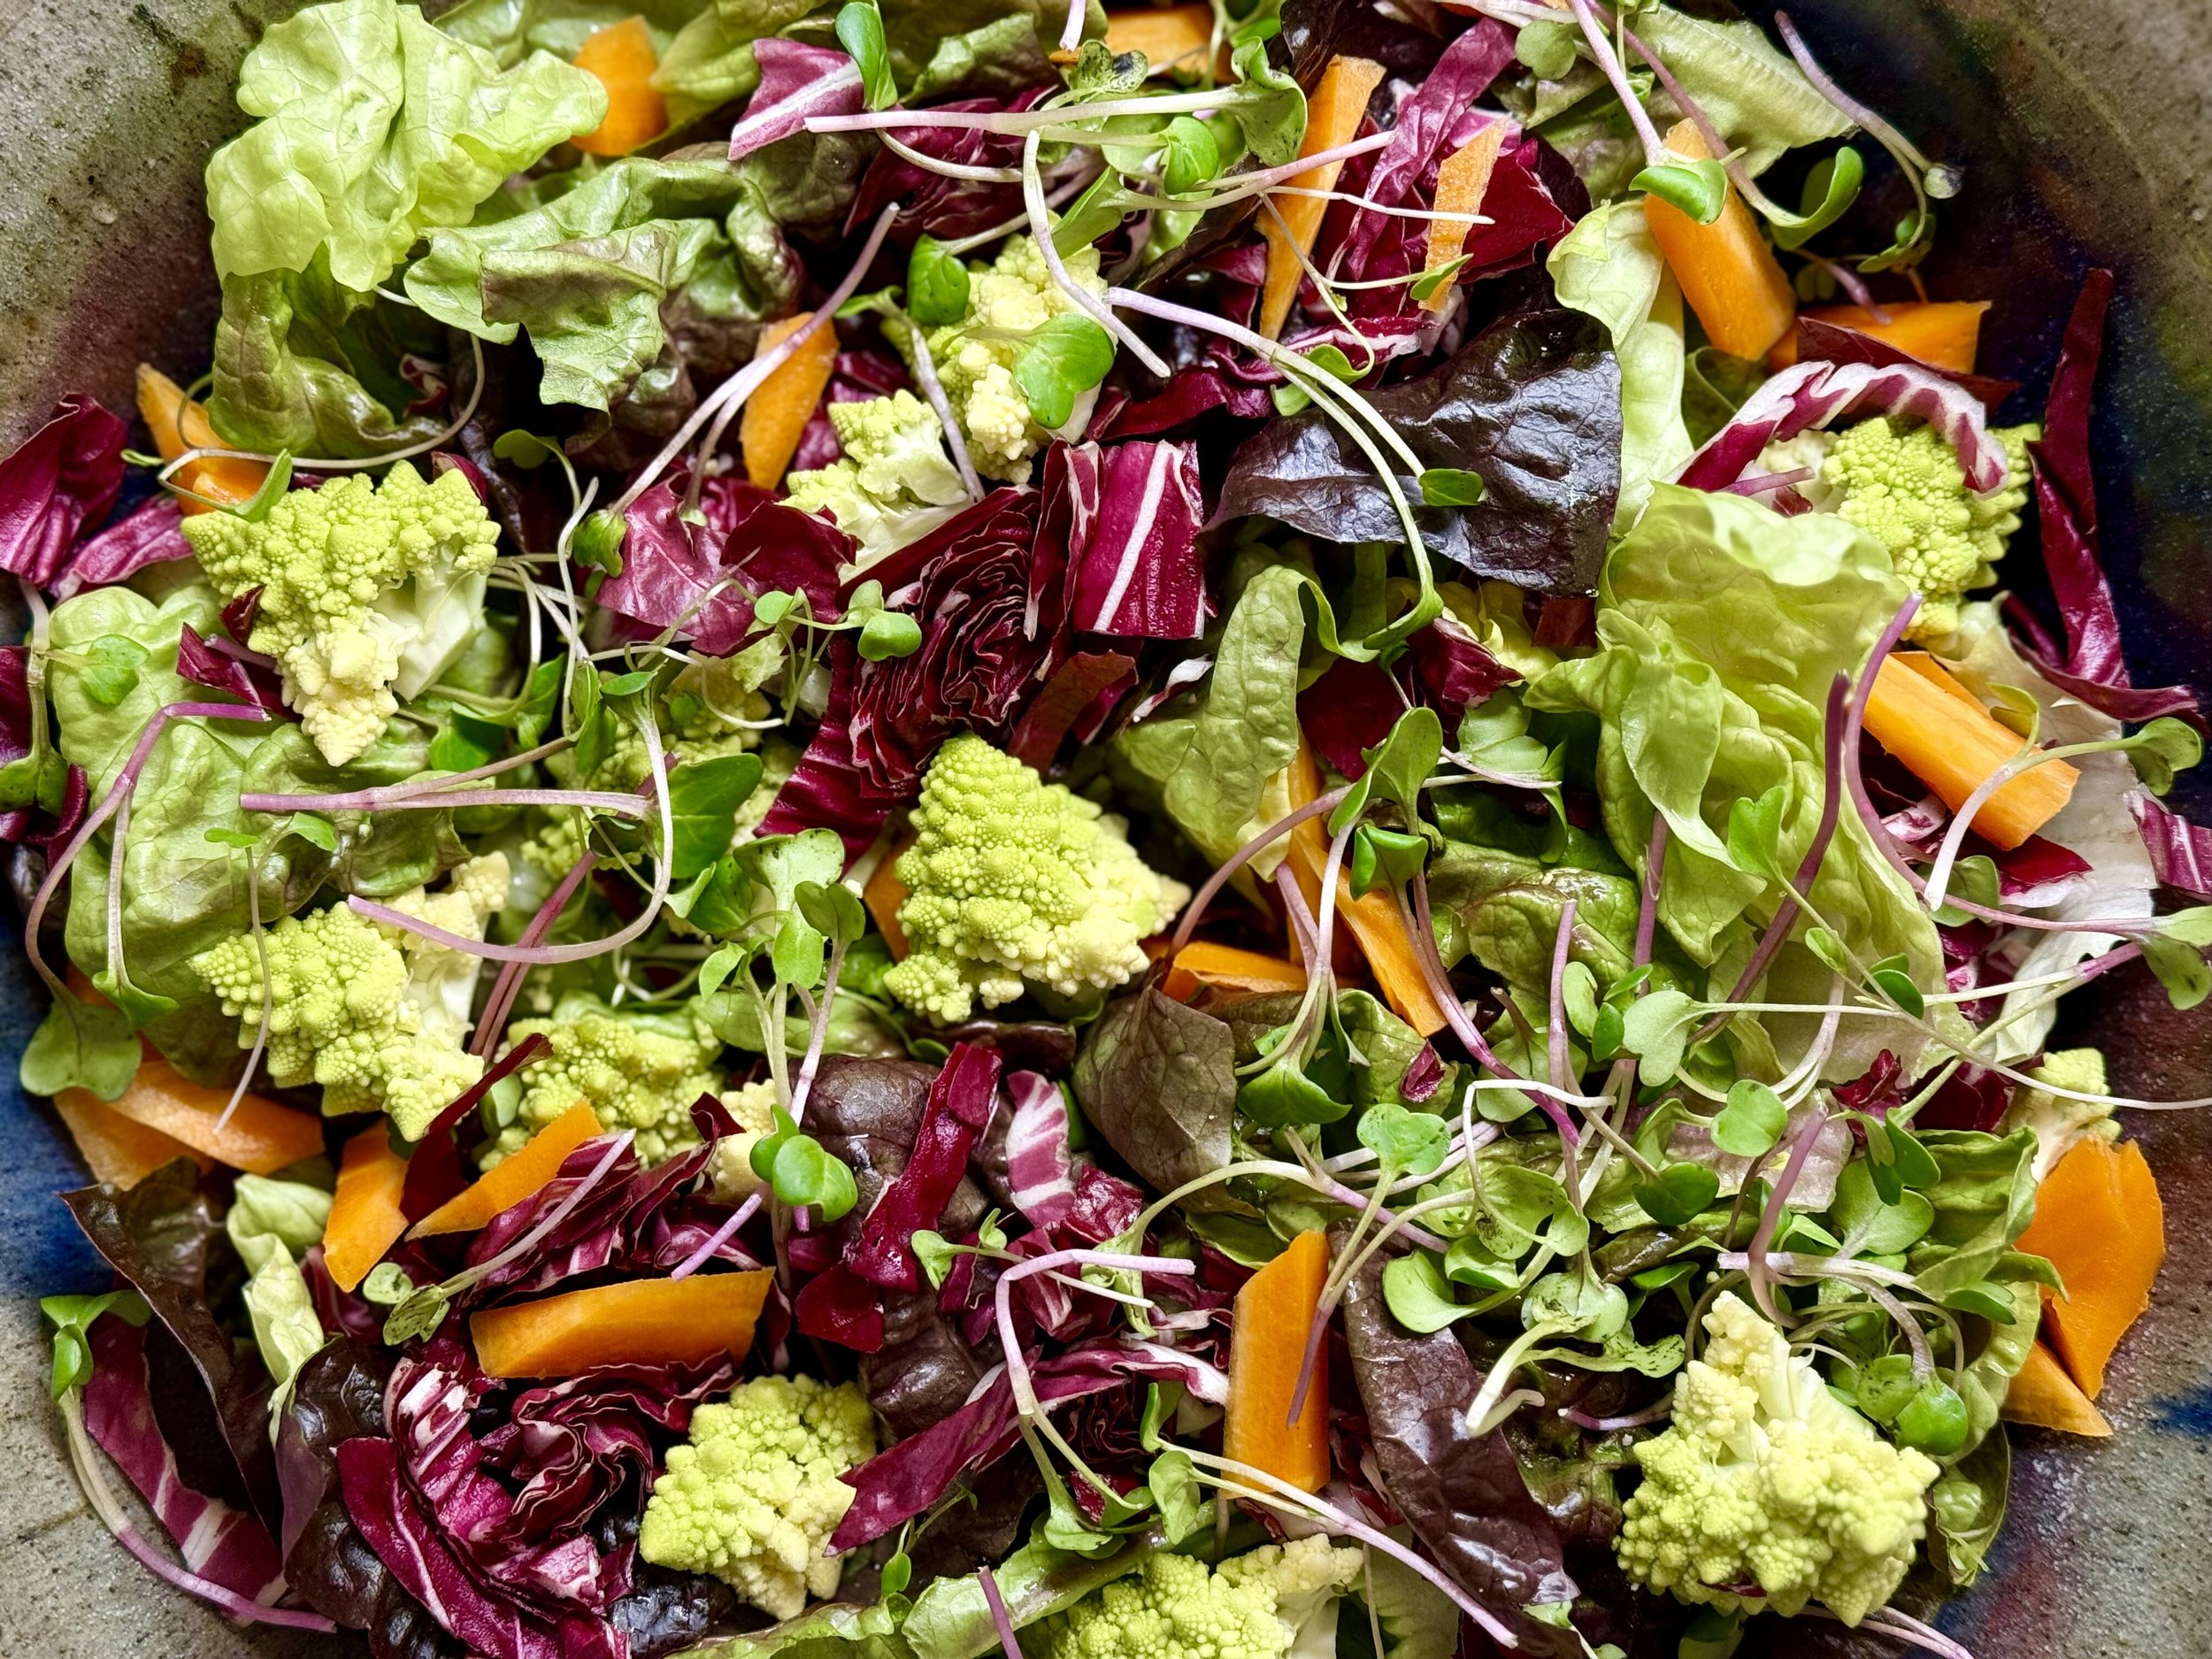
So easy to make and so delicious, this pork tenderloin is perfect for the family or for a party! How about New Year's Eve dinner? The herbs and seasonings in the marinade give the meat an amazing flavor, while the slow cook and long rest time keep it tender and juicy. It made a perfect Christmas eve dinner with my Rosemary Mushroom Cream Sauce, my holiday Rosemary Potatoes au Gratin, and my Holiday Salad.
Ingredients
3 - 4 pounds pork loin
2 tablespoons fresh rosemary, chopped
1 tablespoon fresh thyme, chopped
1 tablespoon gluten-free soy sauce
2 teaspoons Kosher salt
1 1/2 teaspoons black pepper
Pinch red pepper flakes
1/4 cup garlic-infused olive oil
Directions
(1) Select the meat: Considering how close their names are, It’s easy to get confused between a pork loin and a pork tenderloin. Keep in mind, a pork loin, is wide and flat and can be bone-in or boneless. By contrast, a pork tenderloin will be narrow and long without any bones. This recipe is written for pork loin, but could be adapted for pork tenderloin (by reducing the cook time).
(2) Make the marinade: Pork doesn’t have a lot of flavor on its own so it benefits from a marinade before cooking. This marinade is the game changer here. The flavors blend well together and bring out an even more delicious flavor with the pork. Combine the thyme, rosemary, soy sauce, salt, pepper, and red pepper flakes in a mini food processor or blender. Drizzle the olive oil in, while blending, until it is completely combined. You may also combine all ingredients in a jar and shake well to combine.
(3) Marinate the meat: Pour the marinade over the meat in the rimmed baking dish and turn the pork loin several times to coat all sides. Marinate 4 hours or overnight if possible. Turn the meat periodically while marinating.
Make-ahead note: At this point, you may leave the meat in the refrigerator overnight. Just turn the meat a few times to ensure the marinade is reaching all the meat equally.
(4) Cook the meat: Preheat the smoker or oven to 275 degrees F. If using a smoker, but the marinated meat directly on the grill grates, fat side up. If cooking in the oven, use a roasting pan. Cook until the internal temperature of the thickest part of the meat reaches 145 and no more. It should take about 2 hours. Remove from the oven and place in a cooler to rest and keep warm until you’re ready to serve. Rest the meat for at least 15 minutes or up to an hour. Keep warm while resting for longer periods by putting it in a dish, covering with foil, and putting it inside a small cooler to trap the heat.)
(5) Plate and serve: Serve warm with my Rosemary Mushroom Cream Sauce, my Rosemary Potatoes au Gratin, and one of my fresh salads.
Eat and enjoy every bite because you can!
Recipe note: I use Diamond Crystal Kosher salt in all my recipes because it has a wonderful flat and crisp flake that tastes delicious. It is also the least salty salt available so you can use it more liberally as a seasoning than you can table salt or sea salt. If you use another type of salt, you may need to reduce the amount so it is not over-salted.
Have a question you’d like to have answered? Email us at hello@ibsgamechanger.com
Link note: This post contains links for you to easily purchase items listed on the page. In some cases, we have provided a special discount code for IBS Game Changers so be sure to use it when you purchase an item to get the discount that has been arranged just for you! As an Amazon Associate, I earn a commission from qualifying Amazon purchases.
More Deliciously Low FODMAP™ main course recipes
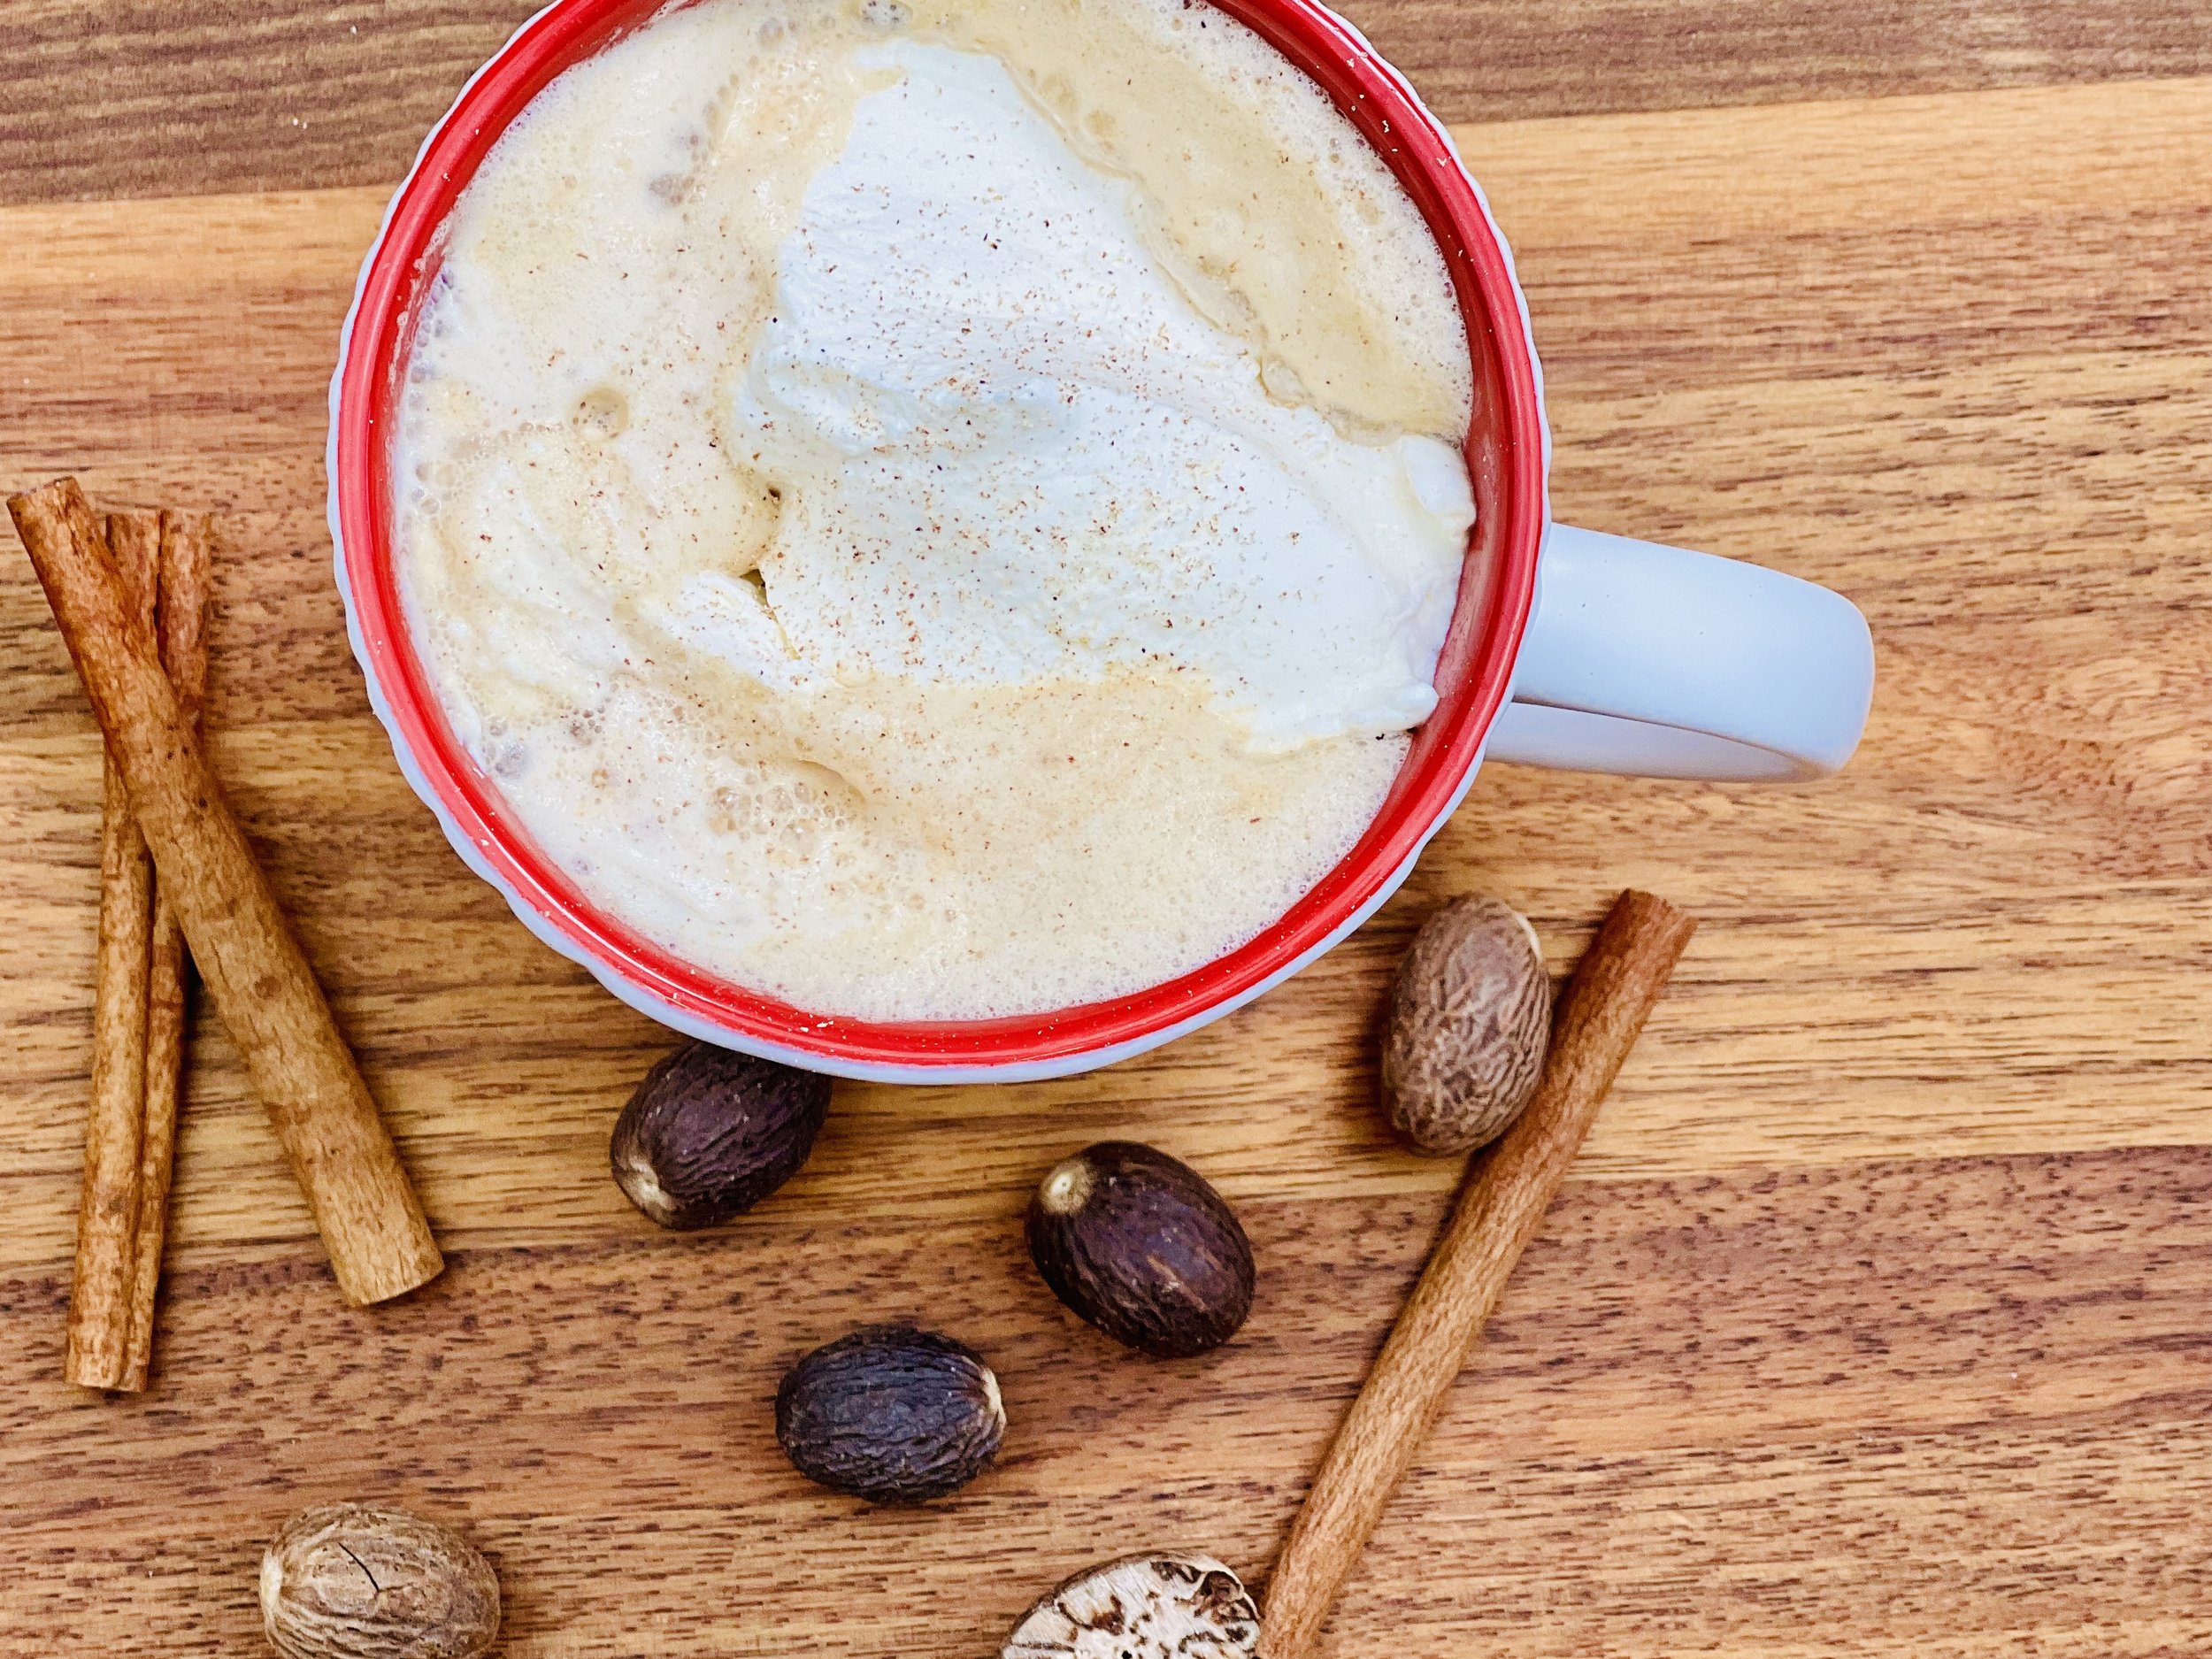
Holiday Egg Nog (Low FODMAP)
20 Minutes prep • 4 hours cook/chill • Low FODMAP • Serves 8
20 Minutes prep • 4 hours cook/chill • Low FODMAP • Serves 8 • Ok to make ahead: Steps 1-6
Creamy egg nog is a wonderful holiday tradition and this eggnog is no exception! It’s not hard to make and so much more delicious than the store-bought variety. You can sugar the rims of your glasses for a fancy touch, or just serve it in mugs with a dusting of grated nutmeg. Add alcohol if you like, or just enjoy it as is. Eggnog is truly Christmas in a cup.
Ingredients
6 large egg yolks
1/2 cup granulated sugar
1 cup heavy whipping cream
2 cups lactose-free milk (I used whole milk)
1/2 teaspoon ground nutmeg
Pinch of Kosher salt
1/4 teaspoon vanilla extract
Fresh ground nutmeg, for topping (fresh grated is best if you have whole nutmeg and a nutmeg grater)
Brandy, bourbon, or whisky, optional, see note
Directions
(1) Beat the egg yolks: In the bowl of your stand mixer, whisk the egg yolks and sugar together until light and creamy.
(2) Heat the milk: In a saucepan over medium-high heat, combine the cream, milk, nutmeg, and salt. Stir often until the mixture just starts to simmer.
(3) Temper the eggs: Add a big spoonful of the hot milk to the egg mixture, whisking vigorously as you add it. Repeat, adding a big spoonful at a time, to temper the eggs. Once most of the hot milk has been added to the eggs, pour the mixture back into the saucepan on the stove.
(4) Heat the mixture: Whisk constantly while heating, until the mixture reaches about 160 degrees F on an instant-read thermometer. It will thicken more as it cools.
(5) Add flavoring: Remove from heat and stir in the vanilla, and alcohol*, if using.
(6) Chill: Pour the eggnog into a mason jar, pitcher, or other container and cover it tightly with plastic wrap. Refrigerate overnight or until well-chilled. It will thicken as it cools.
(7) Serve: Serve with a sprinkle of nutmeg or cinnamon.
(8) Storage: Store homemade eggnog in the refrigerator for up to one week.
Drink and enjoy every bit because you can!
Alcohol: If you want to add alcohol to your eggnog, start with 1/4 cup brandy, bourbon, or whisky added at the same time as the vanilla, or after cooling the eggnog. Add more to taste, if desired.
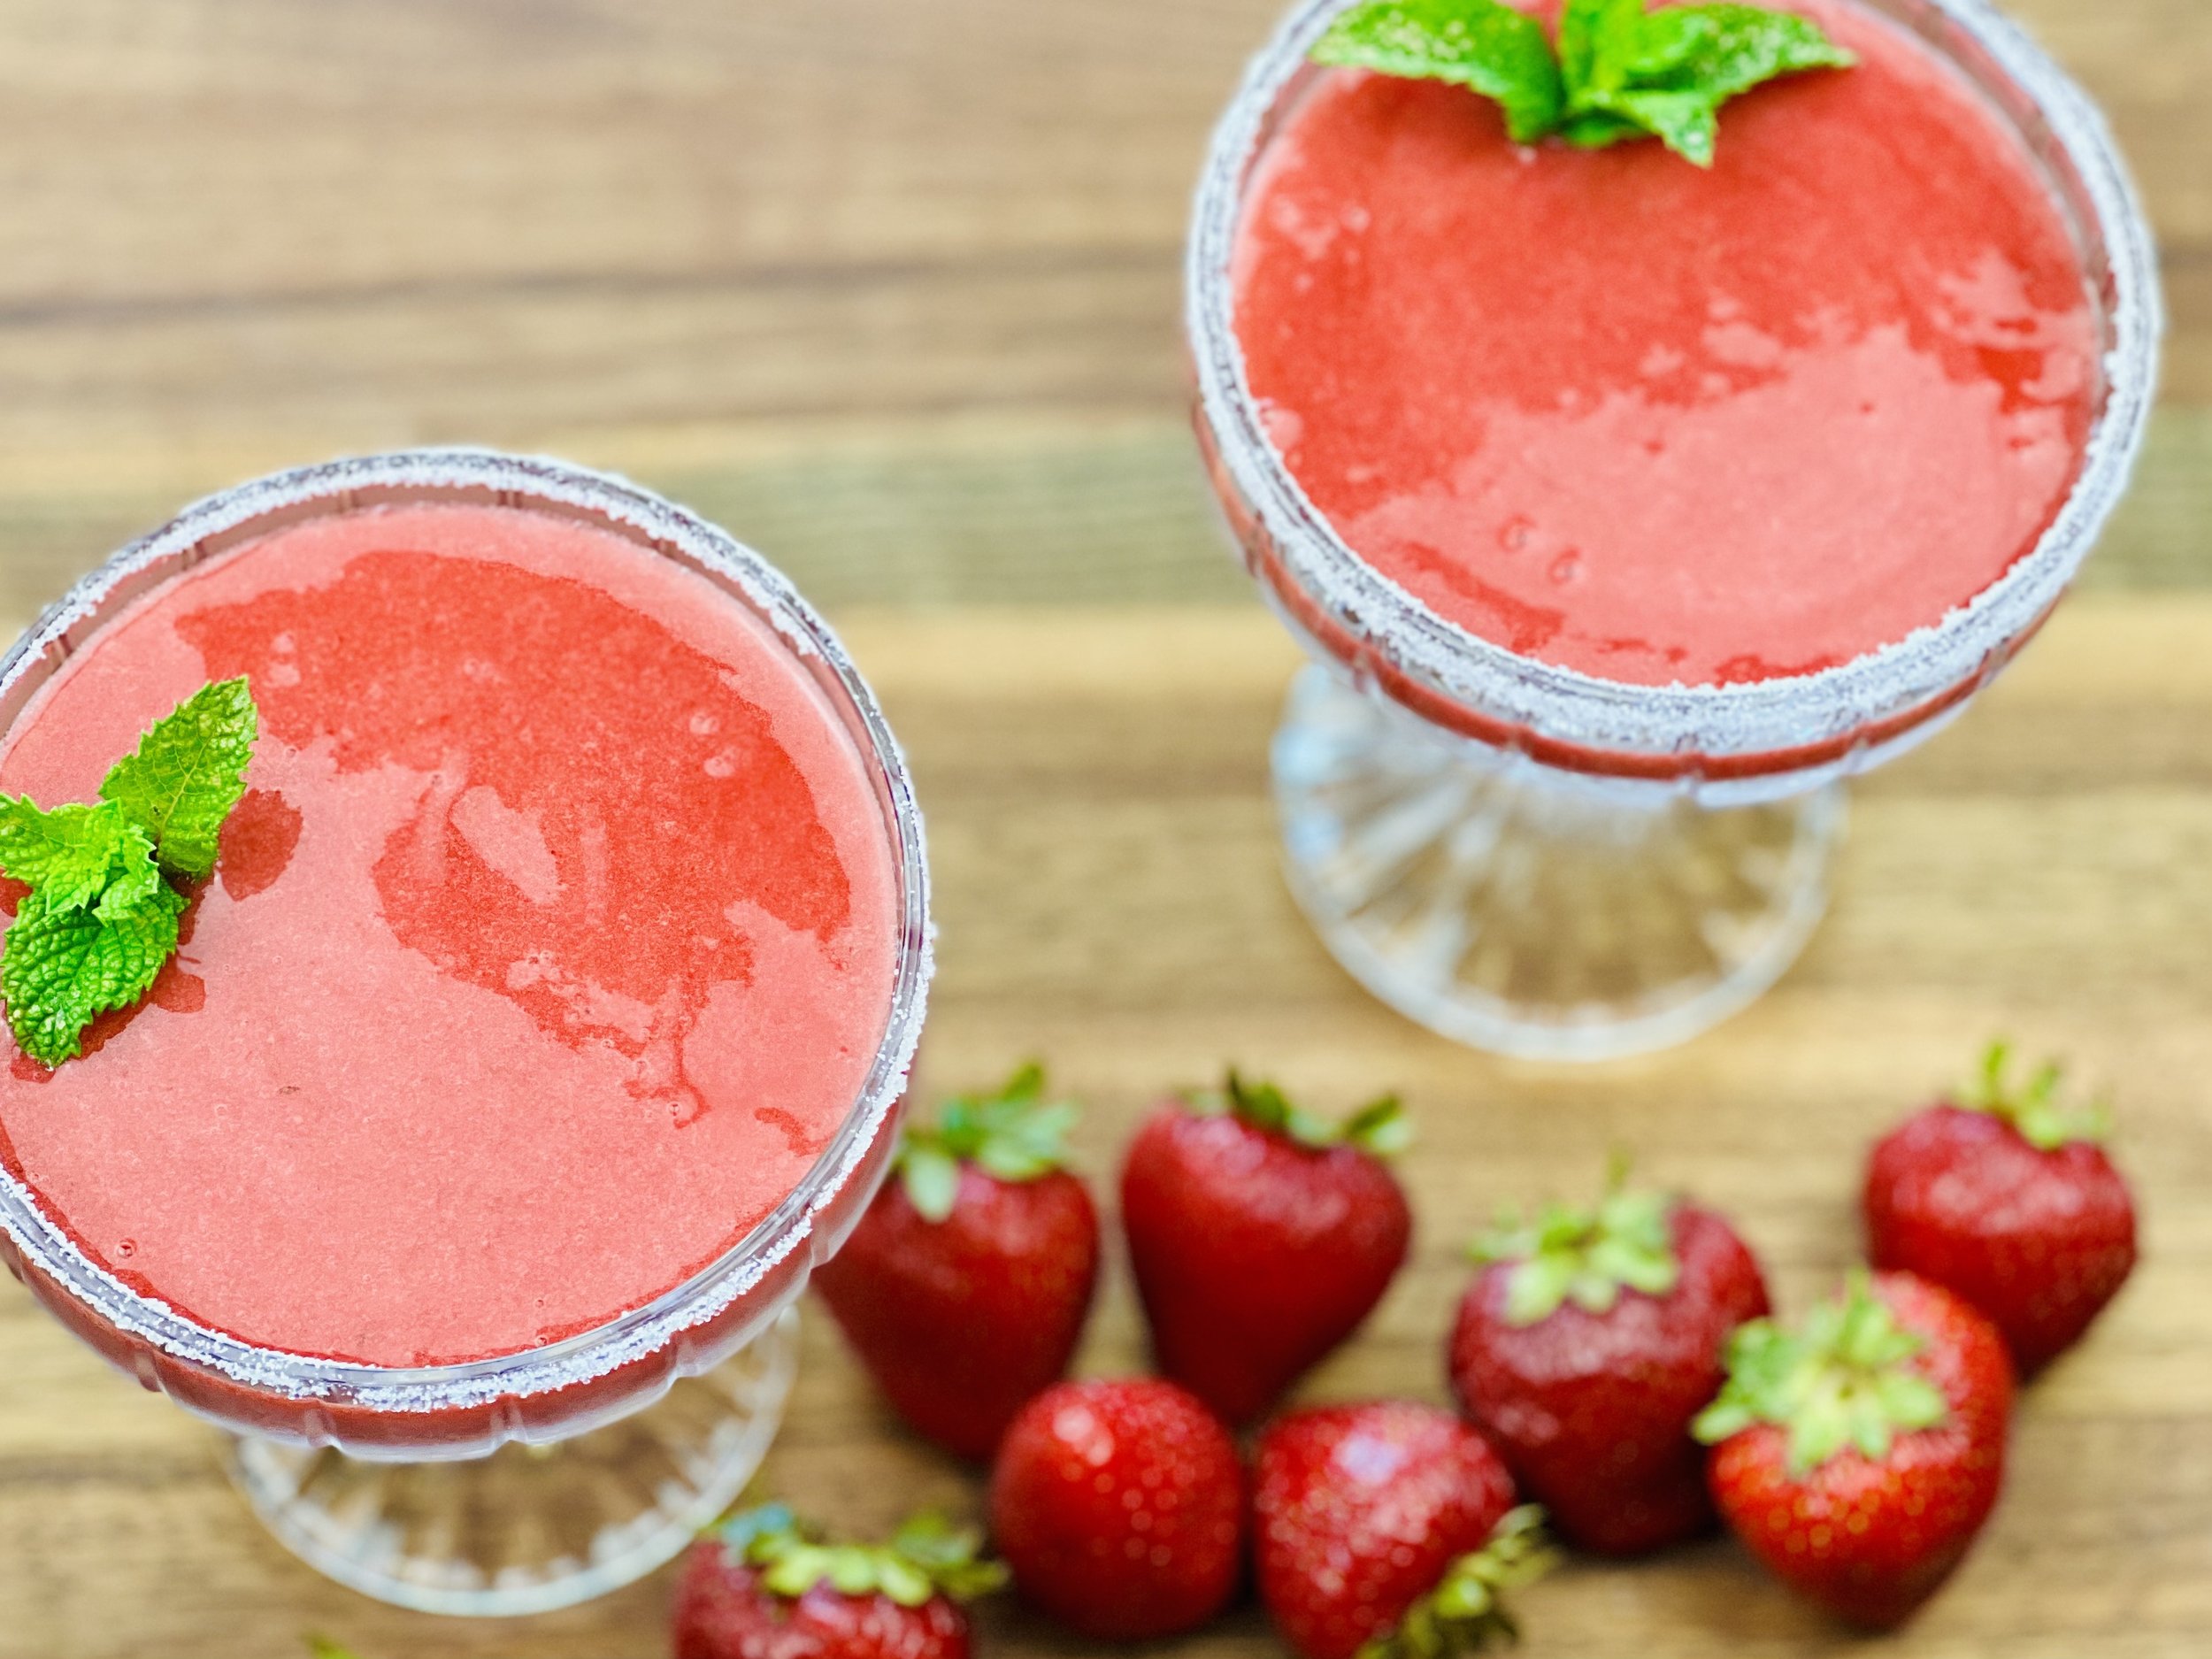
Sugared-rim glass: Dip the rim in corn syrup, then in granulated sugar. Voila! A sugared rim.
Have a question you’d like to have answered? Email us at hello@ibsgamechanger.com
Link note: This post contains links for you to easily purchase items listed on the page. In some cases, we have provided a special discount code for IBS Game Changers so be sure to use it when you purchase an item to get the discount that has been arranged just for you! As an Amazon Associate, I earn a commission from qualifying Amazon purchases.
More Deliciously Low FODMAP™ drink recipes


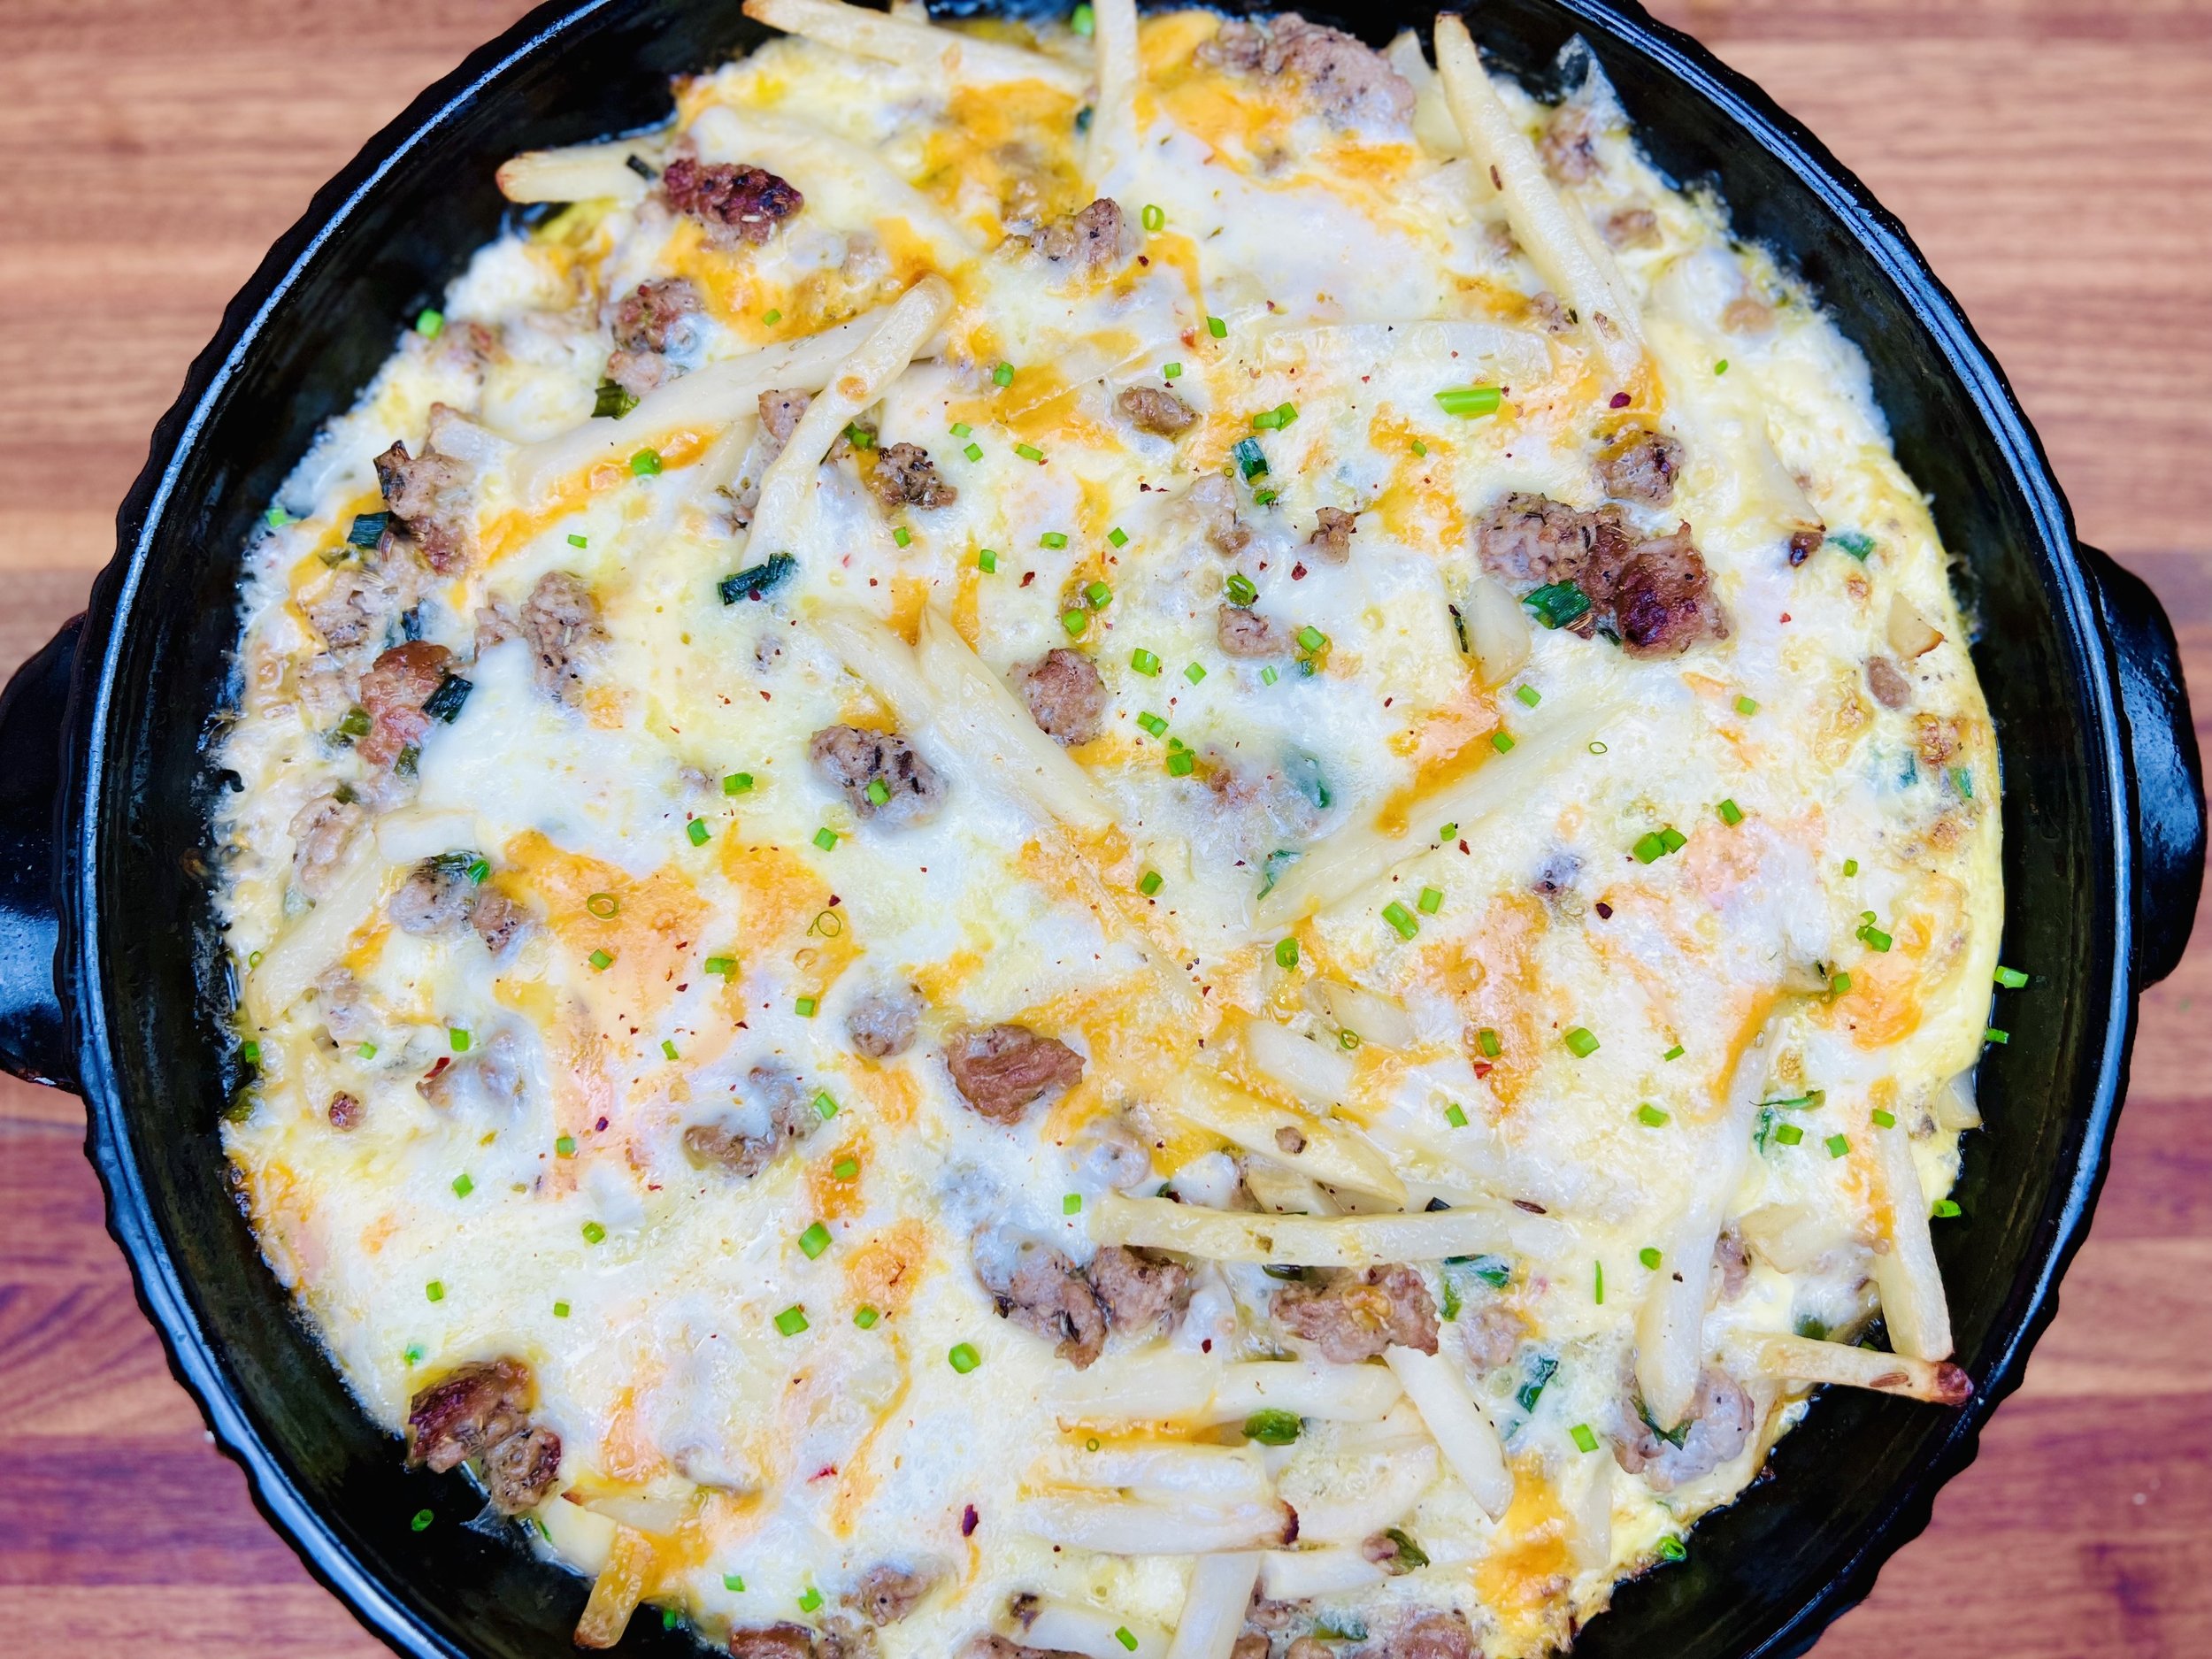
Sausage and Potato Breakfast Bake (Low FODMAP)
15 Minutes prep • 55 Minutes cook • Low FODMAP • Gluten-free • Serves 6
15 Minutes prep • 55 Minutes cook • Low FODMAP • Gluten-free • Serves 6 • Ok to make ahead: Steps 1-3
This is a delicious breakfast dish with eggs, meat, and potatoes all baked in one pan. Perfect for Christmas morning or any morning, with something to satisfy all the hungry elves. You can whip this up and serve a small group or a crowd in no time. The combination of flavors is delicious and you can even serve this for an easy Sunday “brinner” (breakfast for dinner). No matter what, it will be a great meal for the whole family—including you!
Ingredients
1 tablespoon vegetable oil plus more to grease the pan
1 1 /2 pounds plain ground pork (organic grass-fed if possible), or use chicken if you prefer
2 1/2 teaspoons Italian seasoning (or 1/2 teaspoon each: thyme, rosemary, basil, marjoram, and oregano)
1 teaspoon fennel seeds, lightly crushed
Pinch red pepper flakes (optional)
1 jalapeño, minced (optional)
1 1/3 cups green onions, green part only
8 large eggs
1 cup lactose-free whole milk
1 teaspoon Kosher salt, plus more as needed
1/4 teaspoon freshly ground black pepper, plus more as needed
2 cups shredded melty low-lactose cheese (such as extra sharp cheddar or Gouda), divided
1 (16-ounce) bag frozen shoestring potatoes or hashbrowns (keep frozen)
2 tablespoons fresh chives, finely chopped
2 tablespoons fresh basil, finely chopped
1 cup lactose-free sour cream
Hot sauce for serving
Directions
(1) Cook the meat: In a large skillet over medium-high heat, heat the oil until shimmering. Add the ground pork (or chicken) and thoroughly brown the meat, crumbling into bite-sized pieces as it cooks. Remove to a plate with a slotted spoon and set aside, leaving about 1 tablespoon of the rendered fat in the pan (or add 1 tablespoon of olive oil if you used ground chicken).
(2) Cook the green onions: After the meat is cooked and removed, reduce the heat to medium and add the green onions and jalapeno (if using). Sauté for about 2 minutes, stirring occasionally, until the onions are beginning to brown around the edges. Remove the skillet from heat and set aside, allowing it to cool while you preheat the oven to 350 degrees F and grease a 9x13-inch pan with oil.
(3) Make the sauce: Mince the remaining 2 tablespoons of green onion greens and mix those, along with the chives, basil, and a pinch of salt, into the sour cream, and set aside.
Make-ahead note: At this point, you can set everything aside until you’re ready to assemble and bake. Keep it all in the refrigerator if it’s going to be more than an hour.
(4) Blend the filling and bake: In a large bowl, whisk the eggs, milk, salt, and pepper together. Add 1 cup of the shredded cheese, the frozen potatoes, the sautéed green onion mixture, and the browned meat, and stir to combine. Pour into the prepared pan, cover with one layer of parchment and then one layer of foil tucked tightly around the edges of the pan. Bake for 45 to 55 minutes, until the mixture has set and the center feels firm to the touch, with a little wiggle.
(5) Finish: Turn on the broiler to preheat while you remove the foil from the pan and sprinkle the remaining cheese and a sprinkle of salt and pepper over the top. Place under the broiler, keeping a close eye to avoid burning. Broil for 3 to 7 minutes, until the top is crispy and starting to brown.
(6) Plate and serve: Serve individual portions topped with dollops of herby sour cream and hot sauce on the side.
Eat and enjoy every bite because you can!
Recipe note: I use Diamond Crystal Kosher salt in all my recipes because it has a wonderful flat and crisp flake that tastes delicious. It is also the least salty salt available so you can use it more liberally as a seasoning than you can table salt or sea salt. If you use another type of salt, you may need to reduce the amount so it is not over-salted.
Have a question you’d like to have answered? Email us at hello@ibsgamechanger.com
Link note: This post contains links for you to easily purchase items listed on the page. In some cases, we have provided a special discount code for IBS Game Changers so be sure to use it when you purchase an item to get the discount that has been arranged just for you! As an Amazon Associate, I earn a commission from qualifying Amazon purchases.
More Deliciously Low FODMAP™ breakfast recipes
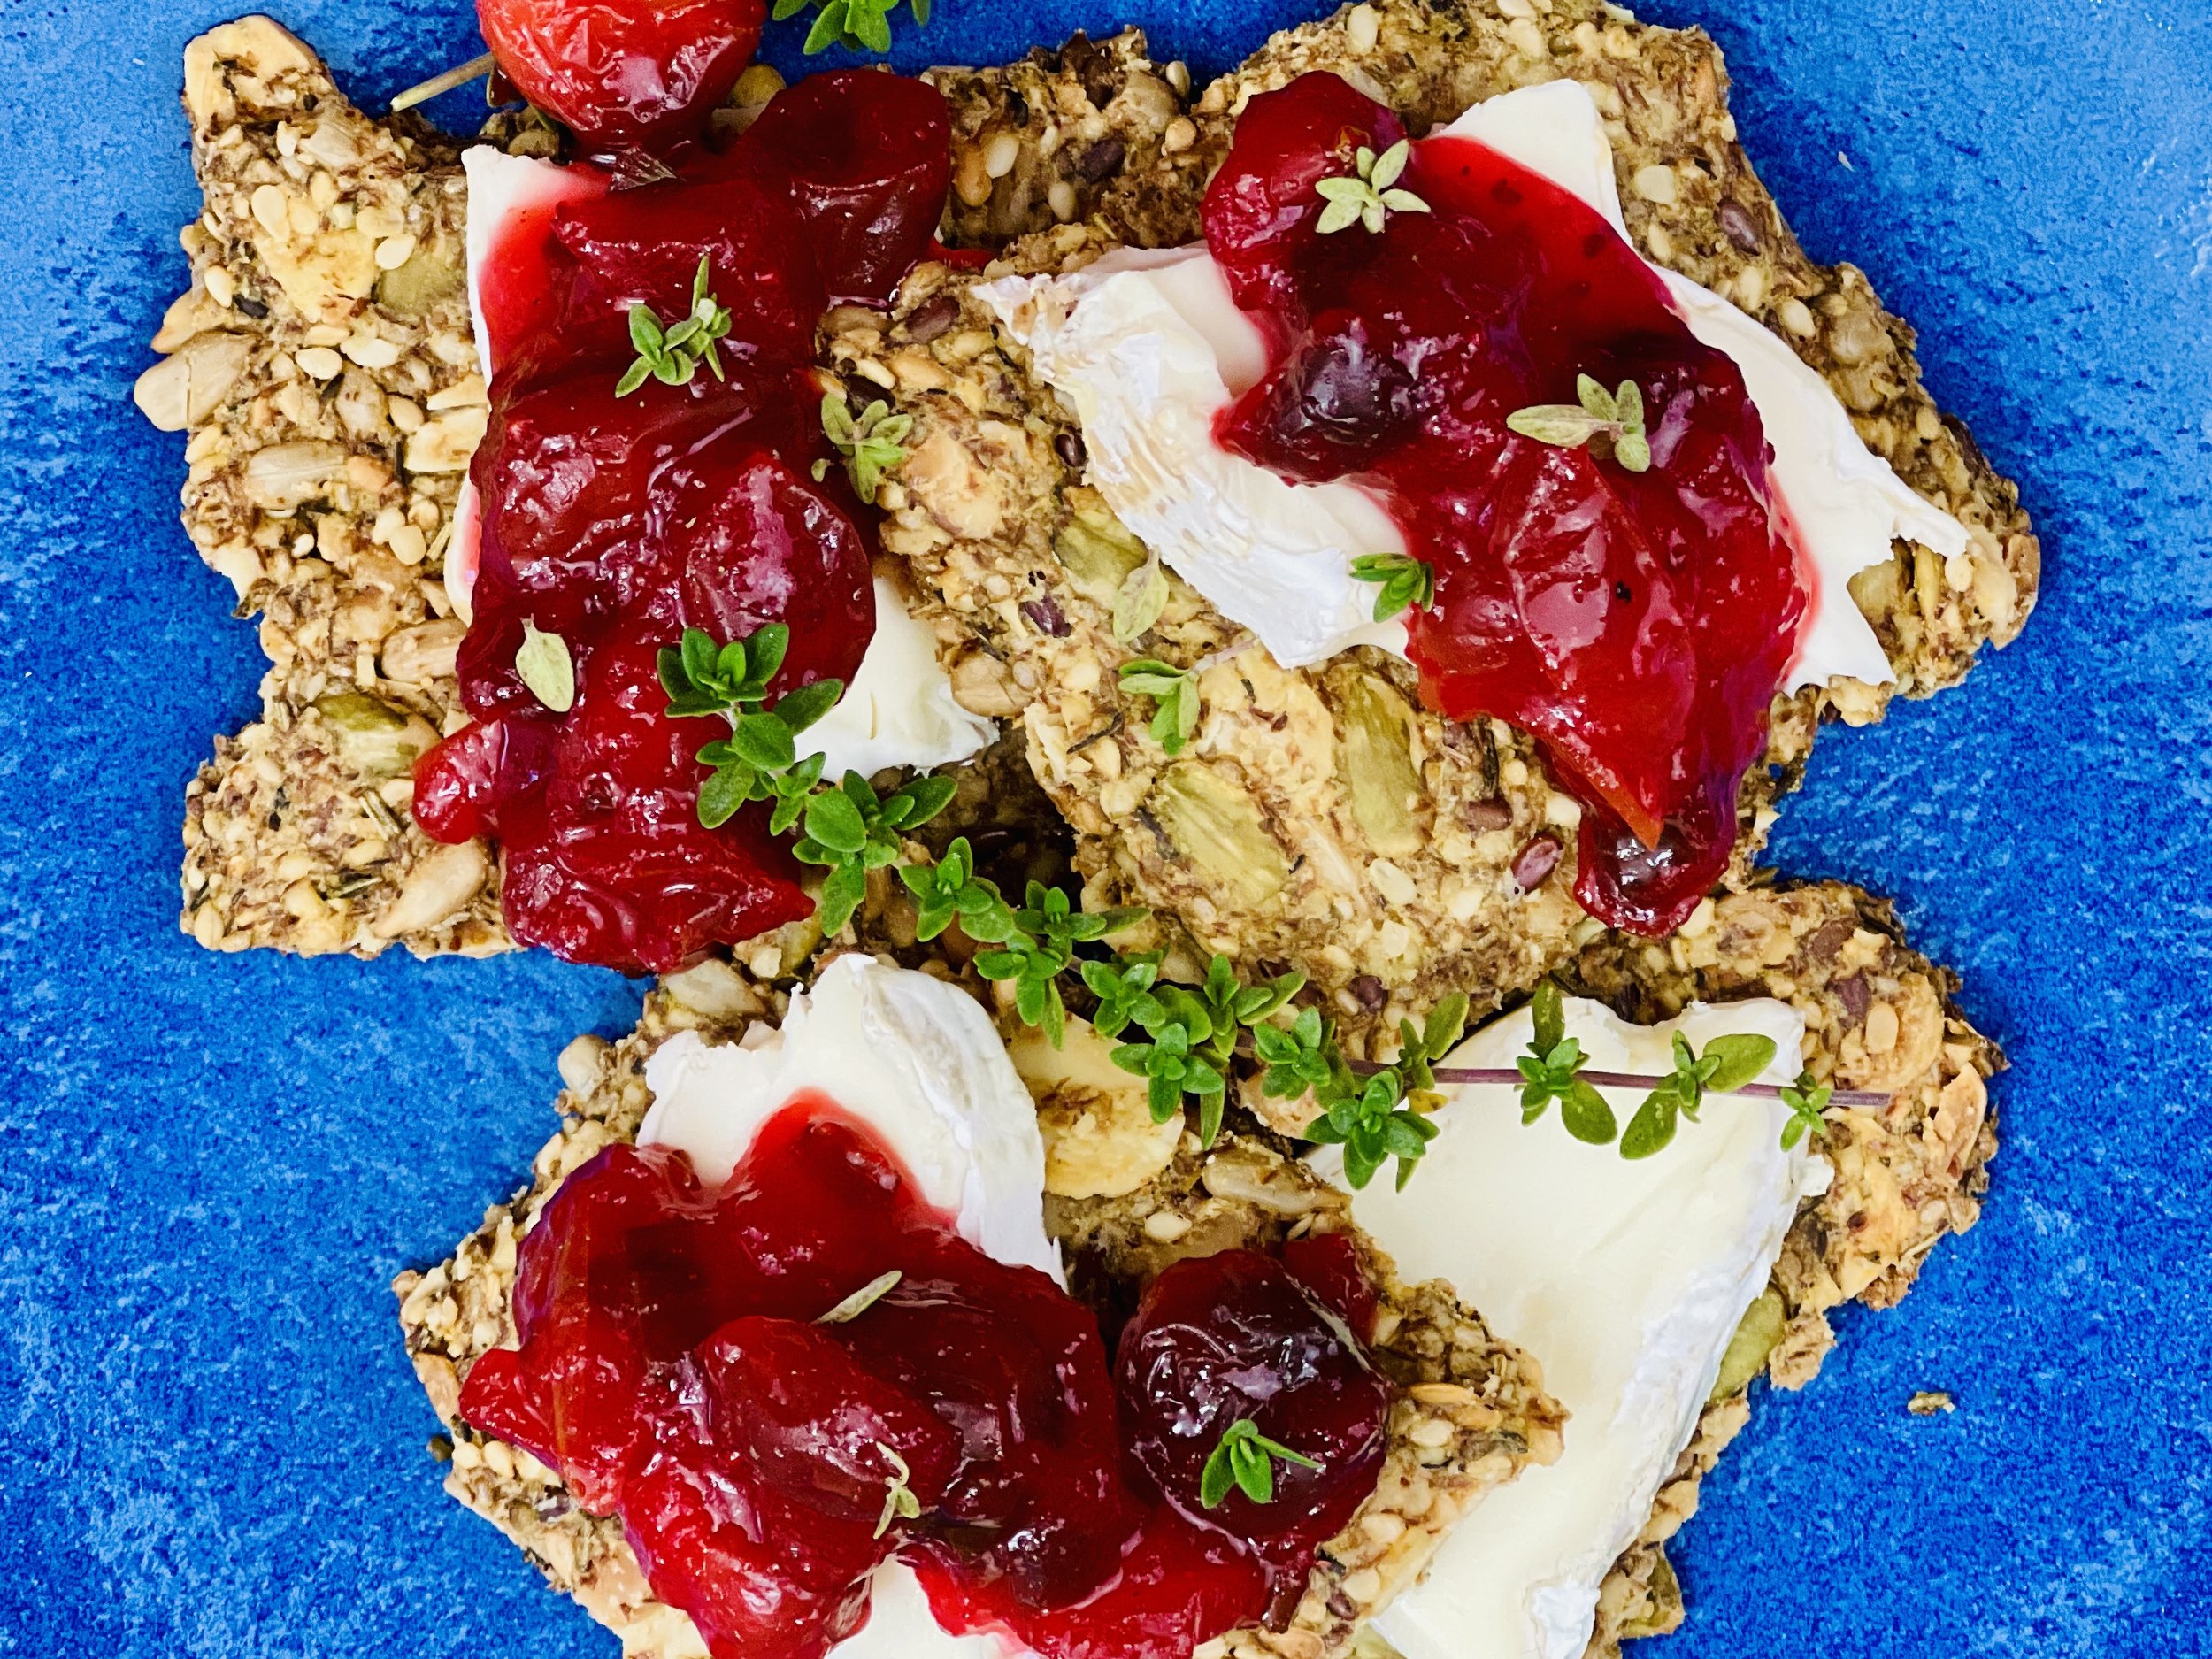
10 Minutes Prep • 50 Minutes Cook • Gluten-free • Dairy-free • Low FODMAP • Serving size 3-4 crackers