Deliciously Low FODMAP

Inspire yourself with hundreds of delicious low FODMAP recipes, tips, and tools, and enjoy the abundance that is yours even when you have IBS.
Use the buttons and filters to find something specific or browse the complete collection for inspiration.
Discover a treasure trove of recipes with my FREE recipe club! Get new ideas delivered straight to your inbox every week.
Deliciously Low FODMAP is a trademark of IBS Game Changer, LLC
Filter to find Recipes and Tools
More Filtering Options
- All 729
- Appetizer 50
- BBQ 46
- Bowl 32
- Breakfast 58
- Cocktails 13
- Collection 1 58
- Collection 10 27
- Collection 11 30
- Collection 12 27
- Collection 13 31
- Collection 14 29
- Collection 15 31
- Collection 16 34
- Collection 17 31
- Collection 18 33
- Collection 19 36
- Collection 2 32
- Collection 20 33
- Collection 21 33
- Collection 22 40
- Collection 23 11
- Collection 24 1
- Collection 3 28
- Collection 4 29
- Collection 5 30
- Collection 6 32
- Collection 7 31
- Collection 8 31
- Collection 9 32
- Condiments 6
- Crock Pot 4
- Dessert 107
- Diabetes Game Changer Exception Protocol Contains Alcohol 11
- Diabetes Game Changer Exception Protocol Contains Flour 109
- Diabetes Game Changer Exception Protocol Contains Flour AND Sugar 77
- Diabetes Game Changer Exception Protocol Contains Sugar 49
- Diabetes Game Changer First Four Weeks 363
- Dinner 331
- Drink 8
- Free Guide 17
- Gluten-free 591
- Gut Microbiome 2
- Guthealth 3
- Holidays 68
- IBS Triggers 4
- Keto Friendly 124
- Lactose-Free 175
- Low FODMAP Diet 715
- Low Net Carb 138
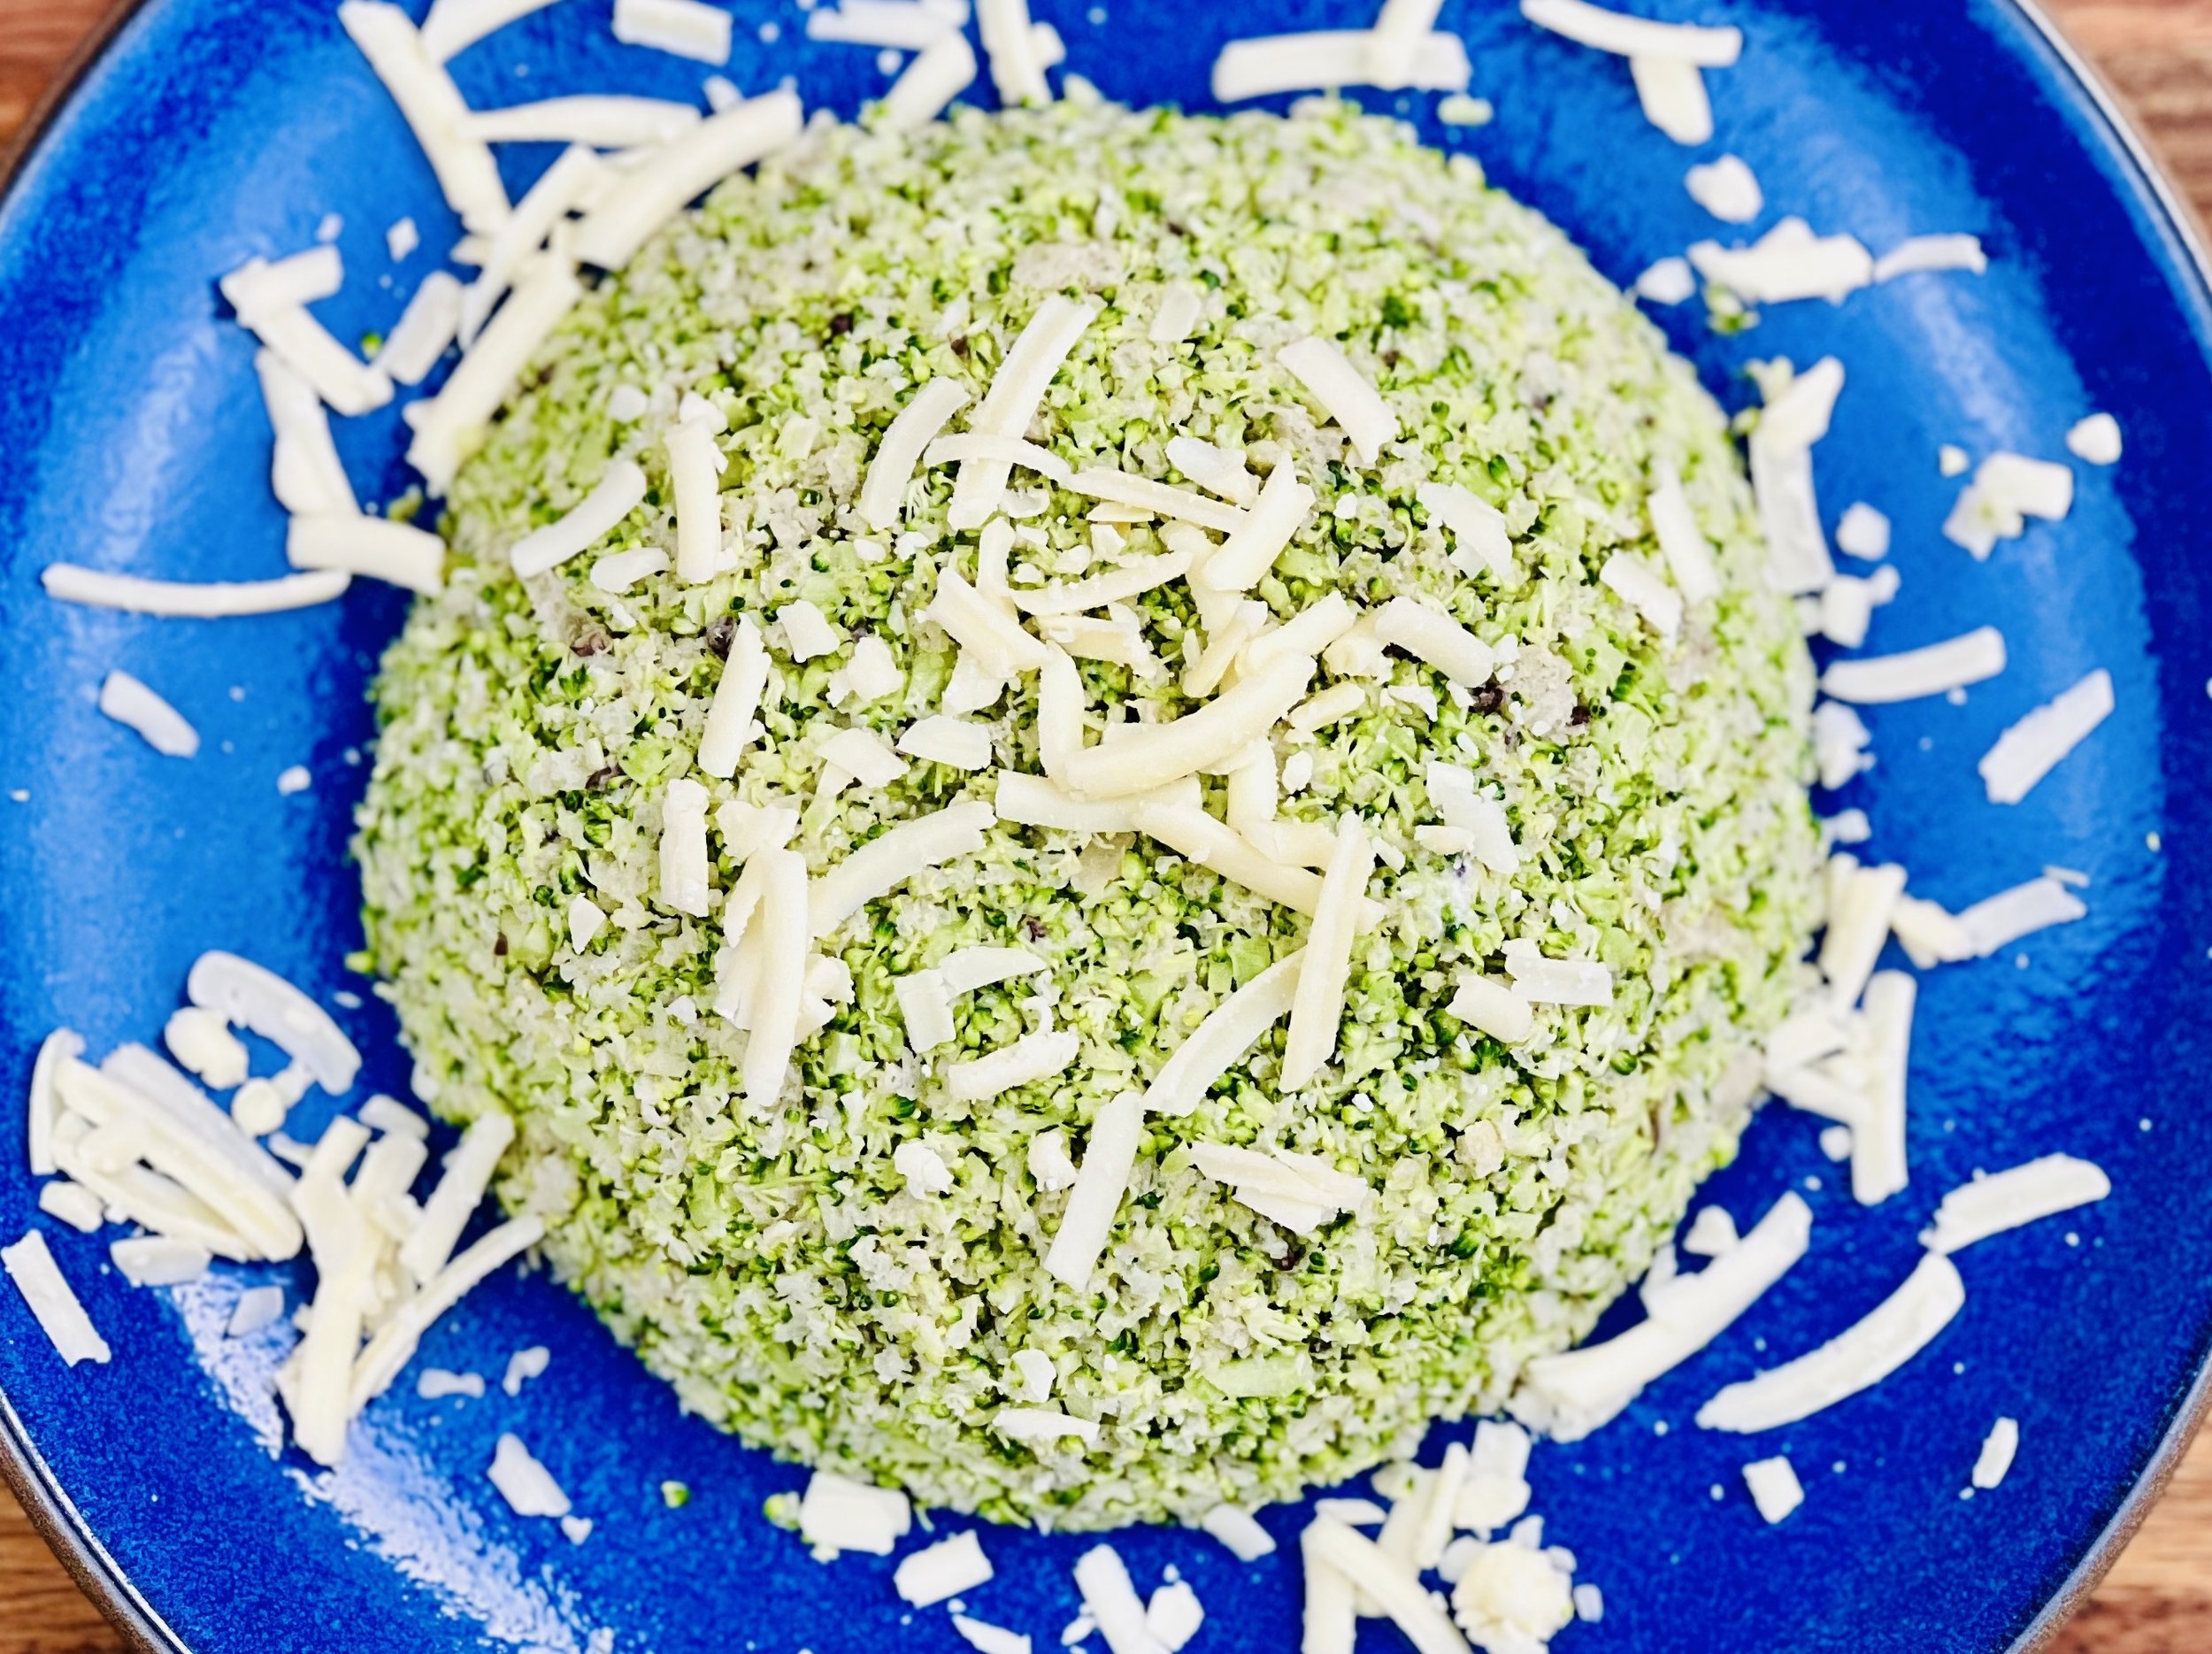
Spring vegetable quiche with broccolini and bacon (low FODMAP)
20 minutes prep • 40 minutes cook • Gluten-free • Low FODMAP • Serves 8
20 minutes prep • 40 minutes cook • Gluten-free • Low FODMAP • Serves 8 • This delicious quiche is equally good served hot or at room temperature so it’s a great make-ahead dish. And, for those of you who love asparagus but can’t tolerate the FODMAPs, you’ll love this quiche, and you’ll swear the broccolini in this recipe is asparagus!

INGREDIENTS:
1 deep dish perfect buttery pate brisee low FODMAP pie crust frozen (alternatively you can use a purchased frozen gluten-free butter pie crust)
1 pound bacon
2 tablespoons garlic-infused olive oil
3 green onions (green part only) chopped
1 bunch broccolini (stems only with leaves removed) cut into 1/2 inch pieces
1 tablespoon chopped chives
1 tablespoon minced fresh thyme
Salt and freshly ground pepper
8 large eggs plus one egg white (you can put the extra yolk in with the rest of the eggs)
1 cup lactose-free whole milk
2 cups white cheddar cheese grated
DIRECTIONS:
Preheat oven to 400 degrees F and line a rimmed baking sheet with foil. Lay your bacon slices on the foil in one layer and put it in the oven.
Bake for 10 minutes and check for doneness. If it’s not yet done, cook another 3-5 minutes. When bacon is cooked through, remove it from the oven and use a pair of tongs to remove the bacon slices and lay them in one layer on folded paper towels to drain and cool.
Meanwhile, prepare the vegetables and herbs and grate the cheese.
Heat 2 tablespoons of garlic-infused olive oil in a medium frying pan. When the oil shimmers, add the green onions and saute for about a minute. Add chopped broccolini and continue to saute for about 5 minutes.
While the vegetables are cooking, chop the cooked bacon.
Add the bacon and chopped chives to the frying pan with the broccolini and season with salt and a good grinding of pepper. Continue cooking until bacon is heated through then set aside.
In a large mixing bowl combine the 8 eggs (plus one egg yolk) and milk and whisk together until light yellow and well blended. Add grated cheese, fresh thyme, and the bacon and broccolini mixture from your frying pan.
Remove pie crust from the freezer and brush with egg white.
Pour the egg, cheese, vegetable mixture into the crust. Reduce oven temperature to 375 degrees F and put the quiche in the oven.
Cook for 30 minutes. If the edges of the pie crust are getting too brown, you can cover them with a strip of foil or silicon crust protector and cook for another 10 minutes until the center is just set but still jiggly.
Remove quiche from the oven and let stand for 10 minutes before cutting and serving.
Eat and enjoy every bite because you can!
This post may contain affiliate links so you can easily purchase items listed on the page. There is no increased cost to you for purchasing items through these links so feel free to use them!
More Deliciously Low FODMAP™ main courses you might enjoy


Carrot spice cake with silky cream cheese frosting (low FODMAP)
15 minutes prep • 45 minutes cook • Gluten-free • Low FODMAP • Makes 12 good-sized pieces
15 minutes prep • 45 minutes cook • Gluten-free • Low FODMAP • Makes 12 good-sized pieces • This cake is very easy to make and delicious to eat. Baking it will fill your home with the spicy-sweet smell of cinnamon and sugar so if you have anyone to impress, put this in the oven before they arrive! This cake is also best the second day so I always make it a day ahead and refrigerate it overnight before serving. This makes it a wonderful make-ahead dessert.

INGREDIENTS
2 cups sifted gluten-free all-purpose flour
2 teaspoons baking soda
2 teaspoons baking powder
2 teaspoons cinnamon
1 teaspoon salt
3 cups grated carrots
1 and 1/3 cups vegetable oil
4 slightly beaten eggs
2 cups granulated sugar
1 - 2 cups finely-chopped walnuts (you can omit if you don’t like walnuts)
1/2 cup drained crushed pineapple or finely-diced fresh pineapple
DIRECTIONS:
Preheat oven to 350 degrees F. Butter and flour a 9'‘ x 13” baking pan or two 9” round pans if you prefer.
Combine flour, baking soda, baking powder, cinnamon, and salt in a sifter.
Mix grated carrots, vegetable oil, and eggs in a mixing bowl and stir well to combine.
Add sugar and stir in.
Finally, add sifted dry ingredients and stir in.
If you’re using walnuts, stir those in now as well.
Pour batter into prepared baking pan. Bake at 350 degrees F for 45 minutes or until a toothpick inserted in the center comes out clean.
Let cool and frost with our silky cream cheese frosting (recipe below).
CREAM CHEESE FROSTING INGREDIENTS:
12 ounces lactose-free cream cheese, at room temperature
1 cup butter, at room temperature
2 tablespoons lactose-free sour cream, at room temperature (gives the frosting that silky quality)
1 teaspoon vanilla
2-3 cups sifted powdered sugar (or enough to achieve a good spreading consistency)
SILKY CREAM CHEESE FROSTING DIRECTIONS:
Combine cream cheese, butter, sour cream, and vanilla in the bowl of your stand mixer and mix until well blended and fluffy. Note: it’s very important to beat the cream cheese, butter, vanilla, and sour cream together before adding the sugar, and to make sure they’re at room temperature before you start. If your ingredients are too cold, or the sugar is added too early, the frosting will be lumpy.
Once the cream cheese mixture is well mixed and smooth, add enough powdered sugar to achieve a good spreading consistency.
Spread the frosting on the cake and chill the cake overnight or until ready to serve.
Enjoy!
Pro Tip: This cake is best the second day so I always make it a day ahead and refrigerate it overnight so it’s a great make-ahead dessert!
Original recipe inspired by Sarah Aitken of Ashland, Oregon
This post may contain affiliate links so you can easily purchase items listed on the page. There is no increased cost to you for purchasing items through these links so feel free to use them!
More Deliciously Low FODMAP™ desserts you might enjoy


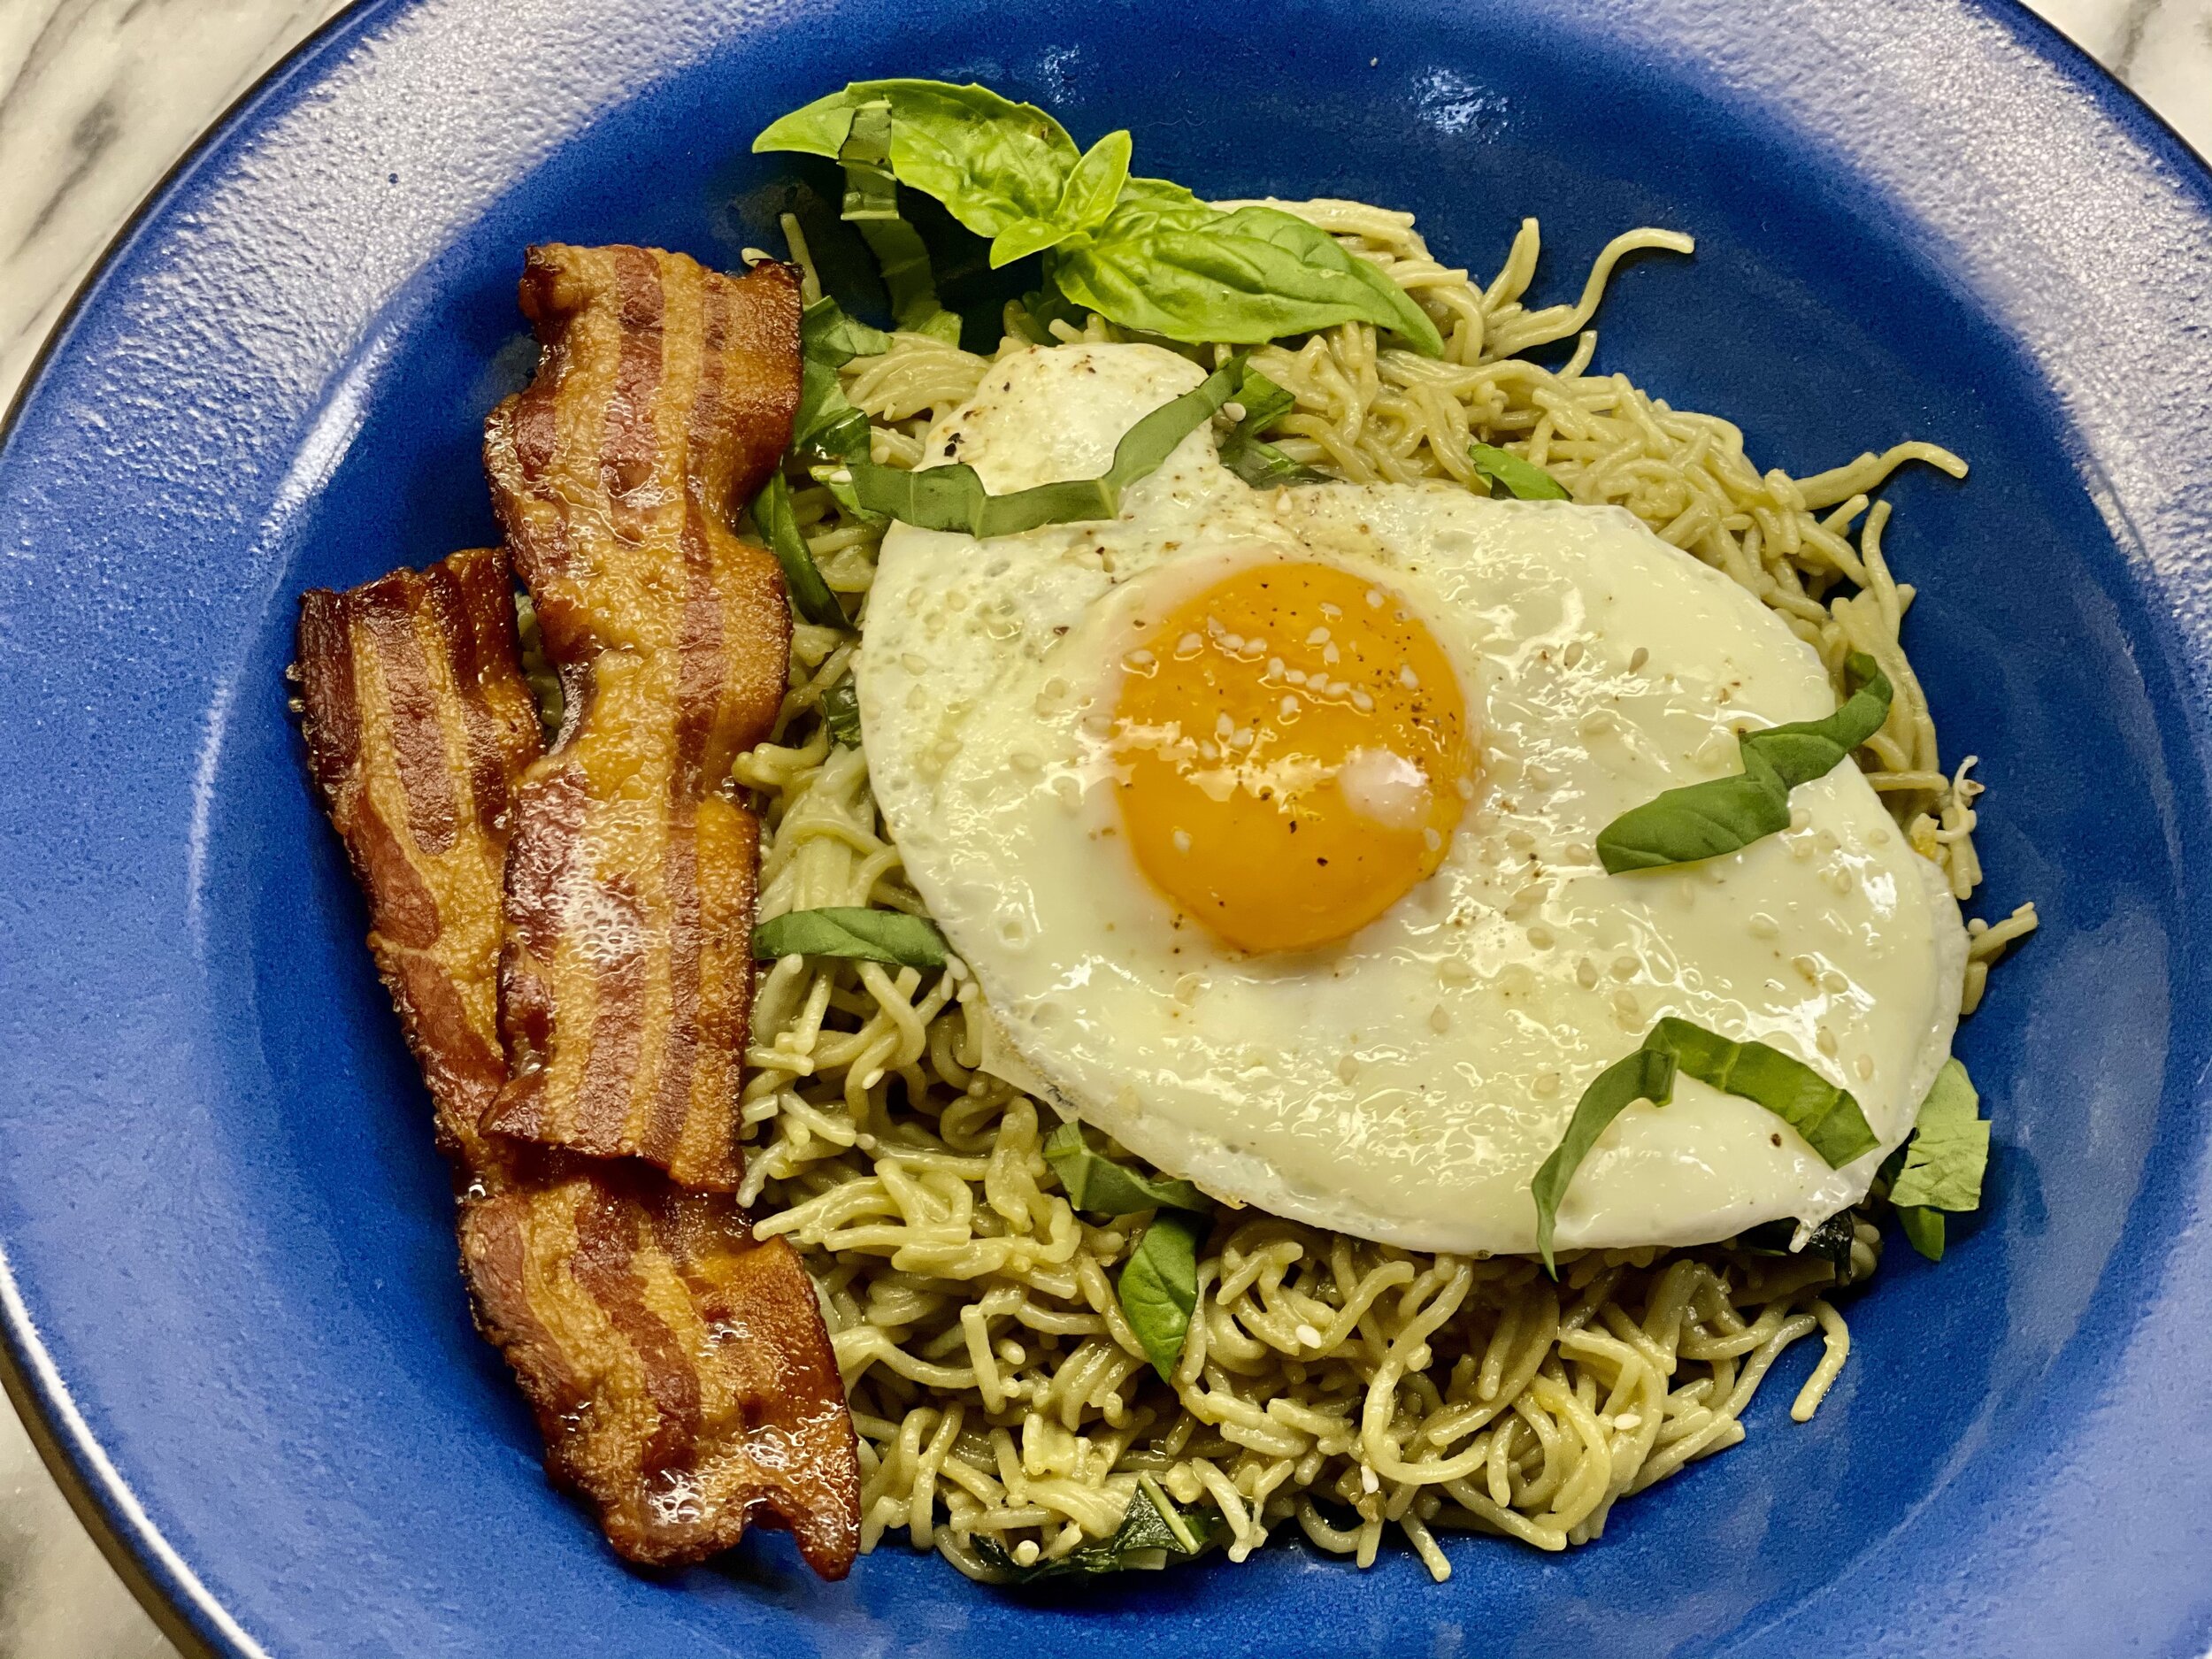
Bacon and egg ramen bowl (low FODMAP)
Prep 10 minutes • Cook 15 minutes • Low FODMAP • Serves 4
Prep 10 minutes • Cook 15 minutes • Gluten-free • Very low Lactose • Low FODMAP • Serves 4 • This ramen makes a great quick supper using basic pantry staples. Perfect for a weeknight pasta dinner or easy Sunday supper. You could even make this for breakfast!
INGREDIENTS
4-6 tablespoons garlic-infused olive oil
4 tablespoons salted butter
4” piece of fresh ginger, peeled and grated
6-8 biscuits (2 packages) of Lotus Foods Jade Pearl rice ramen noodles (or other low FODMAP ramen noodles)
4-6 tablespoons gluten-free low sodium soy sauce
1 cup fresh basil, chopped, plus more for serving
4 eggs
8 slices bacon
Sesame seeds (optional but very pretty)
Freshly ground black pepper
DIRECTIONS
Preheat oven to 400 degrees F.
Line a rimmed baking sheet with foil and lay the bacon slices out flat on the foil.
Cook about 10 minutes in the oven until the bacon has reached your desired crispness. Remove from the oven and put the bacon slices on paper towels to drain and cool. Set aside.
(Cleanup: Once the fat has solidified on the foil you can toss the foil out—fat and all! Such a tidy way to make bacon.)
Meanwhile, cook the ramen noodles according to package instructions. Drain and set aside.
In a large skillet, over medium heat, melt the butter and olive oil together. Add the grated ginger, stirring regularly for about 3 minutes.
Add the cooked ramen noodles, along with the soy sauce, to the frying pan with the ginger. Toss well over medium heat until the ramen is warmed through and coated with the sauce.
Remove from the heat and add the basil, tossing to combine.
Divide the ramen mixture among four warmed bowls.
Add a bit more olive oil to the skillet you used to cook the pasta and place it over medium heat. Crack 4 eggs into the pan – keeping them separated – and cook “sunny side up.” (You may want to put a cover on the pan to help the top cook without overcooking the bottom.)
To serve, top each bowl of ramen with a cooked egg, a sprinkling of toasted sesame seeds, and fresh basil. Season with pepper and serve immediately.
Eat and enjoy every bite because you can!
This post may contain affiliate links so you can easily purchase items listed on the page. There is no increased cost to you for purchasing items through these links so feel free to use them!
More Deliciously Low FODMAP™ main courses you might enjoy
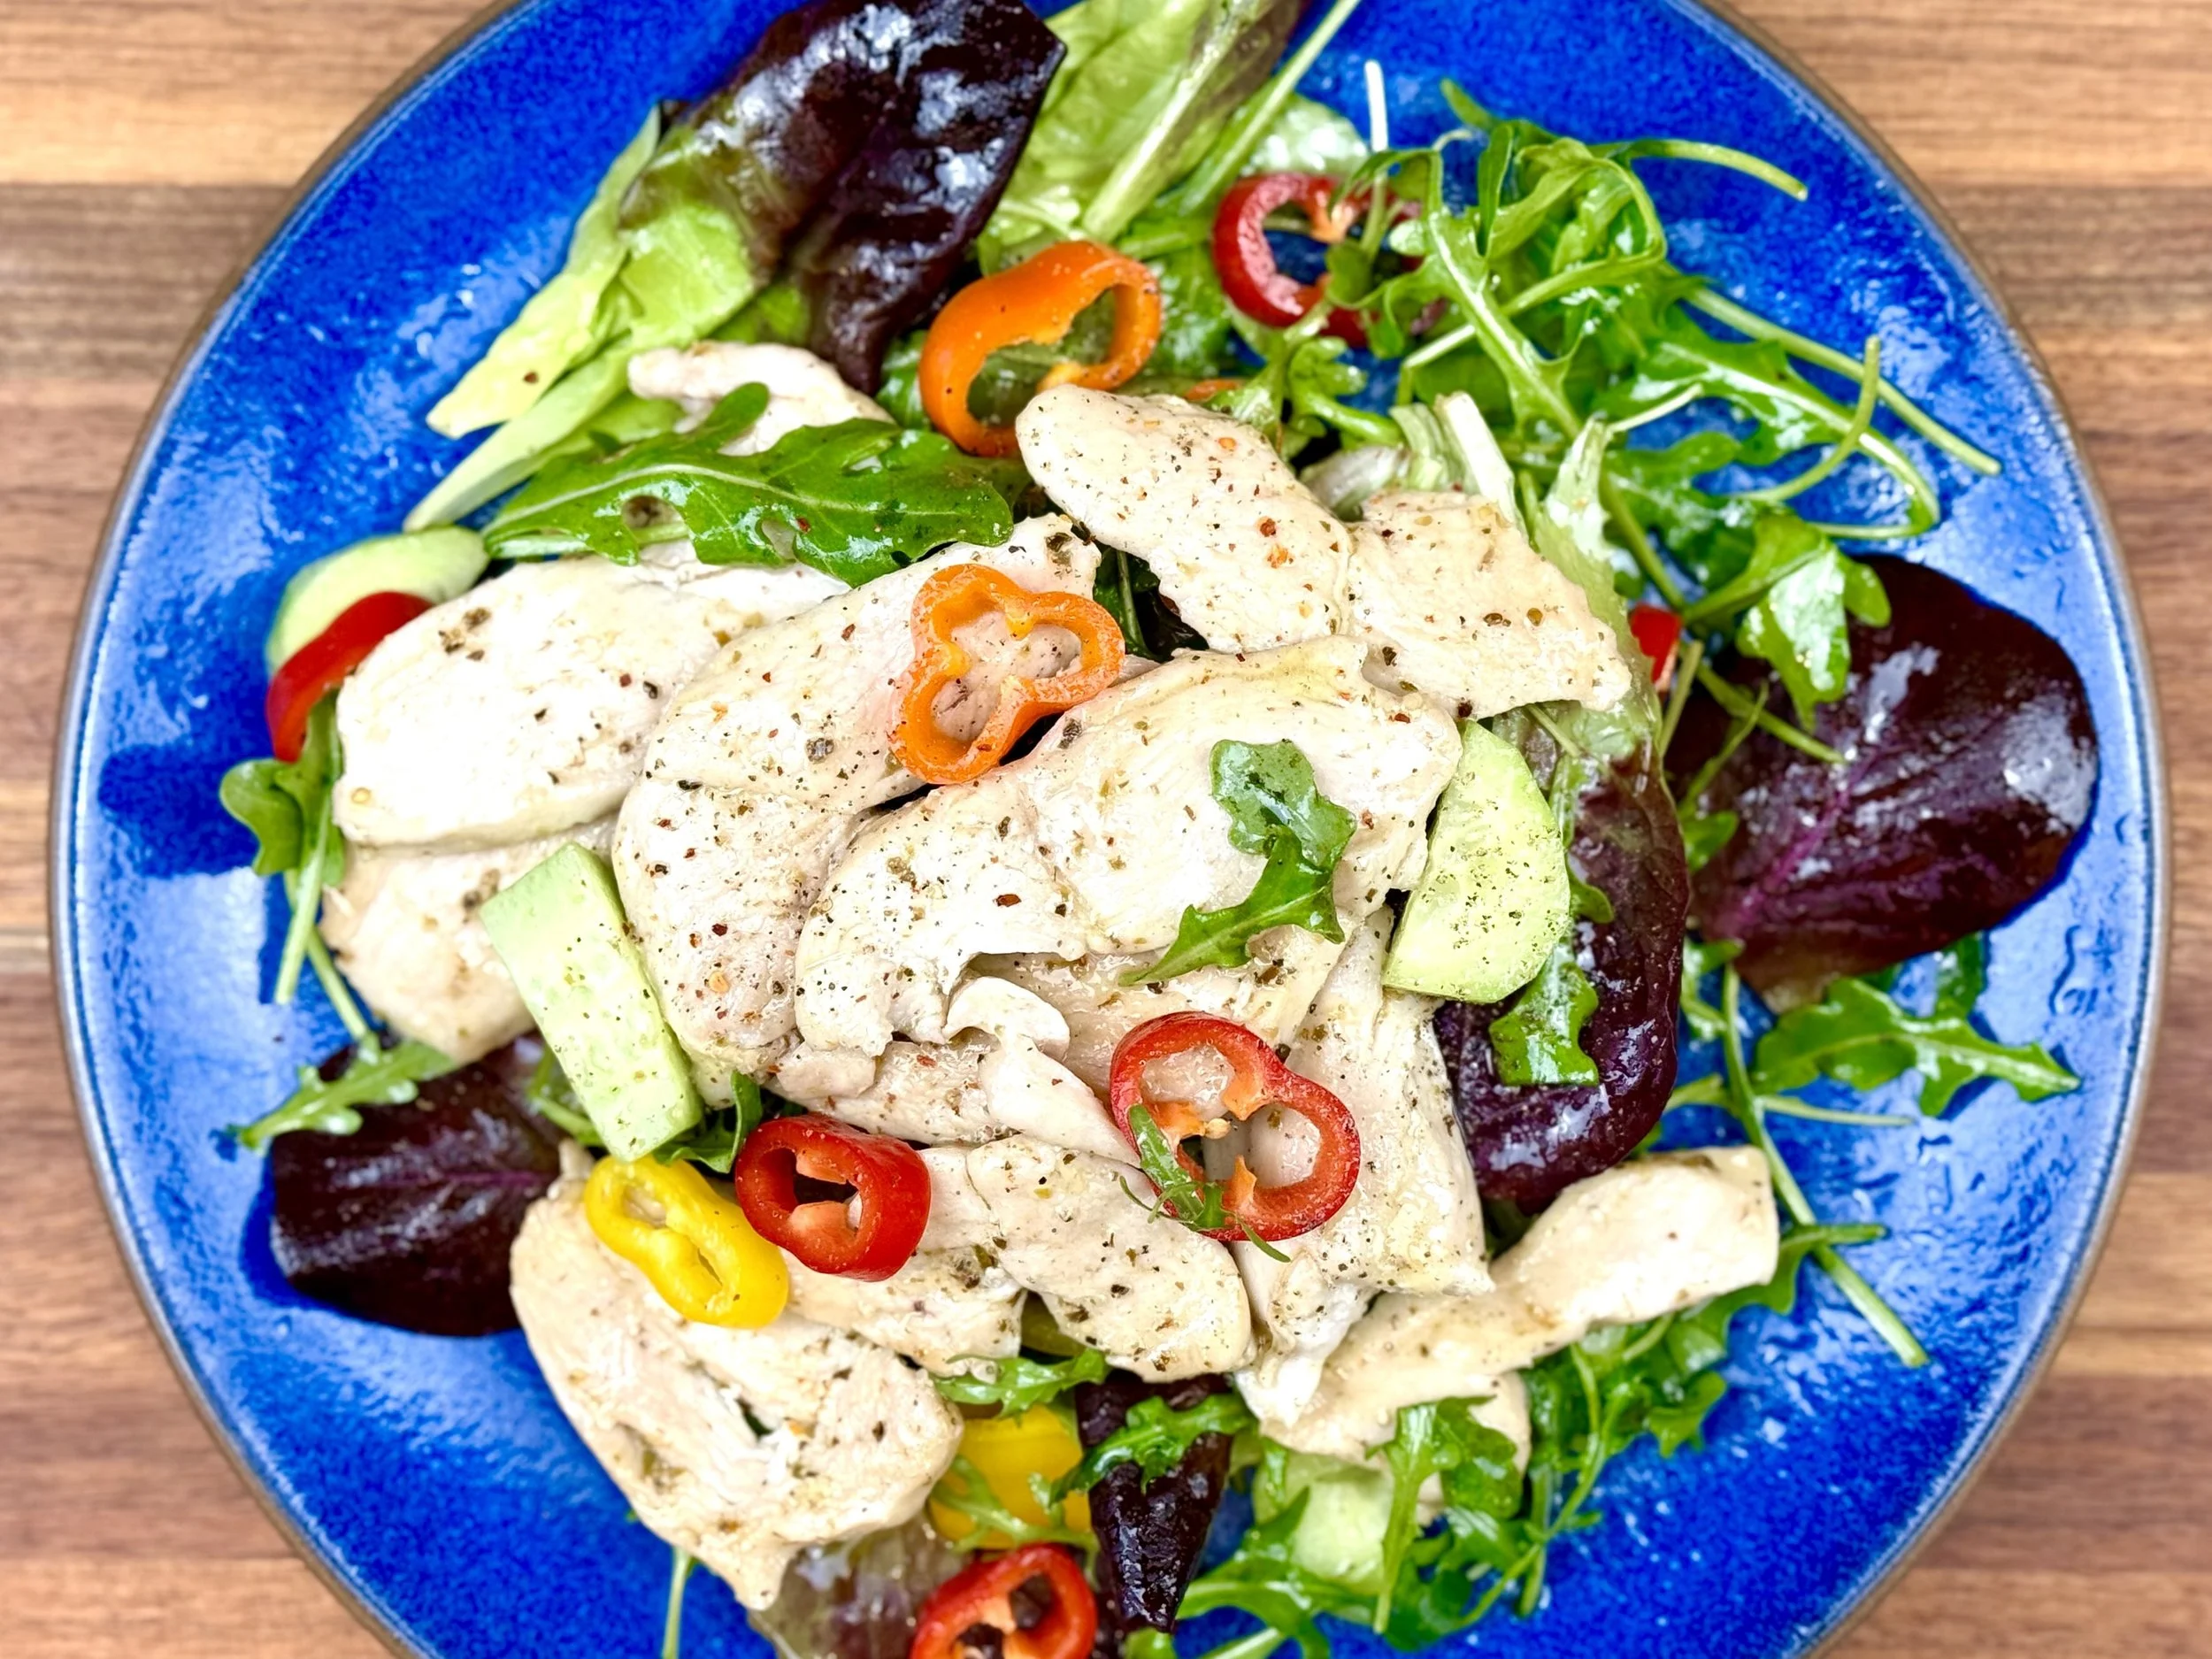
Creamy pasta alfredo and spicy arugula (low FODMAP)
30 minutes • Gluten-free • Low FODMAP • Vegetarian • Serves 4 •
30 minutes • Gluten-free • Low FODMAP • Vegetarian • Serves 4 • I am a huge arugula fan so I absolutely adore this recipe as the sharpness of the arugula provides a wonderful balance with the creaminess of the pasta. You can serve this as a delicious vegetarian main course or a delightful side dish. It’s quick to make and it’s all cooked in one pot so it’s quick to clean up too!

INGREDIENTS:
3 tablespoons salted butter
1 tablespoon garlic-infused olive oil
2 teaspoons dried oregano
2 teaspoons dried basil
1 teaspoon Smoke N Sanity Essence of Onion Salt (10% off with code IBSGC10)
OR 1 scallion (green part only) finely chopped and 1/2 teaspoon salt
1 pound gluten-free pasta (I like Andean Dream quinoa fusilli)
1/2 cup lactose-free whole milk or canned coconut milk
1/2 cup heavy cream or canned coconut milk
2 ounces lactose-free cream cheese, at room temperature
2 cups grated Parmesan cheese, plus more for serving
3 tablespoons chopped fresh parsley
1 tablespoon garlic-infused olive oil
Juice from 1 lemon
2 scallions (green part only), finely chopped
2 cups baby arugula
1/2 cup mixed fresh herbs, such as parsley and basil chopped
DIRECTIONS:
In a large pot set over medium heat, melt together the butter, 1 tablespoon garlic-infused olive oil, oregano, basil, Salt n’ Sanity Essence of Onion salt, and a pinch of red pepper. Cook for about a minute to bloom the seasonings. Pour in 3 1/2 cups of water and bring to a boil over high heat. Add 1 teaspoon salt and the pasta and cook, stirring occasionally, for about 8 minutes. Do not drain the water. Stir in the milk, cream, and cream cheese and cook until the cream cheese has melted and the pasta is al dente, about 4-6 minutes more.
Stir in the parmesan until melted and creamy. Remove from the heat. Stir in the parsley and season with freshly ground black pepper and additional salt (if needed).
To make the arugula, whisk together the olive oil, lemon juice, green onion, and a pinch each of red pepper, salt, and pepper. Add the arugula and mixed herbs, toss to coat.
Serve the pasta topped with arugula and extra parmesan.
Eat and enjoy every bite because you can!
Pro tip: We love and recommend Smoke N Sanity’s Essence of Onion Salt for its wonderful low FODMAP flavor. Get 10% off when you order your own bottle and use the code “IBSGC10”
This post may contain affiliate links so you can easily purchase items listed on the page. There is no increased cost to you for purchasing items through these links so feel free to use them!
More Deliciously Low FODMAP™ main courses you might enjoy
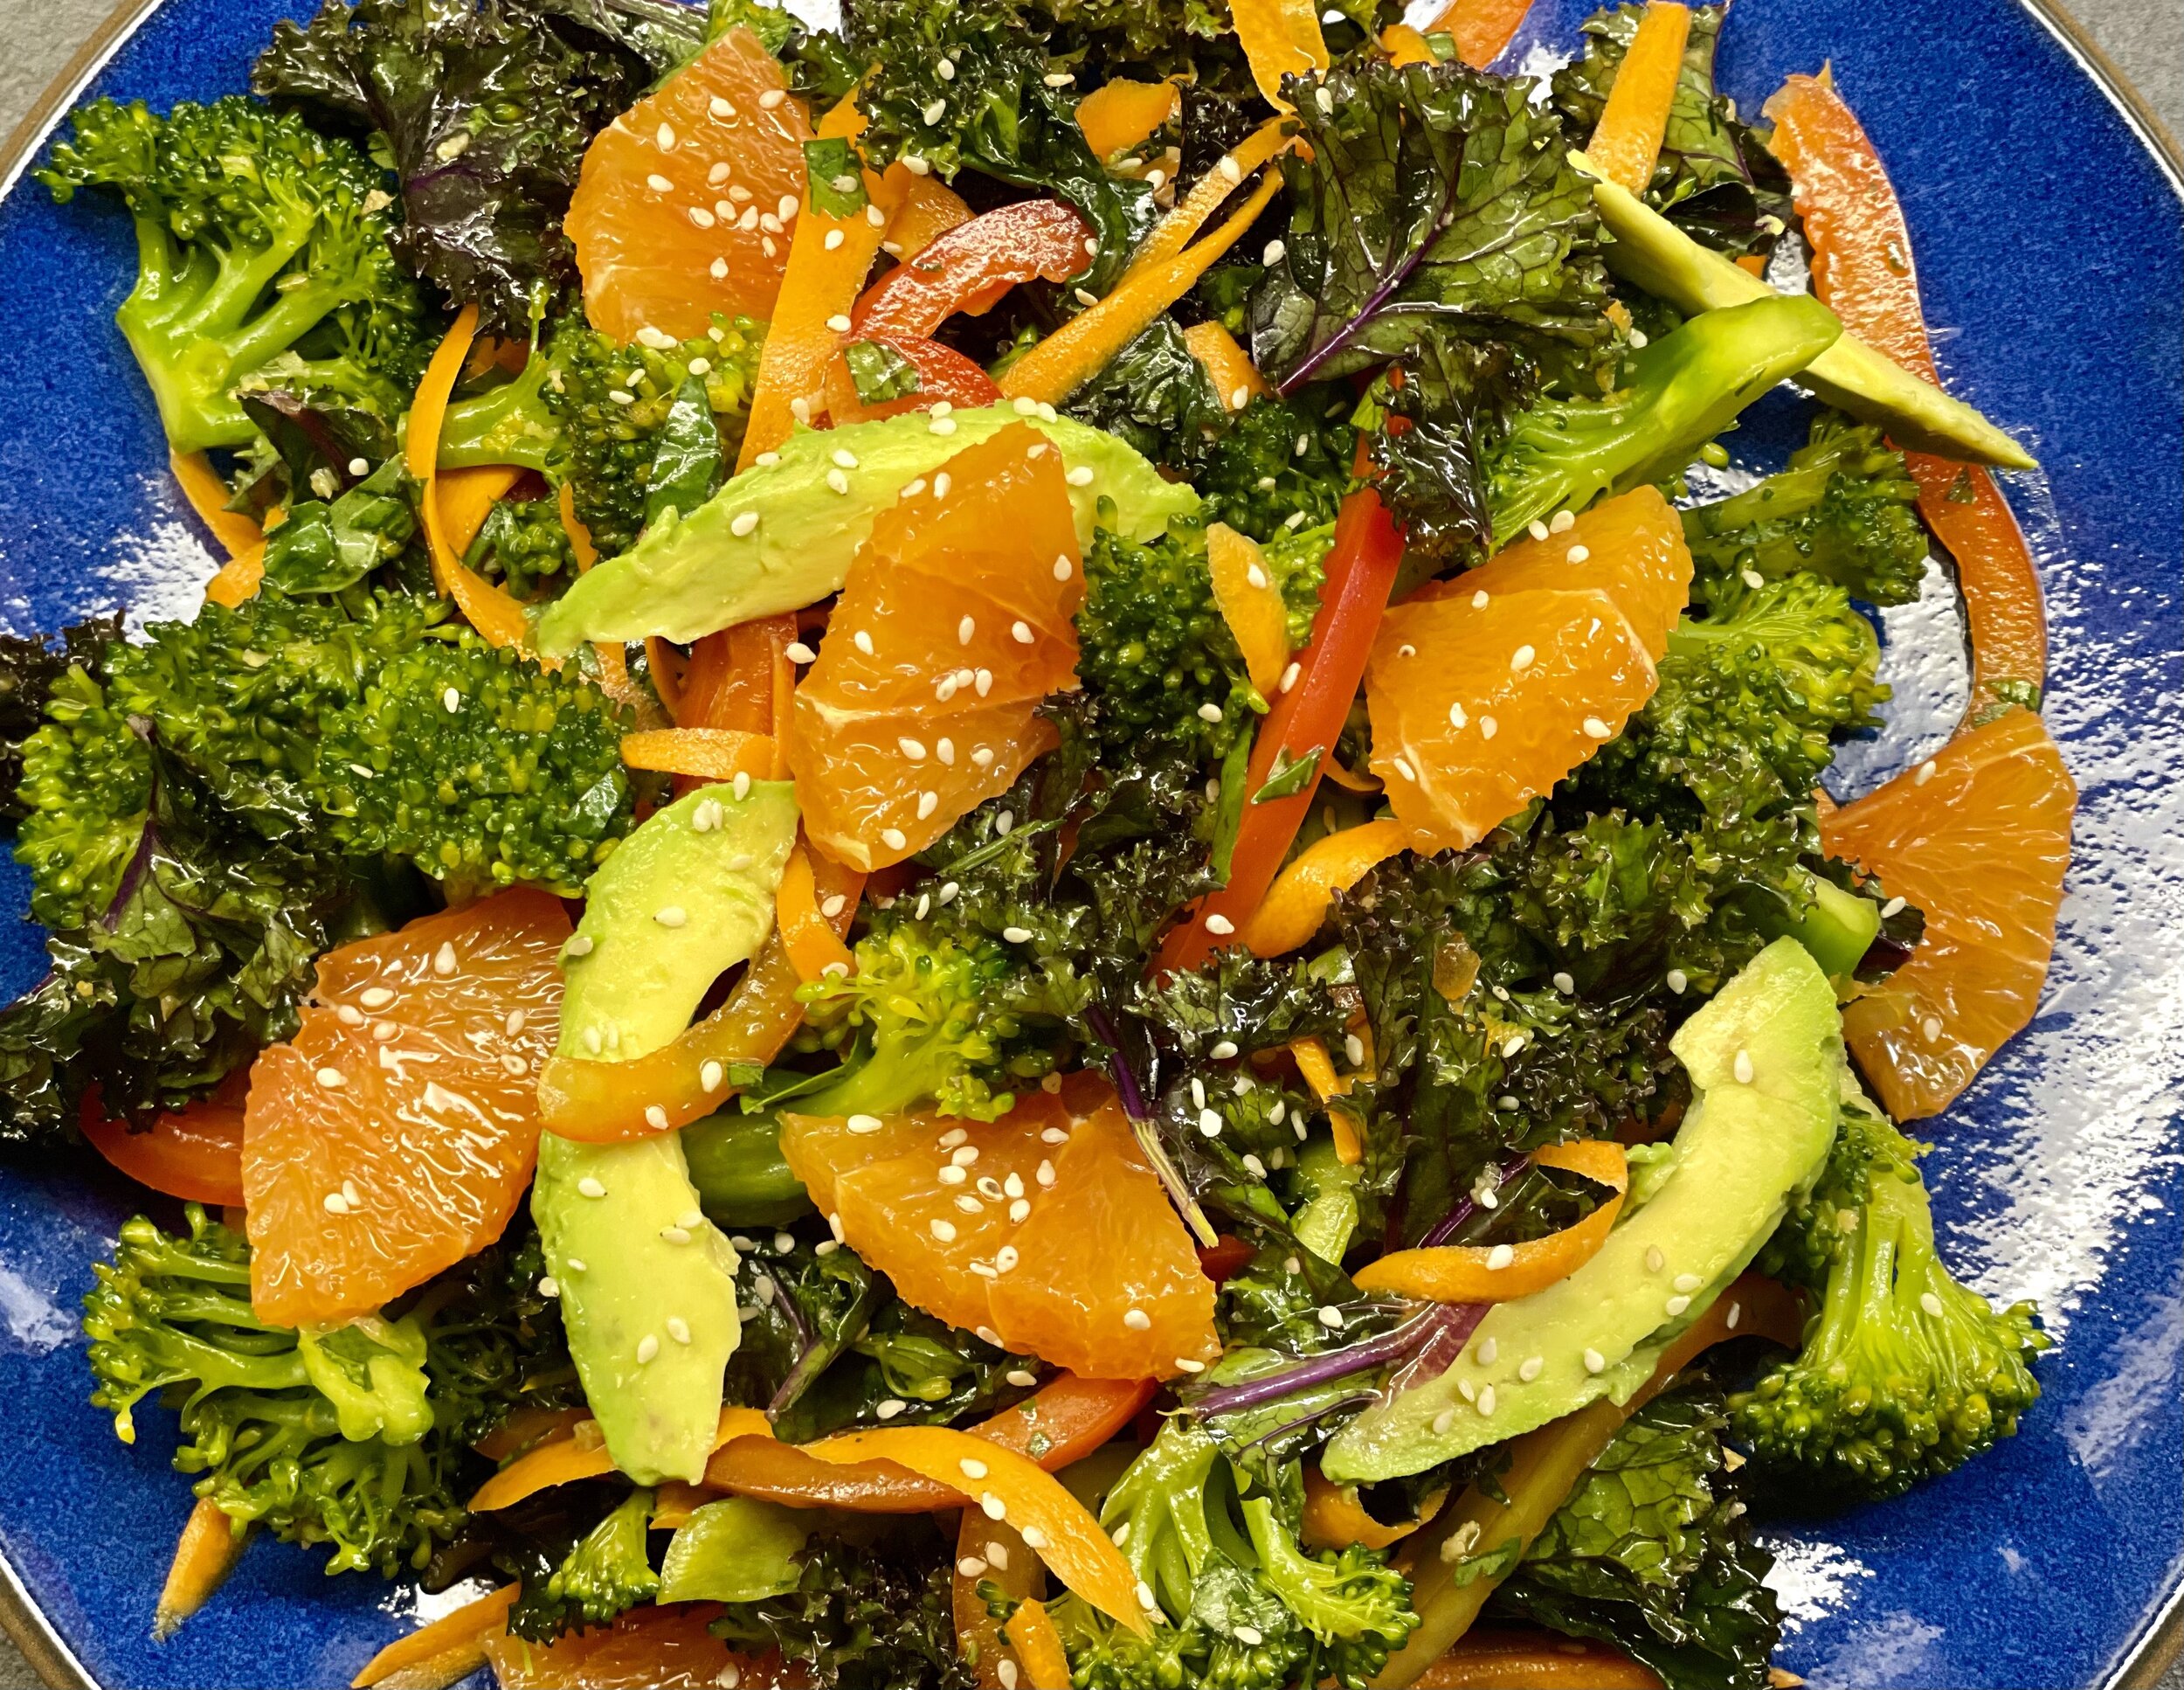
Broccoli and red kale salad with warm ginger dressing (low FODMAP)
25 Minutes prep • 3 hours to overnight sitting time • Gluten-free • Low FODMAP • Serves 4 - 6
25 Minutes prep • 3 hours to overnight sitting time • Gluten-free • Dairy-free • Low FODMAP • Serves 4 - 6 • This is one of those salads that gets better as it sits so it’s perfect as a make-ahead side dish for entertaining or just to have ready for a busy week. The flavors and colors are amazing. The combination of the crisp vegetables with the cool sweetness of the oranges and the creamy taste of the avocado is quite wonderful!
INGREDIENTS:
2 heads broccoli florets only, cut into bite-size pieces
1/2 bunch red kale, torn into bite-size pieces (tough stems removed)
1/3 cup garlic-infused olive oil
1-inch piece fresh ginger, grated
2 tablespoons toasted sesame oil
Zest and juice of 1 lemon
1 tablespoon gluten-free low sodium soy sauce
1 tablespoon maple syrup
1 teaspoon kosher salt
1 pinch crushed red pepper flakes (optional)
2 large carrots, shaved into ribbons
1 bell pepper, thinly sliced
1/4 cup each fresh cilantro and basil, chopped (you can substitute chives for the cilantro if you like)
1 Cara Cara orange, blood orange, or navel orange with the peel cut off, sliced, and quartered
1 avocado, sliced
2 tablespoons toasted sesame seeds
DIRECTIONS:
In a large bowl, toss together the broccoli and the kale.
In a medium skillet, combine the olive oil and ginger over medium heat. Simmer 2-3 minutes. Remove from the heat and add the toasted sesame oil, lemon juice and zest, soy sauce, maple syrup, salt, and a pinch of crushed red pepper flakes (if using).
Pour the warm dressing over the broccoli and kale, massaging it into the greens with your hands. Add the carrots, bell peppers, cilantro, and basil, and toss to combine. Taste and season with salt. If time allows, let the salad sit 30 minutes or up to overnight in the fridge to allow the salad to marinate.
Just before serving, add the orange and avocado. Sprinkle with toasted sesame seeds.
Eat and enjoy every bite because you can!
Pro Tip: You can even make this salad even heartier by adding walnuts, pumpkin seeds, and chunks of cheese or meat if you like. It will be delicious no matter what!
This post may contain affiliate links so you can easily purchase items listed on the page. There is no increased cost to you for purchasing items through these links so feel free to use them!
More Deliciously Low FODMAP™ salads you might enjoy

Jamaican jerk chicken and new potatoes (low FODMAP)
45 minutes (plus marinating time) • Gluten-free • Low FODMAP • Serves 6
45 minutes (plus marinating time) • Gluten-free • Low FODMAP • Serves 6 • This super flavorful Jamaican jerk marinade gives your chicken a wonderful and complex flavor. It’s great hot off the grill and even better as a cold course the next day. This would be the perfect chicken to make for a road trip or picnic!
INGREDIENTS:
6 chicken thighs (you can use bone-in or boneless)
2 pounds new potatoes
2 tablespoons butter (or to your taste)
Kosher salt to taste
MARINADE INGREDIENTS:
4 teaspoons brown sugar
2 teaspoon ground allspice
2 teaspoon kosher salt
1 teaspoon ground cinnamon
1 teaspoon dried basil
1 teaspoon dried thyme
1/2 - 1 teaspoon cayenne pepper
1 teaspoon ground nutmeg
1/2 teaspoon freshly ground black pepper
1/4 cup garlic-infused olive oil
1/4 cup gluten-free low sodium soy sauce
1/4 cup red wine vinegar
1/4 cup fresh-squeezed orange juice
2 tablespoon fresh lime juice
2 thinly sliced scallions, green part only
4 teaspoons finely grated fresh ginger
4 teaspoons finely diced jalapeno peppers
DIRECTIONS:
Combine all marinade ingredients in a small bowl or jar and whisk or shake to combine.
Put your chicken in one layer in a shallow pan or in a Ziploc bag. Pour the marinade in with the chicken and refrigerate for several hours or overnight.
When ready to cook, preheat your grill or smoker to 400 degrees F. Lay your chicken in one layer and grill or smoke until done
Bone-in chicken thighs should take about 35 minutes to grill at 400 degrees. If you’re using boneless chicken thighs – they’ll only take about 15-20 minutes. Always check the temperature of your meat before taking it off the grill. Chicken should reach 160 degrees F before you remove them from the grill and they’ll continue to heat up once you remove them and get to the target of 165 degrees F.
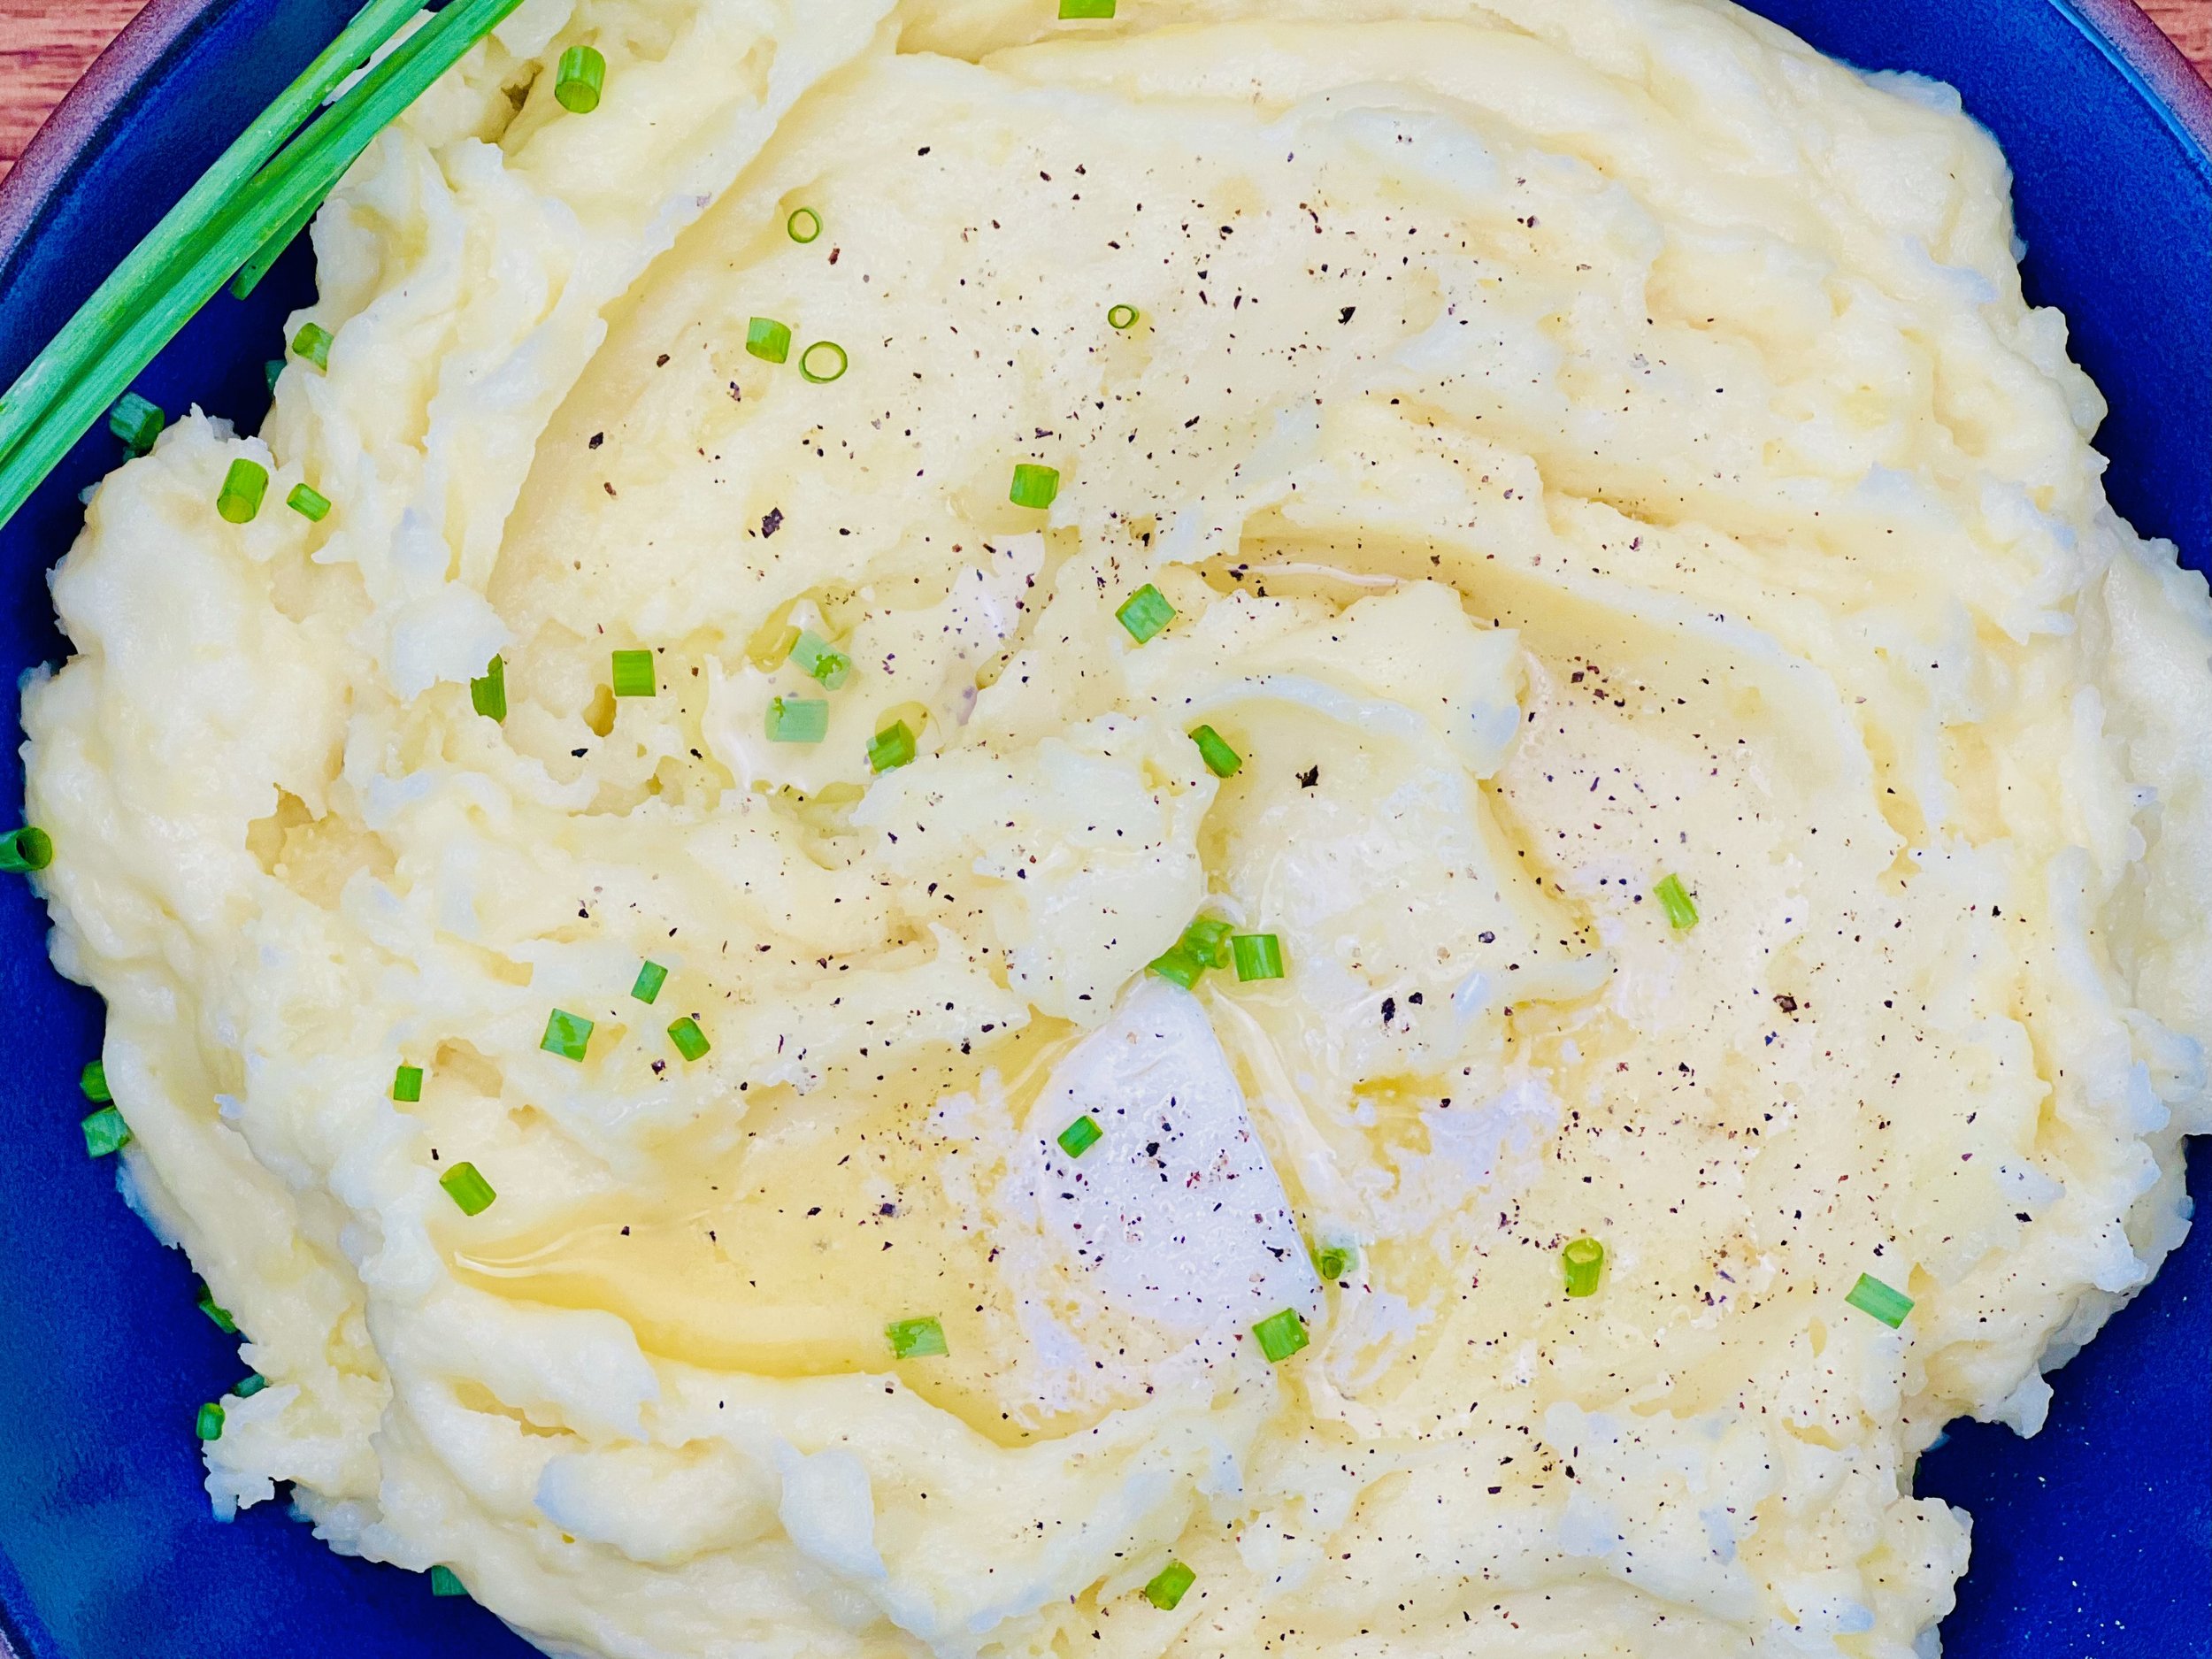
Meanwhile, wash your potatoes and cut them in half unless they are quite small. Put in a large pot of salted water. Bring to a boil and boil until potatoes are fork-tender. When ready, remove from heat, drain and put in a serving bowl. Toss with butter and salt to taste.
Serve with a side salad if you like. You’ll find plenty of salad options right here!
Eat and enjoy every bite because you can!
This post may contain affiliate links so you can easily purchase items listed on the page. There is no increased cost to you for purchasing items through these links so feel free to use them!
More Deliciously Low FODMAP™ main courses you might enjoy
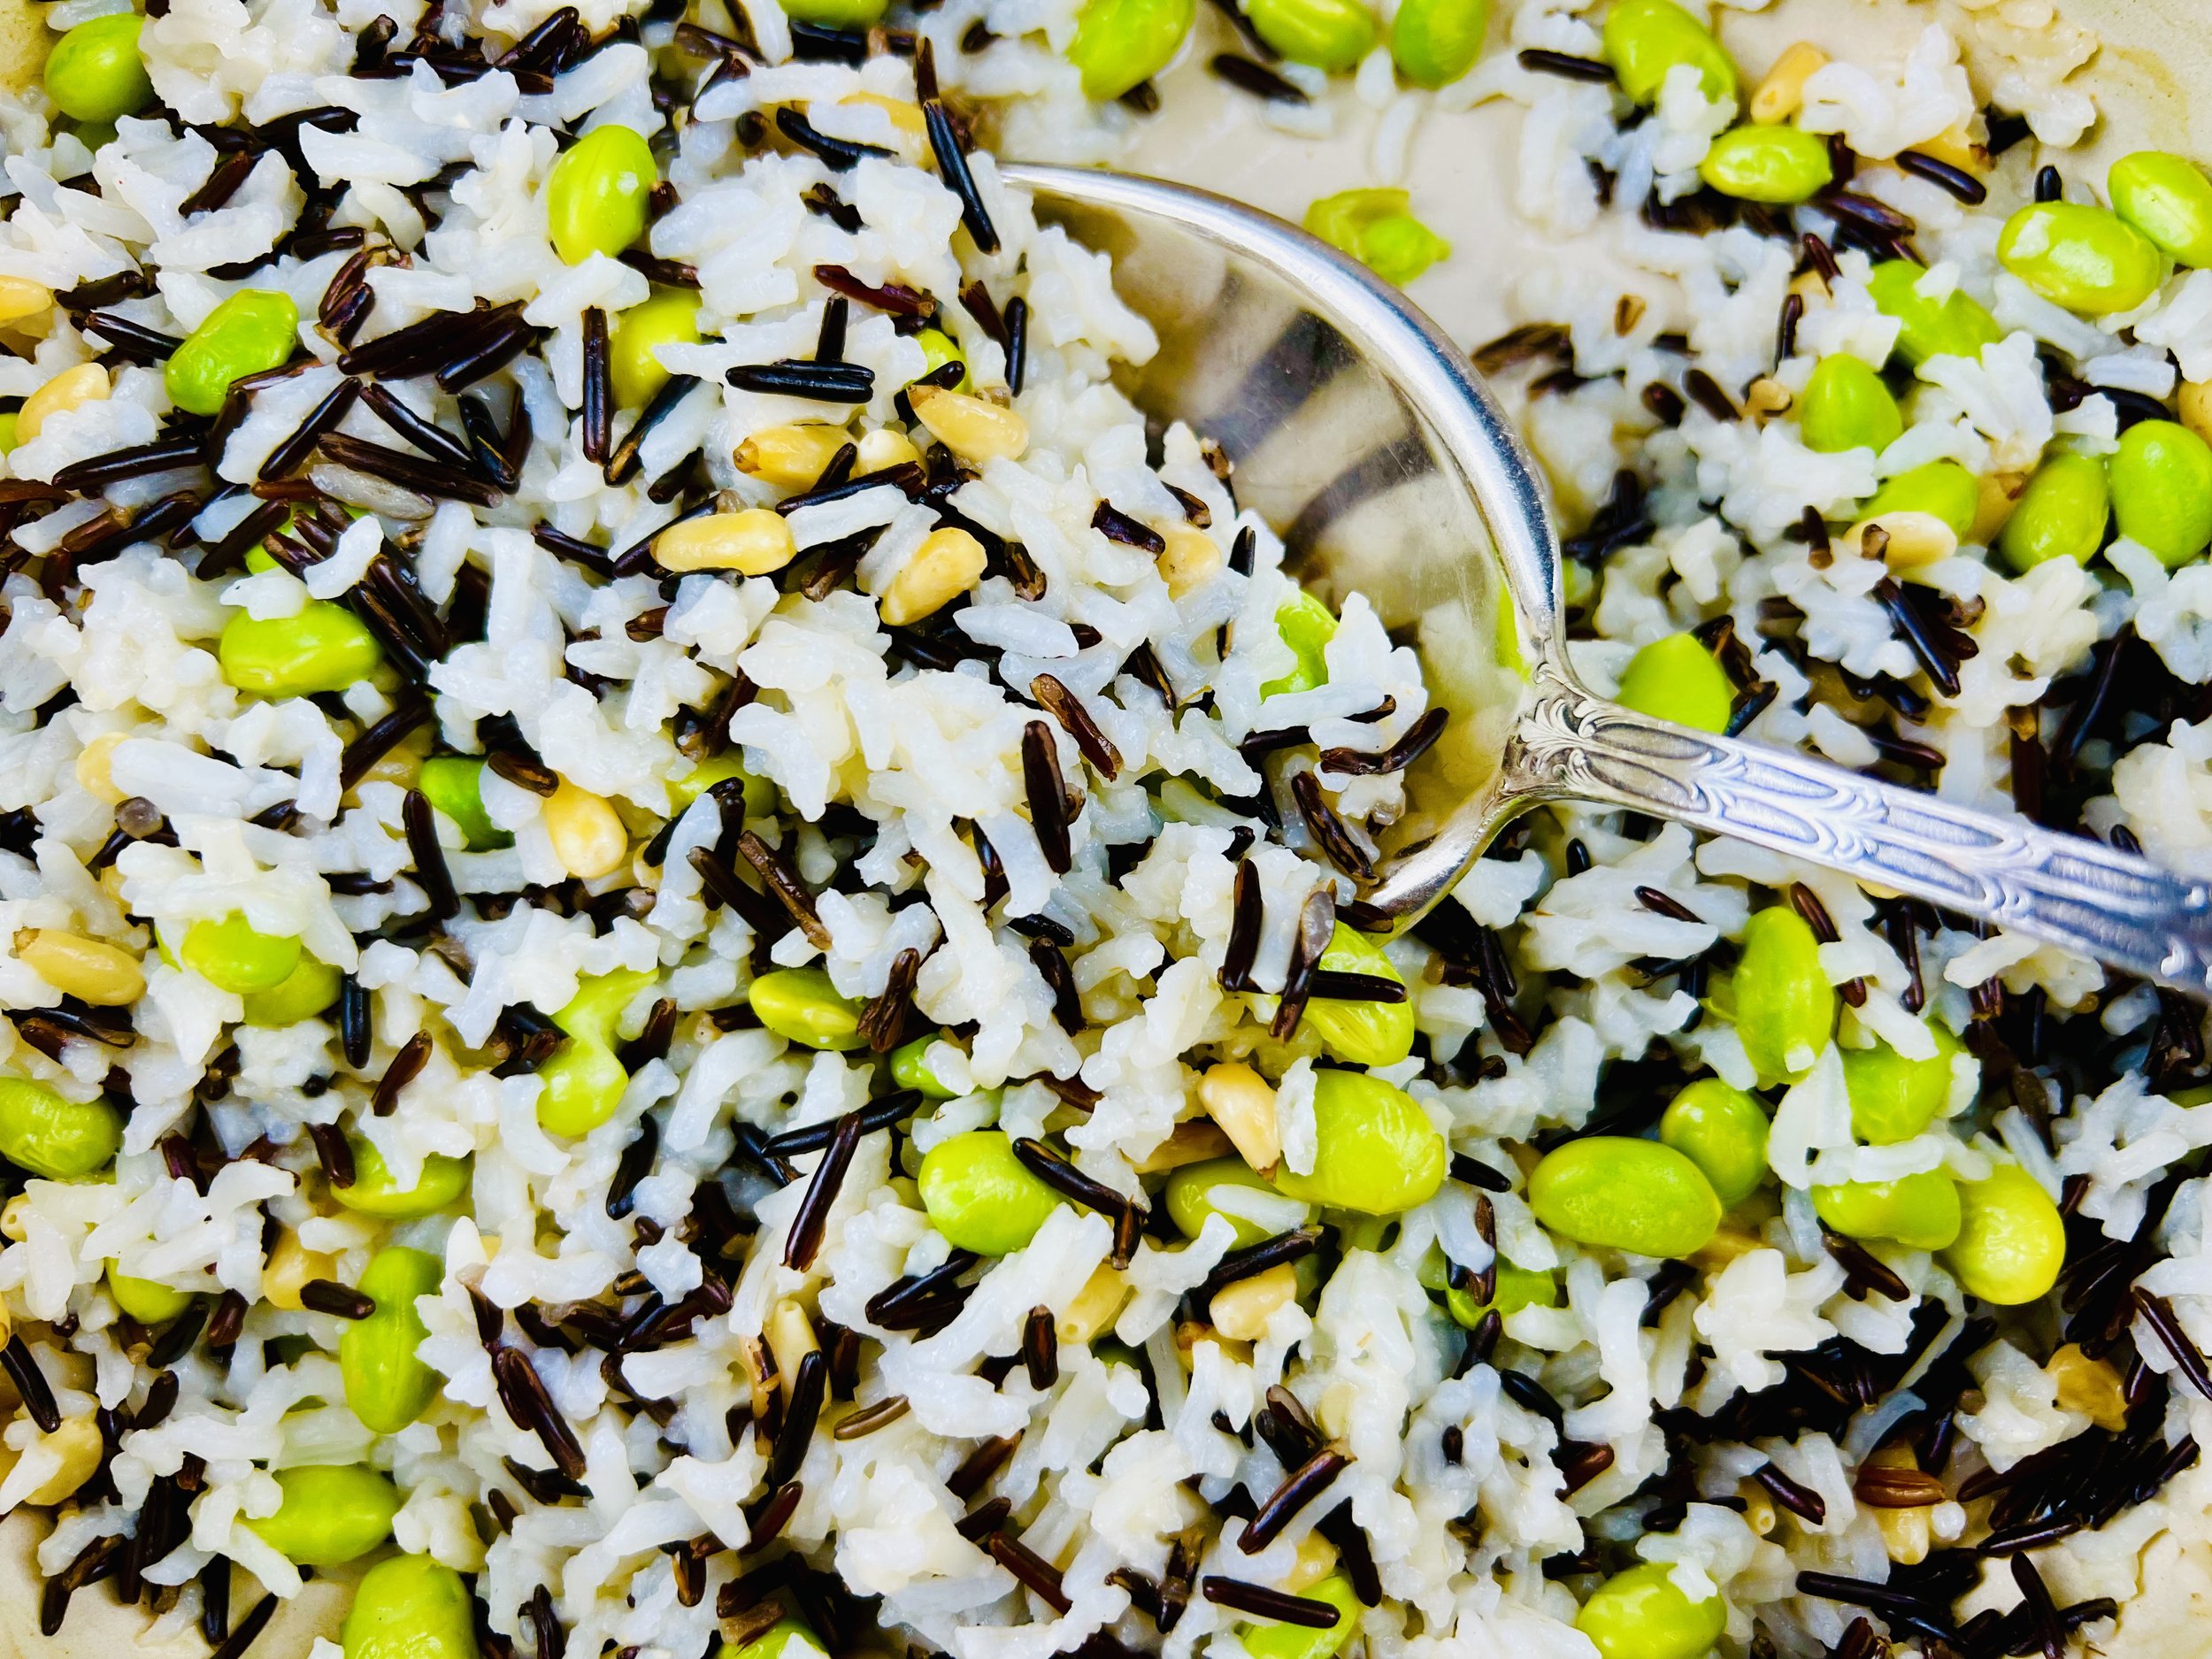
Best Coconut Rice (Low FODMAP)
25 minutes • Gluten-free • Dairy-free • Low FODMAP • Serves 6
5 Minutes prep • 20 Minutes cook • Low FODMAP • Gluten-free • Lactose-free • Serves 6 • Ok to make ahead: Steps 1-4
It’s time to take your rice game up a few notches with this super creamy coconut rice. Serve this rice with our grilled cod and pineapple salsa for an island-themed dinner, or with curried chicken, sticky ginger chicken, kung pao chicken, or stir fry. It makes a delicious foundation for any Asian-themed main course.
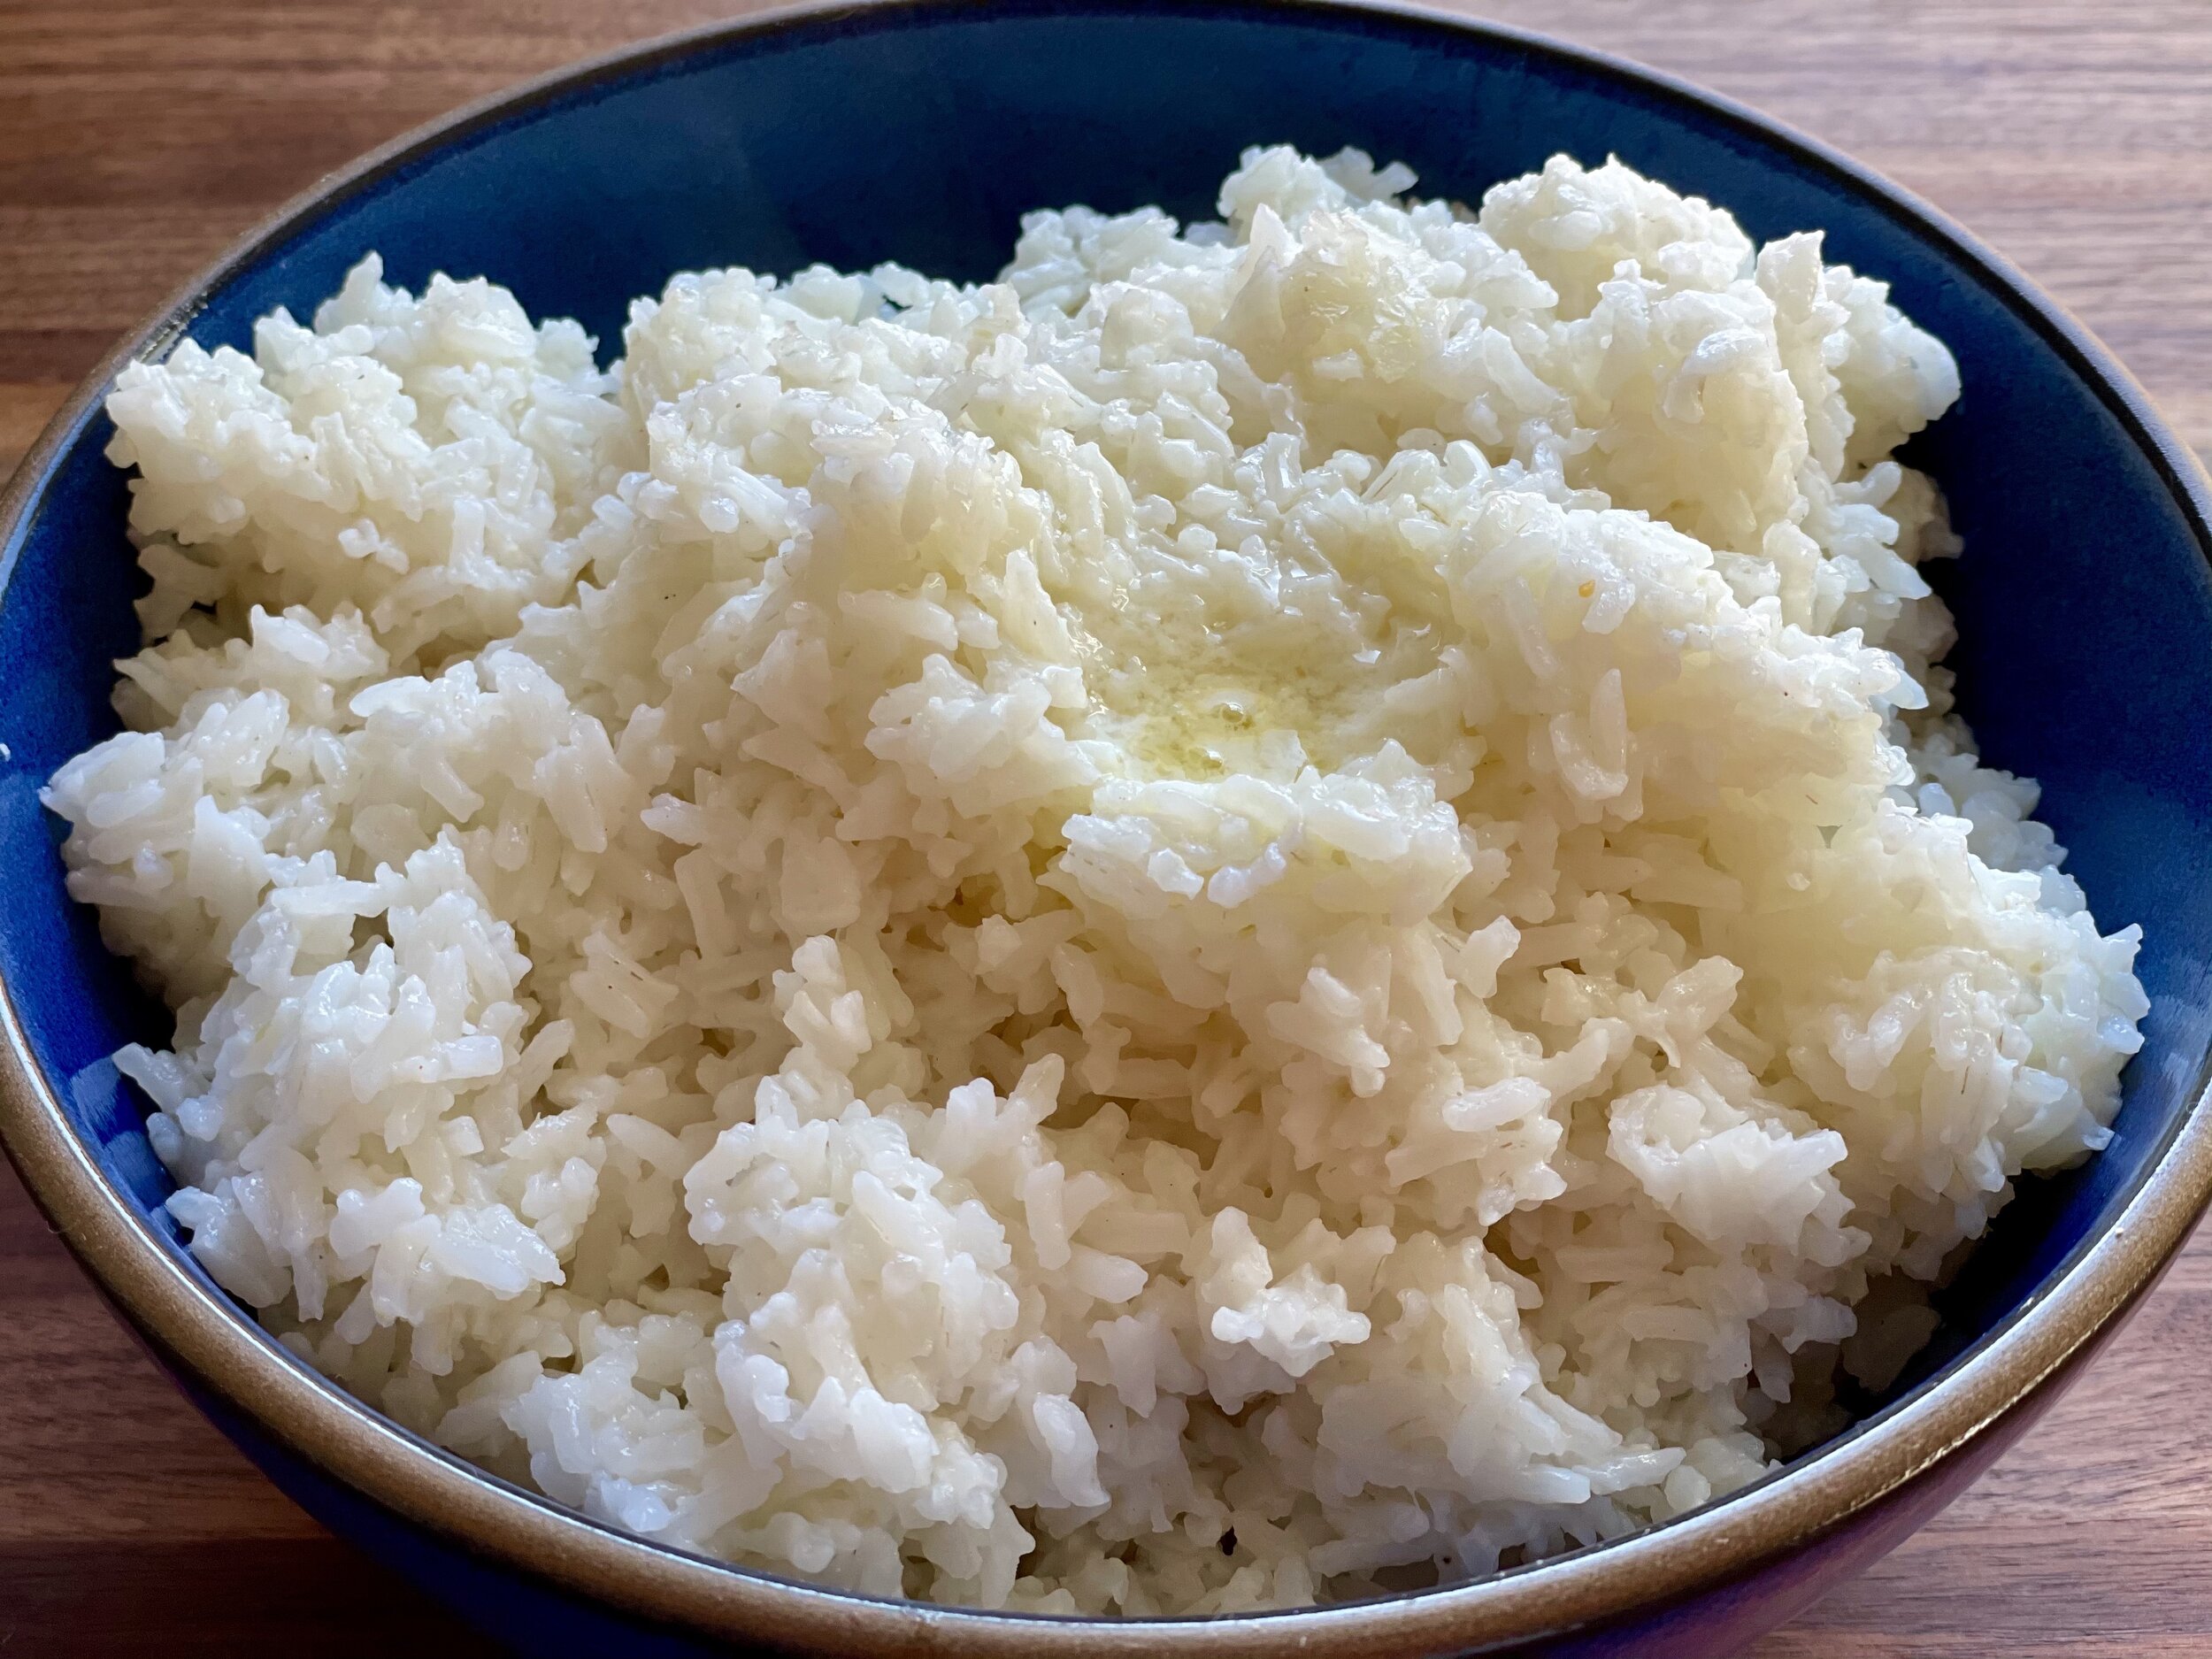
Ingredients
2 teaspoons olive oil or toasted sesame oil
2 cups jasmine rice, rinsed and drained
1 can coconut milk (14 ounces)
10 ounces water (for a total of 3 cups of liquid)
1 teaspoon kosher salt
Directions
(1) Prepare: Put the rice in a fine strainer and rinse under cold water until the water runs clear. Set aside and let drain.
(2) Saute: Heat the olive oil or toasted sesame oil in a large saucepan over medium heat. Add the rice and sauté for 2 minutes.
(3) Cook: Add the coconut milk, water, and salt and bring to a boil. Reduce heat to a simmer, cover, and cook 15-20 minutes, until the liquid has been absorbed.
(4) Finish: Fluff with a fork and let sit, covered, until ready to serve.
Eat and enjoy every bite because you can!
Recipe note: I use Diamond Crystal Kosher salt in all my recipes because it has a wonderful flat and crisp flake that tastes delicious. It is also the least salty salt available so you can use it more liberally as a seasoning than you can table salt or sea salt. If you use another type of salt, you may need to reduce the amount so it is not over-salted.
Link note: This post contains links for you to easily purchase items listed on the page. In some cases, we have provided a special discount code for IBS Game Changers so be sure to use it when you purchase an item to get the discount that has been arranged just for you! As an Amazon Associate, I earn a commission from qualifying Amazon purchases.
More Deliciously Low FODMAP™ side dishes


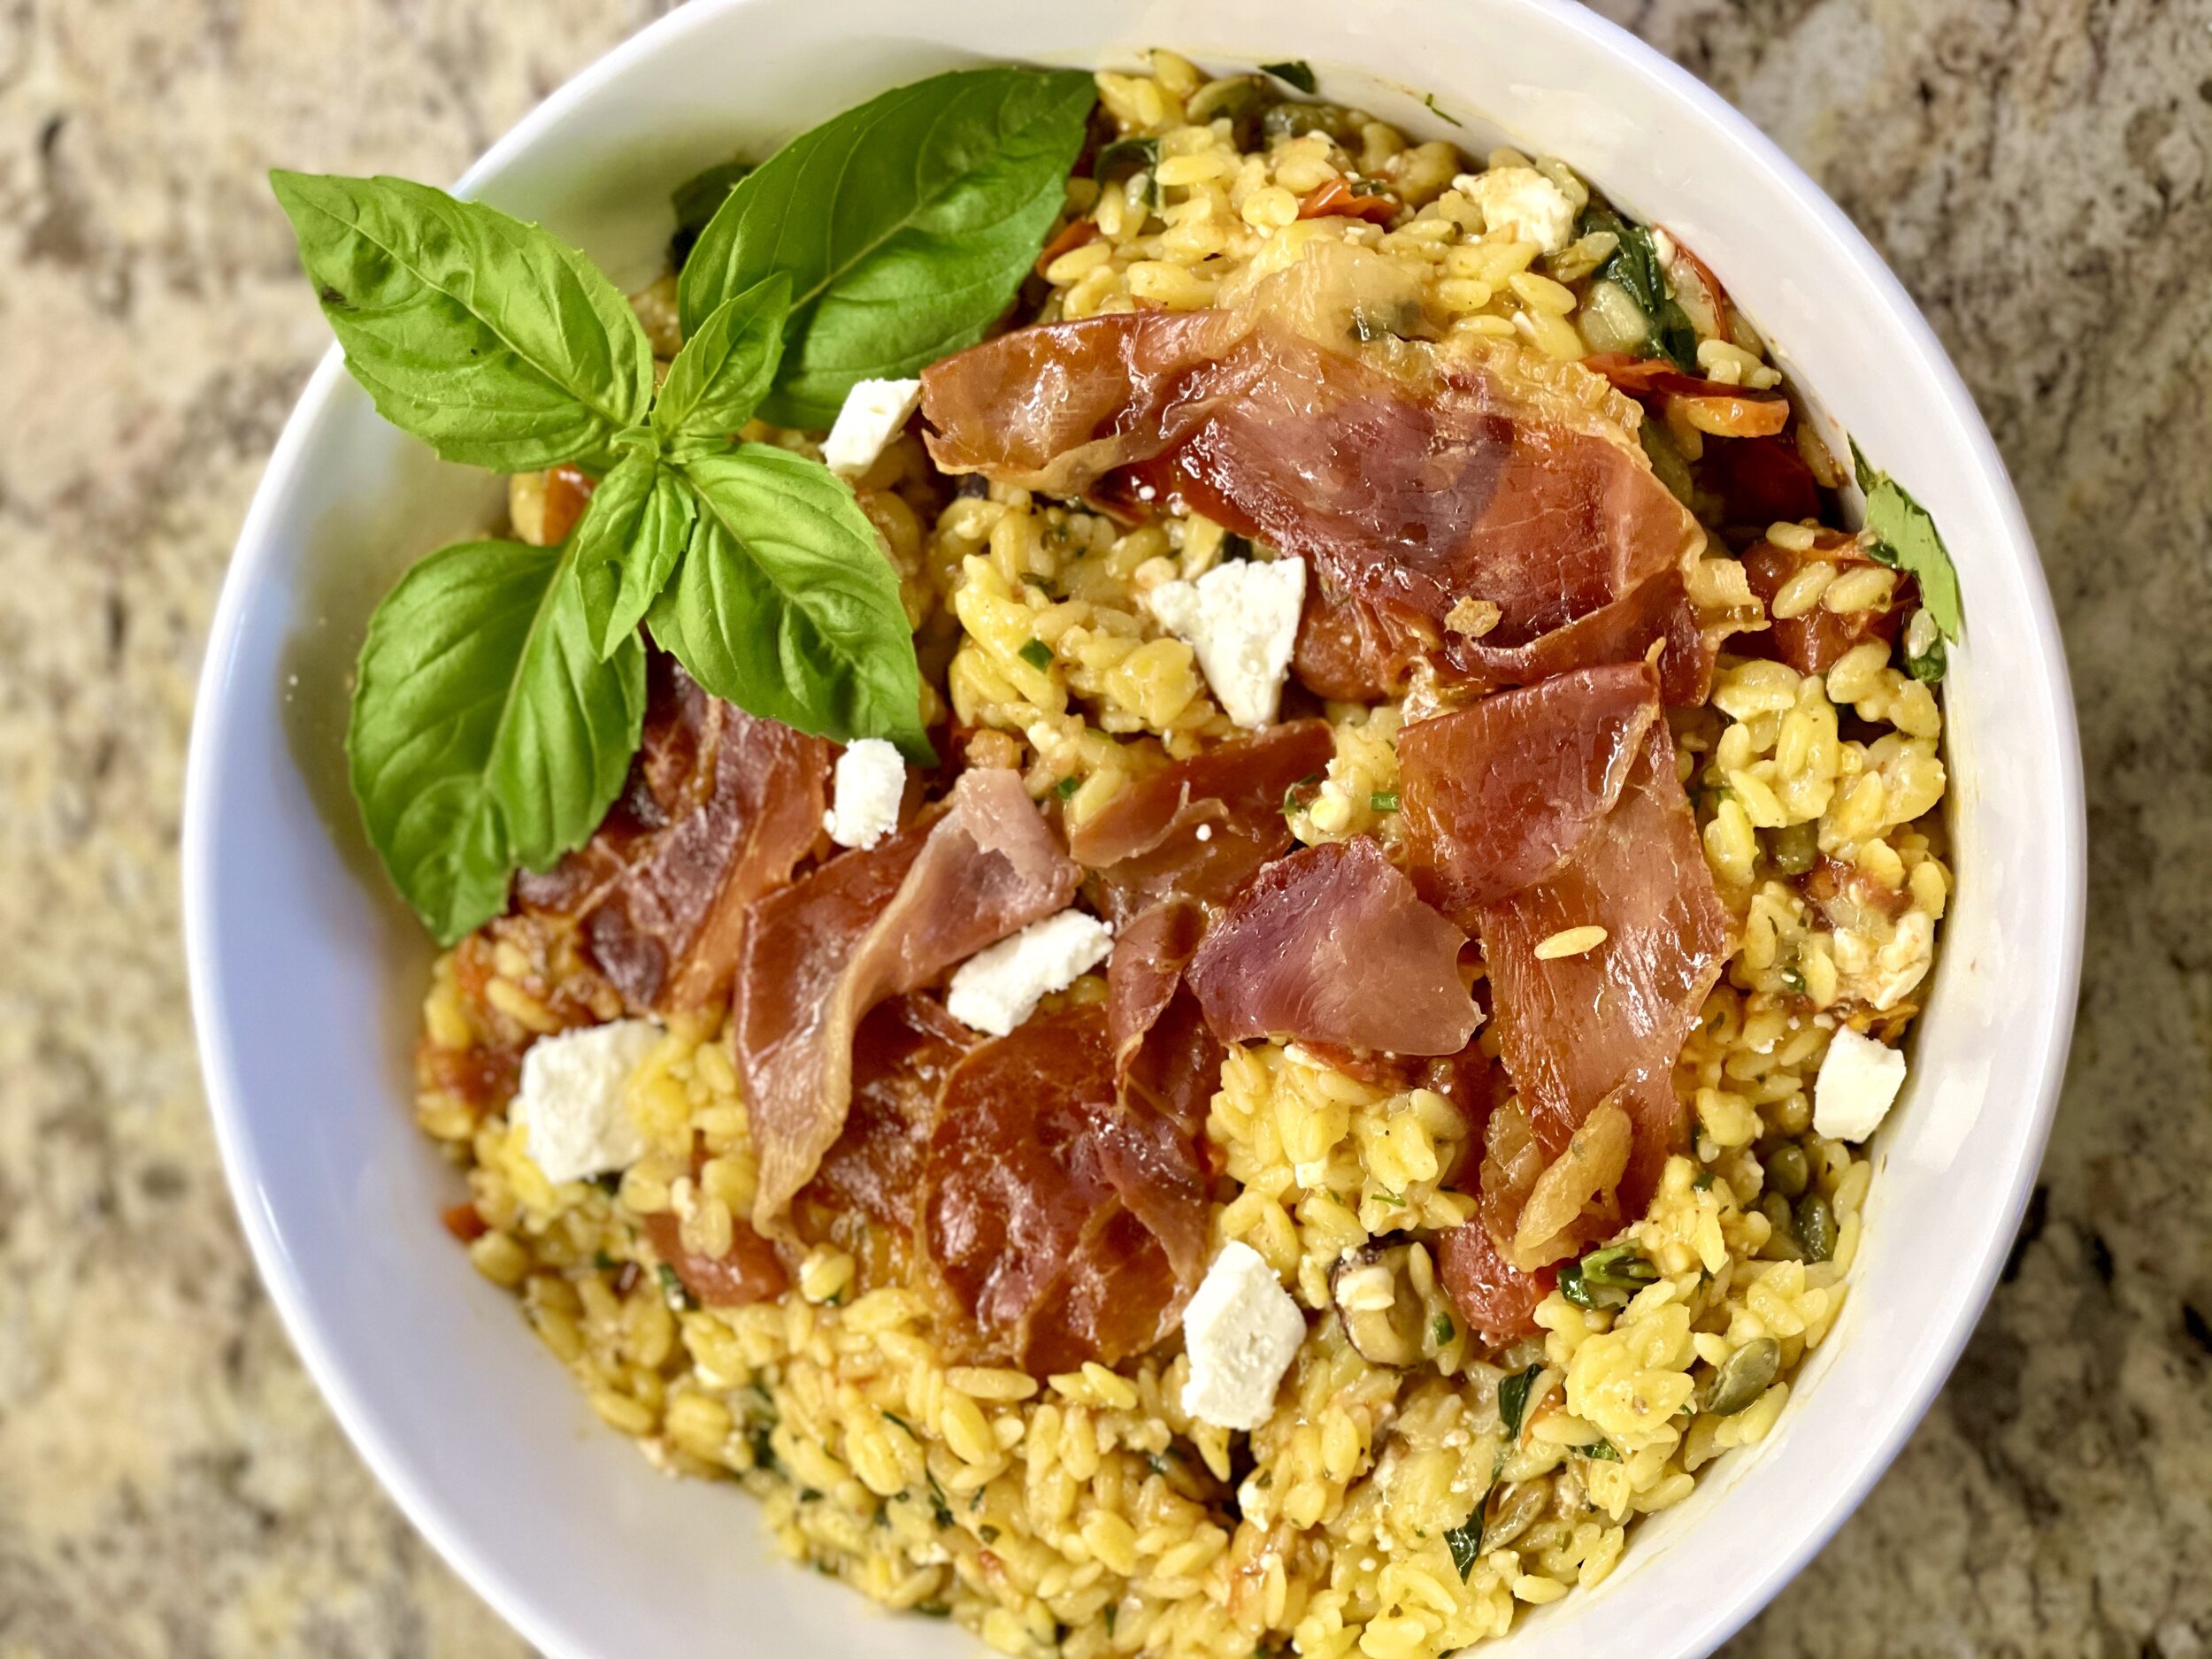
Orzo with roasted cherry tomatoes, and crispy prosciutto (low FODMAP)
30 minutes • Gluten-free • Low FODMAP • Vegetarian option • Serves 4 - 6
30 minutes • Gluten-free • Low FODMAP • Vegetarian option • Serves 4 - 6 • Creamy orzo and crispy prosciutto all wrapped up in a super flavorful sauce make this a wonderful main course or side dish. It can be served warm or chilled so it’s a great make-ahead meal for guests or a busy weeknight. It’s great heated up the next day for lunch too!
INGREDIENTS:
7 tablespoons garlic-infused olive oil
4 cups cherry tomatoes
2 tablespoons fresh thyme leaves (or 2 teaspoons dried thyme)
1 teaspoon chili powder
3 teaspoons maple syrup
3 ounces prosciutto, torn (optional but very good!)
1 pound gluten-free dry orzo pasta (or substitute arborio rice if you prefer to make this more like a risotto)
2 tablespoons red wine vinegar
Pinch red pepper flakes
1/2 cup fresh basil, roughly chopped
Chopped chives for serving (optional)
8 ounces feta cheese, crumbled, plus more for serving
1/3 cup toasted pumpkin seeds or pine nuts plus more for serving
DIRECTIONS:
Preheat the oven to 425° F.
In a roasting pan, combine 3 tablespoons garlic-infused olive oil, tomatoes, thyme, chili powder, 1 teaspoon maple syrup, and a pinch each of salt and pepper. Roast for 20-25 minutes, until the tomatoes burst.
Line a baking sheet with parchment paper and arrange the prosciutto in an even layer. Put in the oven with the tomatoes and bake 5-8 minutes until the prosciutto is crisp.
Bring a large pot of salted water to a boil. Boil the orzo until al dente per package instructions. Drain.
Meanwhile, in a large bowl, combine 4 tablespoons garlic-infused olive oil, the red wine vinegar, 2 teaspoons maple syrup, and a pinch each of red pepper flakes, salt, and pepper. Add the hot orzo and fresh herbs, toss to combine. Add the tomatoes and any juices left in the pan, the feta, and toasted pumpkin seeds or pine nuts, gently toss. Top with prosciutto.
Serve with additional feta, pumpkin seeds, and chopped dill
Eat and enjoy every bite because you can!
Pro tips: This dish can be served warm or chilled as a salad so it’s a great make-ahead dish for guests or a busy weeknight. Leave the prosciutto out for a delicious vegetarian version.
This post may contain affiliate links so you can easily purchase items listed on the page. There is no increased cost to you for purchasing items through these links so feel free to use them!
More Deliciously Low FODMAP™ main courses you might enjoy
Chipotle chicken crunch wraps (low FODMAP)
30 minutes • Gluten-free • Low FODMAP • Serves 4
30 minutes • Gluten-free • Low FODMAP • Serves 4 • Rich and flavorful chipotle chicken, with rice, cheese, and a spicy ranch dressing all wrapped up in a crunchy tortilla. It’s delicious. My son says this is one of his top five favorites and I agree!

INGREDIENTS:
2 tablespoons Sigona’s garlic-infused olive oil (Sigona’s is the best flavor garlic-infused olive oil I have find and I really recommend it—but you can use other low FODMAP brands as well)
1 pound boneless skinless chicken, cut into bite-size pieces
6 green onions (green part only), chopped
1 teaspoons chipotle chili pepper flakes
1 1/2 teaspoons smoked paprika
1 teaspoon ground cumin
2 teaspoons Smoke n’ Sanity essence of garlic salt
Or: 1 teaspoon Gourmend garlic scape powder and 1 teaspoon kosher salt
1/2 teaspoon dried oregano
6 large (burrito size) brown rice tortillas (or other low FODMAP tortillas)
1 cup cooked white rice or brown rice
1/4 cup fresh cilantro chopped (or substitute chives if you are not a cilantro fan)
2 cups shredded extra-sharp cheddar cheese
1 jalapeno pepper, seeded and chopped (for serving)
SPICY RANCH INGREDIENTS:
1 cup lactose-free sour cream
3/4 cup fresh cilantro, finely chopped (or substitute chives if you are not a cilantro fan)
2 teaspoons Smoke n’ Sanity Supper Club Ranch
Or: 1 teaspoon Gourmend garlic scape powder
1 jalapeño seeded and chopped
Juice of 1 lime
1 teaspoon kosher salt
DIRECTIONS:
Cook the rice per package instructions.
Prepare your ingredients by chopping the chicken and the green onions, grating the cheese, and measuring the spices into a small bowl.
In a large skillet, heat the olive oil over medium-high heat. When the oil shimmers, add the chicken and green onions. Cook until the chicken is browned, about 5 minutes. Add the spices and 3/4 cup water. Reduce the heat to medium and simmer until the sauce has thickened slightly around the chicken, about 10 minutes. Remove from the heat.
Meanwhile, make the ranch dressing. Combine all ingredients in a small bowl and stir until well combined.
Crunch wrapping!
To assemble, cut down from the center of the tortilla to the edge (click “print recipe” to see the PDF with photos to show technique). Spread some ranch on the top right corner, and put some cheese on the bottom right corner. Put a spoon of rice in the top left corner and spread some chicken on the rice. Fold the bottom left corner of the tortilla over the chicken and rice. Then, working clockwise, fold that quarter over the ranch. And finally, fold that quarter down over the cheese until you have a triangle shape with all the ingredients nicely captured inside.
Eat and enjoy every bite because you can!
Pro Tips:
Check out this video for a quick “how-to” on doing the wrap. It’s easy. And fun. And delicious!
Regarding seasoning: I have provided substitutions, but I really recommend the Smoke n’ Sanity essence of garlic salt and the Smoke n’ Sanity low FODMAP Supper Club Ranch seasonings in this recipe as they add complexity and intensify the flavor in a wonderful way. Get 10% off when you order your own bottle and use the code “IBSGC10”
This post may contain affiliate links so you can easily purchase items listed on the page. There is no increased cost to you for purchasing items through these links so feel free to use them!
More Deliciously Low FODMAP™ main courses you might enjoy
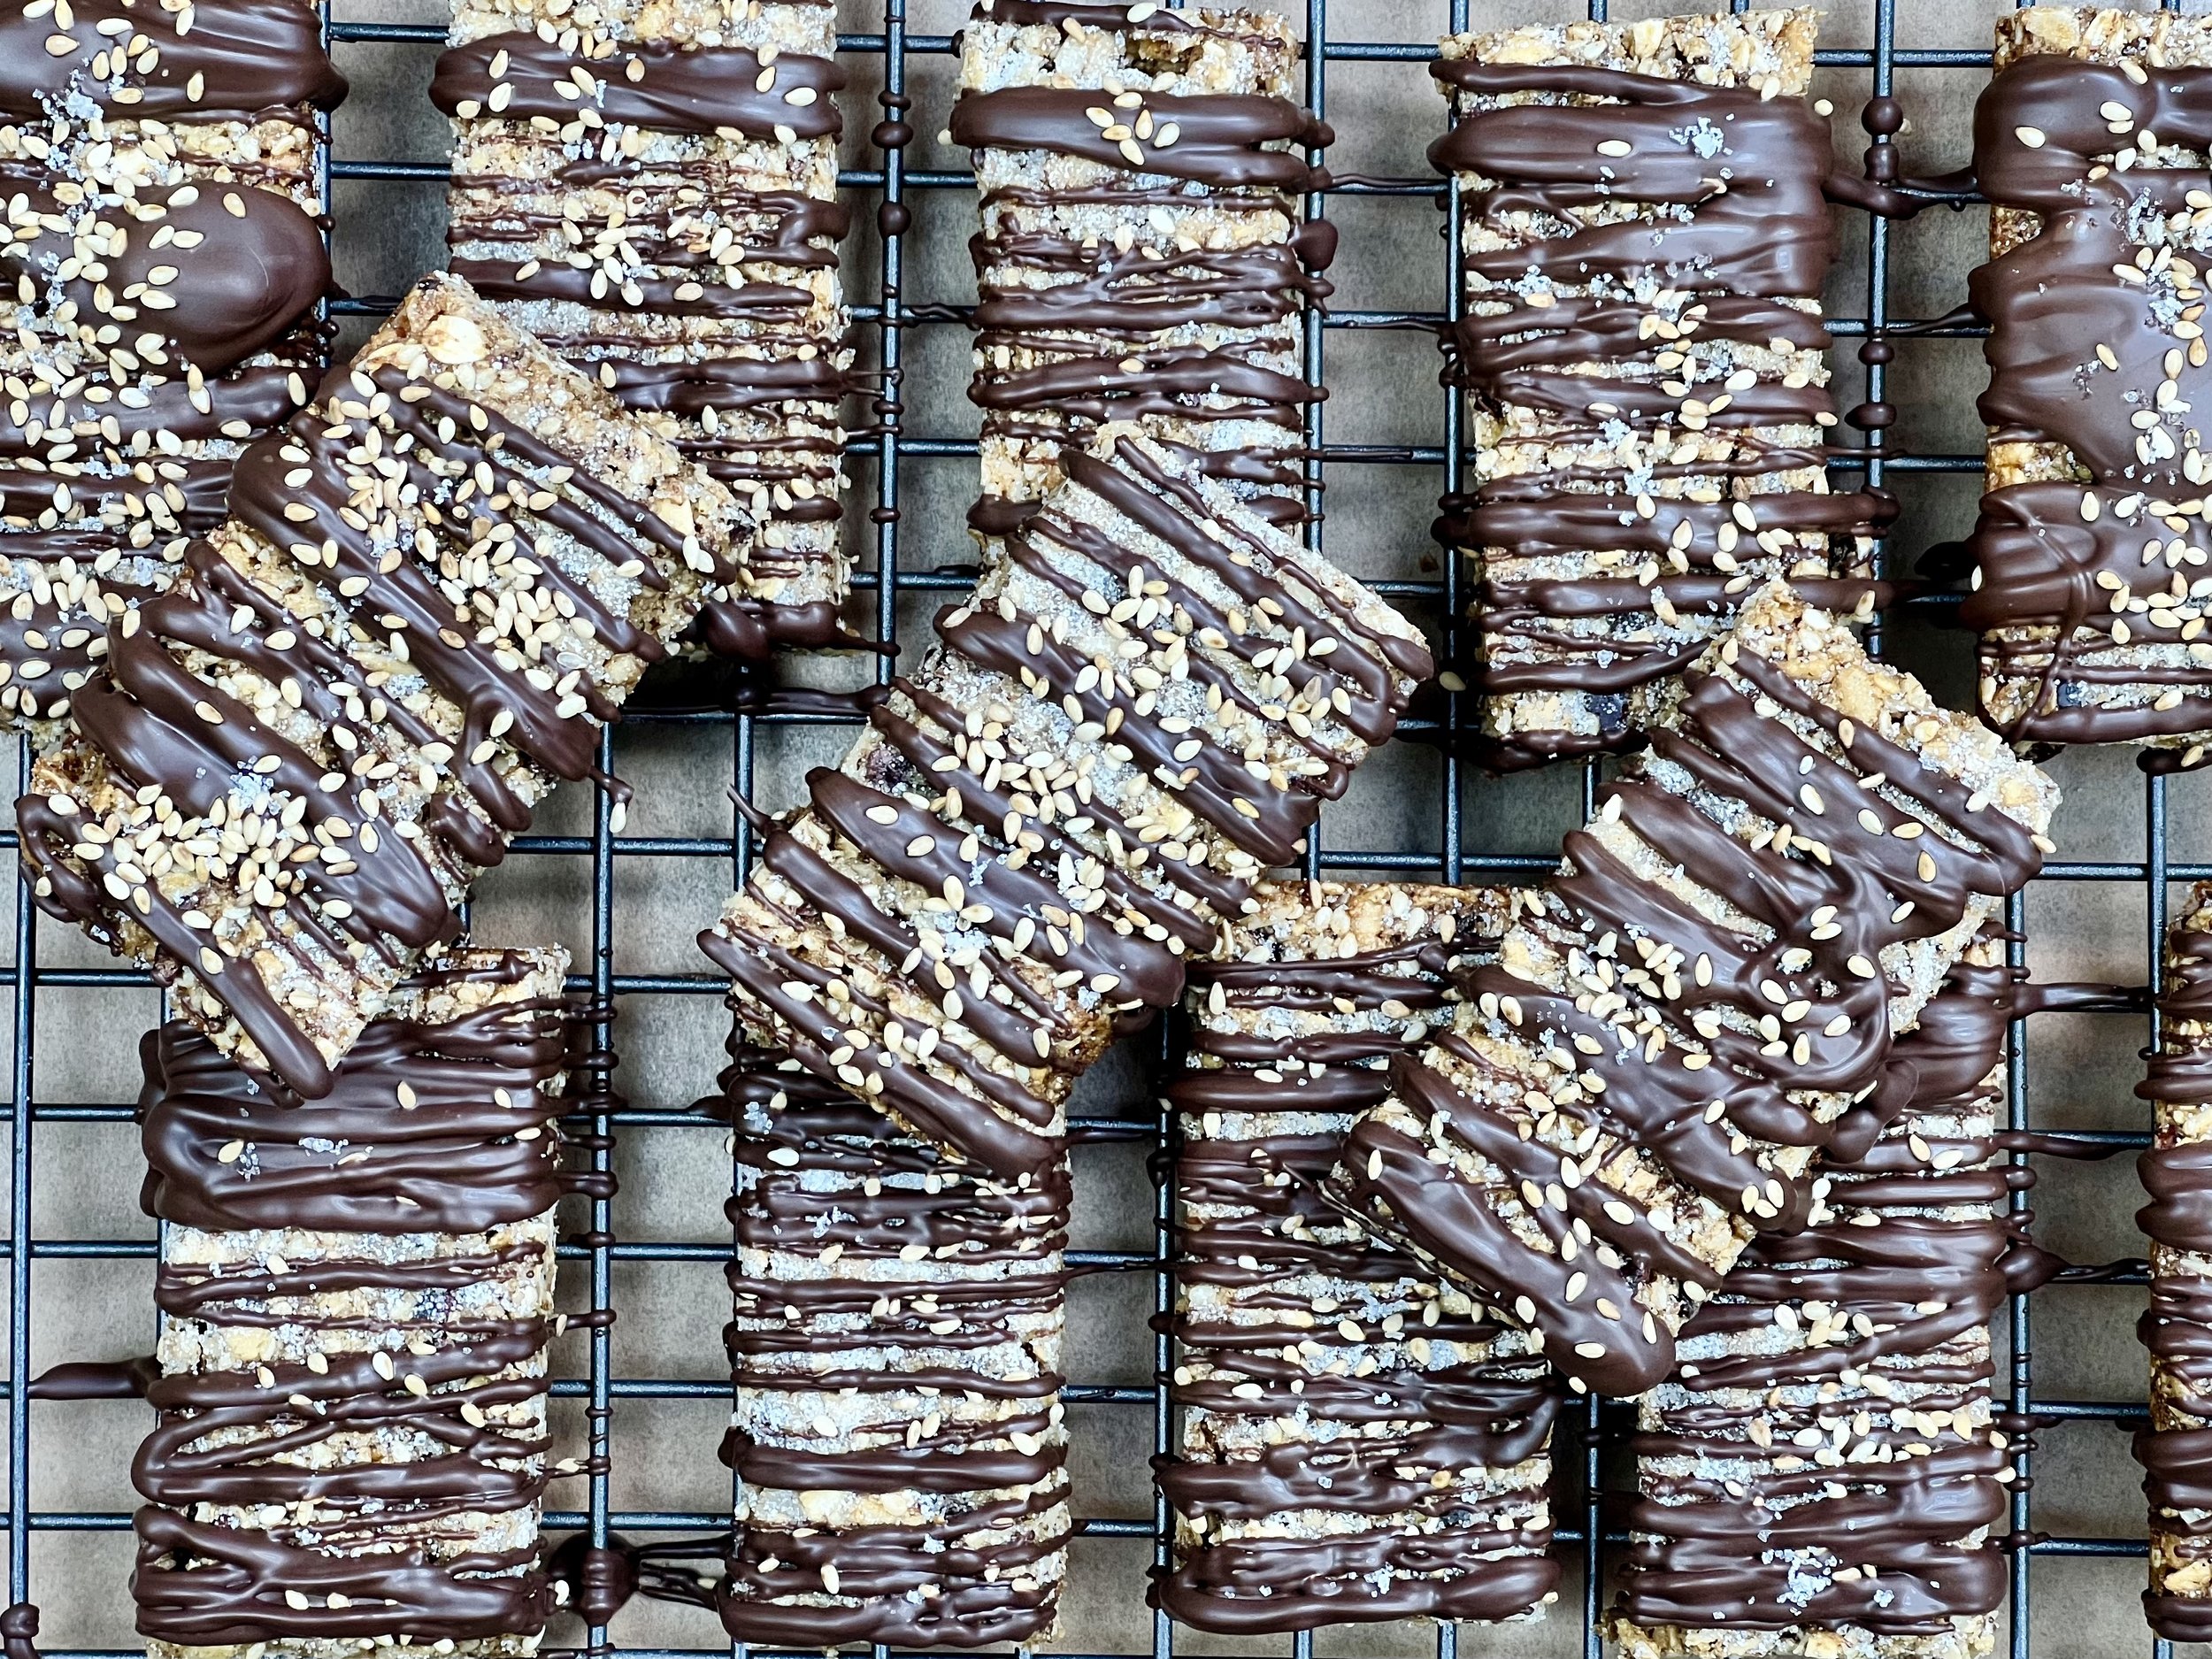
Chocolate dipped mocha meltaways (low FODMAP)
45 minutes • Gluten-free • Low FODMAP • Makes about 3 dozen cookies
45 minutes • Gluten-free • Low FODMAP • Makes about 3 dozen cookies • These chocolate-covered mocha cookies are reminiscent of those classic bakery cookies you had when you were a kid. They’re perfect with a hot cup of tea or coffee. The custard powder gives them a fine texture and the chocolate dip helps hold them together. They are a delightful change of pace from the routine chocolate chip cookie!

INGREDIENTS:
3/4 cups unsalted butter, cubed and softened to room temperature
1 1/4 cup gluten-free all-purpose flour
1/2 cup custard powder, preferably Bird’s (or substitute 6 tablespoons vanilla instant pudding and reduce the sugar by 2 tablespoons)
1/2 cup plus 1 tablespoon confectioners’ sugar
1/2 teaspoon instant decaf espresso powder (such as Starbucks decaf Via)
2 tablespoons lactose-free half and half
1/4 teaspoon vanilla extract
5 1/4 ounces semi-sweet chocolate chips
3/4 cup dark chocolate tempered dipping chocolate wafers
Flaky salt, for sprinkling (optional)
DIRECTIONS:
Preheat oven to 350°F and line two baking sheets with parchment paper.
Add the butter to the bowl of a stand mixer and beat with the paddle attachment until it turns pale and fluffy about 2-3 minutes.
Remove the bowl from the mixer and sift the flour, custard powder, confectioners’ sugar, and espresso powder on top of the butter.
Return to the mixer and mix on low speed until the mixture comes together in an even crumble. Scrape the sides of the bowl down with a rubber spatula.
Add the milk and vanilla and mix on medium speed until you get a smooth dough, about 1 minute.
Add the chocolate chips and mix on medium speed for about 30 seconds until evenly distributed.
Using a tablespoon or cookie dough scoop, drop about 36 evenly sized scoops about 1 inch apart onto the parchment-lined cookie sheets.
The cookies will not spread during baking so before putting them in the oven press them down with the bottom of a glass or with a fork dipped in powdered sugar to prevent them from sticking to the dough.
Bake for about 15 minutes, until the edges start to turn golden brown, swapping the baking sheets between the oven racks and rotating them halfway through the baking time.
Let the cookies cool on the baking sheets for about 5 minutes, then carefully transfer them to a wire rack to cool completely.
Meanwhile, melt the tempered dipping chocolate in the microwave. Dip each cookie and lay them back down on the parchment to let the chocolate set. As the chocolate is setting you may sprinkle with flaky salt if you’d like.
Store the dipped cookies in an airtight container for 2 or 3 days.
Enjoy!
This post may contain affiliate links so you can easily purchase items listed on the page. There is no increased cost to you for purchasing items through these links so feel free to use them!
Magnificent Mac n’ Cheese (low FODMAP)
30 minutes • Low FODMAP • Gluten-free • Vegetarian option • Serves 6
30 minutes • Low FODMAP • Gluten-free • Vegetarian option • Serves 6 • When you’re craving mac ‘n cheese, THIS is what you’re craving. Super creamy, cheesy, and flavorful. We’ve used gluten-free pasta and lactose-free milk to make this mac n’ cheese FODMAP friendly but your family will never know the difference! We’re sure you are all going to love it!

INGREDIENTS:
3 cups extra sharp cheddar (about 3/4 pound grated)
8 ounces (uncooked) gluten-free macaroni noodles
1/3 cup butter
1/3 cup gluten-free flour
2 1/2 cups lactose-free whole milk
1 teaspoon salt
1/2 teaspoon pepper
1/2 teaspoon paprika
1/2 teaspoon Coleman’s dry mustard (optional but good!)
6 slices low FODMAP bacon (optional for serving)
1/8 cup chives, chopped (optional for serving)
DIRECTIONS:
Preheat oven to 400 degrees F. Line a rimmed baking sheet with foil.
Lay your bacon slices on the foil and cook in the oven until they reach your desired crispness. Remove and set on paper towels while you prepare the rest of the meal.
After the bacon is cooked, reduce the oven temperature to 350 degrees F.
Meanwhile, butter 6 ramekins or one square (8x8-inch) baking pan or similar-sized baking dish and set aside.
Grate the cheese and set it aside.
Cook the pasta according to package instructions, drain, rinse and set aside.
To make the white sauce, melt the butter in a saucepan over medium heat. Add the flour and stir constantly for about a minute so the flour cooks in the butter. (This is important as it takes away the “raw” taste of the flour in your white sauce.)
Very slowly add the milk while constantly whisking the mixture. Stop periodically to let the sauce heat and thicken and then continue to add the milk in a slow stream while whisking almost constantly. This takes a few minutes but prevents your sauce from burning on the bottom of the pan.
Once all the milk is added and the sauce is thickened, add the salt, pepper, paprika, and about half the grated cheese. Stir until the cheese is melted and remove the sauce from the heat.
Now you’re ready to assemble your Magnificent Mac n’ Cheese.
Fill the buttered dish(es) halfway with pasta. Pour about half the cheese sauce over the pasta. Add another layer of pasta and pour on the remaining half of the sauce. Sprinkle the remaining cheese on top of the mac n’ cheese and put it in the oven for 20 - 30 minutes (larger dishes will take a bit longer) until the cheese is bubbling and starting to brown lightly at the edges.
Remove from the oven and, while the mac n’ cheese cools just a bit, chop your bacon and chives and sprinkle them on the top.
Serve with a side salad.
Enjoy!
This post may contain affiliate links so you can easily purchase items listed on the page. There is no increased cost to you for purchasing items through these links so feel free to use them!
IBS Awareness Month Tip #4
Did you know 2 out of 3 people who have IBS are women? Don’t let IBS run your life. Be an IBS Game Changer.
Did you know 2 out of 3 people who have IBS are women? Don’t let IBS run your life. Be an IBS Game Changer.

Most of us who have IBS are women. And, most of us who have IBS experience significant, negative, daily impacts on our lives.
I spent years doing research and testing different solutions and I learned what works and what doesn’t work.
Now I spend hours every week creating and sharing new content, recipes, and special offerings just for you. And, every week I publish Feel Good Friday emails that highlight all the content I’ve pushed during the week so you don’t miss a thing. It’s all free and all developed with you in mind. My goal is to help you feel empowered, inspired, in control, and really great!
If you need more help or you’re at your wit’s end with your symptoms running your life, check out the IBS Game Changer program. It’s not just a game-changer, it’s a life-changer.
*As explained in program agreement
Macadamia nut chicken and coconut noodles (low FODMAP)
20 minutes • Gluten-free • Dairy-free • Low FODMAP • Serves 4
20 minutes • Gluten-free • Dairy-free • Low FODMAP • Serves 4 • Quick to make and wonderful to eat! This chicken is sautéed in a sweet and spicy sauce, with macadamia nuts, fresh basil, and served over creamy coconut noodles. A perfect weeknight dinner.

INGREDIENTS:
1 1/2 pounds boneless skinless chicken breasts, thinly sliced
5 tablespoons gluten-free low-sodium soy sauce
2 tablespoons garlic-infused olive oil
3 tablespoons toasted sesame oil
1 tablespoon tangerine (or other citrus) jam
2 tablespoons maple syrup
1 tablespoon grated ginger
1/2 teaspoon red pepper flakes
1/2 cup roasted and salted macadamia nuts, chopped
1 cup fresh basil, roughly chopped plus more for serving
8 ounces rice noodles
1/3 cup canned coconut milk
Lime wedges, for serving
DIRECTIONS:
Cook the rice noodles according to package directions and set them aside.
In a glass jar, mix together 4 tablespoons soy sauce, citrus jam, and maple syrup.
In a large skillet over medium-high, heat 2 tablespoons of garlic-infused olive oil, the ginger, and red pepper flakes until fragrant, about 30 seconds. Add the chicken and 1 tablespoon soy sauce, cook 5 minutes until lightly caramelized. Stir in the macadamia nuts. Add the maple syrup-soy sauce mixture and cook until the sauce glazes the chicken and the meat is cooked through (about 2 - 3 minutes).
Remove from the heat and stir in the basil.
Meanwhile, set a medium skillet over medium heat. Add 1 tablespoon toasted sesame oil.
When oil shimmers, add noodles and cook for about 2 minutes until heated through. Stir in the coconut milk and toss the noodles in the coconut sauce for about a minute until fully heated.
Divide the noodles between bowls and top with the chicken. Serve with additional chopped basil and a generous squeeze of llime.
Enjoy!
This post may contain affiliate links so you can easily purchase items listed on the page. There is no increased cost to you for purchasing items through these links so feel free to use them!
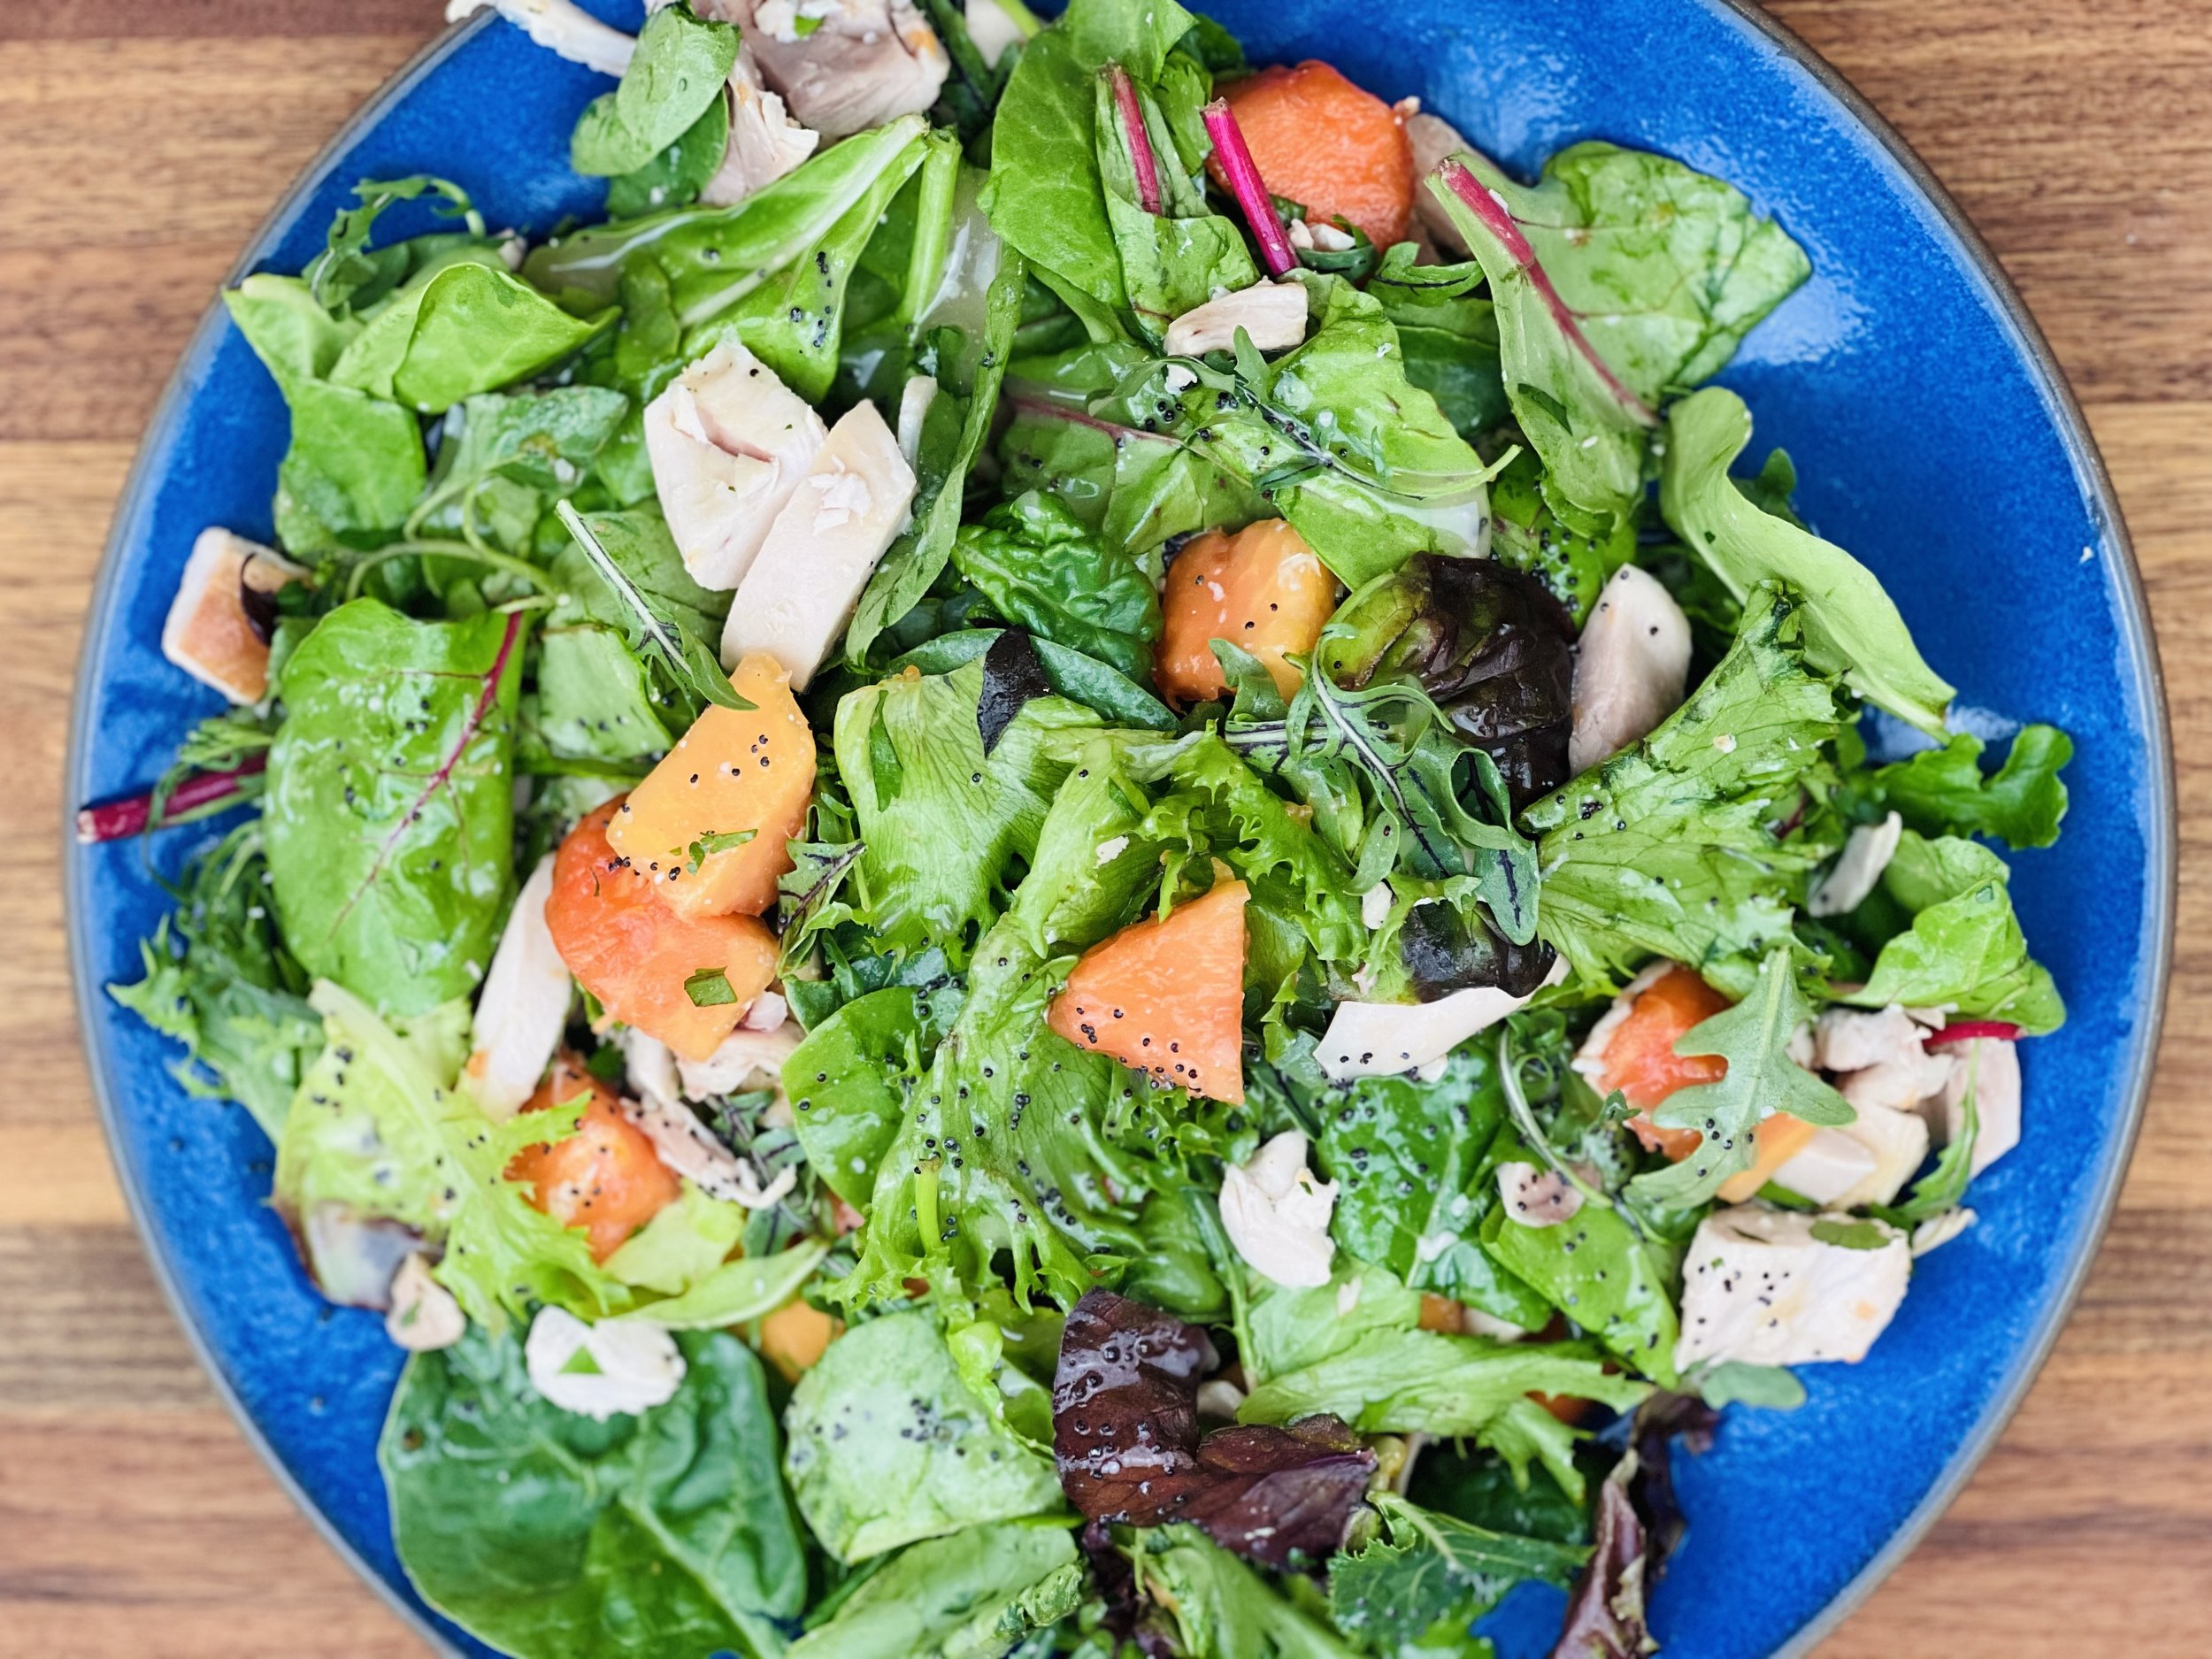
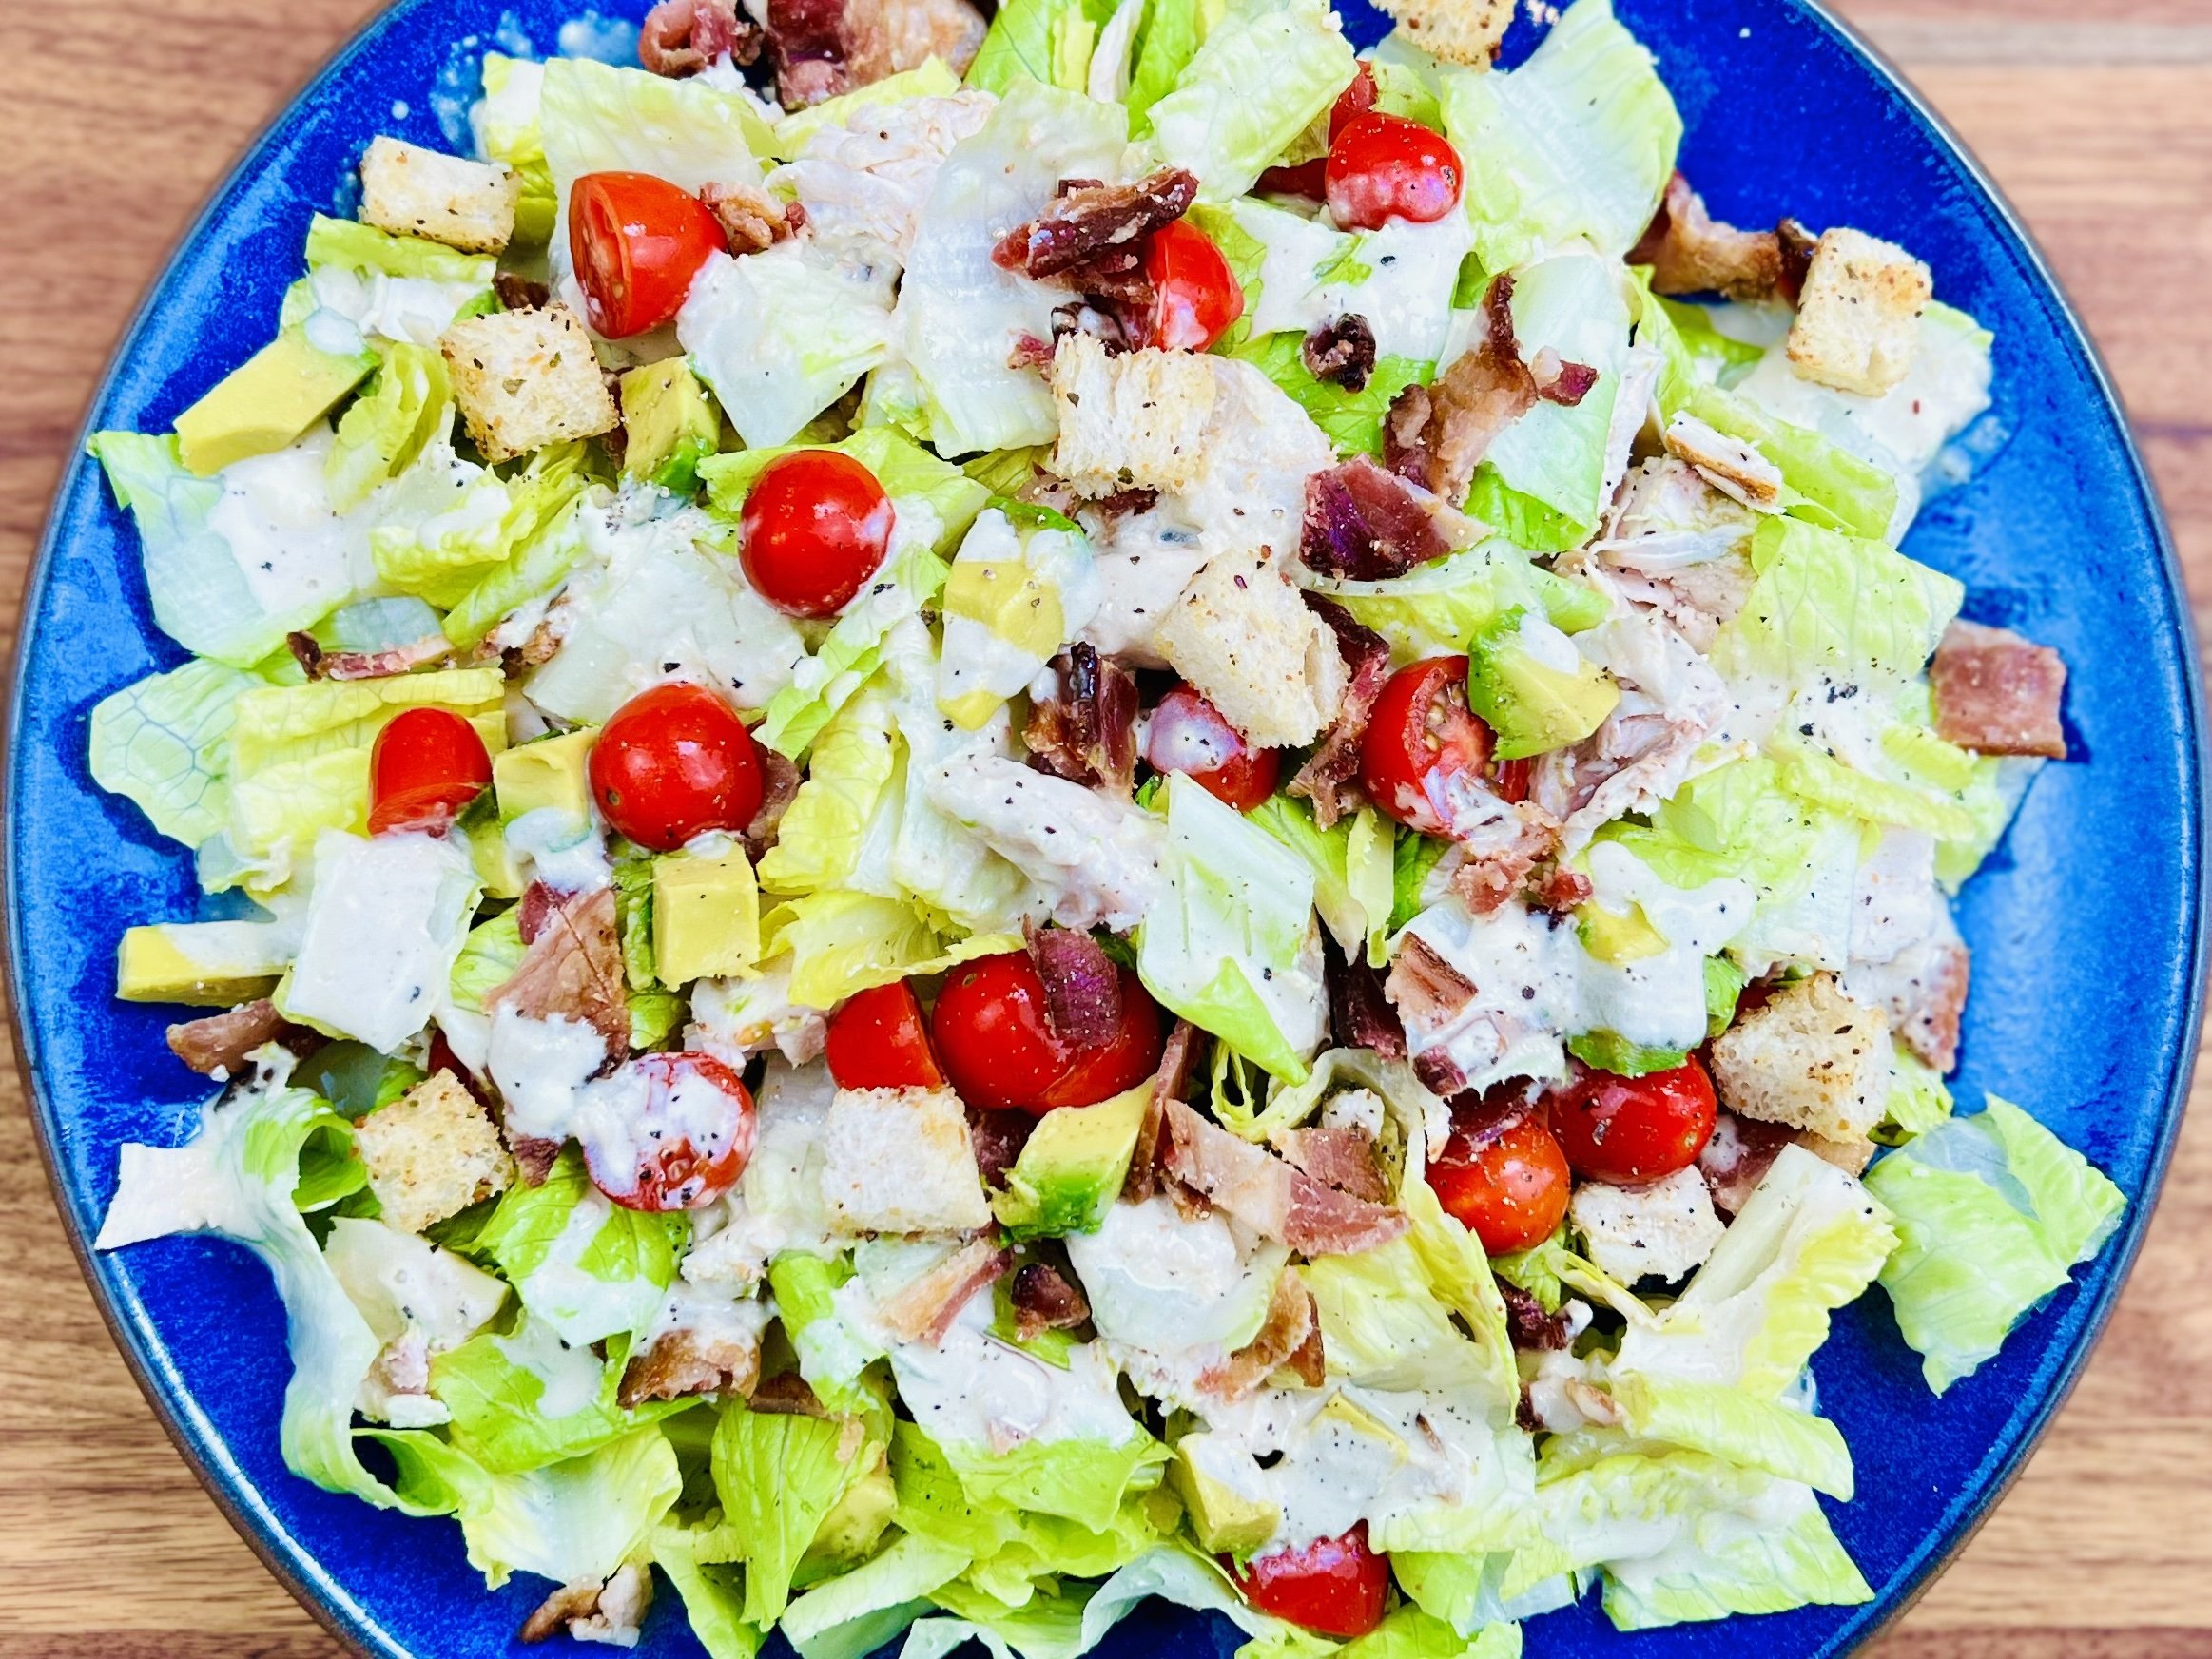
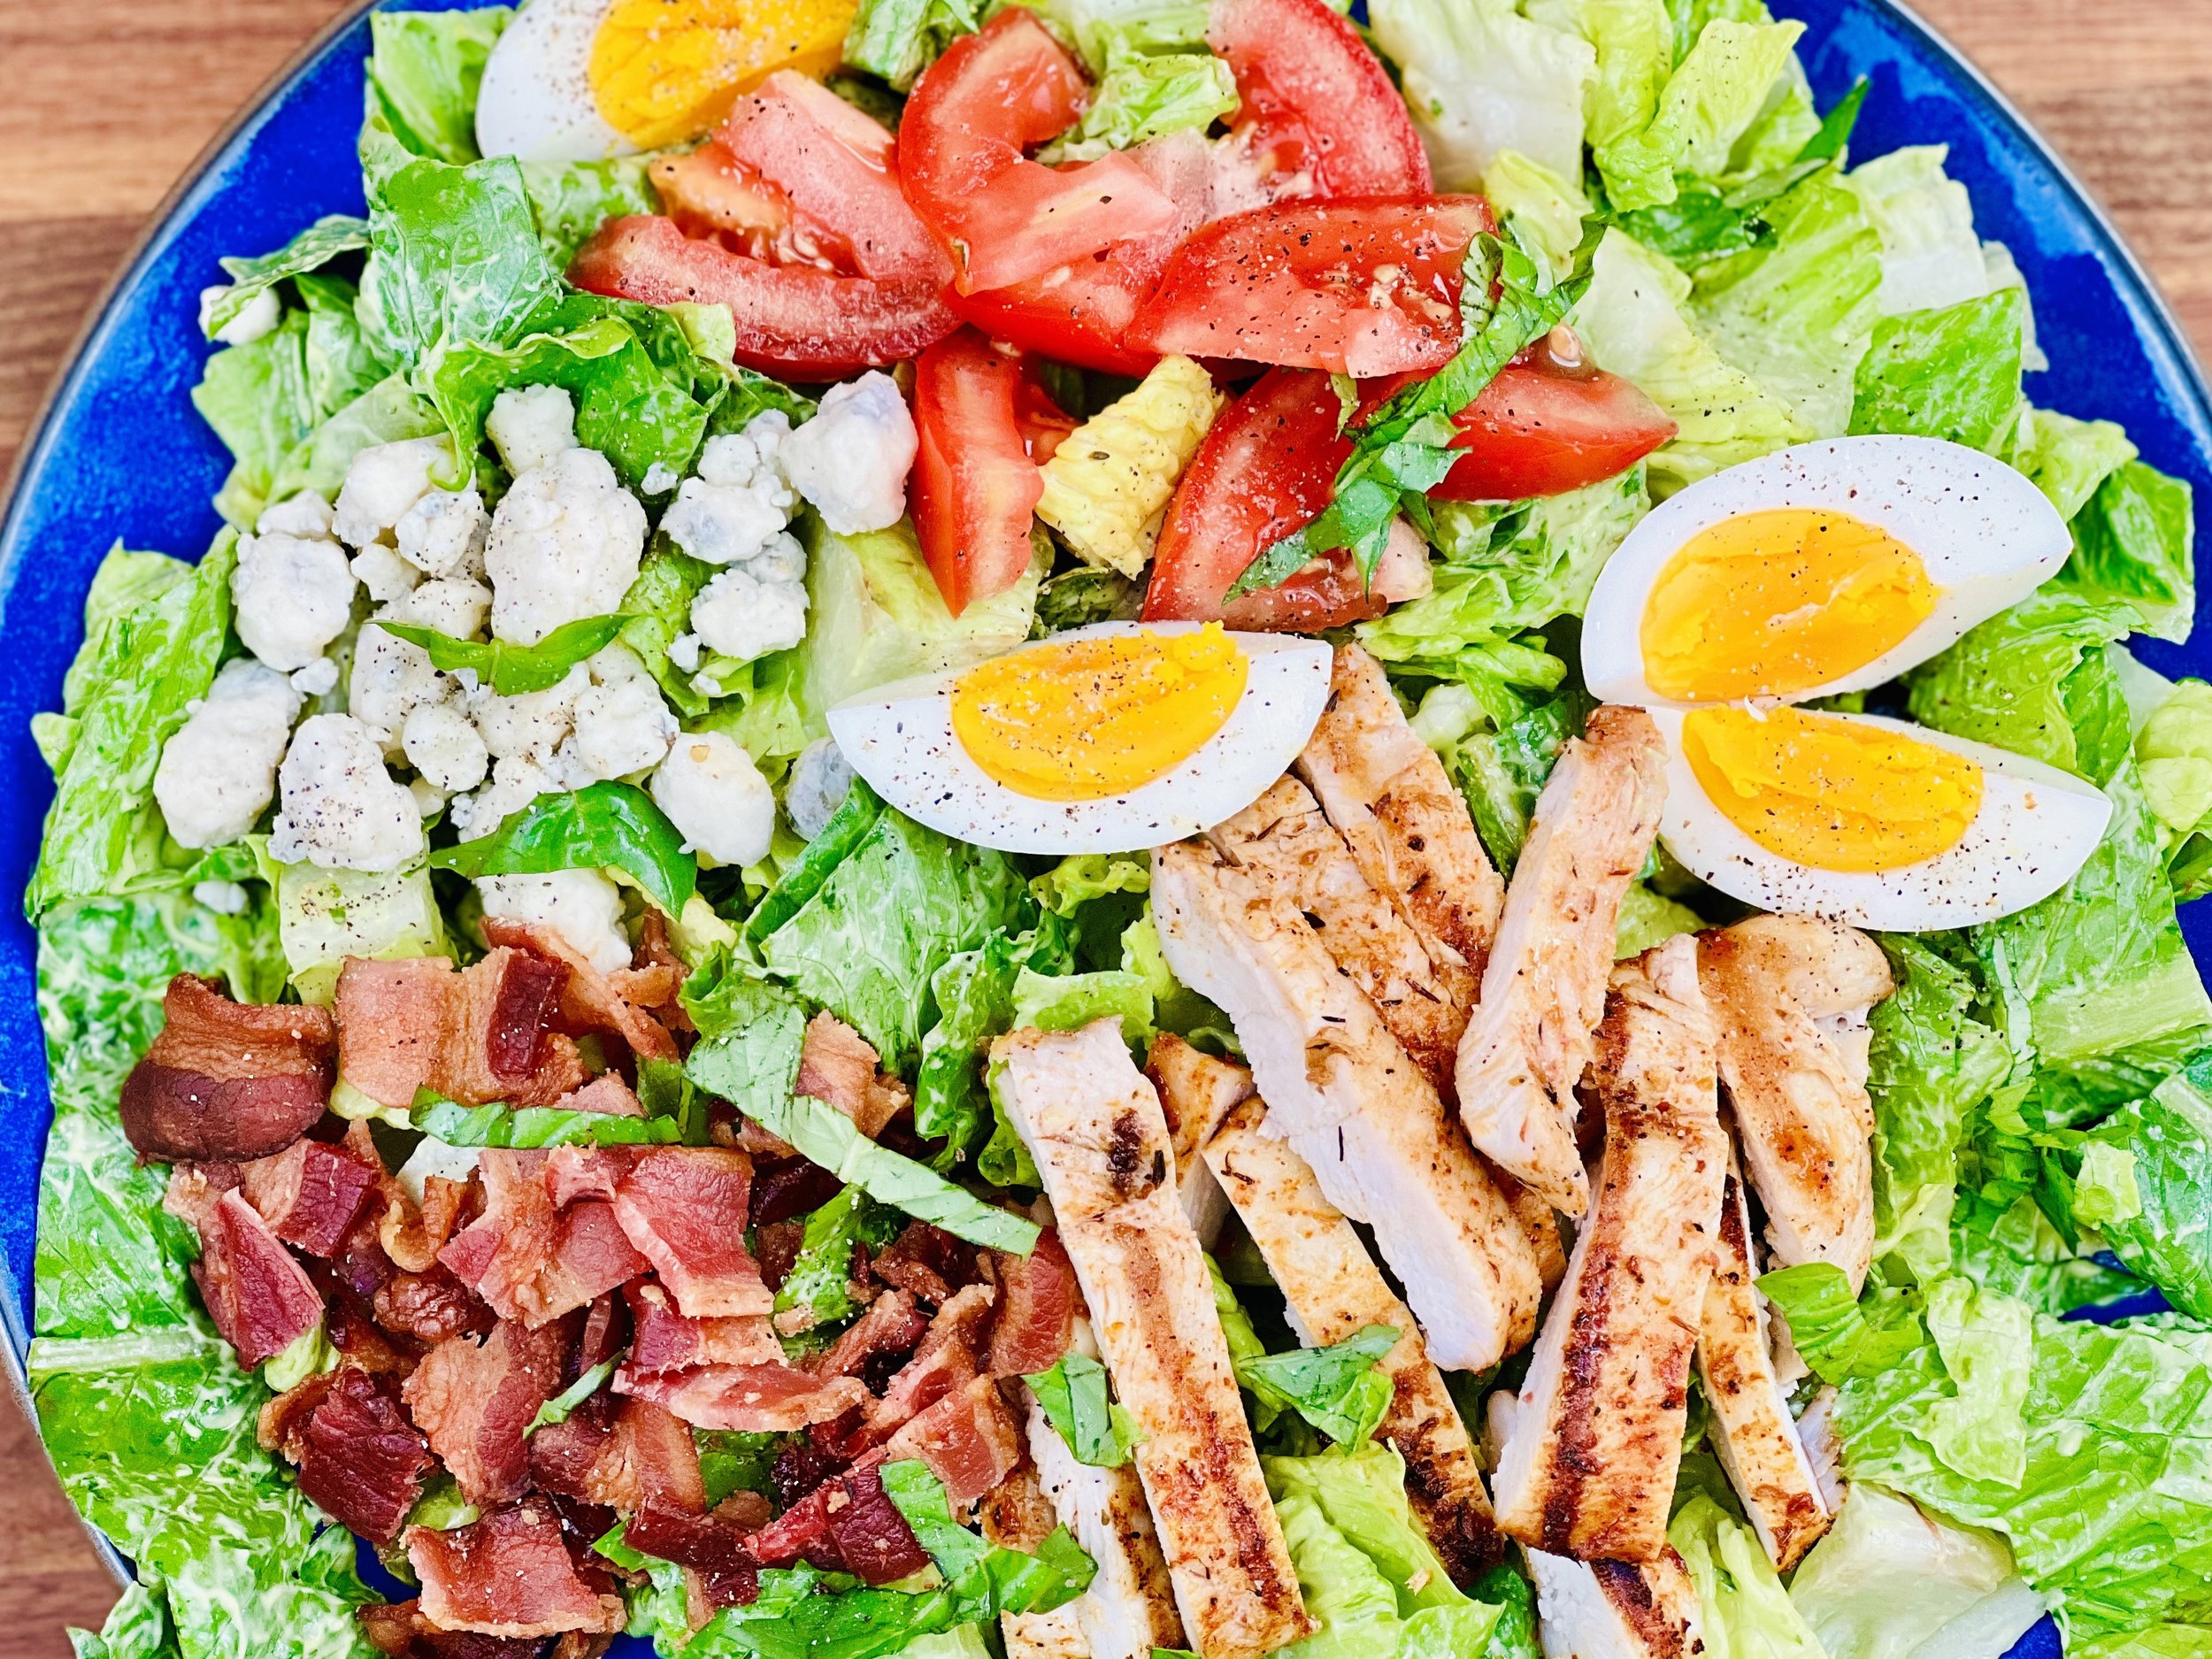
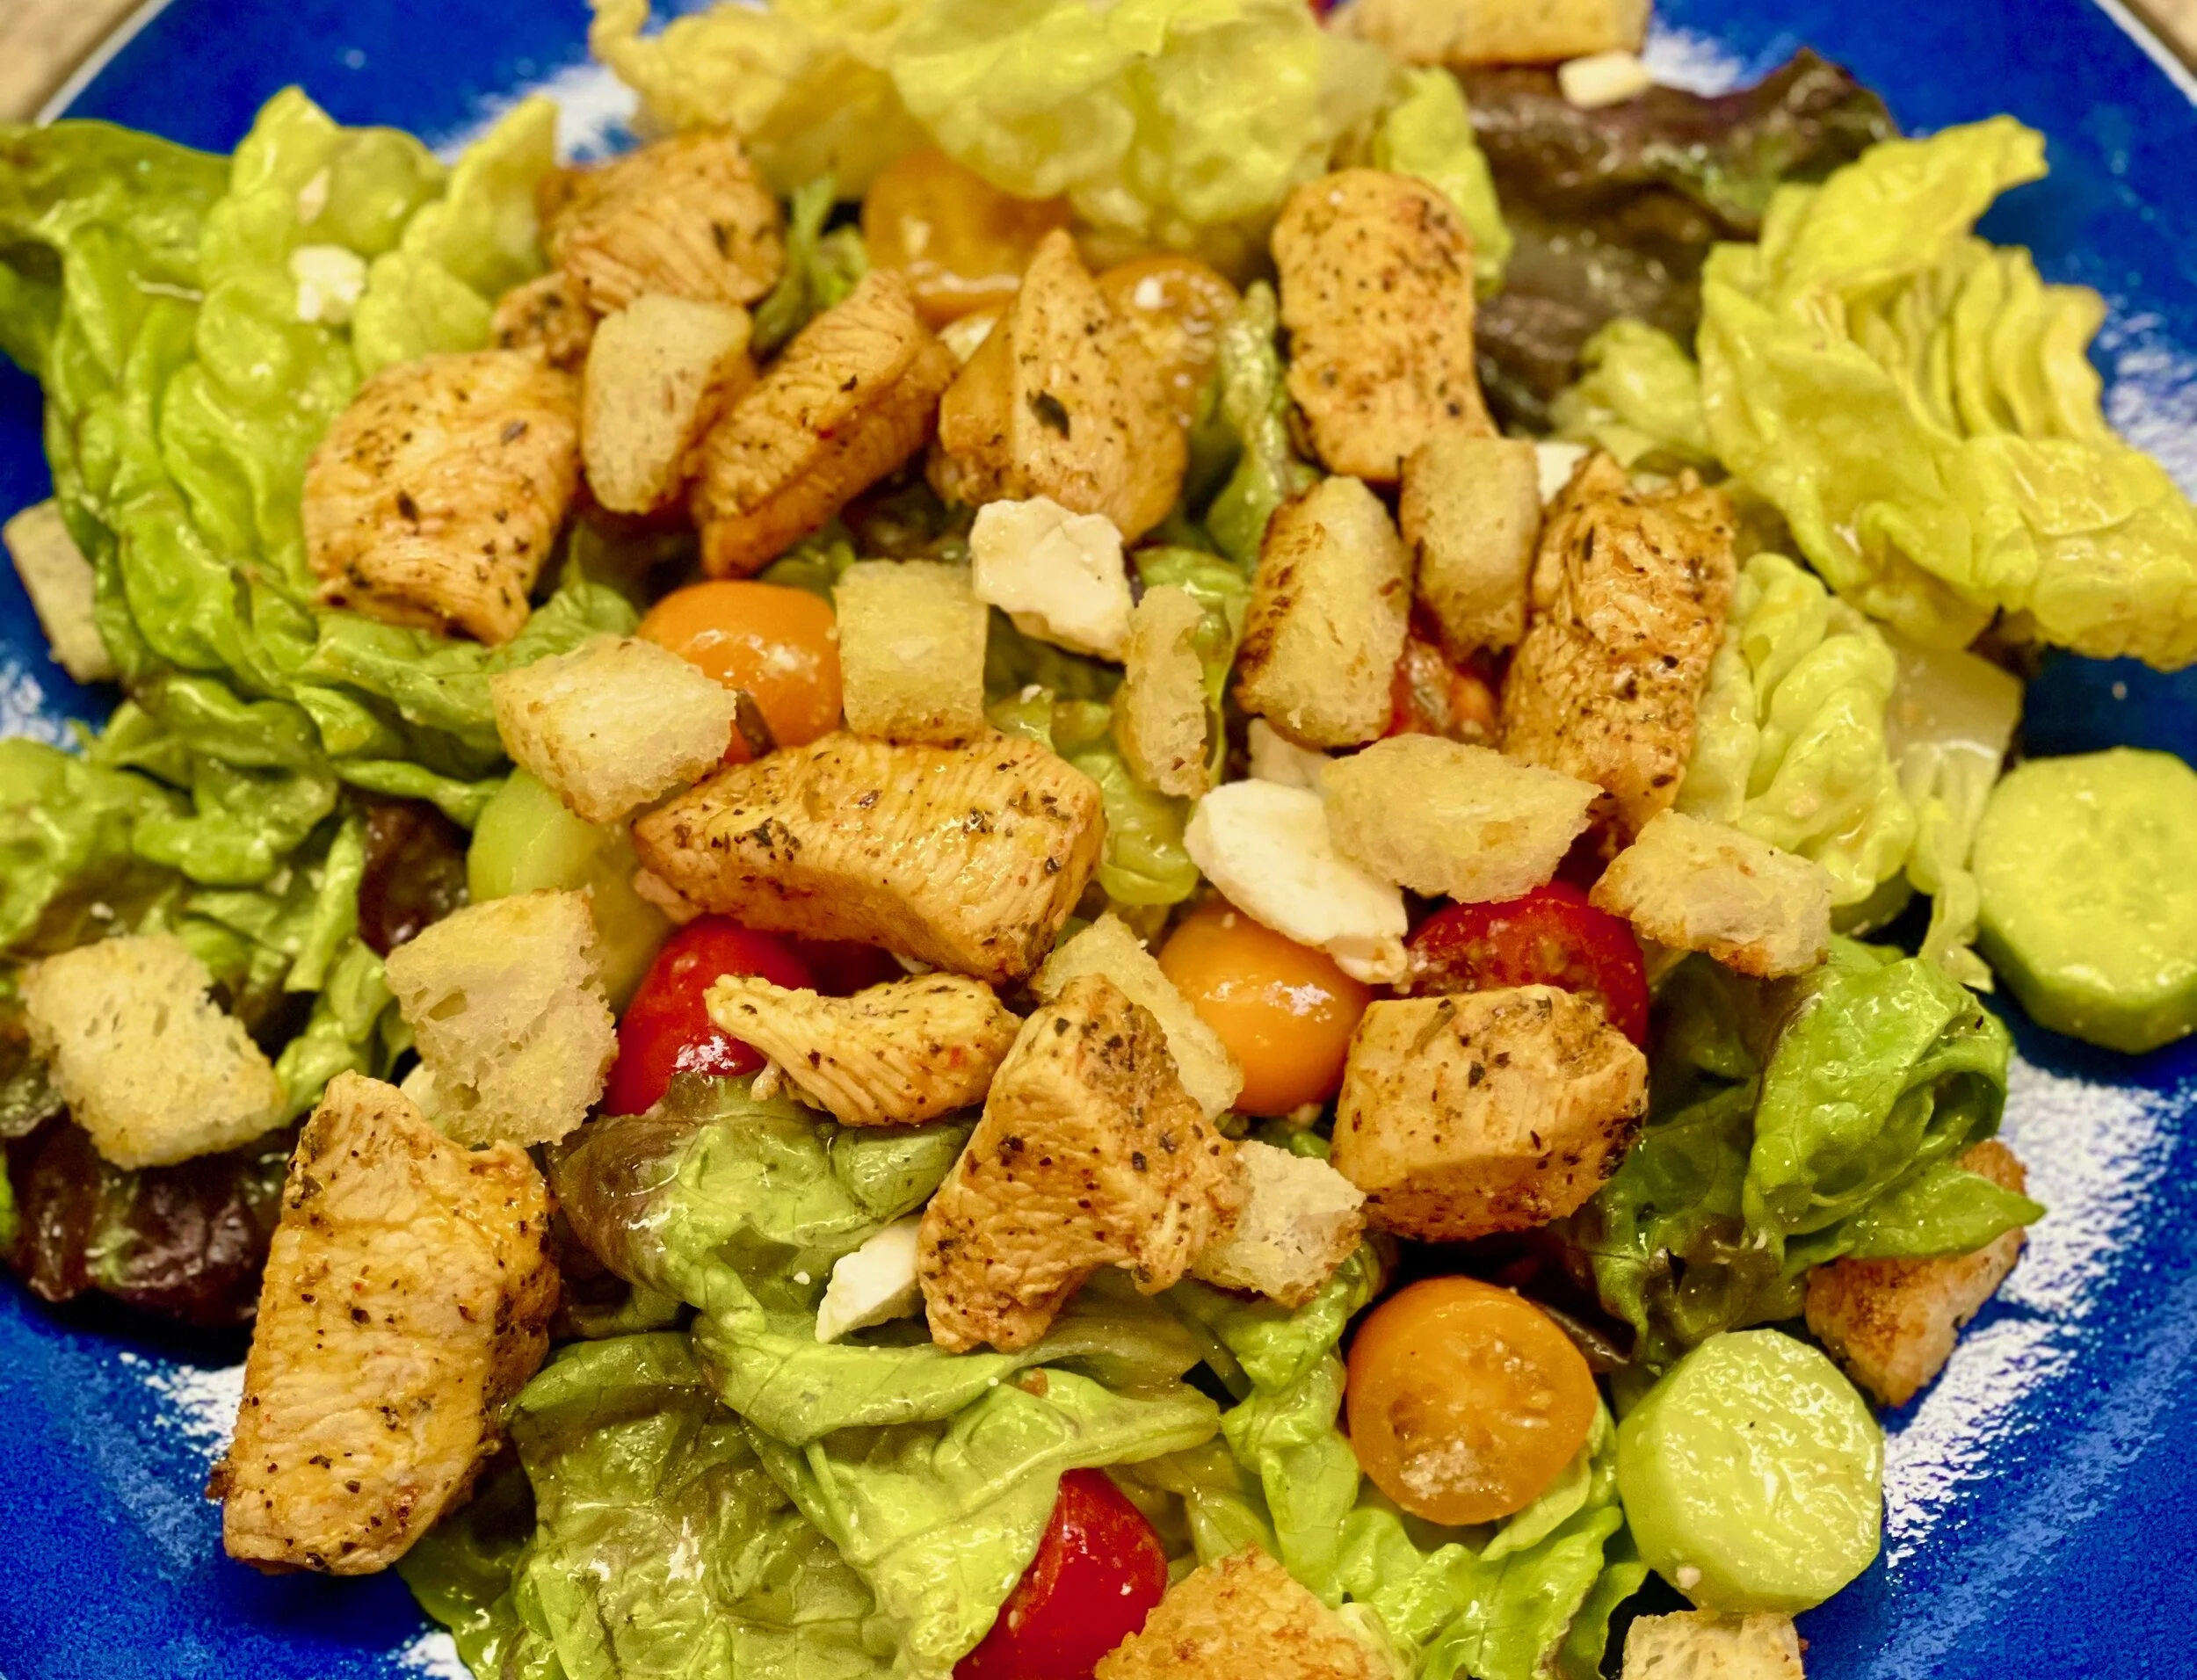
Greek lemon chicken salad with sourdough croutons (low FODMAP)
Prep 30 minutes • Cook 15 minutes • Low FODMAP • Serves 4 • This hearty Greek-themed salad is a delightful combination of flavors that will brighten up a weeknight or make a splash on the weekend. The sourdough croutons are excellent so don’t leave them off!
INGREDIENTS:
1 pound boneless skinless chicken breasts, cut into bite-size chunks
4 tablespoons garlic-infused olive oil
1 tablespoon balsamic vinegar
1 teaspoon smoked paprika
2 teaspoons dried oregano (or 1 tablespoon chopped fresh oregano)
Zest and juice of 1 lemon
Red pepper flakes, kosher salt, and black pepper
1 cup traditional sourdough bread cut into cubes
2 tablespoons butter
6 cups shredded romaine or butter lettuce
1 cup cherry tomatoes, halved
2 Persian cucumbers, sliced
Optional for serving: Feta cheese, fresh herbs, mixed olives
INGREDIENTS - VINAIGRETTE:
1/4 cup extra virgin olive oil
Juice of 2 lemons (about 1/3 cup lemon juice)
2 tablespoons balsamic vinegar
1 tablespoon dijon mustard
2 teaspoons maple syrup
DIRECTIONS:
In a small jar, combine 2 tablespoons of garlic-infused olive oil, balsamic vinegar, paprika, oregano, lemon juice, lemon zest, crushed red pepper flakes, and a large pinch of salt.
In a Ziploc bag, combine the chicken, and the marinade and marinate for 15 minutes or up to overnight in the refrigerator until ready to cook.
Meanwhile, make the croutons. Heat the olive oil in a small skillet over medium heat. When the oil shimmers, add the bread and a pinch of red pepper flakes. Cook, stirring occasionally until golden and toasted all over, about 5 minutes. During the last minute, add the butter and stir the croutons to allow butter to lightly coat them all. Remove from the heat and season with salt. Slide the croutons onto a plate and set them aside. Wipe the skillet clean.
Make the salad. Combine the lettuce, cherry tomatoes, and cucumbers in a large salad bowl. Toss gently to combine.
Make the vinaigrette. Combine all ingredients in a glass jar and shake until completely smooth. Taste and adjust the salt and pepper.
Heat the same skillet used for the croutons over medium-high heat. Add the chicken in a single layer and cook, stirring once or twice, until the chicken is cooked through, about 5-10 minutes.
To serve: Divide the salad between 4 plates, add the chicken, croutons, and drizzle with a bit more vinaigrette. Add feta, herbs, and/or olives if you like.
Serve immediately.
Enjoy!
This post may contain affiliate links so you can easily purchase items listed on the page. There is no increased cost to you for purchasing items through these links so feel free to use them!
Ricciarelli almond cookies a la chocolate (low FODMAP)
Prep 20 minutes • Cook 30 minutes • Gluten-free • Dairy-free • Low FODMAP • Makes 24 - 30 cookies
Prep 20 minutes • Cook 30 minutes • Gluten-free • Dairy-free • Low FODMAP • Makes 24 - 30 cookies • Ricciarelli are dense, chewy Italian almond cookies originating in Siena in the 14th century! This variation on the classic Ricciarelli includes a dark chocolate drizzle. The combination of the orange zest and the dark chocolate with the chewy almond cookies is simply wonderful.

INGREDIENTS:
2 egg whites
1 dash lemon juice
2 1/4 cups almond flour
1 3/4 cups powdered sugar
1 pinch salt
1/4 tsp baking powder
1 tsp orange zest about half a large orange
1 tbsp almond extract
1 tsp vanilla extract
1/2 cup powdered sugar for coating cookies
1/2 cup semi-sweet or dark chocolate chips
DIRECTIONS:
Preheat oven to 300 degrees F.
Whip egg whites and lemon juice together with a stand mixer or hand mixer until stiff peaks form.
Using a sifter or fine-mesh sieve, sift in almond flour, 1 3/4 cups powdered sugar, salt, and baking powder, and fold into egg whites in 2-3 batches. Even though it will form a pretty sticky dough, try to keep some air in the egg whites.
Add orange zest, vanilla extract, and almond extract and fold in until combined.
Line a baking sheet with parchment paper. Using clean hands, roll dough into balls about 1" in diameter, then roll in powdered sugar until well coated. Arrange on a baking sheet with some space between them for spreading, and flatten slightly with your finger dipped in powdered sugar.
When the cookies are ready, bake for about 18 - 20 minutes.
Melt the chocolate in the microwave or over a double boiler. Drizzle the melted chocolate over the cookies.
Serve right away or store in an airtight container for 2-3 days.
Enjoy!
This post may contain affiliate links so you can easily purchase items listed on the page. There is no increased cost to you for purchasing items through these links so feel free to use them!
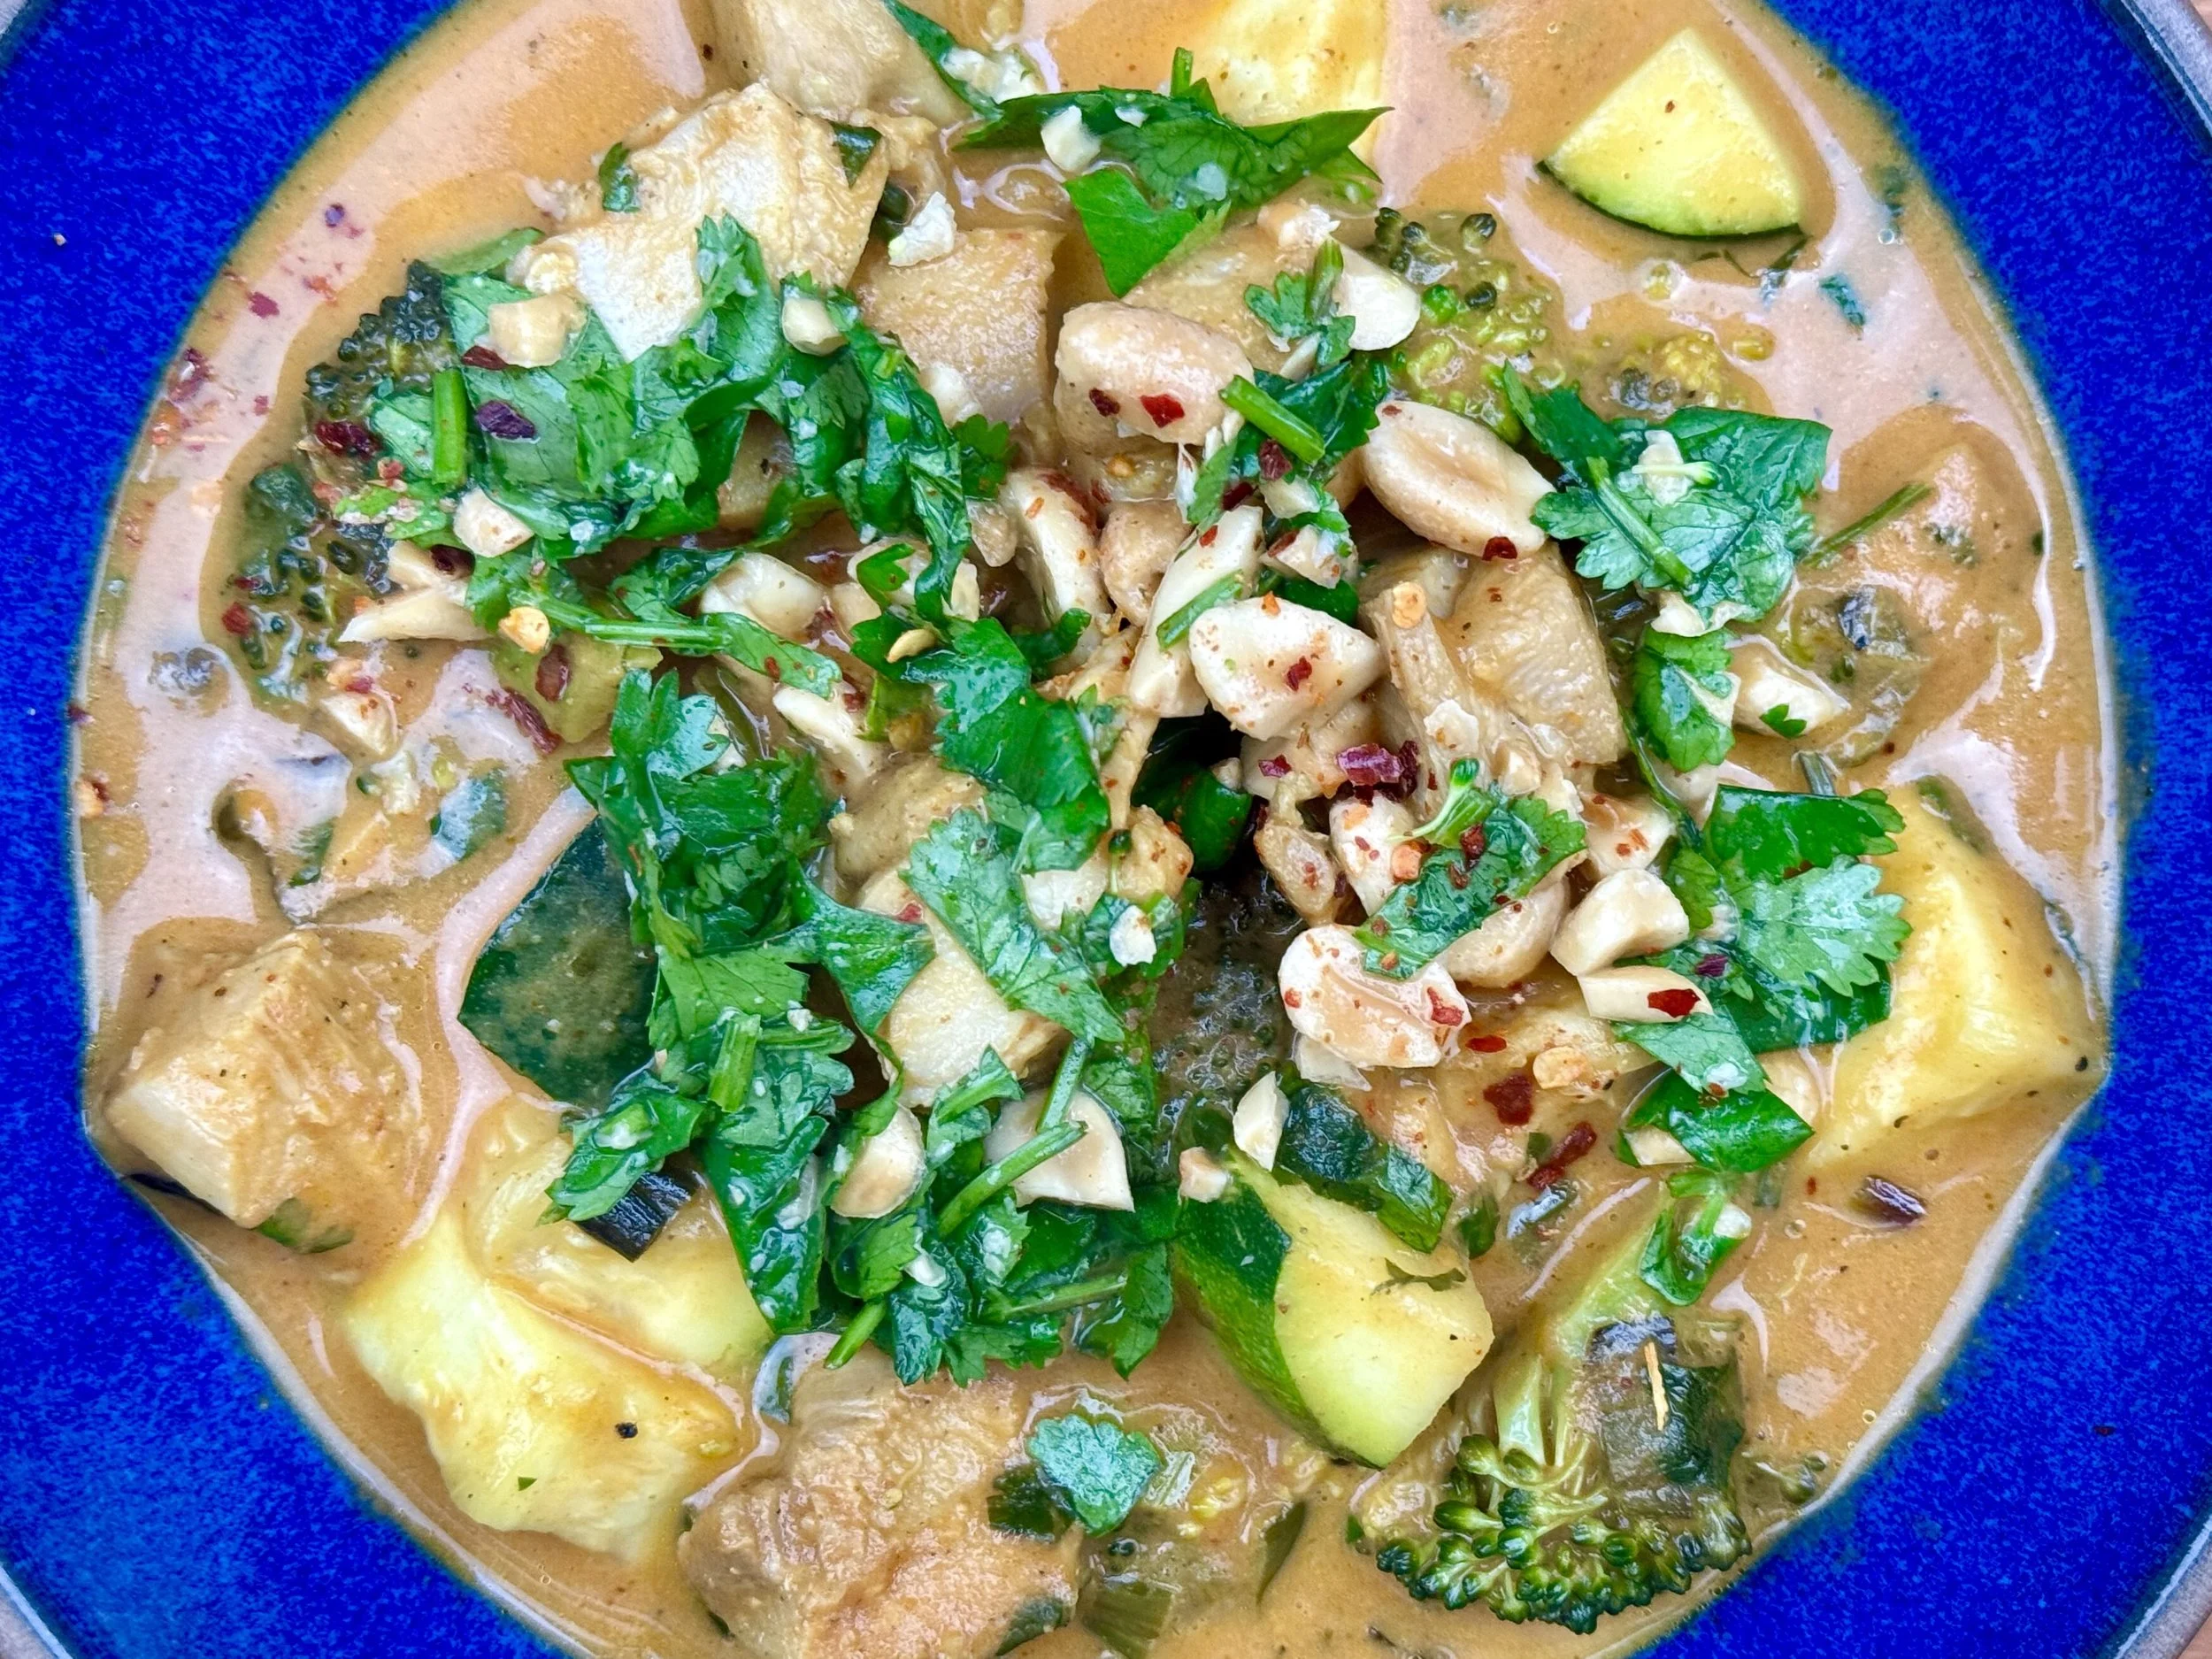
Thai beef or chicken with creamy coconut rice (Low FODMAP)
25 minutes • Gluten-free • Dairy-free • Low FODMAP • Serves 4-6
25 minutes • Gluten-free • Dairy-free • Low FODMAP • Serves 4-6 • This super easy Thai beef or chicken is fabulous over extra creamy coconut rice. Your whole family will love it. It’s a perfect weeknight dinner.

COCONUT RICE INGREDIENTS:
2 cups uncooked jasmine rice
1 can (14 ounces) full fat coconut milk
14 ounces water (just use the coconut milk can to measure!)
1 tablespoon toasted sesame oil
1 tablespoon fresh lemongrass, chopped
THAI TOPPING INGREDIENTS:
2 medium-size carrots cut into matchsticks
4 baby bell peppers sliced in thin rounds
1 Jalapeno pepper, seeded and sliced
3 green onions (green part only) chopped
2 teaspoons gluten-free low sodium soy sauce
2 teaspoons rice vinegar
1/2 teaspoon maple syrup
THAI BASIL BEEF OR CHICKEN INGREDIENTS:
2 tablespoons garlic-infused olive oil
Juice of 1 lime plus lime wedges for serving
3 teaspoons fresh ginger, grated
1 pound ground chicken, lean ground beef, or even ground pork
Black pepper
1/3 cup + 2 tablespoons gluten-free low sodium soy sauce divided
1 tablespoon maple syrup
Pinch red pepper flakes
2 cups fresh basil leaves, chopped, plus extra for serving
Chopped roasted peanuts for serving
DIRECTIONS:
To make the rice. Add the coconut milk and water to a medium-size pot. Bring to a low boil and then add the rice, sesame oil, and lemongrass. Stir to combine, then place the lid on the pot and turn the heat down to the lowest setting possible. Allow the rice to cook for twenty minutes on low or until all the moisture has been absorbed by the rice.
While the rice is cooking, make the meat. Add the carrots, bell peppers, jalapeno, green onions, soy sauce, rice vinegar, maple syrup, lime juice, and 2 tablespoons of soy sauce to a medium bowl. Toss well and set aside.
Heat a large heavy-bottomed skillet over medium heat. Add the oil and once hot add the ginger. Cook 15-30 seconds then add the meat. Season the meat with black pepper and brown all over, breaking it up as it cooks, about 5 minutes. Once the meat is browned, add 1/3 cup soy sauce, 1 tablespoon maple syrup, and the red pepper flakes, plus 1 cup of fresh basil.
Bring the mixture to a simmer and cook until the sauce coats the meat, about 3-5 minutes. Remove from the heat and stir in the remaining 1 cup fresh basil.
Divide the rice among bowls, top with equal amounts of meat. Add the carrot, pepper mixture on top of the meat.
Garnish with chopped peanuts.
Enjoy!
This post may contain affiliate links so you can easily purchase items listed on the page. There is no increased cost to you for purchasing items through these links so feel free to use them!
World IBS Awareness Day: April 19. Is IBS running (ruining?) your life?
Ask yourself, is this the day I decide to get my IBS under control? If so, you’ve come to the right place.
Today is dedicated to world IBS Awareness. For the 10% of the population (nearly 800 Million People!) who suffer from IBS, this is an important day! Ask yourself, is this the day I decide to get my IBS under control? If so, you’ve come to the right place.

I wasn’t diagnosed with IBS until I was in my 30’s (a diagnosis shared by 10 - 15% of the global population) and everything I held dear was impacted. I was prescribed various medications, but I wasn’t excited about relying on pills just to mask symptoms. When I learned that 80% of people with IBS see a dramatic improvement just by modifying their diet, I decided I needed to transform the way I understood, consumed, and prepared food without sacrificing everything I enjoyed about food.
As a Registered Nurse, nutritionist, and foodie with IBS, I created the IBS Game Changer program to help you take control of your IBS and your life, discover Deliciously Low FODMAP™ recipes, reduce the need to take medications for symptoms, and feel your best!
Learn more about the program and sign up for Feel Good Friday to get a weekly dose of goodness that includes tips, tricks, IBS-friendly recipes, inspiration, motivation, and more.
There’s no downside!
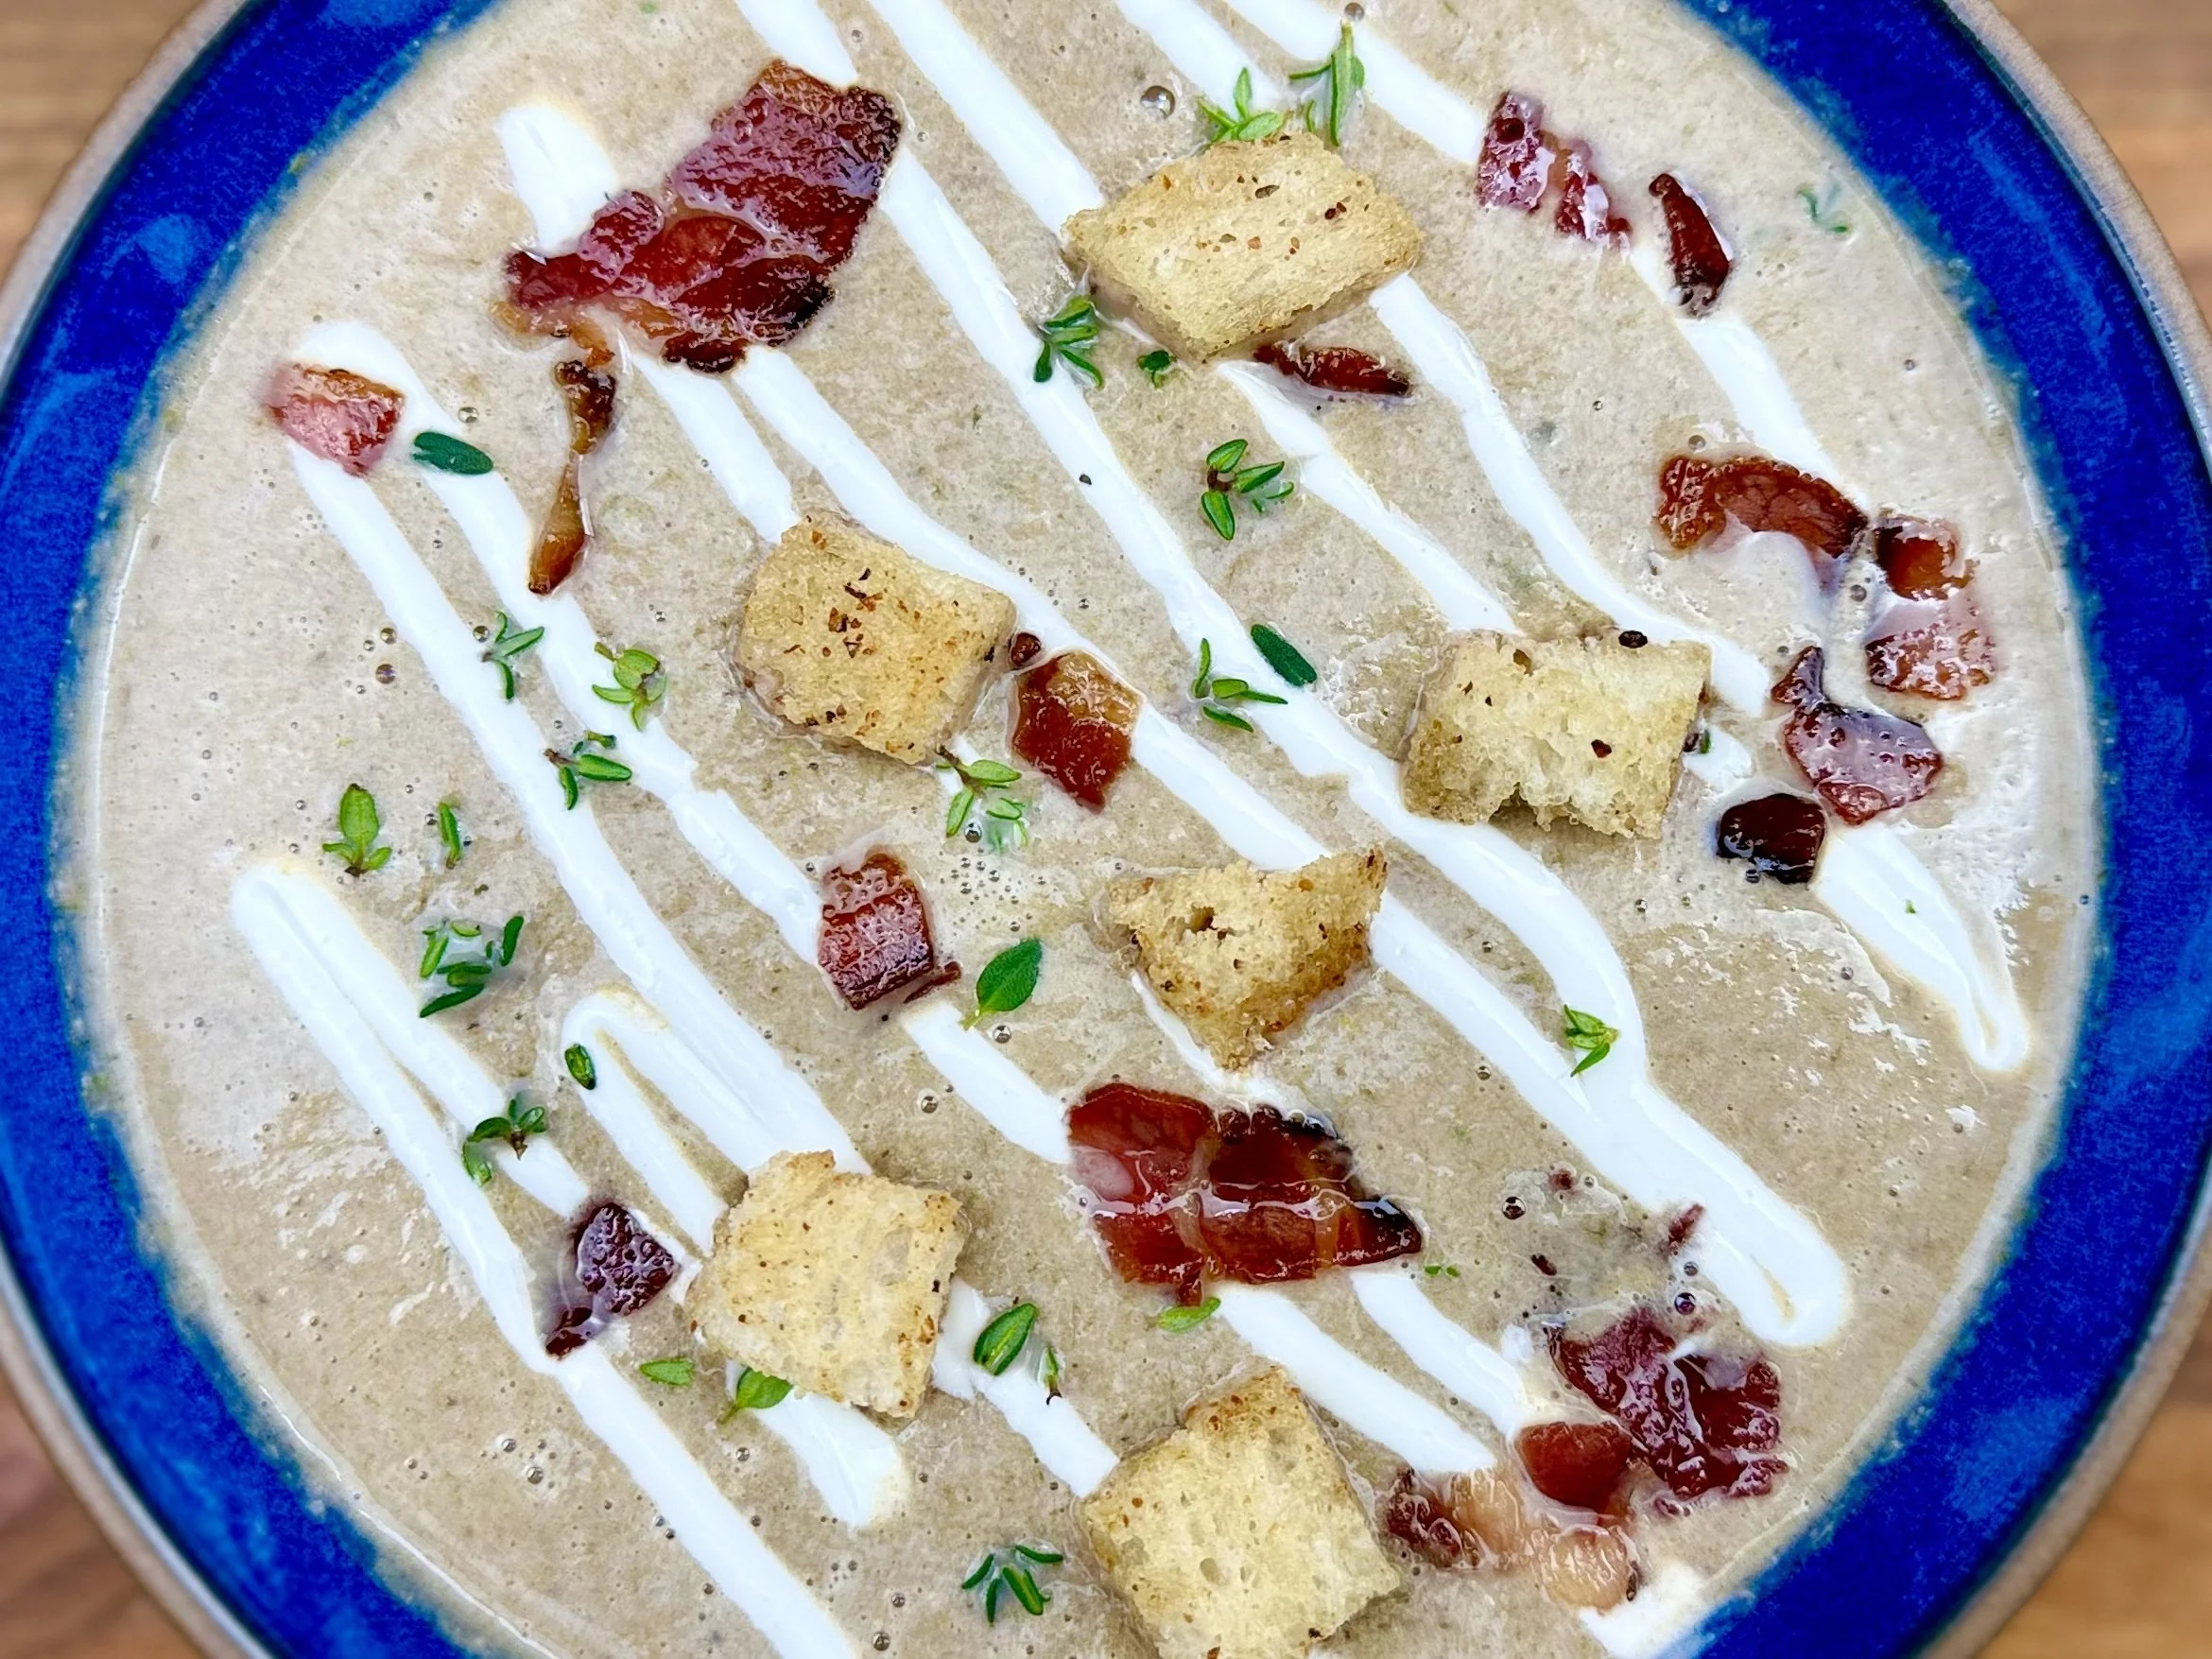
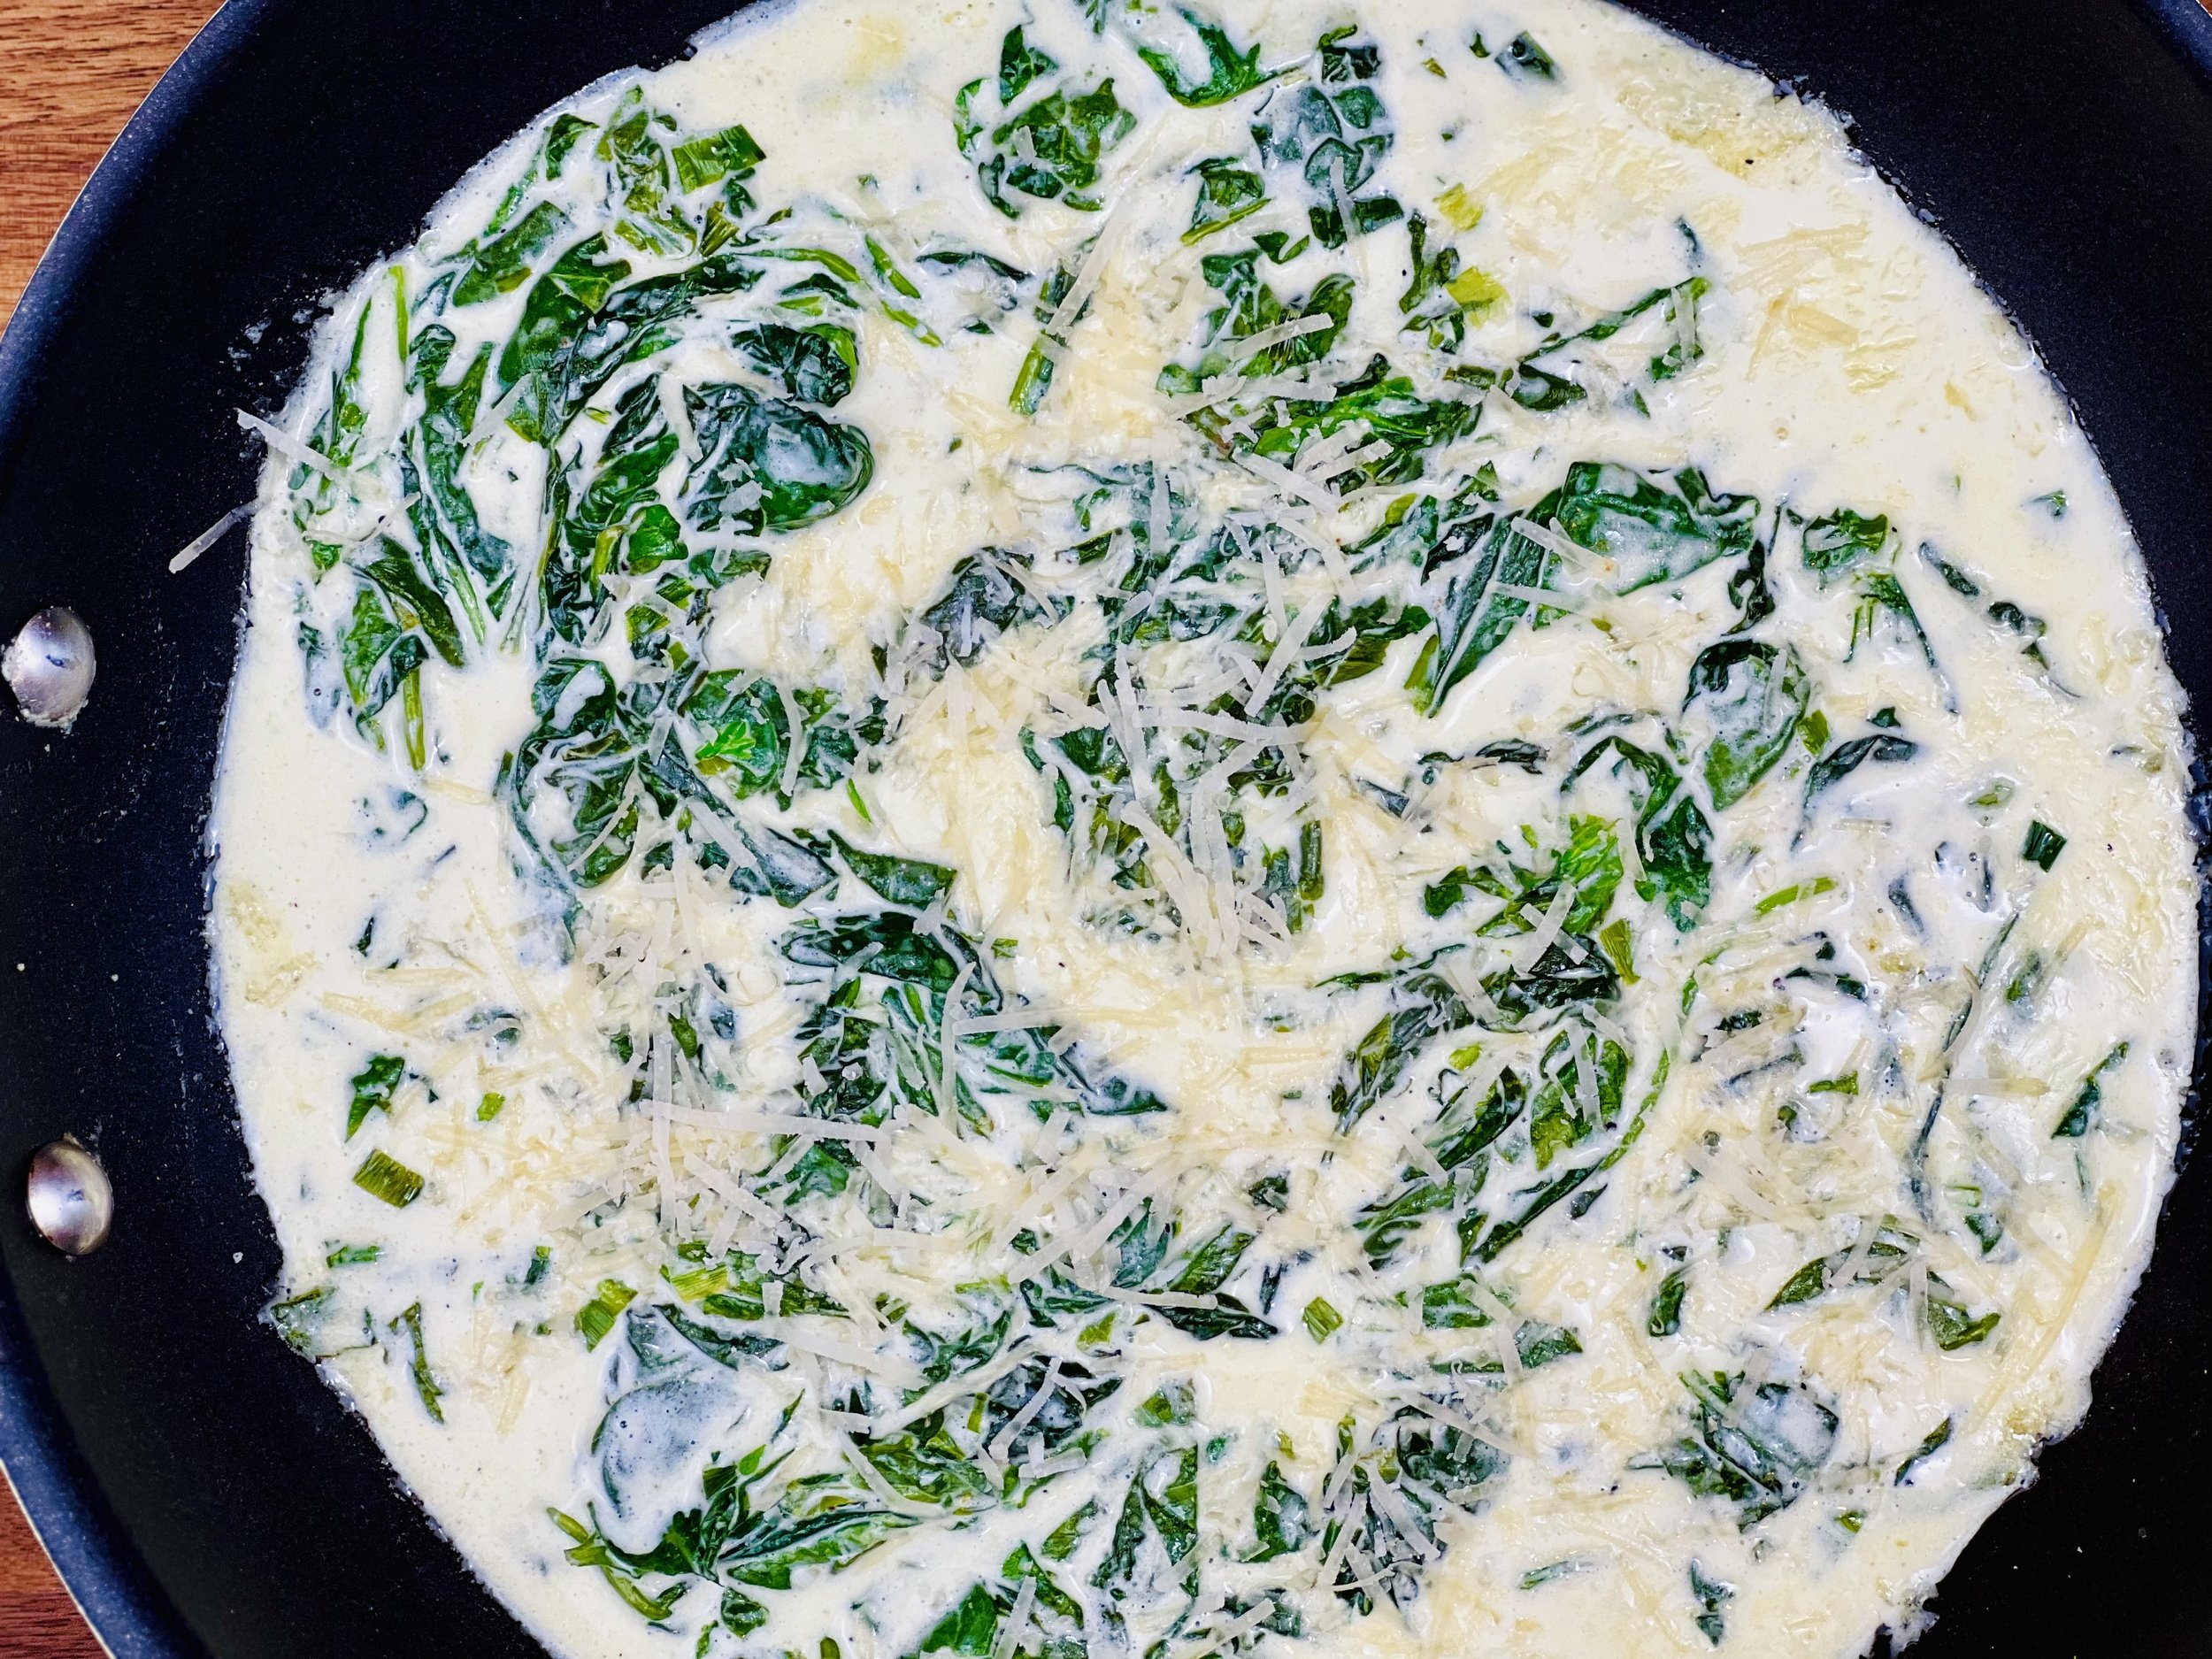
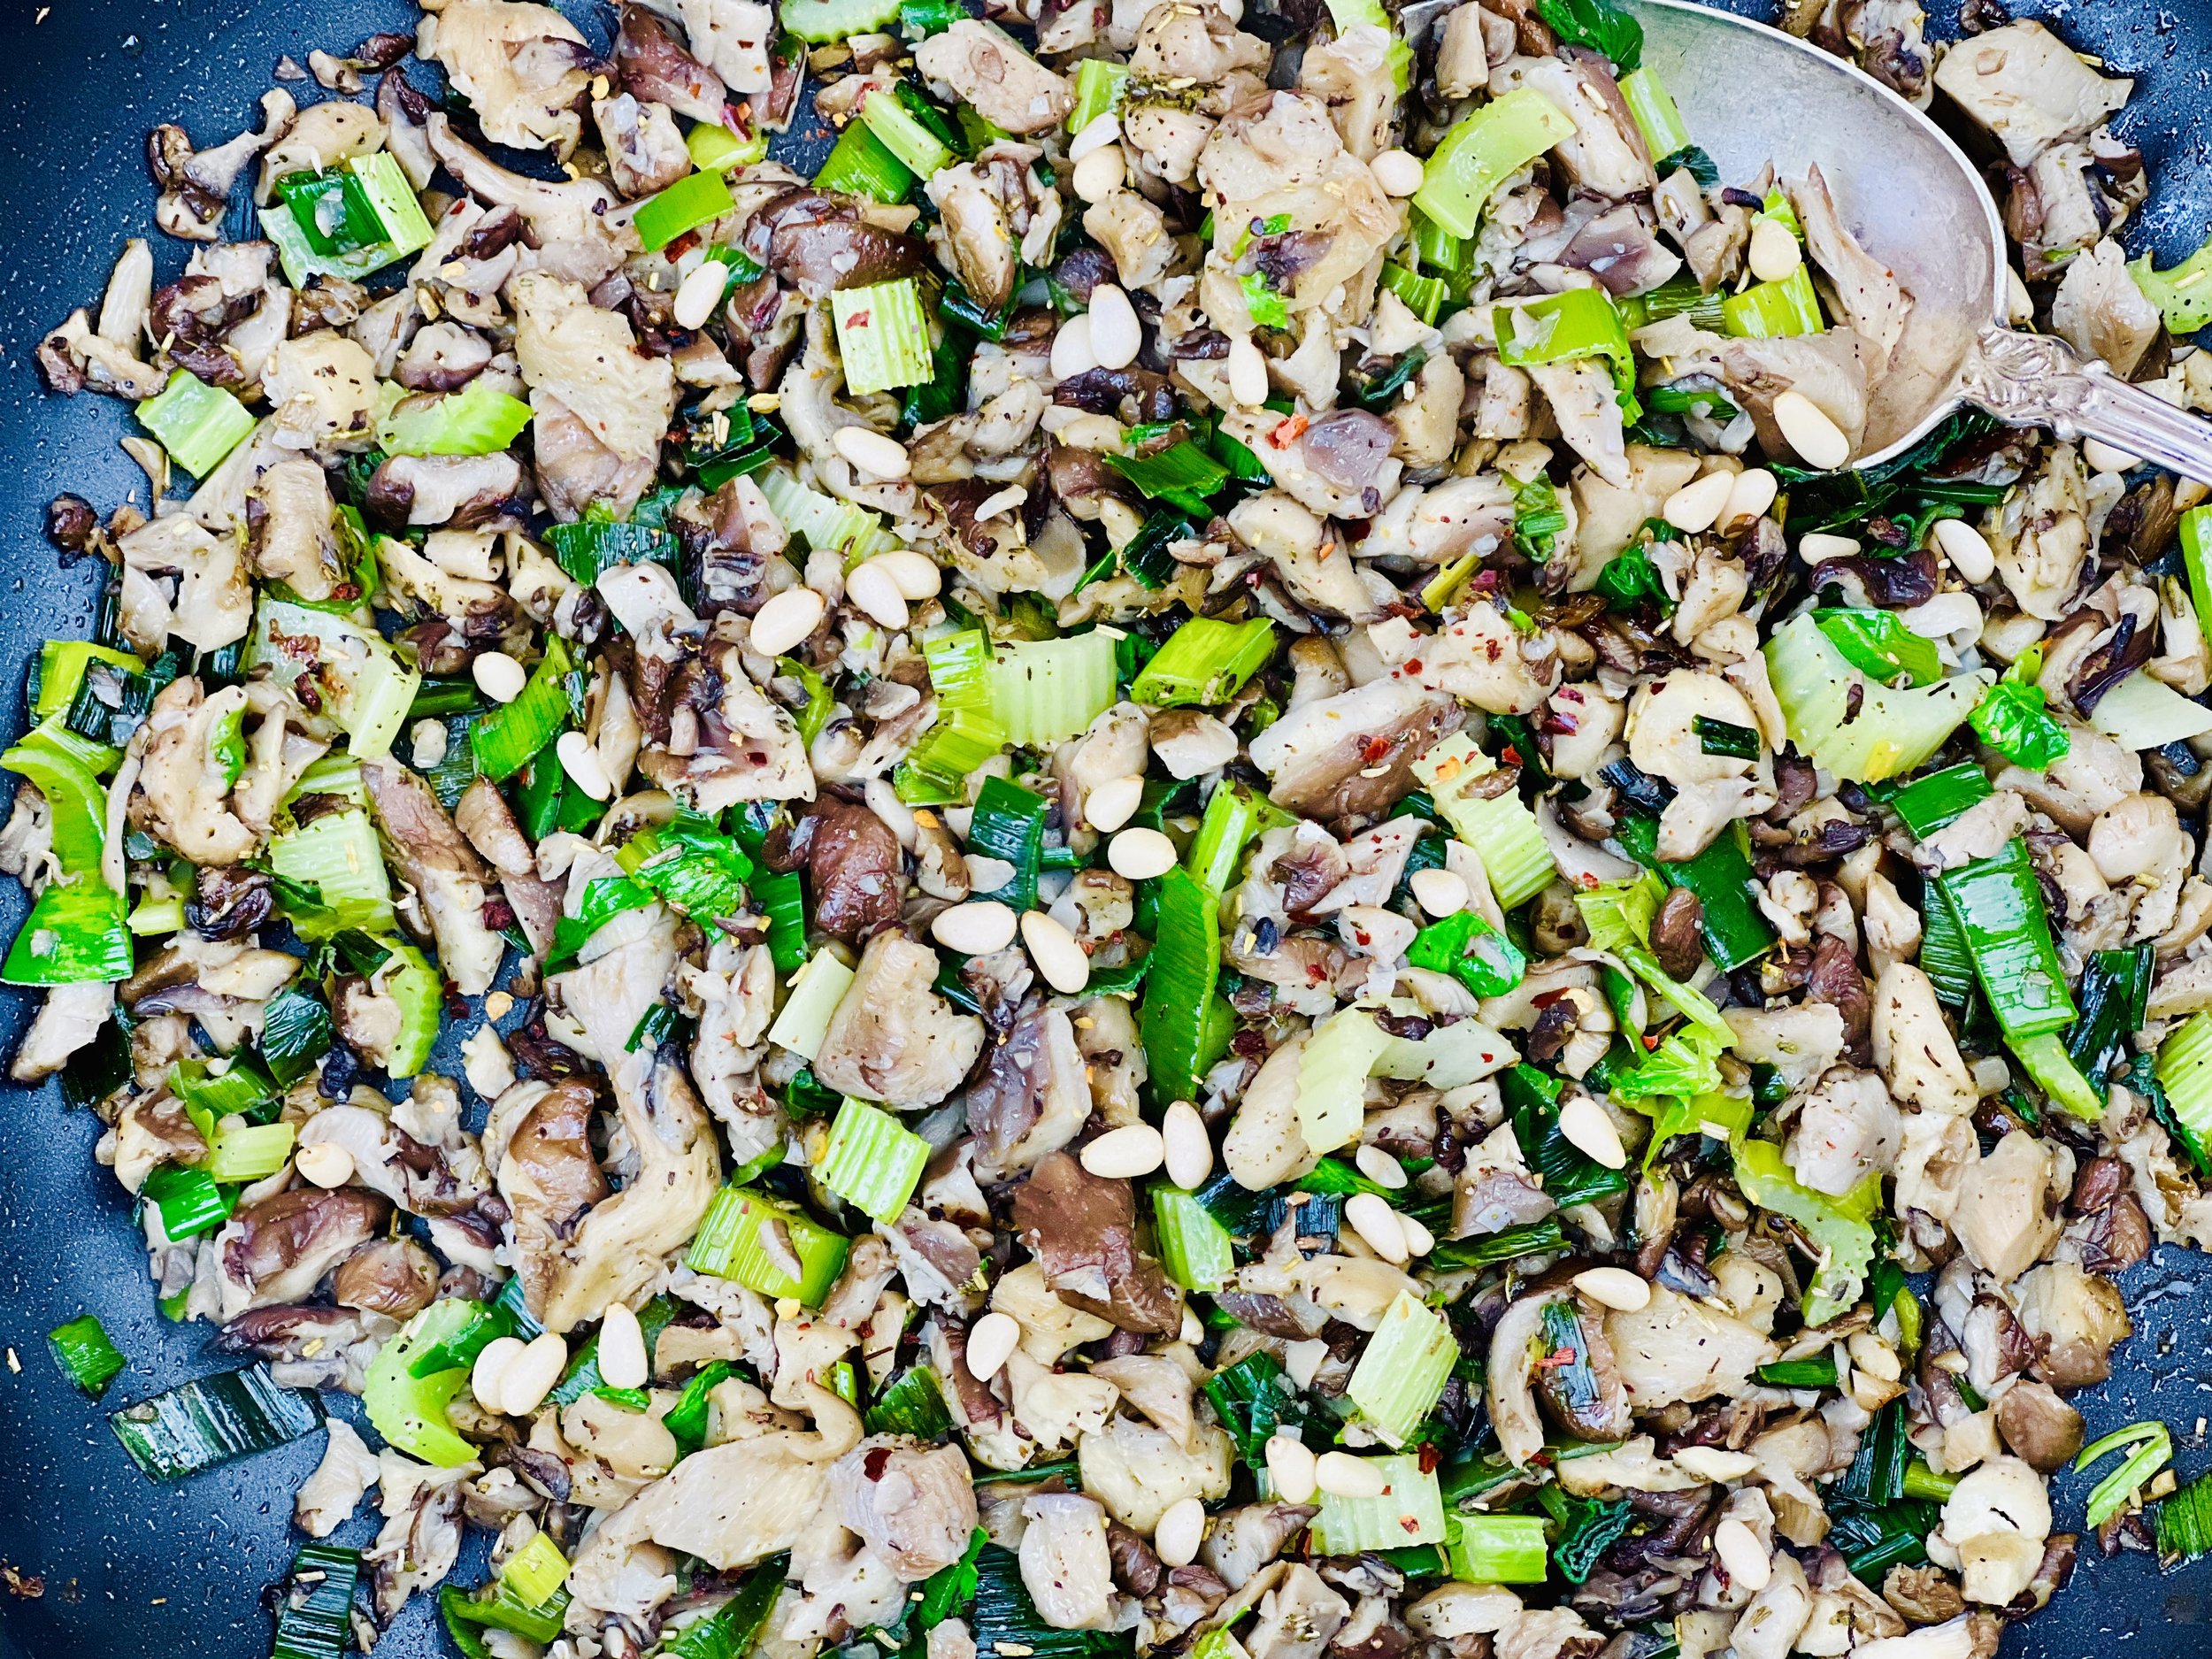
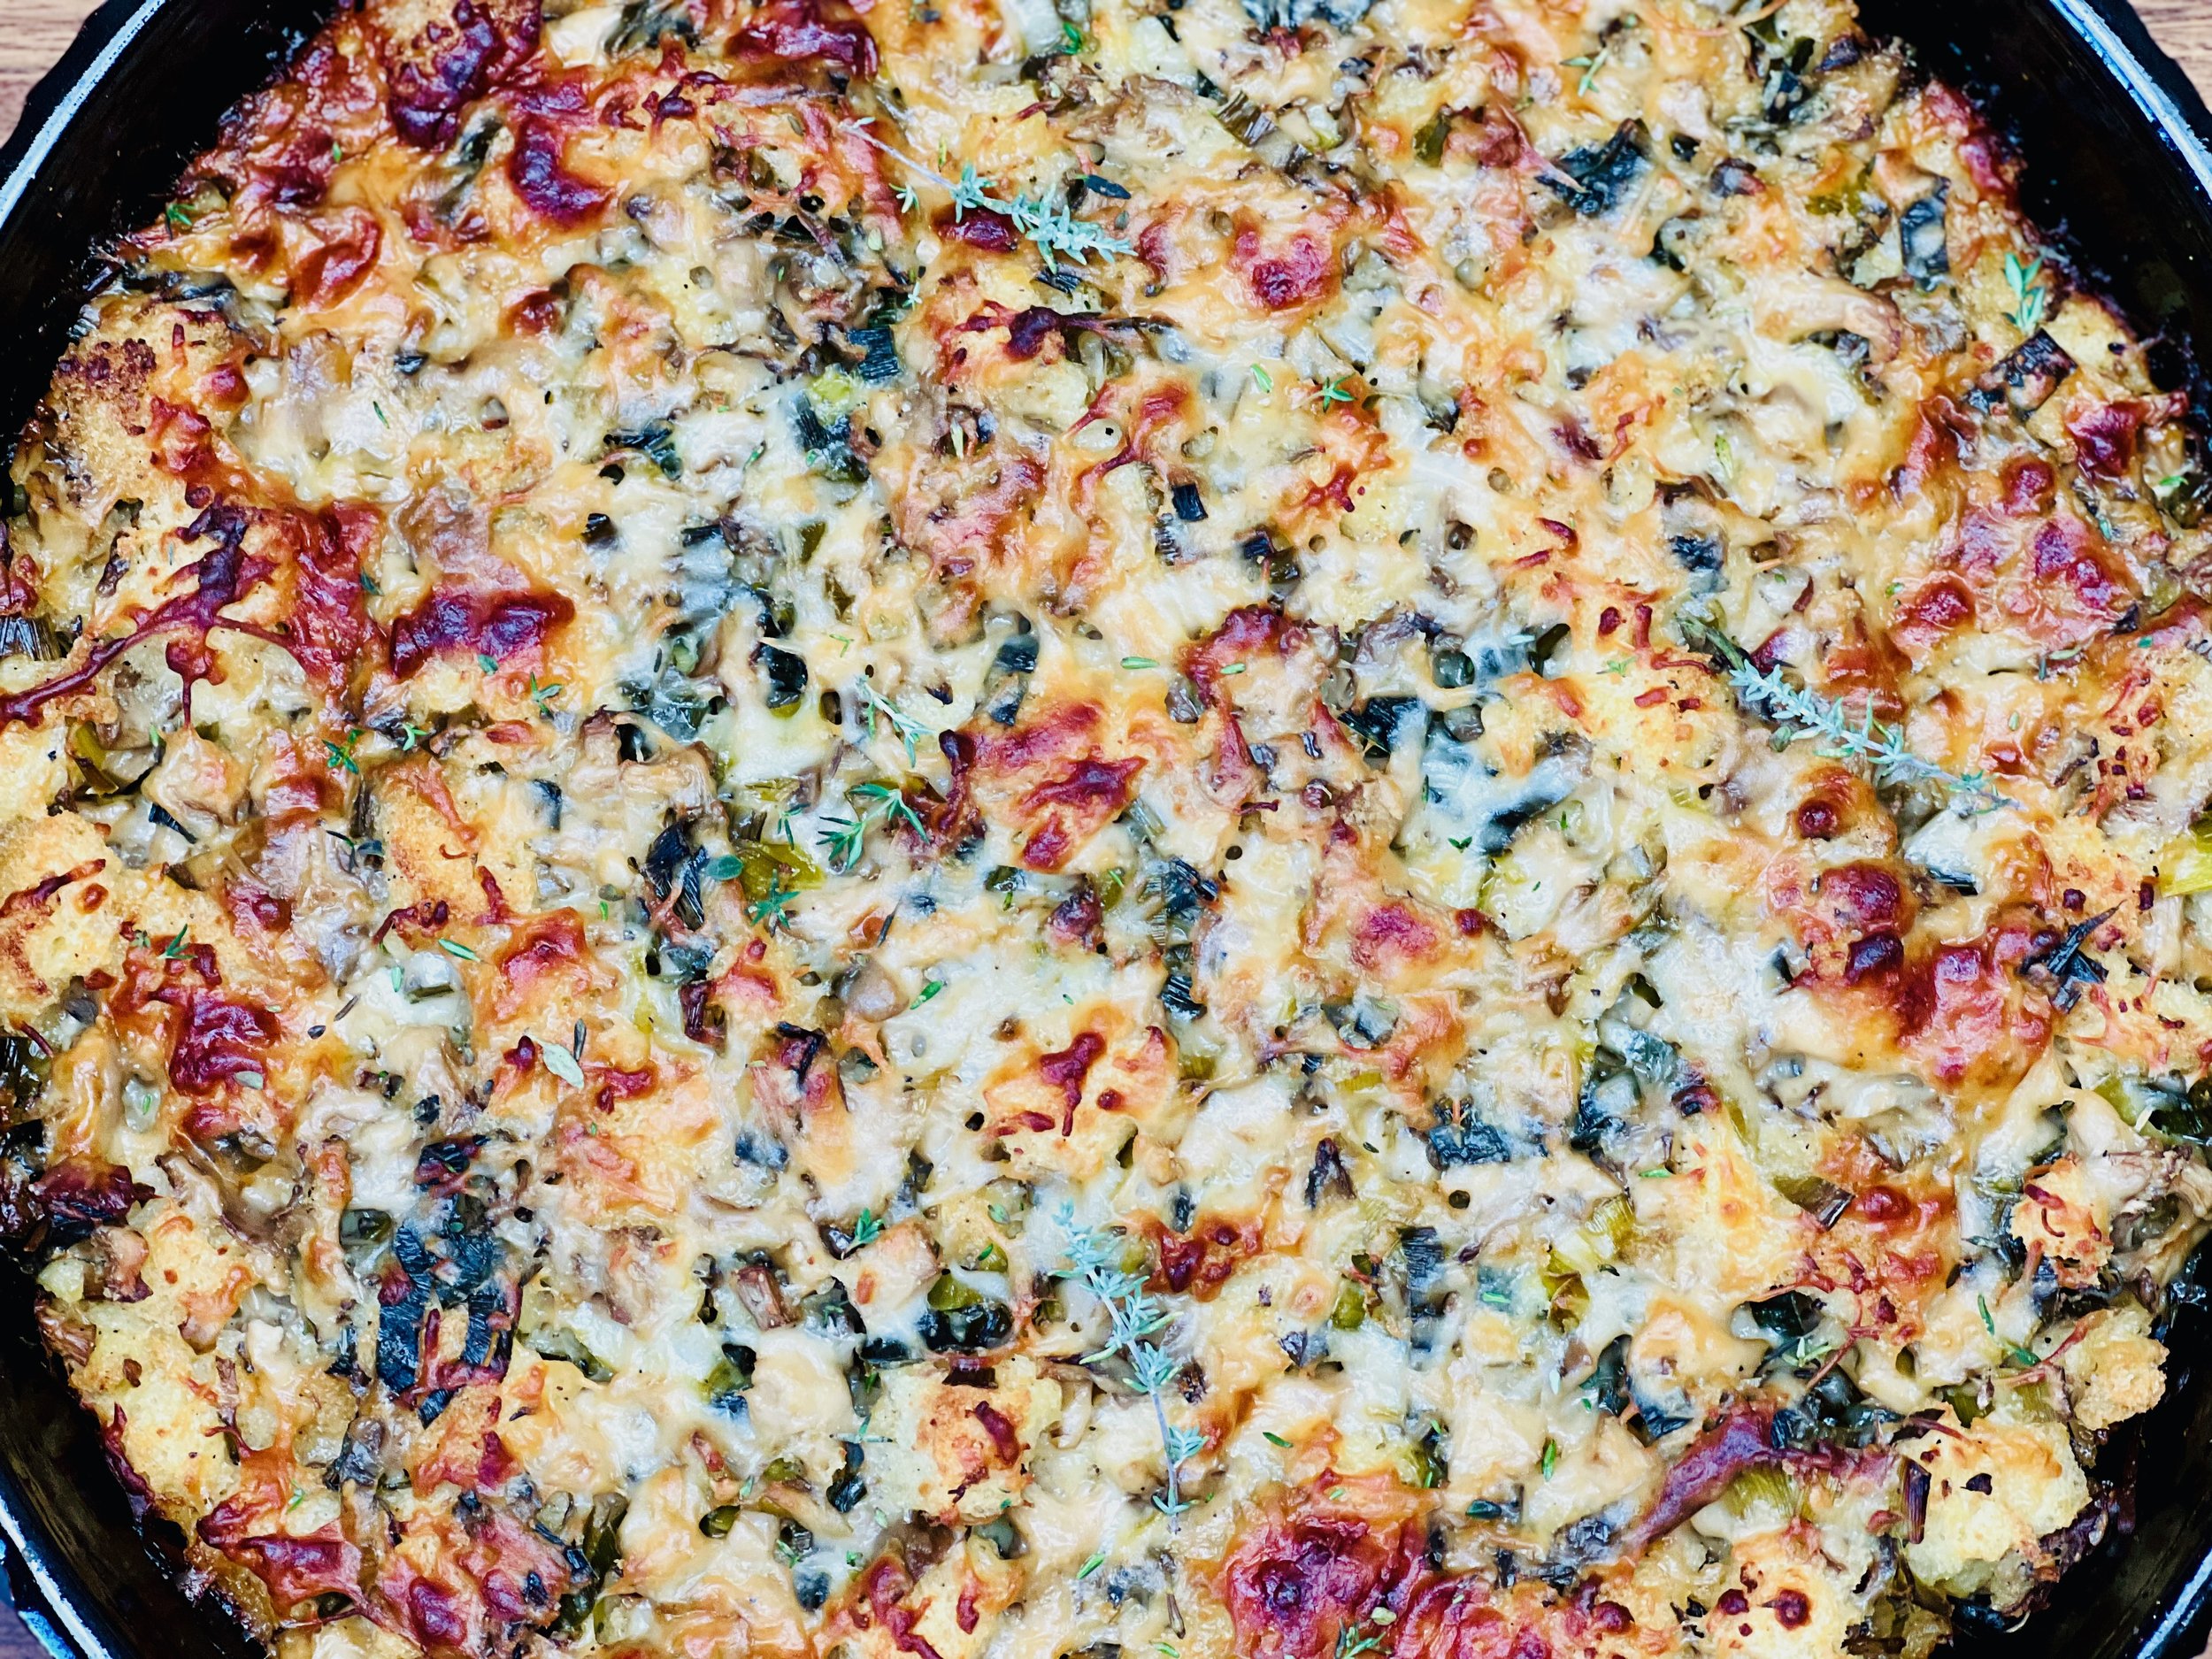
Mushroom prosciutto quiche with perfect butter crust (low FODMAP)
45 Minutes to make the crust and prep • 45 - 60 Minutes to cook • Gluten-free • Low FODMAP • Makes one deep dish or two standard depth quiches
45 Minutes to make the crust and prep • 45 - 60 Minutes to cook • Gluten-free • Low FODMAP • Makes one deep dish or two standard depth quiches • Quiche is one of my favorite recipes to use up vegetables that might not be so perfect or extra bits of cheese leftover from a cheese board. You can put different things together in a quiche or follow this recipe for a delicious option! I made this quiche with brie, sharp cheddar, and parmesan, but you could use any combo of cheeses that are in your fridge. Omit the prosciutto for a vegetarian version. Use your imagination!

INGREDIENTS:
1 Perfect buttery pie crust or purchased gluten-free crust (the best I have found is Whole Foods brand gluten-free butter crust)
2 tablespoons garlic-infused olive oil
4 green onions (green part only) chopped
2 cups oyster mushrooms (finely chopped)
2 teaspoons dried thyme
2 ounces prosciutto, chopped (optional)
1/2 teaspoon each of salt and pepper
1/2 cup brie cheese rind removed and cut into chunks (or sub any other low lactose cheese you have on hand)
3/4 cup extra sharp cheddar cheese shredded (or sub any other low lactose cheese you have on hand)
1/2 cup fresh-grated parmesan cheese (or sub any other low lactose cheese you have on hand)
7 eggs
1 1/2 cups lactose-free milk (you can use 2% or whole milk for a creamier taste)
2 tablespoons chives, chopped
DIRECTIONS:
Preheat the oven to 350 degrees F.
Prepare our perfect buttery pie crust in one deep-dish pie pan or two standard-depth pans and put in the freezer.
Meanwhile, prepare the filling. Heat a large skillet over medium heat and add the garlic-infused olive oil. Once hot, add the mushrooms, green onions, dried thyme, salt, and pepper, and cook over medium heat for about 5 minutes until the mushrooms start to brown a bit. Stir in chopped prosciutto and cook until the meat is cooked through (about 2-3 more minutes).
Combine all your grated cheese except the parmesan.
Allow the mixture to cool while you remove the crust from the freezer, brush the interior of the crust(s) with one egg white to seal it and prevent sogginess.
Next, spread a layer of cheese (any cheese except parmesan) evenly over the bottom of the crust.
Spoon half the mushroom mixture over the cheese. Then add another layer of cheese and the other half of the mushroom mixture. Finish with the Parmesan (if using) or one last layer of your grated cheese mixture.
Whisk the eggs and milk in a bowl and pour gently over the vegetables and cheeses.
Sprinkle the chopped chives over the entire quiche.
Bake a deep-dish quiche for 60 minutes then jiggle the pan to confirm the center is no longer liquid and the quiche is cooked through.
Bake standard depth quiches for 45 minutes then jiggle the pan to confirm the center is no longer liquid and the quiche is cooked through.
Remove from oven and allow to sit 10 - 15 minutes before cutting. Or cool to room temperature. Quiche is very flexible this way!
Enjoy!
Pro Tips:
You can make your pie crust ahead of time and store it in the freezer until you’re ready to assemble.
If your pie pans are very full, cook the quiche(s) on a rimmed cookie sheet so they don’t bubble over on the bottom of the oven as they cook.
This post may contain affiliate links so you can easily purchase items listed on the page. There is no increased cost to you for purchasing items through these links so feel free to use them!
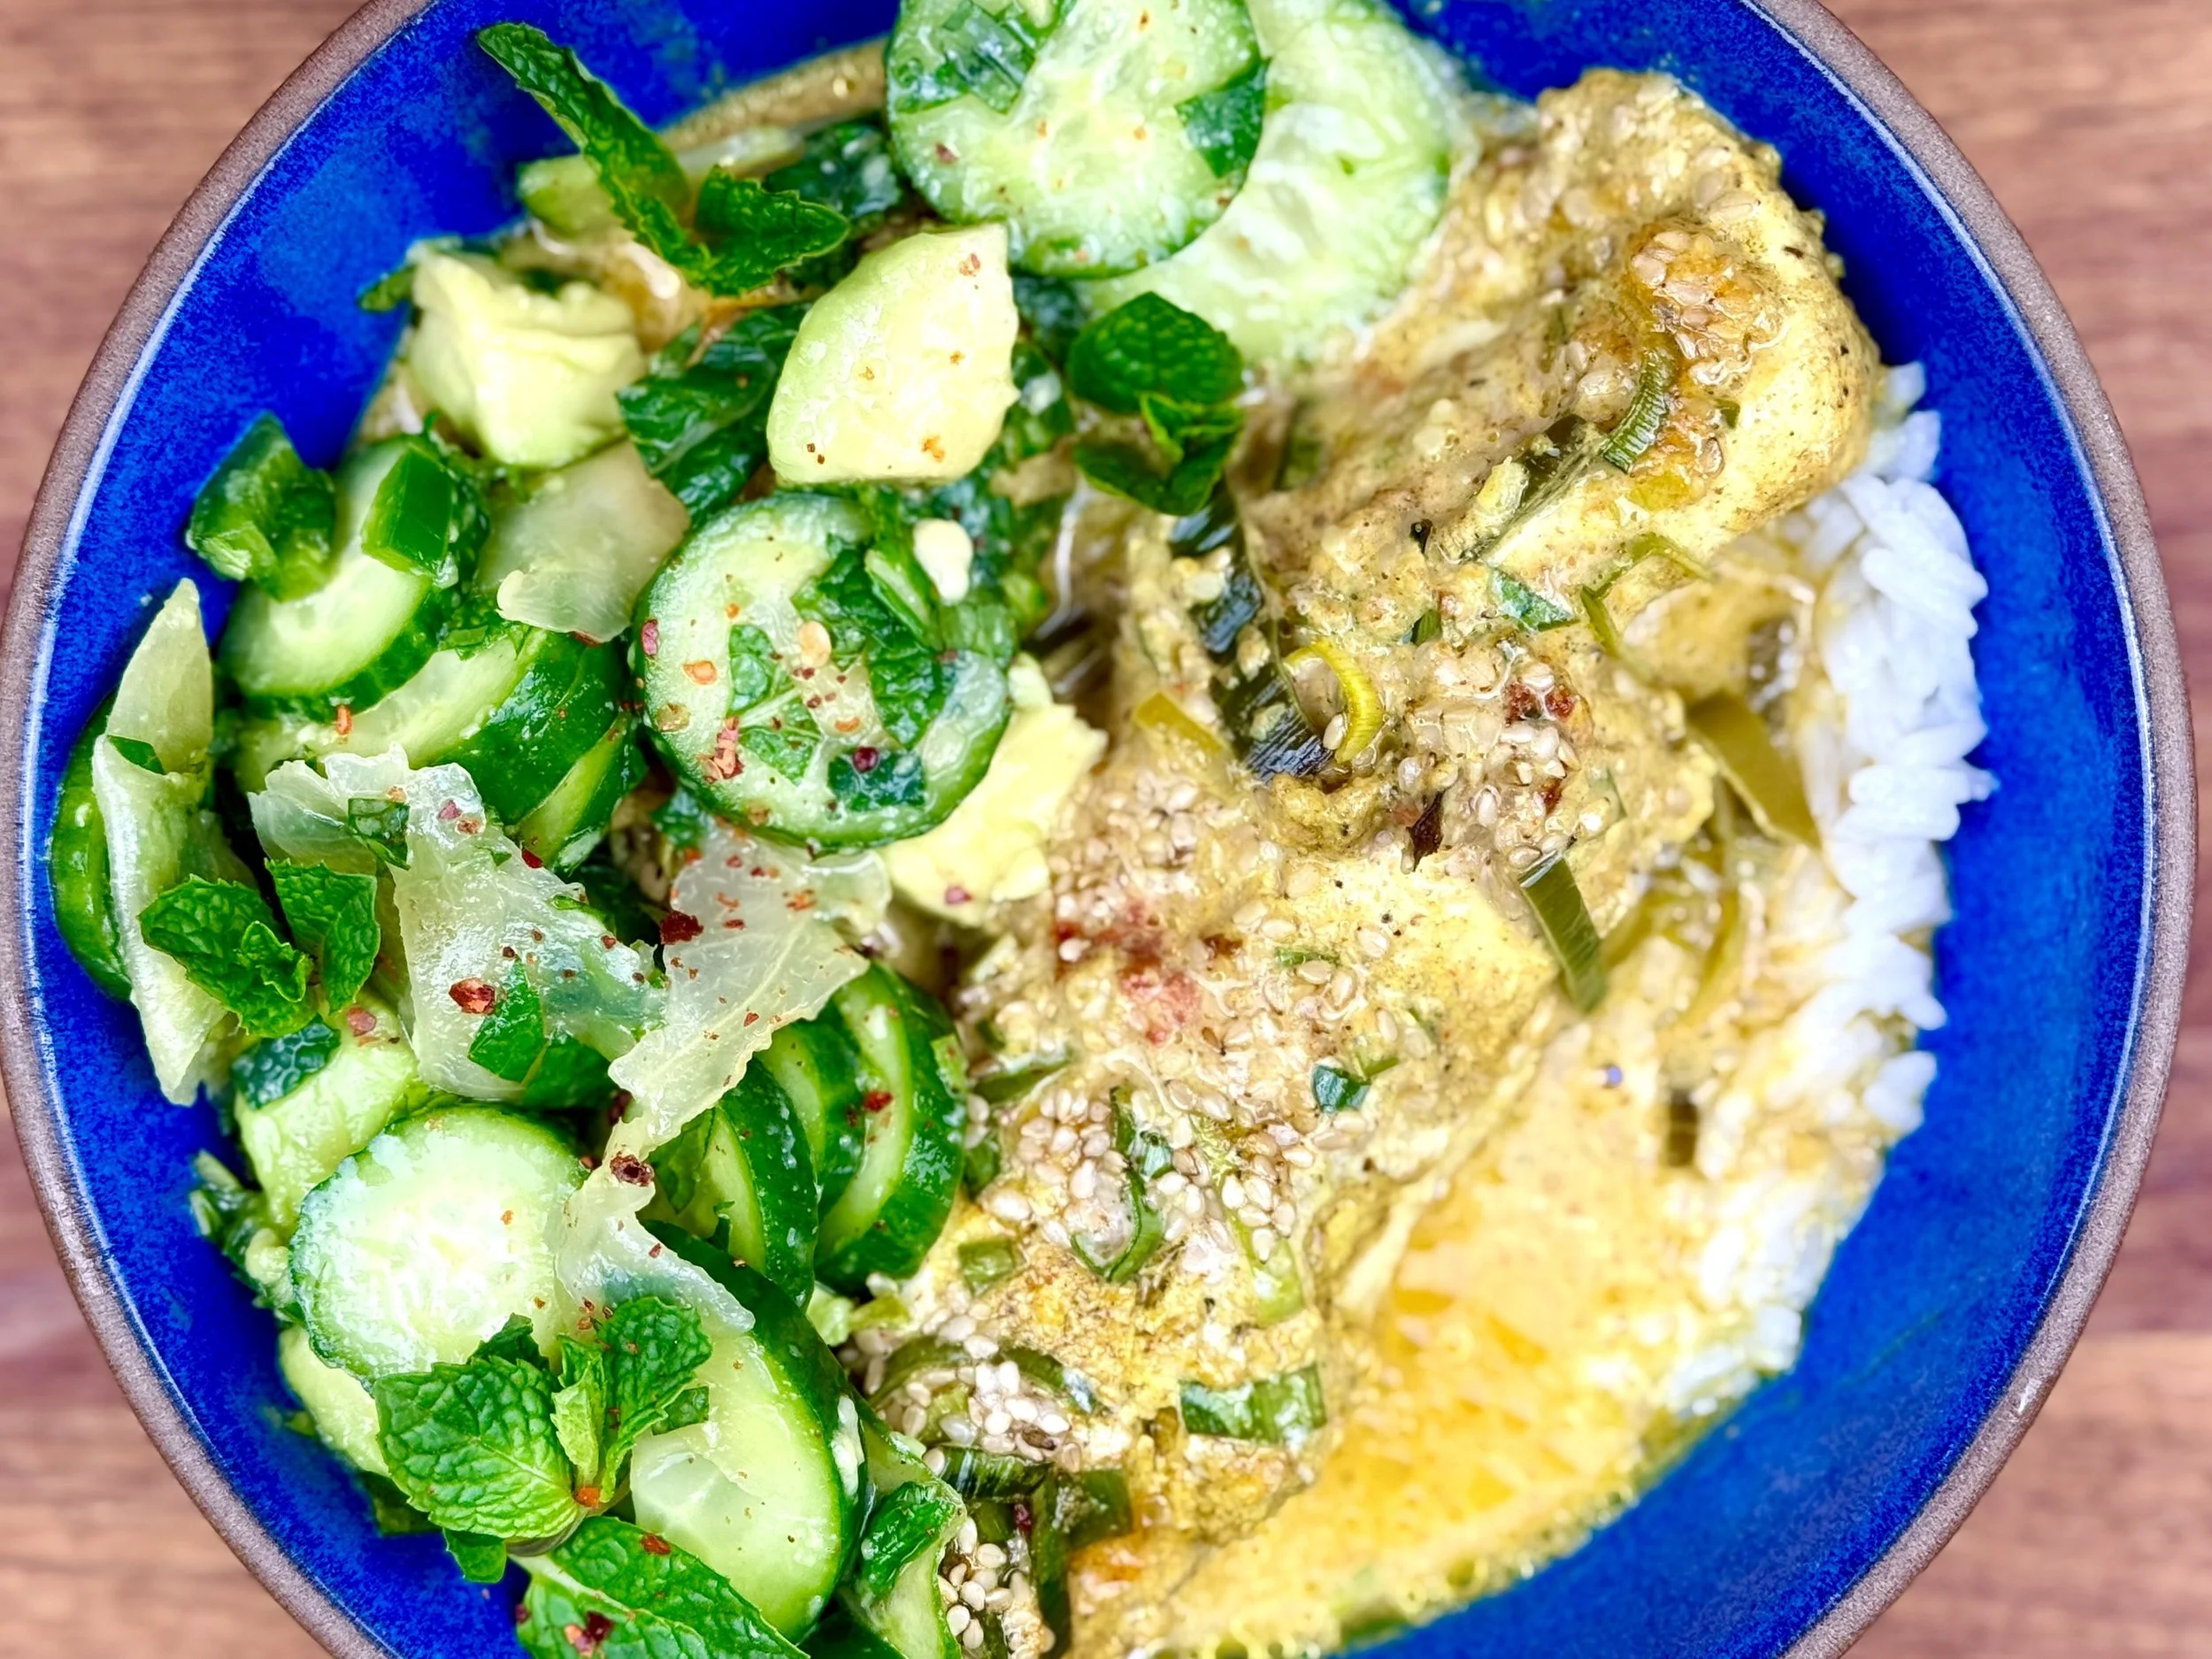
Grilled cod with pineapple salsa and coconut rice (low FODMAP)
60 minutes • Gluten-free • Dairy-free • Low FODMAP • Serves 6
60 minutes • Gluten-free • Dairy-free • Low FODMAP • Serves 6 • Looking for a taste of the tropics in your own backyard? With this tropical trio, you can take yourself on a virtual vacation to Jamaica without leaving home and without getting a stomach ache. As soon as you dig into this jerk-marinated cod, sweet and savory pineapple salsa, and oh so creamy coconut rice, you'll be transported! Not a fan of fish? Substitute chicken thighs for an equally tantalizing tropical treat.

INGREDIENTS:
6 (6oz) pieces cod fillets
MARINADE INGREDIENTS:
4 teaspoons brown sugar
2 teaspoon ground allspice
2 teaspoon kosher salt
1 teaspoon ground cinnamon
1 teaspoon dried basil
1 teaspoon dried thyme
1/2 - 1 teaspoon cayenne pepper
1 teaspoon ground nutmeg
1/2 teaspoon freshly ground black pepper
4 tablespoons garlic-infused olive oil
4 tablespoons gluten-free low sodium soy sauce
4 tablespoons red wine vinegar
4 tablespoons fresh-squeezed orange juice
2 tablespoon fresh lime juice
2 thinly sliced scallions, green part only
4 teaspoons finely grated fresh ginger
4 teaspoons finely diced jalapeno peppers
PINEAPPLE SALSA INGREDIENTS:
1½ cups diced fresh pineapple
2 tablespoons green onions (green part only), finely chopped
1/4 cup diced red bell pepper
1 tablespoon fresh mint, thinly sliced
1 tablespoon fresh lime juice
1 teaspoon maple syrup
kosher salt, to taste
COCONUT RICE INGREDIENTS:
2 teaspoons vegetable oil
2 cups jasmine rice, rinsed and drained
2 cups canned coconut milk
2 cups water
1 teaspoon kosher salt
DIRECTIONS:
For the marinade, in a medium-size jar, mix together all marinade ingredients and shake well to combine. Pour marinade into a zip lock bag and place fish in the bag with the marinade. Refrigerate for 2 hours or overnight.
In the meantime, prepare the pineapple salsa and coconut rice.
For the pineapple salsa, in a medium bowl, combine pineapple, green onions, red pepper, mint, lime juice, and maple syrup. Toss to combine. Season to taste with salt. Cover and refrigerate for at least one hour to blend flavors.
For the coconut rice, rinse the rice until the water runs clear. Then, heat vegetable oil in a large saucepan over medium heat. Add the rice and sauté for 2 minutes. Add the coconut milk, water, and salt and bring to a boil. Reduce heat to a simmer, cover, and cook 15-20 minutes, until the liquid has been absorbed. Serve hot.
TO GRILL:
Preheat grill or smoker to 375ºF. Place a sheet of heavy-duty aluminum foil directly on the hot grill grates. Remove fish from marinade and place it, skin-side down, on the foil, and turn up the edges of the foil so the juices stay around the fish.
Bake 9-12 minutes or until fish is just cooked through.
TO COOK IN THE OVEN:
Preheat oven to 375ºF.
Line a baking sheet with aluminum foil. Remove fish from marinade and place it, skin-side down, on the foil, and bake 9-12 minutes or until fish is just cooked through.
TO SERVE:
Serve fish over coconut rice and top with pineapple salsa.
Enjoy!
Original recipe inspired by Food52.
This post may contain affiliate links so you can easily purchase items listed on the page. There is no increased cost to you for purchasing items through these links so feel free to use them!
Low FODMAP Ribollita soup
10 Minutes Prep • 30 Minutes Cook • Low FODMAP • Serves 8
10 Minutes Prep • 30 Minutes Cook • Low FODMAP • Serves 8 • This soup is rustic and deliciously full of Italian flavor and color. Ribollita is traditionally thickened with crusty bread and filled with fresh herbs and vegetables. For our low FODMAP version of this classic soup, we left out the traditional cannellini beans and we used real sourdough bread. It’s a wonderful variation!

INGREDIENTS:
2 tablespoons garlic-infused olive oil
4 scallions (green part only), chopped
3 carrots, chopped
1/4 teaspoon crushed red pepper flakes
28 oz crushed tomatoes (San Marzano are nice but you can use any type you like)
4 cups low FODMAP chicken broth
3 sprigs fresh thyme
2 tablespoons chopped fresh basil
1/2 teaspoon minced fresh rosemary
1 bay leaf
1 Parmesan rind, about 4-inch size
Kosher salt and black pepper, to taste
1 small bunch Tuscan kale, ribs and stems removed, chopped
2 cups cubed crusty traditional sourdough bread, day-old or stale
Grated Parmesan cheese, and fresh basil, for serving (optional)
DIRECTIONS:
In a large pot, heat the olive oil over medium-high heat. Add the green onions and carrot and cook for 5 minutes or until vegetables start to soften. Stir in the red pepper flakes, cook for 2 minutes.
Add the tomatoes, broth, thyme, basil, rosemary, bay leaf, and Parmesan rind. Season with salt and black pepper, to taste. Stir until combined.
Simmer the soup with the lid slightly ajar for 20 minutes or until the vegetables are softened. Remove the lid and stir in the kale.
Add the bread and simmer for 3-5 minutes or until the bread starts to dissolve into the soup and the soup thickens.
Remove the thyme sprigs, bay leaf, and Parmesan rind and discard. Taste and season with additional salt and pepper, if necessary.
Ladle the soup into bowls and top with Parmesan cheese, and fresh basil, if desired.
If you don’t have day-old bread or stale bread, you can dry it out in the oven. This is a thick soup. If you prefer more liquid, you can add more chicken broth.
This post may contain affiliate links so you can easily purchase items listed on the page. There is no increased cost to you for purchasing items through these links so feel free to use them!
10 minutes • Gluten-free • Dairy-free • Low FODMAP • Serves 1