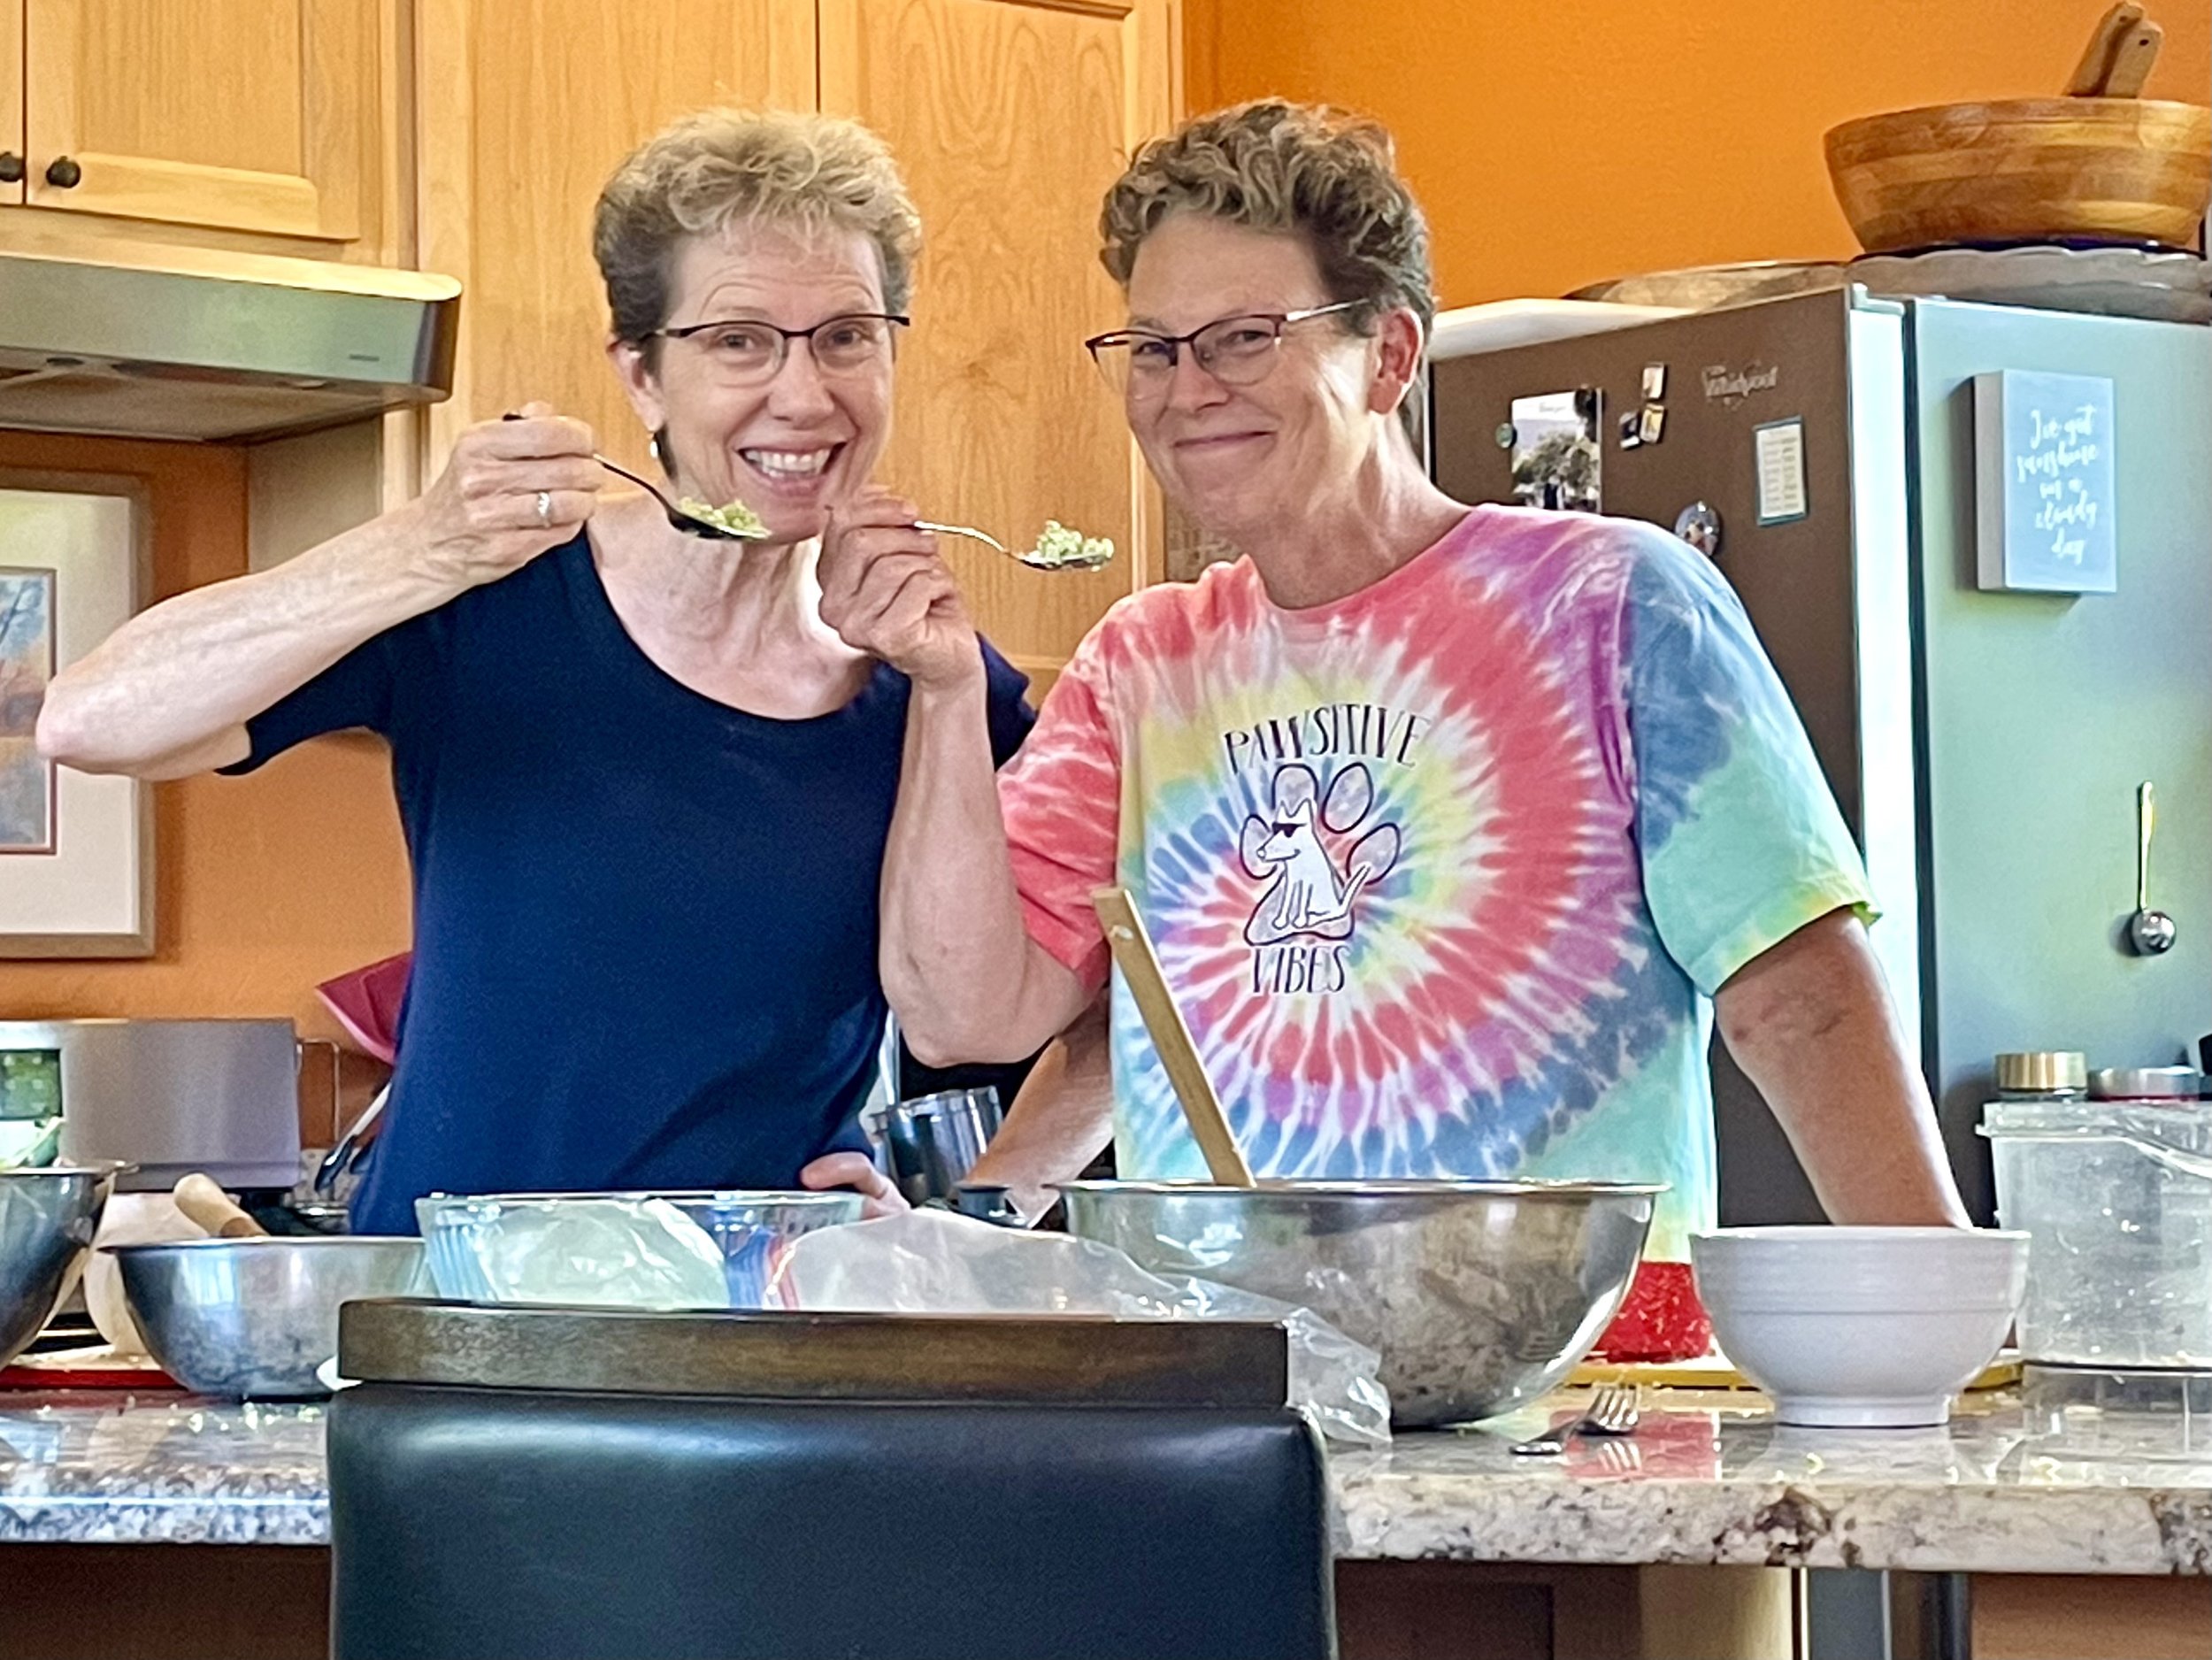
Deliciously Low FODMAP

Inspire yourself with hundreds of delicious low FODMAP recipes, tips, and tools, and enjoy the abundance that is yours even when you have IBS.
Use the buttons and filters to find something specific or browse the complete collection for inspiration.
Discover a treasure trove of recipes with my FREE recipe club! Get new ideas delivered straight to your inbox every week.
Deliciously Low FODMAP is a trademark of IBS Game Changer, LLC
Filter to find Recipes and Tools
More Filtering Options
- All 735
- Appetizer 50
- BBQ 46
- Bowl 32
- Breakfast 58
- Cocktails 13
- Collection 1 58
- Collection 10 27
- Collection 11 30
- Collection 12 27
- Collection 13 31
- Collection 14 29
- Collection 15 31
- Collection 16 34
- Collection 17 31
- Collection 18 33
- Collection 19 36
- Collection 2 32
- Collection 20 33
- Collection 21 33
- Collection 22 40
- Collection 23 17
- Collection 24 1
- Collection 3 28
- Collection 4 29
- Collection 5 30
- Collection 6 32
- Collection 7 31
- Collection 8 31
- Collection 9 32
- Condiments 6
- Crock Pot 4
- Dessert 108
- Diabetes Game Changer Exception Protocol Contains Alcohol 11
- Diabetes Game Changer Exception Protocol Contains Flour 109
- Diabetes Game Changer Exception Protocol Contains Flour AND Sugar 77
- Diabetes Game Changer Exception Protocol Contains Sugar 49
- Diabetes Game Changer First Four Weeks 368
- Dinner 335
- Drink 8
- Easter 1
- Free Guide 17
- Gluten-free 596
- Gut Microbiome 2
- Guthealth 3
- Holidays 69
- IBS Triggers 4
- Keto Friendly 127
- Lactose-Free 175
- Low FODMAP Diet 721
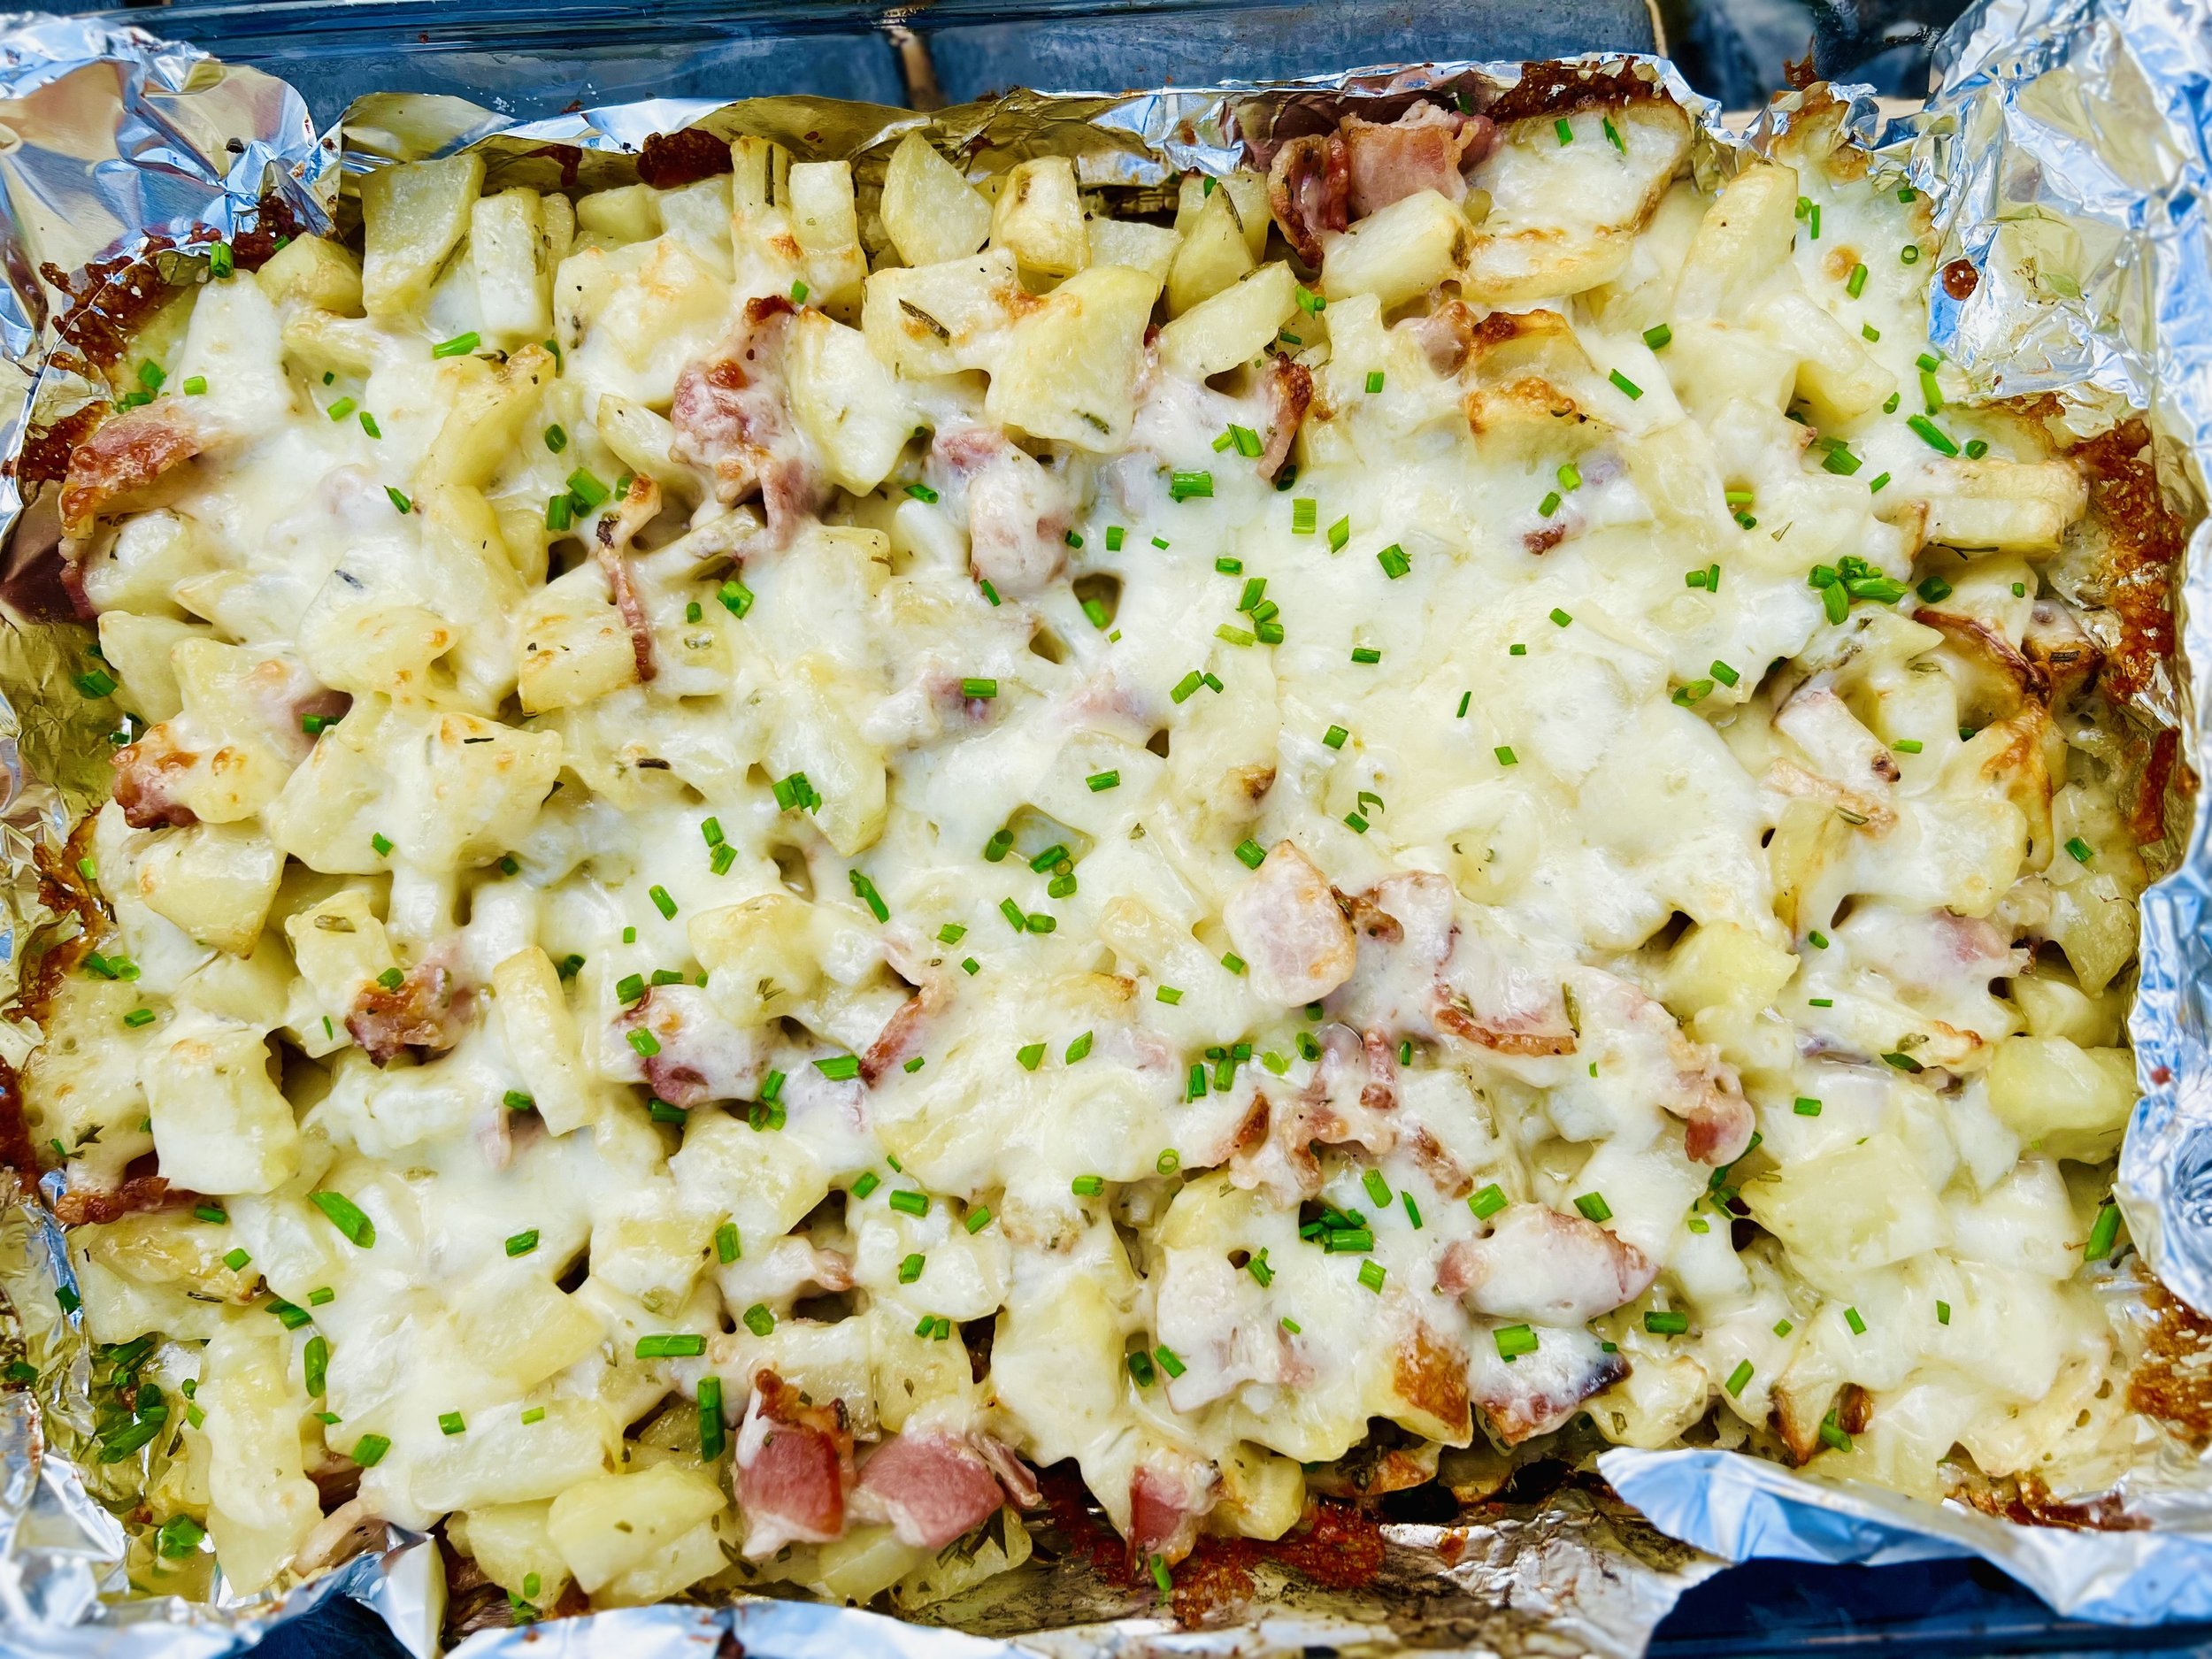
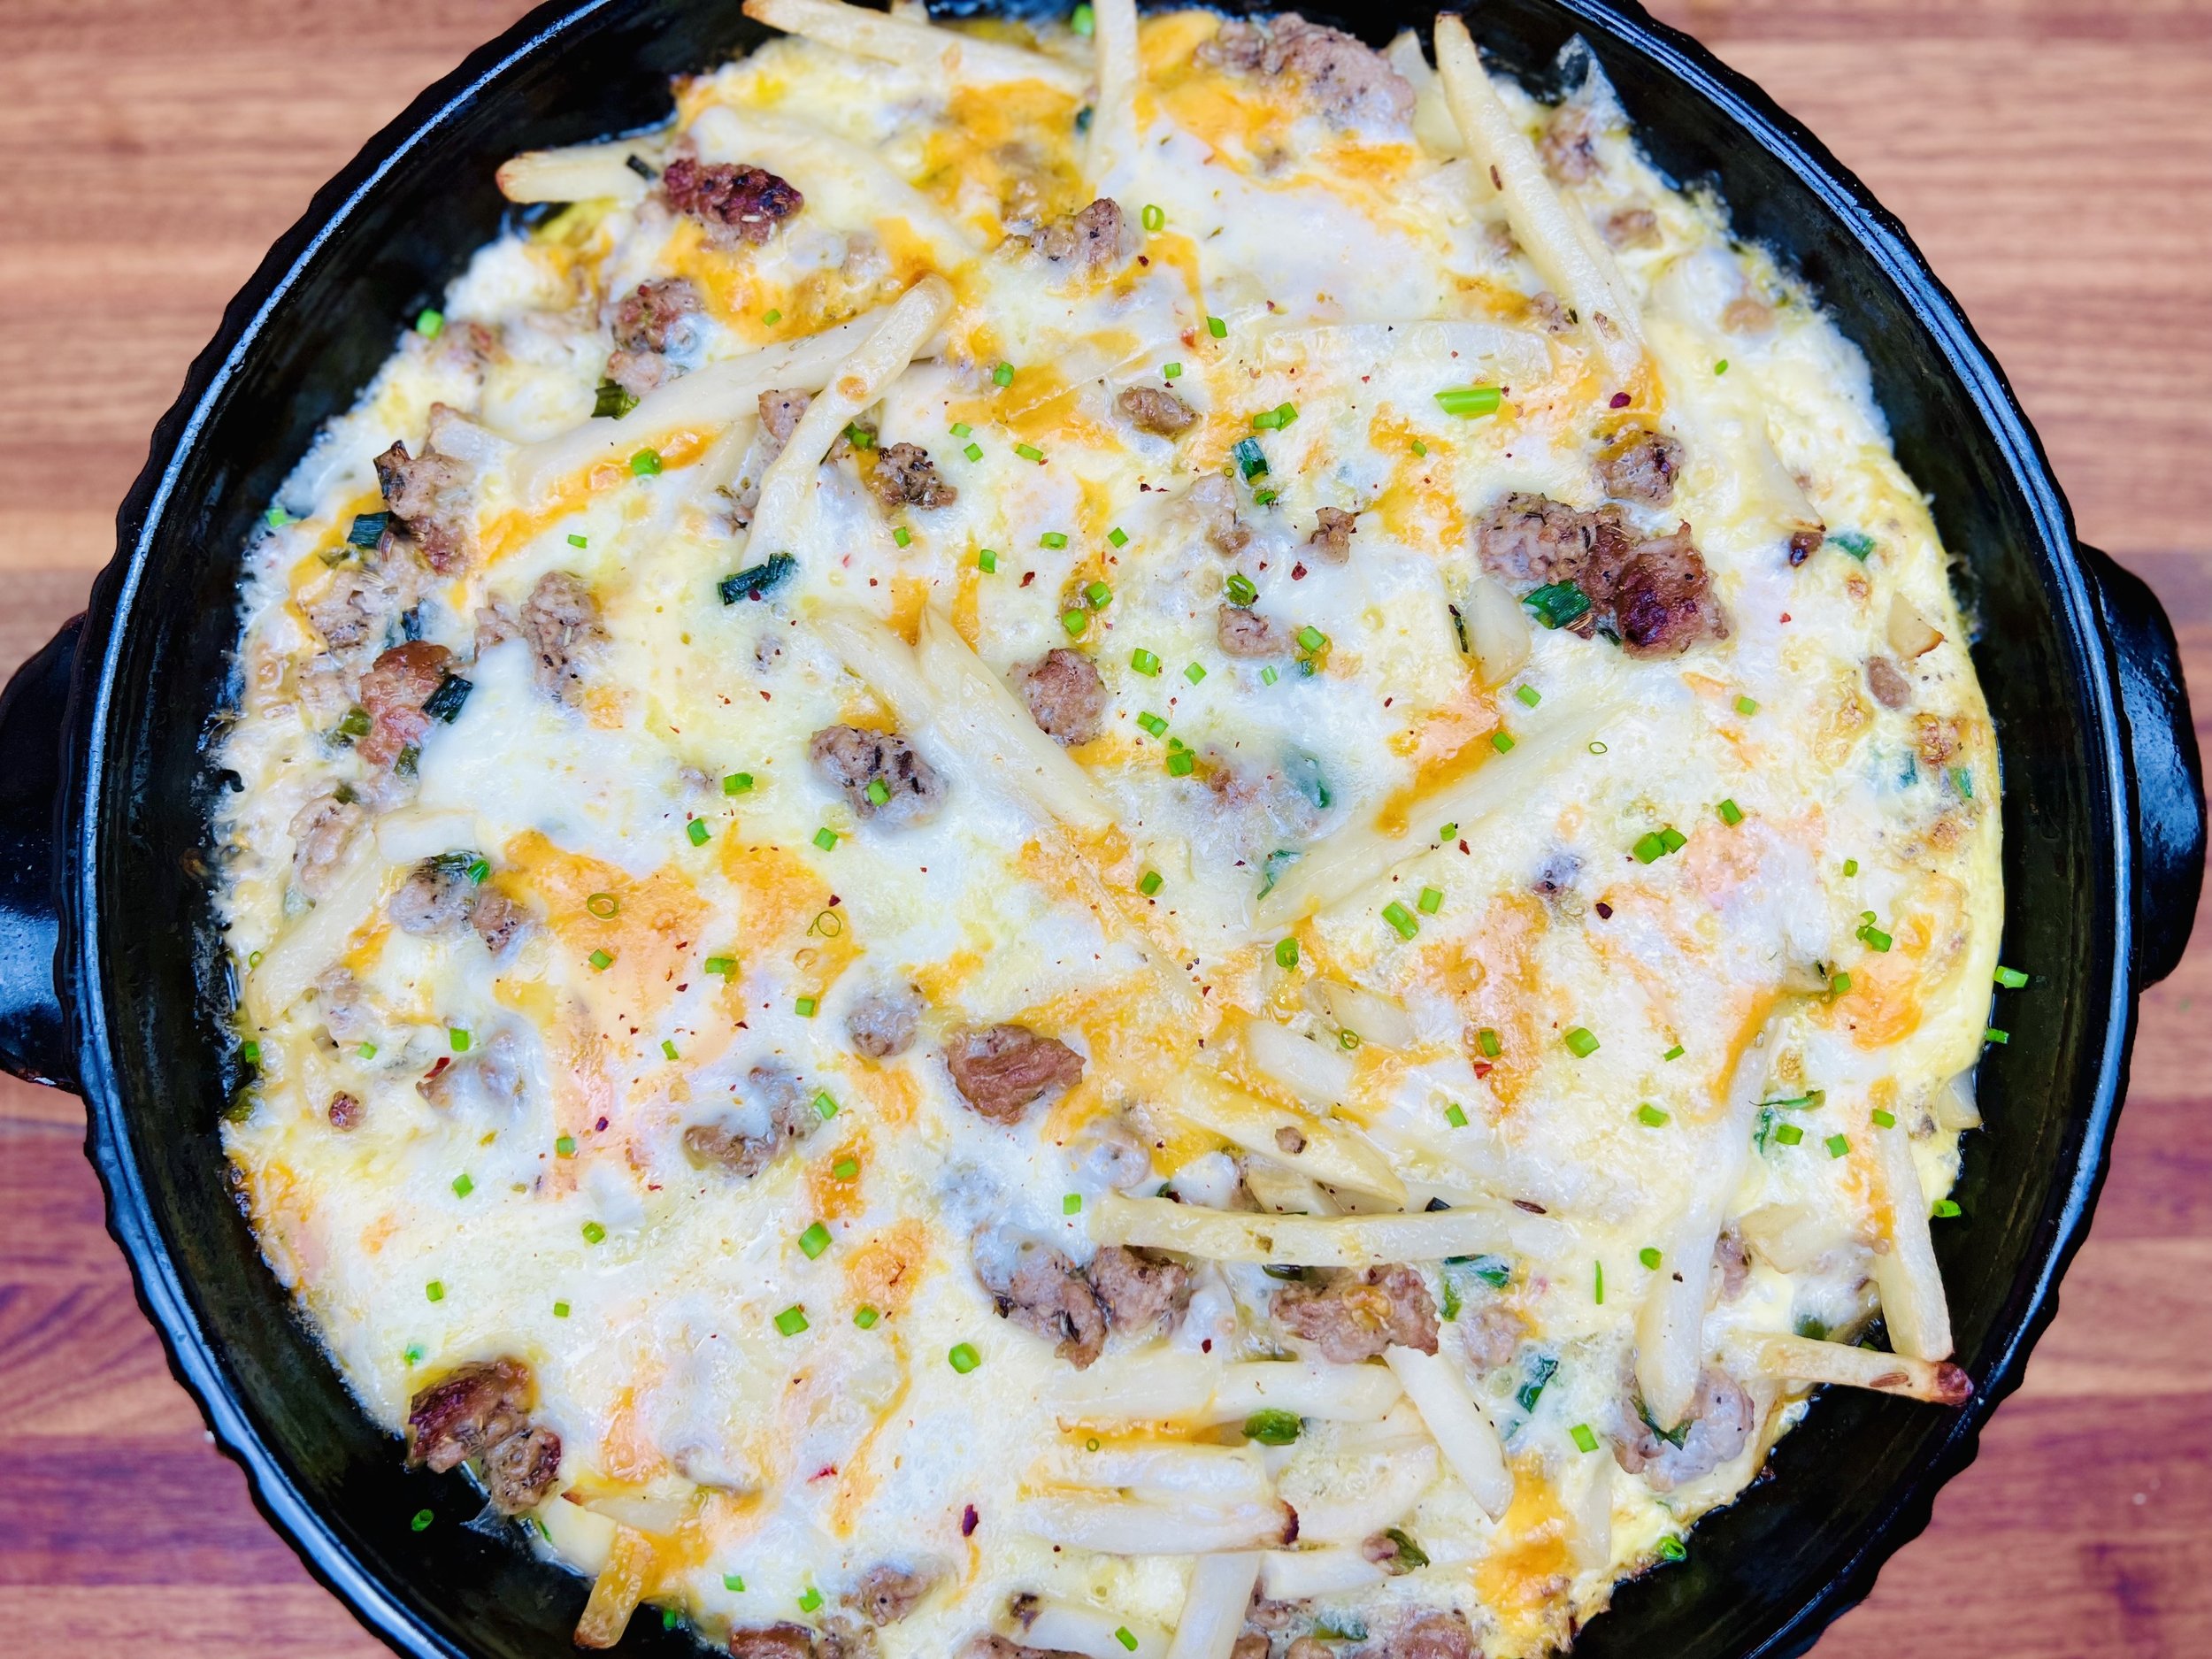
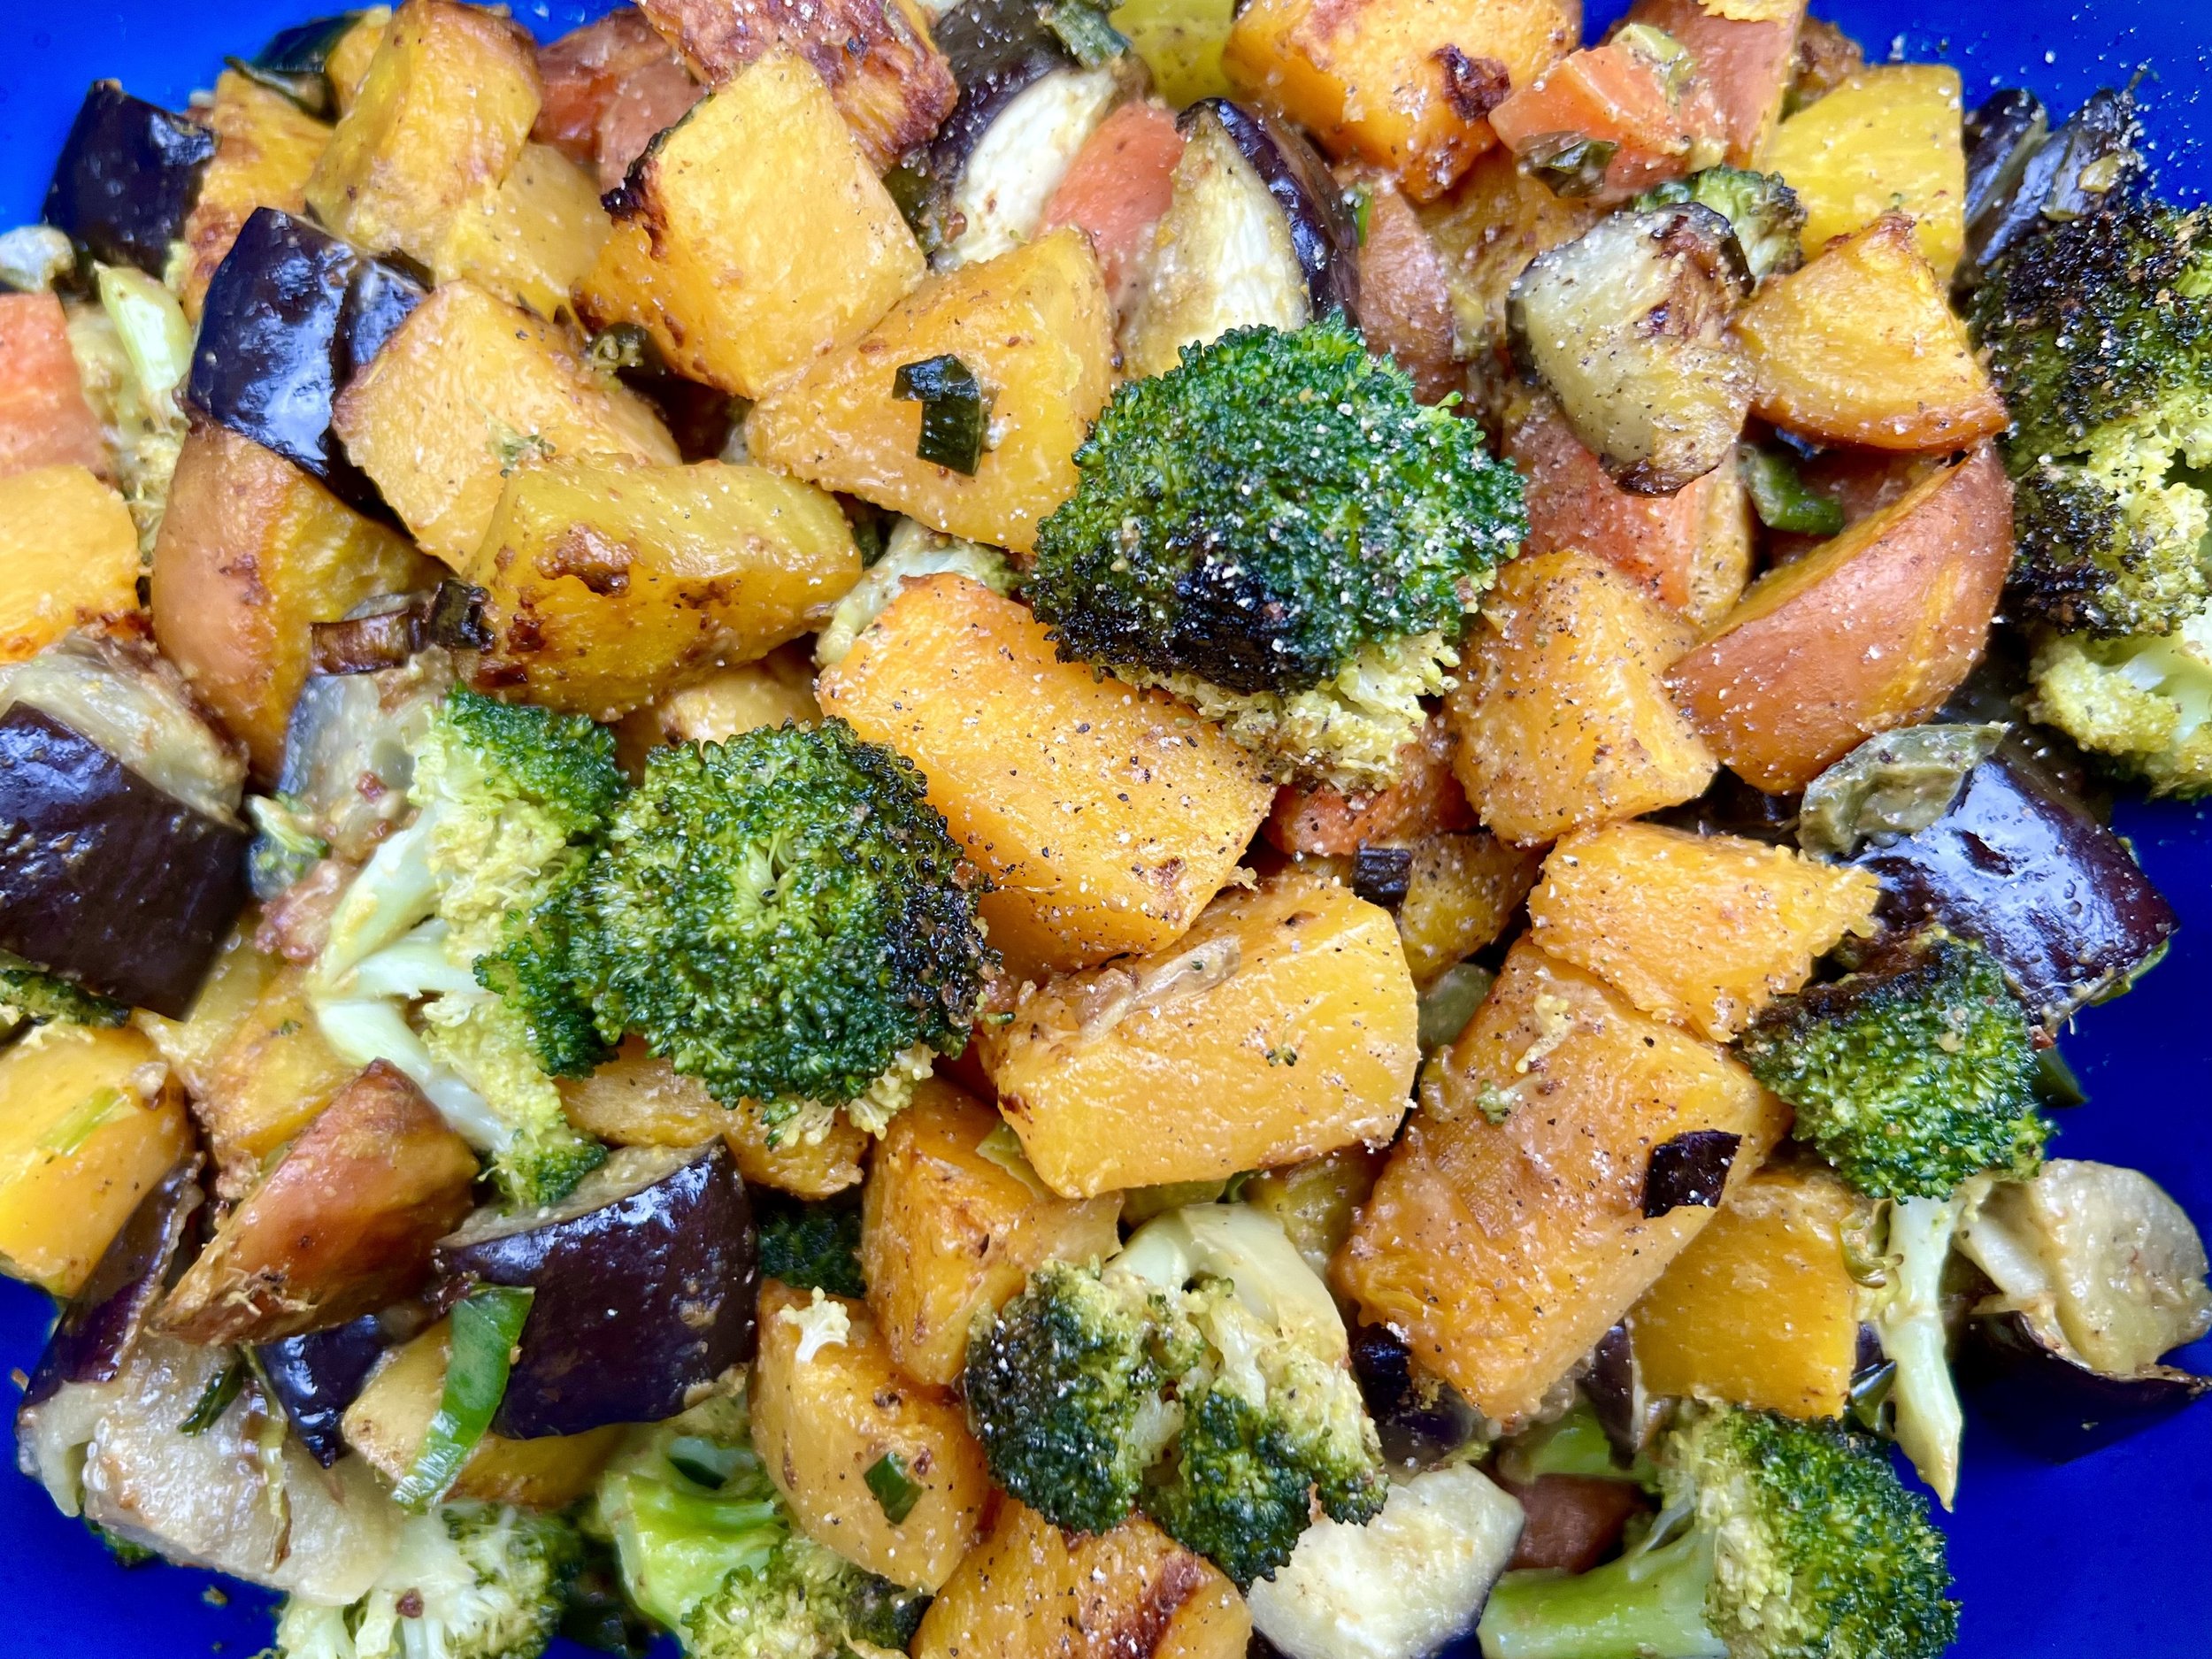
30-Minute One-Pan Keto Veggie Bake (Low FODMAP)
10 Minutes prep • 20 Minutes cook • Low FODMAP • Vegetarian Option • Gluten-free • Serves 4
10 Minutes prep • 20 Minutes cook • Low FODMAP • Vegetarian Option • Gluten-free • Serves 4 • Ok to make ahead: Steps 1-2
It all started because I had chicken left over from the Buttery Sage One-Pan Company Chicken dinner I published recently. What to do with this delicious chicken? So, I set about to create the most wonderful combination of buttery vegetables, seasonings, and really flavorful cheese (it was so good, the chicken became totally optional!) For the cheese, I used the sharp cheddar and havarti I had left from a recent cheeseboard, but you can use any cheese you like! This comes together in one pan in 30 minutes or less and it’s the perfect combination of comfort food, plenty of plants, and really excellent flavor.
This is an exclusive recipe just for recipe club members.
In addition to the two free recipes I create each week I am creating and delivering one very special recipe just for my recipe club members. If you’re not yet a member, I encourage you to join! Membership in the club includes access to the complete archive of recipes with filters so it can become your virtual low FODMAP cookbook plus, I am creating and delivering one special NEW recipe every week ONLY for recipe club members.
Your membership in the club helps me continue creating new, delicious, easy-to-make, low FODMAP recipes just for you.
As always, all recipes will emphasize simple ingredients, easy preparation, and delicious low FODMAP results. Recipes will be for everything from main courses, salads, soups, side dishes, appetizers, desserts, sauces, breakfast and lunch, and even mocktails and cocktails. Everything you need to prepare fantastic low FODMAP meals everyone will love.
Join the club. Let’s keep making delicious Low FODMAP meals together.
More Deliciously Low FODMAP™ keto-friendly recipes


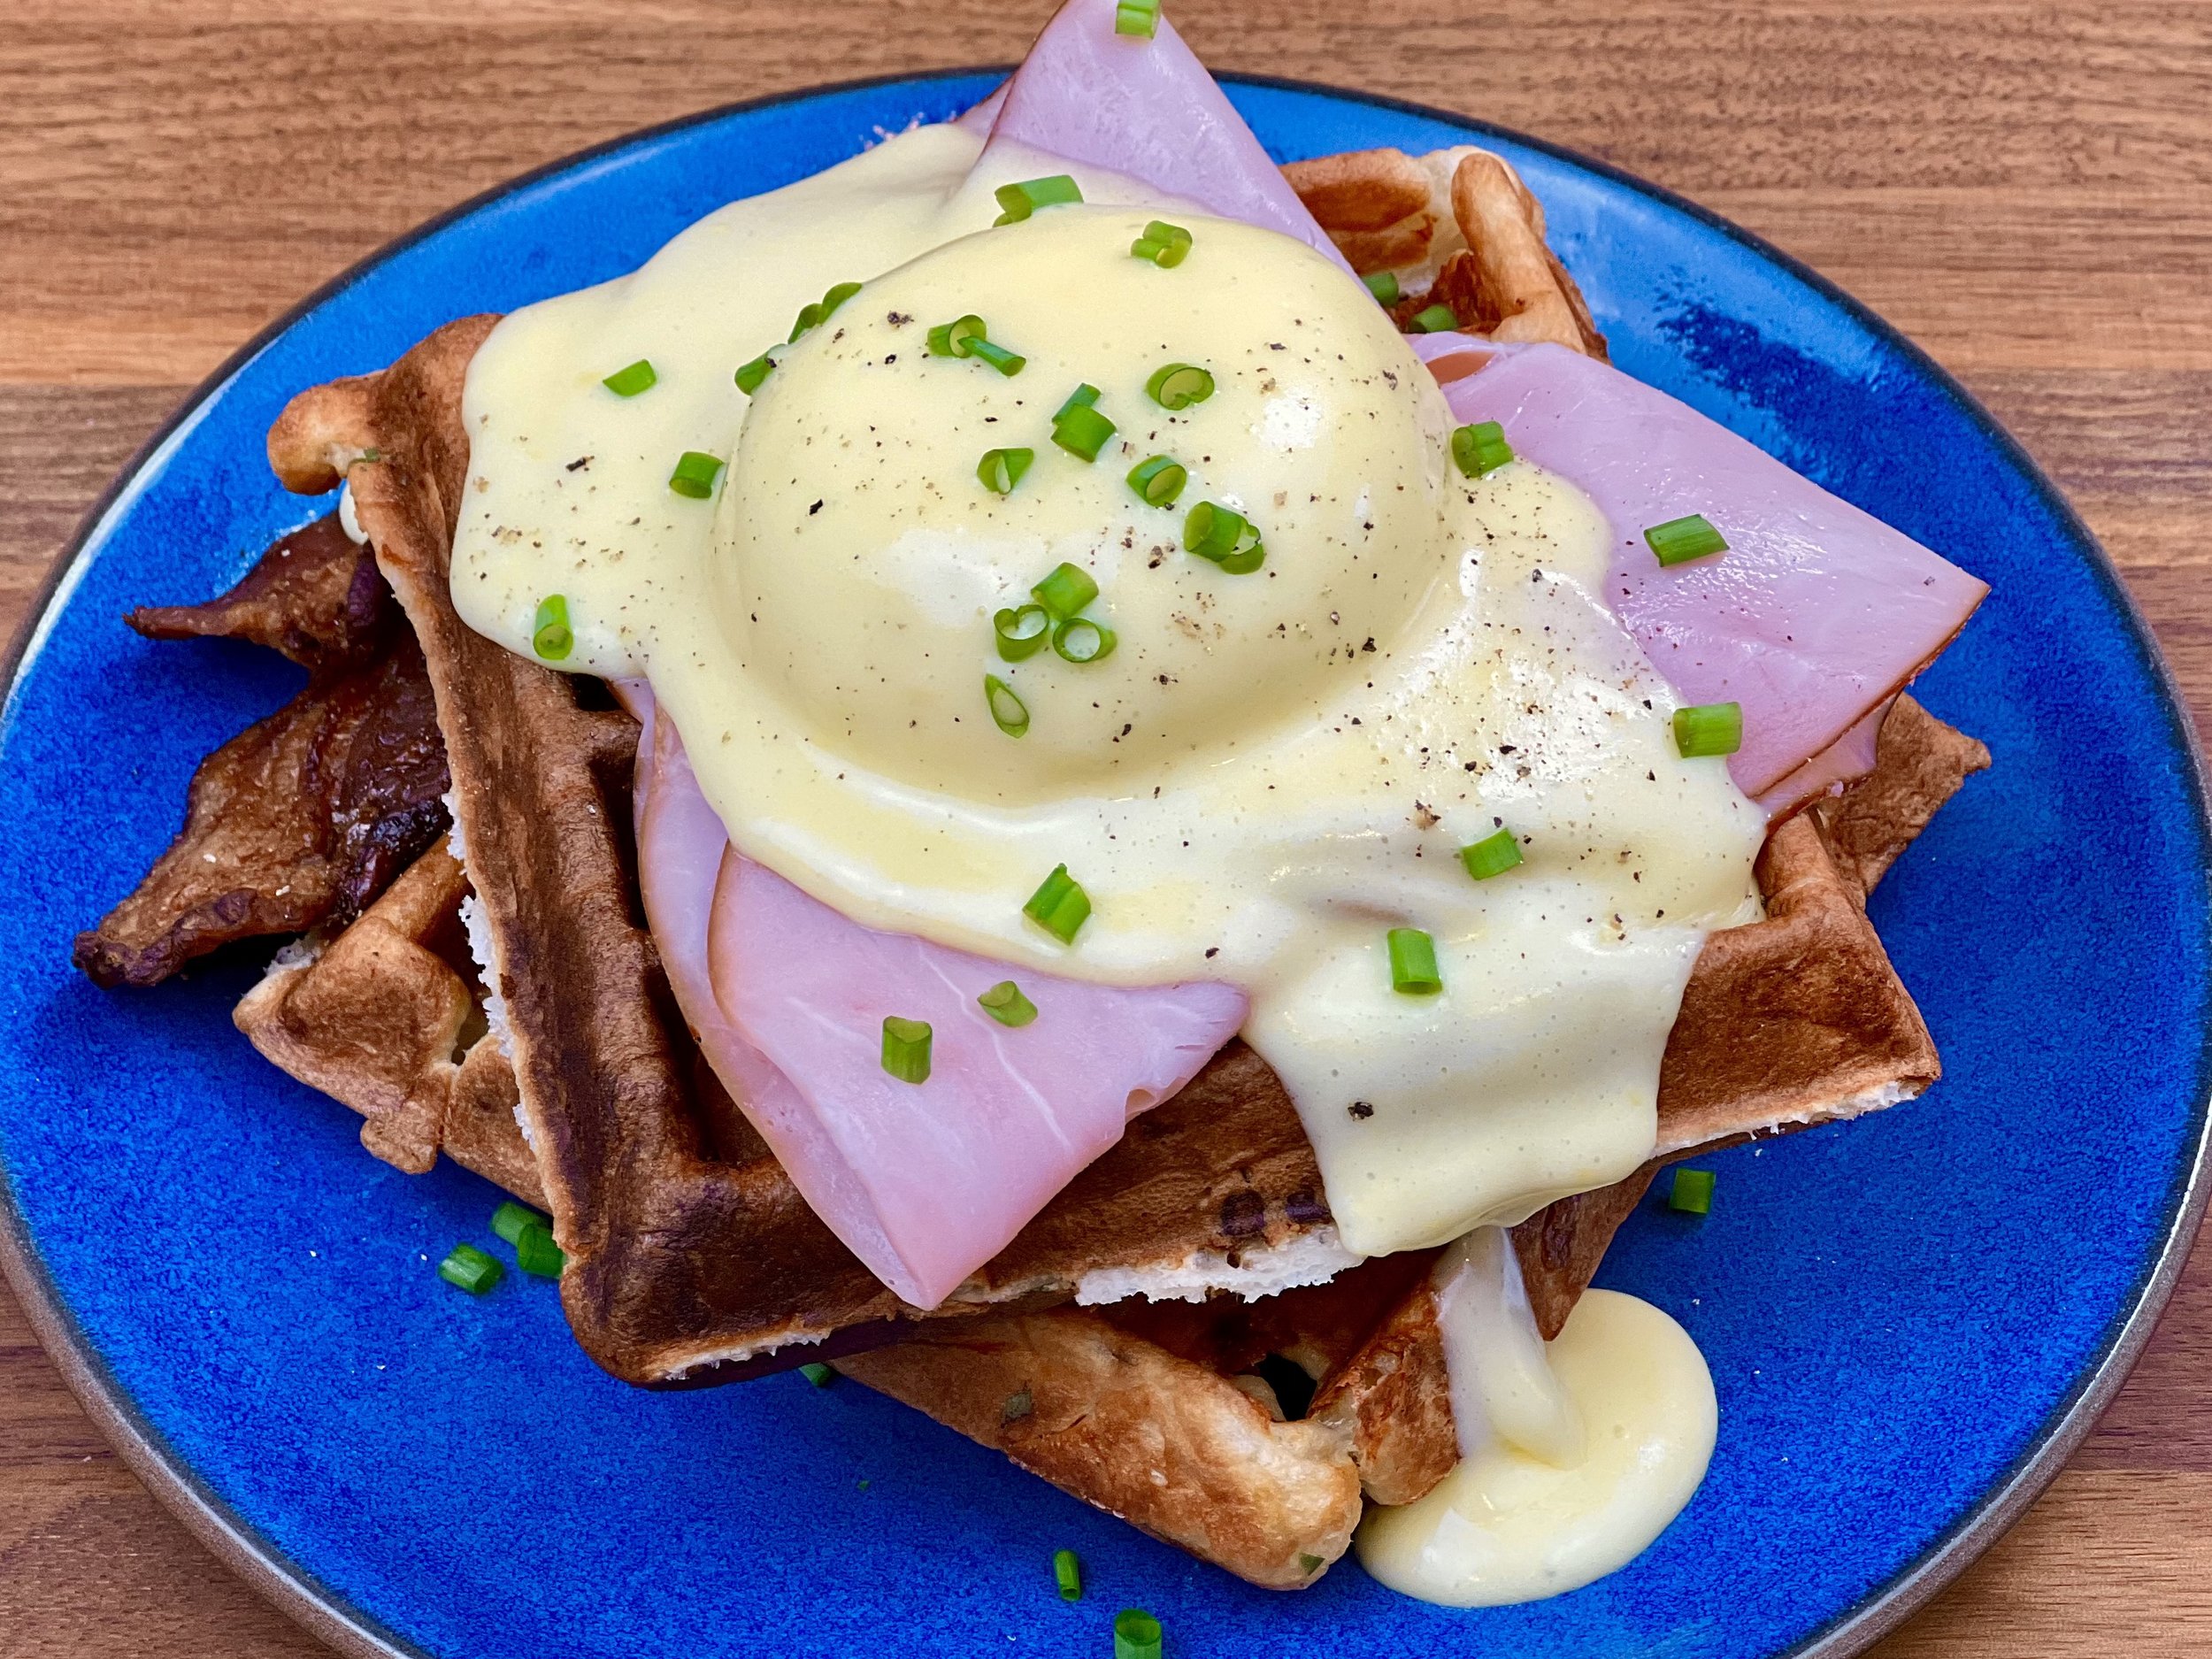
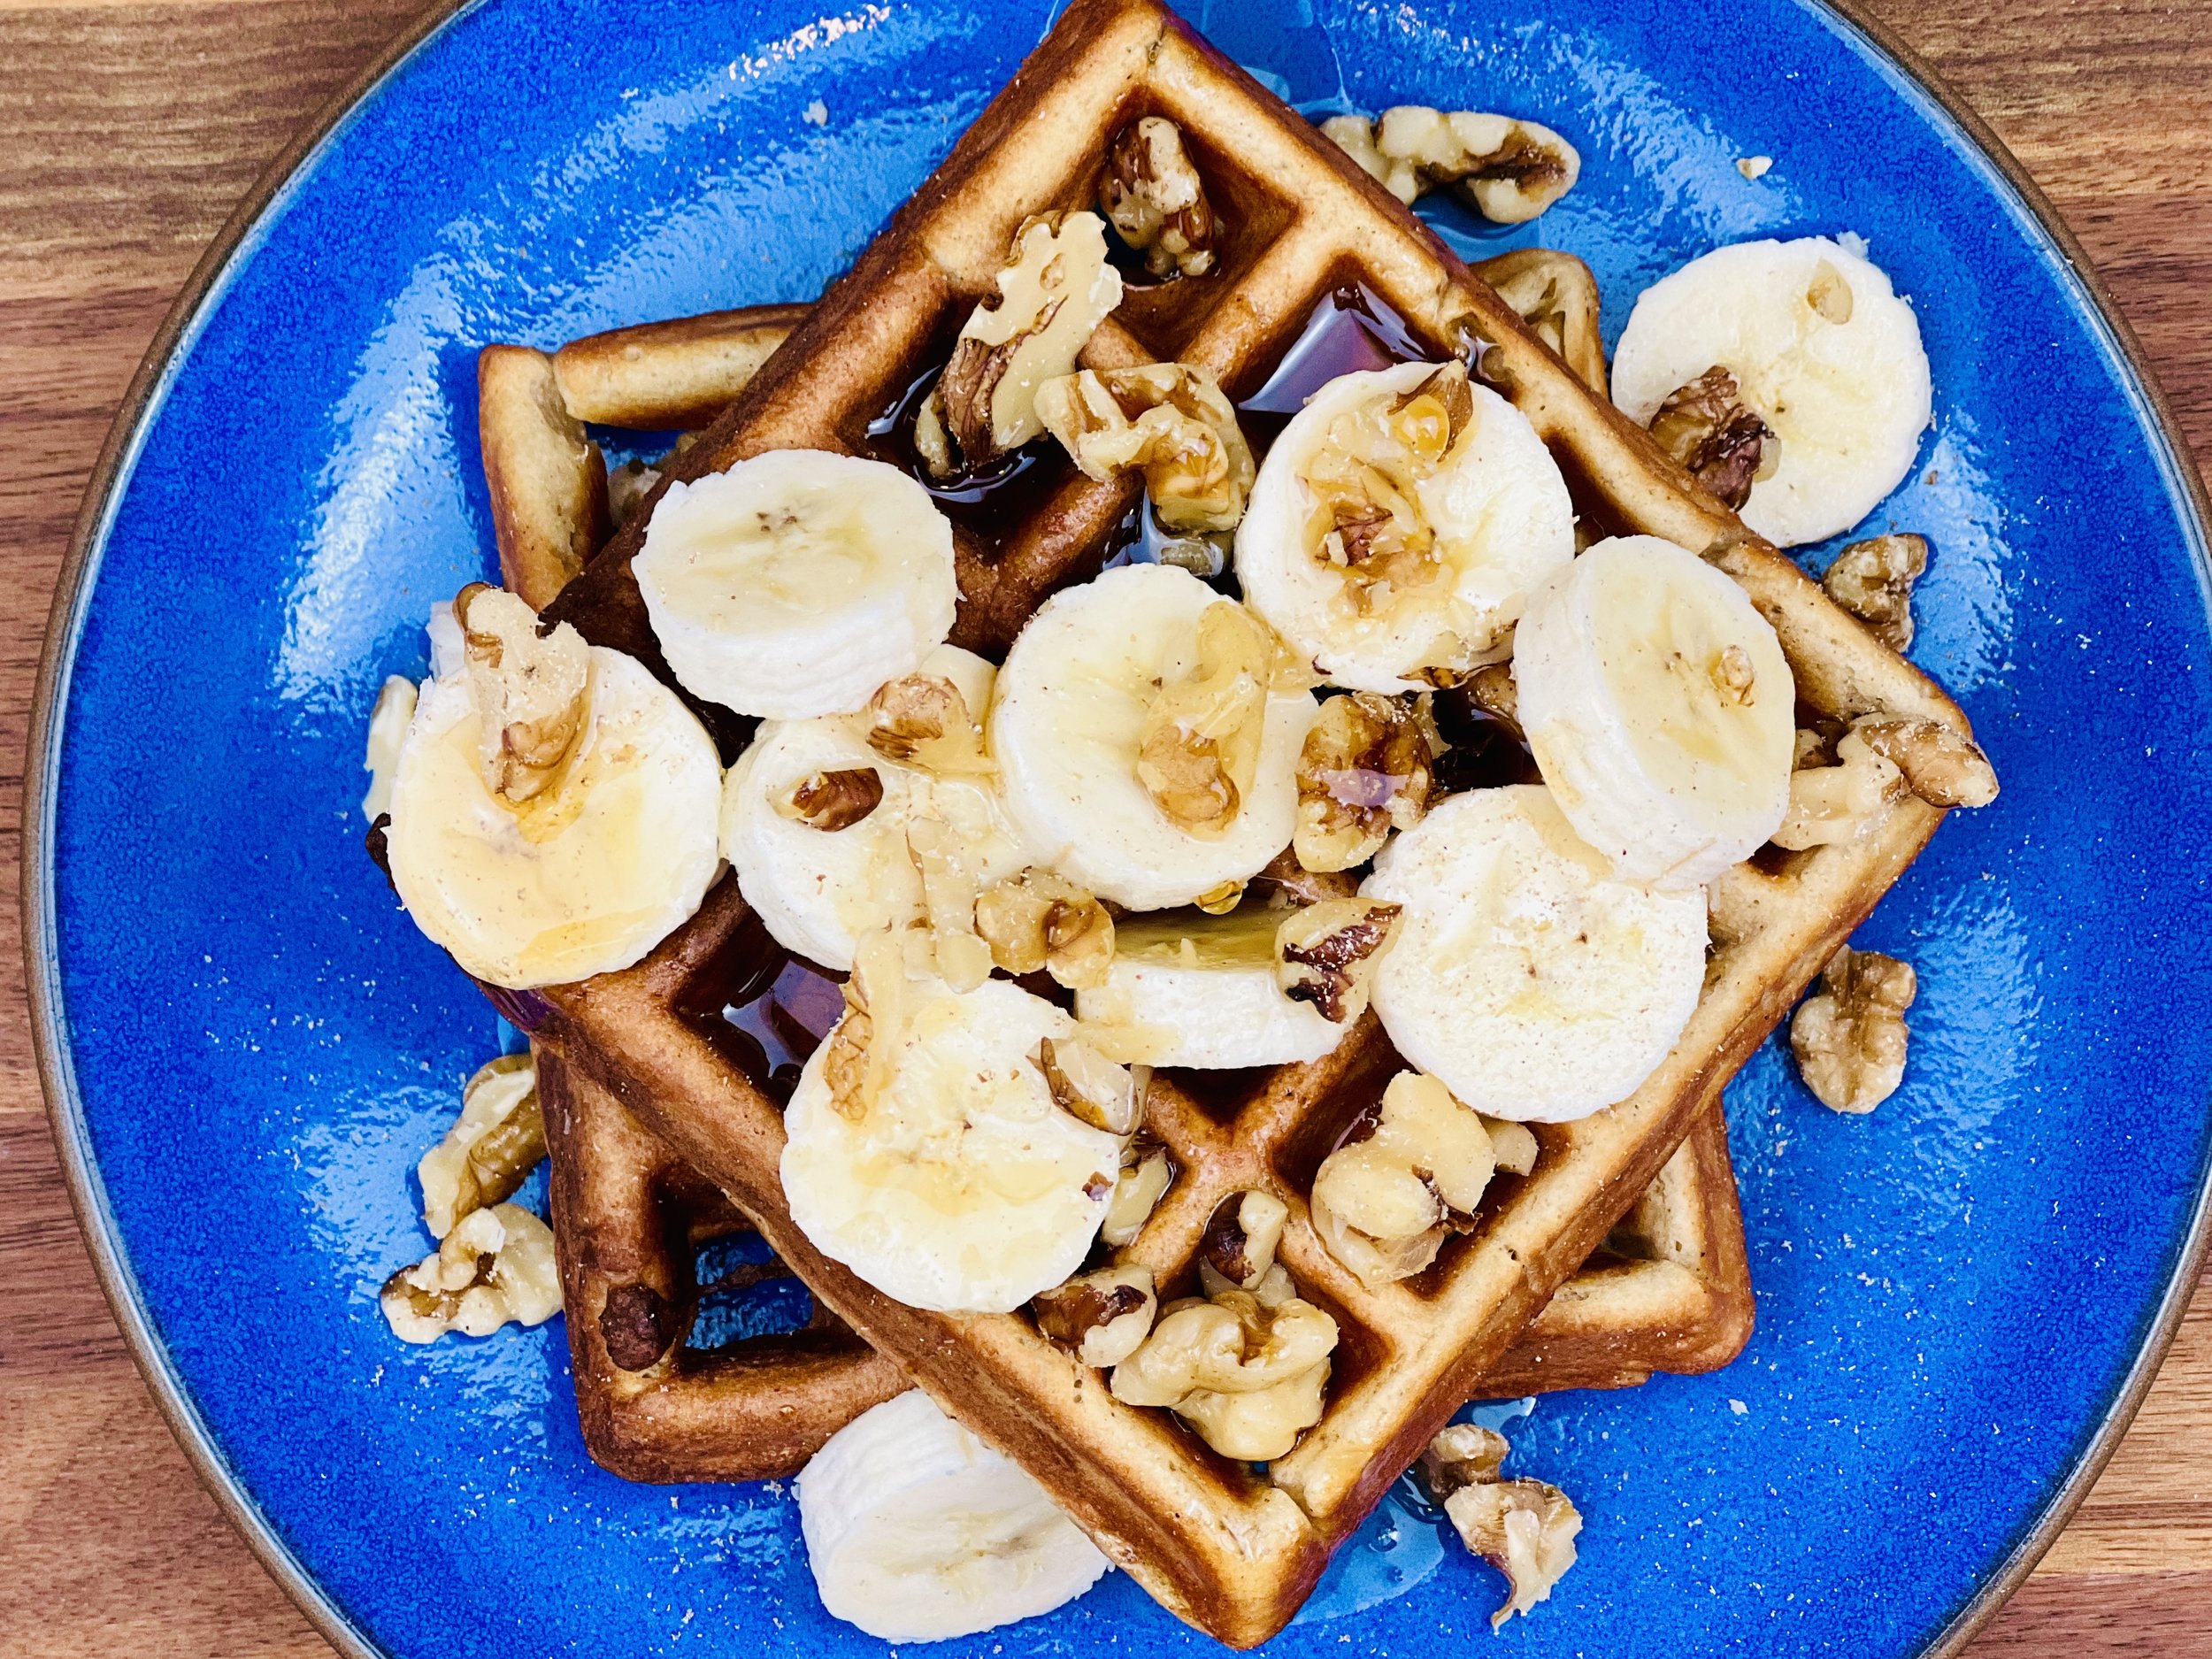
Crispy Cheesy Chaffles (Low FODMAP)
20 Minutes prep • 25 Minutes cook • Low FODMAP • Gluten-free • Serves 4
10 Minutes prep • 10 Minutes cook • Low FODMAP • Gluten-free • Serves 4 • Ok to make ahead: Steps 1-2
Crispy, cheesy, and a perfect substitute for toast with your eggs benedict or avocado toast, buns on your burger, bread on your grilled cheese, crust on your pizza, you get the idea! Five ingredients and a waffle iron are all it takes to have these delicious chaffles. Be creative with the cheese and seasoning you use according to what you have on hand and what you are planning to put on top. Cheddar, gruyere, swiss, mozzarella, or even pepper jack are all great choices for cheese. And Italian, Cajun, Taco, or just plain thyme, rosemary, or basil are all great choices for seasoning. They freeze beautifully and reheat from frozen so make a bunch to have on hand (if they last that long!)
Ingredients
2 large eggs (or 3 medium eggs)
1/2 teaspoon baking powder
1 teaspoon savory seasoning of your choice (I used Smoke N Sanity Beyond Italian Seasoning, use code IBSGC15 for 15% discount)
1 tablespoon almond flour (optional but helps keep them sturdy for reheating in the toaster)
1 1/2 cups flavorful cheese (I used 1 cup extra sharp cheddar and 1/2 cup Parmesan, finely grated)
Directions
(1) Prepare: Preheat your waffle iron for about 5 minutes, until hot.
(2) Make the batter: Whisk together the eggs, baking powder, almond flour and seasoning. Add the cheese and stir until well combined.
(3) Cook: Spoon enough of the chaffle batter into the waffle maker to cover the surface well when the lid closes. (That's about 1/2 cup batter for a regular waffle maker and 1/4 cup for a mini waffle maker.) Close the lid and let cook until browned and crispy, about 3-4 minutes. (Watch for the steam to stop coming out of the waffle iron, or at least slow way down to indicate they are done.)
(4) Finish: Carefully remove the chaffle from the waffle maker and set aside on a cooling rack to crisp up more. (Cooling is important for crispy texture!) Repeat with remaining batter, if any.
(5) Plate and serve: Serve at room temperature or reheat in the oven or toaster, with your favorite toppings.
Storage: Once you’ve let your waffles cool, you can store them in an airtight container in the refrigerator for up to 5 days or the freezer up to 6 months.
Reheating: Reheat in the toaster, toaster oven, skillet, or conventional oven at 350 degrees F. (You can even reheat right from frozen.) I like to use the toaster, which is the fastest and easiest. Do not microwave as the chaffles will lose their crispiness.
Eat and enjoy every bite because you can!
Recipe note: I use Diamond Crystal Kosher salt in all my recipes because it has a wonderful flat and crisp flake that tastes delicious. It is also the least salty salt available so you can use it more liberally as a seasoning than you can table salt or sea salt. If you use another type of salt, you may need to reduce the amount so it is not over-salted.
Have a question you’d like to have answered? Email me at hello@ibsgamechanger.com
Link note: This post may contain affiliate links for you to easily purchase items that are linked. I may earn a small commission from qualifying purchases but none of this costs you a thing so feel free to use the links! In addition, for some items, I have provided a special discount code for IBS Game Changers so be sure to use the code when you purchase an item to get the discount that has been arranged just for you.
More Deliciously Low FODMAP™ breakfast recipes


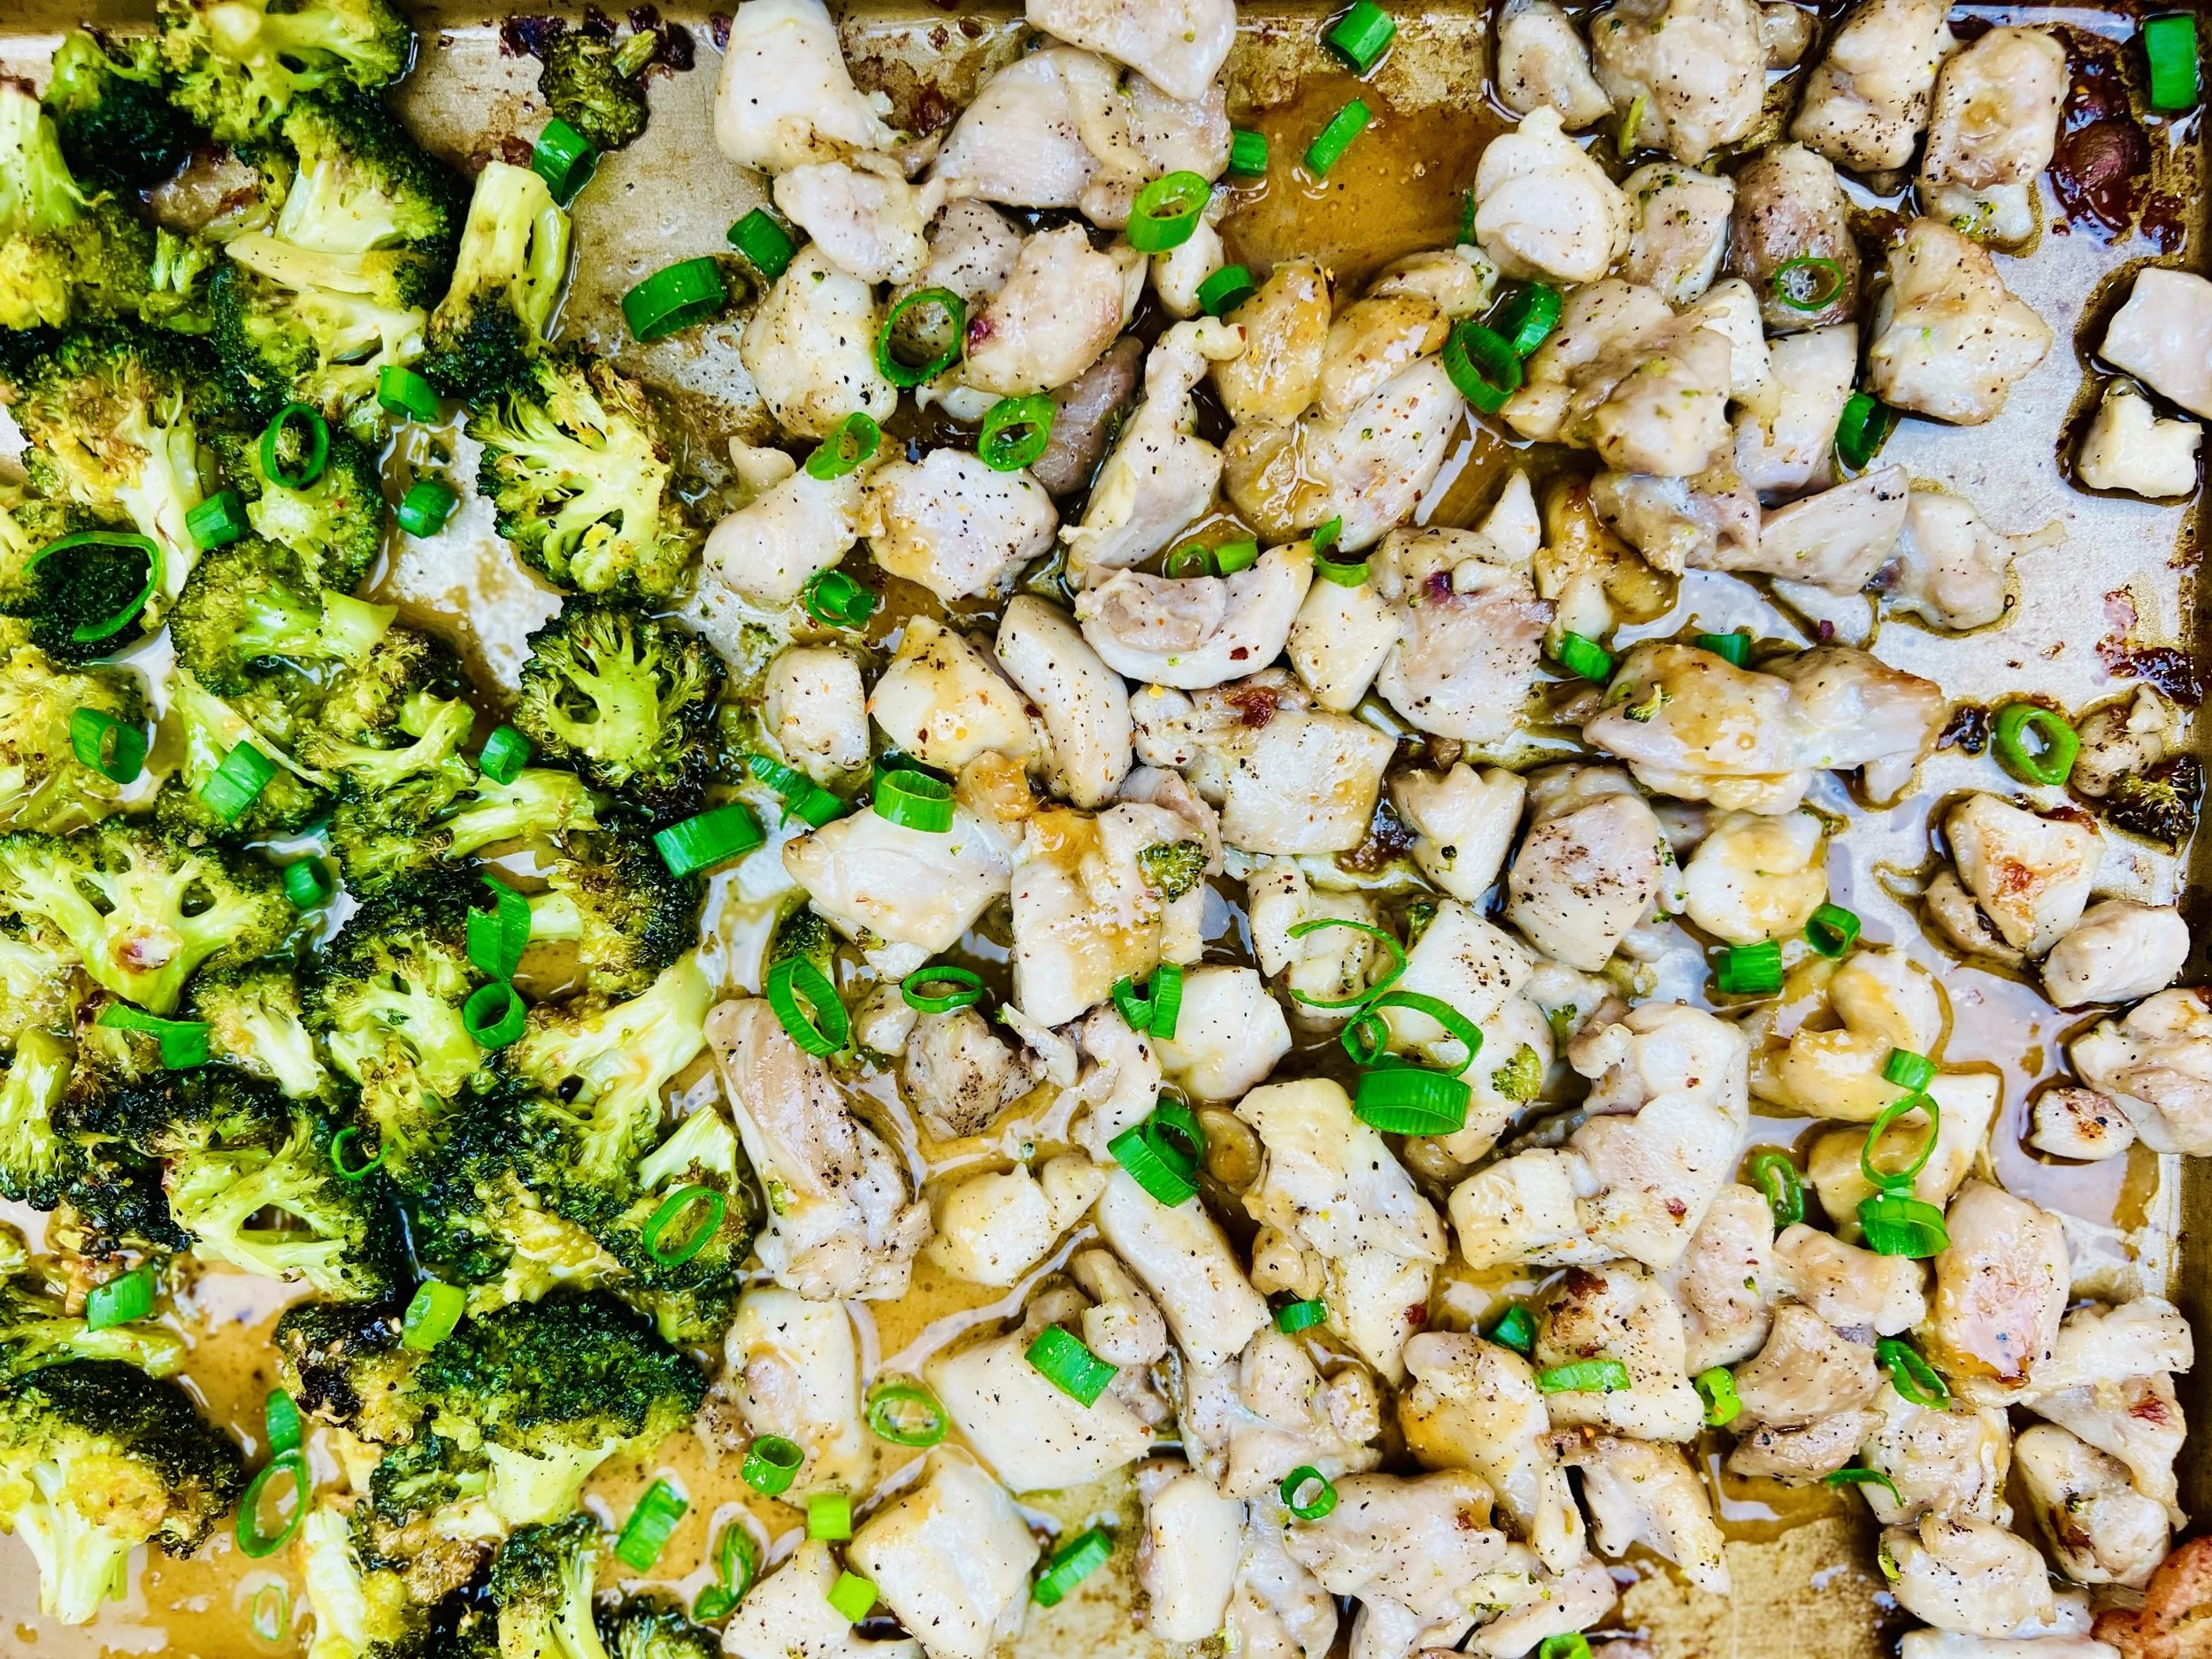
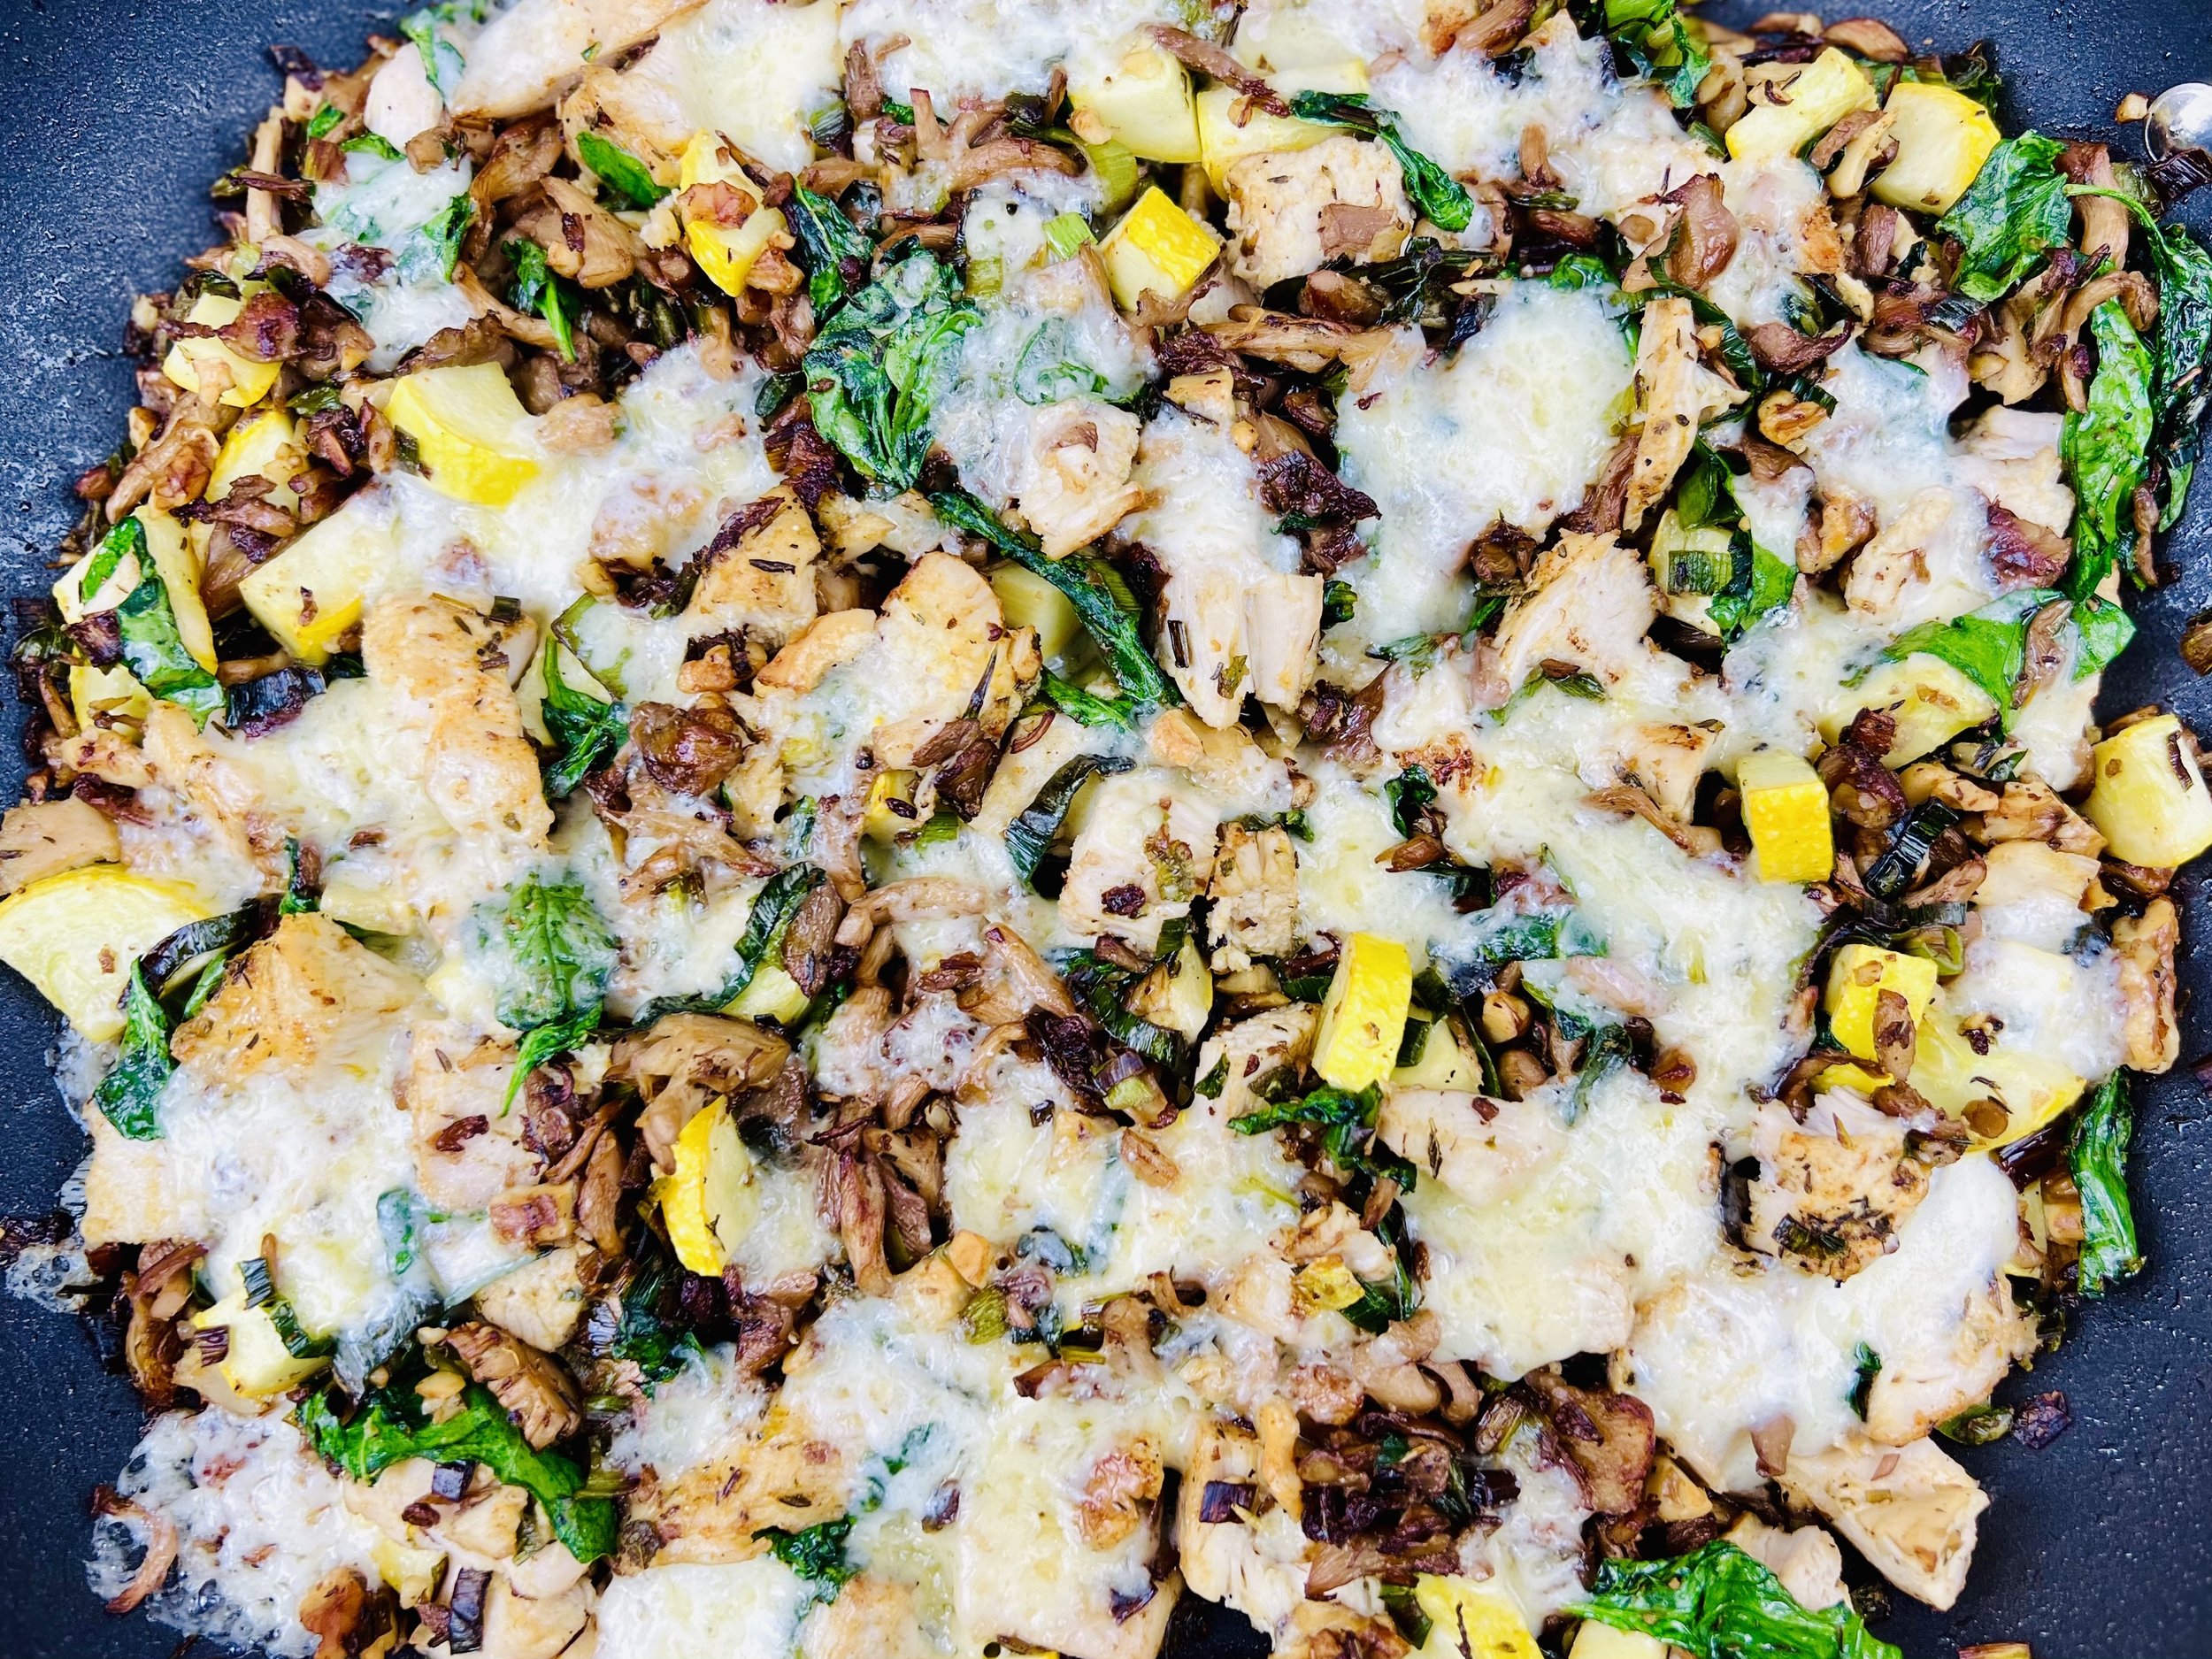
Buttery Sage One-Pan Company Chicken (Low FODMAP)
20 Minutes prep • 25 Minutes cook • Low FODMAP • Serves 4
20 Minutes prep • 40 Minutes cook • Low FODMAP • Gluten-free • Serves 6 • Ok to make ahead: Steps 1-2
I love dinners that you make all in one pan that cook themselves while you enjoy time with your guests. Here is my latest favorite in this category! This dish has rice, vegetables, and chicken all cooked together in the oven so all you have to do is add one of my delicious salads and you’ve got a meal fit for company.

Ingredients
6 boneless chicken thighs or breasts (skin on)
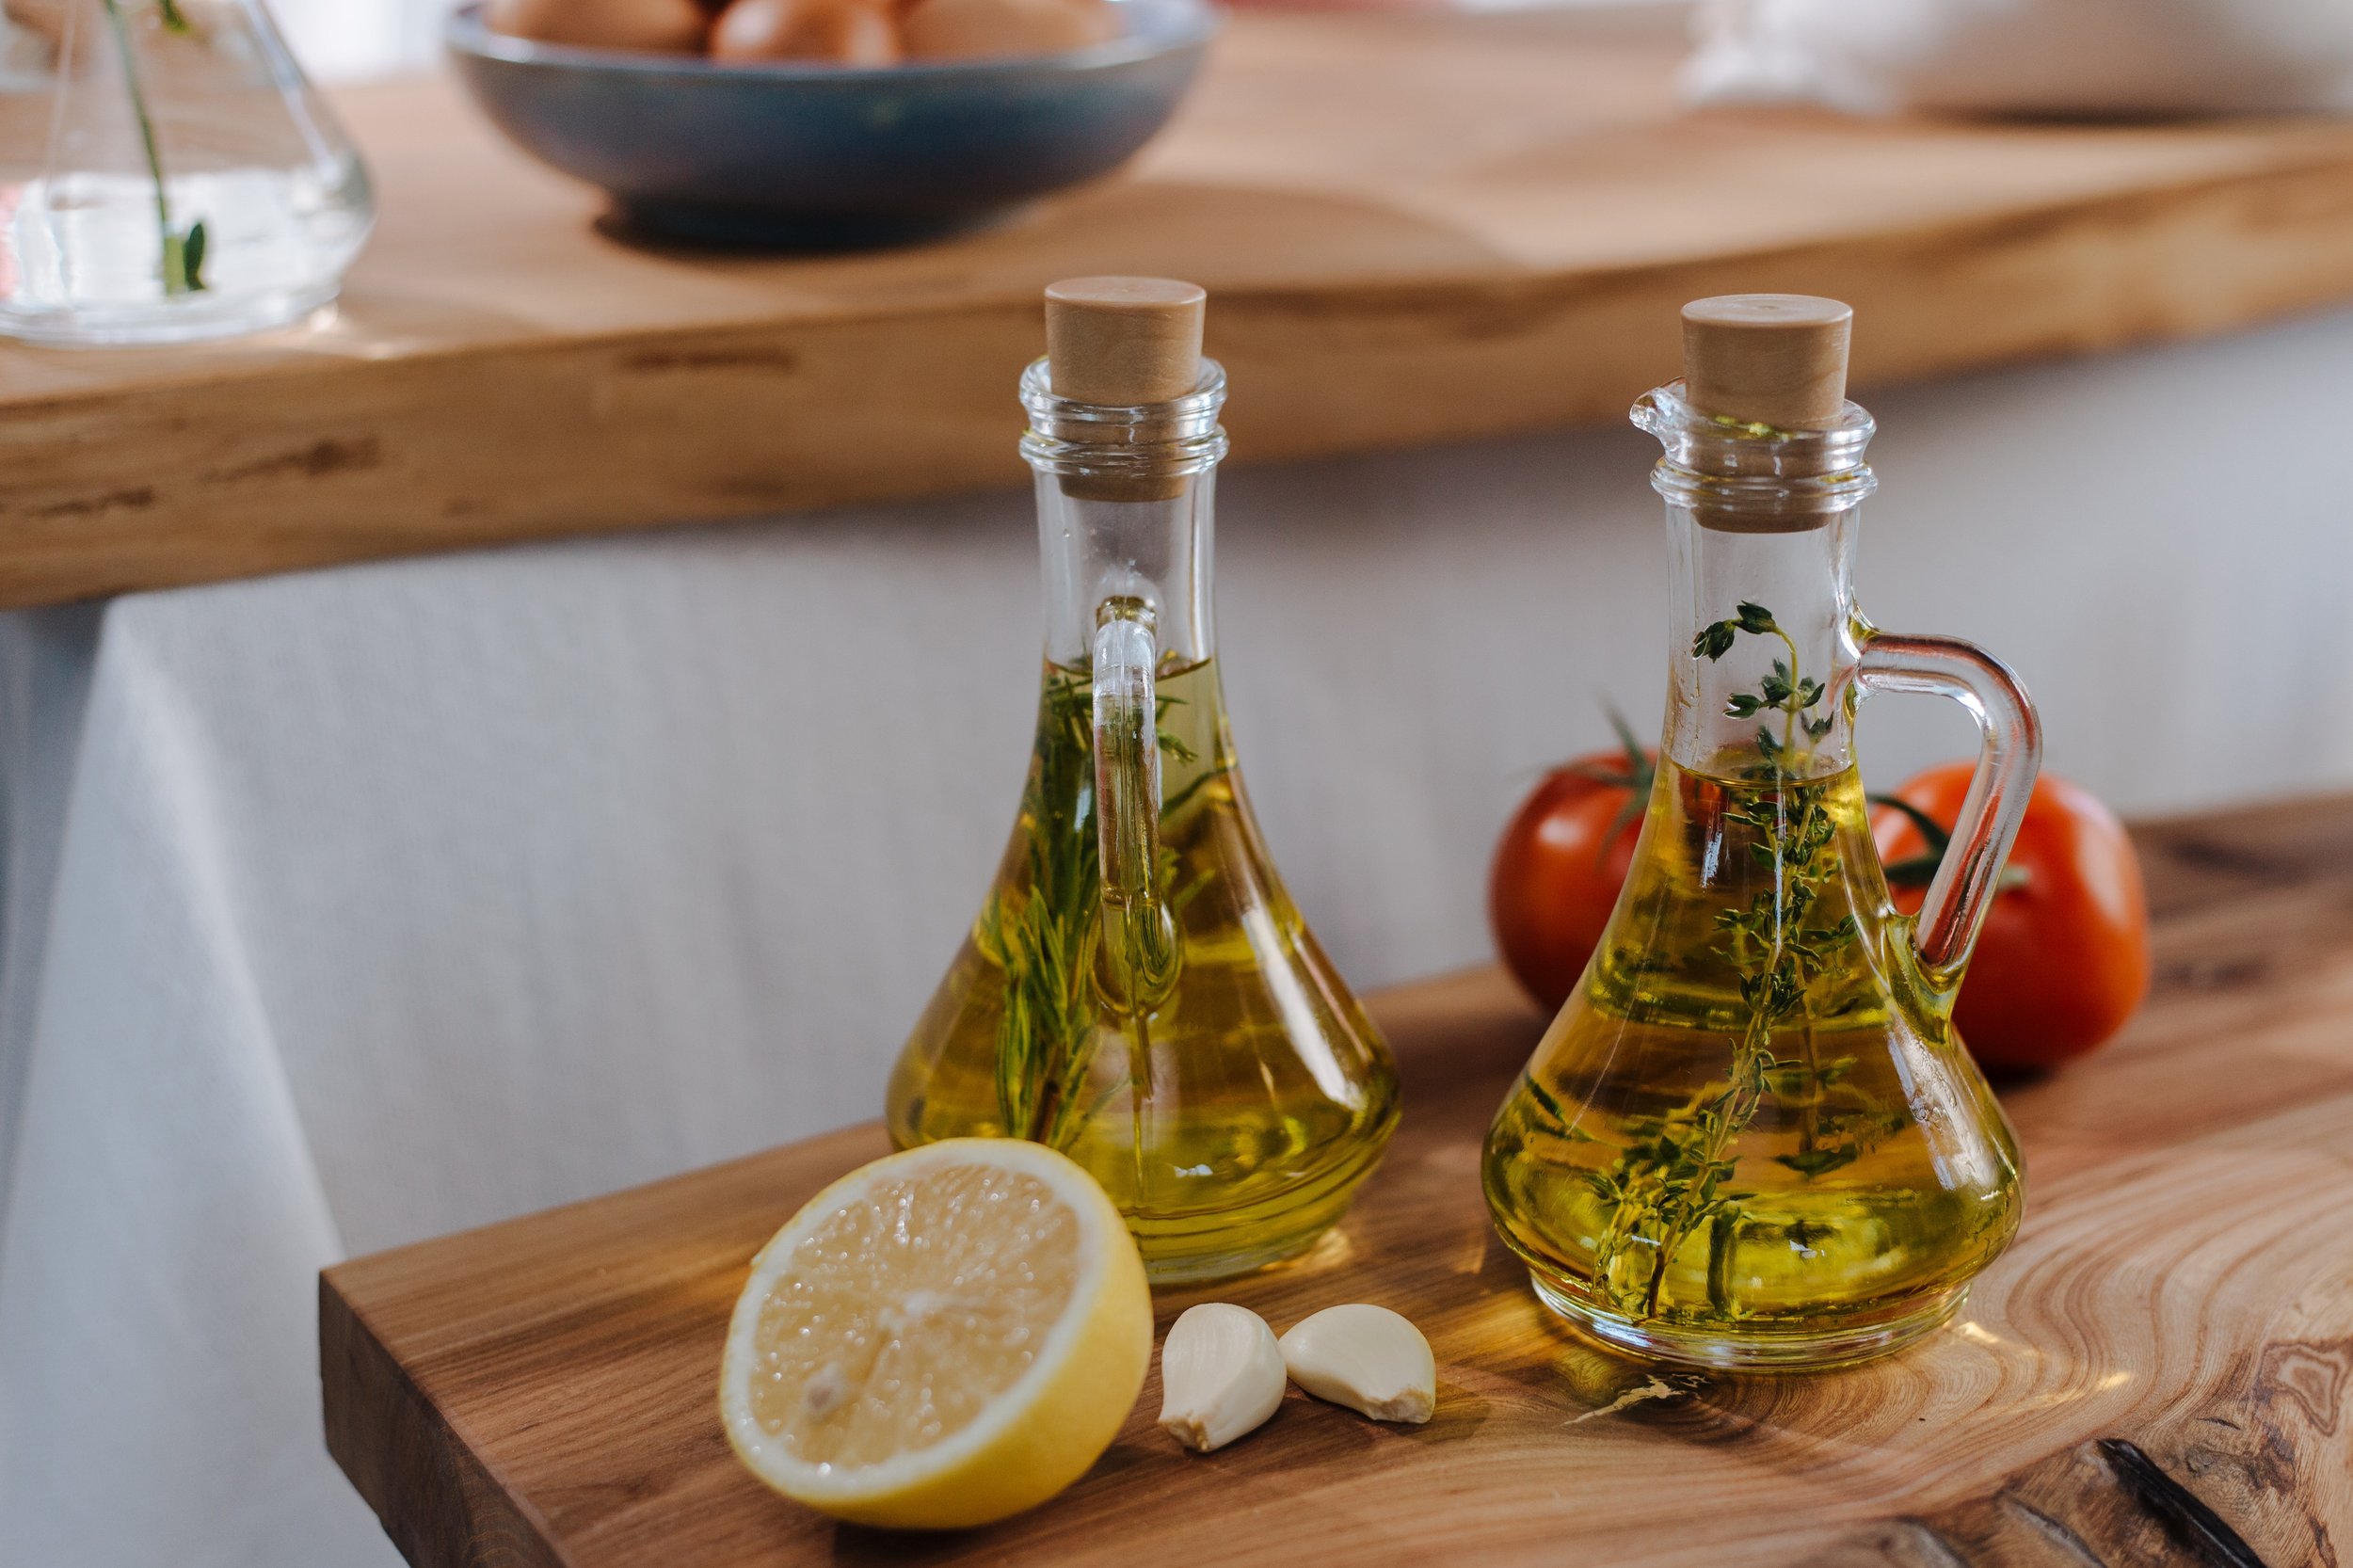
2 tablespoons garlic-infused extra virgin olive oil
1/4 cup grated parmesan
2 teaspoons dry thyme
1 teaspoon dry rosemary
1 teaspoon smoked paprika
1/8 - 1/4 teaspoon cayenne pepper (depending on how spicy you like it)
1/2 teaspoon Kosher salt
1/4 teaspoon black pepper
1 1/2 cups dry long-grain or jasmine white rice
1 bunch green onions (green part only), chopped (about 1 cup)
1 leek (green part only), chopped (about 1 cup)
1 cup grated zucchini, summer squash, or a combination of the two
1 tablespoon chopped fresh sage, plus 8 sage leaves
3 cups low FODMAP chicken broth (I use Whole Foods Organic 365 chicken broth or Gourmend low FODMAP Organic Chicken Broth - use code IBSGC15 for 15% discount)
4 tablespoons salted butter
1 parmesan rind (optional but adds great flavor)
Directions
(1) Marinate the chicken: In a bowl combine garlic-infused olive oil, parmesan, thyme, rosemary, smoked paprika, cayenne, salt, and pepper. Add the chicken and use your hands to combine the chicken with the marinade ensuring all the chicken is coated with the marinade. Set aside in the refrigerator until you’re ready to cook.
(2) Prepare: Preheat the oven to 400 degrees F. Chop the leek and green onion greens. In a large baking dish (9” x 13” or equivalent) pour the rice, green onion greens, leek greens, zucchini and/or summer squash, and chopped sage.
(3) Add the chicken: Pour over the 3 cups of chicken broth. Stir gently to ensure all the rice is loosened from the bottom of the pan. Sprinkle over the mixture 2 tablespoons of butter cut into small pieces. Arrange the chicken over the rice mixture. Add the parmesan rind, if using.
(4) Bake: Bake 30-40 minutes, until the rice is fluffy and the chicken is just cooked through (internal temperature of 165 degrees F). If the rice is still hard, add 1/3 cup water or chicken broth and cook for an additional 10 minutes.
(5) Finish: Just before serving, remove the parmesan rind (if you added one). Melt together the 2 tablespoons butter and sage leaves in a skillet set over medium heat. Cook until the butter is browning and the sage is crisp which will take about 4 minutes.
(6) Plate and serve: Serve the chicken and rice drizzled with sage butter and crispy sage leaves.
Eat and enjoy every bite because you can!
Recipe note: I use Diamond Crystal Kosher salt in all my recipes because it has a wonderful flat and crisp flake that tastes delicious. It is also the least salty salt available so you can use it more liberally as a seasoning than you can table salt or sea salt. If you use another type of salt, you may need to reduce the amount so it is not over-salted.
Have a question you’d like to have answered? Email me at hello@ibsgamechanger.com
Link note: This post may contain affiliate links for you to easily purchase items that are linked. I may earn a small commission from qualifying purchases but none of this costs you a thing so feel free to use the links! In addition, for some items, I have provided a special discount code for IBS Game Changers so be sure to use the code when you purchase an item to get the discount that has been arranged just for you.
More Deliciously Low FODMAP™ main course recipes


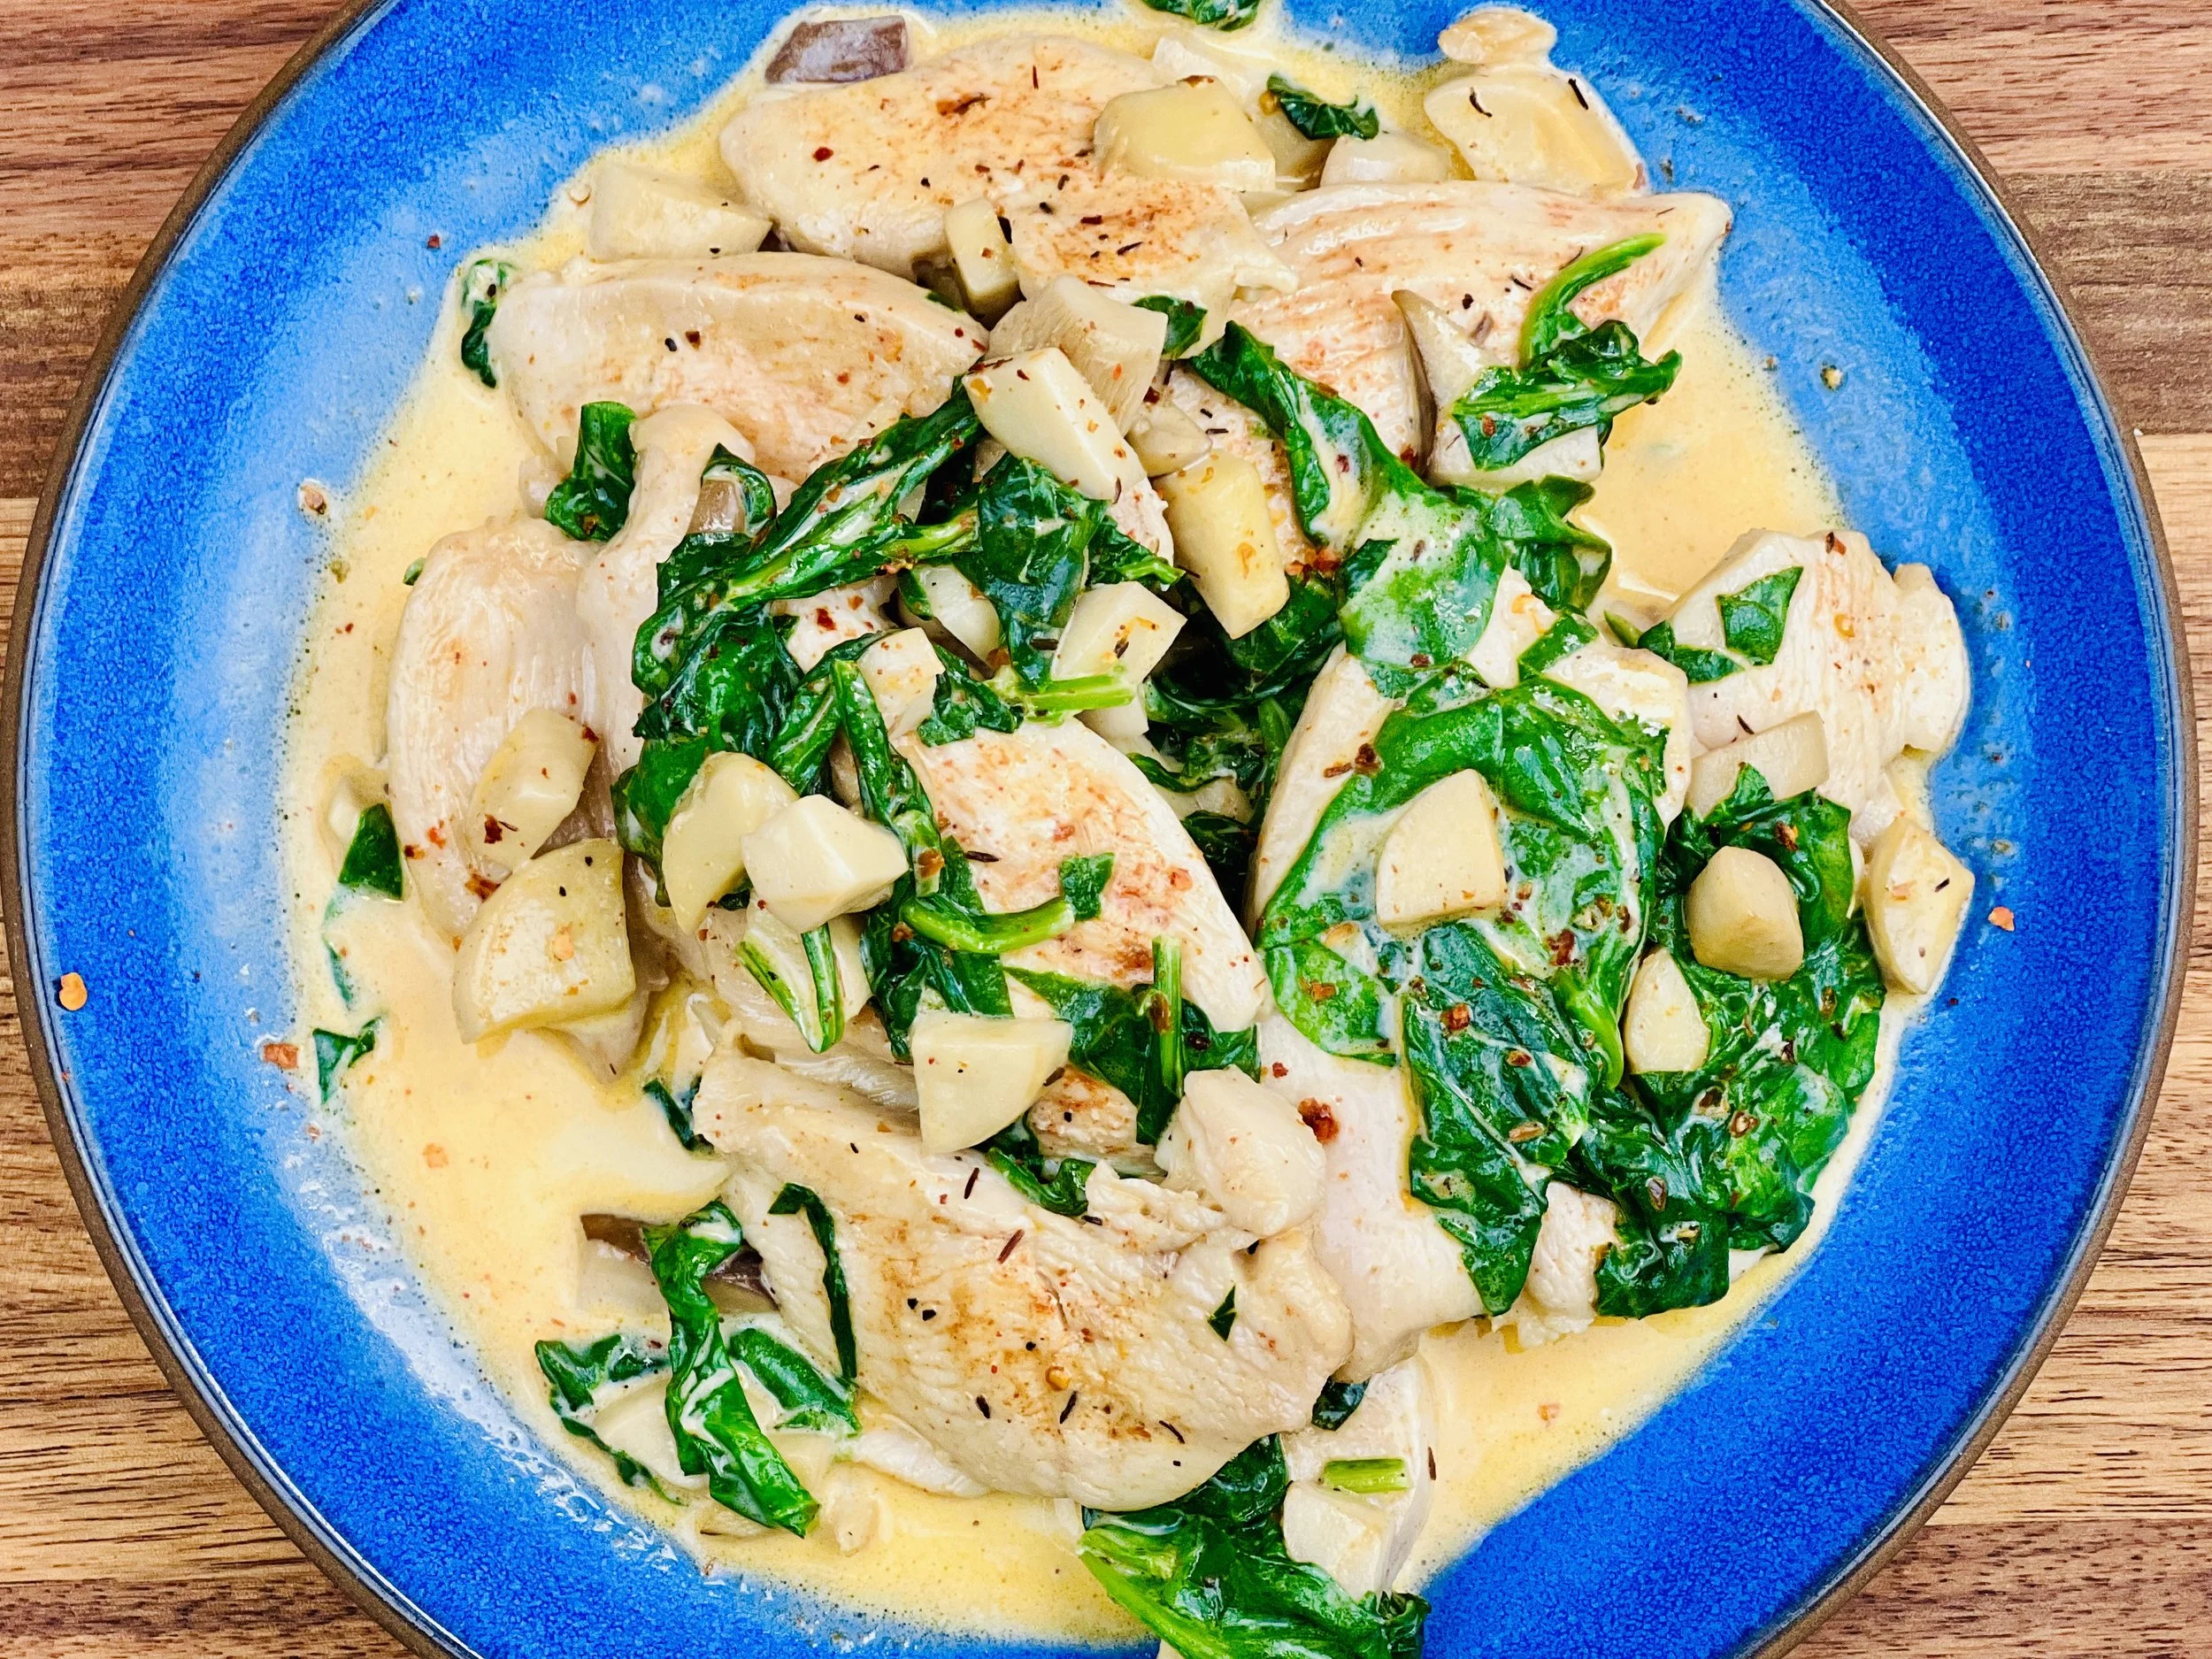
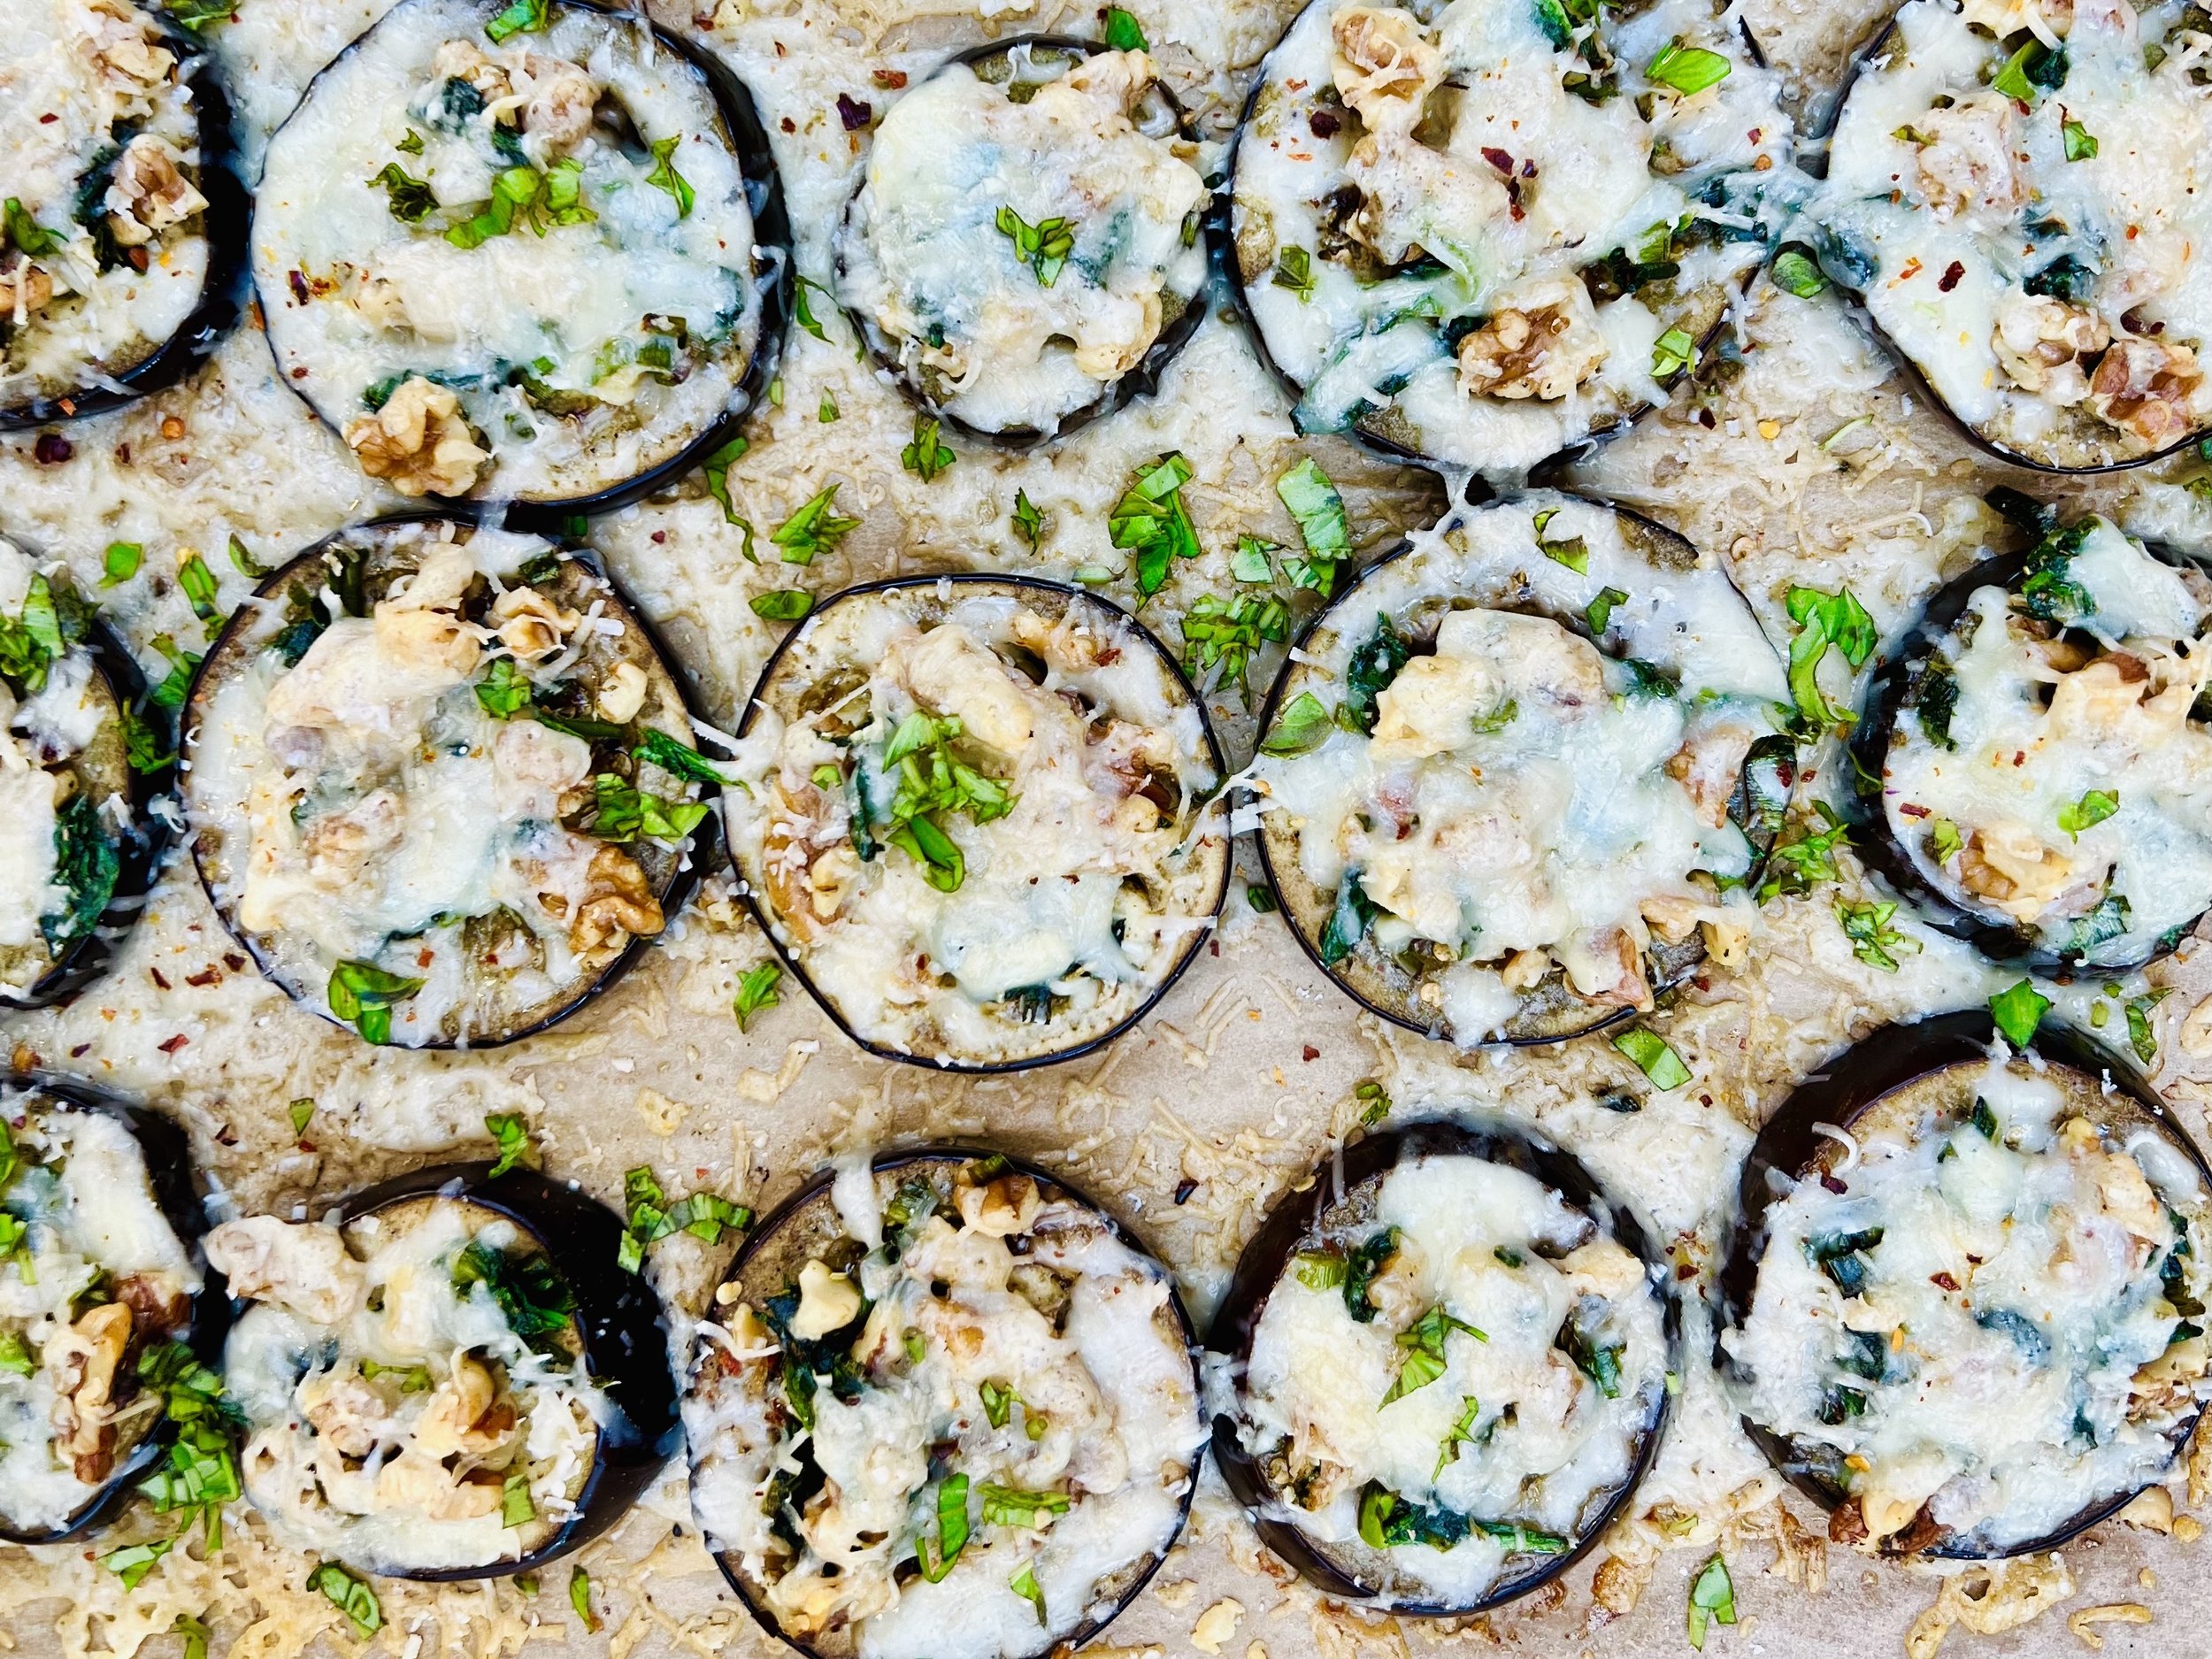
Keto Veggie Eggplant Pizza (Low FODMAP)
15 Minutes prep • 20 Minutes cook • Low FODMAP • Gluten-free • Vegetarian • Serves 2-3
15 Minutes prep • 20 Minutes cook • Low FODMAP • Gluten-free • Vegetarian • Serves 4
For all the taste of delicious artisan vegetarian pizza without the gluten or the carbs, these eggplant pizzas are perfect. Leeks, green onions, spinach, and mushrooms come together for classic pizza taste. Walnuts add amazing flavor and texture. And super-flavorful cheese adds a delicious depth that tops it off perfectly. The kitchen smelled wonderfully like pizza and the flavor did not disappoint. The roasted eggplant made a perfect foundation for all the delicious toppings.
Ingredients
1 eggplant cut into 1/4 inch slices
5 tablespoons garlic-infused olive oil, divided
1 small leek (green part only), chopped
2 green onions (green part only), chopped
1 cup oyster mushrooms, chopped
2 teaspoons Smoke n Sanity Italian Seasoning use code IBSGC15 for 15% discount
OR 1/4 teaspoon each dry basil, oregano, rosemary, and thyme
1 packed cup baby spinach, long stems removed and roughly chopped
1/2 - 3/4 cup walnuts, roughly chopped
6 ounces gruyere cheese, grated (or other robust flavored cheese you prefer)
1/2 cup parmesan cheese, grated
1/2 teaspoon Kosher salt
1/4 teaspoon black pepper
Fresh basil, chopped (for serving)
Red pepper flakes (optional for serving)
Directions
(1) Prepare: Preheat the oven to 400 degrees F. Grate the cheese. Line a cookie sheet with parchment paper. Slice the eggplant into 1/4-inch slices and toss out the two ends. Lay the eggplant slices on the prepared baking sheet and brush both sides of each slice with olive oil (using about 3 tablespoons altogether). Sprinkle lightly with salt and pepper.
(2) Pre-cook the eggplant: Put the cookie sheet in the preheated oven and cook for 7 - 10 minutes until the eggplant is hot and starts to cook down.
(2) Cook the veggies: Meanwhile, heat the remaining 2 tablespoons of olive oil in a medium-size skillet over medium-high heat. When the oil shimmers, add the Italian seasoning and let sizzle for about 30 seconds. Then add the leek greens, green onions, and chopped mushrooms. Cook for 3 - 4 minutes. Stir in walnuts, and season the whole thing lightly with salt and pepper. Cook for another minute. Add the spinach and stir and continue to cook until the spinach is wilted and cooked through. Remove from the heat and set aside.
(3) Layer the toppings: Once the eggplant is pre-cooked, remove from the oven. Layer the cooked veggie mixture equally across all the eggplant slices. Sprinkle on the gruyere cheese and then the parmesan cheese. Sprinkle lightly with black pepper.
(4) Bake: Put the whole tray back in the oven and bake for another 5 - 10 minutes until the cheese is melted and starting to crisp.
(5) Plate and serve: Serve warm with fresh basil and a light sprinkling of red pepper flakes.
Eat and enjoy every bite because you can!
Recipe note: I use Diamond Crystal Kosher salt in all my recipes because it has a wonderful flat and crisp flake that tastes delicious. It is also the least salty salt available so you can use it more liberally as a seasoning than you can table salt or sea salt. If you use another type of salt, you may need to reduce the amount so it is not over-salted.
Have a question you’d like to have answered? Email me at hello@ibsgamechanger.com
Link note: This post may contain affiliate links for you to easily purchase items that are linked. I may earn a small commission from qualifying purchases but none of this costs you a thing so feel free to use the links! In addition, for some items, I have provided a special discount code for IBS Game Changers so be sure to use the code when you purchase an item to get the discount that has been arranged just for you.
More Deliciously Low FODMAP™ vegetarian recipes

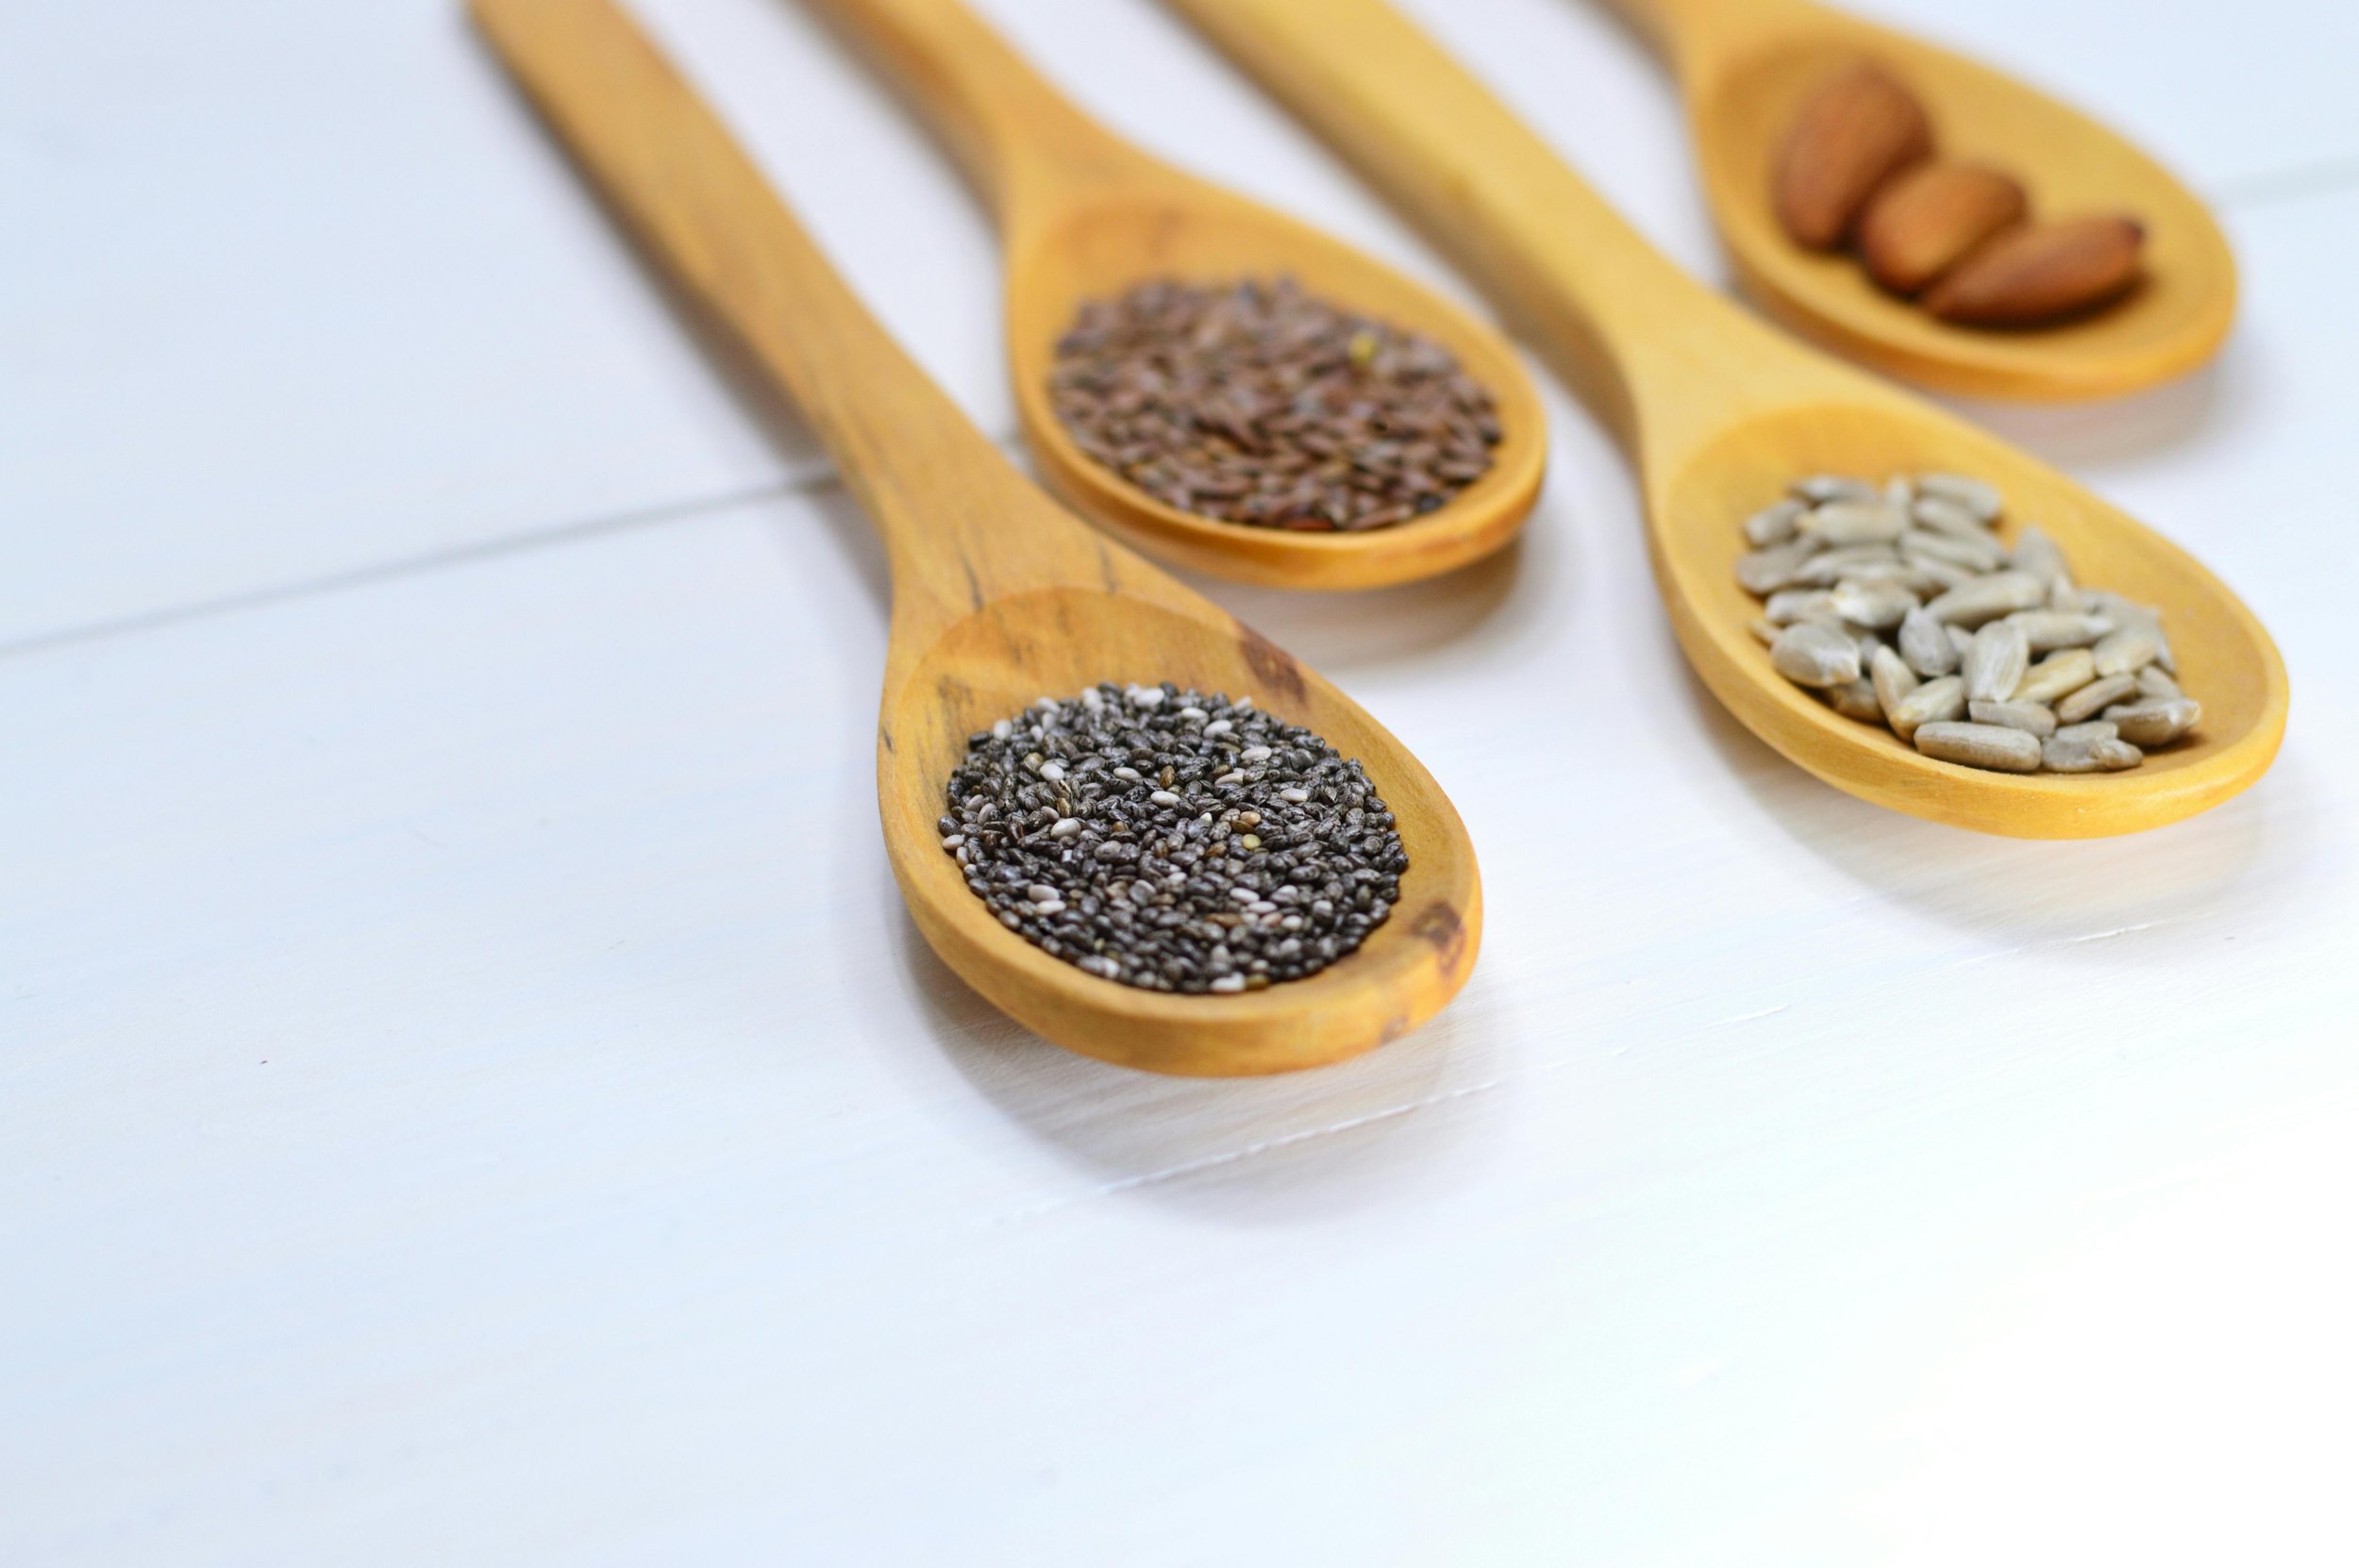
Amazing Magnificent Chia Pudding (Low FODMAP)
10 Minutes prep • Overnight Chill • Low FODMAP • Gluten-free • Lactose-free • Serves 2 - 4
10 Minutes prep • Overnight Chill • Low FODMAP • Gluten-free • Lactose-free • Serves 2 - 4 • Ok to make ahead: Steps 1-3
Why do I call this Amazing and Magnificent? Chia seeds are considered a super food for their many health benefits including blood sugar regulation, weight management, and bone health. They are also full of antioxidants, fiber, and omega-3 fatty acids, and they are gluten-free, and low FODMAP among other things! For those of us with IBS-C, they can also be a super-regulating food! I use chia in my Amazing Seed Crackers, of course, and I often find myself wondering how I can incorporate more chia into my recipes. Hence, this recipe for chia pudding! It’s not only delicious, it’s easy to make and incredibly healthy. Learn more about the health benefits of chia seeds at the end of this recipe.
Ingredients
3-4 Tablespoons of chia seeds (more if you use dairy or almond milk, and less if you use coconut milk)
1 cup of lactose-free milk, almond milk, or full-fat canned coconut milk (coconut milk creates an ultra-thick and creamy chia pudding), or some combination of low-FODMAP milks
1 - 2 teaspoons maple syrup (depending on how sweet you like it)
1/2 teaspoon vanilla extract or vanilla bean paste (or coconut extract if you prefer to use that with coconut milk)
Any combination of nuts, seeds, berries, bananas, my great granola, shredded coconut, dried cranberries, raisins, cacao nibs, etc. for serving
Directions
(1) Prepare: Combine the chia and the milk or milk alternative in a mason jar or small bowl. Stir well to blend. Once the mixture is well combined, let it sit for 5 minutes, and then stir it again to break up any clumps of chia seeds.
(2) Chill: Cover the container and put it in the refrigerator to “set” ideally overnight. (I like to use a wide-mouth Mason Jar with one of these awesome air and water-tight easy on/off plastic Mason Jar Lids)
(3) Finish: If you don’t like the texture of chia pudding, try blending at high speed in your blender. Once blended, the mixture will be smooth and creamy, more like a regular pudding instead of a bit seedy like tapioca pudding.
Eat and enjoy every bite because you can!
Here are some reasons why chia seeds are considered good for you:
Rich in Nutrients: Chia seeds are packed with essential nutrients. They are a good source of dietary fiber, protein, healthy fats (omega-3 fatty acids), vitamins (such as vitamin B, thiamin, and niacin), and minerals (such as calcium, phosphorus, and magnesium).
High in Antioxidants: Chia seeds contain antioxidants, which help protect your cells from damage caused by free radicals. Antioxidants are important for overall health and may contribute to disease prevention.
Dietary Fiber: Chia seeds are an excellent source of soluble fiber, which absorbs water and forms a gel-like substance in your digestive tract. This can help improve digestion, promote a feeling of fullness, and regulate bowel movements.
Omega-3 Fatty Acids: Chia seeds are one of the richest plant-based sources of alpha-linolenic acid (ALA), a type of omega-3 fatty acid. Omega-3s are important for heart health, brain function, and in reducing inflammation.
Hydration: Chia seeds can absorb many times their weight in water and form a gel-like substance. This property can help you stay hydrated and maintain electrolyte balance, especially during exercise.
Low FODMAP: Chia seeds are considered low FODMAP, making them suitable for people with IBS or those following a low FODMAP diet.
Blood Sugar Regulation: The soluble fiber in chia seeds can help slow down the digestion and absorption of carbohydrates, which may contribute to more stable blood sugar levels.
Weight Management: Due to their high fiber and protein content, chia seeds can help promote satiety and reduce overall calorie intake, potentially supporting weight management.
Bone Health: Chia seeds are a good source of calcium, magnesium, and phosphorus, which are important minerals for maintaining healthy bones and teeth.
Gluten-Free: Chia seeds are naturally gluten-free, making them a suitable option for those with gluten sensitivities or celiac disease.
Link note: This post may contain affiliate links for you to easily purchase items that are linked. I may earn a small commission from qualifying purchases but none of this costs you a thing so feel free to use the links! In addition, for some items, I have provided a special discount code for IBS Game Changers so be sure to use the code when you purchase an item to get the discount that has been arranged just for you.
Cahill, J. P., Etherton, T. D., & Moag-Stahlberg, A. (2006). Omega-3 fatty acids from fish oils and cardiovascular disease. Molecular and Cellular Biochemistry, 283(1-2), 165-173.
Tovar, J., Johansson, E., Björck, I. (2008). A multifunctional diet improves cardiometabolic-related biomarkers independently of weight changes: an 8-week randomized controlled intervention in healthy overweight and obese subjects. European Journal of Nutrition, 47(5), 294-300.
Valenzuela, R., Videla, L. A. (2003). The importance of the long-chain polyunsaturated fatty acid n-6/n-3 ratio in development of non-alcoholic fatty liver associated with obesity. Food & Function, 4(1), 6-26.
Vuksan, V., Whitham, D., Sievenpiper, J. L., Jenkins, A. L., Rogovik, A. L., Bazinet, R. P., ... & Hanna, A. (2007). Supplementation of conventional therapy with the novel grain Salba (Salvia hispanica L.) improves major and emerging cardiovascular risk factors in type 2 diabetes: results of a randomized controlled trial. Diabetes Care, 30(11), 2804-2810.
More Deliciously Low FODMAP™ breakfast recipes
SnS Smokehouse Chicken (Low FODMAP)
5 Minutes prep • 25 Minutes cook • Low FODMAP • Gluten-free • Serves 2
5 Minutes prep • 25 Minutes cook • Low FODMAP • Gluten-free • Serves 2 • Ok to make ahead: Steps 1-3
Want quick juicy smokey chicken without using the grill? Smoke n Sanity’s latest creation, Smokehouse Seasoning, makes it easy to do just that right on your stove! This chicken is ready in 30 minutes and, paired with one of my delicious salads, it makes a perfectly wonderful dinner. This chicken is also delicious cold so don’t hesitate to double the recipe and chill the extra for making some fantastic Crisp and Crunchy Chicken Salad the next day!
Ingredients
2 boneless, skinless chicken breasts
1 tablespoon olive oil
1 tablespoon salted butter
2 - 3 teaspoons Smoke N Sanity Smokehouse Seasoning
Directions
(1) Prepare: Sprinkle both sides of each chicken breast with Smoke N Sanity Smokehouse Seasoning. Set aside on a plate.
(2) Cook the chicken: Put a medium-size frying pan over medium-high heat. Put the oil and butter in the frying pan and warm over medium-high heat until the butter melts. The butter and oil should sizzle but not smoke before you put the chicken in. Lay the chicken breasts in one layer in the pan. Cook (sear) for about 2 minutes until it’s nicely browned on the bottom. Flip the chicken and cook for another 1 - 2 minutes until it’s nicely browned on the other side. Cover the pan and turn the heat down to low. Cook for 12 minutes. Leave the cover on the pan and turn the heat off. Let stand with the cover on for another 12 minutes.
(3) Finish: When the chicken is cooked, remove it to a cutting board. Cut into slices, then return the slices to the pan and toss in the pan juice.
(4) Plate and serve: Serve the chicken alongside one of my green salads.
Eat and enjoy every bite because you can!
Have a question you’d like to have answered? Email me at hello@ibsgamechanger.com
Link note: This post may contain affiliate links for you to easily purchase items that are linked. I may earn a small commission from qualifying purchases but none of this costs you a thing so feel free to use the links! In addition, for some items, I have provided a special discount code for IBS Game Changers so be sure to use the code when you purchase an item to get the discount that has been arranged just for you.
More Deliciously Low FODMAP™ main course recipes
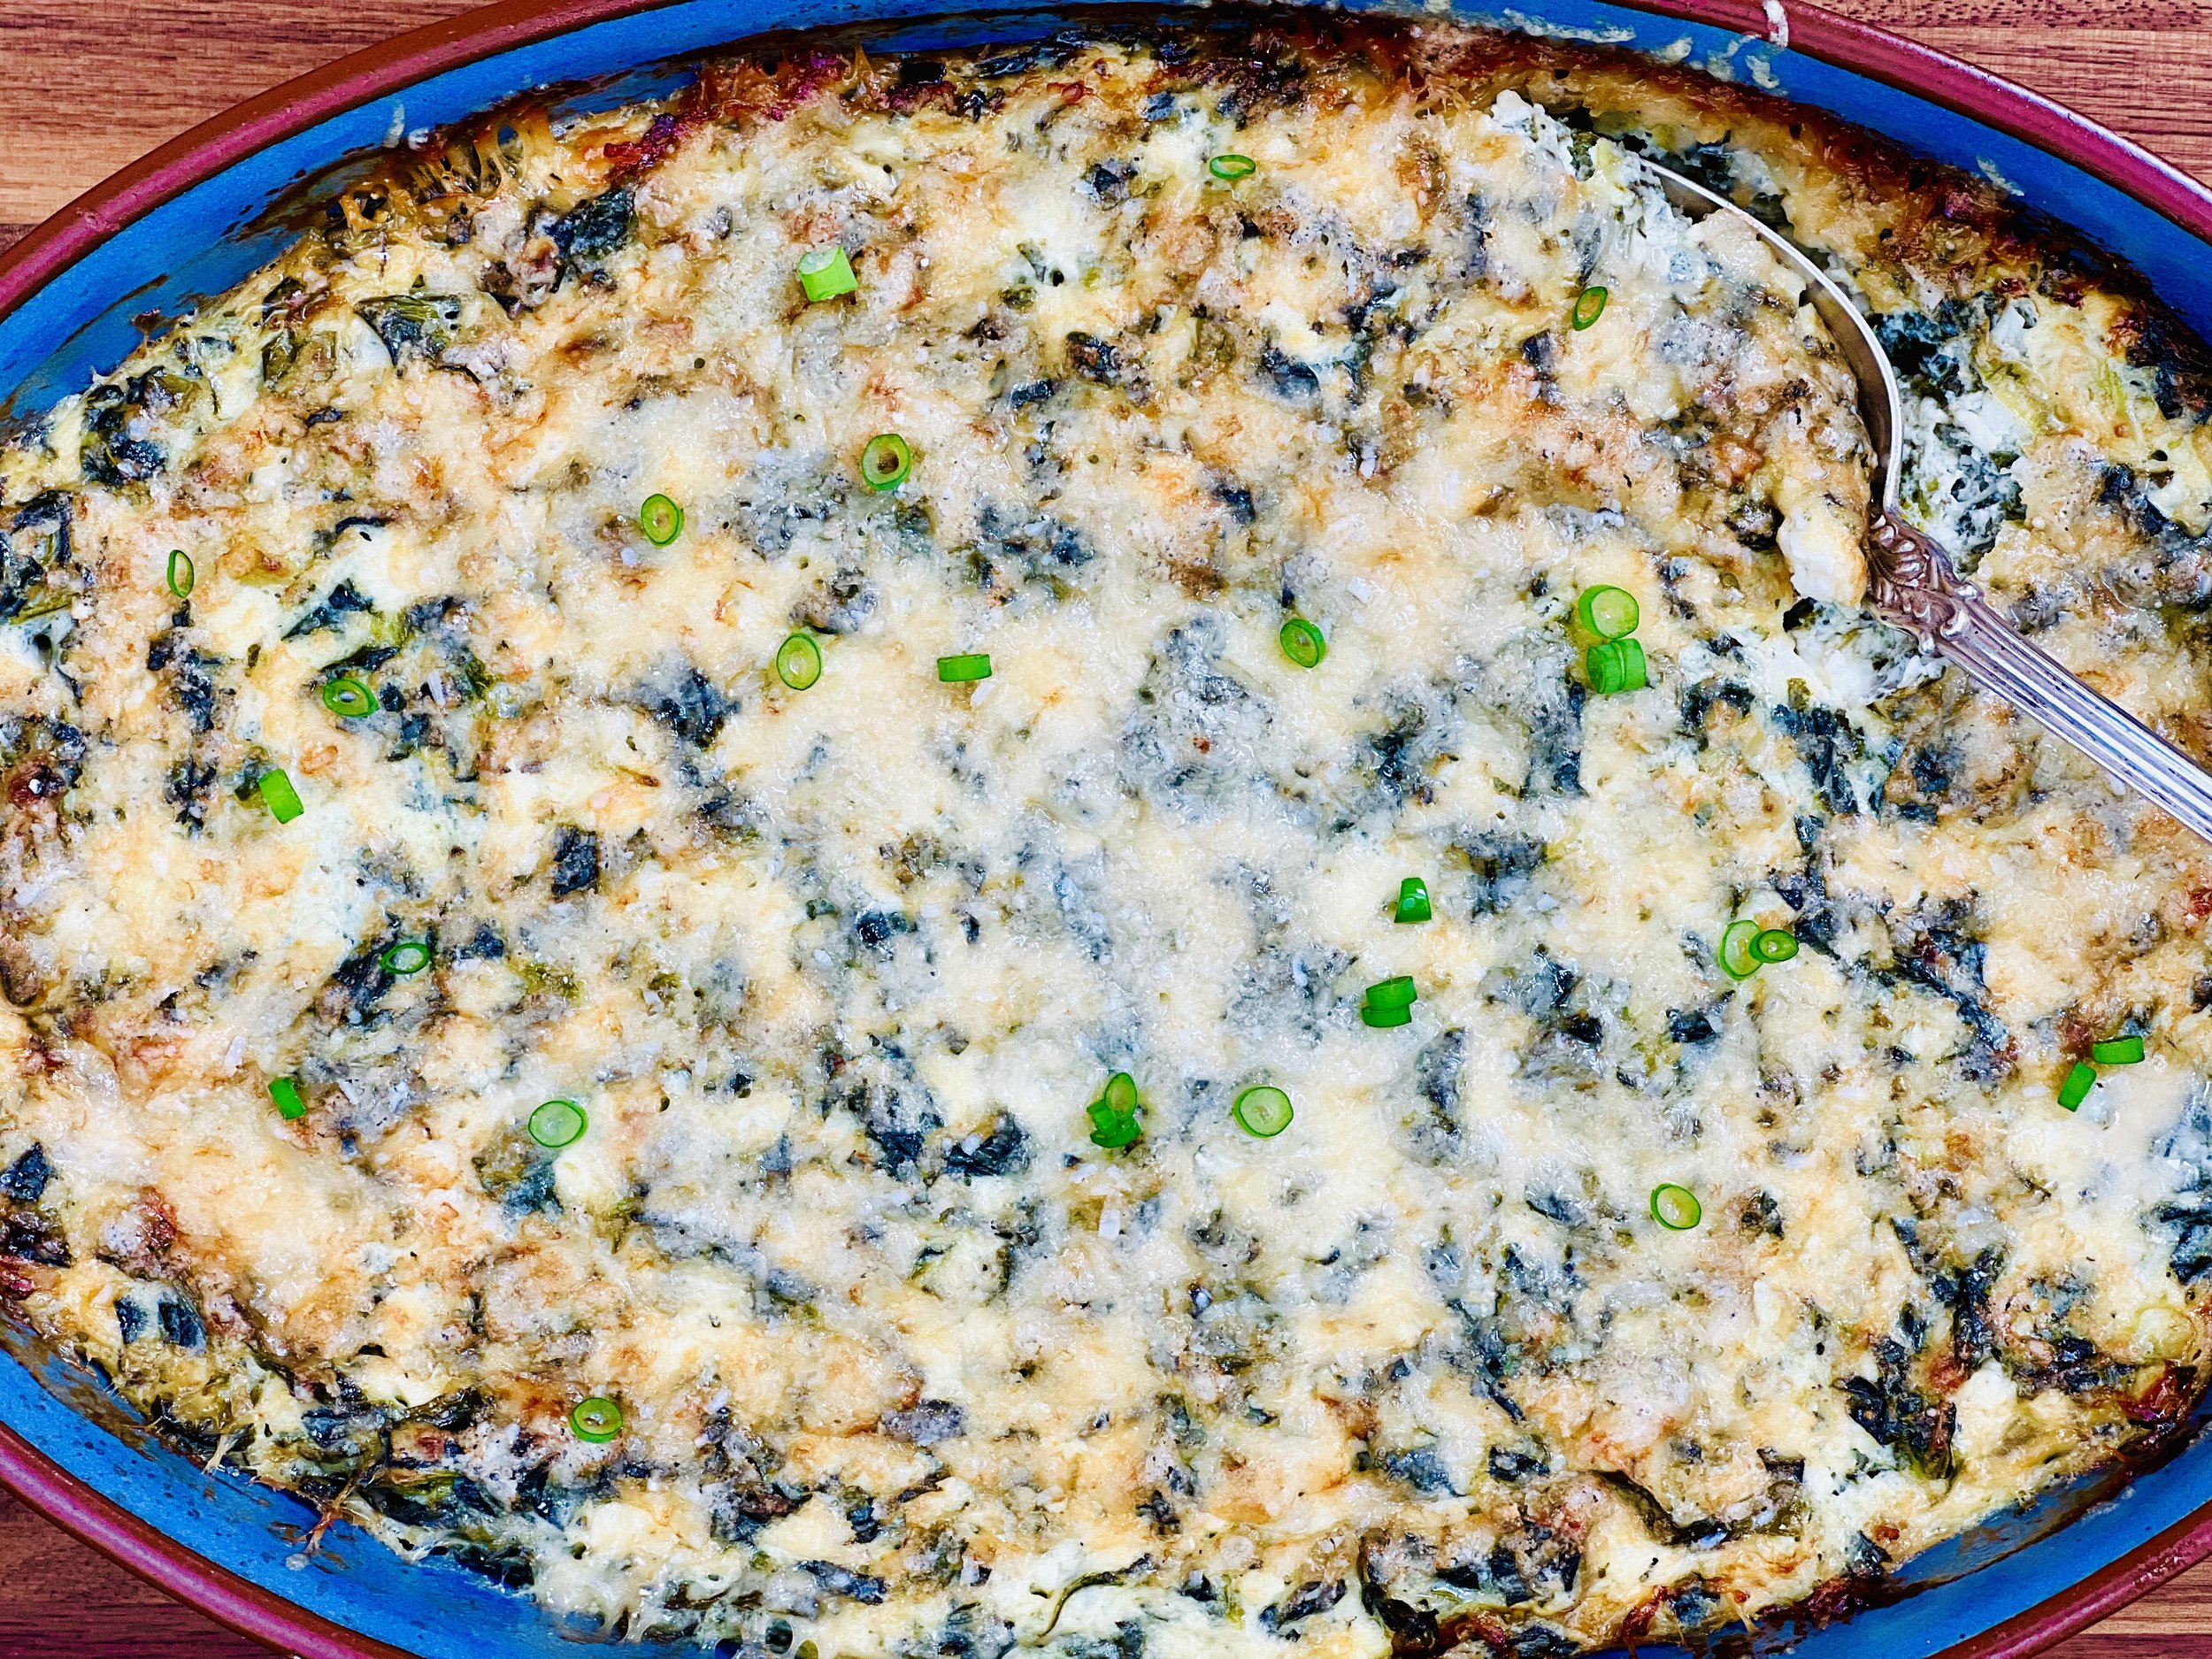
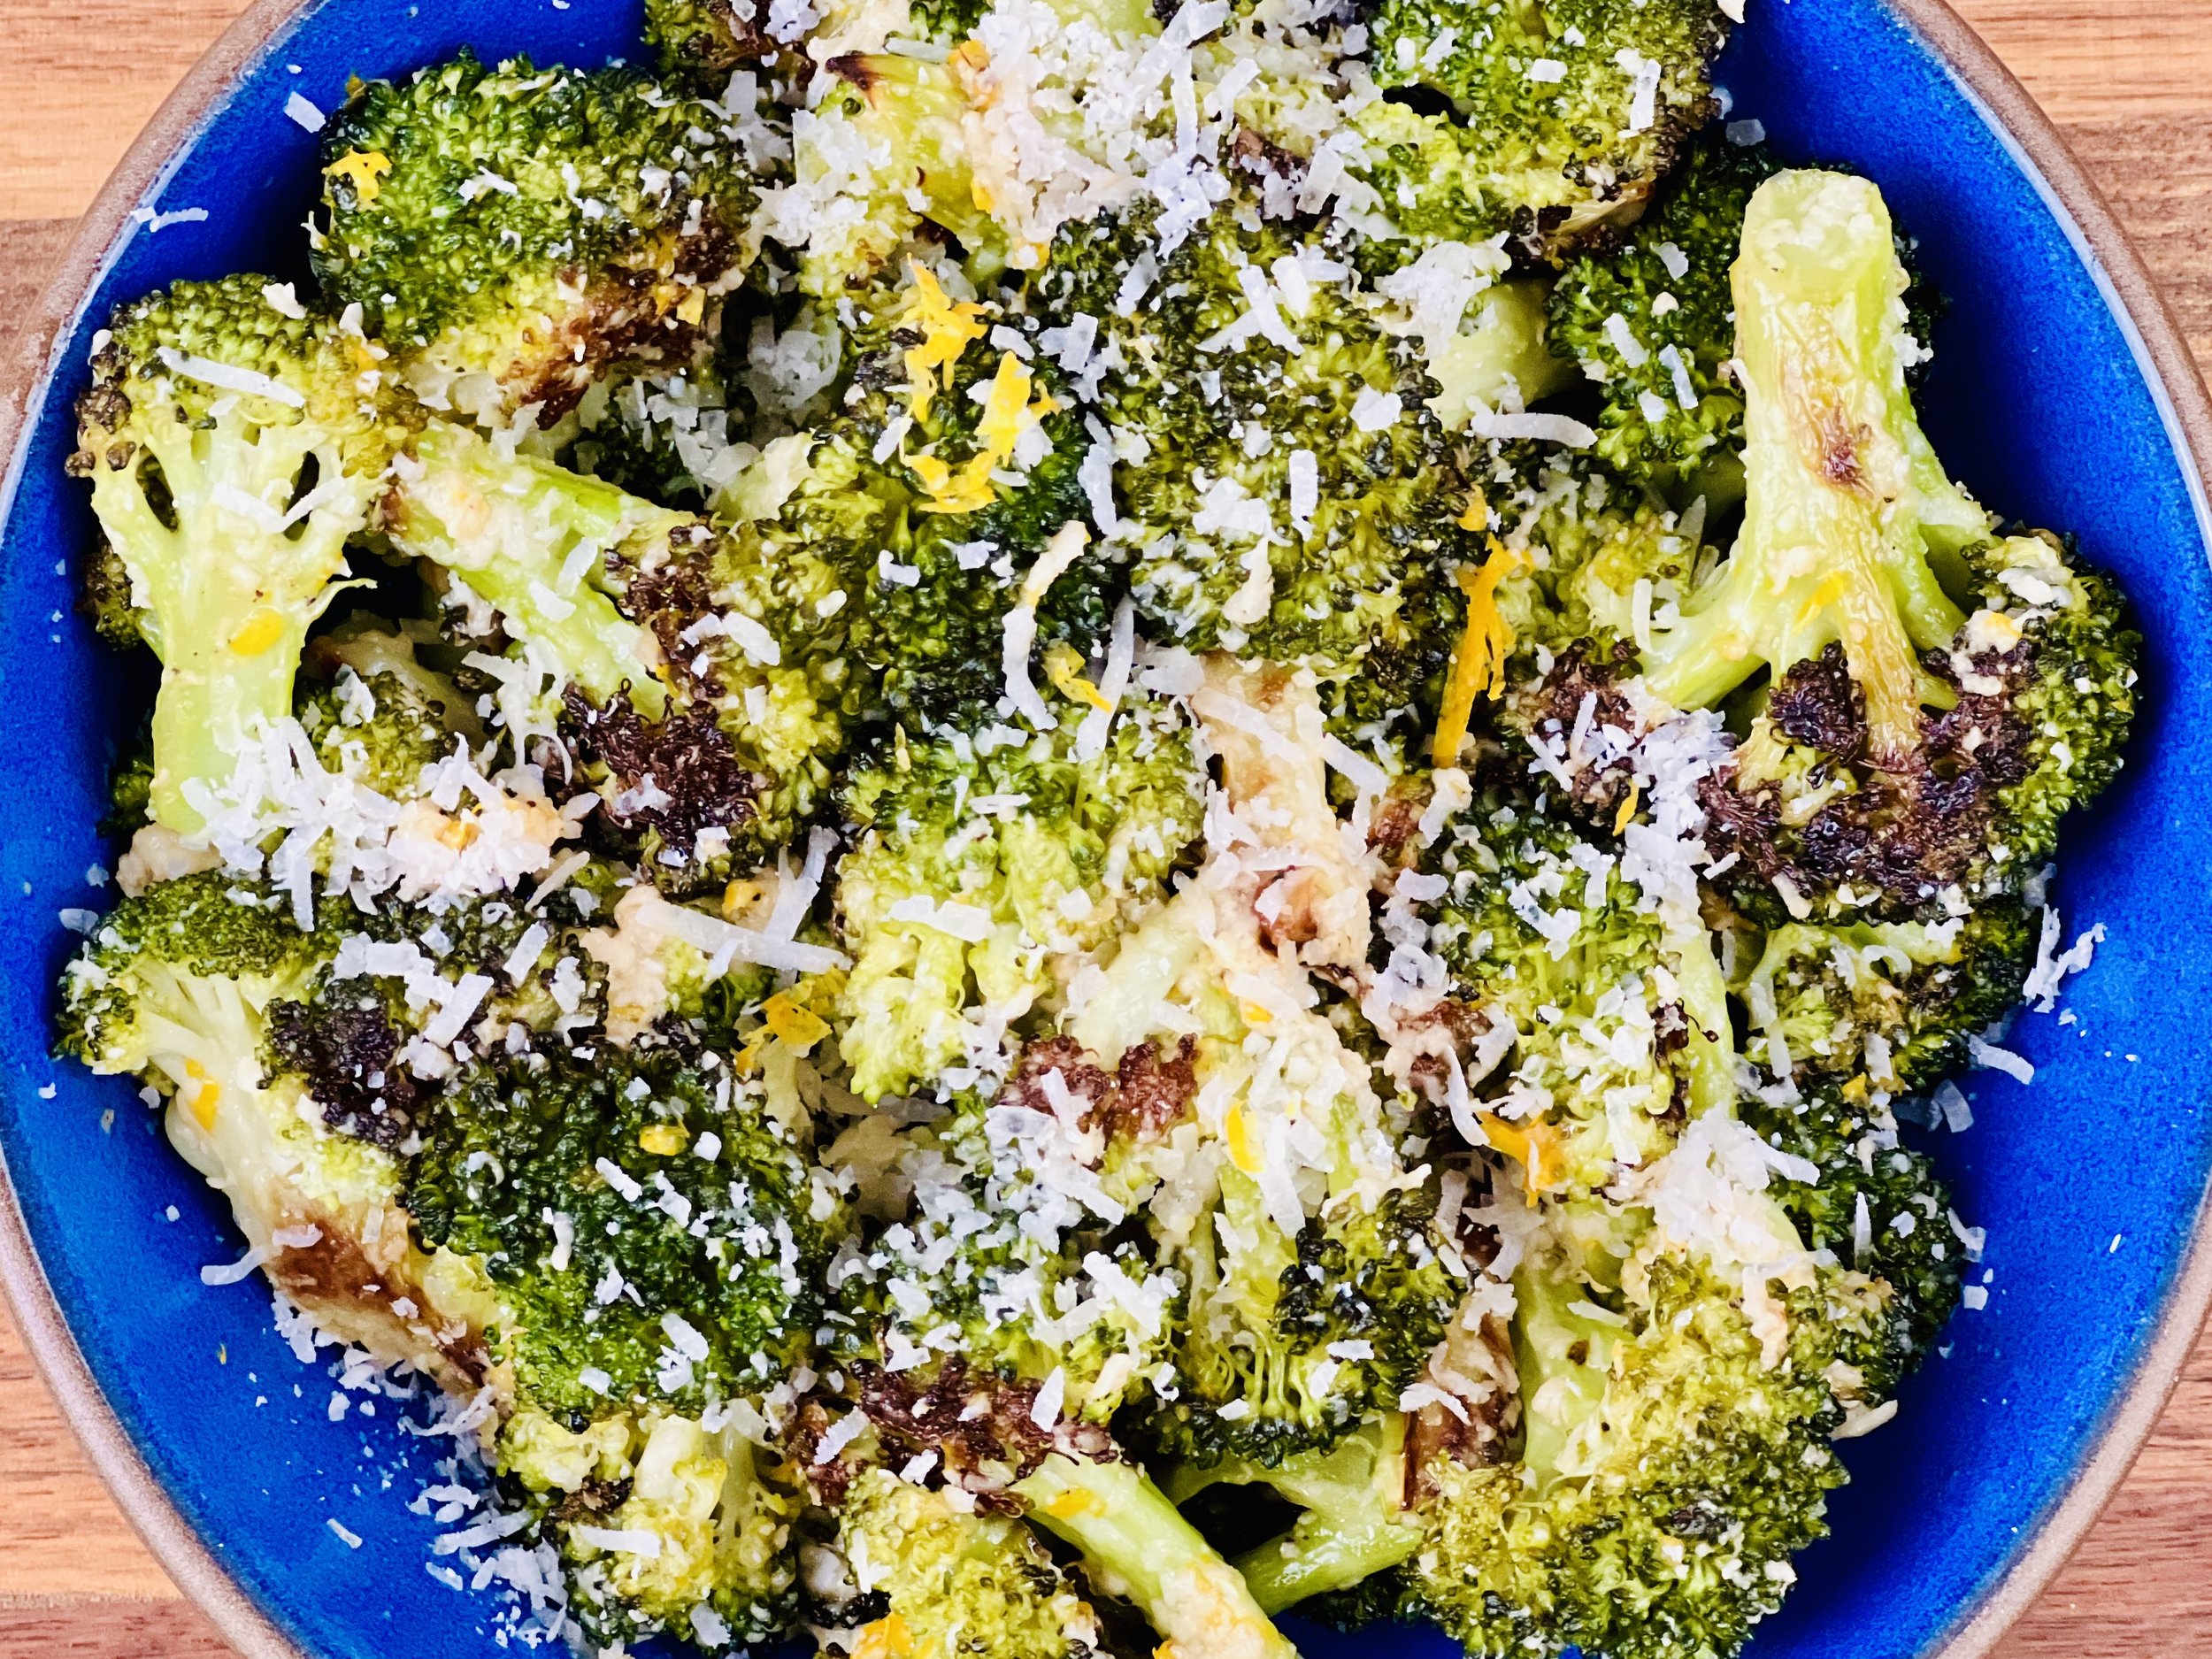
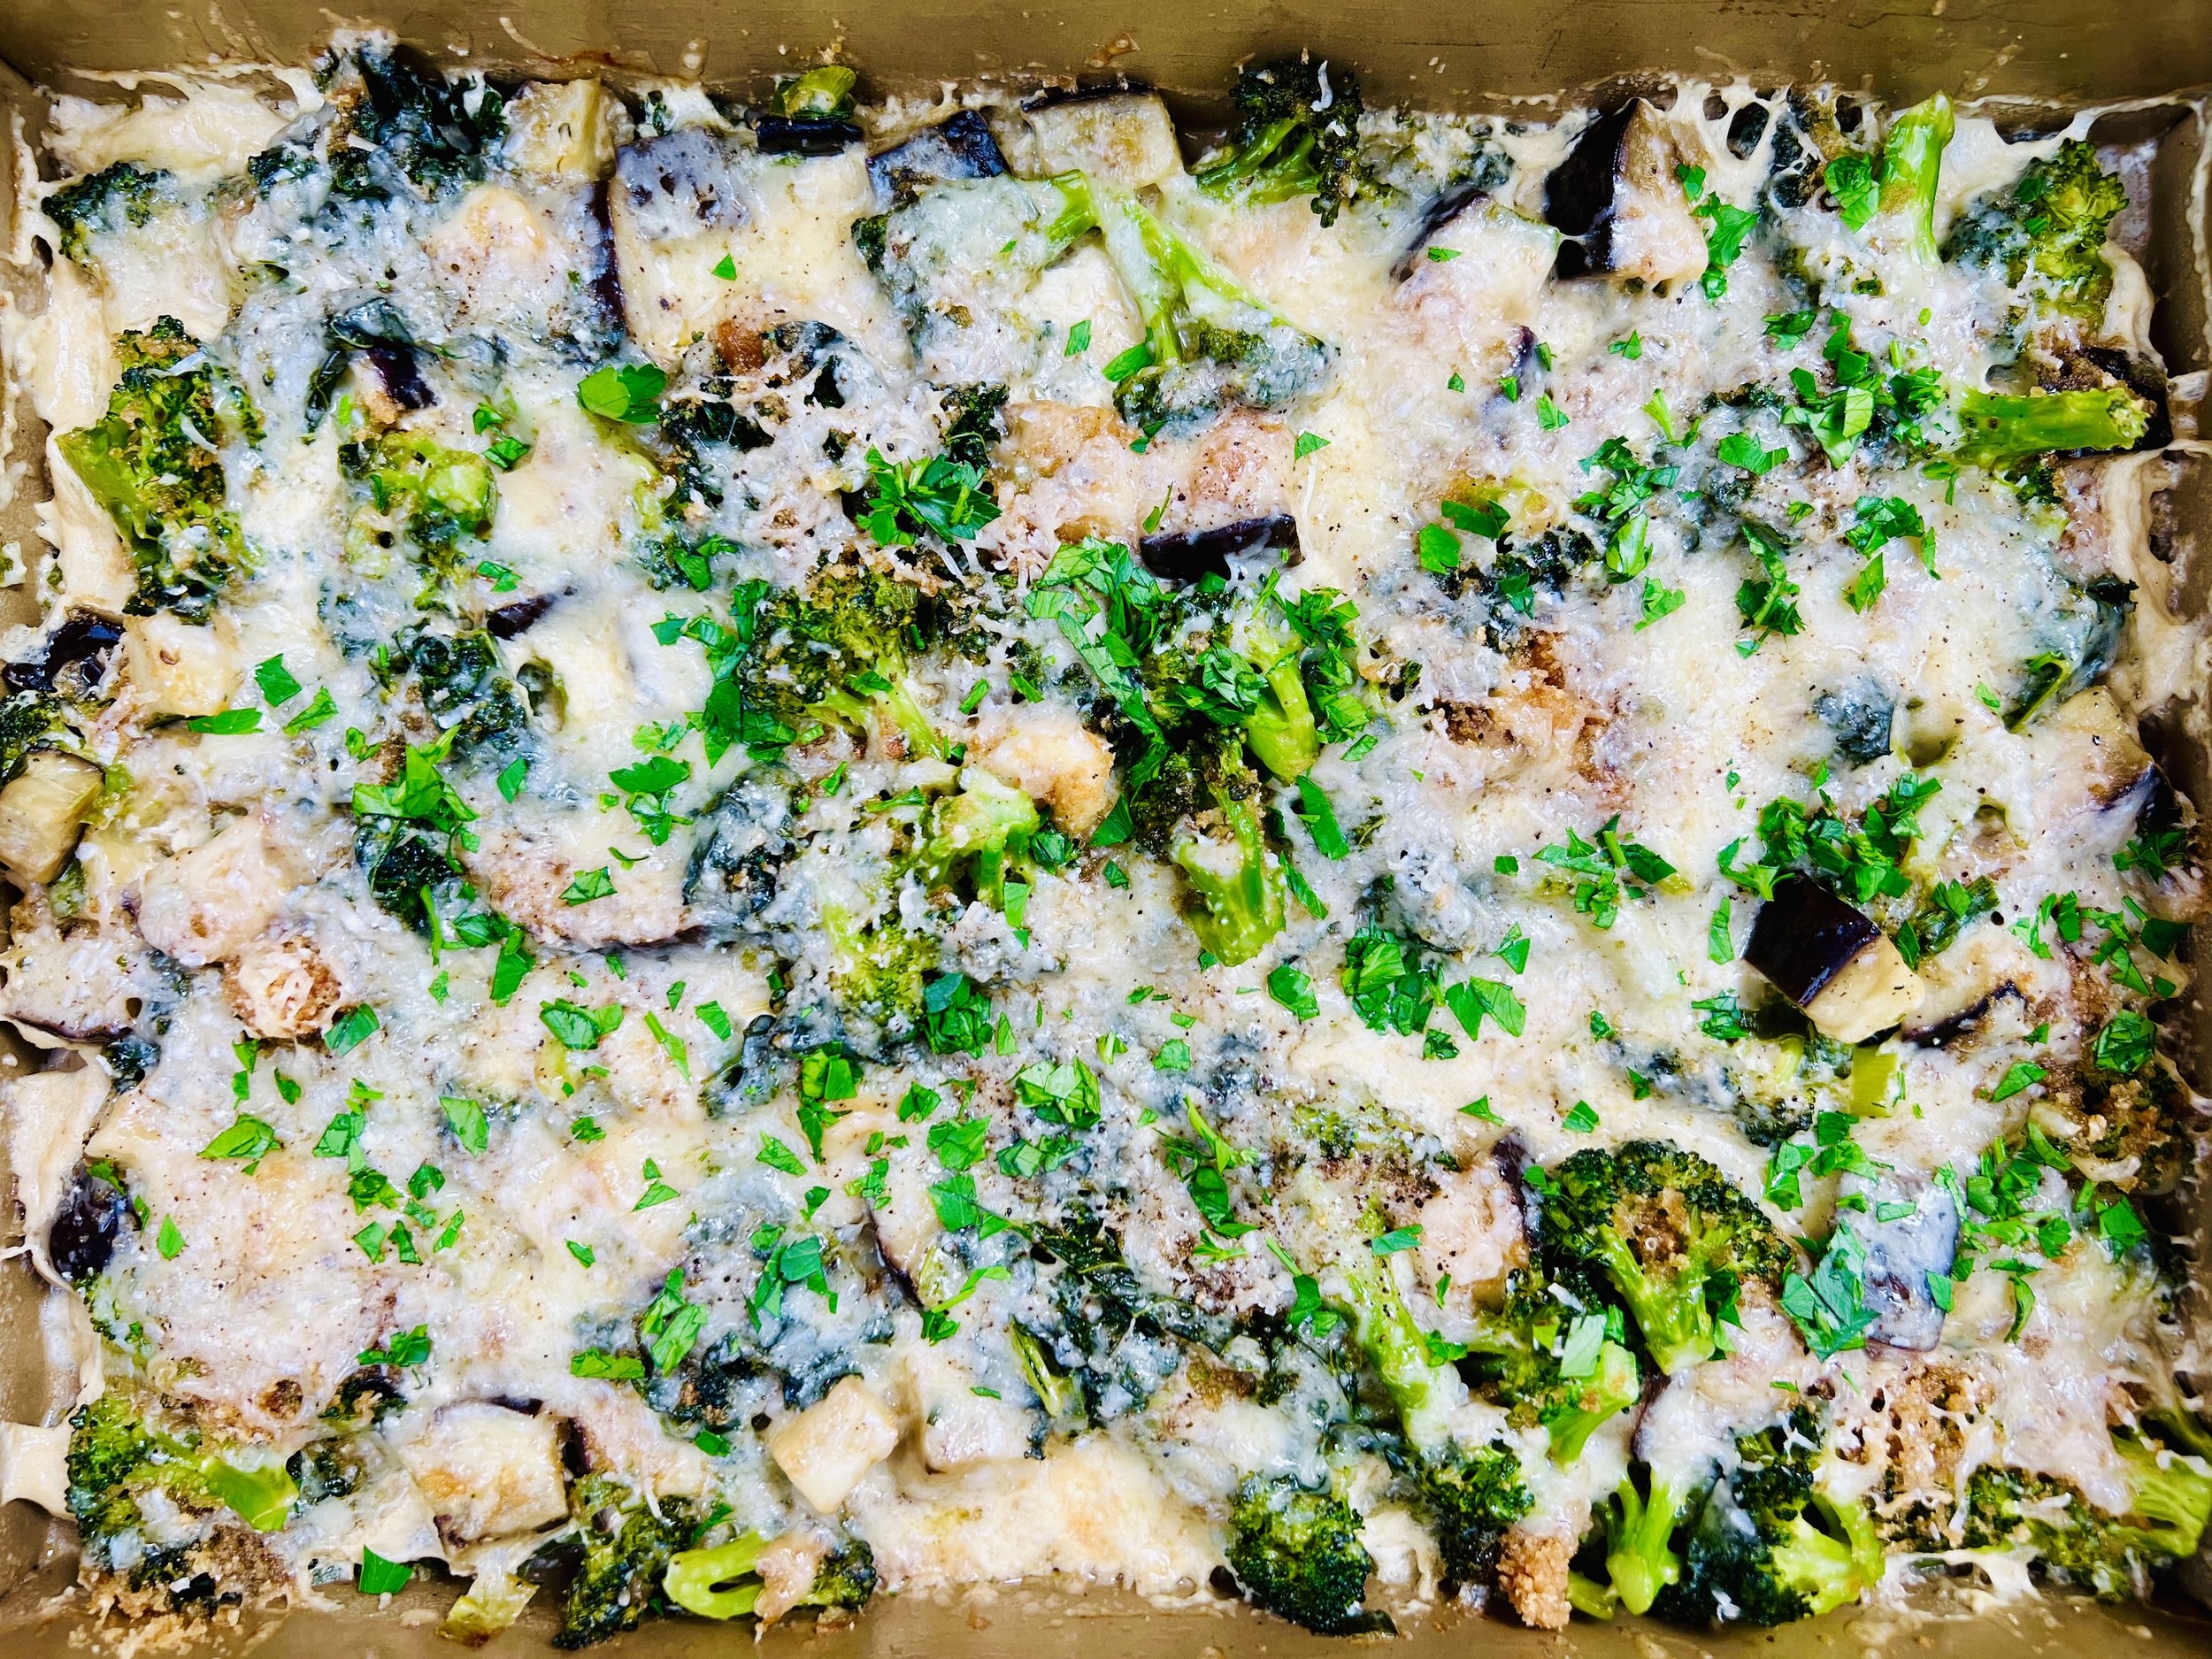
Vegetable Casserole (Low FODMAP)
20 Minutes prep • 20 Minutes cook • Low FODMAP • Serves 4 as main • Serves 6-8 as a side
20 Minutes prep • 20 Minutes cook • Low FODMAP • Serves 4 as main • Serves 6-8 as a side • Ok to make ahead: Steps 1-3
This delicious creamy casserole is a great way to get a large serving of healthy vegetables into everyone at the table. It’s so good, nobody will notice it’s vegetarian or healthy. (Sneaky mom!) Enjoy this recipe as a vegetarian main or as a hearty side dish. It’s a great addition to a gathering with multiple food preferences. You can make it very low-carb by substituting pork panko—as long as you aren’t trying to keep it pure vegetarian. No matter how you make it, I’m sure you will find it delicious!
Ingredients
4 tablespoons salted butter
1/2 cup green onion greens, chopped
2 cups eggplant, cubed
1 cup broccoli florets only
2 cups curly kale, washed, dried, central stems removed and massaged with 1 tablespoon olive oil
1 cup lactose-free whole milk
2 tablespoons heavy cream
2/3 cup gluten-free panko, or use pork panko for a very low-carb (but not vegetarian) version
1 cup grated gruyere cheese or other strong-flavored well-aged cheese
1/2 cup freshly grated parmesan cheese
1 teaspoon Kosher salt
1/2 teaspoon black pepper
1/4 cup flat leaf or regular parsley, chopped (for serving)
Directions
(1) Prepare: Wash, spin dry, and cut away the thick central stems from the kale. Roughly chop, add to a bowl, drizzle with 1 tablespoon of olive oil, and massage the kale with the oil. Cube the eggplant. Cut the broccoli into florets (no stems). Grate the cheeses. Preheat oven to 375 degrees F. Grease a 2-quart baking dish with salted butter.
(2) Pre-cook the vegetables: Put a large frying pan over medium-high heat. Add the butter to the pan. Once melted, add the green onions, eggplant, broccoli, and kale. Toss the vegetables in the melted butter and let cook for about 10 minutes until the vegetables have softened and are starting to crisp and brown, and the kale has turned bright green.
(3) Add the dairy: Add the milk and cream to the mixture. Stir to combine. Once the milk is heated and starting to bubble, remove the pan from the heat and pour the mixture into the greased baking dish.
(4) Finish: Sprinkle the panko, grated gruyere, and grated parmesan cheese evenly over the top of the vegetables.
Make-ahead note: At this point, you may cover the baking dish and let sit until ready to bake and serve. If it’s longer than 30 minutes, then refrigerate the dish.
(5) Bake: Put in the oven and bake for 15 - 20 minutes until the cheese is melted and the vegetables are tender.
(6) Plate and serve: Remove from the oven, garnish with chopped parsley. You may also garnish with, or serve alongside, some chopped walnuts. They add a nice layer of protein and crunch to the dish. Serve hot.
Eat and enjoy every bite because you can!
Recipe note: I use Diamond Crystal Kosher salt in all my recipes because it has a wonderful flat and crisp flake that tastes delicious. It is also the least salty salt available so you can use it more liberally as a seasoning than you can table salt or sea salt. If you use another type of salt, you may need to reduce the amount so it is not over-salted.
Have a question you’d like to have answered? Email me at hello@ibsgamechanger.com
Link note: This post may contain affiliate links for you to easily purchase items that are linked. I may earn a small commission from qualifying purchases but none of this costs you a thing so feel free to use the links! In addition, for some items, I have provided a special discount code for IBS Game Changers so be sure to use the code when you purchase an item to get the discount that has been arranged just for you.
More Deliciously Low FODMAP™ vegetarian recipes
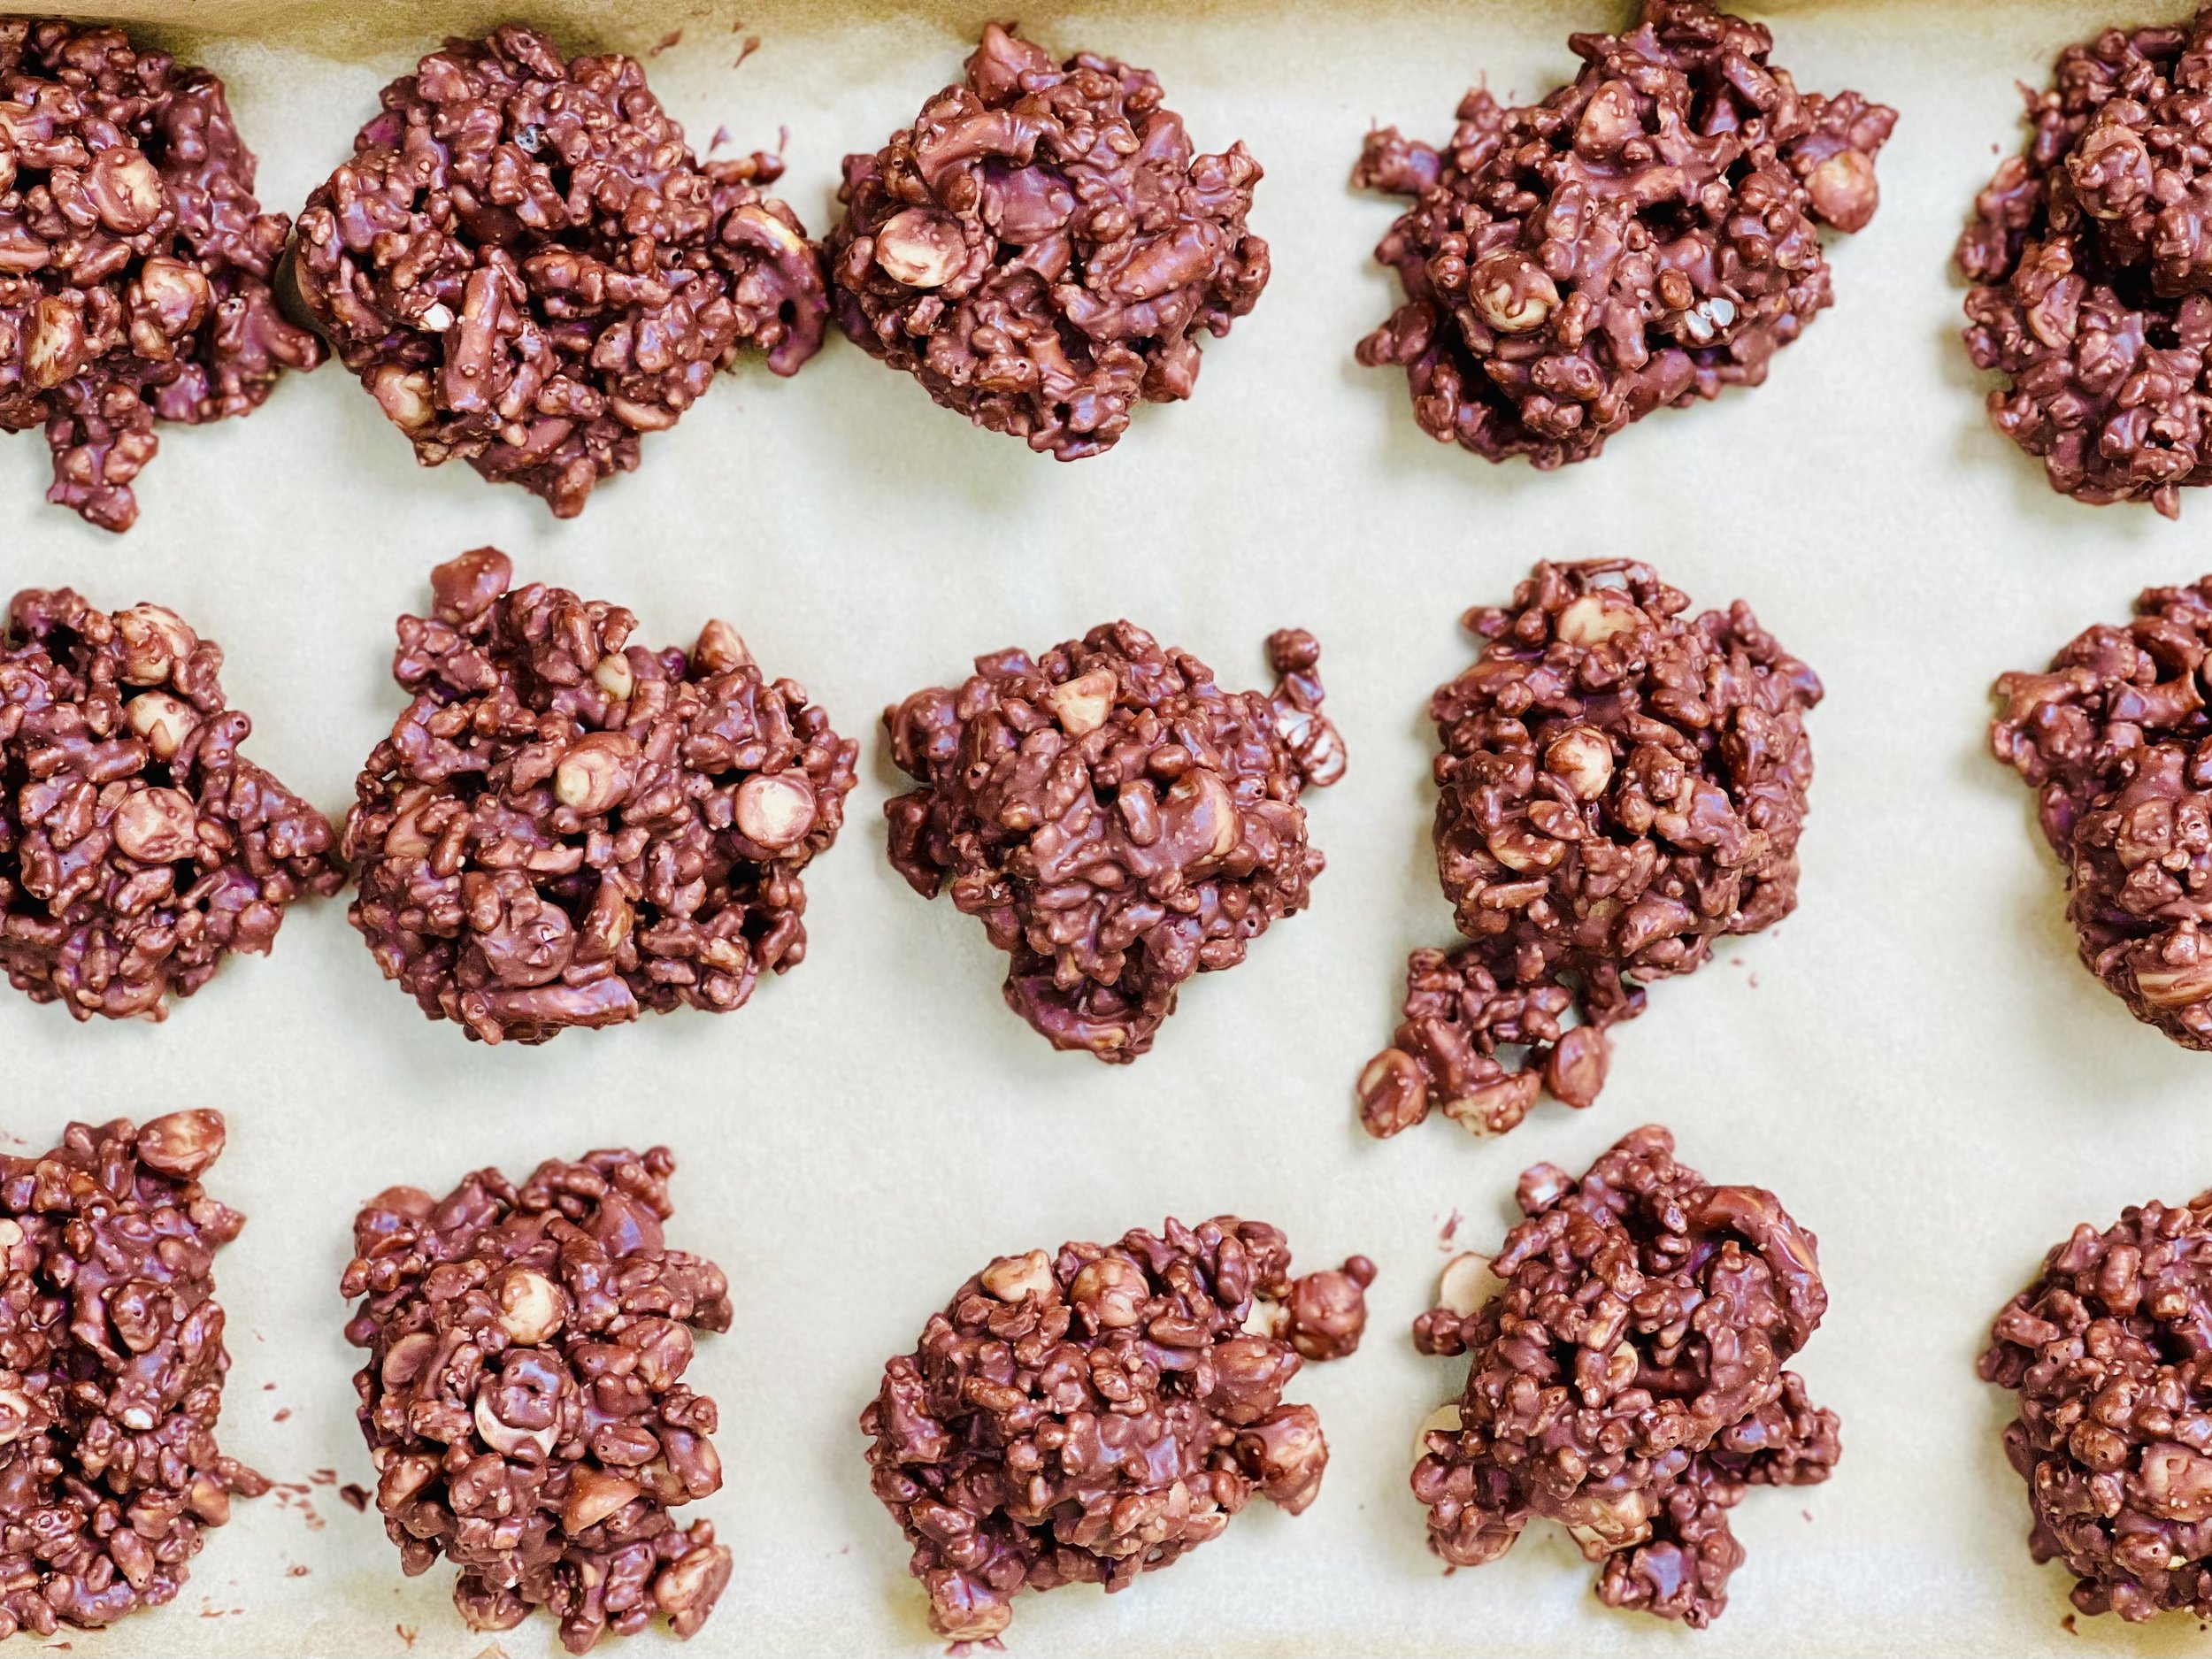
Chocolate-Covered Peanut Butter Pretzel Treats (Low FODMAP)
15 Minutes prep • 20 Minutes chill • Low FODMAP • Gluten-free • Makes 24
15 Minutes prep • 20 Minutes chill • Low FODMAP • Gluten-free • Makes 24 • Ok to make ahead: Steps 1-6
These crunchy treats are just that. A treat! They are quick and easy to make — no cooking required. The combination of peanut butter, pretzels, and chocolate is delicious (I love anything with peanut butter and chocolate!) The crunch of the added rice cereal brings out the “treat” in anything! They are so good you’ll be tempted to eat them all at once so plan to make them when you have a few friends around to help.
Ingredients
1 (12-ounce) bag good quality semi-sweet chocolate chips (I used Guittard)
1 tablespoon coconut oil
3/4 cup crunchy or creamy natural peanut butter (just peanuts and salt)
3 cups gluten-free crispy brown rice cereal
1 cup gluten-free pretzels, broken into pieces
1 cup peanut butter chips, peanuts, or Peanut Butter M&Ms
Directions
(1) Prepare: Line a cookie sheet or two (that fit in your refrigerator) with parchment paper.
(2) Melt chocolate: Combine the chocolate chips and the coconut oil in a microwave save bowl and heat on high for 1 minute. Stir and heat for another 30 seconds (or more) if additional time is needed to melt the chips completely.
(3) Add the pretzels: In a large bowl, combine the pretzel pieces and the crisp rice cereal. Pour the chocolate mixture over the pretzel blend and fold the mixture with a rubber spatula just until everything is coated in chocolate.
(4) Add the chips: Add the peanut butter chips, peanuts, or M&M and stir just until combined.
(5) Shape the treats: Use a cookie scoop to scoop out about 1 1/2 tablespoon size balls and drop them onto the parchment-lined pan with a little space between each one.
(6) Chill: Put the pan(s) in the refrigerator to chill for about 20 minutes until set. If you have any left, store them in the refrigerator so they don’t get too melty.
Eat and enjoy every bite because you can!
Have a question you’d like to have answered? Email me at hello@ibsgamechanger.com
Link note: This post may contain affiliate links for you to easily purchase items that are linked. I may earn a small commission from qualifying purchases but none of this costs you a thing so feel free to use the links! In addition, for some items, I have provided a special discount code for IBS Game Changers so be sure to use the code when you purchase an item to get the discount that has been arranged just for you.
More Deliciously Low FODMAP™ dessert recipes


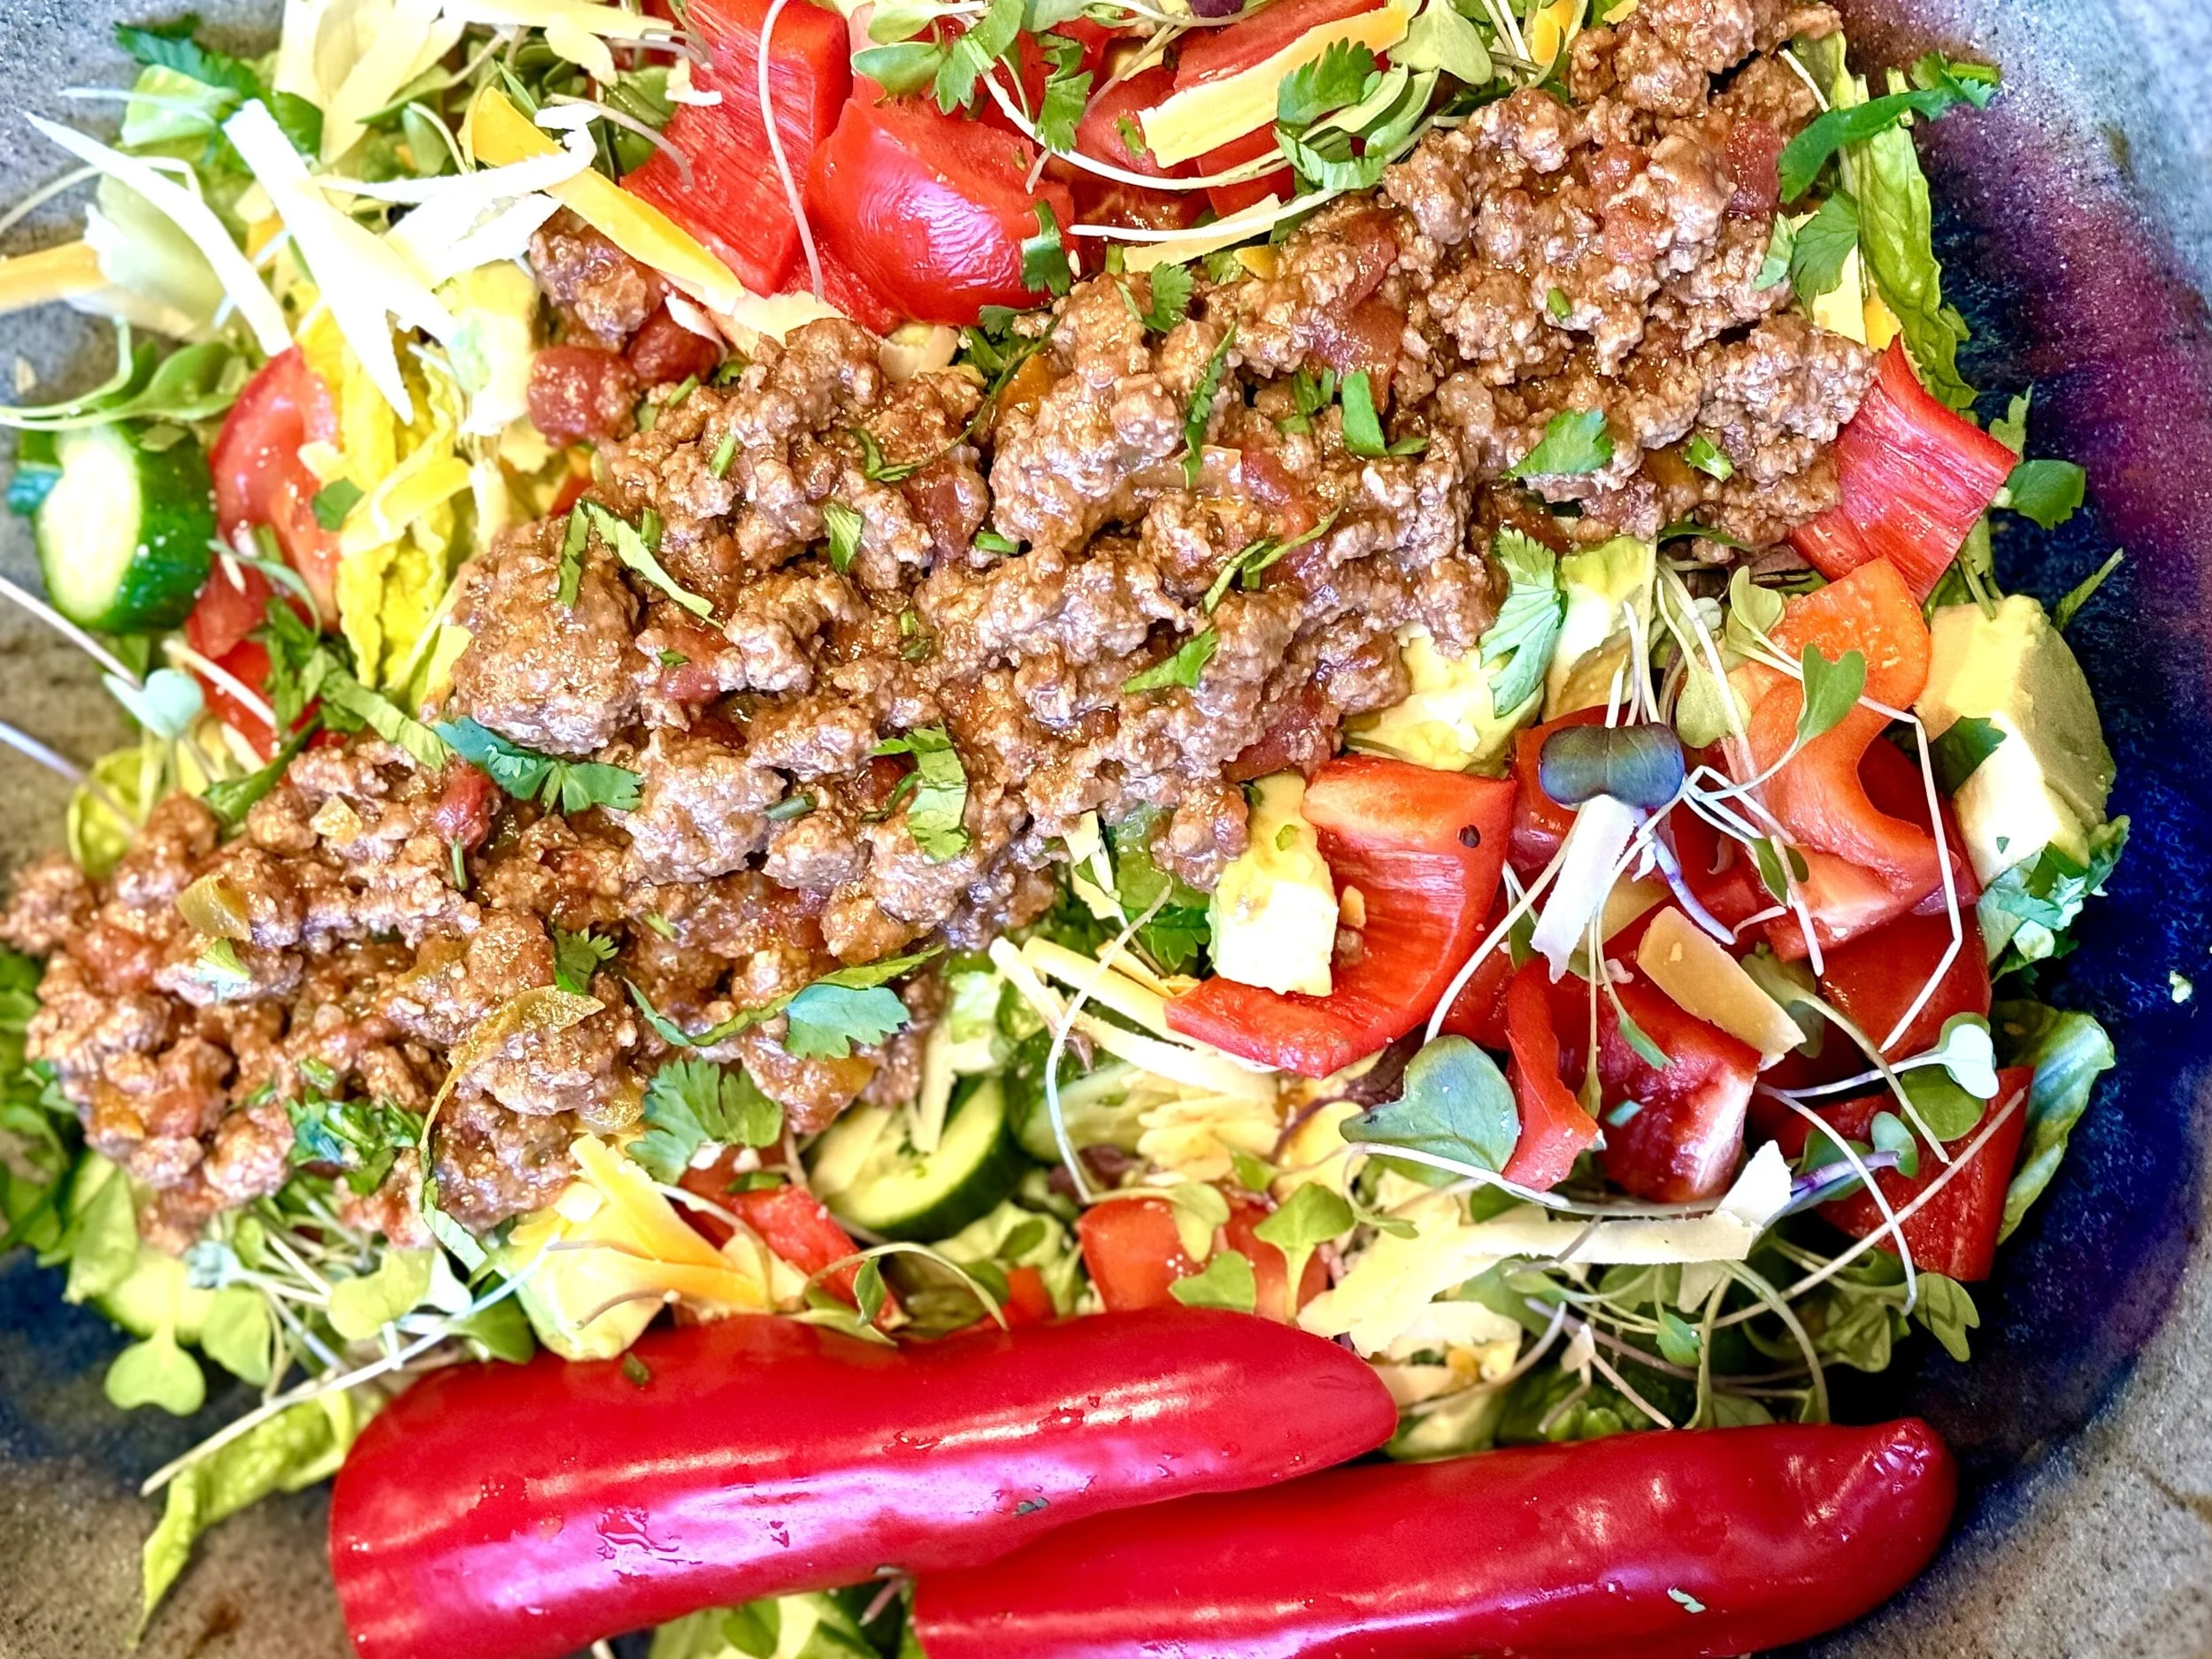
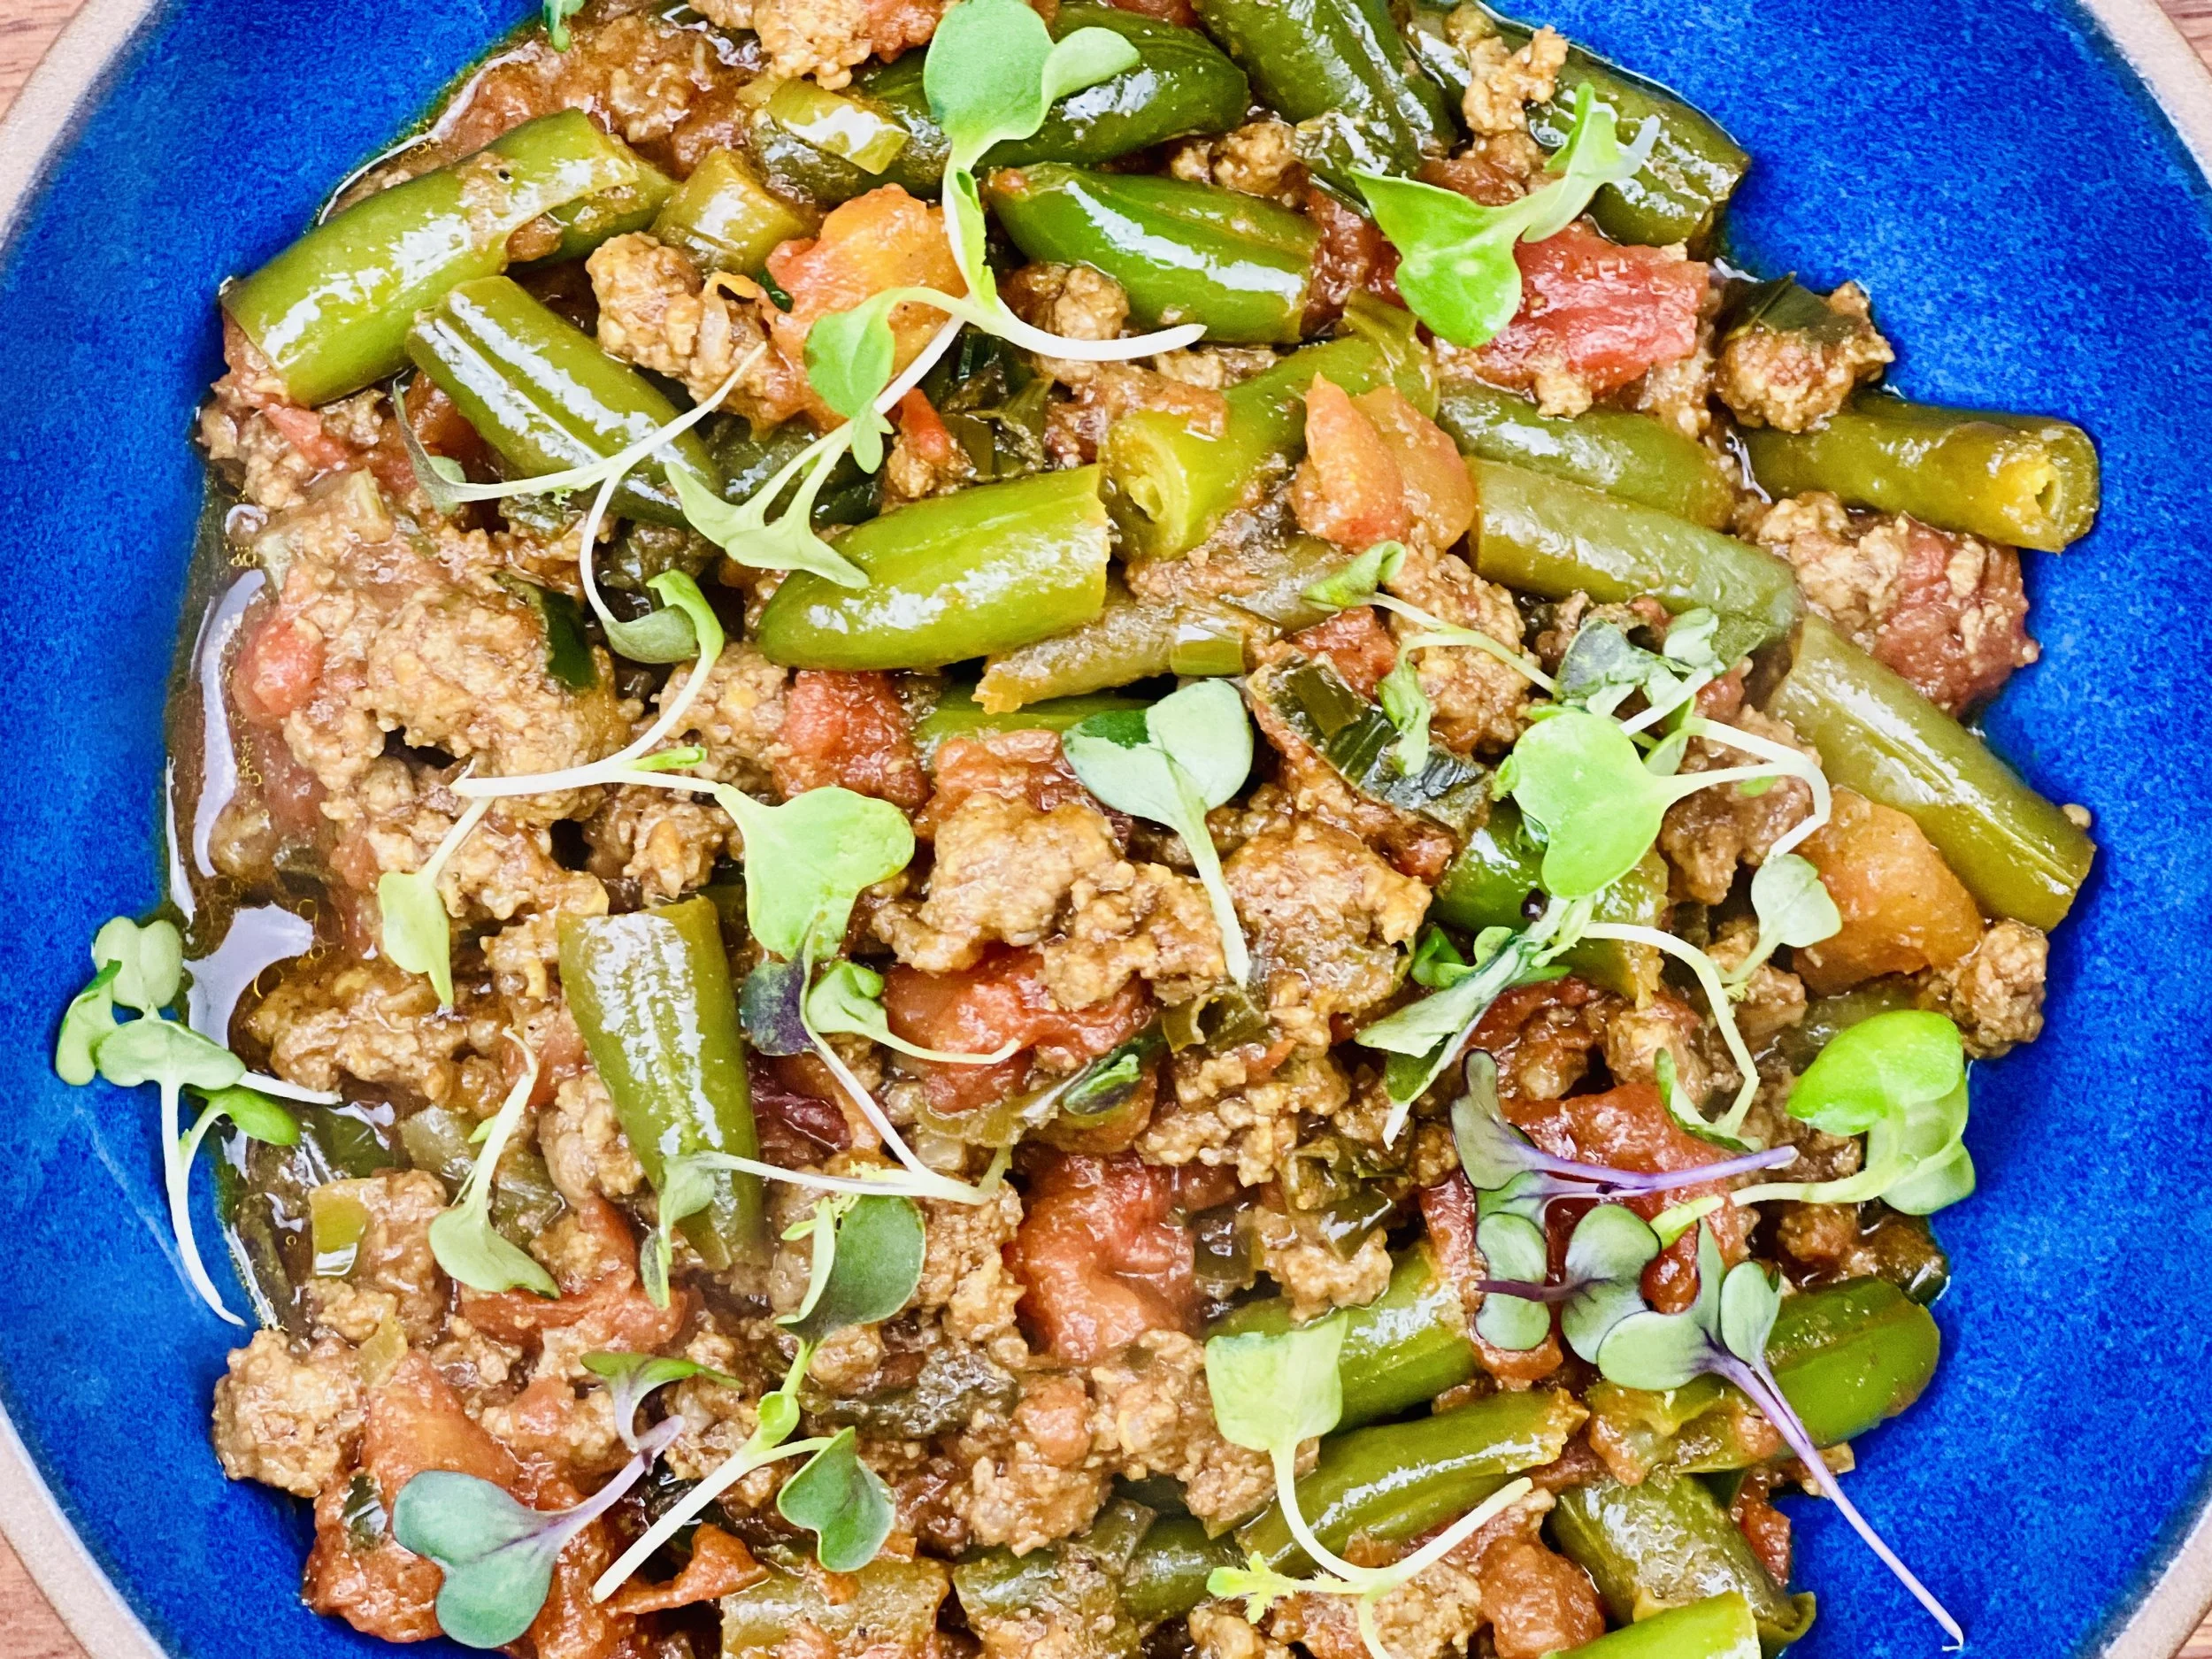
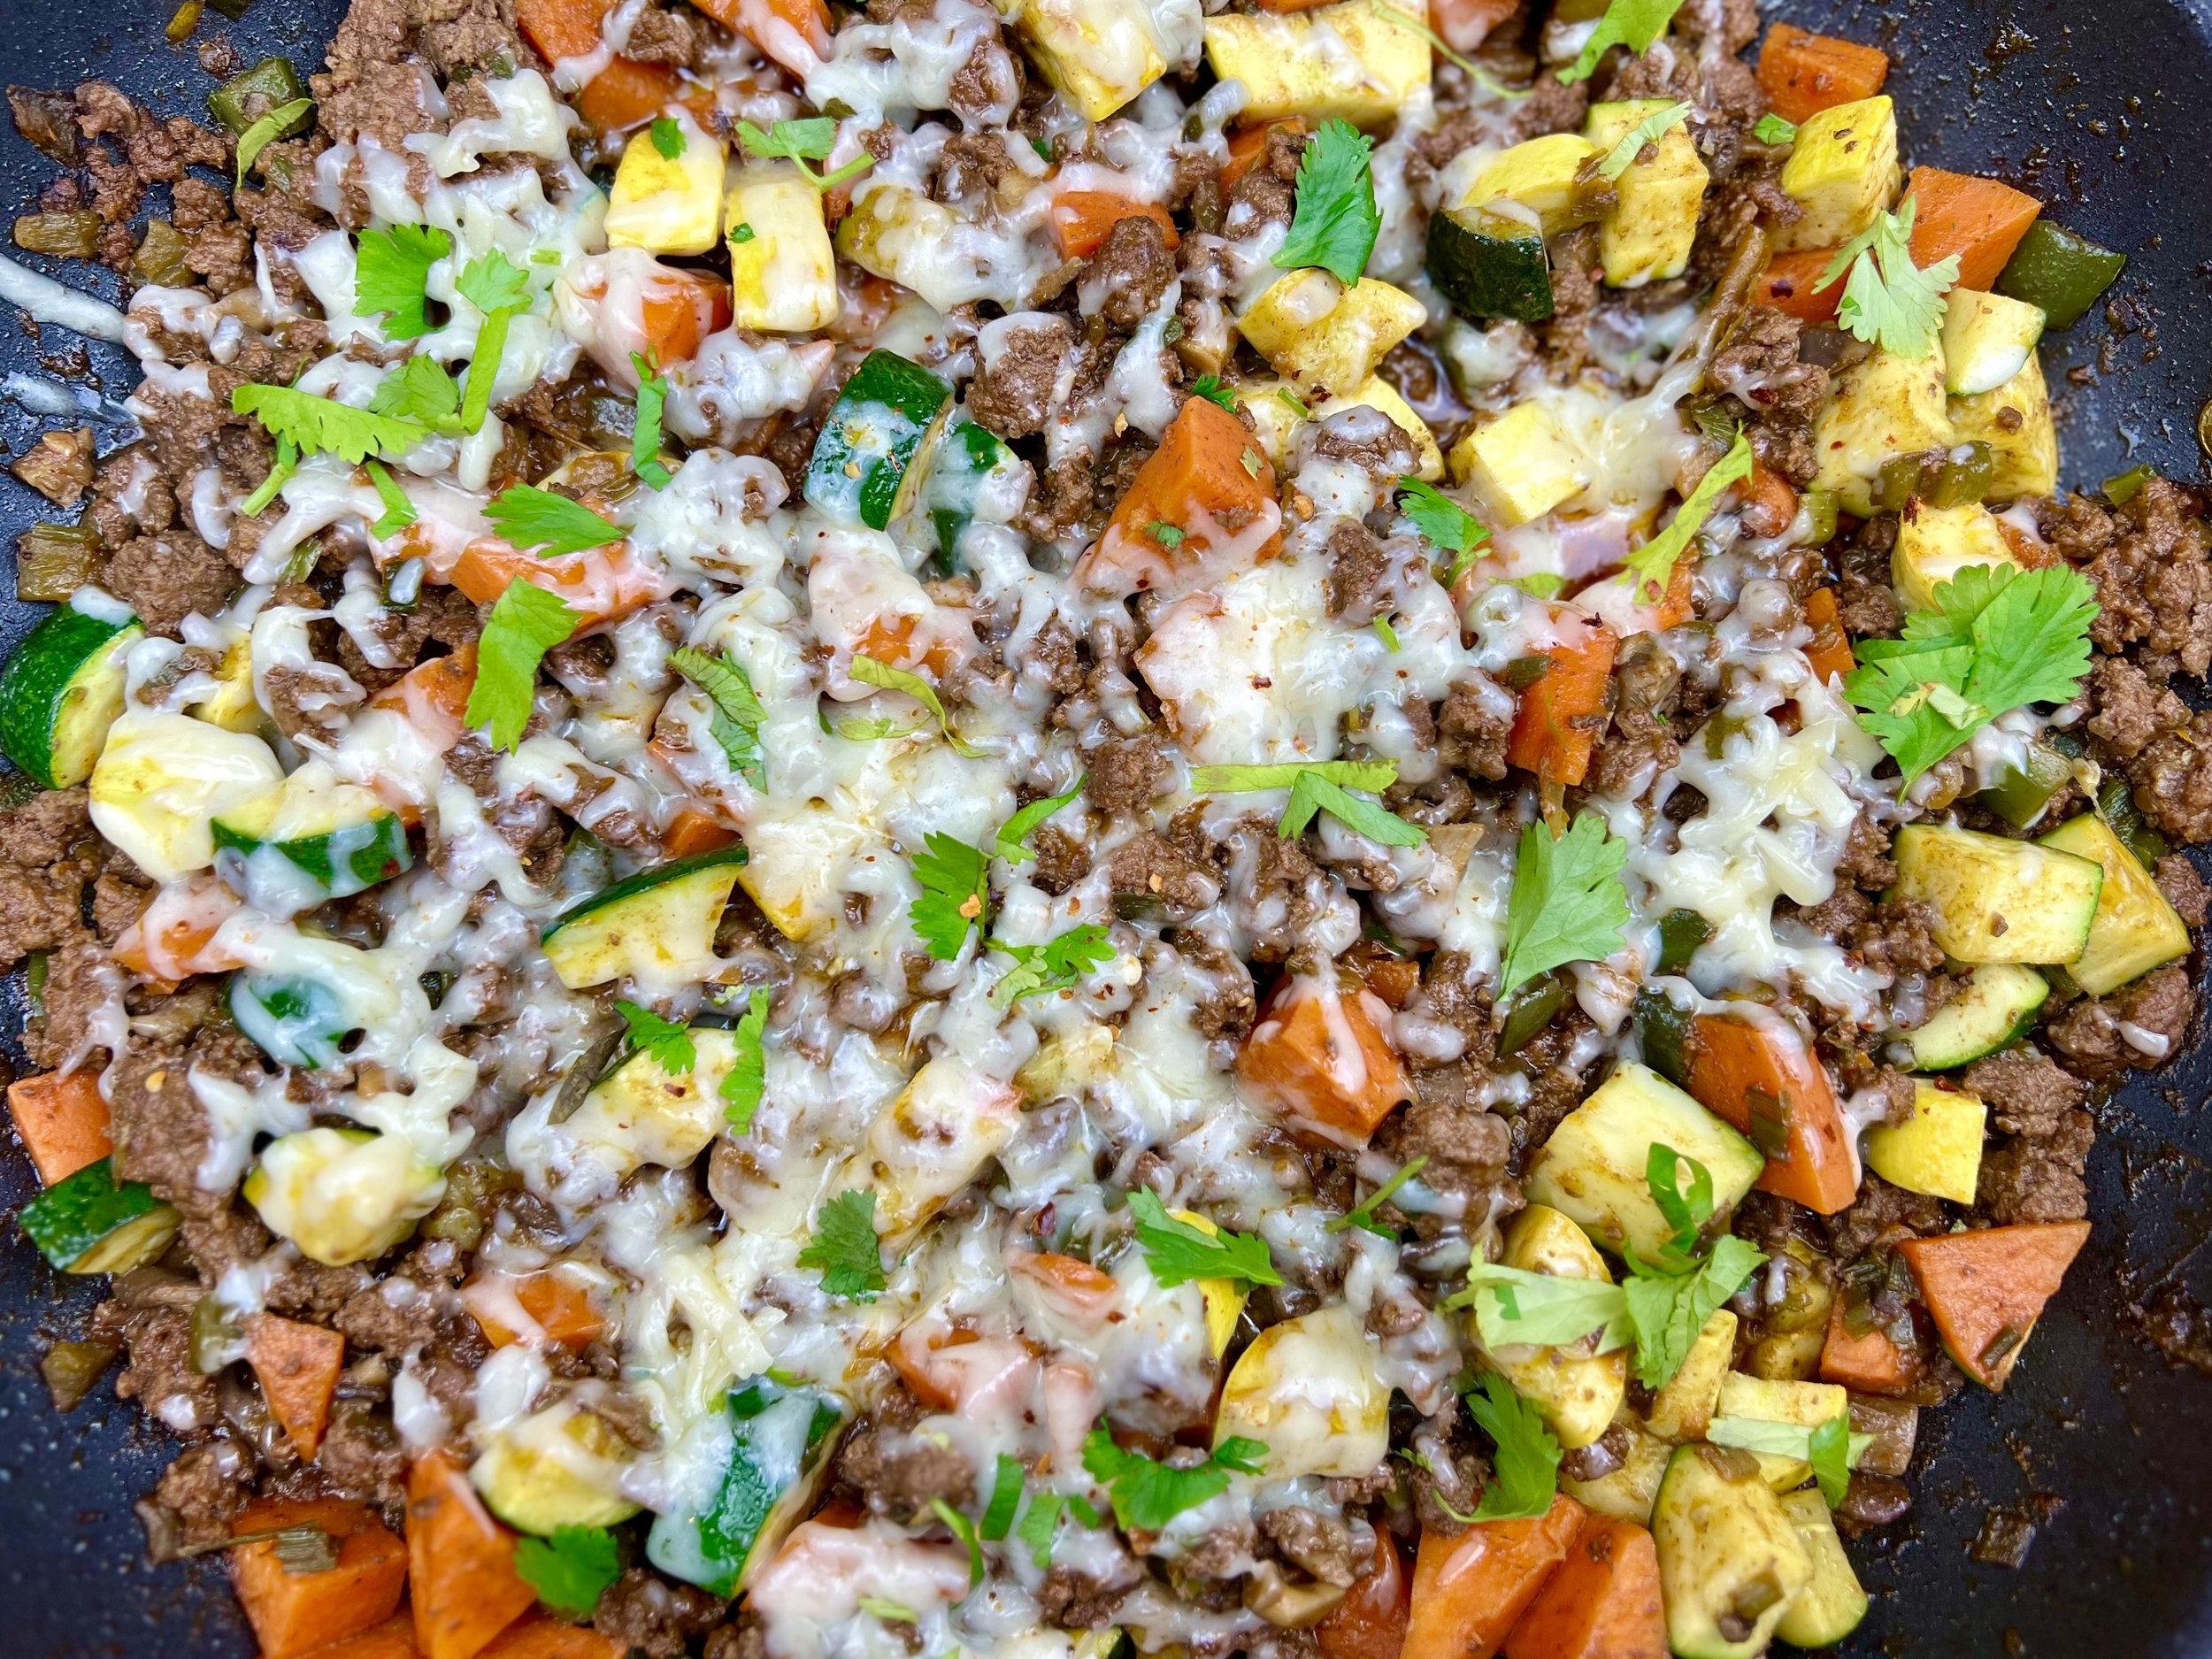
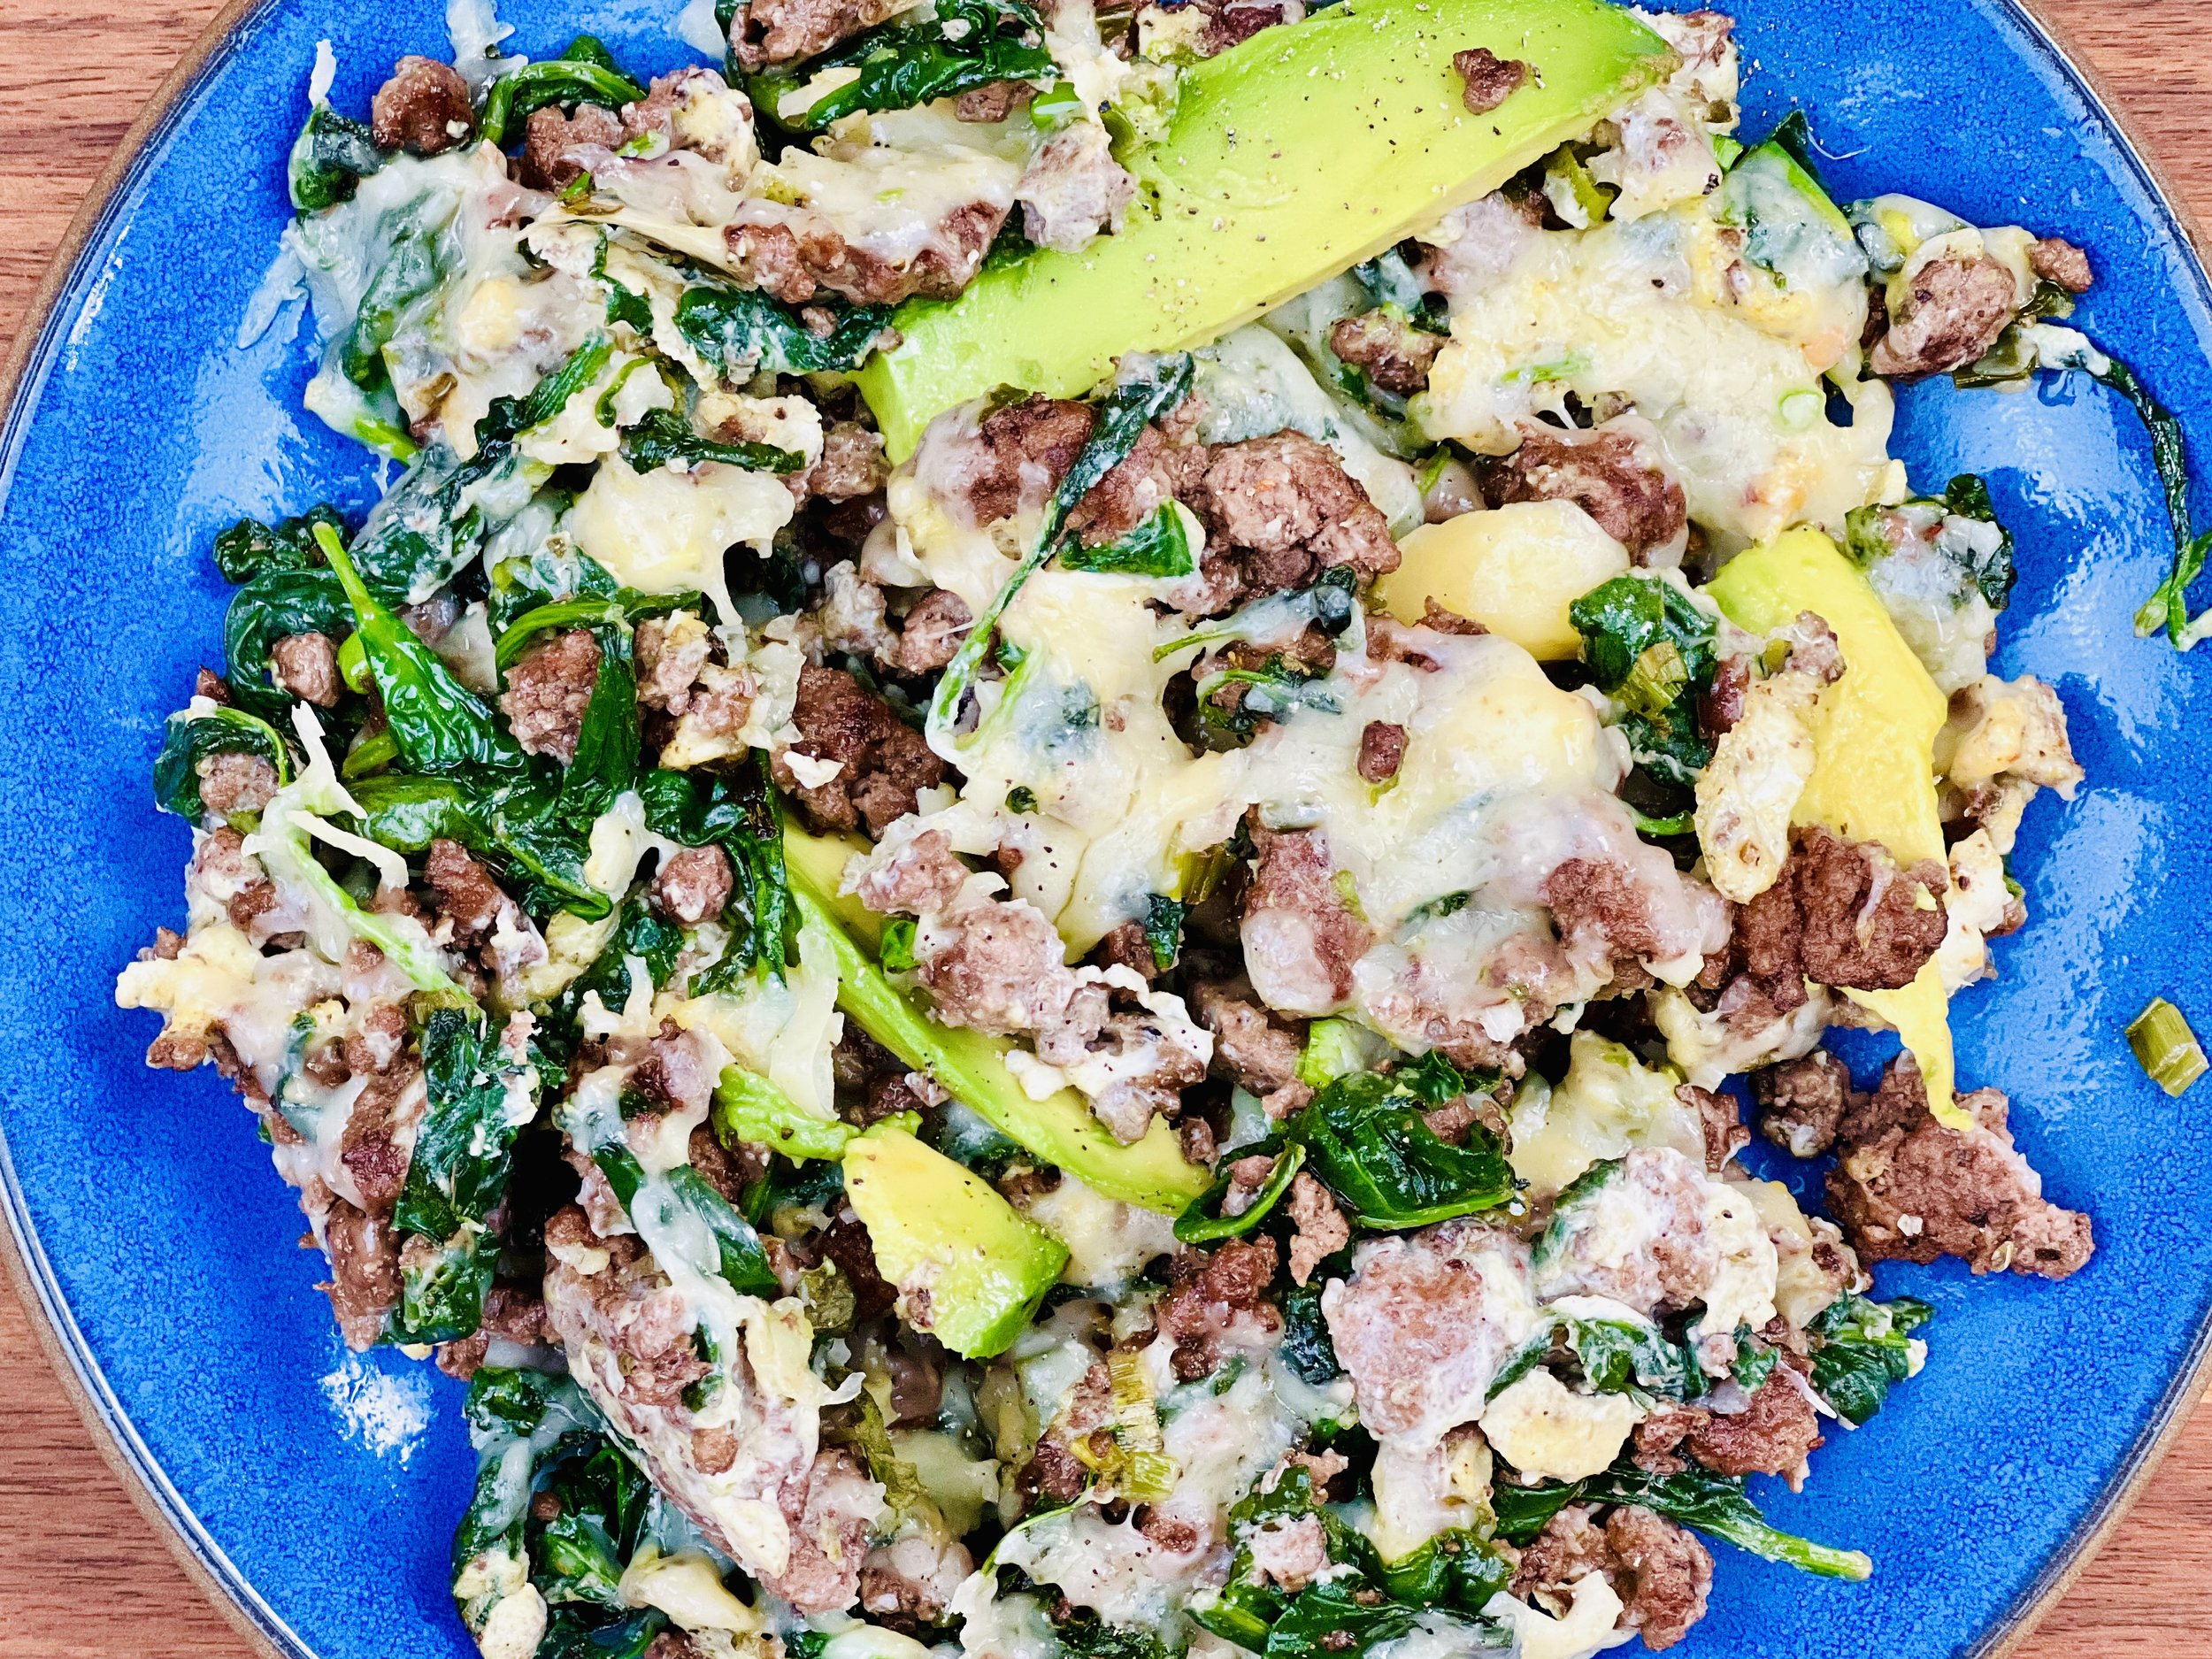
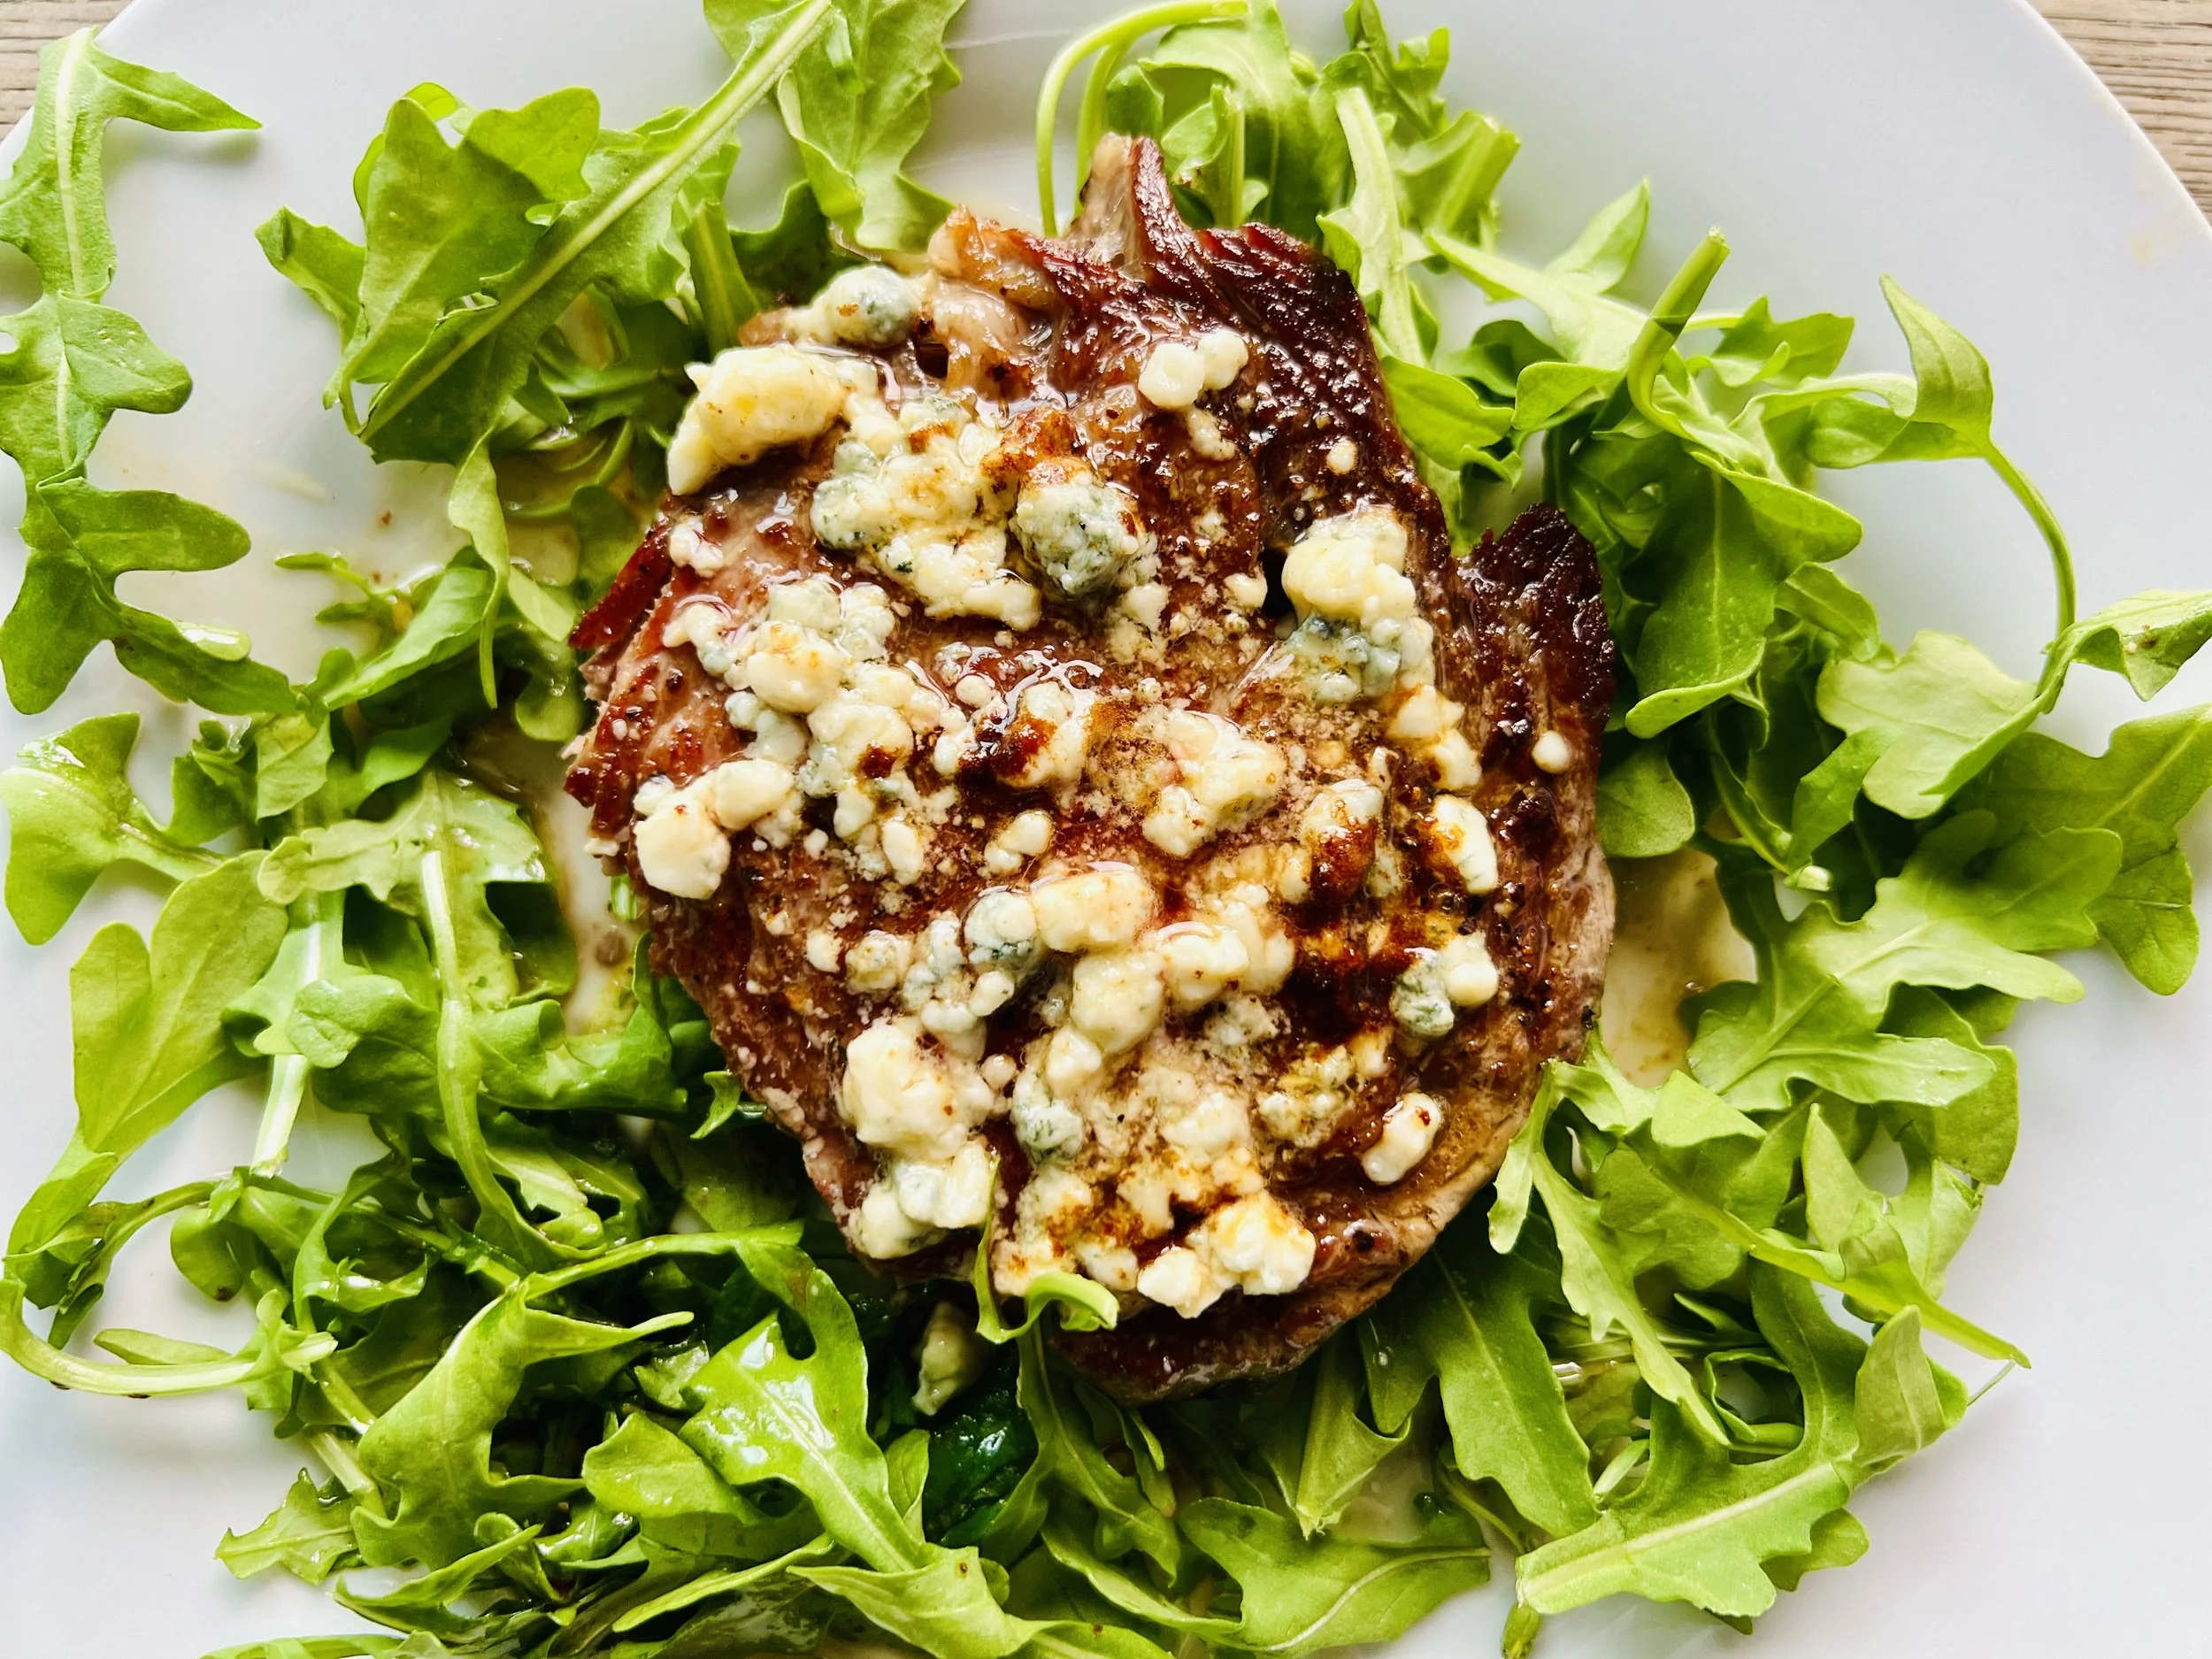
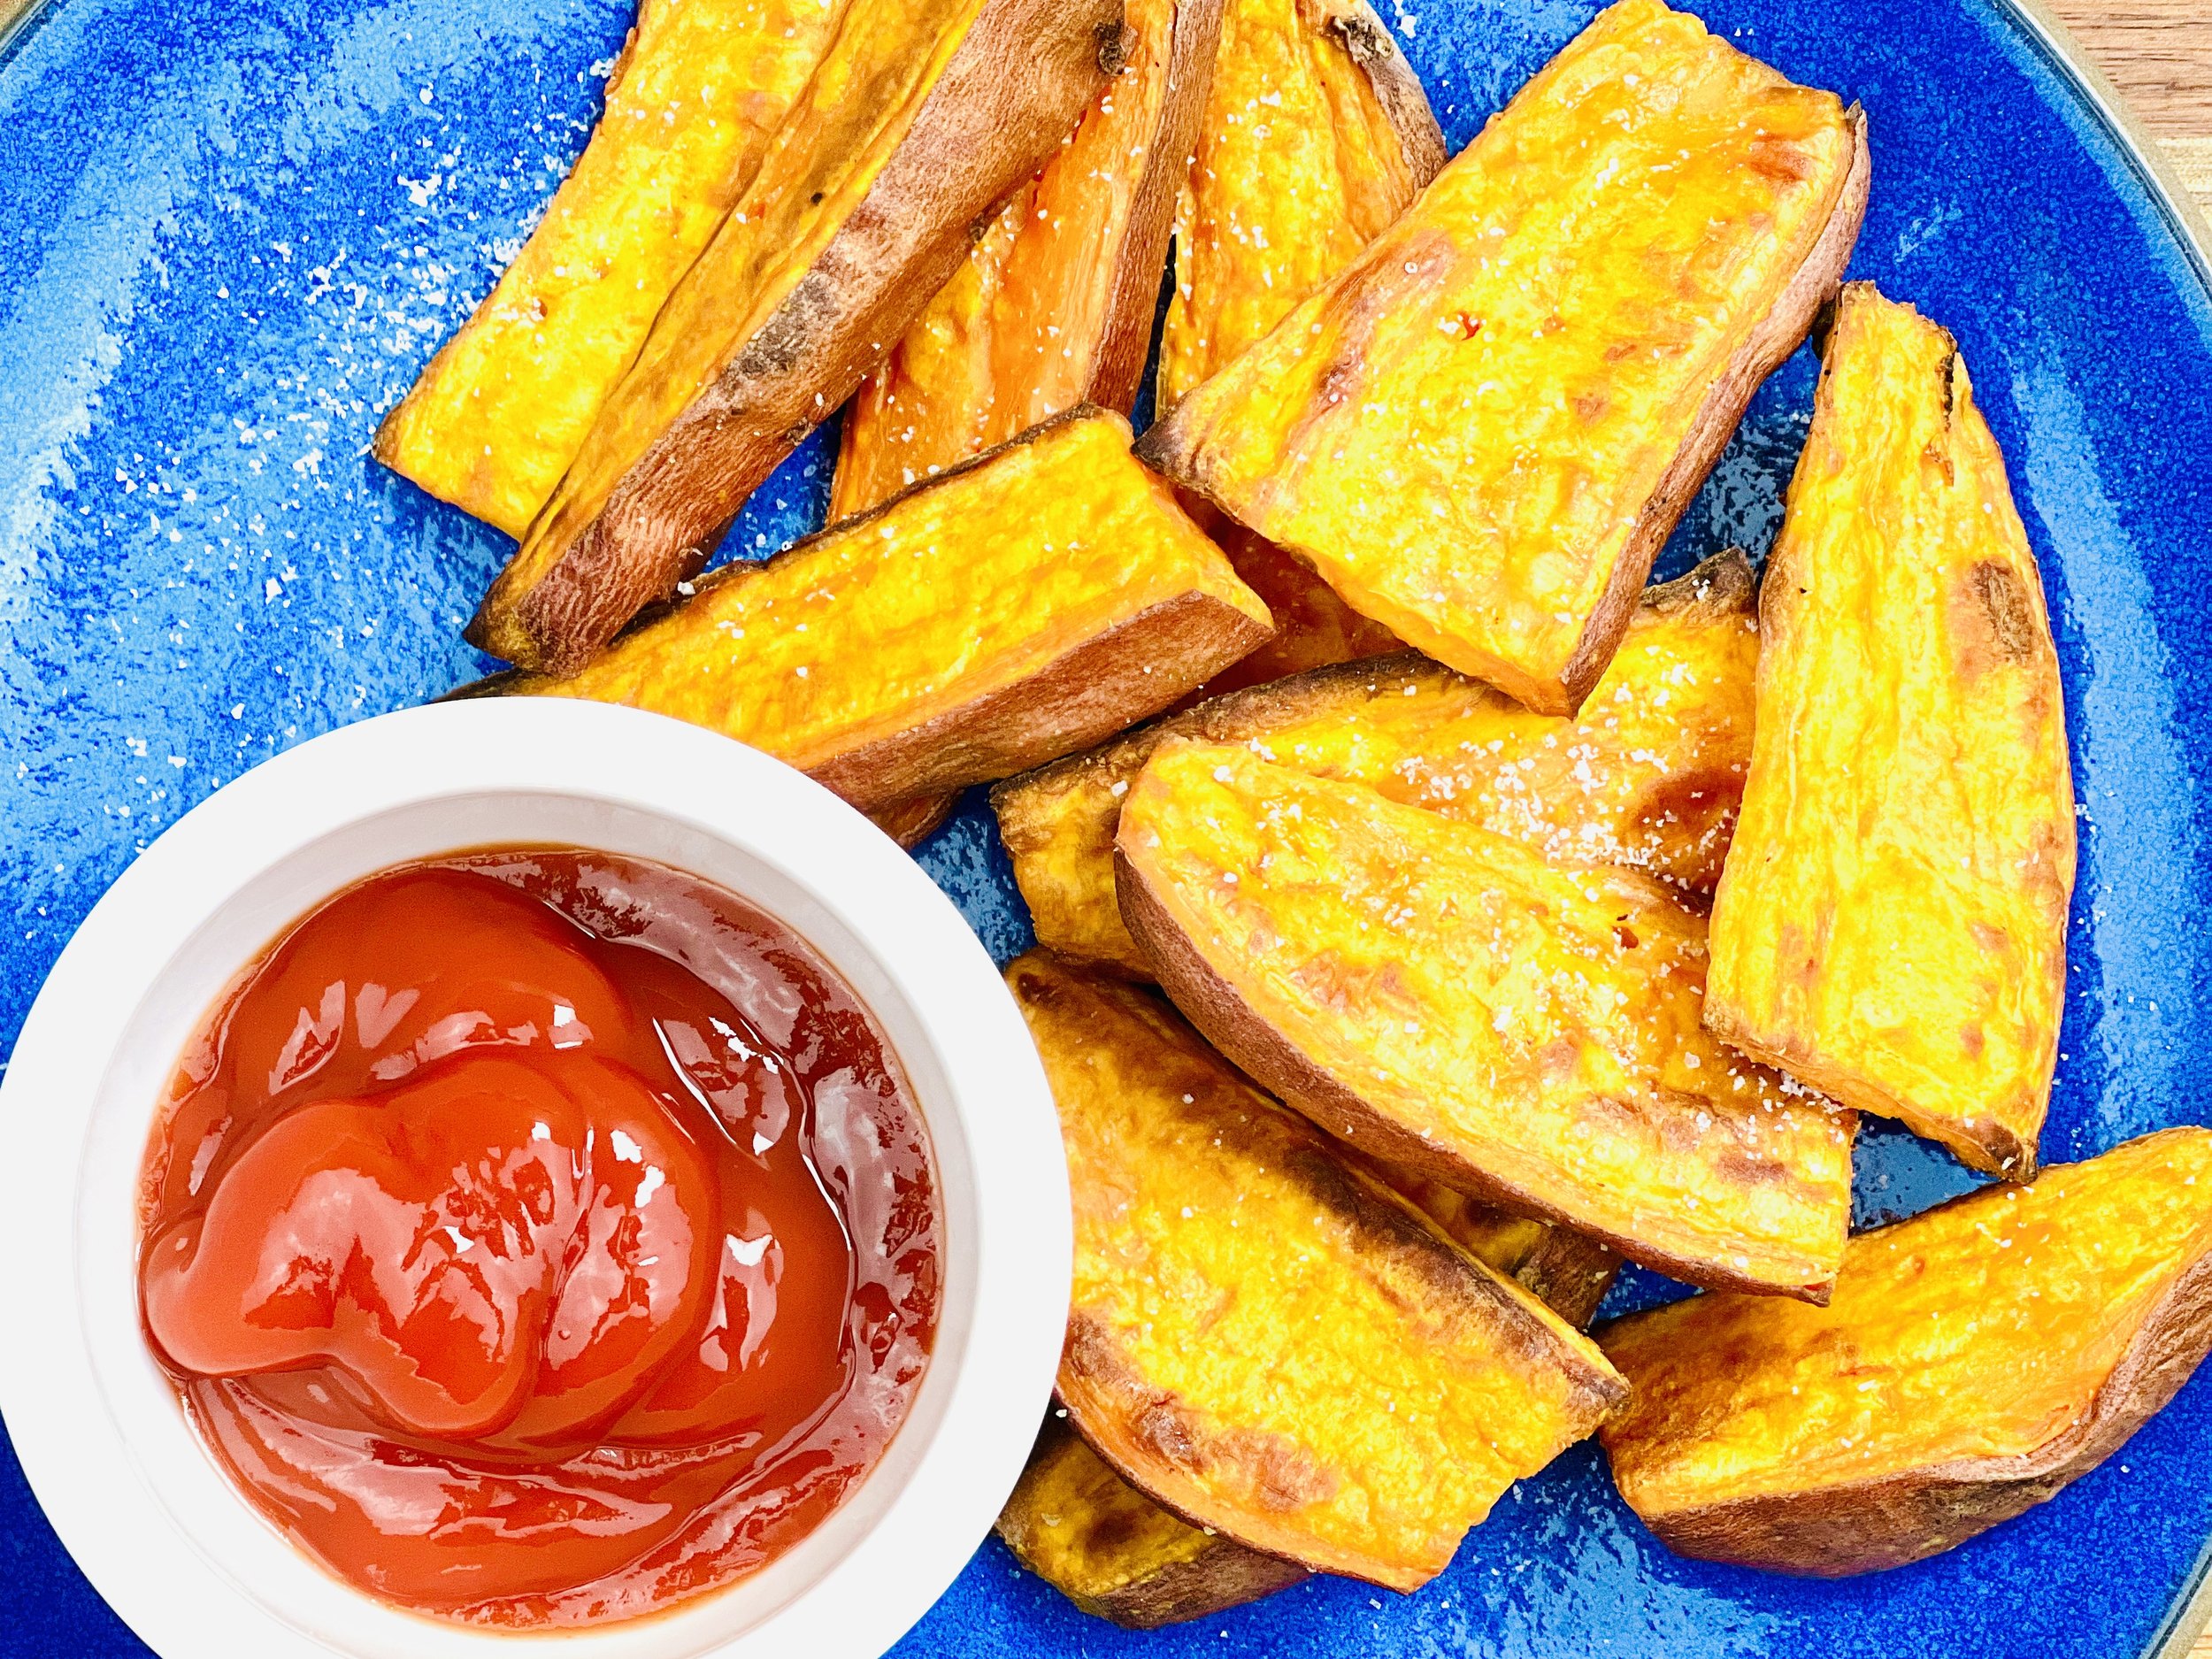
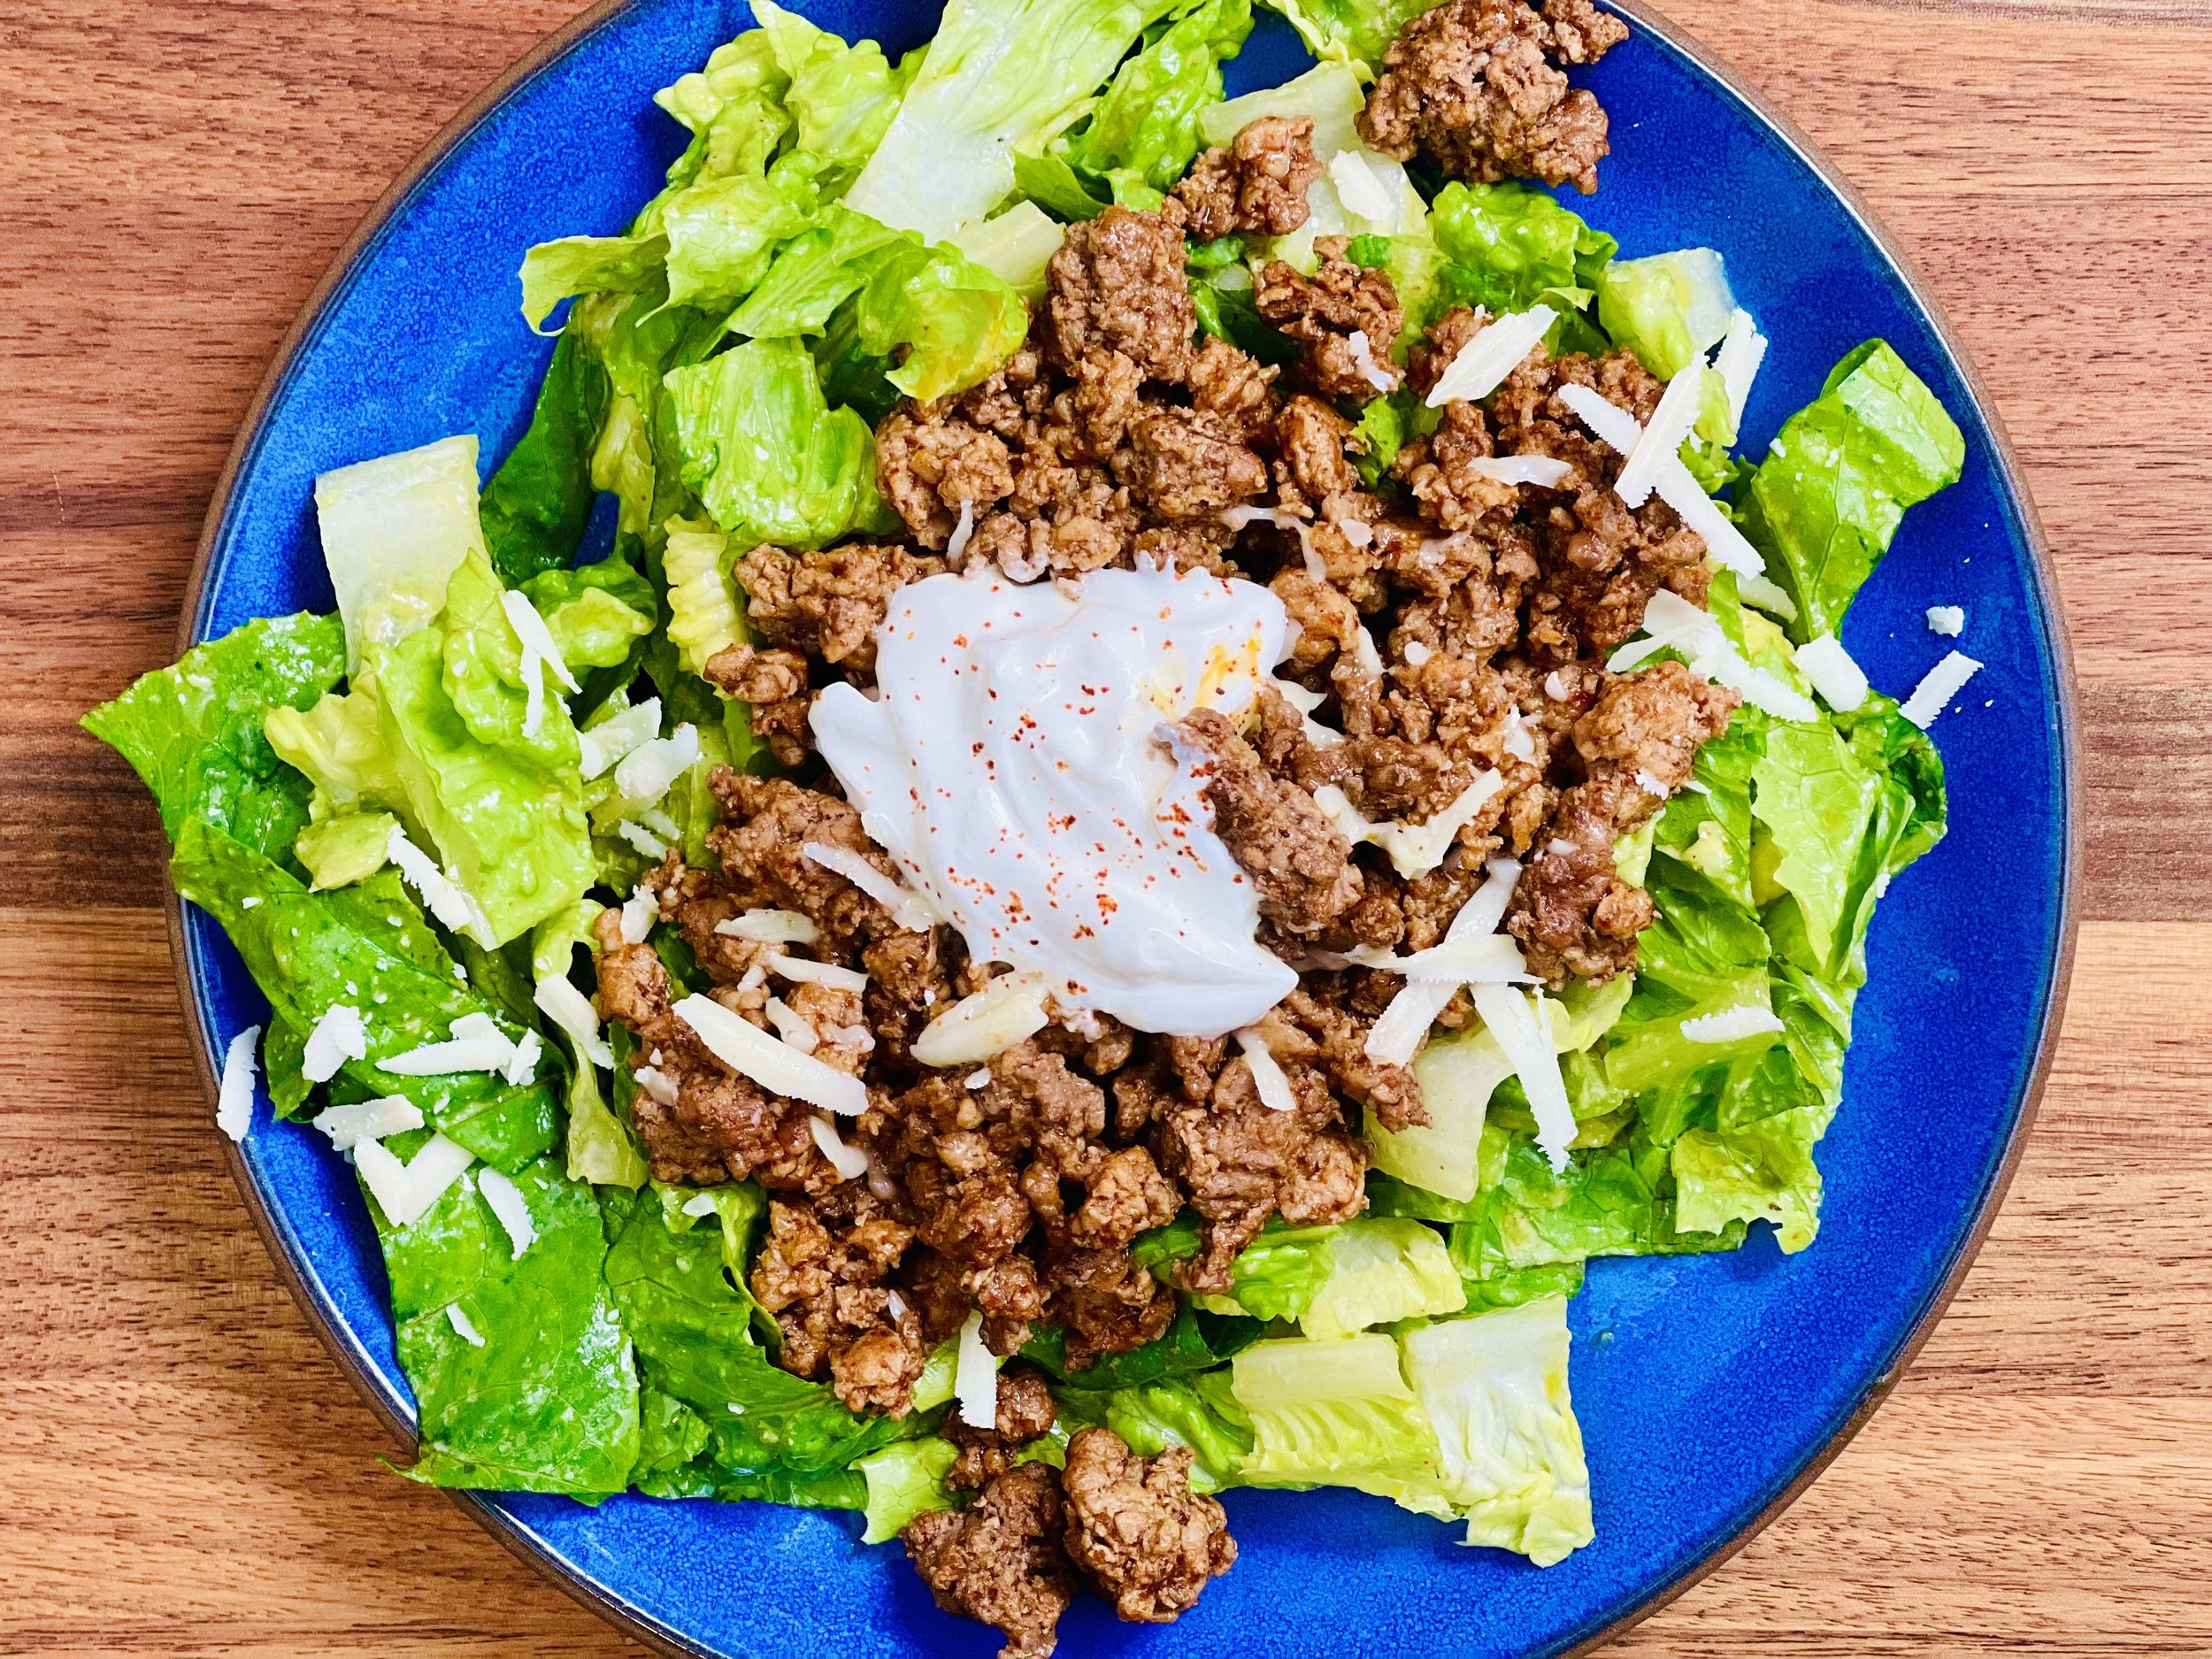
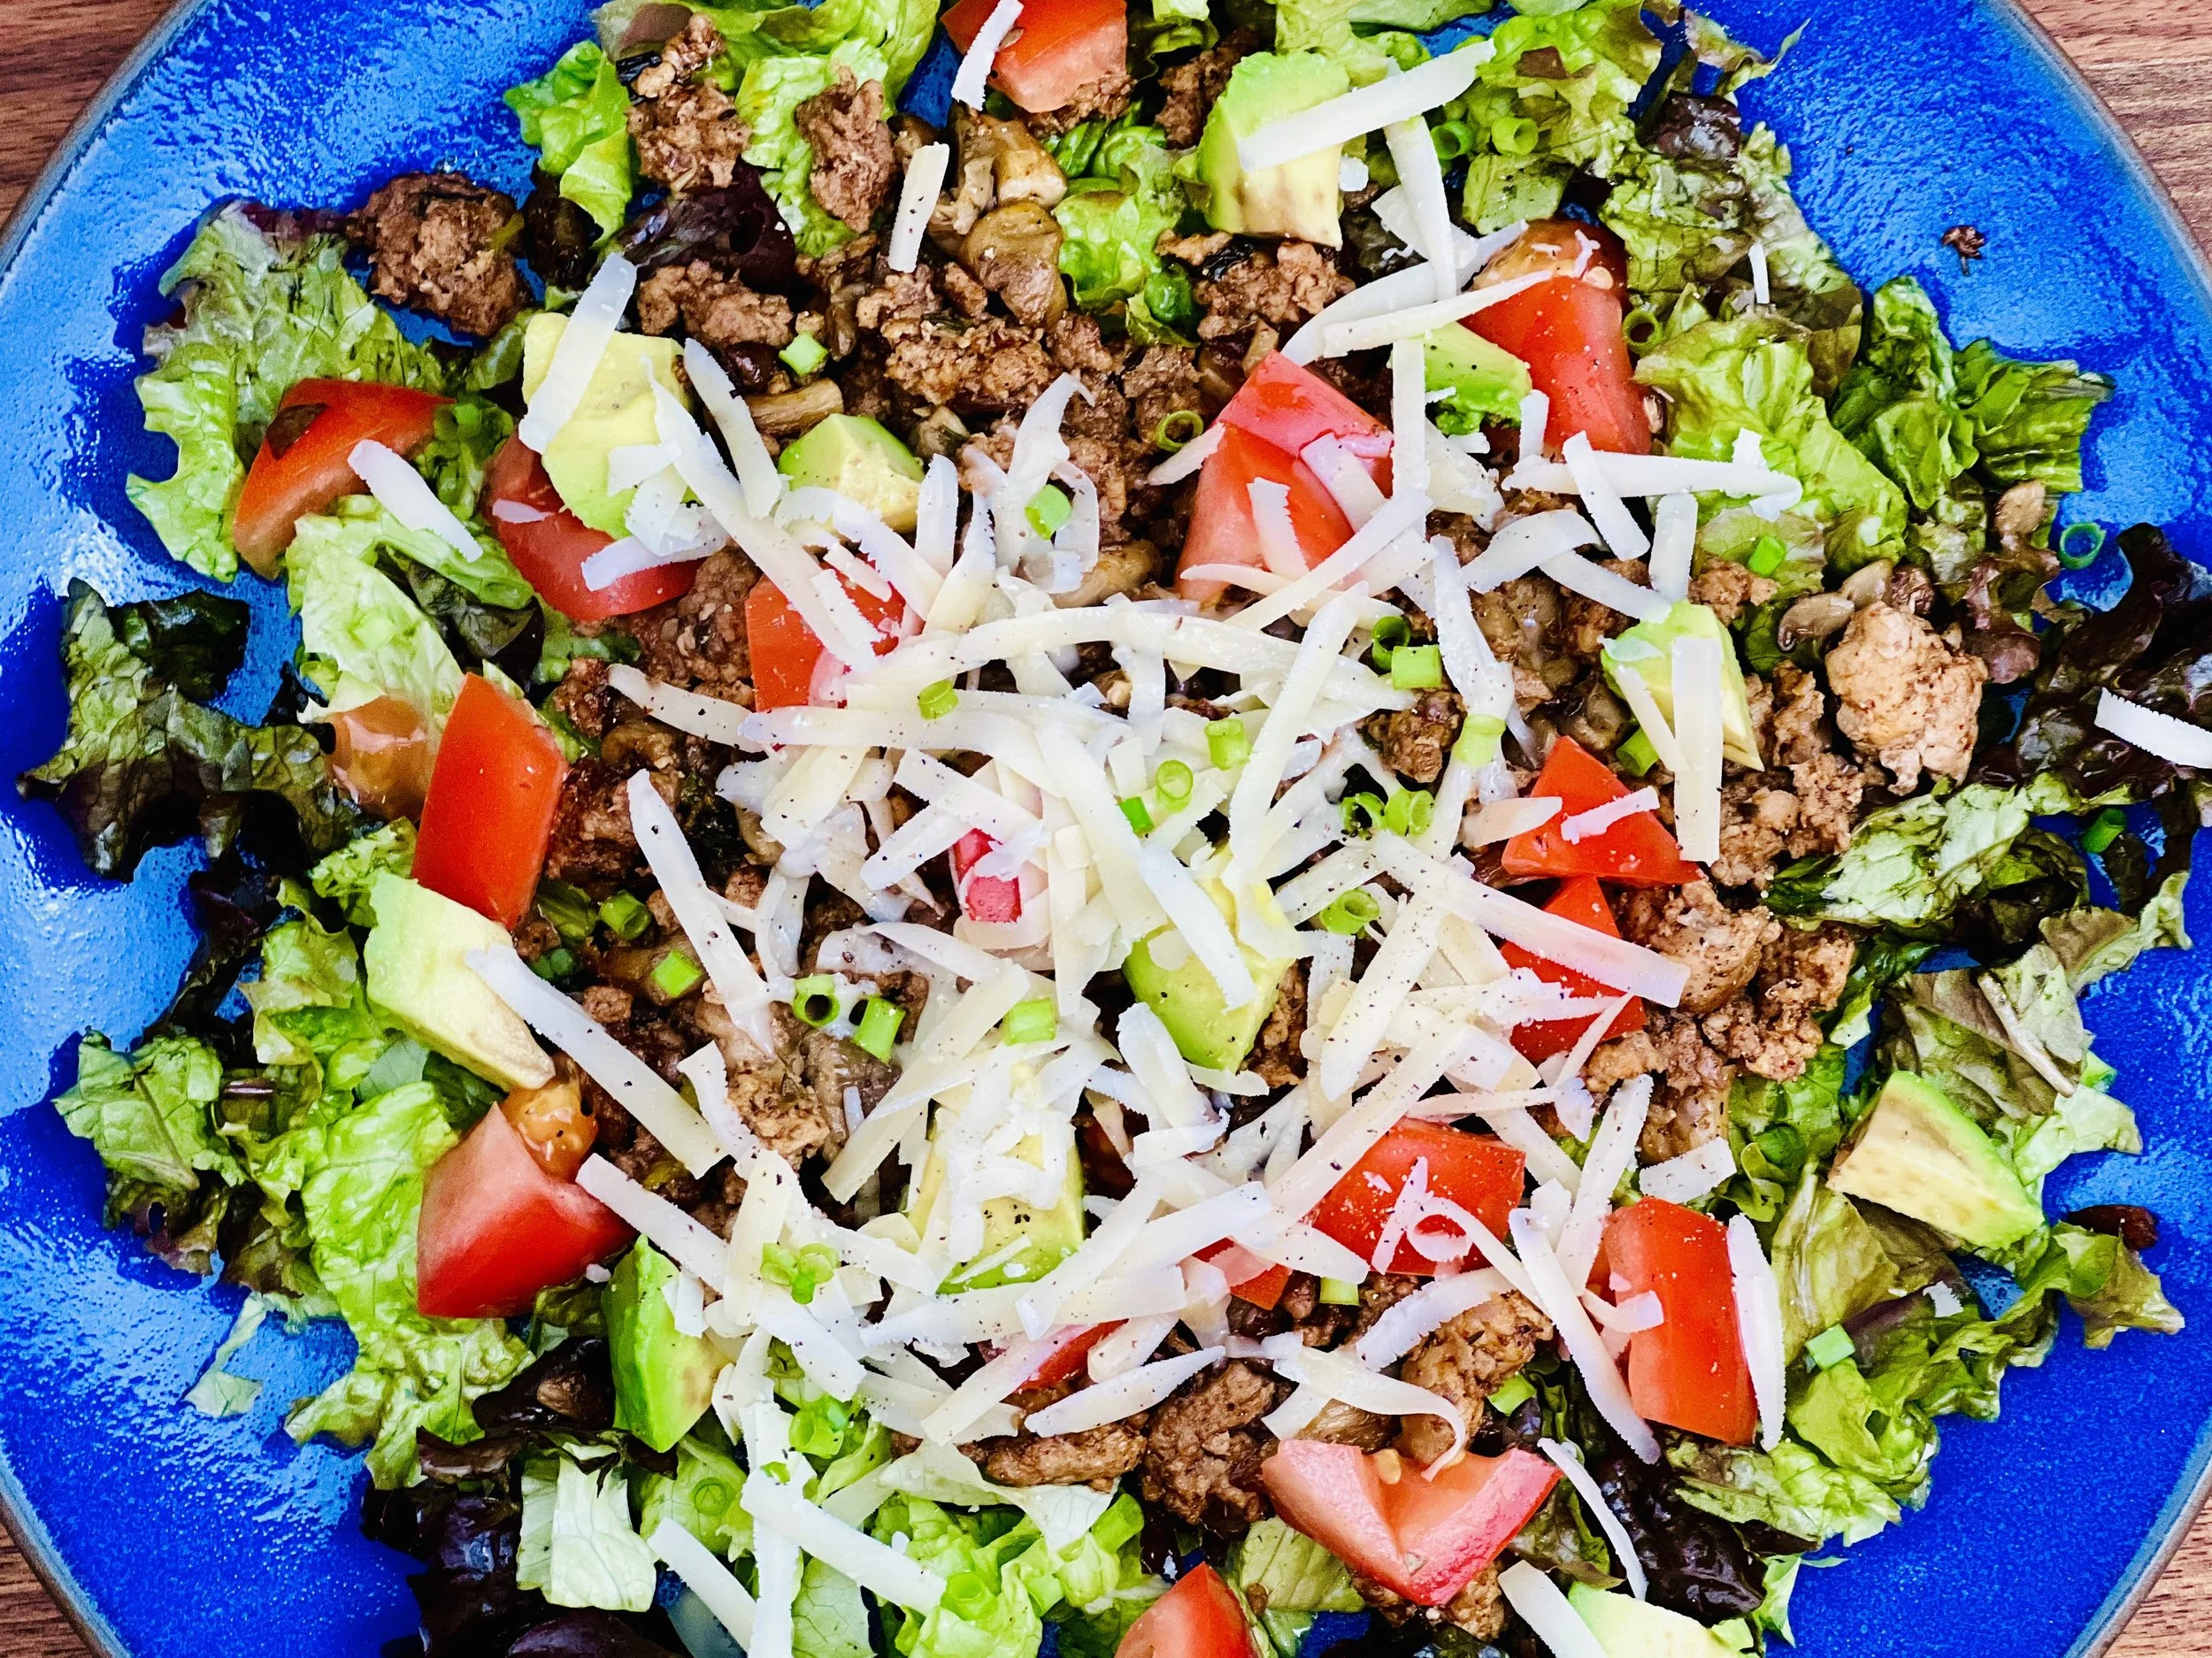
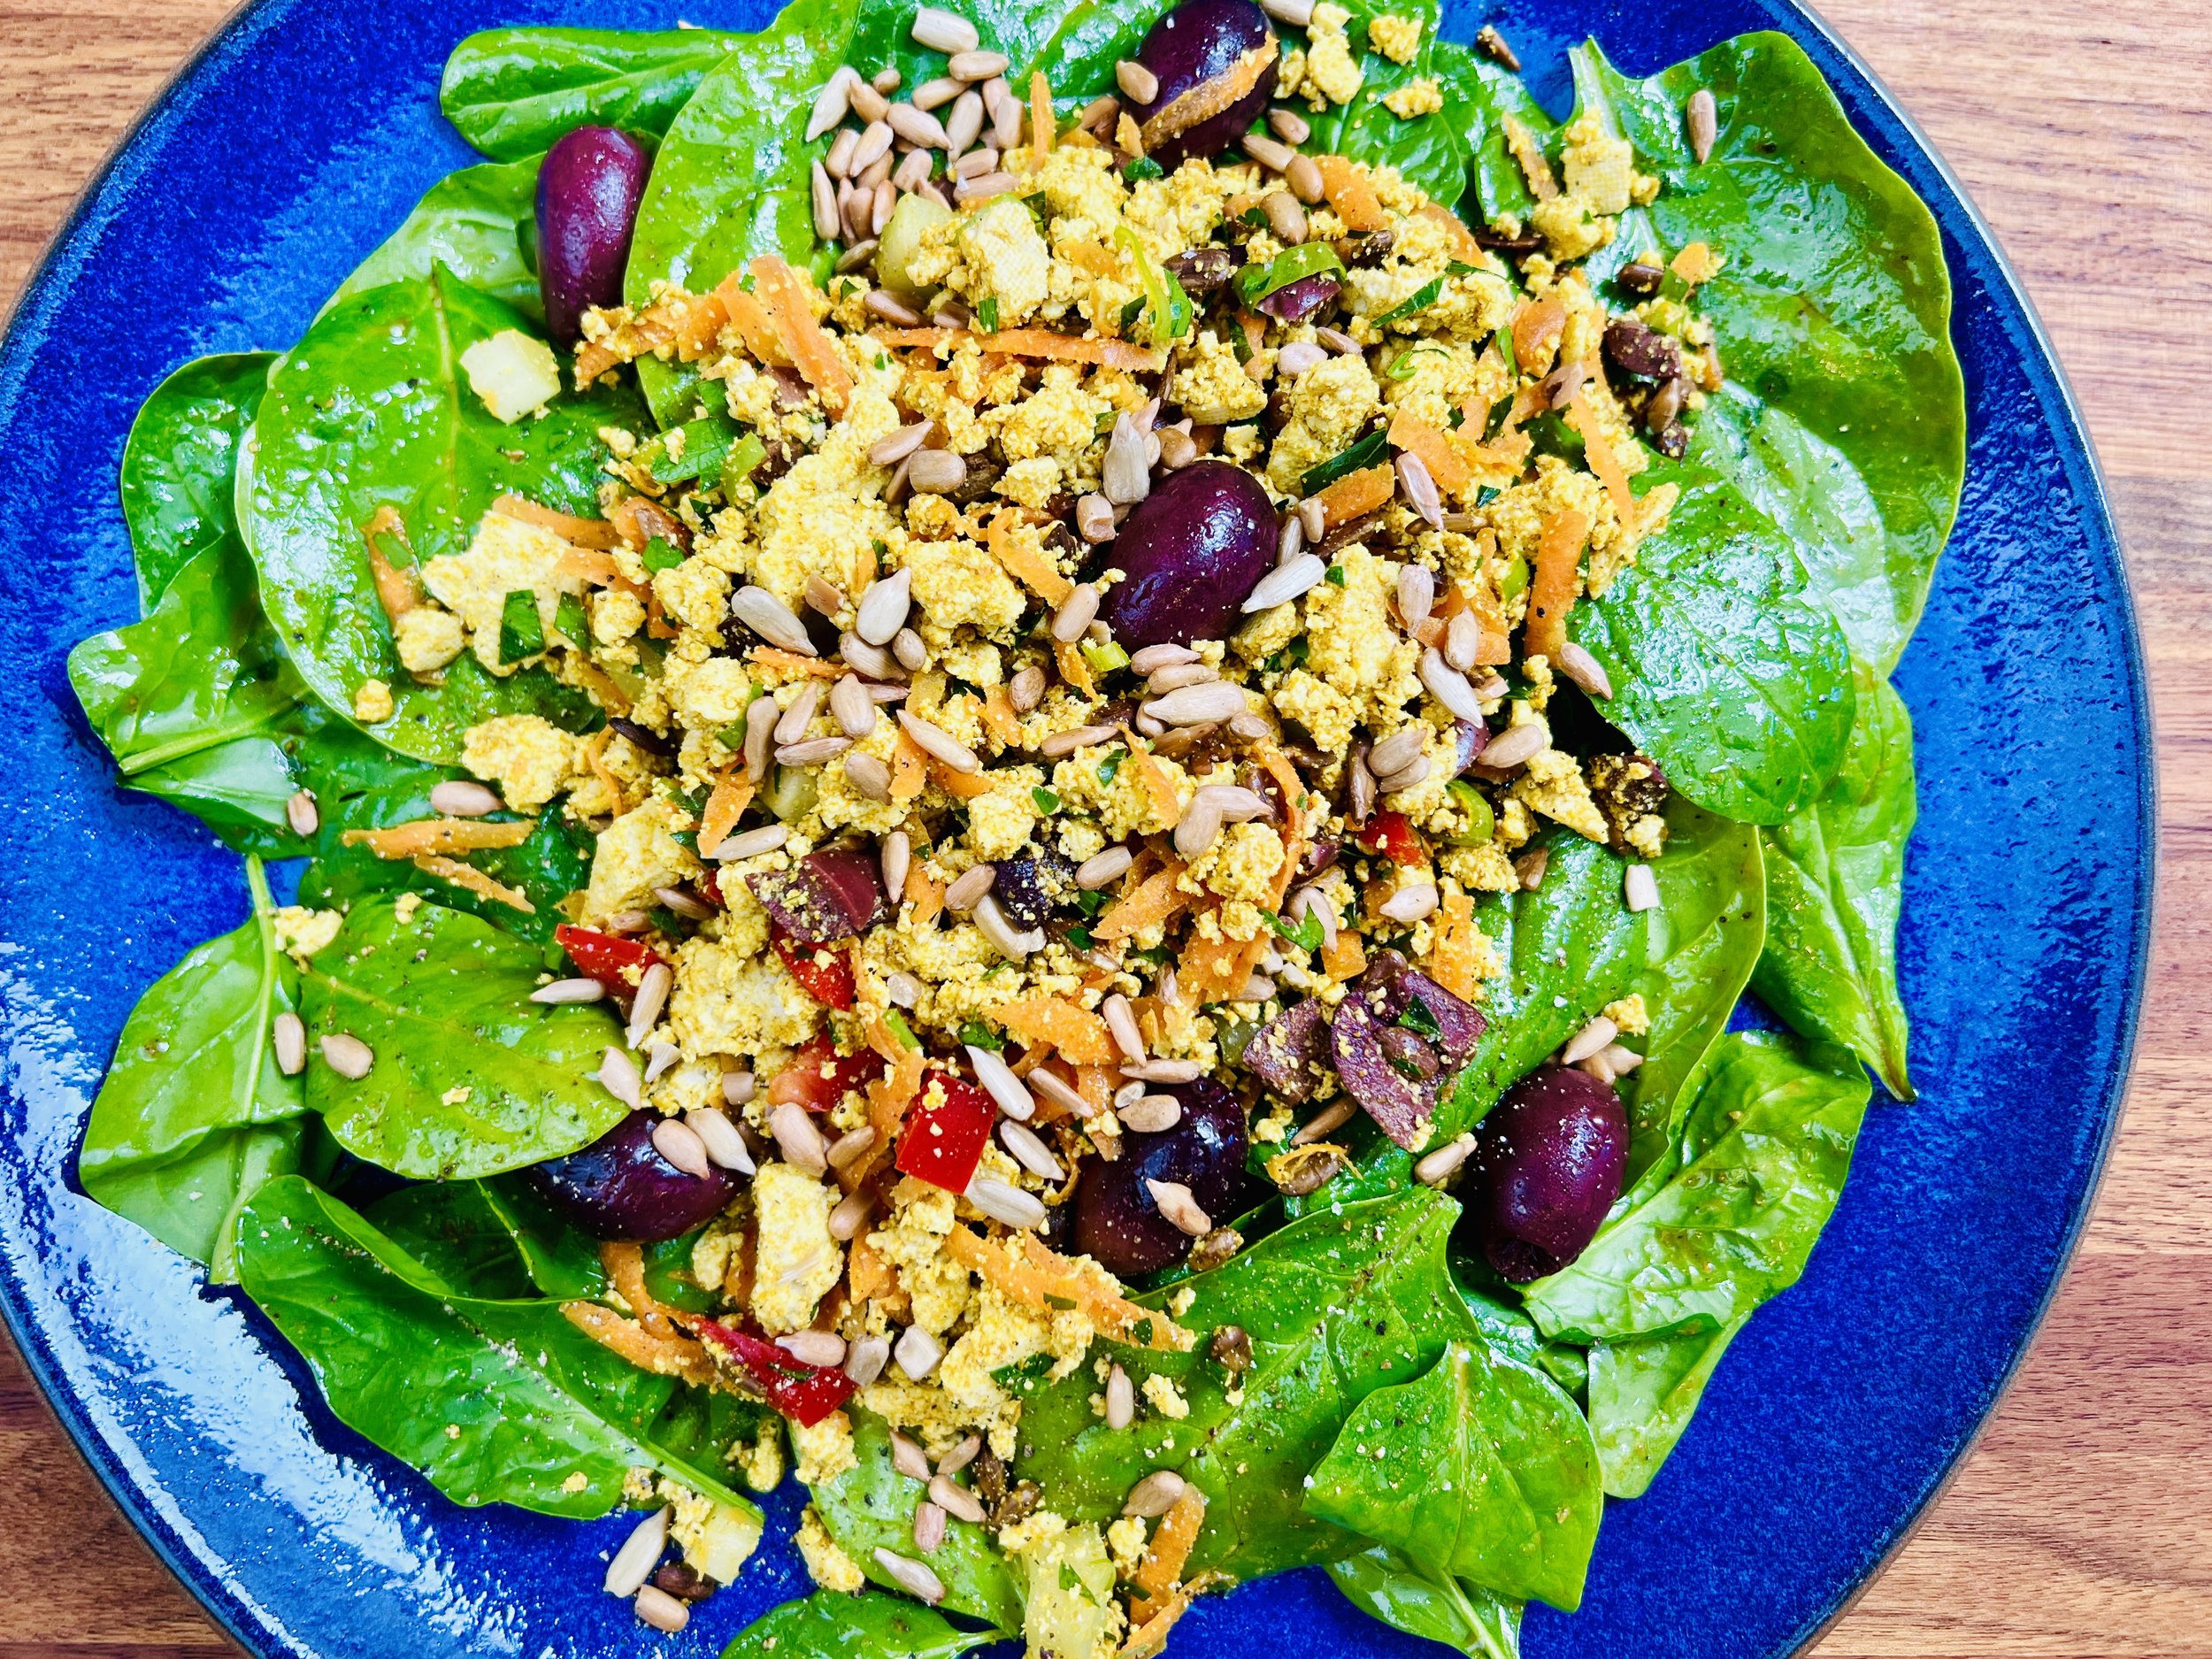
California Style Joe’s Special (Low FODMAP)
10 Minutes prep • 20 Minutes cook • Low FODMAP • Gluten-free • Serves 4
10 Minutes prep • 20 Minutes cook • Low FODMAP • Gluten-free • Serves 4 • Ok to make ahead: Step 1
Whether you live anywhere near San Francisco or not, you’ve probably heard of Joe’s Special! According to local San Francisco history, Joe's Special was created at New Joe's restaurant in San Francisco’s North Beach district in 1937. All the recipes for Joe’s Special include ground beef, spinach, and eggs. It’s not fancy, but it makes a great breakfast, brunch, or main dish for a light supper. Of course, I can never use a recipe without adding my own personal spin to it—hence this Low FODMAP, low starch, California Style Joe’s Special. I love it with some low FODMAP hot sauce or ketchup but any way you serve it, it’s delicious!
Ingredients
4 eggs, lightly beaten
1 tablespoon garlic-infused olive oil
1 tablespoon salted butter
1 pound lean ground beef (organic grass-fed preferred)
1/2 teaspoon Kosher salt (or to taste)
1/4 teaspoon black pepper (or to taste)
1/2 cup green onion greens finely chopped (or a combination of green onion greens, chives, and/or leek greens)
2 (5-ounce) bags of fresh baby spinach leaves (long stems removed, roughly chopped or whole)
OR: 1 (10-ounce) package of frozen chopped spinach, thawed and drained
2 teaspoons Smoke n Sanity Beyond Italian Seasoning
OR: 1 teaspoon dried basil and 1⁄2 teaspoon dried oregano
1/2 - 3/4 cup grated sharp cheddar cheese (or other aged cheese of your preference)
1/2 ripe avocado (optional for serving)
1/2 teaspoon red pepper flakes (optional for serving)
Low FODMAP hot sauce or Smoke N Sanity Ketchup (optional for serving)
Directions
(1) Prepare: Beat the eggs in a small bowl and set aside. Wash, dry, remove long stems, and roughly chop the spinach. Chop the green onion greens (and leeks and chives if using). Grate the cheese. Set all aside. If using frozen spinach, squeeze as much liquid out of the frozen and thawed spinach as possible.
(2) Cook the meat: Heat the oil and butter in a large heavy skillet over medium heat. When the butter has melted, add the ground beef and cook, stirring occasionally, until browned and crumbly. Add salt and pepper. Add the green onion greens (and leeks and/or chives if using), and cook until the onion greens are tender but not browned.
(3) Add the spinach: Stir in the spinach, and Italian seasoning (or basil, and oregano). If using fresh spinach, cook until the spinach wilts.
(4) Add the eggs: Pour the beaten eggs into the pan with the beef/spinach mixture. Let cook until the eggs are set, stirring occasionally for about 3 minutes. Once set, stir and toss the mixture to blend the eggs throughout. Add additional salt and pepper to taste. Add the red pepper flakes (if using).
(5) Add the cheese: Spread the meat and spinach mixture into one uniform layer in the pan. If using, sprinkle the cheese on top and put the whole pan into the oven under the broiler. Watch carefully and remove after the cheese is melted to your liking.
(6) Plate and serve: Serve a generous scoop of the mixture onto each plate with sliced avocado on top and hot sauce or ketchup alongside.
Eat and enjoy every bite because you can!
Recipe note: I use Diamond Crystal Kosher salt in all my recipes because it has a wonderful flat and crisp flake that tastes delicious. It is also the least salty salt available so you can use it more liberally as a seasoning than you can table salt or sea salt. If you use another type of salt, you may need to reduce the amount so it is not over-salted.
Have a question you’d like to have answered? Email me at hello@ibsgamechanger.com
Link note: This post may contain affiliate links for you to easily purchase items that are linked. I may earn a small commission from qualifying purchases but none of this costs you a thing so feel free to use the links! In addition, for some items, I have provided a special discount code for IBS Game Changers so be sure to use the code when you purchase an item to get the discount that has been arranged just for you.
More Deliciously Low FODMAP™ breakfast recipes
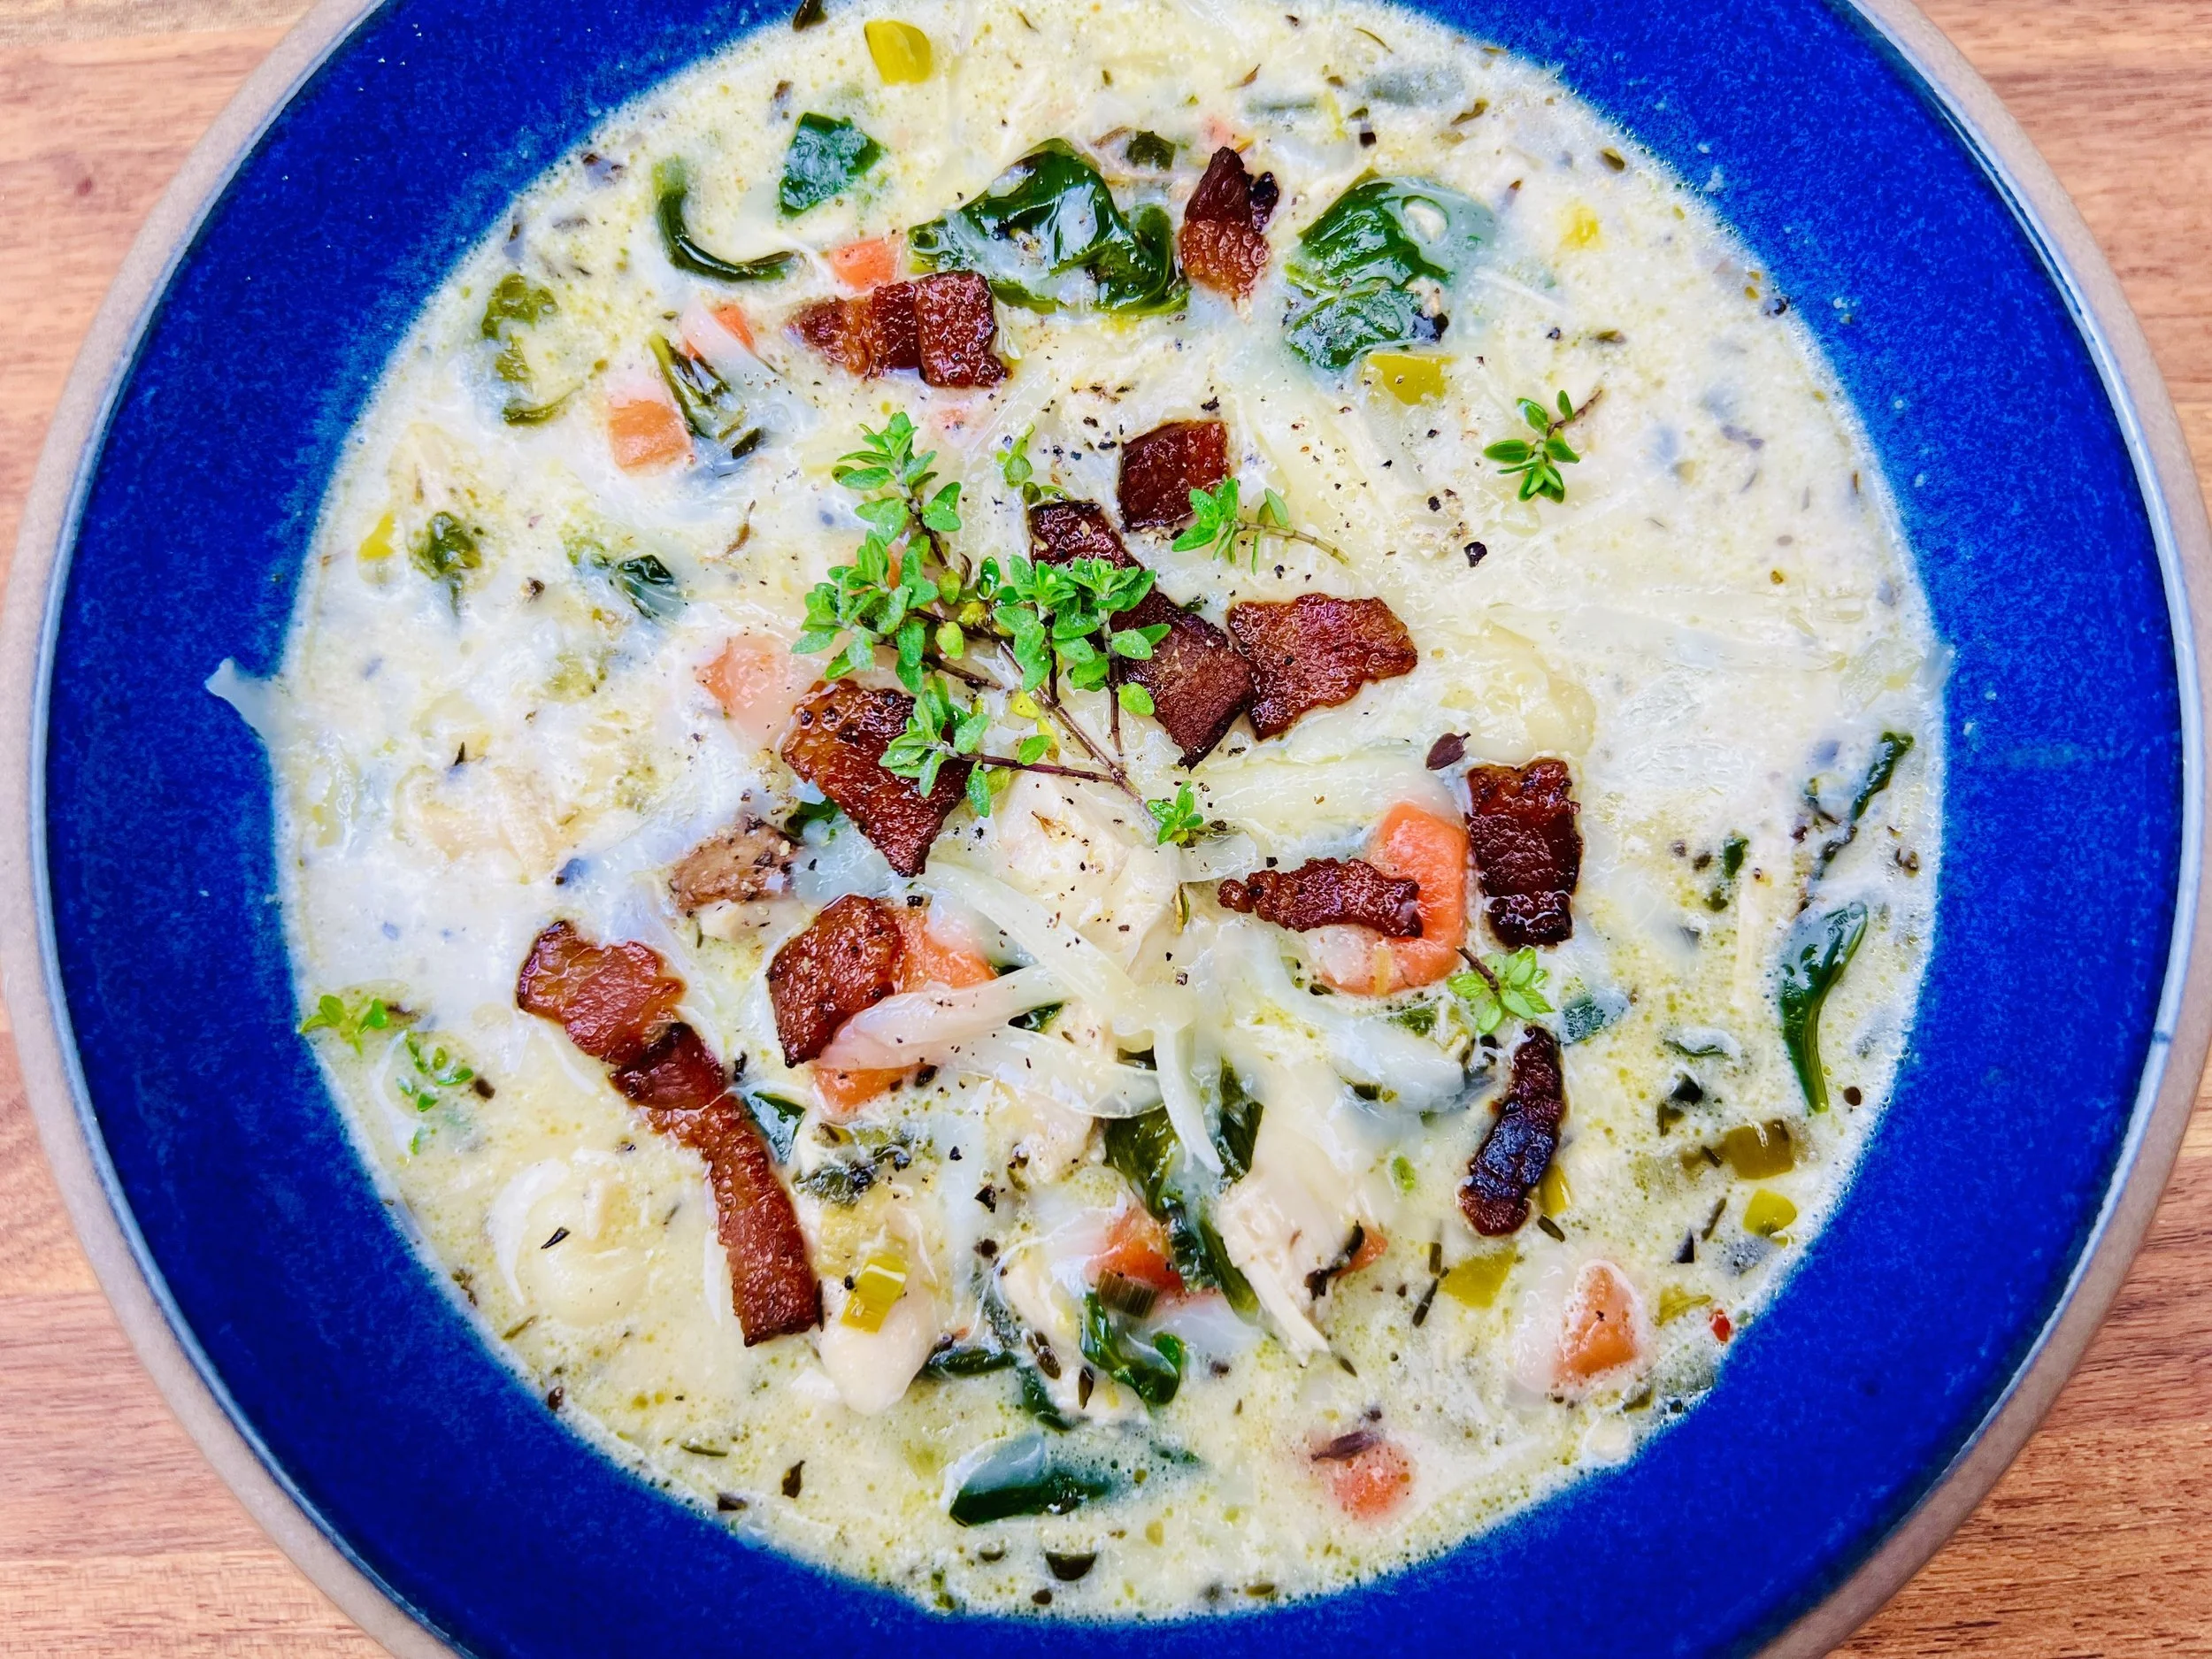
Hydration and Irritable Bowel Syndrome: Understanding the Connection
Understanding the Connection between hydration and Irritable Bowel Syndrome (IBS)
By now, we are all pretty much aware that for most of us, drinking plenty of water is very important for our overall health. For those of us with Irritable Bowel Syndrome (IBS), it’s even more important. While the exact causes of IBS are not totally clear, research suggests that hydration plays a significant role in managing IBS symptoms. In this blog post, I have broken down the connection between hydration and IBS, and I’ve shared a few practical tips to help you maintain your own optimal hydration level.

Let’s look at hydration and gut function for starters. The gastrointestinal tract requires adequate hydration to function optimally. Adequate hydration supports digestion, nutrient absorption, bowel motility, gut lining integrity, and microbial balance. For those of us with IBS, proper hydration is especially important as it can help alleviate common symptoms like constipation and bloating. Drinking an adequate amount of water throughout the day is essential for overall gut health and well-being.
Fluid Balance and Symptom Management: Proper hydration is crucial for maintaining fluid balance in the body. Proper fluid balance can have a positive impact on IBS symptoms. Dehydration can exacerbate gastrointestinal problems such as bloating, gas, and abdominal pain. A randomized controlled trial published in The American Journal of Gastroenterology found that increasing fluid intake improved symptoms and overall well-being in individuals with IBS (1). Furthermore, a well-hydrated body helps prevent constipation
Choosing the right thing to drink for hydration is very important: While water is the best choice for hydration, other drinks can contribute to your overall daily fluid intake as well. Some examples include herbal tea (my go-to herbal tea is this Ginger Tea), infused water, or other non-caffeinated, low-sugar drinks. It is very important to be mindful of certain drinks that may trigger or worsen IBS symptoms. Caffeine-containing drinks, carbonated drinks, and those drinks that contain a high percentage of sugar can irritate the gut and cause bloating and discomfort when you have IBS. Opting for water, infused water, herbal tea, or other non-caffeinated, low-sugar options is almost always going to be the best choice for maintaining hydration without exacerbating IBS symptoms.
Practical Tips for Hydration and IBS Management:
Set a goal to drink at least 8 cups (for a total of 64 ounces) of water every day to maintain hydration levels.
Build habits around drinking adequate water such as keeping a glass by the sink that reminds you to fill it and drink it every time you pass by.
Carry a water bottle with you to ensure easy access to water throughout the day.
Sip water regularly instead of gulping it down in large quantities, which can cause bloating.
If plain water feels boring, try infusing it with low-FODMAP fruits (oranges or strawberries for example), vegetables (cucumber slices for example), or herbs (mint or basil for example) for added flavor. Simply fill a pitcher with water, add the fruit, vegetables, or herbs, and then let sit in the refrigerator until you’re ready to drink it. Refresh the whole thing every couple of days.
Avoid excessive consumption of caffeine, carbonated drinks, and sugary beverages.
Monitor urine color to assess hydration levels. Clear or light yellow urine usually indicates adequate hydration.
Staying properly hydrated is essential for managing Irritable Bowel Syndrome and minimizing its symptoms. Adequate hydration supports proper gut function, helps maintain fluid balance, and alleviates common symptoms such as constipation and bloating. By being mindful of your fluid intake and making informed drink choices, you can improve your overall well-being. Remember, water is the absolute best option for hydration, but other hydrating beverages can be included that will keep you hydrated without triggering your symptoms. Just set all the excuses aside (about why you can’t possibly drink 8 glasses of water a day) and give your gut what it needs to function well. You will be giving your entire body and mind just what it needs to make you feel your best.
Drink and enjoy every sip because you can!
References:
Teixeira MZ, Guedes CC, Barros LL, et al. Fluid intake and symptoms in adults with irritable bowel syndrome. Am J
Have a question you’d like to have answered? Email me at hello@ibsgamechanger.com
More Deliciously Low FODMAP™ tips and tools


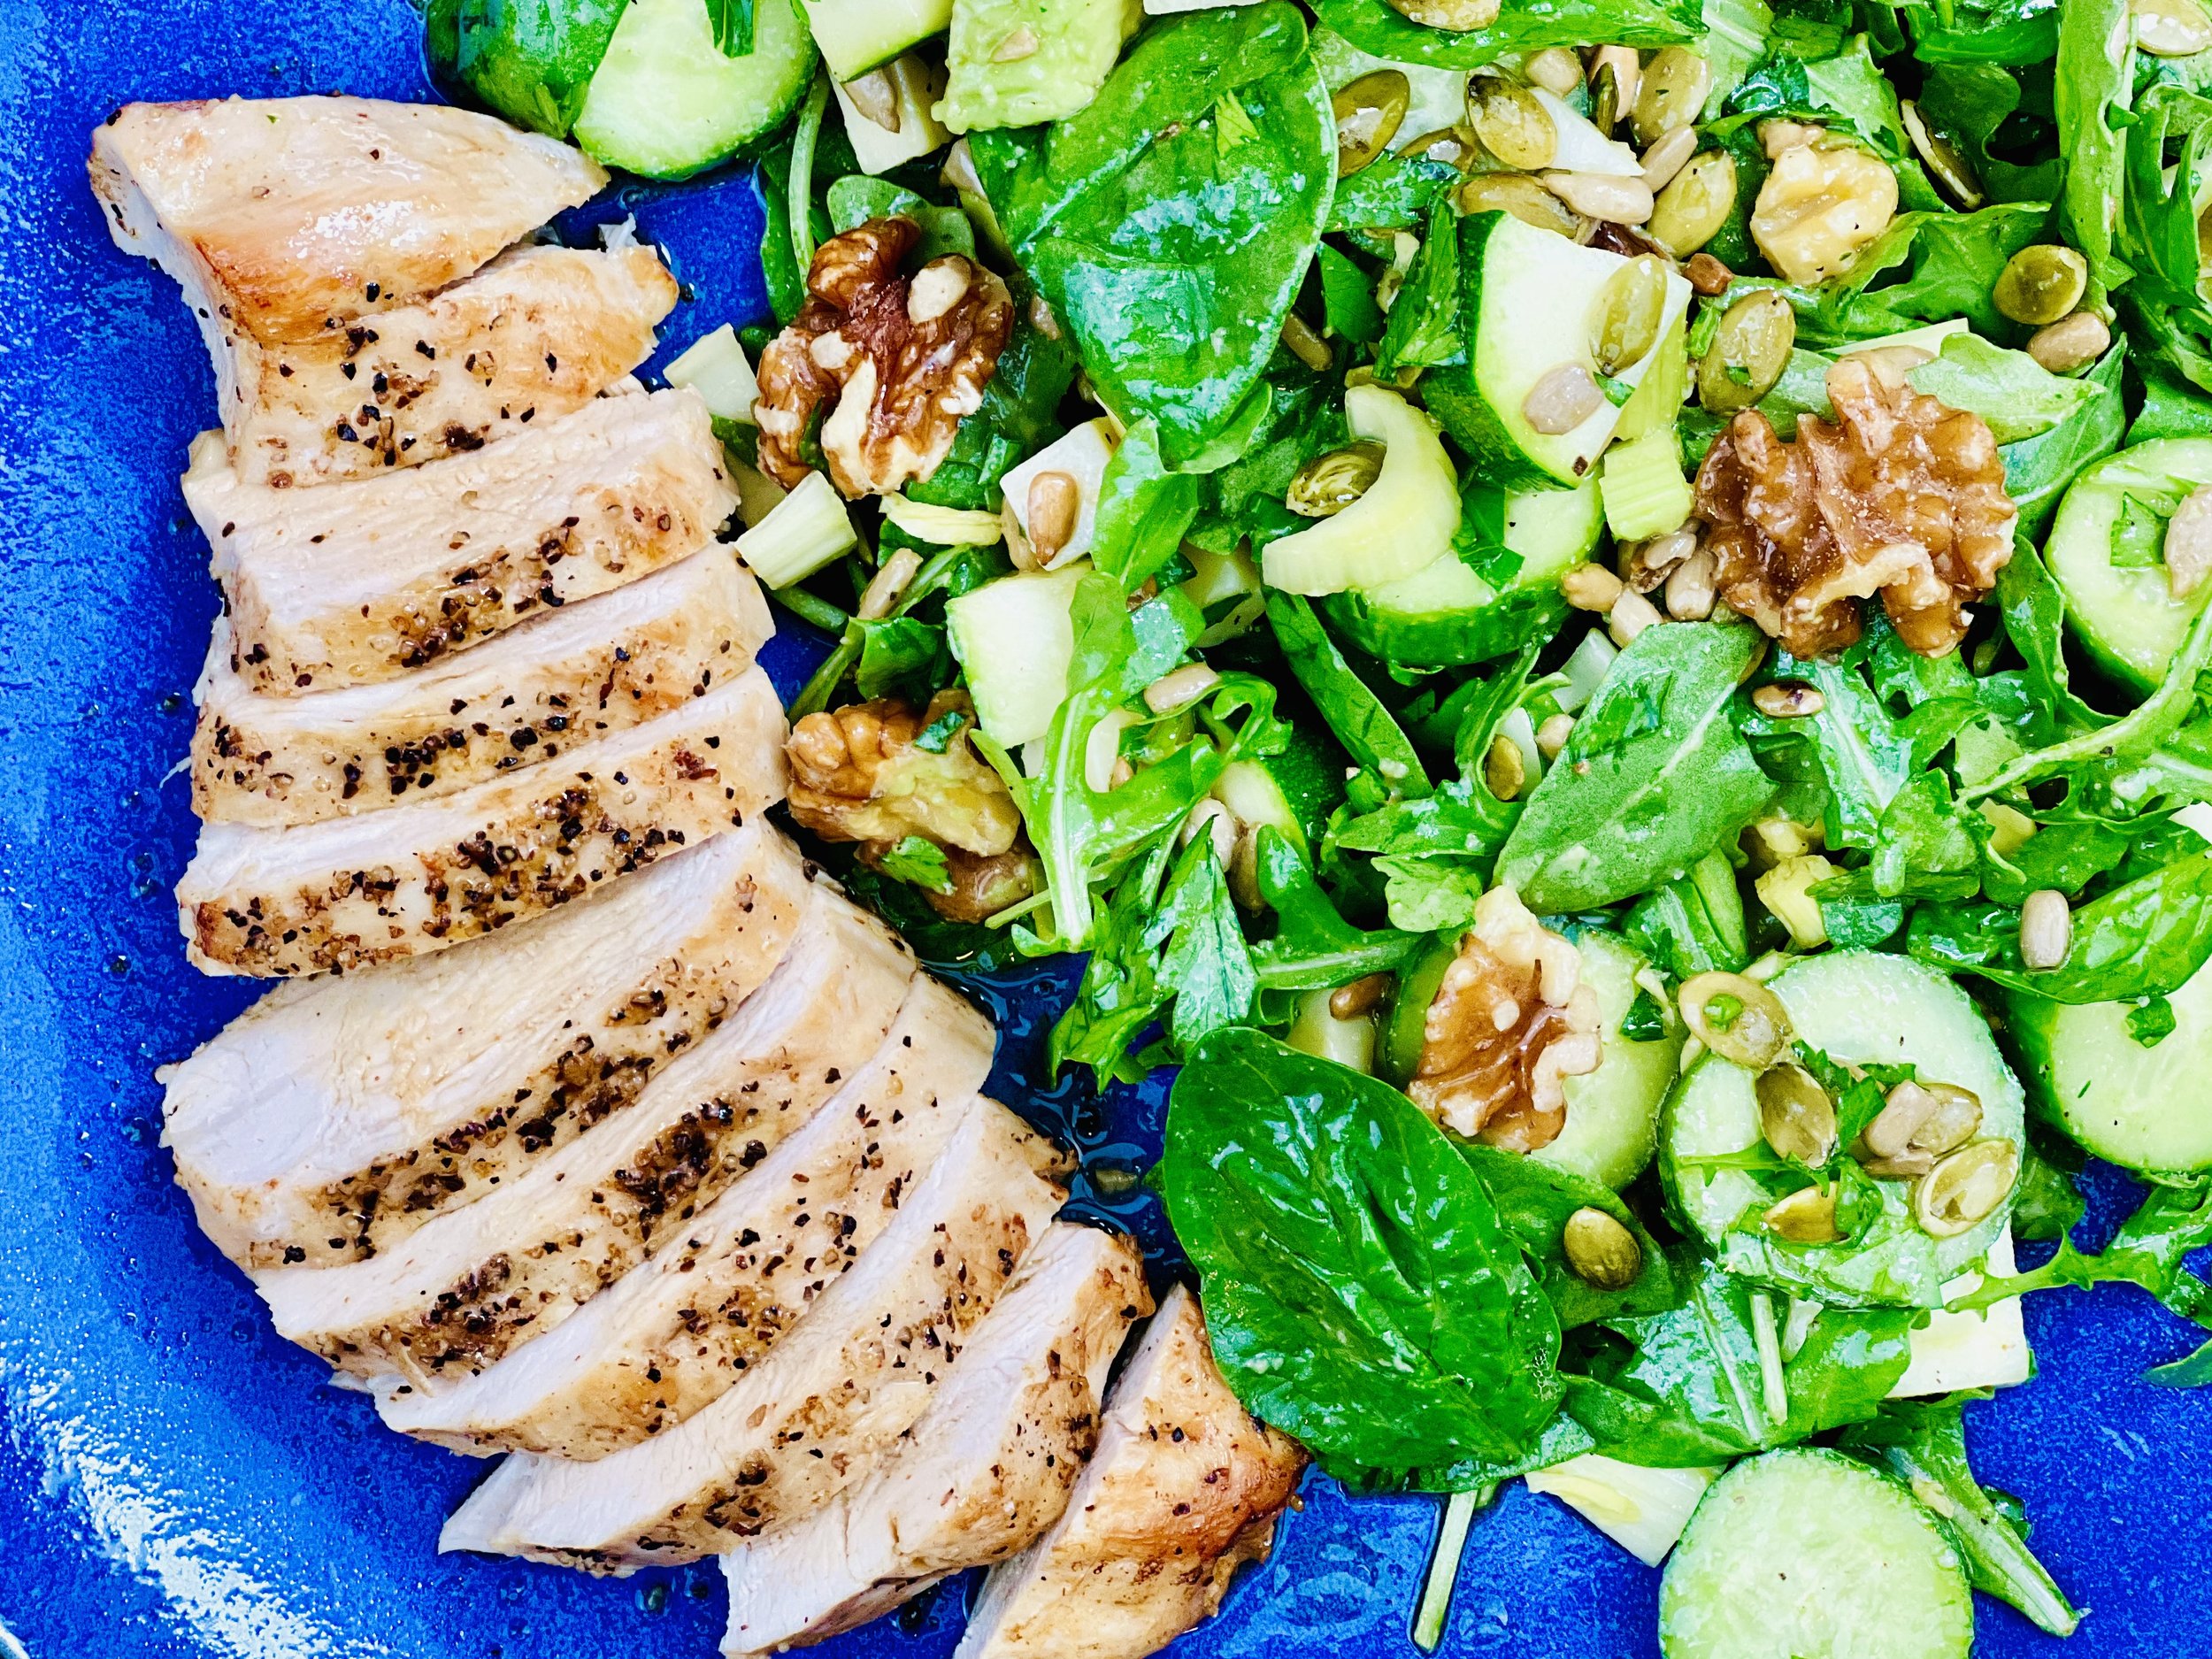
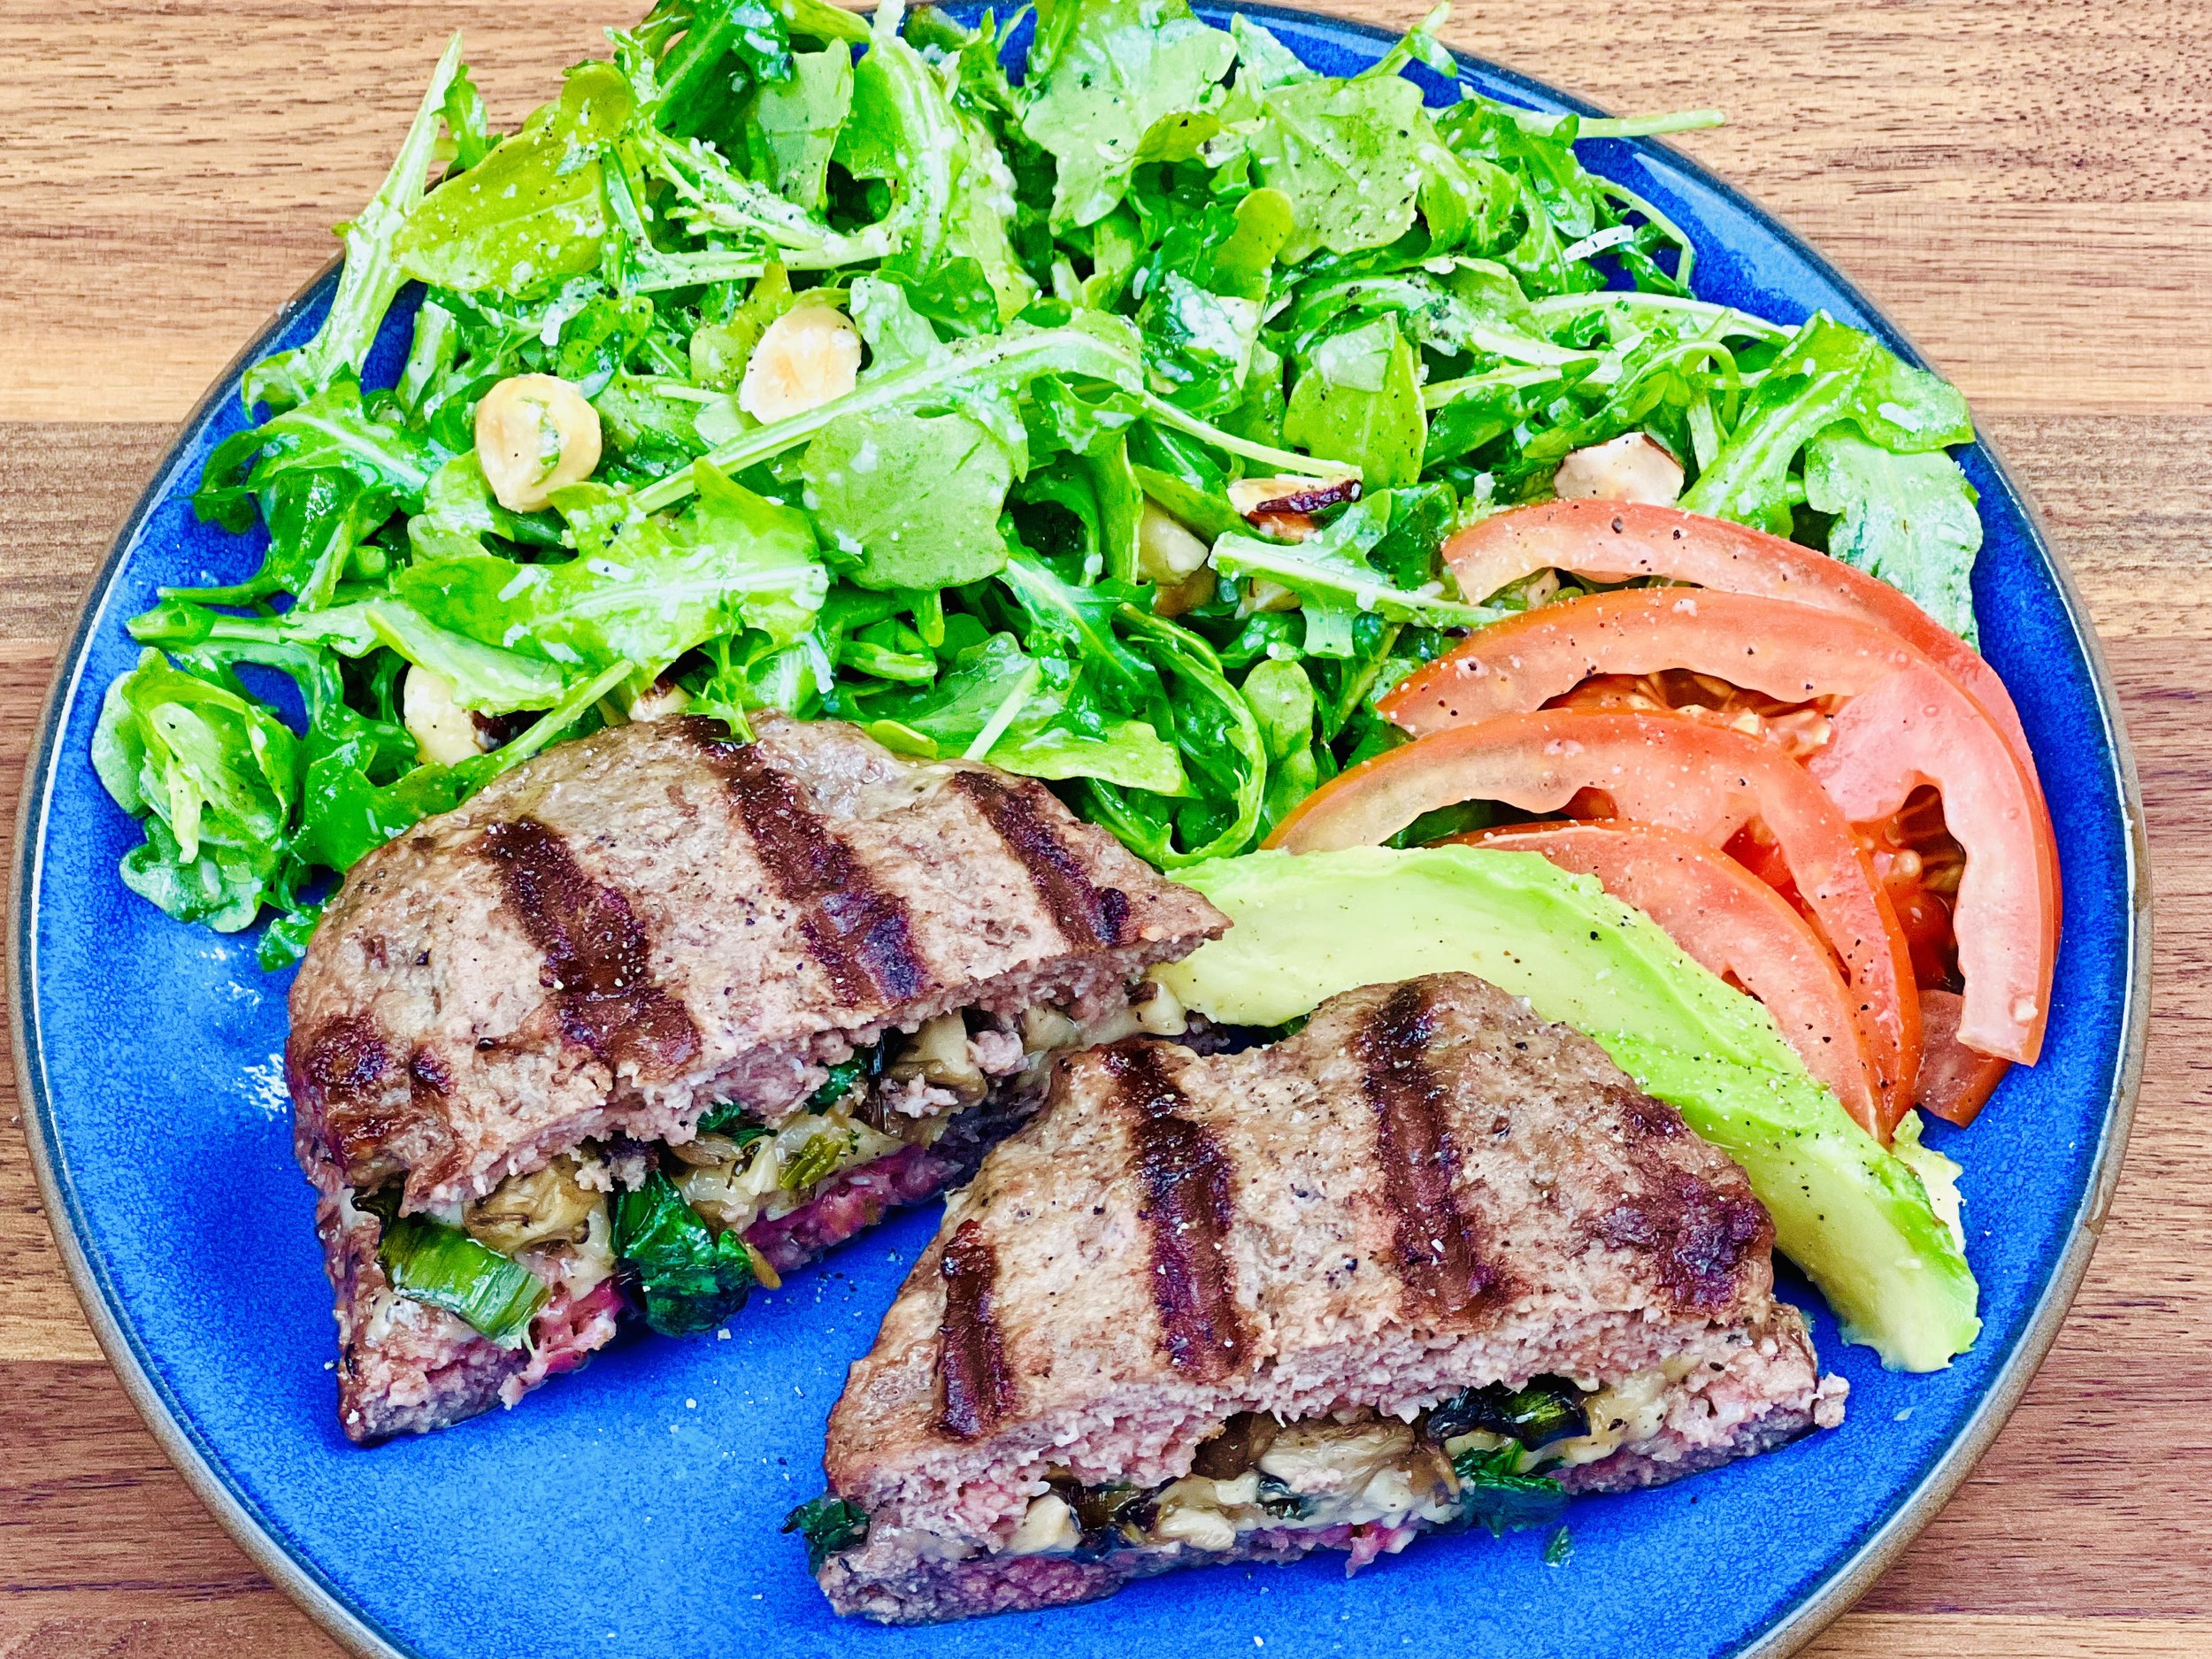
Sarah’s Super Stuffed Burgers (Low FODMAP)
20 Minutes prep • 12 Minutes cook • Low FODMAP • Gluten-free • Serves 2 - 4
20 Minutes prep • 12 Minutes cook • Low FODMAP • Gluten-free • Serves 2 - 4 • Ok to make ahead: Steps 1-4
This is one of those recipes that changes everything. Once you’ve had one of these stuffed burgers, well, you won’t want a burger any other way! The flavors blend and build and deliver a fantastic hamburger experience! While you may add a bun or lettuce wrap and all the fixings, you really don’t need to. This burger is great on its own. And, it’s low FODMAP, low Net Carb, Low Net Starch, and Keto Friendly! Give this recipe a try, but only if you’re ready to change your burger game…forever!
Ingredients
2 tablespoons garlic-infused olive oil
2 teaspoons dry thyme
1/2 cup chopped leek greens
1 1/2 cups chopped oyster mushrooms
1 cup baby spinach, roughly chopped and long stems removed
1 teaspoon Kosher salt
1/2 teaspoon black pepper
1 pound grass-fed, organic ground beef (I used 20% fat)
1/2 cup grated sharp white cheddar cheese (or gruyere, smoked gouda, or other strong-flavored cheese)
1/2 avocado, sliced (optional for serving)
1 vine-ripened tomato, sliced (optional for serving)
Directions
(1) Prepare: Chop the leeks and mushrooms, and grate the cheese. Preheat your grill to high for 15 minutes (if using a grill).
(2) Cook the veggies: Put a medium skillet over medium-high heat. When hot, add the olive oil. When the oil is hot, add the dry thyme and let it sizzle for about 30 seconds. Add the leek greens, mushrooms, salt, and pepper. Cook, stirring every so often for about 15 minutes until the mushrooms begin to brown and the leek greens are nice and soft. Add the spinach and cook another 2 - 3 minutes until the spinach is wilted and cooked down. Remove from the heat and let cool a bit.
(3) Prepare the meat: While the veggies are cooking, you can prepare the meat. Sprinkle the meat with salt and pepper and blend together with your hands. Form the meat into four equally sized patties (round, square, or rectangle). Flatten the pieces until they are about 1/2 inch thick.
(4) Fill the burgers: Put 1/4 cup cheese and about 1/2 the vegetable mixture in the middle of two of the patties. Lay the other patties on top, then pinch the edges all around to make a good seal.
(5) Cook the burgers: Brush the patties with olive oil and lay oil-side down directly on the preheated grill. Turn the grill down to medium-high. Brush the top of each patty with oil. Cook for about 6 minutes on each side. Remove from the grill and let rest for a couple of minutes before serving. If cooking on the stove, use a covered skillet and cook 6 minutes per side.
(6) Plate and serve: Use a serrated knife to cut each stuffed burger in half, exposing the delicious melty middle. A light eater may only want half, but a bigger eater will be happy to devour the whole thing. Serve alongside one of my green salads.
Eat and enjoy every bite because you can!
Recipe note: I use Diamond Crystal Kosher salt in all my recipes because it has a wonderful flat and crisp flake that tastes delicious. It is also the least salty salt available so you can use it more liberally as a seasoning than you can table salt or sea salt. If you use another type of salt, you may need to reduce the amount so it is not over-salted.
Have a question you’d like to have answered? Email me at hello@ibsgamechanger.com
Link note: This post may contain affiliate links for you to easily purchase items that are linked. I may earn a small commission from qualifying purchases but none of this costs you a thing so feel free to use the links! In addition, for some items, I have provided a special discount code for IBS Game Changers so be sure to use the code when you purchase an item to get the discount that has been arranged just for you.
More Deliciously Low FODMAP™ main course recipes
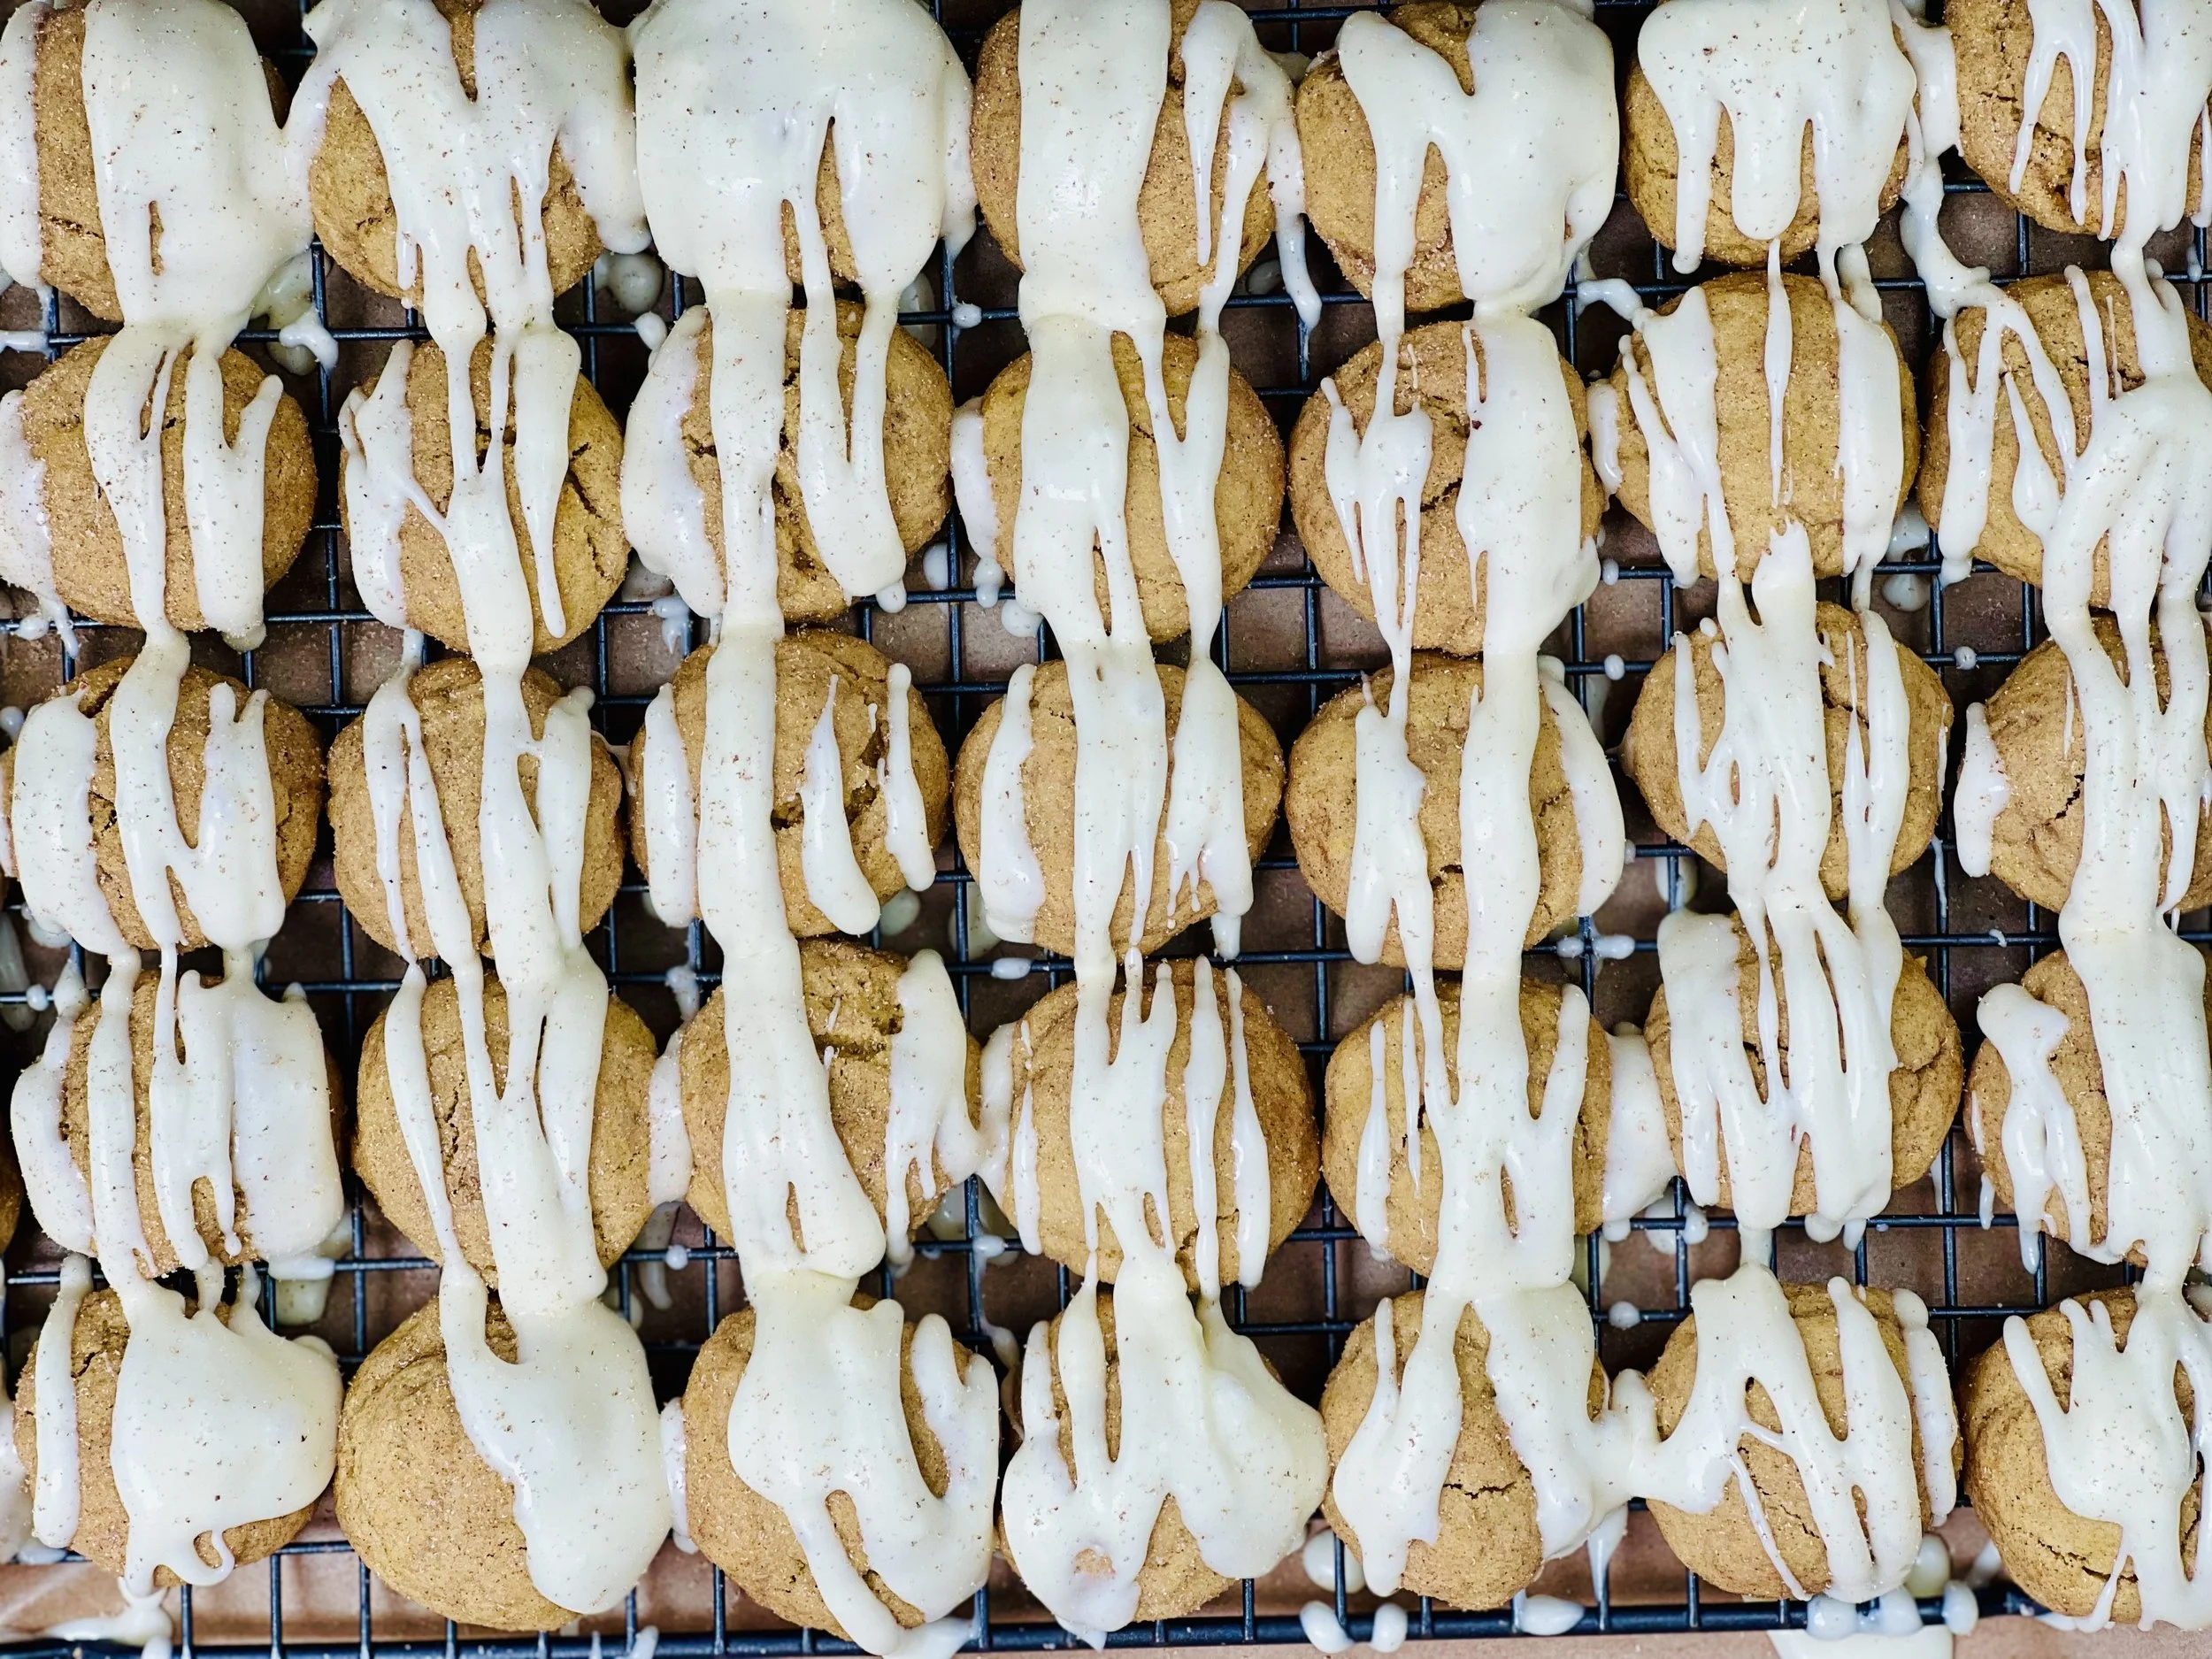
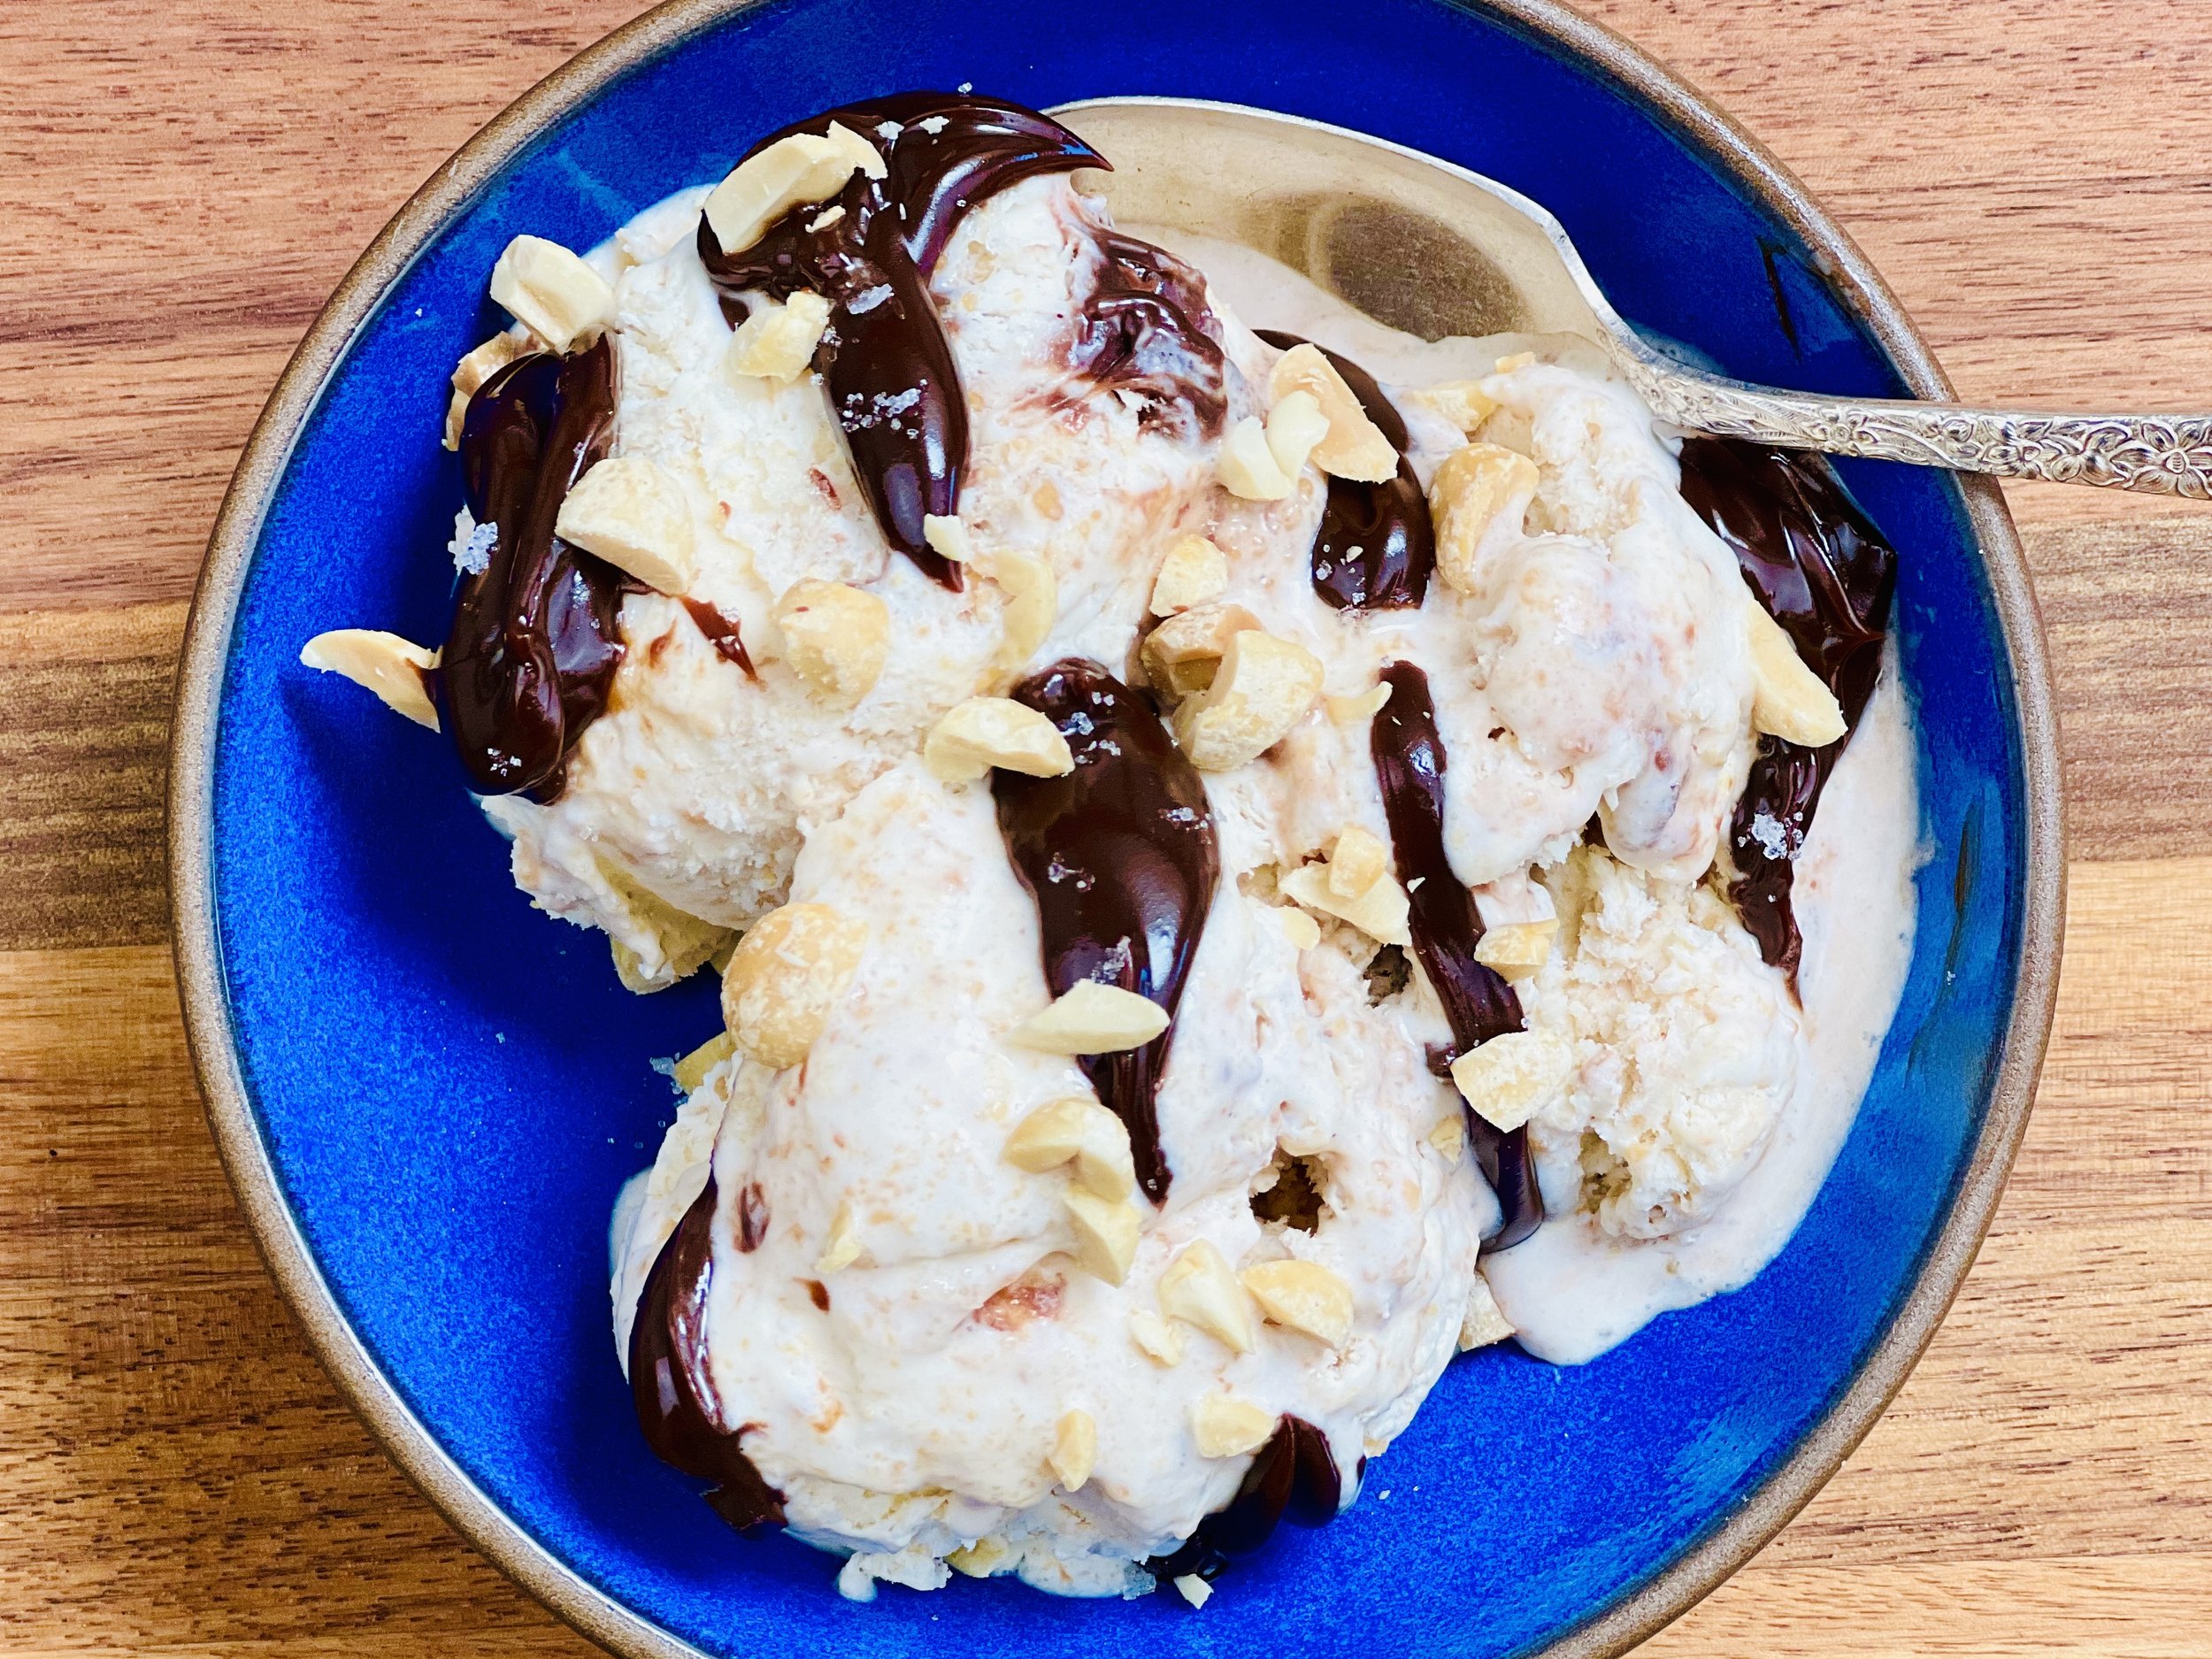
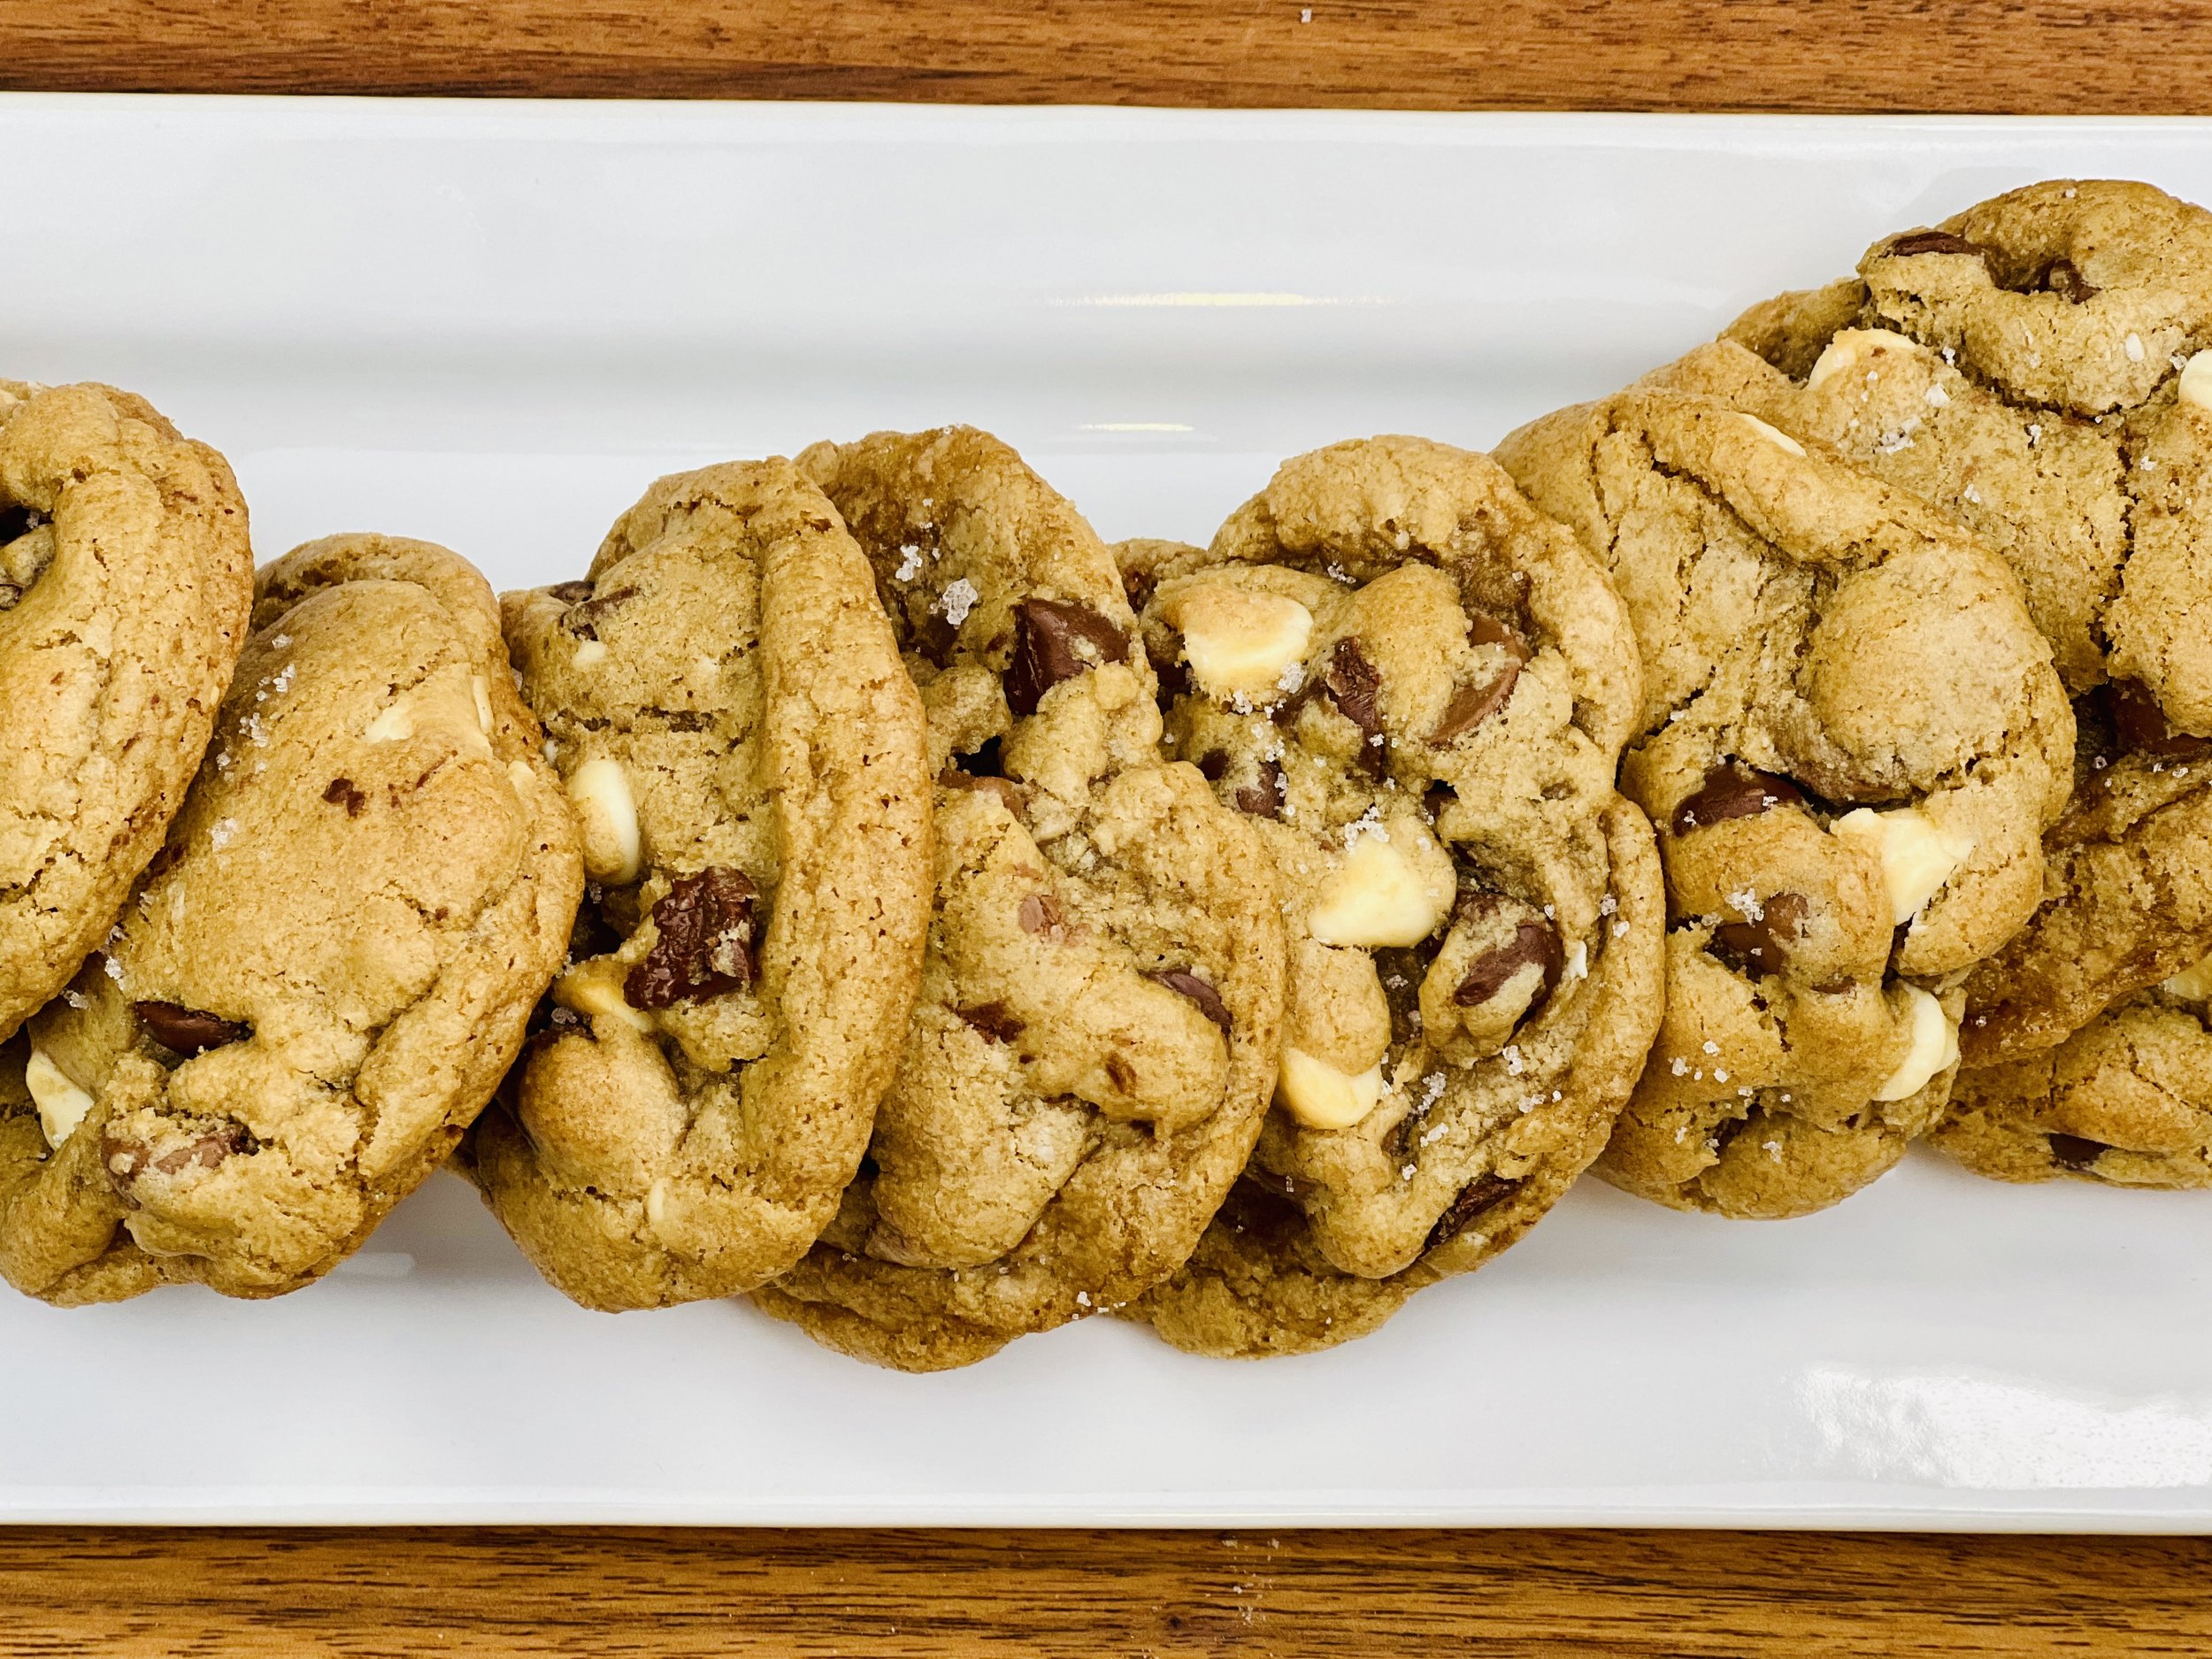
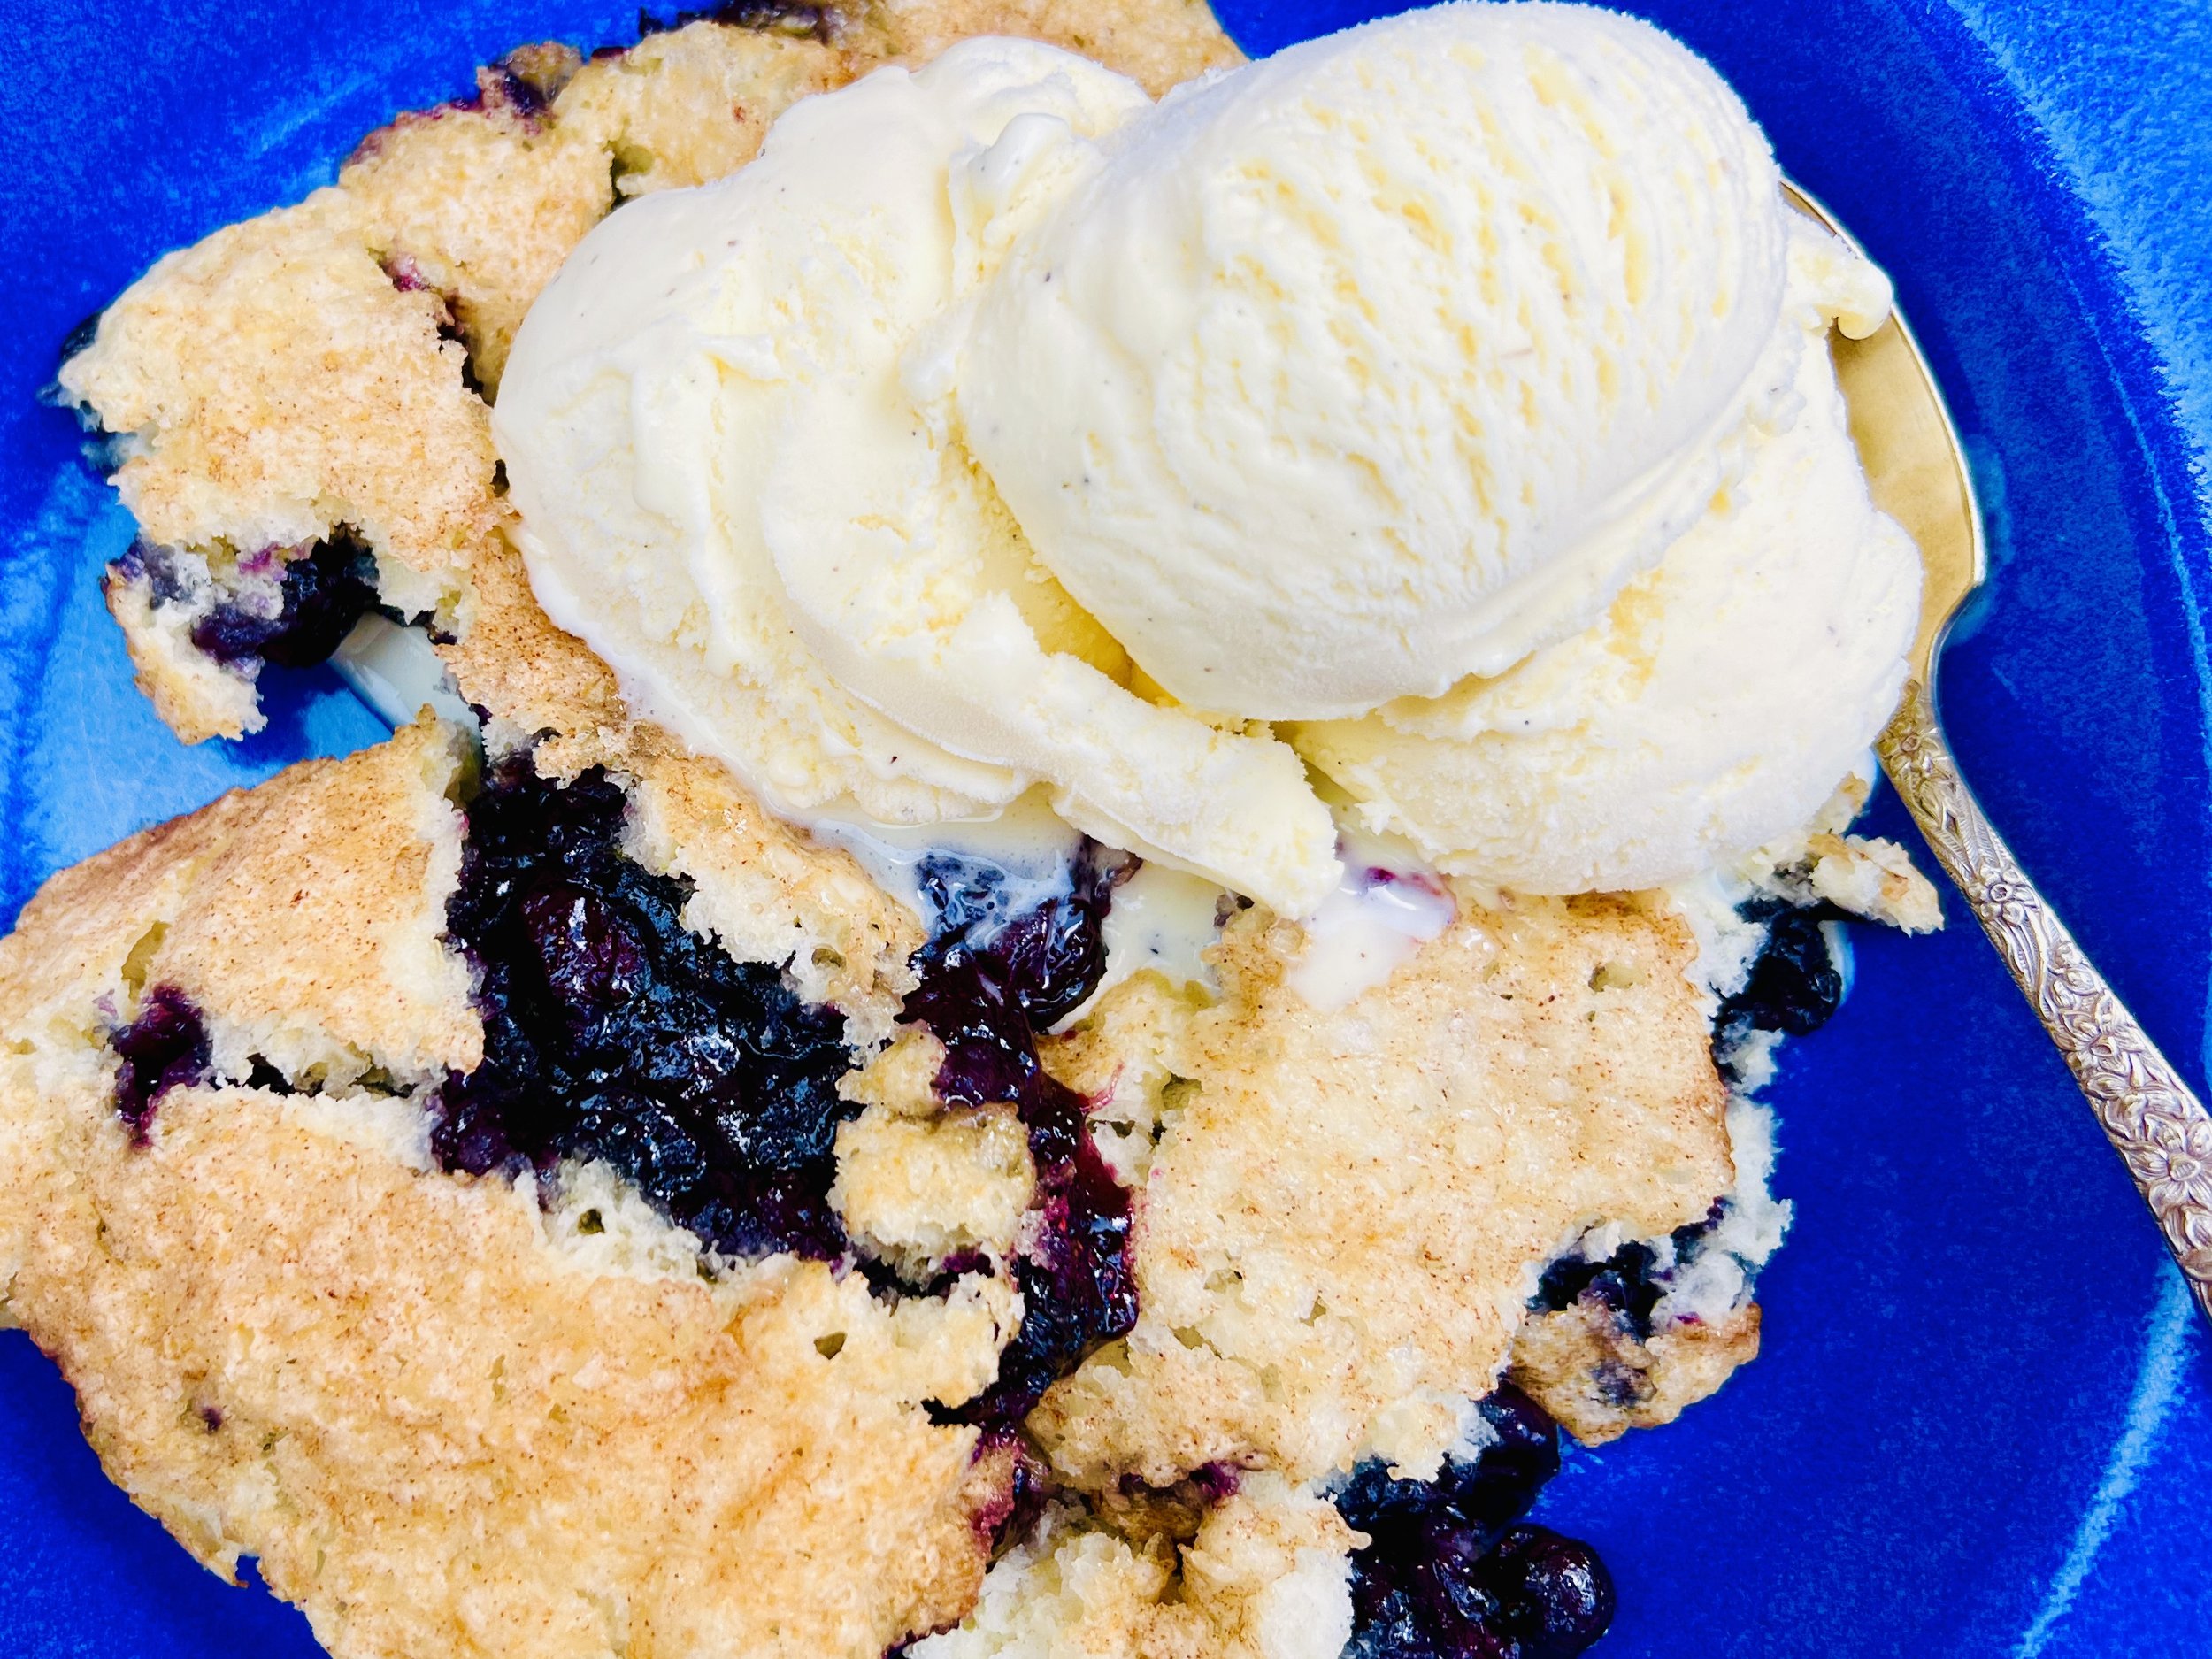
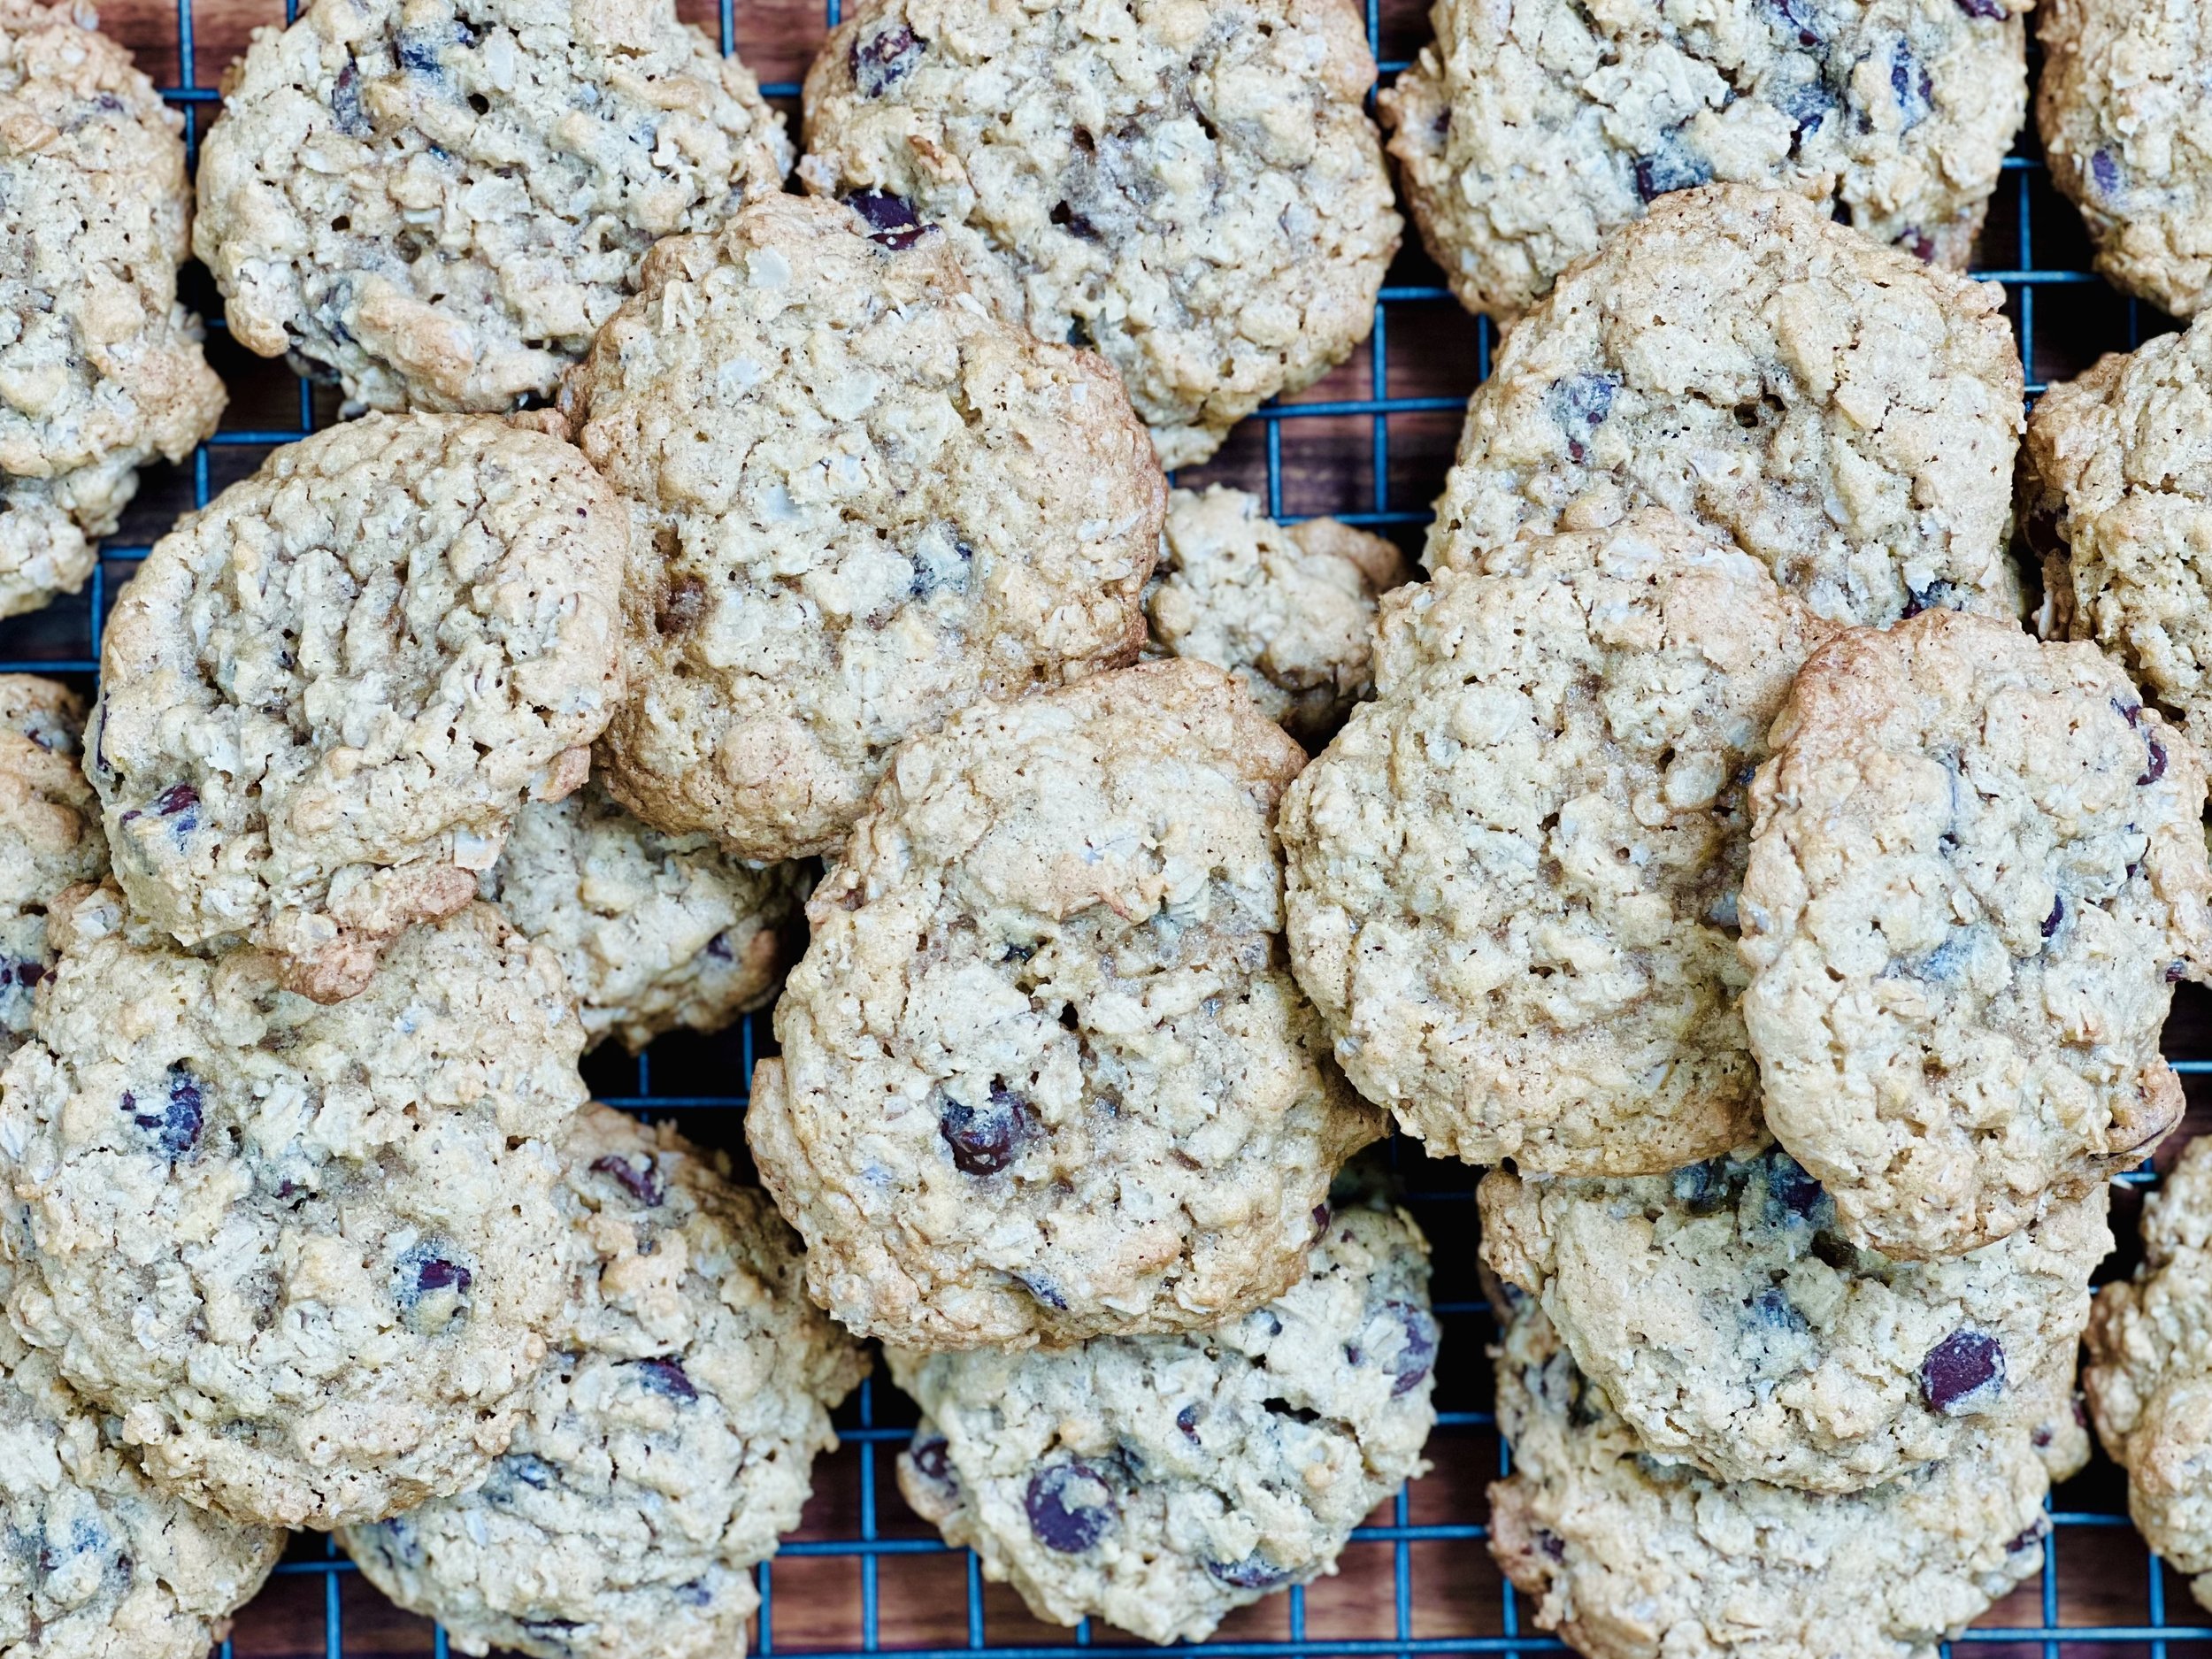
Chewy Oatmeal Chocolate Chip Cookies (Low FODMAP)
25 Minutes prep • 12 Minutes cook • Low FODMAP • Gluten-free • Makes 24
25 Minutes prep • 12 Minutes cook • Low FODMAP • Makes 24 • Ok to make ahead: Steps 1-8
Big, delicious, good old-fashioned, chewy oatmeal cookies are one of my favorites. The chocolate chips are the “icing on the cake” in this recipe. These cookies are simple to make and so good when they are hot out of the oven. They also store well — if you’re lucky enough to have a few left over. Keep them in an airtight container or freeze them and let them thaw at room temperature for about 20 minutes.
This is an exclusive recipe just for recipe club members.
In addition to the two free recipes I create each week I am creating and delivering one very special recipe just for my recipe club members. If you’re not yet a member, I encourage you to join! Membership in the club includes access to the complete archive of recipes with filters so it can become your virtual low FODMAP cookbook plus, I am creating and delivering one special NEW recipe every week ONLY for recipe club members.
Your membership in the club helps me continue creating new, delicious, easy-to-make, low FODMAP recipes just for you.
As always, all recipes will emphasize simple ingredients, easy preparation, and delicious low FODMAP results. Recipes will be for everything from main courses, salads, soups, side dishes, appetizers, desserts, sauces, breakfast and lunch, and even mocktails and cocktails. Everything you need to prepare fantastic low FODMAP meals everyone will love.
Join the club. Let’s keep making delicious Low FODMAP meals together.
More Deliciously Low FODMAP™ dessert recipes
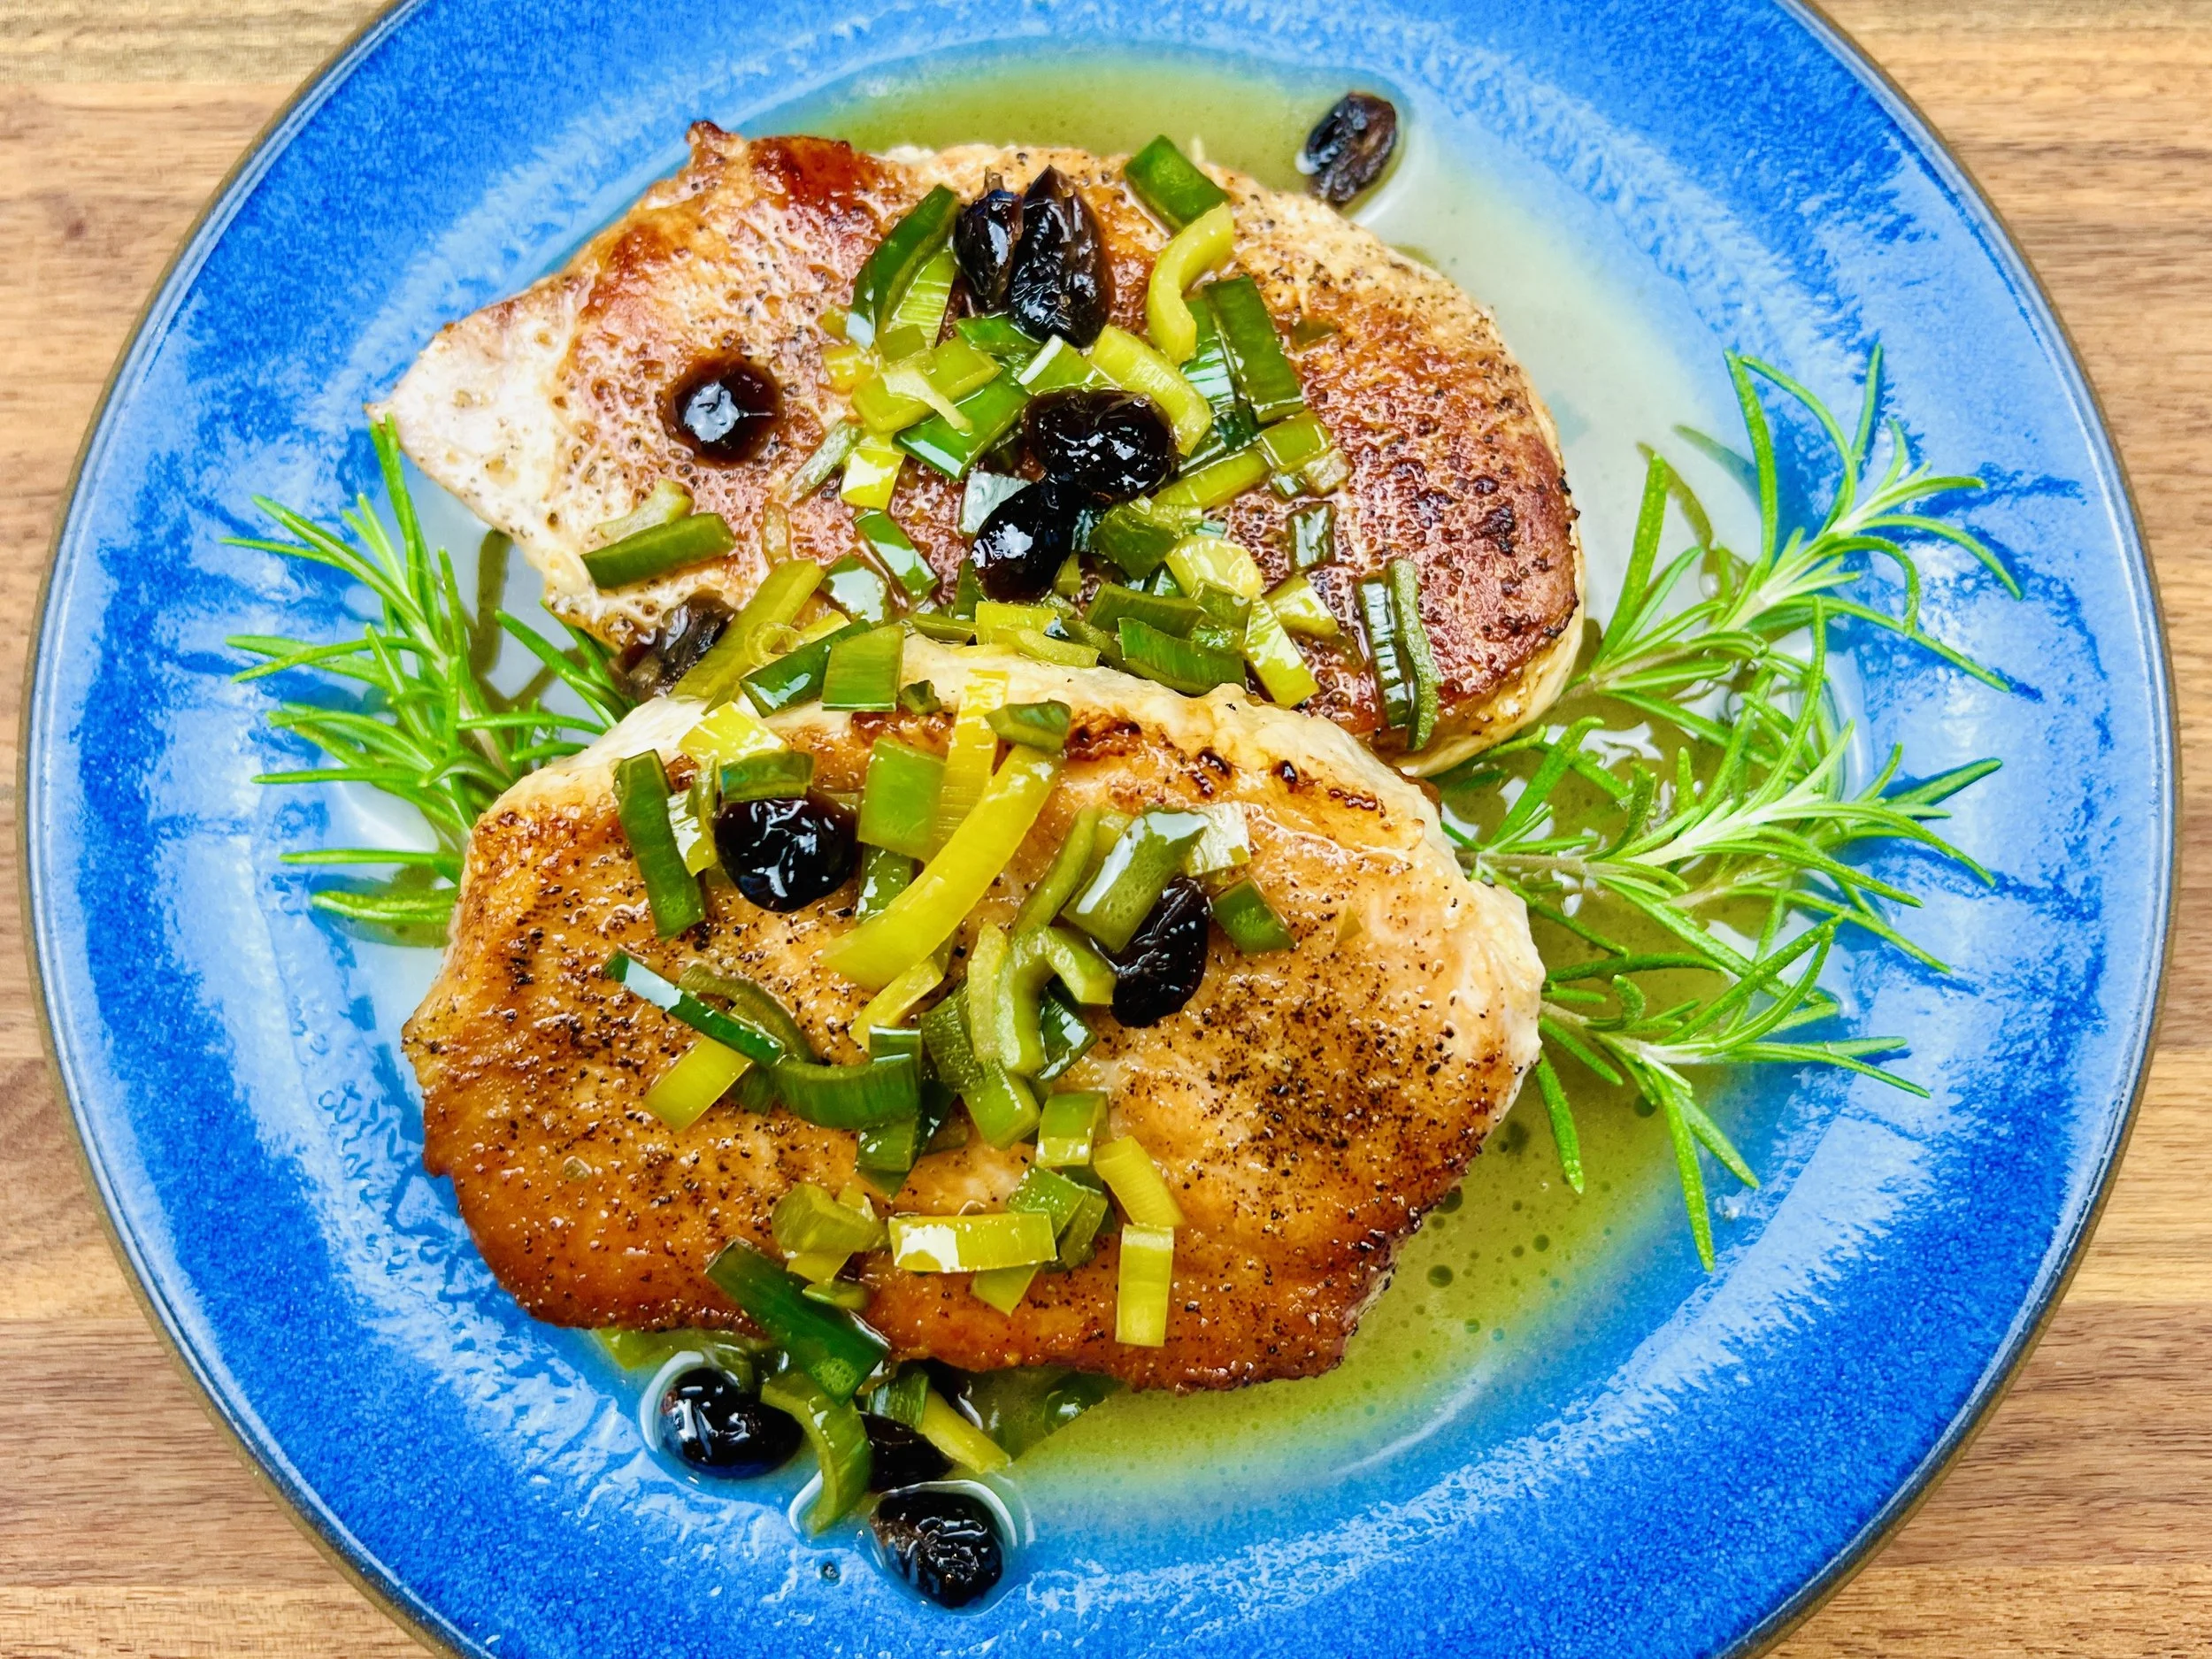
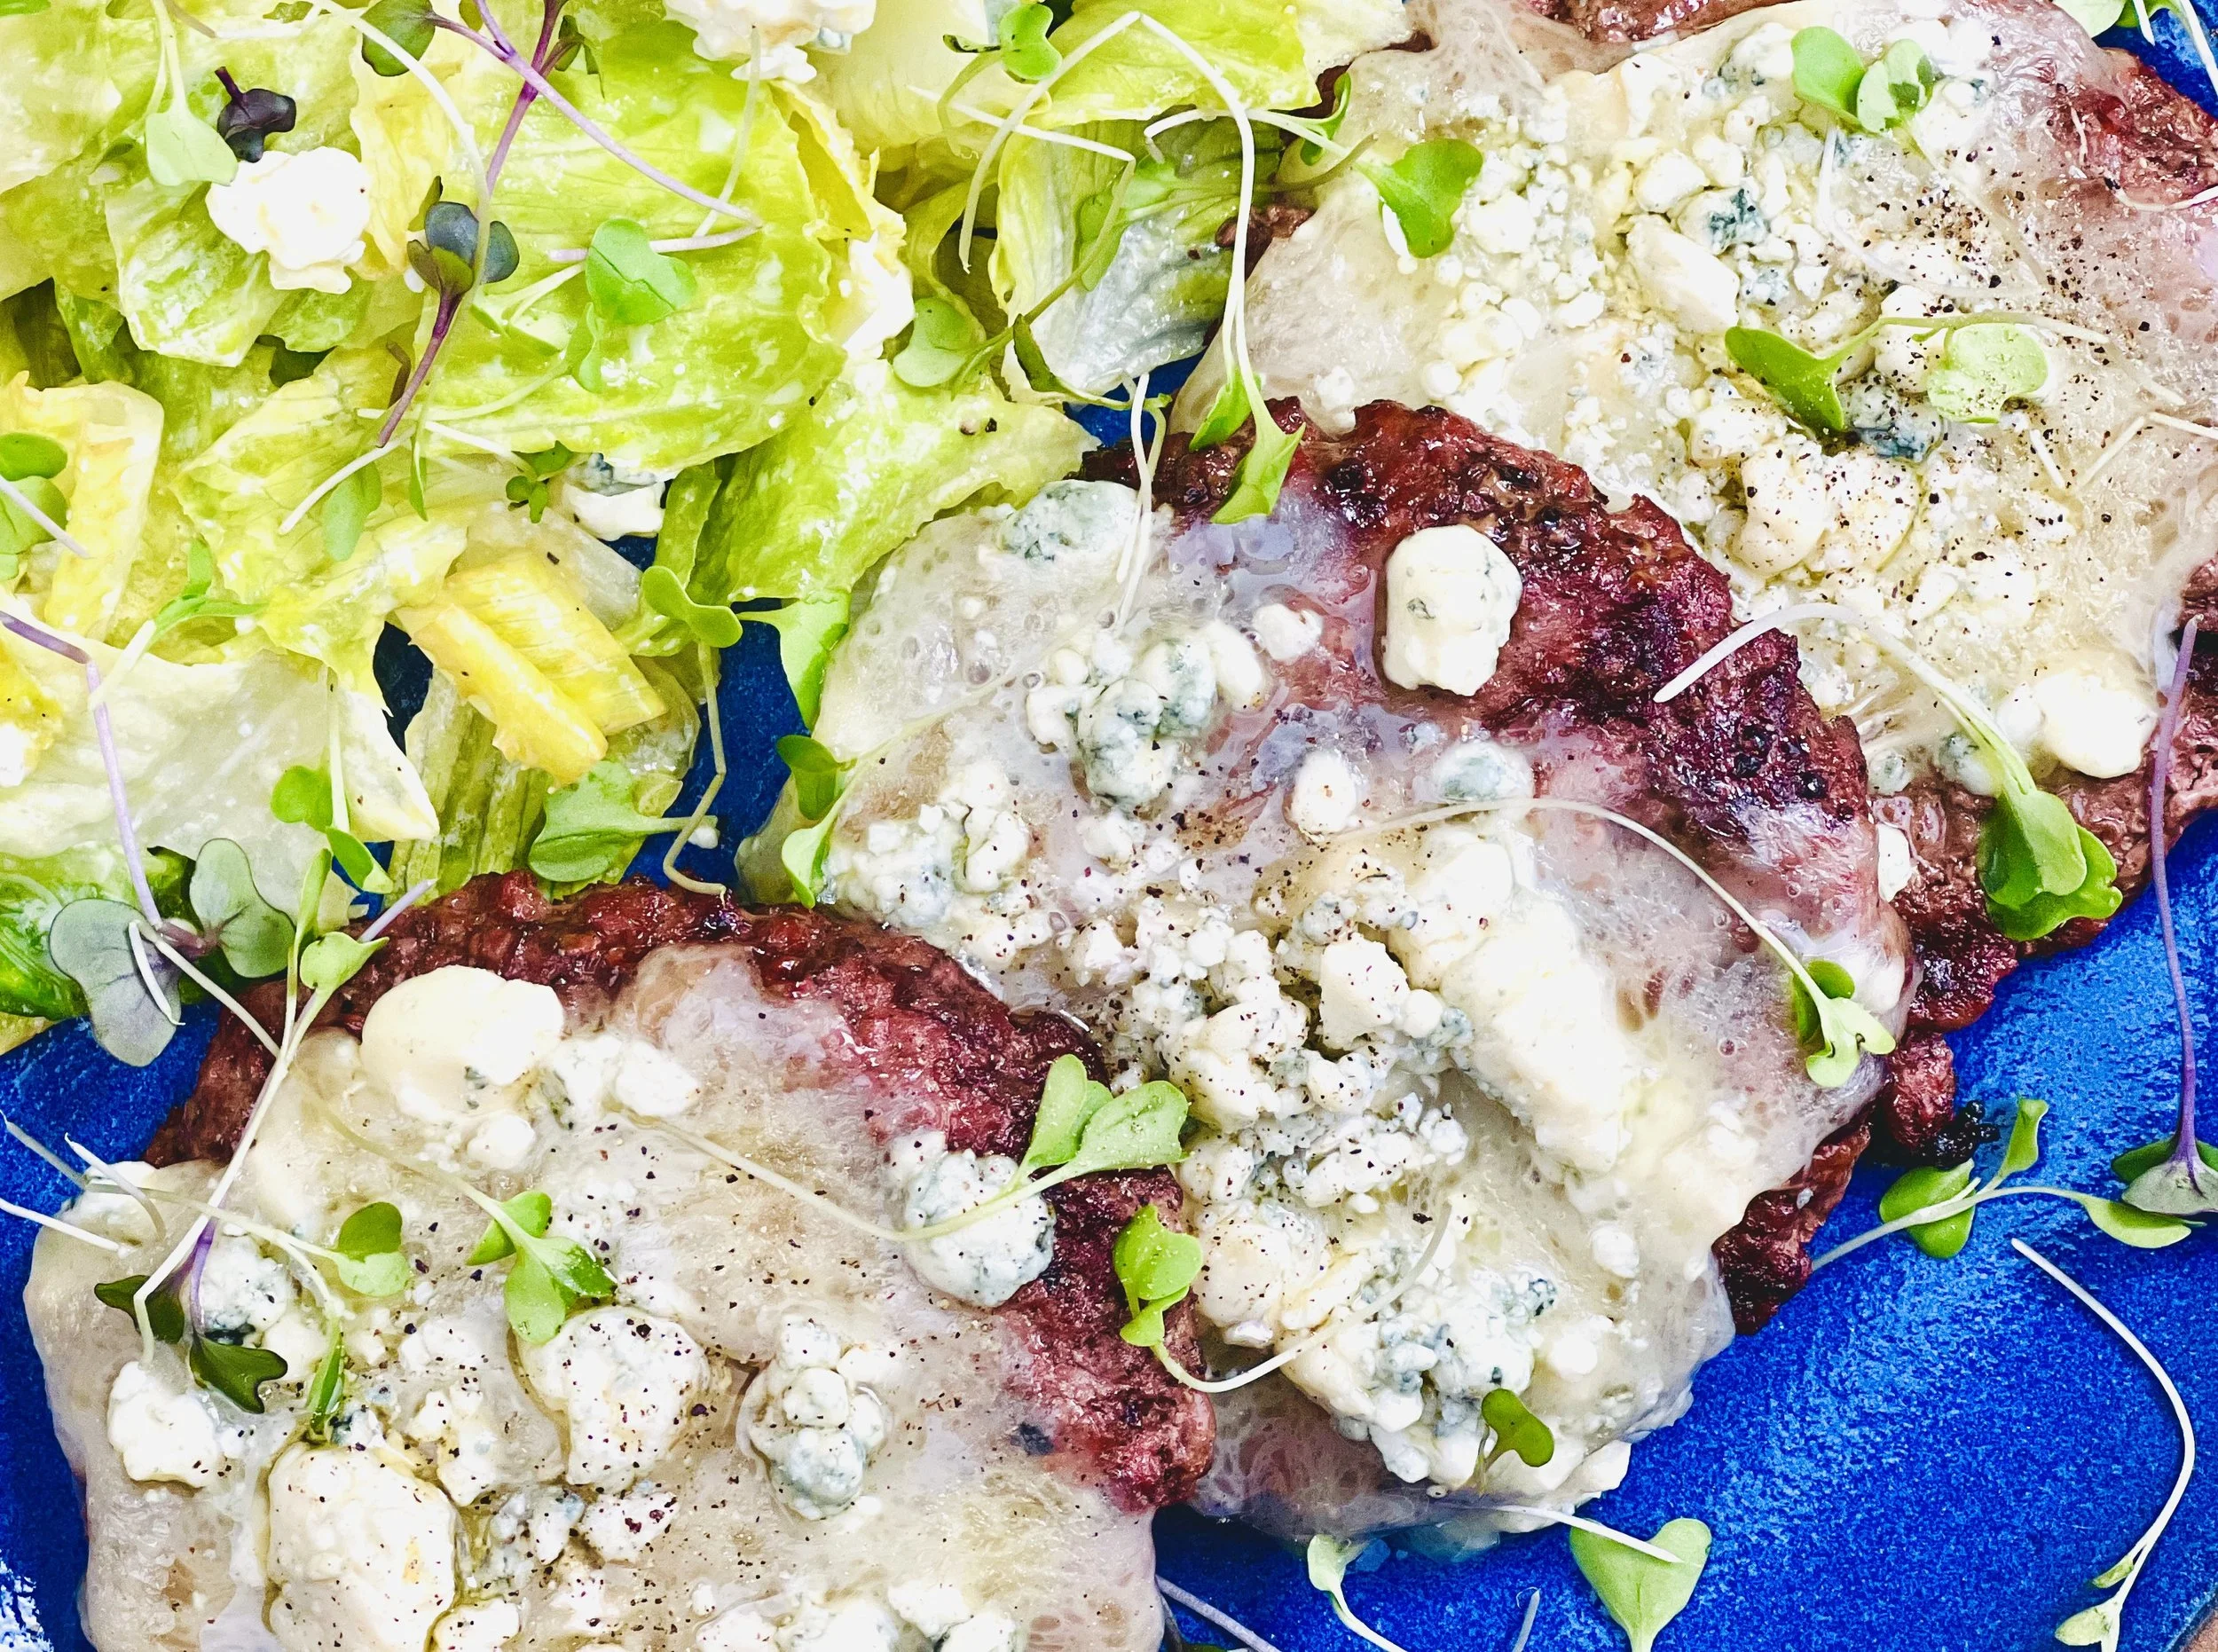
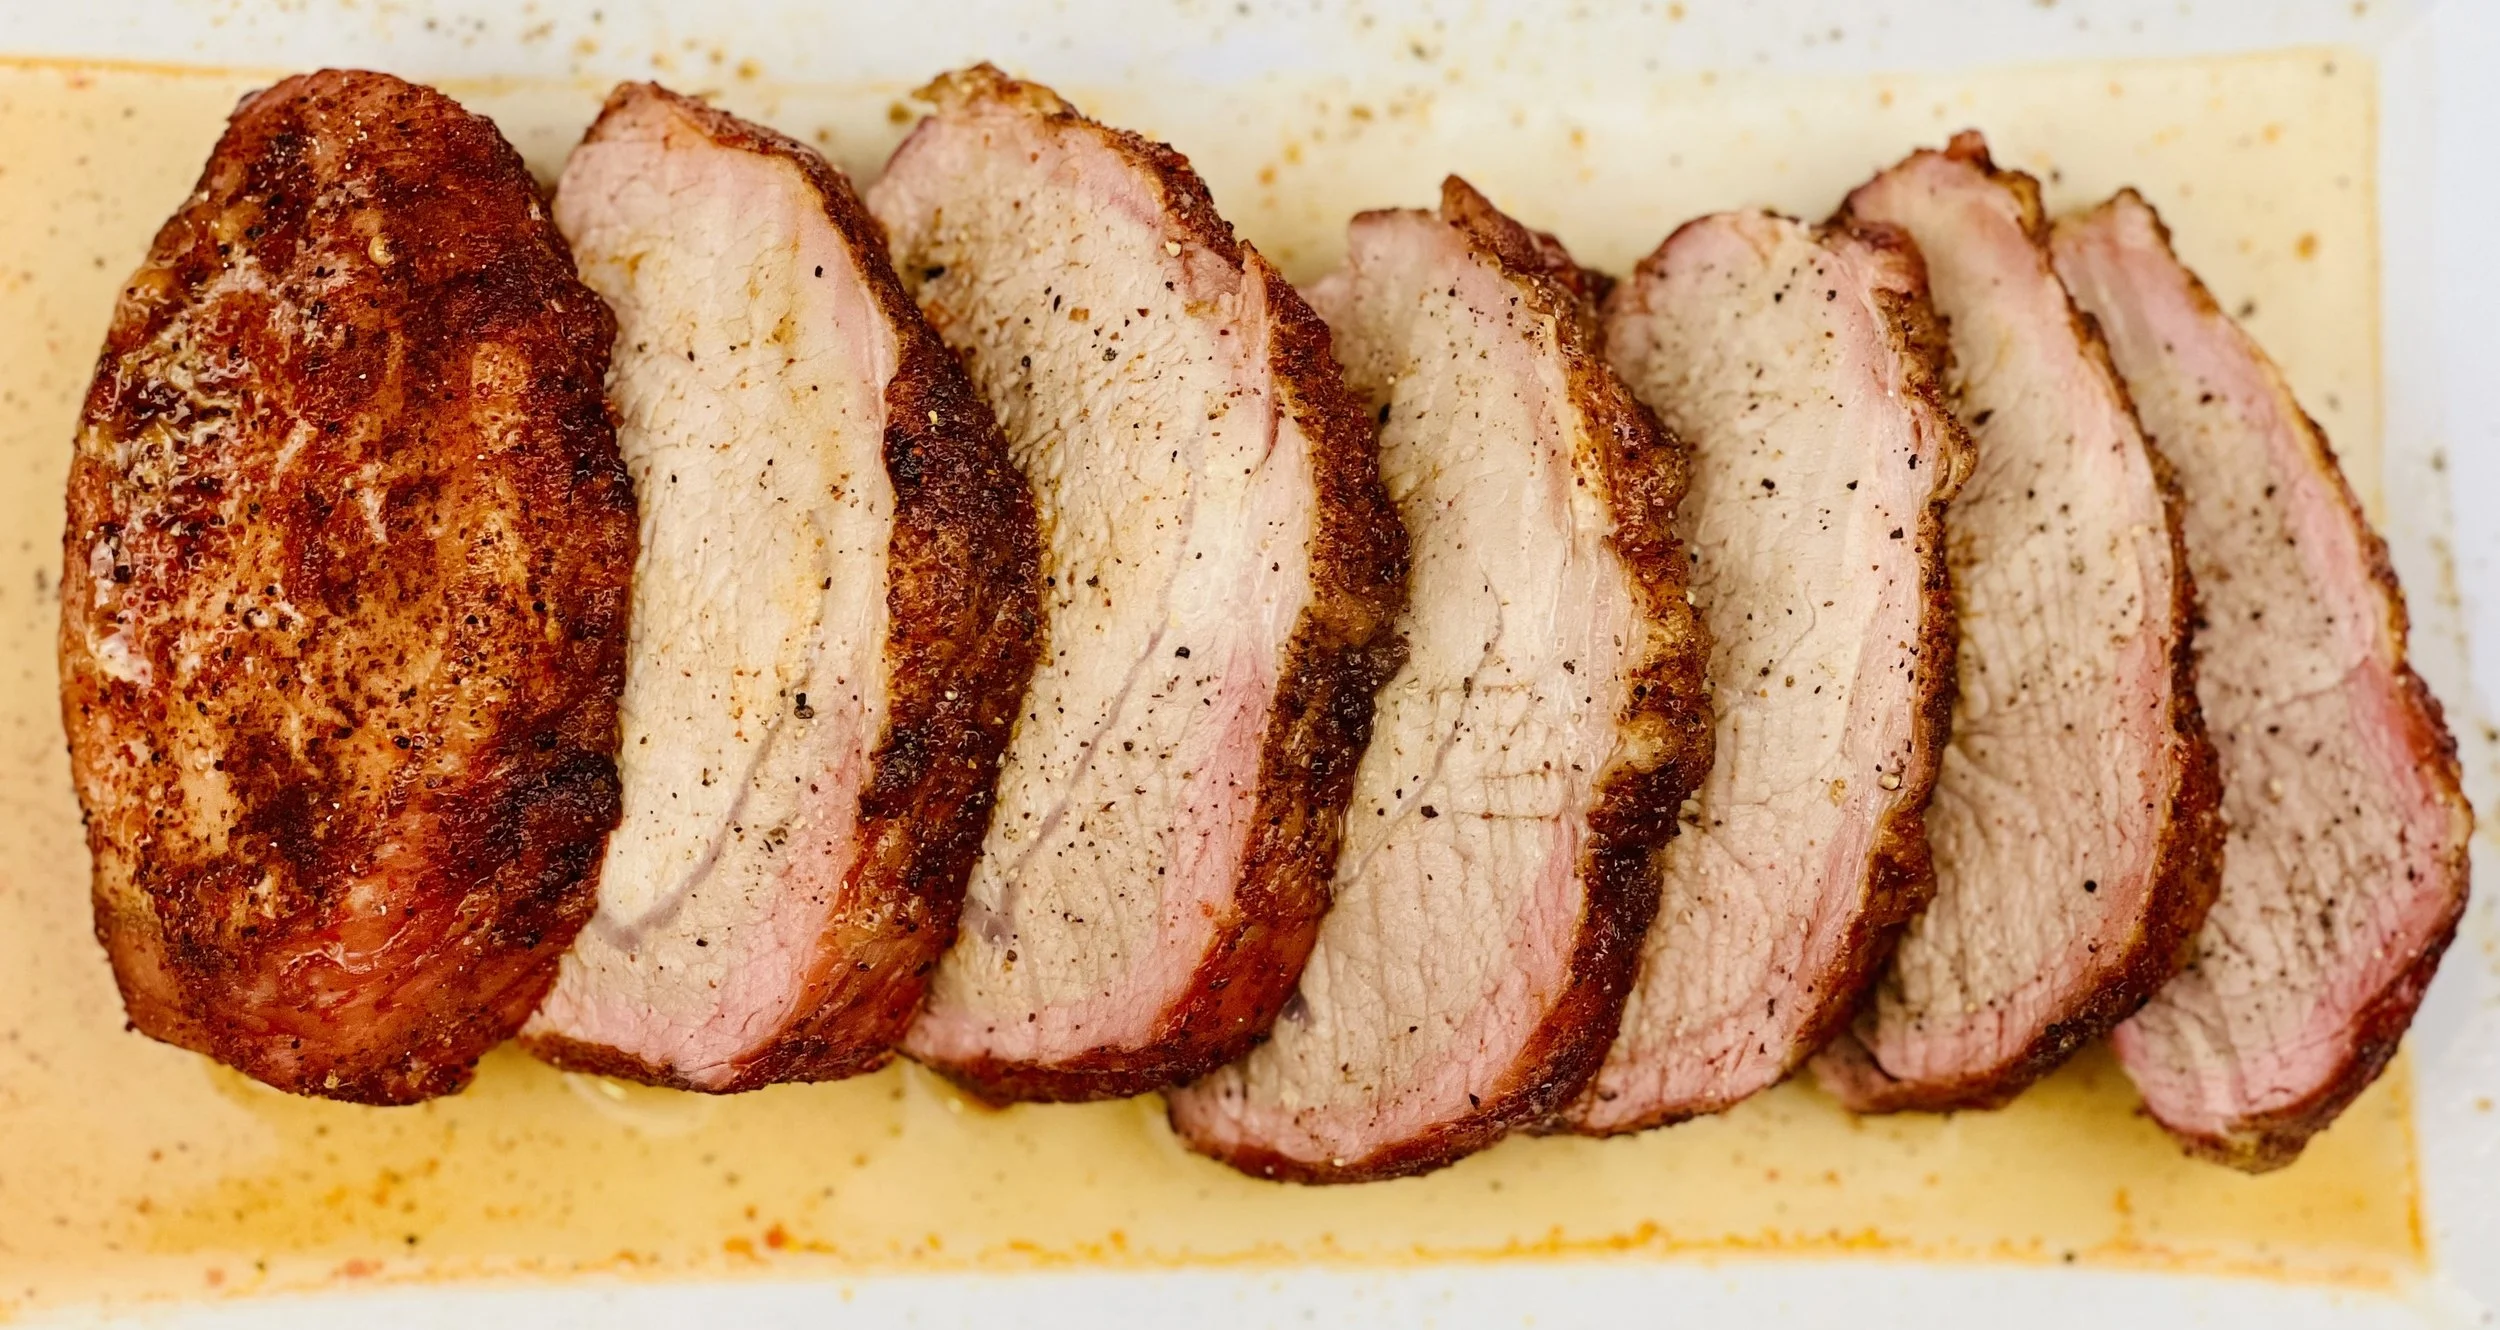
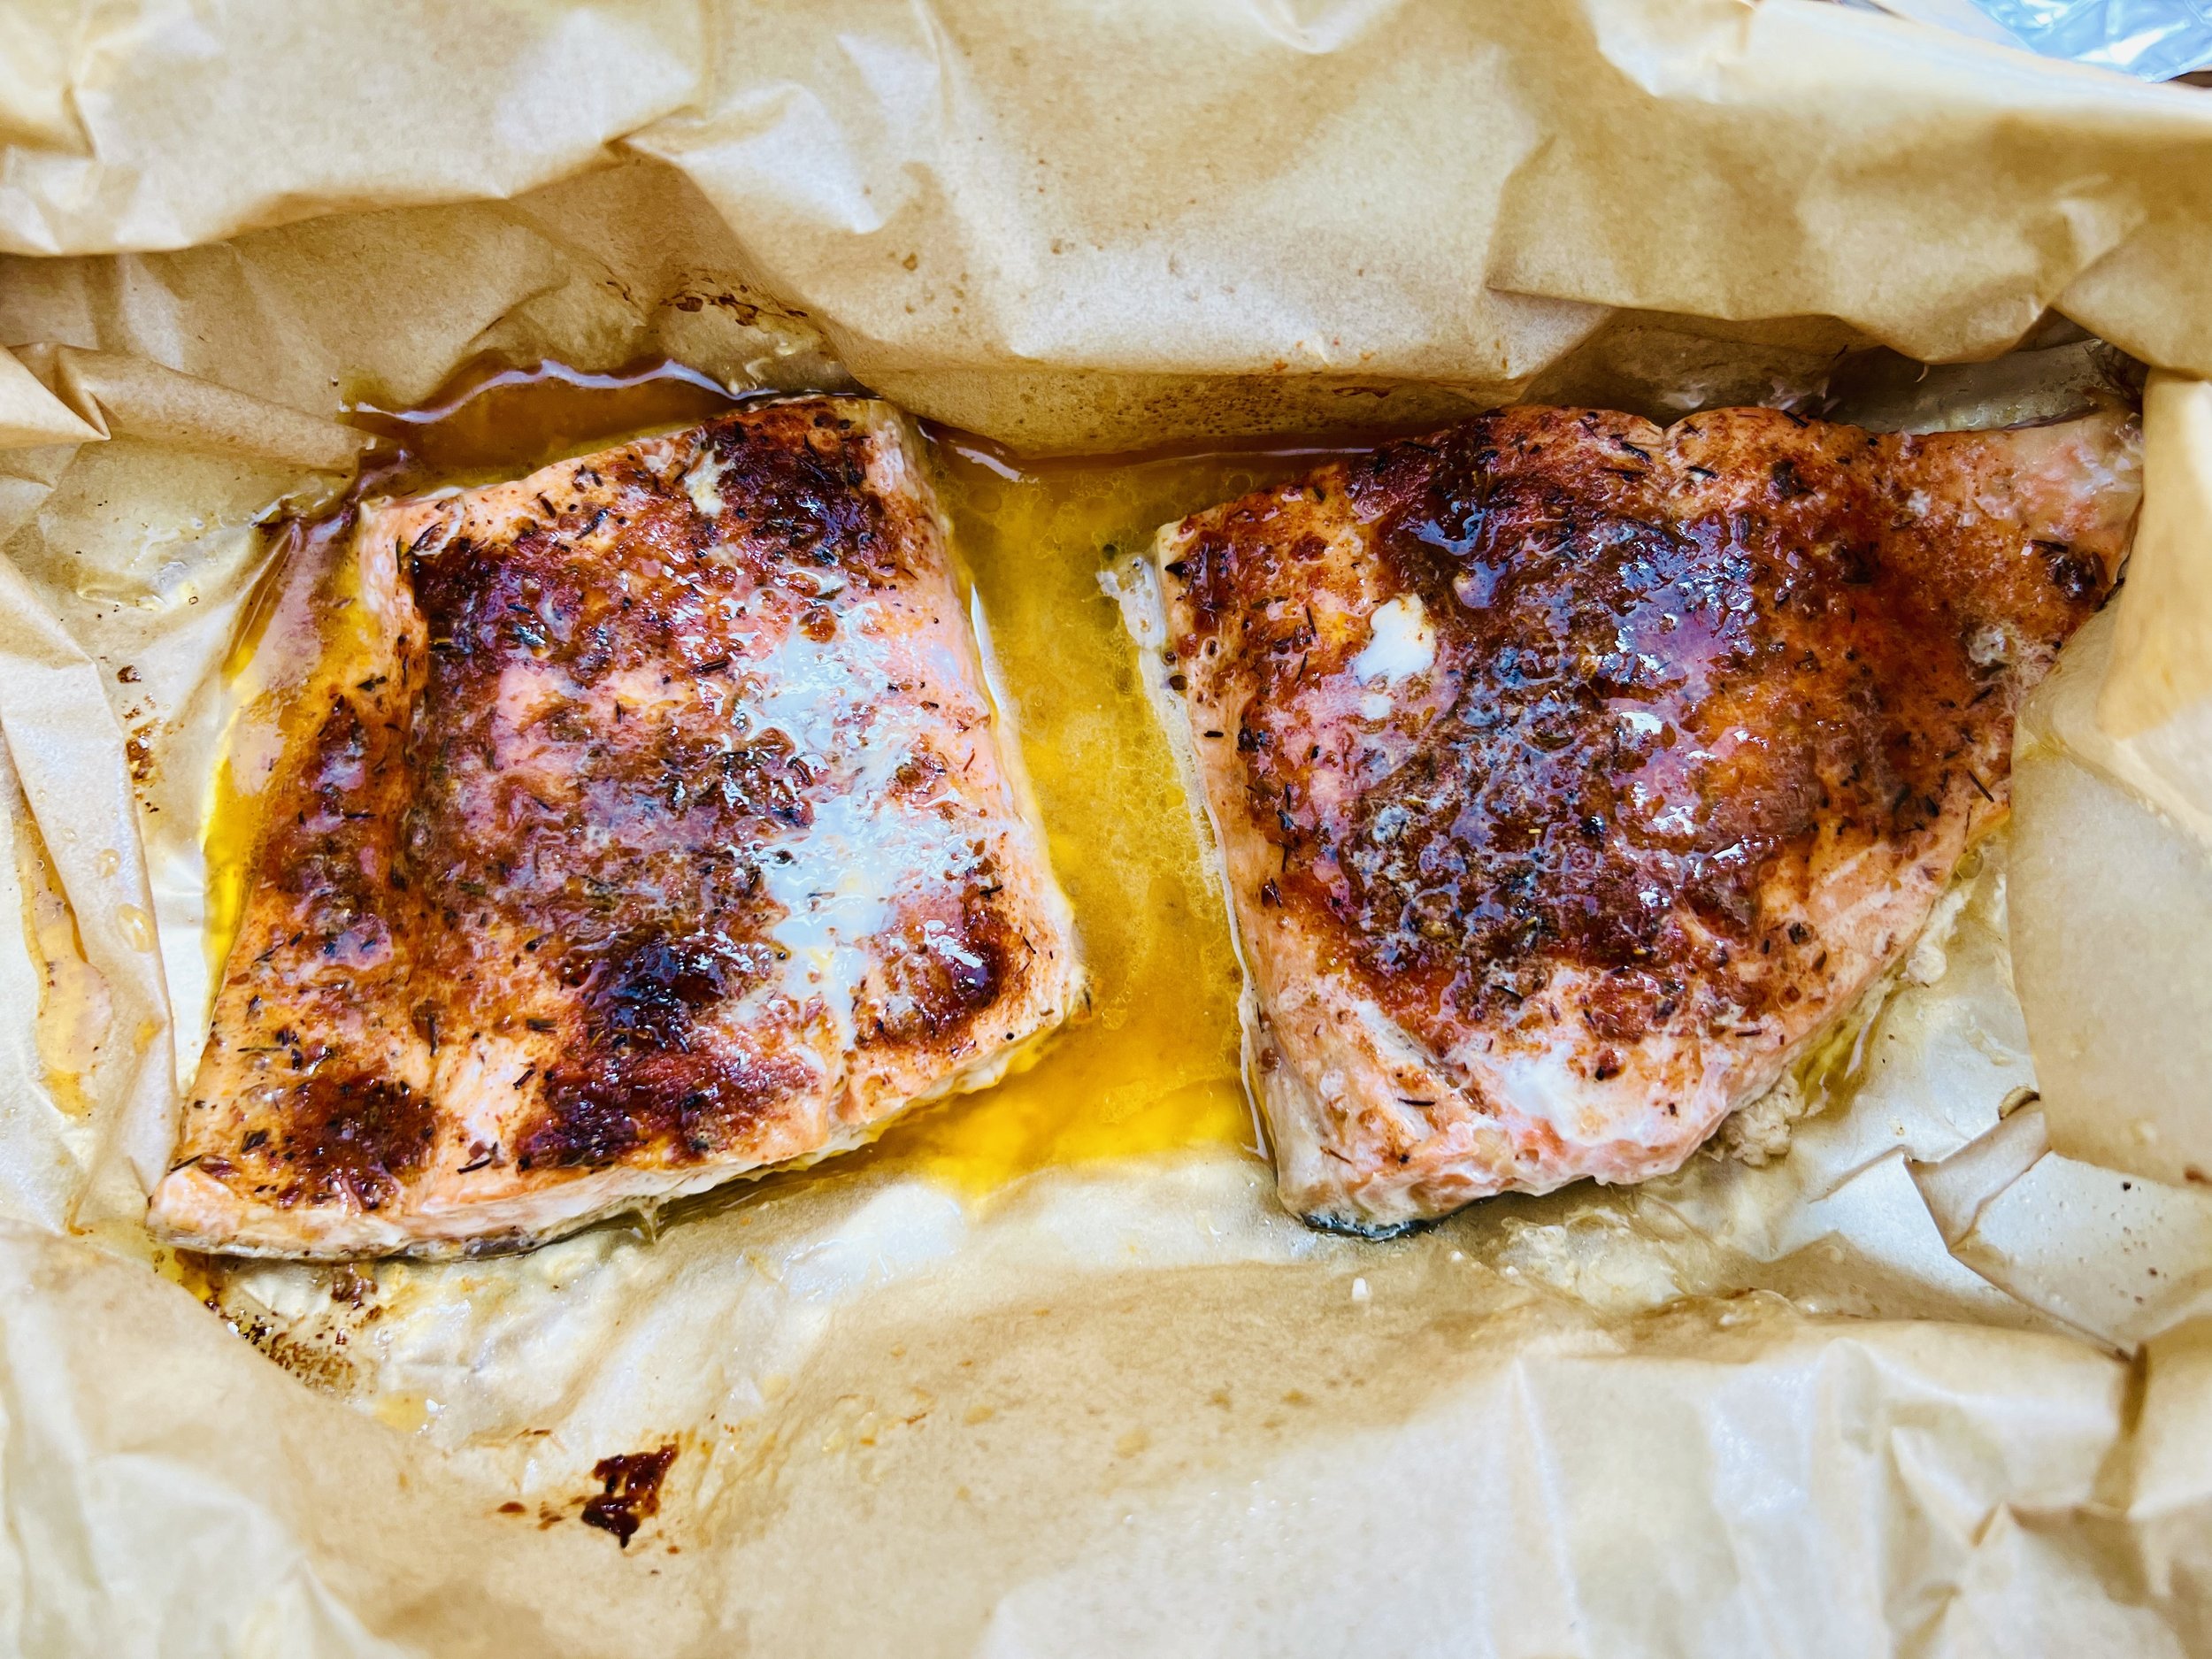
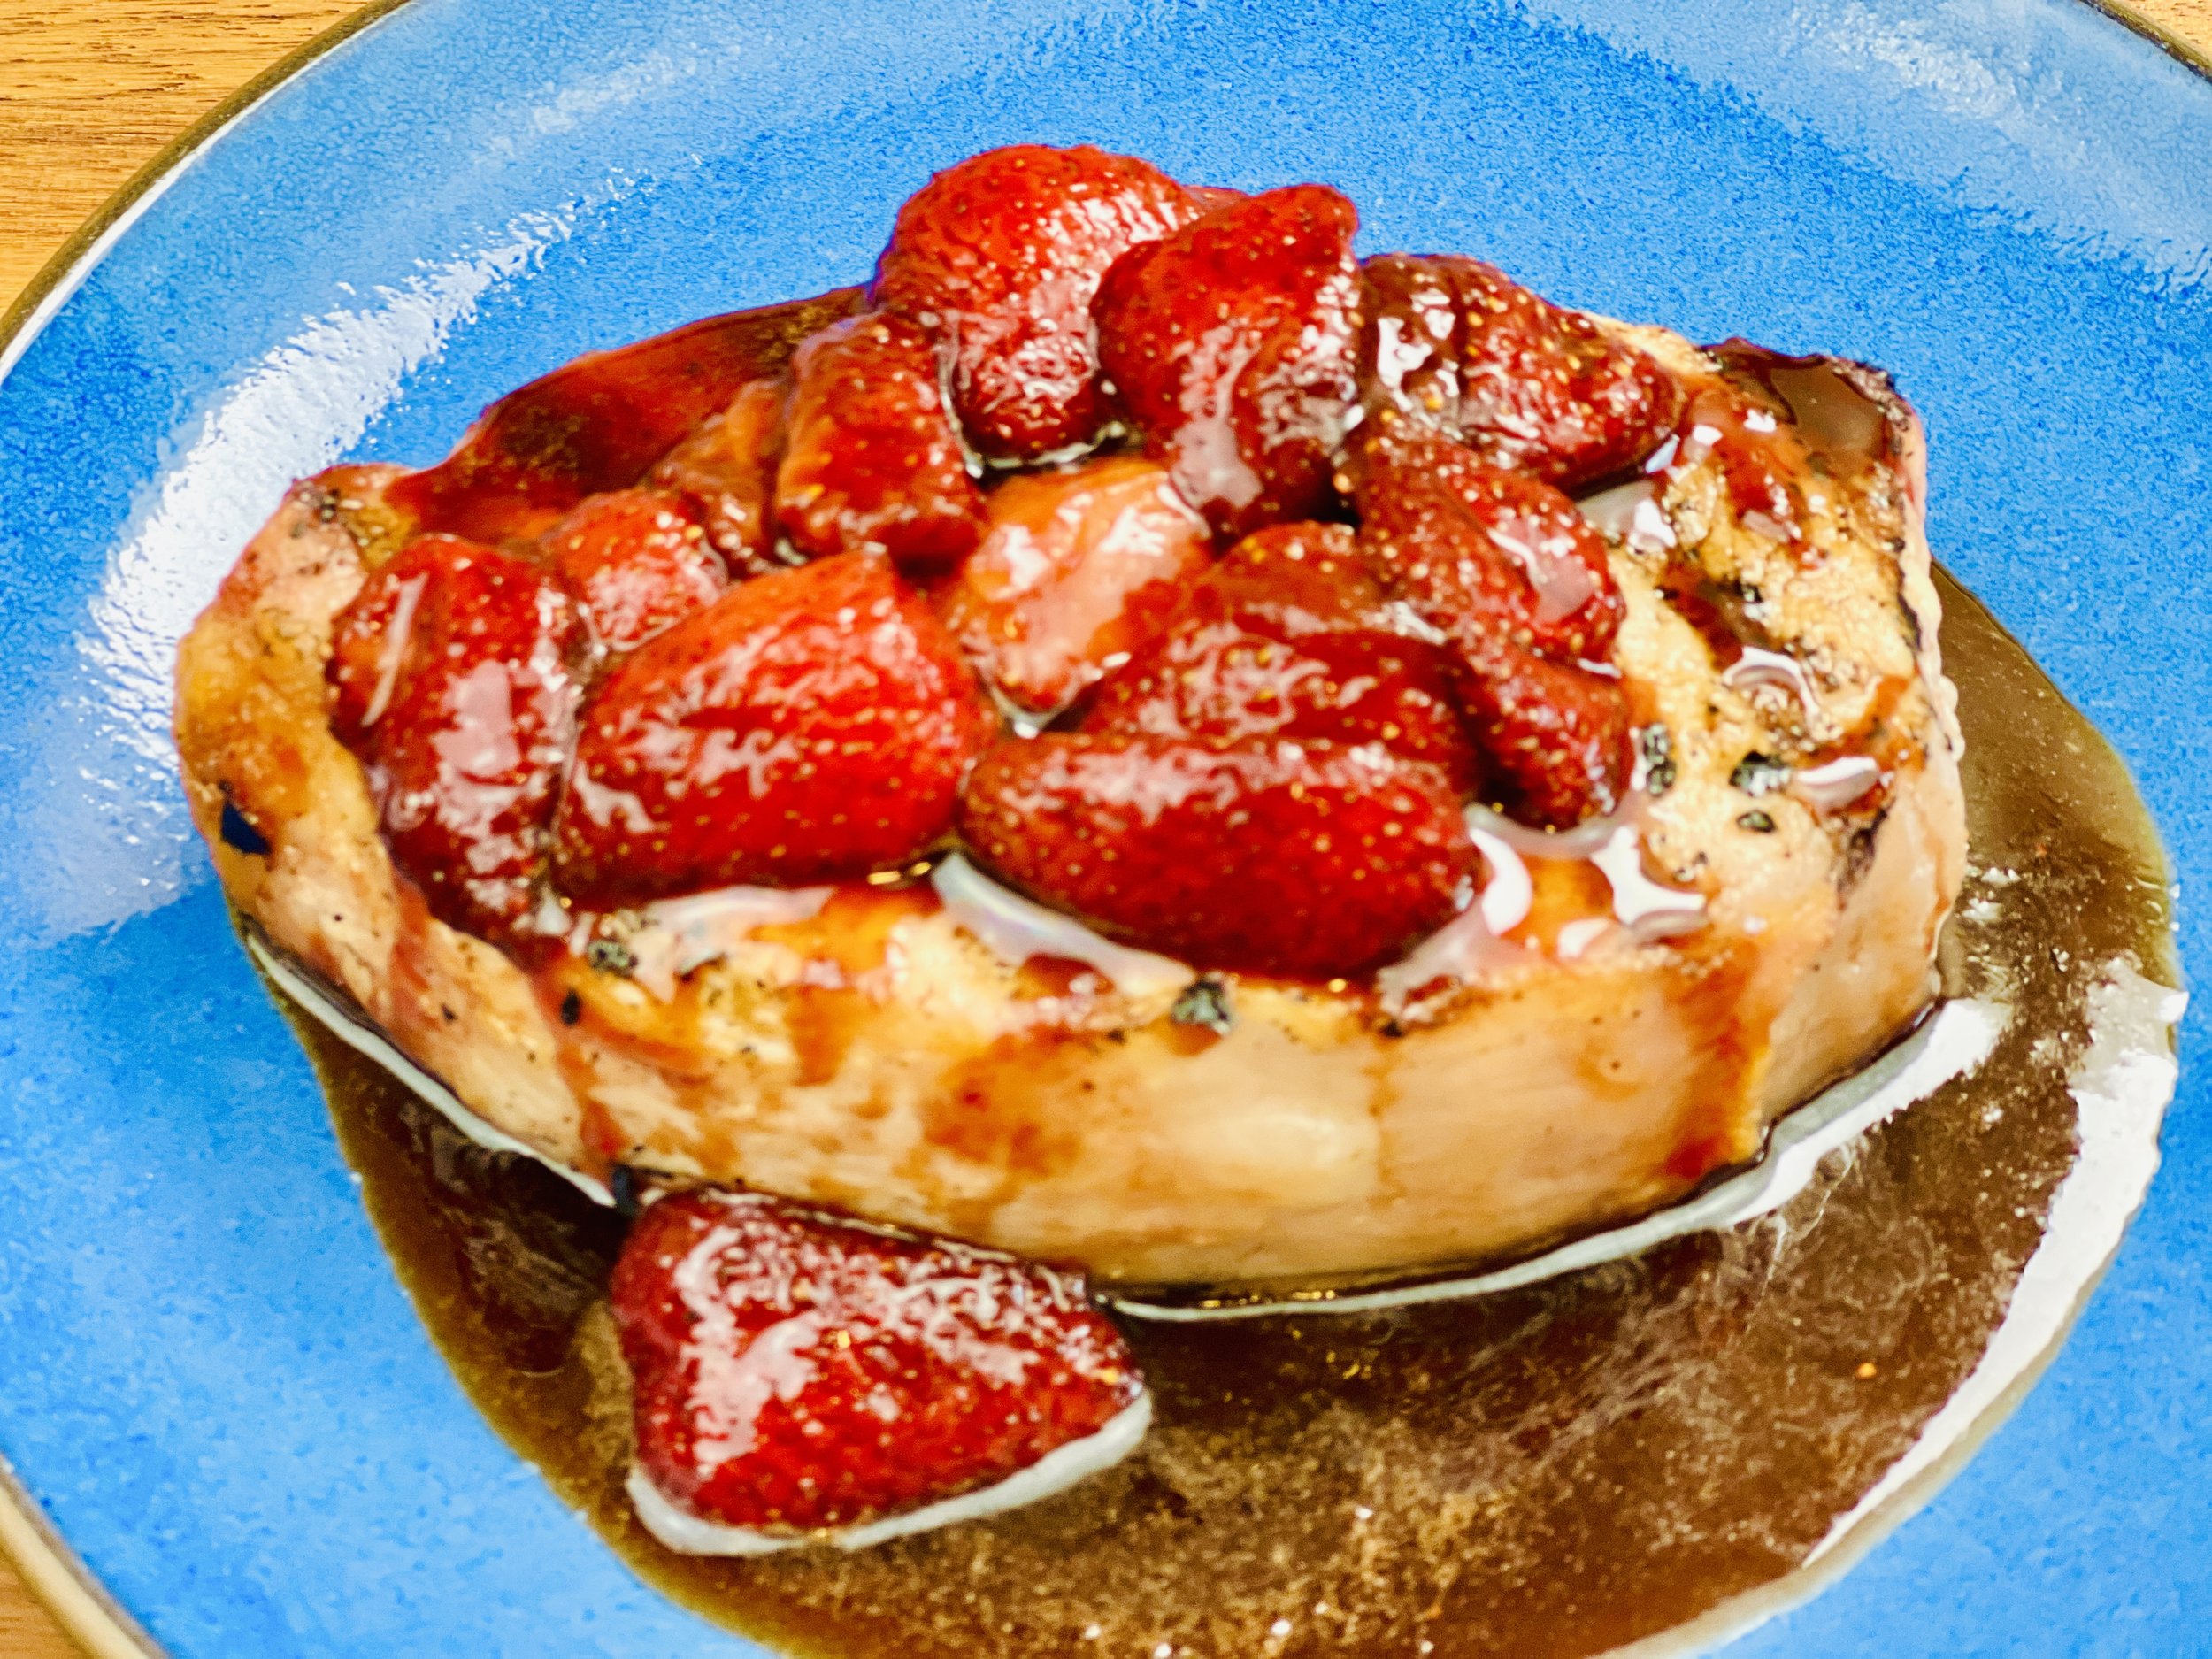
Pork Chops with Strawberry Balsamic Reduction (Low FODMAP)
10 Minutes prep • 15 Minutes cook • Low FODMAP • Gluten-Free • Lactose-free
10 Minutes prep • 15 Minutes cook • Low FODMAP • Gluten-Free • Lactose-free • Serves 4 • Ok to make ahead: Steps 1-2
Pork is wonderful when it’s balanced with sweet fruit, most commonly apples. This recipe combines sweet strawberries and rich balsamic vinegar which turns out to be an excellent combination with pork. If you cook the chops on the stove, then you retain the juice from cooking the meat to incorporate into the sauce—which is delicious! But you can also grill the chops and make the sauce separately. If you have any leftovers, they make a wonderful addition to a salad. Just chop the chilled meat and strawberries and toss them in!
Ingredients: Pork Chops
Four (8-ounce) boneless or bone-in pork chops, about 1 inch thick
1 tablespoon extra-virgin olive oil
1 teaspoon Kosher salt
1/2 teaspoon black pepper
Ingredients: Strawberry Balsamic Reduction
2 cups (about 20 strawberries), hulled and roughly chopped
1/4 cup balsamic vinegar
2 teaspoons firmly packed light or dark brown sugar
1/4 teaspoon freshly ground black pepper
Directions
(1) Prepare the meat: This step is optional but results in more flavorful and tender meat. Remove the pork from the package, and put it in one layer on a rimmed plate or baking dish. Season both sides of each piece lightly with Kosher salt (about 1/4 teaspoon per side). Cover the dish with plastic wrap and refrigerate until ready to use, ideally about 4 hours before cooking or overnight.
(2) Prepare: Season the pork chops on both sides with pepper and salt if you didn’t pre-salt the meat. Chop the strawberries.
(3) Cook the chops: You may grill the chops, or cook them on the stove. For the stove, put a large skillet over medium-high heat. When the pan is hot, add the olive oil. When the oil is heated, add the pork chops in a single layer and cook for 4 minutes. Flip the chops and continue cooking until the second side is browned and the pork is cooked to an internal temperature of 145 degrees F on an instant-read thermometer, about 6 minutes more. (Keep an eye on the temperature as the cooking time will vary depending on the thickness of the chops.) Transfer the chops to a warmed serving plate and cover to keep warm.
For the grill, heat the grill to medium-high. Put the chops directly on the grill. Turn after 4 minutes. Watch the temperature of the meat and remove the chops from the grill as soon as the internal temperature reaches 145 degrees F. Transfer the chops to a warmed serving plate and cover to keep warm.
(3) Make the strawberry balsamic reduction: Return the skillet to medium heat and add the strawberries, balsamic vinegar, and brown sugar. Cook, stirring frequently until the mixture has thickened, 6 to 8 minutes more. Taste and season well with black pepper. If you cooked the chops on the grill, just use a saucepan or frying pan to make the sauce. You won’t have the juices from cooking the meat, but it will still be delicious!
(4) Plate and serve: Pour the strawberry sauce over the chops and serve warm alongside one of my delicious salads.
Eat and enjoy every bite because you can!
Recipe note: I use Diamond Crystal Kosher salt in all my recipes because it has a wonderful flat and crisp flake that tastes delicious. It is also the least salty salt available so you can use it more liberally as a seasoning than you can table salt or sea salt. If you use another type of salt, you may need to reduce the amount so it is not over-salted.
Have a question you’d like to have answered? Email me at hello@ibsgamechanger.com
Link note: This post may contain affiliate links for you to easily purchase items that are linked. I may earn a small commission from qualifying purchases but none of this costs you a thing so feel free to use the links! In addition, for some items, I have provided a special discount code for IBS Game Changers so be sure to use the code when you purchase an item to get the discount that has been arranged just for you.
More Deliciously Low FODMAP™ main course recipes
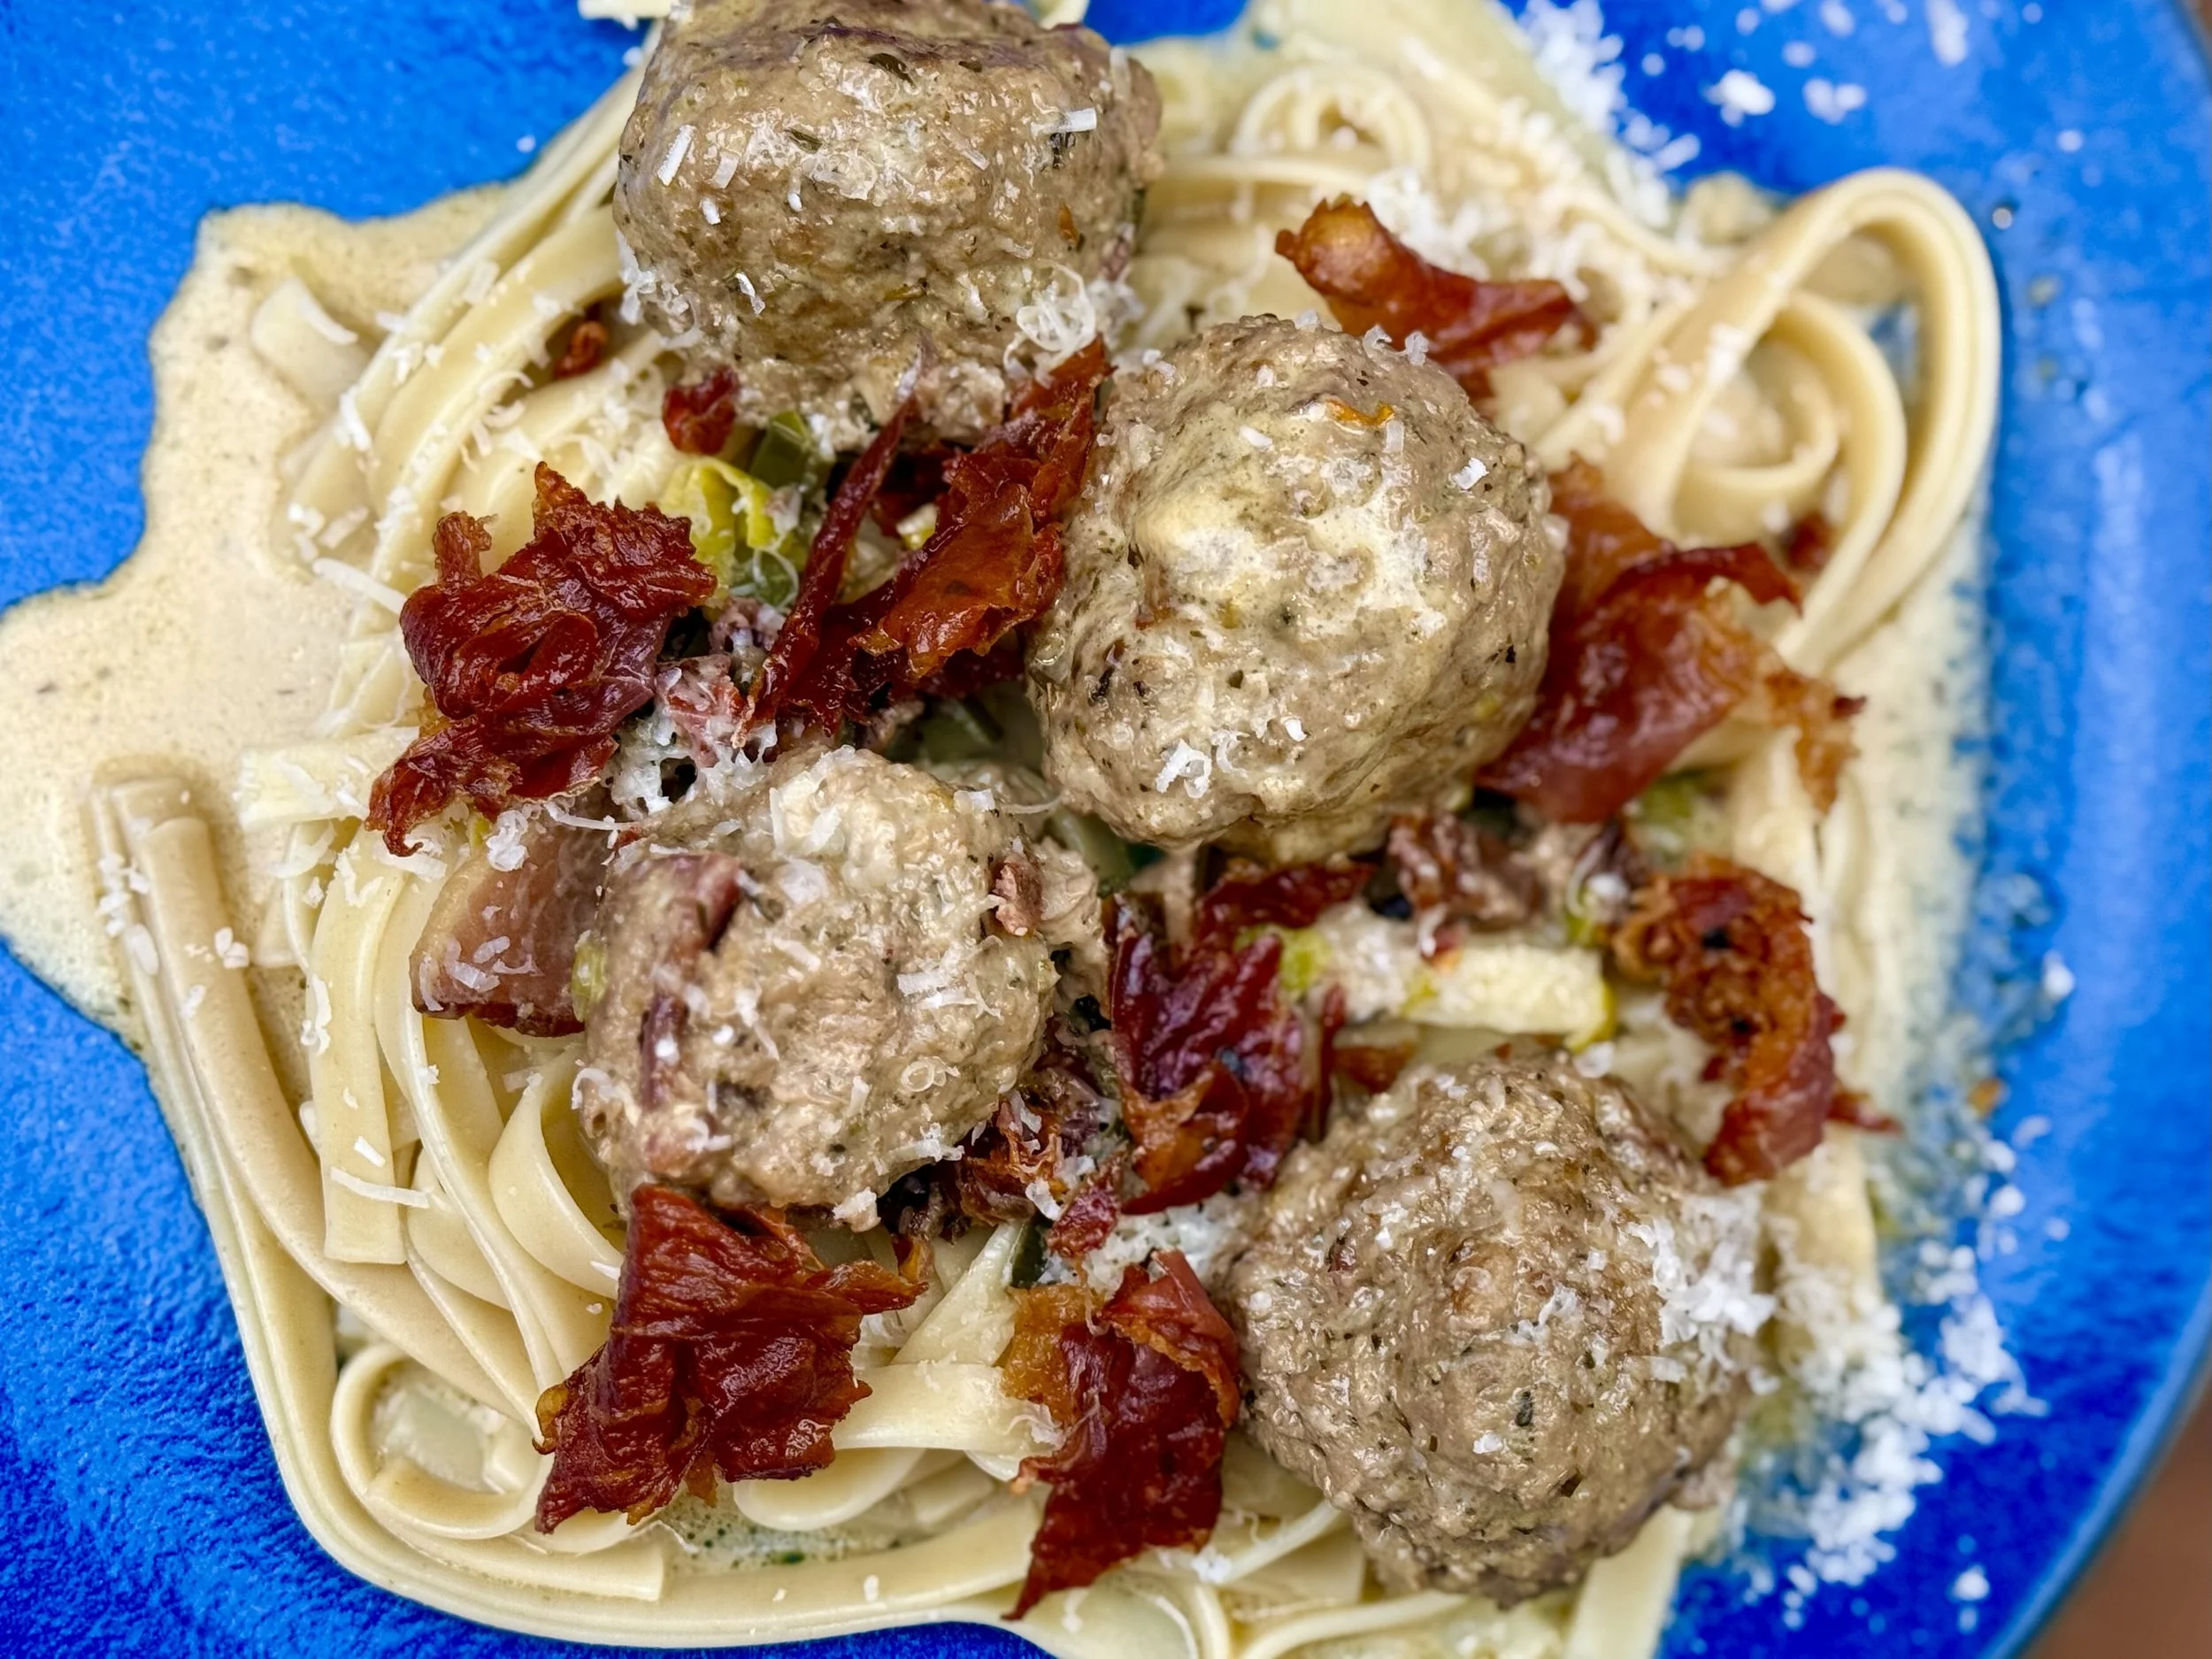
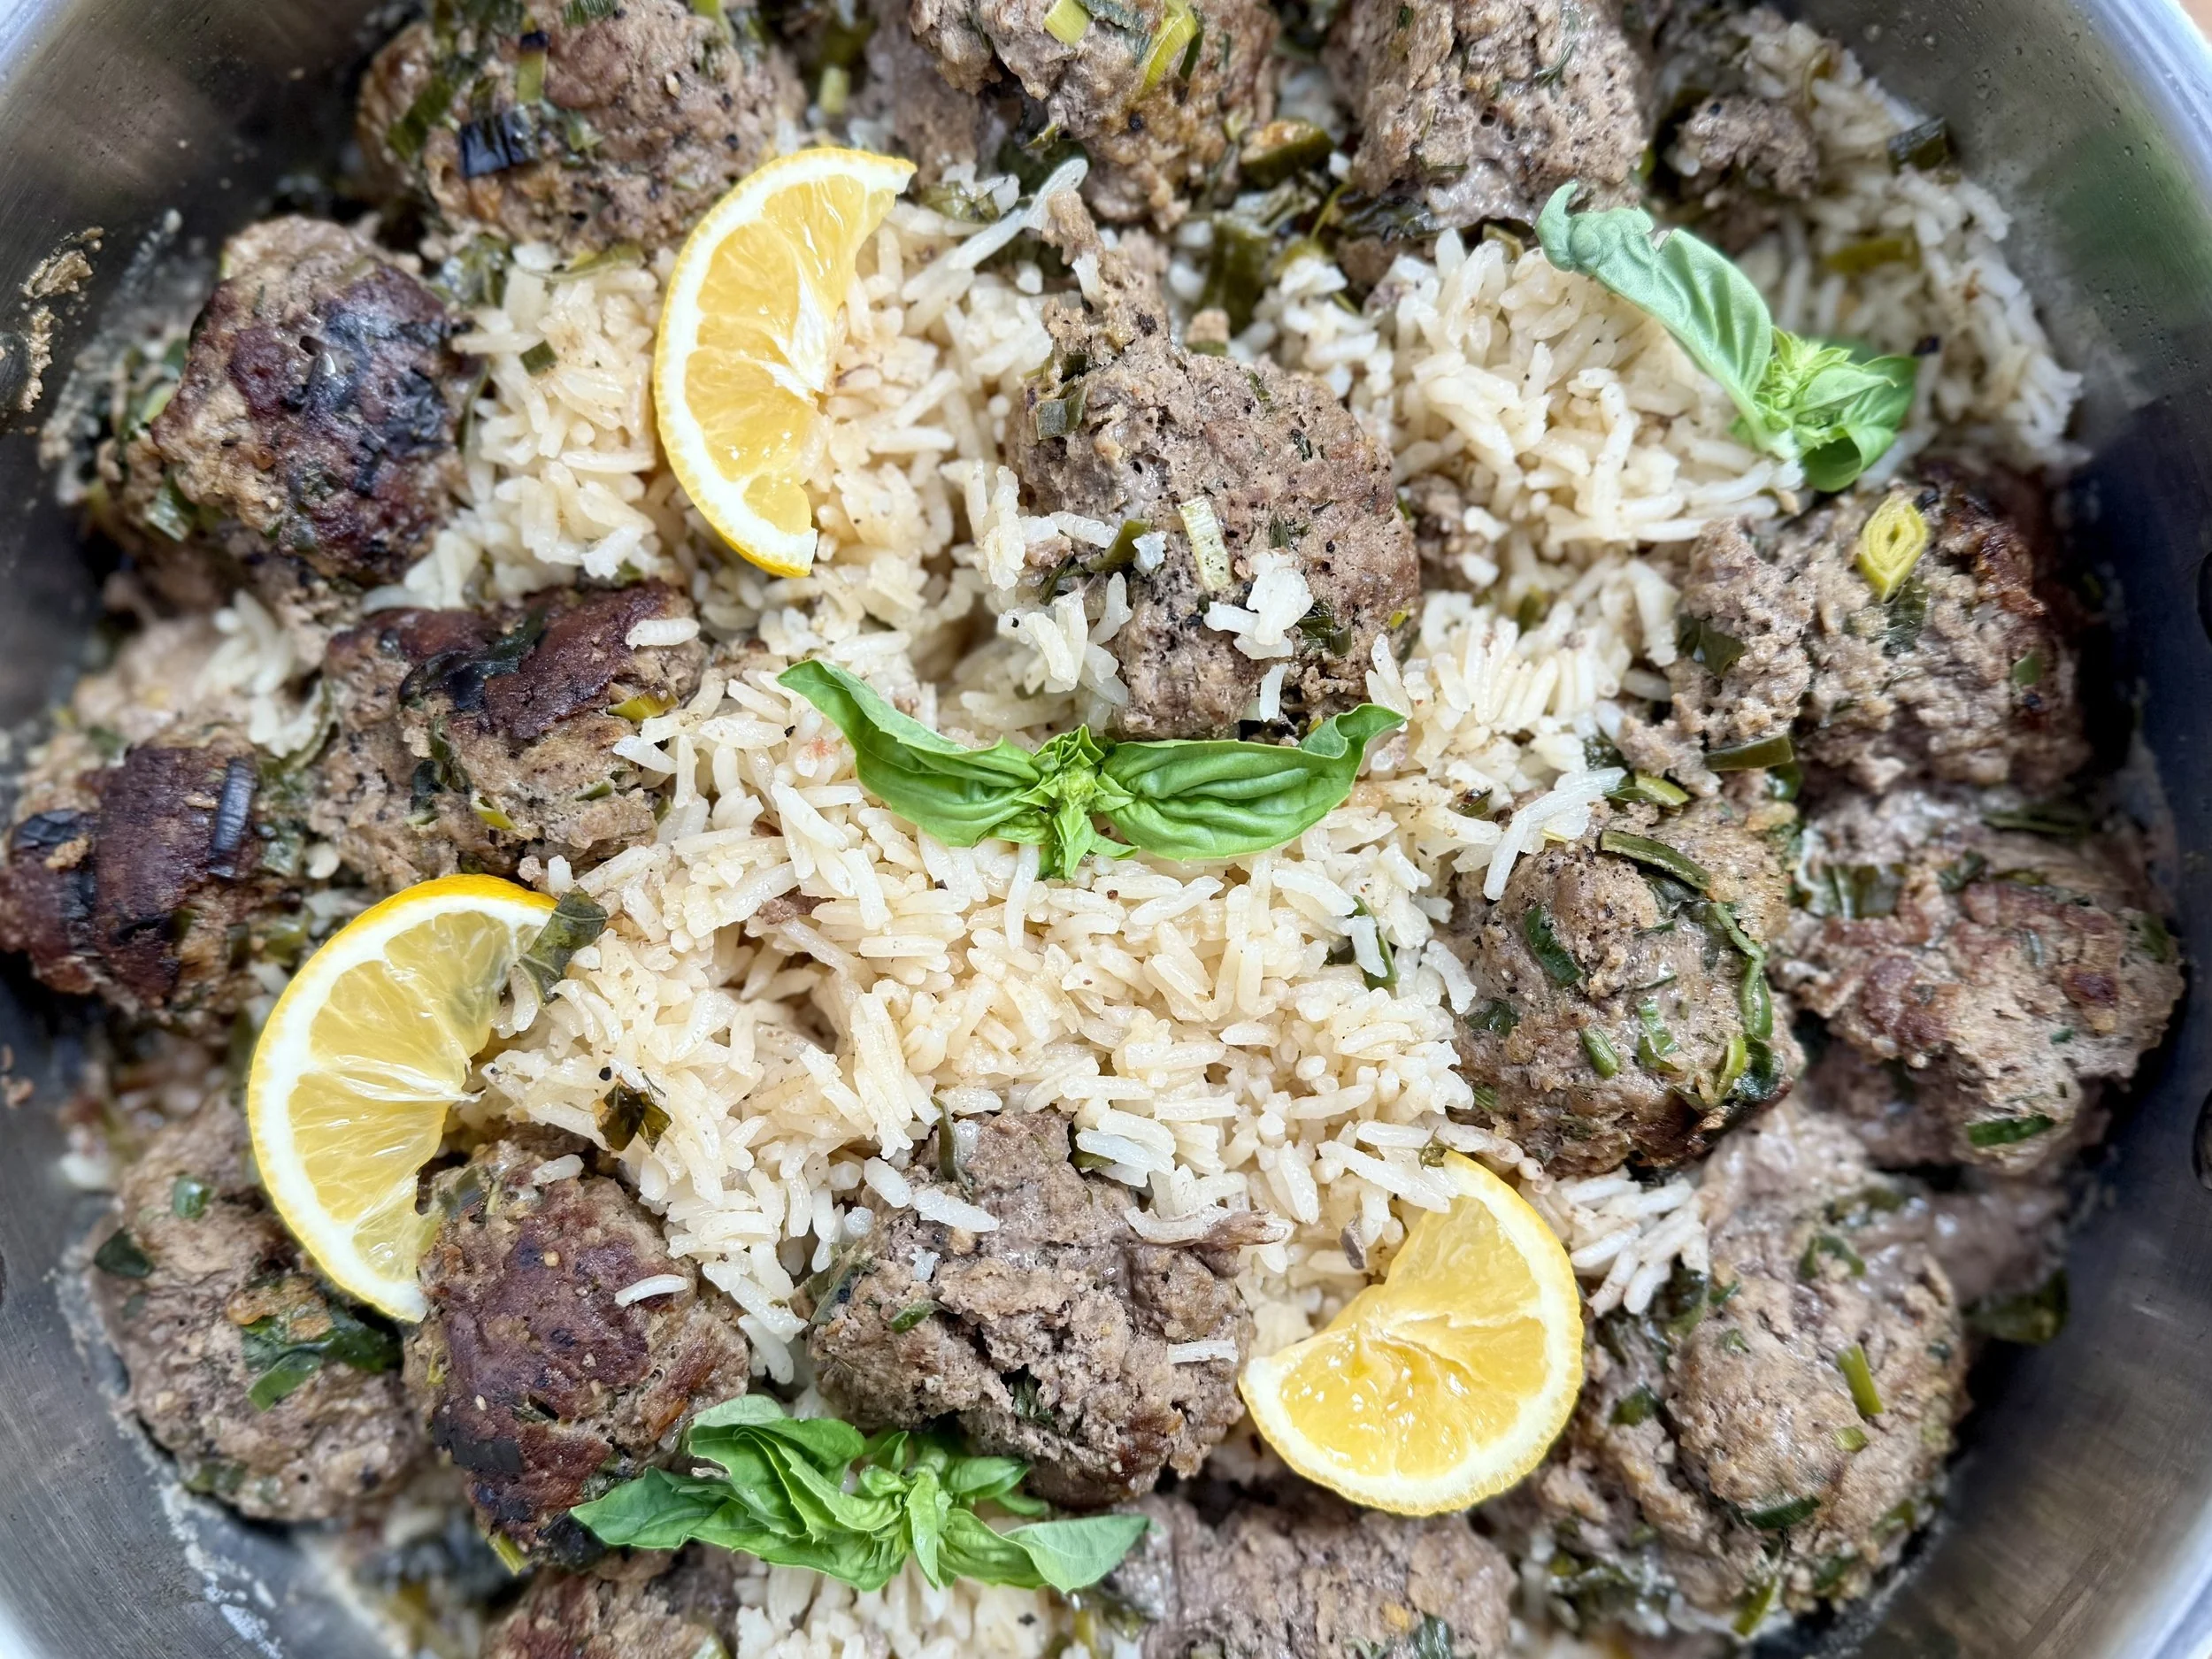
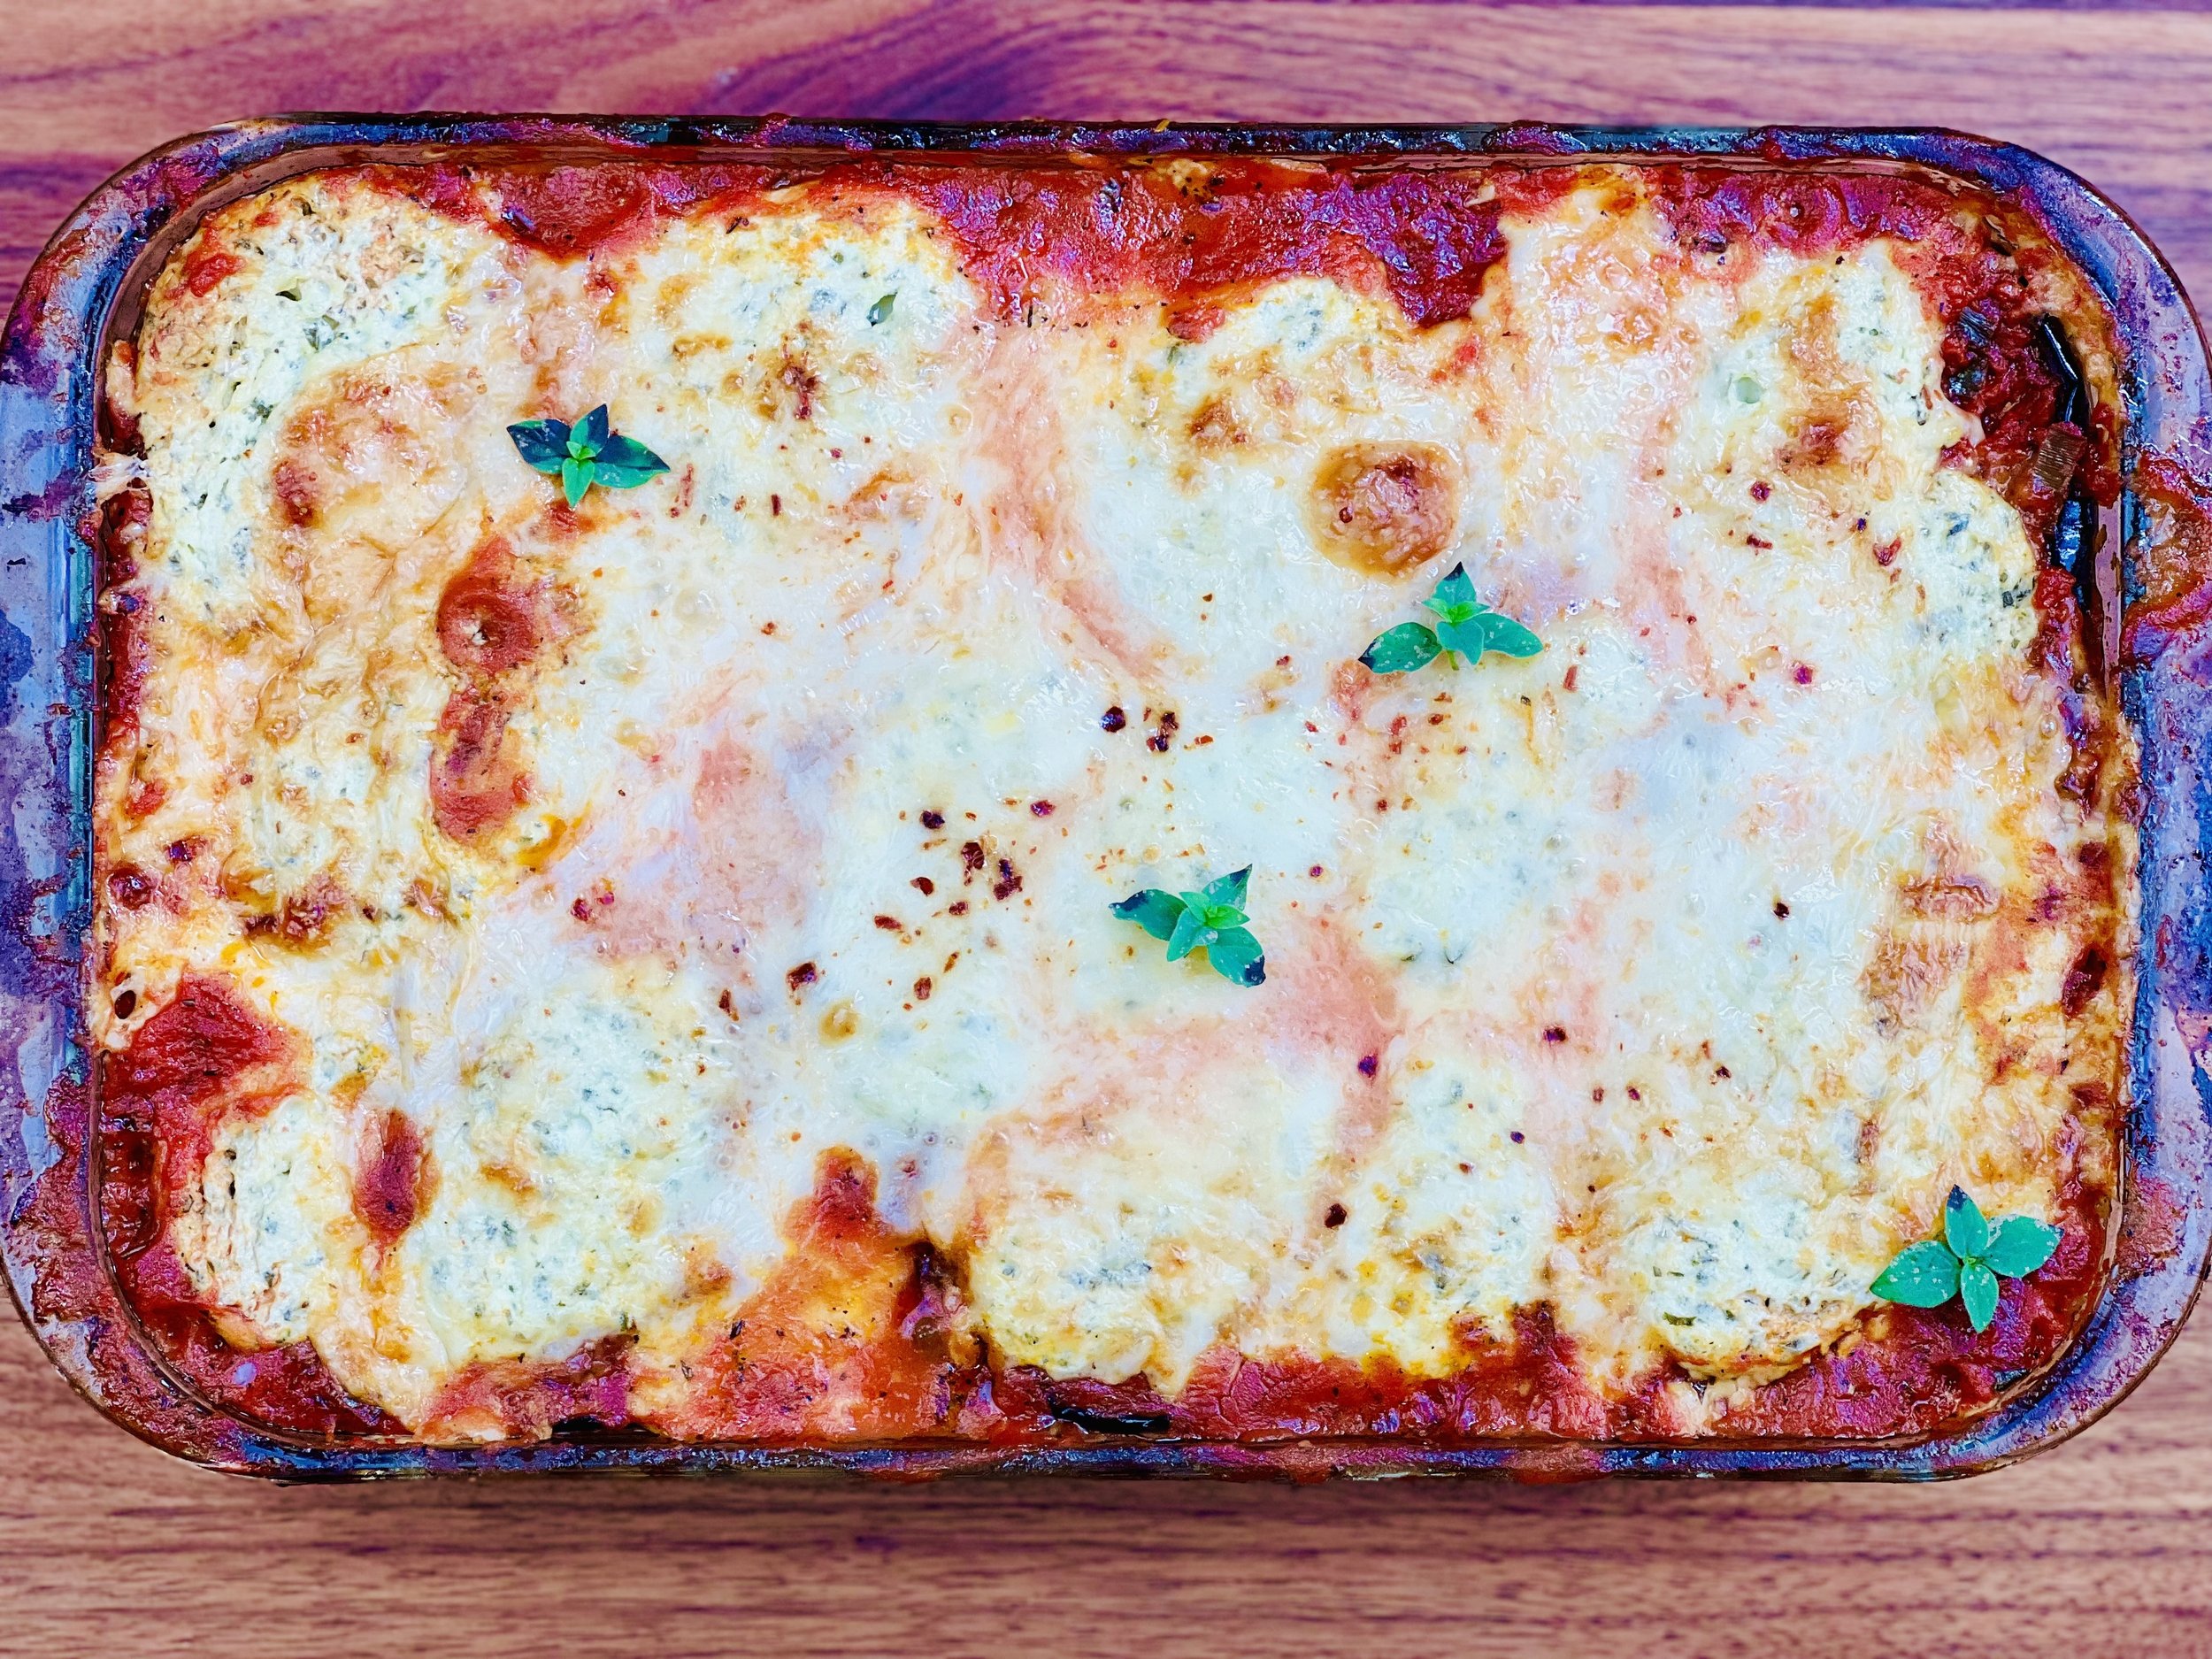
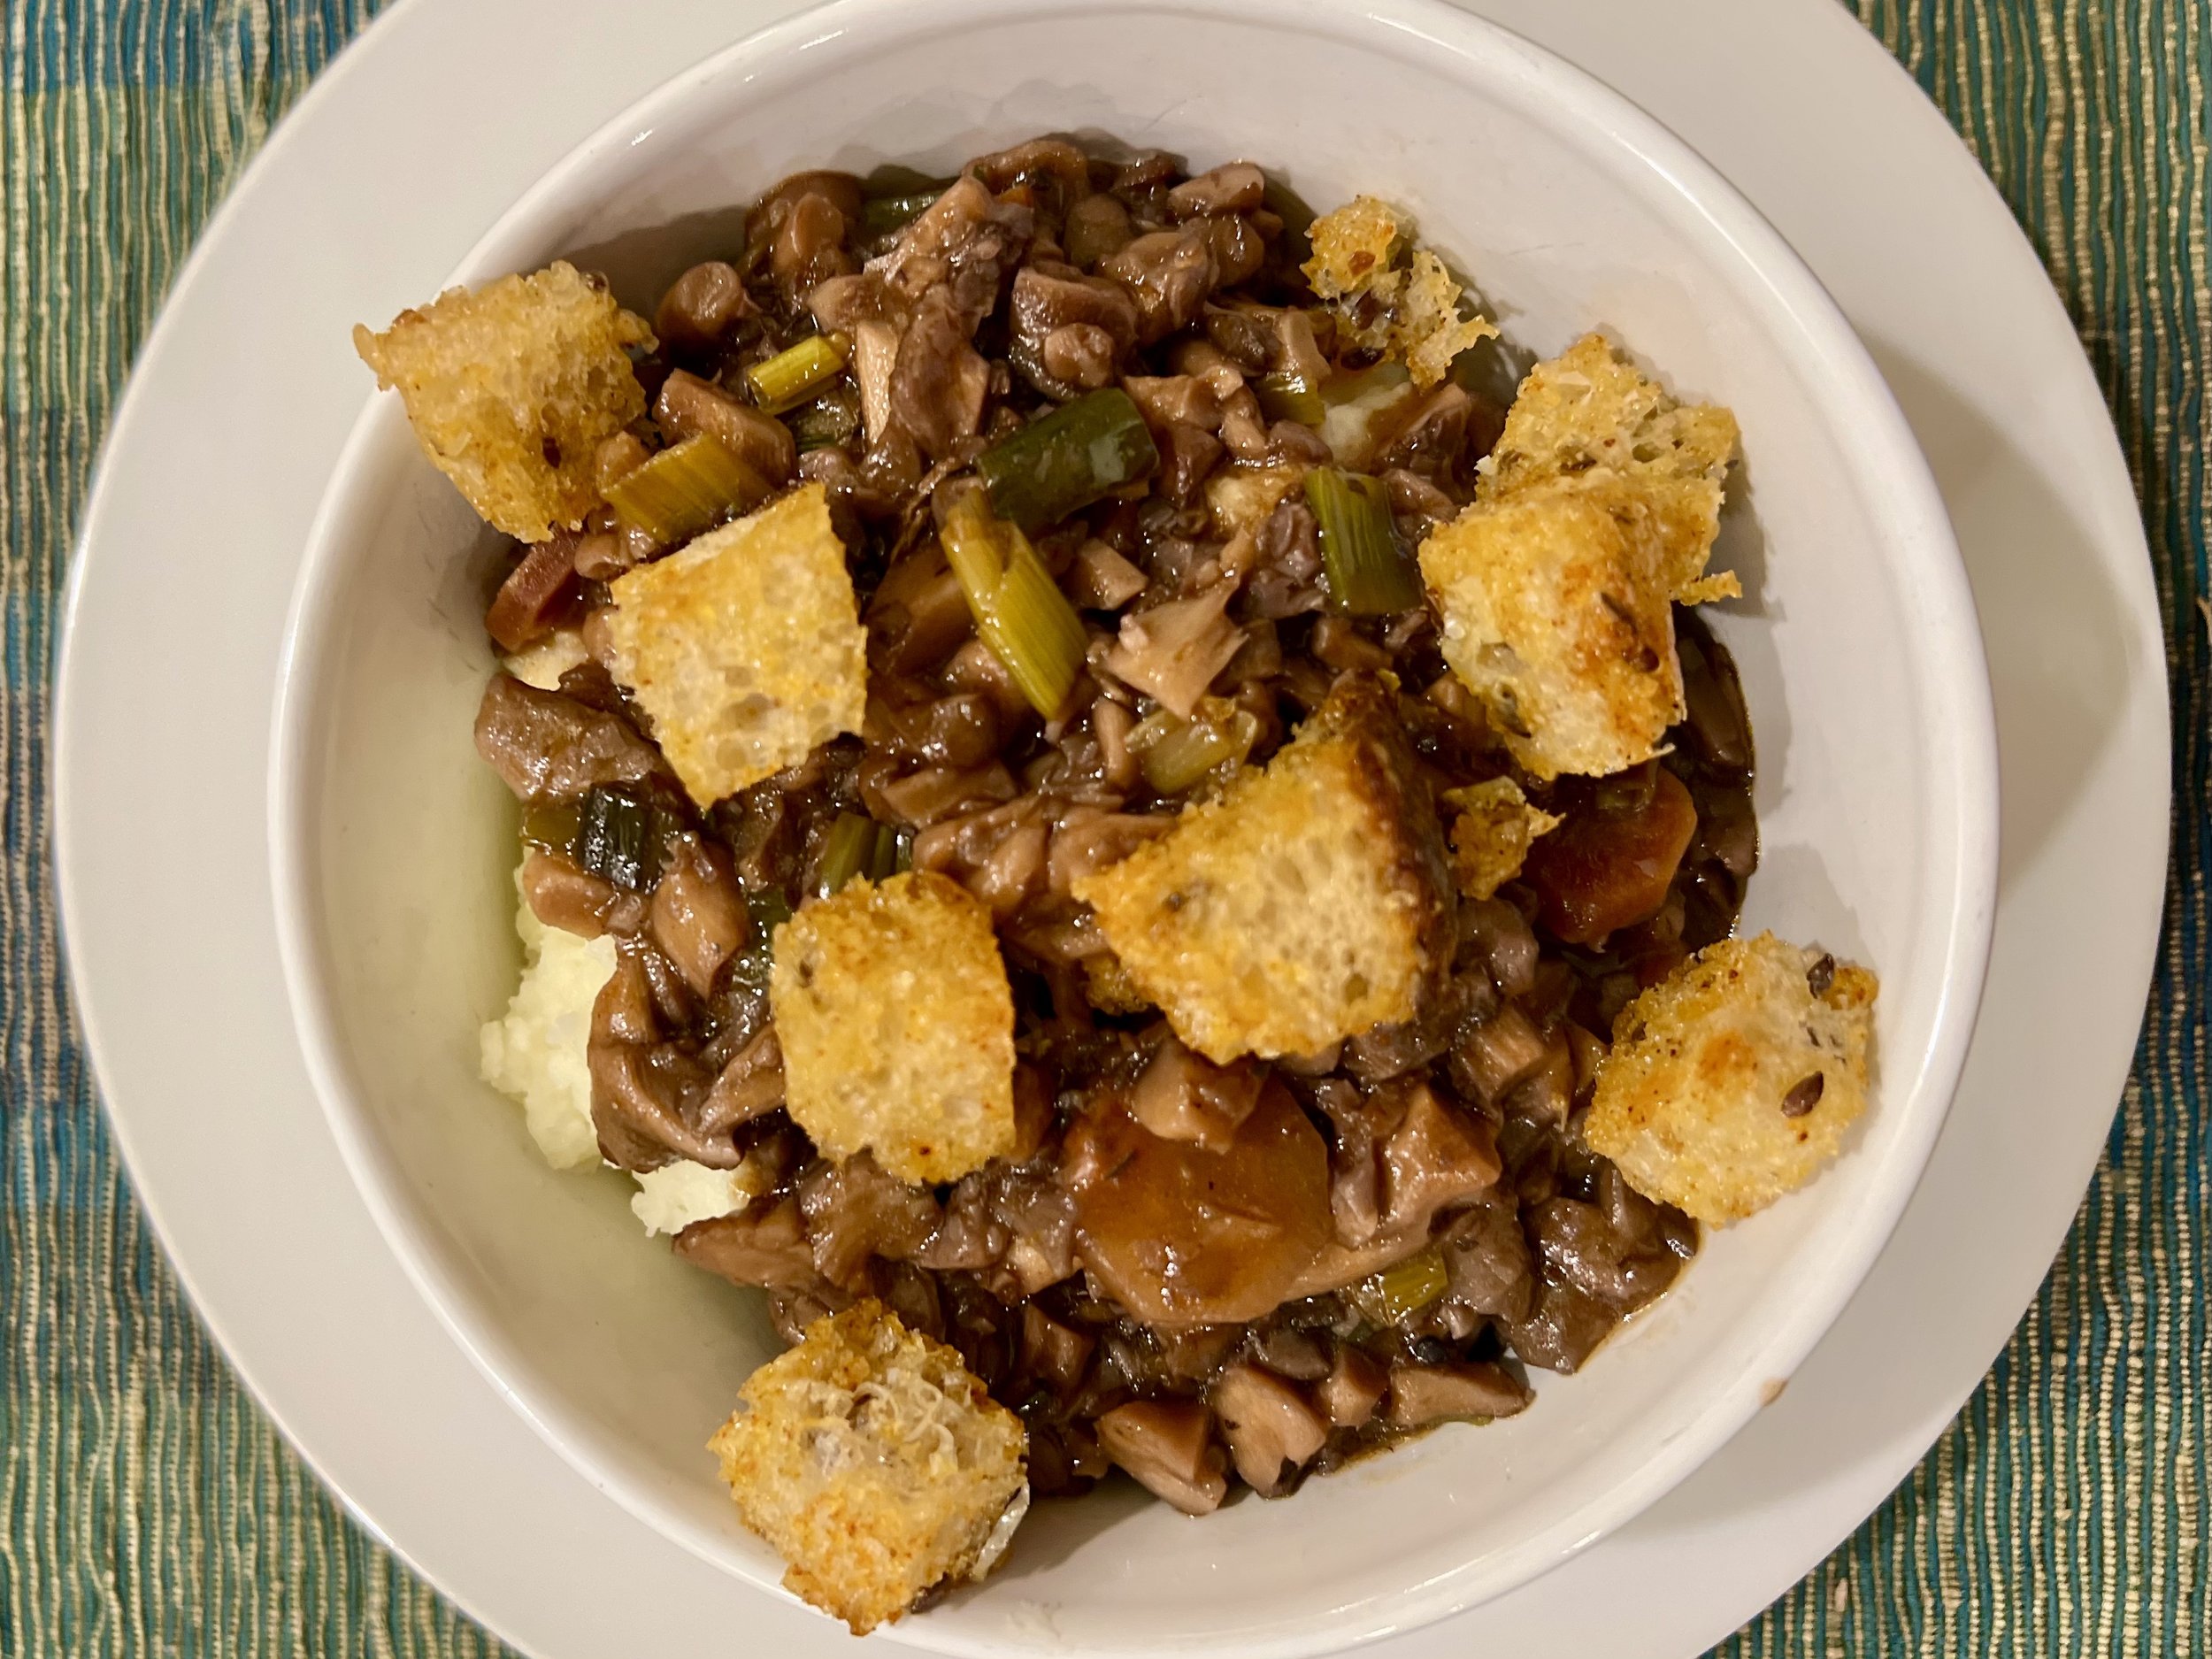
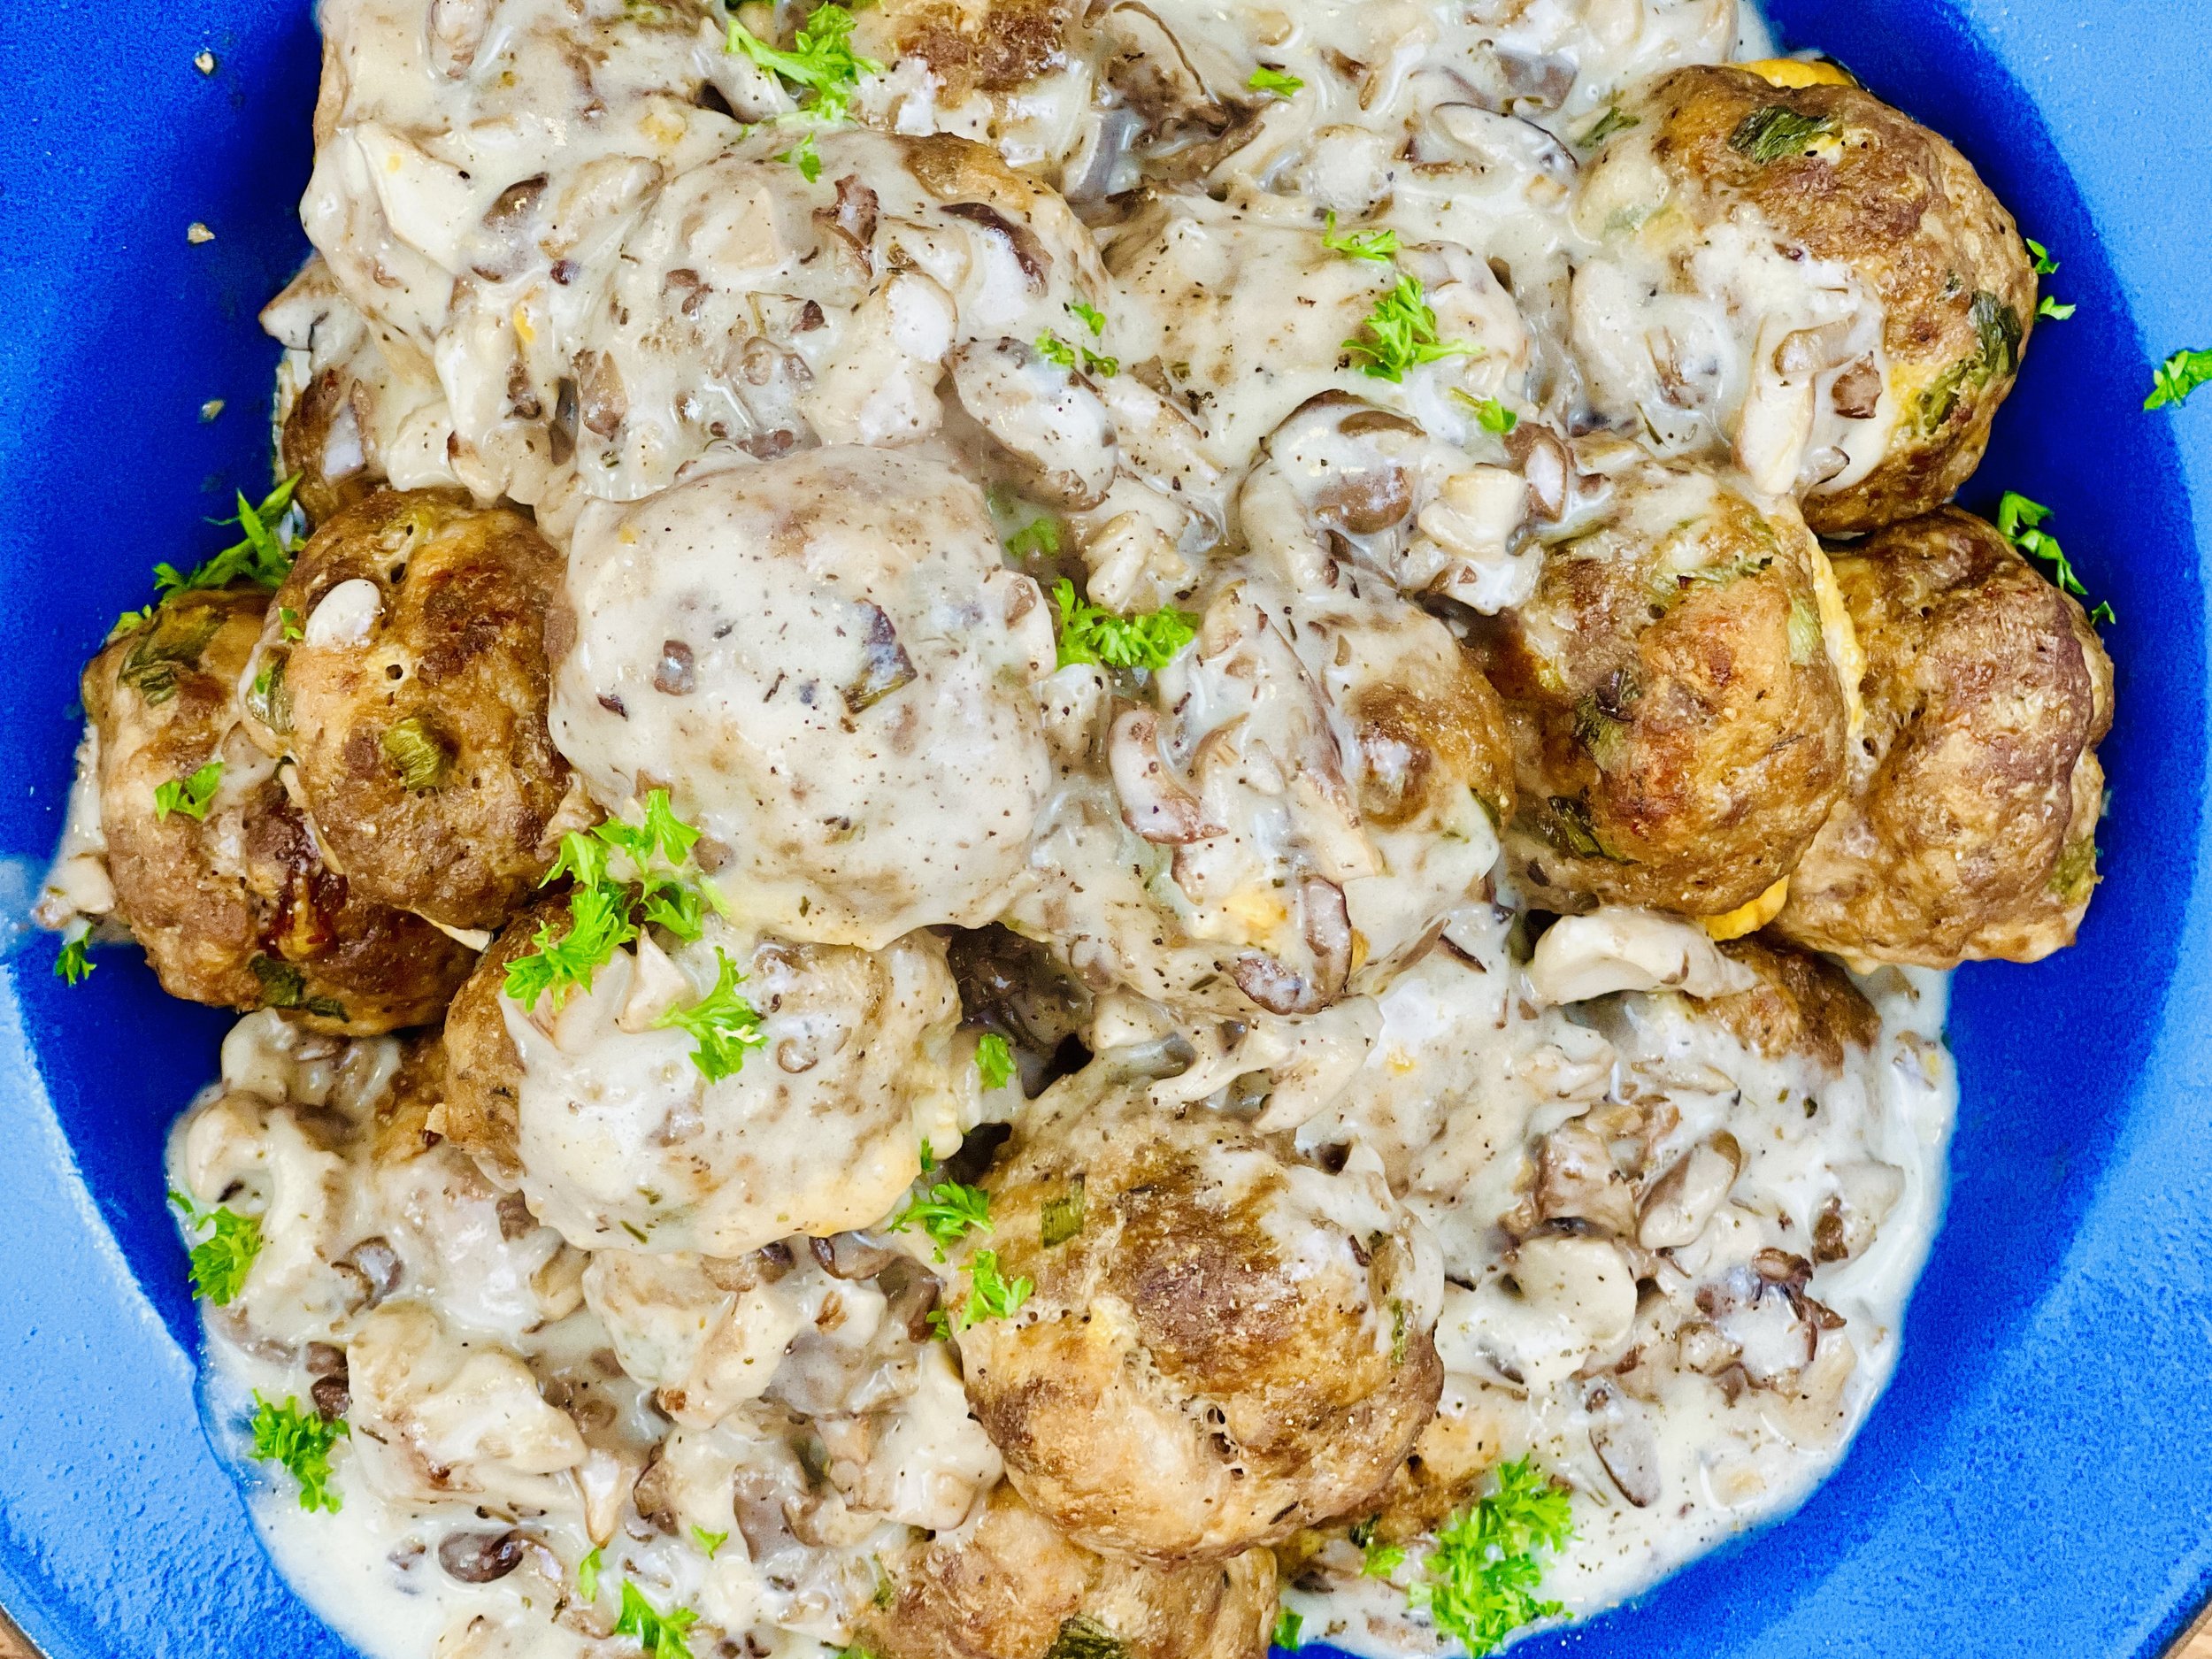
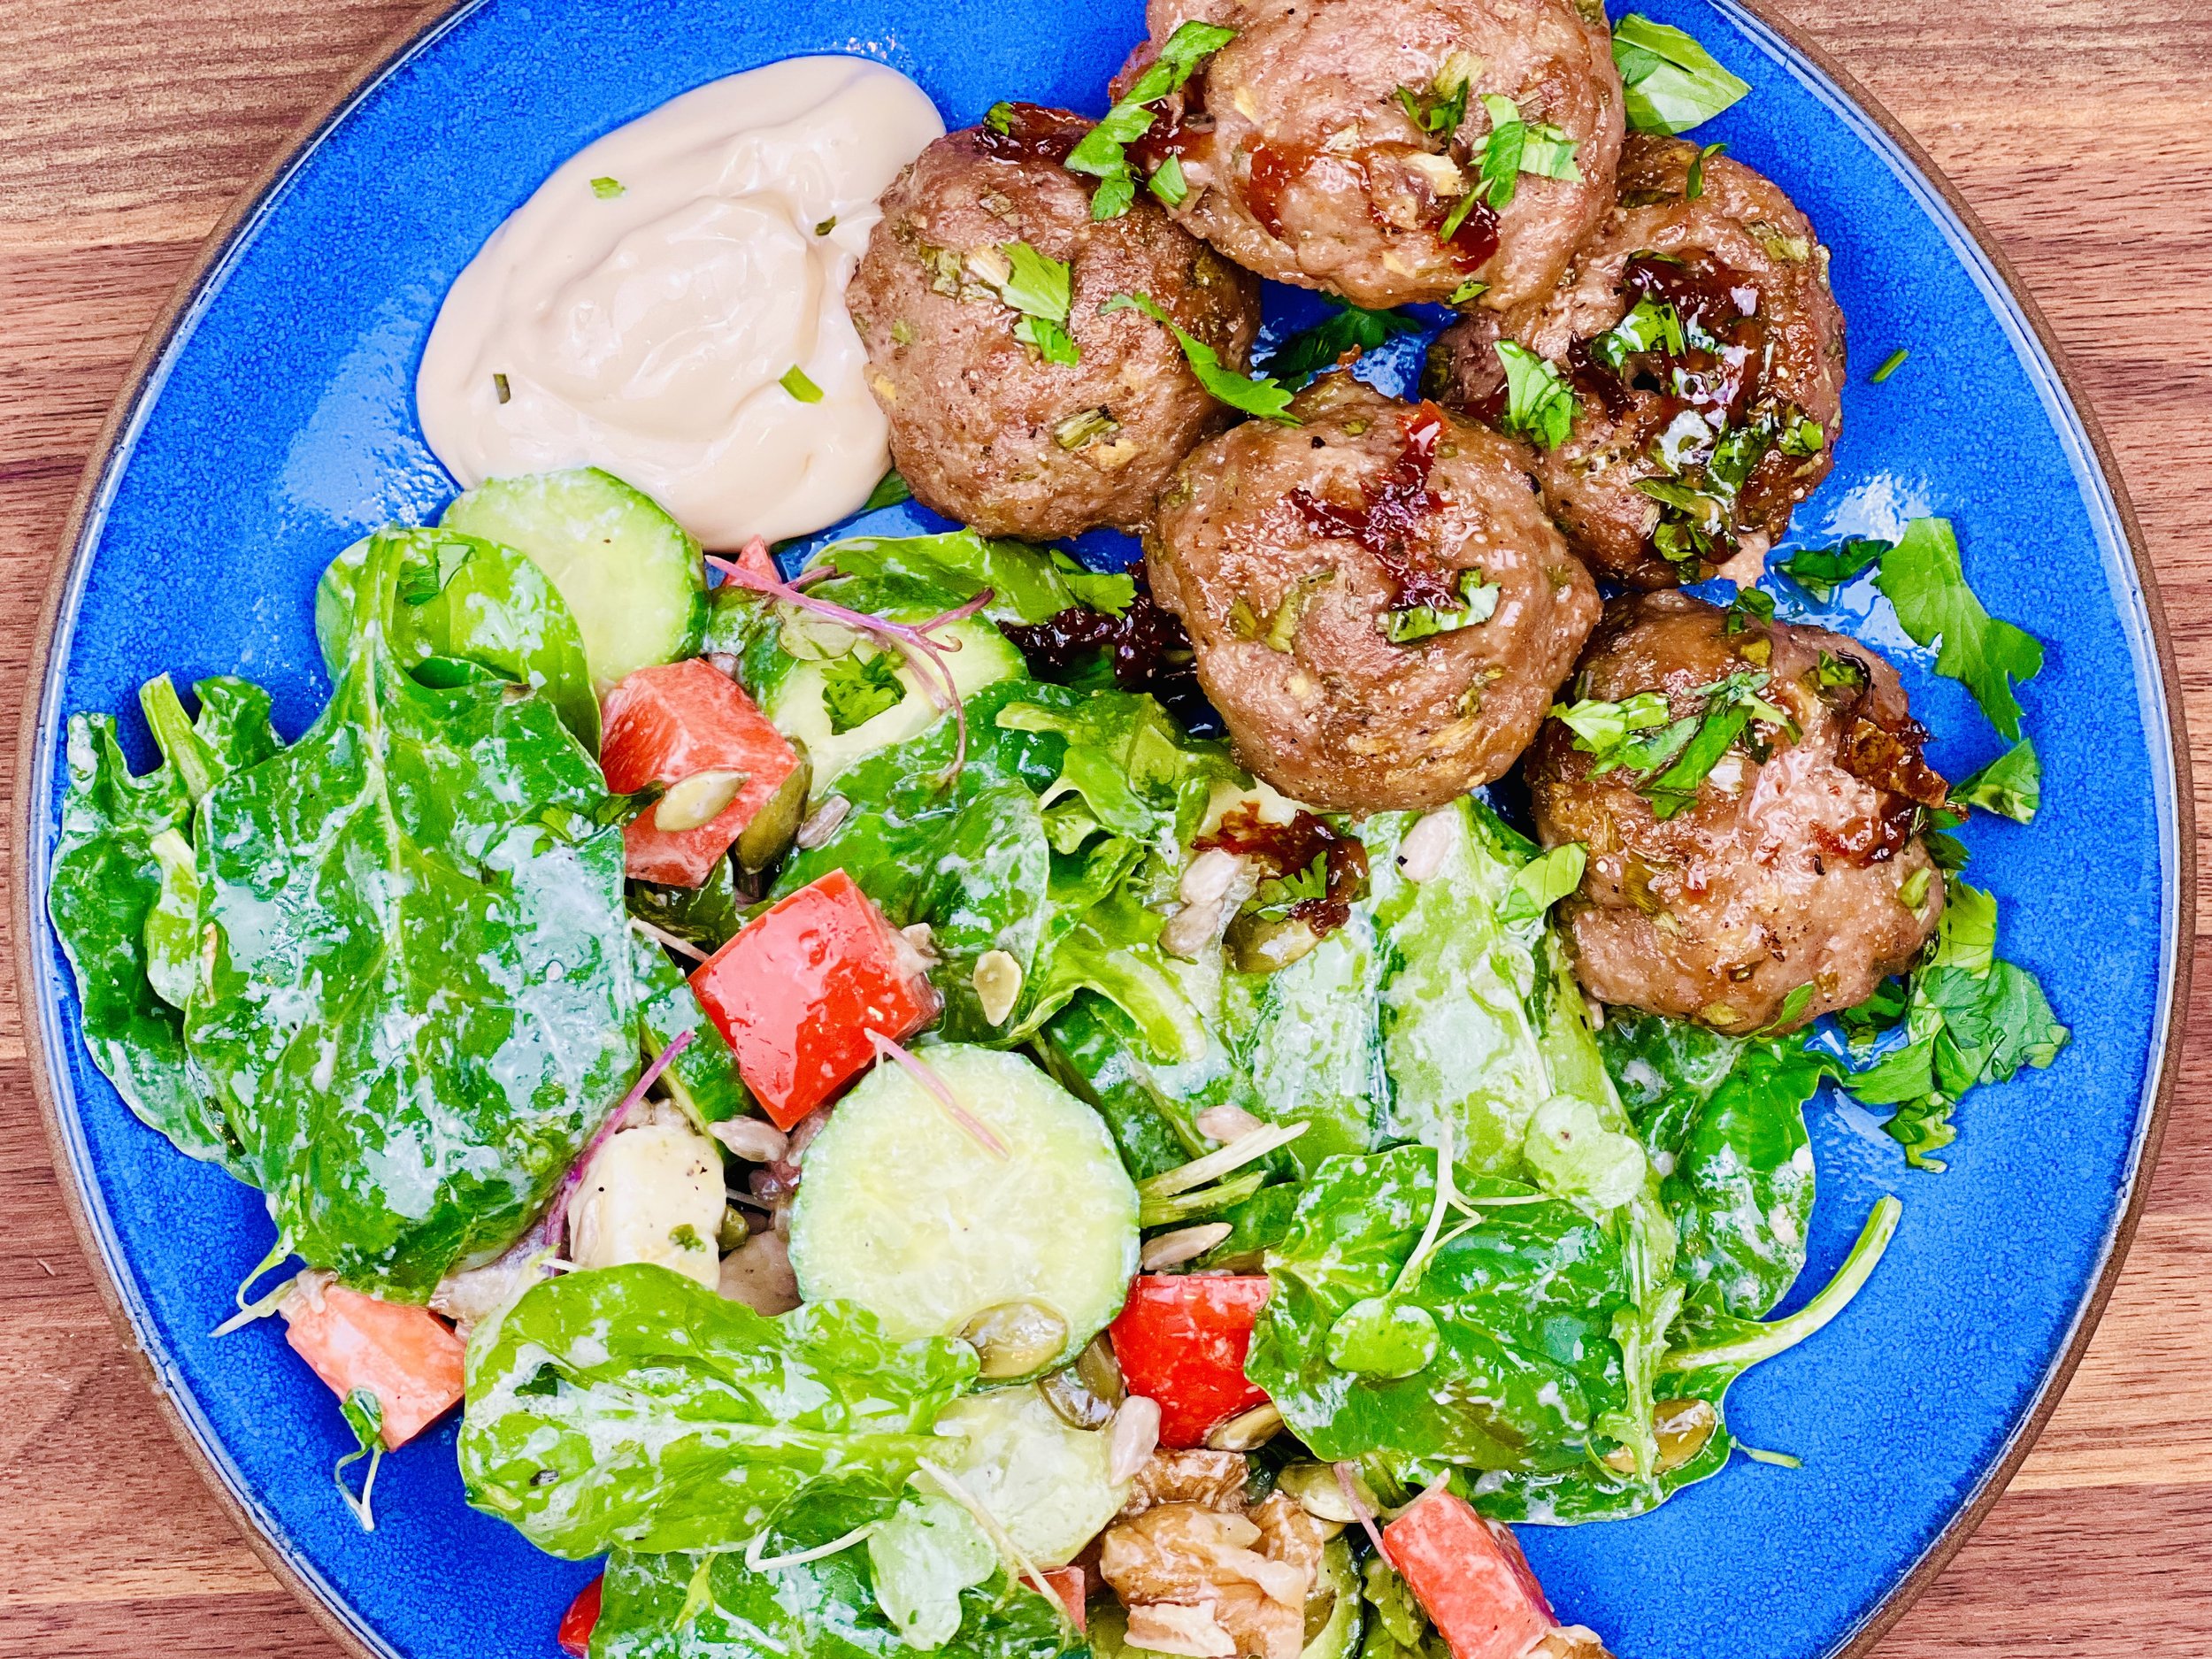
Italian Meatballs with Mushroom Cream Sauce (Low FODMAP)
20 Minutes prep • 30 Minutes cook • Low FODMAP • Gluten-free • Makes 12-24
20 Minutes prep • 30 Minutes cook • Low FODMAP • Gluten-free • Makes 12-24 • Ok to make ahead: Steps 1-3
We often think only of classic spaghetti and meatballs so we pair the meatballs with red sauce and serve them over pasta. This is, of course delicious, but…the combination of creamy white sauce and flavorful meatballs is a great change of pace that I think you will love! I added sauteed mushrooms to the sauce for added flavor, texture, and nutrition. Serve the meatballs on their own as a delicious main course or make bite-size meatballs and serve them as a hot appetizer.
Ingredients: Meatballs
3/4 cup gluten-free panko, gluten-free oats (or use pork panko for a low-carb version)
1 cup parmesan cheese, grated
1 bunch green onions (green part only) chopped
1 large egg (or 2 medium eggs)
2 tablespoons low FODMAP ketchup (I used Smoke N Sanity Ketchup)
2 tablespoons low FODMAP tomato sauce
2 teaspoons gluten-free Worcestershire sauce
2 teaspoons dry thyme
1 teaspoon Kosher salt
1/2 teaspoon black pepper
1 pound ground beef (15% fat, grass-fed, organic preferred)
1 pound ground pork (grass-fed organic preferred)
1 - 2 tablespoons minced fresh parsley, for serving
Ingredients: Cream Sauce
2 tablespoons salted butter
2 tablespoons gluten-free all-purpose flour
1 teaspoon dried thyme
1/2 teaspoon Kosher salt
1/4 teaspoon black pepper to taste
14 ounces low FODMAP chicken broth (I use Whole Foods Organic 365 chicken broth, or Gourmend low FODMAP Organic Chicken Broth - use code IBSGC15 for 15% discount)
1/2 - 3/4 cup dry white wine (such as Sauvignon blanc or chardonnay)
2/3 cup heavy whipping cream
Ingredients: Mushrooms (optional but delicious!)
1 tablespoon extra virgin olive oil
1 tablespoon salted butter
1 teaspoon dry thyme
1 1/2 - 2 cups oyster mushrooms, chopped
1/2 teaspoon Kosher salt
1/4 teaspoon black pepper
Directions: Meatballs
(1) Prepare: Preheat oven to 400 degrees F. Line a large, rimmed baking sheet with parchment paper (for easy cleanup).
(2) Make the meatballs: Combine the panko, parmesan, green onion greens, egg, ketchup, tomato sauce, Worcestershire sauce, thyme, salt, and pepper in a large bowl. Crumble the meat over the mixture and mix well. Shape into 1-1/2-inch balls and place, with a little space in between, on your prepared pan. (If you are making these for an appetizer you can make smaller meatballs and cook them for a shorter period of time.)
(3) Cook the meatballs: Bake for 10 minutes. Check the meatballs and if they are getting overly browned on the bottom, you can turn them over. Otherwise, leave them as is and bake until the meat is no longer pink, about 10 minutes more. Remove from the oven, transfer to a warmed serving dish.
Directions: Sauce
(4) Cook the mushrooms (if using): While the meatballs are cooking, chop the mushrooms. Put a large skillet over medium-high heat. When the pan is hot add 1 tablespoon each olive oil and butter. Add 1 teaspoon dry thyme and let is sizzle in the oil and butter mixture for 30 seconds. Add the chopped mushrooms and cook them, stirring periodically until they turn golden brown. Season with 1/2 teaspoon salt, and 1/4 teaspoon pepper. Remove from heat and set aside.
(5) Make the cream sauce: Melt the butter in a medium saucepan over medium heat. Stir in the flour and cook 1-2 minutes so the flour is cooked in the butter. Add the thyme, salt, and pepper until smooth. While whisking the sauce, gradually add the broth until you have a thick creamy sauce. Next, add the wine, and whisk it into the cream sauce. Finally, add the cream and whisk in. Heat just to a gentle boil, then reduce the heat a bit and cook and stir until thickened about 2 minutes. If you are adding mushrooms, stir them into the cream sauce.
(6) Plate and serve: Drizzle the sauce generously over the meatballs and serve with some extra sauce on the side. Sprinkle the meatballs and sauce with chopped parsley. If you like, serve the meatballs on a bed of pasta or rice.
Eat and enjoy every bite because you can!
Recipe note: I use Diamond Crystal Kosher salt in all my recipes because it has a wonderful flat and crisp flake that tastes delicious. It is also the least salty salt available so you can use it more liberally as a seasoning than you can table salt or sea salt. If you use another type of salt, you may need to reduce the amount so it is not over-salted.
Have a question you’d like to have answered? Email me at hello@ibsgamechanger.com
Link note: This post may contain affiliate links for you to easily purchase items that are linked. I may earn a small commission from qualifying purchases but none of this costs you a thing so feel free to use the links! In addition, for some items, I have provided a special discount code for IBS Game Changers so be sure to use the code when you purchase an item to get the discount that has been arranged just for you.
More Deliciously Low FODMAP™ main course recipes
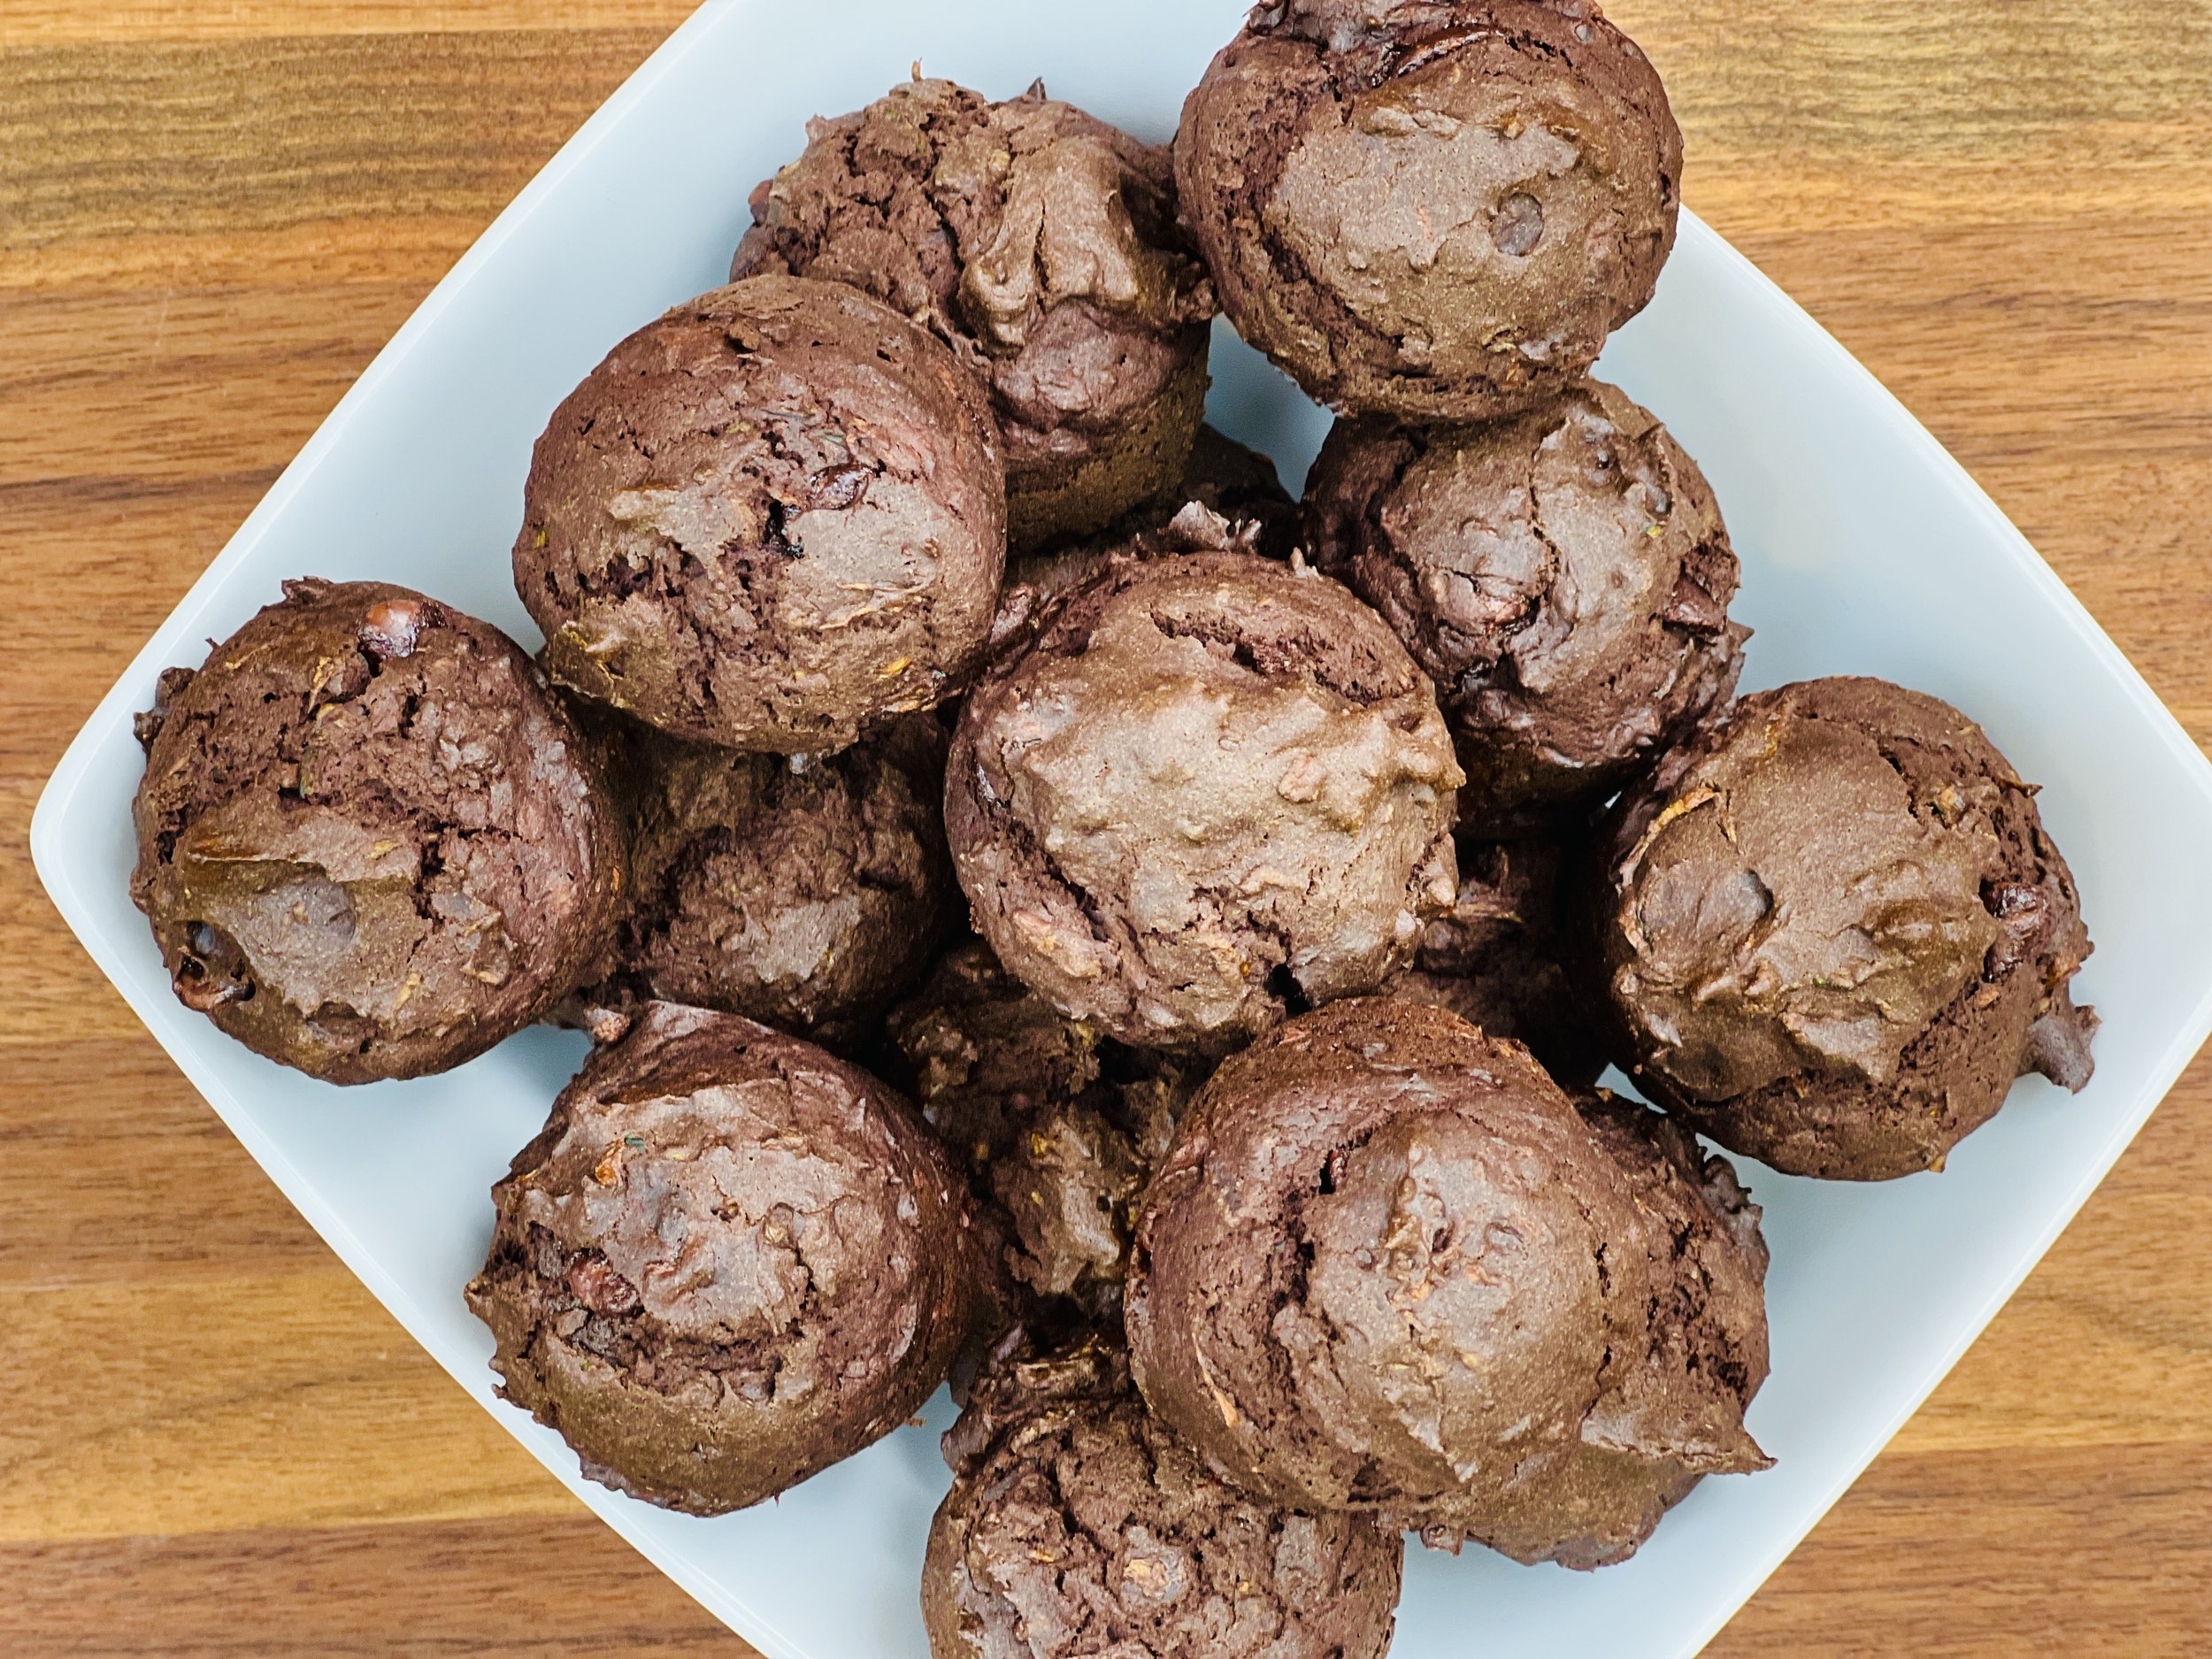
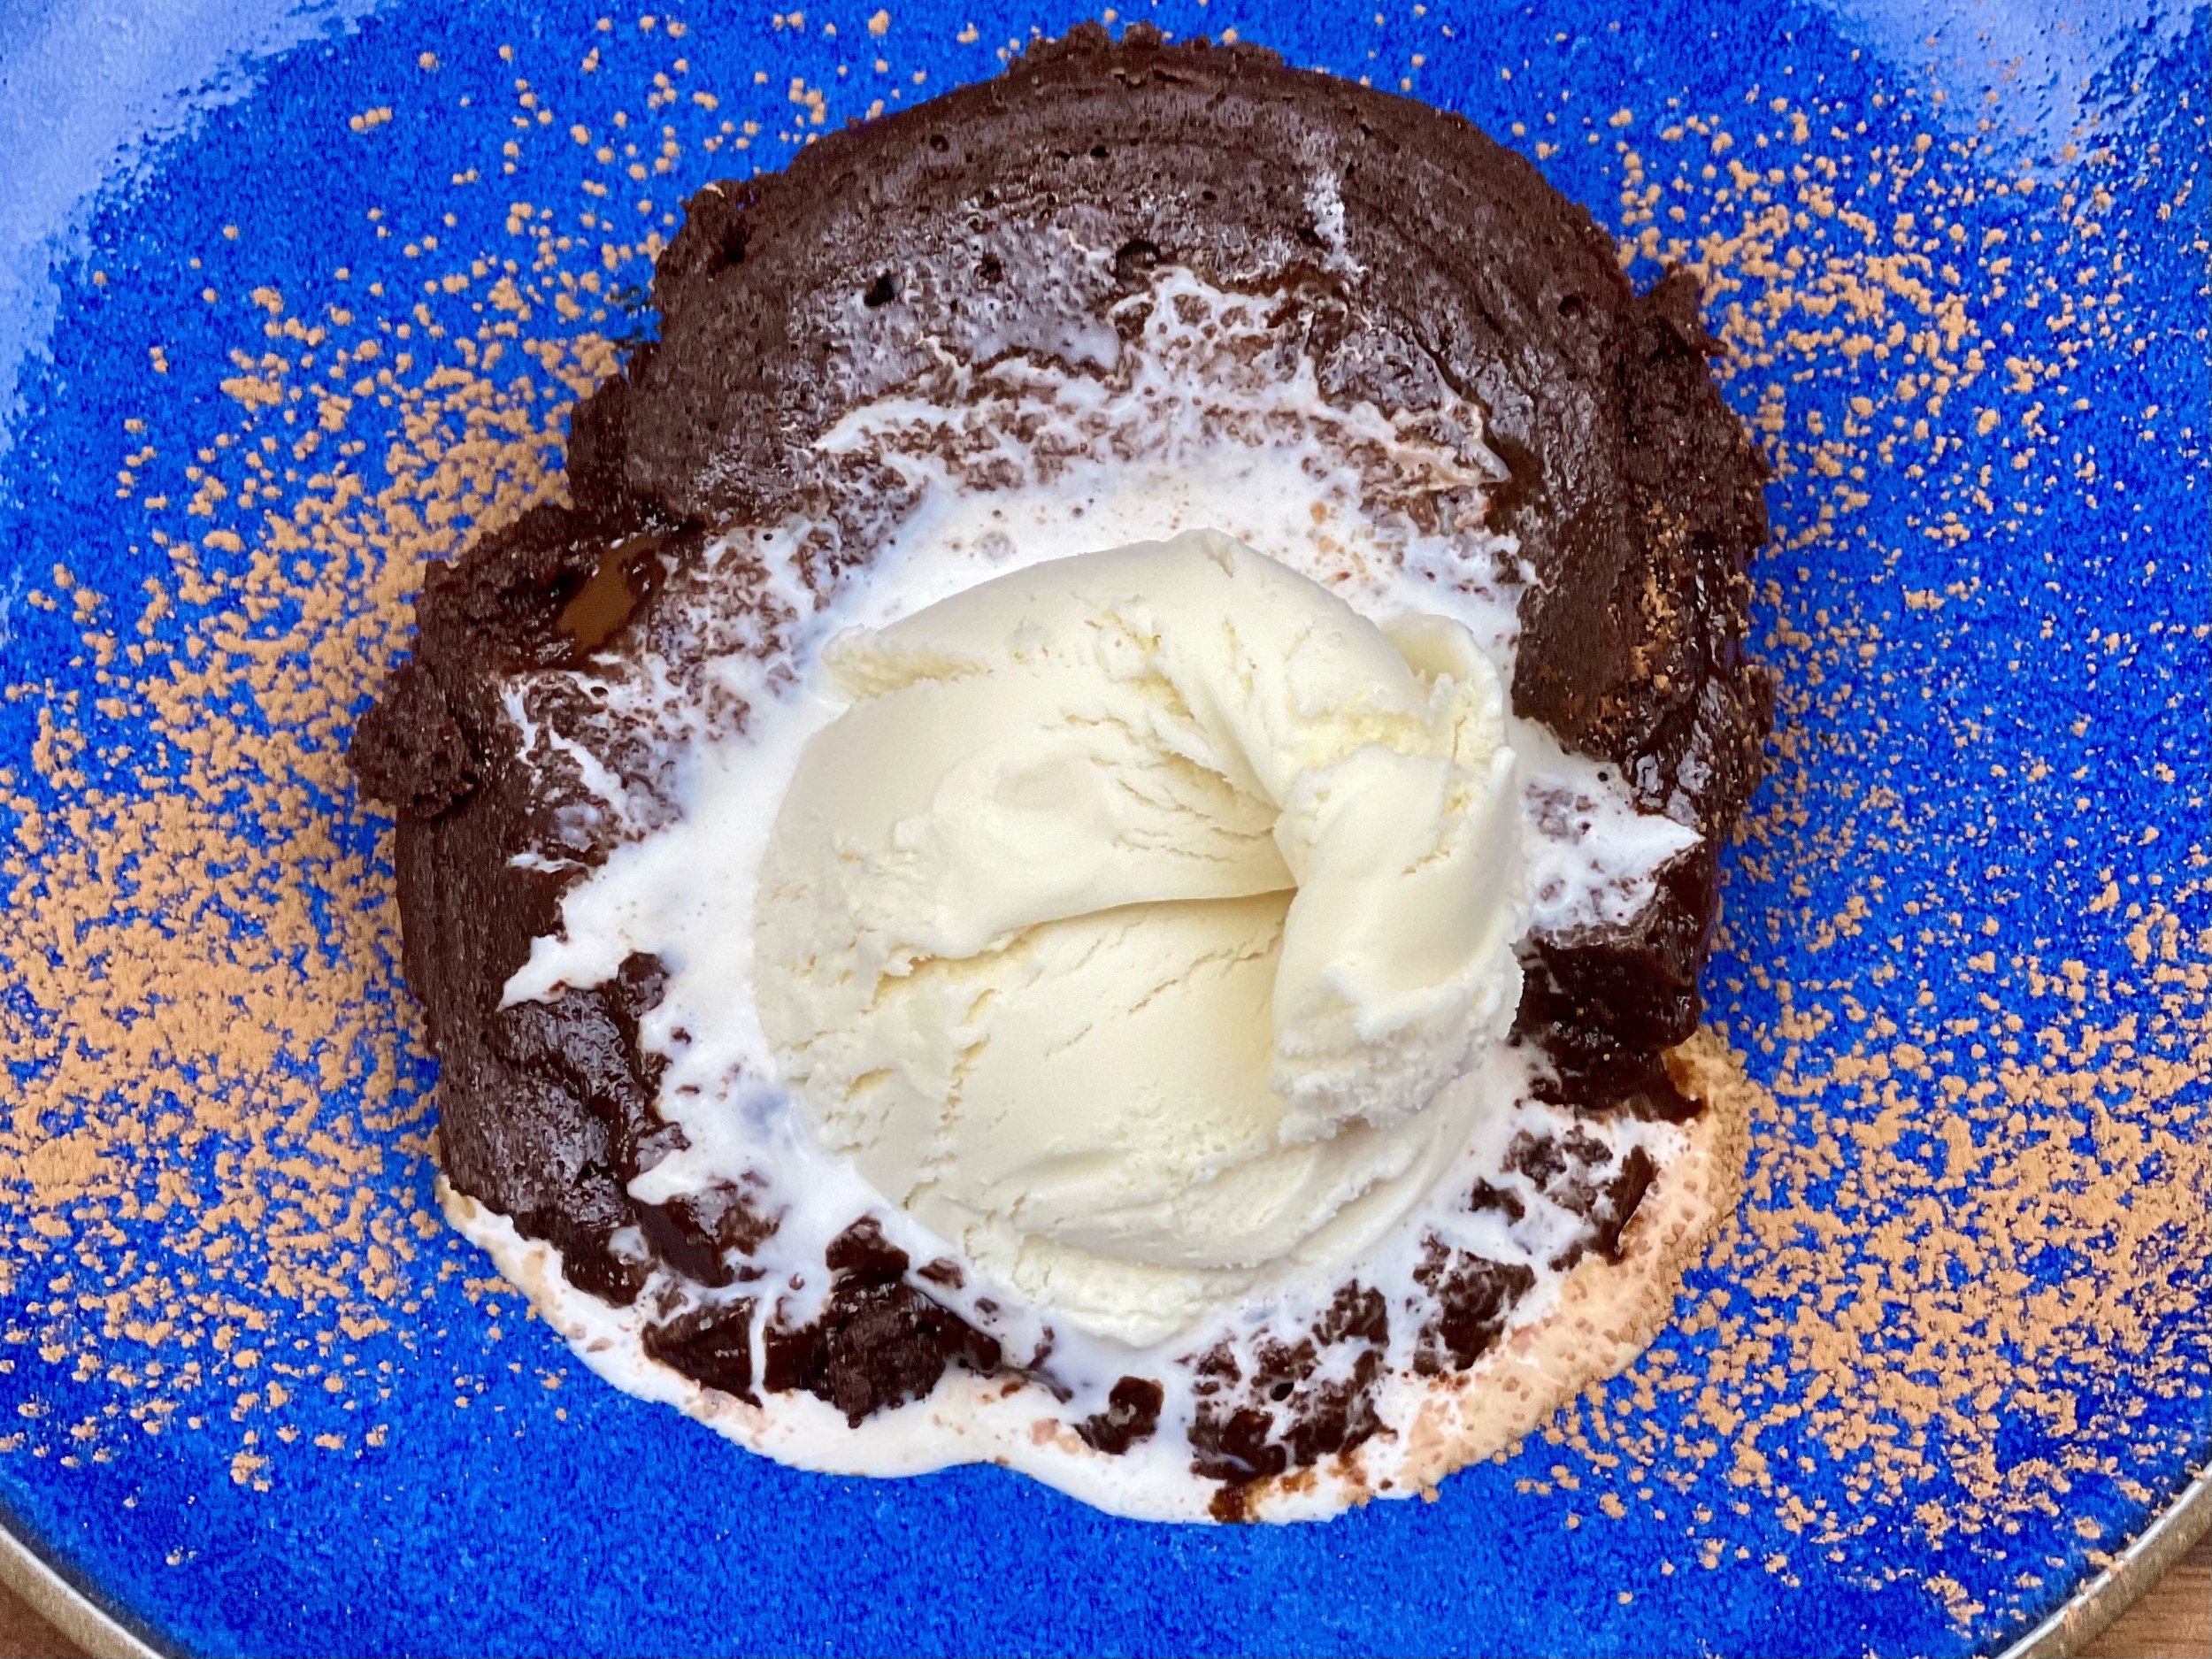
Dark Chocolate, Espresso, and Coconut Mini Muffins (Low FODMAP)
15 Minutes prep • 25 Minutes cook • Low FODMAP • Gluten-free • Lactose-free • Makes 24
15 Minutes prep • 25 Minutes cook • Low FODMAP • Gluten-free • Lactose-free • Makes 24 • Ok to make ahead: Steps 1-5
Deep dark chocolate. A hint of coconut. Rich chocolate chips. And zucchini! These mini muffins are so delicious the whole family will love them. And don’t let the “mini” size fool you, the flavor is intense enough that one mini muffin is the right amount! You make them all in one bowl so clean up is easy. Don’t want to eat them all at once? They freeze beautifully and thaw quickly at room temperature. I used cacao and cacao nibs (along with the chocolate chips) in this recipe for some added gut biome benefit, but you can use regular cocoa with the chocolate chips and they will be equally delicious.
This is an exclusive recipe just for recipe club members.
In addition to the two free recipes I create each week I am creating and delivering one very special recipe just for my recipe club members. If you’re not yet a member, I encourage you to join! Membership in the club includes access to the complete archive of recipes with filters so it can become your virtual low FODMAP cookbook plus, I am creating and delivering one special NEW recipe every week ONLY for recipe club members.
Your membership in the club helps me continue creating new, delicious, easy-to-make, low FODMAP recipes just for you.
As always, all recipes will emphasize simple ingredients, easy preparation, and delicious low FODMAP results. Recipes will be for everything from main courses, salads, soups, side dishes, appetizers, desserts, sauces, breakfast and lunch, and even mocktails and cocktails. Everything you need to prepare fantastic low FODMAP meals everyone will love.
Join the club. Let’s keep making delicious Low FODMAP meals together.
Link note: This post may contain affiliate links for you to easily purchase items that are linked. I may earn a small commission from qualifying purchases but none of this costs you a thing so feel free to use the links! In addition, for some items, I have provided a special discount code for IBS Game Changers so be sure to use the code when you purchase an item to get the discount that has been arranged just for you.
More Deliciously Low FODMAP™ dessert recipes
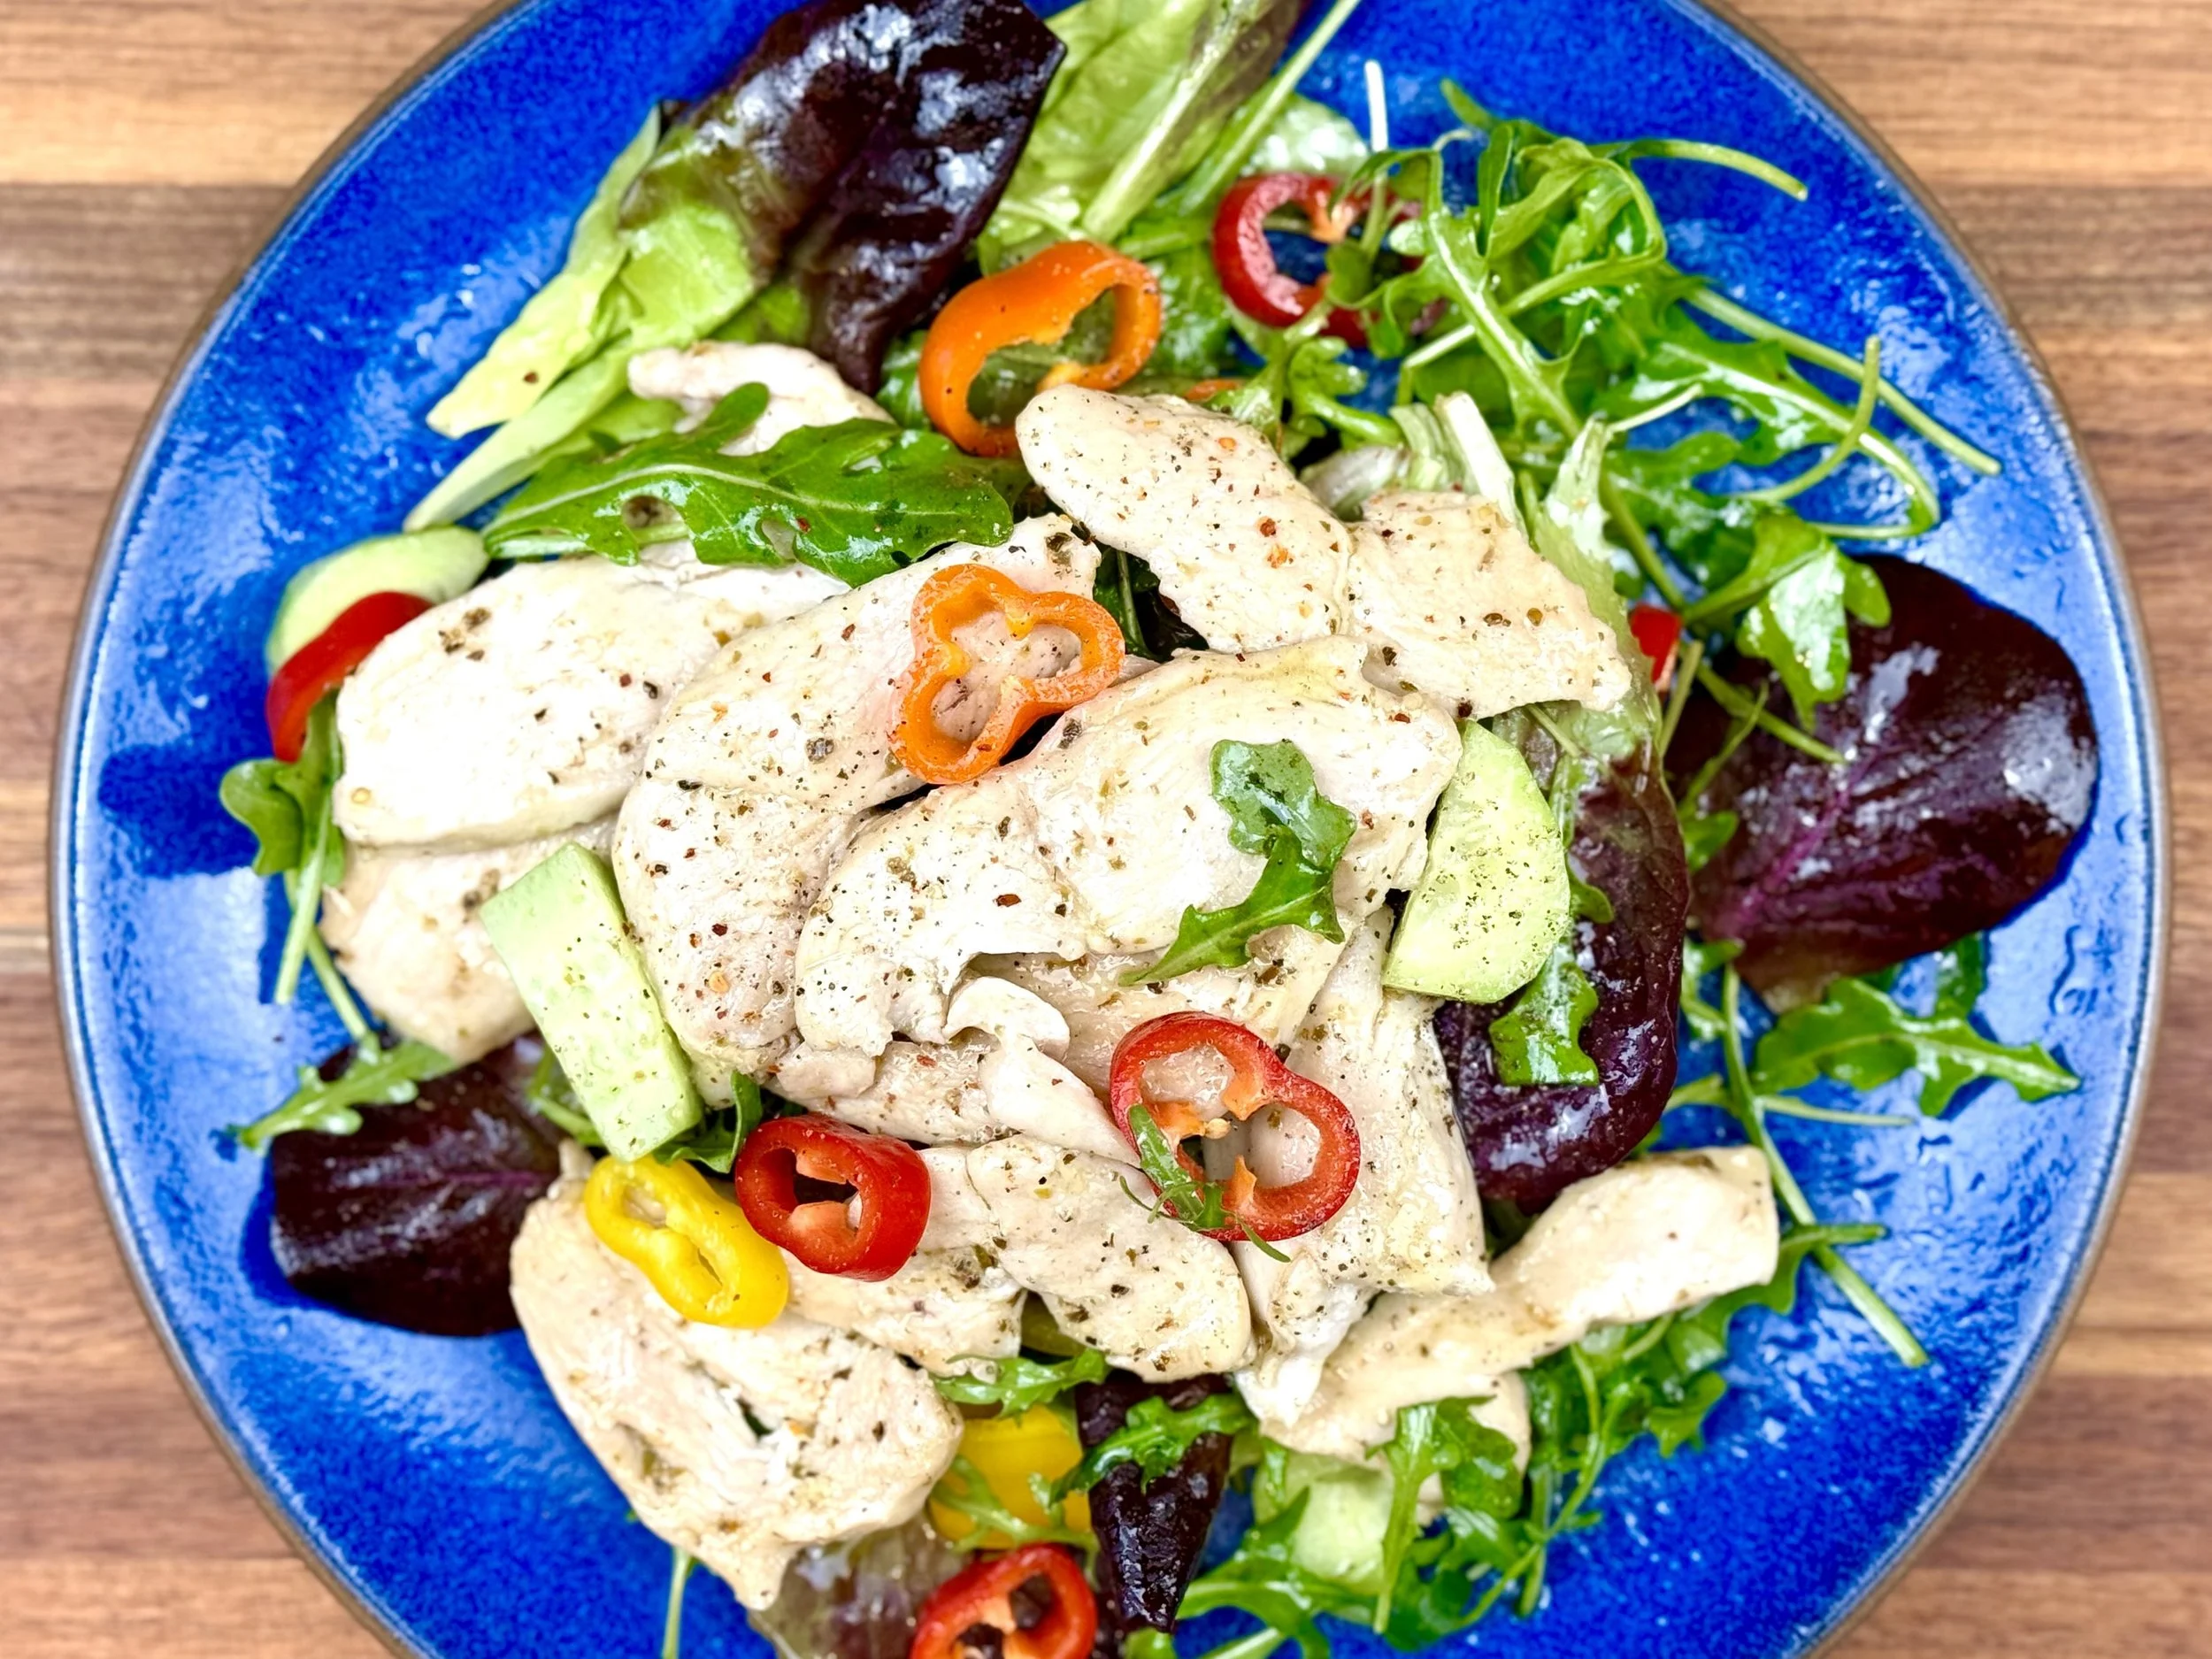
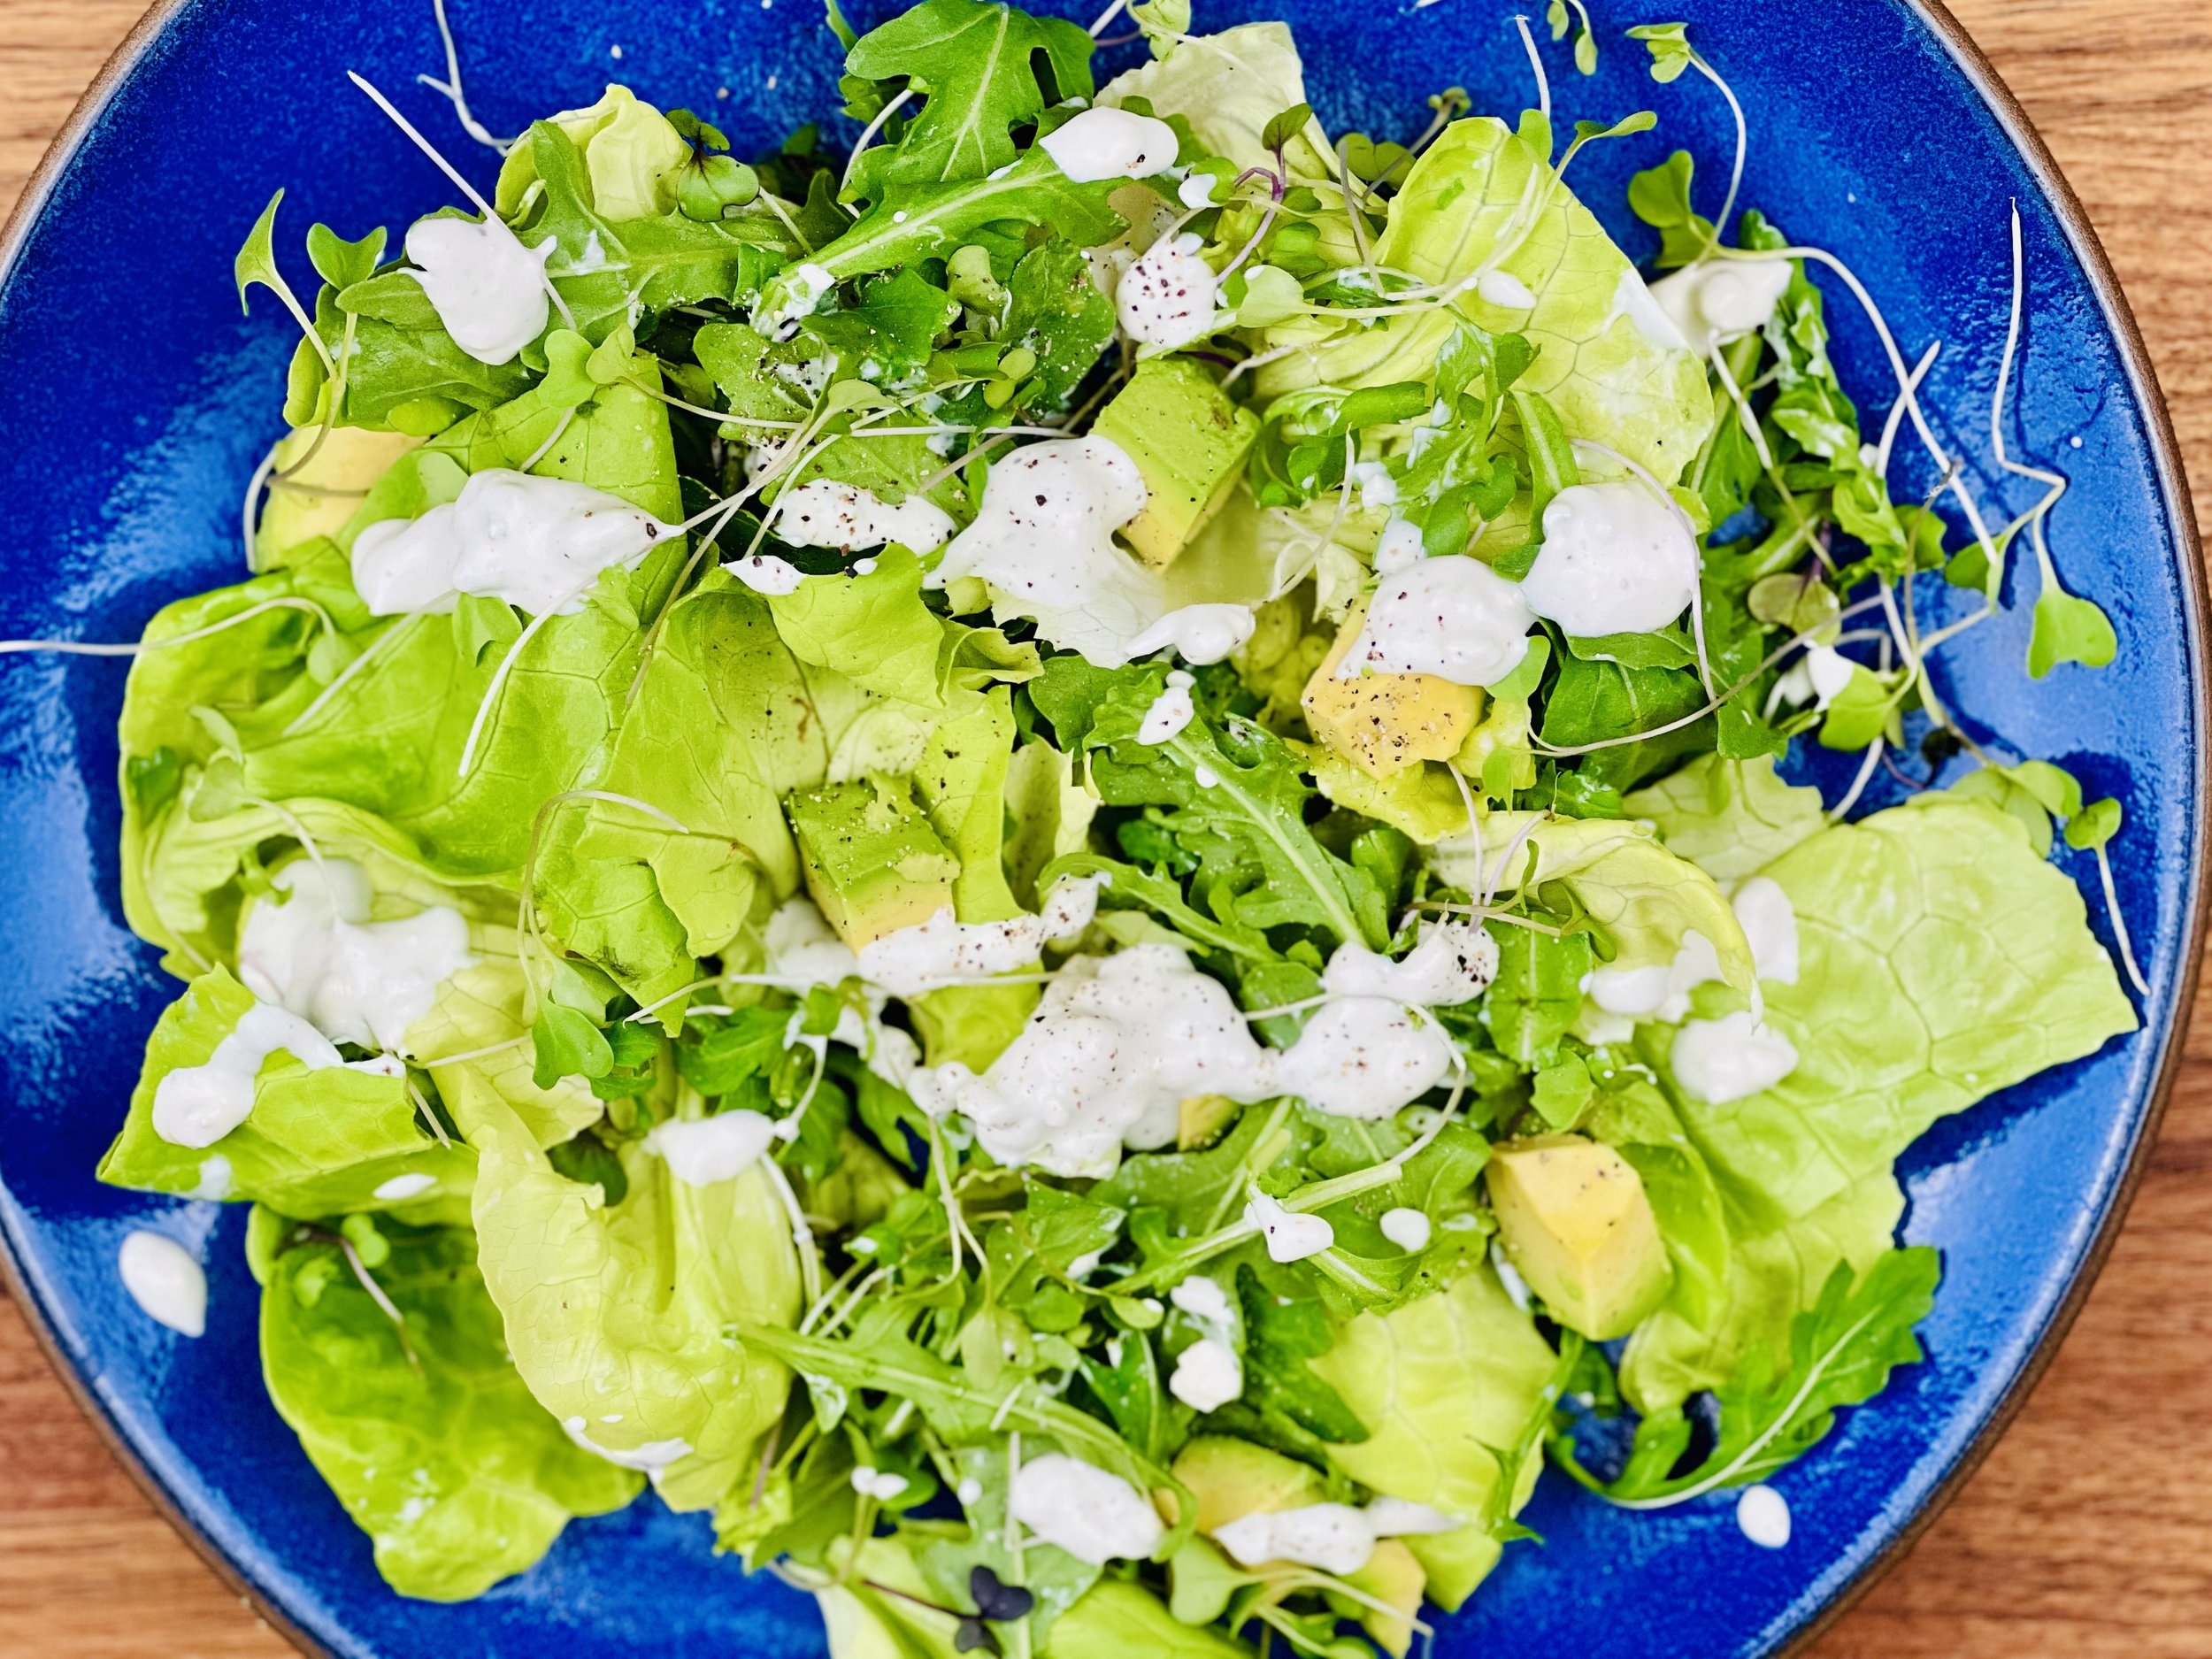
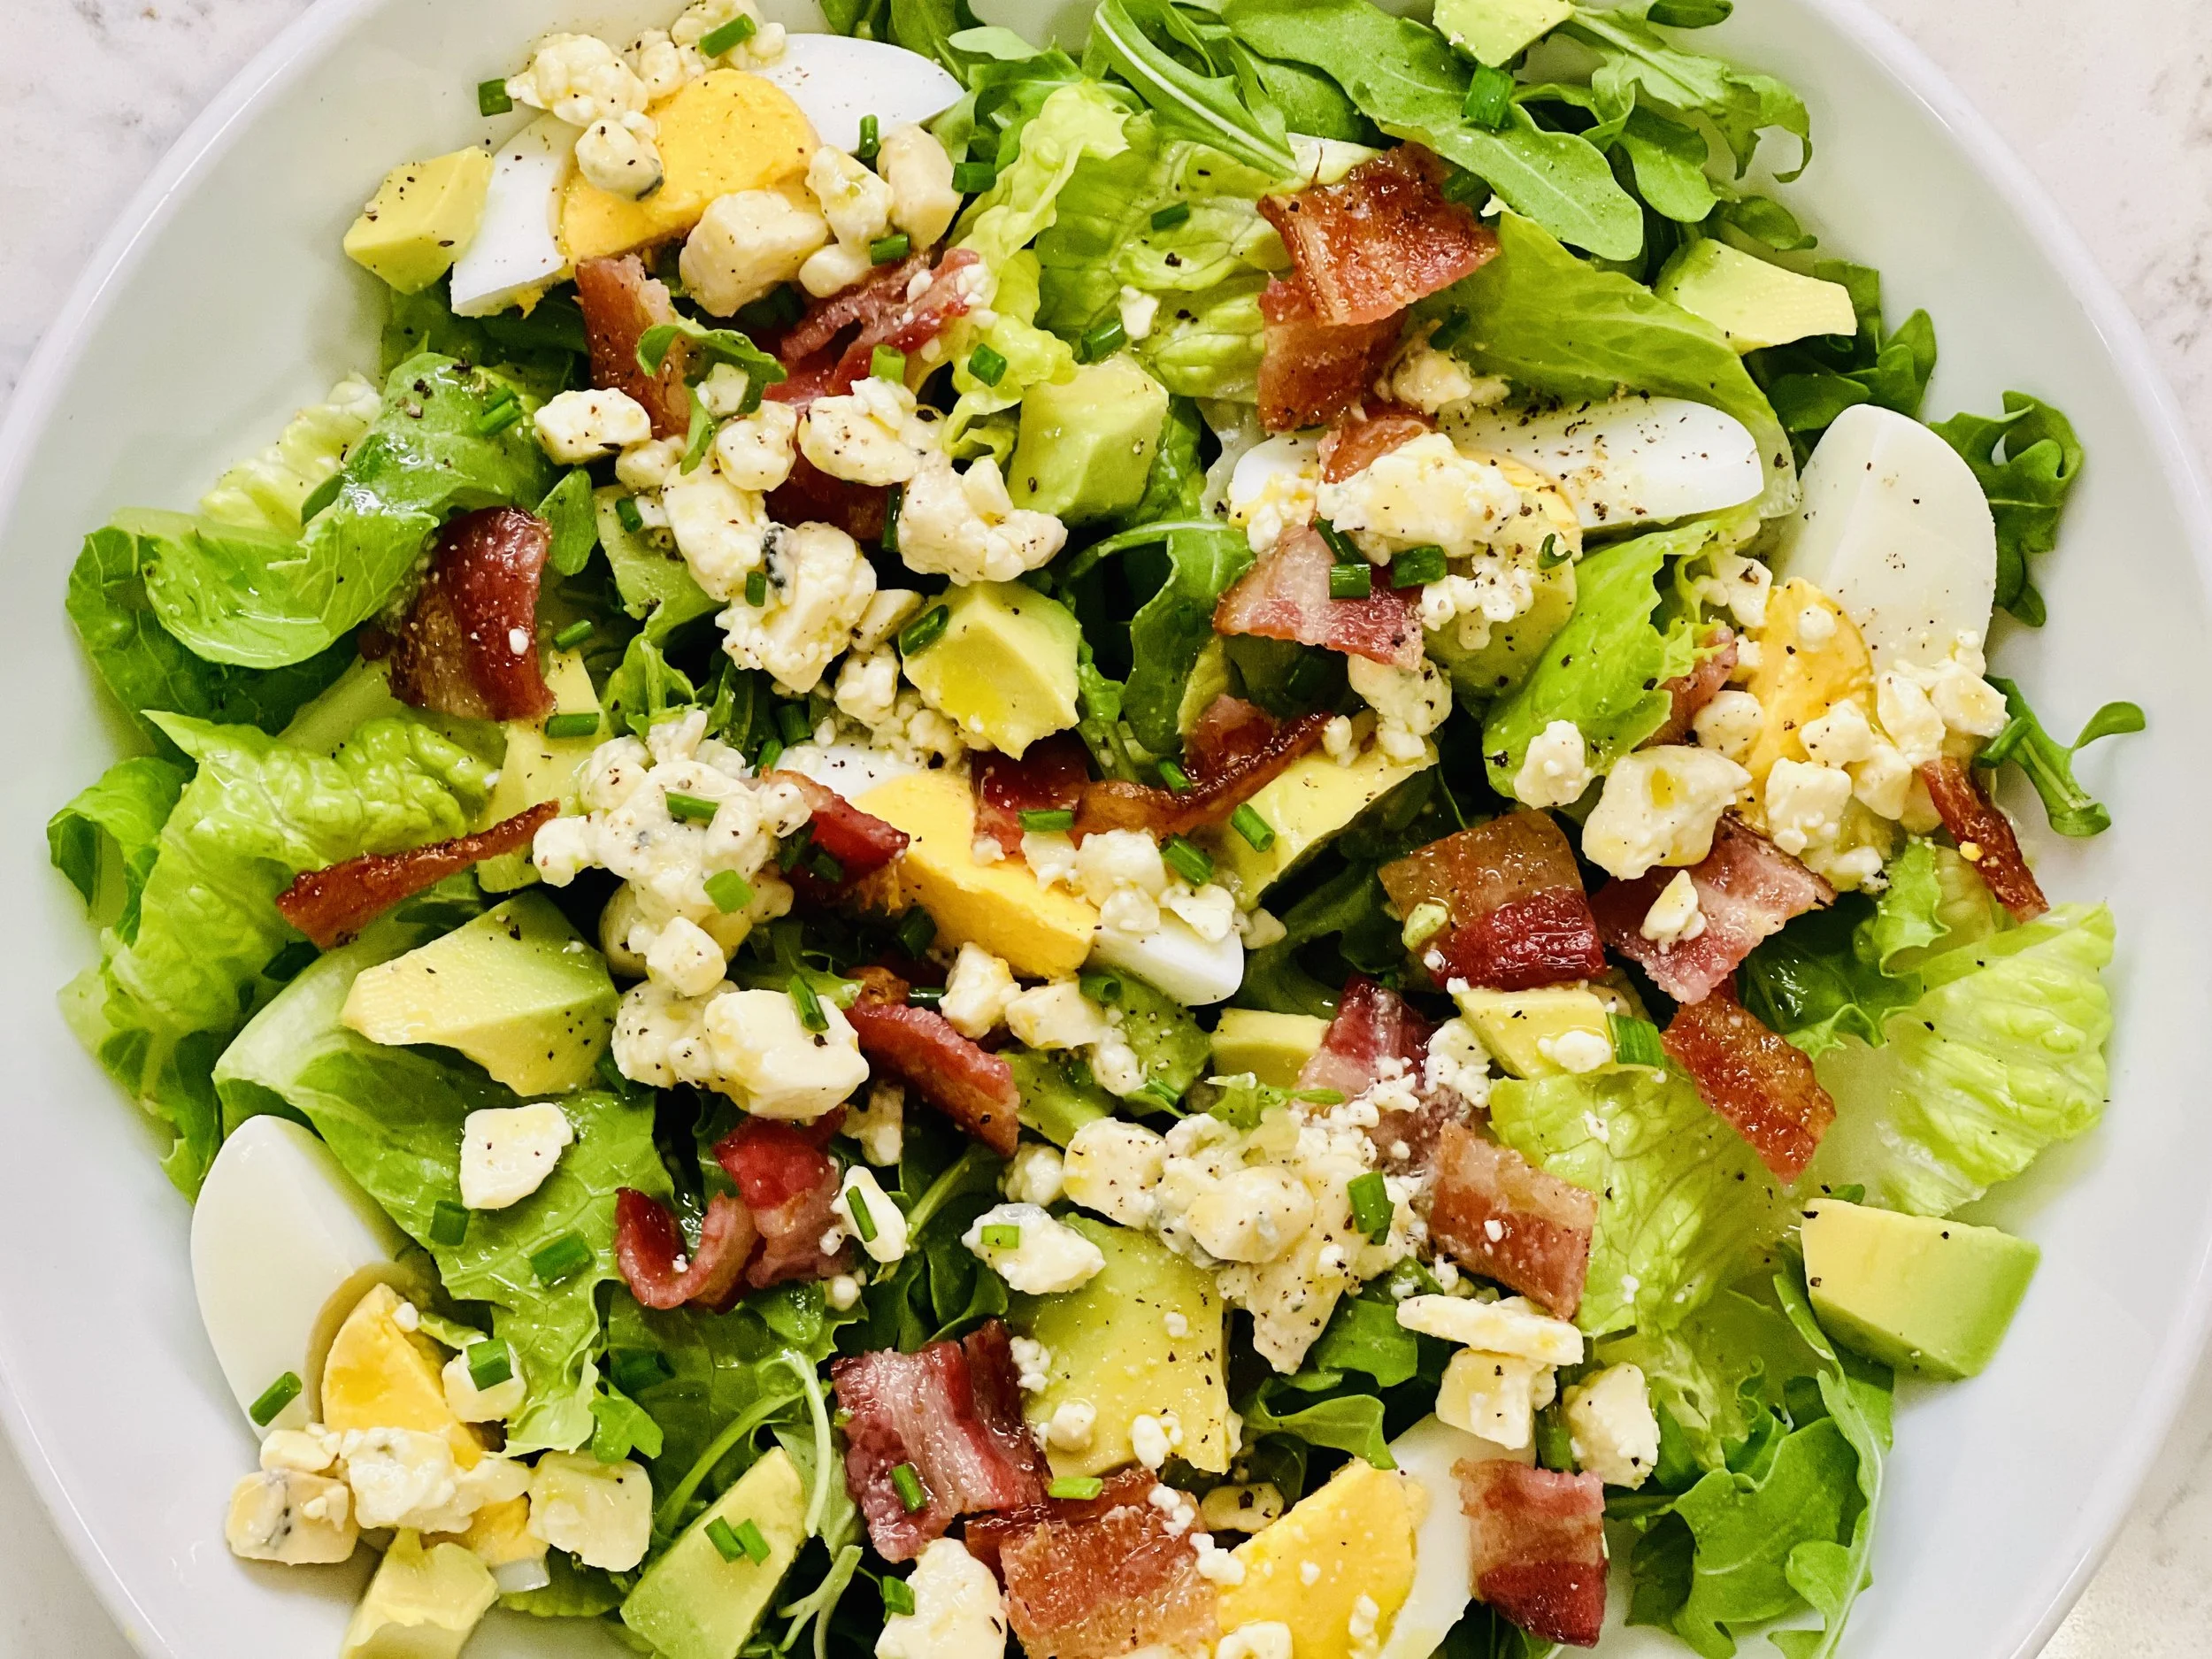
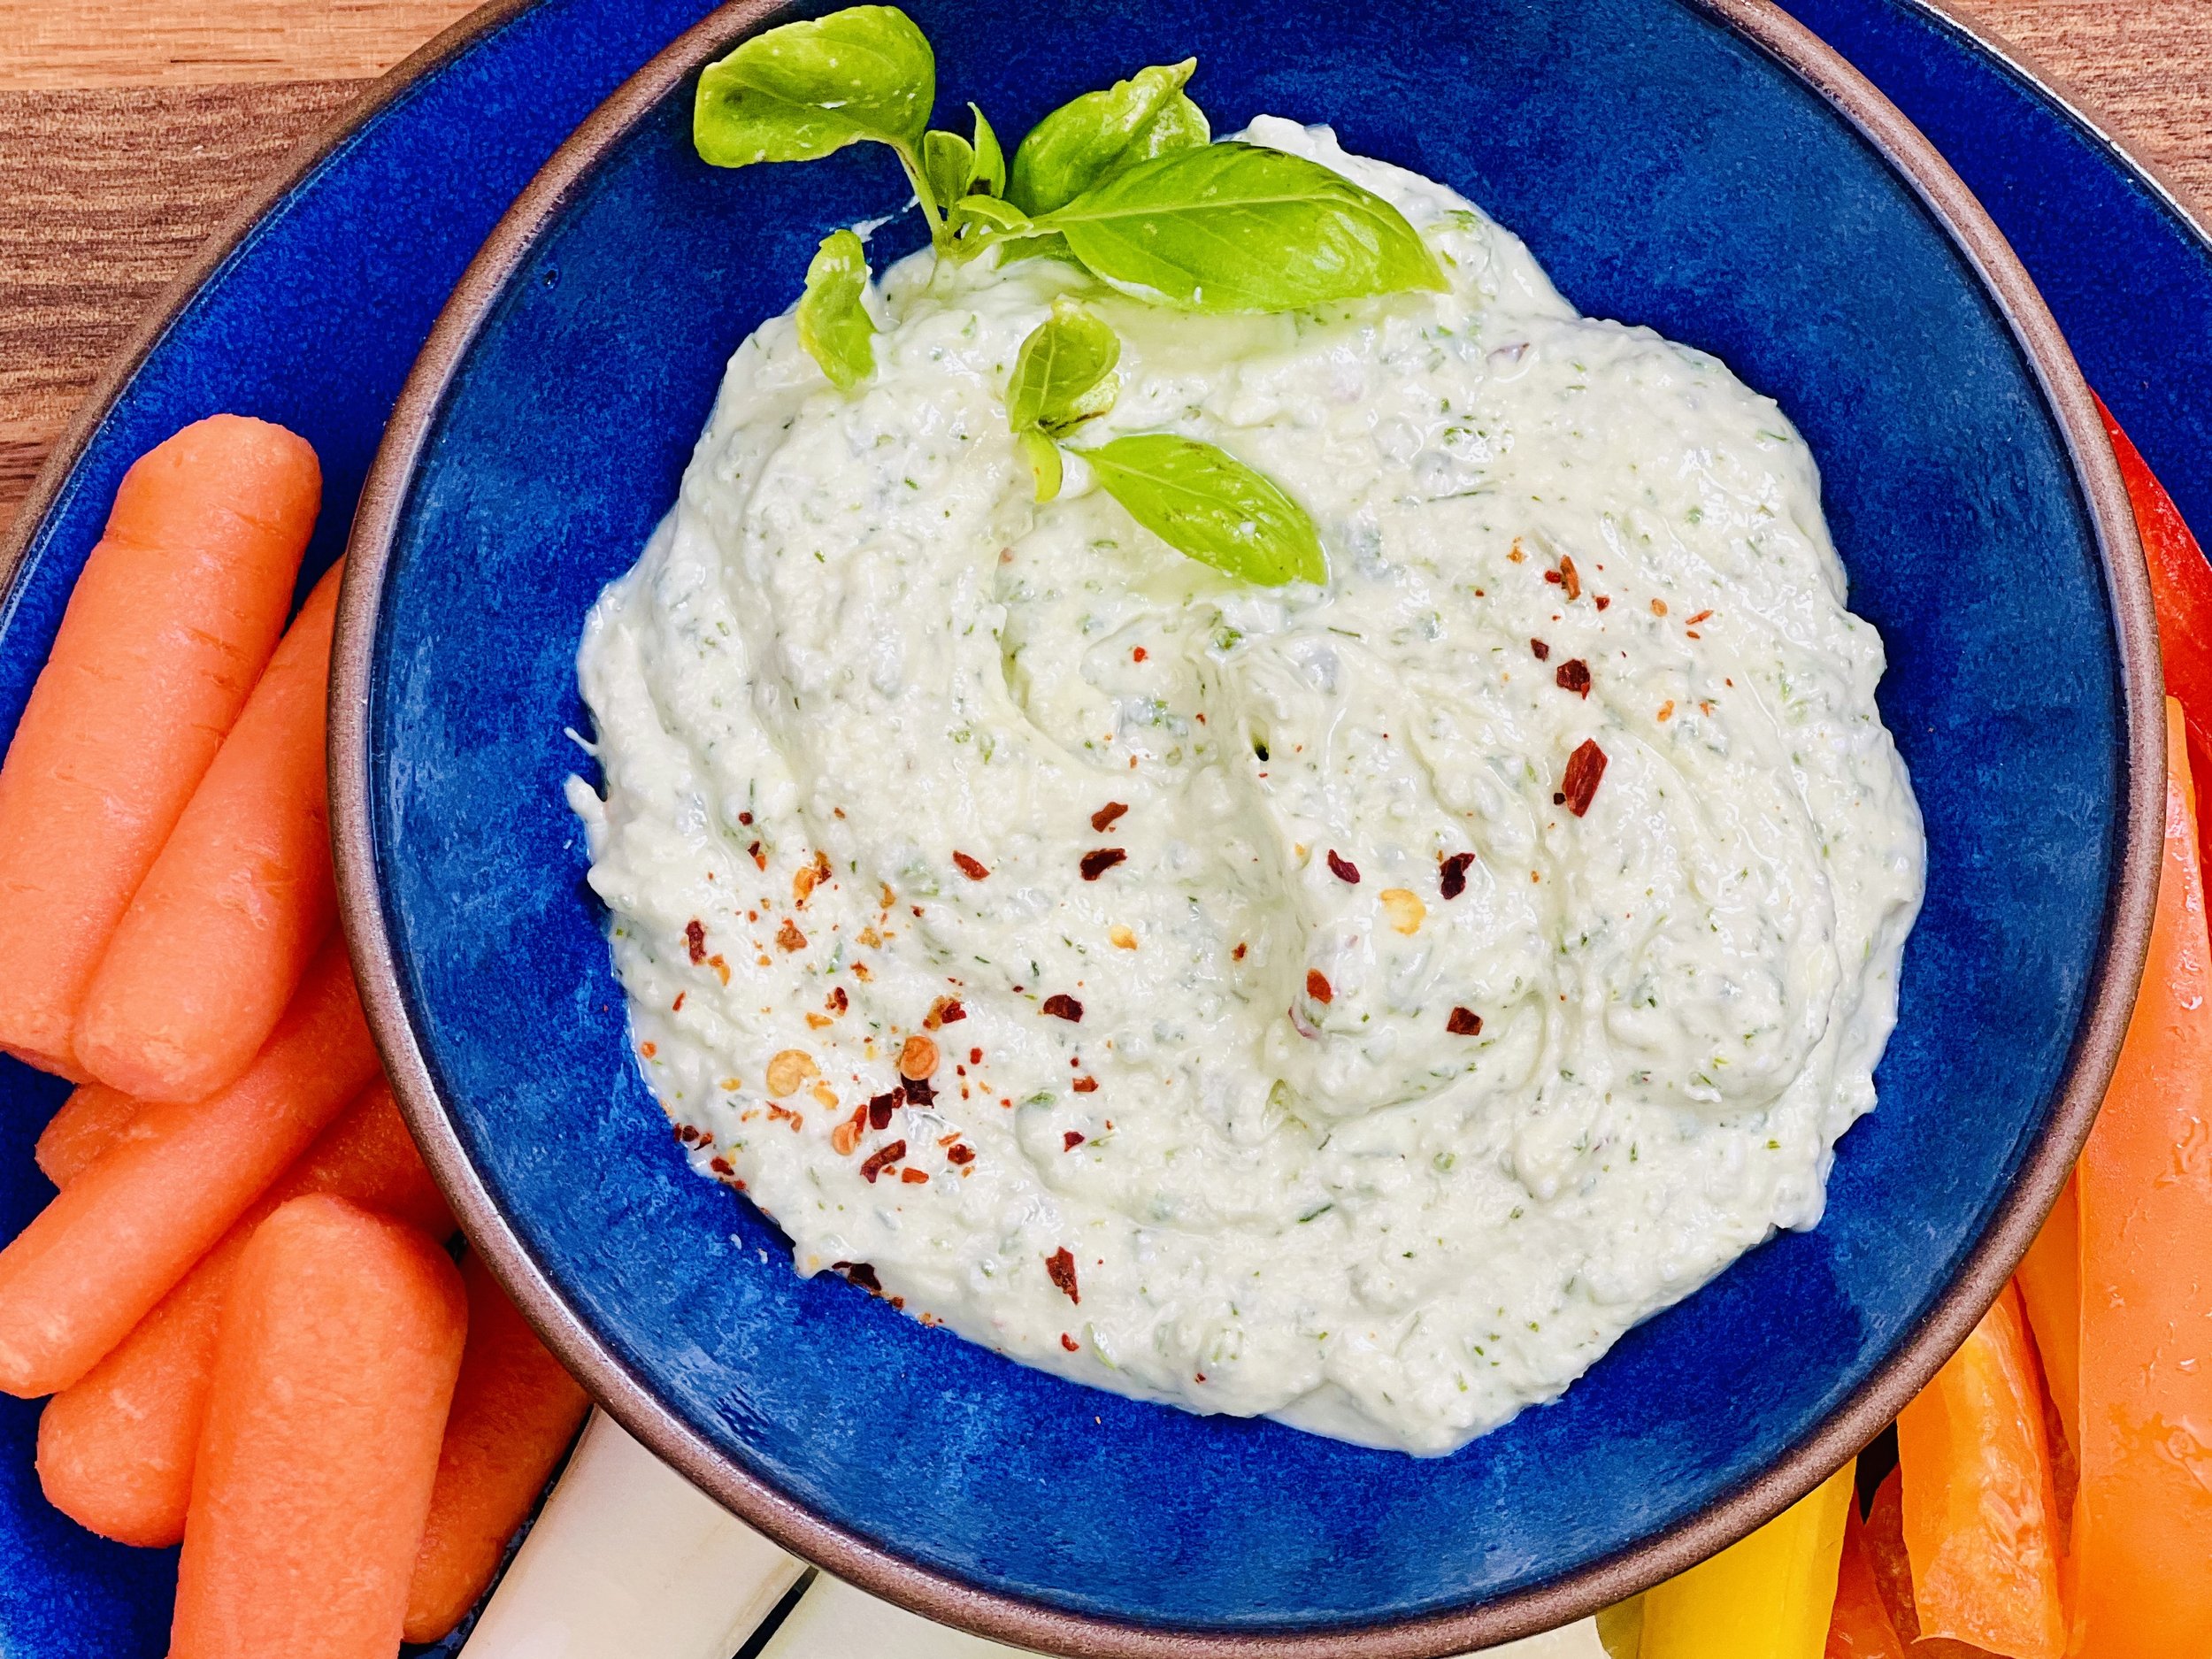
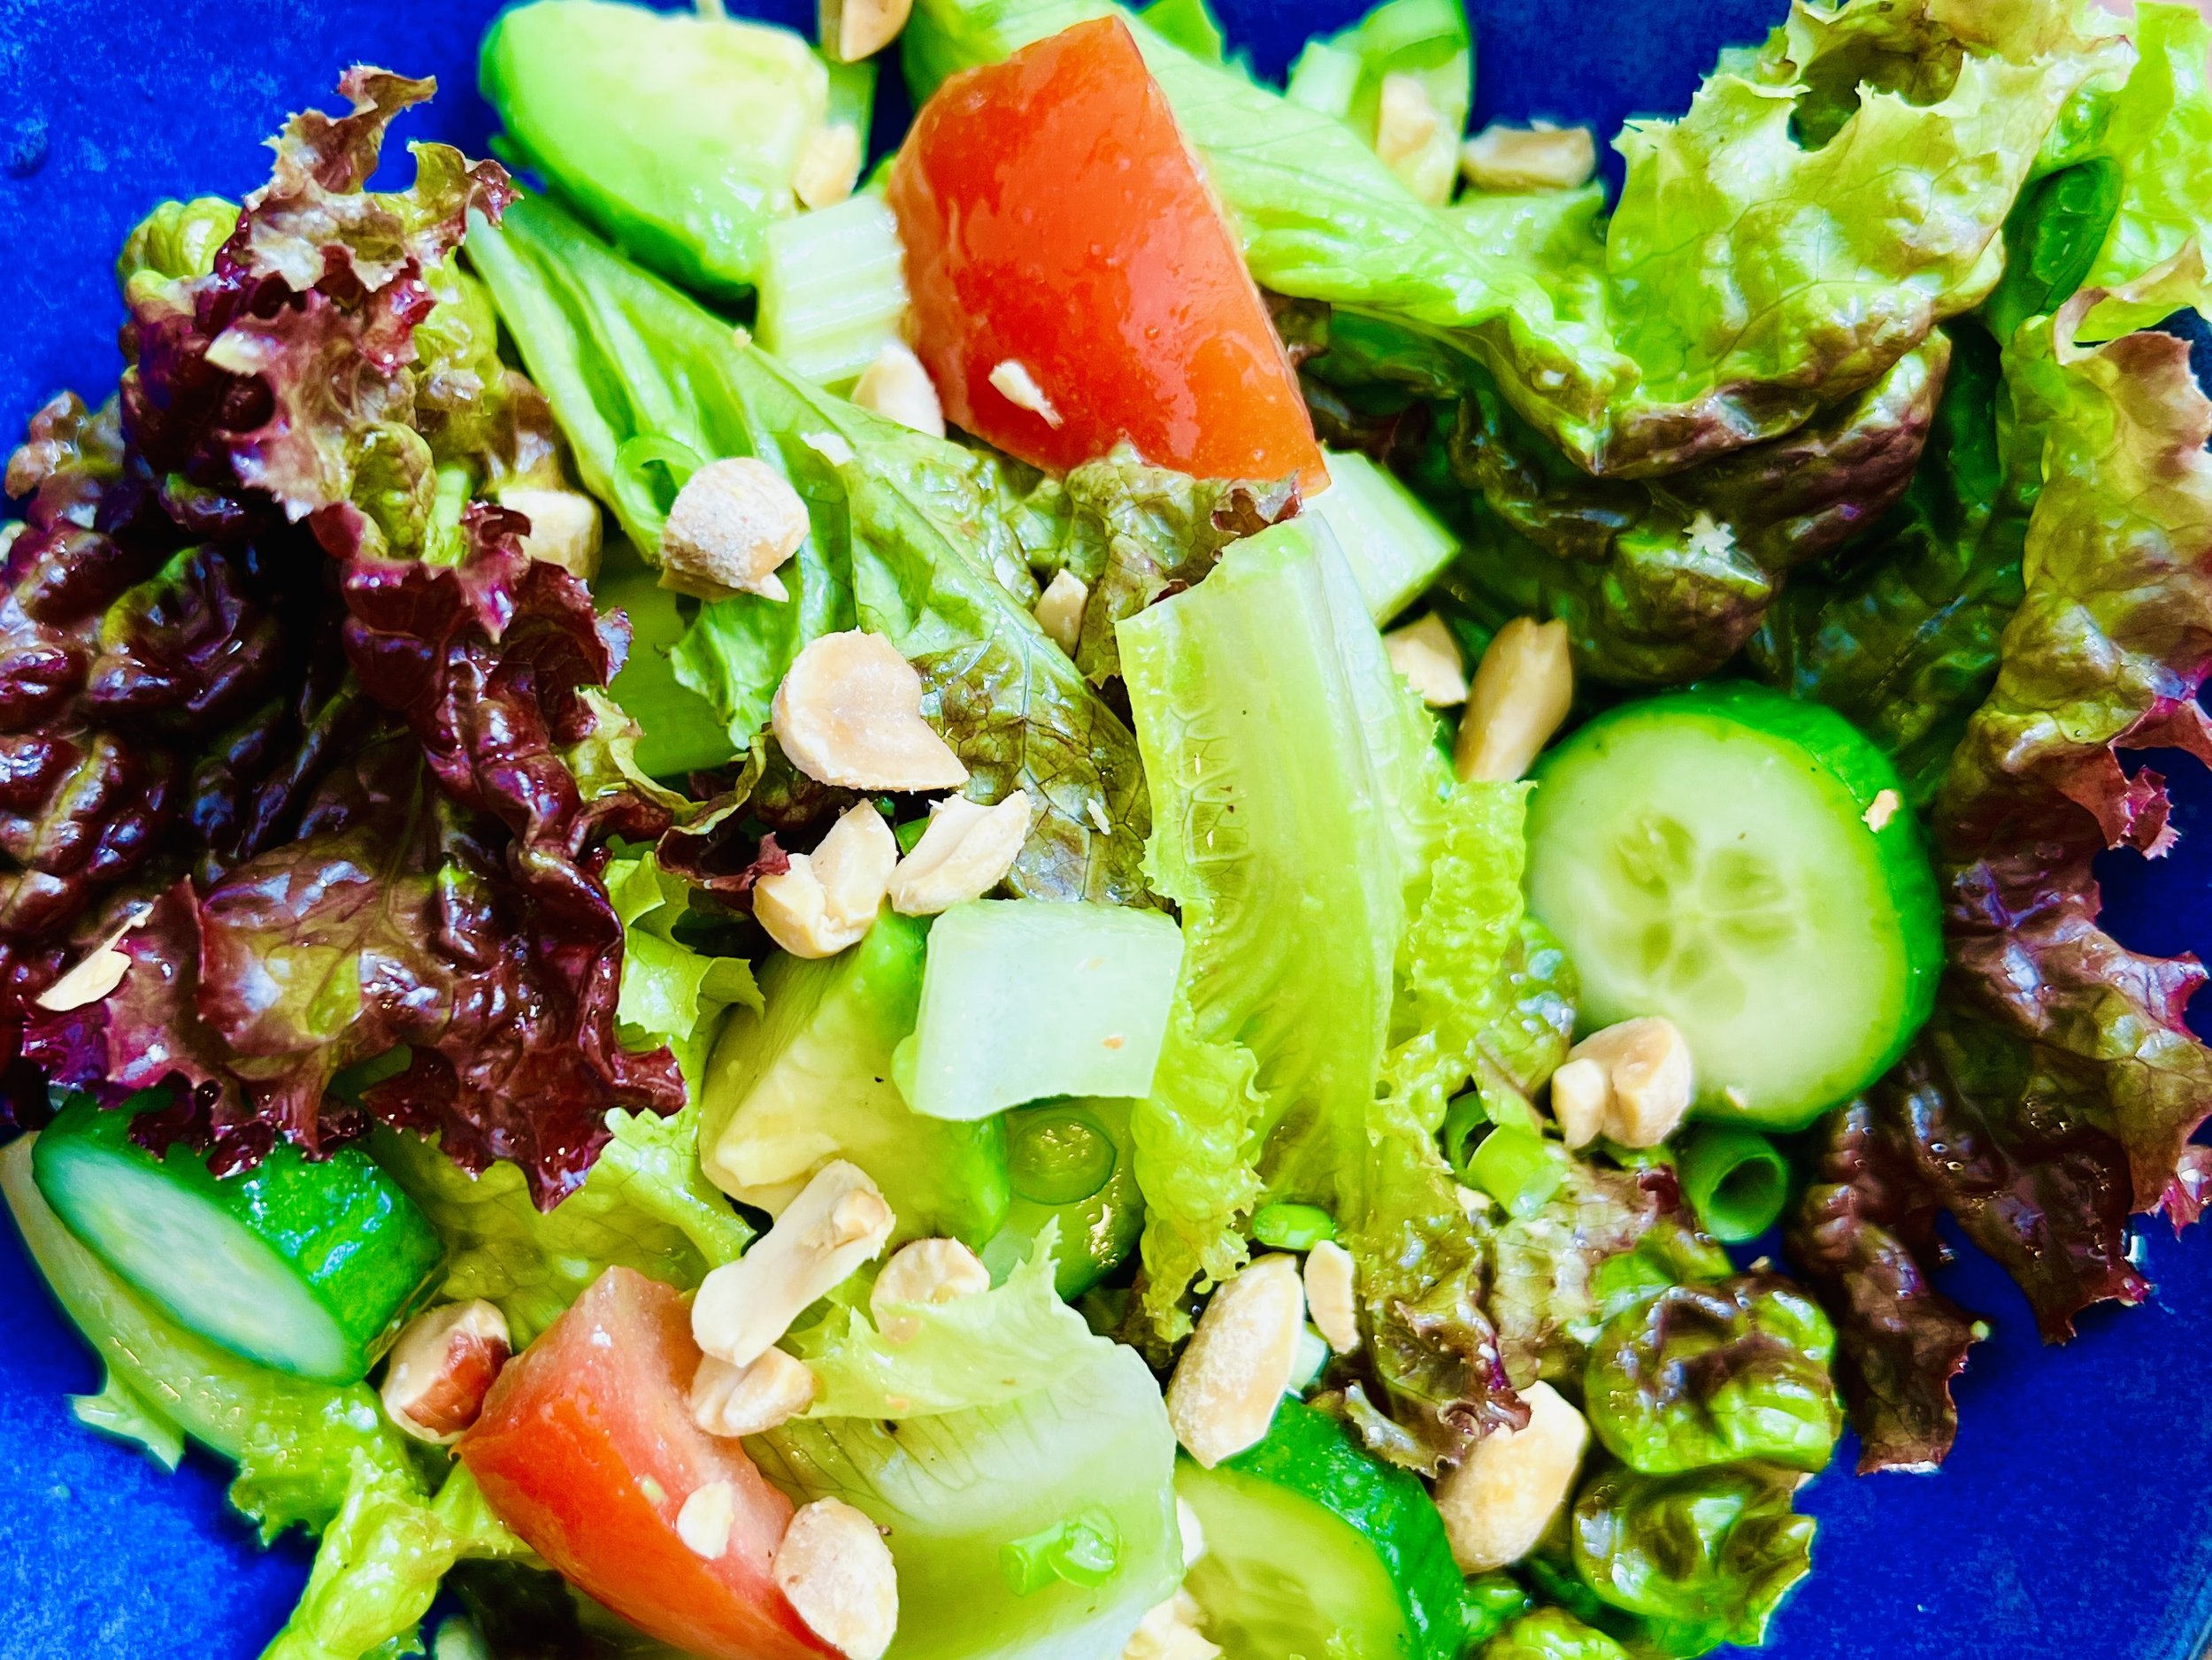
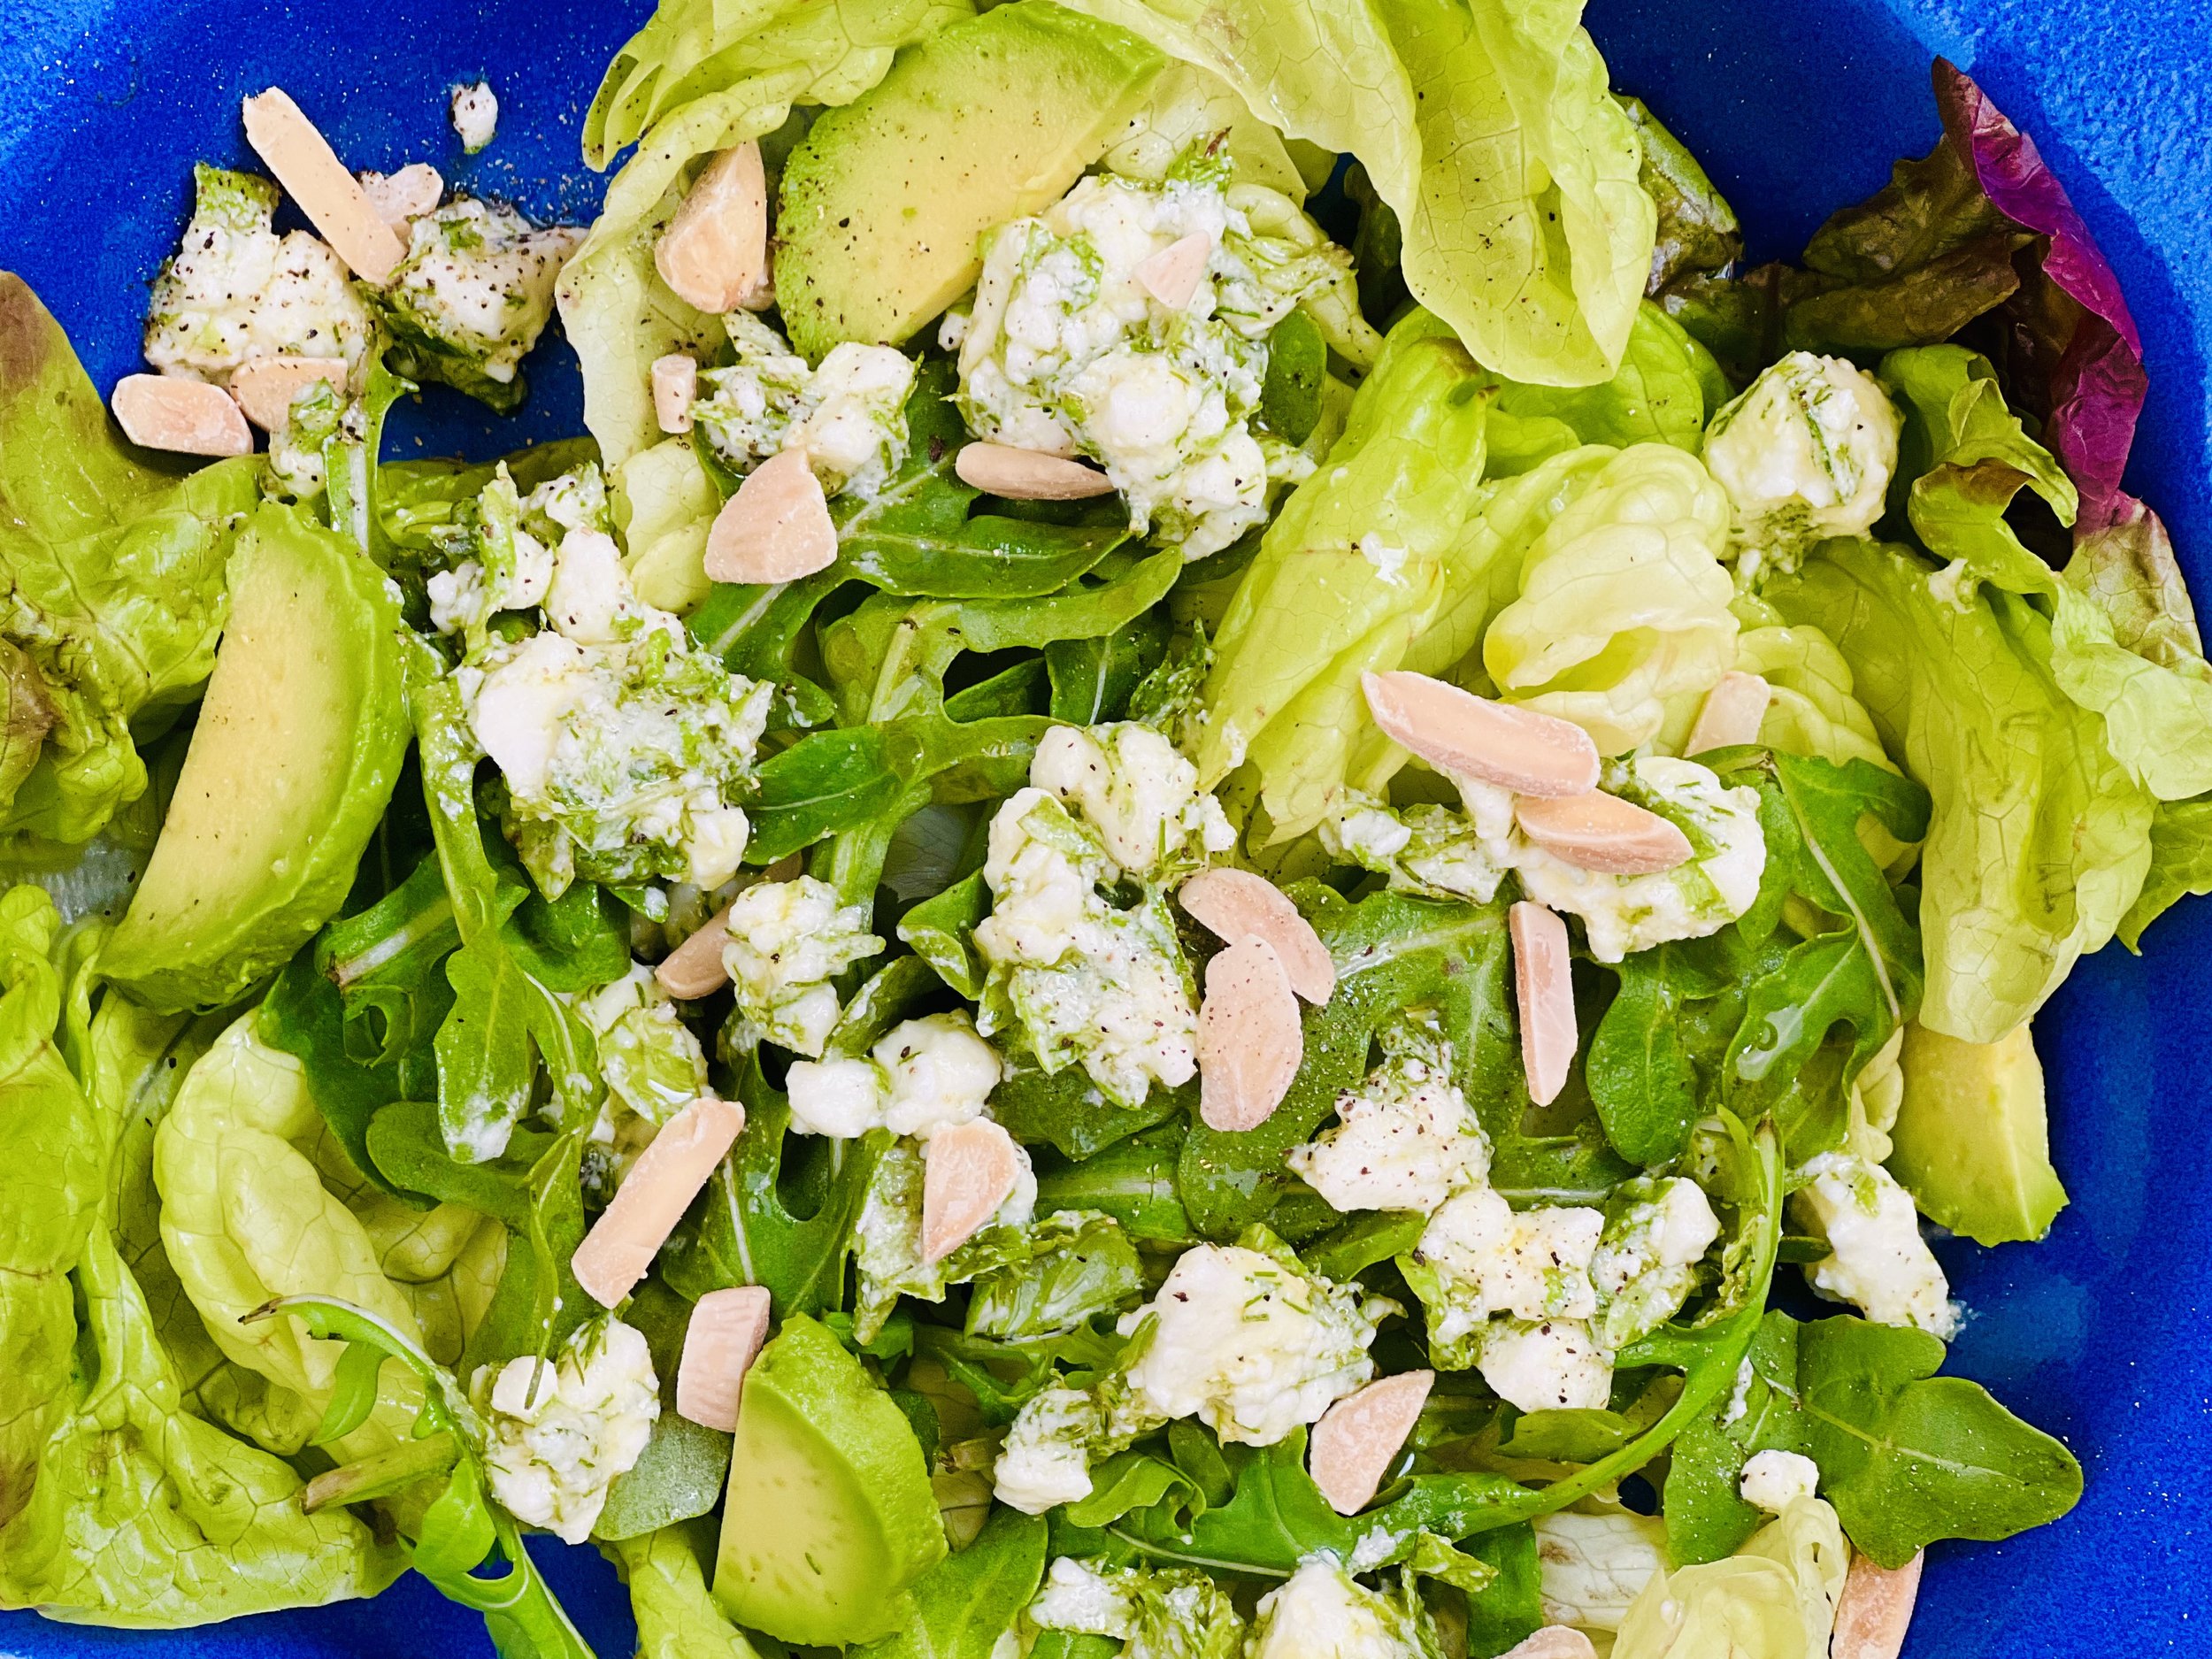
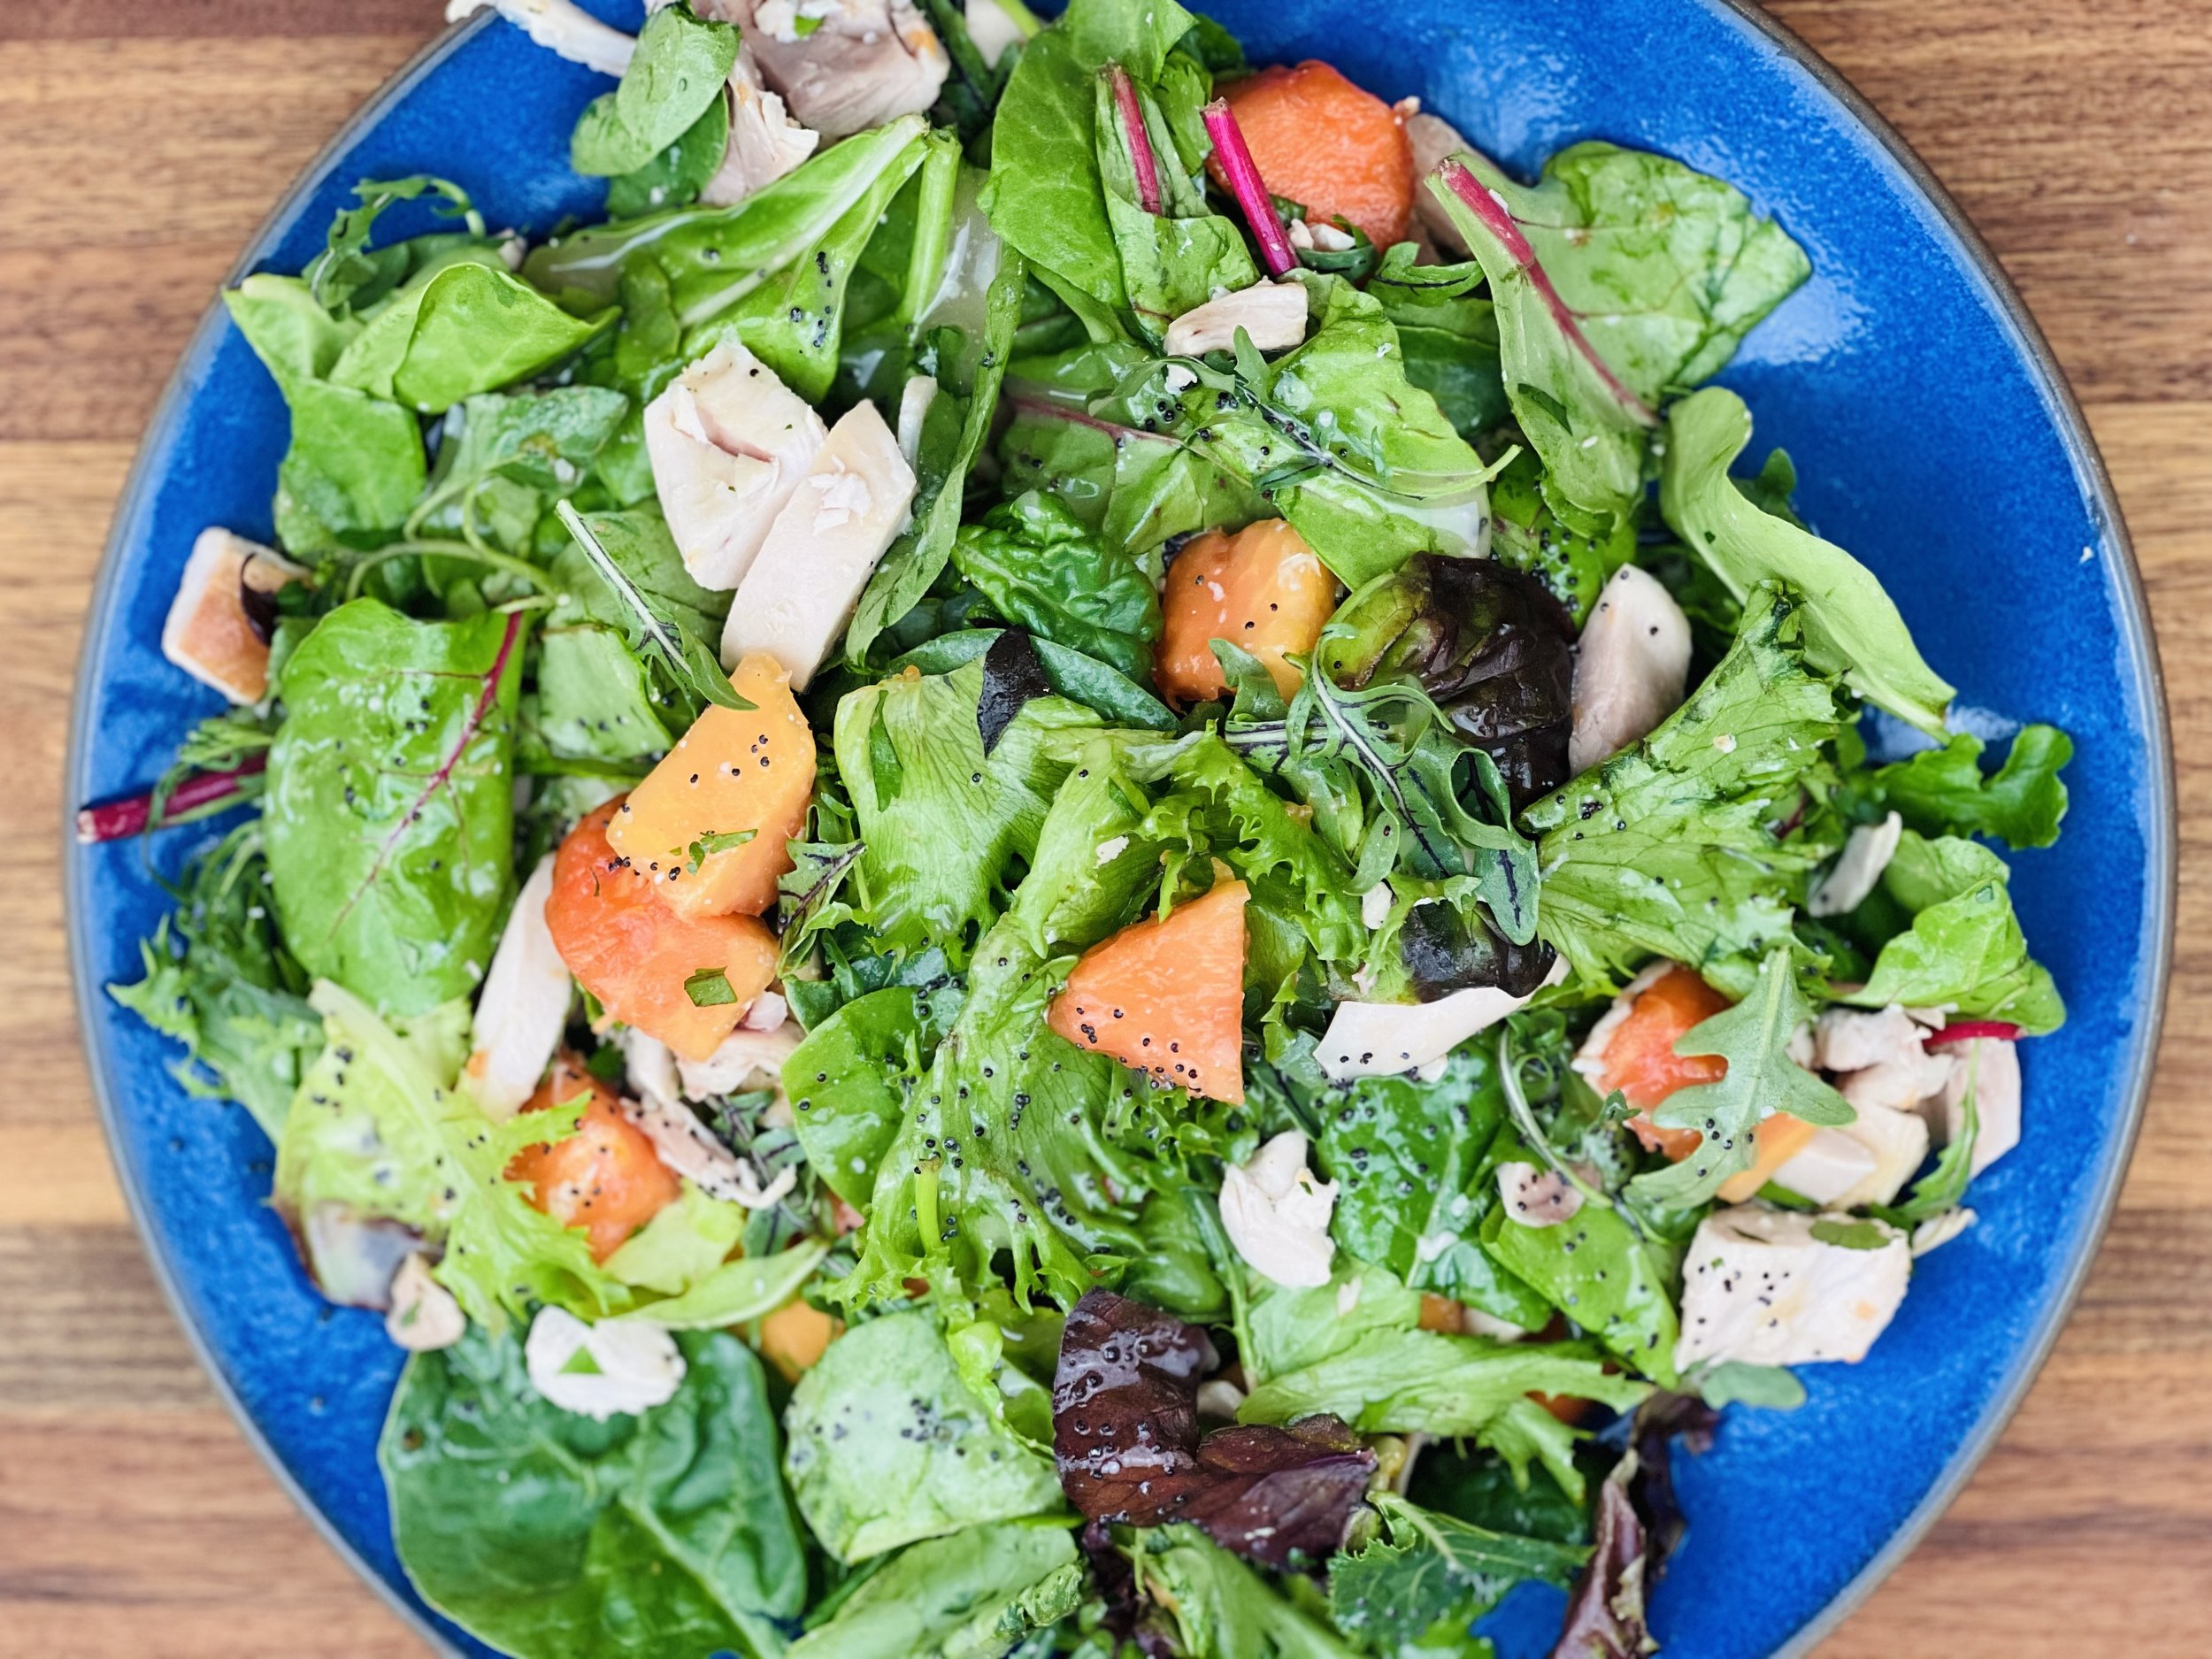
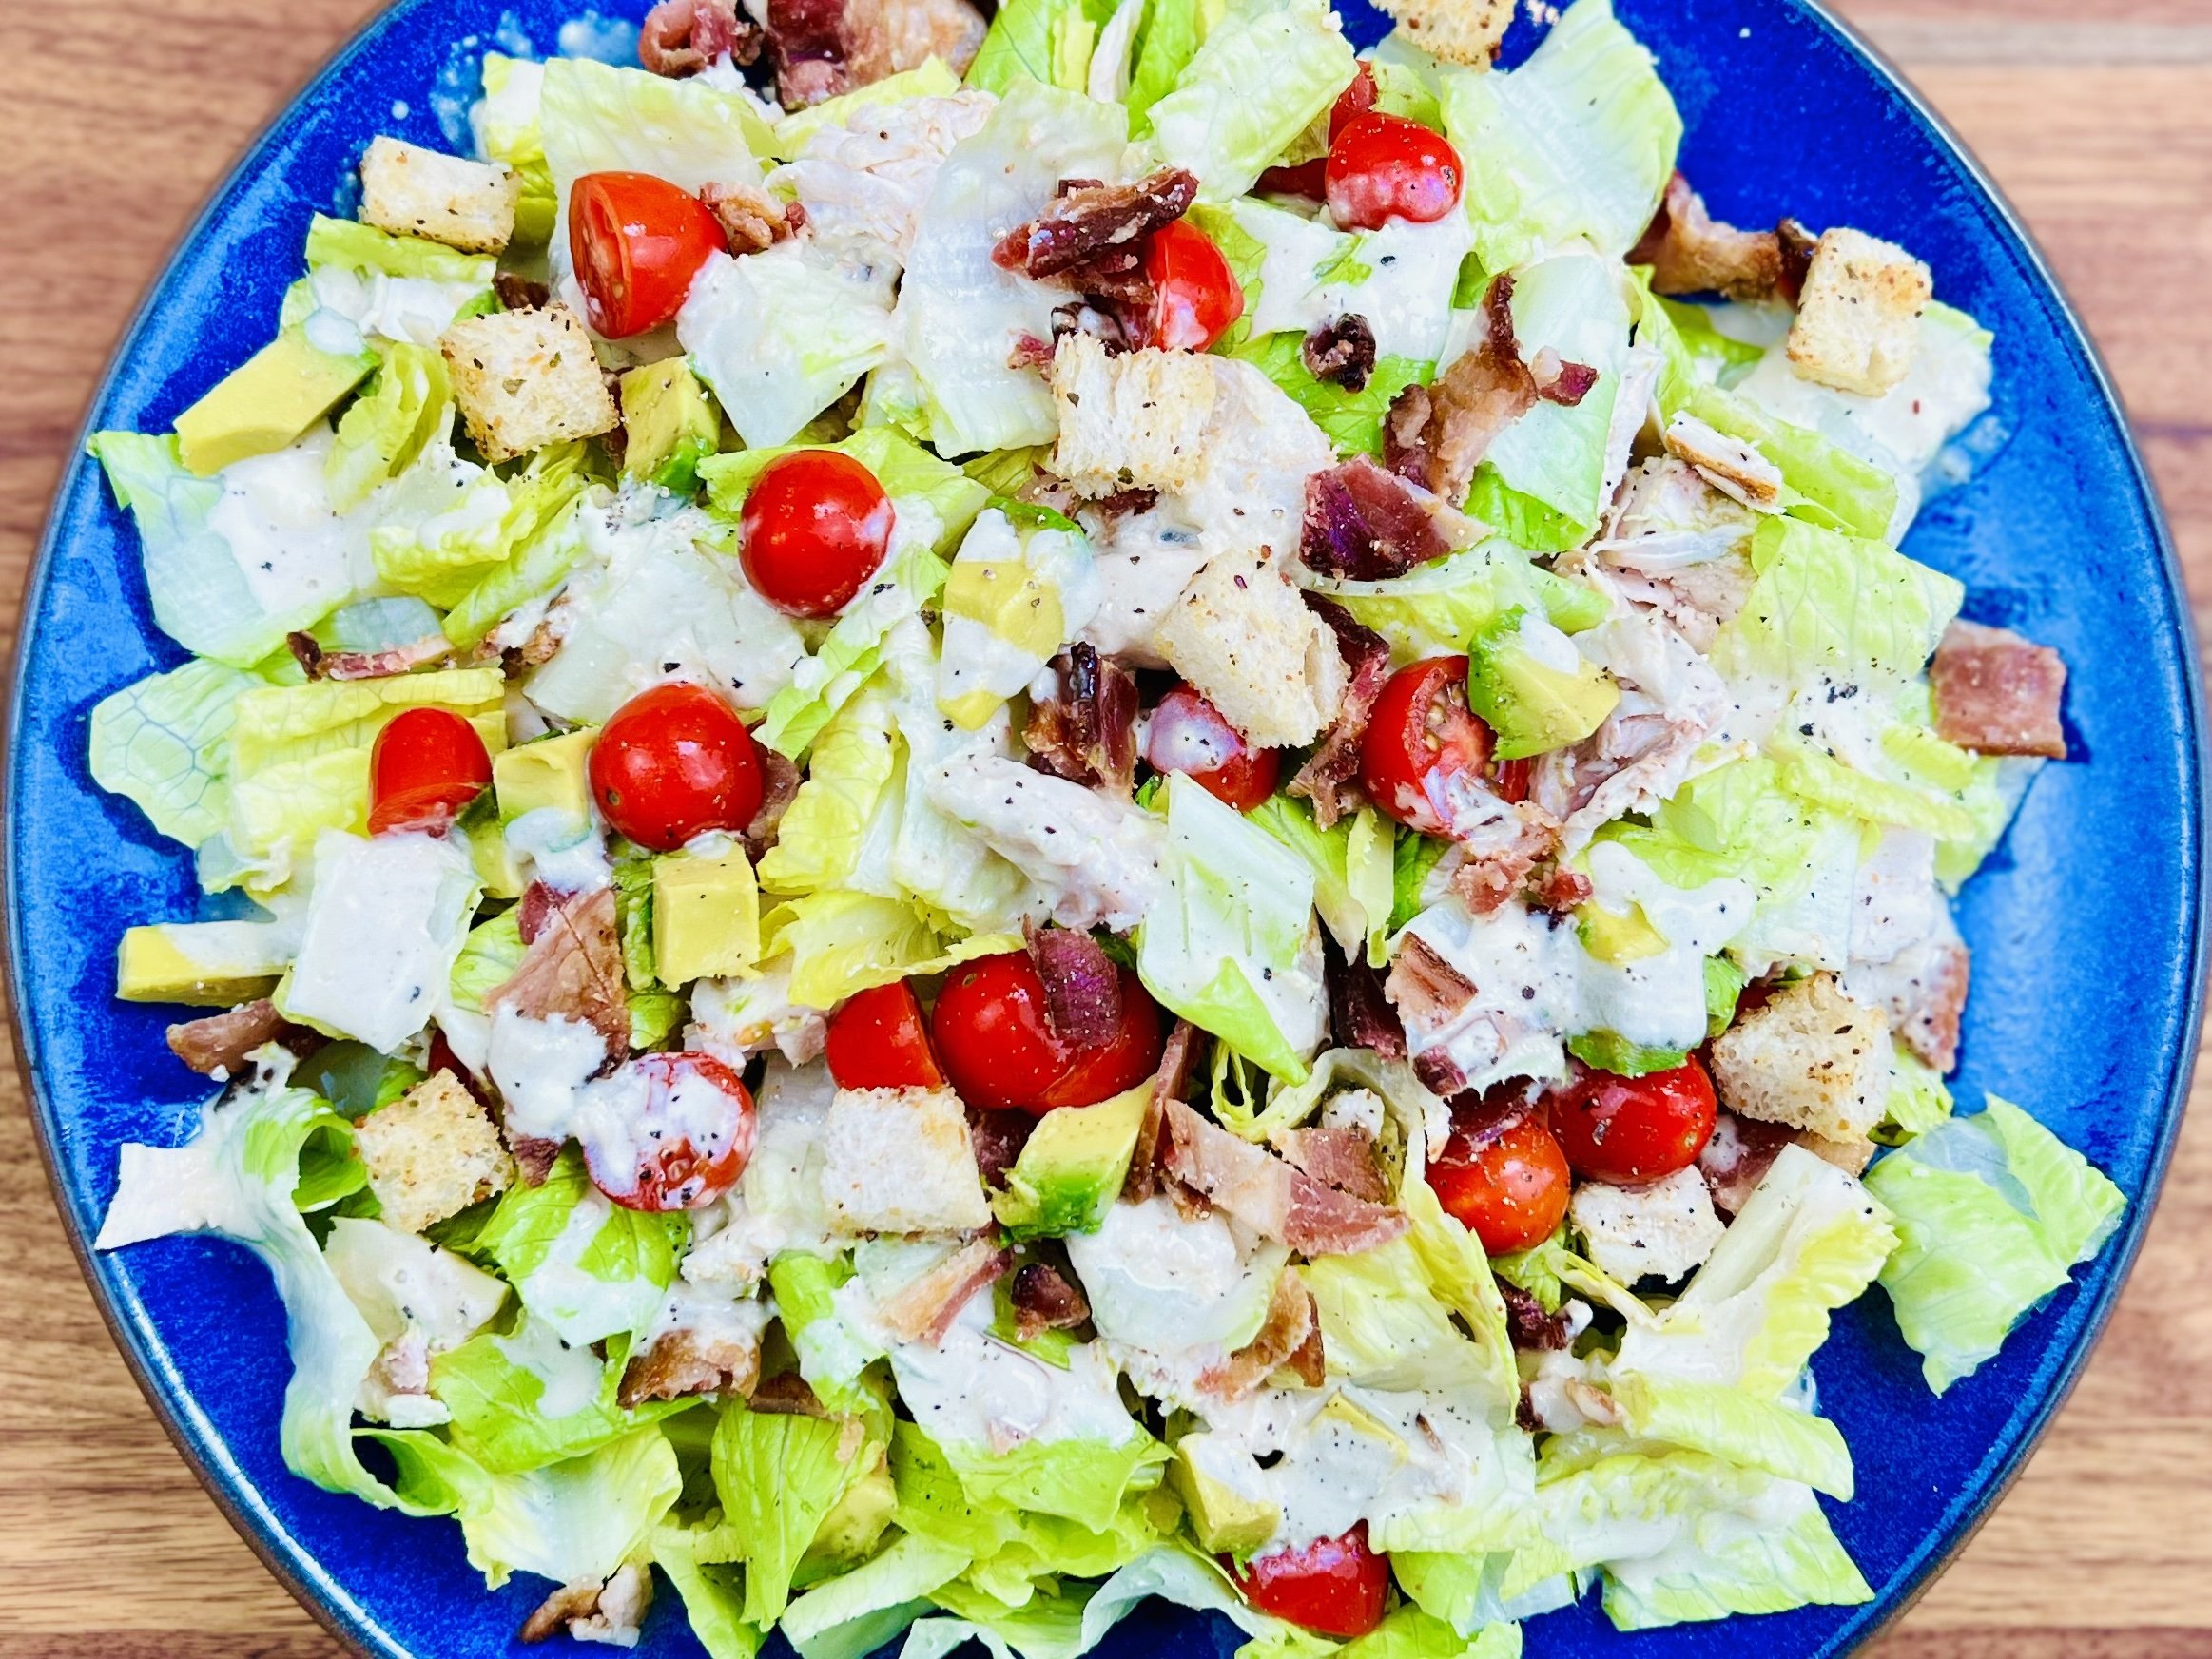
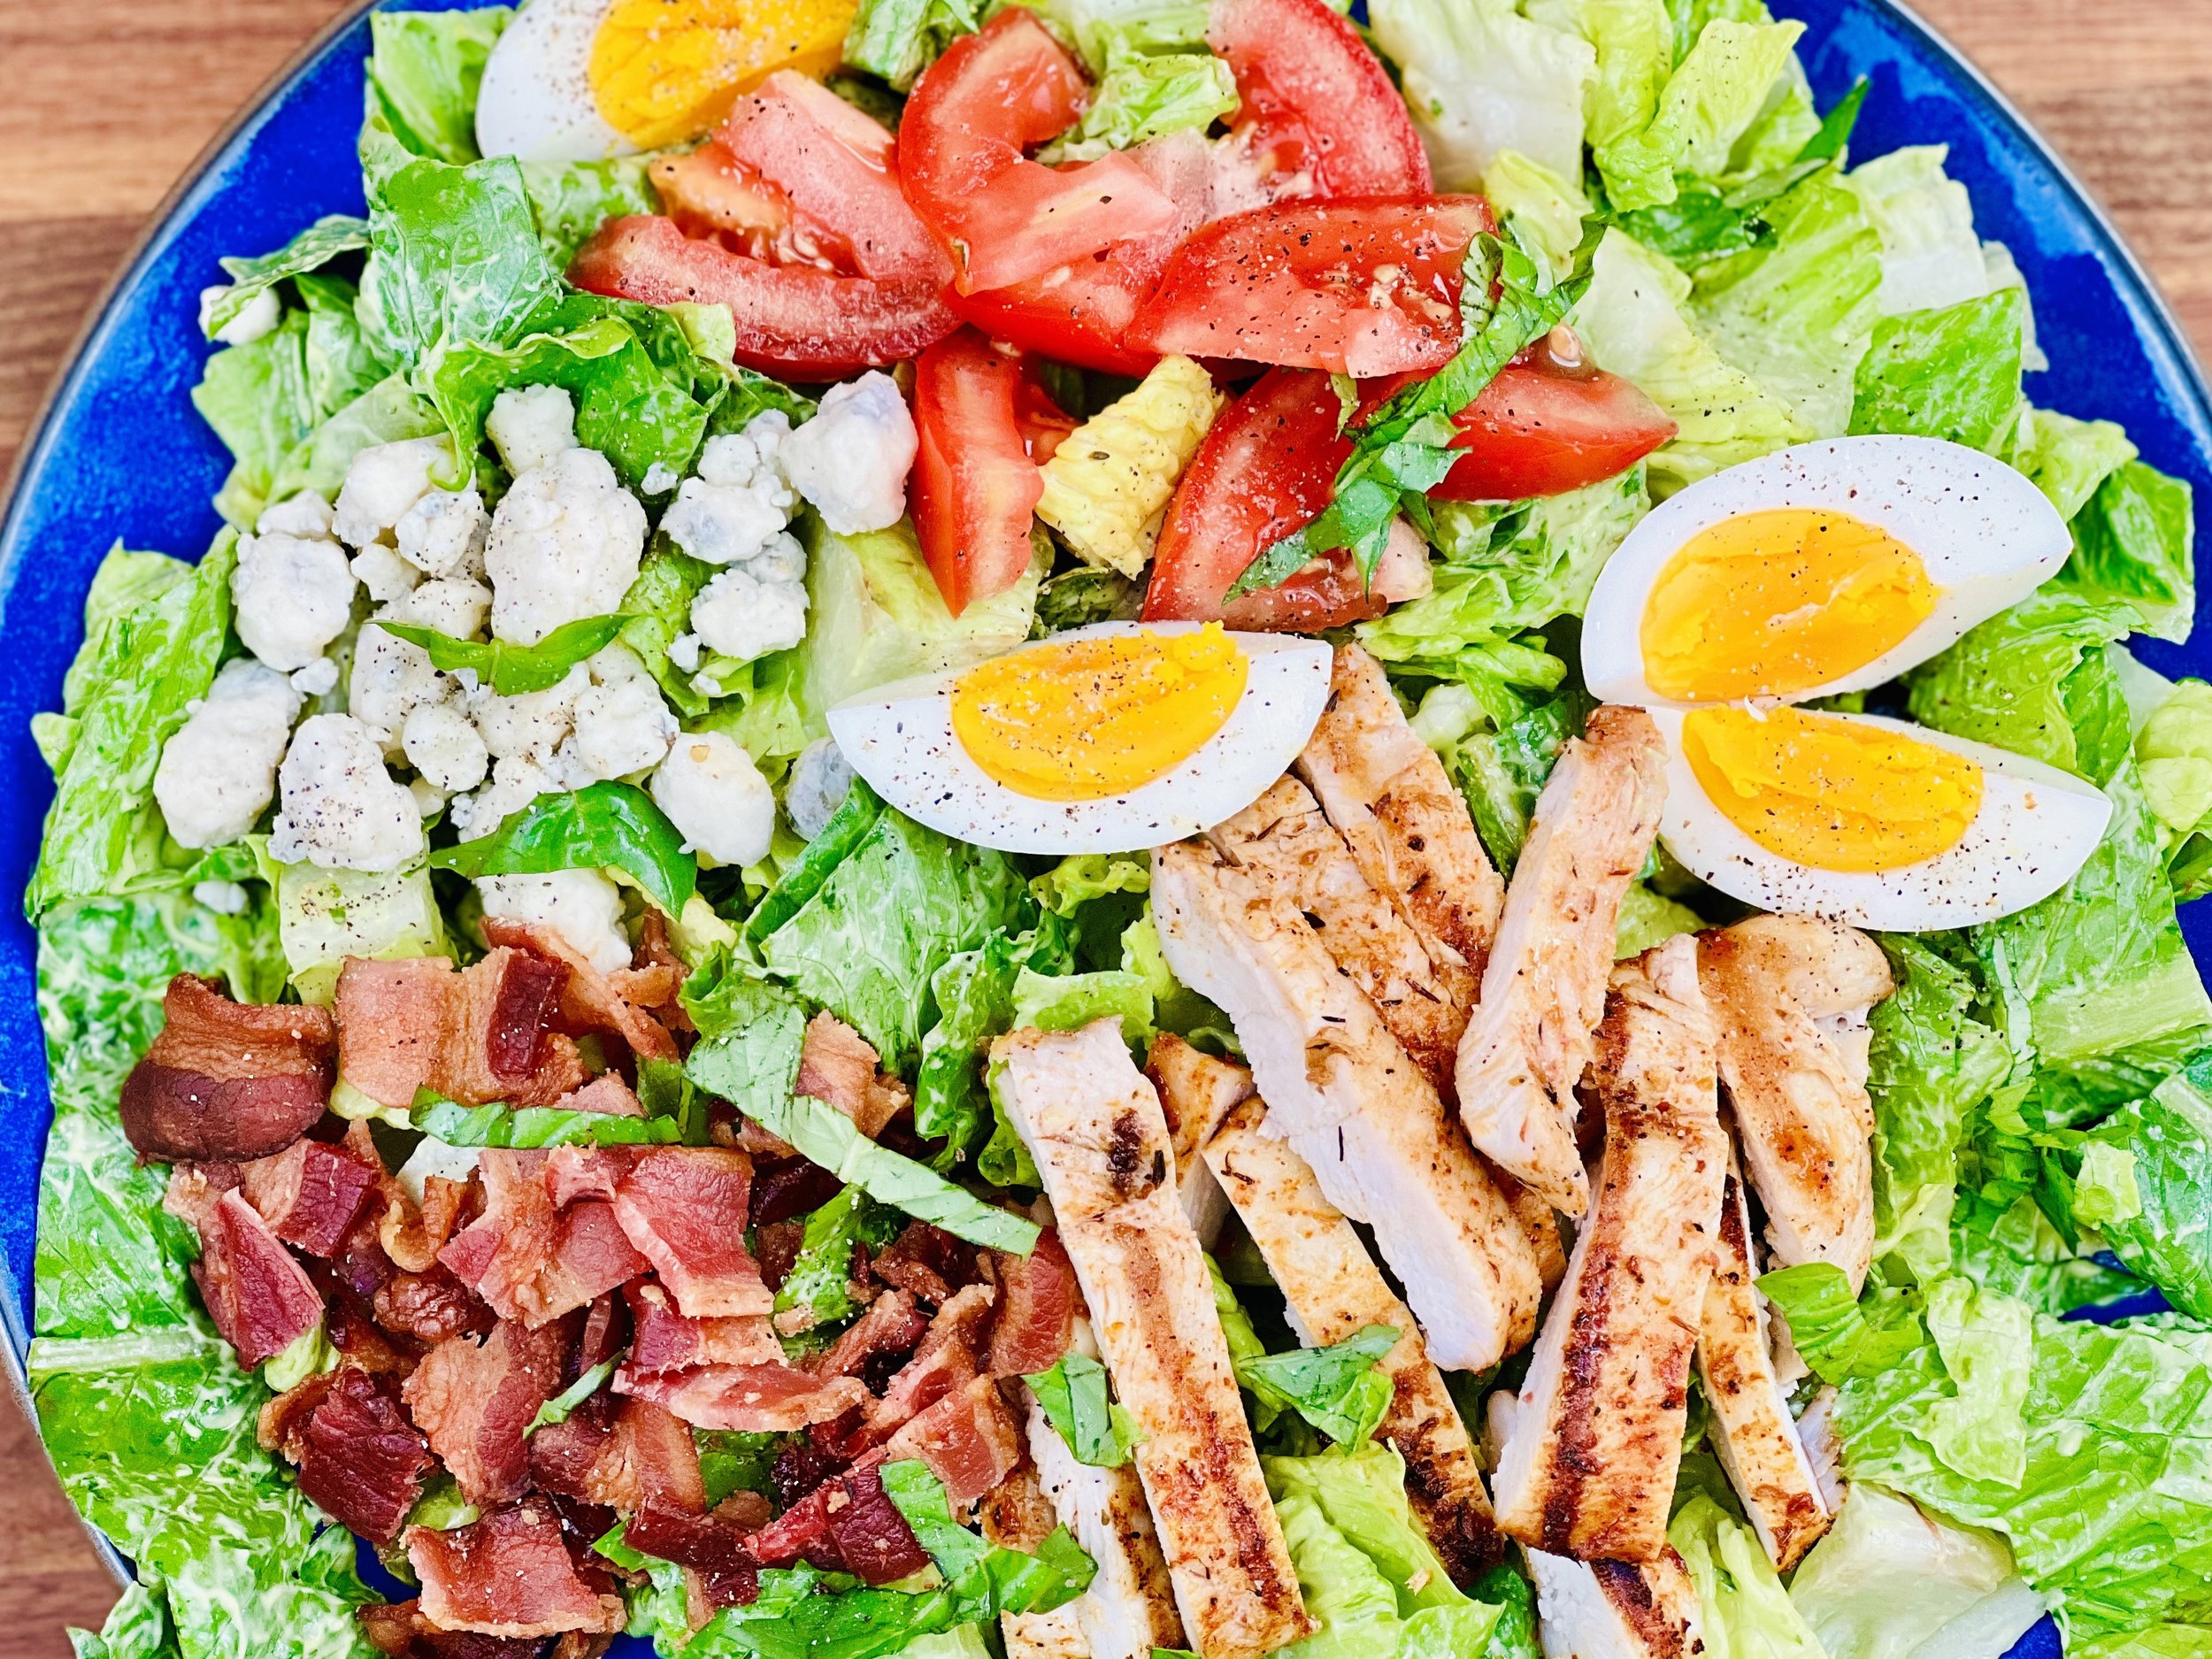
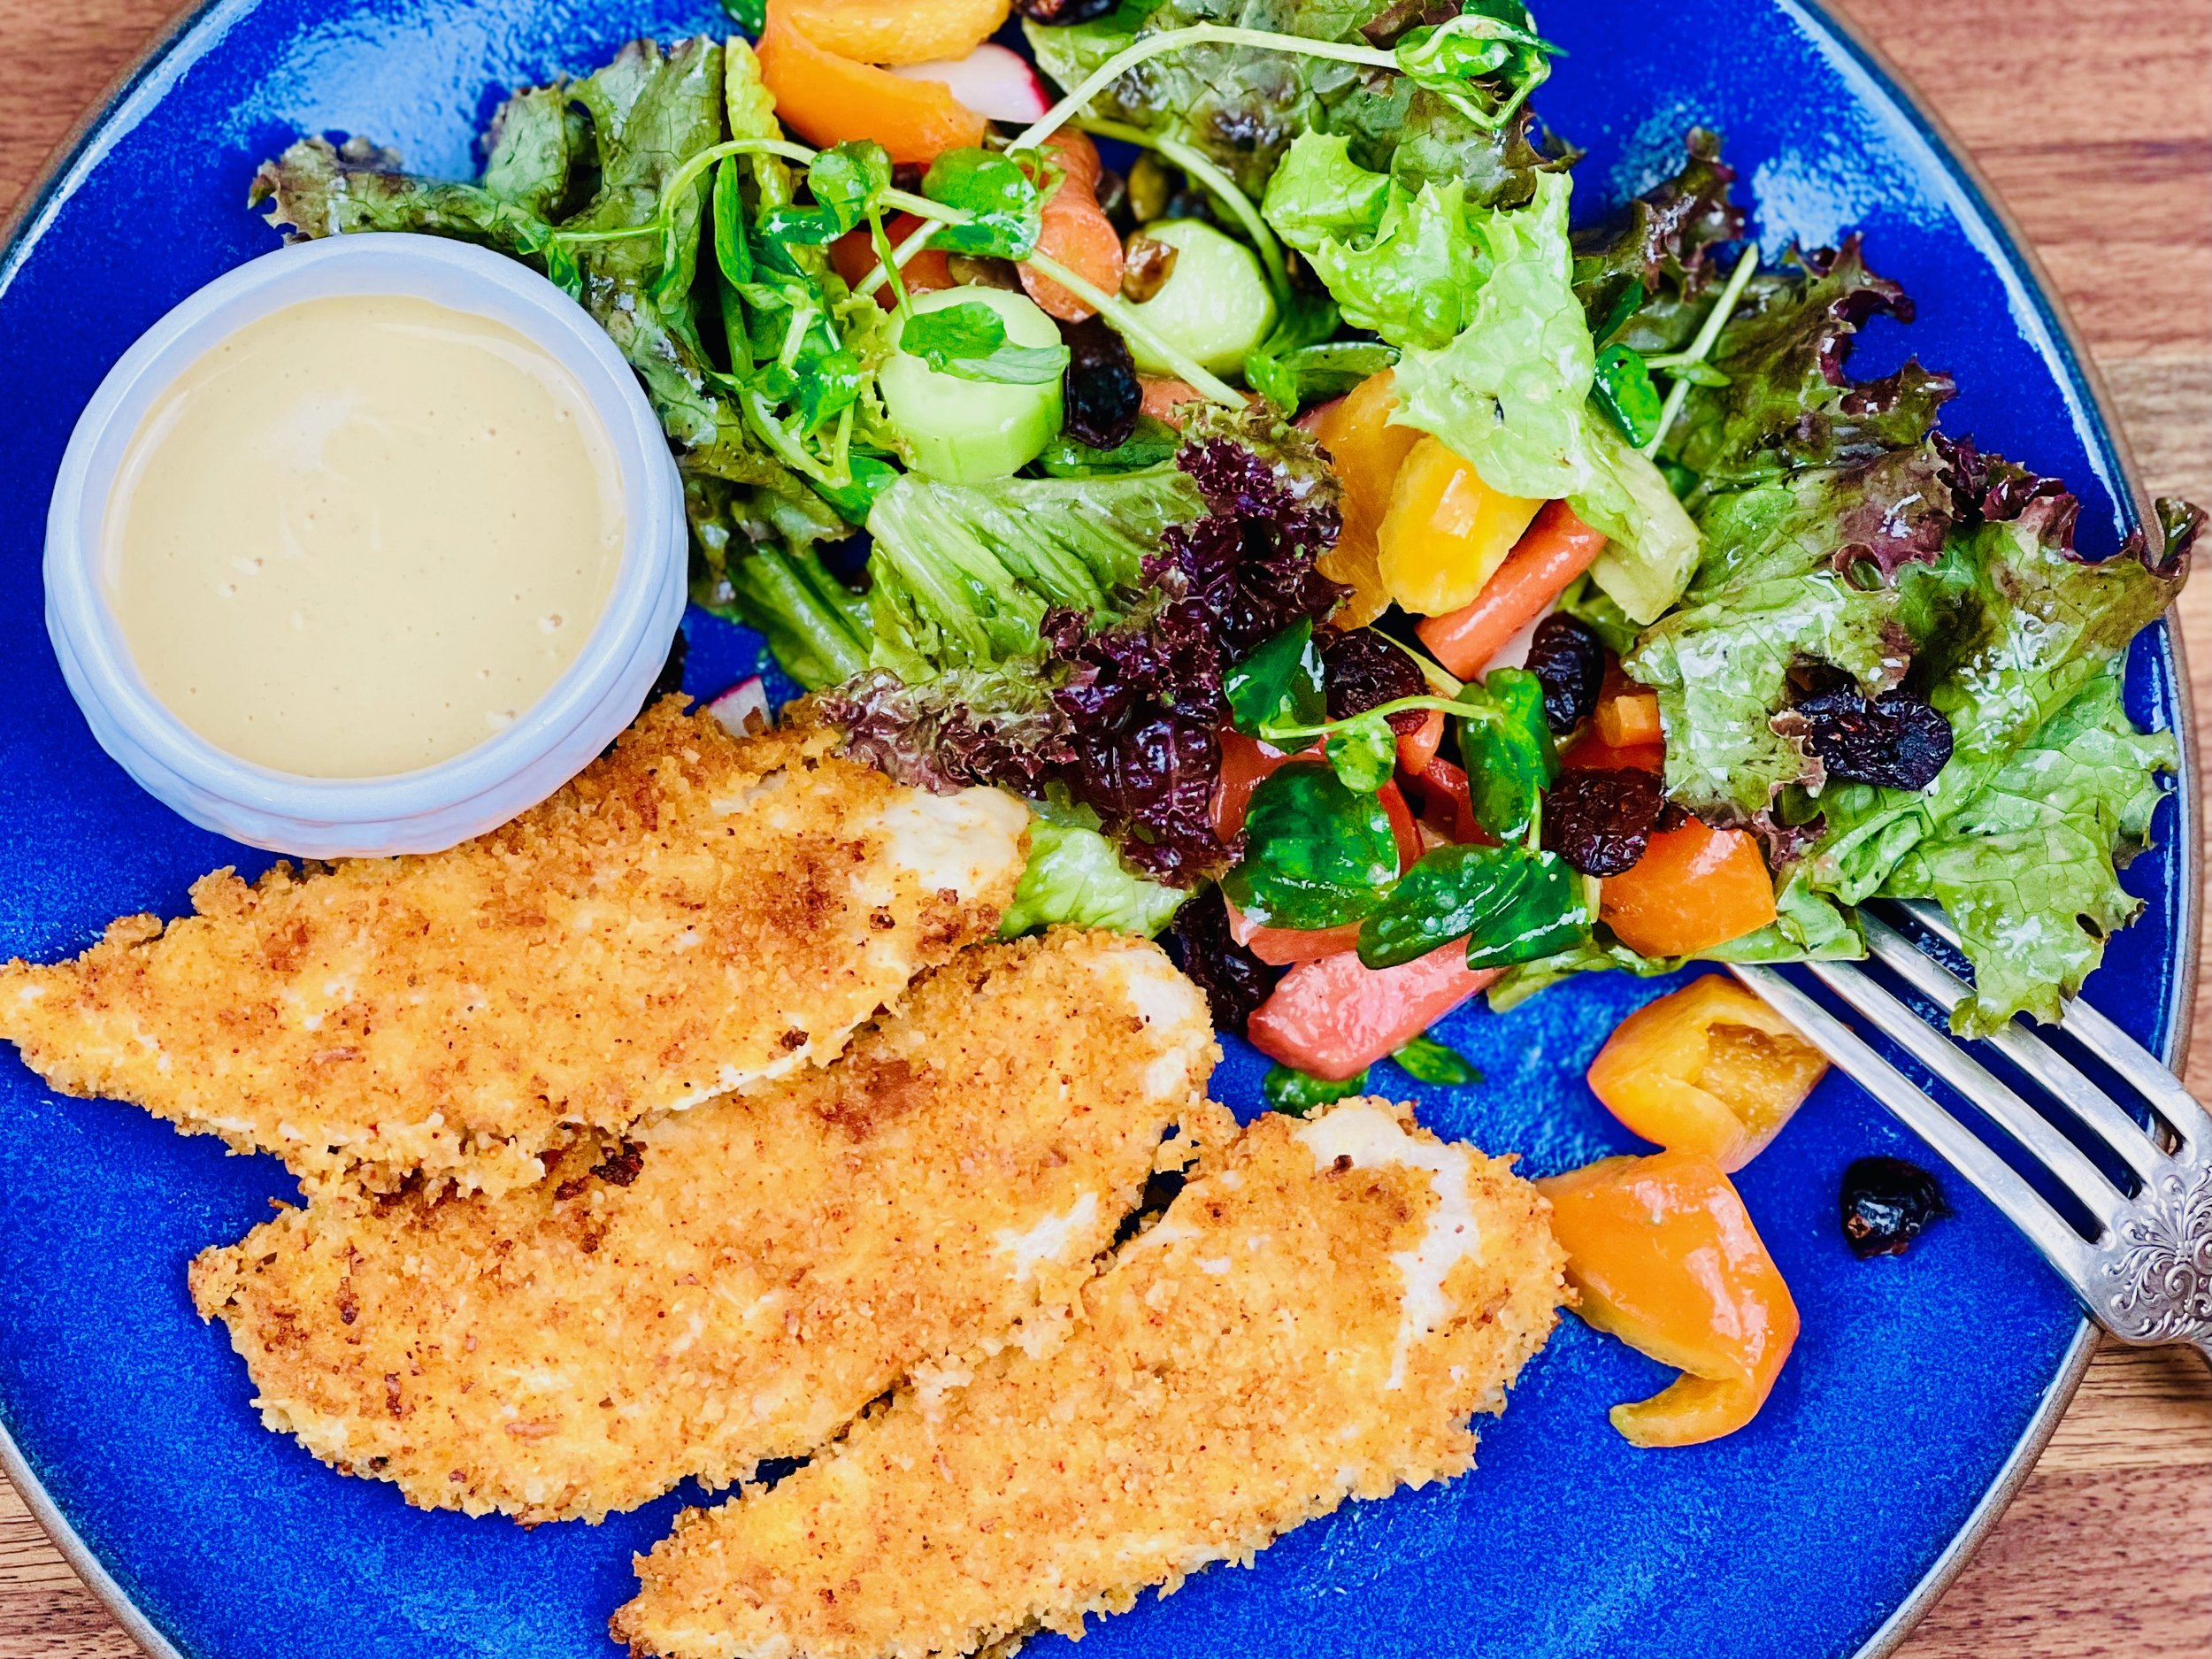
Chicken Cobb Salad with Creamy Avocado Dressing (Low FODMAP)
20 Minutes prep • 10 Minutes cook • Low FODMAP • Gluten-free • Serves 4
20 Minutes prep • 10 Minutes cook • Low FODMAP • Gluten-free • Serves 4 • Ok to make ahead: Steps 1-6
This salad is simple to make, beautiful to look at, and has the most delicious creamy avocado dressing! It’s a perfect main course dinner for a warm summer evening, or a wonderful hearty side for your next barbecue. Make extra Avocado Caesar dressing because it’s so creamy, flavorful, and thick, it makes a great dip for veggies and crackers as well.
Ingredients: Salad
1 pound boneless skinless chicken breasts
2 tablespoons Smoke N Sanity Cajun Creole or Lemon Pepper Seasoning
1 tablespoon extra virgin olive oil
6 cups shredded lettuce
1/2 cup fresh basil leaves
1 cup chopped fresh tomatoes or cherry tomatoes, sliced
1/2 cup crumbled blue cheese
6 strips of bacon, cooked and crumbled
4 hard-boiled eggs, quartered
Ingredients: Avocado Caesar Dressing
1/2 avocado, chopped
3 tablespoons heavy cream, plus more to thin the dressing if needed
3 tablespoons mayonnaise
2 teaspoons lemon juice
1/4 cup fresh basil, chopped, plus more for serving
1/2 teaspoon Smoke N Sanity Essence of Garlic Salt
1/4 teaspoon Kosher salt
1/4 teaspoon black pepper
Directions
(1) Cook the bacon: Preheat the oven to 400 degrees F. Line a rimmed baking sheet with foil and lay out the bacon slices so they aren’t crowded together. Bake 8-10 minutes, until the bacon is crisping, watch closely so it doesn’t burn. Remove from the oven and lay on paper towels to cool. Once cool, chop the bacon and set aside.
(2) Hard boil the eggs: Put the eggs in a saucepan and just cover with cold water. Bring the water to a boil on the stove. Turn the heat off and cover the pan. Let the eggs sit in the pan to cook in the hot water for about 10 minutes (longer if you like a very firm yolk). Pour off the hot water and run cold water over the eggs until they are cooled. The fresher the eggs, the harder they are to peel after boiling so use eggs that you have had for a little while if you can!
(3) Slice the chicken: You can buy “thin cut” chicken, or slice it horizontally yourself. This will help the seasoning reach more of the chicken and it will cook quite fast on the grill.
(4) Marinate and grill the chicken: In a bowl, toss the chicken with olive oil and cajun or lemon pepper seasoning. Set aside until you’re ready to cook. Set your grill, grill pan, or skillet to medium-high. Grill the chicken until lightly charred and cooked through, turning halfway through cooking, about 10 minutes. Remove from the heat and let rest on a cutting board while you make the rest of the salad.
(5) Make the dressing: While the chicken is cooking, combine all ingredients in a blender or in a compact food processor and blend until creamy, adding more cream or lactose-free whole milk to thin the dressing if needed. Taste and adjust the salt and pepper as needed.
(6) Slice the chicken: Cut the chicken into bite-size pieces and chop the bacon into crumbles.
Make-ahead note: At this point, you may set everything aside in the refrigerator until you’re ready to plate and serve.
(7) Finish: In a large bowl, toss the greens and basil with the dressing.
(8) Plate and serve: Put 1/4 of the dressed greens on each plate, then arrange the chicken, tomatoes, cheese, bacon, and eggs on top. Drizzle with additional dressing if you like. Sprinkle with chopped fresh basil and a few grinds of black pepper.
Eat and enjoy every bite because you can!
Recipe note: I use Diamond Crystal Kosher salt in all my recipes because it has a wonderful flat and crisp flake that tastes delicious. It is also the least salty salt available so you can use it more liberally as a seasoning than you can table salt or sea salt. If you use another type of salt, you may need to reduce the amount so it is not over-salted.
Have a question you’d like to have answered? Email me at hello@ibsgamechanger.com
Link note: This post may contain affiliate links for you to easily purchase items that are linked. I may earn a small commission from qualifying purchases but none of this costs you a thing so feel free to use the links! In addition, for some items, I have provided a special discount code for IBS Game Changers so be sure to use the code when you purchase an item to get the discount that has been arranged just for you.
More Deliciously Low FODMAP™ salad recipes

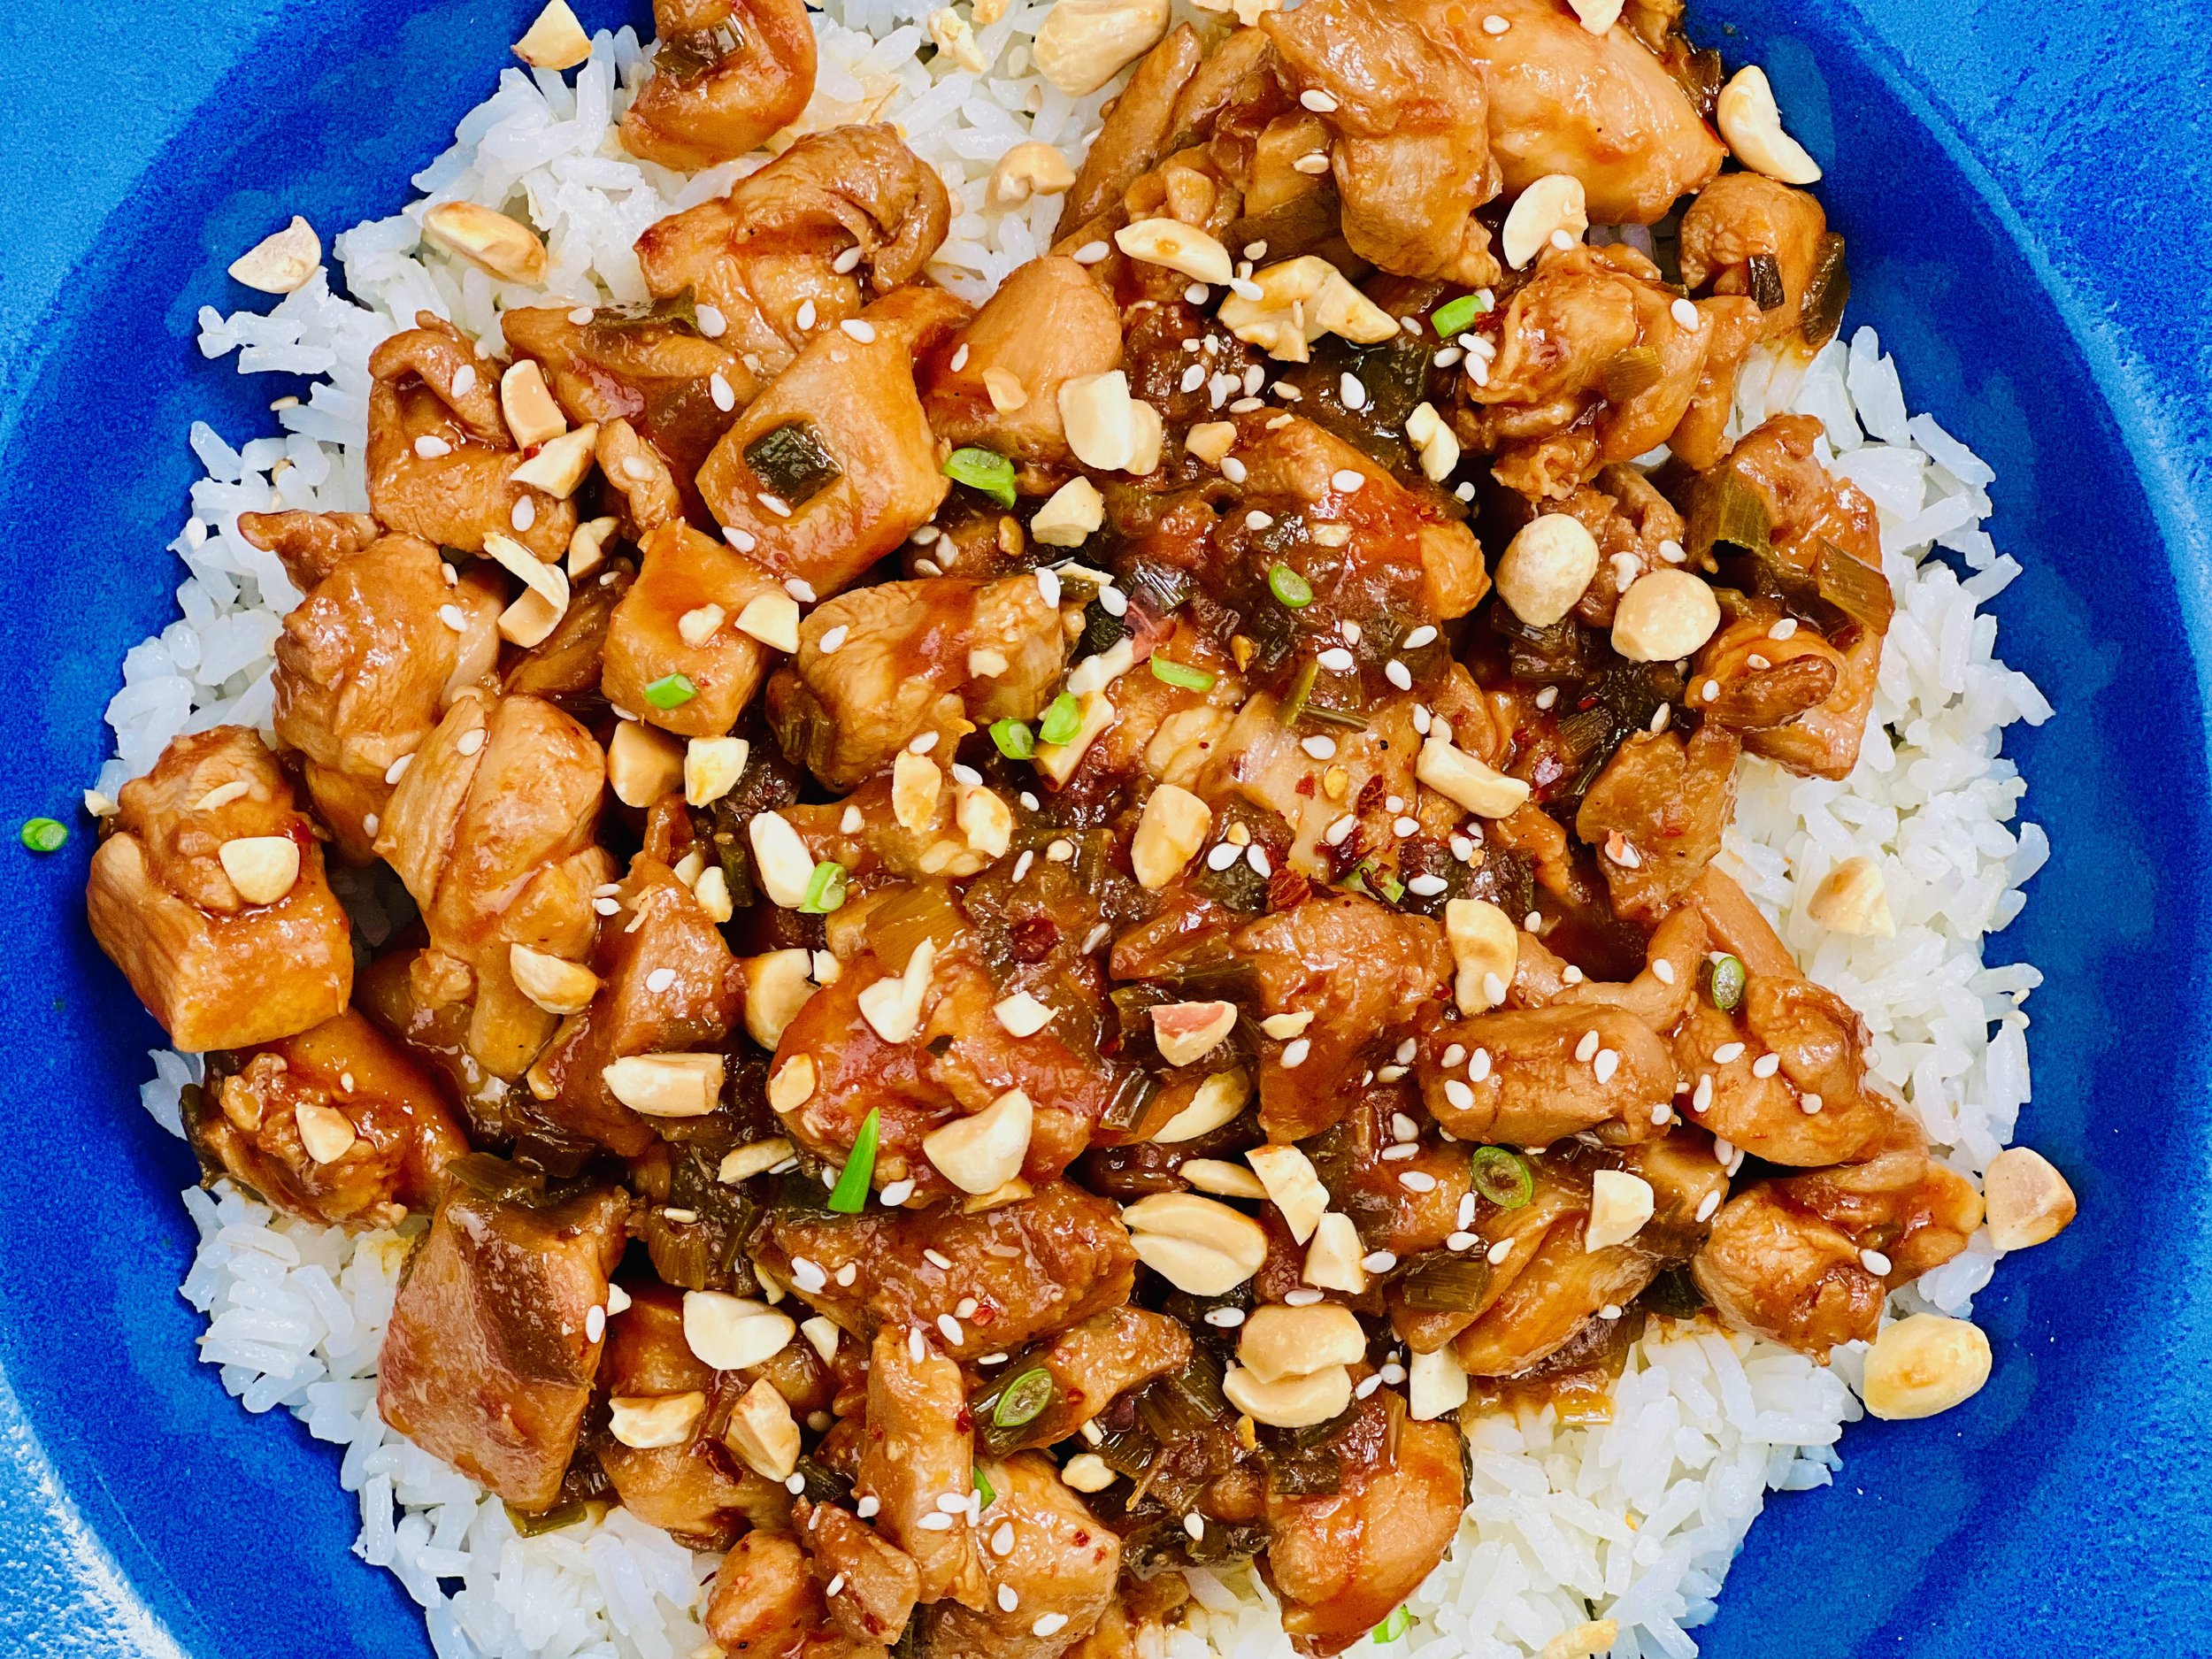
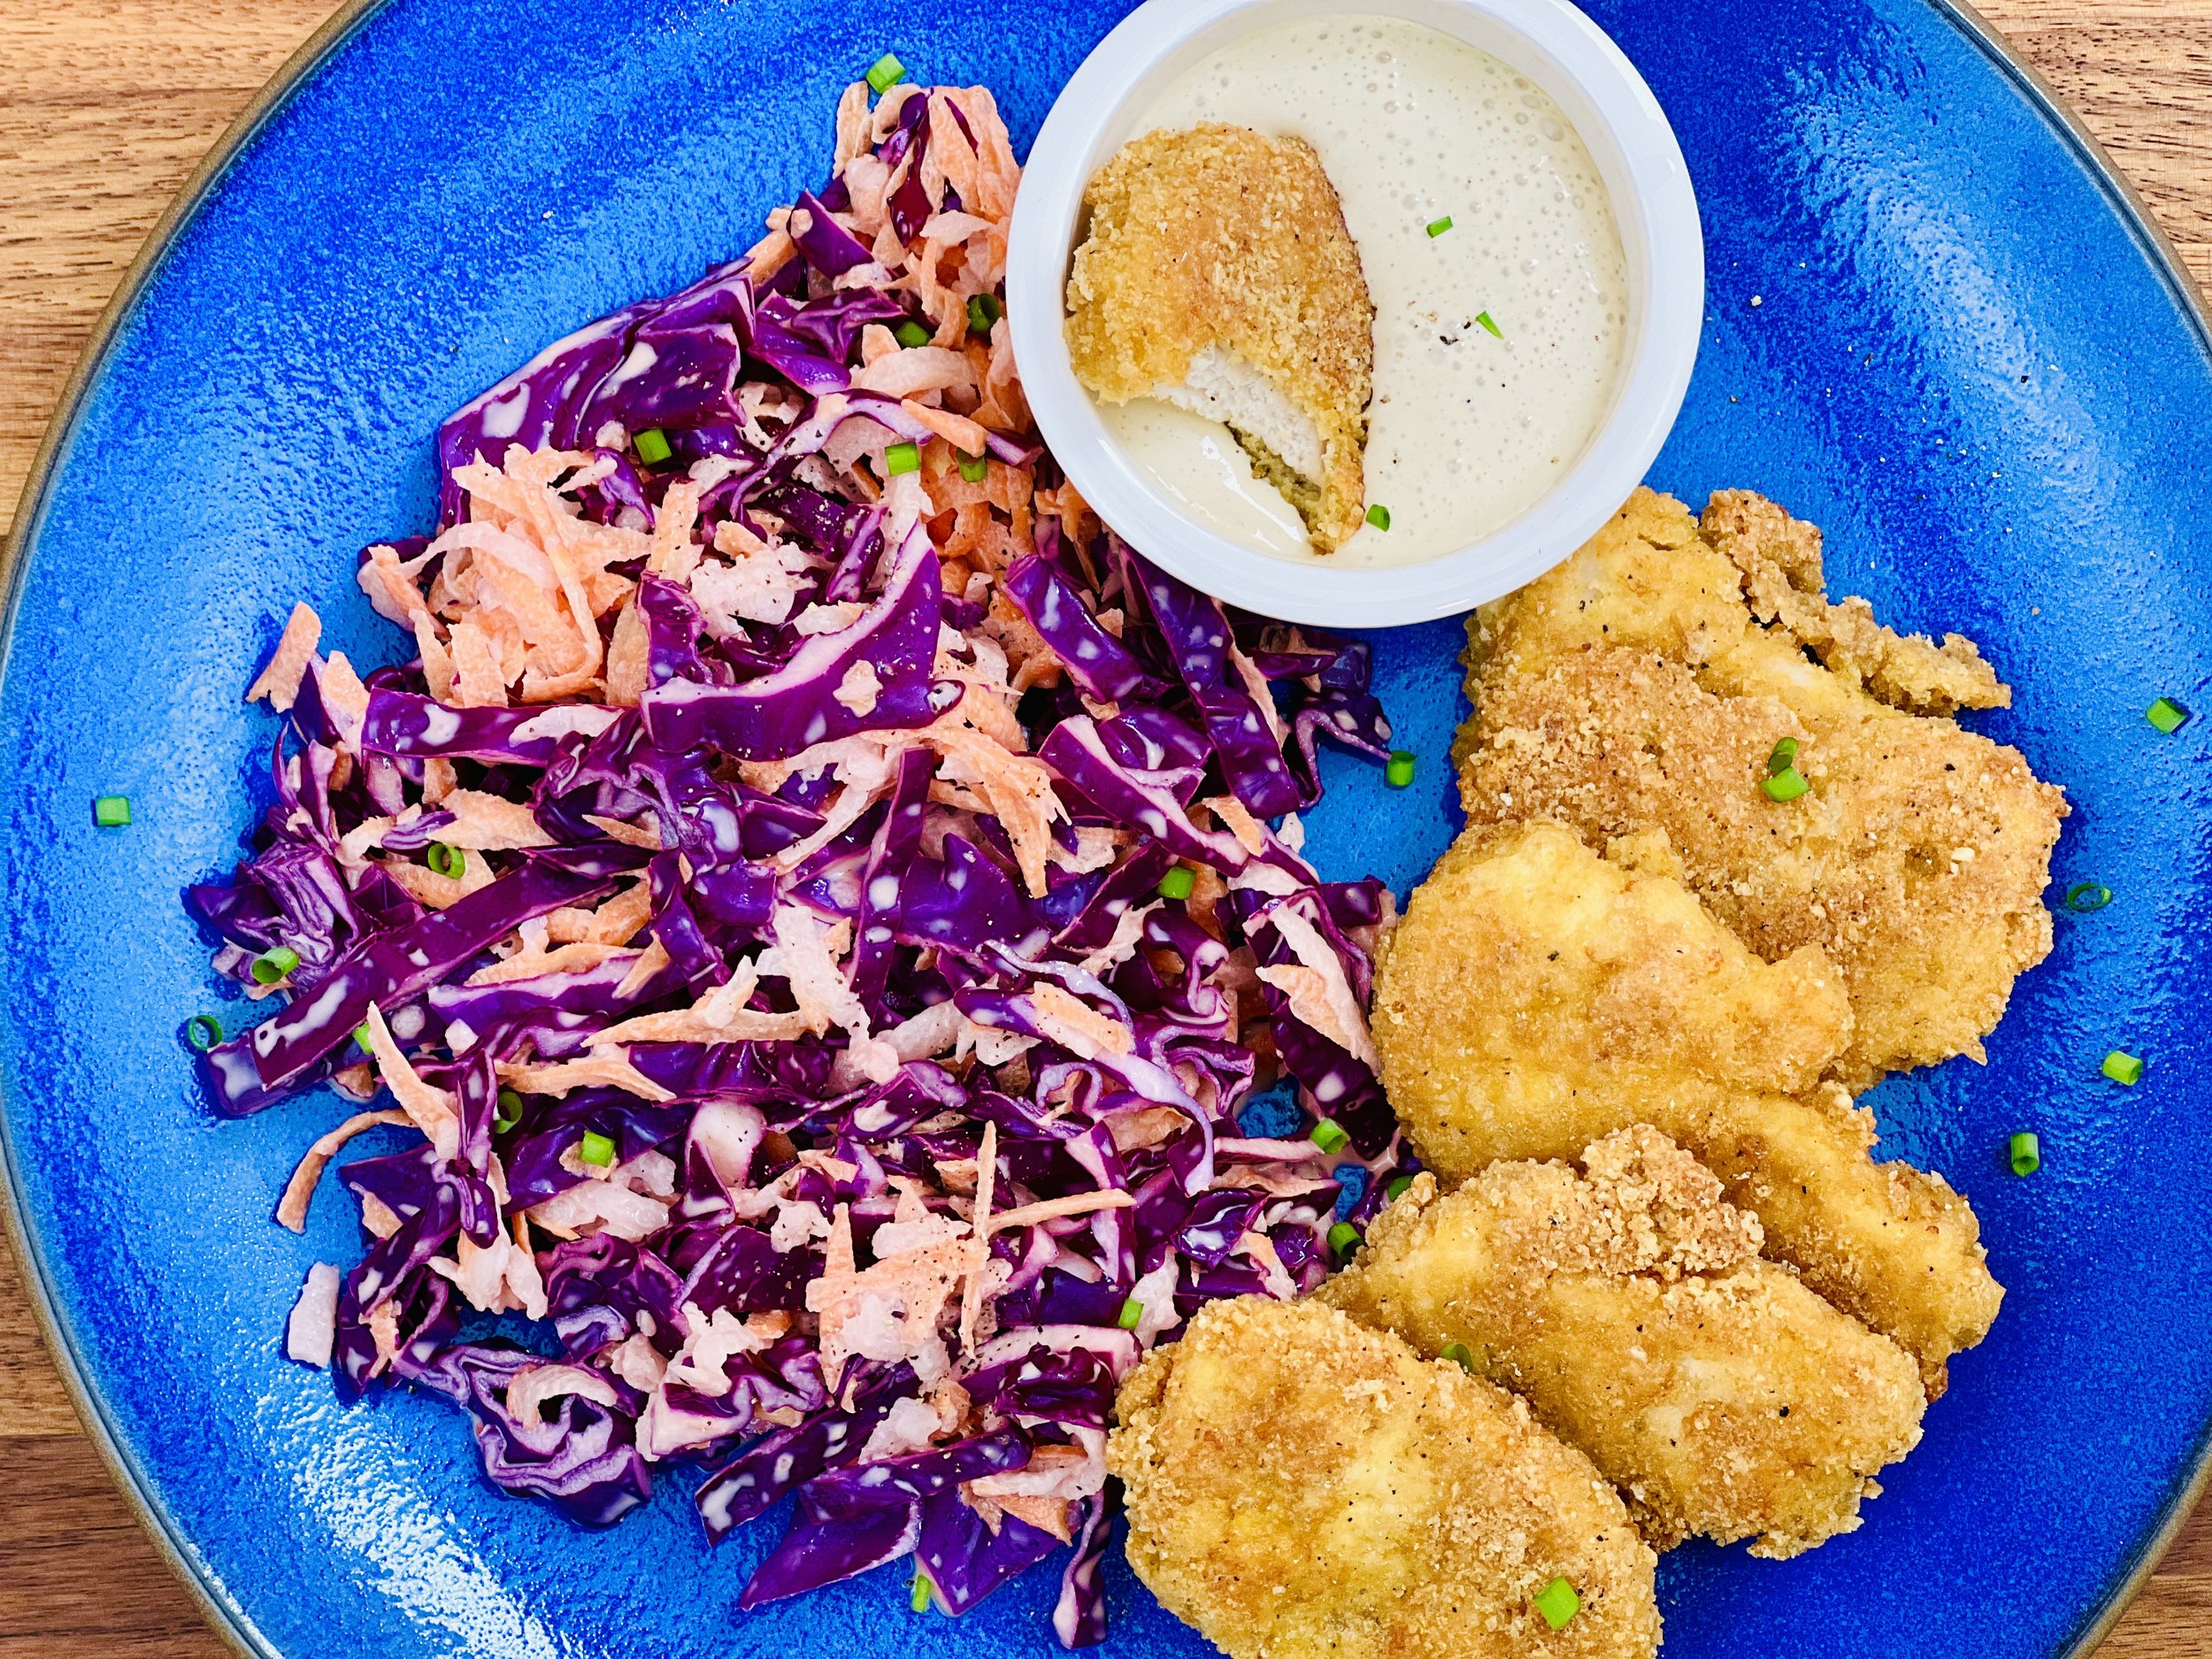
Better Than Takeout Sesame Chicken (Low FODMAP)
15 Minutes prep • 15 Minutes cook • Low FODMAP • Gluten-free • Lactose-free • Serves 4
15 Minutes prep • 15 Minutes cook • Low FODMAP • Gluten-free • Lactose-free • Serves 4 • Ok to make ahead: Steps 1-3
Give Chinese takeout a run for its money with this super simple sesame chicken recipe you can have ready in 30 minutes. The thick sauce is tangy and slightly sweet, without being overwhelming. The peanuts are a nice crunchy complement. Every bite of the chicken is tender and flavorful. You cook it all in one pan and eat it all in one bowl so serving and clean up are easy. All this makes for a perfect weeknight or any night dinner.
Ingredients
1 1/2 tablespoons toasted sesame oil
1 bunch green onions (green part only), chopped, plus more for serving
1 1/2 pounds boneless skinless chicken breasts or thighs, cut into bite-size pieces
5 tablespoons gluten-free soy sauce
1/4 cup low FODMAP ketchup (I used Smoke N Sanity Ketchup)
1/2 teaspoon Smoke N Sanity Essence of Onion Salt
1 tablespoon toasted sesame oil
1/4 teaspoon red pepper flakes (and here’s a nifty red pepper flake grinder!)
Sesame seeds for serving
1/2 cup peanuts, chopped, optional for serving
Directions
(1) Prepare the chicken: This step is optional but results in a more flavorful and tender chicken. Remove chicken from the package, and put it in one layer on a rimmed plate or baking dish. Season both sides of each piece lightly with Kosher salt (about 1/8 teaspoon per side). Cover the dish with plastic wrap and refrigerate until ready to use, ideally about 4 hours before cooking or overnight.
(2) Make the rice or mushroom pilaf: This chicken is delicious on its own alongside a green salad. If you prefer to serve it on a bed of rice or veggies, make those now. I recommend my Best Coconut Rice or my Mushroom Pilaf.
(3) Make the sauce: In a small mixing bowl, combine the soy sauce, ketchup, Smoke N Sanity Essence of Onion salt, toasted sesame oil, and red pepper flakes. Stir to combine and set aside.
(4) Marinate the chicken: Chop the chicken into bite-size pieces. Add to the bowl with the sauce, stir, and let sit for about 30 minutes.
(5) Cook: Heat a large non-stick skillet over medium-high heat. Add the toasted sesame oil and heat until the oil shimmers. Add the chopped green onion greens to the oil and cook for about a minute. Add the chicken and toss with the green onion greens then spread out in one layer in the pan. Cook for about 3 minutes then stir the chicken around in the pan so that most of the pieces turn over and are coated with the sauce. Cook for another 3 - 5 minutes.
(6) Finish: Turn the heat down to medium-low and let simmer for about 5 minutes until the sauce is thickened and the chicken is cooked through (if using thigh meat, it will take a bit longer to cook.)
(7) Plate and serve: Serve as is alongside one of my green salads, or over my Best Coconut Rice or my Mushroom Pilaf topped with green onion greens, sesame seeds, and/or peanuts for garnish. For the best flavor, heat any leftovers on the stove, not in the microwave.
Eat and enjoy every bite because you can!
Have a question you’d like to have answered? Email me at hello@ibsgamechanger.com
Link note: This post may contain affiliate links for you to easily purchase items that are linked. I may earn a small commission from qualifying purchases but none of this costs you a thing so feel free to use the links! In addition, for some items, I have provided a special discount code for IBS Game Changers so be sure to use the code when you purchase an item to get the discount that has been arranged just for you.
More Deliciously Low FODMAP™ main course recipes
Delicious Low FODMAP Beef Sticks and Jerky from Good Fod Foods
Thanks to our friends at Good Fod Foods you can now have delicious Beef Sticks and Jerky in a variety of flavors that you can keep on hand for a quick snack or light lunch on the go.
When you have Irritable Bowel Syndrome (IBS) sometimes it’s hard to find a good “car snack” or on-the-go food for hiking or backpacking that you can count on for flavor, nutrition, and shelf stability. Or, you’re just trying to get more protein in your everyday low FODMAP diet without adding a bunch of calories. Thanks to our friends at Good Fod Foods you can now have delicious Beef Sticks and Jerky in a variety of flavors that you can keep on hand for a quick snack or light lunch on the go. The beef sticks are tender, flavorful, and easy to chew. The jerky is just that—jerky! Exactly the way you want it to be and all the flavors are delicious. As usual, I have arranged a 15% discount (IBSGC15) just for you. In fact, if you click the image or button below to start shopping, the discount will be automatically applied to your cart at checkout!

The Good Fod Foods family dealt with sensitive stomachs for a while before they tried a low-FODMAP diet. They felt better and they realized it was hard to find nutritious, shelf-stable low-FODMAP snacks. So, they made some to share! I tried them all and I can personally say they are delicious.
Give them a try with the IBS Game Changer 15% Discount.
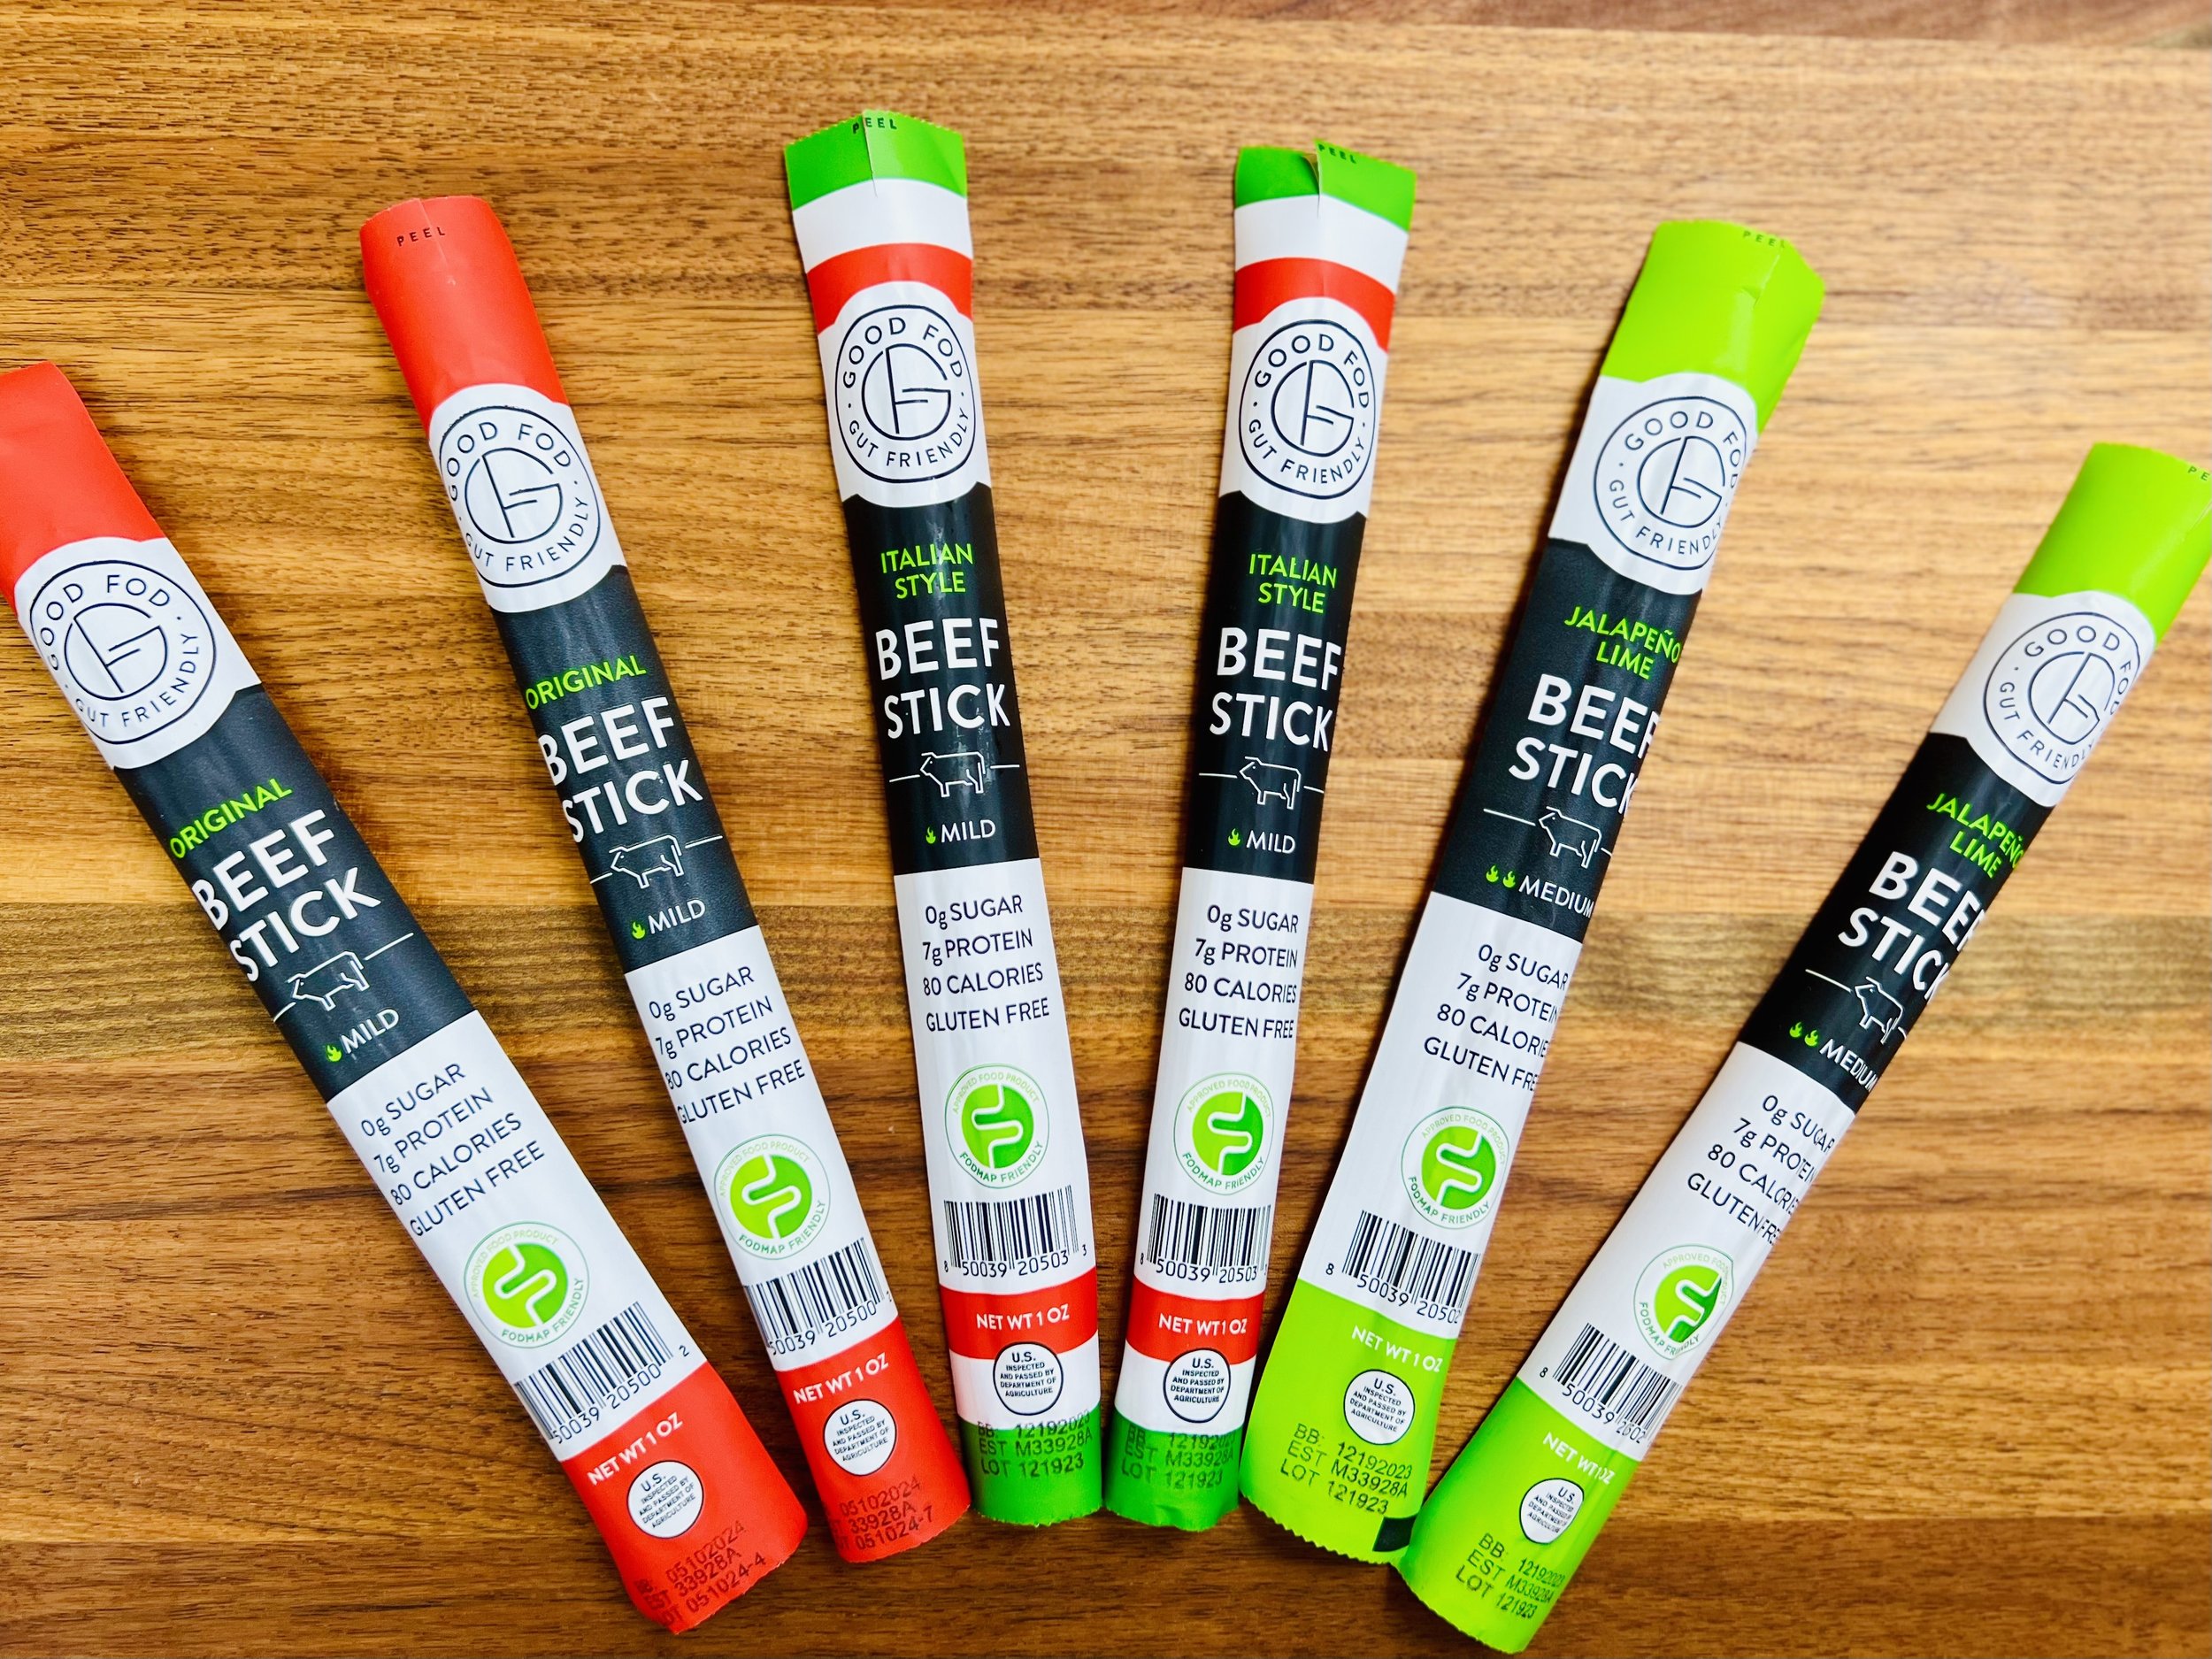
Beef Sticks: 3 Great Flavors/Same Great Stats:
0 Grams Sugar
7 Grams Protein
80 Calories
Gluten-free
Lactose-free

Beef Jerky: 3 Great Flavors/3 Servings/pkg
3 Grams of Carbs
10 Grams Protein
80 Calories
Gluten-free
Lactose-free
More Deliciously Low FODMAP™ tips & tools

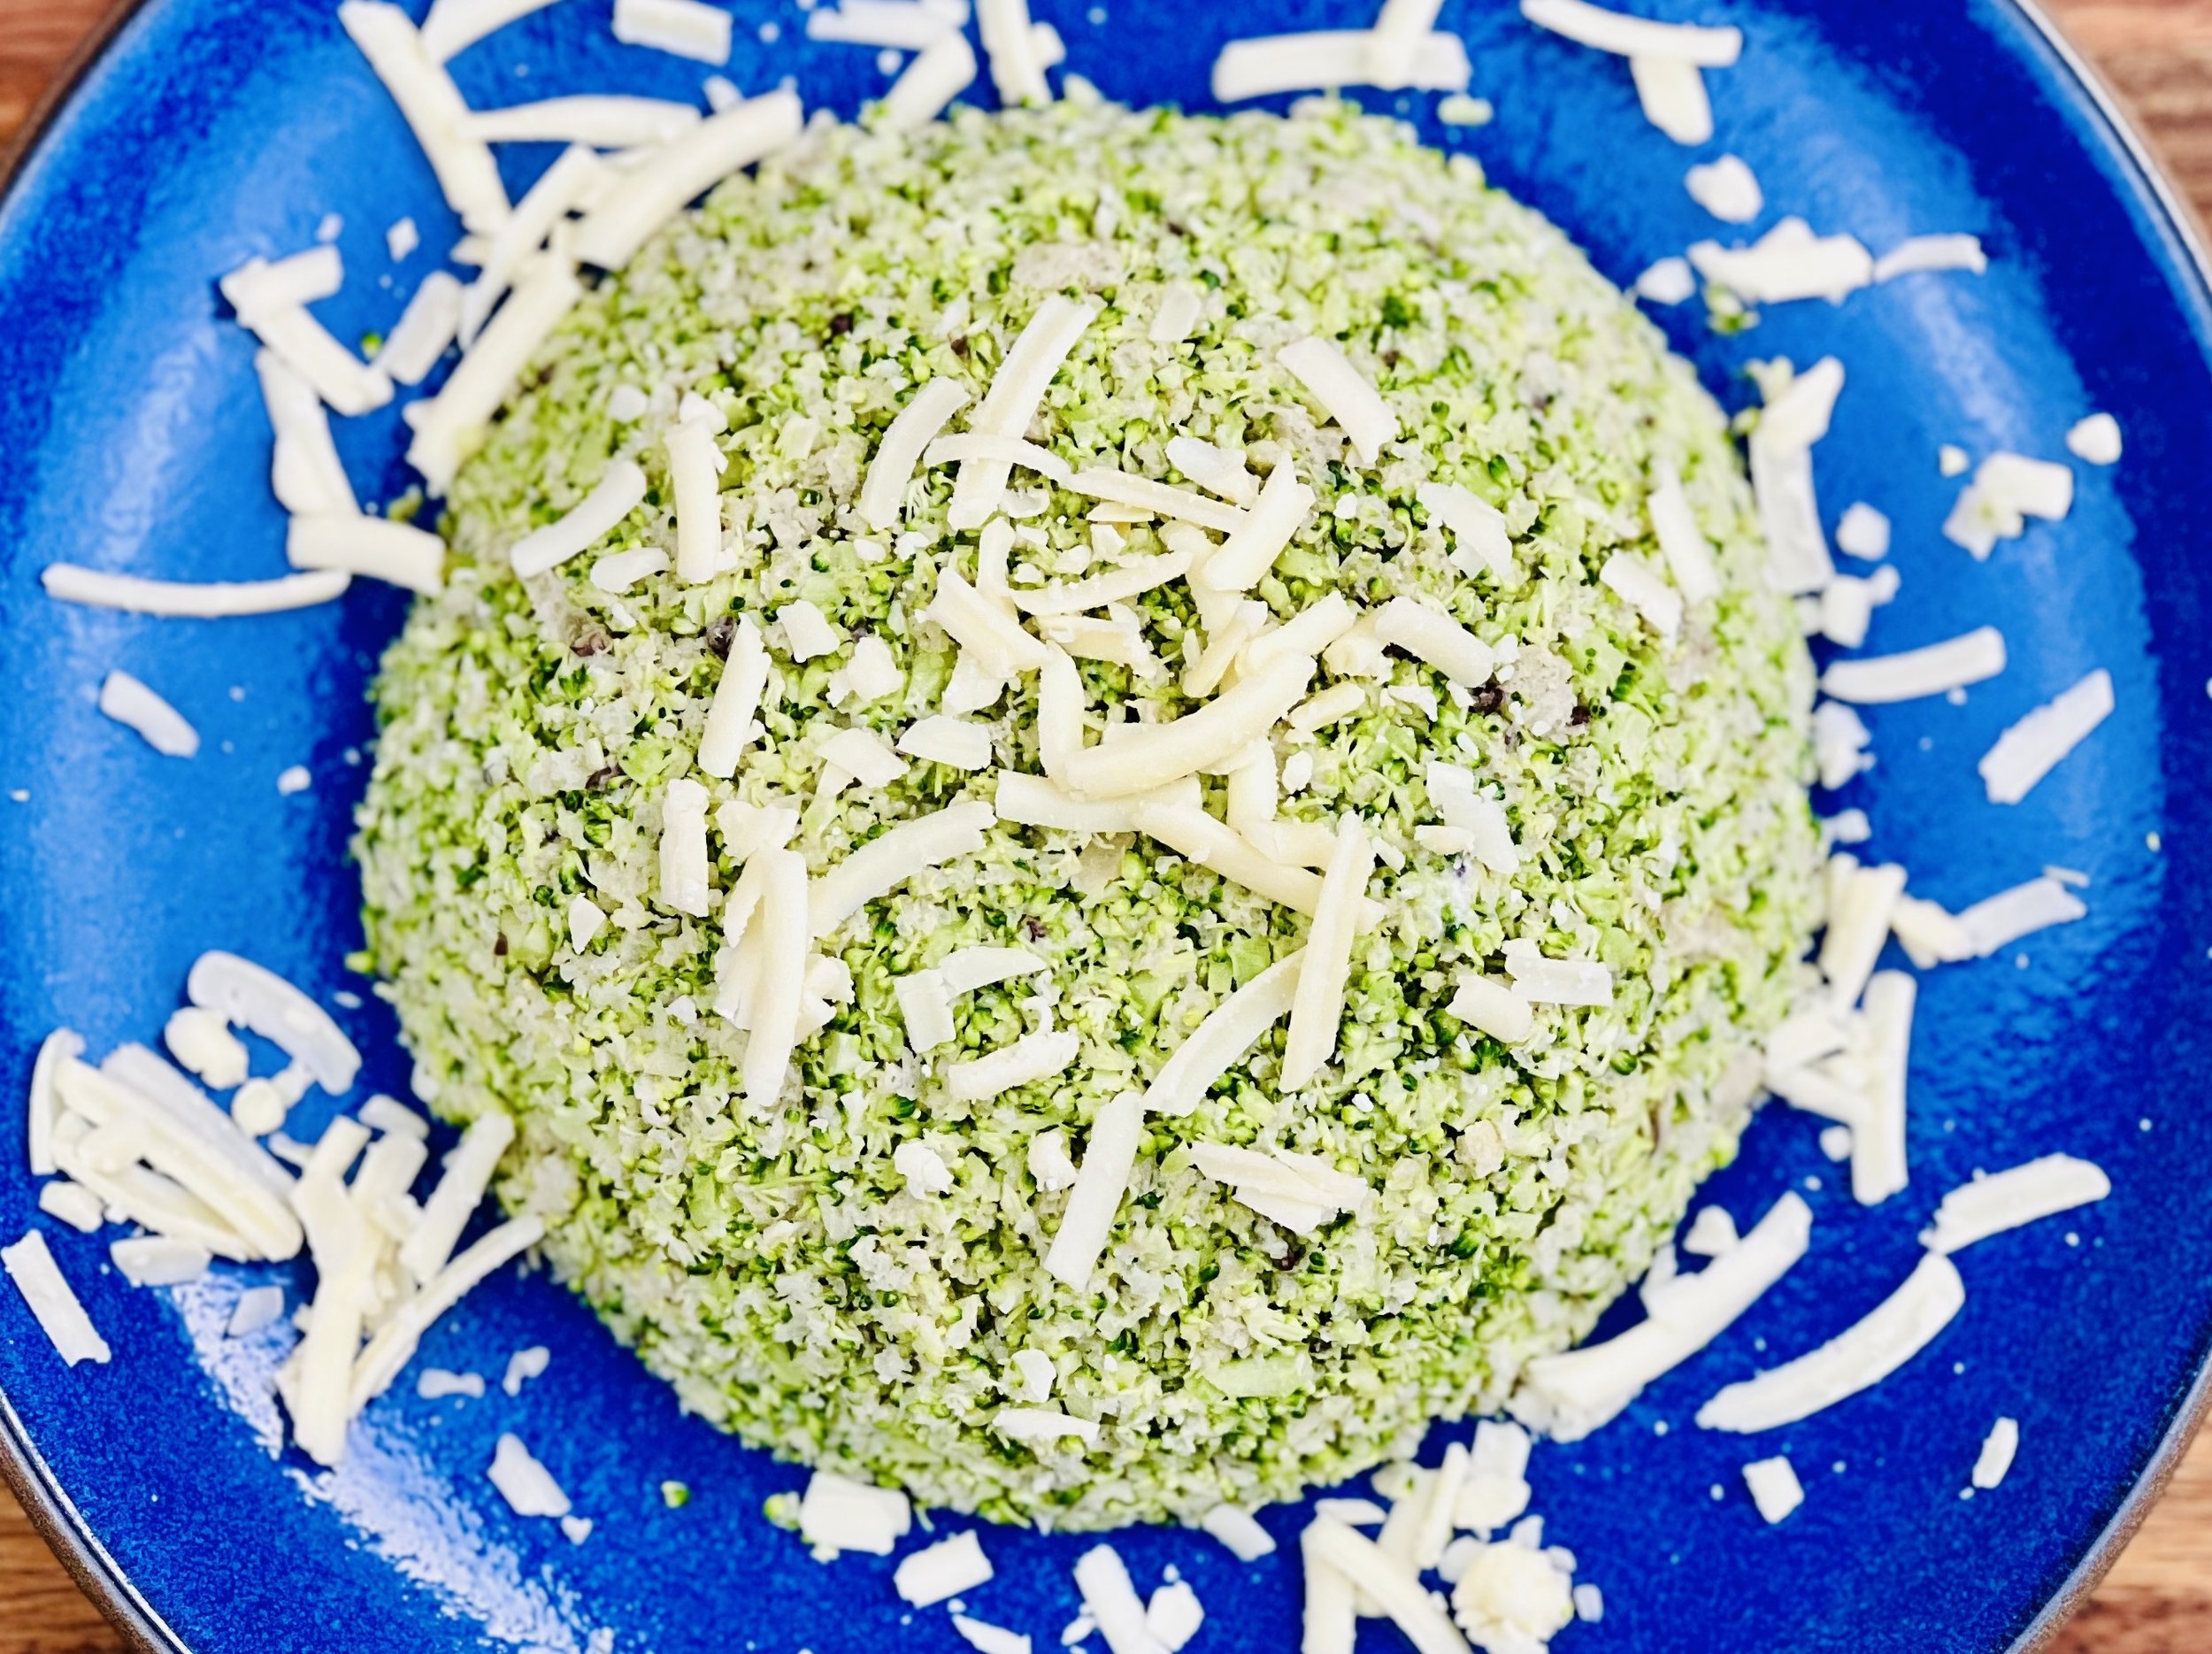
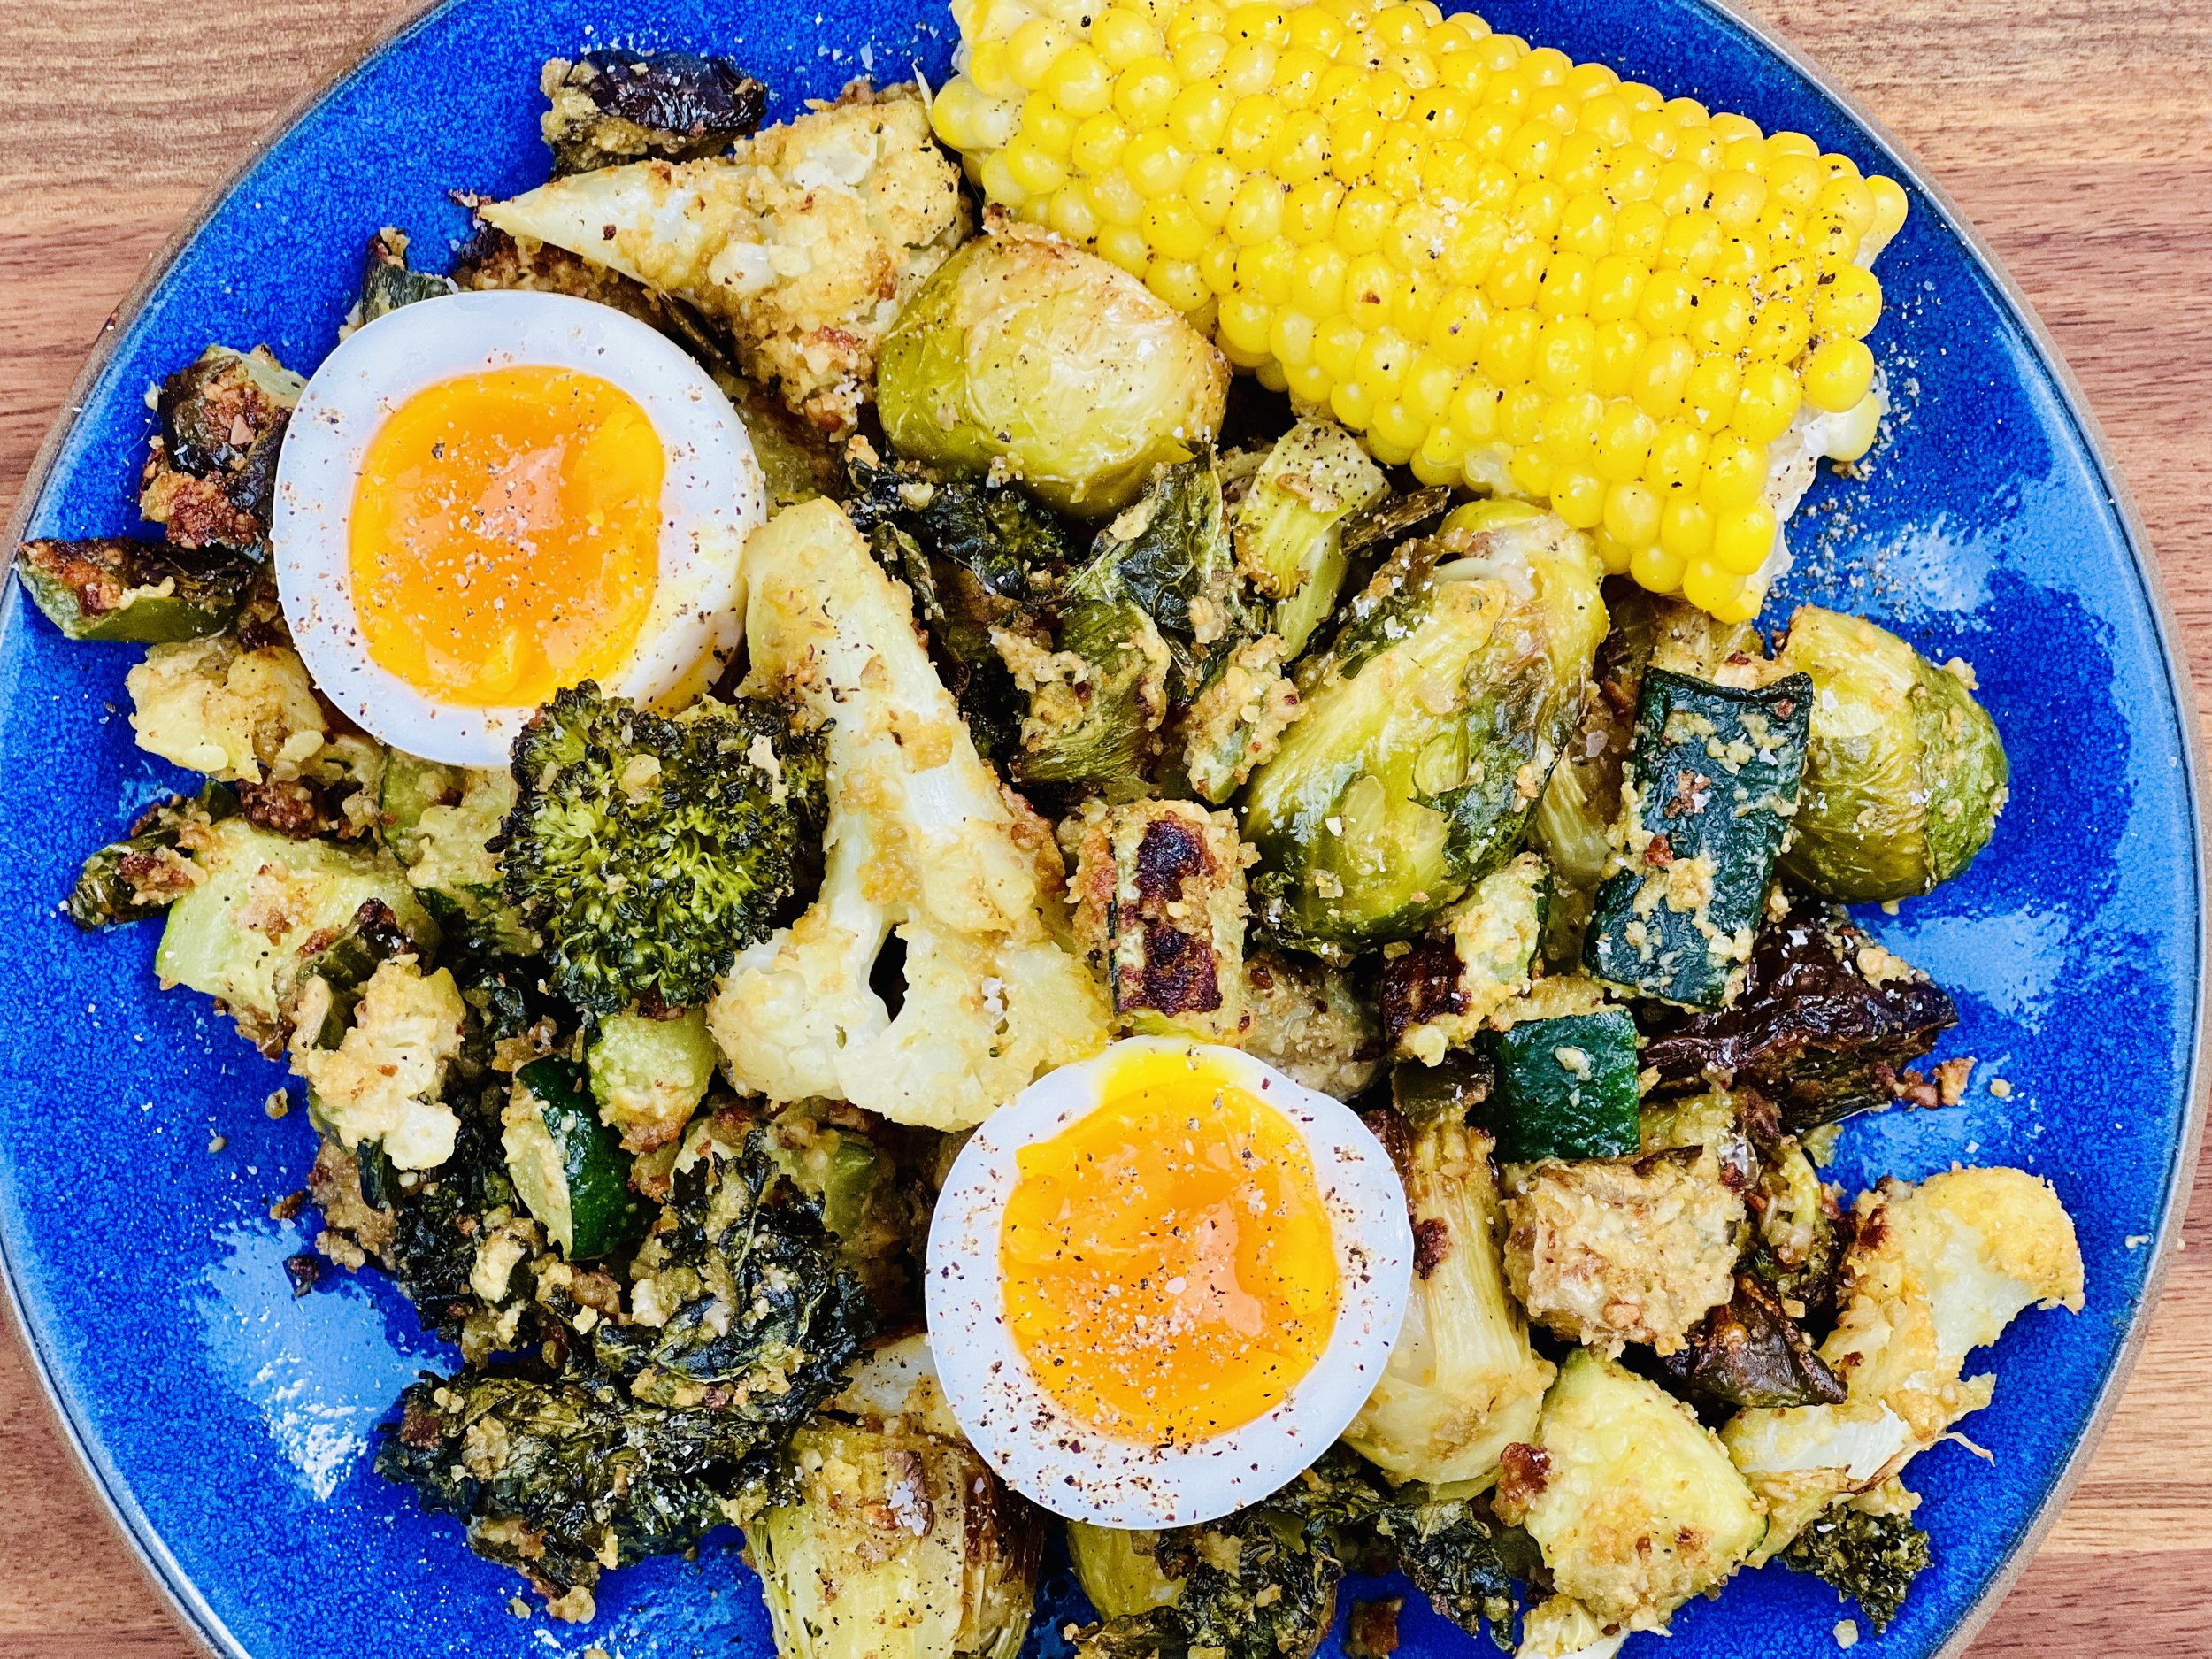
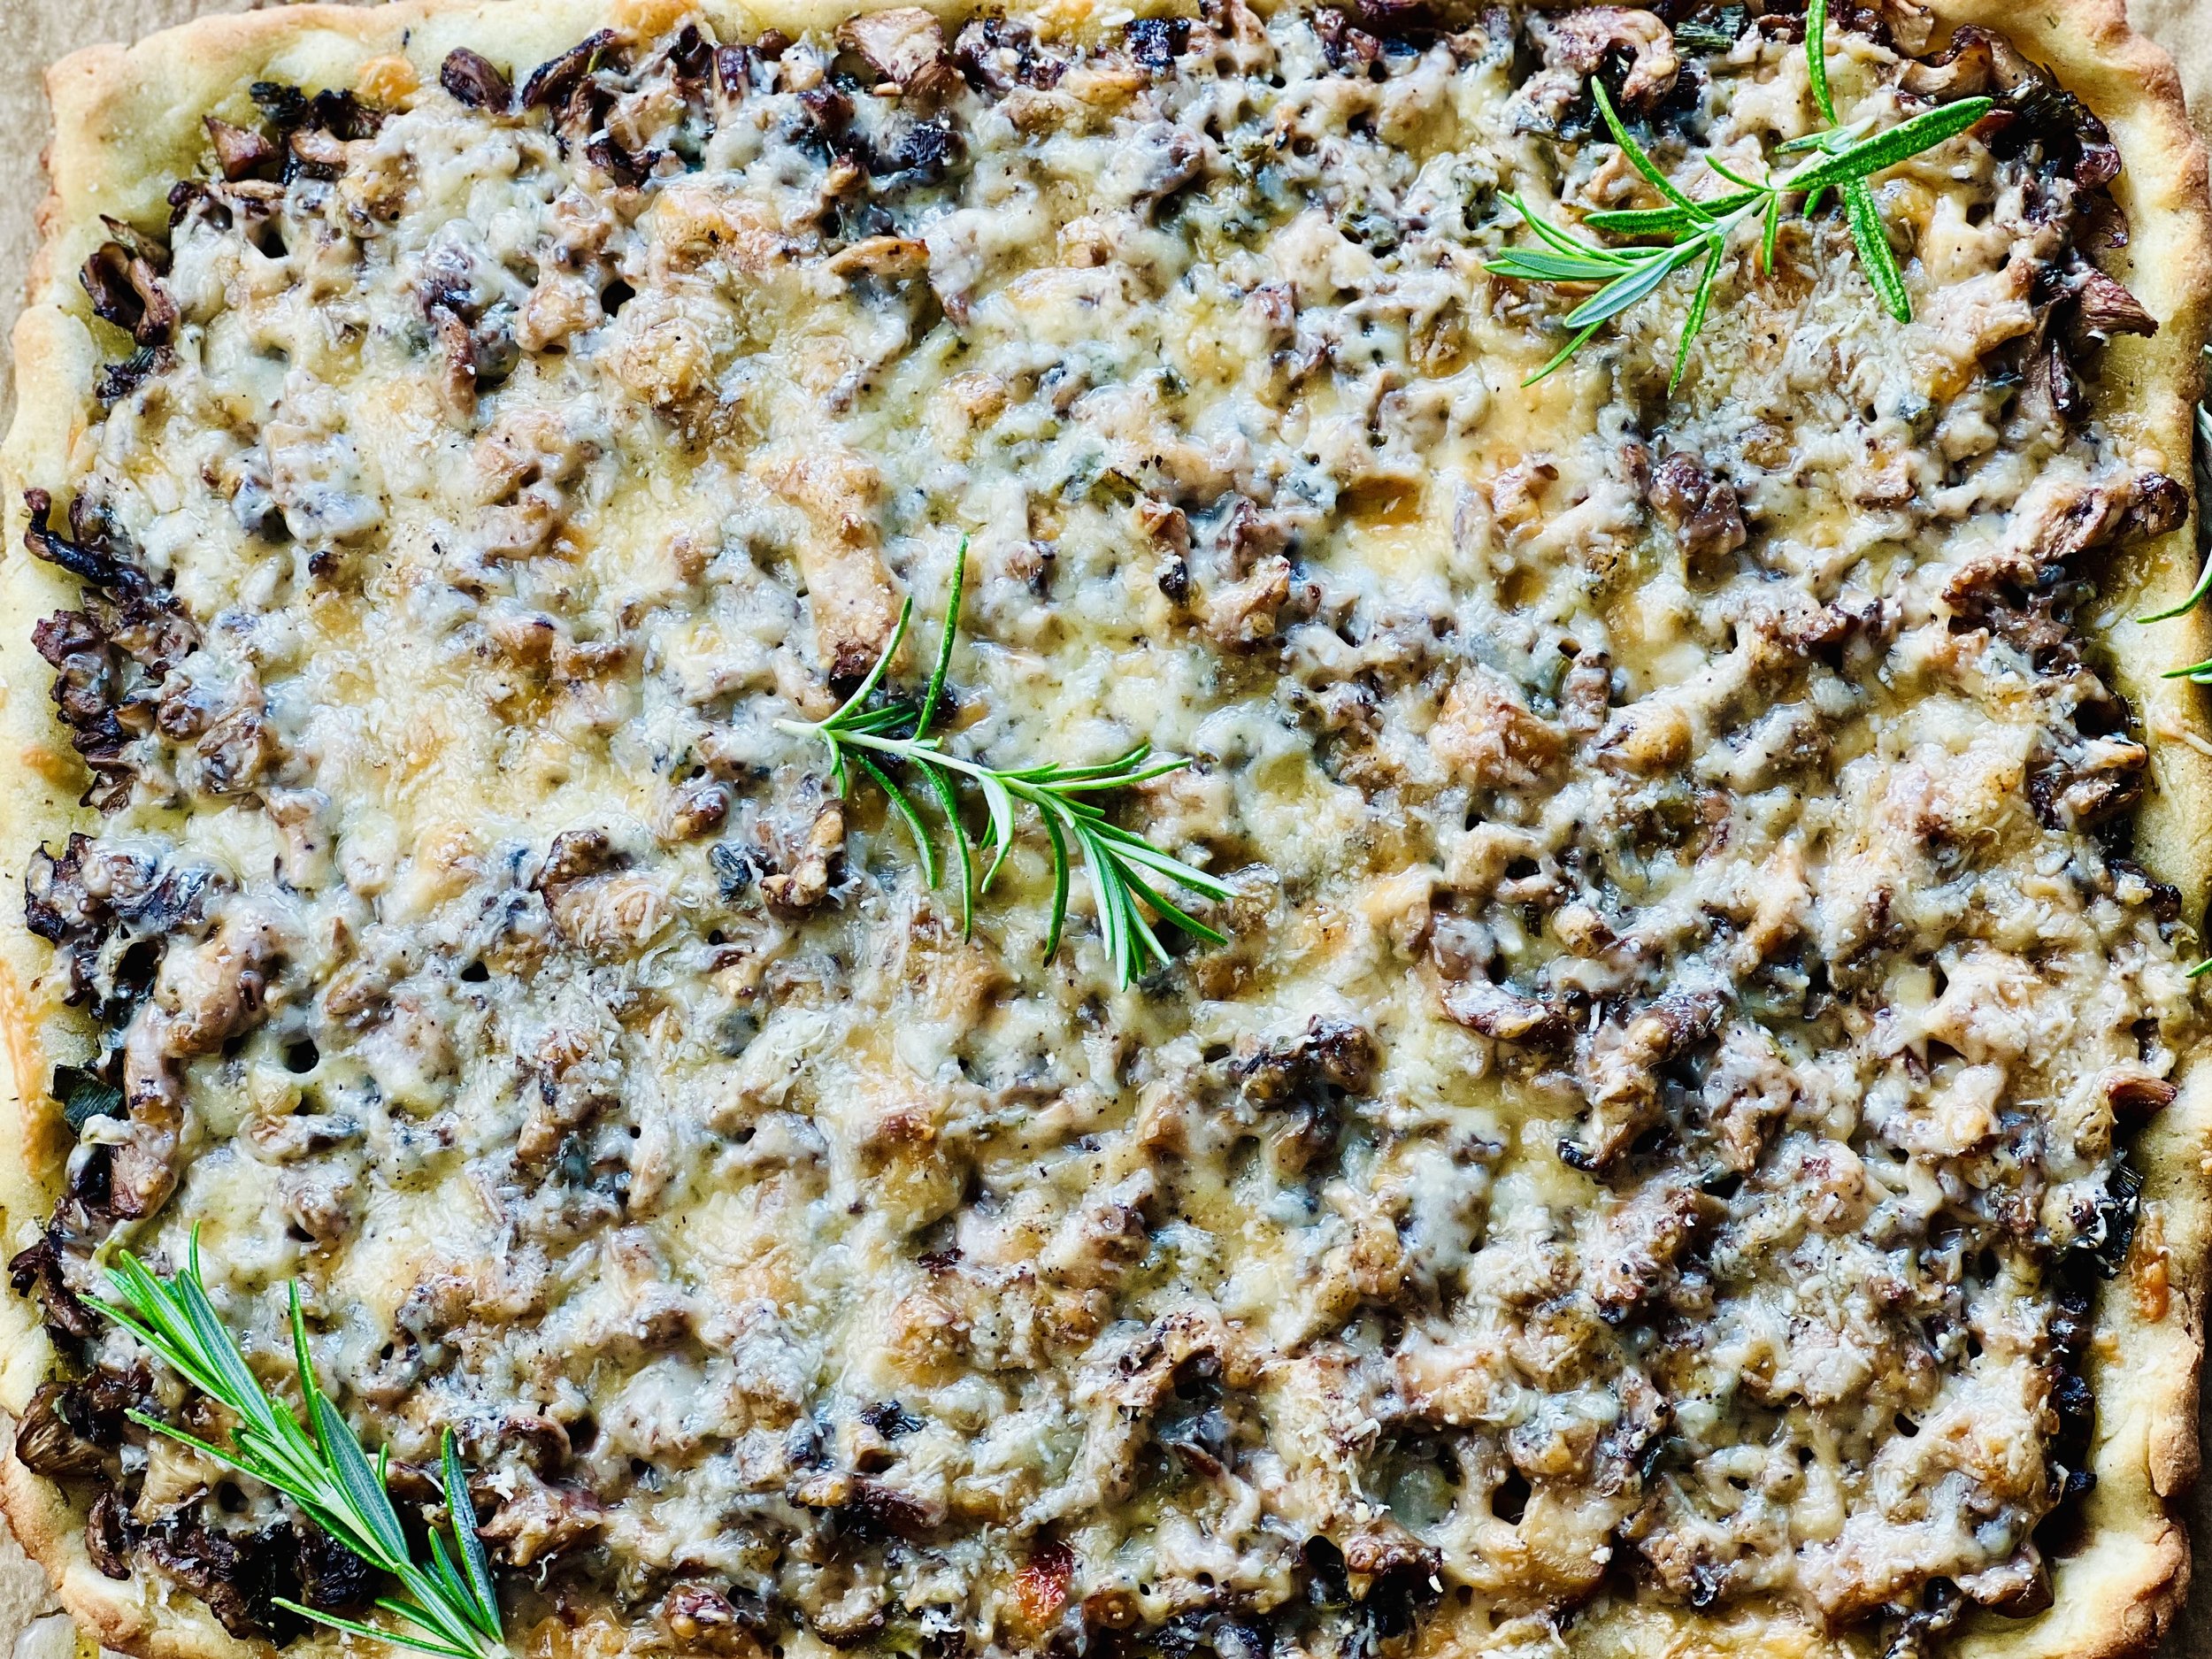
Roasted Vegetable Main Course (Low FODMAP)
20 Minutes prep • 25 Minutes cook • Low FODMAP • Gluten-free • Lactose-free • Vegetarian • Serves 4
20 Minutes prep • 25 Minutes cook • Low FODMAP • Gluten-free • Lactose-free • Vegetarian • Serves 4 • Ok to make ahead: Steps 1-5
Eating a broad variety of plants is important for the health of our gut biome. Roasting a combination of vegetables is a great way to get that variety in a delicious way (this recipe includes 14 different plants!) Roasting vegetables brings out a wonderful nutty sweetness you can’t get any other way. This recipe enhances that nutty flavor with seasoning that is a combination of macadamia nuts, sunflower seeds, and nutritional yeast that deliver an incredibly flavorful, protein-packed vegetarian main course the whole family will love. The combination of vegetables in this recipe is specifically selected to minimize FODMAP stacking (the different vegetables have differing FODMAP profiles). I have included a bit of cauliflower, but if you are sensitive to the FODMAP Mannitol, please sub this out.
Ingredients: Vegetables
2 tablespoons garlic-infused olive oil
1 leek, green part only, chopped
1 bunch green onions, green part only, chopped
2 cups broccoli florets (top part only)
1 cup cauliflower florets or chopped carrots (use cauliflower only if you can tolerate some mannitol)
1 cup Brussels sprouts, cut in half if they are large
2 large leaves kale, central stem removed and roughly chopped
2 small Japanese eggplant, sliced into 1/2-inch rounds
2 jalapeno peppers, seeded and chopped (optional but delicious without being hot)
2 small zucchini, diced
Ingredients: Seasoning
1/2 cup roasted and salted macadamia nuts
1/4 cup raw sunflower seeds
1/2 cup nutritional yeast
1/2 teaspoon Kosher salt
1/2 teaspoon black pepper
1 generous pinch of cayenne pepper (optional but adds a nice kick)
Directions
(1) Prepare: Preheat the oven to 400 degrees F. Cut the leaves from the stems of the kale and discard the stems. Wash and spin dry the leaves. Remove the seeds and chop the jalapeno (removing the seeds removes the heat!) Wash and chop the other vegetables. Note: If you are not including the cauliflower, please add 1 cup of broccoli, Brussels sprouts, and/or chopped carrots instead.
(2) Massage kale: Put kale leaves in a mixing bowl or in the roasting pan and drizzle 1 tablespoon of olive oil over them. Use your hands to massage the kale to soften it up and coat all the leaves with the oil. Add all other vegetables except the zucchini. Set aside.
(3) Prepare the seasoning: In your blender (or mini food processor) combine the macadamia nuts, sunflower seeds, 4 tablespoons of nutritional yeast, salt, pepper, and cayenne pepper. Blend/pulse for about 30 seconds until it turns into a fine meal. Scrape down the sides of the bowl if needed and pulse again to break down all the nuts.
(4) Combine: Sprinkle the seasoning mixture on the vegetables and toss well to distribute as the seasoning as evenly as possible.
(5) Cook: Spread the vegetables out in the roasting pan or rimmed baking sheet and bake for 15 minutes. Remove from the oven and toss the vegetables to ensure even baking. Add the zucchini. Toss again. Return to the oven and bake for 10 - 15 minutes more, or until vegetables are tender and starting to turn deep brown.
Make-ahead note: Once completely cooled, store leftovers in an airtight container for 2-3 days. They heat up very nicely in a 325-degree F oven for 15 minutes or in the microwave.
(6) Plate and serve: Serve as a vegetarian main course or side dish as is or top with a soft-boiled egg for even more protein.
Eat and enjoy every bite because you can!
Recipe note: I use Diamond Crystal Kosher salt in all my recipes because it has a wonderful flat and crisp flake that tastes delicious. It is also the least salty salt available so you can use it more liberally as a seasoning than you can table salt or sea salt. If you use another type of salt, you may need to reduce the amount so it is not over-salted.
Have a question you’d like to have answered? Email me at hello@ibsgamechanger.com
Link note: This post may contain affiliate links for you to easily purchase items that are linked. I may earn a small commission from qualifying purchases but none of this costs you a thing so feel free to use the links! In addition, for some items, I have provided a special discount code for IBS Game Changers so be sure to use the code when you purchase an item to get the discount that has been arranged just for you.
More Deliciously Low FODMAP™ plant forward recipes
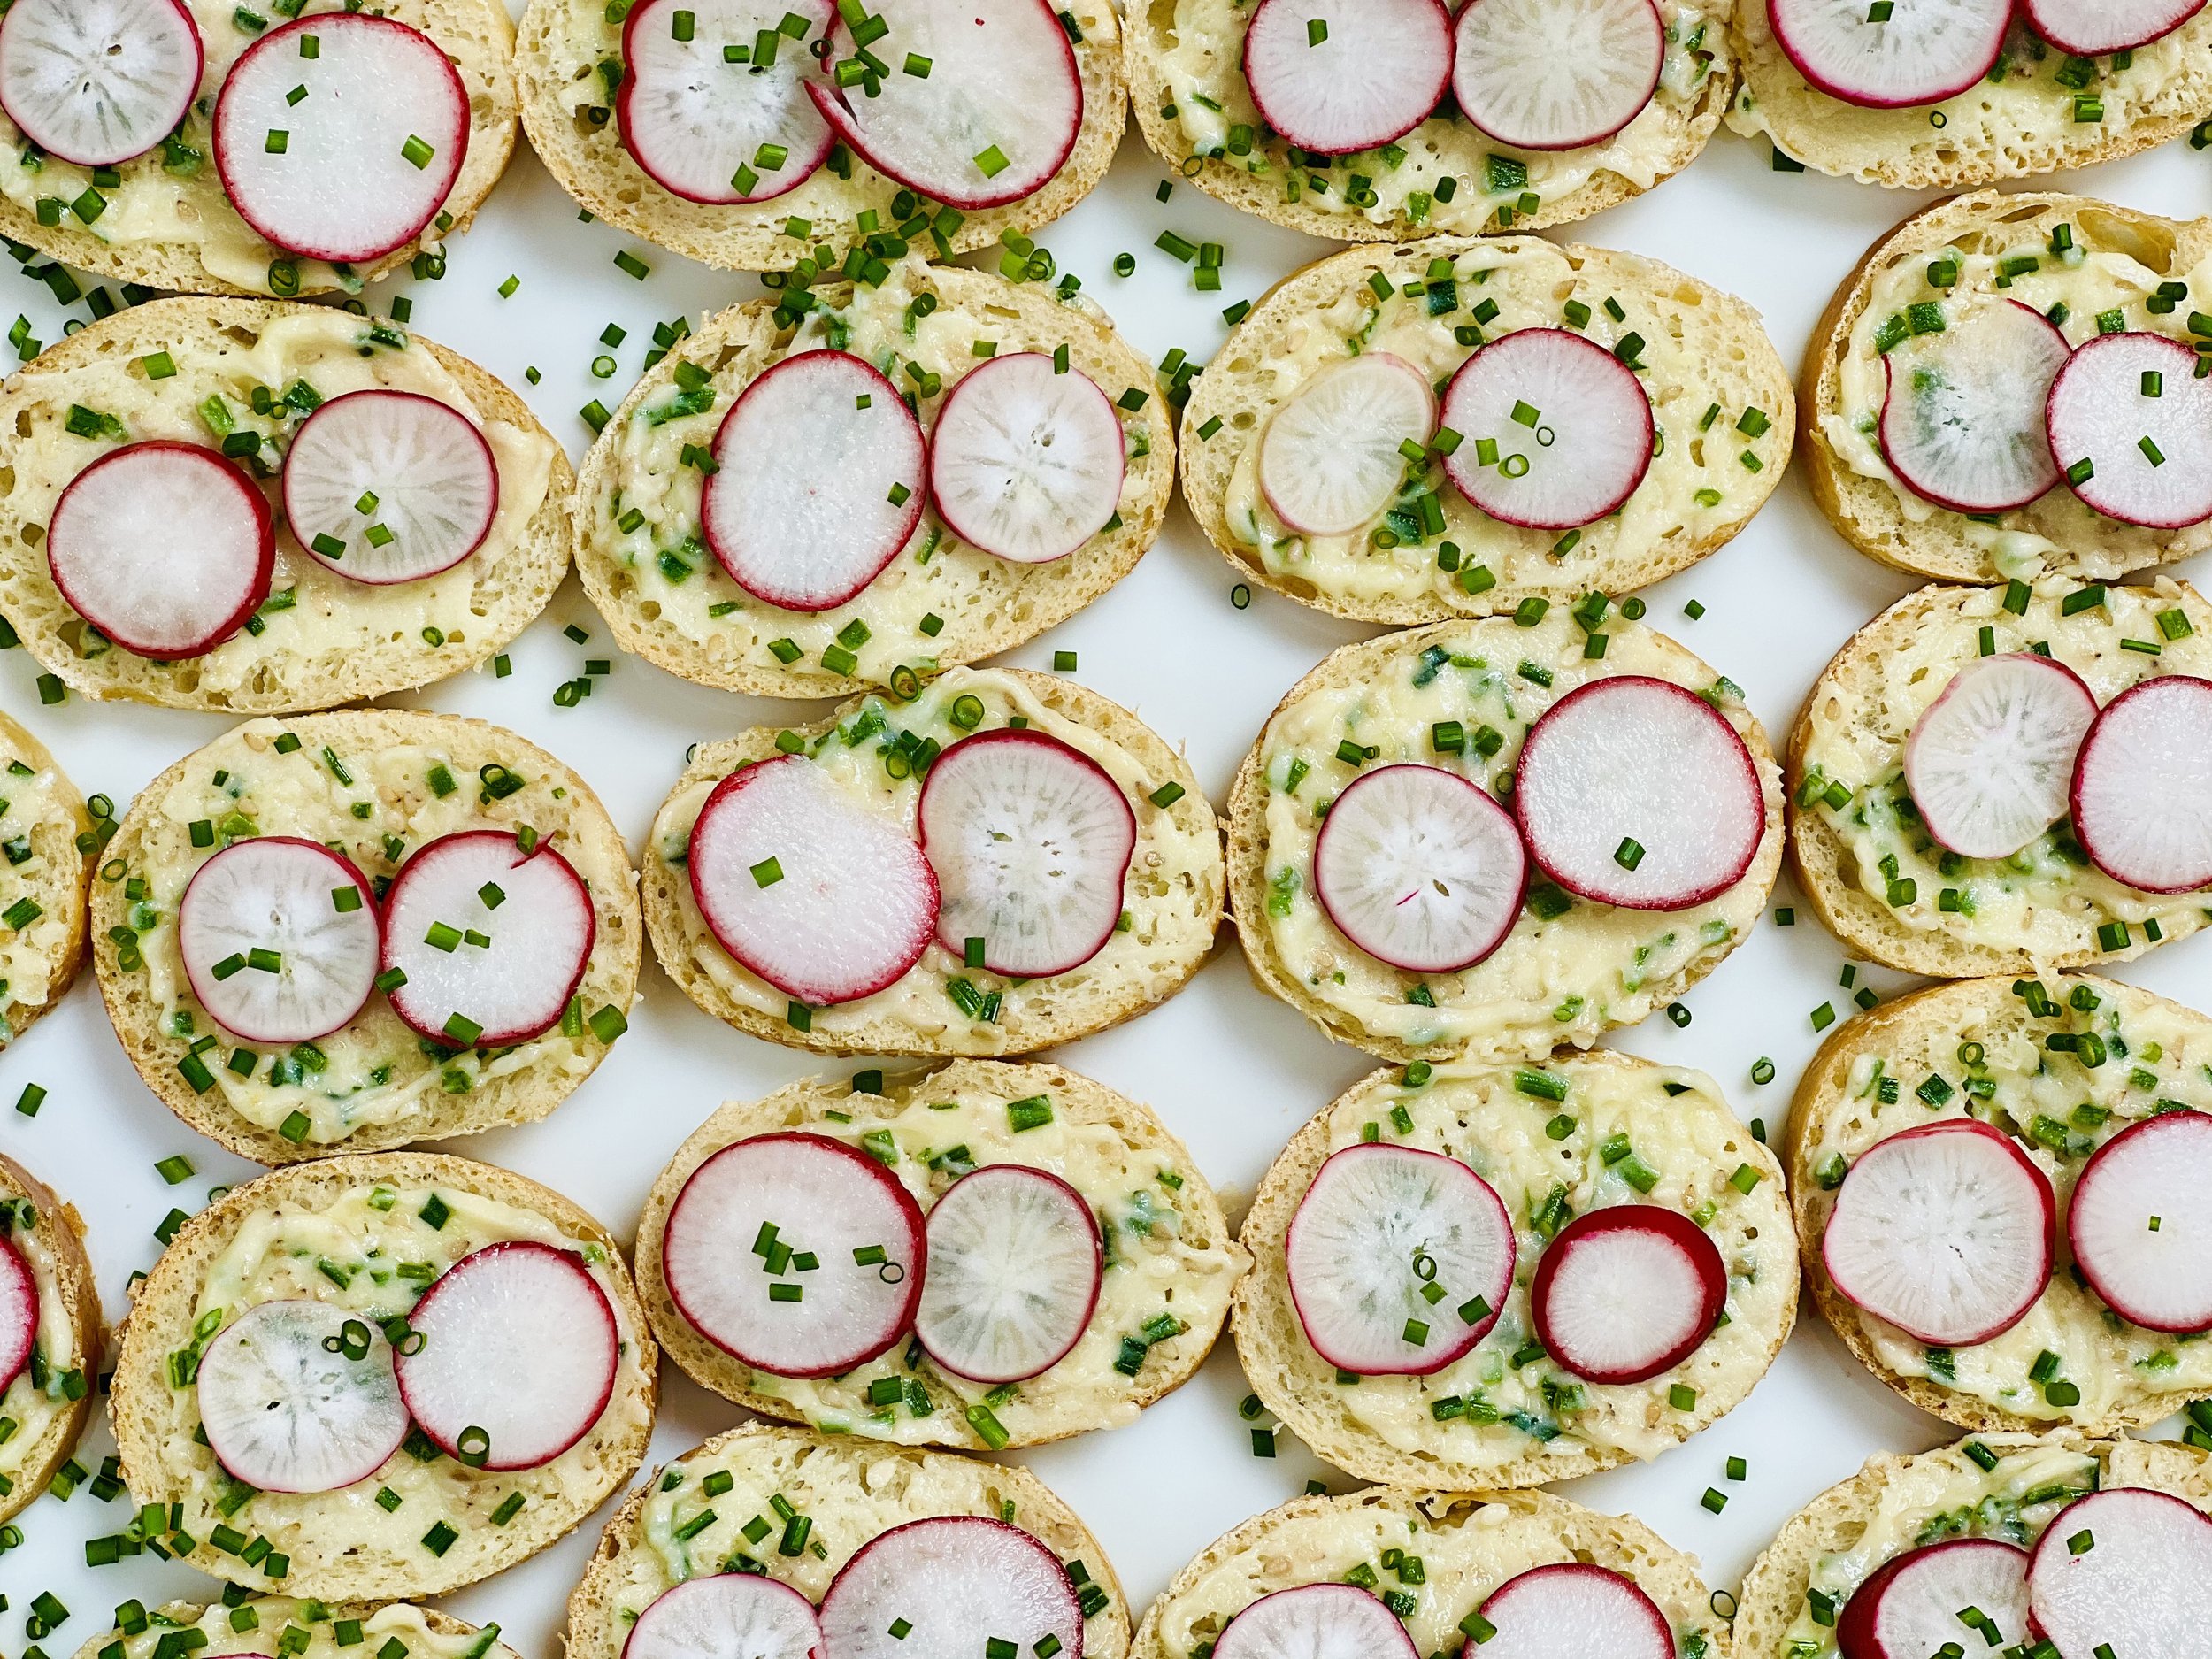
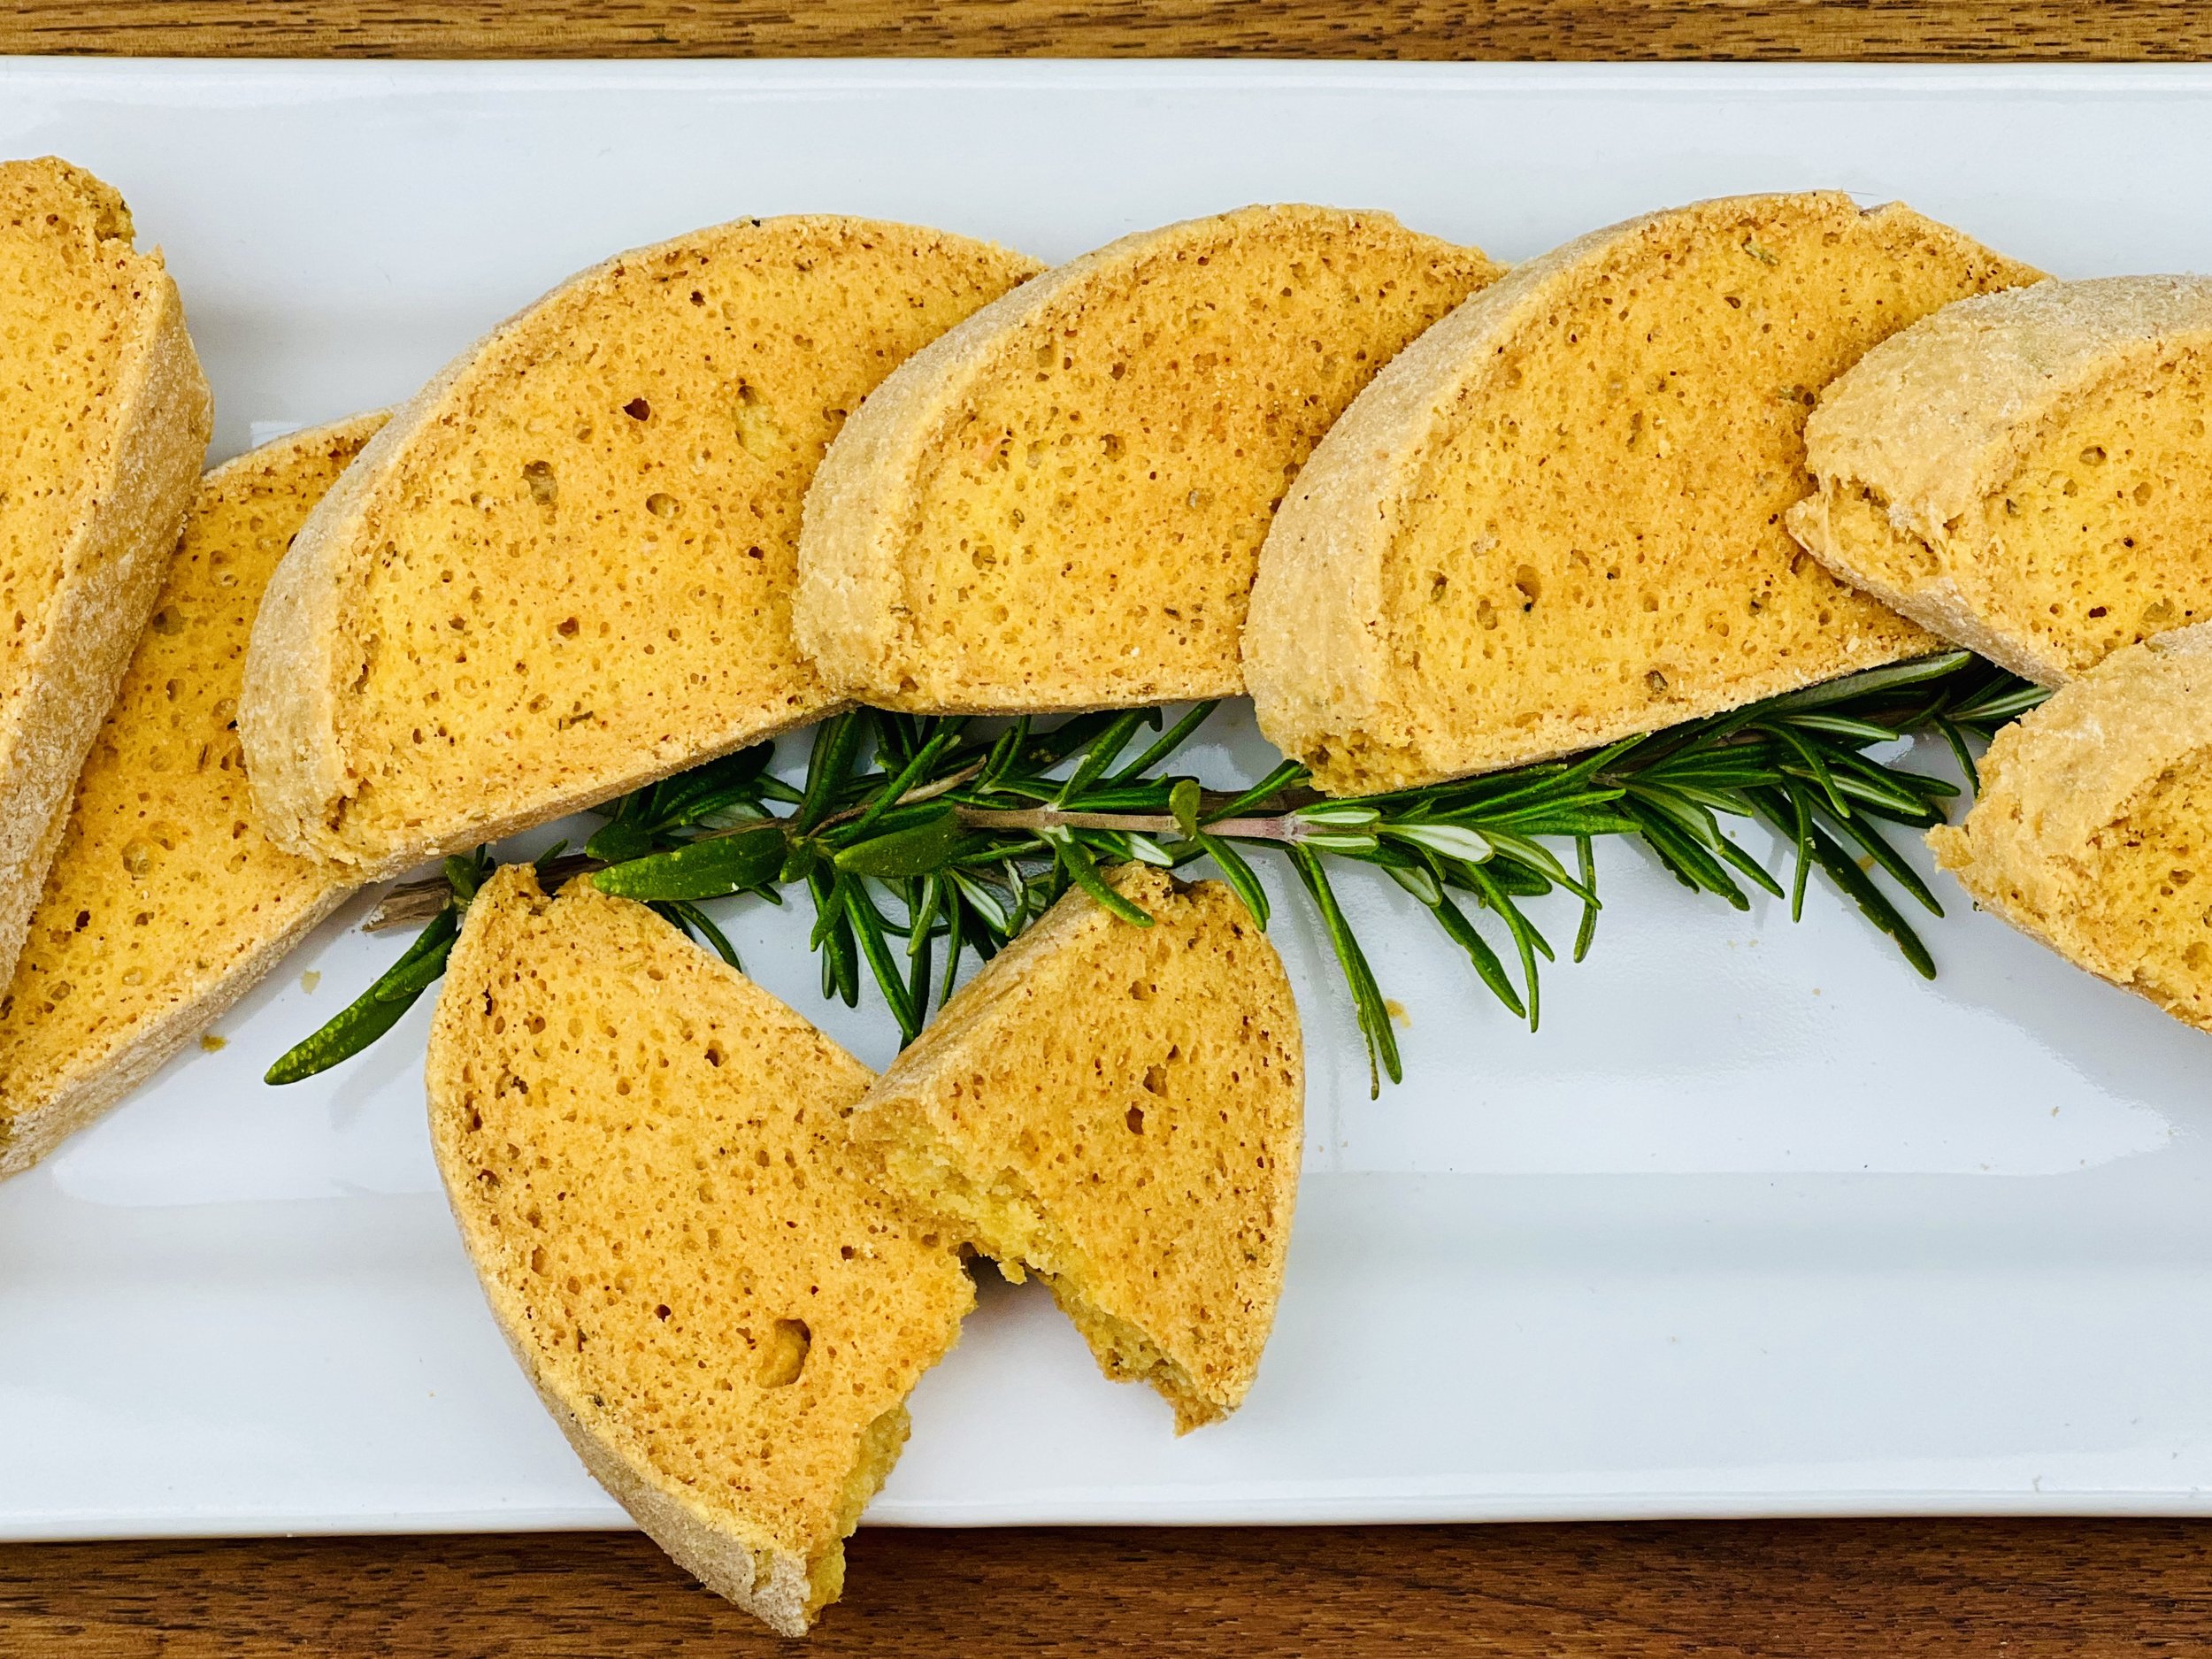
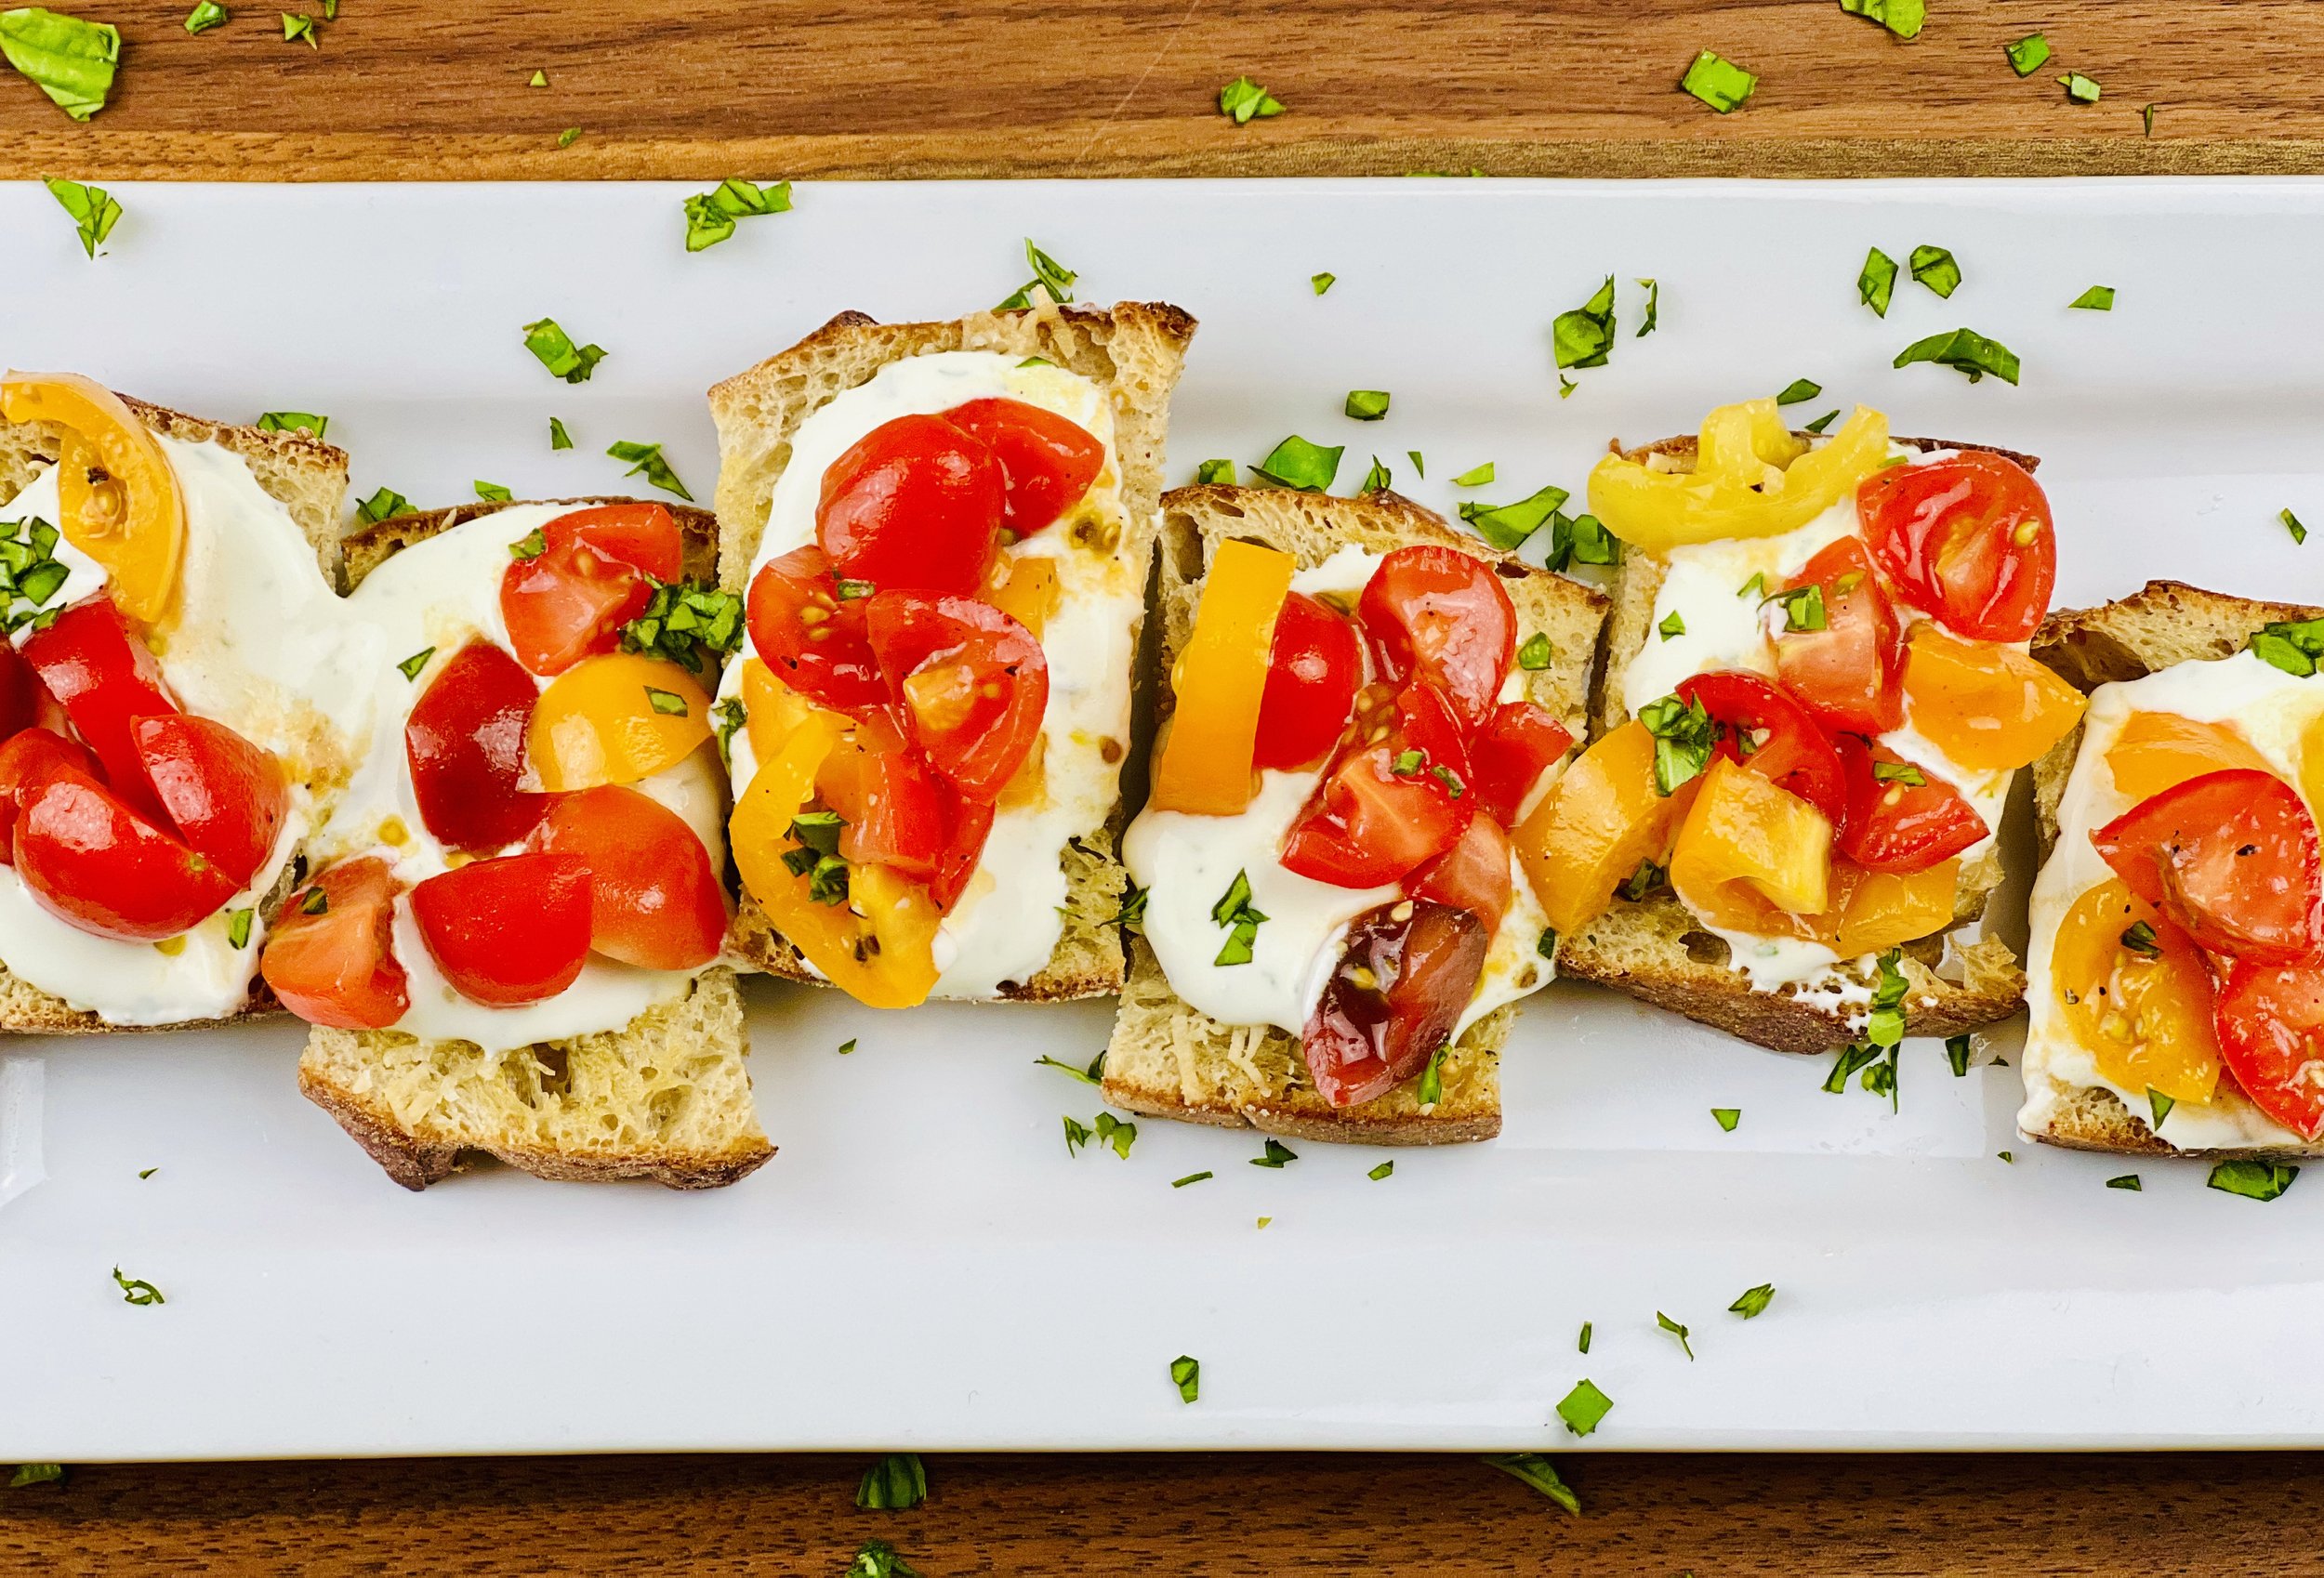
Asian Fusion Radish and Chive Bites (Low FODMAP)
20 Minutes prep • Low FODMAP • Makes 16 - 20 Pieces
20 Minutes prep • Low FODMAP • Makes 16 - 20 Pieces • Ok to make ahead: Steps 1-2
Looking for a different, delicious, low FODMAP, easy-to-make, and fun new appetizer to add to your repertoire? This is it! Inspired by a recipe I found in Bon Appetit over 15 years ago, this Asian-influenced appetizer is perfect for summer barbecues, potlucks, and backyard get-togethers. The sliced sourdough baguette is spread with a wonderful compound butter and layered with crisp radishes. Finished with a sprinkle of salt, these appetizers will delight your guests with their freshness and flavor.
Ingredients
1/4 cup (1/2 stick) salted butter, room temperature
2 tablespoons fresh chives, finely chopped plus more for serving
1 tablespoon toasted sesame seeds
1/4 teaspoon fresh ginger, grated
1/4 teaspoon toasted sesame oil
1/8 teaspoon Kosher salt
1/8 teaspoon black pepper
1 sourdough baguette, cut into 1/4-inch slices
4 radishes, thinly sliced
Fleur de sel or Diamond Crystal Kosher salt
Directions
(1) Prepare: Let the butter come to room temperature (do not melt); chop the chives; grate the ginger; slice the baguette.
(2) Make the compound butter: Combine the butter, 2 tablespoons of chopped chives, sesame seeds, ginger, toasted sesame oil, salt and pepper in a small bowl. Stir well to combine.
Make-ahead note: At this point, you may set everything aside until you’re ready to assemble and serve.
(3) Build: Spread the butter on the bread slices. Top with two or three radish slices, overlapping is fine. Sprinkle with remaining chives and the fleur de sel or Kosher salt.
(4) Plate and serve: Serve in one layer as an appetizer or fun side dish. These are best eaten fresh so don’t worry about storing leftovers.
Eat and enjoy every bite because you can!
Recipe note: I use Diamond Crystal Kosher salt in all my recipes because it has a wonderful flat and crisp flake that tastes delicious. It is also the least salty salt available so you can use it more liberally as a seasoning than you can table salt or sea salt. If you use another type of salt, you may need to reduce the amount so it is not over-salted.
Have a question you’d like to have answered? Email me at hello@ibsgamechanger.com
Link note: This post may contain affiliate links for you to easily purchase items that are linked. I may earn a small commission from qualifying purchases but none of this costs you a thing so feel free to use the links! In addition, for some items, I have provided a special discount code for IBS Game Changers so be sure to use the code when you purchase an item to get the discount that has been arranged just for you.
More Deliciously Low FODMAP™ appetizer recipes


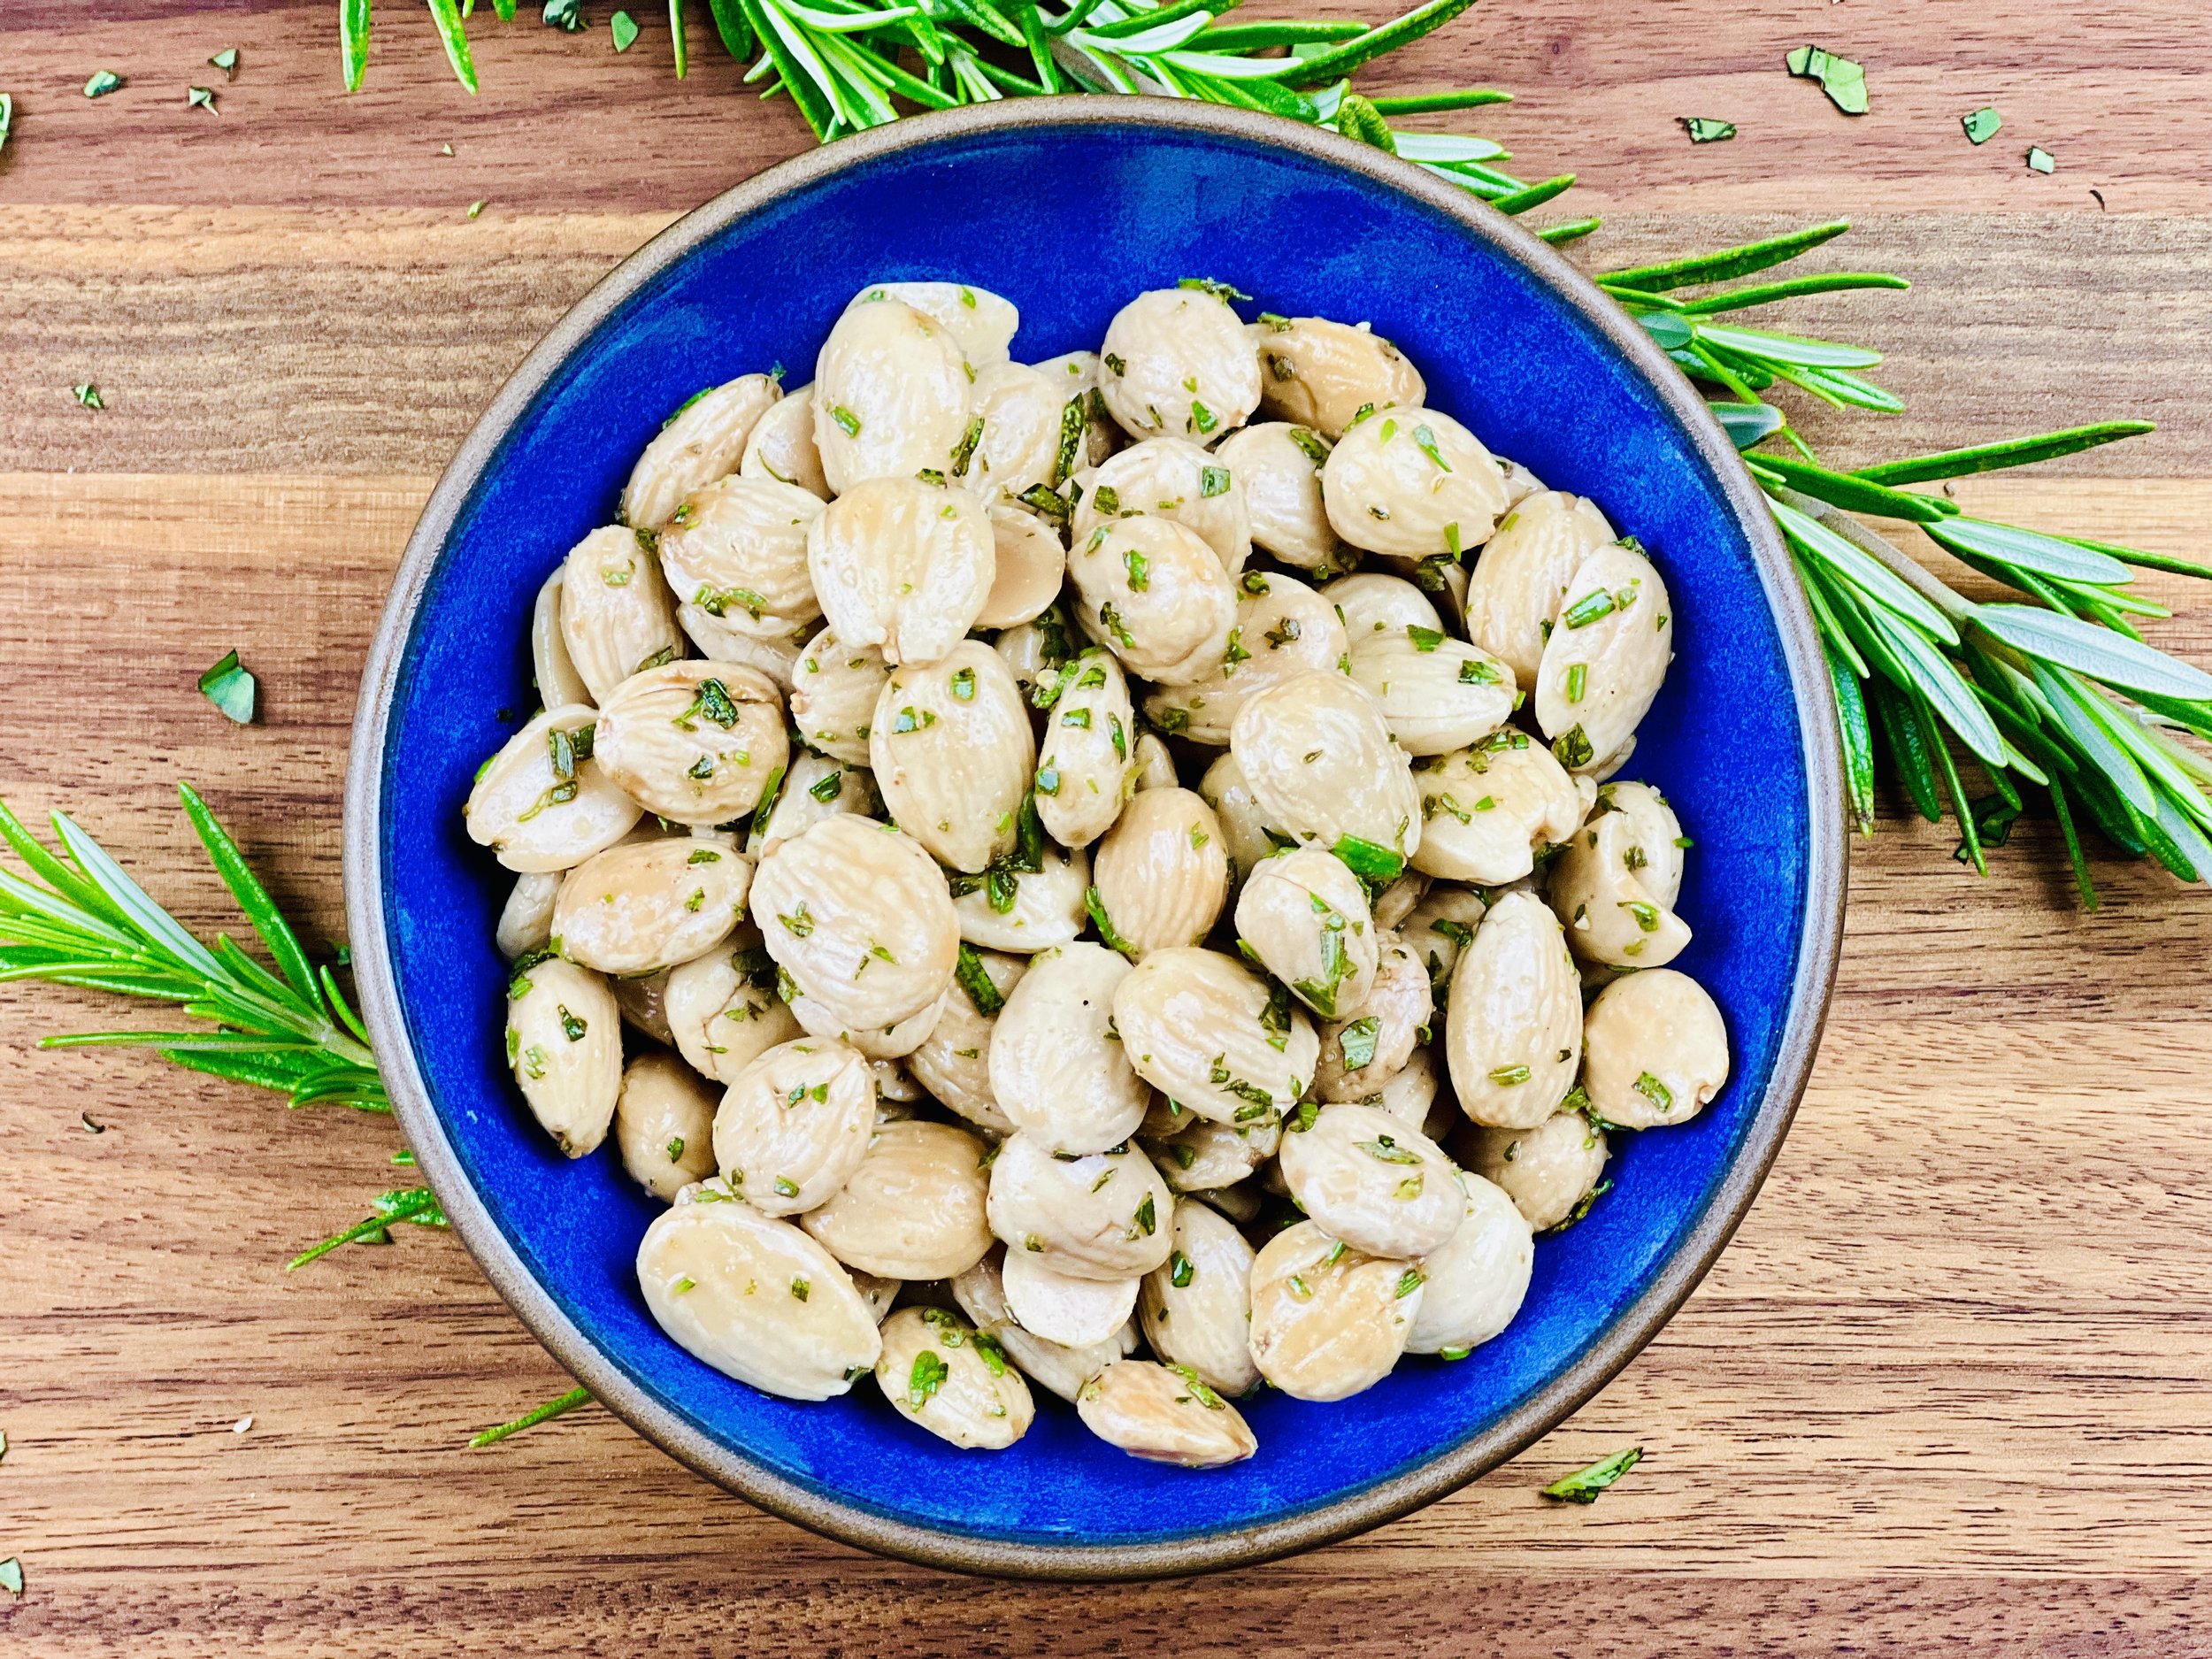
10 Minutes Prep • 50 Minutes Cook • Gluten-free • Dairy-free • Low FODMAP • Serving size 3-4 crackers