Deliciously Low FODMAP

Inspire yourself with hundreds of delicious low FODMAP recipes, tips, and tools, and enjoy the abundance that is yours even when you have IBS.
Use the buttons and filters to find something specific or browse the complete collection for inspiration.
Discover a treasure trove of recipes with my FREE recipe club! Get new ideas delivered straight to your inbox every week.
Deliciously Low FODMAP is a trademark of IBS Game Changer, LLC
Filter to find Recipes and Tools
More Filtering Options
- All 728
- Appetizer 50
- BBQ 46
- Bowl 32
- Breakfast 58
- Cocktails 13
- Collection 1 58
- Collection 10 27
- Collection 11 30
- Collection 12 27
- Collection 13 31
- Collection 14 29
- Collection 15 31
- Collection 16 34
- Collection 17 31
- Collection 18 33
- Collection 19 36
- Collection 2 32
- Collection 20 33
- Collection 21 33
- Collection 22 40
- Collection 23 10
- Collection 24 1
- Collection 3 28
- Collection 4 29
- Collection 5 30
- Collection 6 32
- Collection 7 31
- Collection 8 31
- Collection 9 32
- Condiments 6
- Crock Pot 4
- Dessert 107
- Diabetes Game Changer Exception Protocol Contains Alcohol 11
- Diabetes Game Changer Exception Protocol Contains Flour 108
- Diabetes Game Changer Exception Protocol Contains Flour AND Sugar 77
- Diabetes Game Changer Exception Protocol Contains Sugar 49
- Diabetes Game Changer First Four Weeks 363
- Dinner 330
- Drink 8
- Free Guide 17
- Gluten-free 590
- Gut Microbiome 2
- Guthealth 3
- Holidays 68
- IBS Triggers 4
- Keto Friendly 124
- Lactose-Free 175
- Low FODMAP Diet 714
- Low Net Carb 138
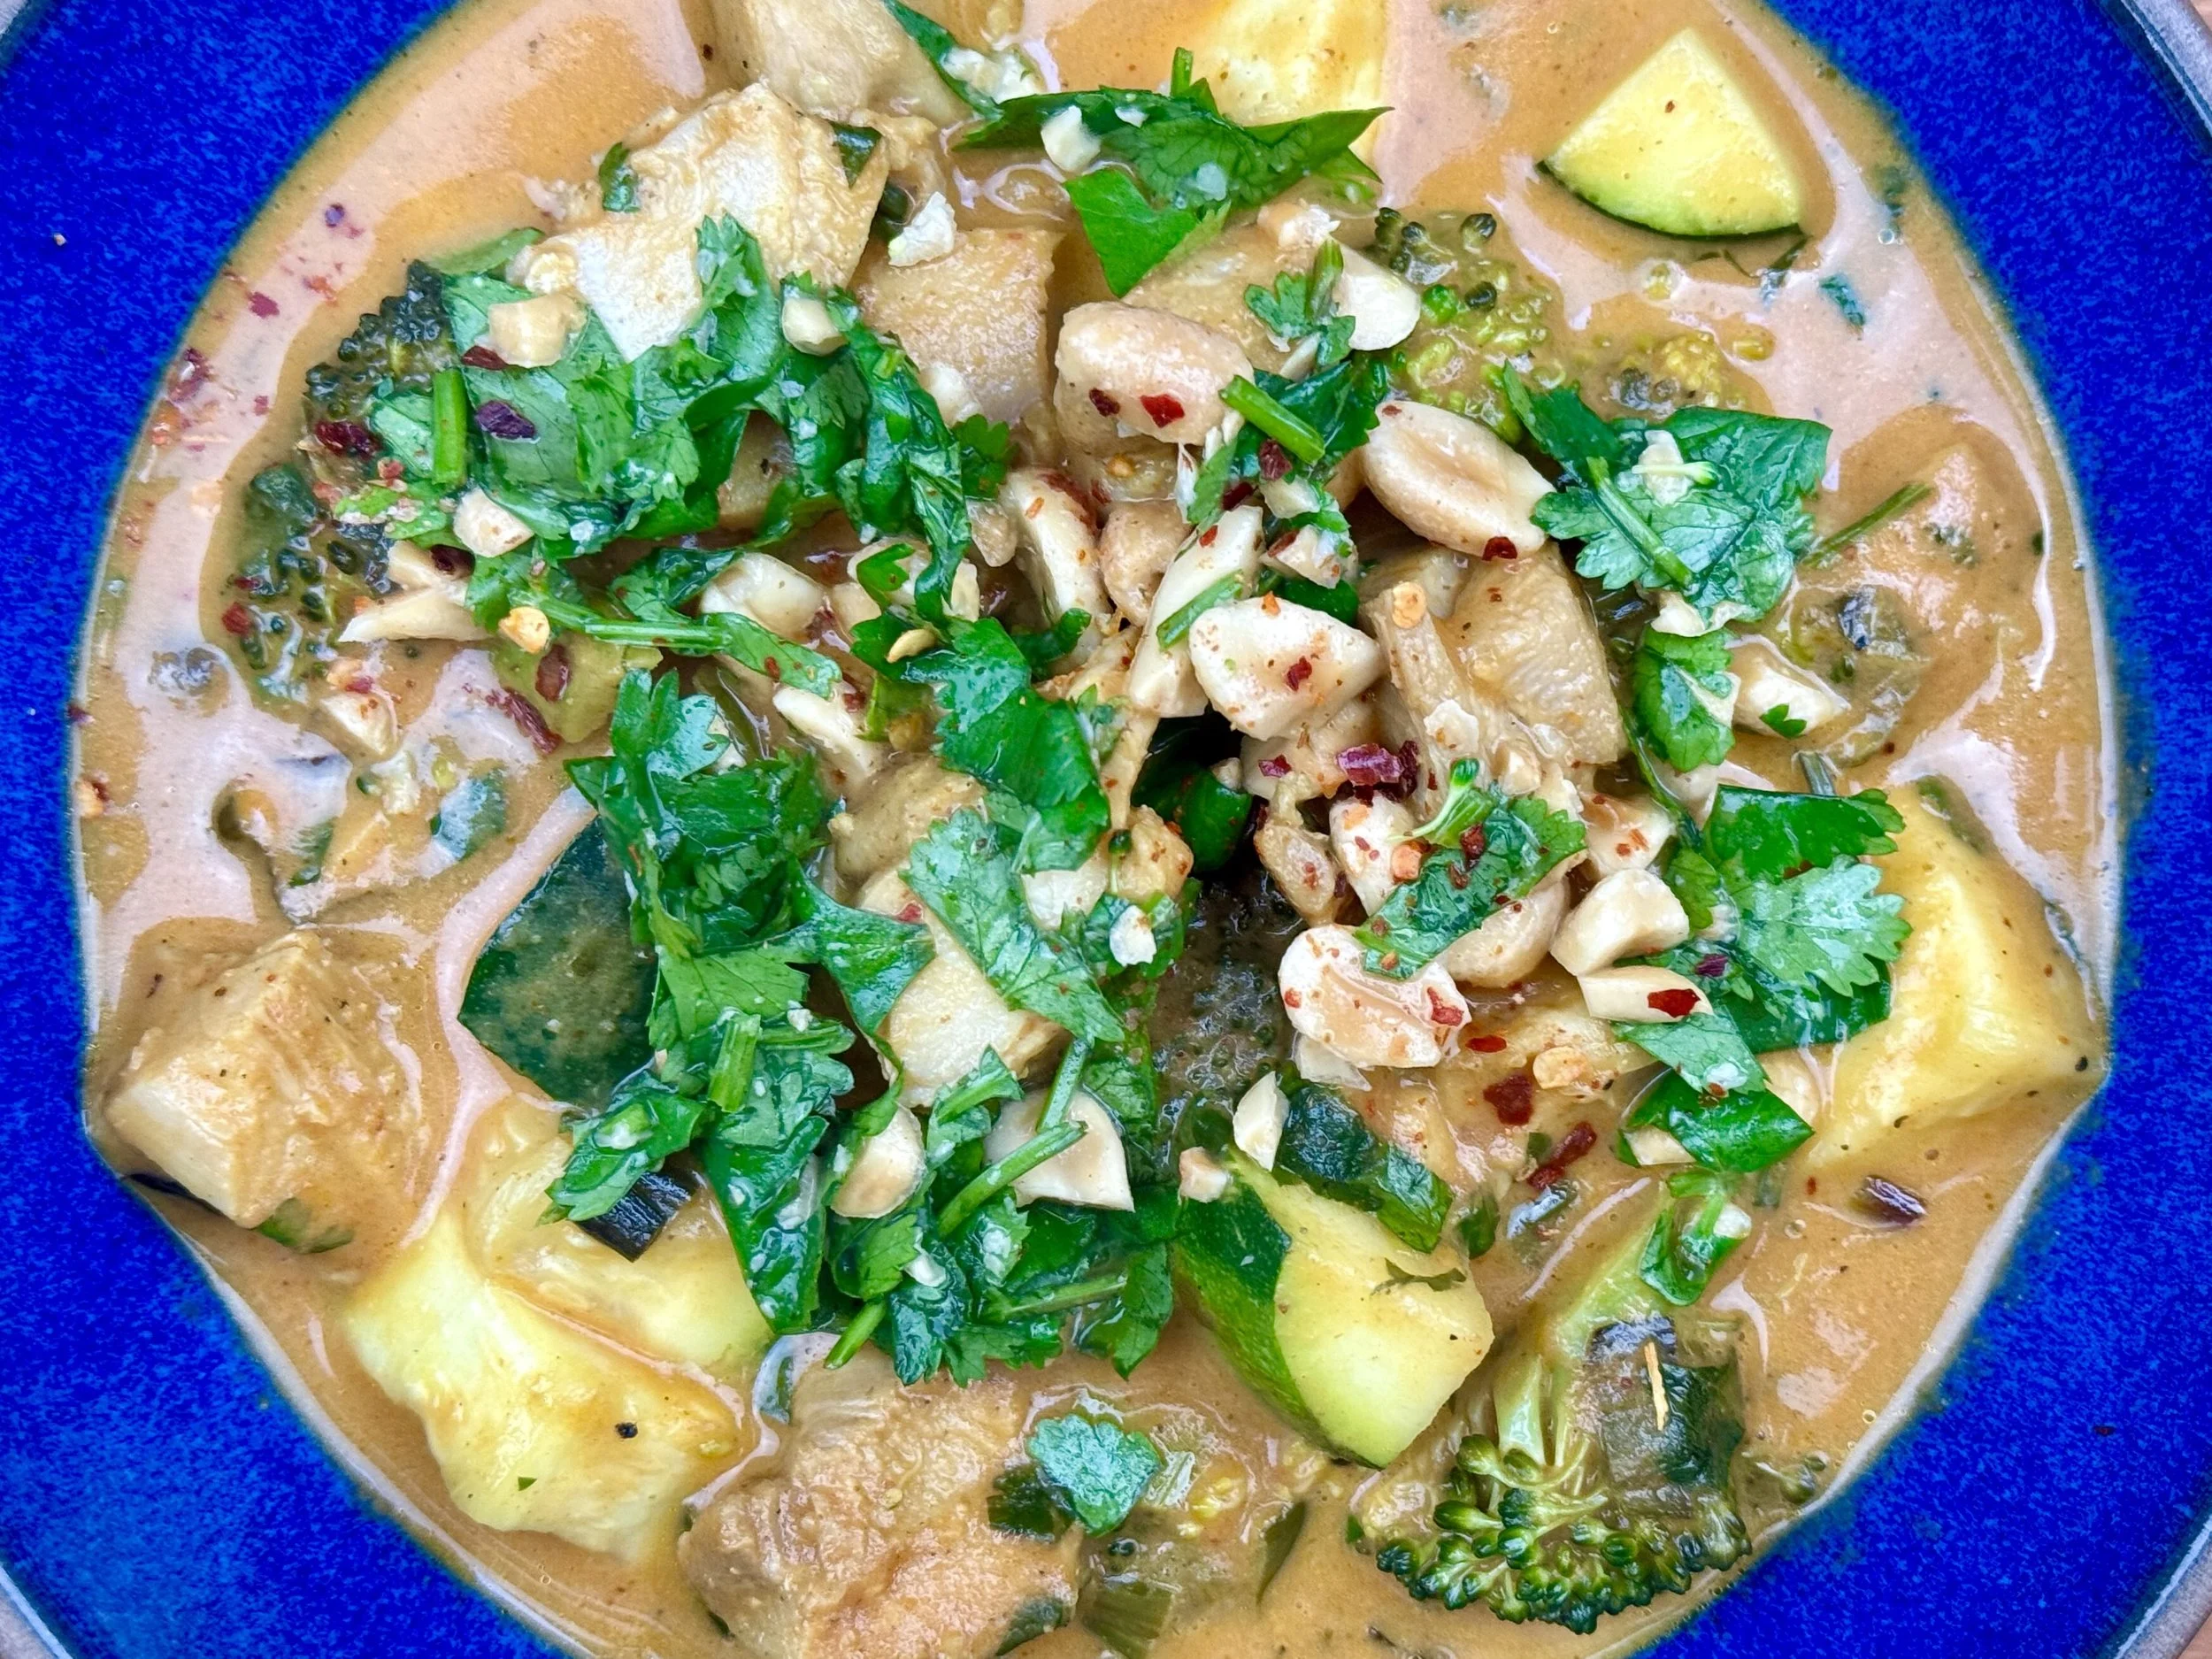
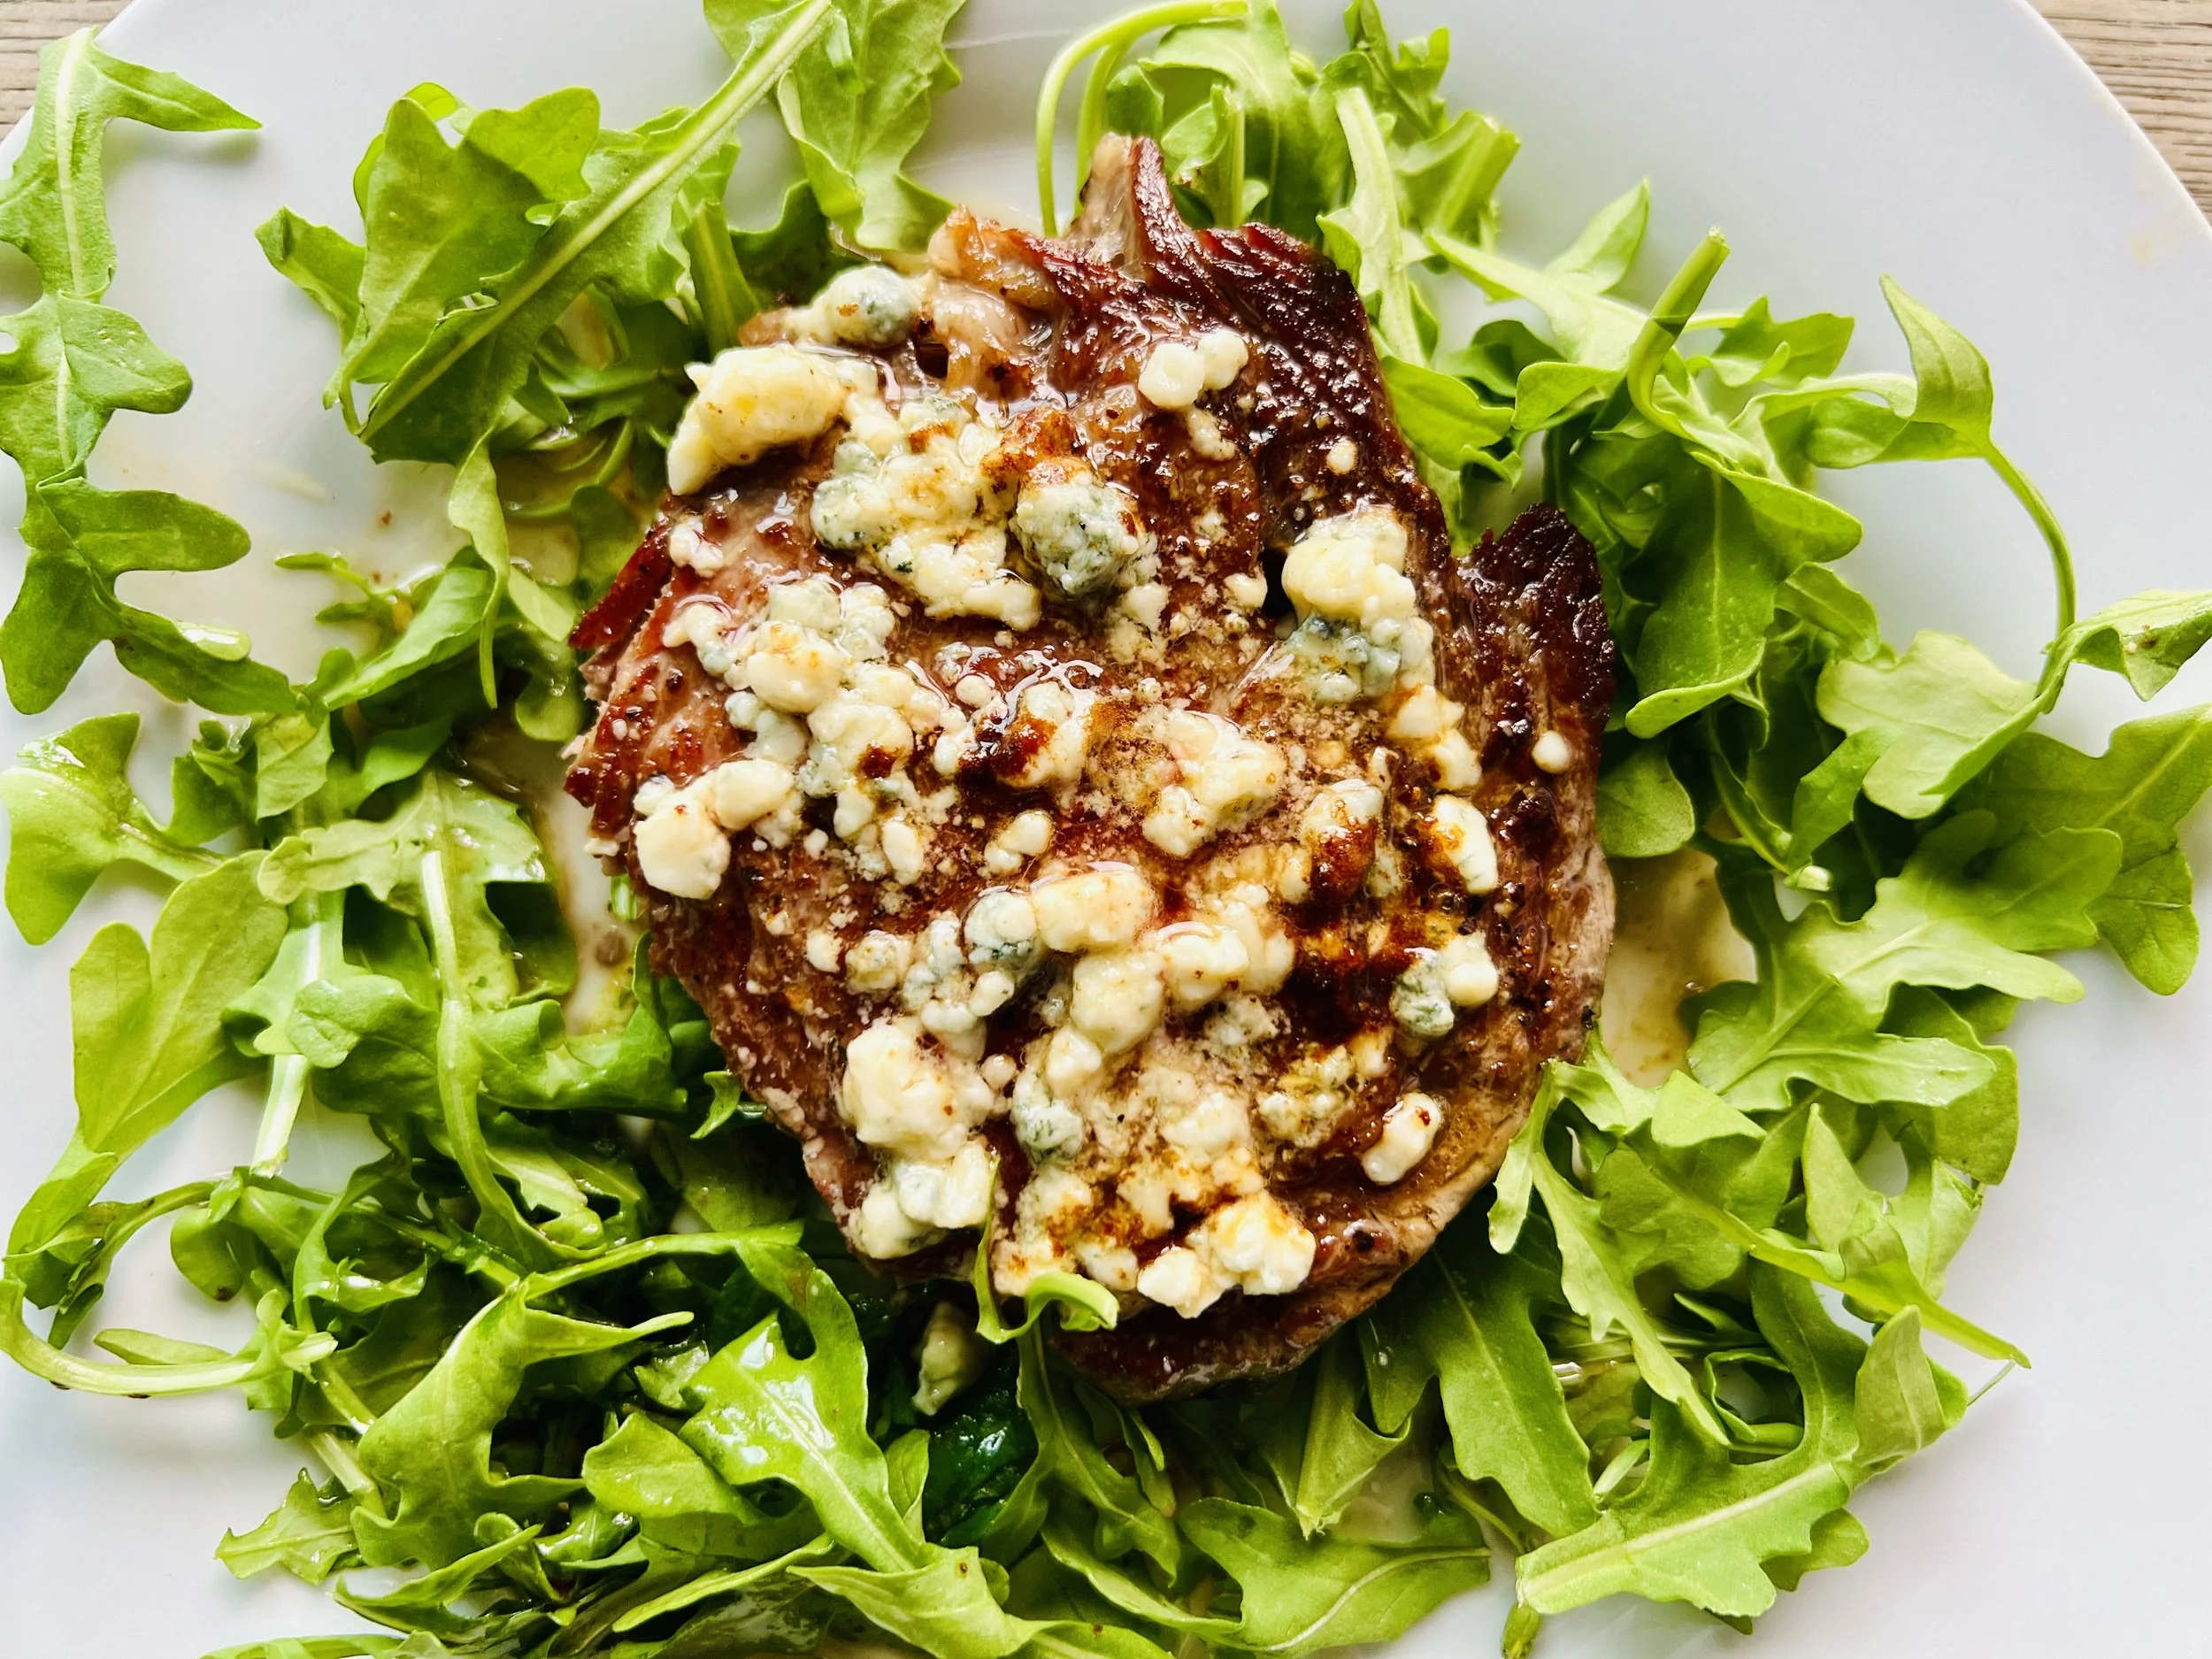
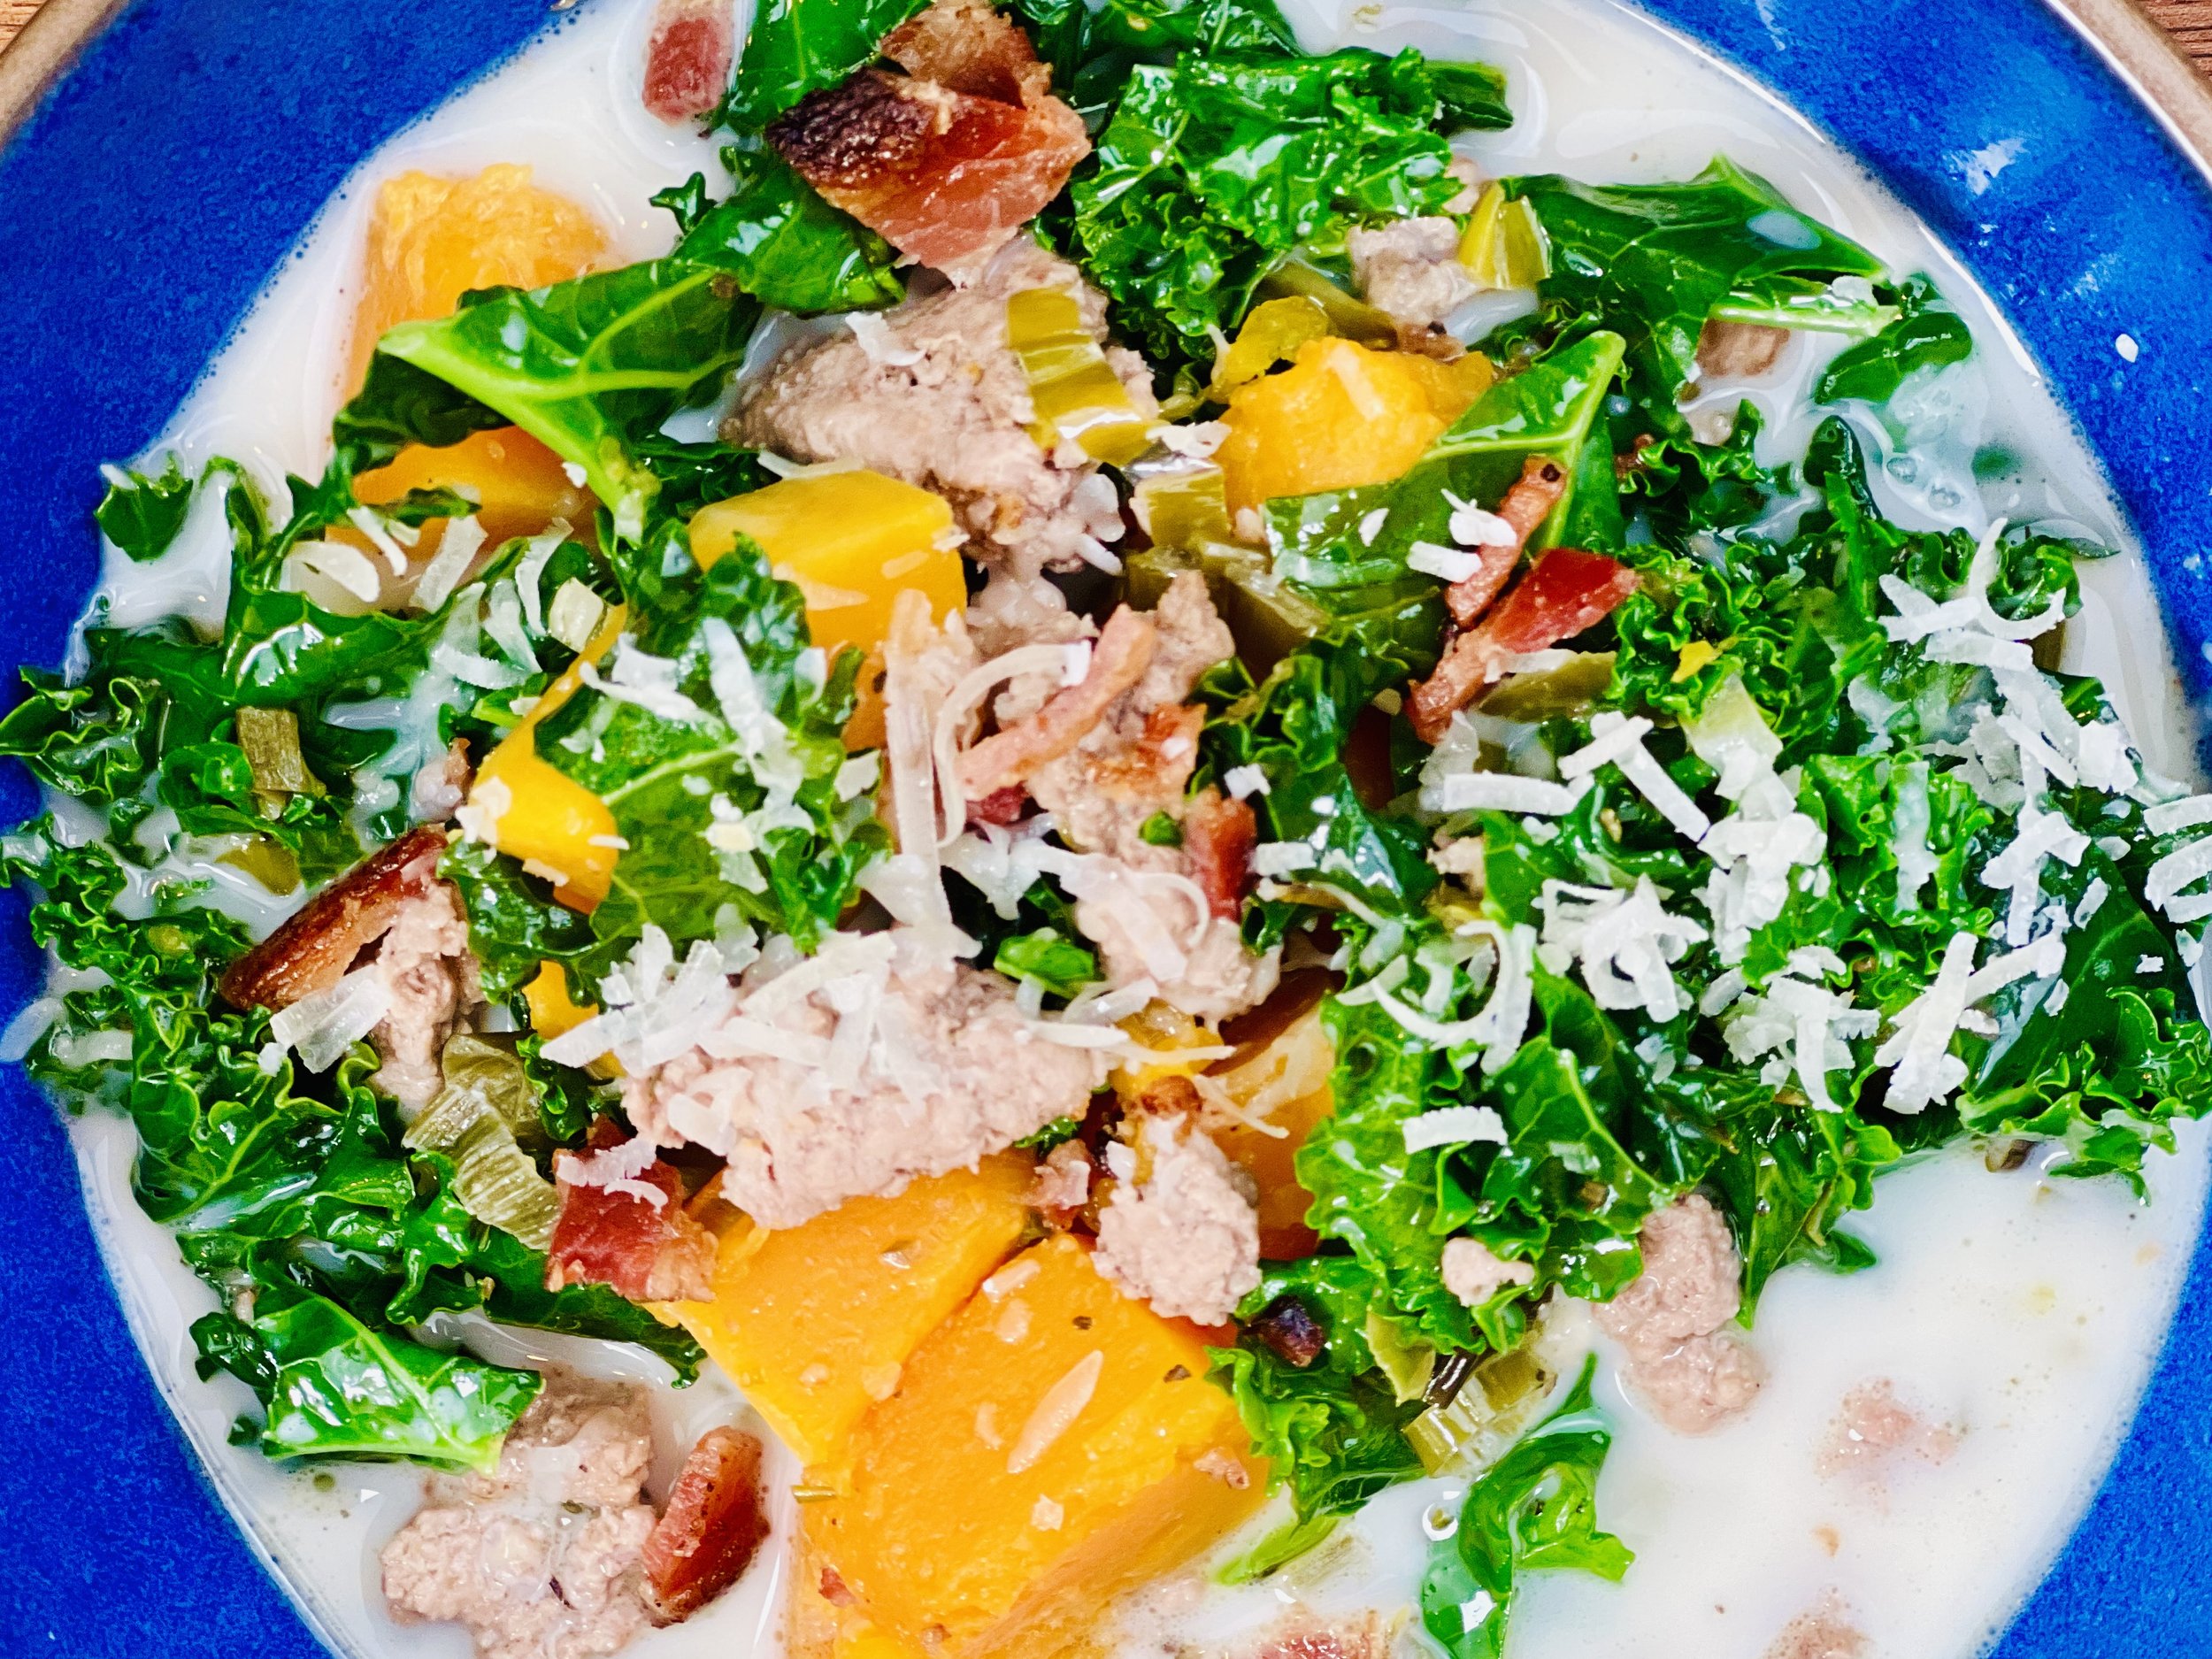
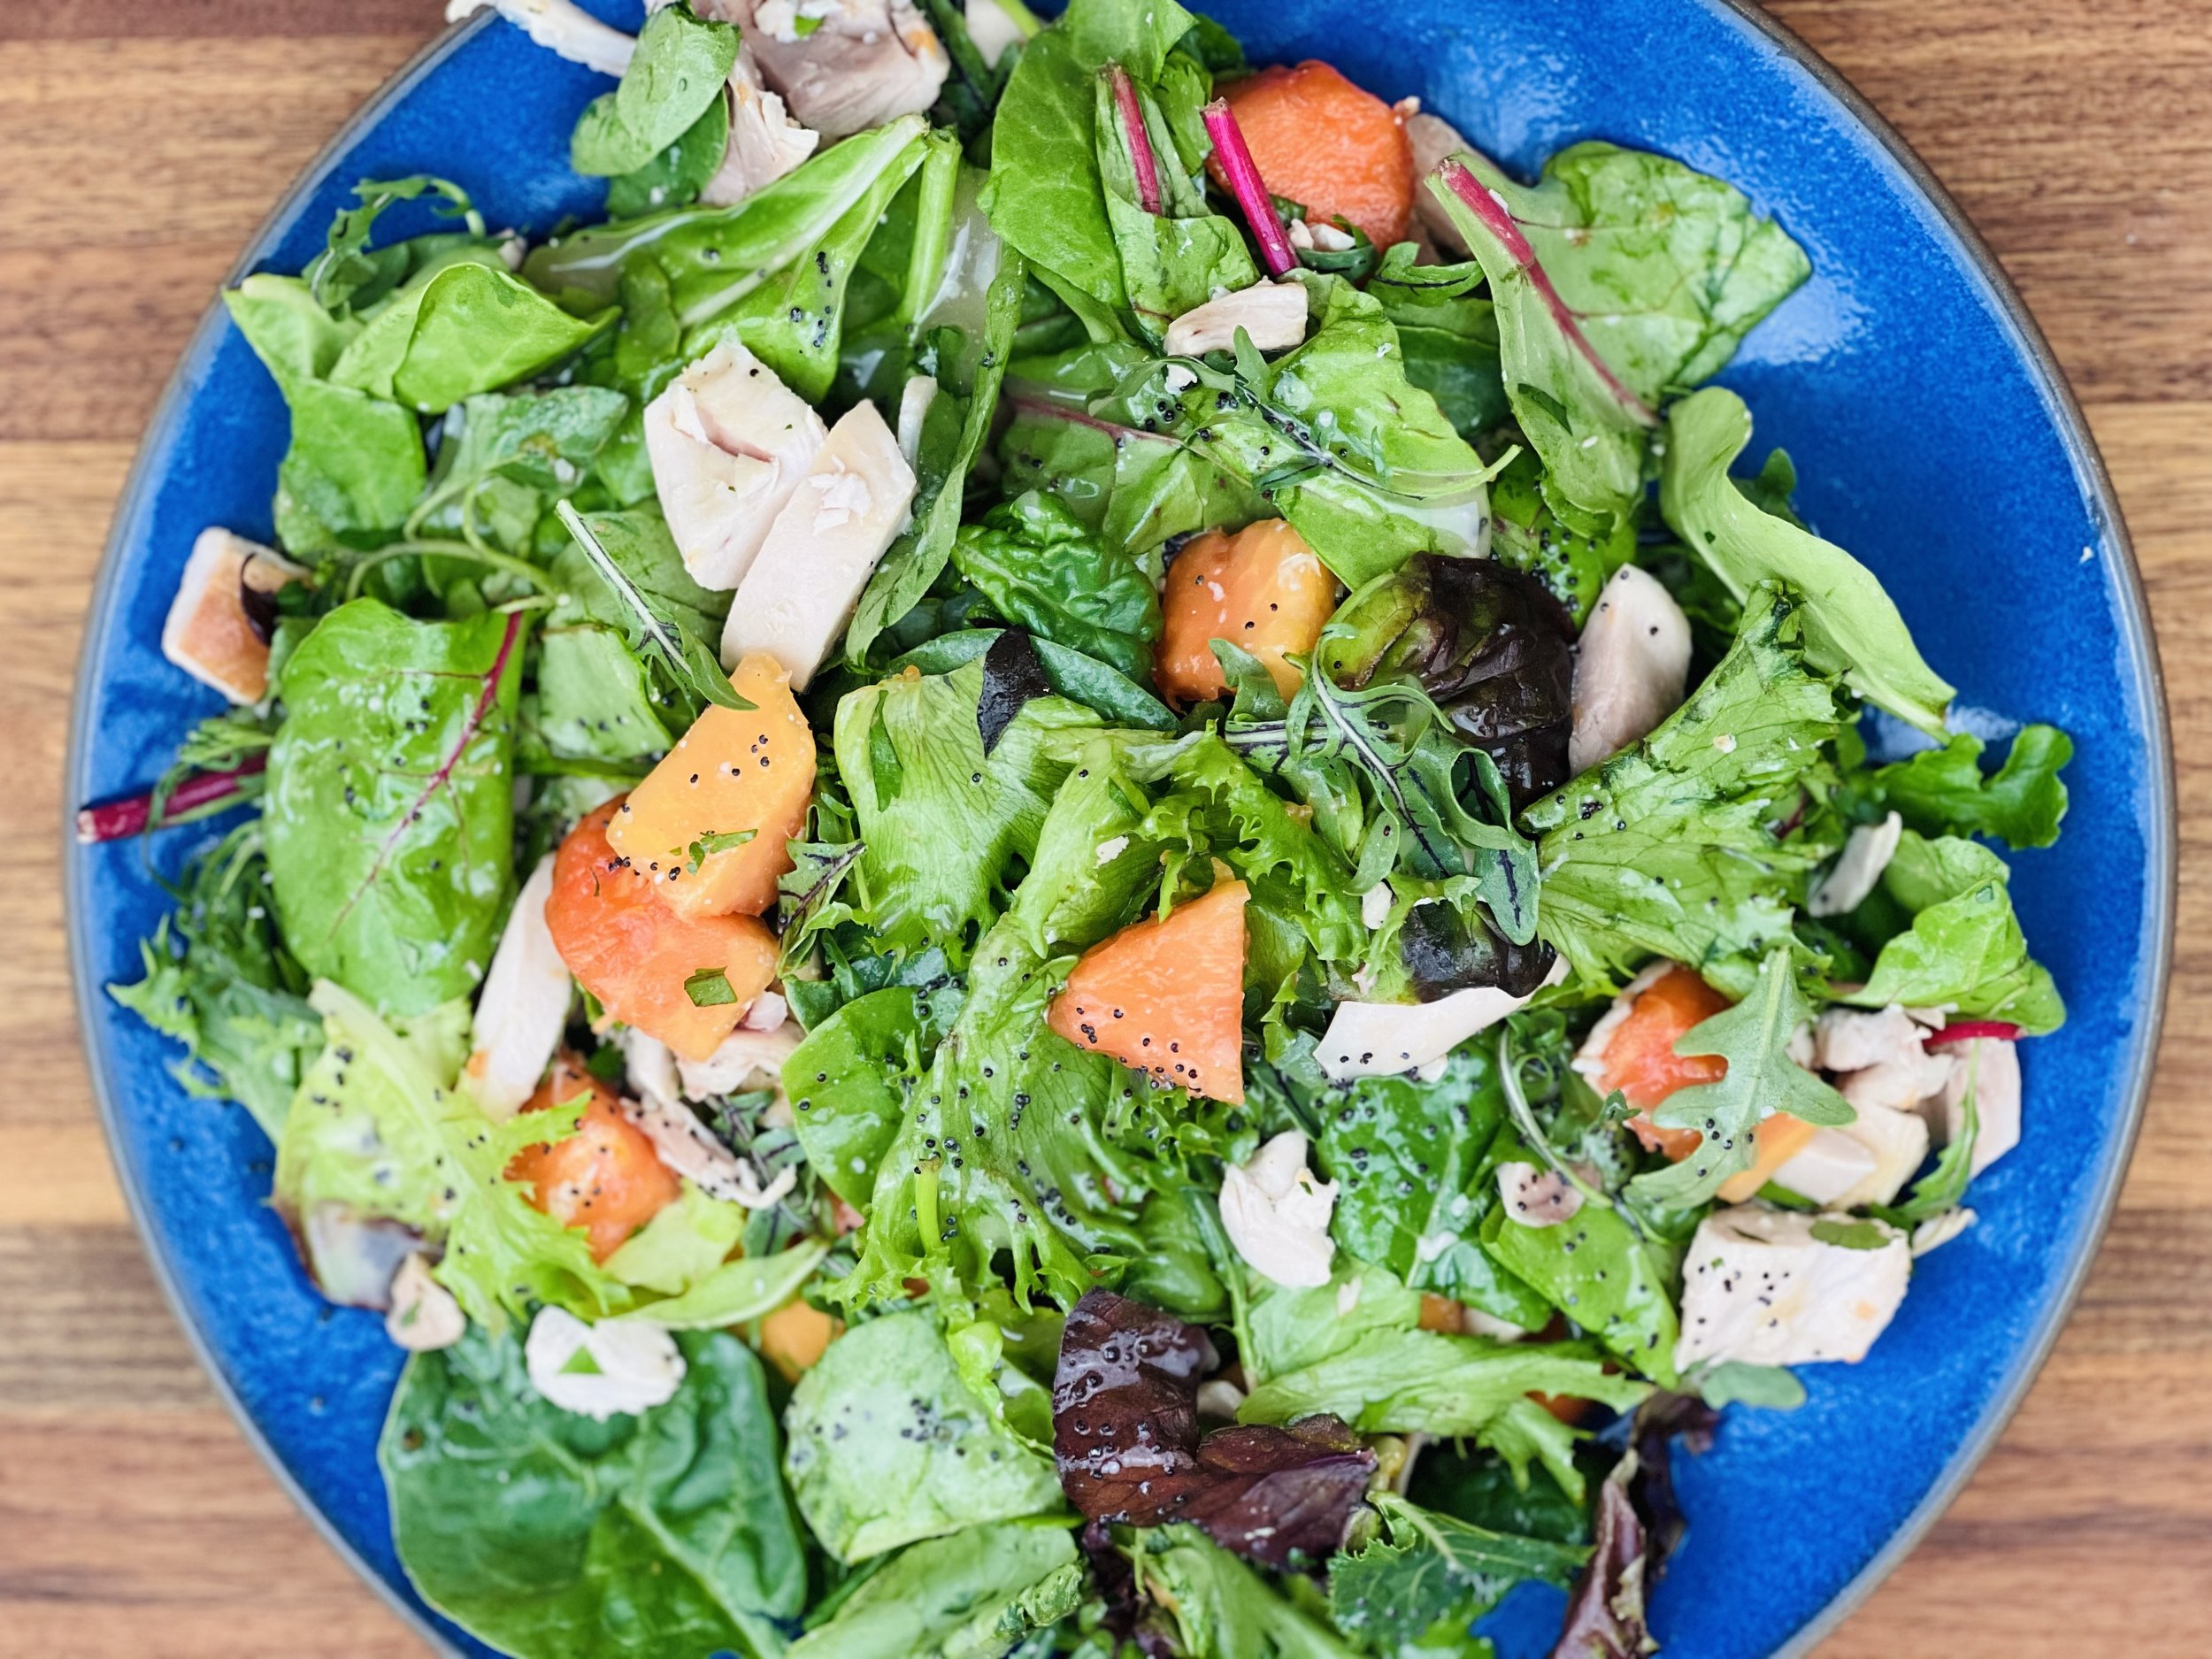
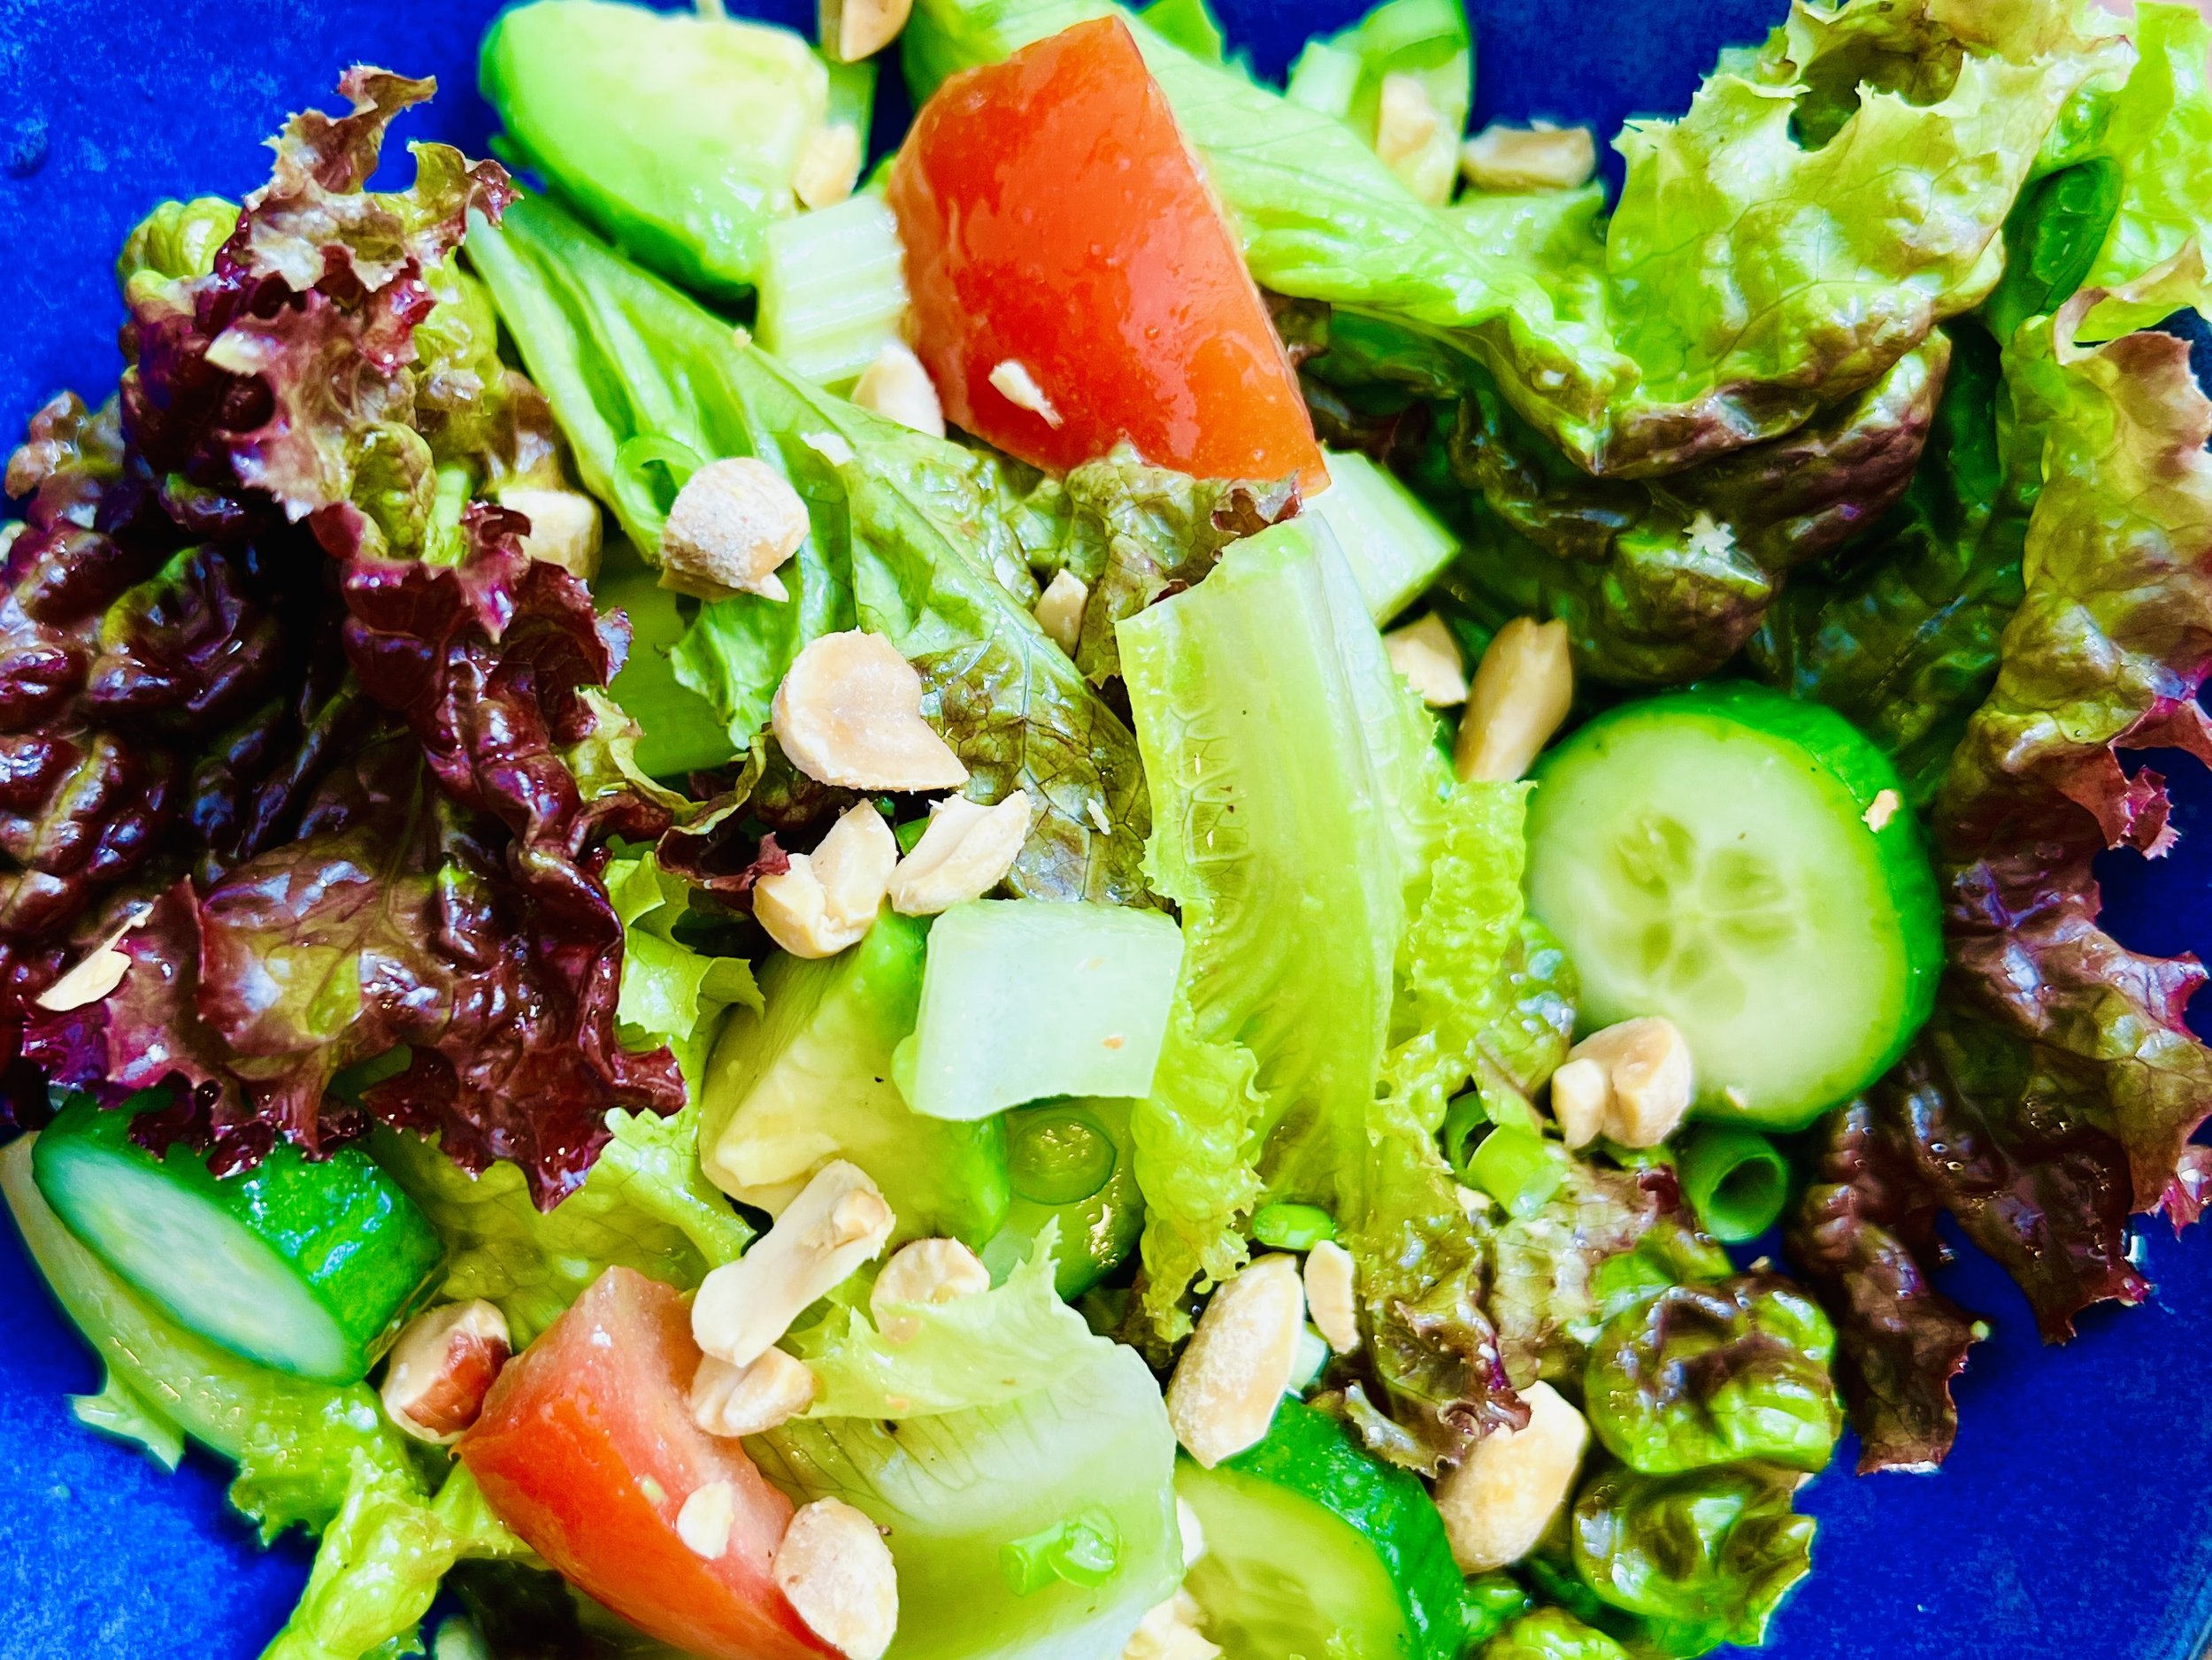
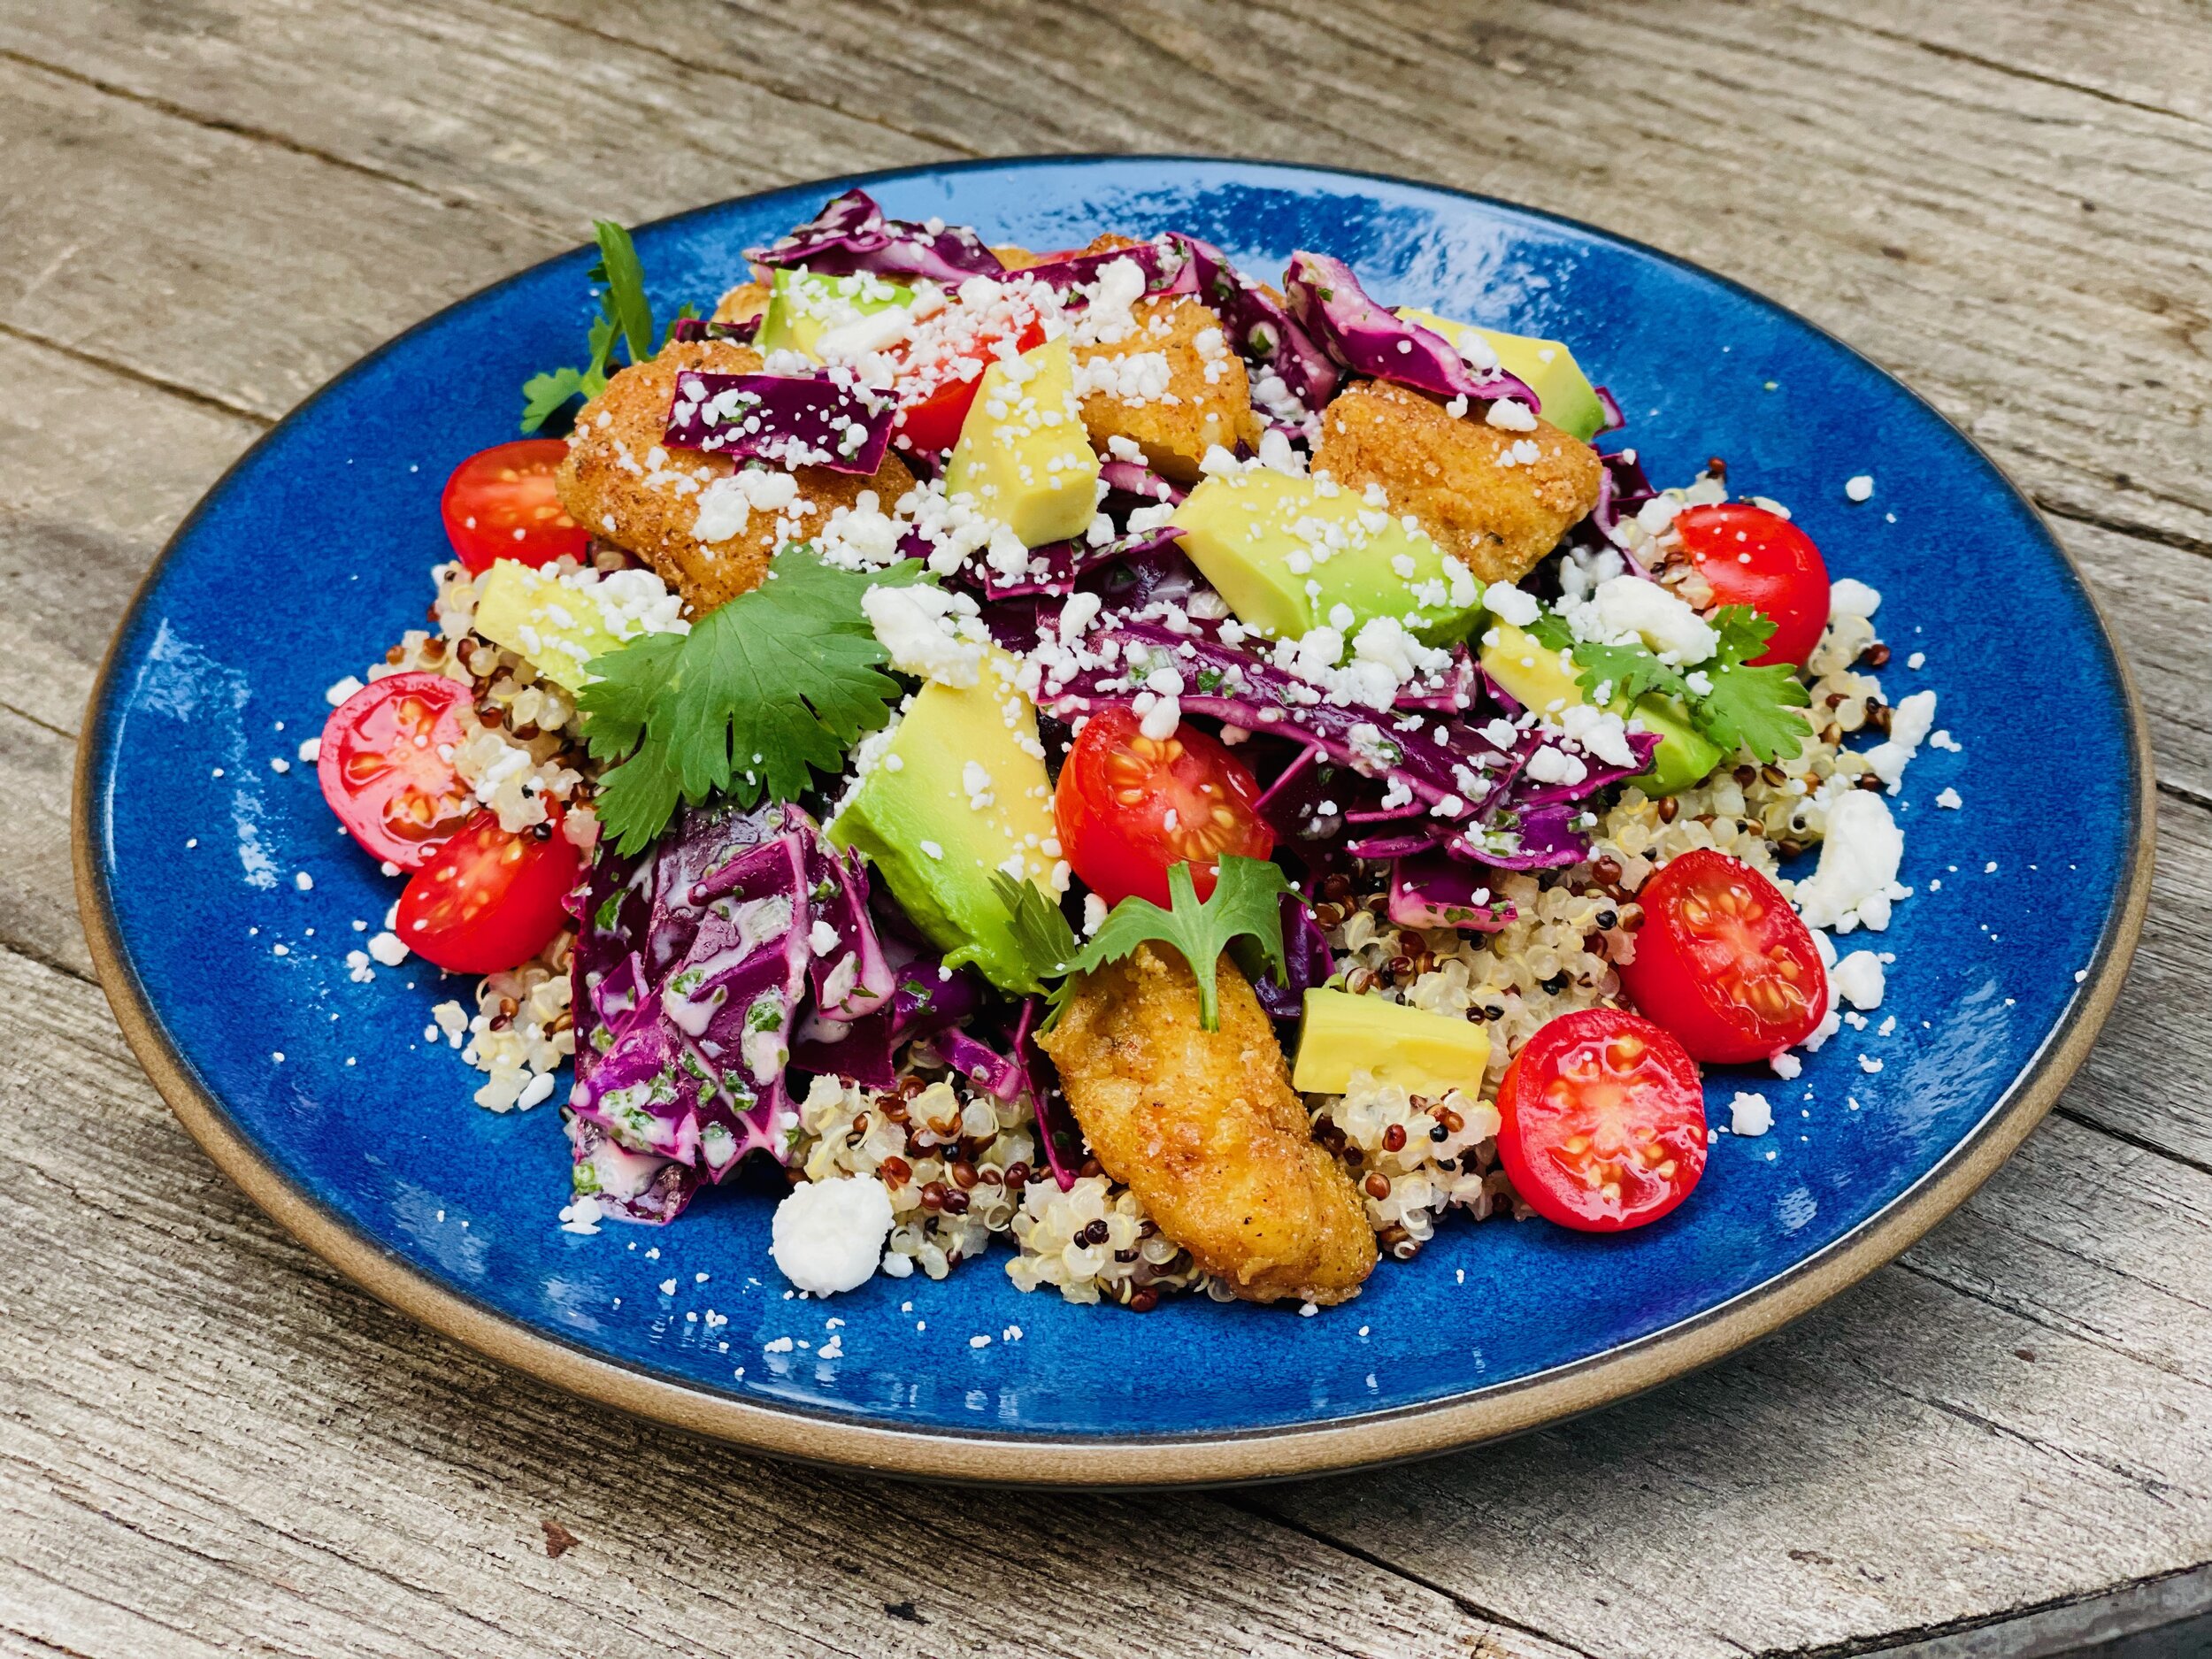
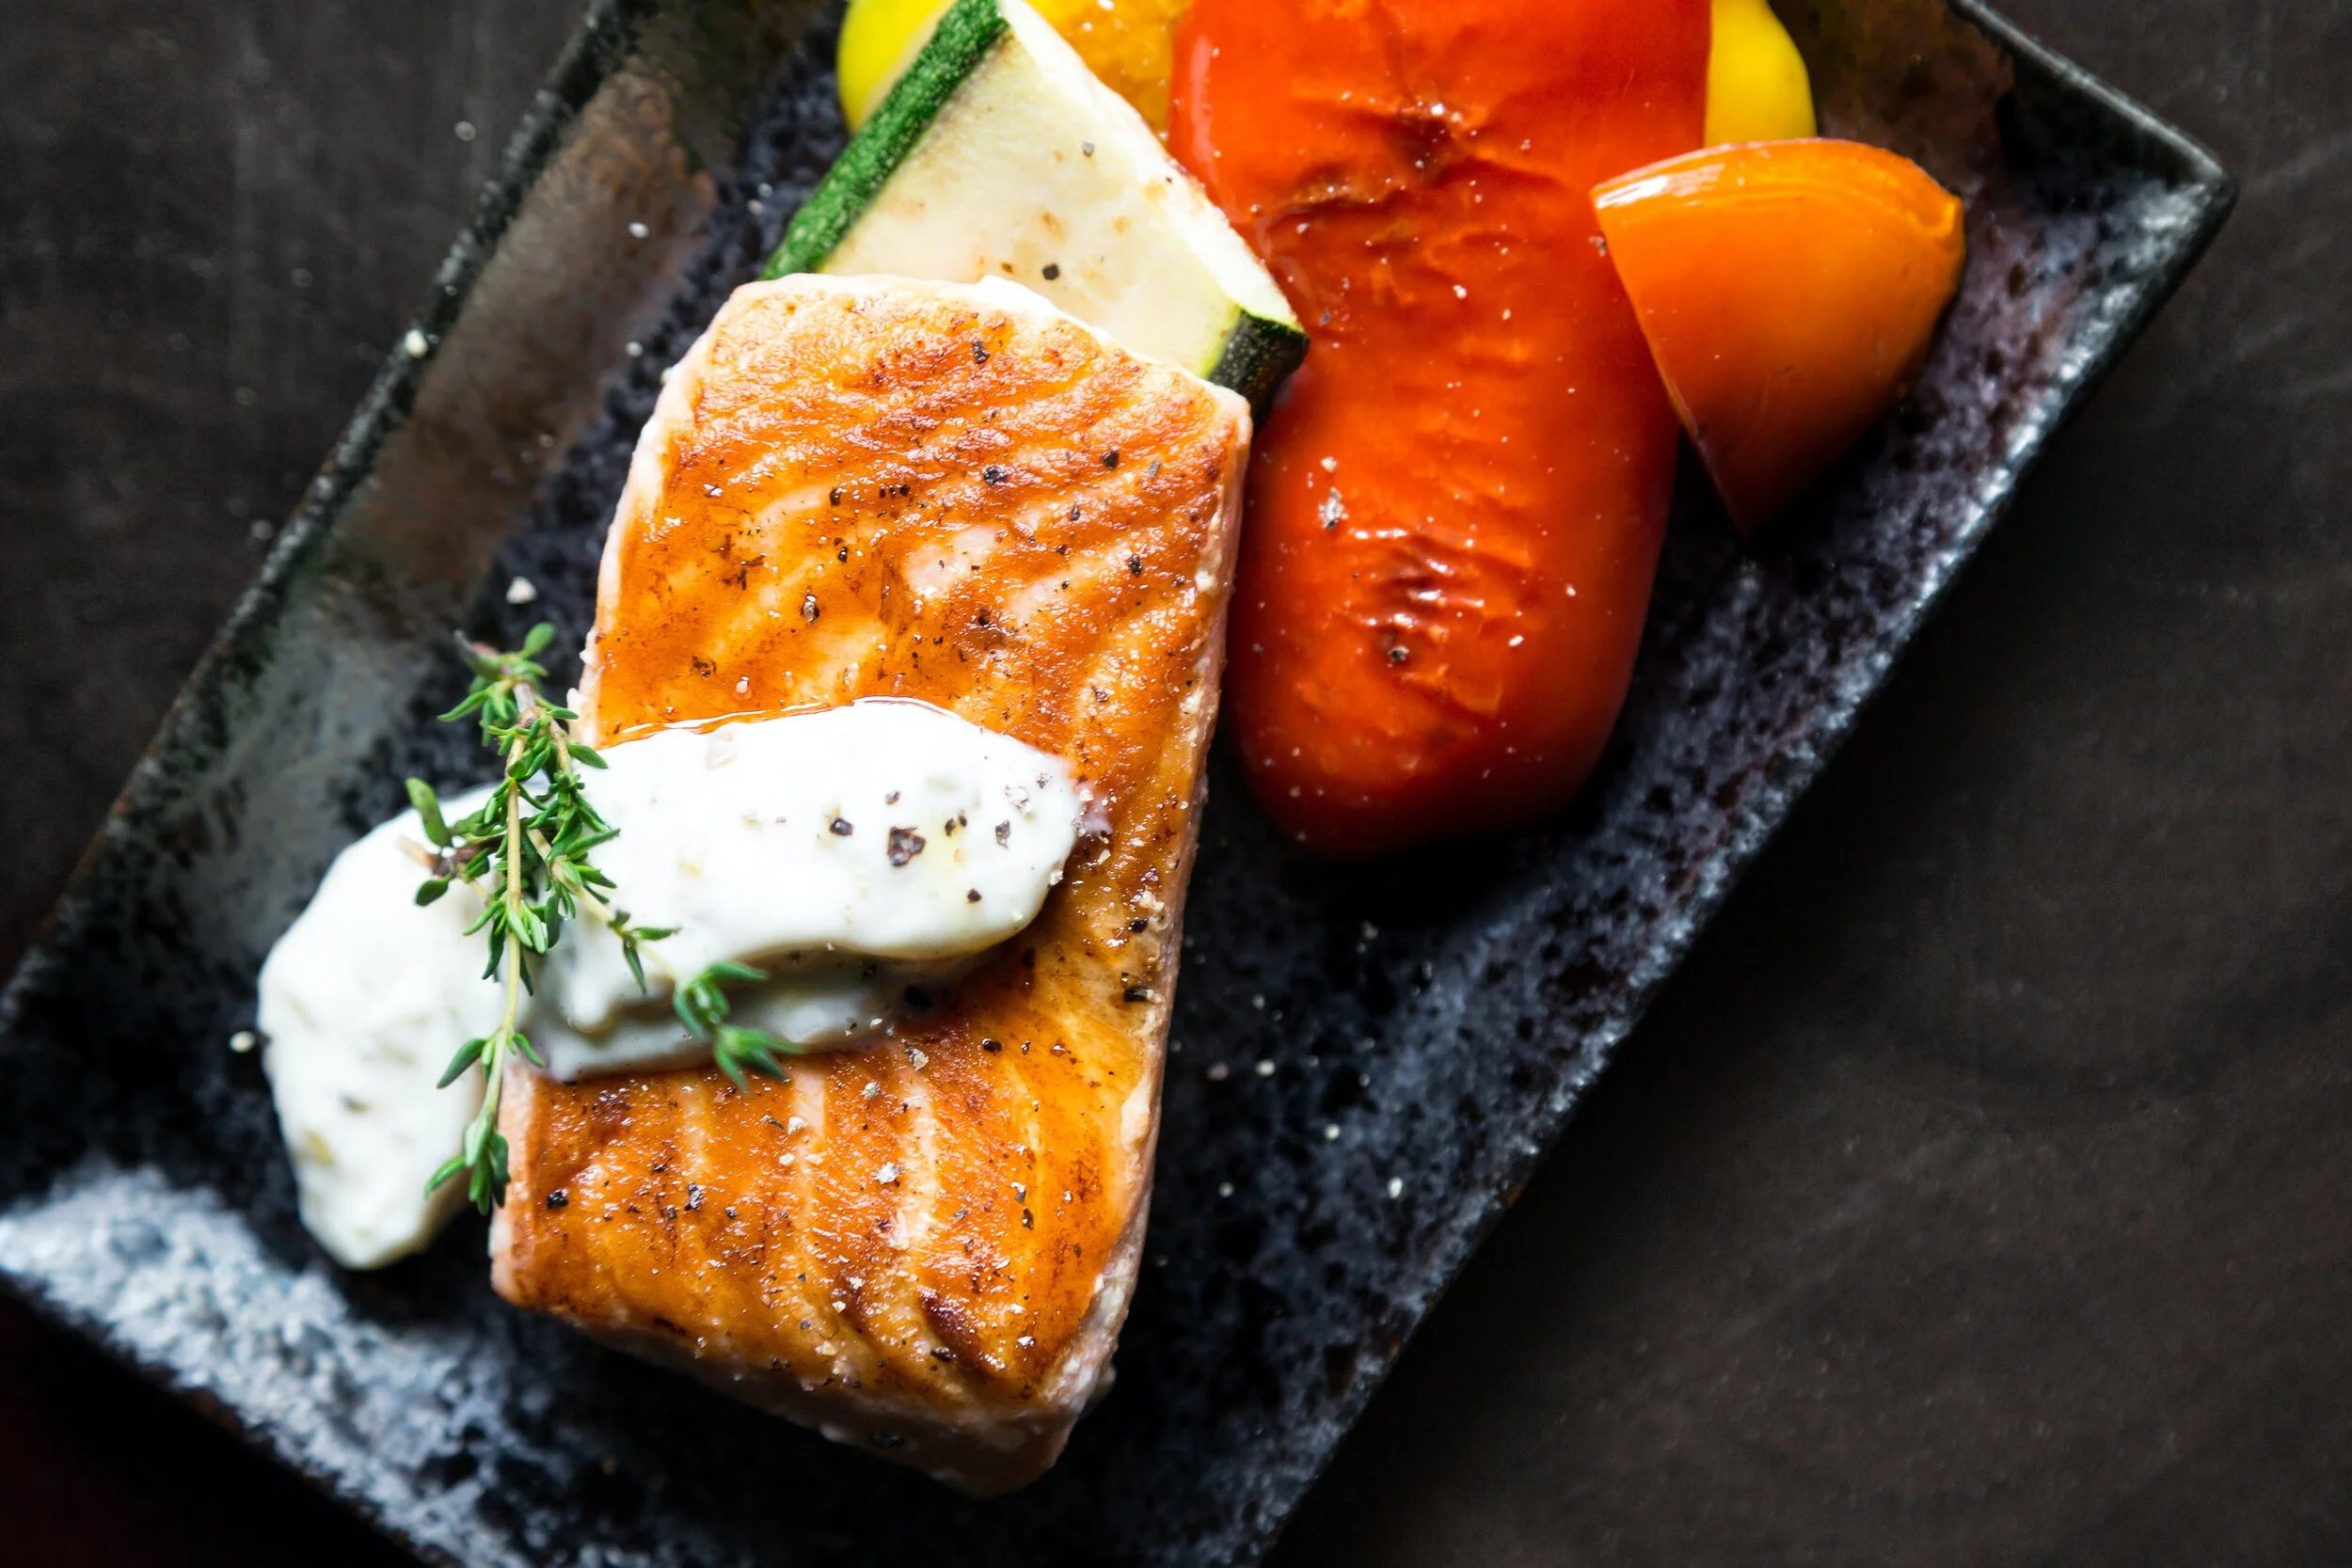
Chicken Milanese and Winter Salad (low FODMAP)
20 Minutes prep • 15 Minutes cook • Low FODMAP • Gluten-free • Serves 4
20 Minutes prep • 15 Minutes cook • Low FODMAP • Gluten-free • Serves 4 • Ok to make-ahead: Step 1
Craving crispy fried chicken? How about crispy fried chicken that has been stuffed with creamy mozzarella and tucked under a simple salad? Chicken Milanese is a feast for your senses and it’s the perfect way to enjoy this delightful combination. My recipe is low FODMAP of course, so dive on in and make it tonight!

This is an exclusive recipe just for recipe club members.
Each week I am creating and delivering one very special recipe just for my recipe club members. If you’re not yet a member, I encourage you to join! Membership in the club includes access to the complete archive of recipes with filters so it can become your virtual low FODMAP cookbook plus, I am creating and delivering one special NEW recipe every week ONLY for recipe club members. And, for my true fans, I’ll be sharing behind-the-scenes content, and updates on the progress of the new cookbook.
Your membership in the club helps me continue creating new, delicious, easy-to-make, low FODMAP recipes just for you.
As always, all recipes will emphasize simple ingredients, easy preparation, and delicious low FODMAP results. Recipes will be for everything from main courses, salads, soups, side dishes, appetizers, desserts, sauces, breakfast and lunch, and even mocktails and cocktails. Everything you need to prepare fantastic low FODMAP meals everyone will love.
Join the club. Become a Patron. Let’s keep making delicious Low FODMAP meals together.
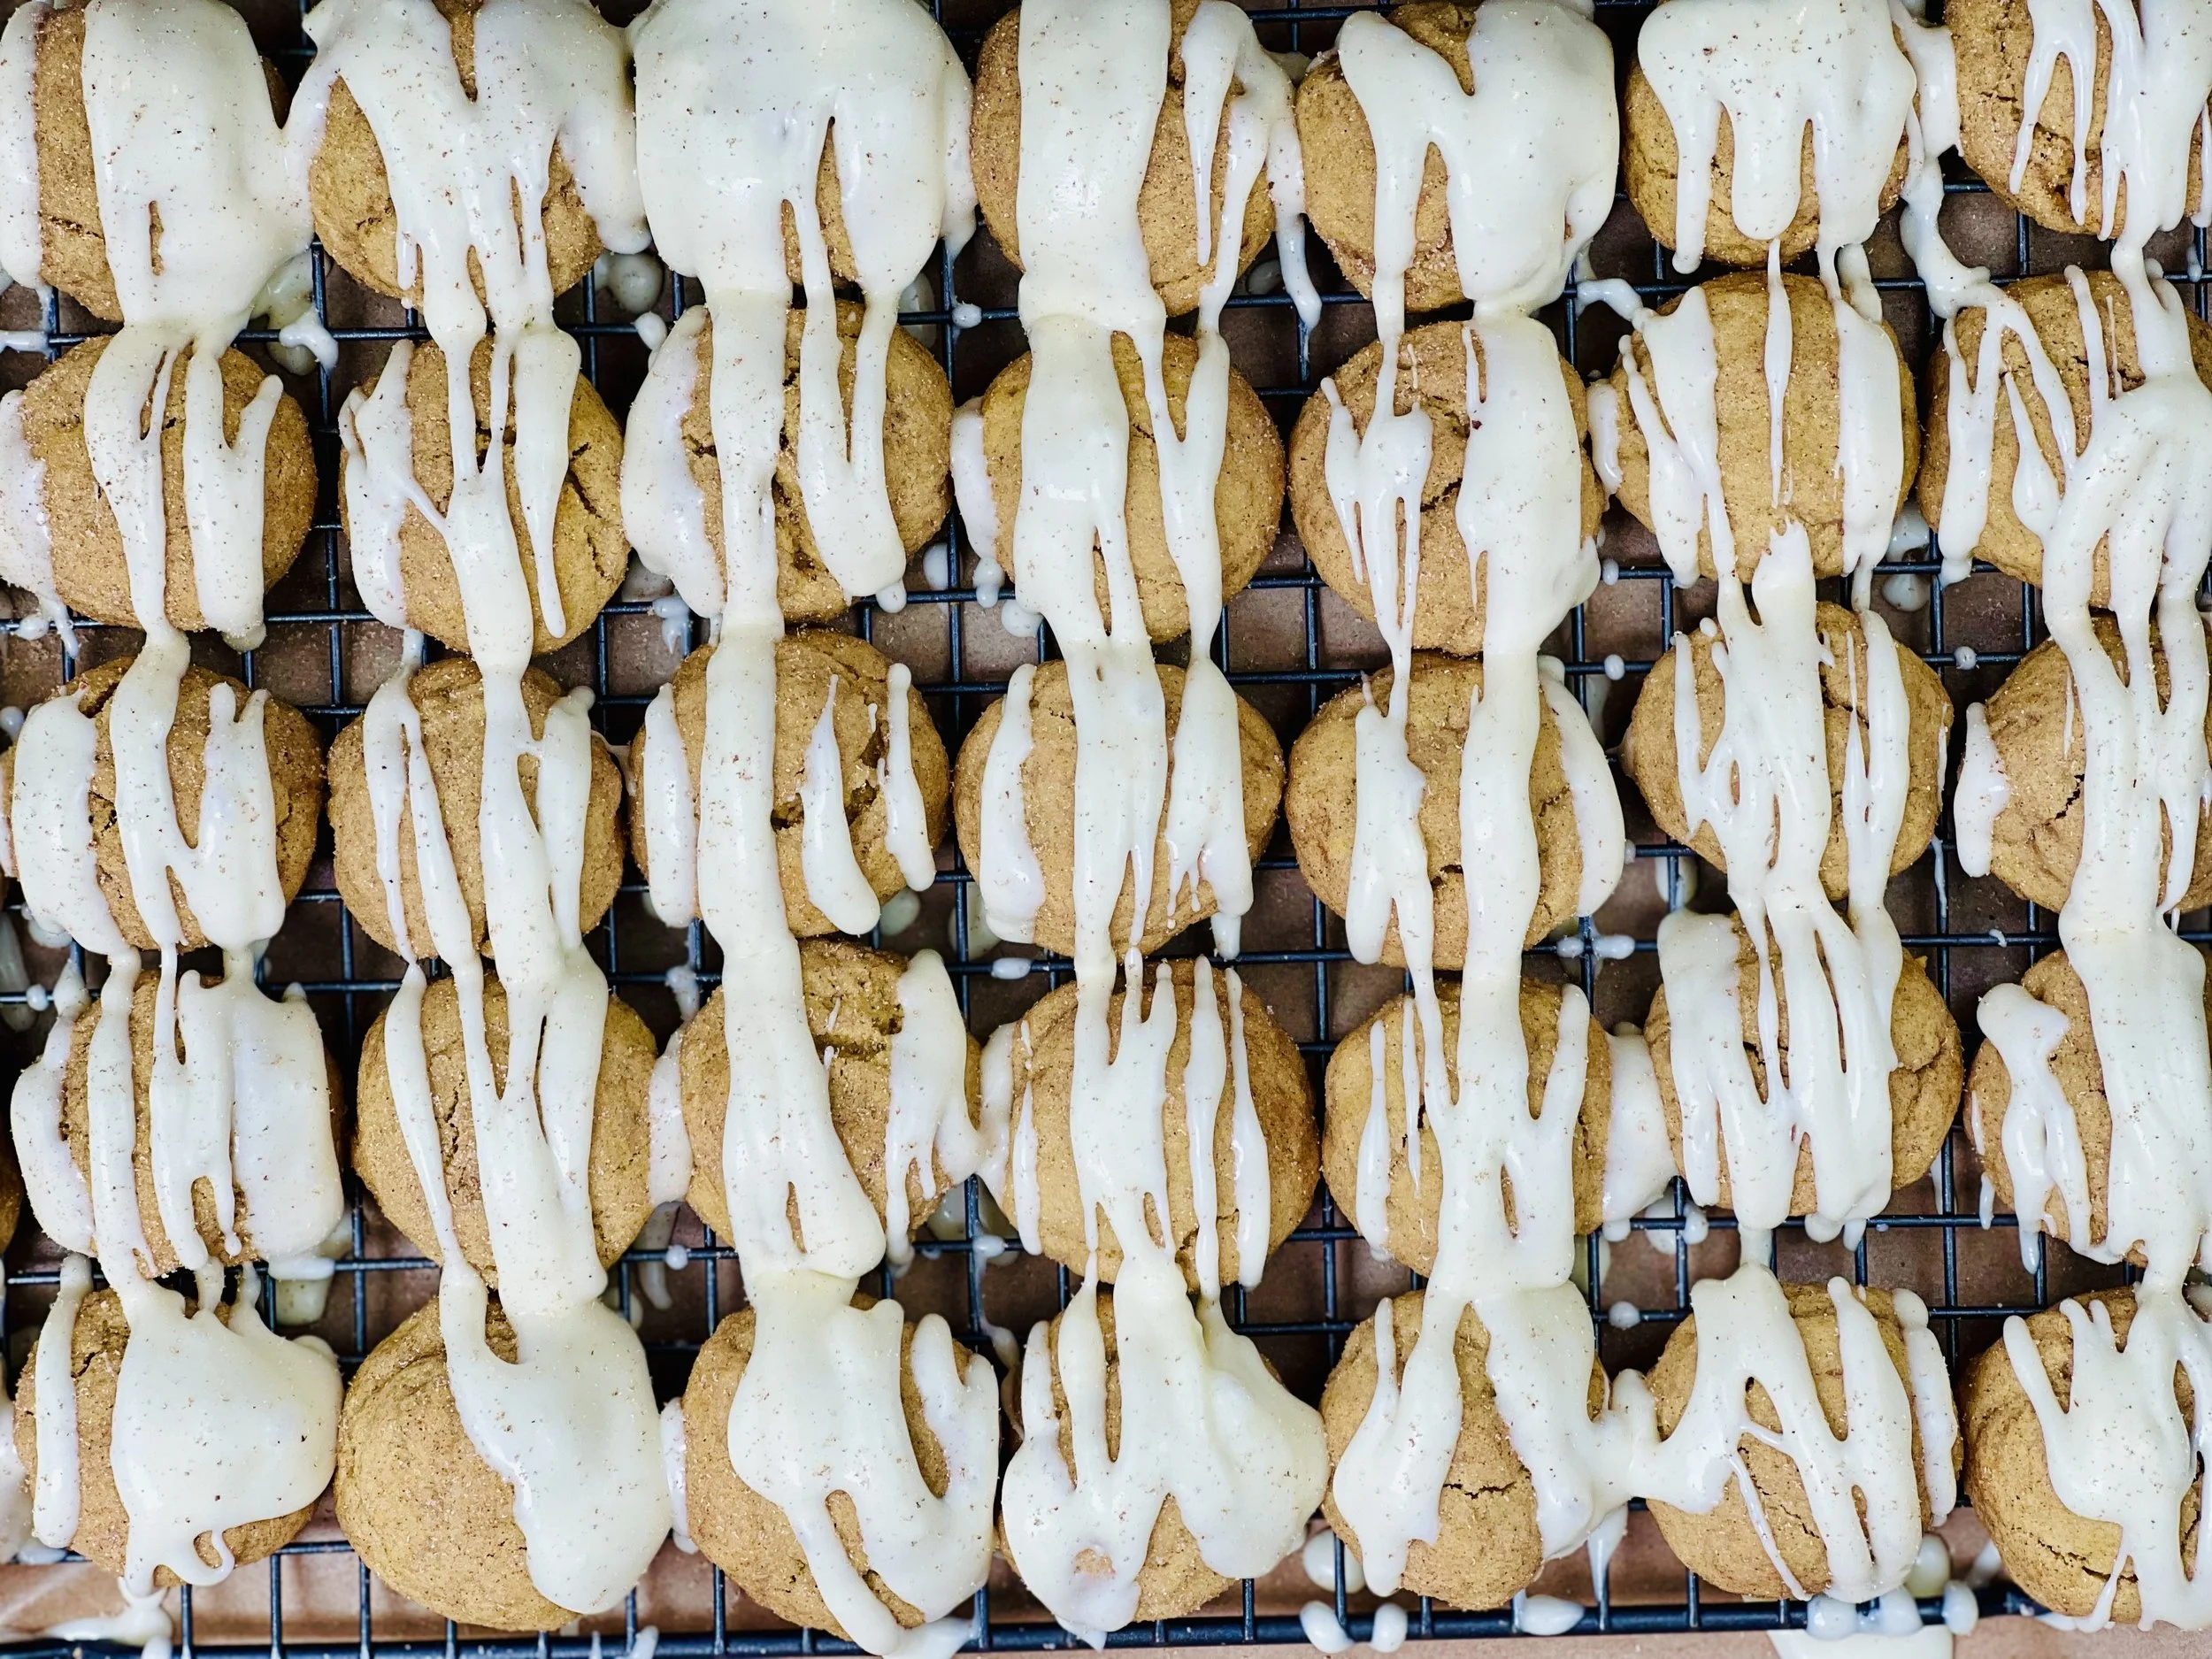
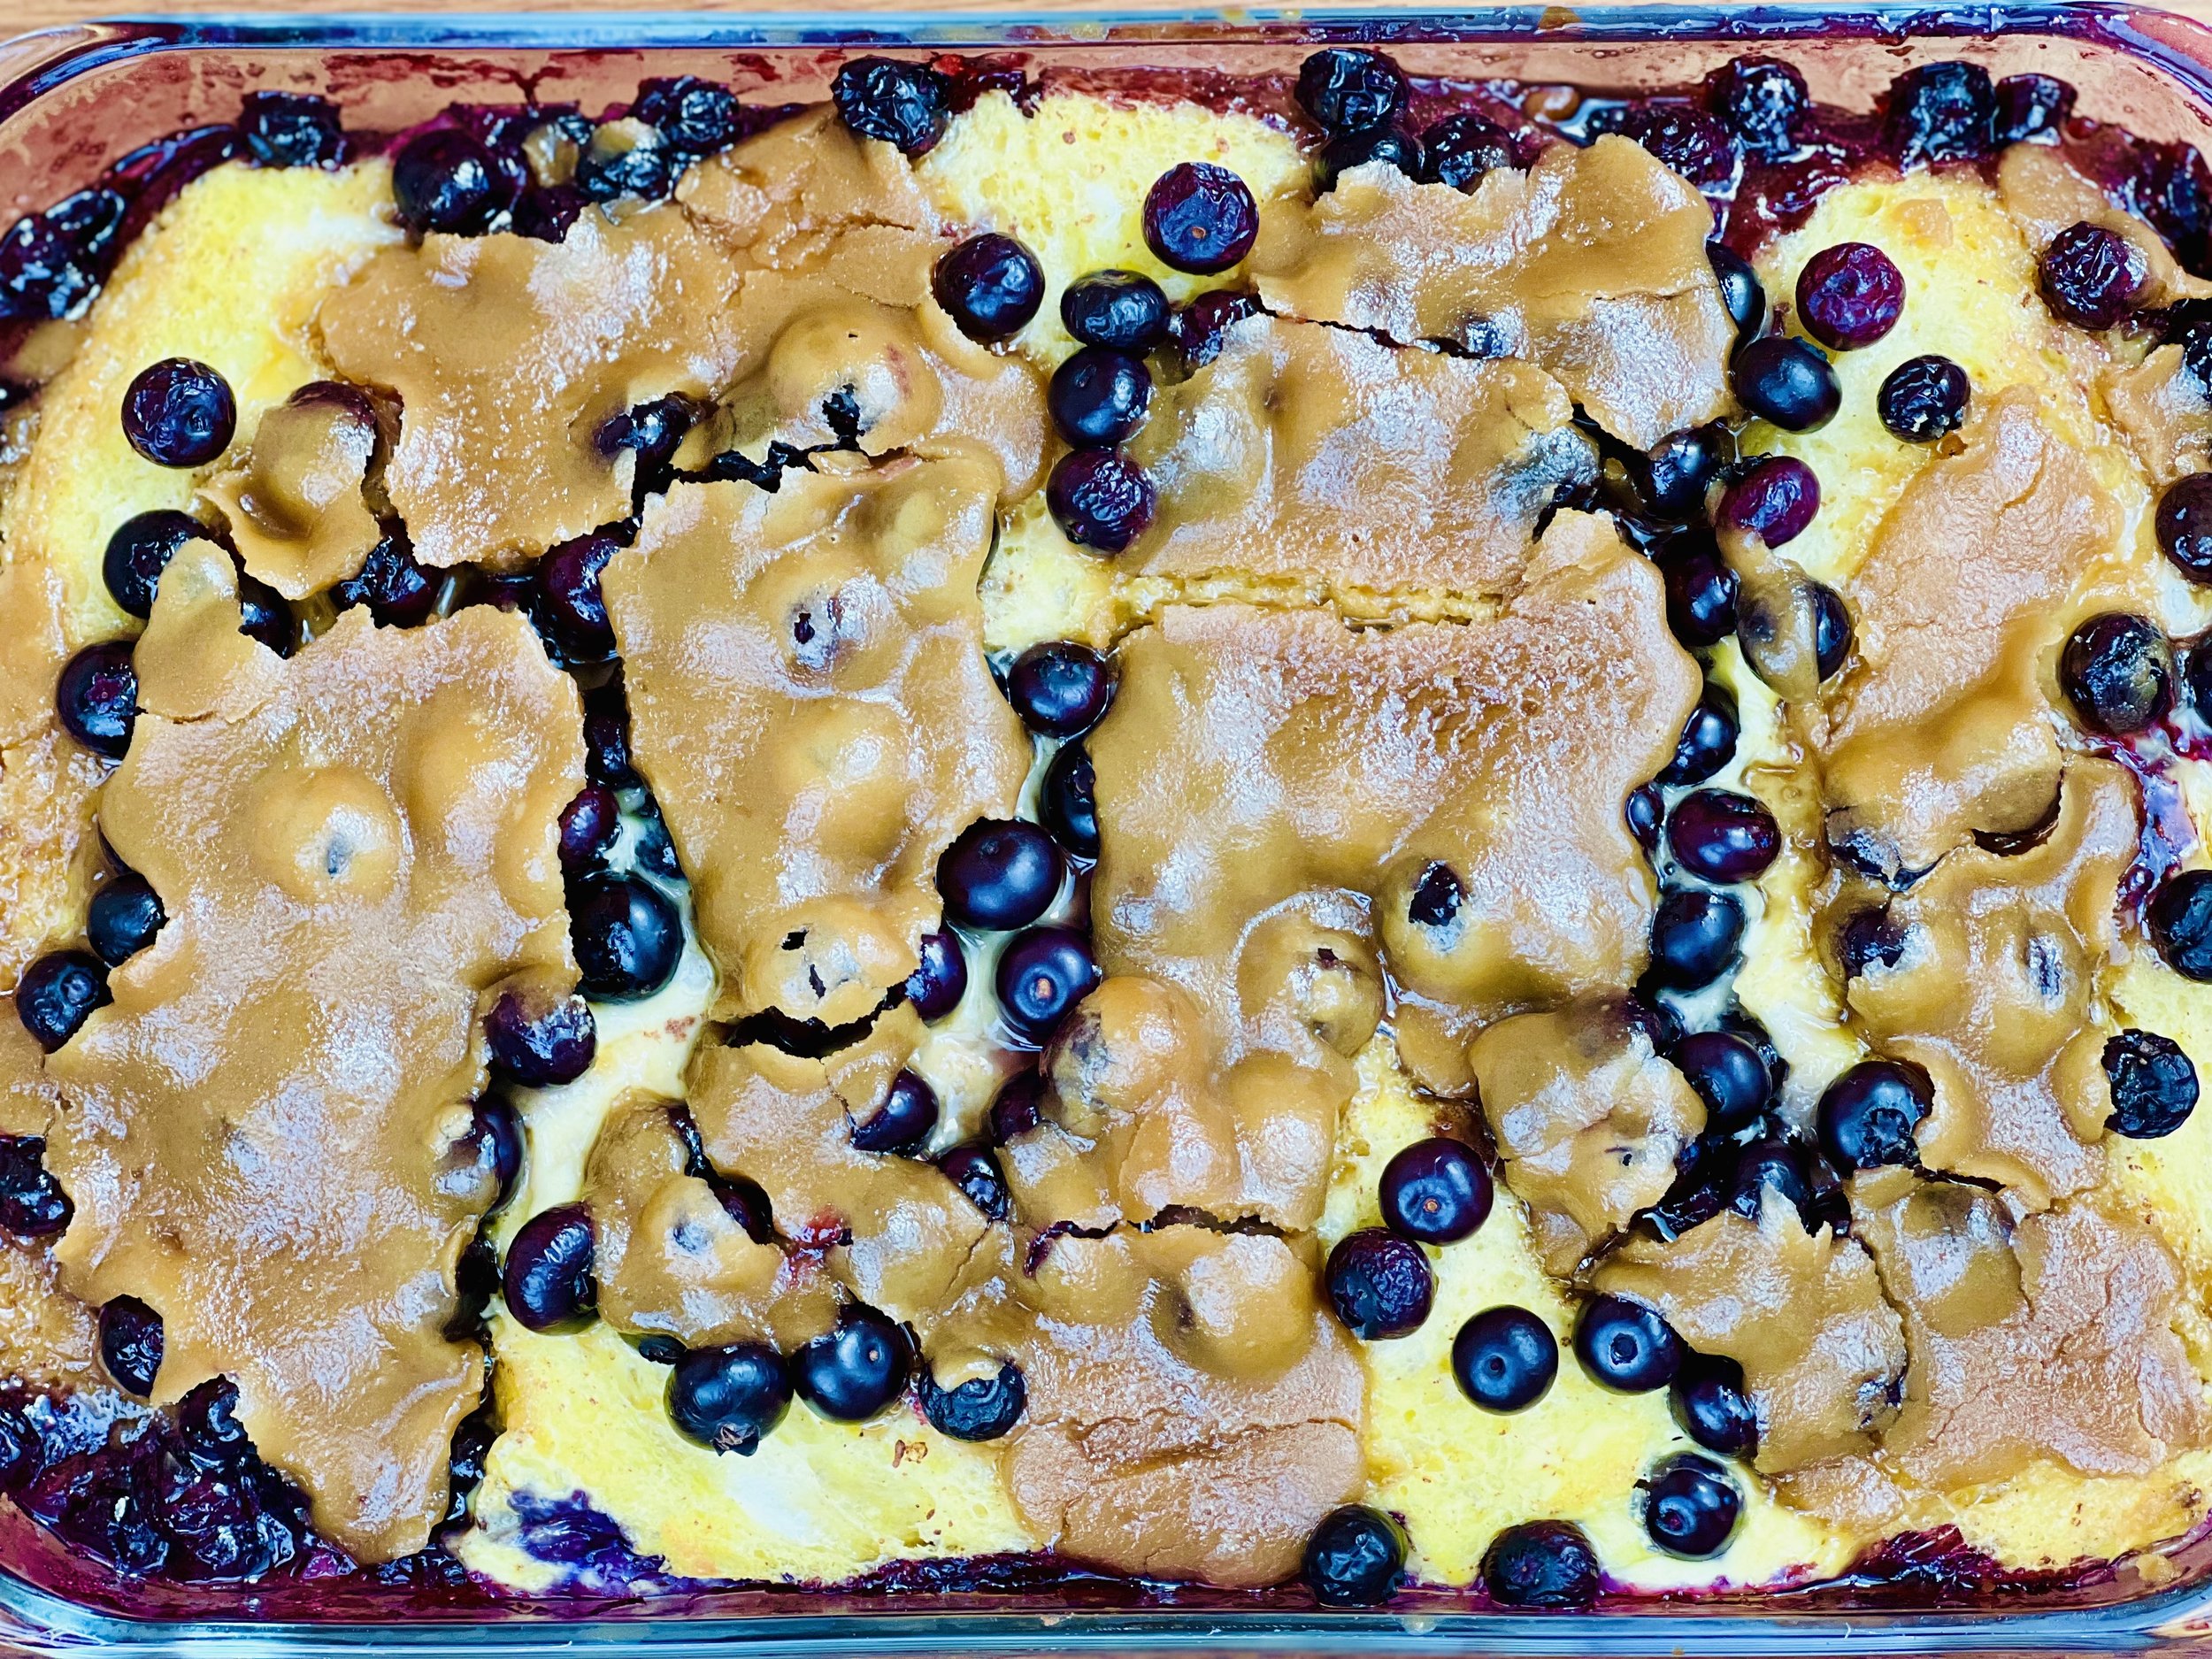
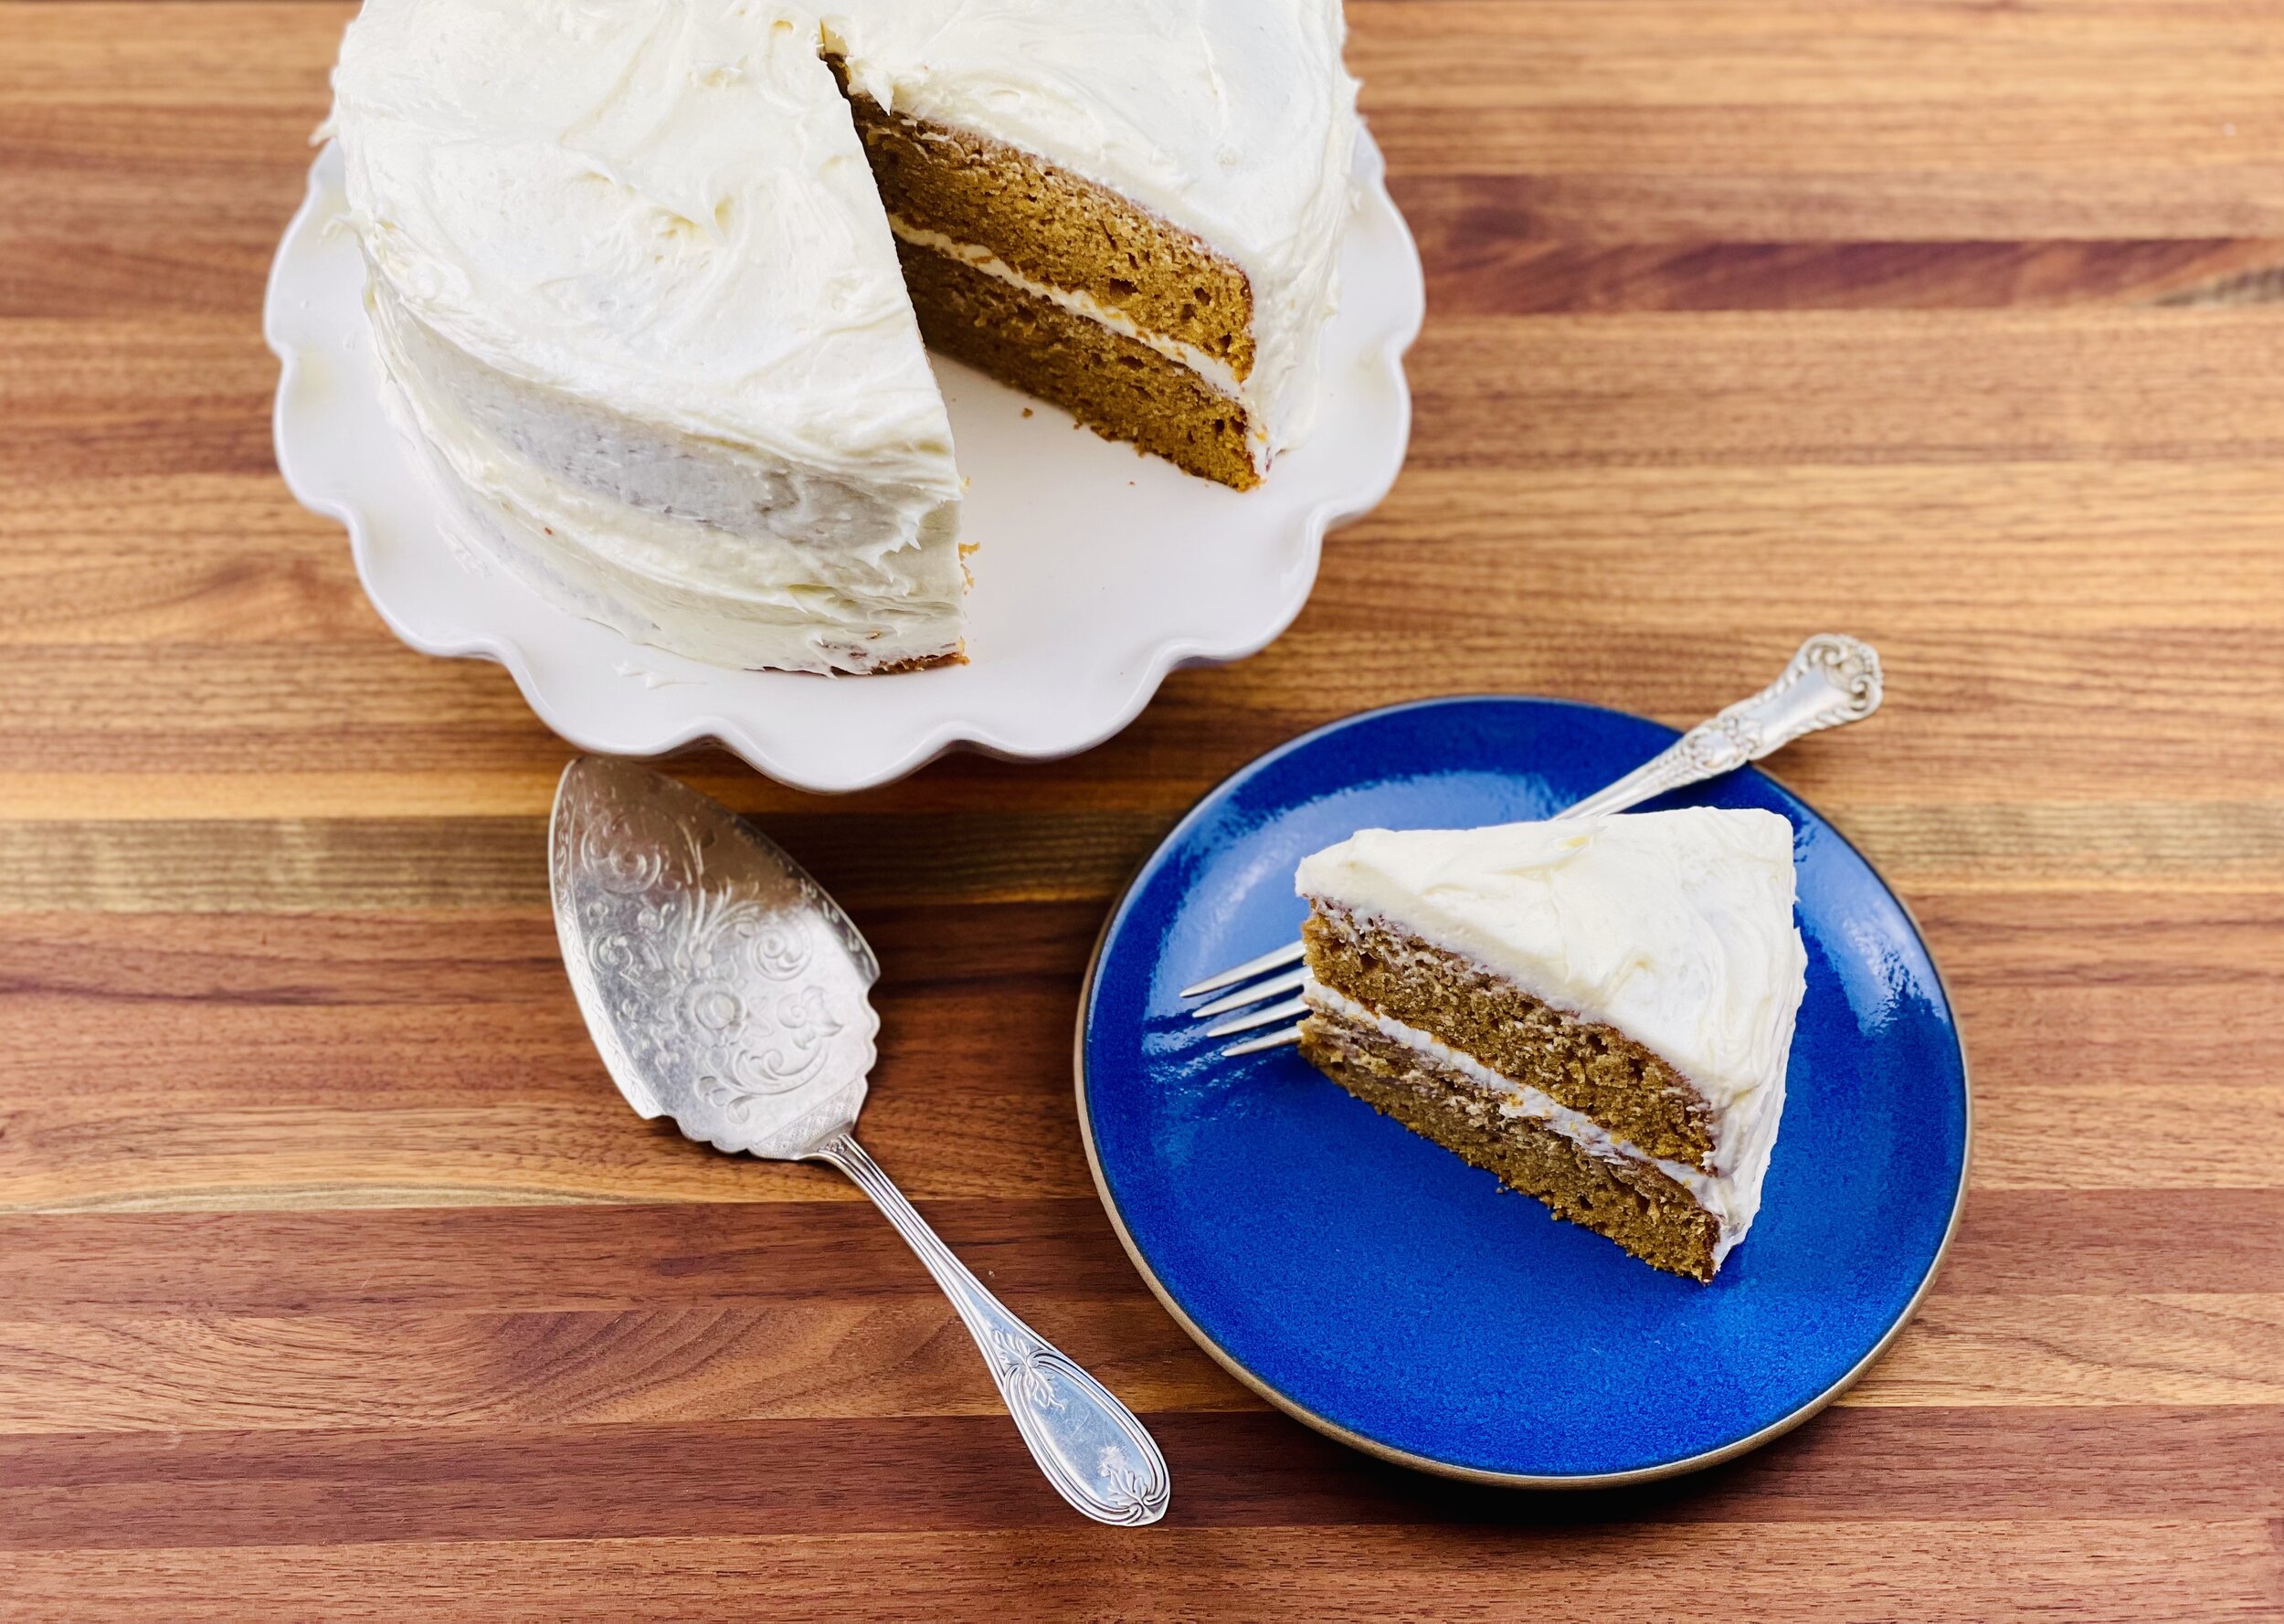
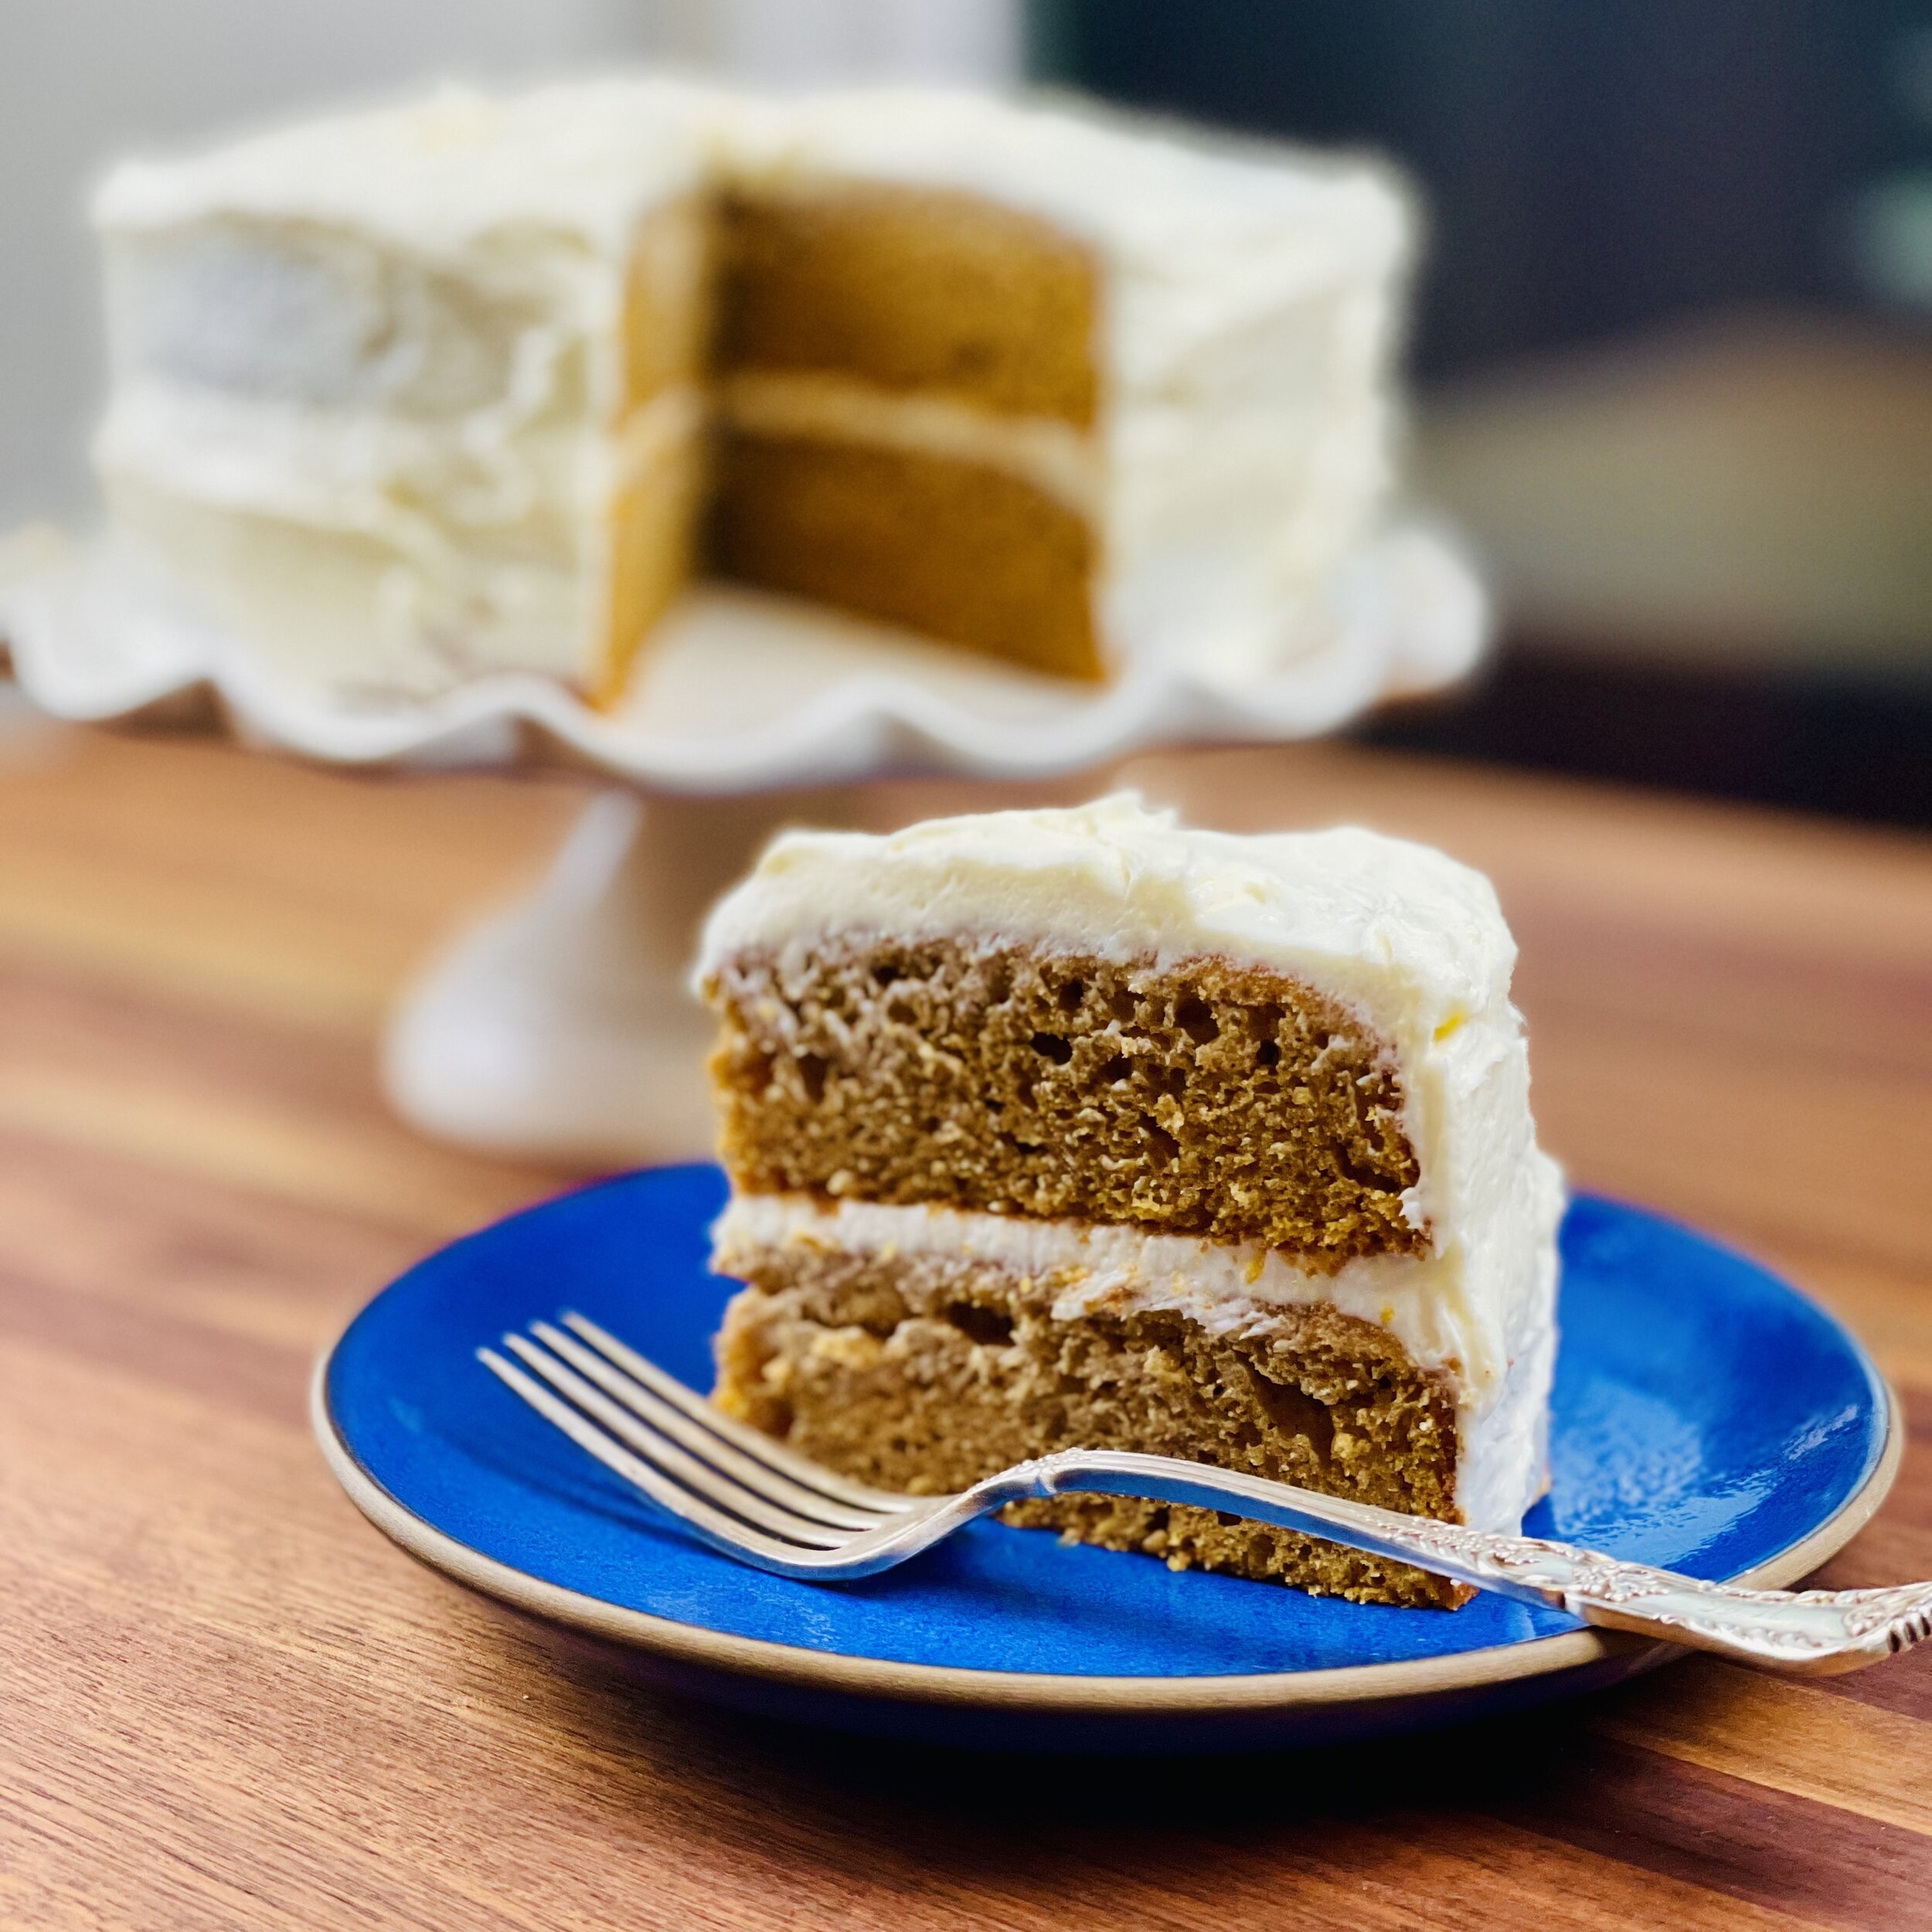
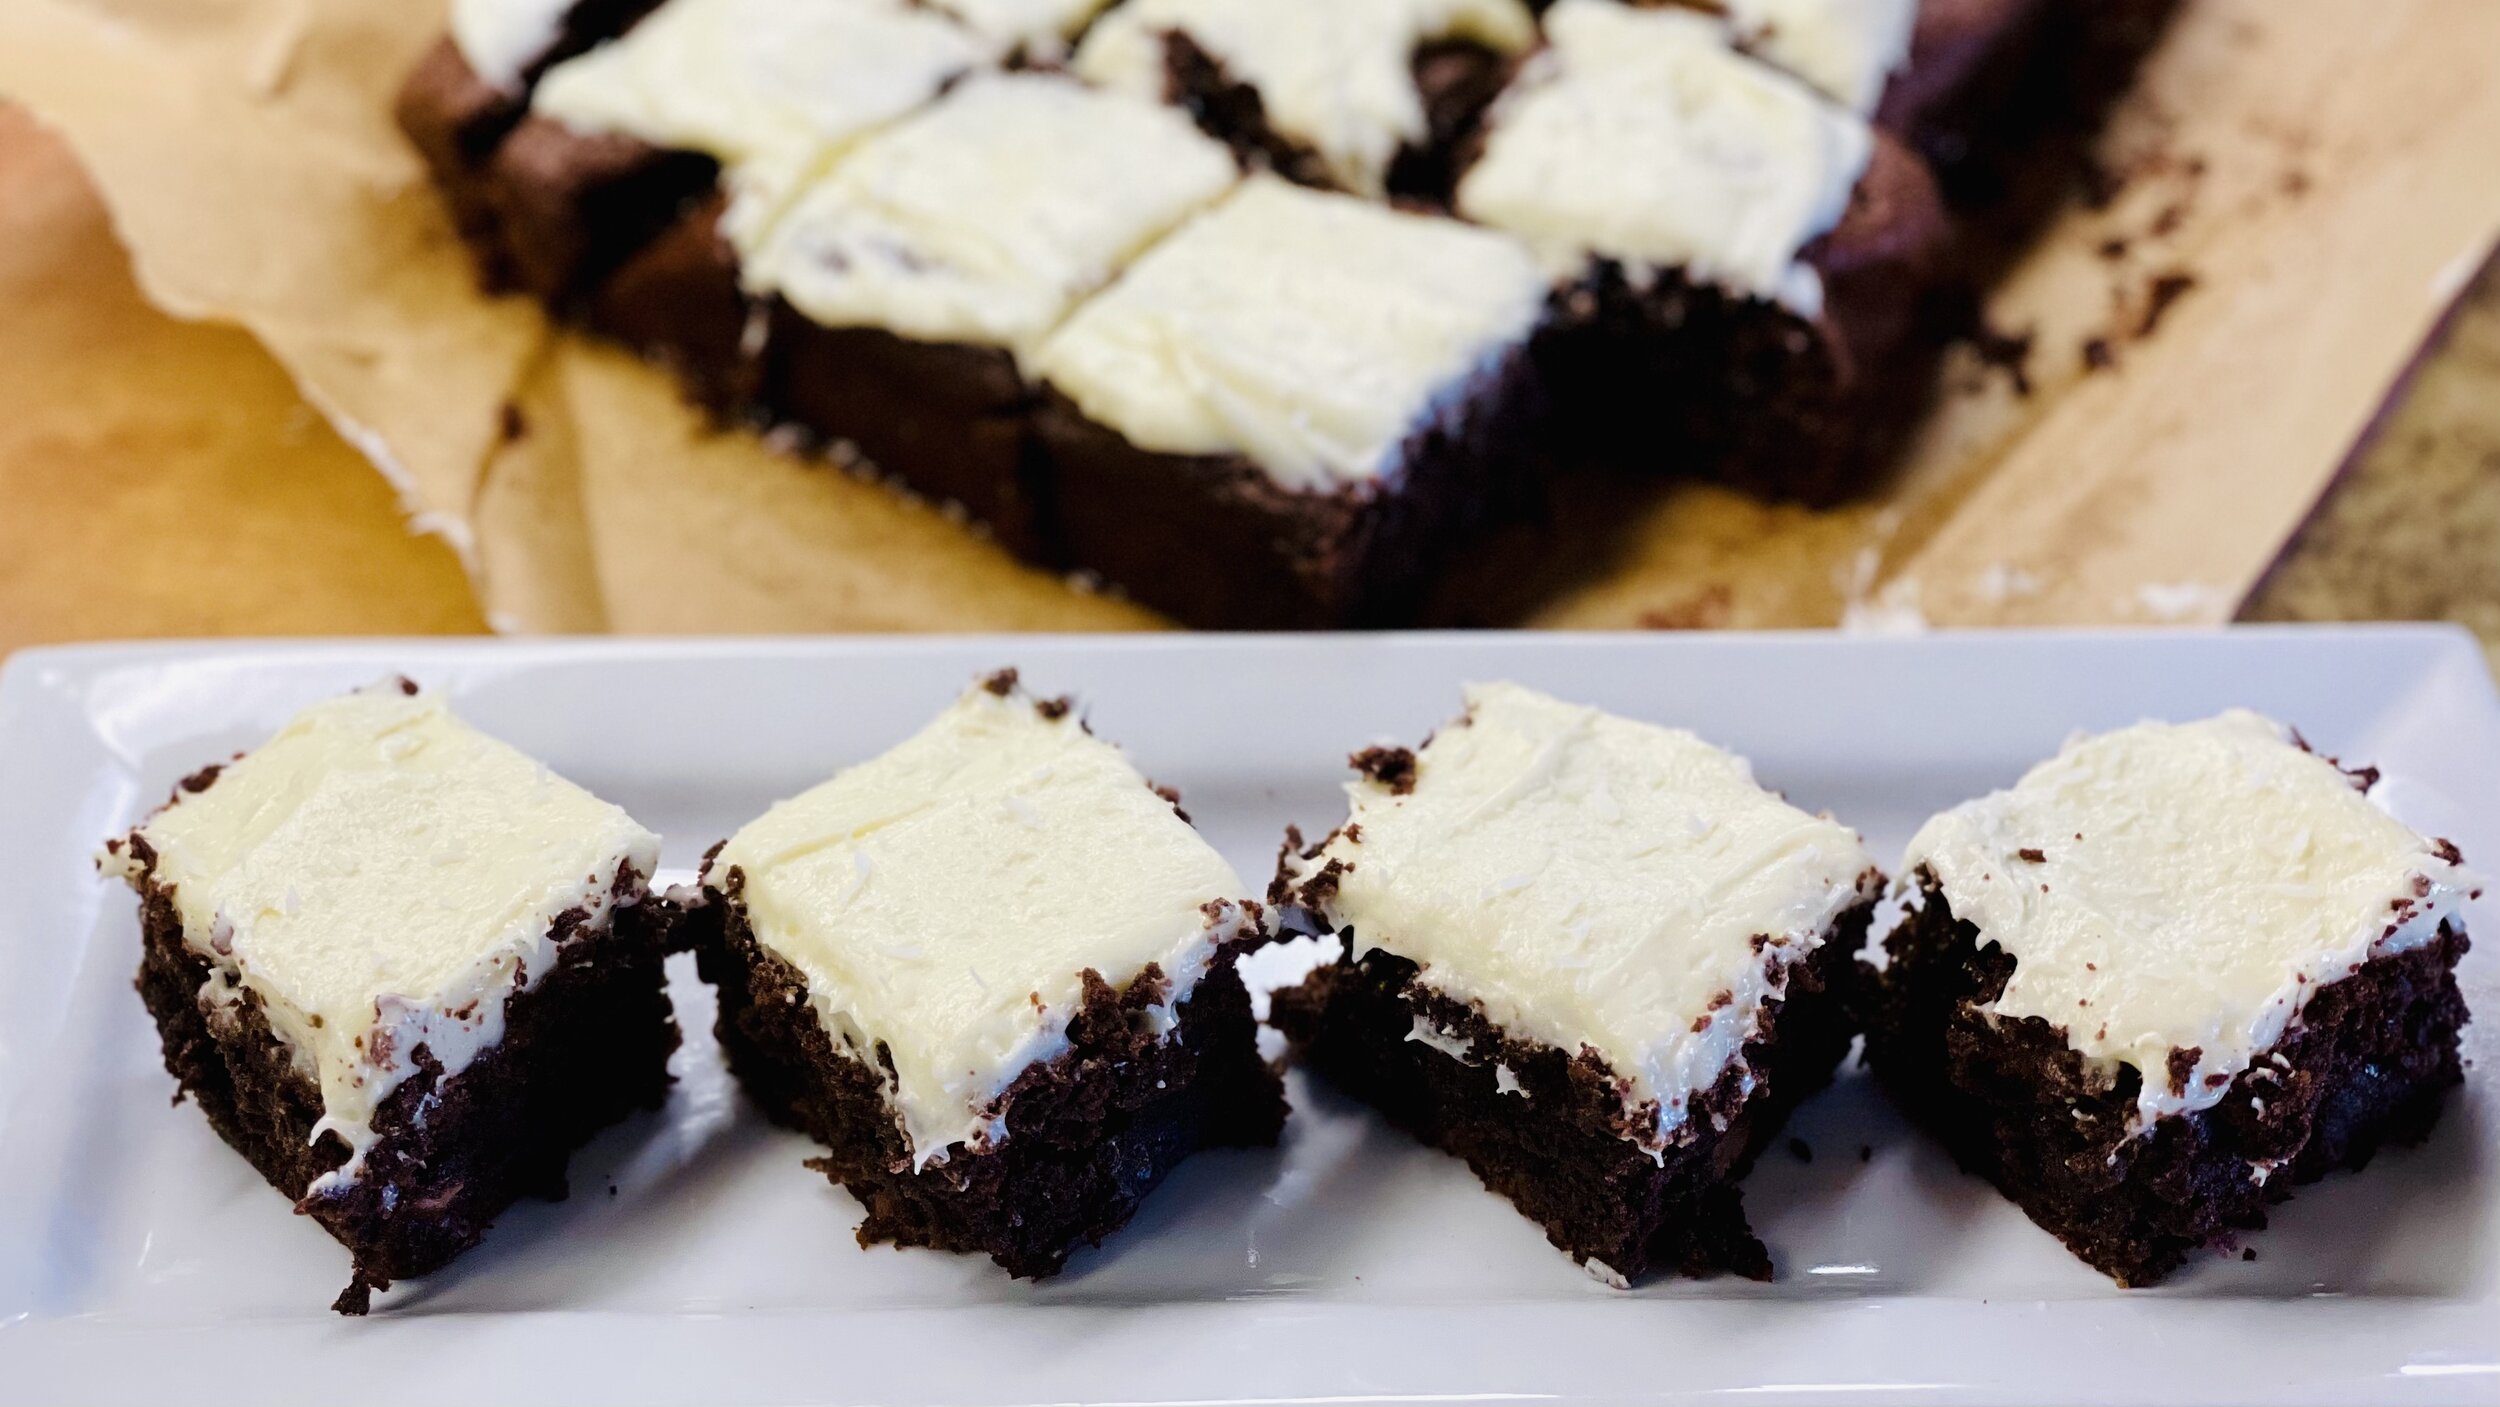
Pumpkin Spice Cake (low FODMAP)
15 Minutes prep • 30 Minutes cook • Low FODMAP • Gluten-free • Serves 8 - 12 • Ok to make-ahead: Steps 1 - 6
15 Minutes prep • 30 Minutes cook • Low FODMAP • Gluten-free • Serves 8 - 12 • Ok to make-ahead: Steps 1 - 6
Our sweet potato spice cake was so good, we had to create a pumpkin spice version too! This cake is moist, beautifully spicy, delicious, and easy to make. The batter is flexible enough to be perfect as a sheet cake, layer cake, or even cupcakes. I think you’re going to love this one!

Ingredients: Cake
2 3/4 cups gluten-free all-purpose flour (I used King Arthur Measure for Measure*)
1 3/4 teaspoons baking powder*
1/4 teaspoon baking soda*
1 teaspoon kosher salt*
2 teaspoons ground cinnamon*
3/4 teaspoon ground nutmeg*
1/2 teaspoon ground ginger*
1/4 teaspoon ground allspice*
1 cup canola oil* or other vegetable oil
3 large eggs at room temperature
1 large egg yolk at room temperature
1 1/2 cups light brown sugar*
1 cup granulated sugar*
1 (15-ounce) can pumpkin puree**
1/2 cup lactose-free sour cream
2 teaspoons pure vanilla extract*
Directions: Cake
(1) Prepare: Preheat the oven to 350 degrees F. Grease one 13x9x2-inch pan, two 9-inch round pans, or a large rimmed baking sheet for sheet cake, and line the bottom with parchment paper.
(2) Combine the dry ingredients: In a medium-sized bowl, whisk together the gluten-free flour, baking powder, salt, baking soda, and spices.
(3) Combine the wet ingredients: In the bowl of the stand mixer fitted with paddle attachment mix together the oil, sugars, and vanilla. Add the eggs and extra egg yolk, one at a time, and beat on medium speed until smooth between each addition. Add the pumpkin and the sour cream and beat until smooth.
(4) Blend the cake: Add the dry ingredients to the wet in two parts and, mix on low just until the flour is incorporated—do not over-mix.
(5) Bake the cake: Transfer the batter to the prepared pan and smooth the top with a rubber spatula. Bake for 30 to 35 minutes until a toothpick comes out with only a moist crumb or two.
(6) Finish: Let cool until easy to handle, then run a butter knife around the edges, releasing it from the pan. Invert the cake onto a cooling rack, flipping it right side up to cool to room temperature.
Make-ahead note: At this point, the cake will keep in an airtight container at room temperature for 2-3 days. Or you can prepare the cake through step 6. Cover it tightly and refrigerate for up to 2 days or freeze for up to 3 months. Bring to room temperature, make the frosting, frost, and serve. You can also freeze the frosted cake, up to 3 months. Thaw overnight in the refrigerator, bring to room temperature or serve cold.
(7) Frost the cake: When ready to frost the cake, make our best cream cheese frosting then frost.
(8) Plate and serve: Slice and serve and watch your family, friends, or guests marvel at what a moist and delicious cake you have made!
Pro tips: To bring eggs up to room temperature quickly so they blend more evenly in your batter, simply put them in a bowl of warm (not hot) water for a few minutes.
This cake would be delicious and would work well, as a layer cake (bake 25 mins), or cupcakes (bake 18-21 mins).
**Pumpkin: While you can cook down your own pumpkin, that takes a lot of time and I think the flavor and consistency of canned pumpkin work best for this recipe. I always use Libby’s brand canned pumpkin for all my pumpkin recipes because it is consistently the best taste, color, and consistency.
Ingredients: Frosting
1/2 cup (4 ounces) lactose-free cream cheese, at room temperature
2 sticks (8 ounces) unsalted butter, at room temperature
4 cups confectioners’ sugar, sifted
1/2 teaspoon kosher salt*
1 teaspoon white vinegar
1 teaspoon vanilla*
2 tablespoons heavy cream, lactose-free whole milk, or lactose-free half and half
Directions: Frosting
(1) Combine the cream cheese and butter: In the bowl of a stand mixer fitted with the paddle attachment, beat the cream cheese and butter on medium-high speed for about 5 - 7 minutes until light yellow and fluffy.
(2) Add the sugar: Turn the mixer off and sift the confectioner’s sugar into the bowl with the butter mixture. Mix on low for 2 minutes then scrape down the sides of the bowl. Continue to mix, increasing the speed to medium-high, until the frosting is light and fluffy and no lumps are visible.
(3) Finish: Add the salt, vinegar, vanilla, and heavy cream. Use the frosting immediately, or store it in the fridge until you’re ready to decorate.
(4) Frost something! Use the frosting immediately, or store it in the fridge until you’re ready to decorate.
Make-ahead note: At this point, you may refrigerate the frosting if you’re not going to use it right away. If you do refrigerate it, you may have to let it warm up a bit and then re-whip it for a minute or two in the stand mixer on low before it’s spreadable again.
Eat and enjoy every bite because you can!
*This post may contain links for you to easily purchase items listed on the page. In some cases, we have provided a special discount code for IBS Game Changers so be sure to use it when you purchase an item to get the discount that has been arranged just for you! As an Amazon Associate, I earn a commission from qualifying Amazon purchases.
More Deliciously Low FODMAP™ dessert recipes you might enjoy


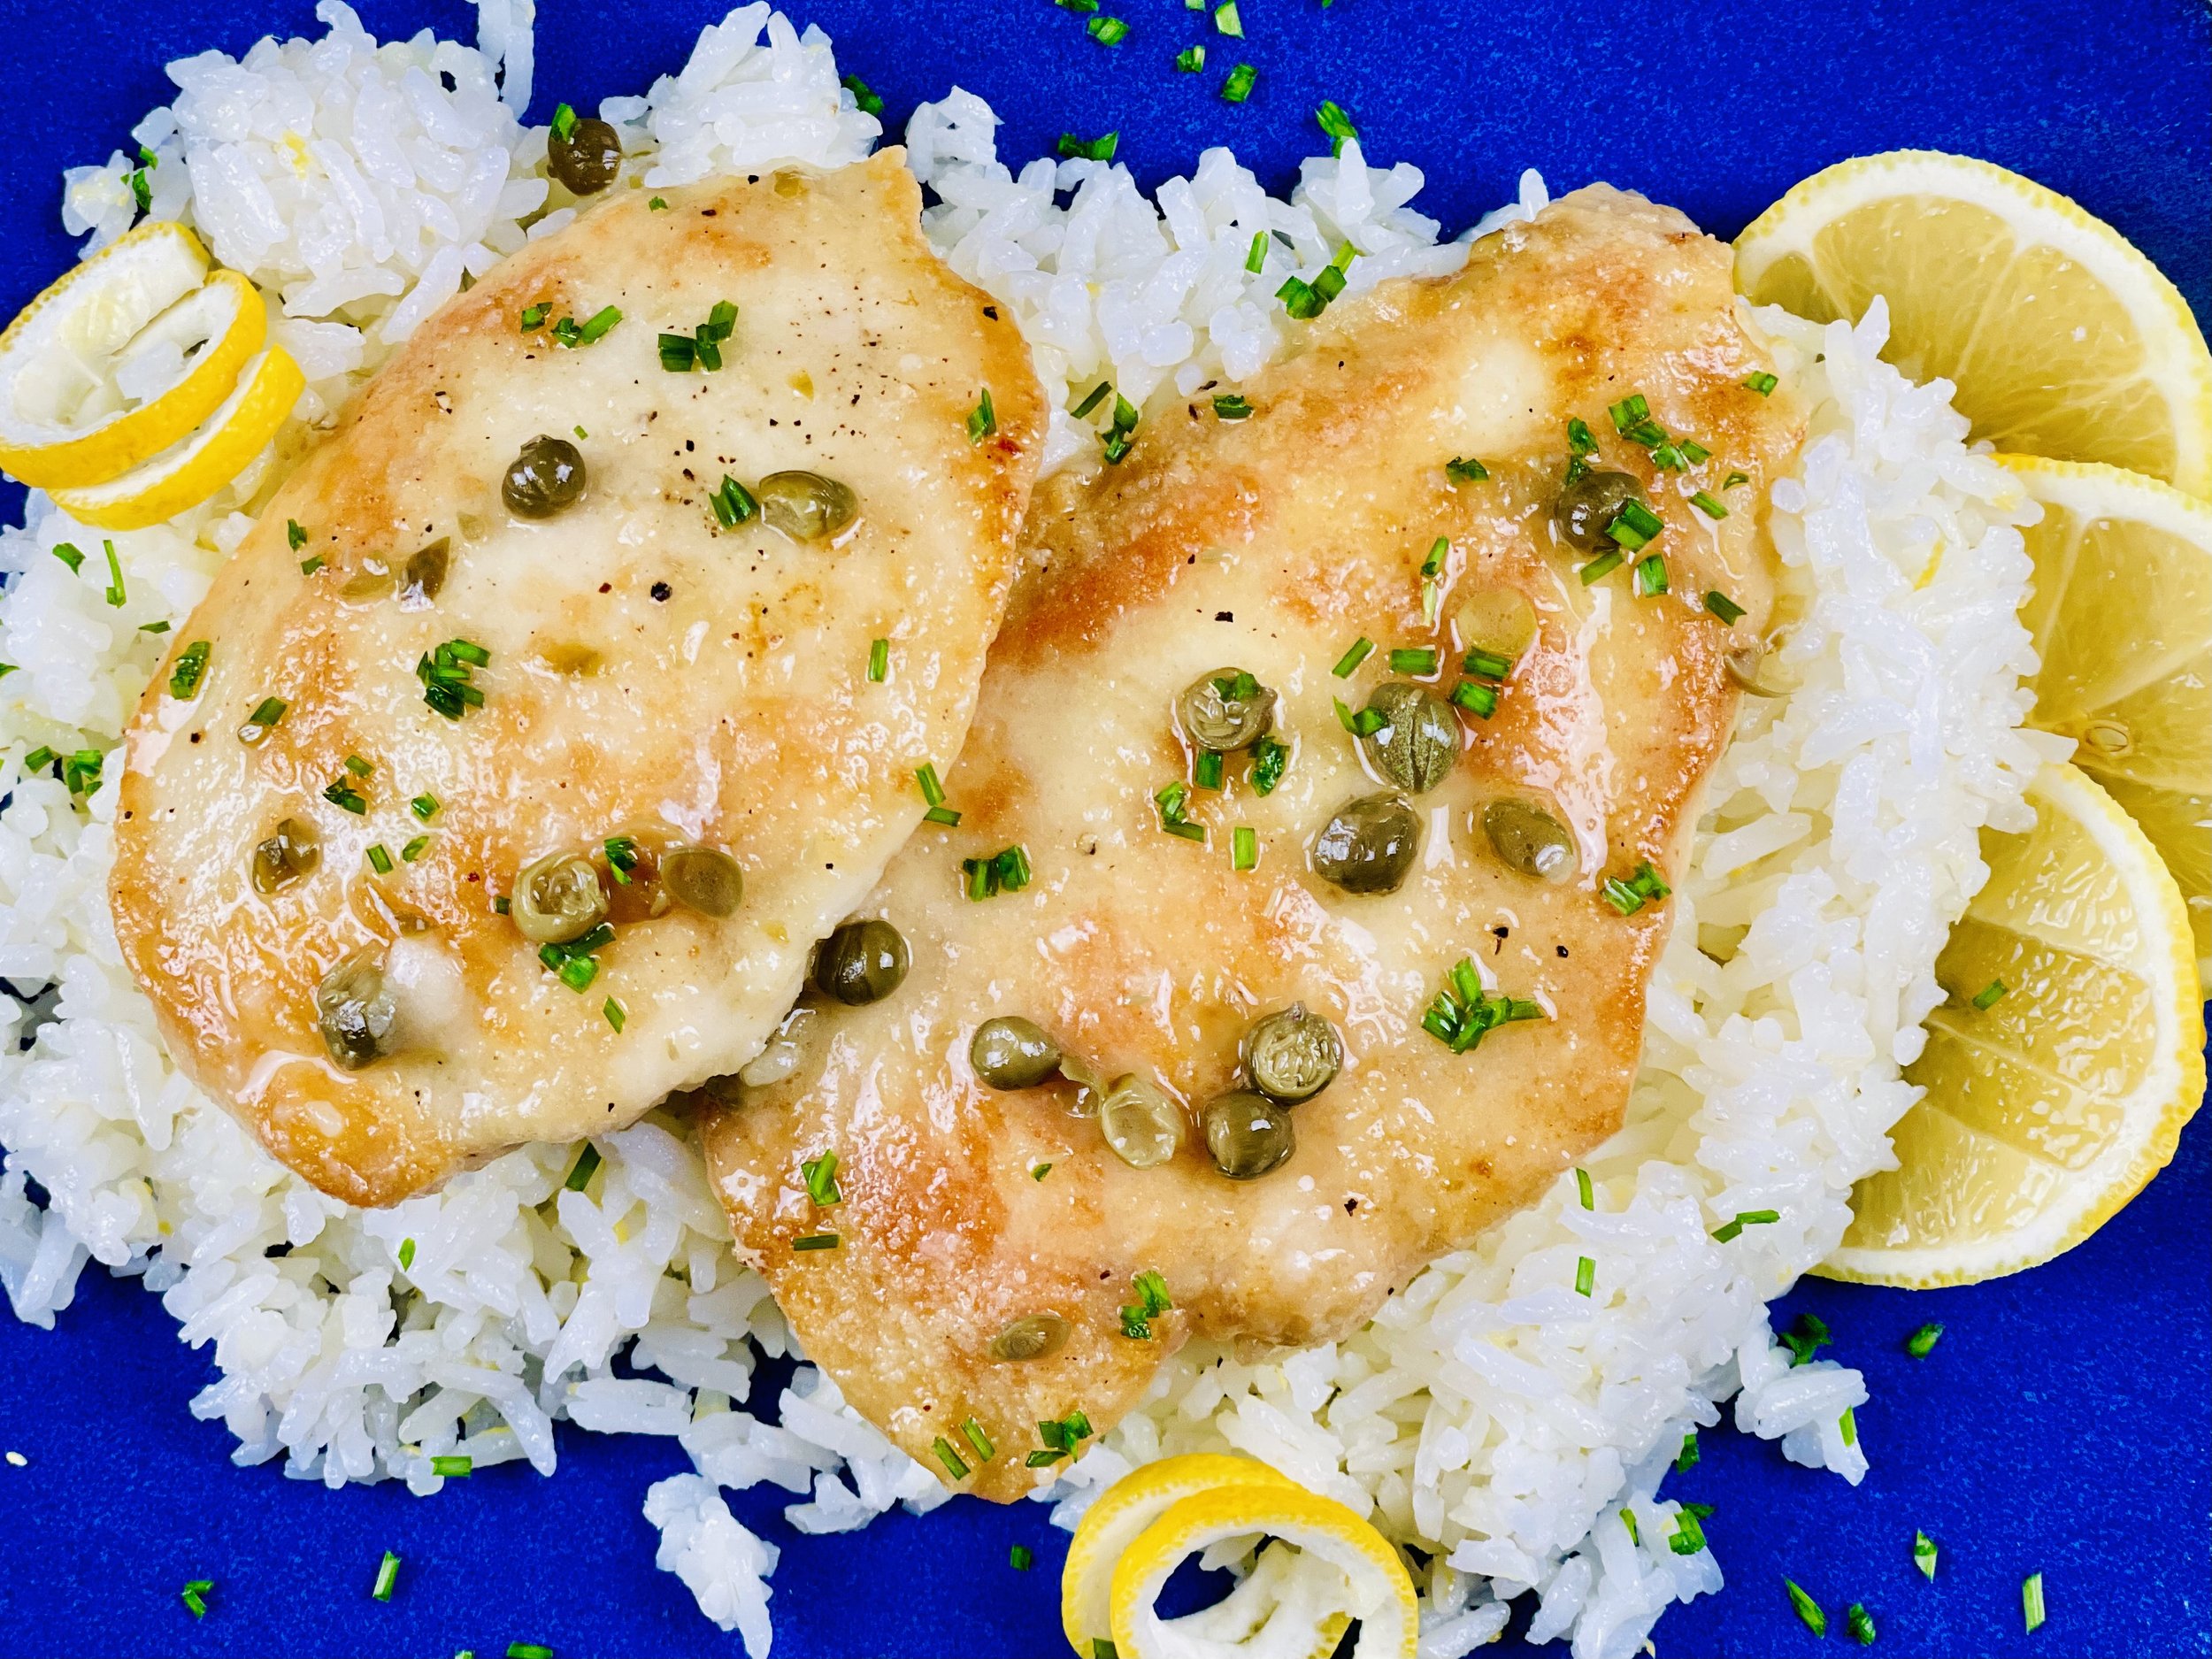
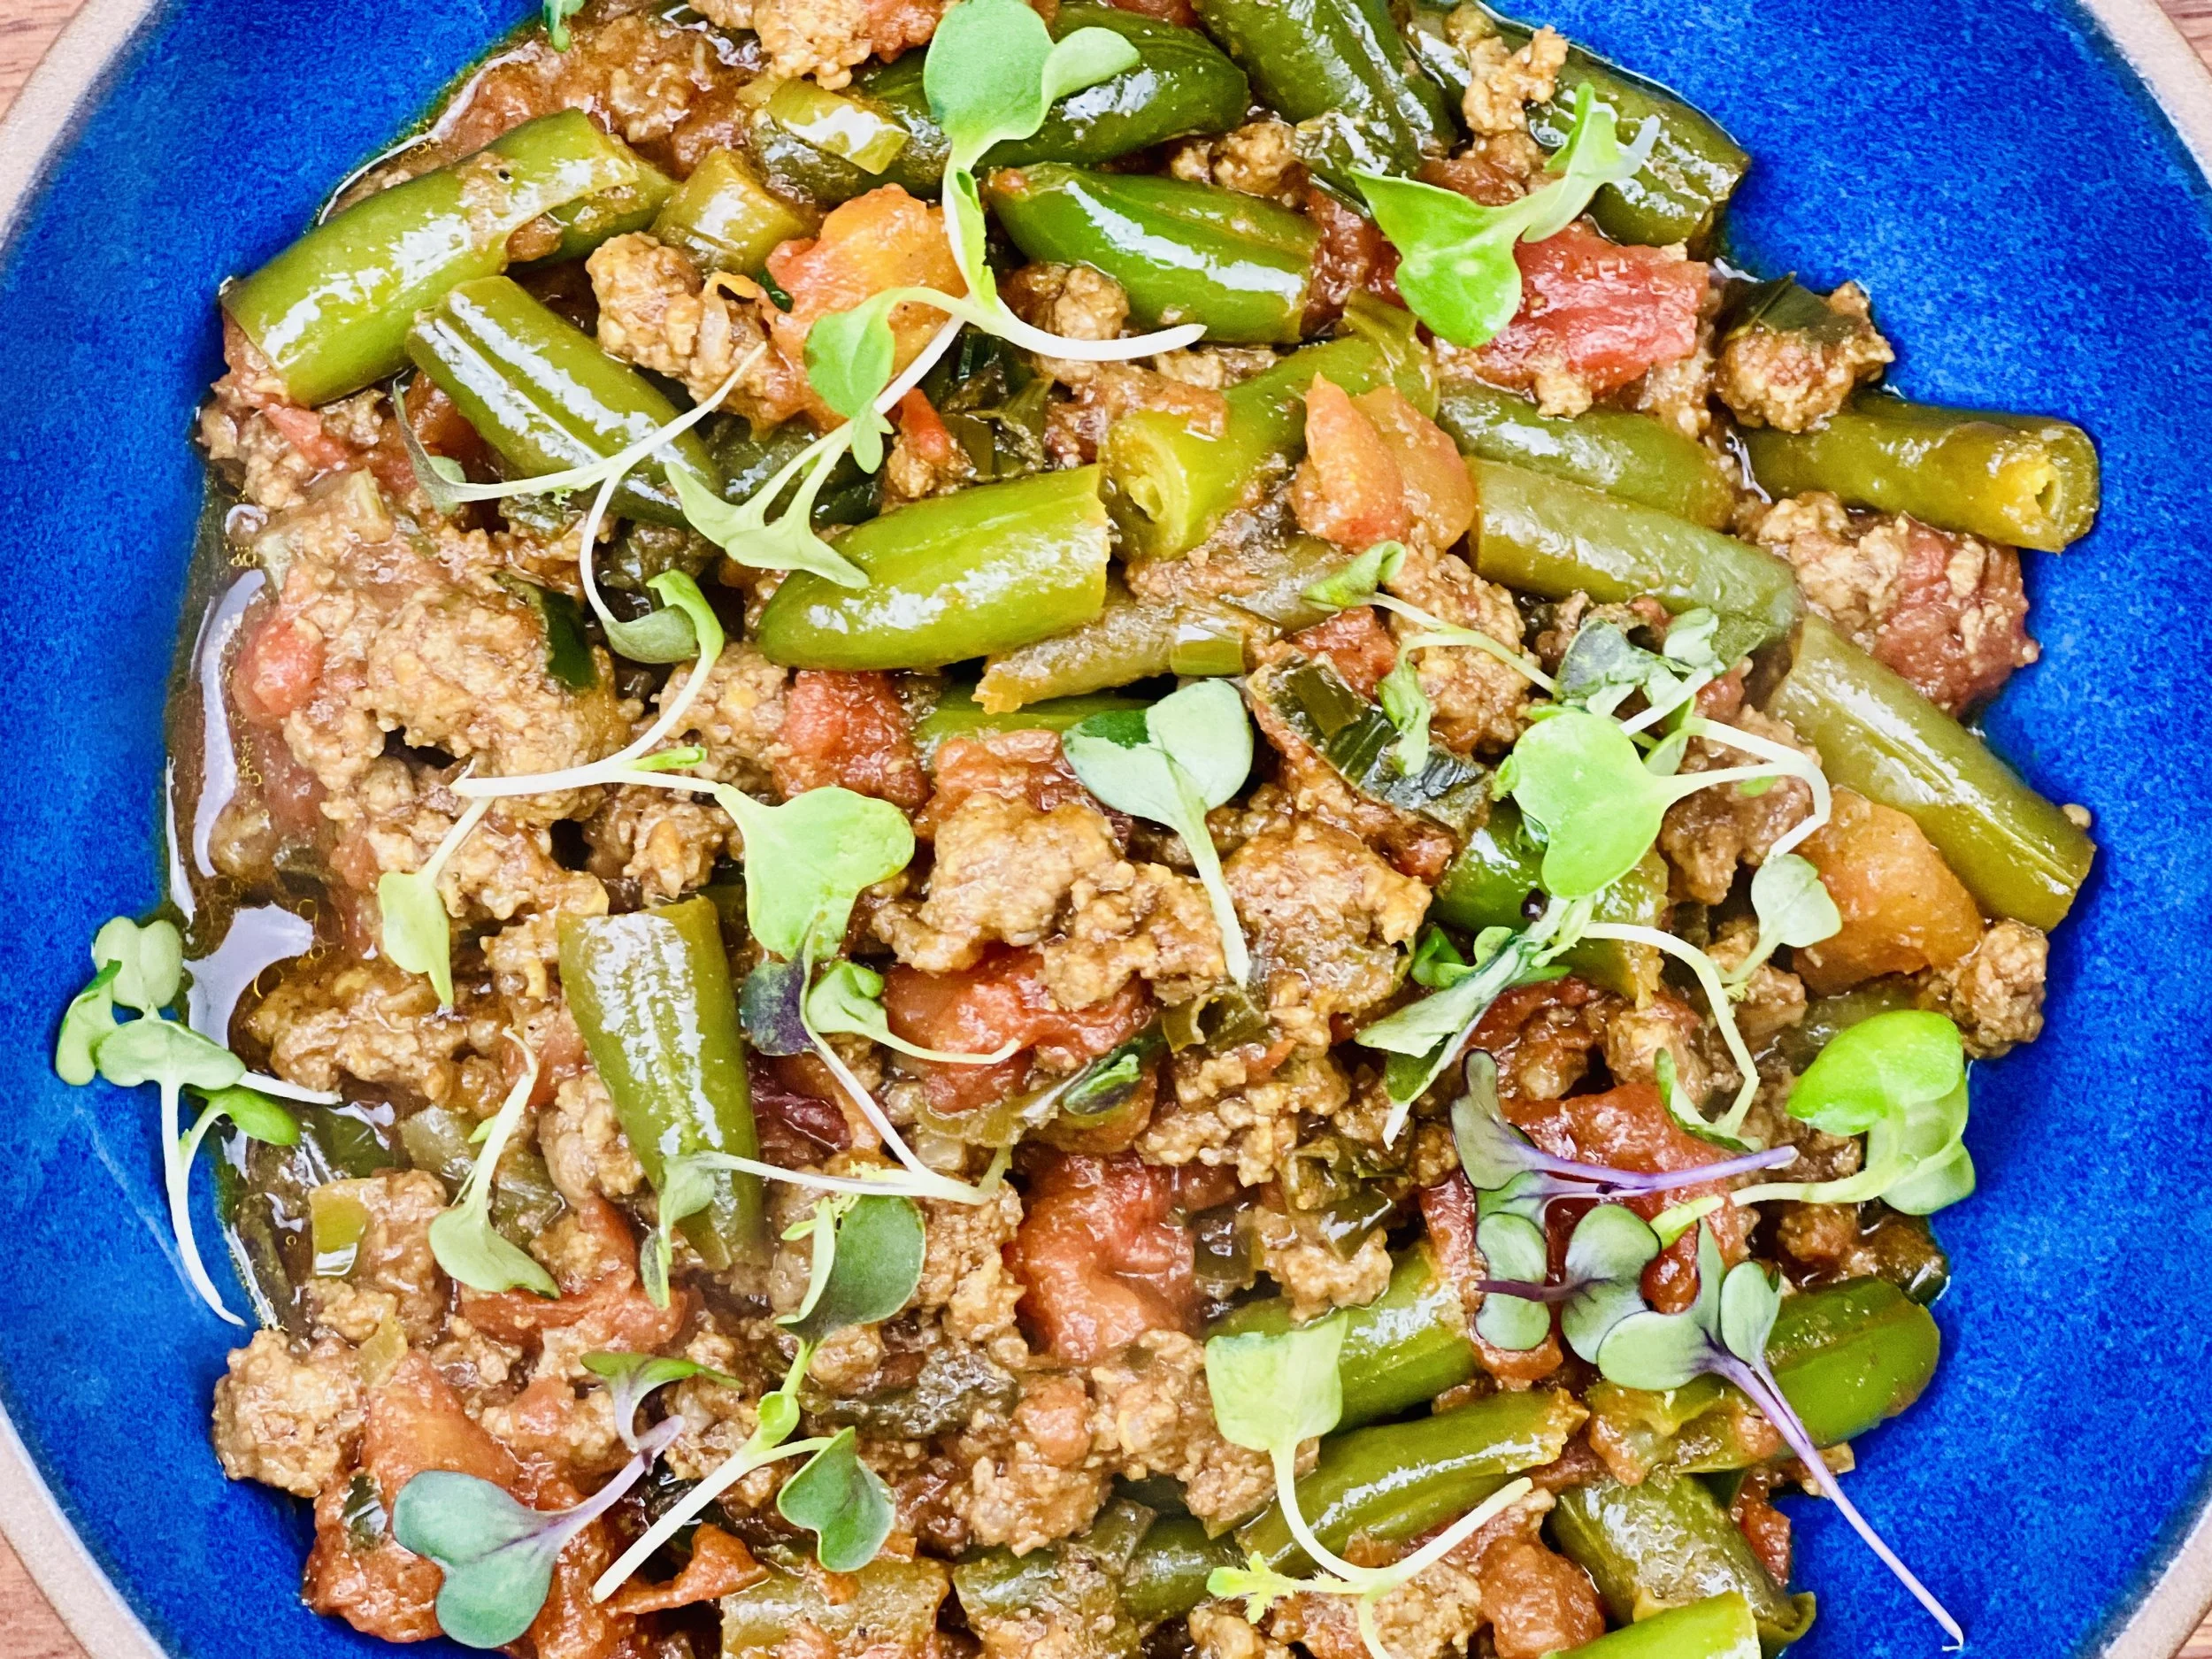
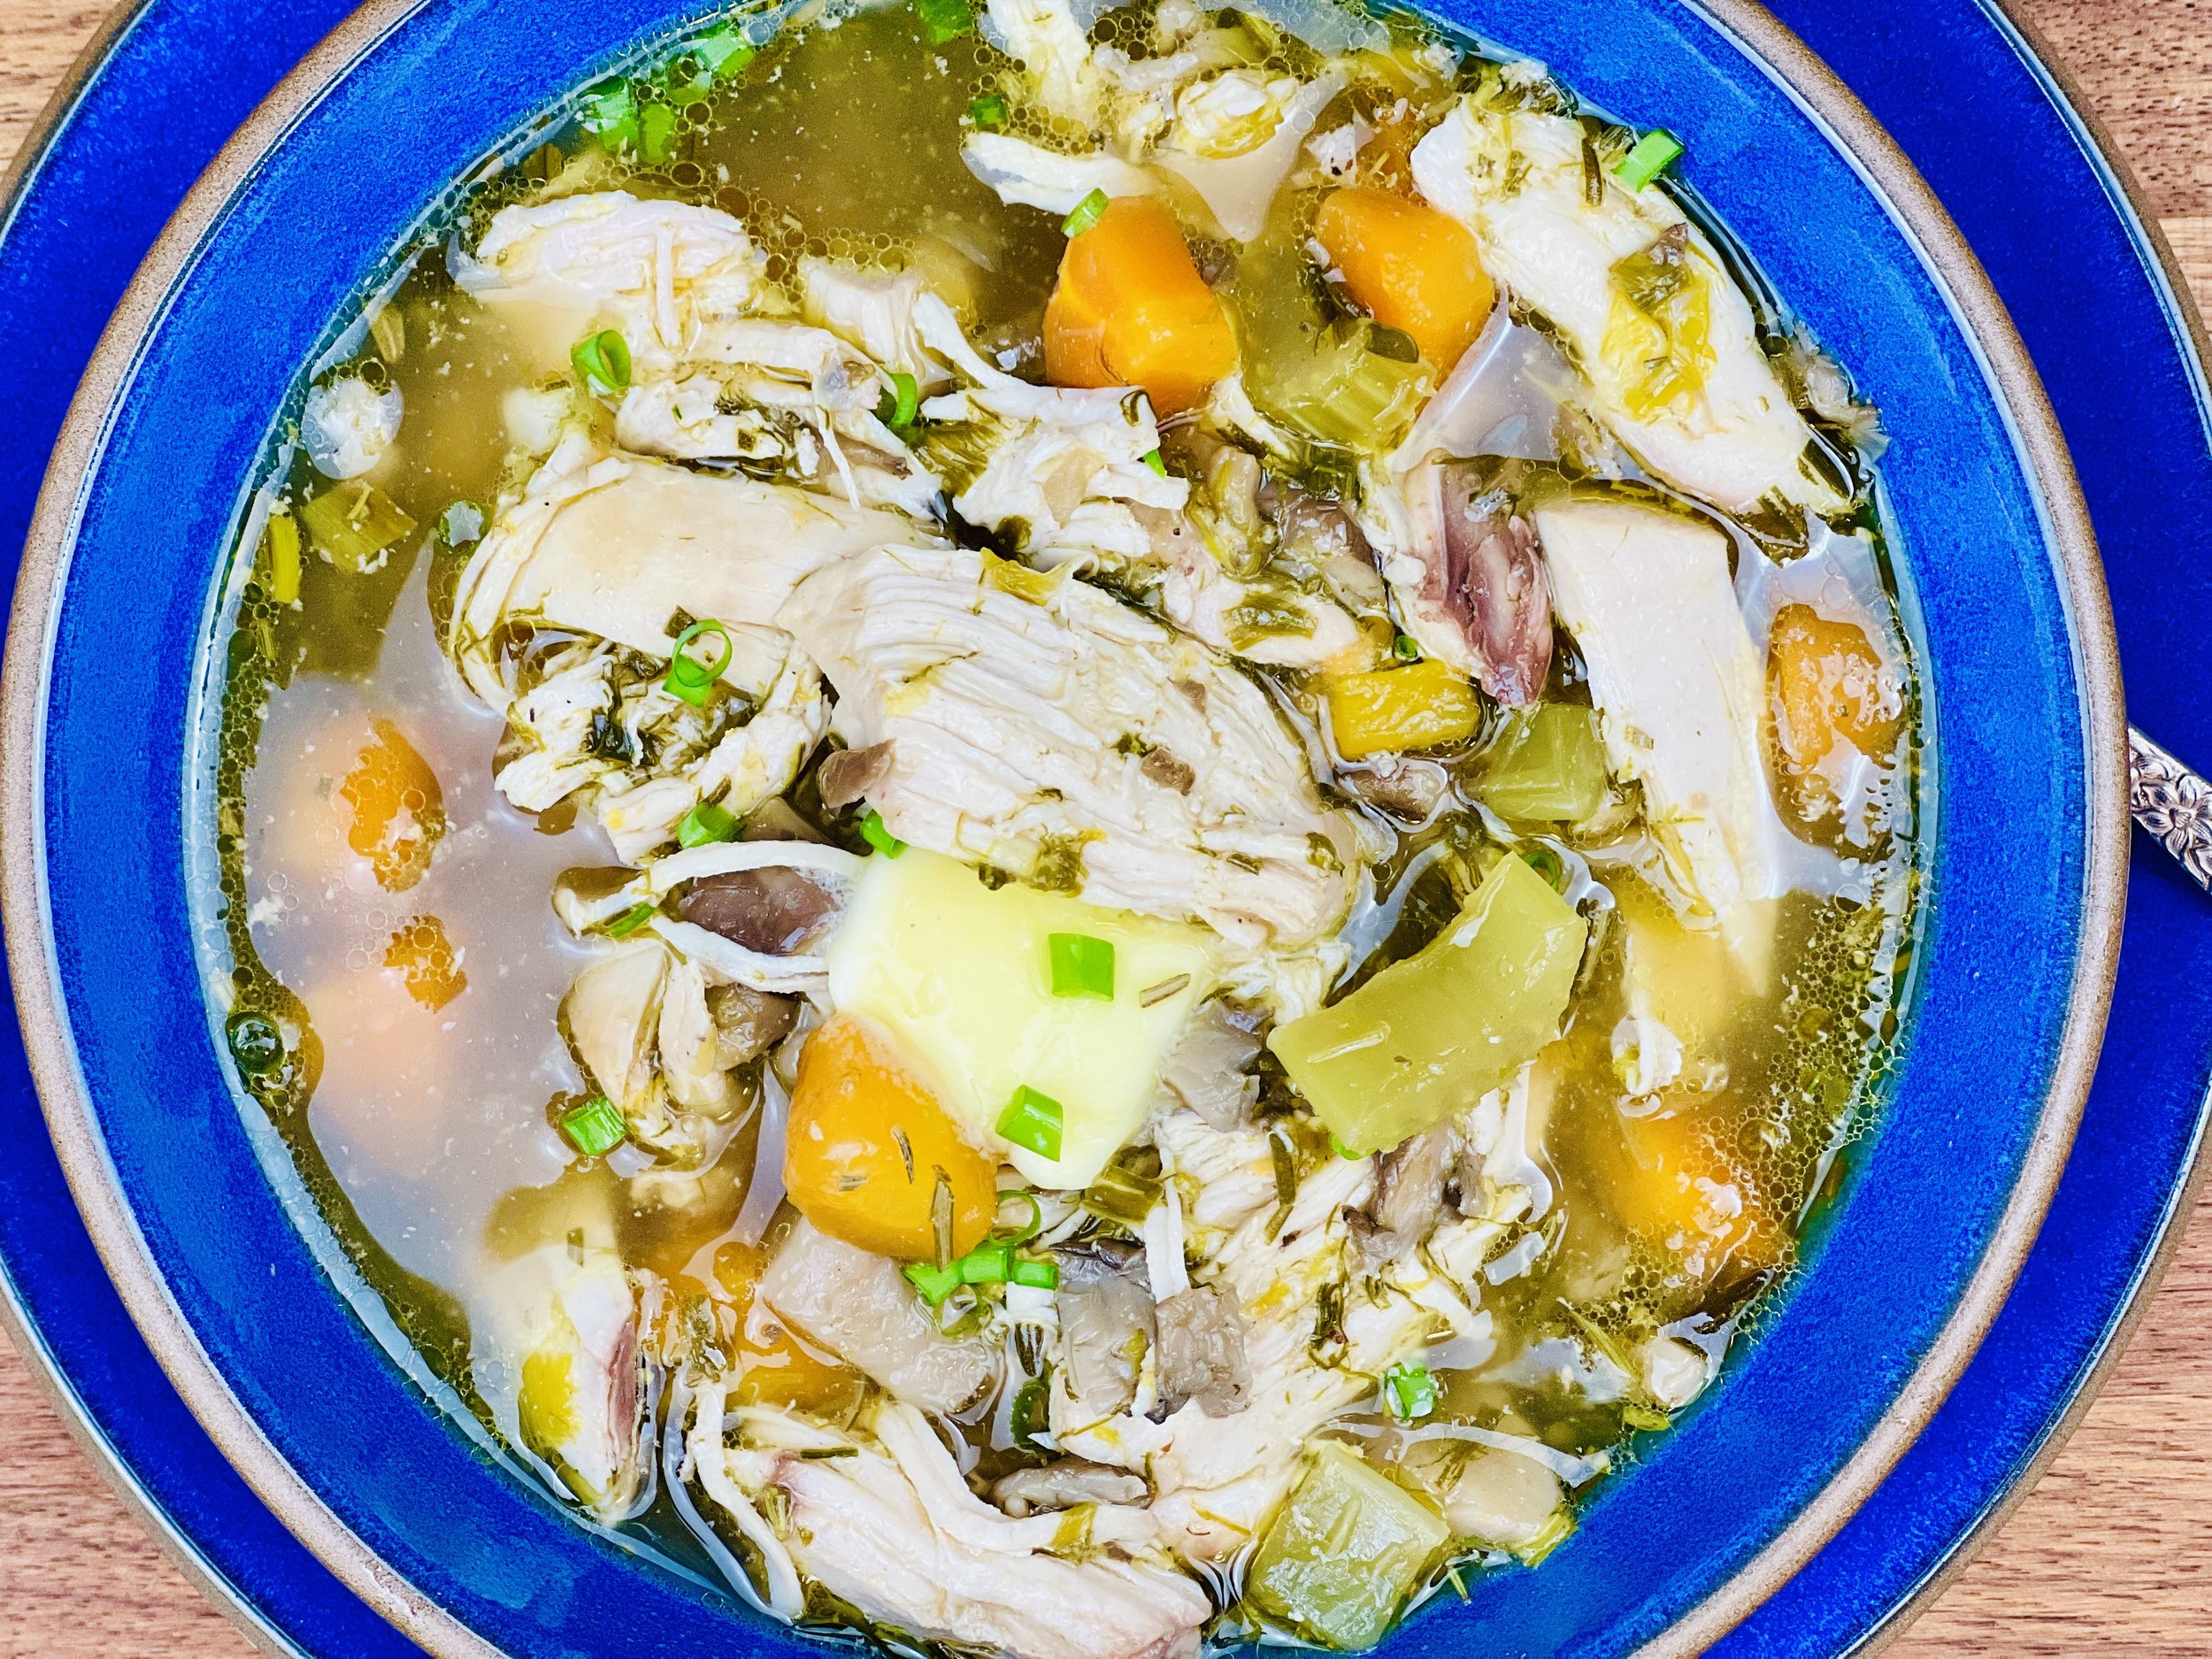
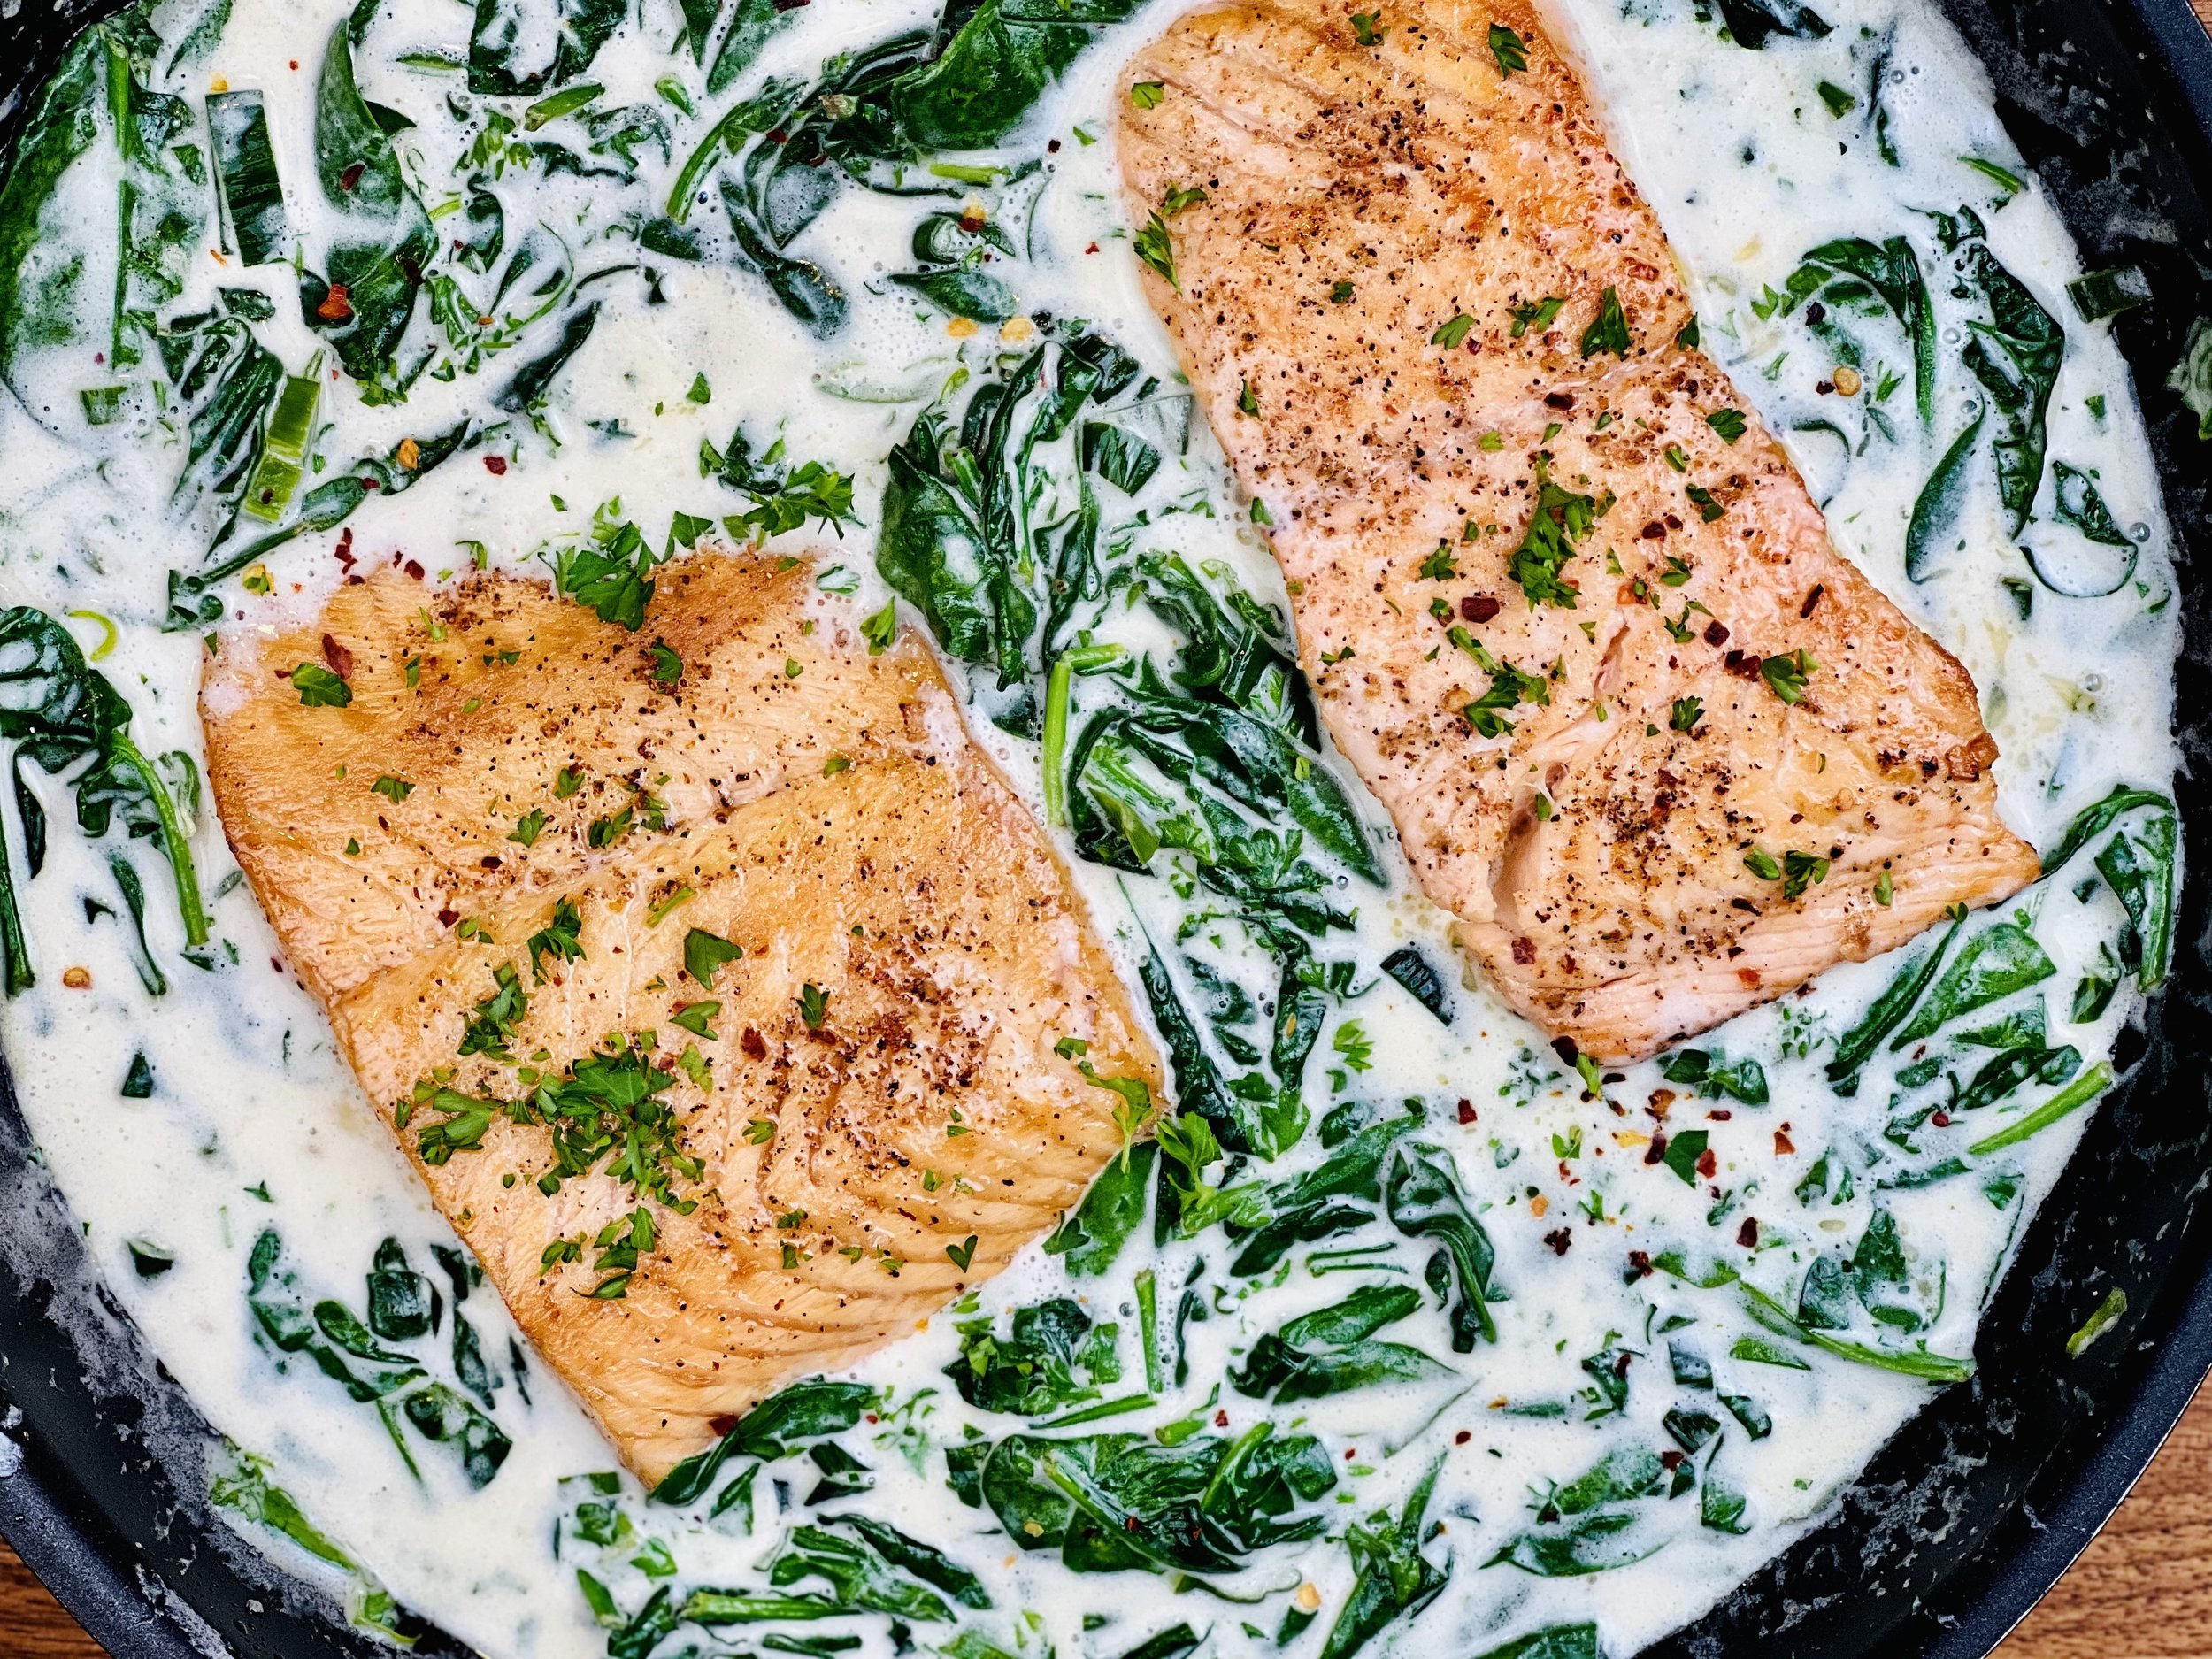
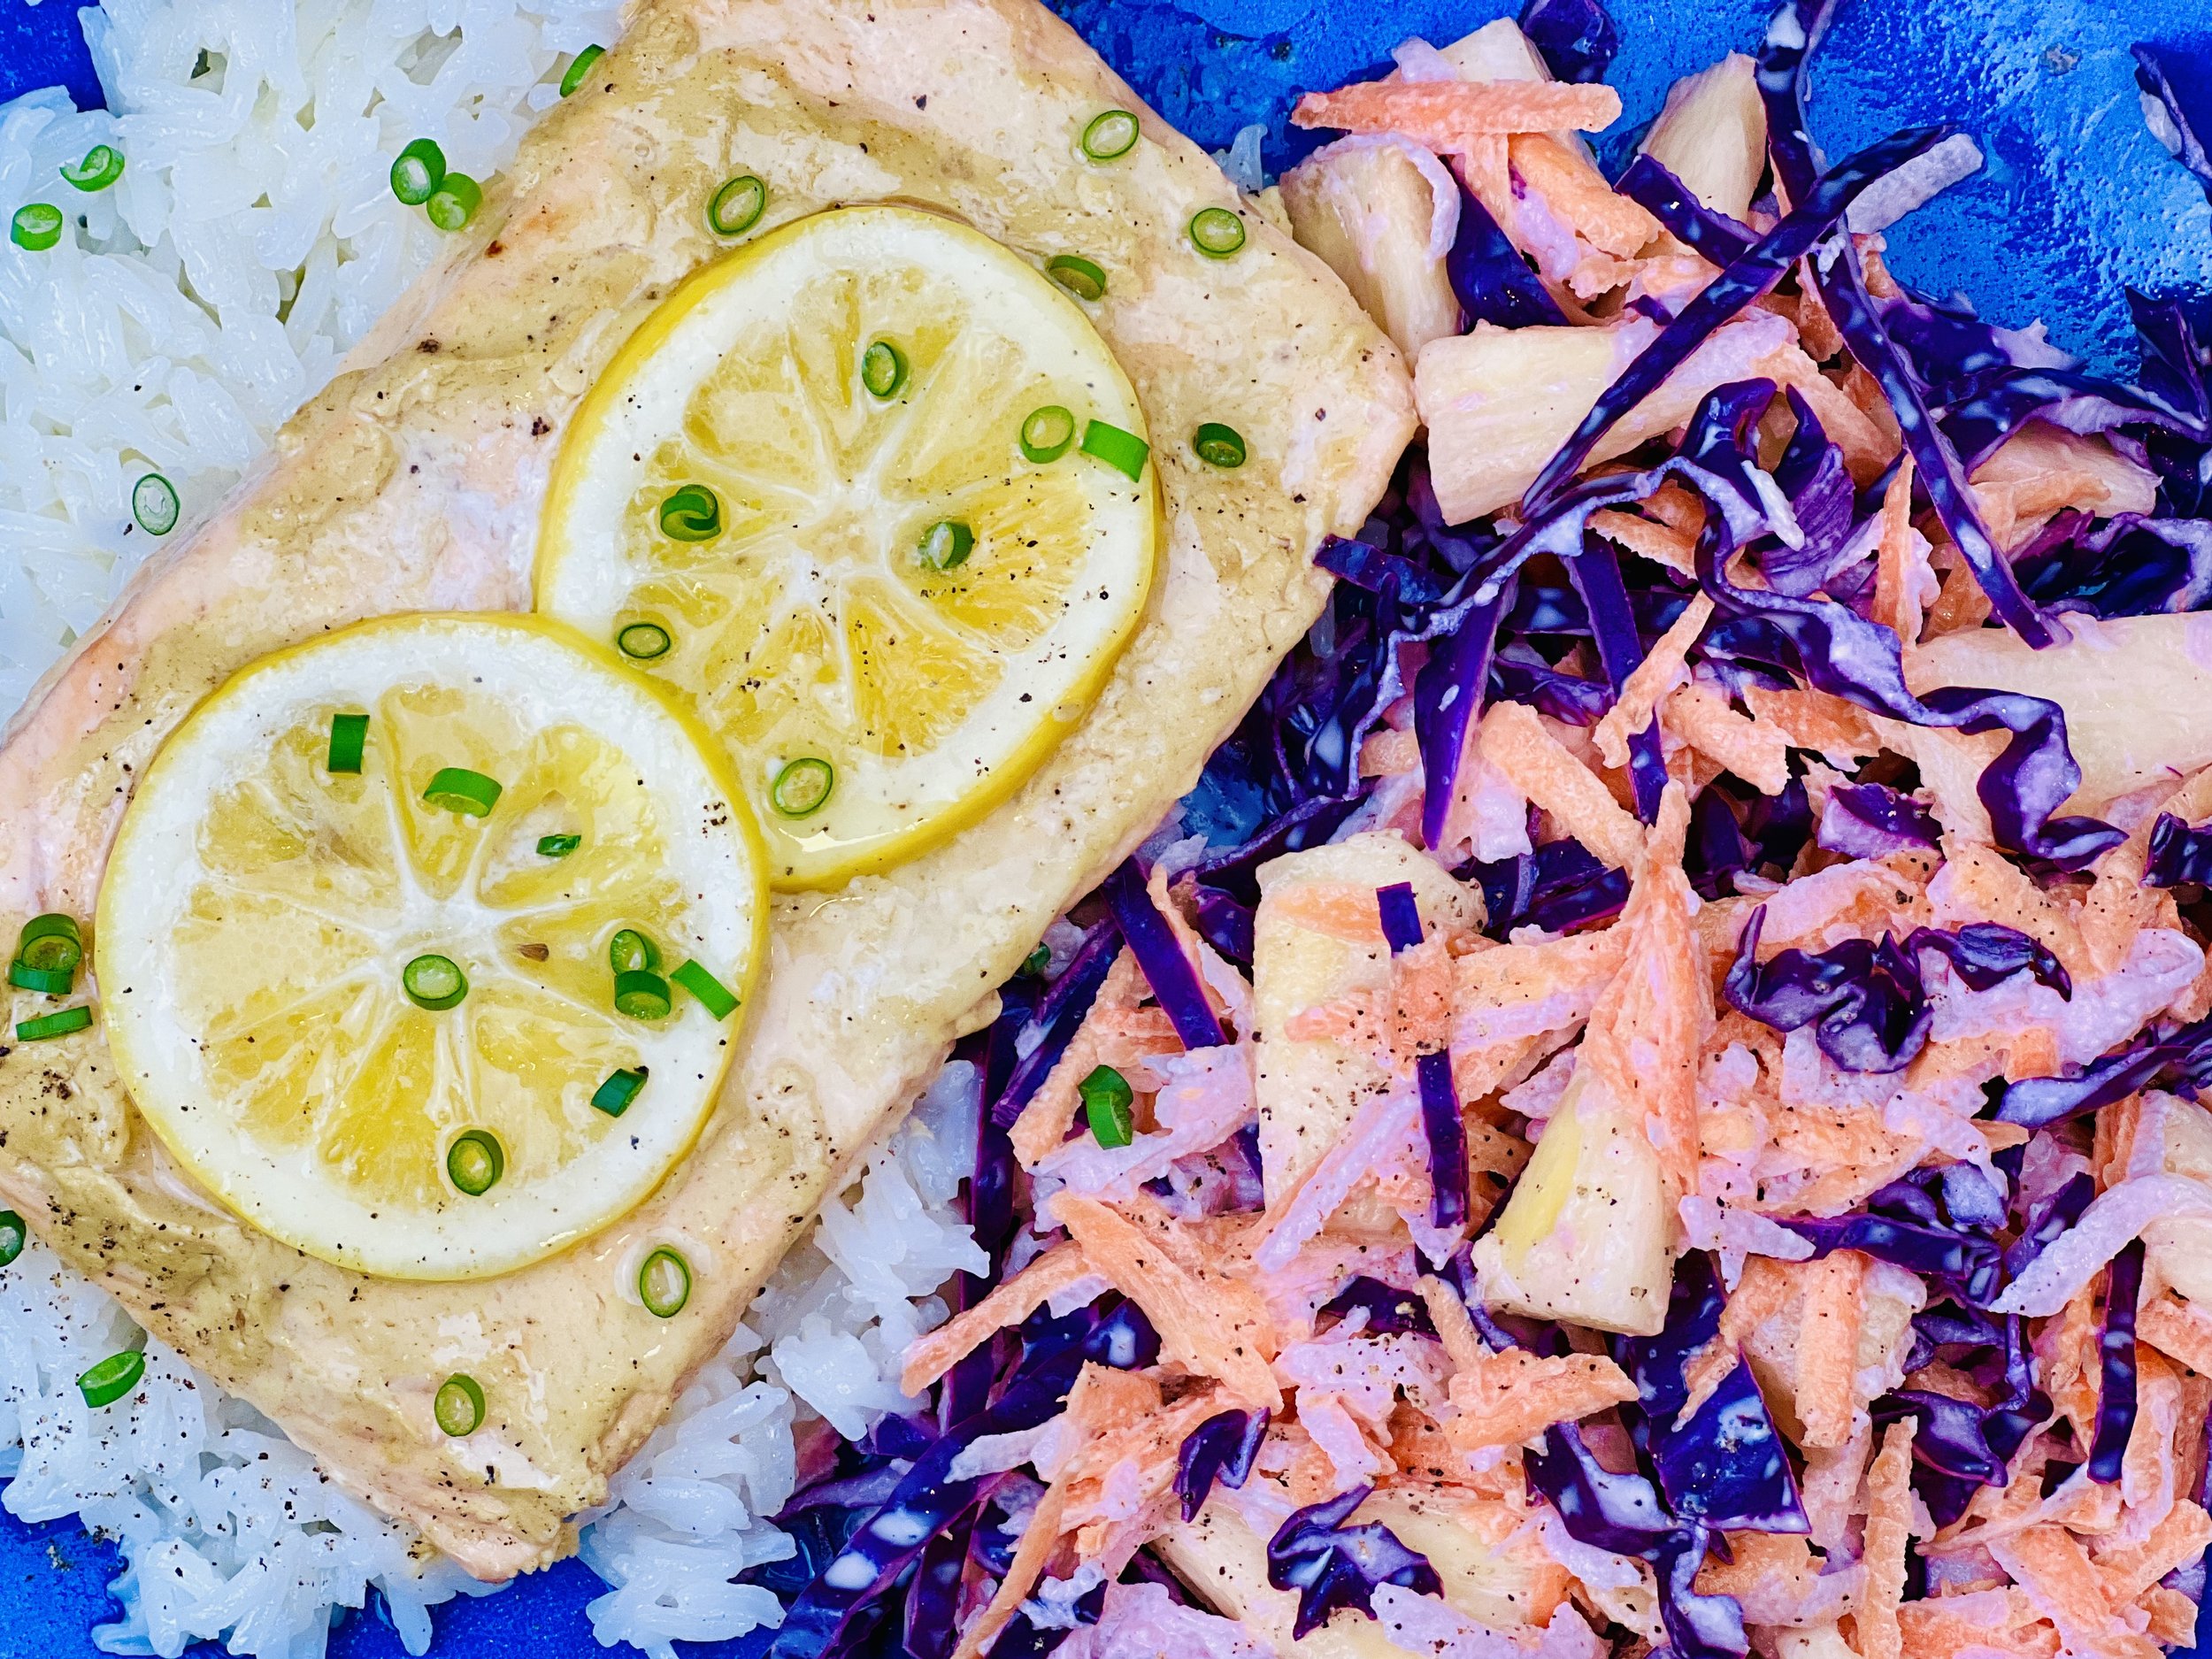
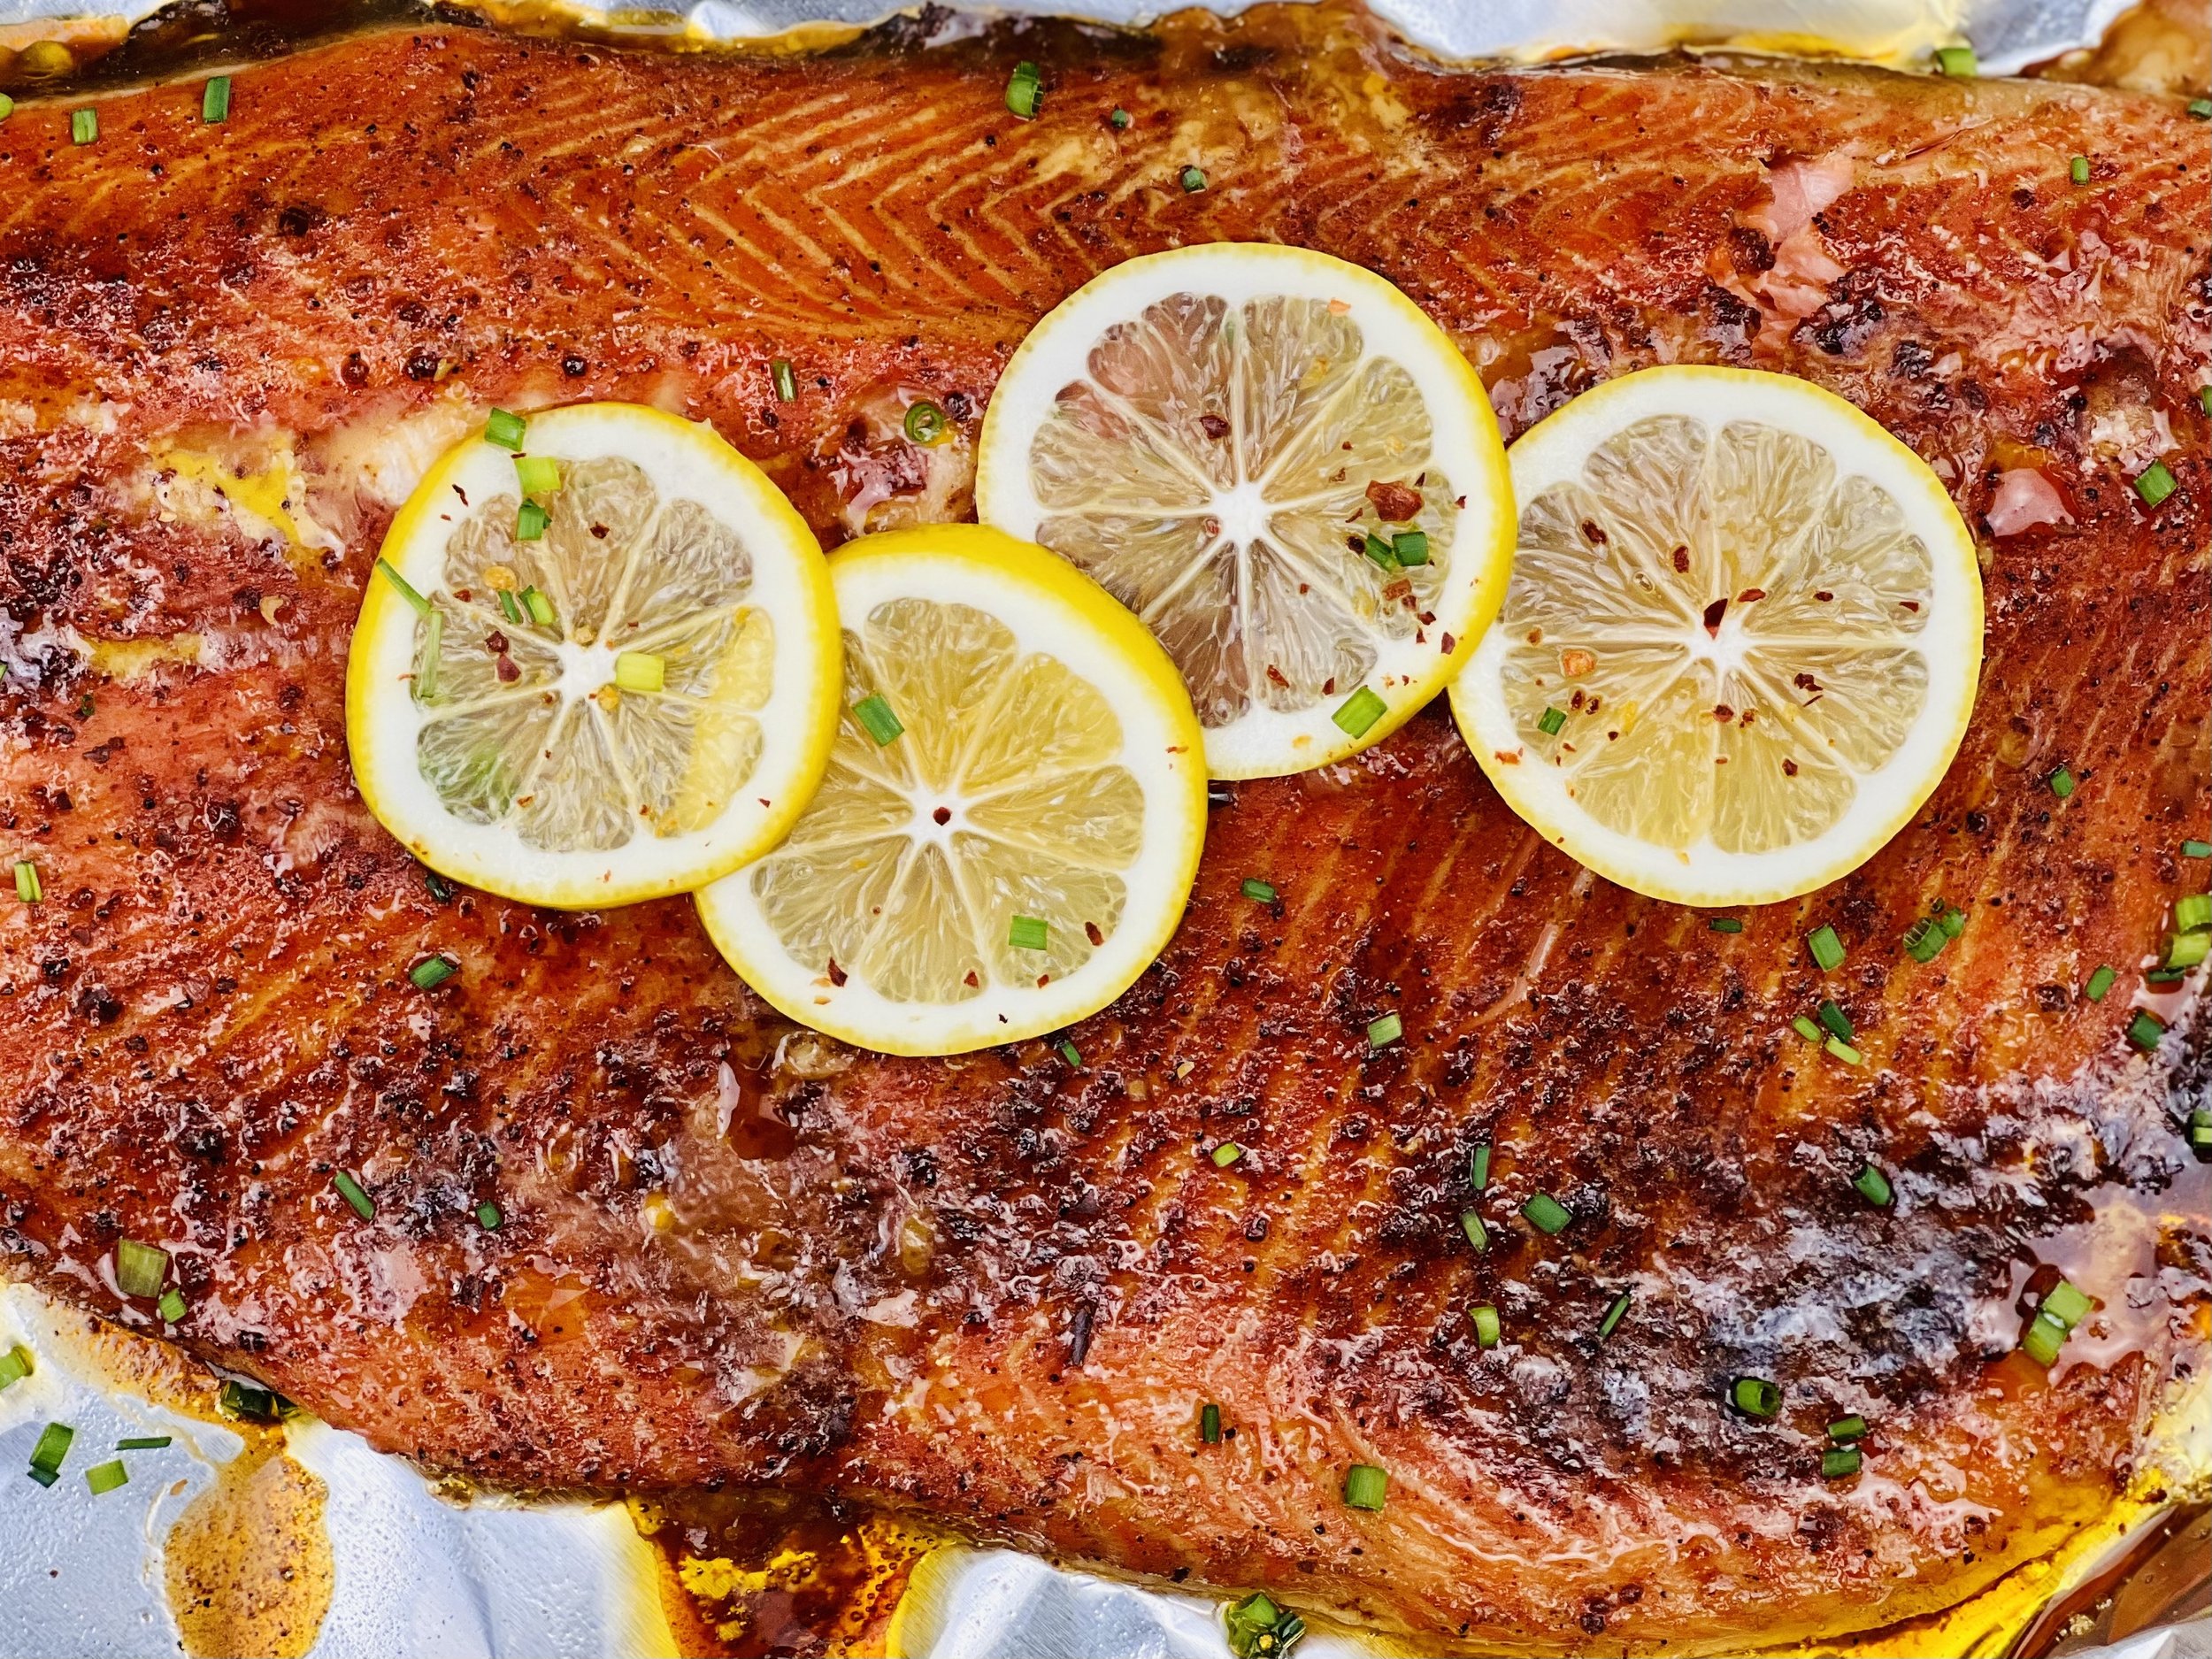
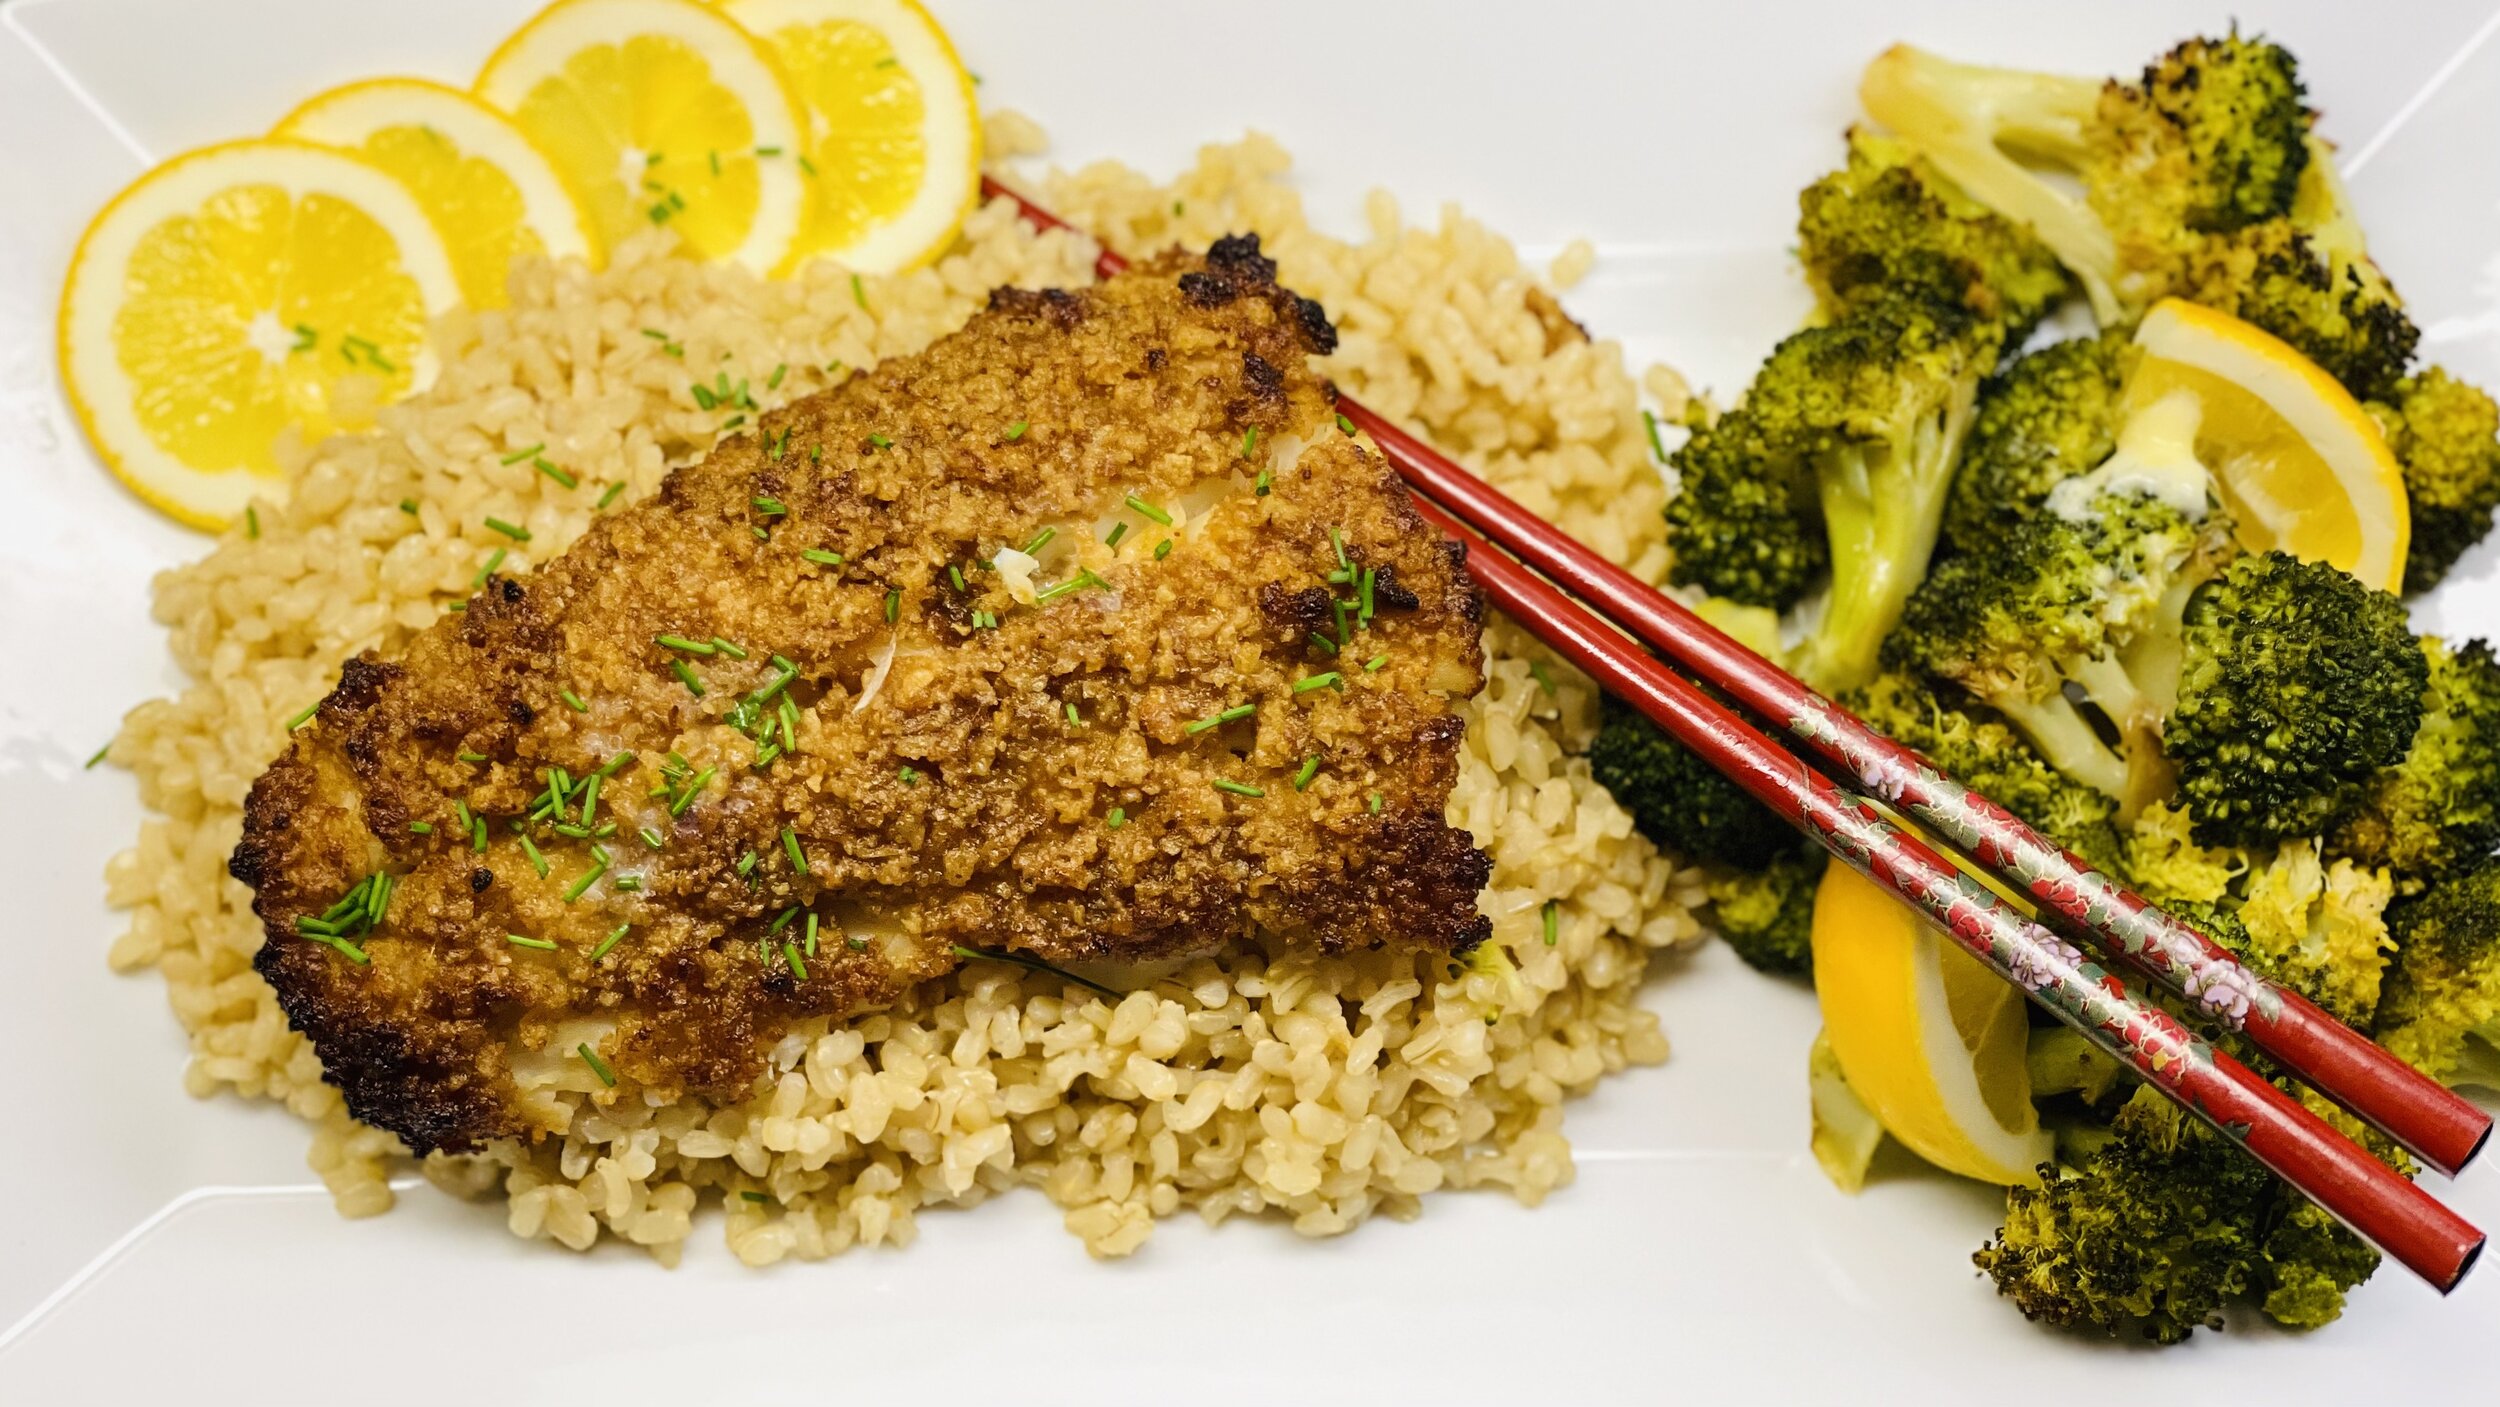
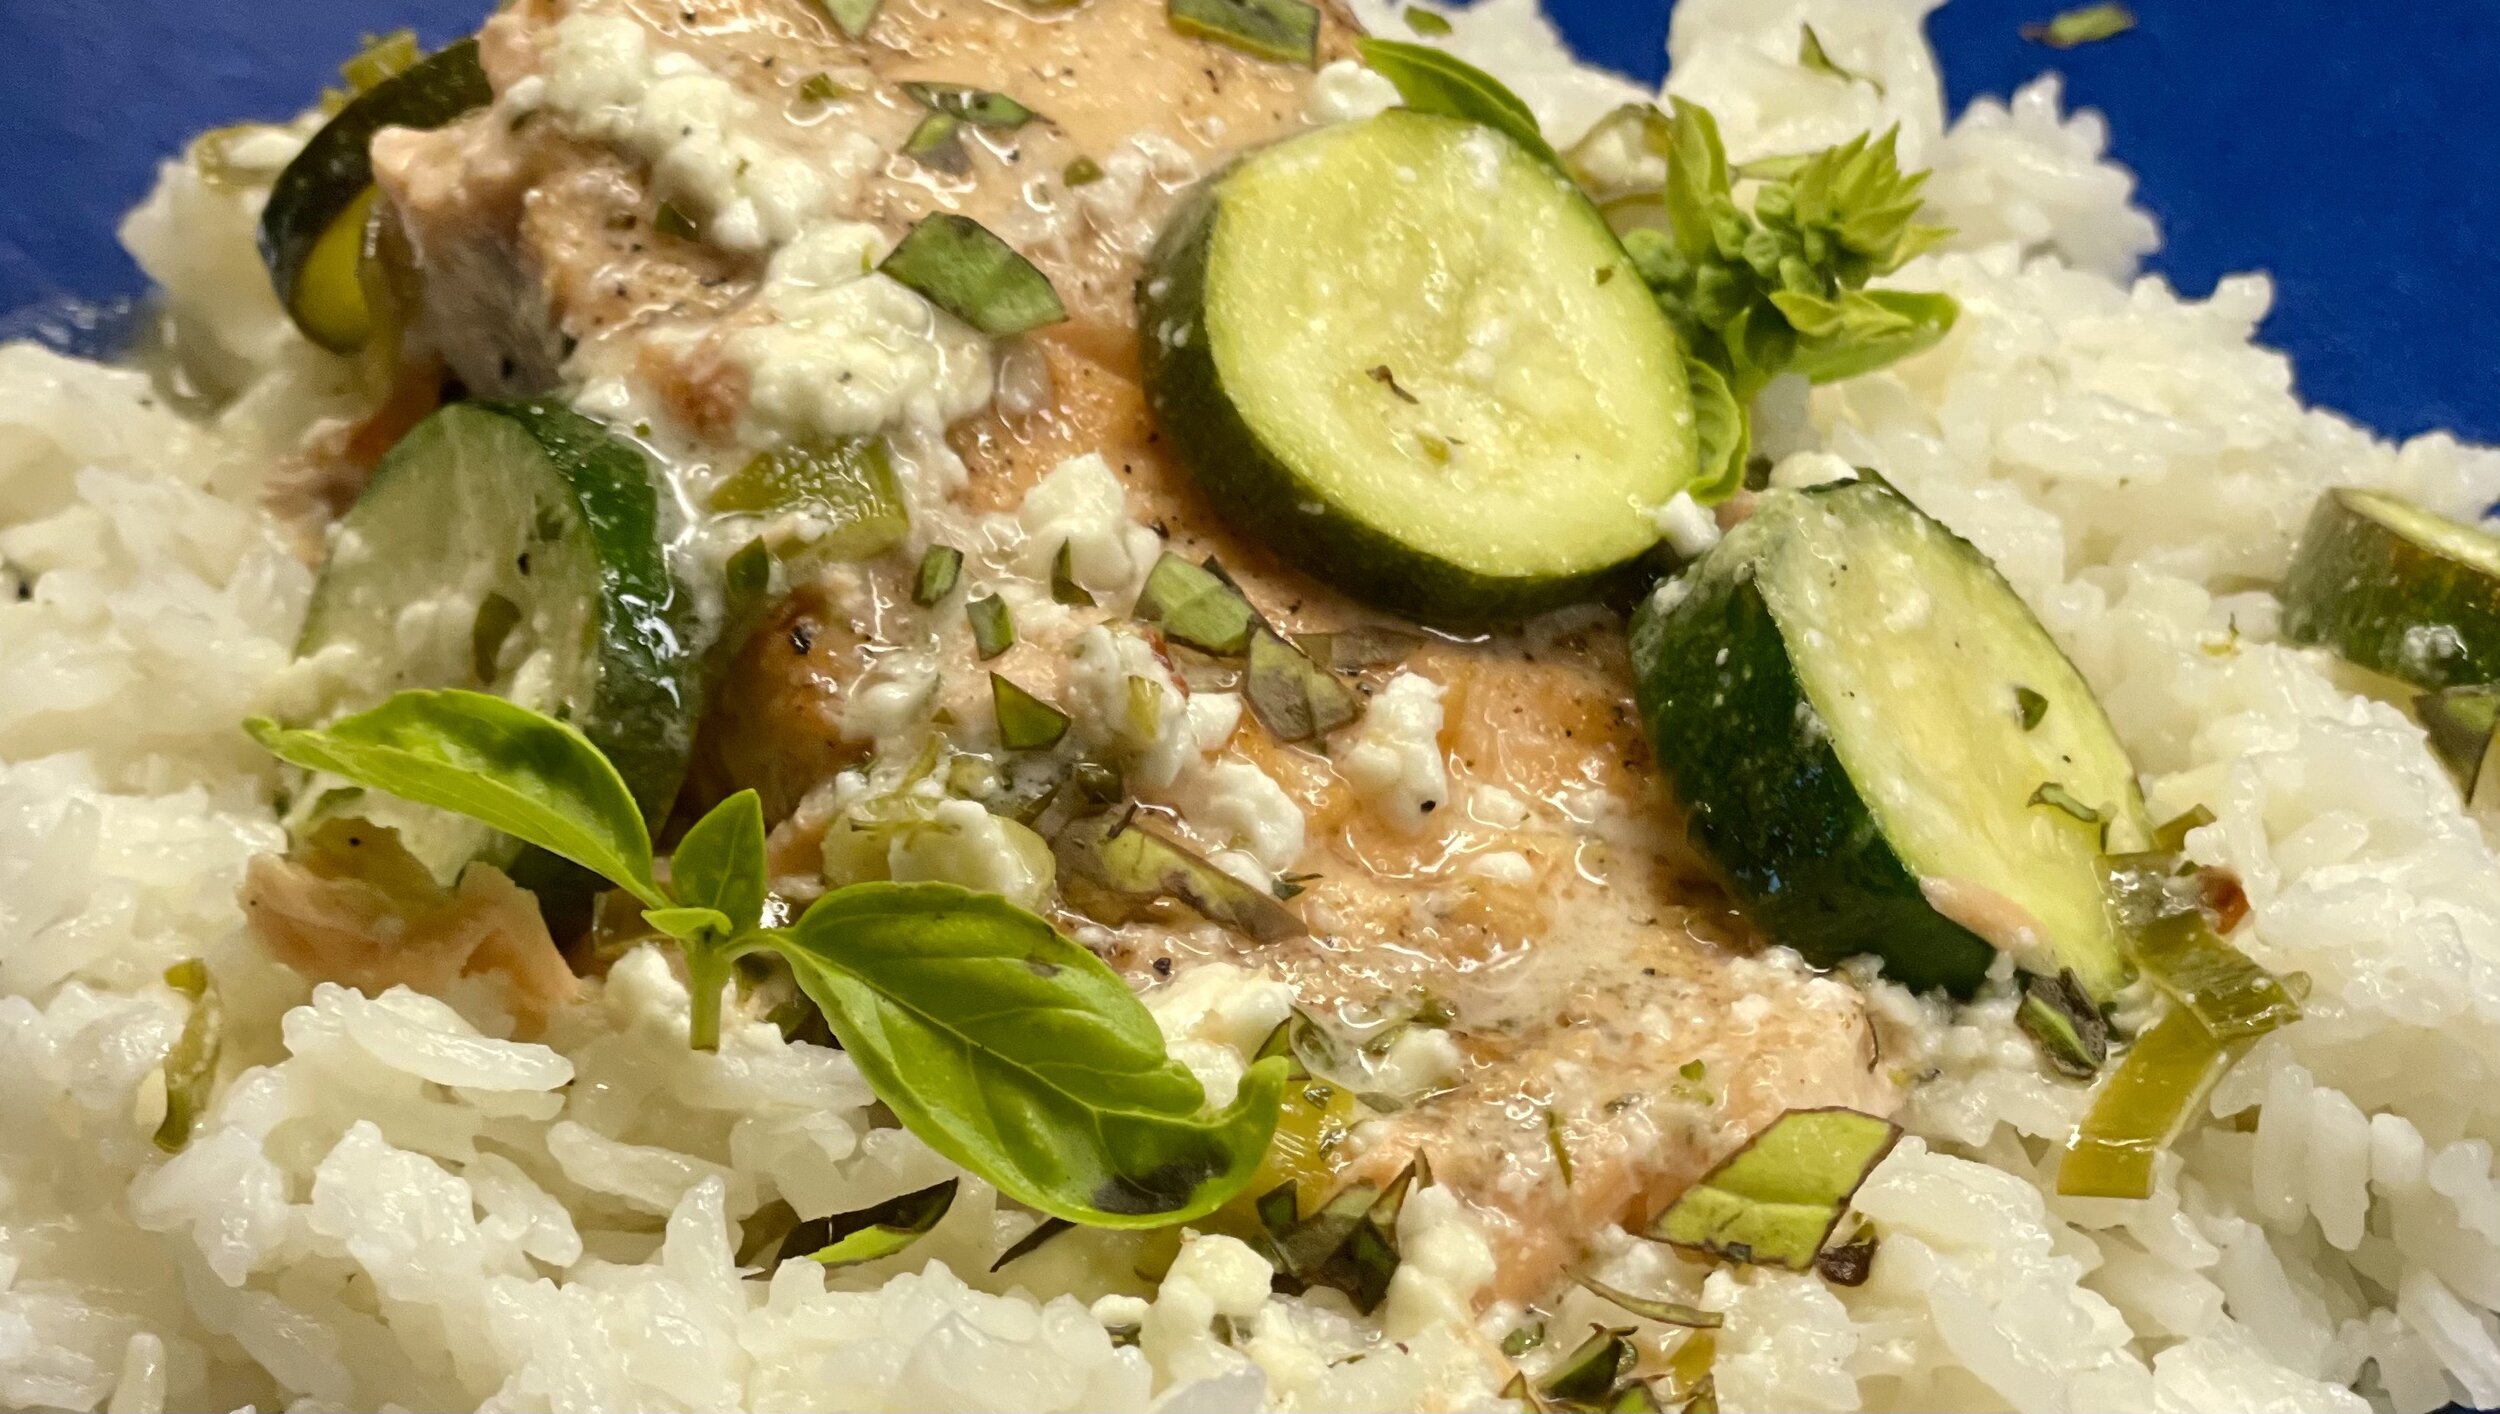
Chicken Piccata and Lemon Rice (low FODMAP)
15 Minutes prep • 15 Minutes cool • Low FODMAP • Gluten-free • Lactose-free • Makes 1 pint • Ok to make-ahead: Steps 1 - 4
15 Minutes prep • 20 Minutes cook • Low FODMAP • Gluten-free • Serves 4 • Ok to make-ahead: Step 1
This method of preparing chicken piccata renders it extremely moist, tender, and flavorful. And, especially if you take time to salt the meat ahead of time, you will end up with a meal that is every bit as good as the restaurant versions, without all the FODMAPs! I like to serve this over lemon rice so all that amazing buttery lemon sauce has somewhere to go and you won’t miss it!
Ingredients: Chicken
2 large skinless, boneless chicken breasts
½ cup gluten-free all-purpose flour* (I used King Arthur Measure for Measure)
3 tablespoons garlic-infused olive oil, divided
1/3 cup dry white wine
1 tablespoon drained capers, coarsely chopped
4 tablespoons unsalted butter, cut into pieces
2 tablespoons fresh lemon juice
Chopped chives or parsley and lemon wedges (for serving)
Ingredients: Rice
1 cup jasmine rice*
2 tablespoons of salted butter
½ teaspoon of Kosher salt
Grated rind of one lemon
Directions
(1) Prepare chicken: Slice chicken breasts in half crosswise into 4 cutlets and lightly pound the thicker pieces between sheets of plastic wrap until all pieces are a similar thickness of about ½”. Season both sides of each breast lightly with Kosher salt. Put on a plate, covered with plastic wrap and refrigerate overnight or at least 4 hours before cooking.
Make-ahead note: This chicken is pretty quick to cook but the texture and flavor benefit from early salting. So, salt your chicken and let it sit overnight or at least for about 4 hours before you cook it.
(2) Cook the rice: Cook the rice per package instructions, adding butter and salt to the water and then stirring the lemon zest in after the rice is fully cooked.
(3) Dredge chicken: Put the flour in a shallow bowl and dredge one piece of chicken at a time, tossing to coat in the flour. Shake off excess flour, transfer to a plate, and sprinkle with fresh ground pepper.
(4) Cook the chicken: Heat a large skillet over medium-high heat. When the pan is warm, add 2 tablespoons of garlic-infused olive oil and heat. Once the oil is hot, gently slide the cutlets into the pan and cook, without moving, until deeply browned on the pan side, which should take about 2 minutes. Turn them over and cook on the other side just until chicken is nearly cooked through, which should only take about 30 seconds. Transfer to a clean plate.
(5) Make the lemon butter sauce: Add the remaining 1 tablespoon of garlic-infused olive oil to the skillet and heat. Then add wine and capers to the hot oil and cook, swirling pan and scraping up any bits stuck to the bottom of the skillet, until the liquid is almost completely evaporated, about 3 minutes. Add ½ cup water, and then add the butter swirling the pan vigorously while the butter melts to help it blend with the water, about 1 minute.
(6) Finish: Return the chicken to the skillet and simmer in the sauce until the chicken is cooked through and sauce is thick enough to coat a spoon, about 2 minutes. Remove from the heat and stir in the lemon juice. Taste the sauce and season with salt if needed.
(7) Plate and serve: Plate the chicken and sauce on a bed of the lemon rice and top with chopped chives or parsley, more sauce, and with lemon wedges alongside.
Eat and enjoy every bite—because you can!
*This post may contain links for you to easily purchase items listed on the page. In some cases, we have provided a special discount code for IBS Game Changers so be sure to use it when you purchase an item to get the discount that has been arranged just for you! As an Amazon Associate, I earn a commission from qualifying Amazon purchases.
More Deliciously Low FODMAP™ main course recipes you might enjoy


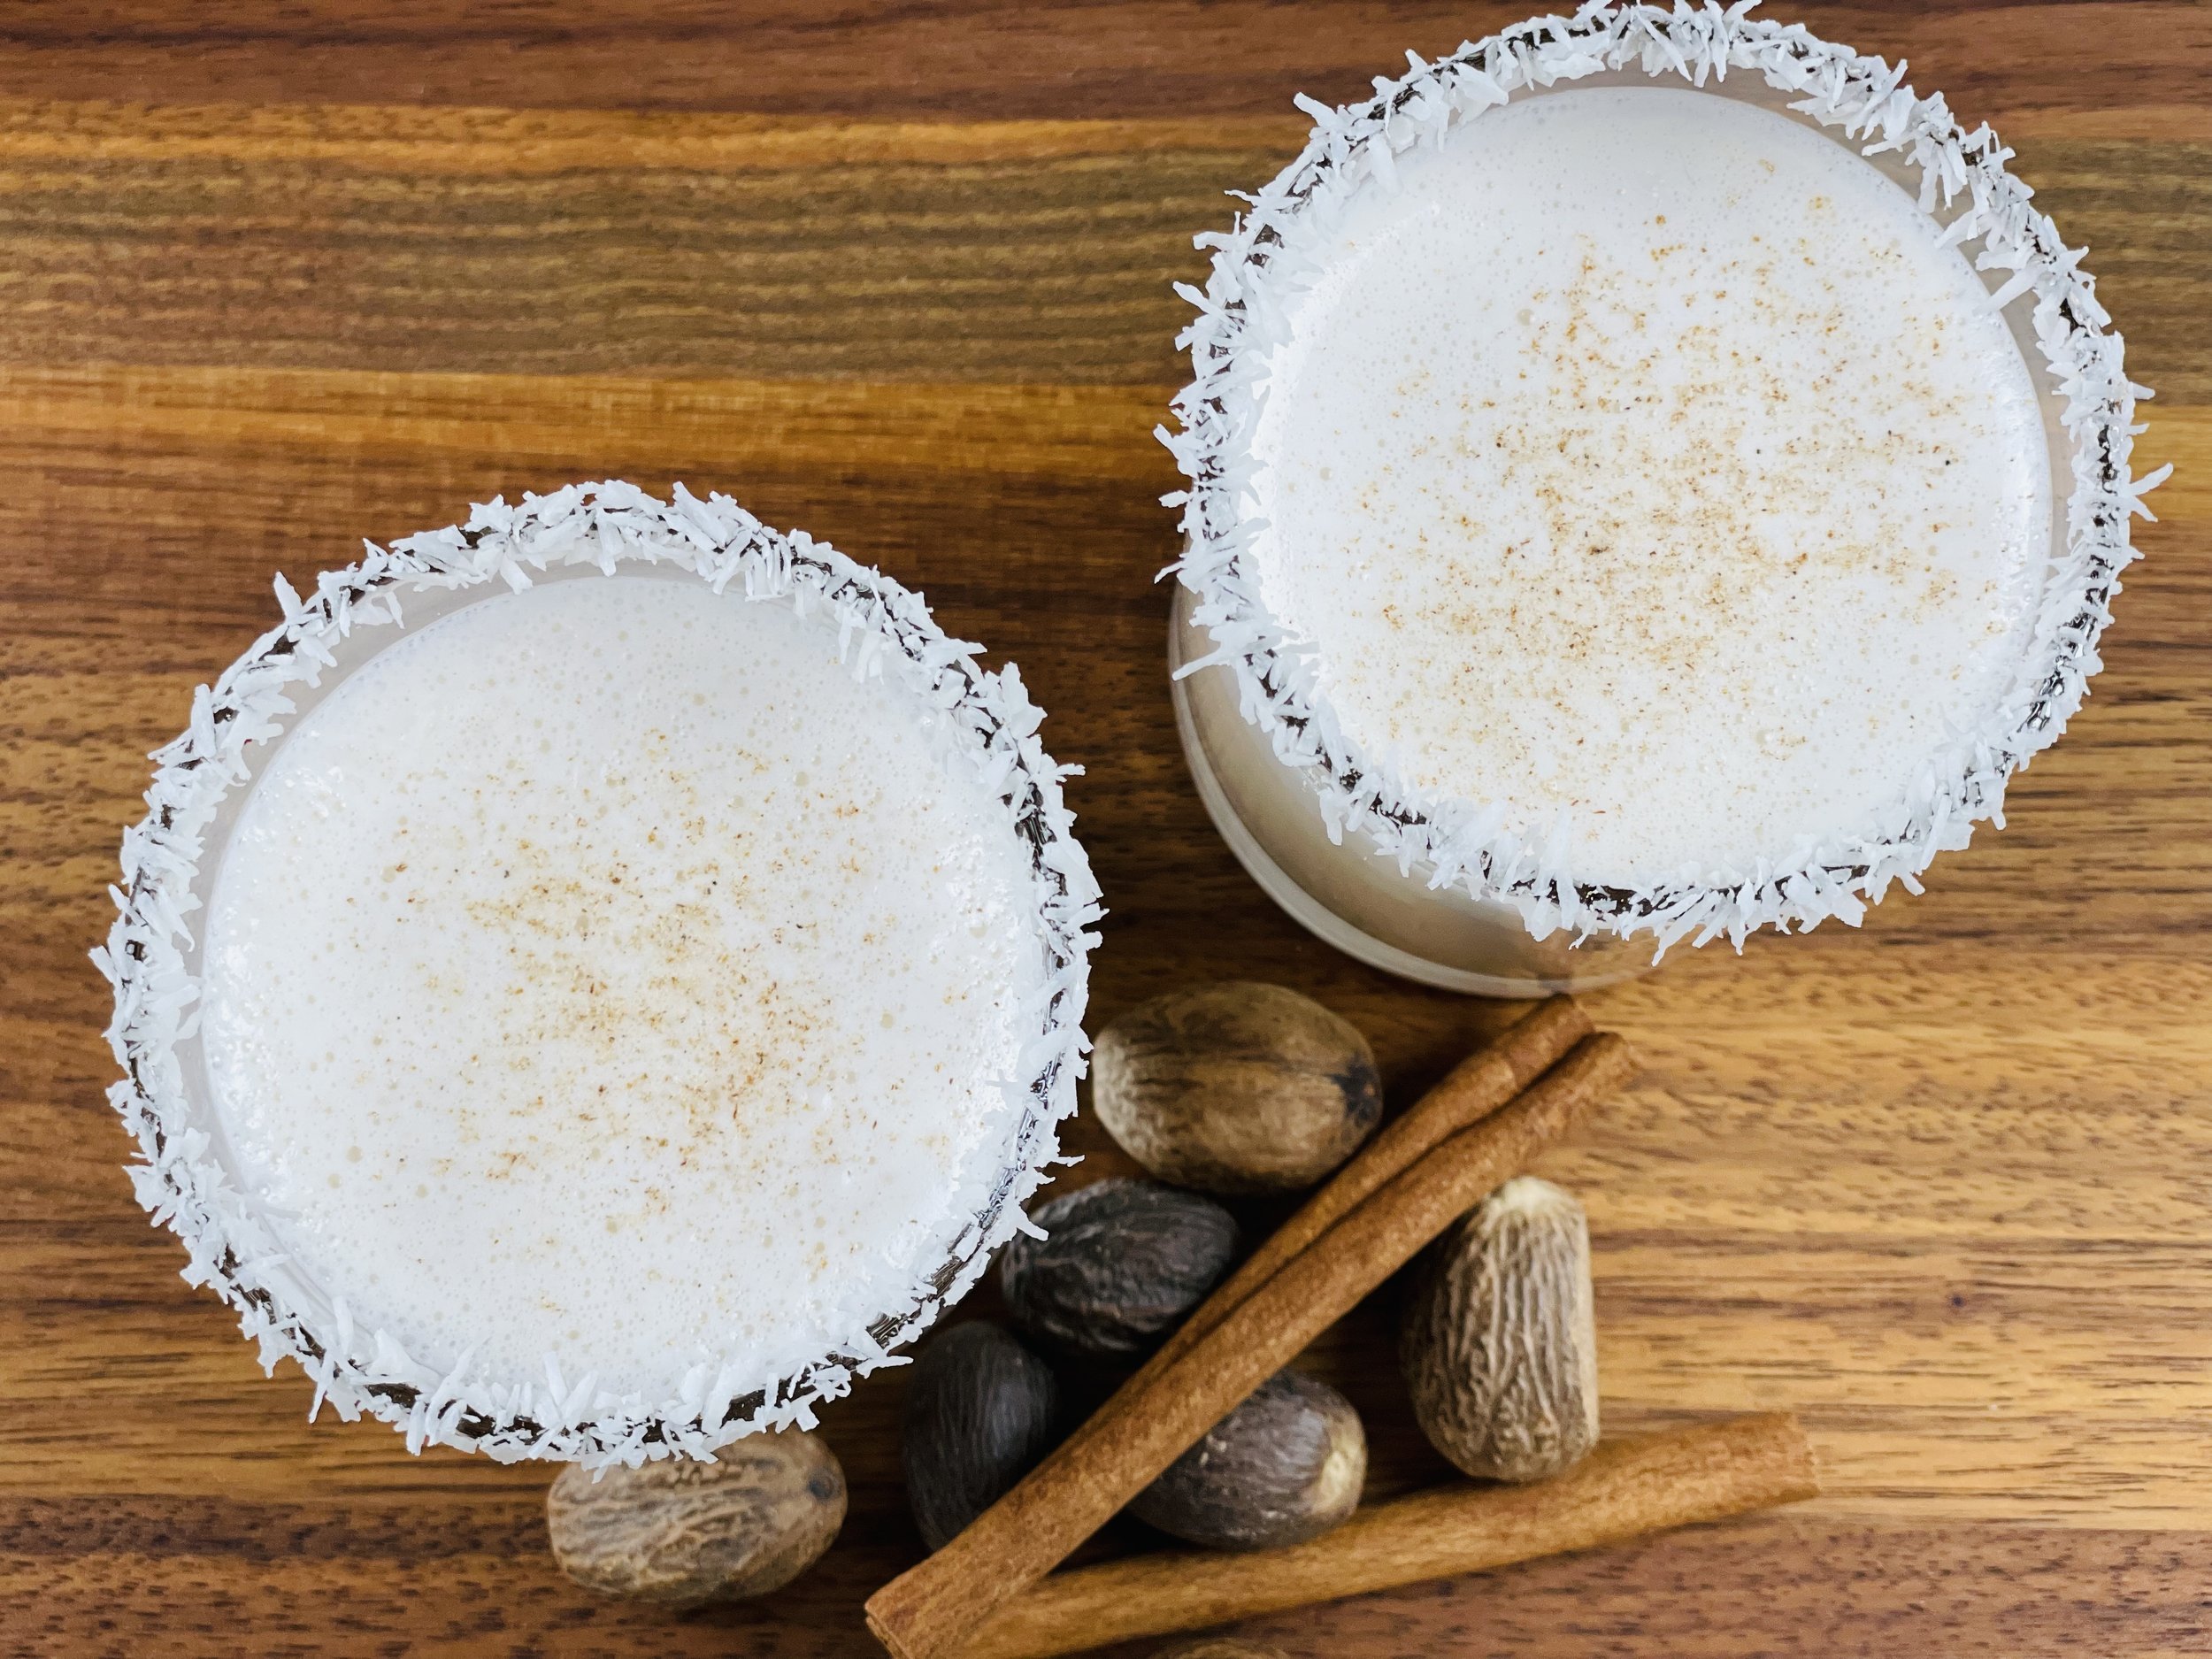
Irish Cream Cocktail (low FODMAP)
15 Minutes prep • 15 Minutes cool • Low FODMAP • Gluten-free • Lactose-free • Makes 1 pint
15 Minutes prep • 15 Minutes cool • Low FODMAP • Gluten-free • Lactose-free • Makes 1 pint • Ok to make-ahead: Steps 1 - 4
I was traveling (and eating!) in Mexico recently and at Yves’ Restaurant Bar in Ajijic, we were served a small glass of homemade Bailey’s Irish Cream after our meal. It was so refreshing and delicious, I was determined to come up with a low FODMAP version. I’m happy to say, I succeeded! This recipe captures the delicious essence of Baileys Irish Cream without the FODMAPs (caffeine, lactose, and high fructose corn syrup!) so you can enjoy it without consequences. With a little advance prep, it’s quick and easy to make and you can have it on-hand for your friends, family, and guests, to enjoy a small glass of this on the rocks after dinner. It might not take you back to Yves’ Restaurant Bar, but you will enjoy it all the same!
Ingredients
3/4 cup lactose-free unsweetened condensed milk (you can substitute additional lactose-free half and half)
1/2 cup superfine sugar (you can substitute regular white sugar instead, but don’t use confectioner’s sugar)
1/2 cup heavy cream or lactose-free half and half
1 1/2 tablespoons chocolate syrup (recipe below or you can buy low FODMAP chocolate syrup)
1/2 teaspoon instant decaf coffee granules (I used Starbucks Via Decaf Italian Roast)
1/2 teaspoon pure vanilla extract
1/2 cup Irish whiskey (I used Jameson triple casked)
Directions
(1) Make the sweetened milk: Place the condensed milk (or half and half), and sugar in a saucepan and bring to a simmer over medium heat. Cook, stirring very frequently, for a minute or two until the sugar is dissolved. Remove from heat and let cool.
(2) Make the chocolate syrup: Our recipe is below. Let cool.
(3) Combine the ingredients: To the cooled milk or cream, add the additional ½ cup of cream or half and half, instant coffee granules, chocolate syrup, and vanilla, and whisk to combine.
(4) Add the whiskey: Add the whiskey and whisk for about a few more seconds to blend.
(5) Serve: Serve in small glasses over ice.
Pro tip: Because this keeps well in the fridge, if you want to make more at one time, simply double (or triple!) the recipe.
Make-ahead note: At this point, you may transfer the homemade Irish cream into sterilized (in the dishwasher is fine) glass bottles with tight-fitting lids and store them in the refrigerator for up to 2 months. Shake well before serving.
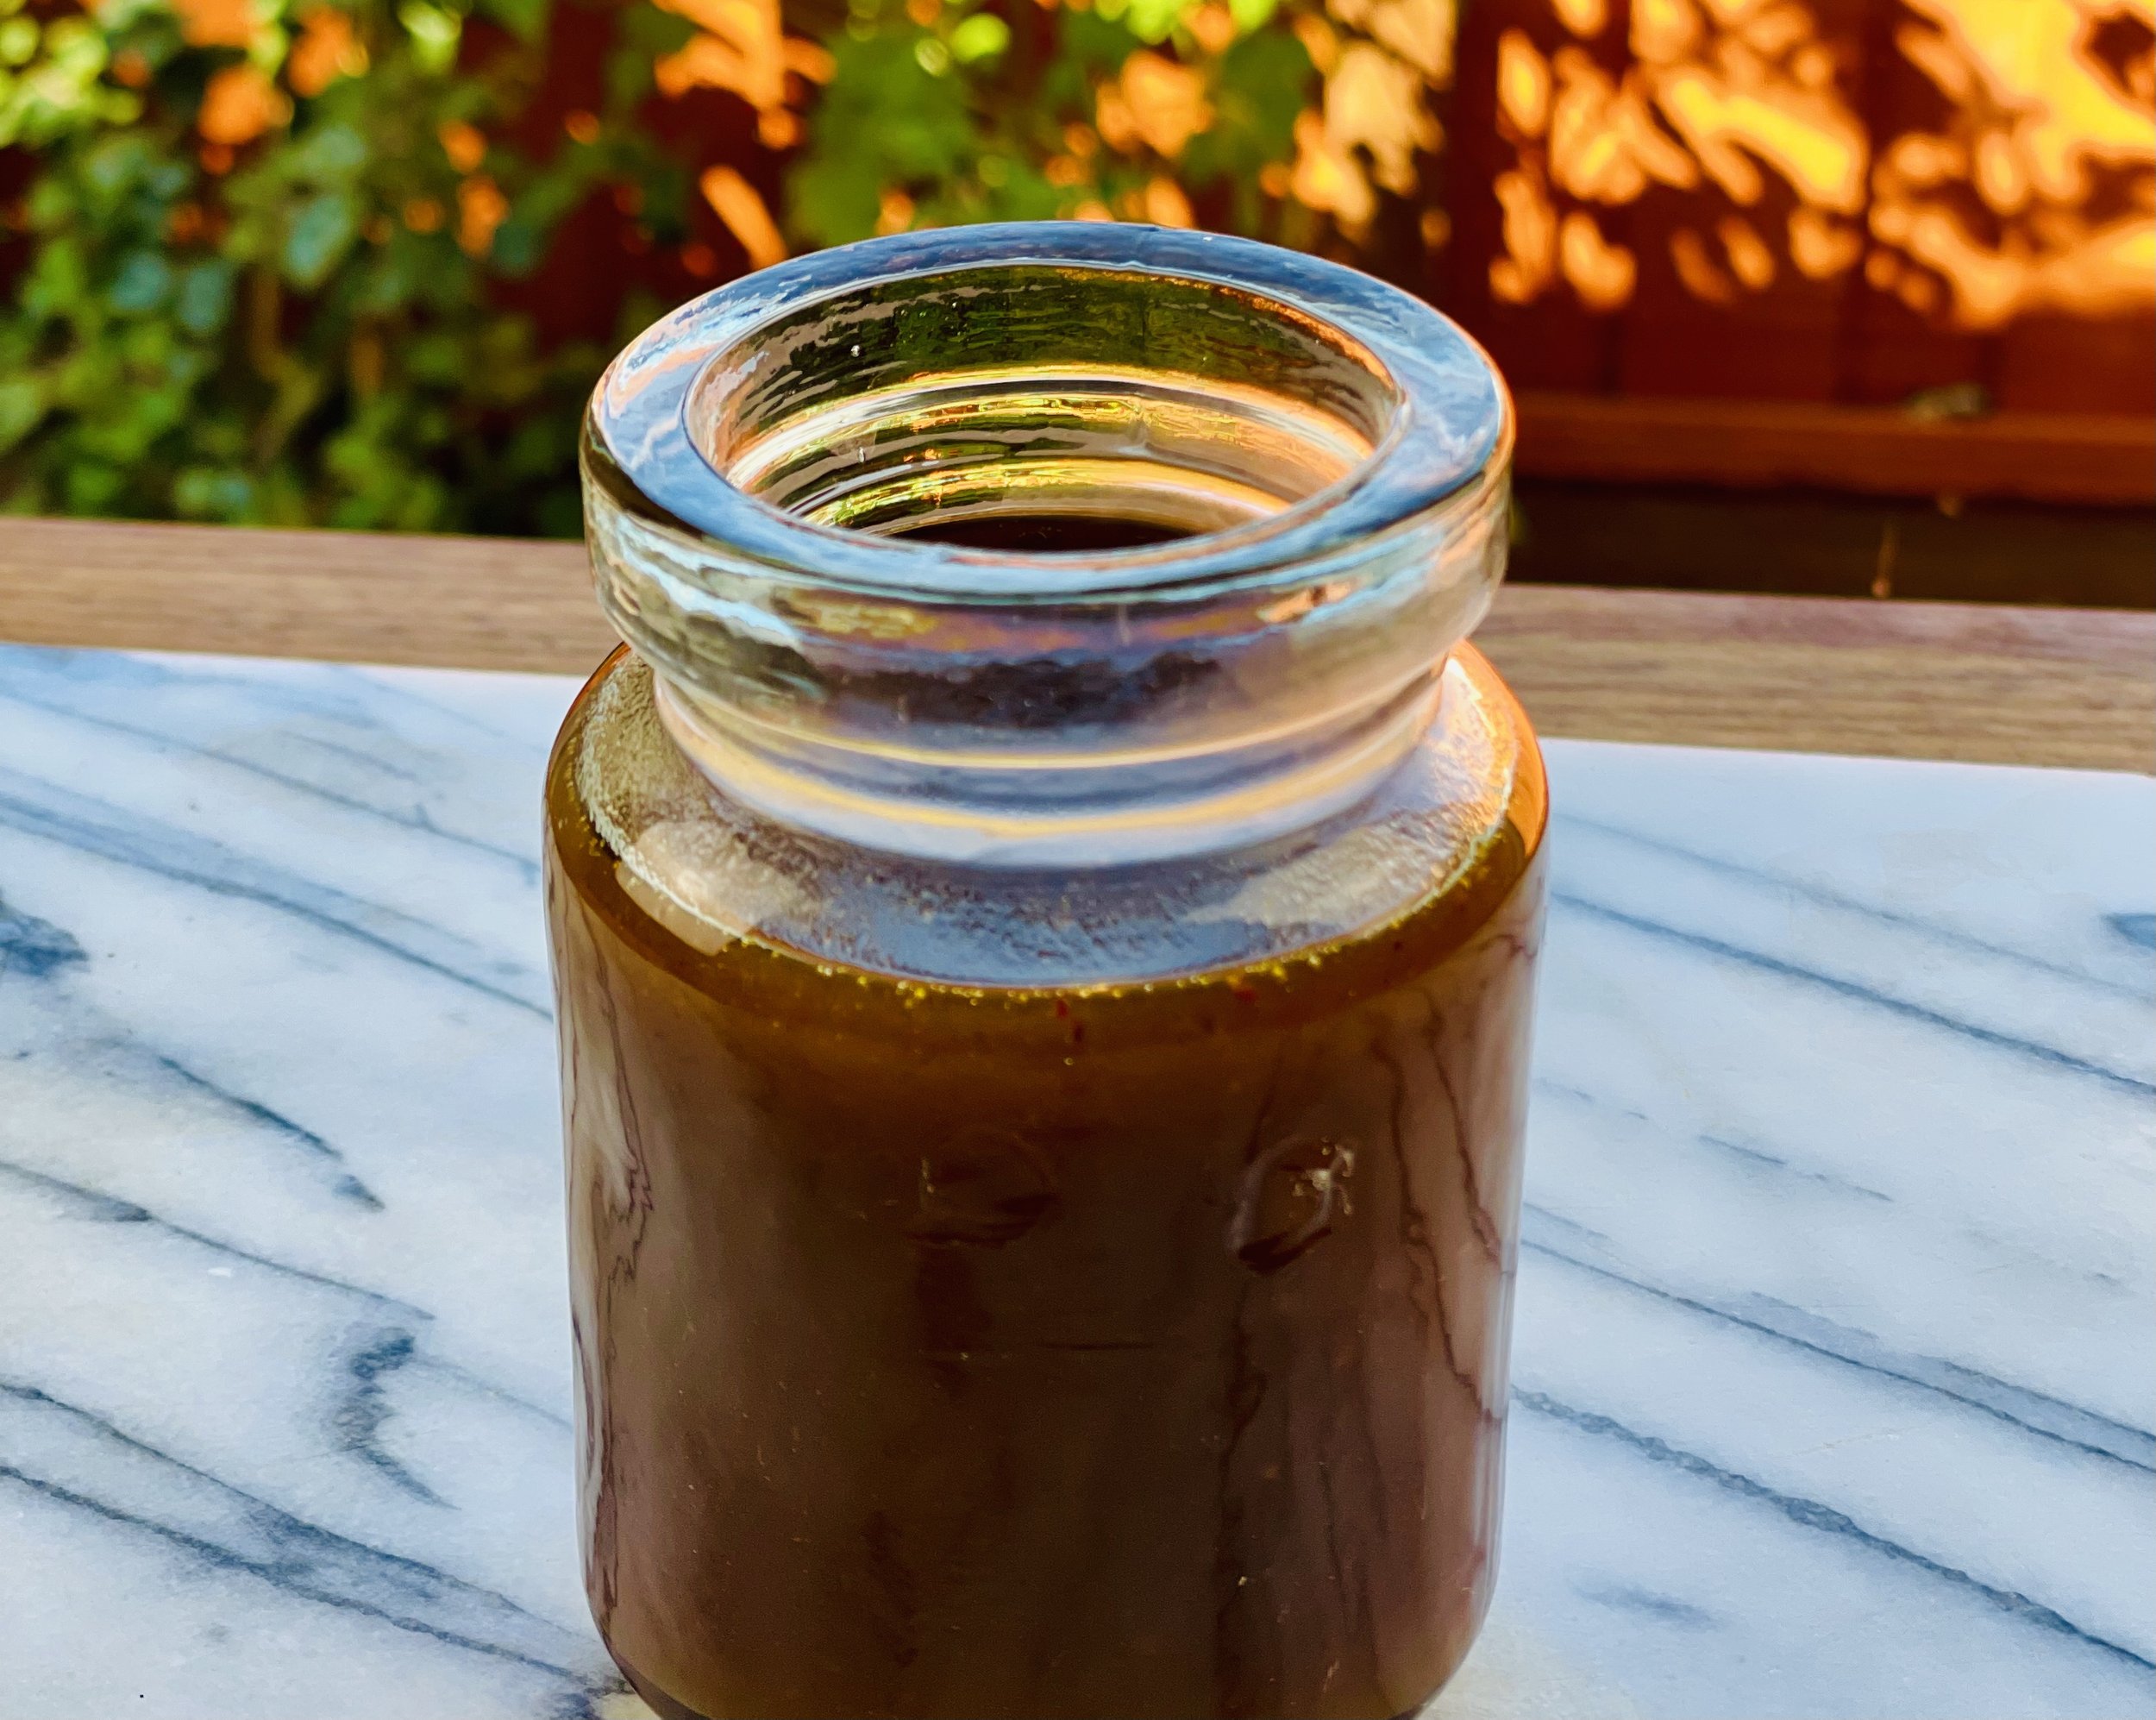
Homemade Chocolate Syrup
This recipe makes 7 ounces of chocolate sauce that may be stored in the fridge for up to 2 weeks. It’s perfect to top ice cream, make chocolate milk, or as a key ingredient in our homemade Bailey’s Irish Cream.
Ingredients
1/4 cup unsweetened cocoa powder
1/2 cup sugar or superfine sugar
Pinch kosher salt
1/4 cup cold water
3/4 teaspoon vanilla
Directions
(1) Combine the ingredients: In a cold saucepan, whisk together the cocoa and the sugar until all lumps are removed. Add the salt and the water and bring to a boil over medium to medium-high heat.
(2) Cook and cool: Reduce to a simmer, stirring constantly. Simmer for about 30 seconds and then remove from heat. Let cool and then add vanilla. Pour into a glass jar and refrigerate until needed. The chocolate sauce will thicken quite a bit as it cools.
(3) Store: This chocolate syrup may be stored in the refrigerator for up to two weeks. Simply heat it for a few seconds in the microwave to make it pourable again before serving.
*This post may contain links for you to easily purchase items listed on the page. In some cases, we have provided a special discount code for IBS Game Changers so be sure to use it when you purchase an item to get the discount that has been arranged just for you! As an Amazon Associate, I earn a commission from qualifying Amazon purchases.
More Deliciously Low FODMAP™ cocktail recipes you might enjoy


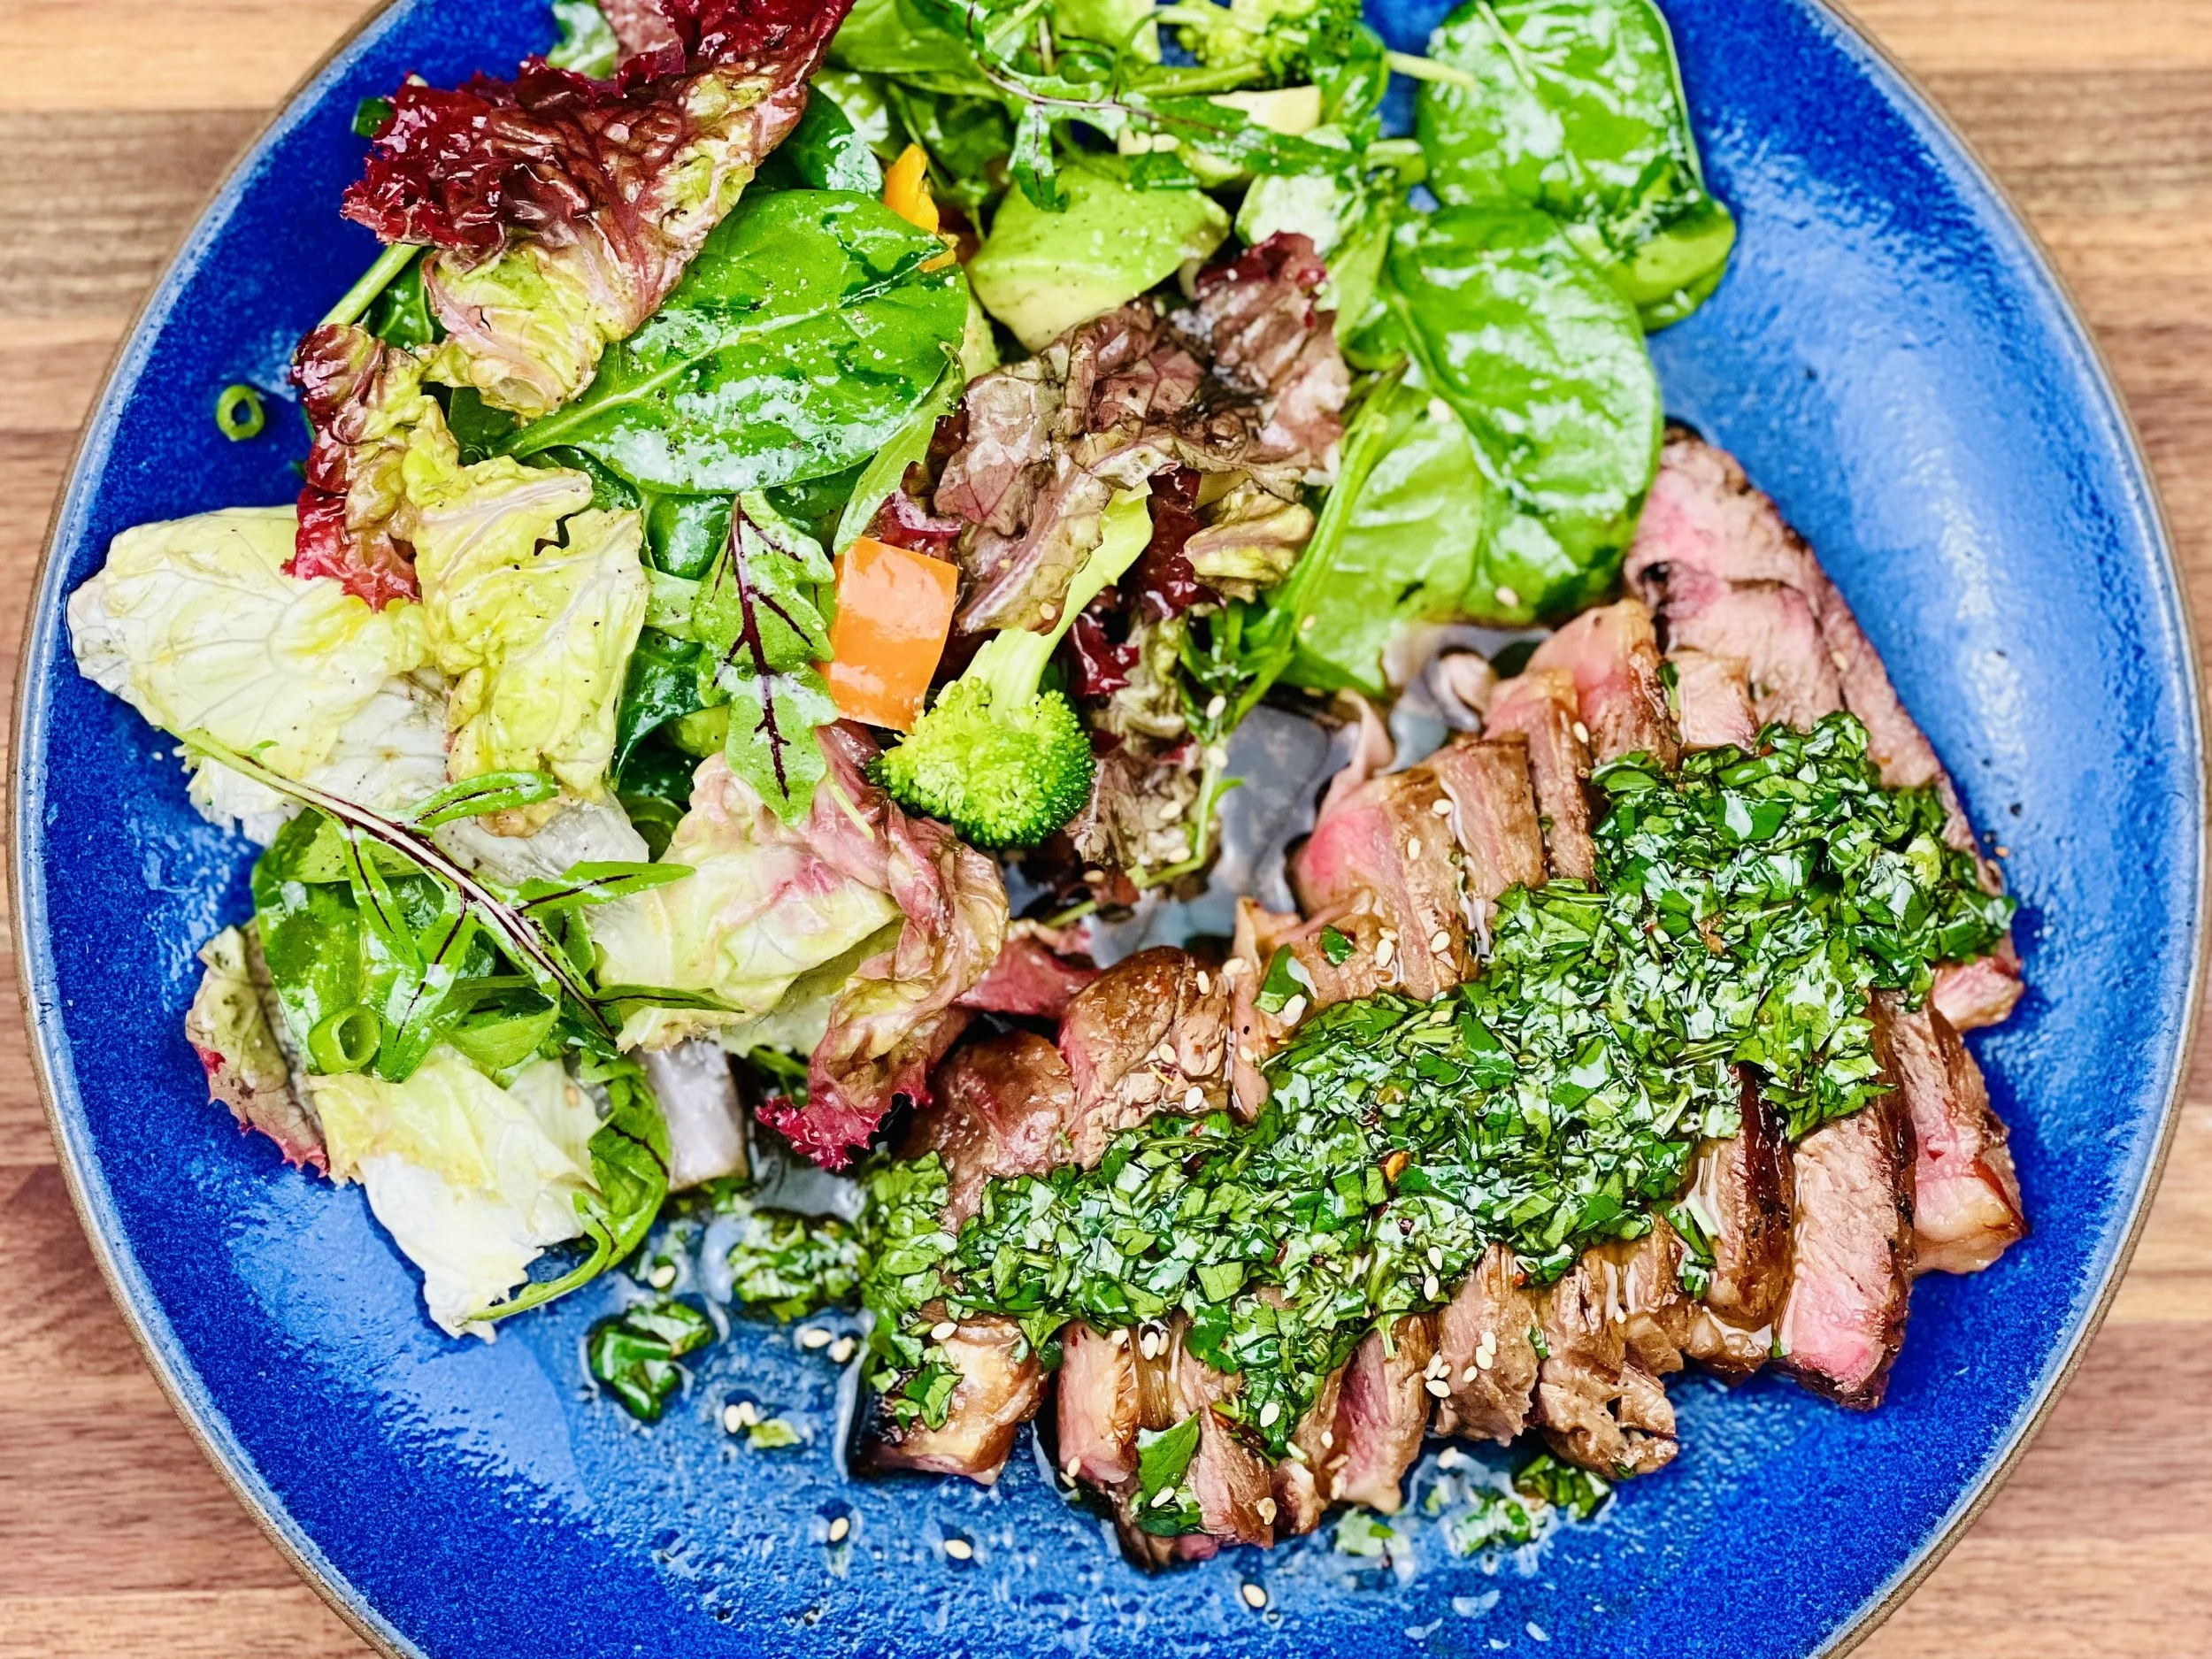
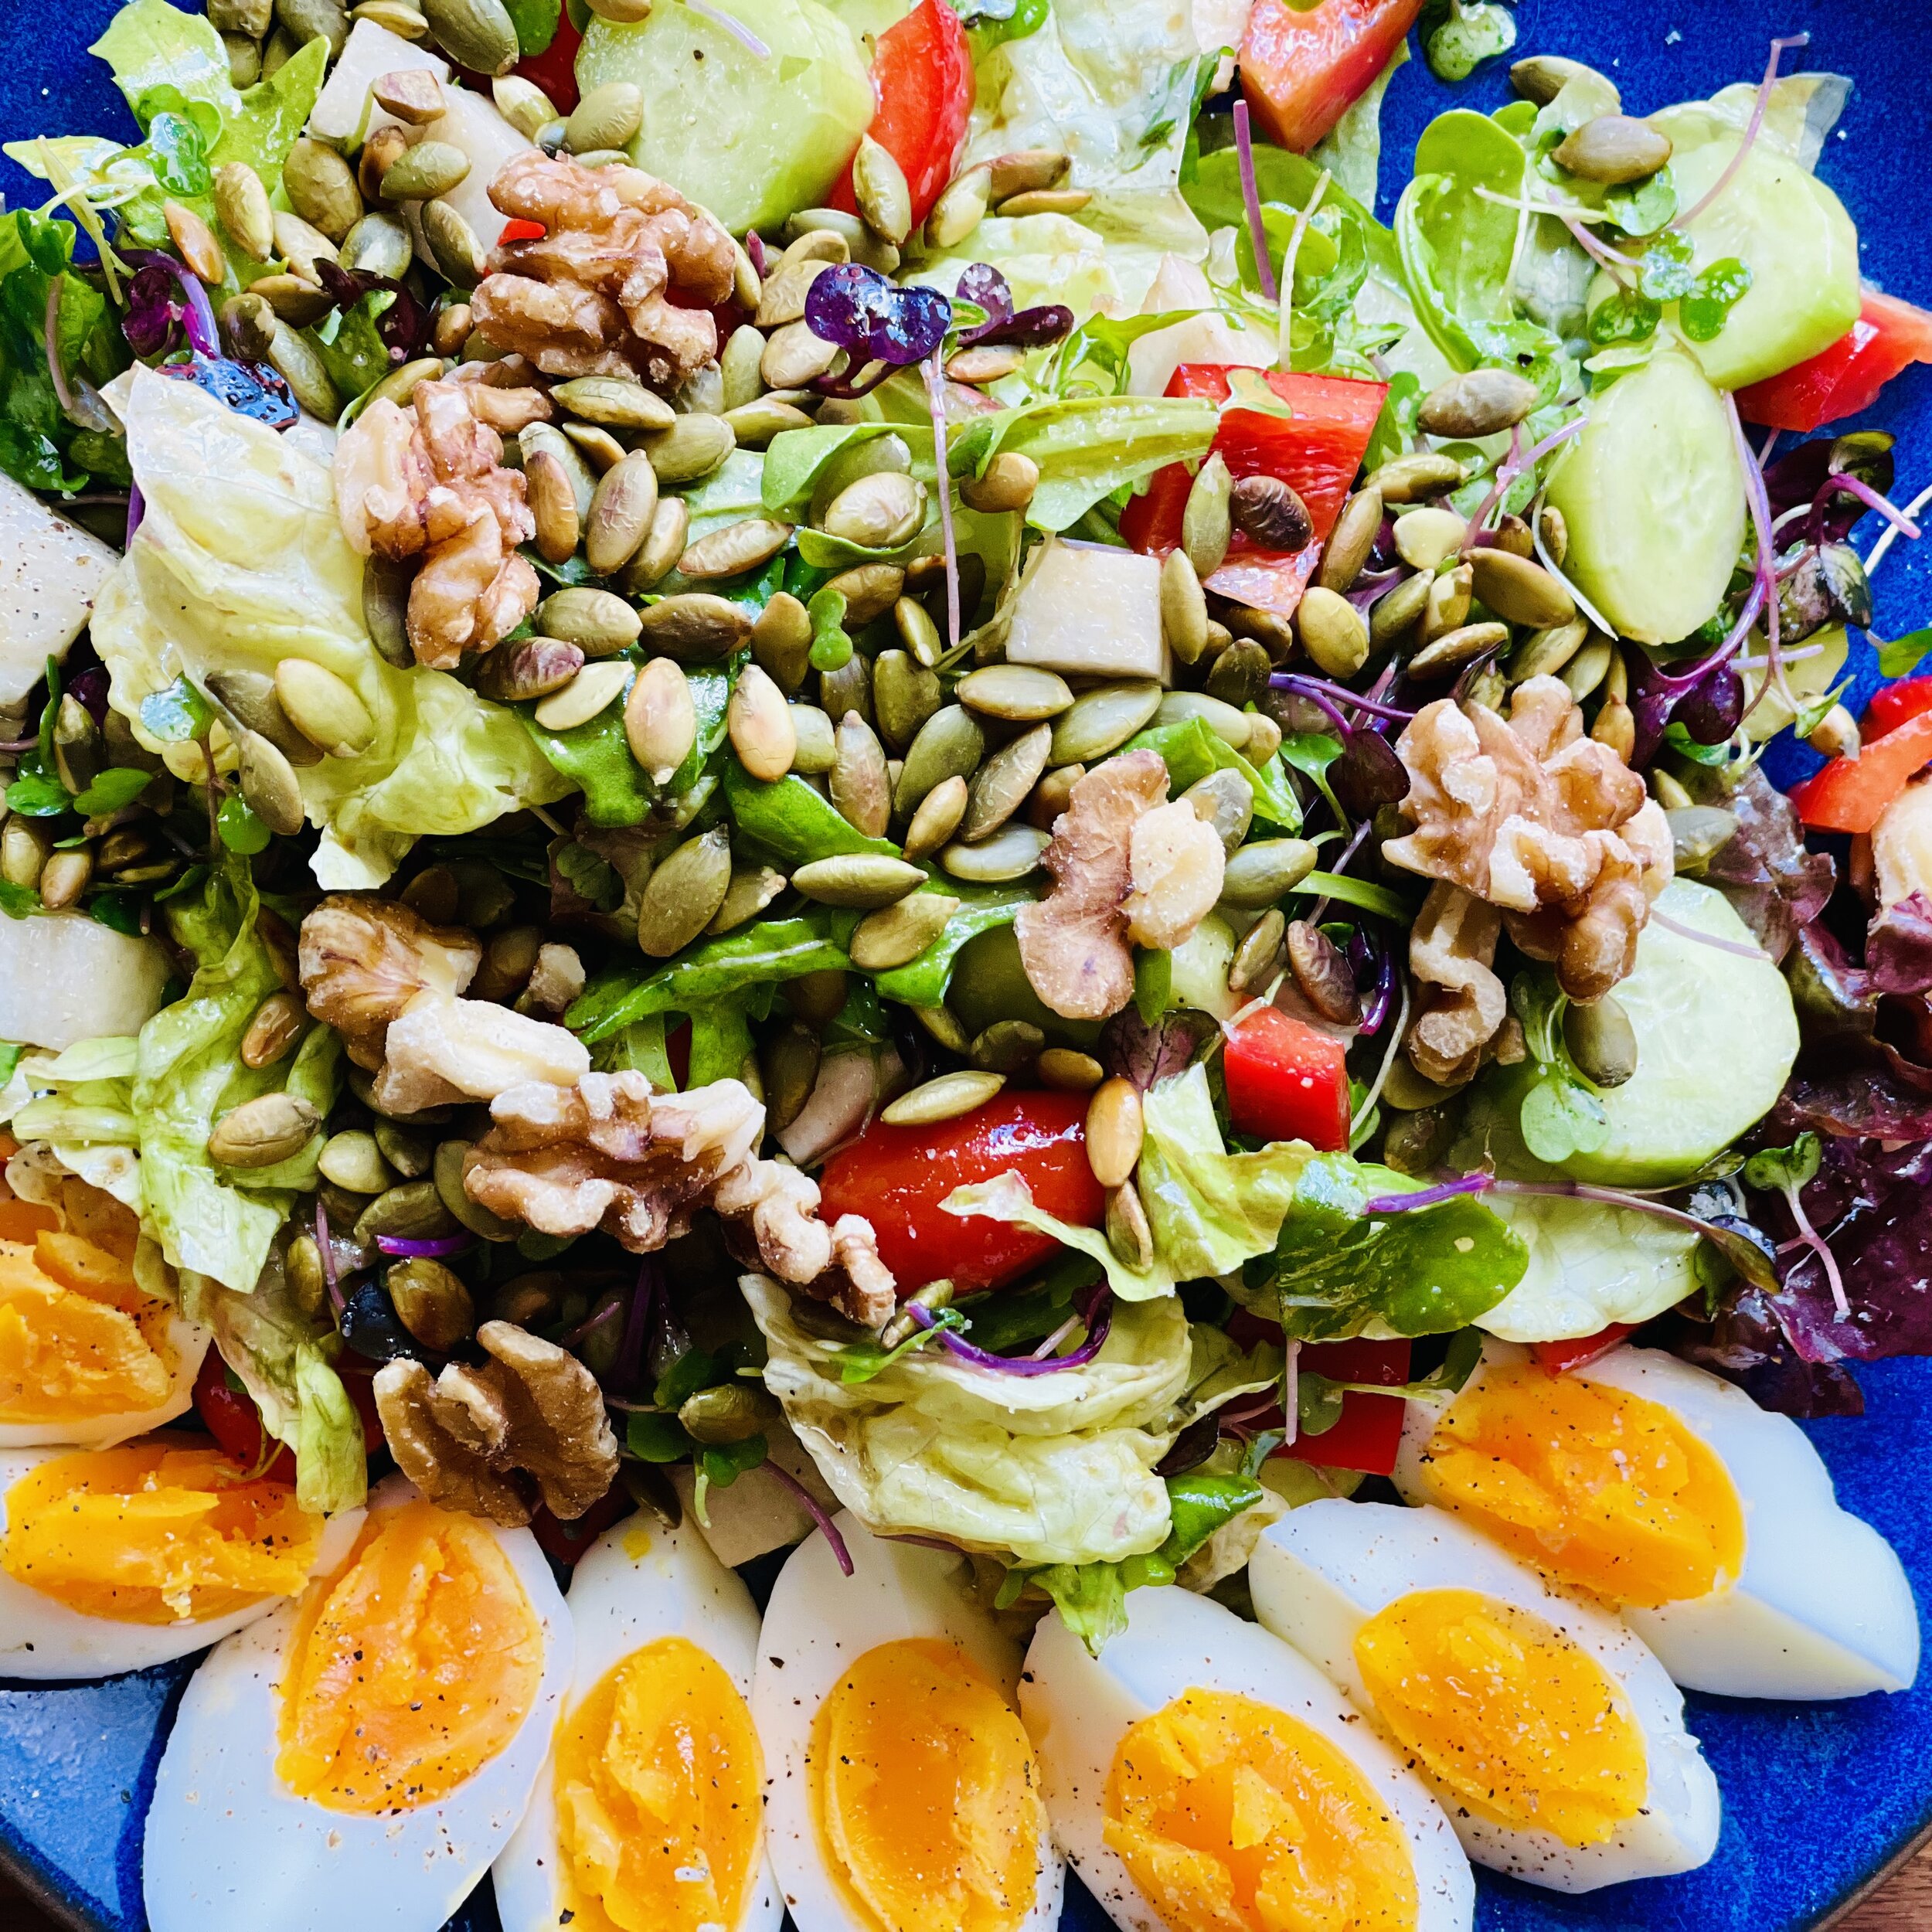
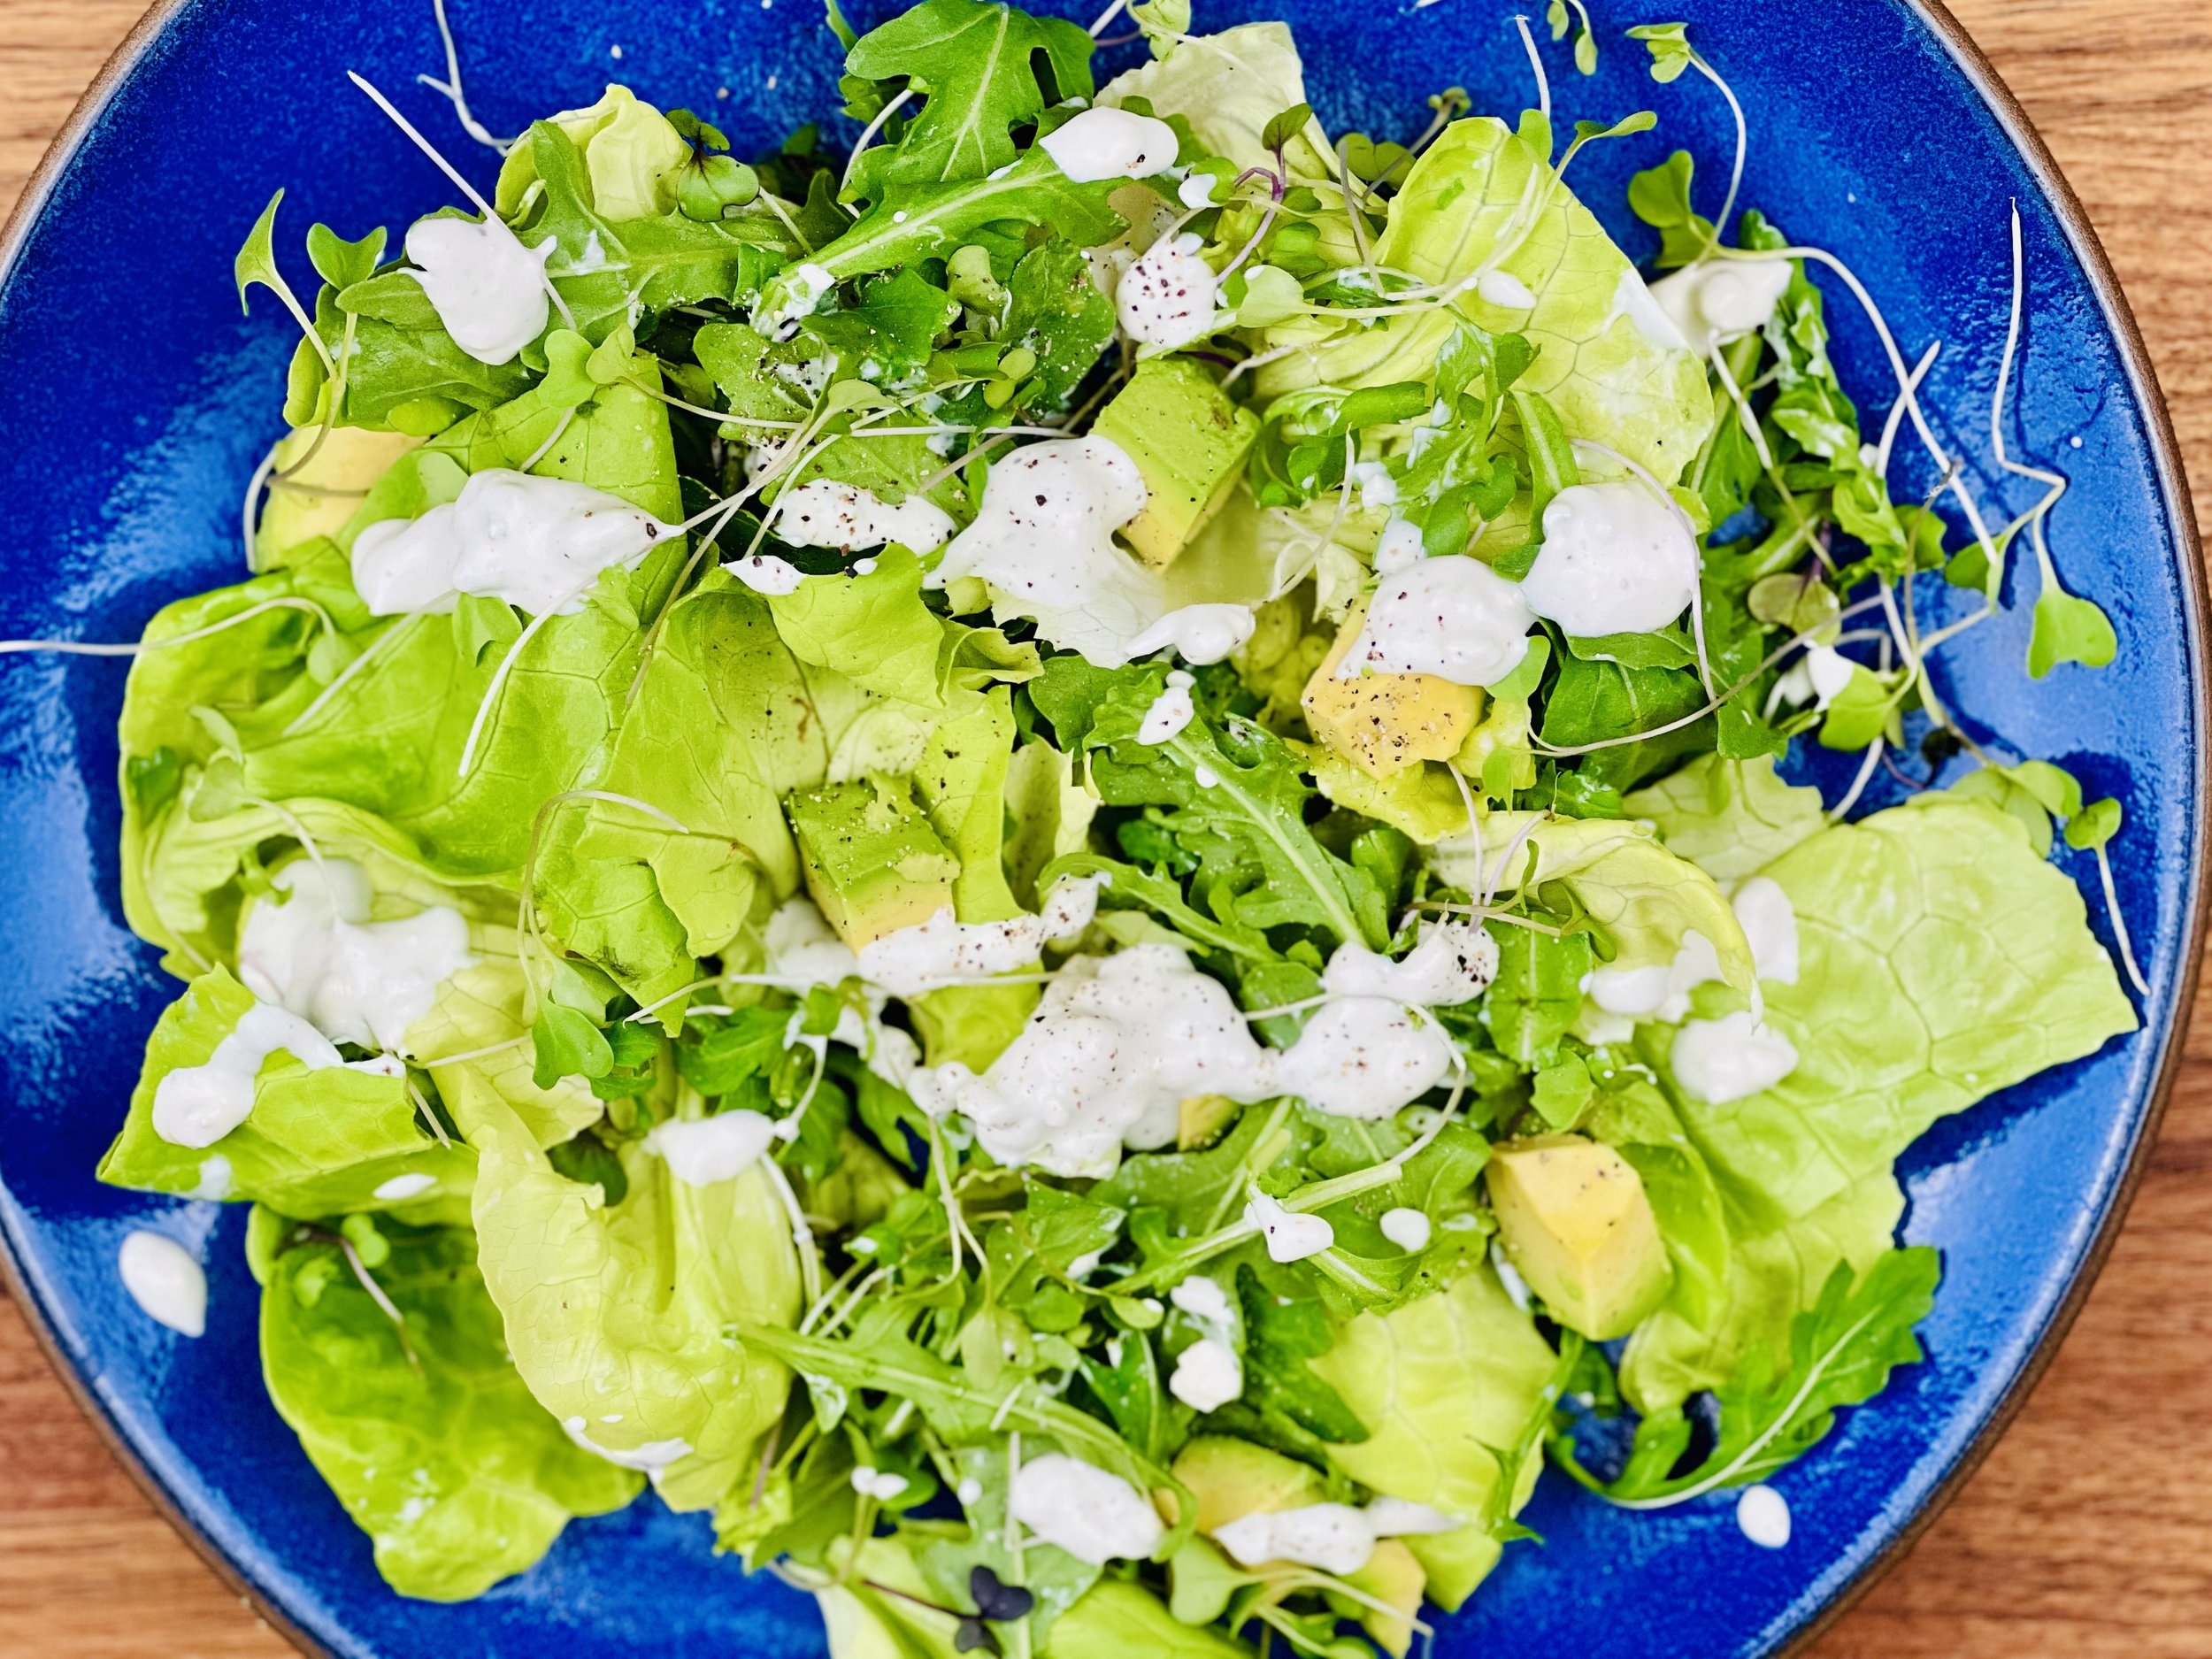
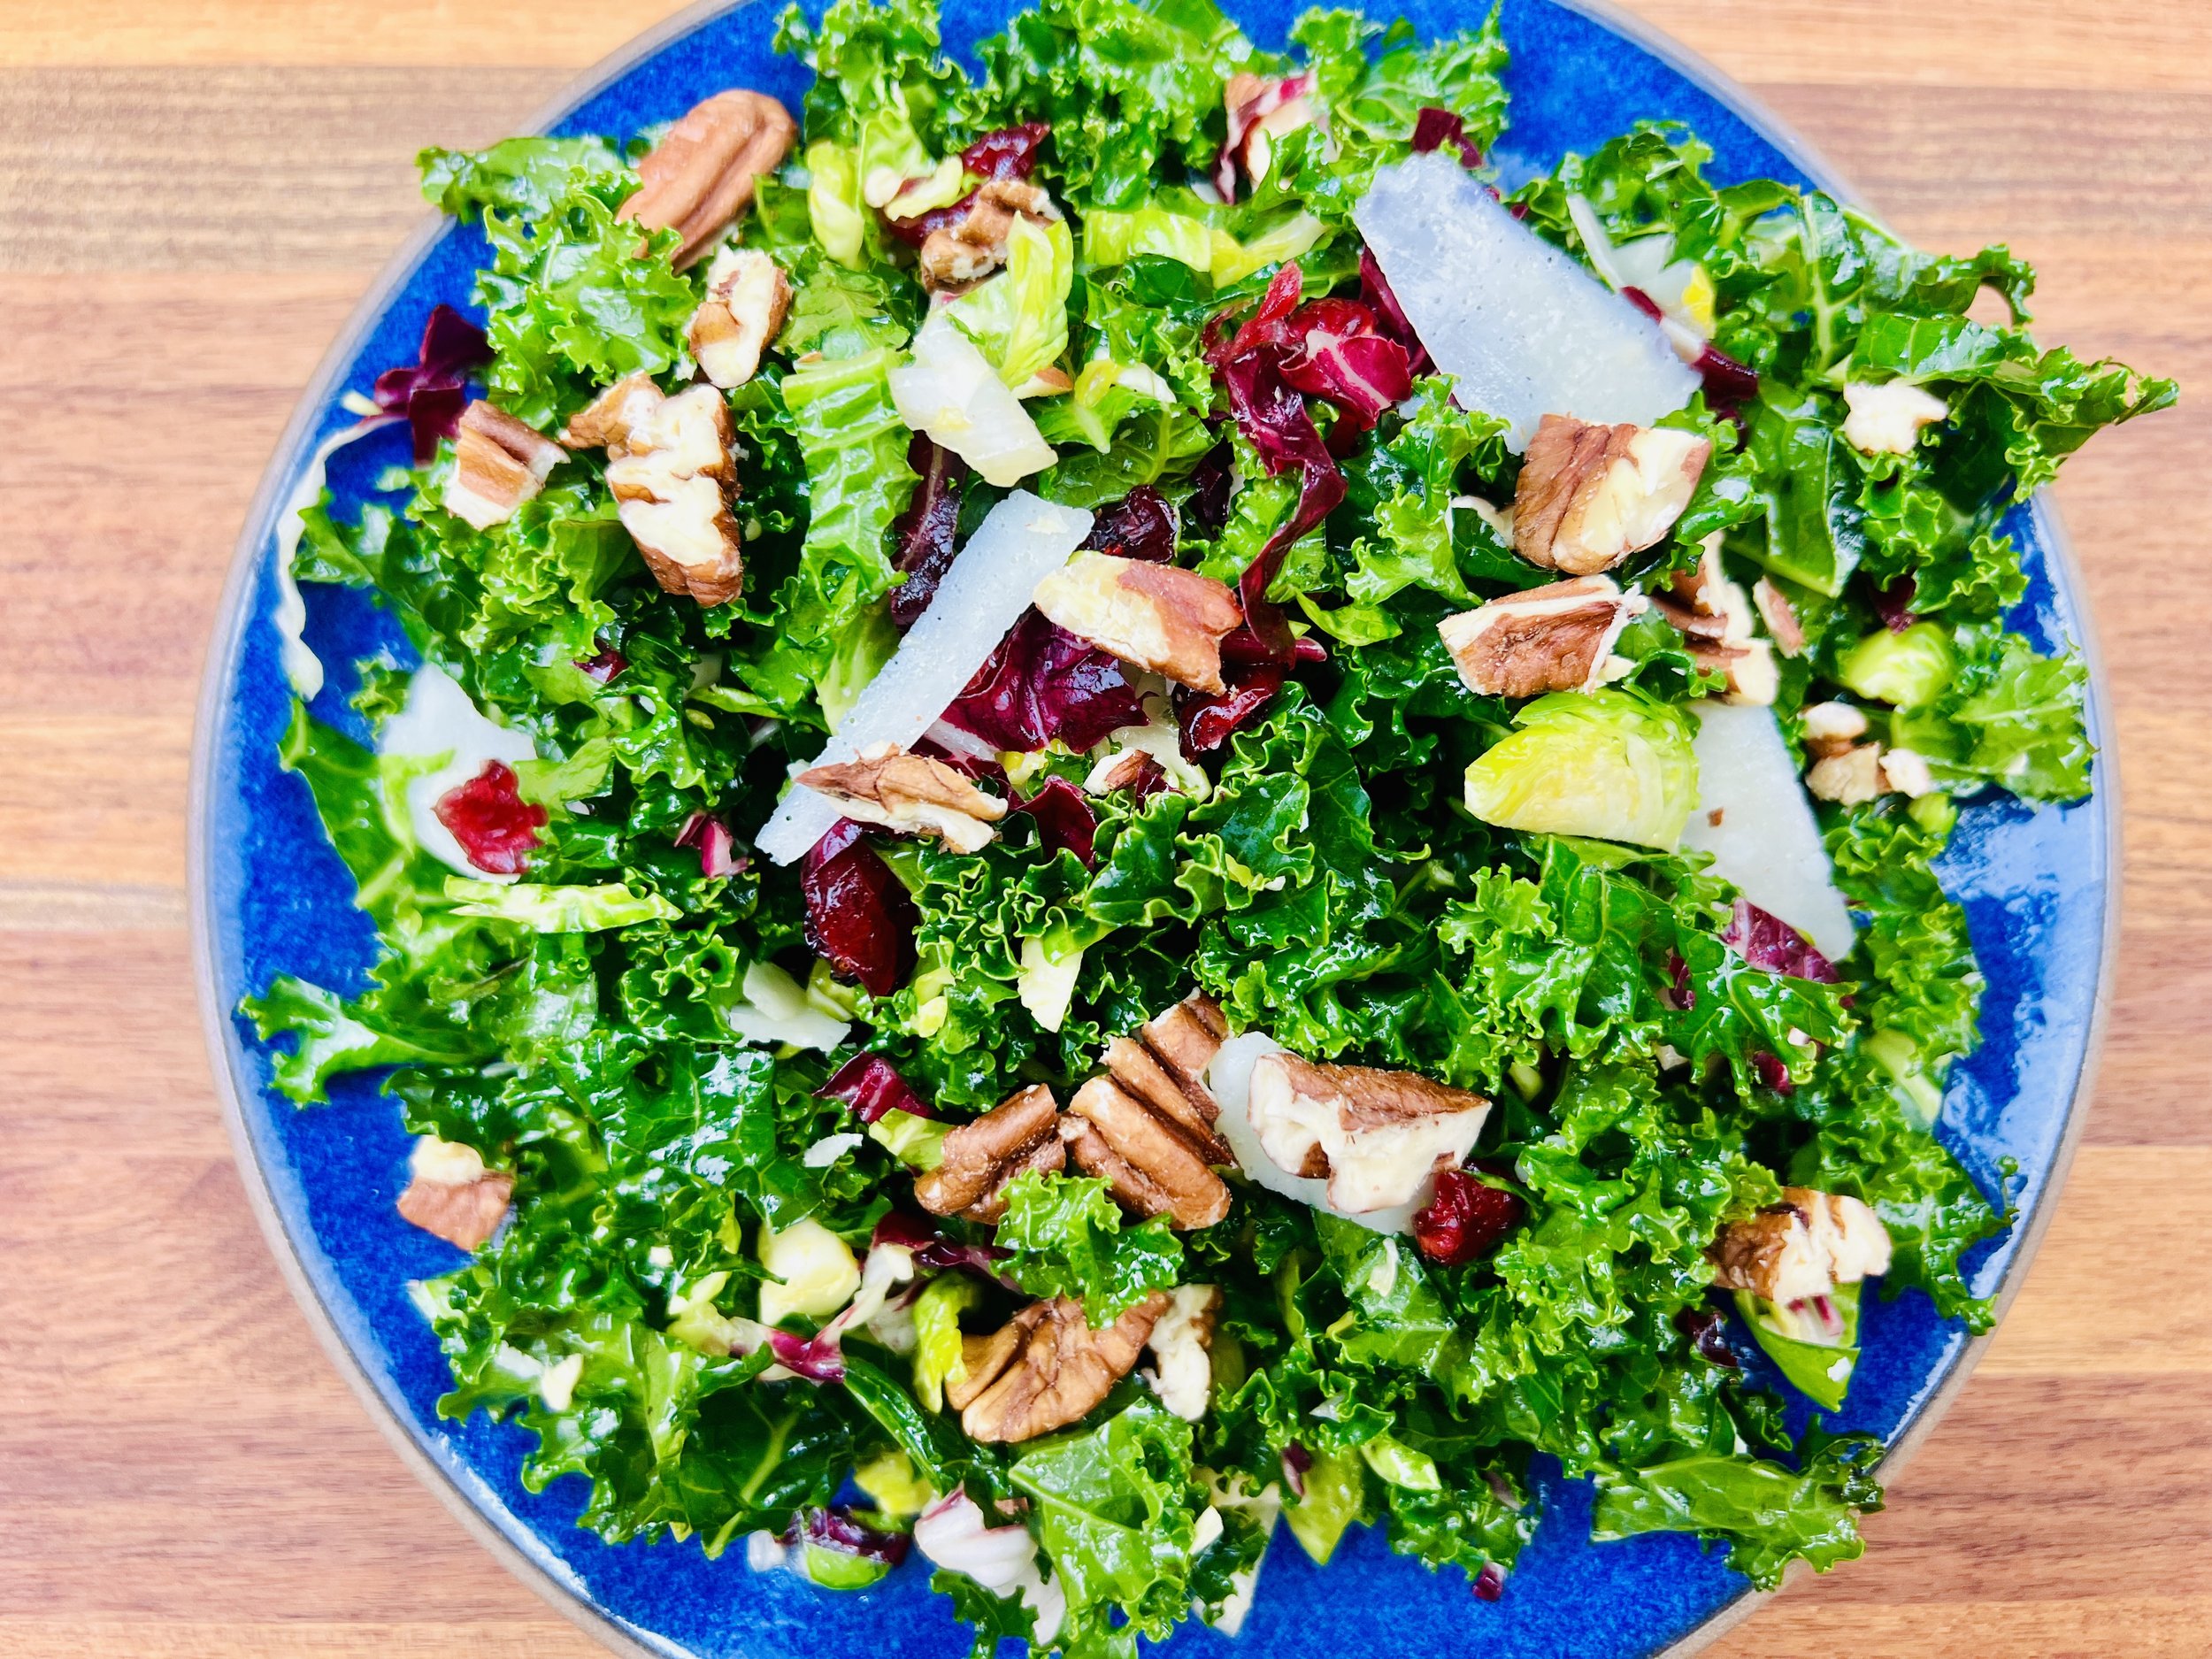
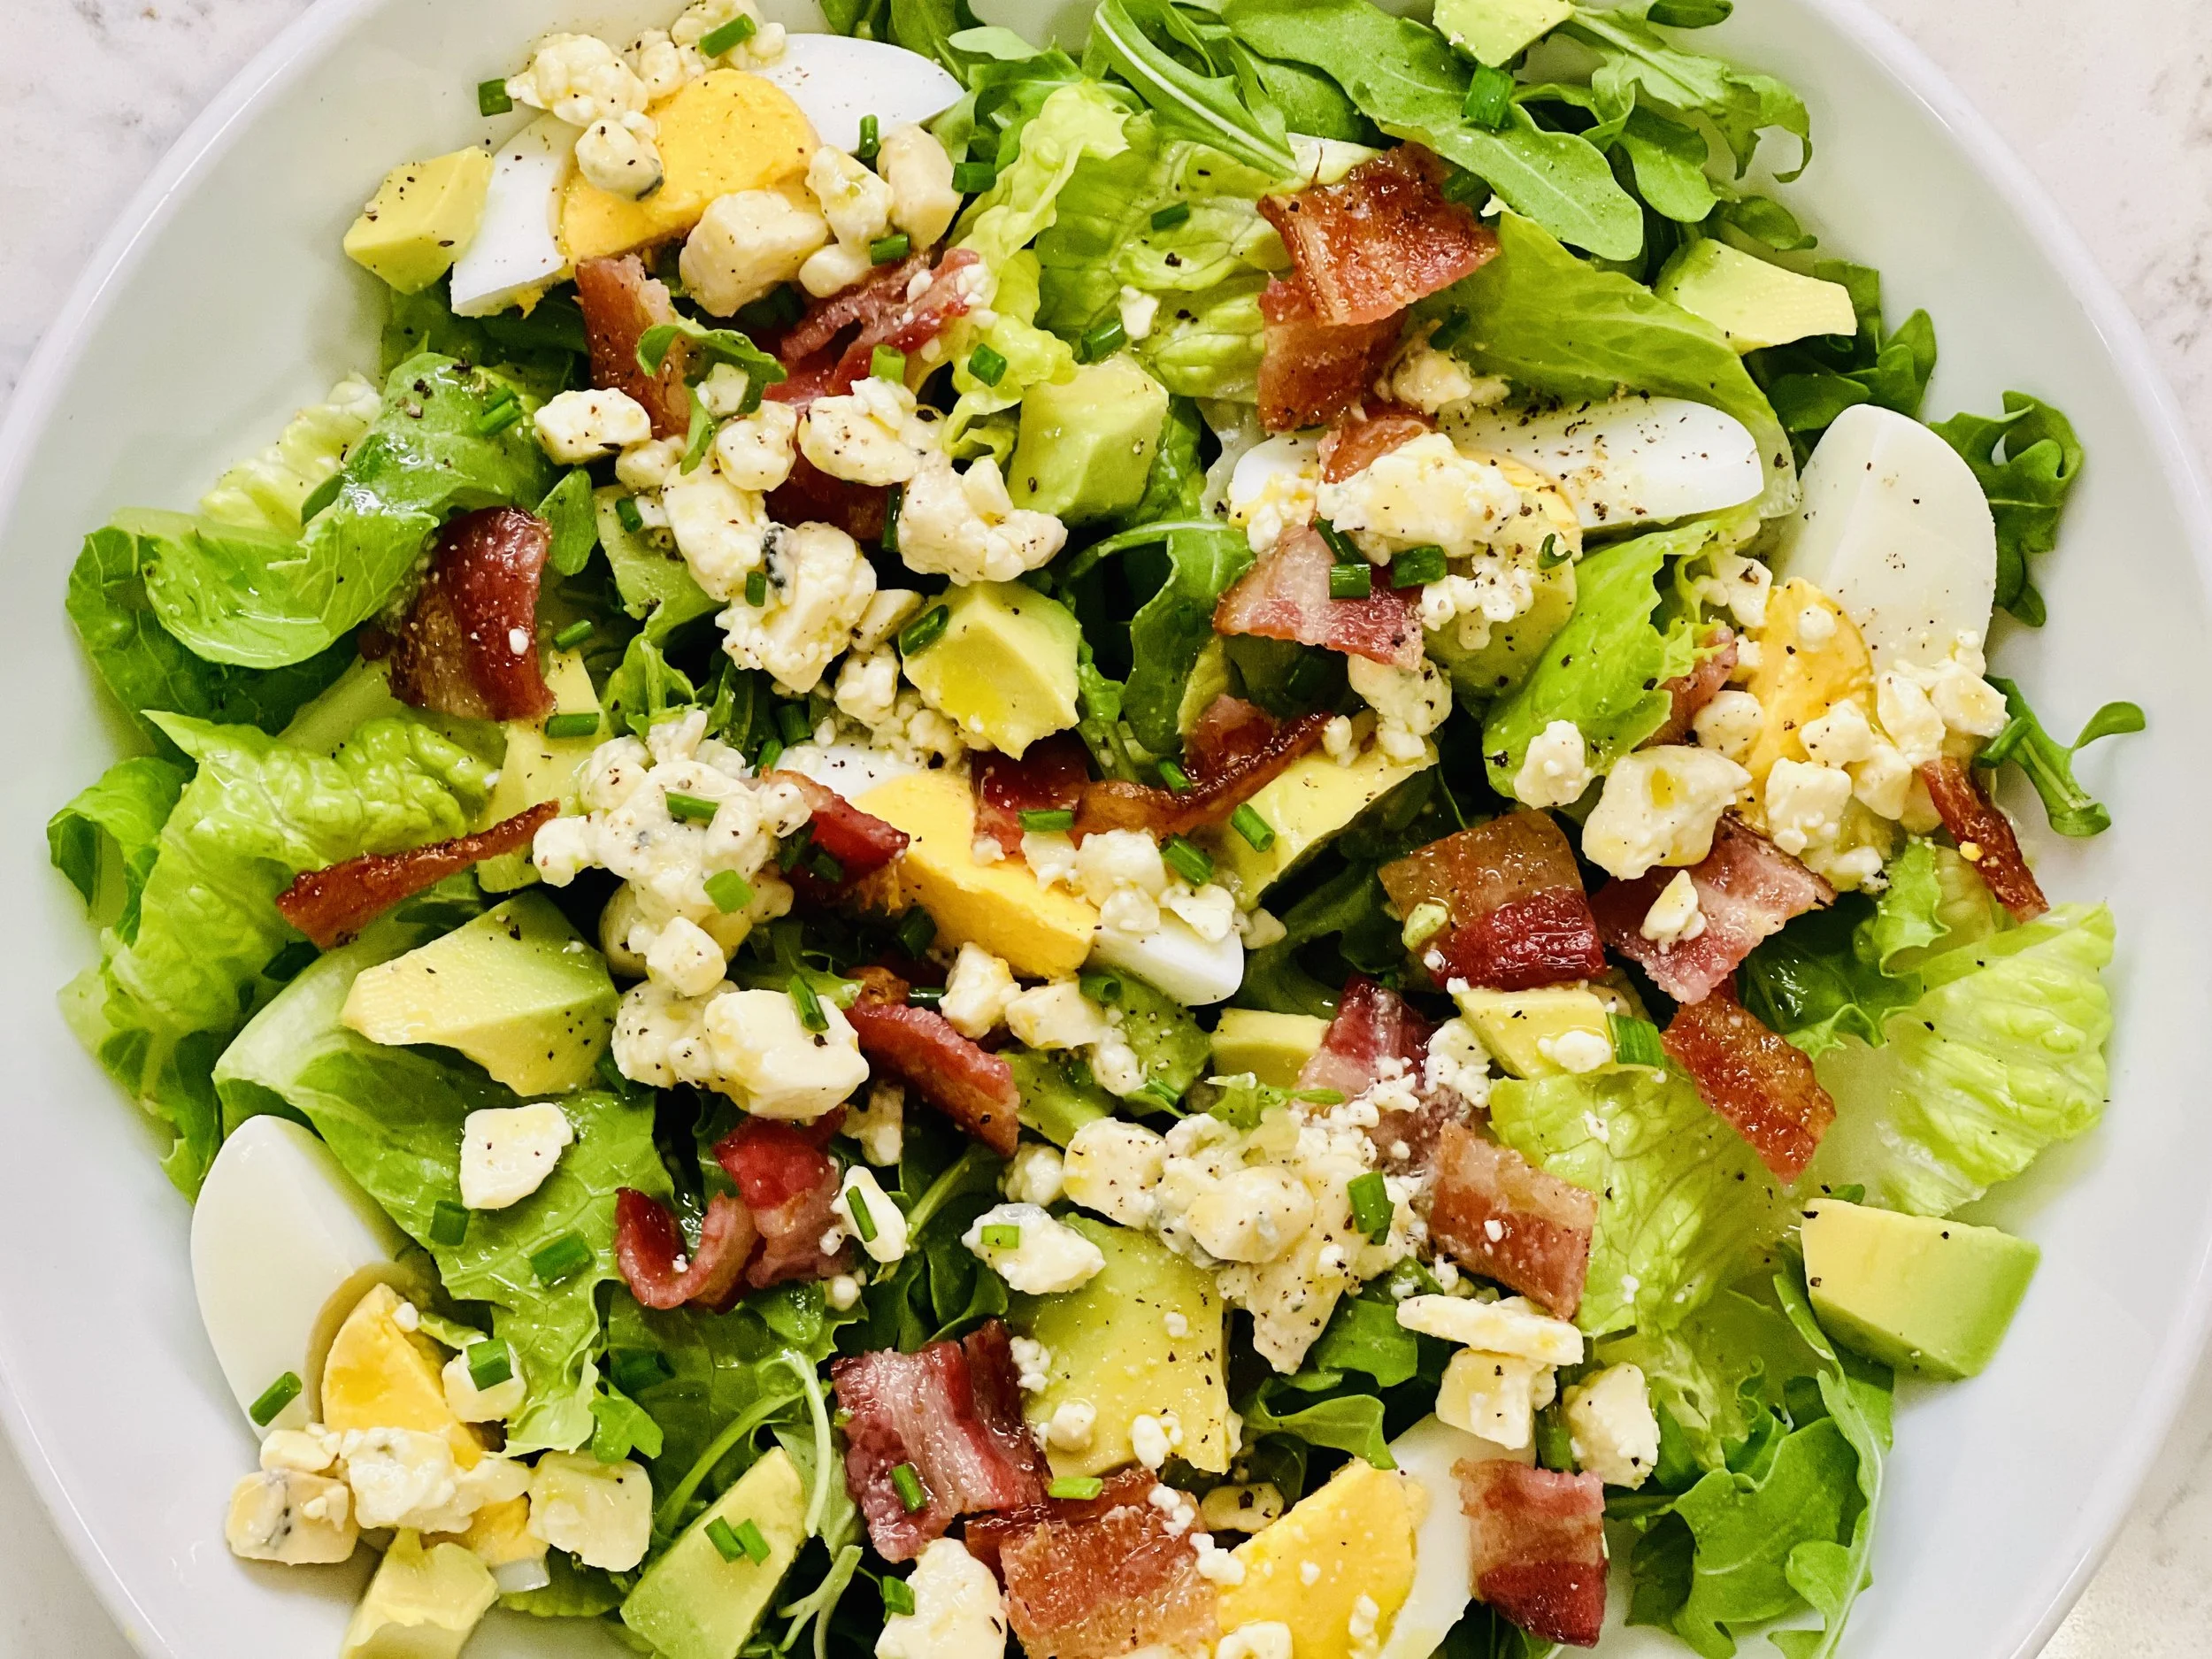
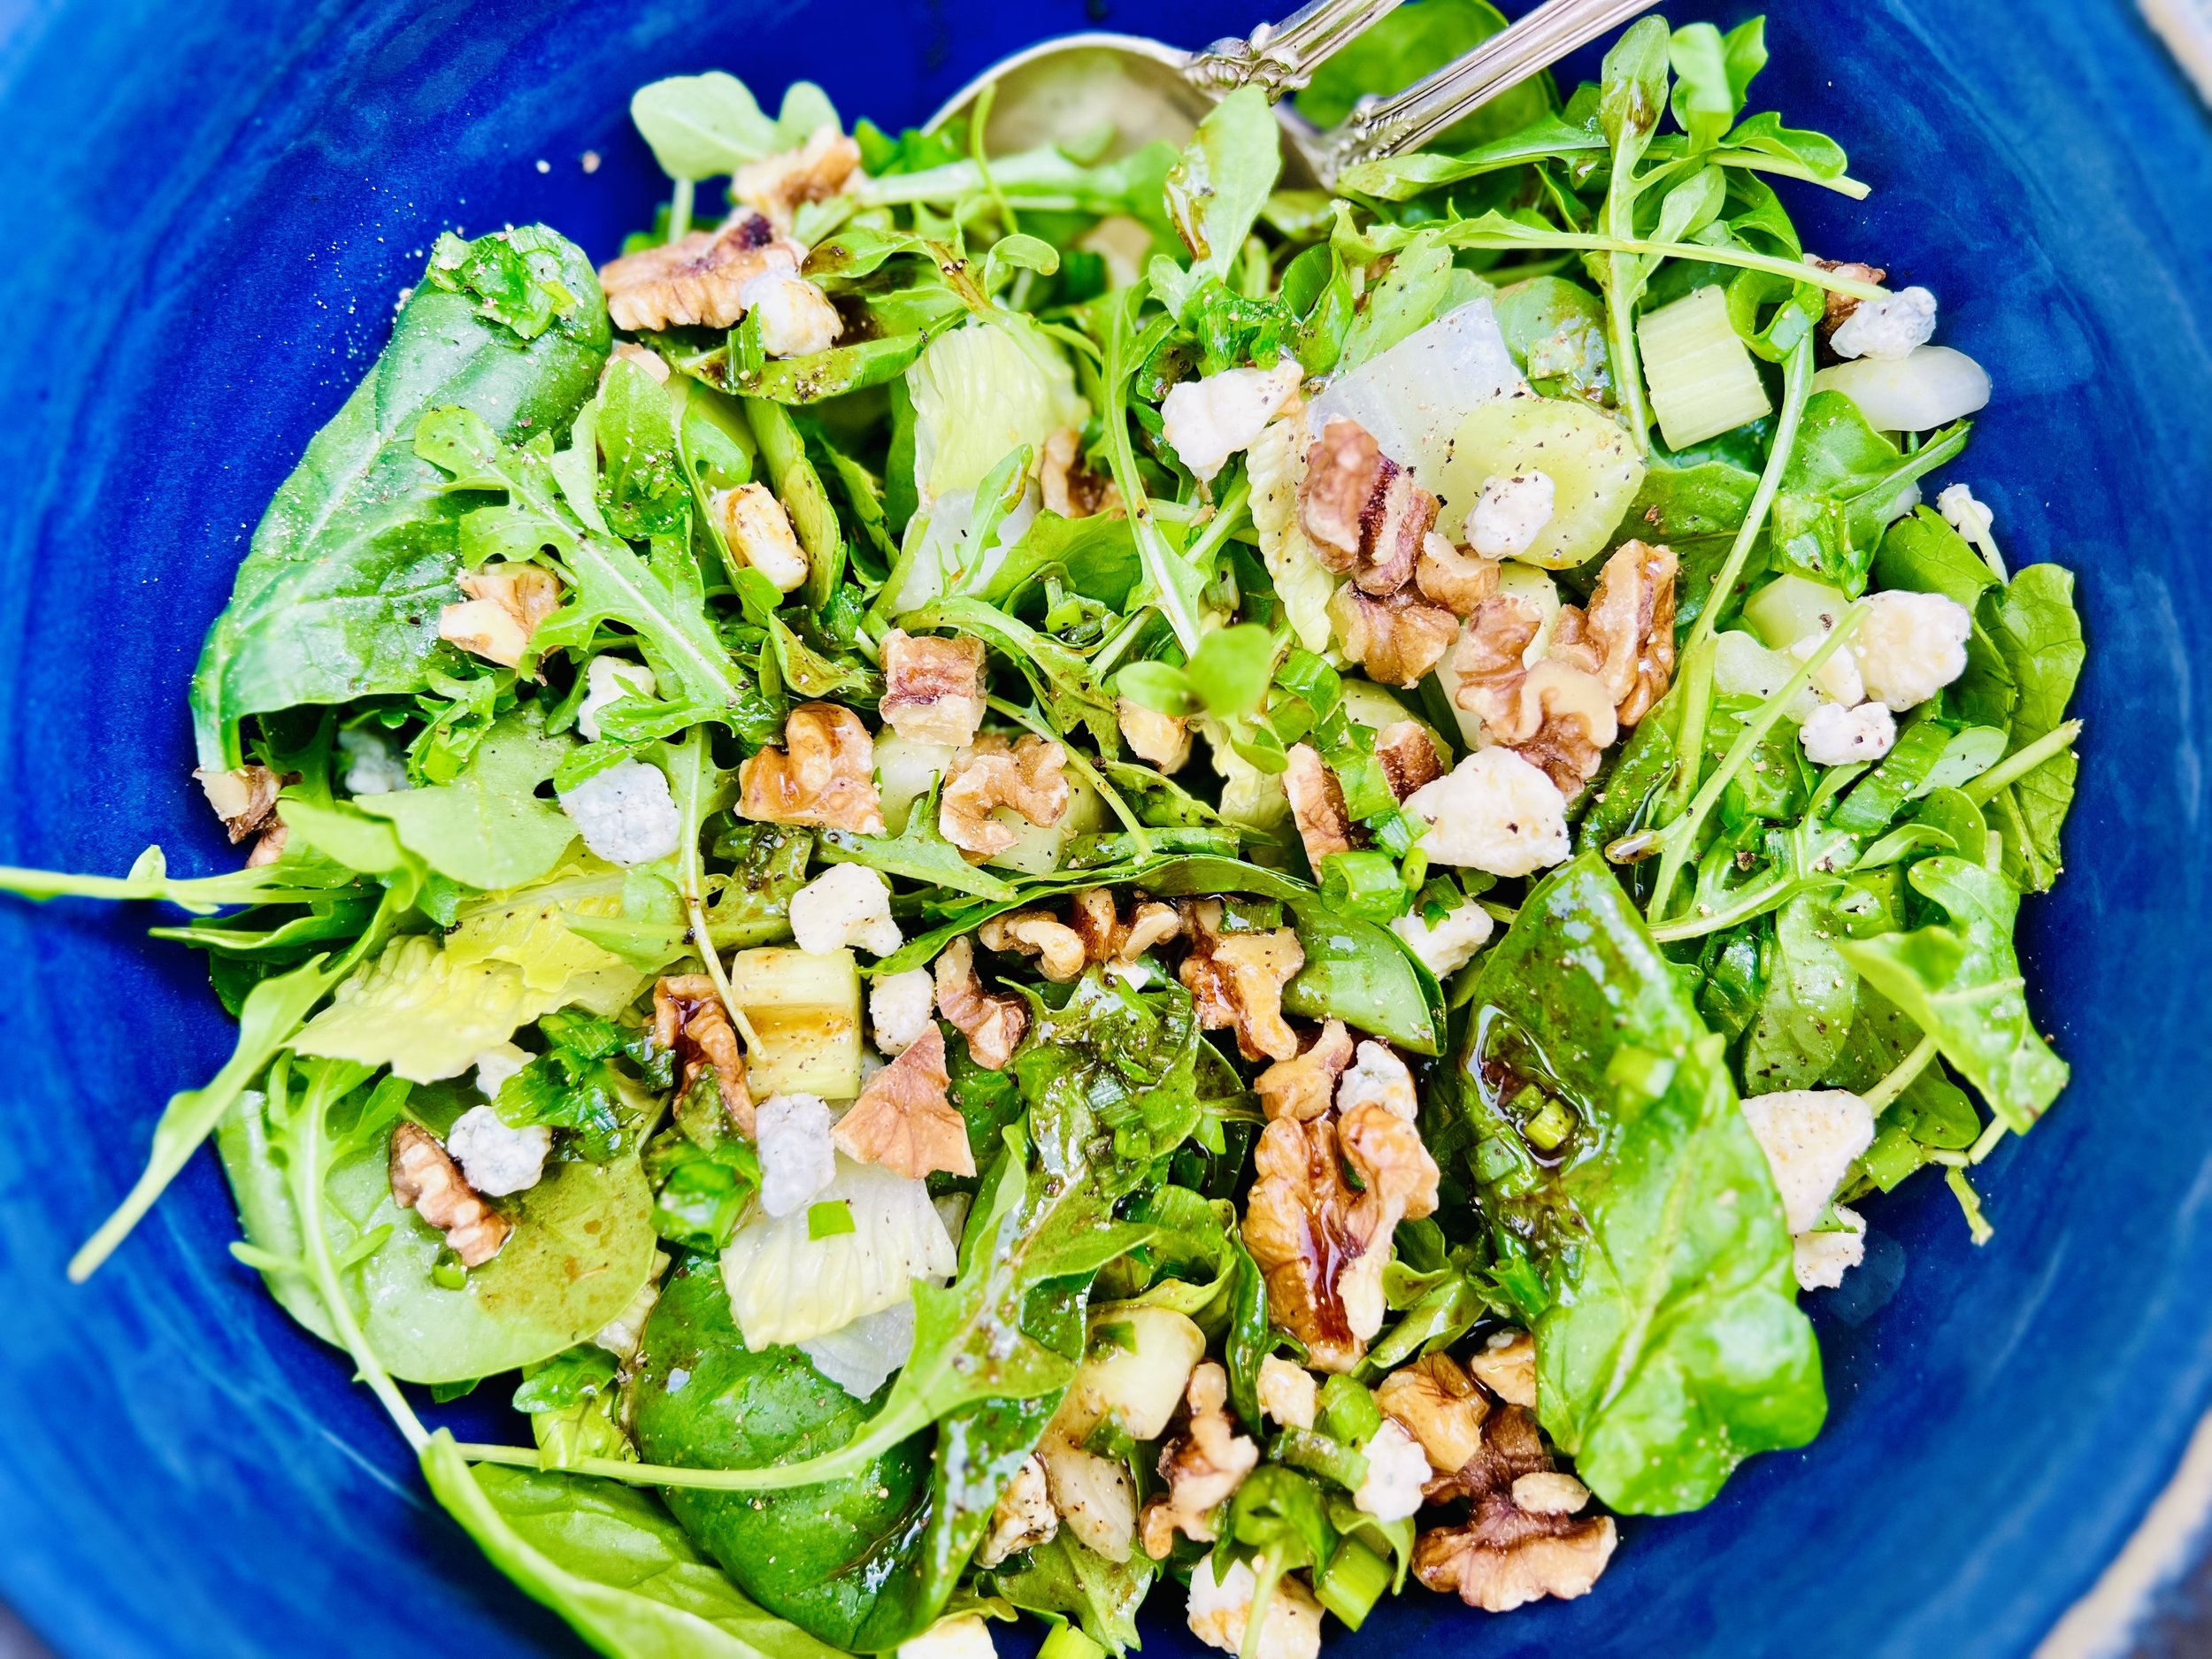
Greens Salad with 8 Minute Eggs (low FODMAP)
20 Minutes prep • Low FODMAP • Gluten-free • Dairy-free • Vegetarian • Serves 2 • Ok to make-ahead: Steps 1 - 3
20 Minutes prep • Low FODMAP • Gluten-free • Dairy-free • Vegetarian • Serves 2 • Ok to make-ahead: Steps 1 - 3
This fresh salad is packed full of a whole variety of greens plus nuts, seeds, and hard-boiled eggs for protein. It’s a perfect vegetarian meal that your body will thank you for eating! Because the greens are the most delicate (butter lettuce, baby arugula, and microgreens) even those who have difficulty with raw vegetables should be able to enjoy this salad.
This is an exclusive recipe just for recipe club members.
Each week I am creating and delivering one very special recipe just for my recipe club members. If you’re not yet a member, I encourage you to join! Membership in the club includes access to the complete archive of recipes with filters so it can become your virtual low FODMAP cookbook plus, I am creating and delivering one special NEW recipe every week ONLY for recipe club members. And, for my true fans, I’ll be sharing behind-the-scenes content, and updates on the progress of the new cookbook.
Your membership in the club helps me continue creating new, delicious, easy-to-make, low FODMAP recipes just for you.
As always, all recipes will emphasize simple ingredients, easy preparation, and delicious low FODMAP results. Recipes will be for everything from main courses, salads, soups, side dishes, appetizers, desserts, sauces, breakfast and lunch, and even mocktails and cocktails. Everything you need to prepare fantastic low FODMAP meals everyone will love.
Join the club. Become a Patron. Let’s keep making delicious Low FODMAP meals together.
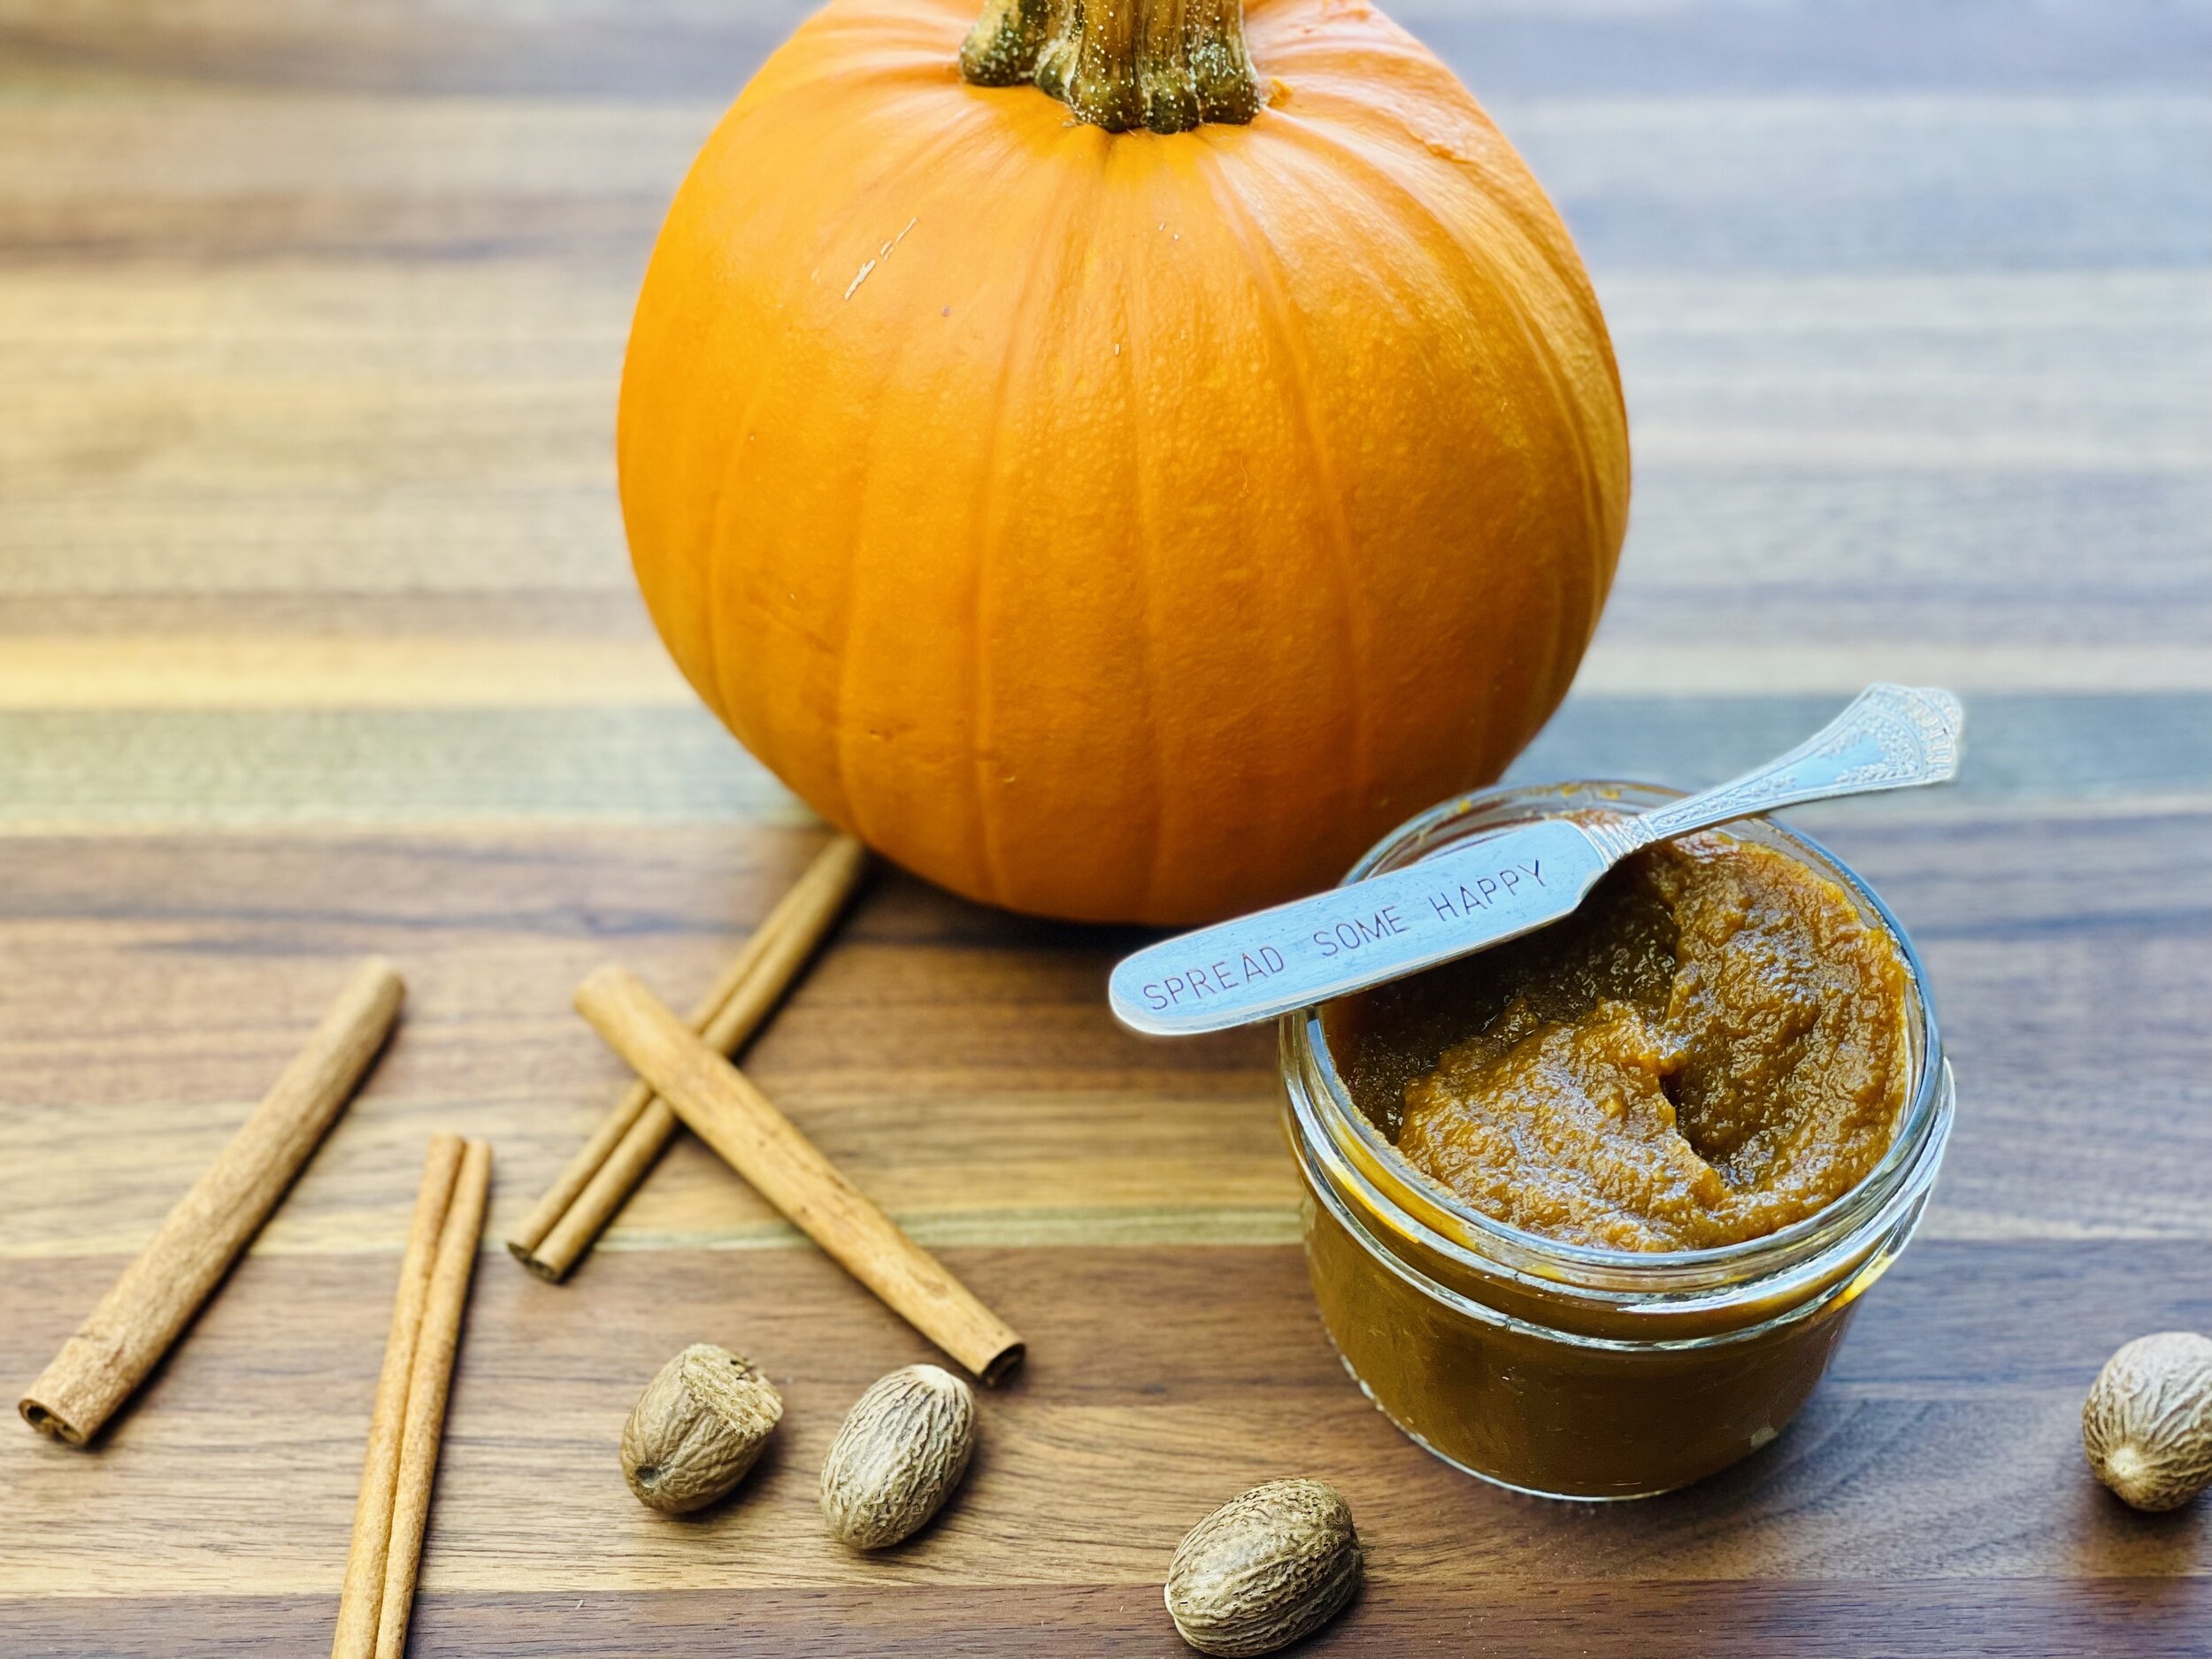
Pumpkin Cream Cheese Schmear (low FODMAP)
10 Minutes prep • Low FODMAP • Gluten-free • Lactose-free • Makes about 1/3 cup
10 Minutes prep • Low FODMAP • Gluten-free • Lactose-free • Makes about 1/3 cup • Ok to make-ahead: Steps 1 - 2
You know when you wait and wait until it’s that time of year to be able to get pumpkin schmear at the bagel shop…and then you realize you can’t eat bagels OR the pumpkin schmear they sell? Well, the wait is over. Now you can make the perfect low FODMAP pumpkin schmear without the FODMAPs so you can improve your sourdough toast game, rev up your gluten-free muffin, or take your low FODMAP pancakes to the next level!

Ingredients
4 ounces lactose-free cream cheese at room temperature
4 tablespoons of our Pumpkin Spice Butter
1 teaspoon maple syrup*
Pinch of Kosher salt*
Directions
(1) Prepare the cream cheese: Stir the cream cheese until it’s the consistency of sour cream. If it’s still a bit chilled, put it in the microwave for 20 - 30 seconds).
(2) Add the Pumpkin Spice Butter: Stir to blend well. Taste and add maple syrup if it needs more sweetness, or salt if it needs more intensity to the flavor.
(3) Serve: Spread on low FODMAP muffins, pancakes, or toasted sourdough bread. You’re going to love it!
Eat and enjoy every bite because you can!
*This post may contain links for you to easily purchase items listed on the page. In some cases, we have provided a special discount code for IBS Game Changers so be sure to use it when you purchase an item to get the discount that has been arranged just for you! As an Amazon Associate, I earn a commission from qualifying Amazon purchases.
More Deliciously Low FODMAP™ breakfast recipes you might enjoy


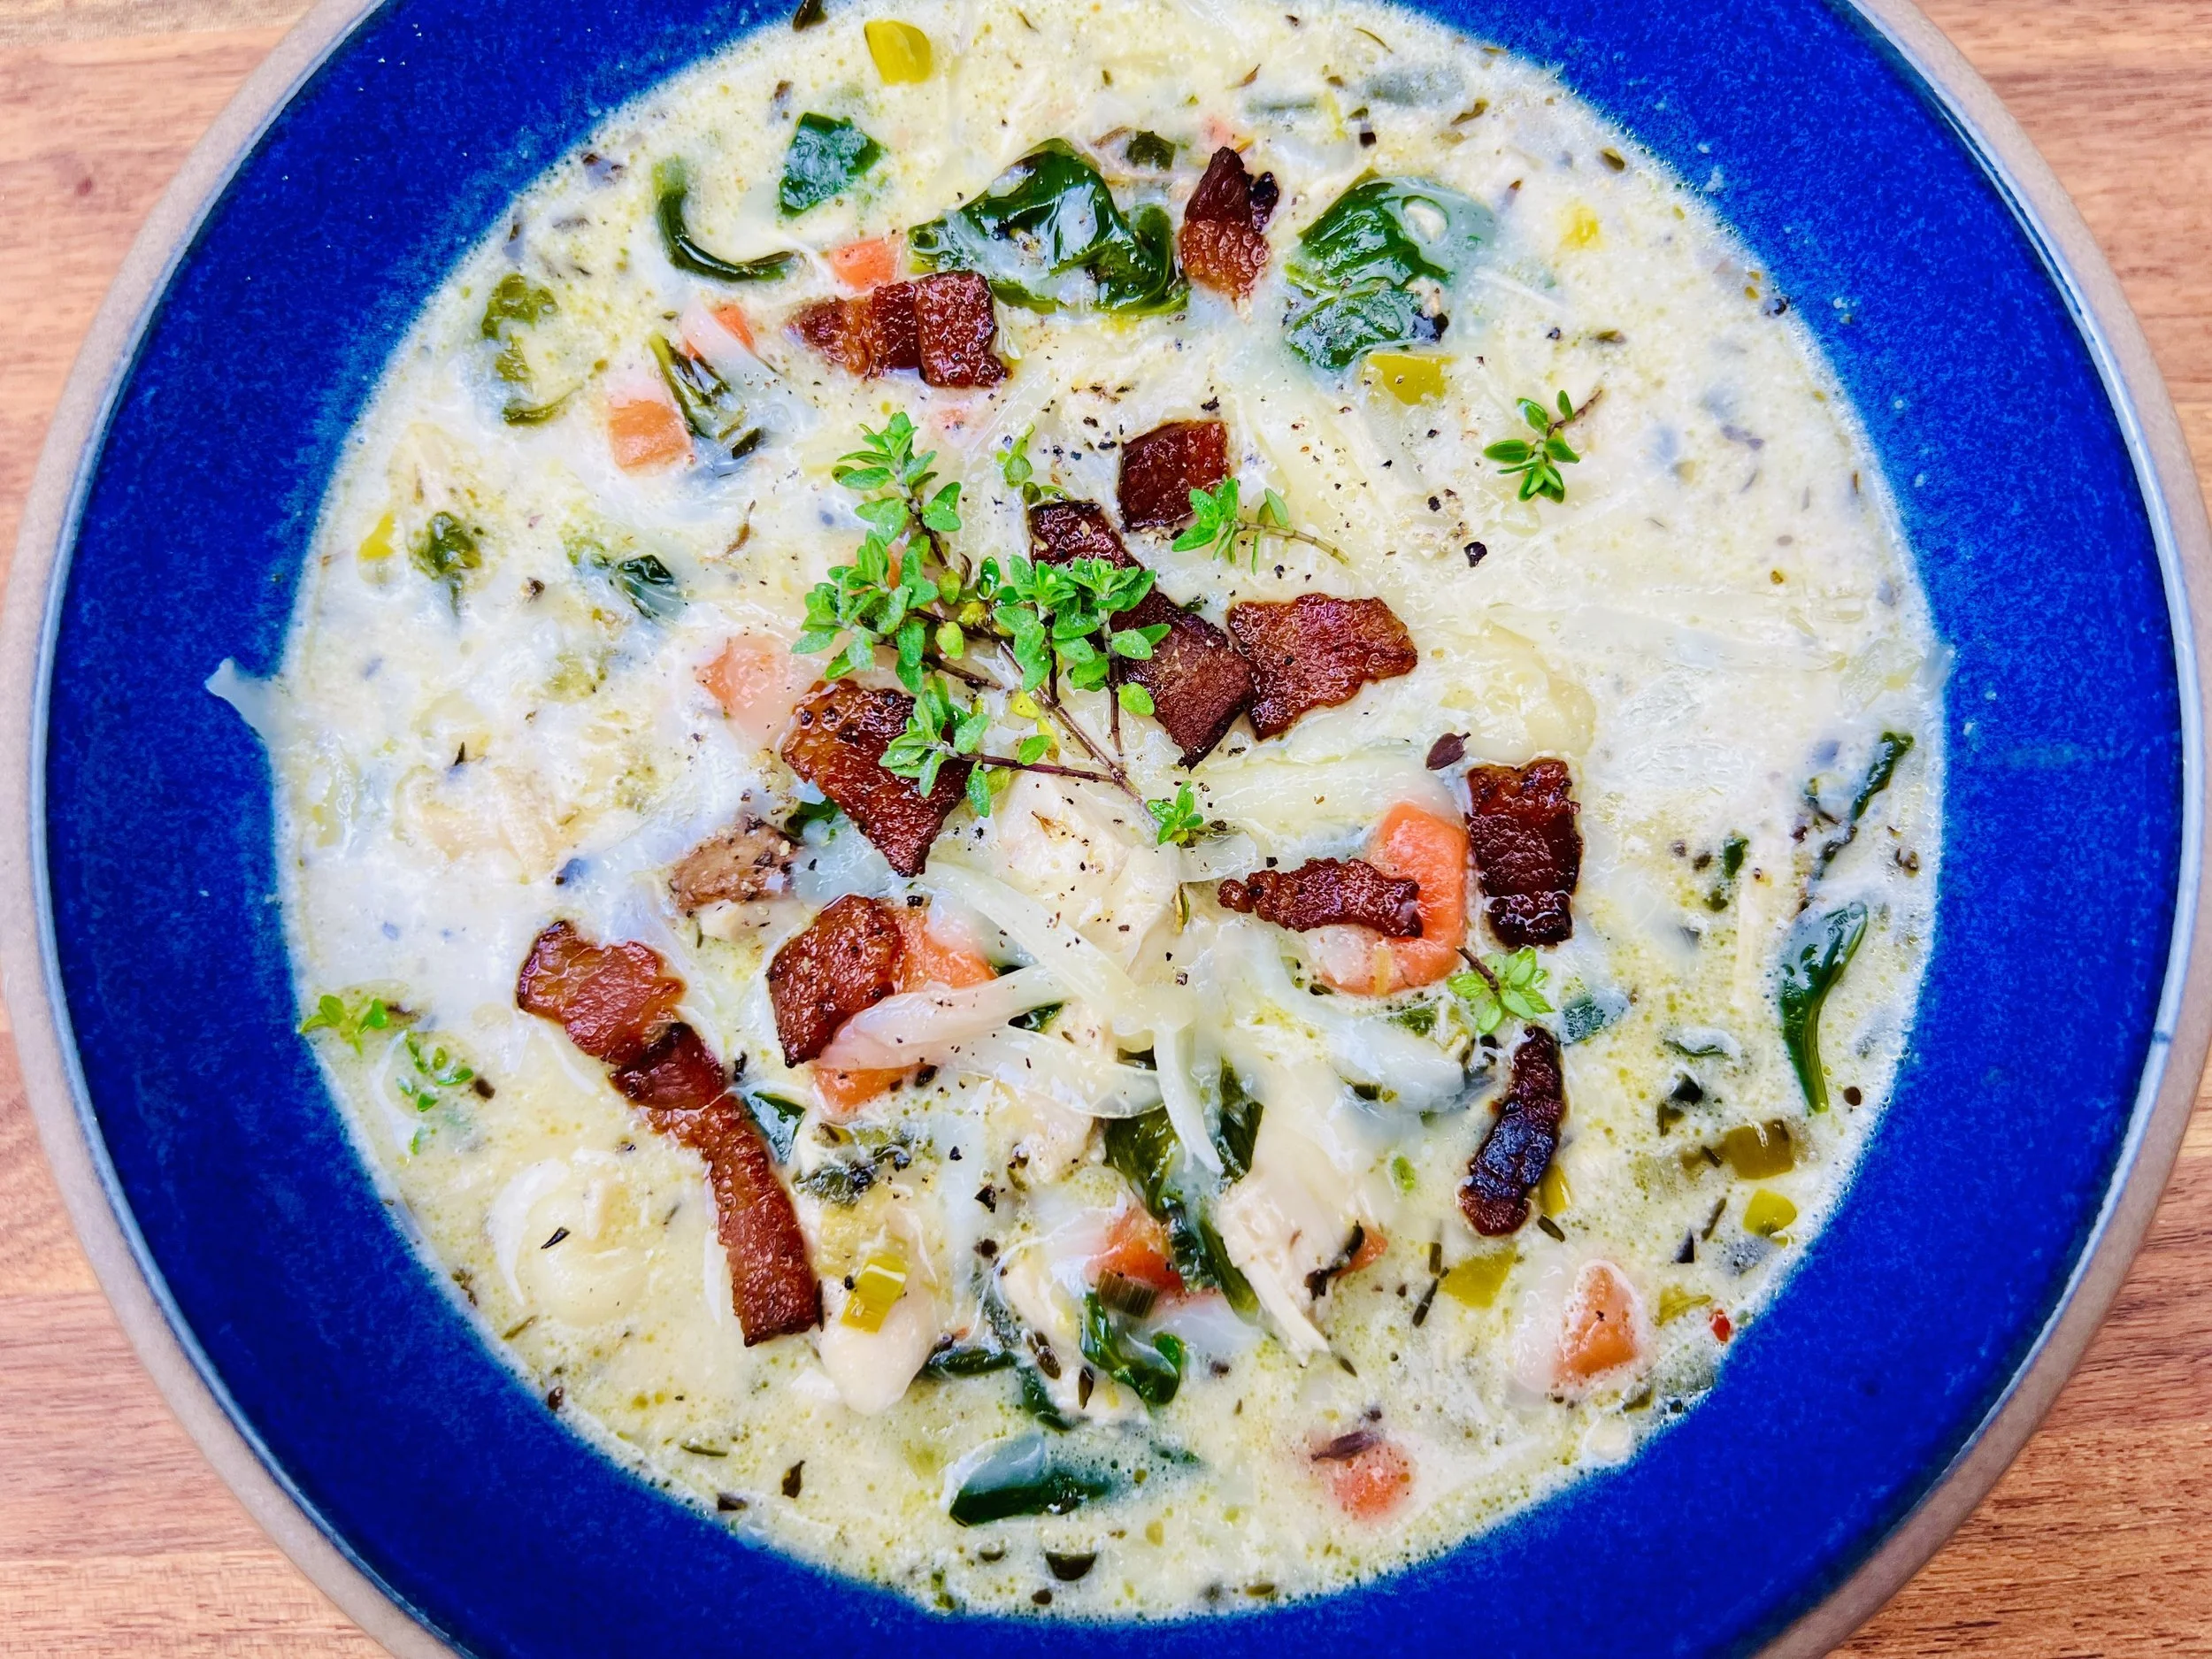
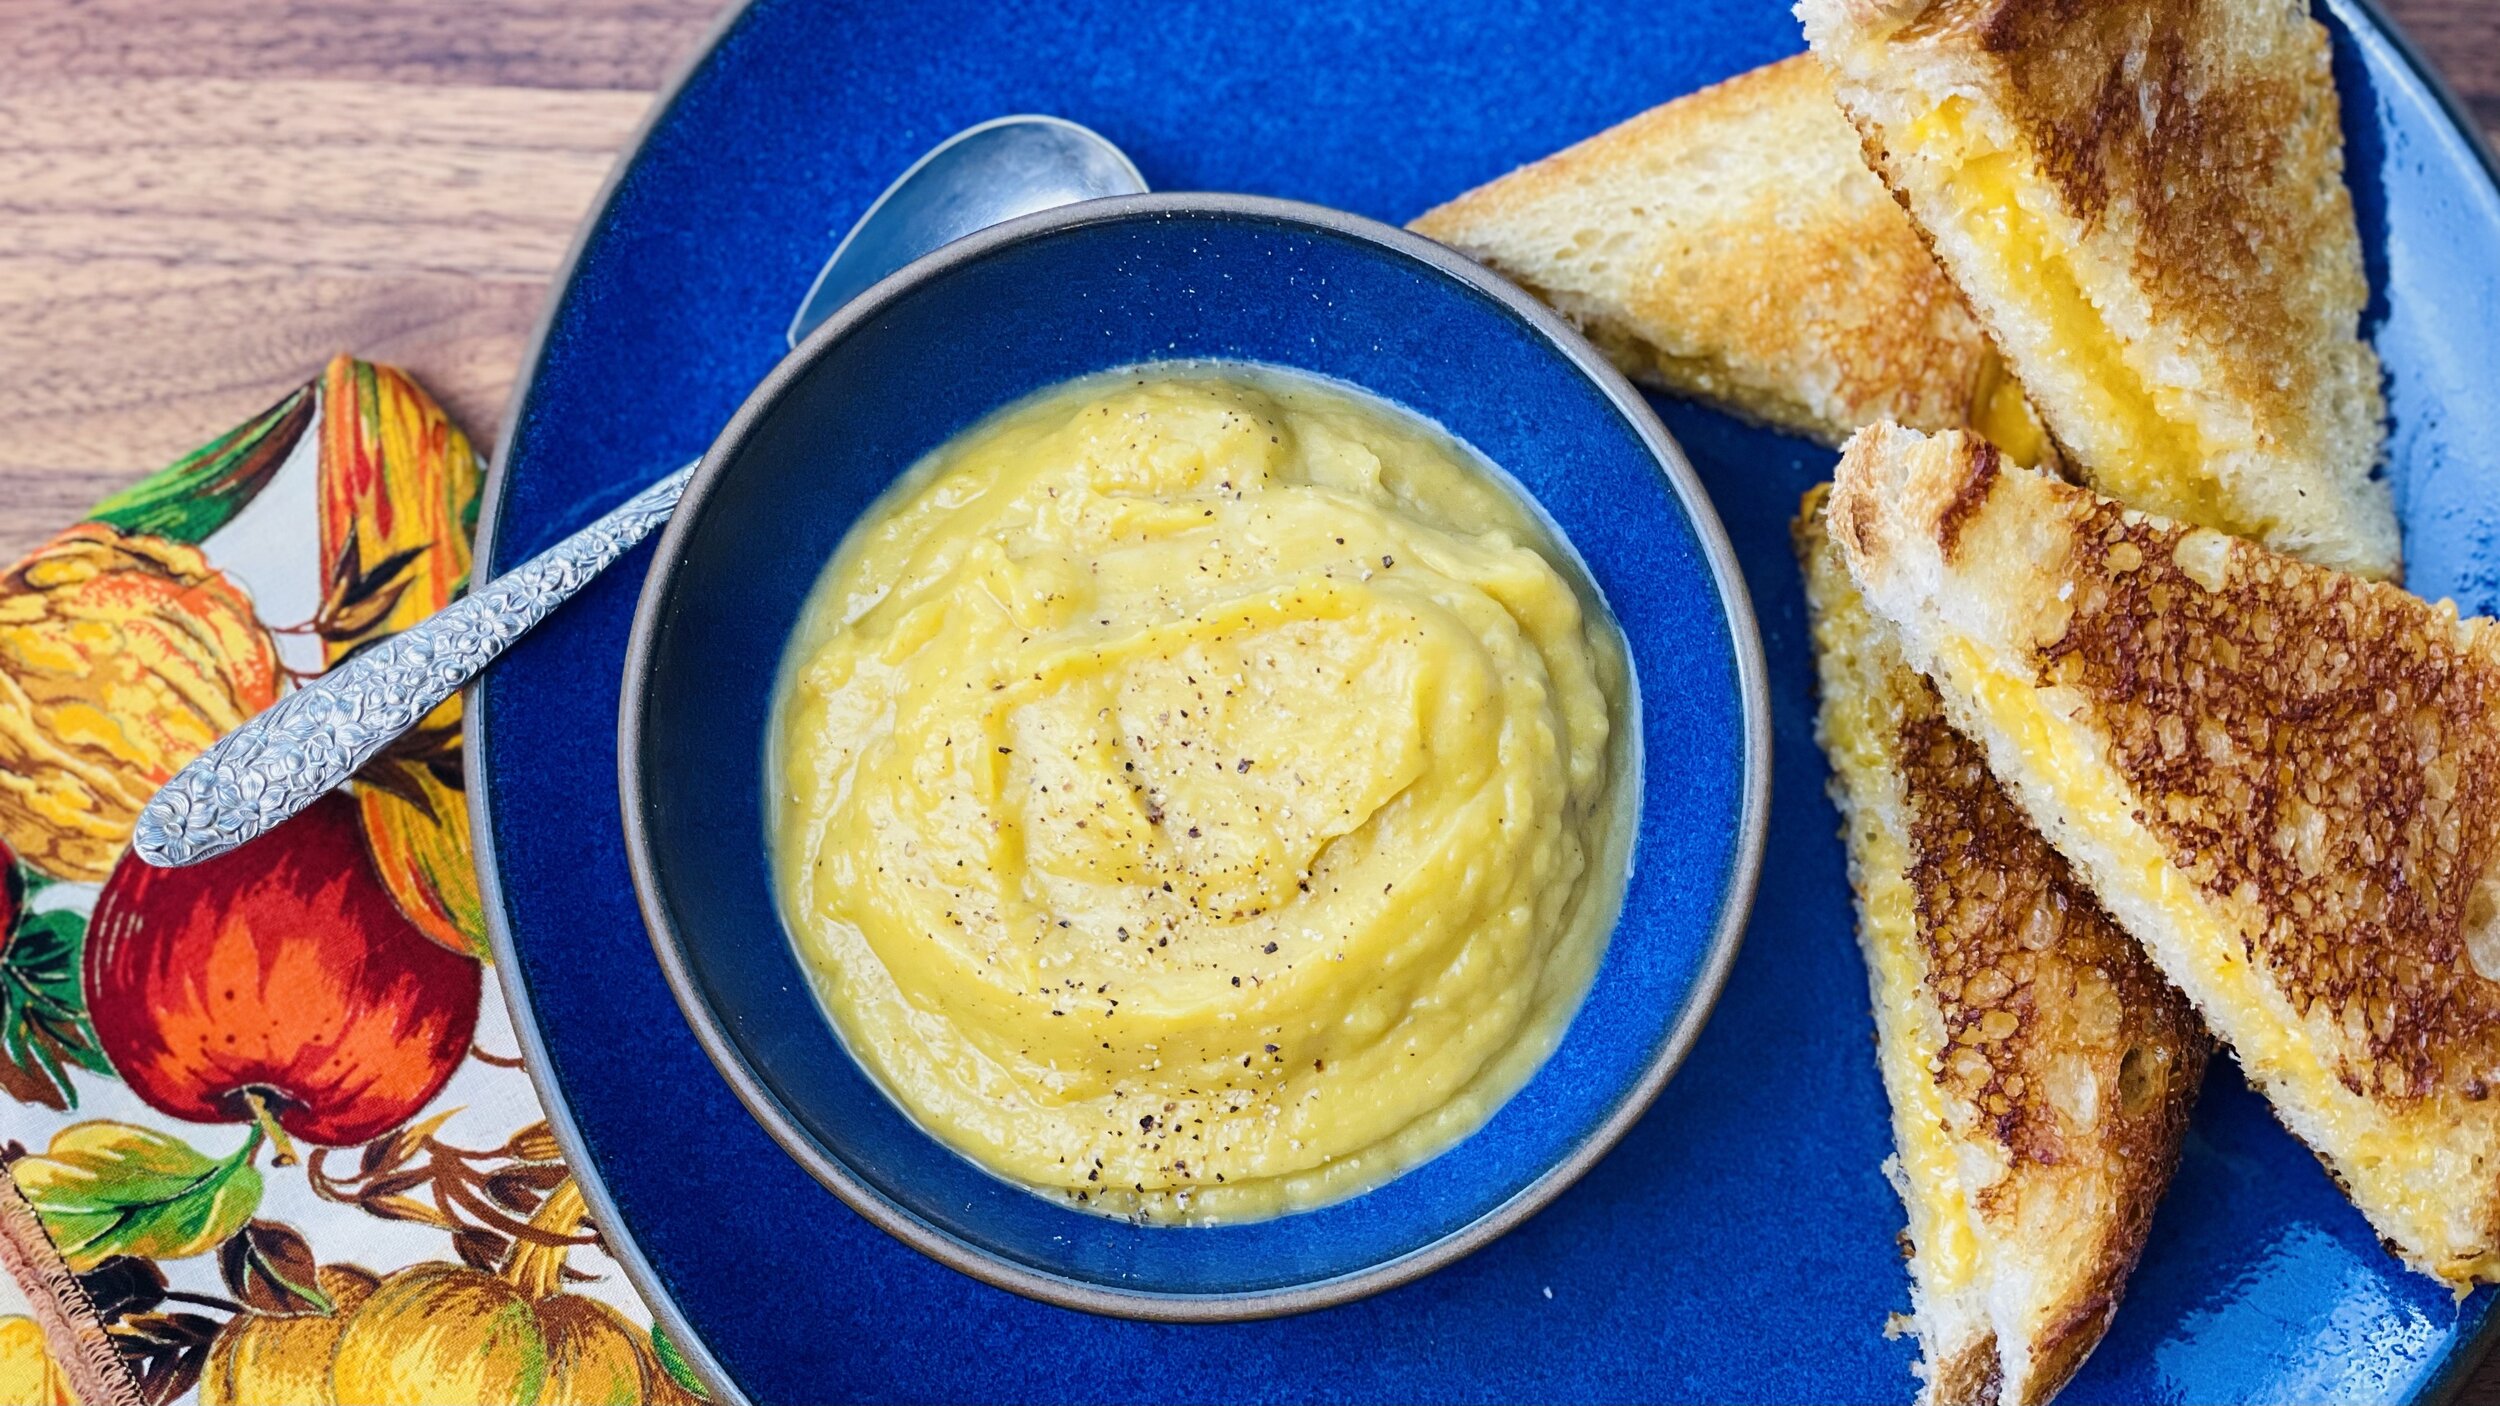
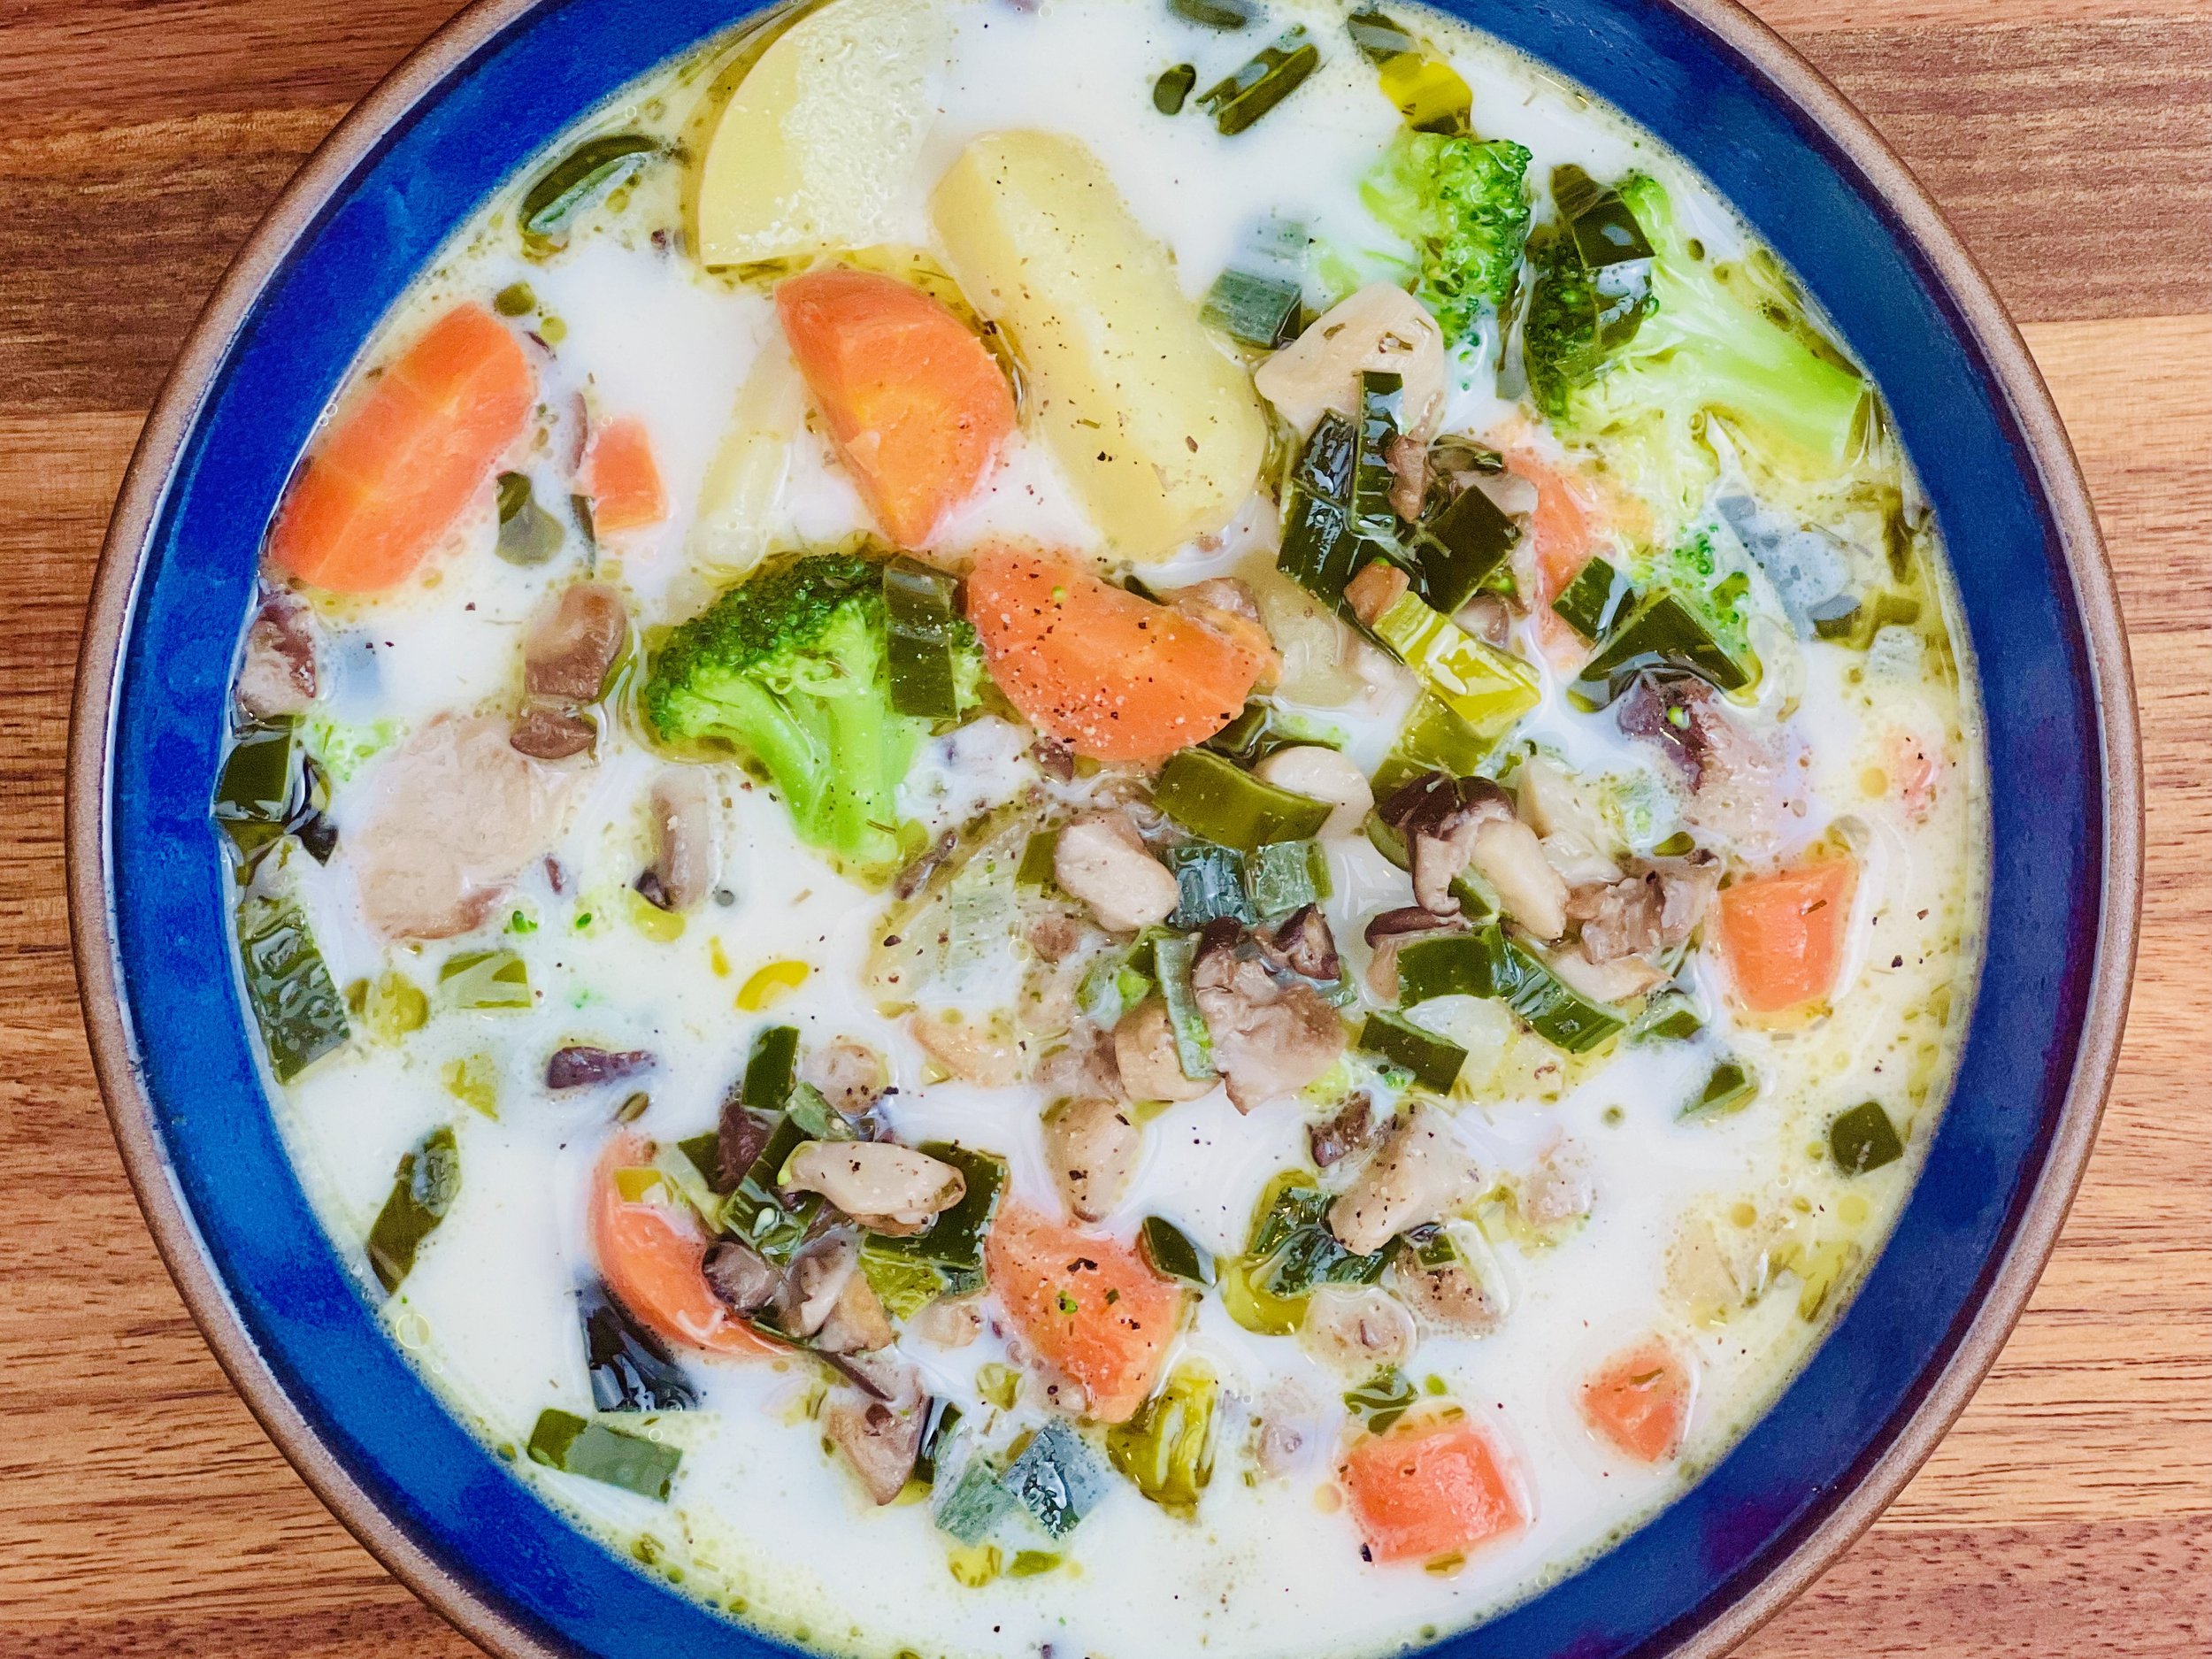
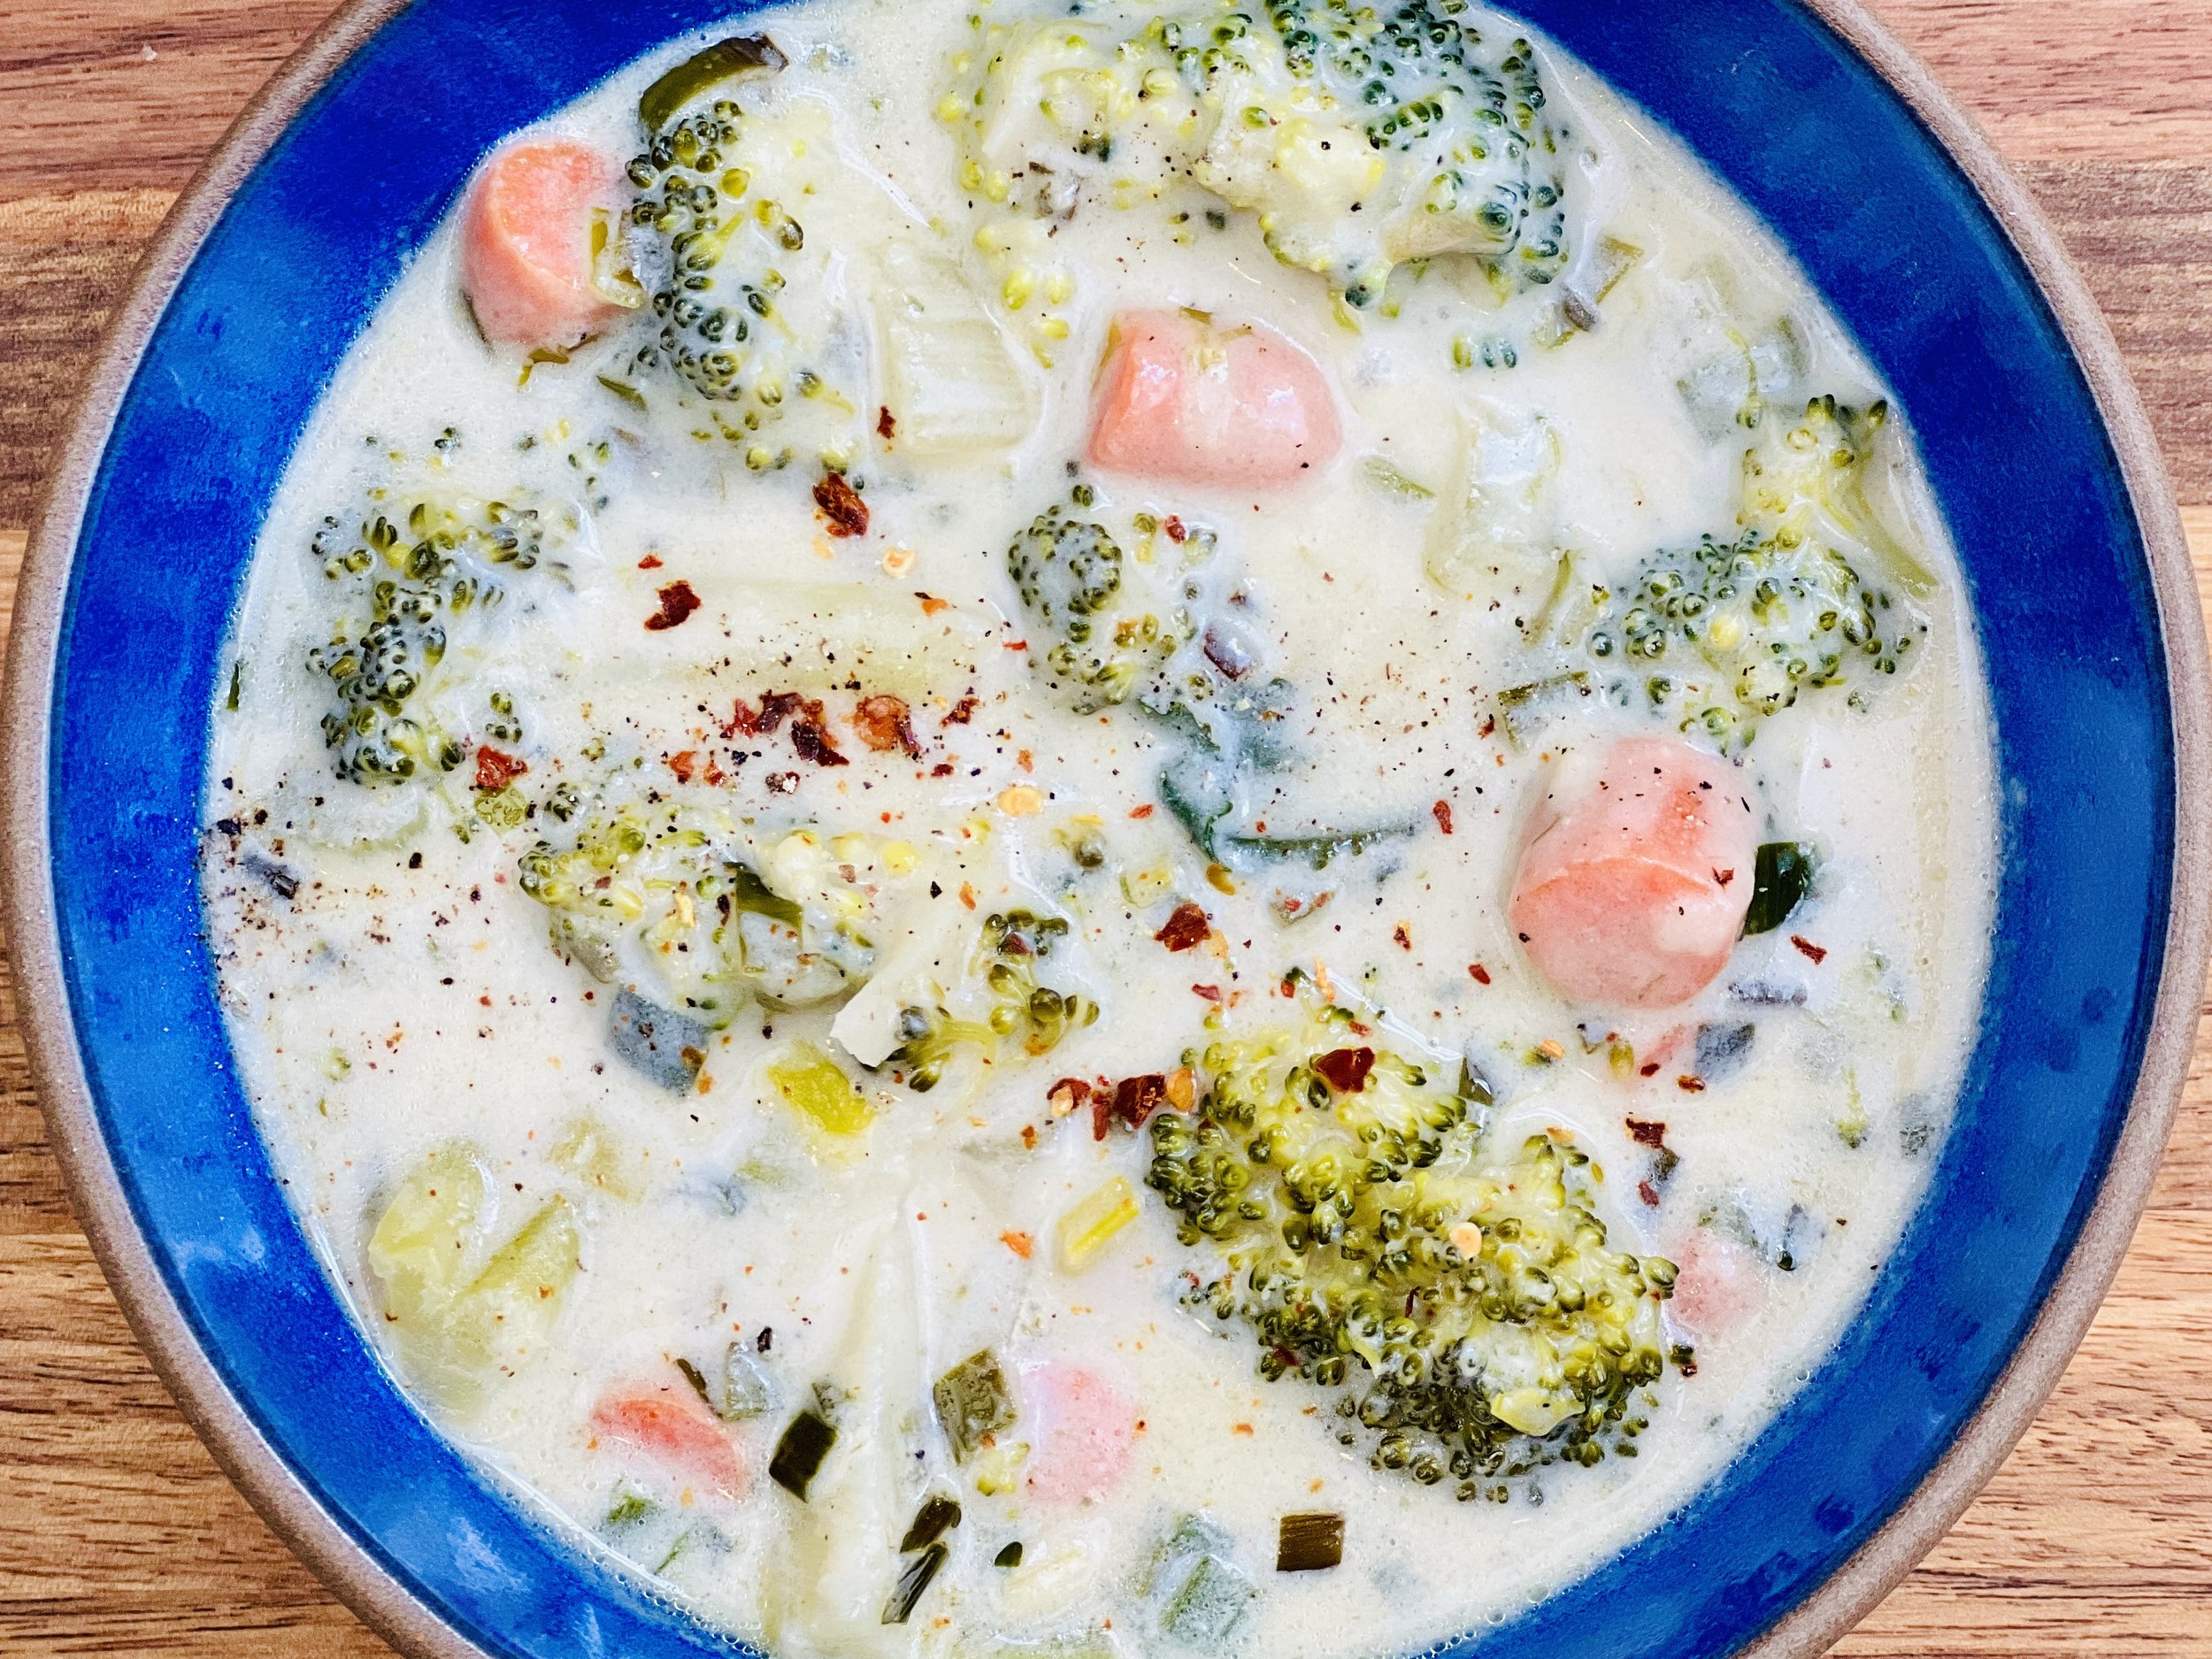
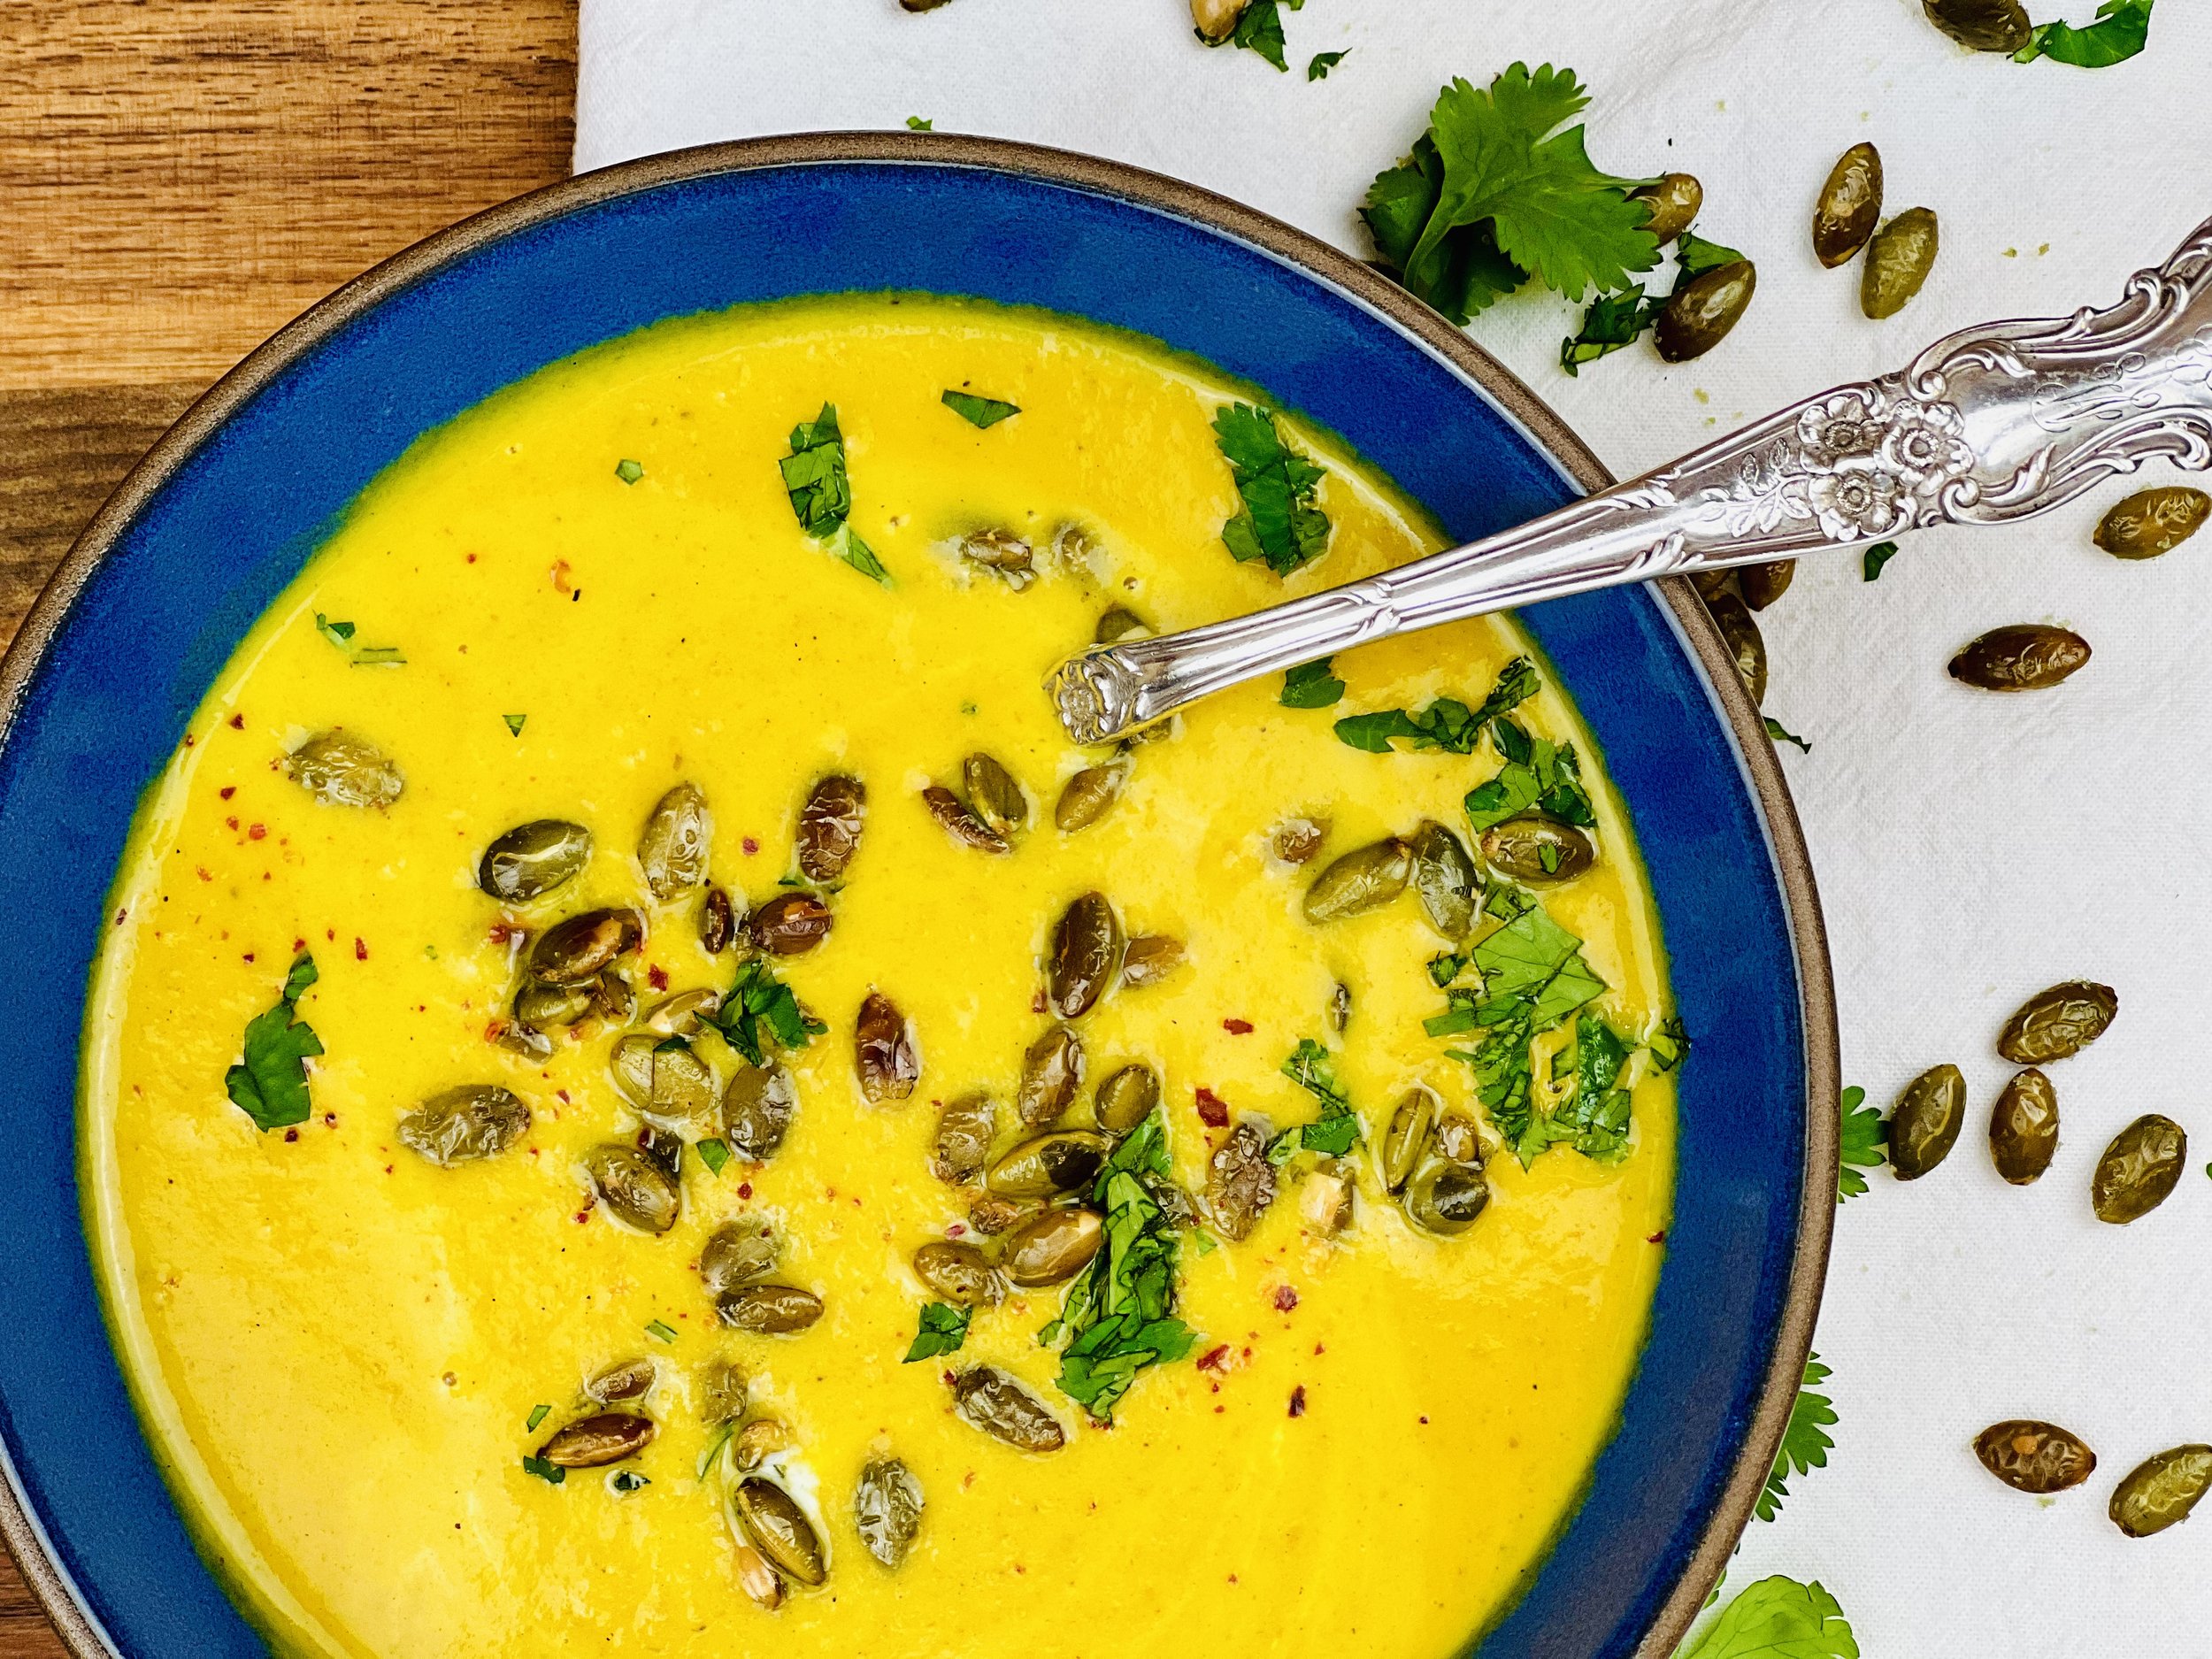
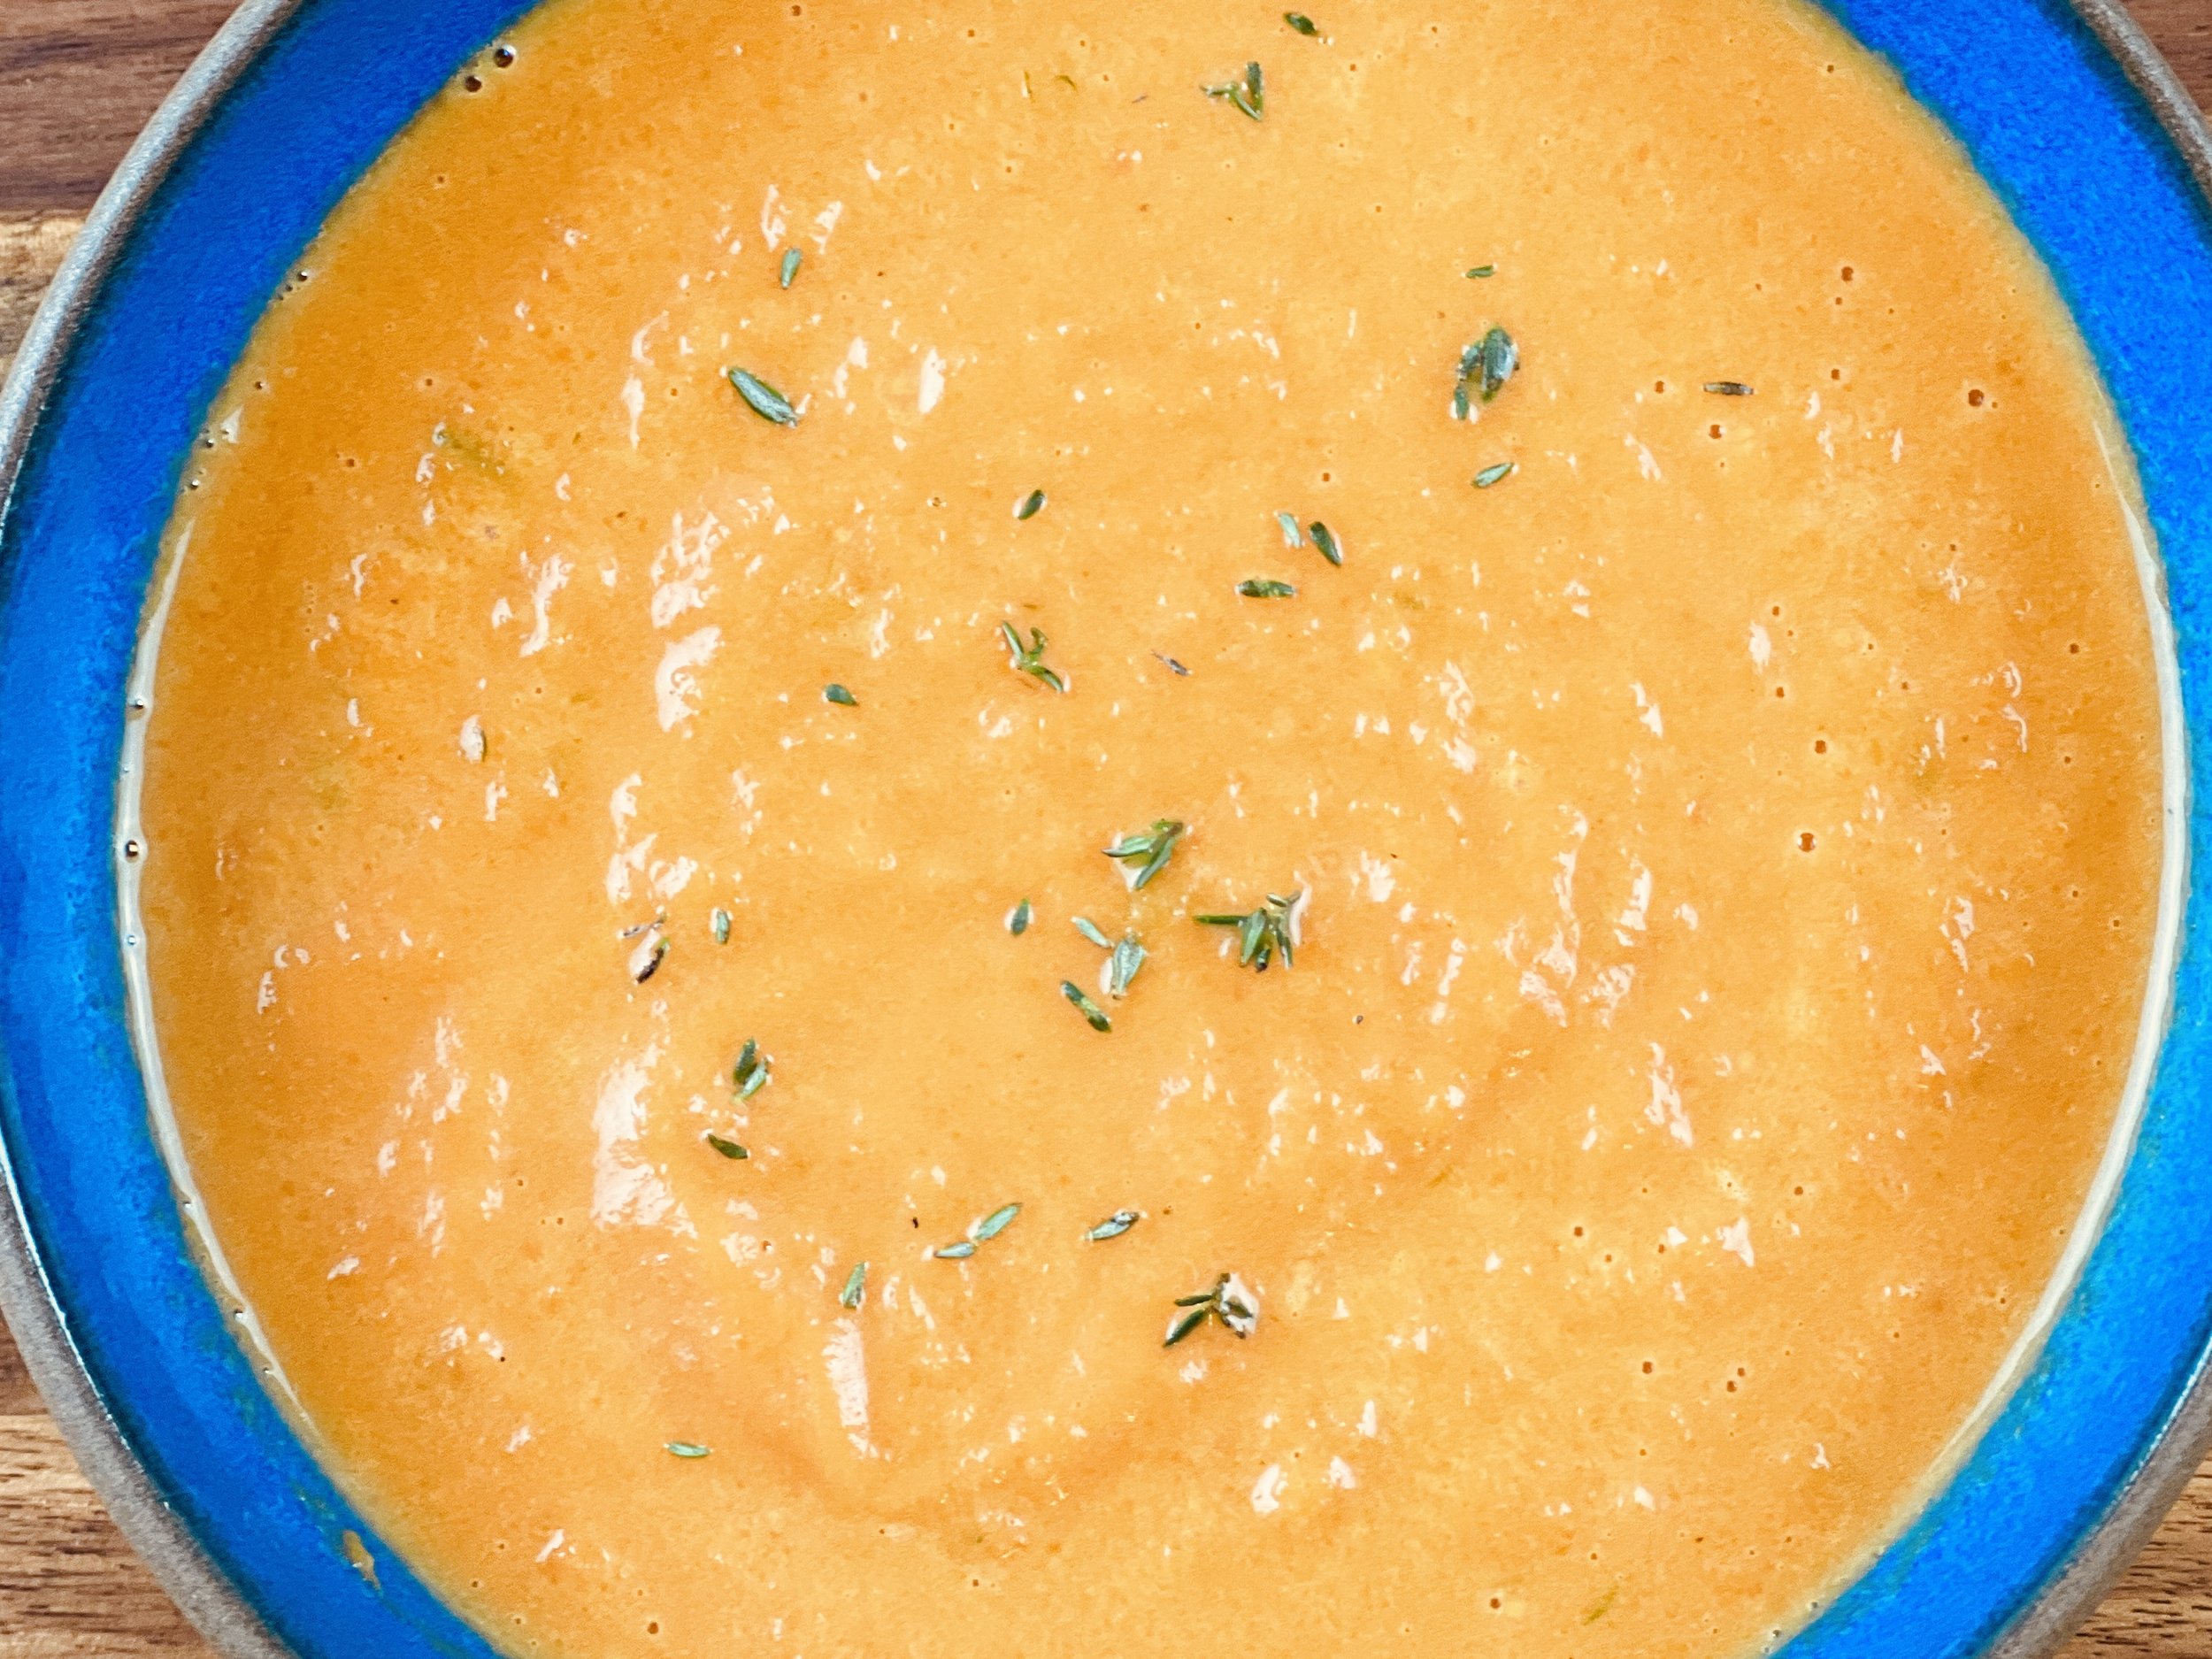
Roasted Pumpkin Soup (low FODMAP)
15 Minutes prep • 60 Minutes cook • Low FODMAP • Vegetarian • Dairy-free • Serves 4 - 6 • Ok to make-ahead: Steps 1 - 7
15 Minutes prep • 60 Minutes cook • Low FODMAP • Vegetarian • Dairy-free • Serves 4 - 6 • Ok to make-ahead: Steps 1 - 7
This low FODMAP pumpkin soup is easy to make, and delicious! It’s dairy-free and the coconut milk gives it a wonderful silky quality. This soup would be great with our perfect grilled cheese sandwich for a wonderful lunch or light dinner or a wonderful addition to your holiday feast. The leftovers taste even better the next day so, you can make it a day ahead to save time. Don’t worry about the onions and the garlic causing an IBS flare-up. They are just used to make the flavored oil and they get removed before any FODMAPs can escape, so this recipe really is low FODMAP!
Ingredients
5 tablespoons garlic-infused olive oil, divided
One 4-pound sugar pie pumpkin (or one large can of unsweetened pumpkin—see pro-tip)
1 medium yellow onion, quartered
4 large garlic cloves, peeled (don’t worry this really is low FODMAP!)
1/2 teaspoon Kosher salt*
1/2 teaspoon ground cinnamon*
1/2 teaspoon ground nutmeg*
1/8 teaspoon cloves*
Pinch of cayenne pepper* (optional)
Freshly ground black pepper*
3 cups low FODMAP chicken or vegetable broth (I like Gourmend Organic Chicken Broth - Use code IBSGC15 for a 15% discount)
1/2 cup full-fat coconut milk*, coconut cream*, or heavy cream
2 tablespoons maple syrup*
Salt and pepper to taste
Roasted and salted pepitas, or chopped fresh chives or parsley for serving
Directions
(1) Roast the pumpkin: Preheat the oven to 425 degrees F and line a rimmed baking sheet with parchment paper. Carefully cut the pumpkin in half and scoop out the seeds. Slice each pumpkin half in half again to make quarters. Brush or rub 1 tablespoon olive oil over the flesh of the pumpkin and put the quarters, cut side down, onto the prepared baking sheet. Roast for 35 minutes or longer, until the orange skin is easily pierced through with a fork. Set it aside to cool for a few minutes.
(2) Prepare your onion/garlic oil: Heat the remaining 4 tablespoons olive oil in a large Dutch oven or heavy-bottomed pot over medium heat. Once the oil is shimmering, add onion, garlic, and salt to the pot. Stir to combine. Cook, stirring occasionally, for about 5 minutes then remove all garlic and onion pieces and bits from the oil.
(3) Chop the pumpkin: In the meantime, using the point of a sharp knife lift away the pumpkin skin and discard it. Chop the roasted pumpkin flesh into chunks.
(4) Prepare the soup: Heat the onion/garlic oil over medium-high heat again and put the roasted pumpkin chunks, cinnamon, nutmeg, cloves, cayenne pepper (if using), and a few twists of freshly ground black pepper in once the oil is hot again. Pour in the broth and stir to break up the pumpkin a bit. Bring the mixture to a boil, then reduce the heat and simmer for about 15 minutes, to give the flavors time to meld.
(5) Blend the soup: Once the pumpkin mixture is done cooking, stir in the coconut milk and maple syrup. Remove the soup from the heat and let it cool slightly. You can use an immersion blender to blend the soup in the pot or you can use a blender—working in batches. Transfer the puréed soup to a serving bowl and repeat the steps until all the soup is puréed and smooth.
(6) Finish: Taste and adjust salt and pepper if necessary (add more coconut milk to make it creamier/milder, add maple syrup to make it a little sweeter, and/or add salt to make the flavors pop a bit more).
Make-ahead note: At this point, you may transfer the soup to an airtight container and store it in the fridge for up to 4 days or freeze and reheat when ready to serve. This soup actually tastes better the second day so it’s a great make-ahead option.
(7) Plate and serve: Ladle into bowls. Sprinkle with roasted pepitas or fresh chives or parsley and a good grinding of fresh pepper and serve.
Pro Tip: This pumpkin soup recipe includes instructions on how to roast fresh pumpkin, for maximum pumpkin flavor. Canned pumpkin purée also works well, if you’re in a time crunch. Just add it in with the broth after you’ve created the garlic/onion oil.
Eat and enjoy every bite because you can!
*This post may contain links for you to easily purchase items listed on the page. In some cases, we have provided a special discount code for IBS Game Changers so be sure to use it when you purchase an item to get the discount that has been arranged just for you! As an Amazon Associate, I earn a commission from qualifying Amazon purchases.
More Deliciously Low FODMAP™ soup recipes you might enjoy


Roasted Corn and Herb Pasta Carbonara (low FODMAP)
15 Minutes Prep • 15 Minutes cook • Low FODMAP • Gluten-free • Serves 6 • Ok to make-ahead: Steps 1 - 3
The roasted corn and fresh herbs in this recipe put a wonderful spin on a classic. Pasta carbonara uses pretty basic pantry ingredients (pasta, parmesan cheese, eggs, and bacon) and comes together without a lot of effort so it’s one of those meals you can probably put together when you have “nothing” to cook! And, it’s delicious! It’s a family favorite and this version has just made it all the more so!

Ingredients
3 ears fresh corn, shucked
6-8 slices bacon**
1 tablespoon salted butter, softened
2 tablespoons extra virgin olive oil
1/2 cup chopped fresh herbs (I used thyme, basil, oregano, and chives but you could use just basil if that’s all you have) + more for serving
3 large eggs, at room temperature, beaten
3/4 cup grated parmesan cheese + more for serving
Zest and juice of 1/2 a lemon
1 tablespoon Smoke N Sanity Essence of Onion Salt* (use code IBSGC10 for a 10% discount)
OR you can use 1 teaspoon Kosher salt and 4 chopped green onions (green part only) added to the fresh herb mixture
12 ounces dry gluten-free dry pasta, any shape you like (I used Delallo Penne Rigate*)
Kosher salt* and black pepper* to taste
**Not a bacon fan? It’s traditional to include bacon in carbonara, but if you’re not a fan or you don’t have any on hand, use Canadian bacon or ham instead. (Heck, you could even use SPAM!)
Directions
(1) Roast the corn and bacon: Preheat oven to 400 degrees F. Line a large rimmed baking sheet with foil. Arrange the corn on one side of a baking sheet and lay the strips of bacon on the other. Roast for 10 minutes.
(2) Make the herb butter: Meanwhile, combine the softened butter, olive oil, herbs, salt, and pepper in a small bowl.
(3) Baste the corn: Remove the pan from the oven, turn the bacon over, and spread half of the herb butter over the corn, rolling the cobs to fully coat. Roast another 5-8 minutes, until the bacon is crisp but not burned! If the corn needs more time, take the bacon out and put it on paper towels, and return the corn to the oven for another 5 minutes. Cut the corn from the cob and chop the bacon.
Make-ahead note: At this point, you may set the corn and bacon and the rest of the herb butter aside until you are ready to cook the pasta and prepare the final dish.
(4) Prepare the carbonara sauce: Whisk together the eggs, parmesan, lemon zest, and lemon juice, and remaining herb butter in a bowl.
(5) Cook the pasta: Bring a large pot of well-salted water to a boil. Boil the pasta until al dente. Before draining, scoop out about 1/2 cup of the pasta water. Drain the pasta and immediately add it back to the hot pot. Next, add the egg/cheese mixture to the hot pasta, tossing as you add the egg mixture (to be sure the eggs don’t scramble) until the eggs thicken and create a sauce. Thin the sauce if needed with a bit of the reserved pasta water until it reaches your desired consistency.
(6) Finish: Add the corn, toss to combine. Add the Essence of Onion Salt (if using). Toss and taste. Then season with additional salt and pepper if needed.
(7) Plate and serve: Divide the pasta among plates and top with parmesan, bacon, and fresh herbs.
Eat and enjoy every bite because you can!
*This post may contain links for you to easily purchase items listed on the page. In some cases, we have provided a special discount code for IBS Game Changers so be sure to use it when you purchase an item to get the discount that has been arranged just for you! As an Amazon Associate, I earn a commission from qualifying Amazon purchases.
More Deliciously Low FODMAP™ main course recipes you might enjoy
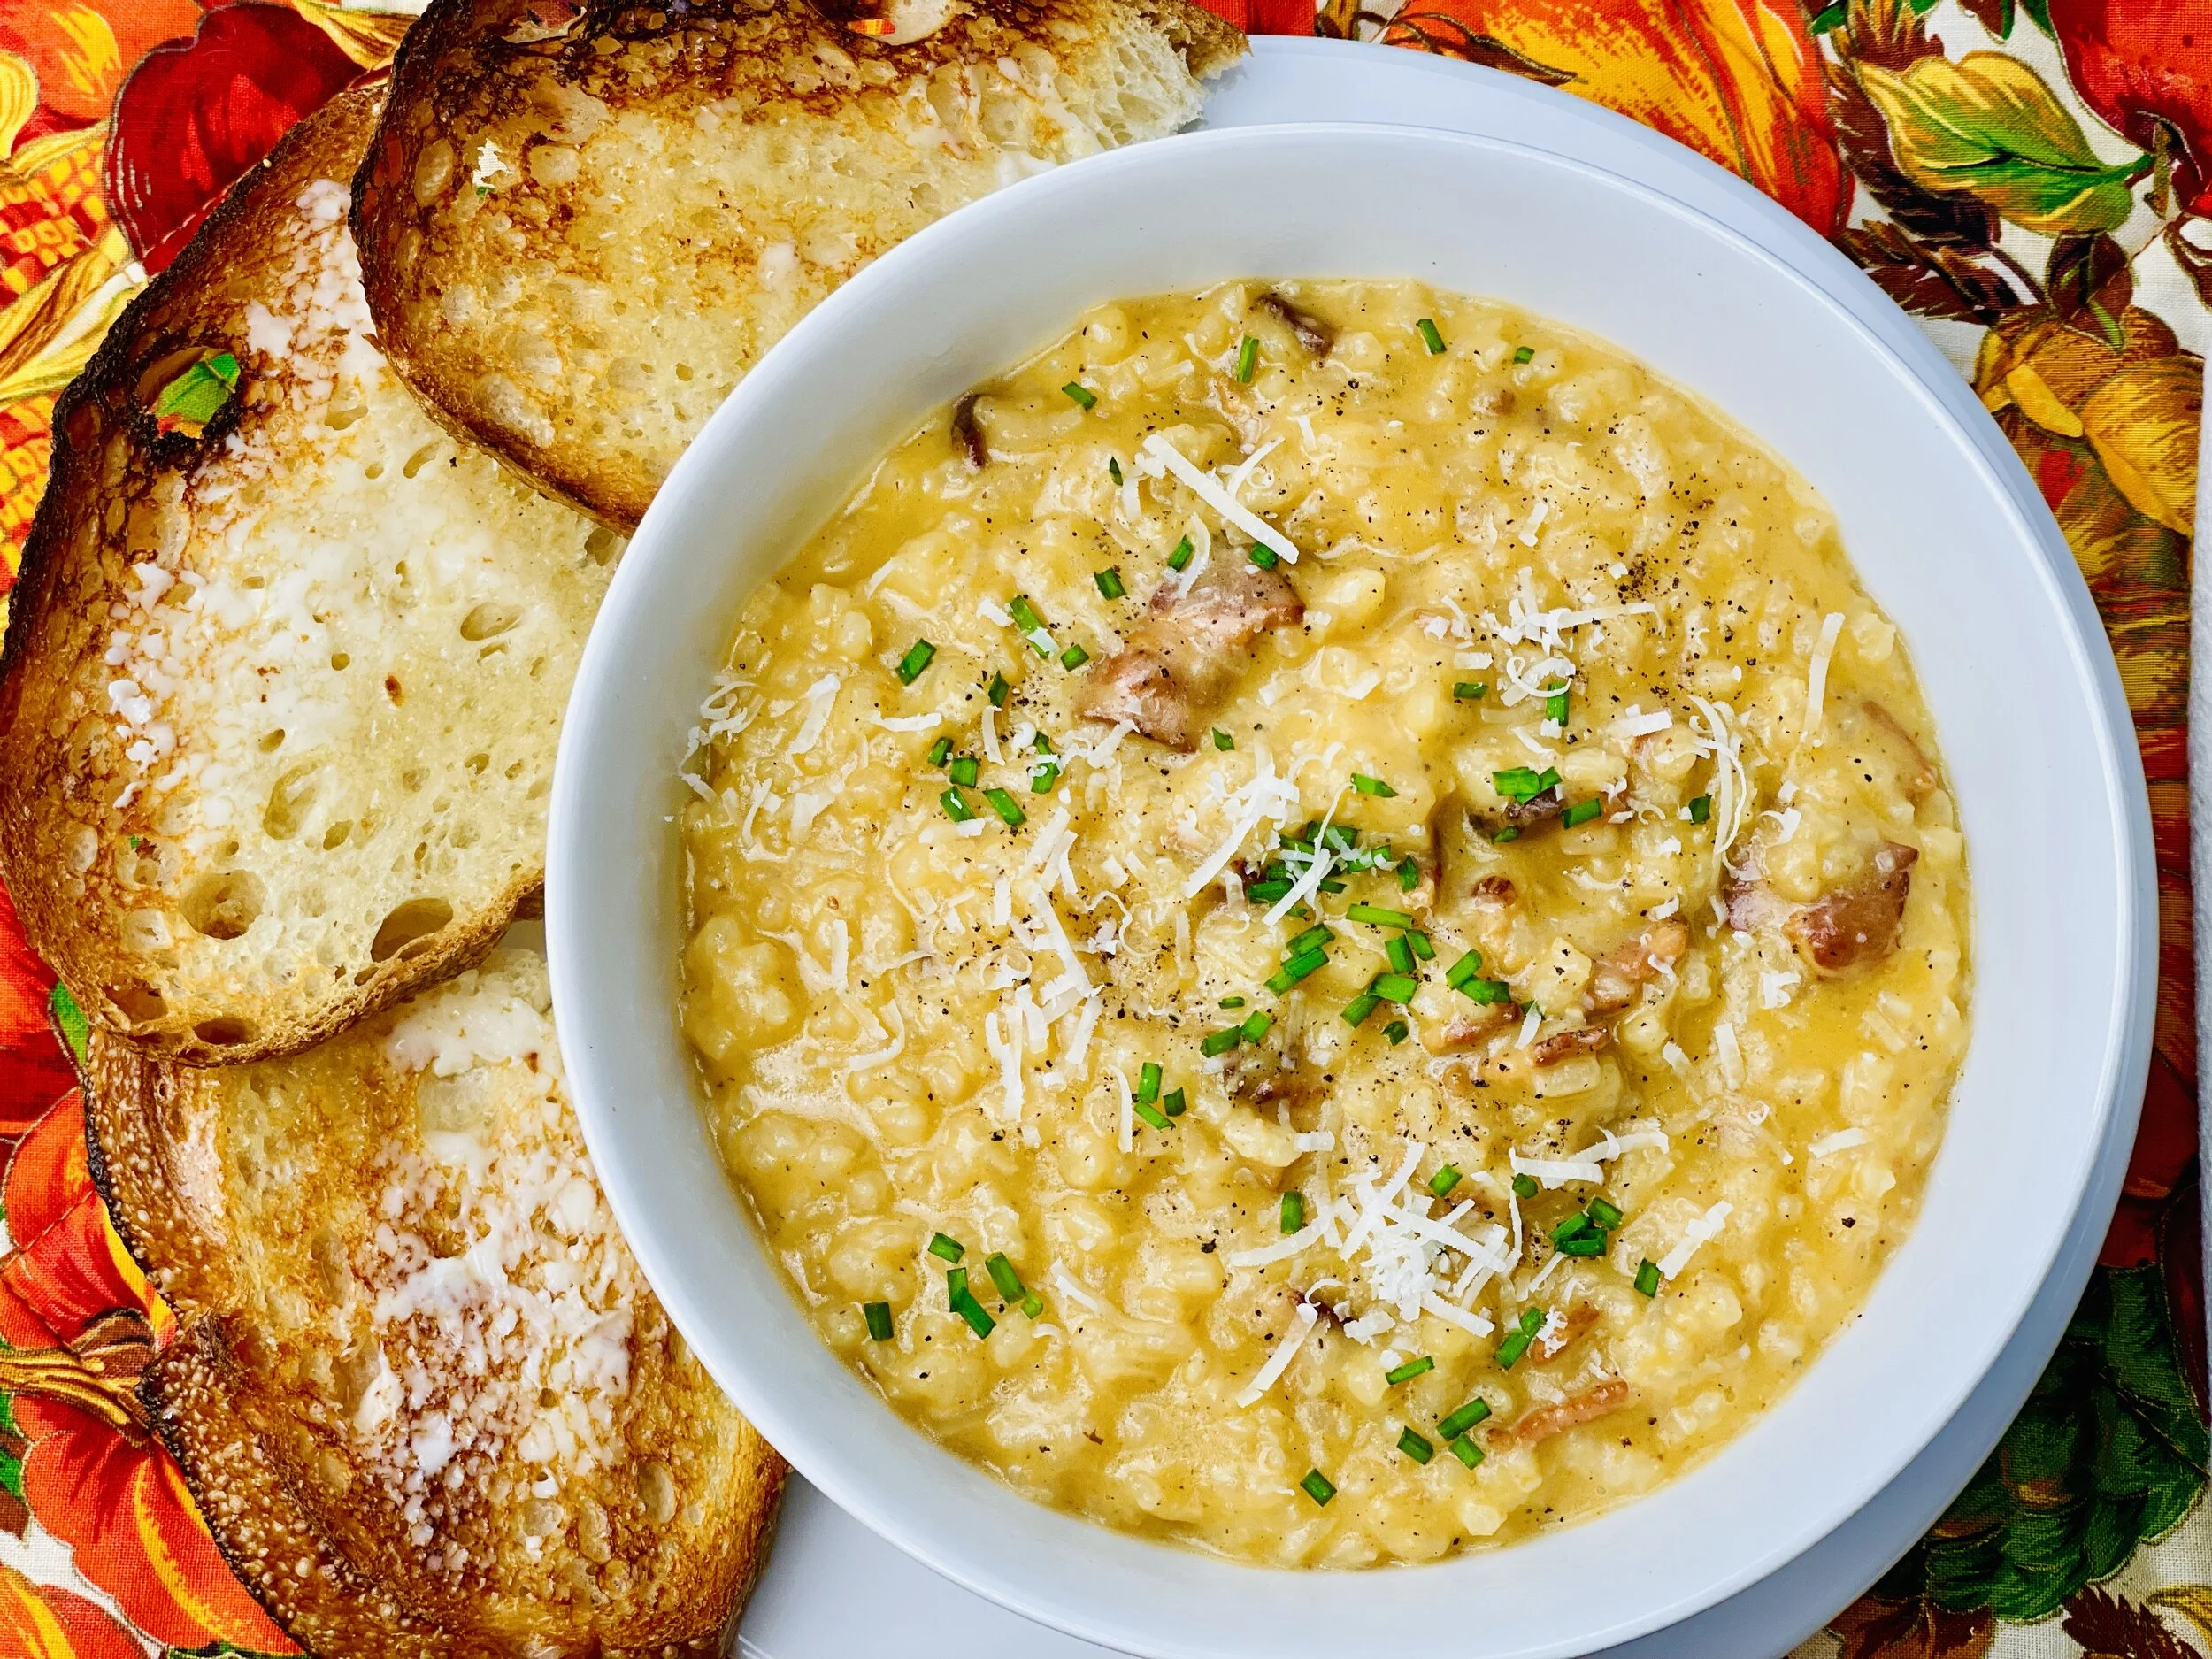
Pumpkin, Bacon, Cheddar Risotto (low FODMAP)
20 Minutes prep • 30 Minutes cook • Low FODMAP • Gluten-free • Serves 6
20 Minutes prep • 30 Minutes cook • Low FODMAP • Gluten-free • Serves 6 • Ok to make-ahead: Steps 1 - 5
Tis’ the season to roll out the comfort food, and this one’s a winner! The flavor is kind of like that yummy potato skin appetizer with the bacon and the cheese but the pumpkin and the risotto bring a whole new level of creamy deliciousness. I like to serve it with some crisp buttered sourdough toast for a bit of crunch to balance the creamy risotto. A nice green salad would round this out into a perfect weeknight, or any night, dinner.
This is an exclusive recipe just for recipe club members.
Each week I am creating and delivering one very special recipe just for my recipe club members. If you’re not yet a member, I encourage you to join! Membership in the club includes access to the complete archive of recipes with filters so it can become your virtual low FODMAP cookbook plus, I am creating and delivering one special NEW recipe every week ONLY for recipe club members. And, for my true fans, I’ll be sharing behind-the-scenes content, and updates on the progress of the new cookbook.
Your membership in the club helps me continue creating new, delicious, easy-to-make, low FODMAP recipes just for you.
As always, all recipes will emphasize simple ingredients, easy preparation, and delicious low FODMAP results. Recipes will be for everything from main courses, salads, soups, side dishes, appetizers, desserts, sauces, breakfast and lunch, and even mocktails and cocktails. Everything you need to prepare fantastic low FODMAP meals everyone will love.
Join the club. Become a Patron. Let’s keep making delicious Low FODMAP meals together.
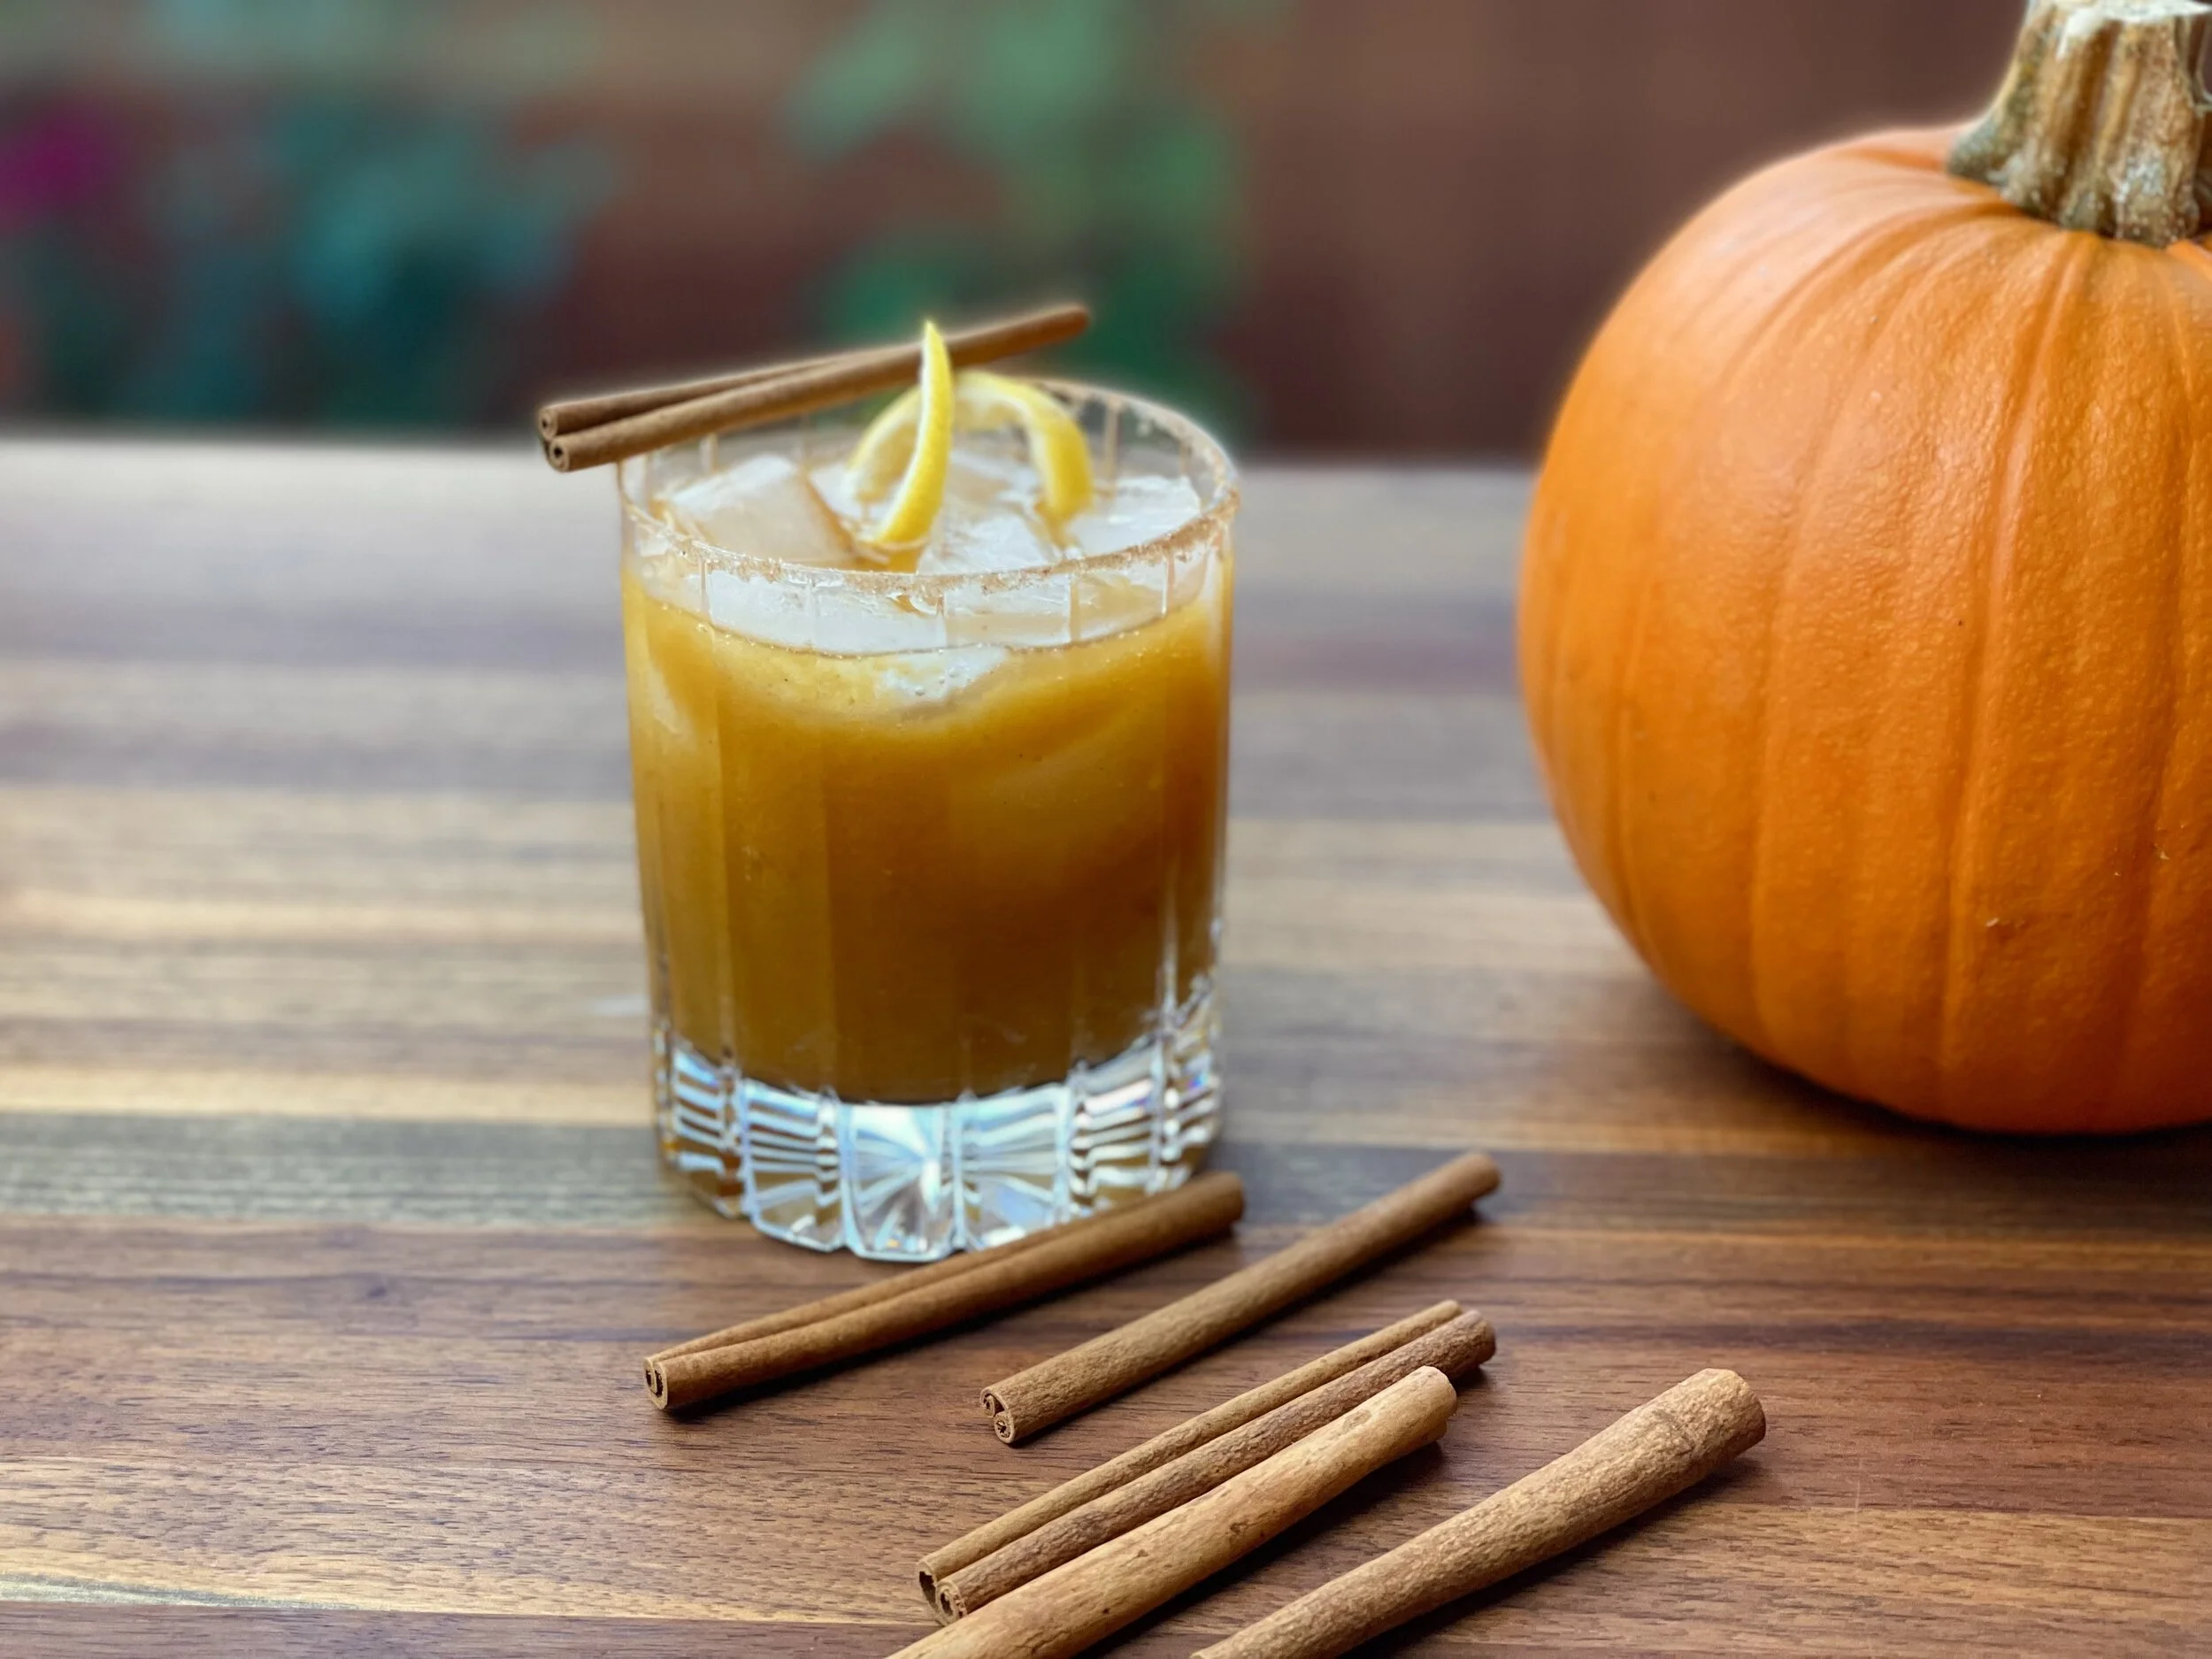
Great Pumpkin Cocktail (low FODMAP)
10 Minutes • Low FODMAP • Serves 2 • Ok to make-ahead: Step 1
10 Minutes • Low FODMAP • Gluten-free • Lactose-free • Serves 2 • Ok to make-ahead: Step 1
I love fall with the crisp air and the smell of fabulous things cooking in the kitchen. This is a wonderful fall cocktail with the flavors of pumpkin spice, maple syrup, and cinnamon. It uses our pumpkin spice butter as a base so make that ahead of time for the best version of this cocktail! (Don’t worry, it’s quick to make.)
Ingredients
1/4 cup white wine (sauvignon blanc works well)
2 tablespoons freshly squeezed lemon juice
2 tablespoons pumpkin butter (use our Pumpkin Spice Butter or buy low FODMAP pumpkin butter)
2 ounces bourbon whiskey or vodka
1 ounce brandy (made from grapes rather than peaches or other high FODMAP fruits)
3 ounces ginger beer or sparkling water (I like Fever Tree Ginger Beer because it’s sweetened without high fructose corn syrup)
2 lemon twists and 2 cinnamon sticks for serving
Cinnamon sugar, for rims of glasses
Directions
(1) Make your cinnamon sugar-rimmed glasses: Rub a piece of lemon around the rim of each glass and dip each glass rim into a small bowl or plate with a mixture of 2 parts sugar to one part cinnamon.
(2) Mix: In a cocktail shaker or glass jar, combine the lemon juice, pumpkin butter, bourbon or vodka, and brandy with a generous scoop of ice cubes. Shake for about 30 seconds to mix and chill well.
(3) Serve: Fill your cinnamon sugar-rimmed glasses with ice and pour the chilled cocktail into the glasses, leaving the ice cubes behind in the shaker. Top off with the ginger beer, a lemon twist, and a cinnamon stick.
Drink and enjoy every sip because you can!
This post may contain affiliate links so you can easily purchase items listed on the page. In some cases, we have provided a special discount code for IBS Game Changers so be sure to use it when you purchase an item to get the discount that has been arranged just for you!
More Deliciously Low FODMAP™ cocktail recipes you might enjoy

Sweet Potato Spice Cake with Cream Cheese Frosting (low FODMAP)
15 Minutes prep • 30 Minutes cook • Low FODMAP • Gluten-free • Serves 8 - 12 • Ok to make-ahead: Steps 1 - 6
15 Minutes prep • 30 Minutes cook • Low FODMAP • Gluten-free • Serves 8 - 12 • Ok to make-ahead: Steps 1 - 6
Sweet potato spice cake is one of the easiest cakes to make and, because it includes both sweet potatoes and oil, it’s an incredibly moist cake. The sweet potatoes give it a beautiful orange color and when you top it off with our best cream cheese frosting you have a picture-perfect cake that you’ll be adding regularly to your cake-making lineup. Bring this cake to your next family gathering and they’ll all think you’ve become a baking genius!
Ingredients
2 3/4 cups gluten-free all-purpose flour (I used King Arthur Measure for Measure)
1 3/4 teaspoons baking powder
1 teaspoon kosher salt
1/4 teaspoon baking soda
2 teaspoons ground cinnamon
3/4 teaspoon ground nutmeg
1/2 teaspoon ground ginger
1/4 teaspoon ground allspice
1 cup vegetable oil
1 1/2 cups light brown sugar
1 cup granulated sugar
2 teaspoons pure vanilla extract
3 large eggs at room temperature
1 large egg yolk at room temperature
1 (15 ounce) can of sweet potato puree
1/2 cup lactose-free sour cream
Directions
(1) Prepare: Preheat the oven to 350 degrees F. Grease one 13x9x2-inch pan or two 9-inch round pans and line the bottom with parchment paper.
(2) Combine the dry ingredients: In a medium-sized bowl, whisk together the gluten-free flour, baking powder, salt, baking soda, and spices.
(3) Combine the wet ingredients: In the bowl of the stand mixer fitted with paddle attachment mix together the oil, sugars, and vanilla. Add the eggs and extra egg yolk, one at a time, and beat on medium speed until smooth between each addition. Add the sweet potato and the sour cream and beat until smooth.
(4) Blend the cake: Add the dry ingredients to the wet in two parts and, mix on low just until the flour disappears—do not over-mix.
(5) Bake the cake: Transfer the batter to the prepared pan and smooth the top with a rubber spatula. Bake for 30 to 35 minutes until a toothpick comes out with only a moist crumb or two.
(6) Finish: Let cool until easy to handle, then run a butter knife around the edges, releasing it from the pan. Invert the cake onto a cooling rack, flipping it right side up to cool to room temperature.
Make-ahead note: At this point, the cake will keep in an airtight container at room temperature for 2-3 days. when I made this cake, I baked the cake on day 1 and then frosted it on day 2. It was delicious!
(7) Frost the cake: When ready to frost the cake, make our best cream cheese frosting then frost.
(8) Plate and serve: Slice and serve and watch your family, friends, or guests marvel at what a moist and delicious cake you have made!
Pro tips: To bring eggs up to room temperature quickly, simply put them in a bowl of warm (not hot) water for a few minutes.
This cake would be delicious and would work well, as a sheet cake or cupcakes too. Just modify your cooking time so they don’t overcook.
This post may contain affiliate links so you can easily purchase items listed on the page. In some cases, we have provided a special discount code for IBS Game Changers so be sure to use it when you purchase an item to get the discount that has been arranged just for you!
More Deliciously Low FODMAP™ dessert recipes you might enjoy
Best Cream Cheese Frosting (low FODMAP)
15 Minutes • Low FODMAP • Gluten-free • Lactose-free • Makes 2 cups • Ok to make-ahead: Steps 1 - 3
15 Minutes • Low FODMAP • Gluten-free • Lactose-free • Makes 2 cups • Ok to make-ahead: Steps 1 - 3
Let’s face it. Cream cheese frosting is one of the more decadent ways of topping your favorite cake. But some cream cheese frosting recipes make a heavy frosting you have to bite into that has the quality of cream cheese rather than the light quality of frosting. This recipe yields a light, fluffy, cream-cheesy taste that is simply divine with our sweet potato cake. It would also be perfect on carrot cake, pumpkin muffins, or anything else you could add creamy cheesy buttery frosting to!
Ingredients
1/2 cup (4 ounces) lactose-free cream cheese, at room temperature
2 sticks (8 ounces) unsalted butter, at room temperature
4 cups confectioners’ sugar, sifted
1/2 teaspoon kosher salt
1 teaspoon white vinegar
1 teaspoon vanilla
2 tablespoons heavy cream, lactose-free whole milk or lactose-free half and half
Directions
(1) Combine the cream cheese and butter: In the bowl of a stand mixer fitted with the paddle attachment, beat the cream cheese and butter on medium-high speed for about 5 - 7 minutes until light yellow and fluffy.
(2) Add the sugar: Turn the mixer off and sift the confectioner’s sugar into the bowl with the butter mixture. Mix on low for 2 minutes then scrape down the sides of the bowl. Continue to mix, increasing the speed to medium-high, until the frosting is light and fluffy and no lumps are visible.
(3) Finish: Add the salt, vinegar, vanilla, and heavy cream. Use the frosting immediately, or store it in the fridge until you’re ready to decorate.
(4) Frost something! Use the frosting immediately, or store it in the fridge until you’re ready to decorate.
Make-ahead note: At this point, you may refrigerate the frosting if you’re not going to use it right away. If you do refrigerate it, you may have to let it warm up a bit and then re-whip it for a minute or two in the stand mixer on low before it’s spreadable again.
Eat and enjoy every bite because you can!
This post may contain affiliate links so you can easily purchase items listed on the page. In some cases, we have provided a special discount code for IBS Game Changers so be sure to use it when you purchase an item to get the discount that has been arranged just for you!
More Deliciously Low FODMAP™ dessert recipes you might enjoy
Pumpkin Spice Butter (low FODMAP)
5 Minutes prep • 30 Minutes cook • Low FODMAP • Makes 2 cups • Ok to make-ahead: Steps 1 - 4
5 Minutes prep • 30 Minutes cook • Low FODMAP • Makes 2 cups • Ok to make-ahead: Steps 1 - 4
Pumpkin spice butter is the low FODMAP answer to apple butter — only better! This wonderful spread can be used as a delicious flavoring for other things (overnight oats for example), as a spread on toasted sourdough, mixed into vanilla ice cream, or incorporated into a cocktail. It’s oh so simple to make and it keeps nicely so you can have it on hand.
Ingredients
1 (15 ounce) can of pumpkin (I like Libby’s canned pumpkin)
2 1/2 tablespoons white wine (sauvignon blanc is a good choice)
1/4 cup real maple syrup
1/4 cup light brown sugar
1 1/2 teaspoons vanilla extract
3 teaspoons pumpkin pie spice
1/2 teaspoon cinnamon
1/4 teaspoon Kosher salt
Directions
(1) Mix: In a medium saucepan, combine the pumpkin, wine, maple syrup, vanilla, pumpkin pie spice, cinnamon, and salt.
(2) Cook: Bring to a gentle boil over medium heat. Cook, stirring often until the pumpkin thickens slightly, but is spreadable for about 20-30 minutes.
(3) Finish: Taste, adding more maple syrup if needed to sweeten or salt if needed to make the flavors pop a bit more.
(4) Serve: Remove from the heat and let cool (the pumpkin butter will thicken more as it cools). Use this pumpkin spice butter as a spread on toasted sourdough, as a key component of our pumpkin schmear, and as a foundation for our Great Pumpkin cocktail.
To store, transfer to glass jars and keep stored in the fridge for up to 1 month or in freezer-safe containers for up to 3 months.
Eat and enjoy every bite because you can!
This post may contain affiliate links so you can easily purchase items listed on the page. In some cases, we have provided a special discount code for IBS Game Changers so be sure to use it when you purchase an item to get the discount that has been arranged just for you!
More Deliciously Low FODMAP™ breakfast recipes you might enjoy
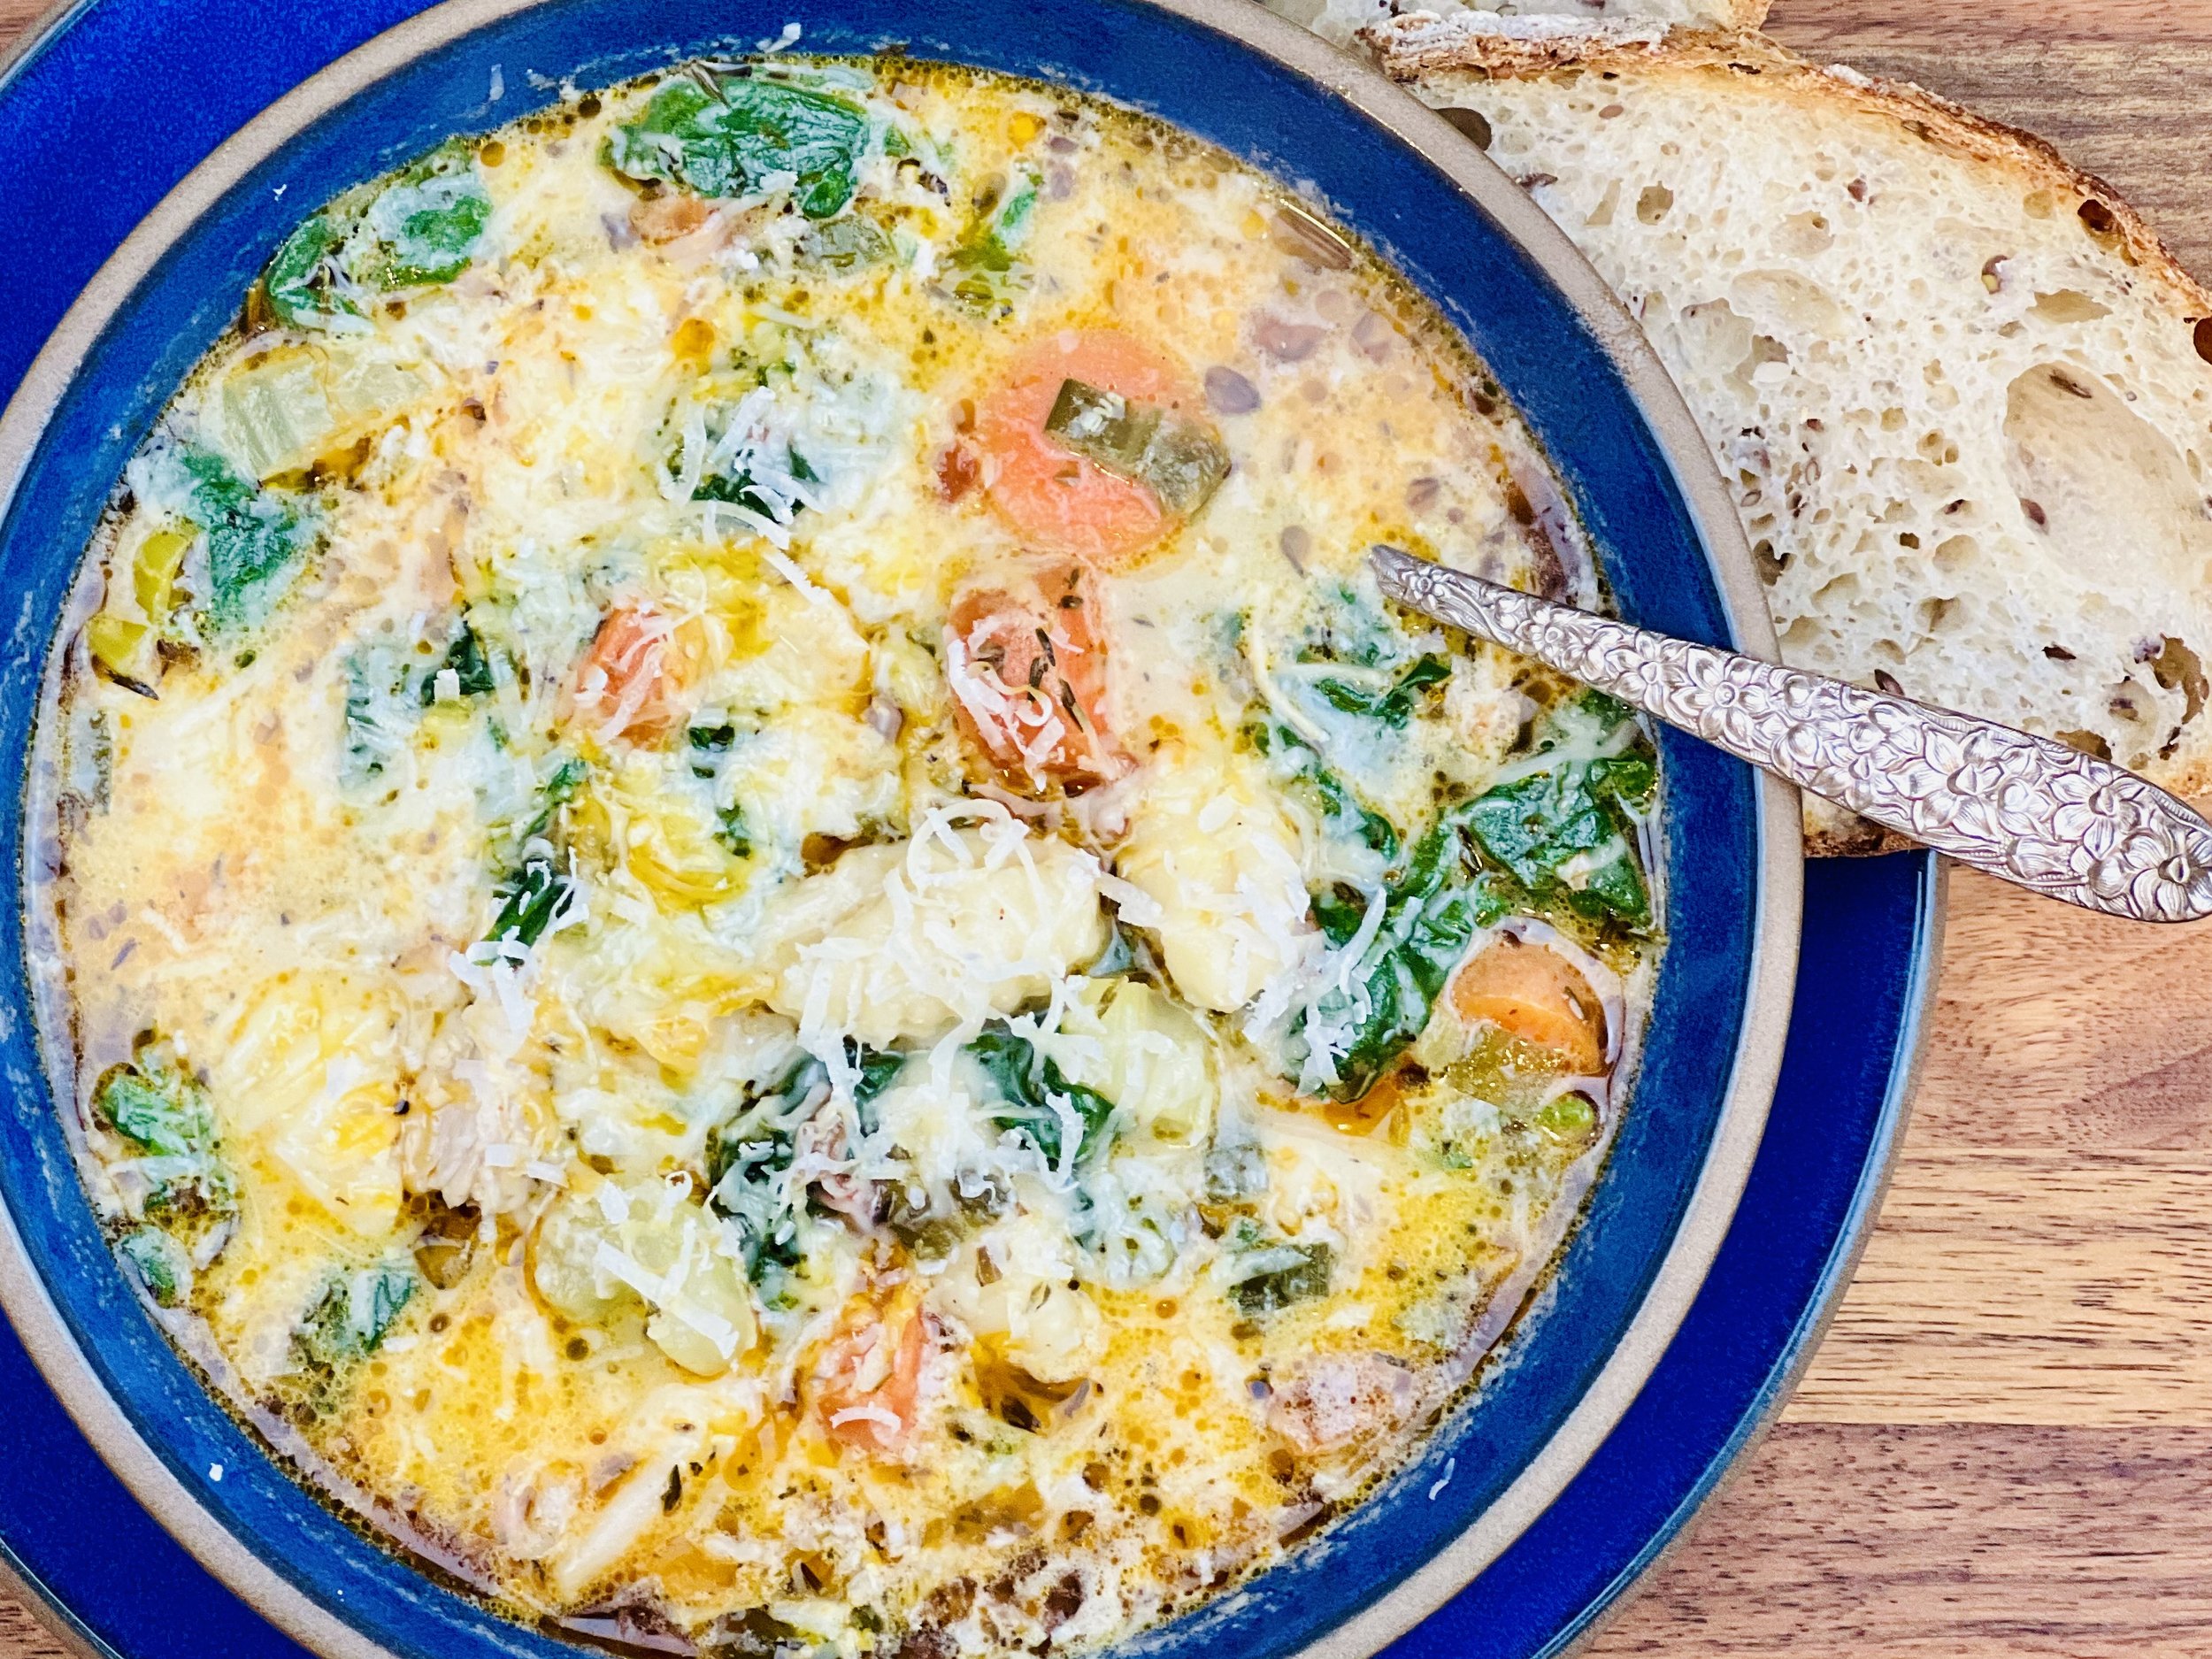
Mac n’ Cheese with Herby Croutons (low FODMAP)
20 Minutes prep • 30 Minutes cook • Low FODMAP • Vegetarian • Serves 8
20 Minutes prep • 30 Minutes cook • Low FODMAP • Vegetarian • Serves 8 • Ok to make-ahead: Steps 1 - 7
This super creamy mac and cheese checks all the boxes when it comes to my favorite mac and cheese recipes. Even better, it comes with a crisp and flavorful surprise for your mouth with the herby croutons. Serve it as a delicious side dish or perfect vegetarian main course. It’s sure to be a crowd-pleaser.

This is an exclusive recipe just for recipe club members.
Each week I am creating and delivering one very special recipe just for my recipe club members. If you’re not yet a member, I encourage you to join! Membership in the club includes access to the complete archive of recipes with filters so it can become your virtual low FODMAP cookbook plus, I am creating and delivering one special NEW recipe every week ONLY for recipe club members. And, for my true fans, I’ll be sharing behind-the-scenes content, and updates on the progress of the new cookbook.
Your membership in the club helps me continue creating new, delicious, easy-to-make, low FODMAP recipes just for you.
As always, all recipes will emphasize simple ingredients, easy preparation, and delicious low FODMAP results. Recipes will be for everything from main courses, salads, soups, side dishes, appetizers, desserts, sauces, breakfast and lunch, and even mocktails and cocktails. Everything you need to prepare fantastic low FODMAP meals everyone will love.
Join the club. Become a Patron. Let’s keep making delicious Low FODMAP meals together.
Heirloom Tomato Salad (low FODMAP)
25 Minutes prep • Low FODMAP • Gluten-free • Lactose-free • Serves 4
25 Minutes prep • Low FODMAP • Gluten-free • Lactose-free • Serves 4 - 6 • Ok to make-ahead: Steps 1 - 2
Heirloom tomatoes make the simplest and most elegant salad ever. You can select a variety of colors or all one color. The flavor is wonderful and the color is right up there with a Van Gogh painting. The simplest dressing is all you need to bring out the best flavor in these remarkable tomatoes.
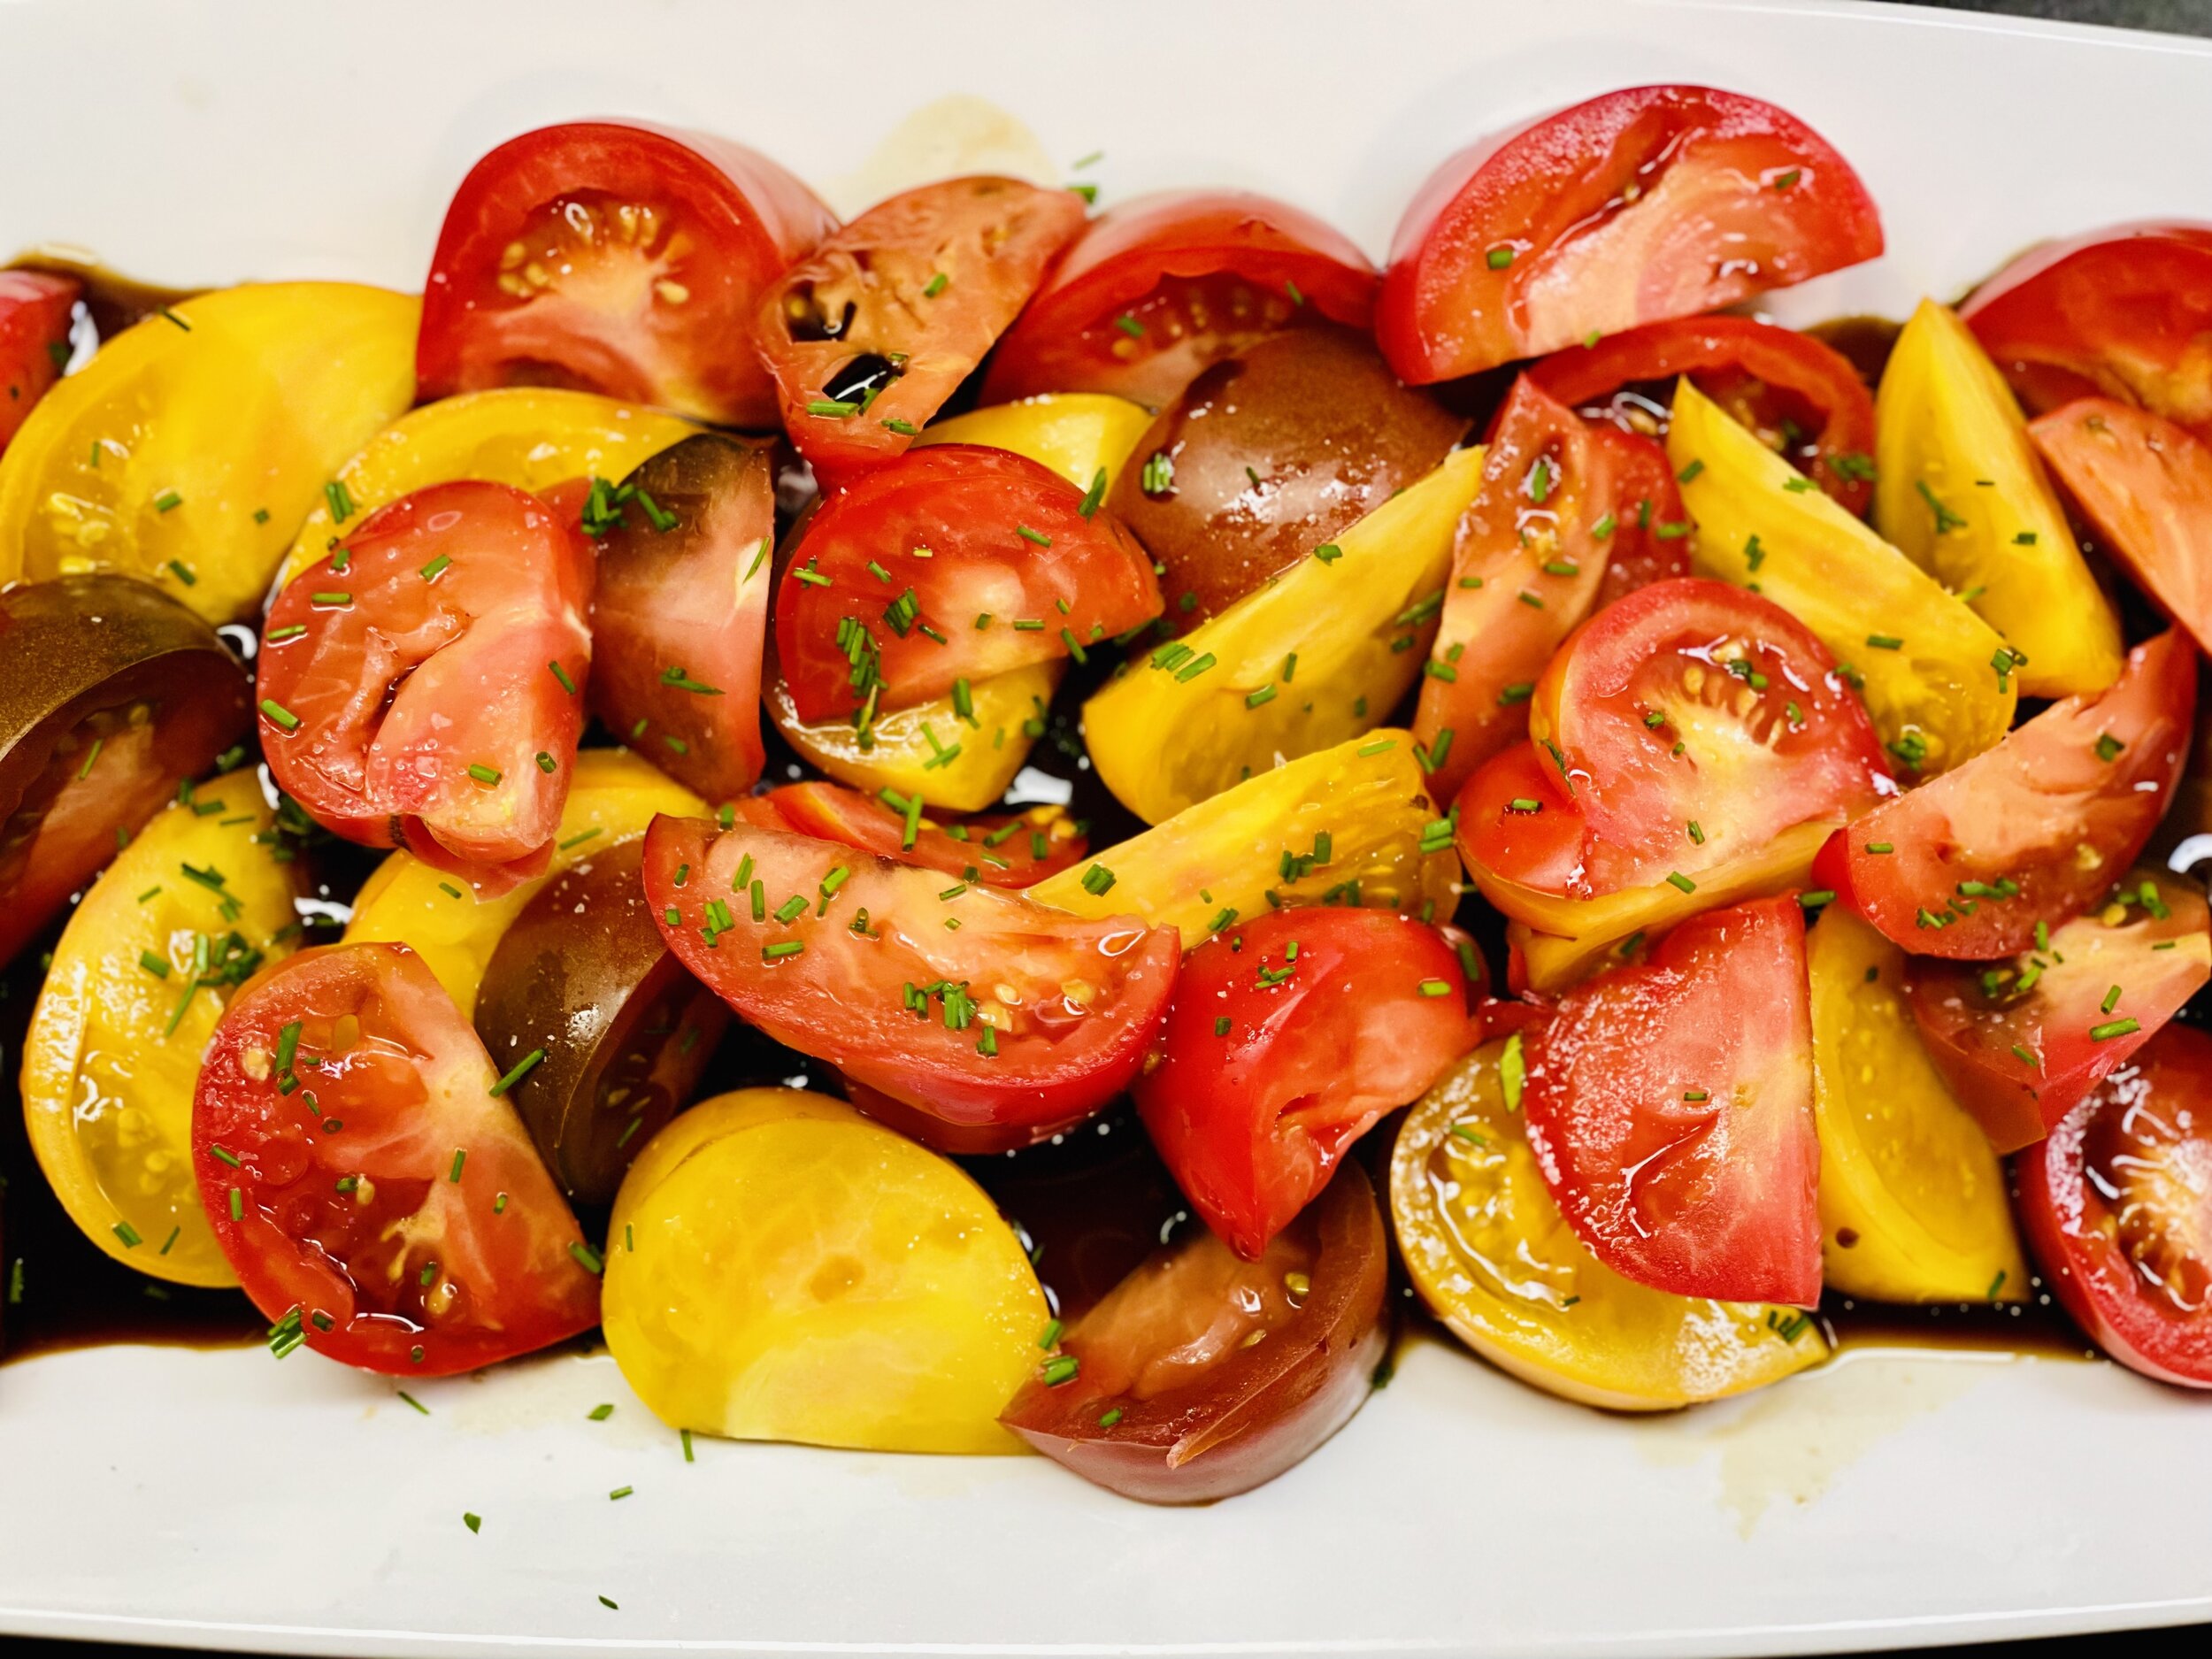
Ingredients
2 - 4 Heirloom tomatoes, cut into wedges
1 tablespoon fresh chives, chopped
1/2 cup Balsamic vinegar, reduced
Kosher salt and pepper to taste
Directions
(1) Reduce the vinegar: In a small saucepan bring the balsamic vinegar to a boil then turn the heat down to a simmer and cook until reduced by about half.
(2) Prepare the vegetables: Wash, dry, and slice the tomatoes into wedges. Chop the chives.
Make-ahead note: At this point, you may set the ingredients aside until you are ready to serve. Do not refrigerate tomatoes as they will lose some of their good taste.
(3) Finish: Put the tomato wedges on a serving plate, drizzle with the cooled balsamic reduction, and sprinkle with salt, pepper, and chives.
(4) Serve: Serve immediately.
Eat and enjoy every bite because you can!
More Deliciously Low FODMAP™ salads you might enjoy

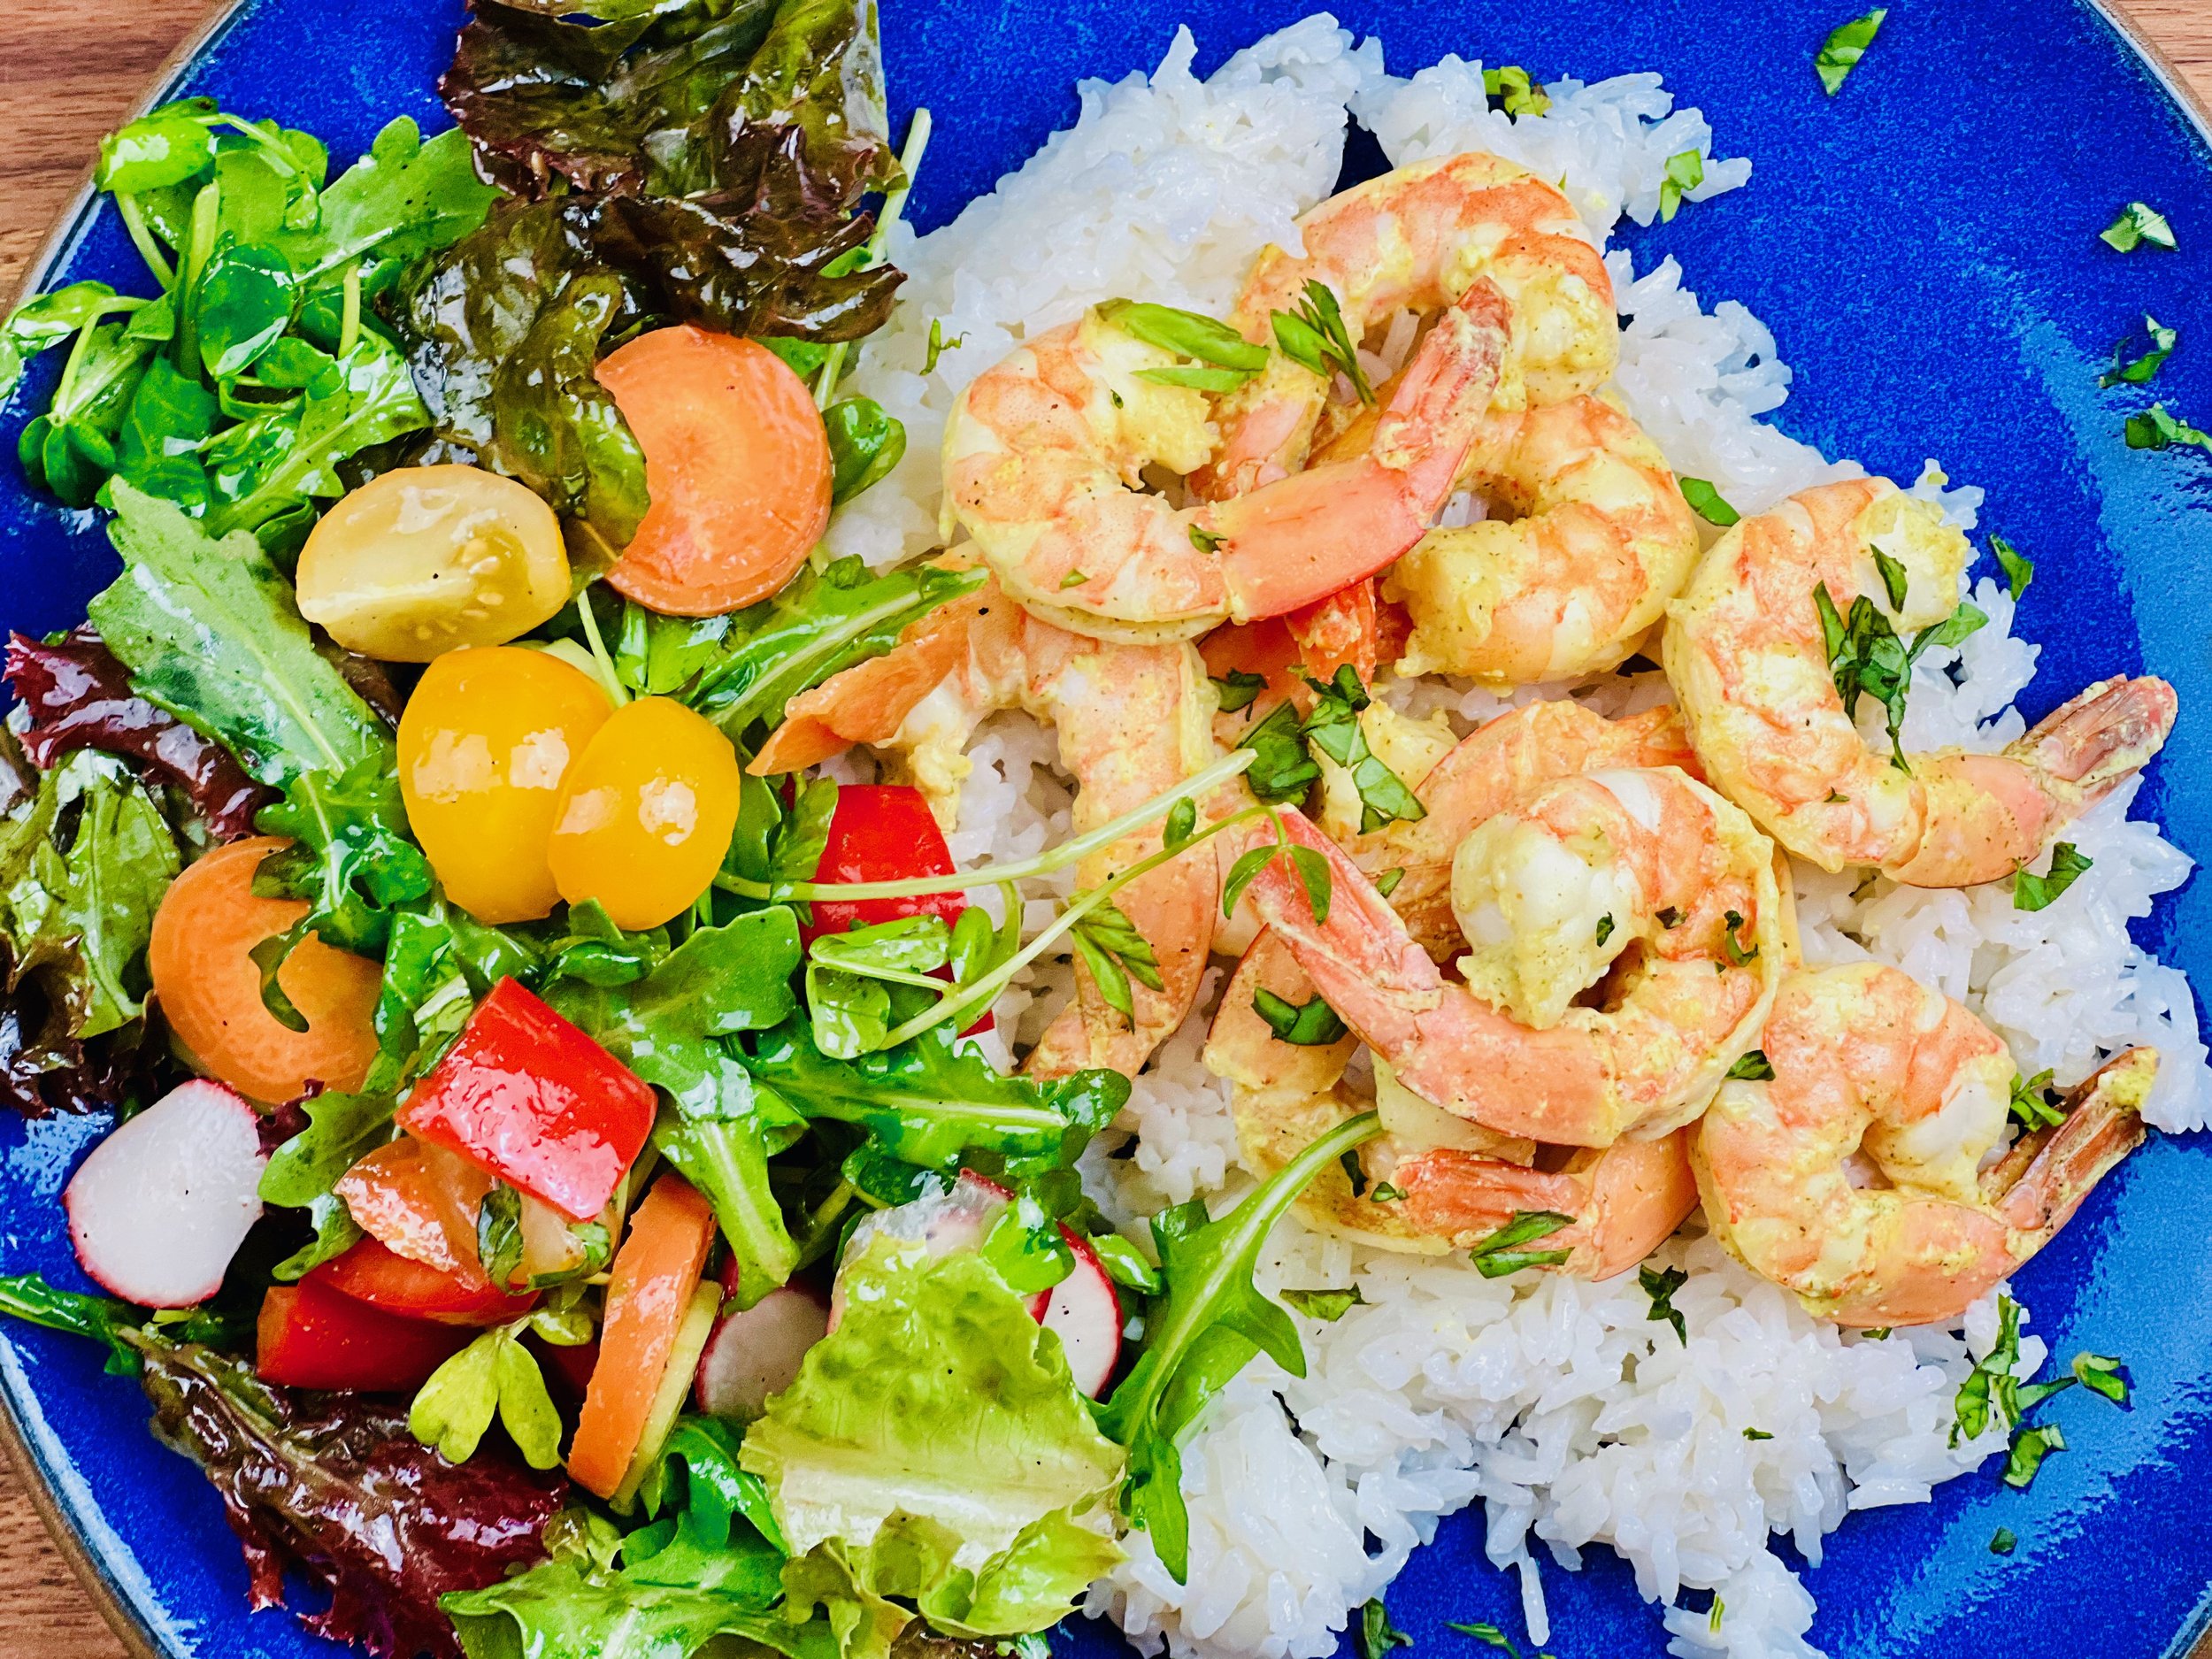
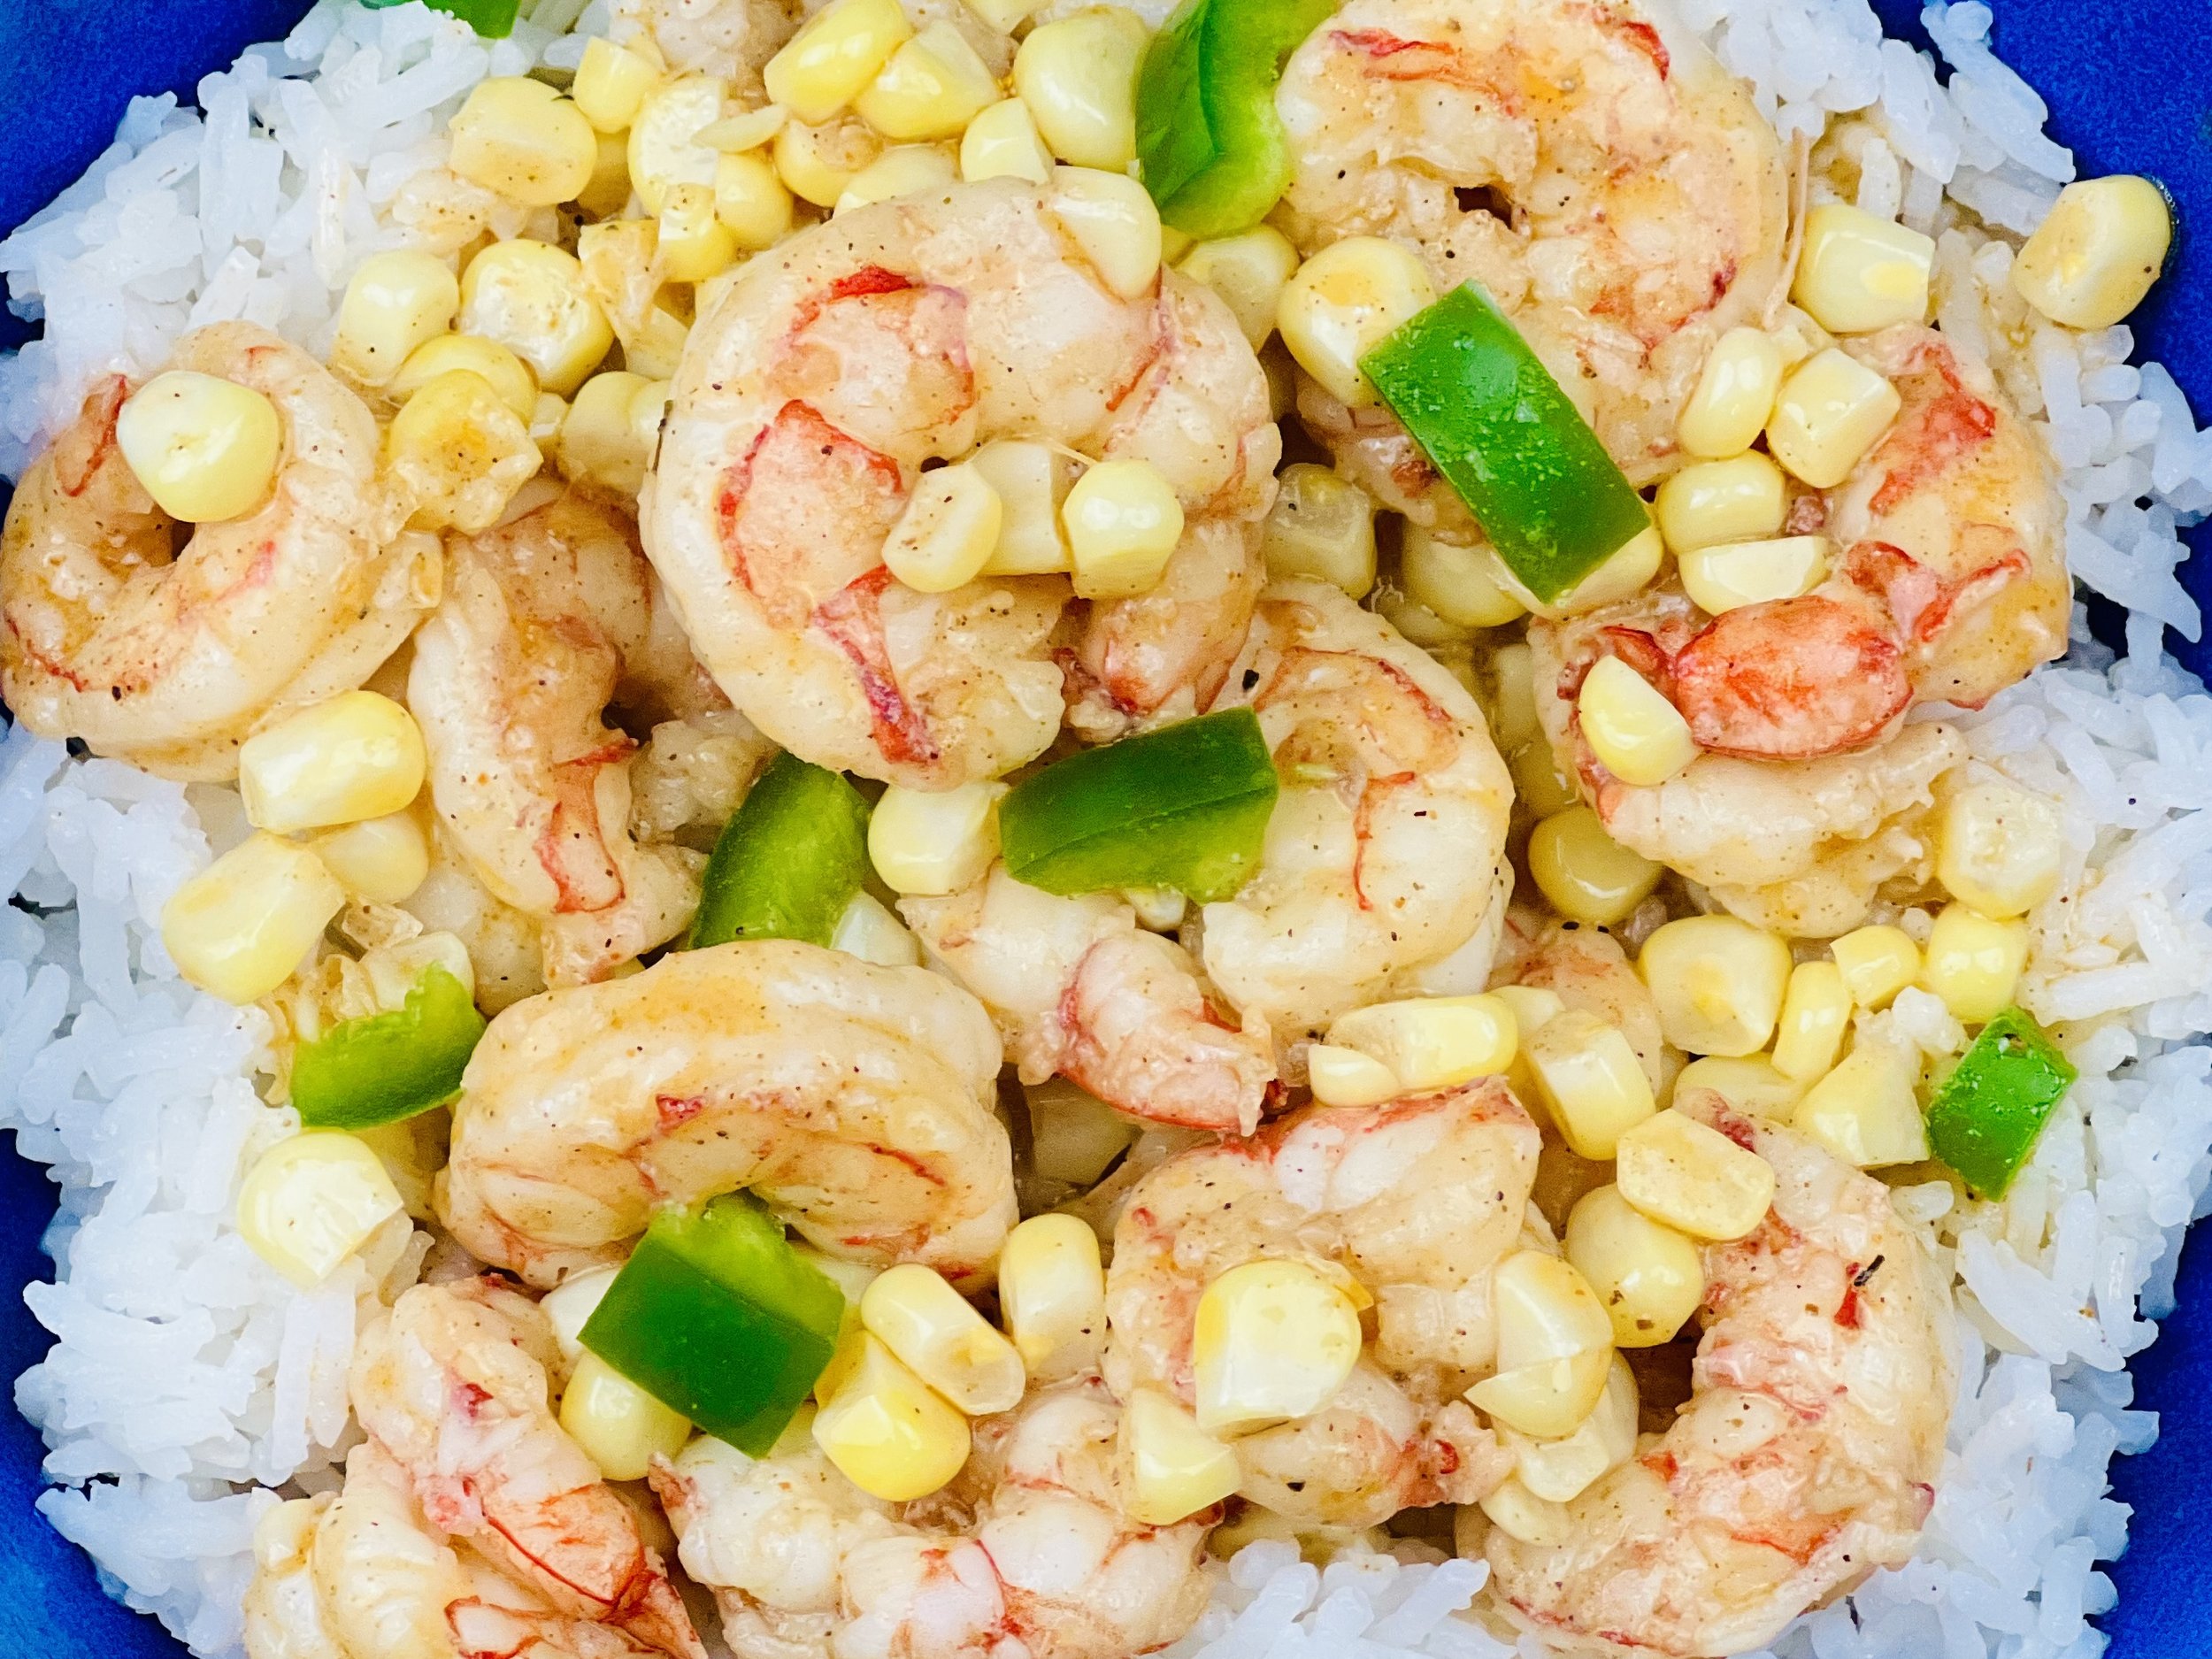
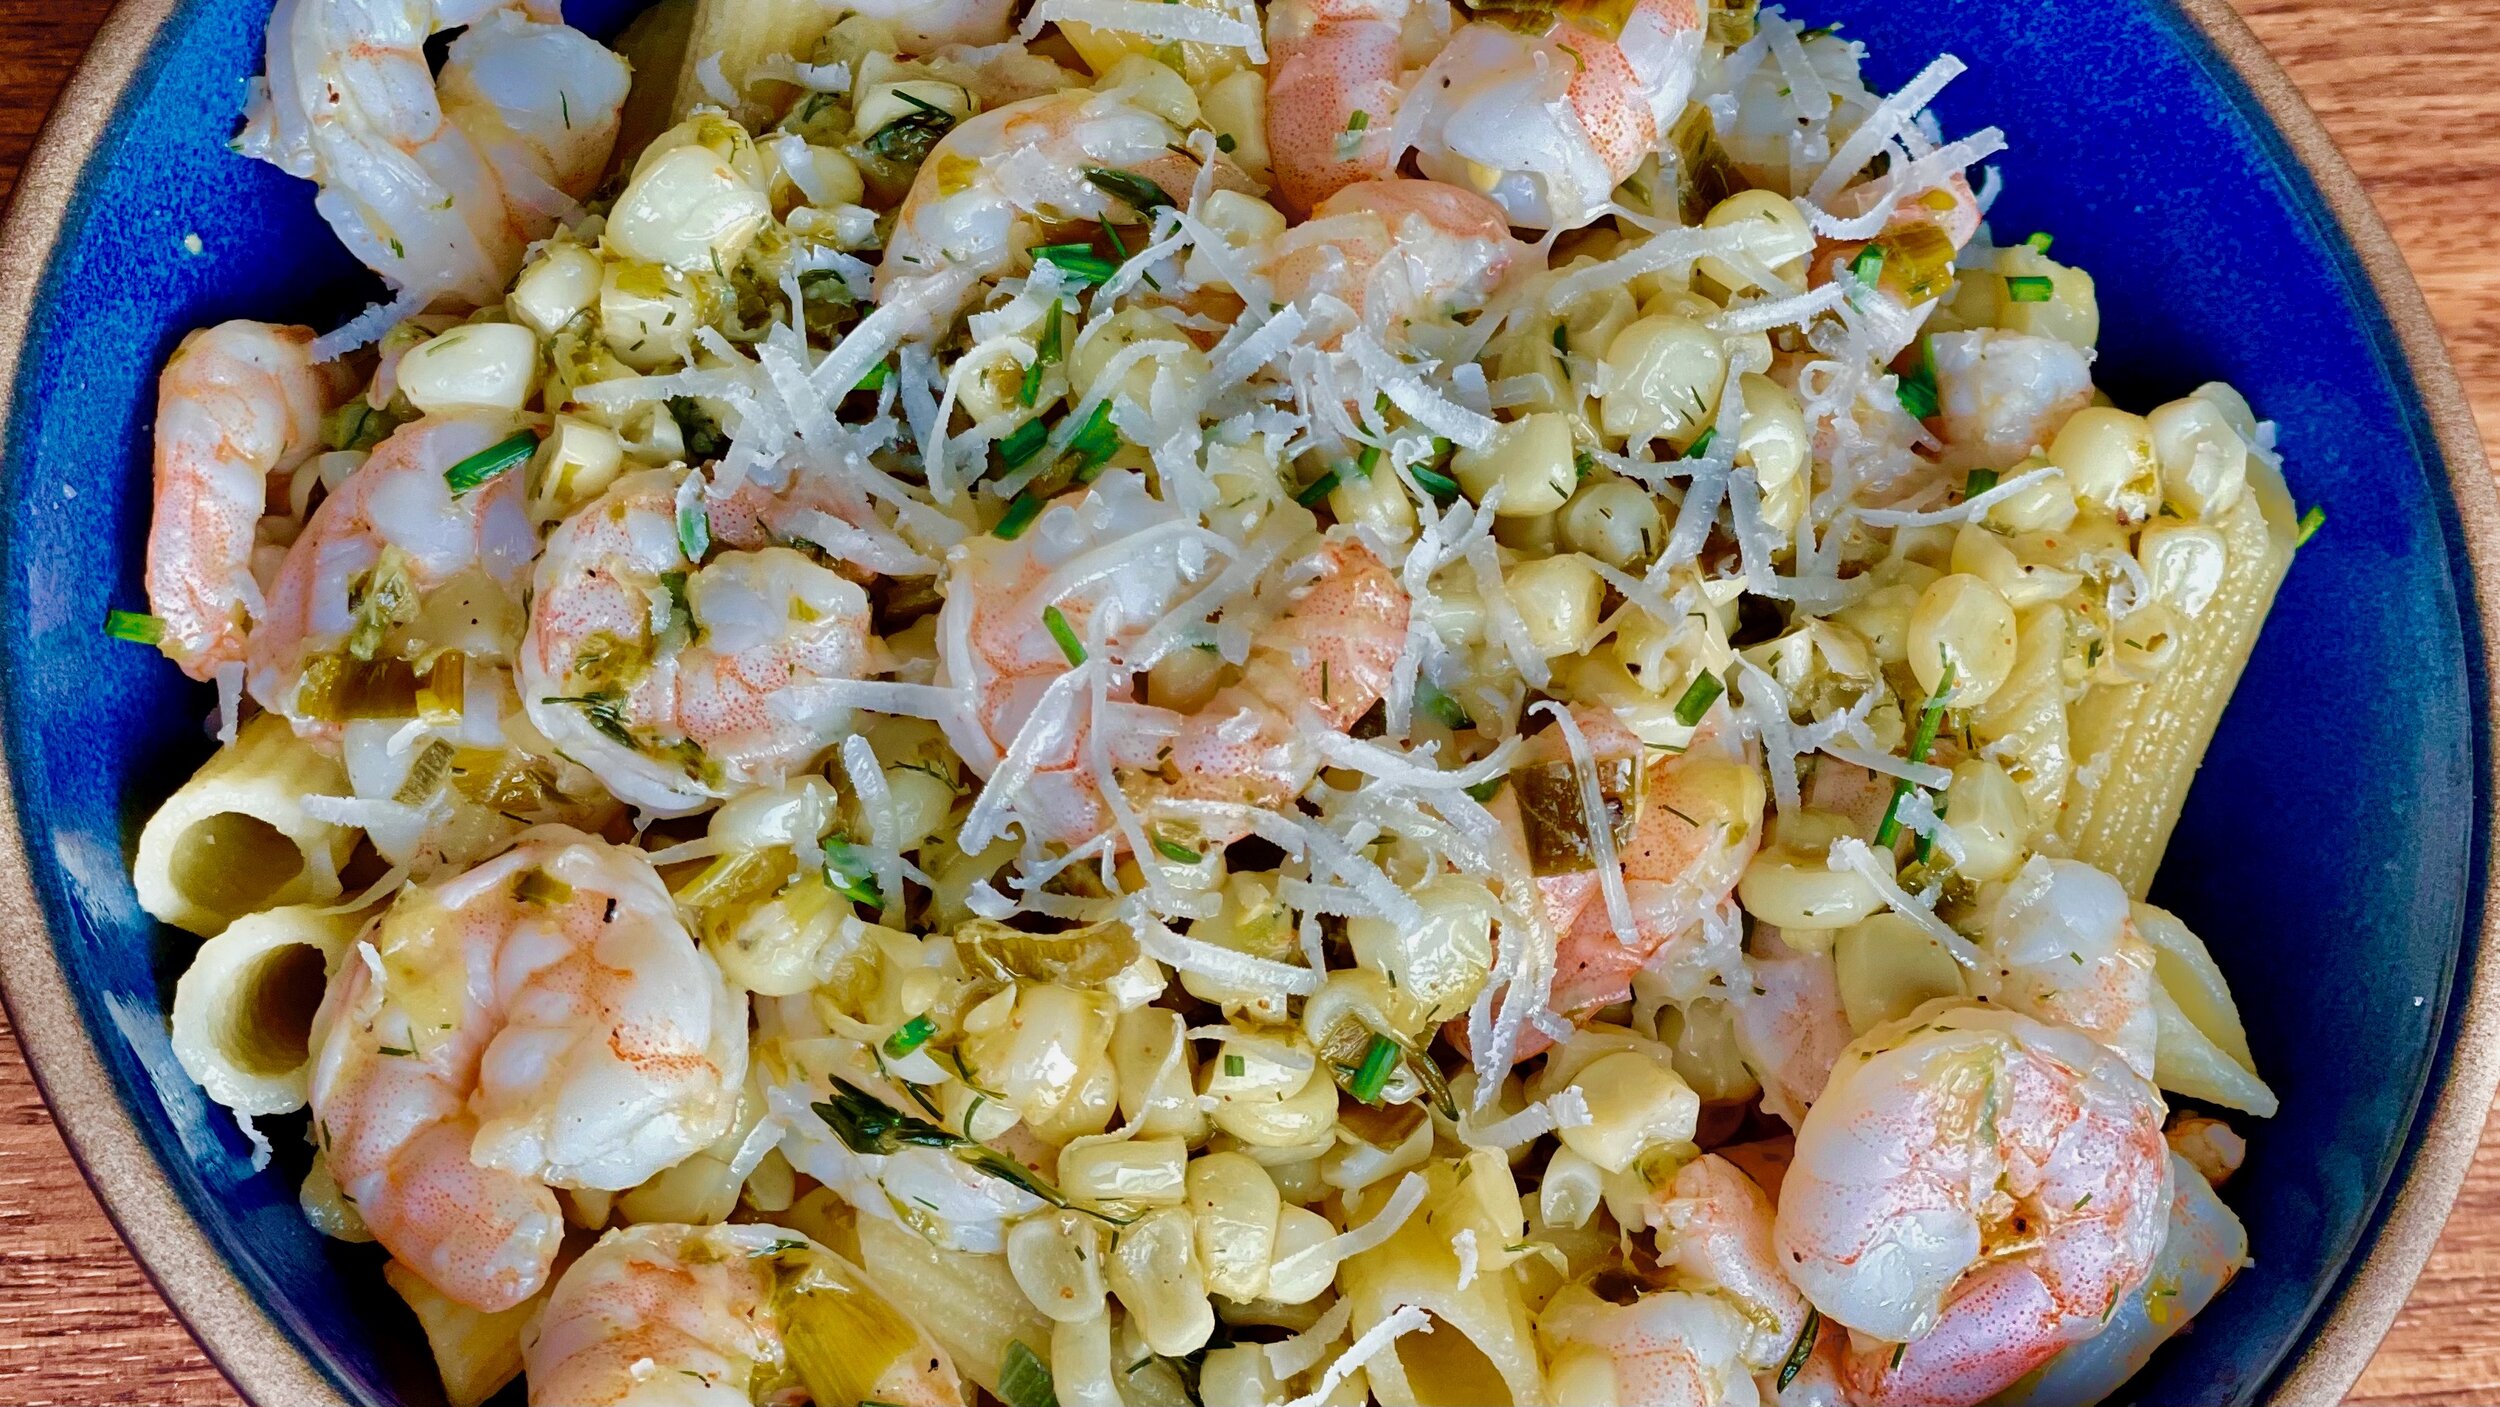
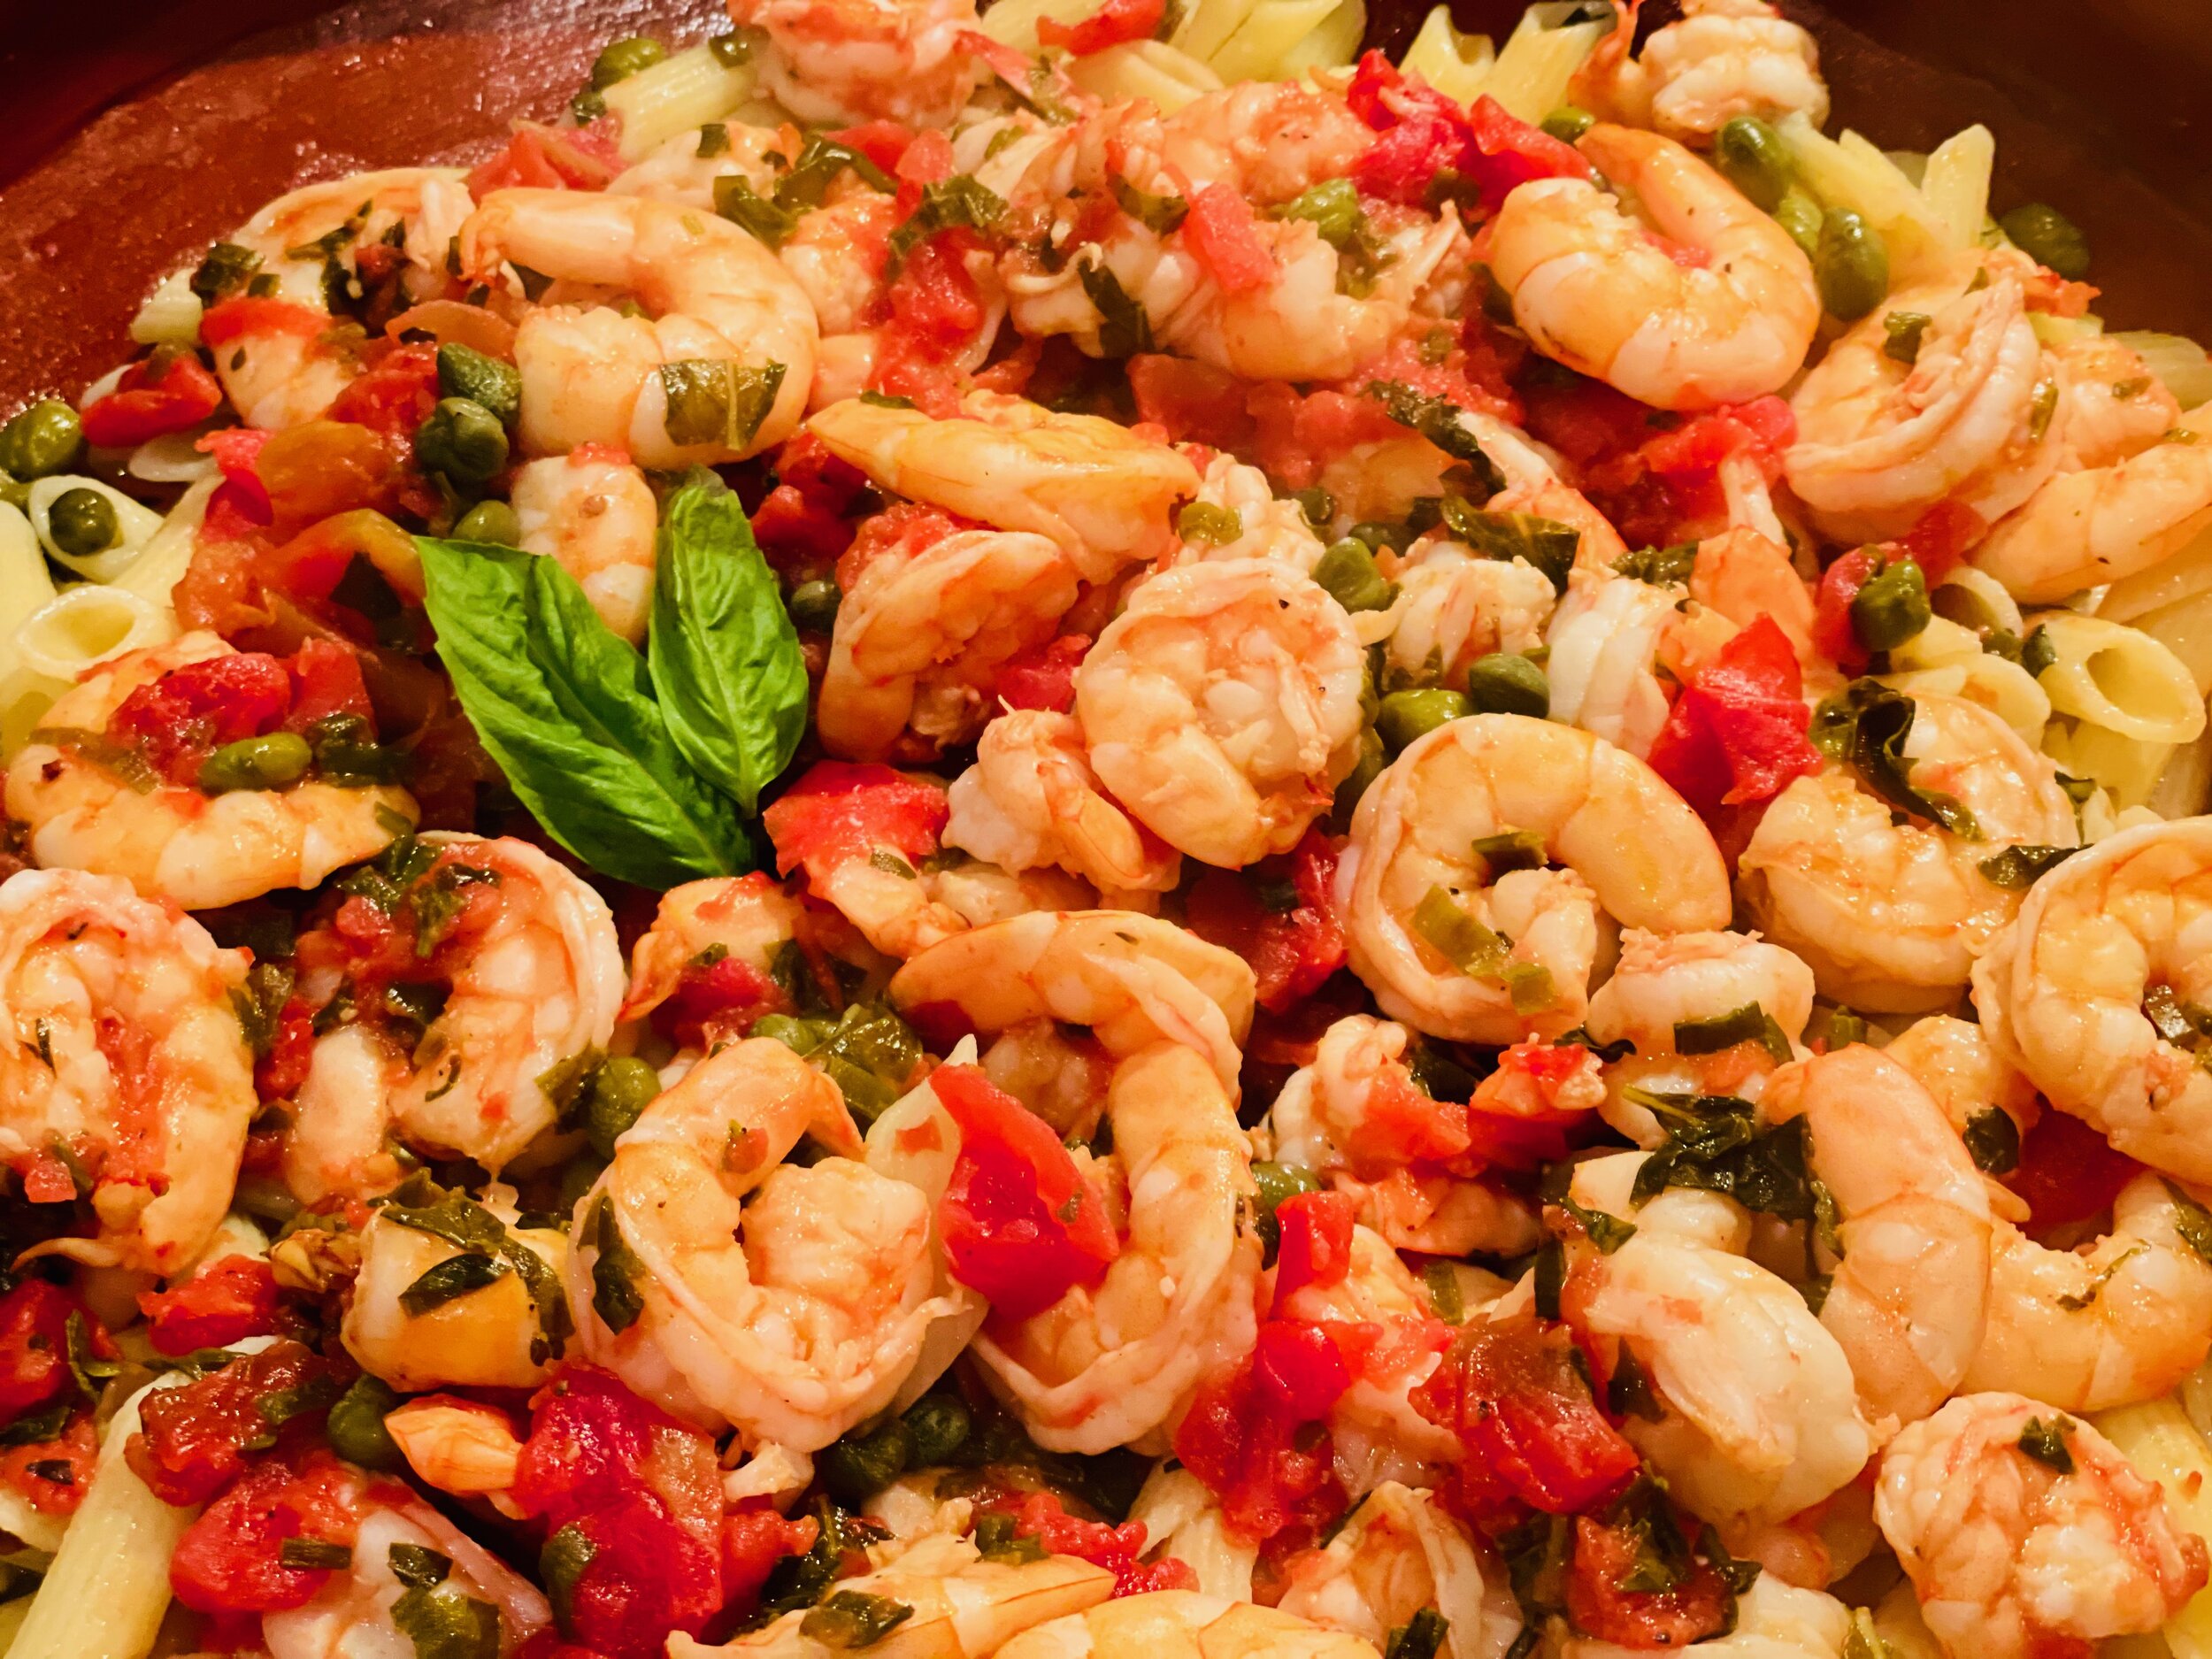
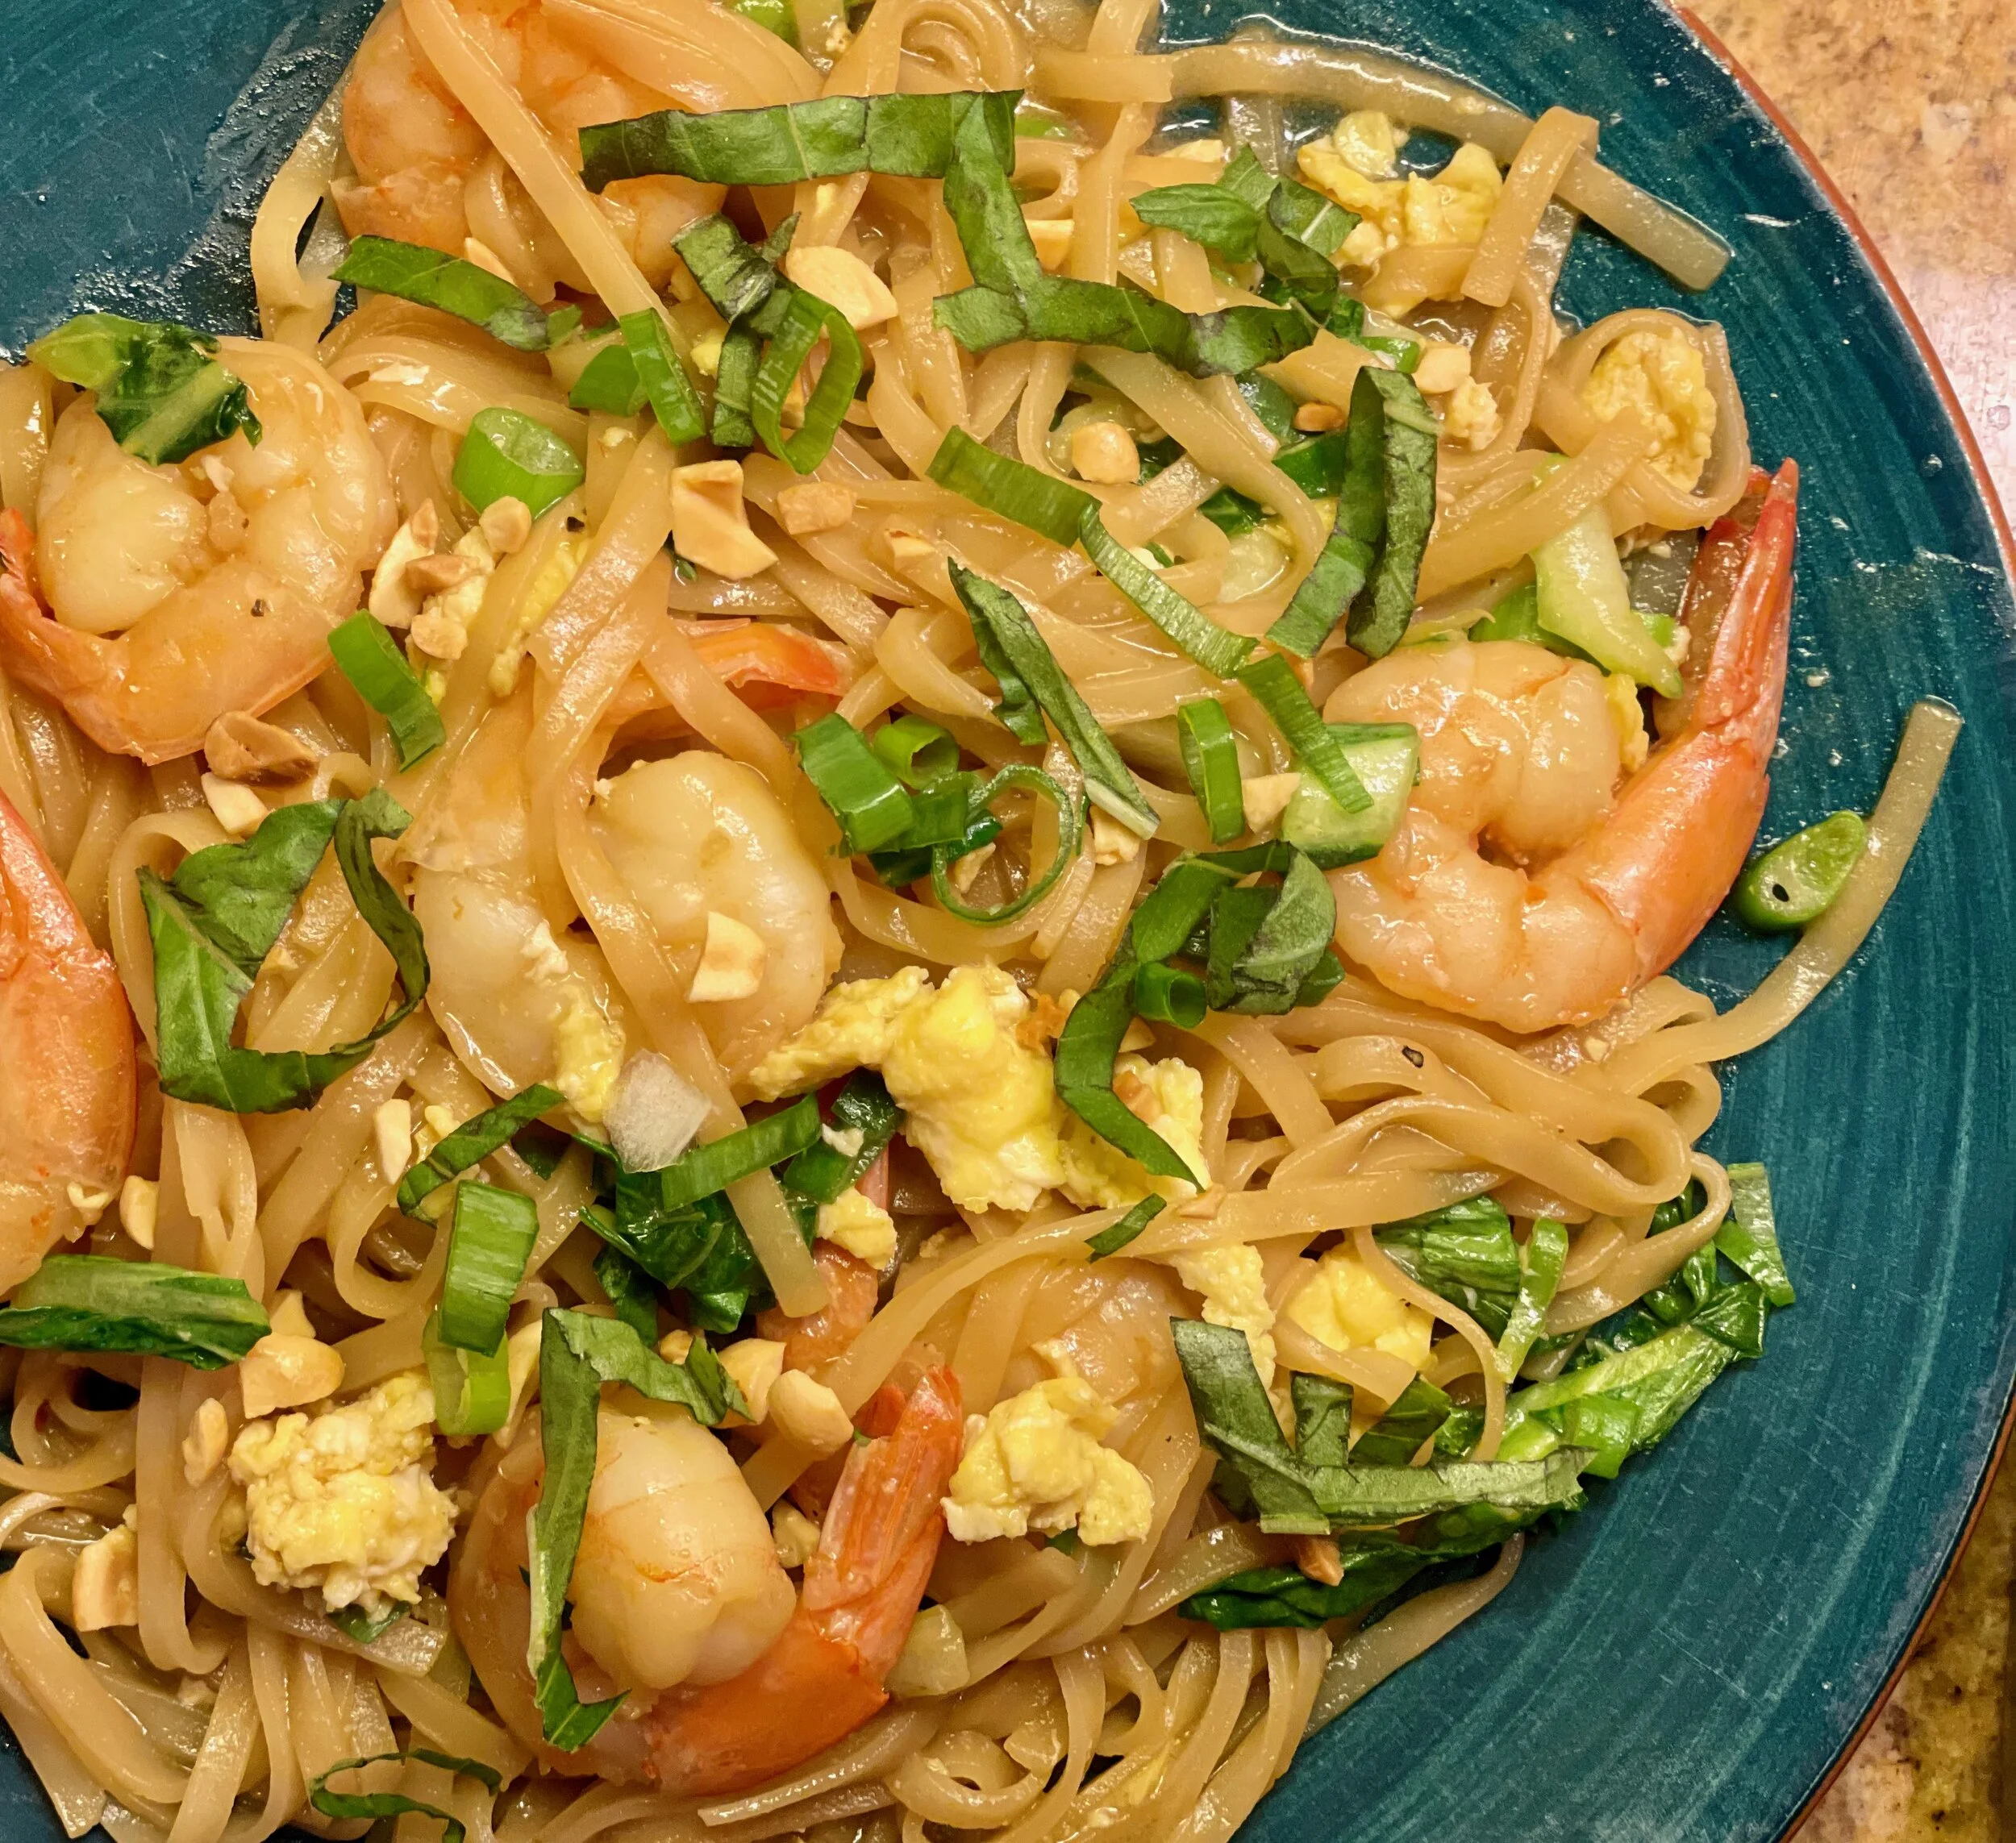
Buttered Corn Shrimp Pasta (low FODMAP)
15 Minutes prep • 10 Minutes cook • Low FODMAP • Serves 4 • Ok to make-ahead: Steps 1 - 4
15 Minutes prep • 10 Minutes cook • Low FODMAP • Serves 4 • Ok to make-ahead: Steps 1 - 4
This is a quick shrimp pasta dish that can be made with fresh or frozen corn and shrimp. Our lemon basil pesto is the perfect fit for this recipe and you can make it in under 5 minutes. The corn, fresh herbs, and shrimp come together in a light and fresh pasta dish that’s sure to please family, friends, and guests.
Ingredients
1/4 cup of our lemon basil pesto or other low FODMAP pesto (recipe below)
1 pound gluten-free dry pasta, such as Delallo Penne Rigate
2 tablespoons garlic-infused olive oil
1/2 stick (4 tablespoons) salted butter
4 green onions (green part only), chopped
2 ears corn on the cob, kernels removed
2 tablespoons fresh thyme leaves
1/2-1 teaspoon chili powder
1/8 teaspoon cayenne pepper
3/4 of a pound raw shrimp, peeled and deveined
1/4 cup dry white wine (such as sauvignon blanc or pinot grigio)
Juice from 1 lemon
2 tablespoons fresh chives, chopped
Directions
(1) Make pesto: Make our Lemon Basil Pesto.
(2) Prepare your ingredients: Cut the corn from the cob. Chop the herbs. Juice the lemon.
(3) Cook the pasta: Bring a large pot of salted water to a boil. Cook the pasta according to package directions until al dente. Drain but don’t rinse and toss with a drizzle of olive oil.
(4) Cook the corn: Meanwhile, melt together the butter and olive oil in a large frying pan. Add the green onions, corn, thyme, chili powder, cayenne, and season with salt and pepper. Cook until the butter begins to brown around the corn, about 3-4 minutes.
Make-ahead note: At this point, you may set the pesto, pasta, and cooked corn aside until you’re ready to prepare the final dish. Depending on how long you leave it, you will need to reheat the pasta and corn, then add the shrimp, cook, and finalize.
(5) Add the shrimp: Stir in the shrimp, tossing with the butter mixture. Add the wine and lemon juice, bring just to a boil, and cook until the shrimp are just pink (about 3-4minutes).
(6) Finish: Remove from the heat and stir in the pesto and chives. Taste and add more pesto, salt, and pepper if needed.
(7) Plate and serve: To serve family-style, toss the pasta, corn, shrimp, and sauce together. Put into a serving bowl and sprinkle with freshly grated parmesan cheese. To plate and serve individually, divide between bowls or plates. Top each with freshly grated parmesan cheese.
Eat and enjoy every bite because you can!
This post may contain affiliate links so you can easily purchase items listed on the page. In some cases, we have provided a special discount code for IBS Game Changers so be sure to use it when you purchase an item to get the discount that has been arranged just for you!
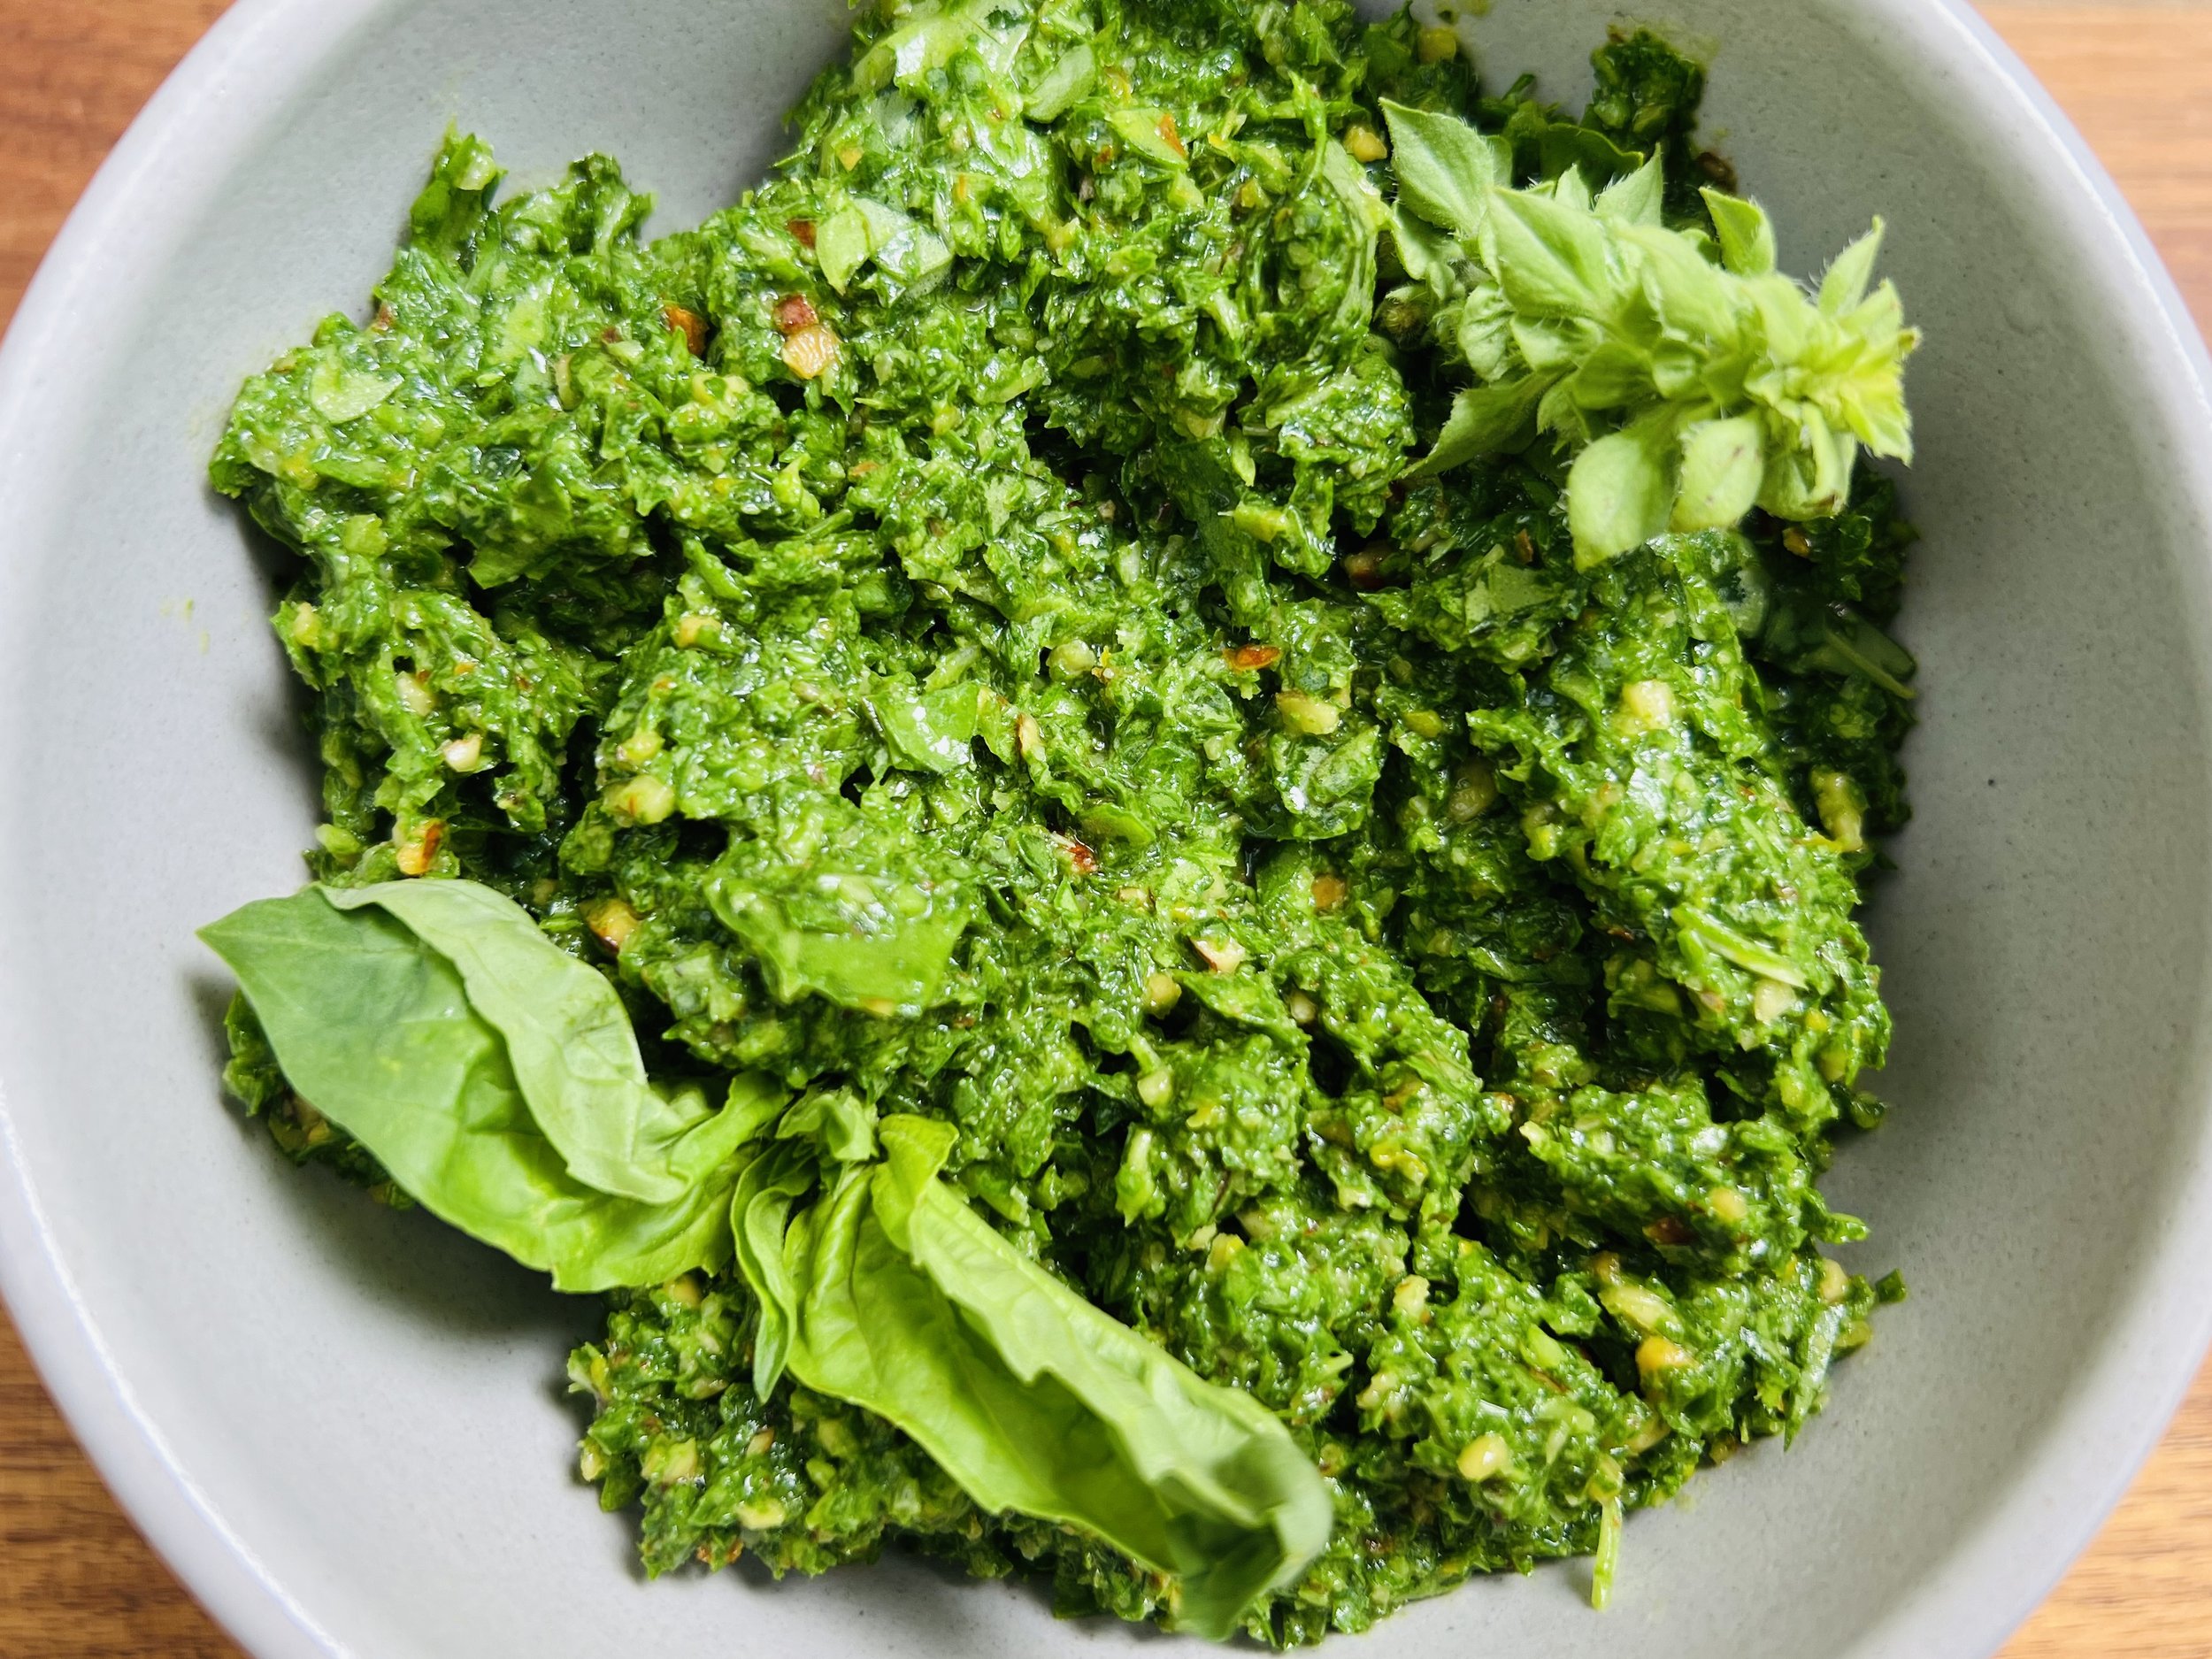
Lemon Basil Pesto
Ingredients
2 cups fresh basil leaves - chopped
1/2 cup fresh dill - chopped
1/4 cup garlic-infused olive oil
1-2 tablespoon fresh-squeezed lemon juice
1 jalapeño pepper, seeded and chopped (optional)
1/4 - 1/2 cup fresh-grated parmesan cheese
Directions
(1) Prepare the ingredients: Wash and chop the basil and dill. Seed and chop the jalapeño (if using). Squeeze the lemon juice. Grate the parmesan.
(2) Blend the ingredients: Blend all ingredients except salt and pepper in either a blender or food processor until smooth.
(3) Finish: Taste and add salt and pepper to your liking.
(4) Serve: Serve on soup, pizza, as a dip for bread, or in any recipe that calls for basil pesto.
More Deliciously Low FODMAP™ seafood recipes you might enjoy


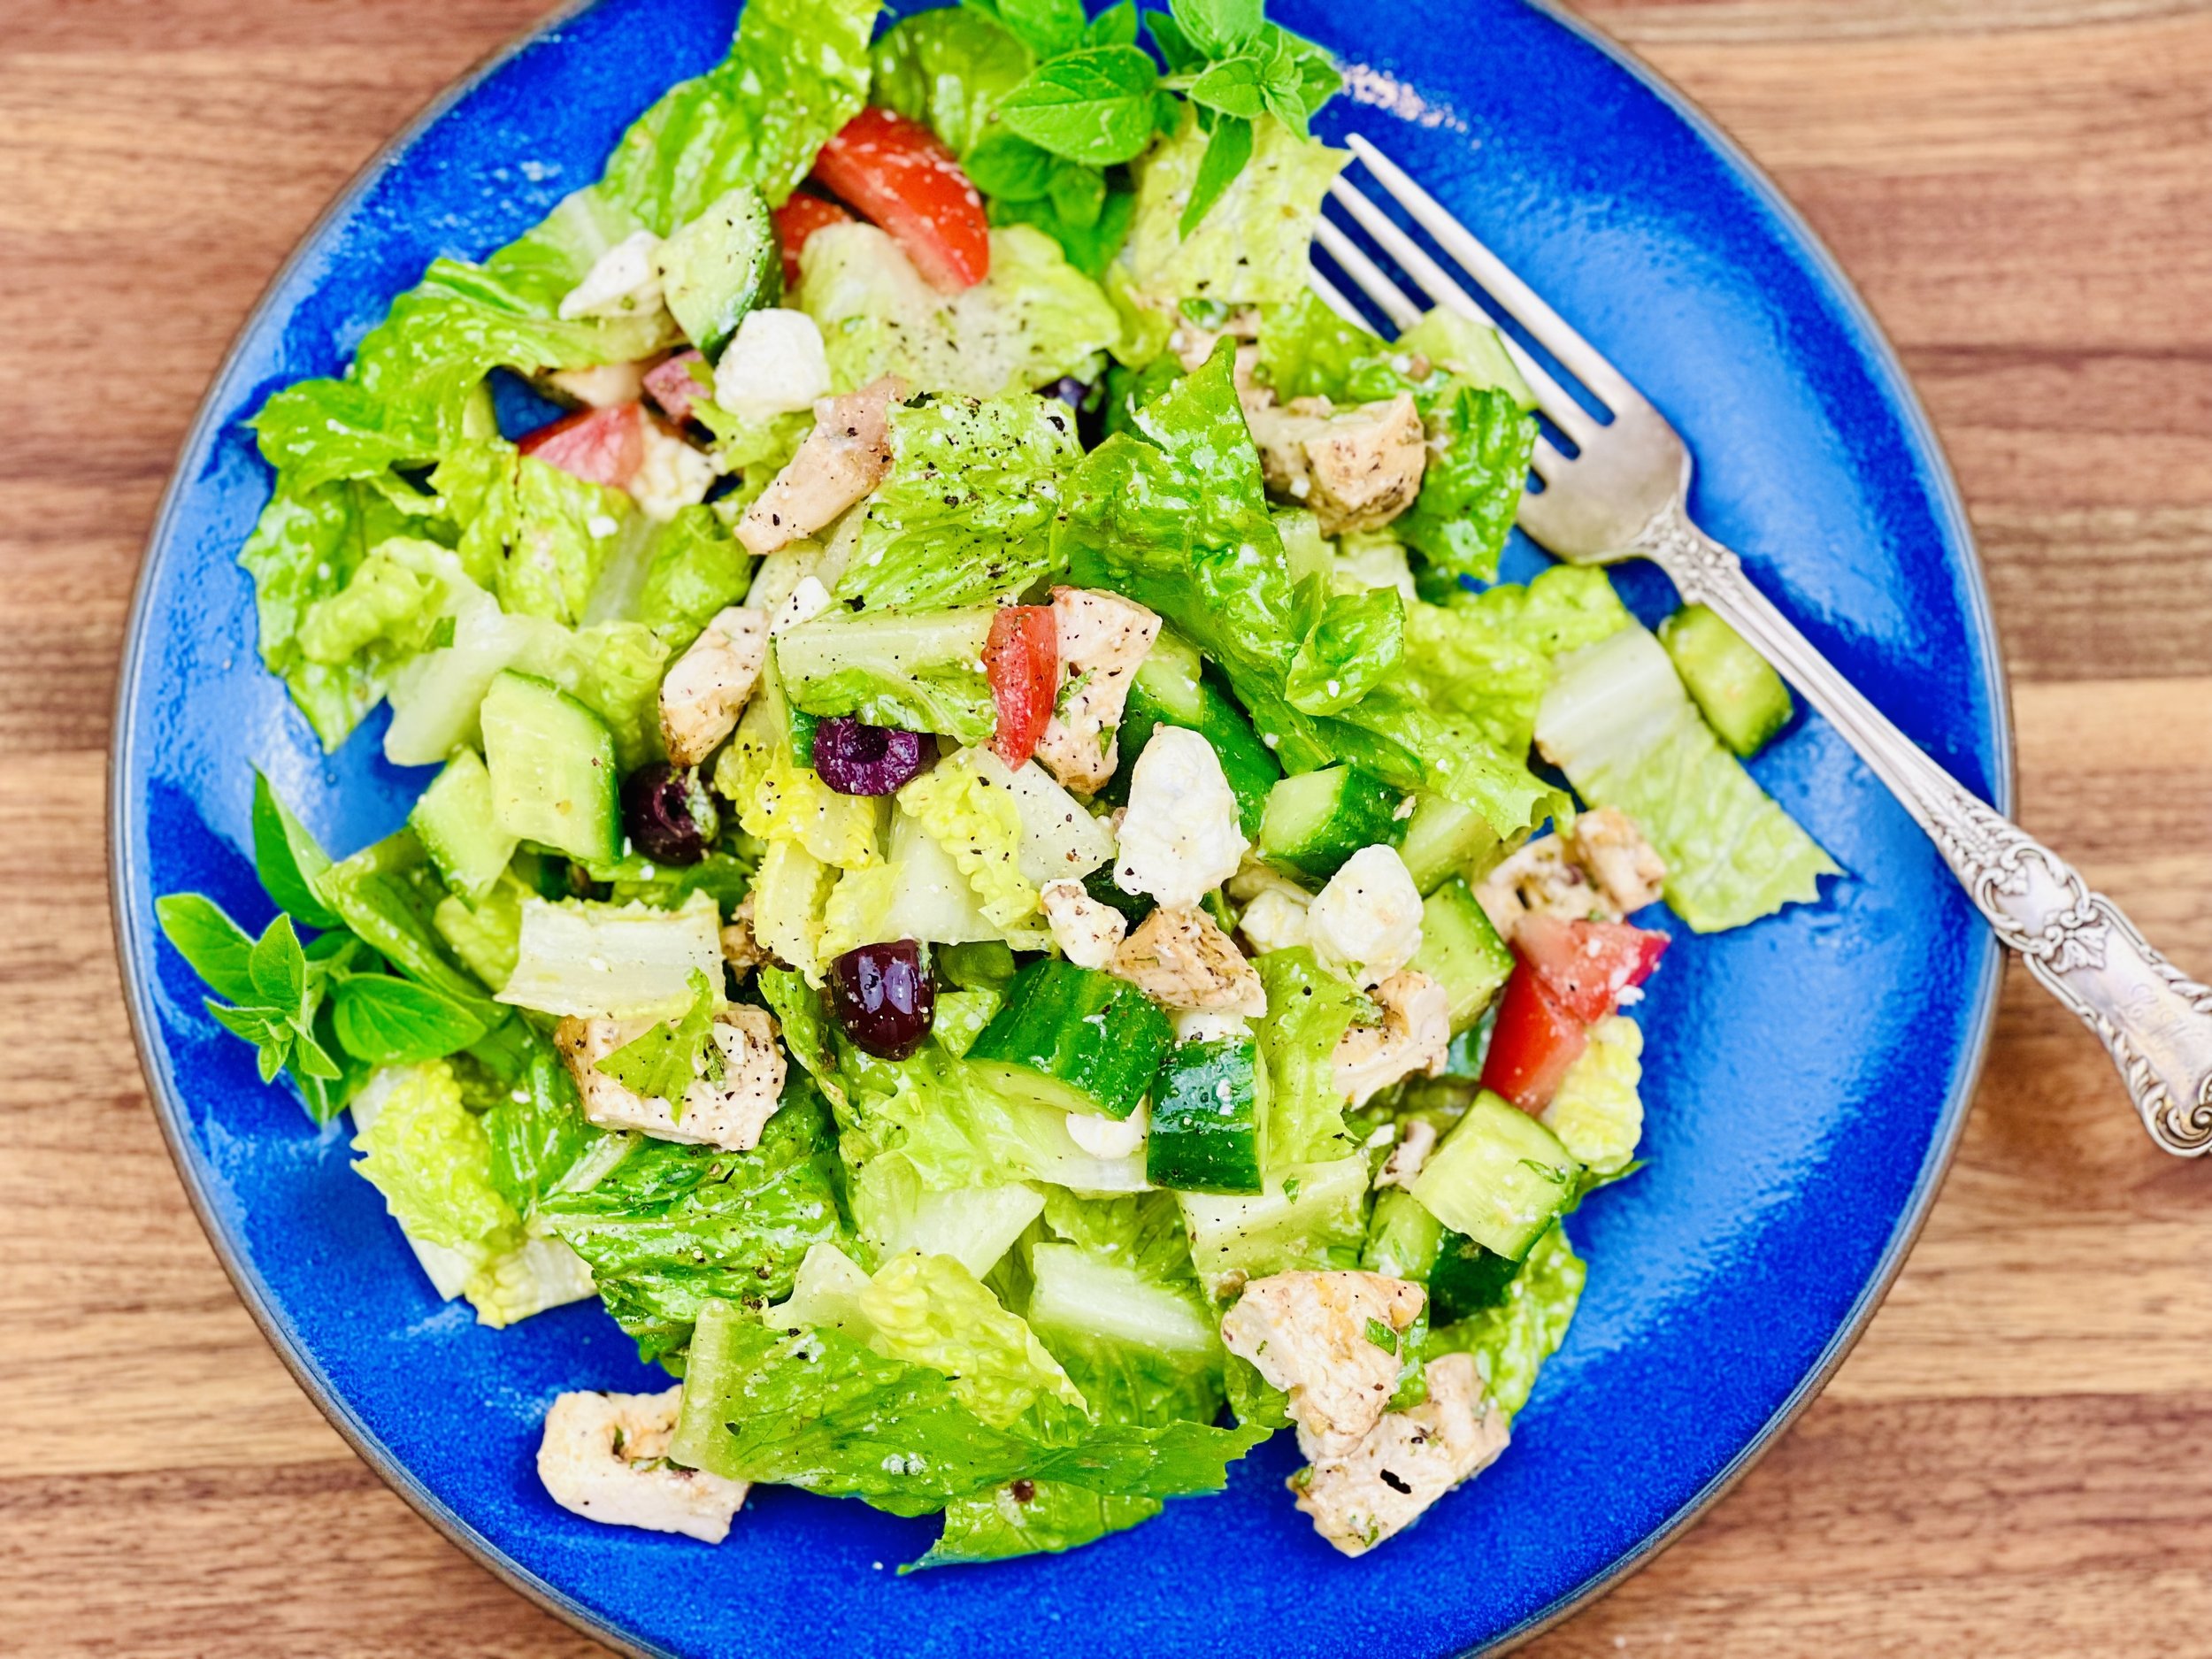
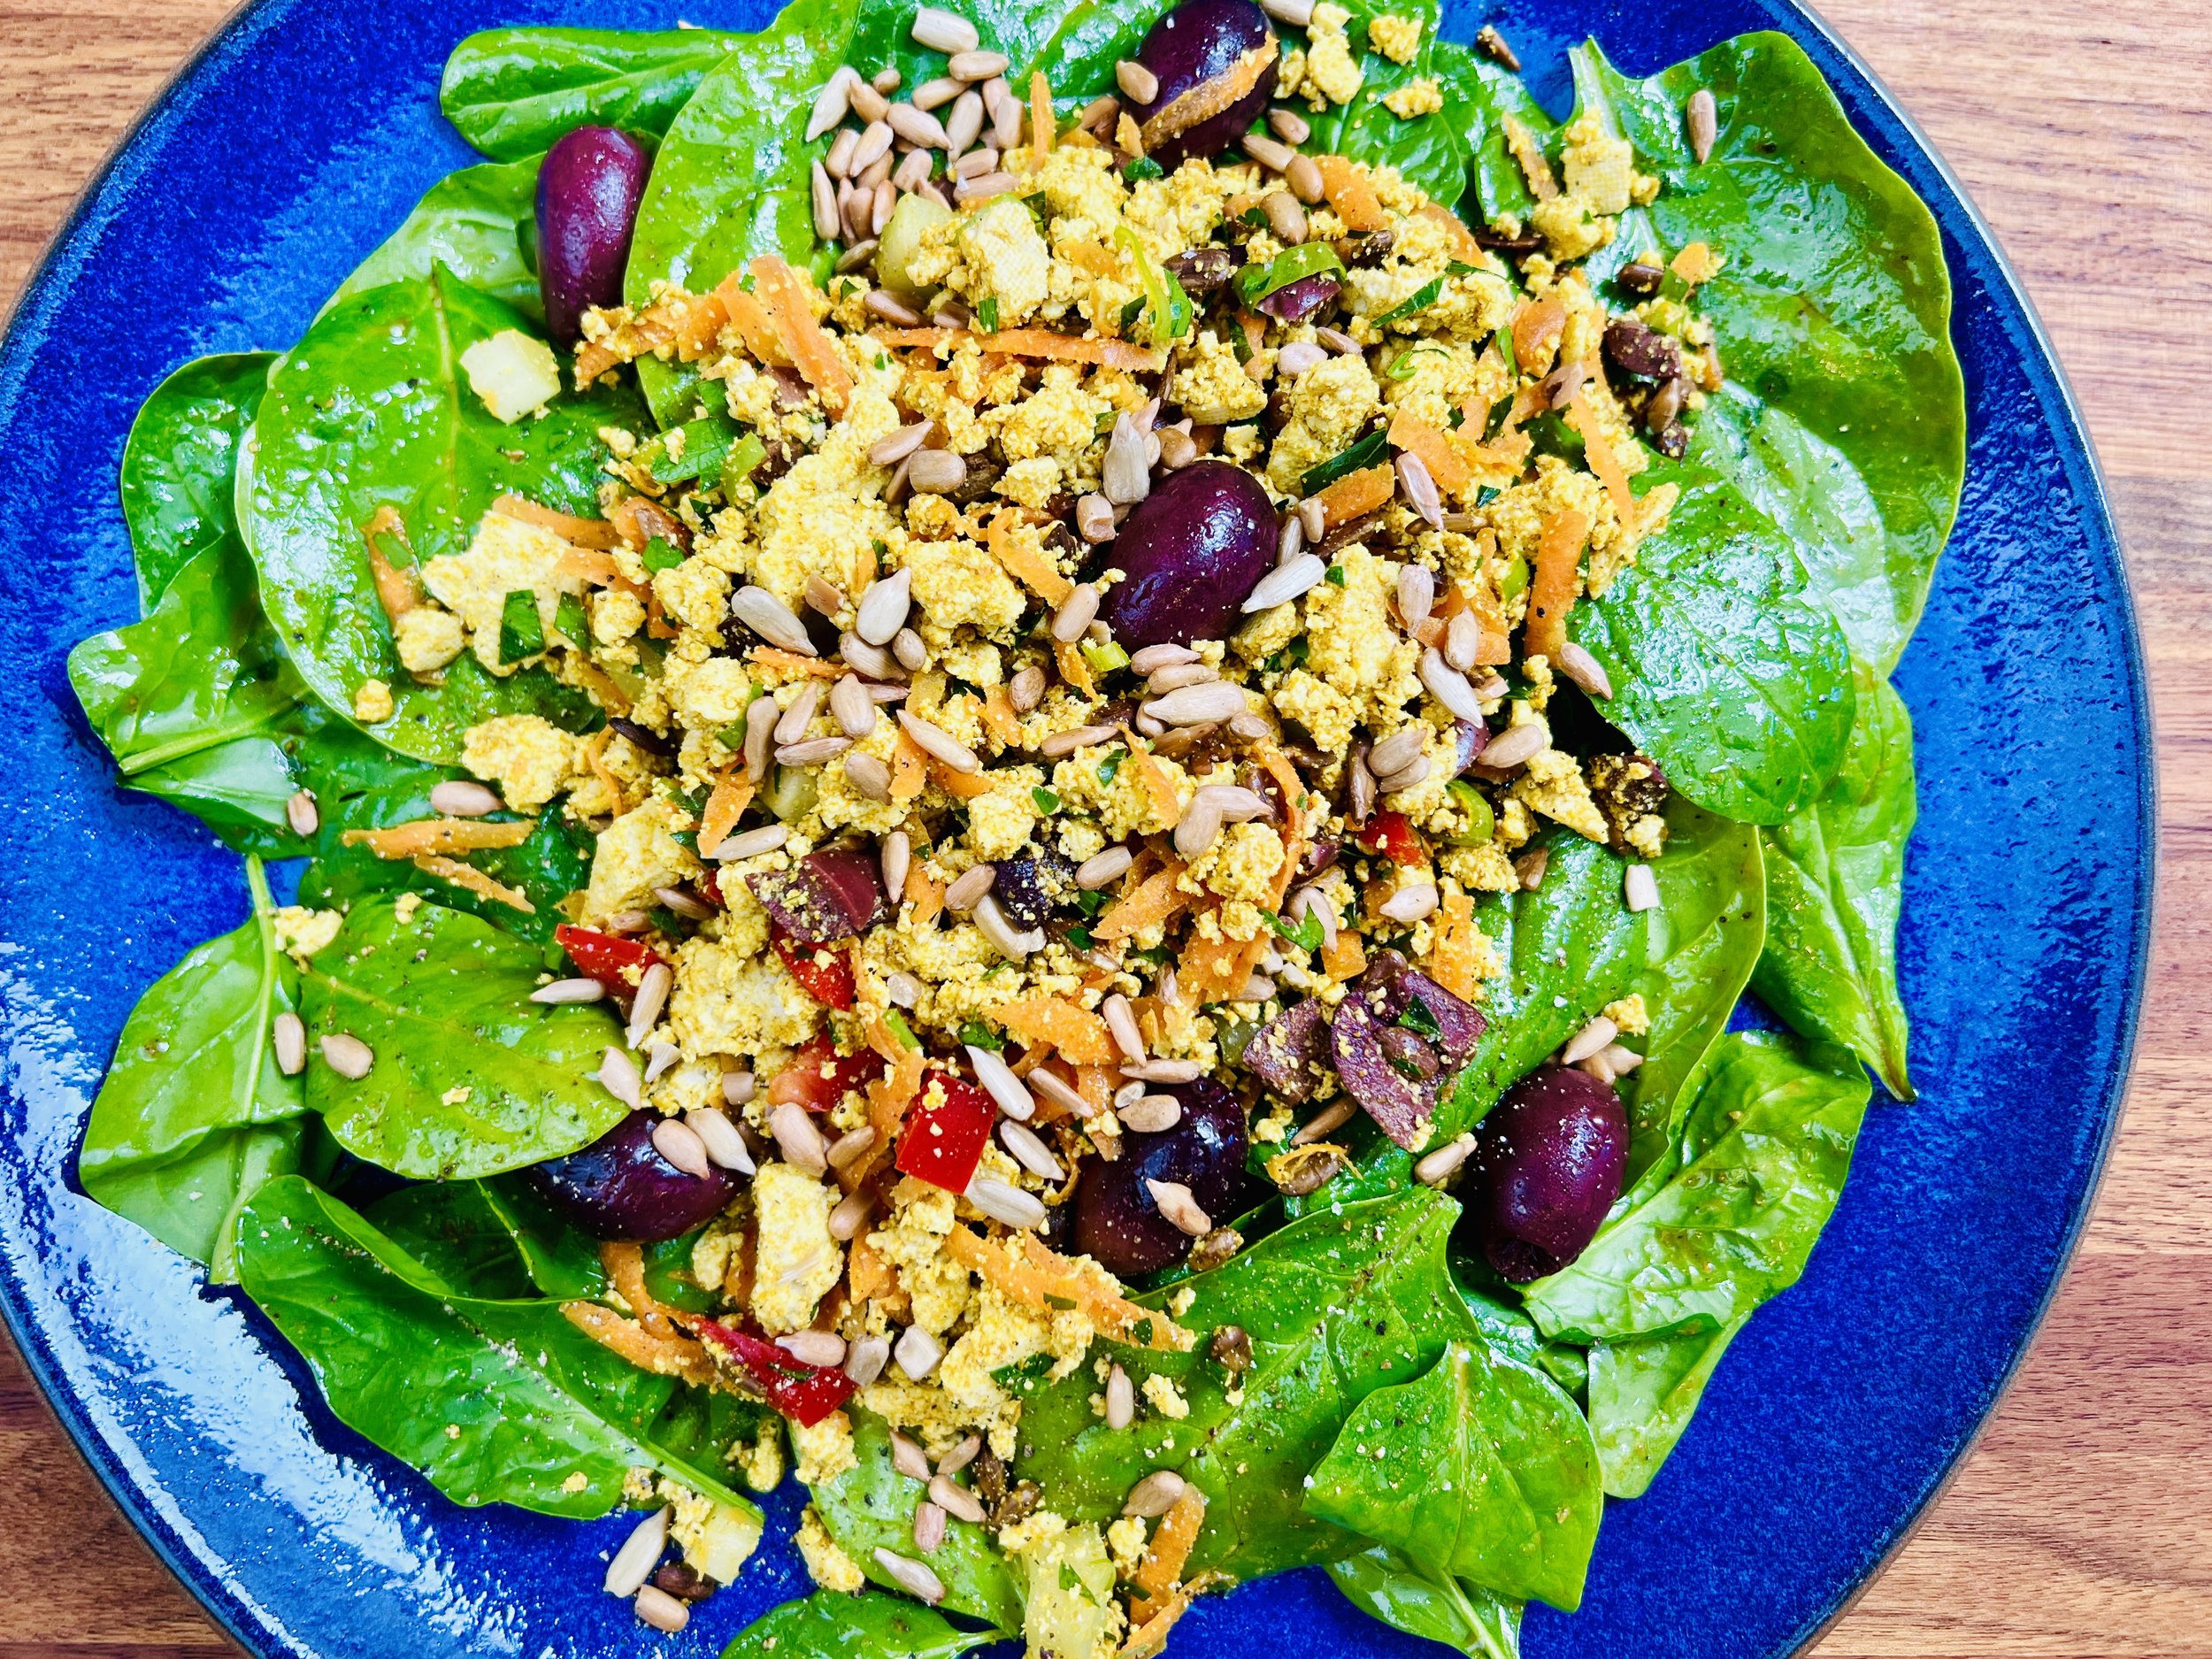
Great Greek Salad (low FODMAP)
20 Minutes prep • Low FODMAP • Gluten-free • Serves 4
20 Minutes prep • Low FODMAP • Gluten-free • Serves 4 • Ok to make-ahead: Steps 1 - 2
Classic Greek salad is made up of a wonderful combination of flavors, colors, and textures. It makes a great side or base for a salad featuring grilled meat or seafood. This recipe excludes the red onion typically found in Greek salad and replaces it with specific herbs and spices so you can enjoy an amazing Greek salad without causing an IBS flare-up. I hope you enjoy it as much as I do.

Ingredients: Salad
1 bunch romaine lettuce
3 Roma tomatoes, seeded and chopped
1 cup crumbled feta cheese
3 small Persian cucumbers, peeled and sliced
1/2 cup pitted Greek olives sliced in half (or more if you like)
2 tablespoons green onions (green part only) chopped
2 tablespoons minced fresh parsley
1 tablespoon minced fresh chives
Ingredients: Dressing
3 tablespoons lemon juice
2 tablespoons garlic-infused olive oil
1/2 teaspoon Kosher salt
1/4 teaspoon fresh ground black pepper
Directions
(1) Prepare the dressing: In a small jar, combine the lemon juice, olive oil, salt, and pepper. Shake to combine.
(2) Prepare the salad ingredients: Wash, spin dry and chop the romaine lettuce. Wash, seed, and chop the tomatoes. Peel and slice the cucumbers. Slice the Kalamata olives. Chop the herbs.
Make-ahead note: At this point, you may set the dressing aside, and put the salad ingredients in the refrigerator until you are ready to make the salad.
(3) Finish: Combine the salad ingredients in a large salad bowl. Pour the dressing over the salad, and toss.
(3) Plate and serve: Serve immediately for the best fresh flavor and crispness.
Eat and enjoy every bite because you can!
More Deliciously Low FODMAP™ salads you might enjoy
Kona Brownies (low FODMAP)
15 Minutes prep • 30 Minutes cook • Low FODMAP • Gluten-Free • Makes 16 • Ok to make-ahead: Steps 1 - 4
15 Minutes prep • 30 Minutes cook • Low FODMAP • Gluten-Free • Makes 16 • Ok to make-ahead: Steps 1 - 4 or 6
Now that I have created them, these may be my all-time favorite brownies. They are rich and coffee-infused with a hint of coconut and topped with coconut cream cheese icing. The perfect “Kona Brownies” that will take you right to the islands and that corner bakery you’ll never forget. These brownies actually improve in flavor and texture over time so make them a day ahead for the perfect Kona brownie. Enjoy with a mug of Lion Decaf Vanilla Macadamia Nut coffee for the perfect combination.
This is an exclusive recipe just for recipe club members.
Each week I am creating and delivering one very special recipe just for my recipe club members. If you’re not yet a member, I encourage you to join! Membership in the club includes access to the complete archive of recipes with filters so it can become your virtual low FODMAP cookbook plus, I am creating and delivering one special NEW recipe every week ONLY for recipe club members. And, for my true fans, I’ll be sharing behind-the-scenes content, and updates on the progress of the new cookbook.
Your membership in the club helps me continue creating new, delicious, easy-to-make, low FODMAP recipes just for you.
As always, all recipes will emphasize simple ingredients, easy preparation, and delicious low FODMAP results. Recipes will be for everything from main courses, salads, soups, side dishes, appetizers, desserts, sauces, breakfast and lunch, and even mocktails and cocktails. Everything you need to prepare fantastic low FODMAP meals everyone will love.
Join the club. Become a Patron. Let’s keep making delicious Low FODMAP meals together.
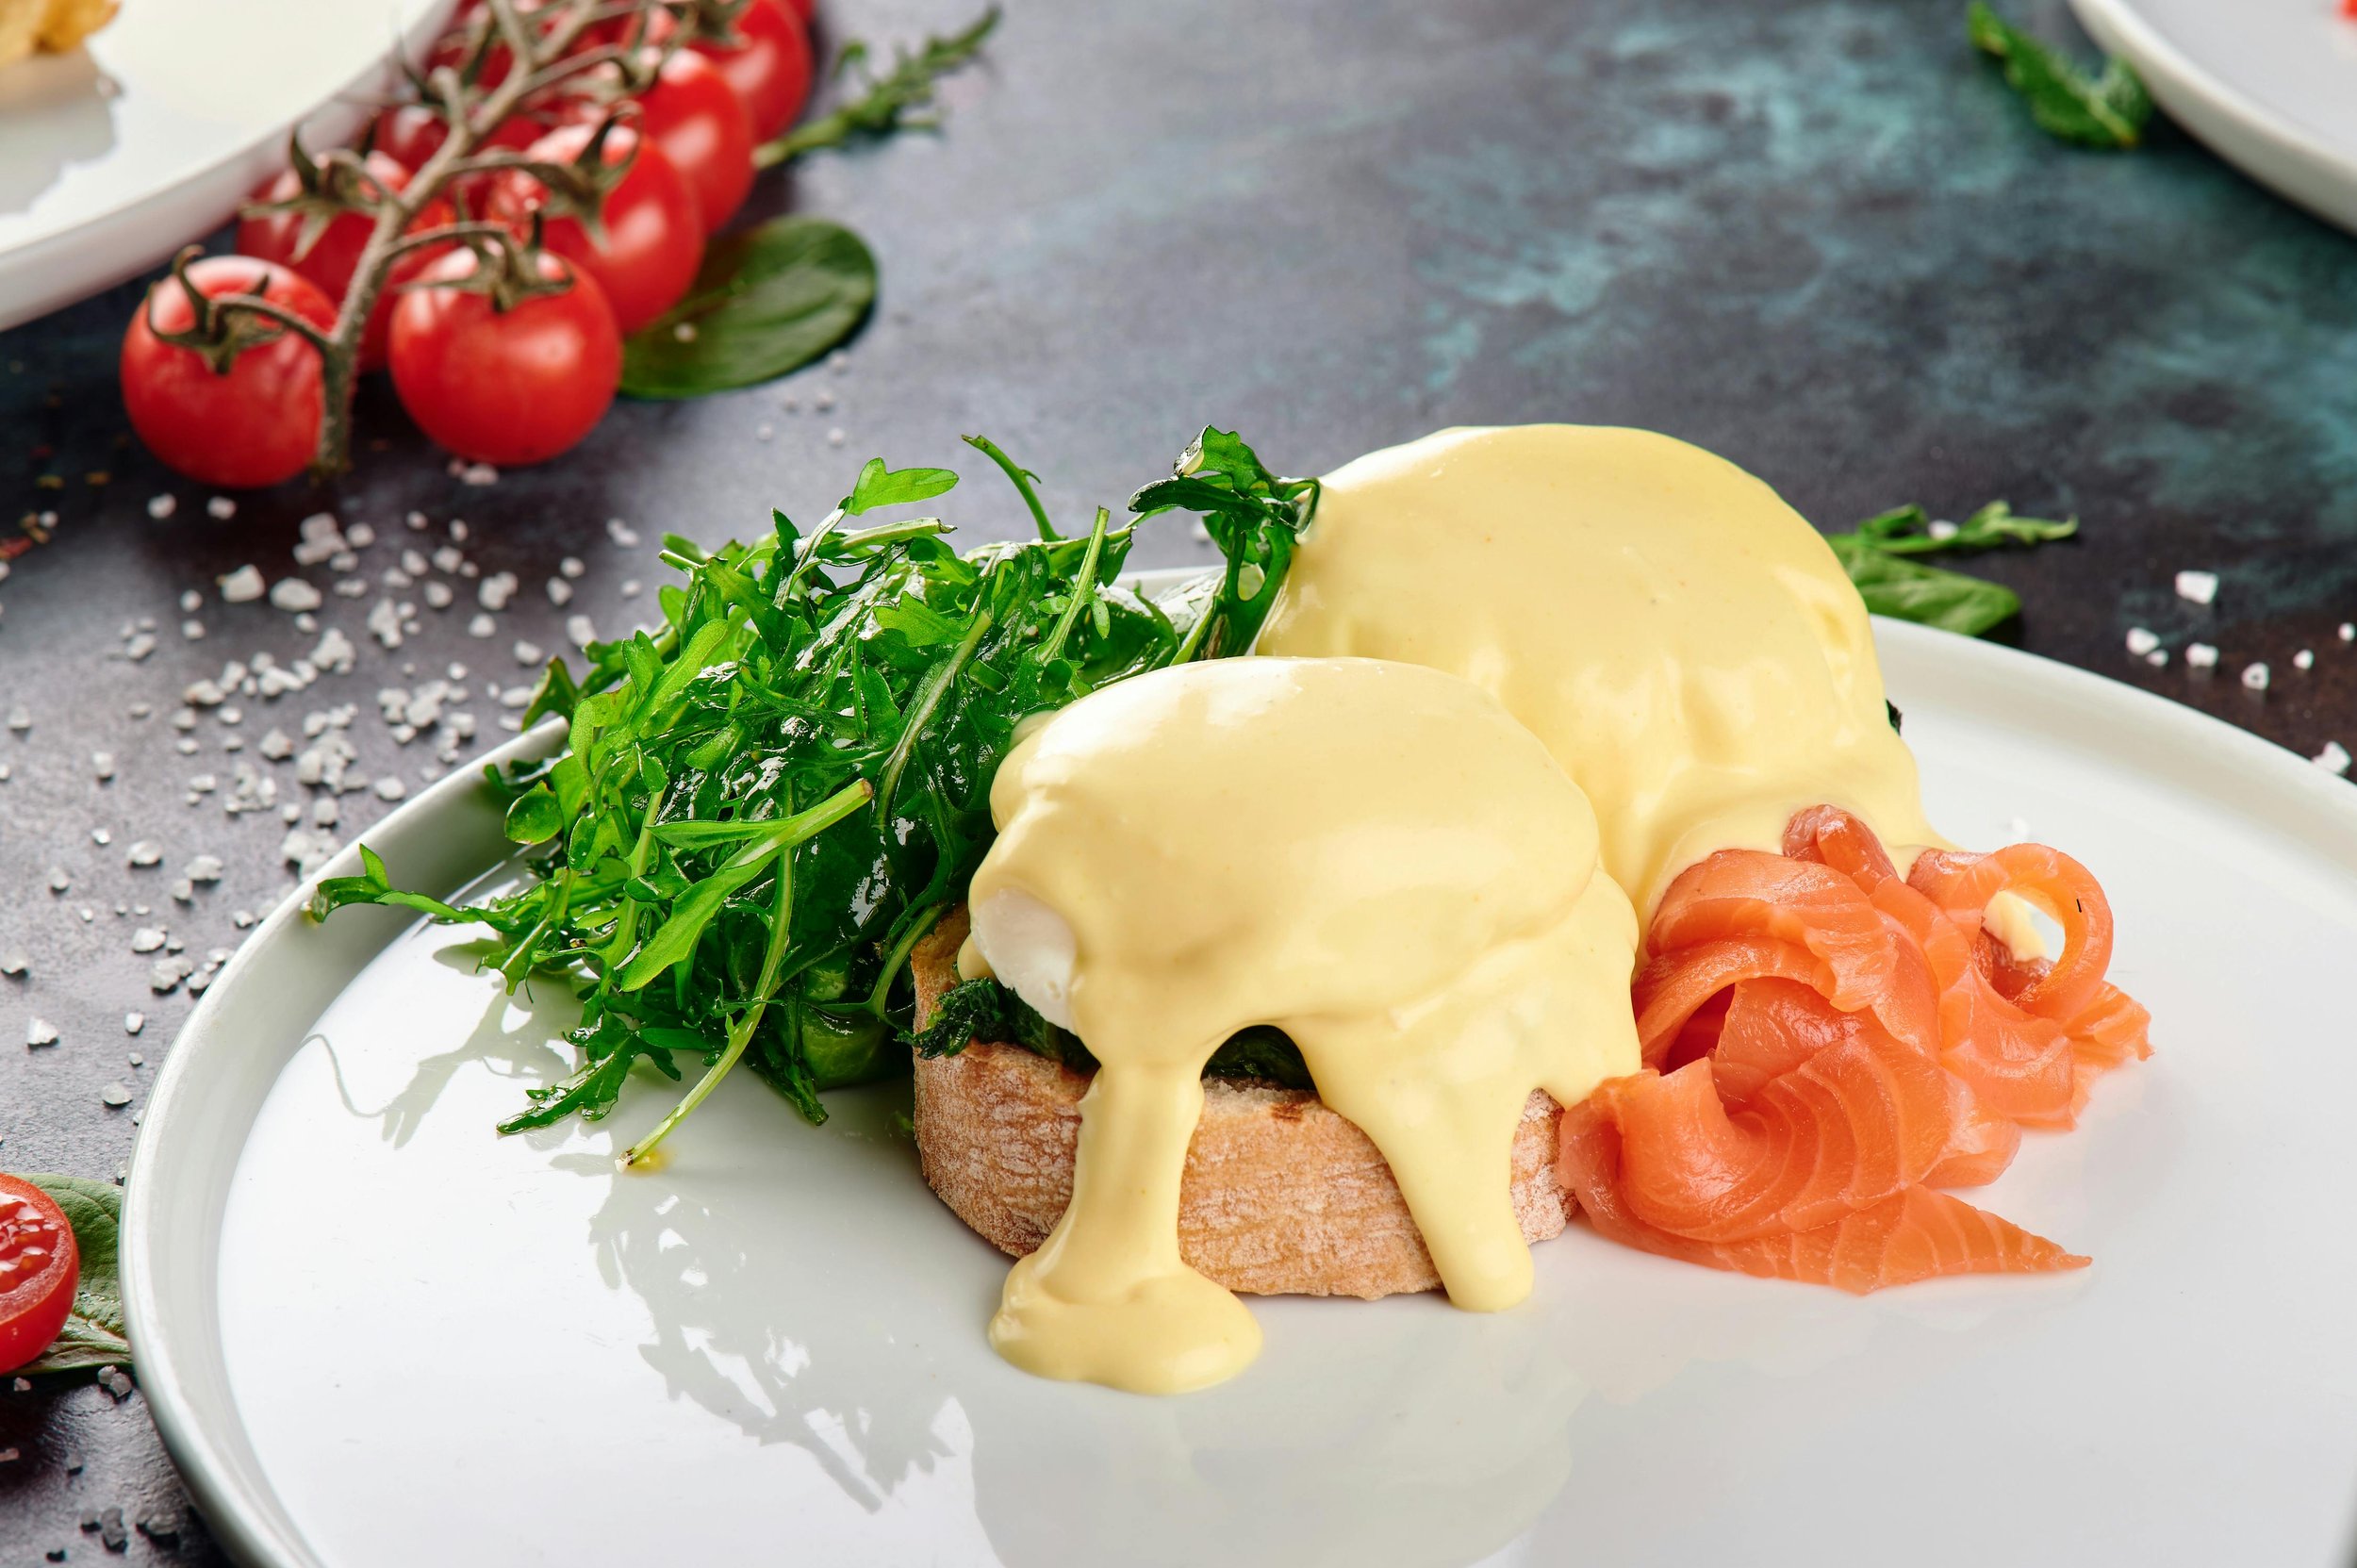
Breakfast Sandwich (low FODMAP)
5 Minutes prep • 10 Minutes cook • Low FODMAP • Serves 1
5 Minutes prep • 10 Minutes cook • Low FODMAP • Serves 1 • Ok to make ahead: Step 1
My grandmother made the very best scrambled eggs. They were always perfectly smooth and creamy and they tasted and smelled divine. It took me years to figure out that her technique was…patience. She would never turn the burner up past medium and she would gently stir the eggs until she had a perfect result. Now whenever I make them, I think of her with appreciation and look forward to enjoying the very best scrambled eggs once again. This breakfast sandwich features those scrambled eggs and it’s one of my favorite breakfasts (which I often have at lunchtime!) It’s easy to make and delicious to eat.

Ingredients
2 slices of real sourdough bread (look for sourdough that doesn’t include yeast or vinegar in the ingredients)
2 tablespoons butter
2 extra-large or 3 large eggs
1/2 cup sharp white cheddar cheese, grated
Kosher salt and black pepper to taste
Microgreens (optional but very good!)
Directions
(1) Prepare: Grate the cheese.
(2) Make the toast: Turn on the broiler and toast the sourdough bread under the broiler, turning over halfway through until it is golden brown and crisp on both sides. Remove from the oven, spread with butter, and set aside on a baking sheet or oven-proof plate.
(3) Prepare the eggs: While the toast is cooking, in a bowl, whisk together the eggs, salt, and pepper.
(4) Cook the eggs: Heat a small frying pan over medium heat. Add 1 tablespoon of butter to the pan and let it melt. Add the eggs and cook slowly, stirring frequently. Don’t be tempted to turn the heat up to cook the eggs faster. Cooking them slowly will yield delicious creamy eggs. Cooking them fast will yield dry eggs and a damp pan.
(5) Finish: When the eggs are just cooked through spoon them onto the buttered toast. Sprinkle with grated white cheddar cheese and put back under the broiler for about a minute until the cheese is melted into the eggs.
(6) Plate and serve: Remove from the oven and transfer to a plate. Sprinkle with microgreens, Kosher salt, and fresh ground black pepper.
Eat and enjoy every bite because you can!
This post may contain affiliate links so you can easily purchase items listed on the page. In some cases, we have provided a special discount code for IBS Game Changers so be sure to use it when you purchase an item to get the discount that has been arranged just for you!
More Deliciously Low FODMAP™ breakfast recipes you might enjoy
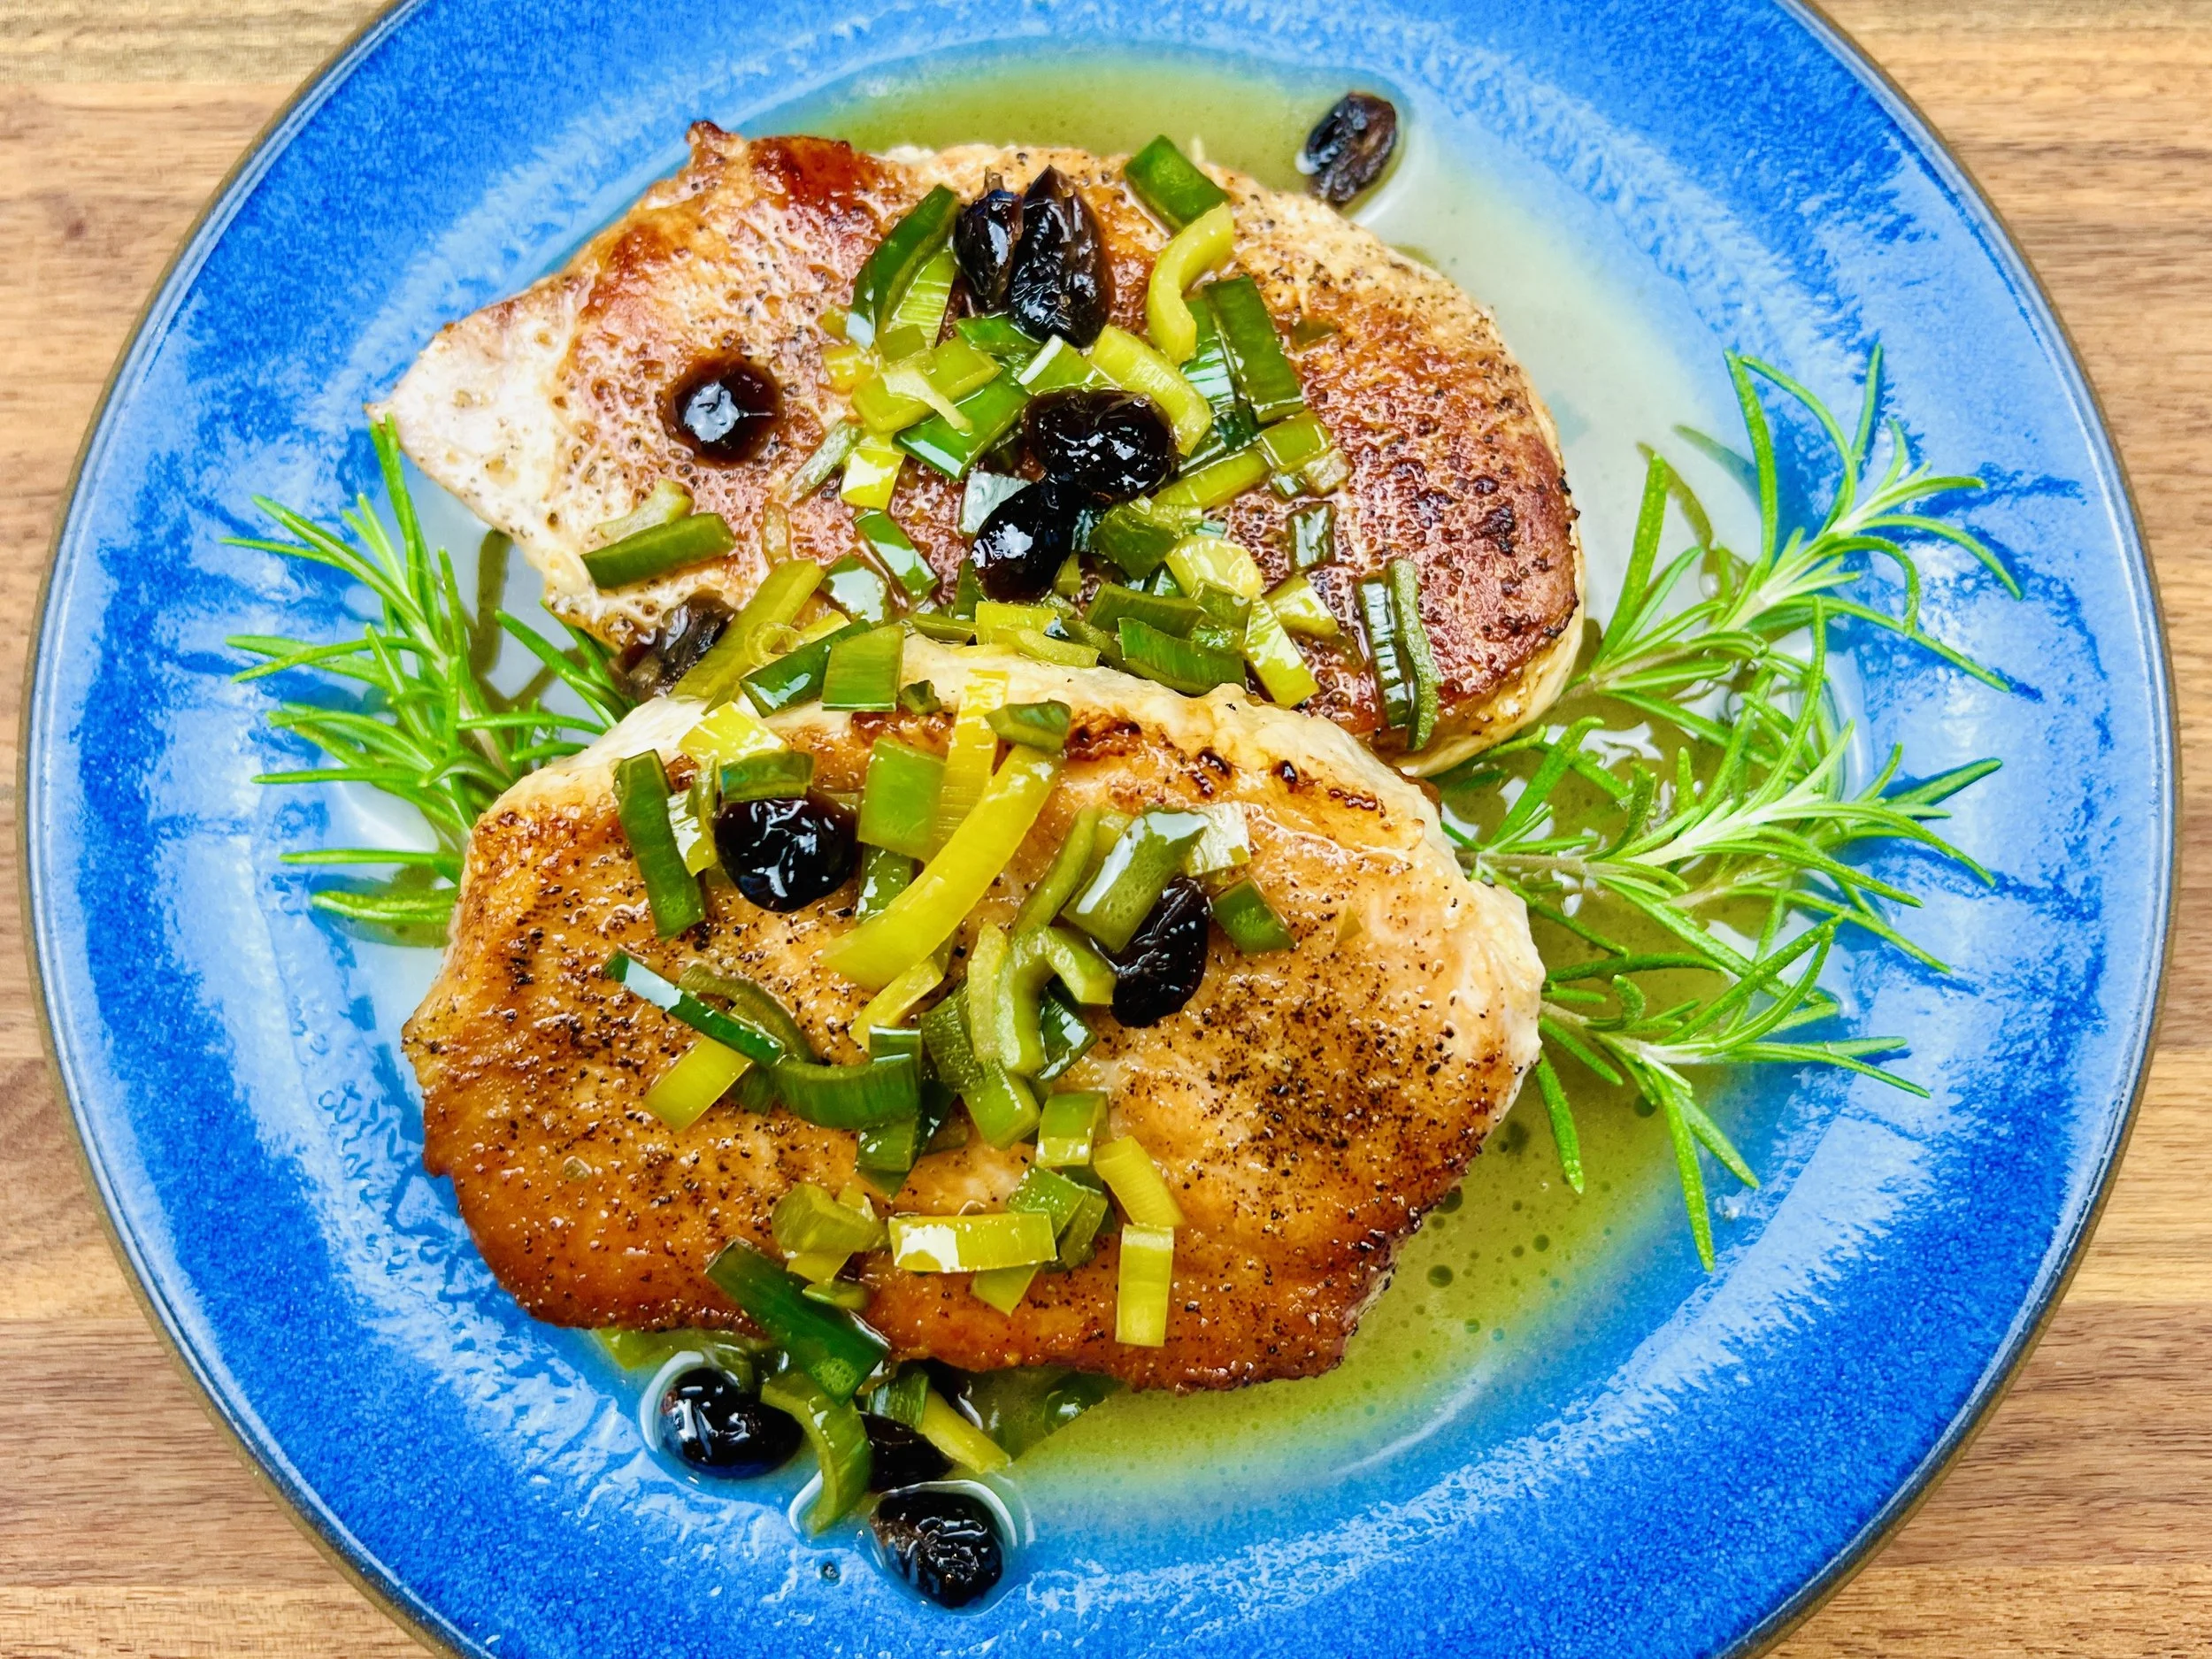
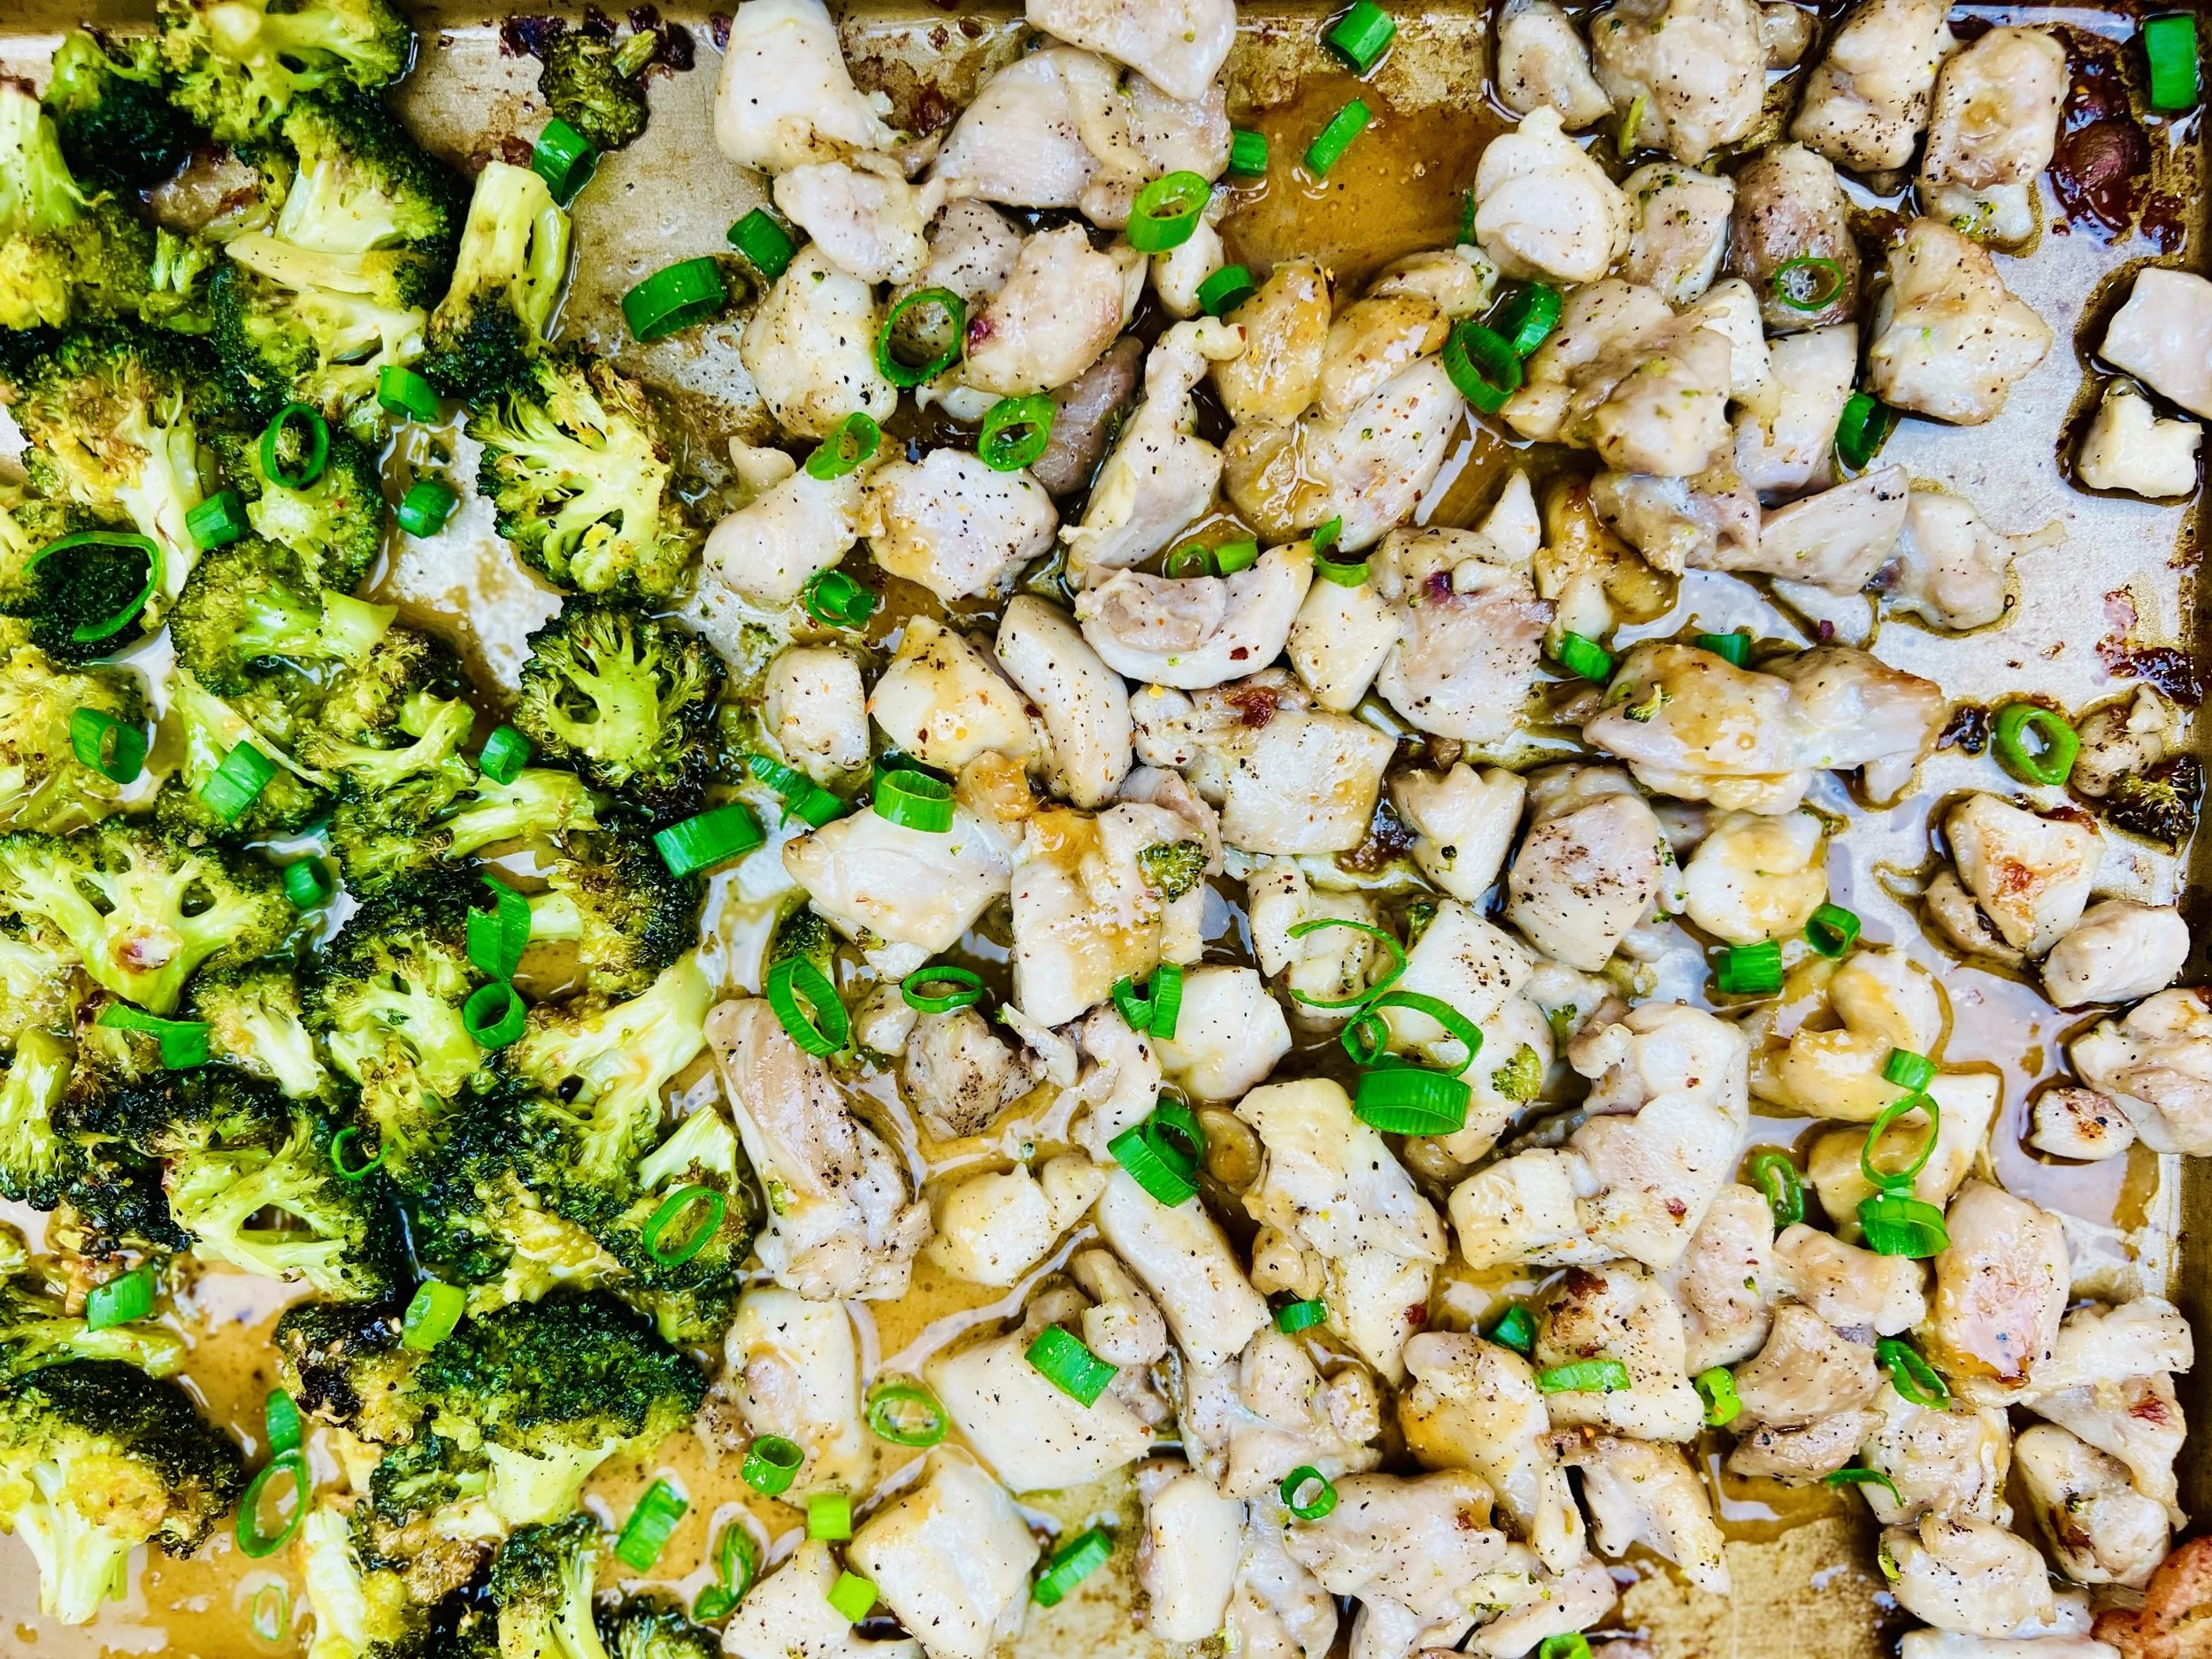
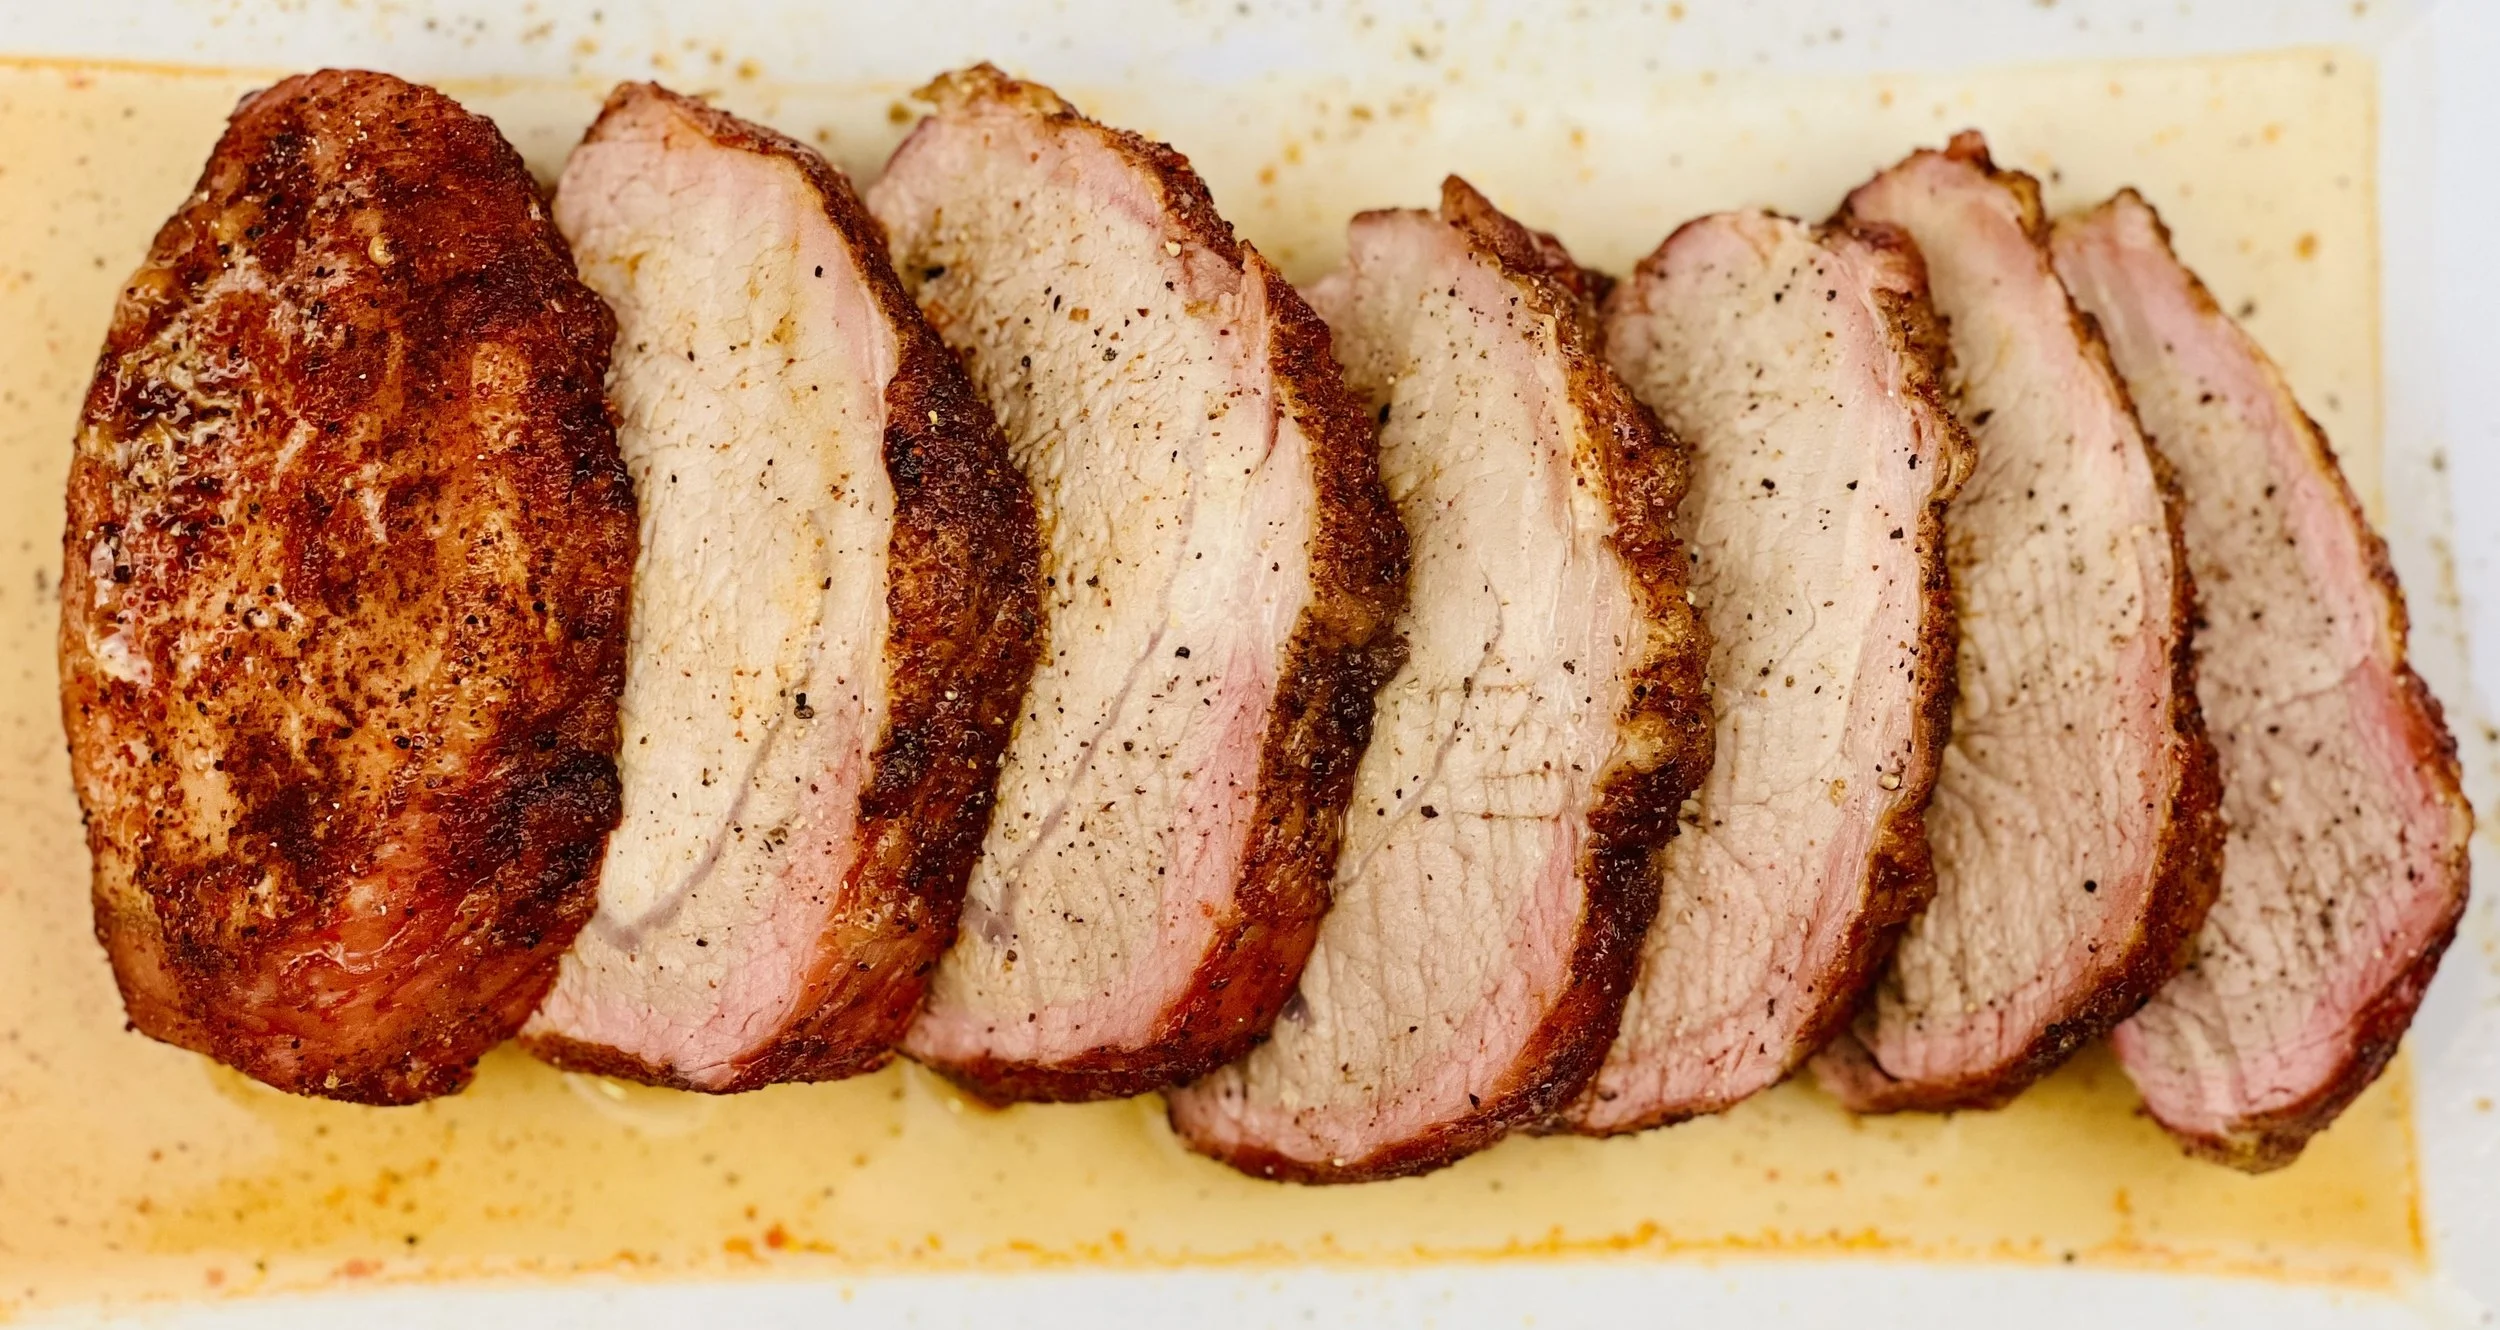
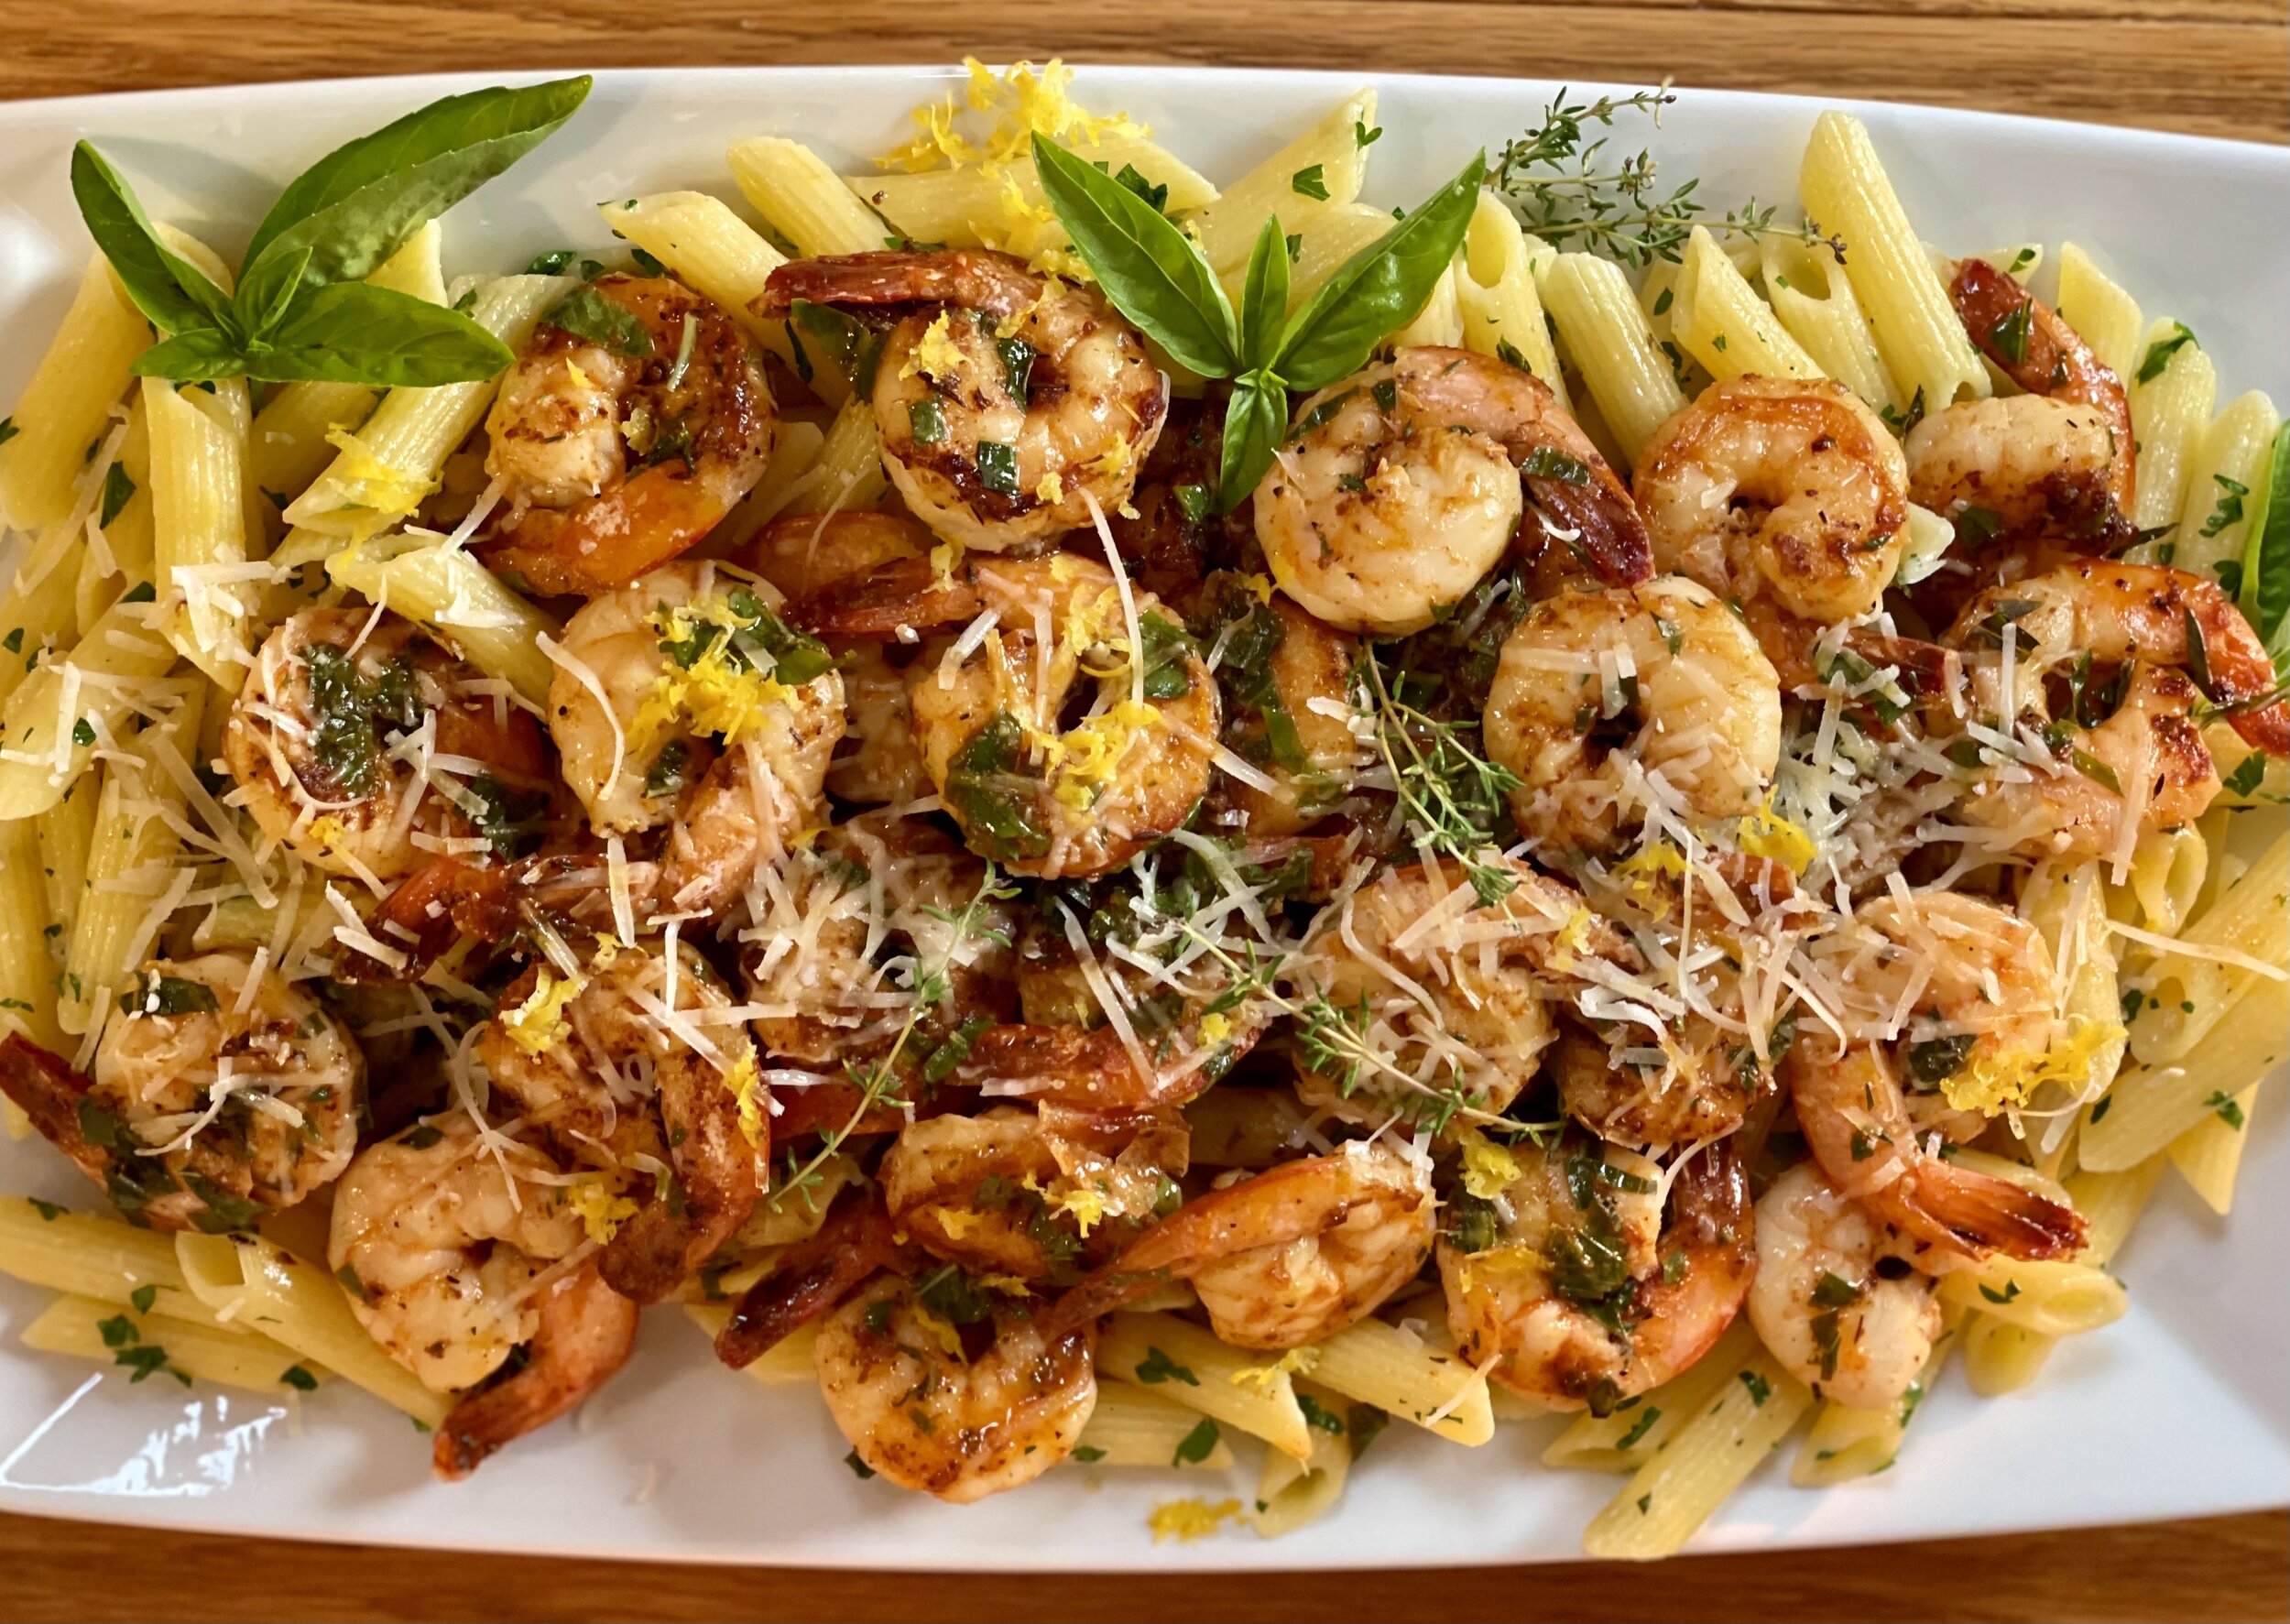
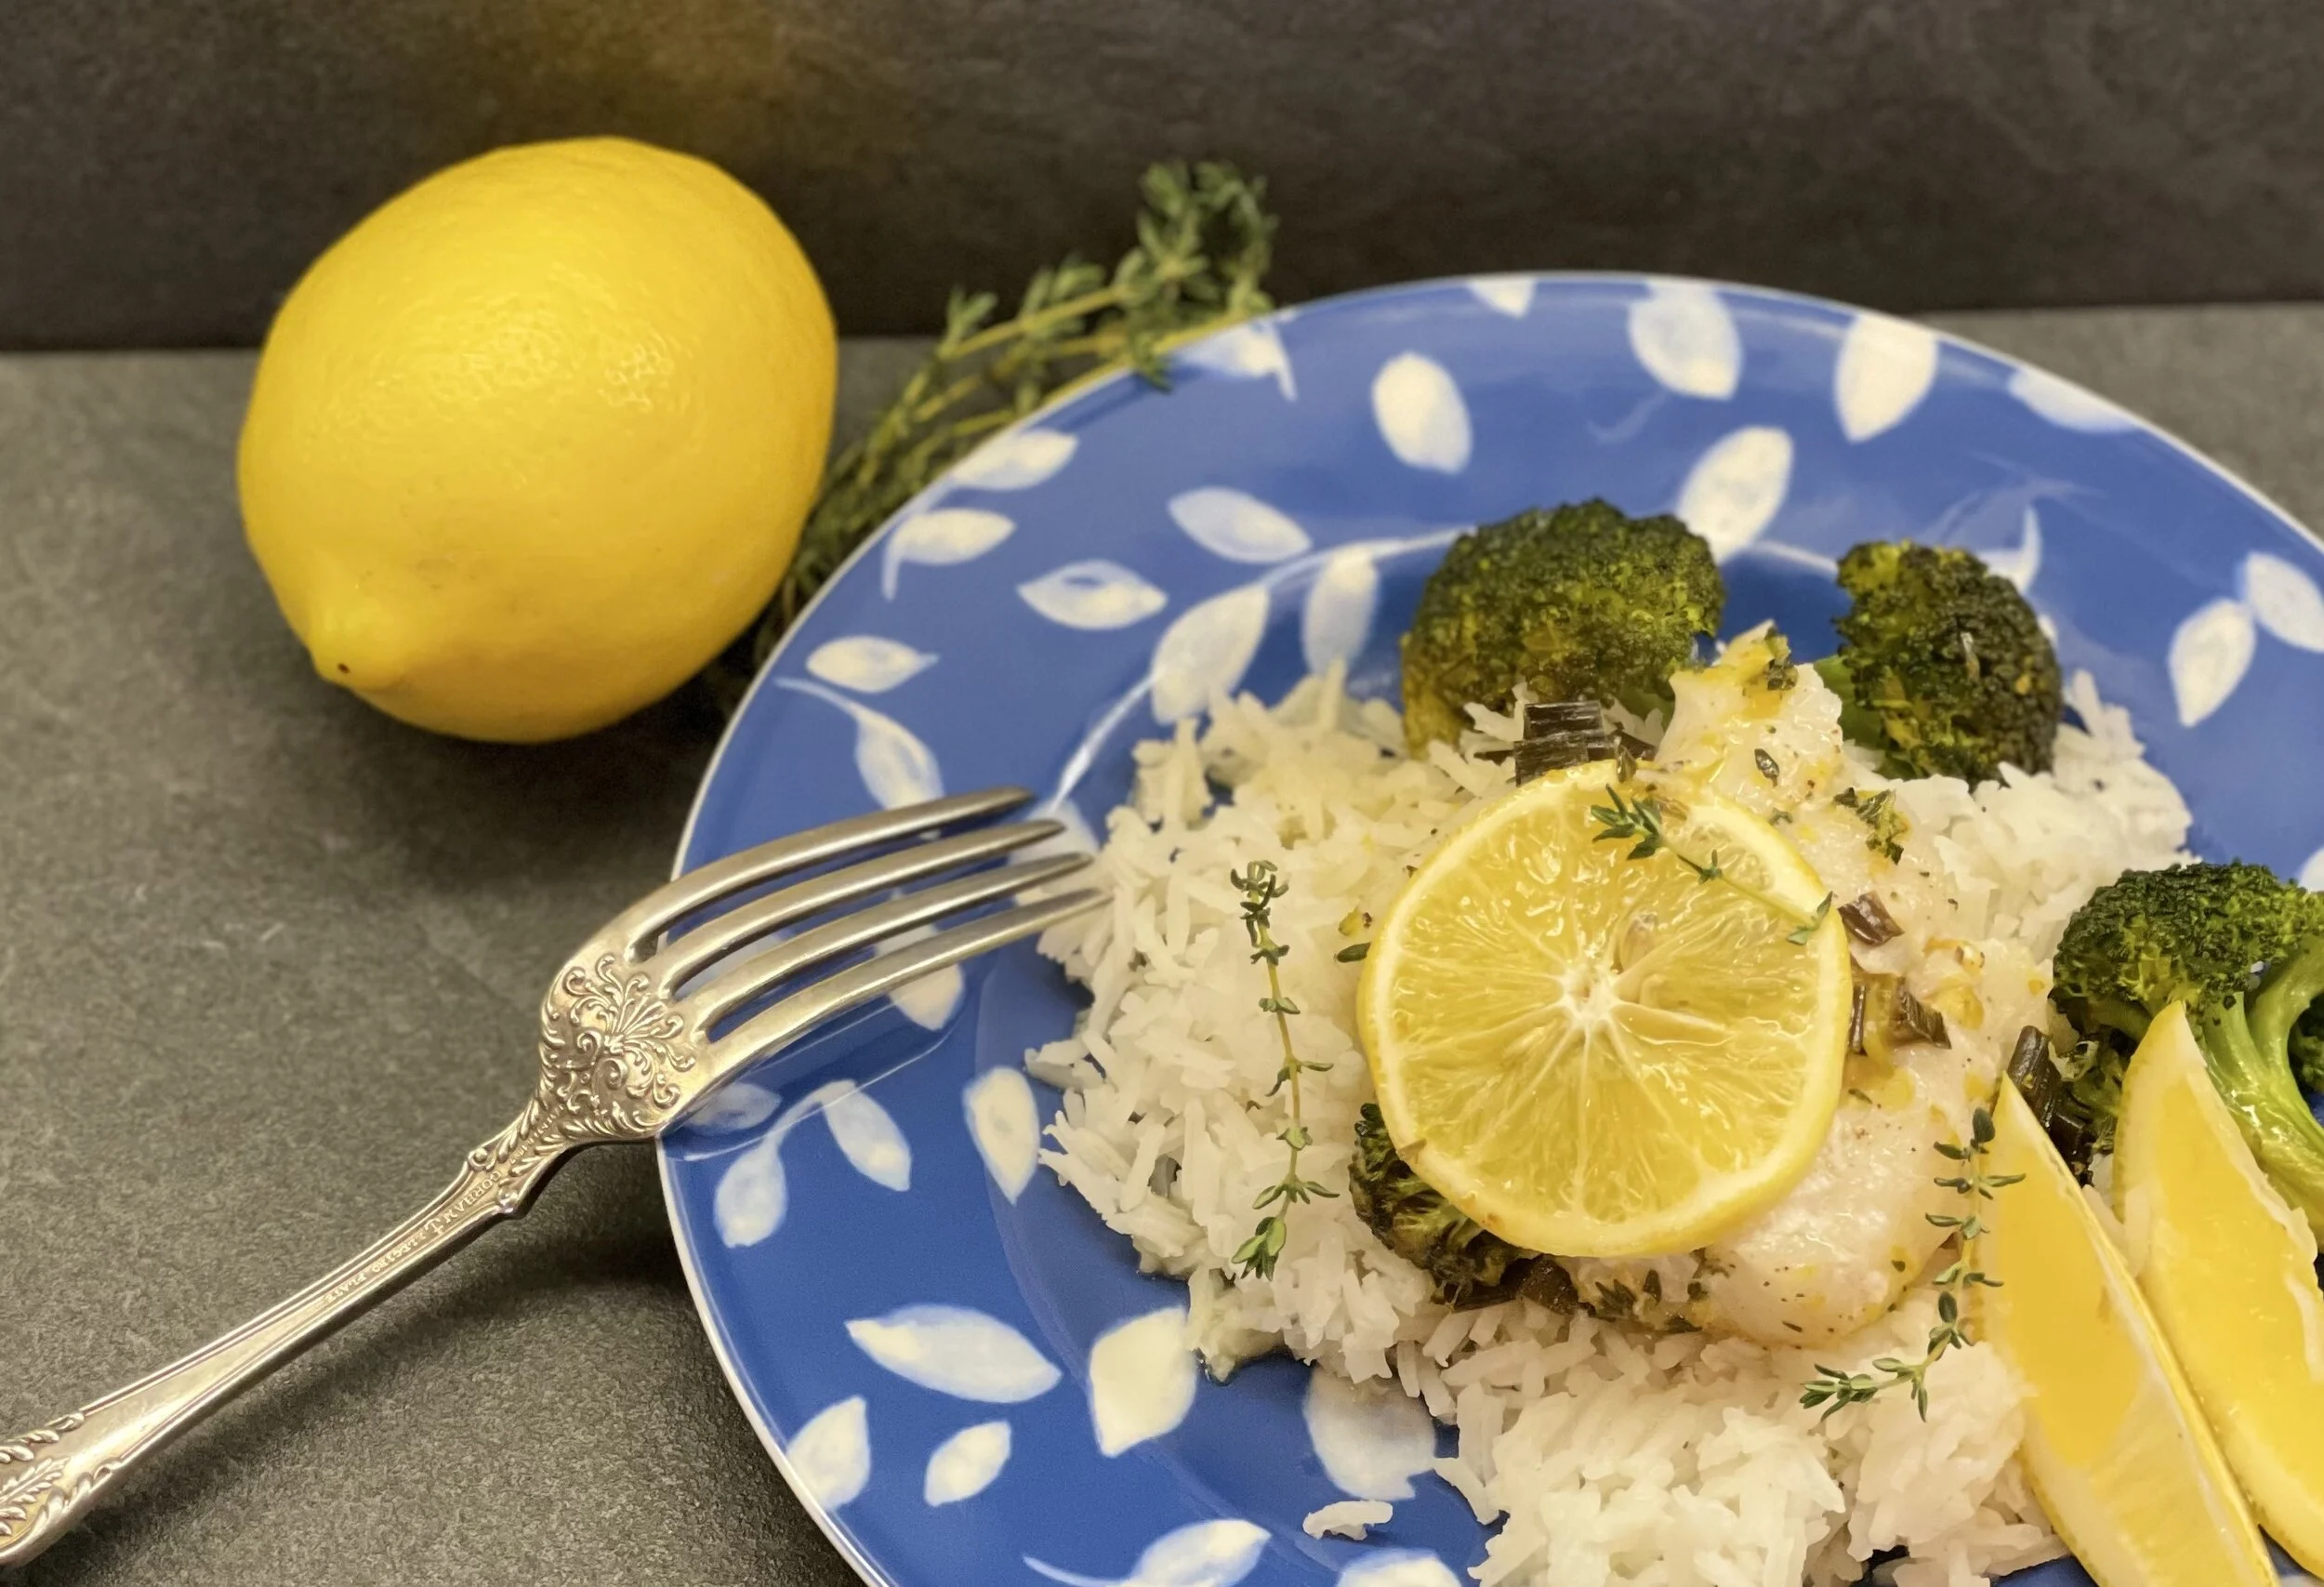
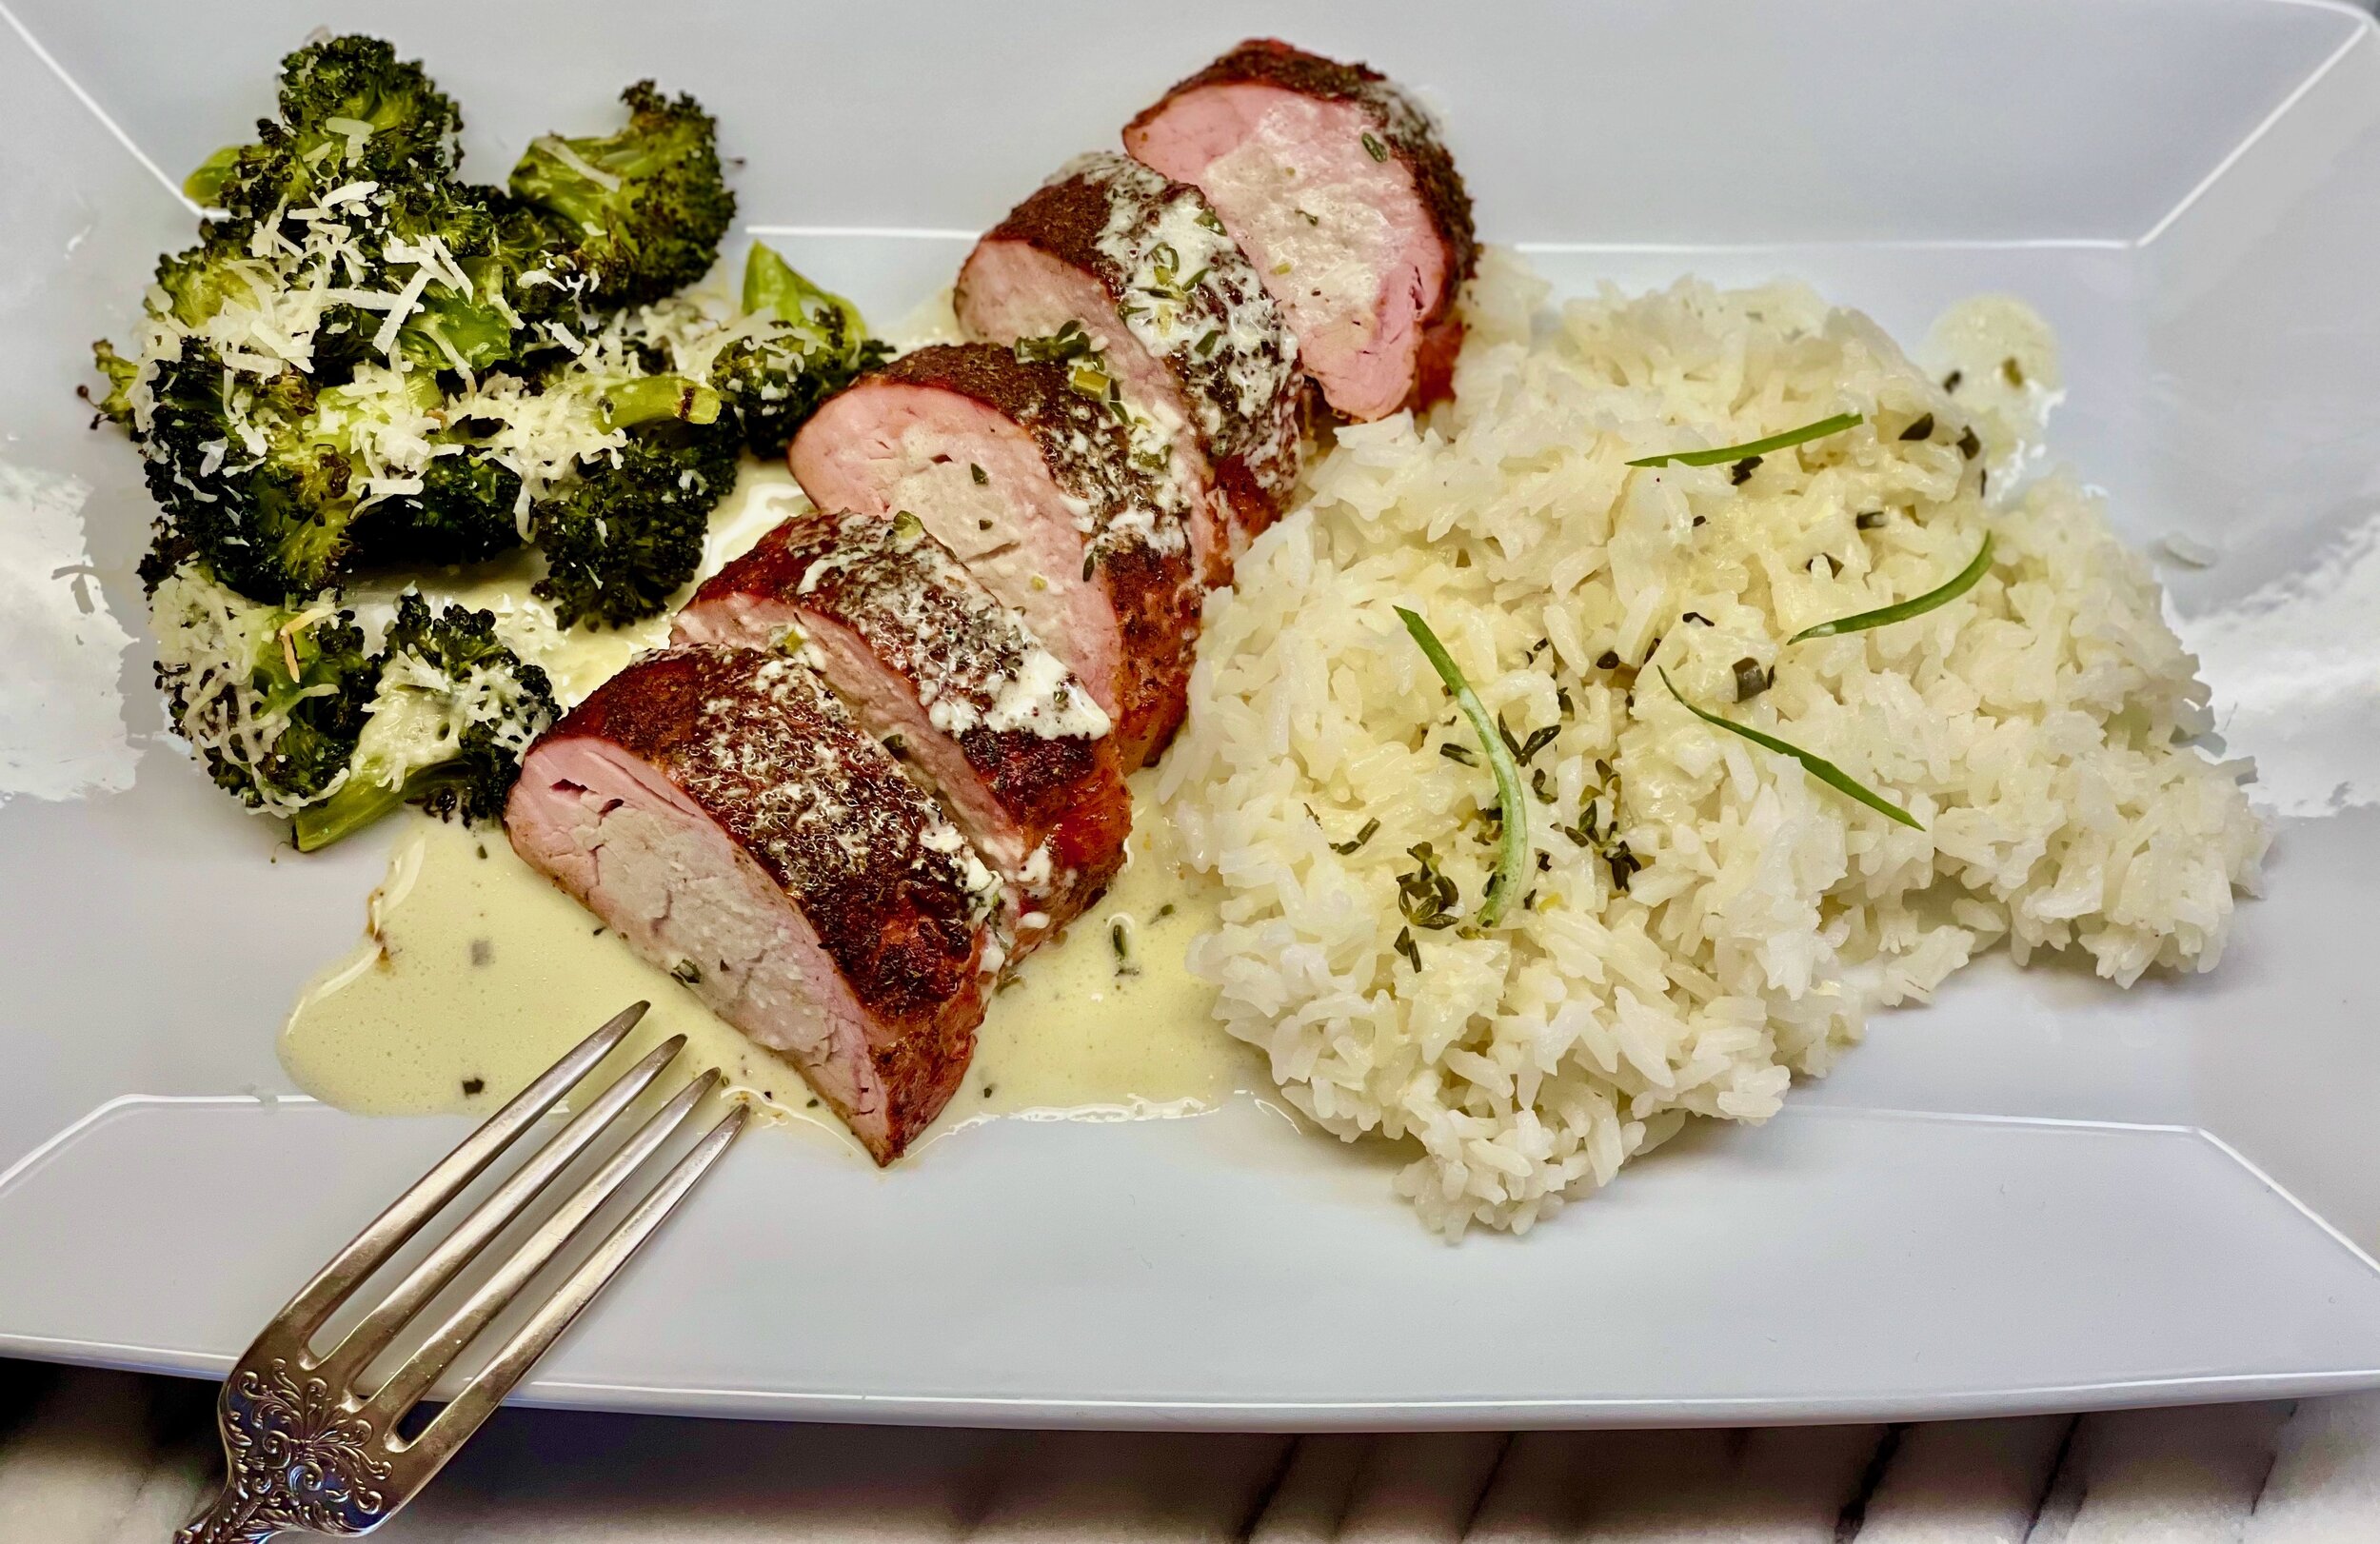
Roasted pork tenderloin with parmesan broccoli (low FODMAP)
10 minutes prep • 30 minutes bake or 60 minutes grill or 3 hours smoker • Gluten-free • Low FODMAP • Serves 4 - 6
10 minutes prep • 30 minutes bake or 60 minutes grill or 3 hours smoker • Gluten-free • Low FODMAP • Serves 4 - 6
This pork tenderloin is flavorful and crispy on the outside, juicy and tender on the inside. Served with rice, parmesan broccoli, and our white wine cream sauce, this is a delicious meal you can present to the family or your next table of guests. Don’t be discouraged by the list of ingredients, most of them are spices that go into the rub!
Ingredients
1-2 heads broccoli florets (no stems)
1 tablespoon extra virgin olive oil
1/2 cup parmesan cheese, grated
Two 1-pound pork tenderloins (see pro tip)
2 tablespoons garlic-infused olive oil
2 teaspoons basil
2 teaspoons oregano
1 teaspoon marjoram
2 teaspoons Gourmend Foods garlic scape powder (use code IBSGC15 for 15% discount)
2 teaspoons cumin
2 teaspoons Kosher salt
2 teaspoons chili powder
1 teaspoon smoked paprika (optional but highly recommended)
1/2 teaspoon black pepper
2 tablespoons dark brown sugar
Directions
(1) Prepare the meat: Pierce tenderloins all over with a fork then rub the garlic-infused olive oil onto all sides of the meat.
Make your rub by whisking together the remaining ten dry ingredients. Sprinkle rub mixture all over tenderloin(s), patting it onto the surface of the meat on all sides.
(2) Cook the meat:
On the smoker (my preferred method as it yields the tenderest and most flavorful meat)
Preheat smoker to 180 degrees.
Place tenderloins diagonally on the smoker grill and smoke at 180 degrees for 3 hours until outside is browned.
Increase the smoker temperature to 275 degrees F and cook until the internal temperature of the thickest part registers at least 145 degrees F. For 1-pound tenderloins, this should only take about 10 or 15 minutes.
On the grill
Preheat grill to medium-high (about 400 degrees F).
Grill for 20-30 minutes until the outside is browned and crispy but not burned. Watch the temperature and take the meat off when the internal temperature of the thickest part is just below 145 degrees F. The meat will continue to cook for a few minutes off the grill and you don’t want it to get dry.
In the oven
Preheat oven to 400 degrees and lightly grease a large baking/casserole dish.
Bake for 25-35 minutes until outside is browned and the internal temperature of the thickest part registers 145 degrees F.
When done, be sure to spoon any remaining juices from the pan over the slices for extra flavor and juiciness.
(3) Make the sauce: See recipe and instructions below.
(4) Steam the rice: While the meat is cooking, steam the rice per package instructions, set it aside, and keep warm.
(5) Cook the broccoli: While the rice is steaming, cook the broccoli. If you are not already using your oven to cook the pork loin, preheat the oven to 400 degrees F. Trim your broccoli into florets (no stems). Put in a large bowl and drizzle with olive oil. Toss to combine. Sprinkle with salt and pepper and toss again. Spread on a parchment-lined rimmed baking sheet and cook in a 400 degree F oven for about 15 minutes. Stir partway through. Broccoli may get blackened in spots — which is great! Remove from the oven and sprinkle with freshly grated parmesan cheese.
(6) Finish: Allow meat to rest, covered with foil, on a cutting board for 5-10 minutes before slicing. Slice into 3/4-inch pieces.
(7) Plate and serve: To each plate add a scoop of rice and broccoli and a few slices of pork loin. Serve with our quick white wine cream sauce (recipe below) drizzled over the rice and the meat.
Eat and enjoy every bite because you can!
Pro tip:
This recipe is pretty flexible and you can use 1-2 very small pork tenderloins, or one medium-large pork tenderloin OR you can double or even triple the ingredients for the seasonings and serve a LOT of people with several large tenderloins. You will have to adjust your cook time to the size of the meat and use a meat thermometer to confirm when done.
White wine cream sauce
Ingredients
1 tablespoon butter
1 tablespoon each minced chives, and fresh thyme or rosemary
1/2 cup white wine (such as sauvignon blanc or pinot grigio)
1 cup heavy cream (or lactose-free half and half for a lighter sauce)
1/2 cup freshly grated parmesan cheese
1/4 teaspoon salt plus additional salt and pepper to taste
Directions
(1) Prepare cream sauce: Melt butter in a medium-size skillet over medium-high heat. Add chives or green onions, and saute for about 1 minute. Add white wine and cook for about 30 seconds, then add the cream or half and half.
(2) Cook cream sauce: Cook for about 10 - 12 minutes over medium heat stirring frequently.
(3) Finish: Add salt and chopped thyme or rosemary and the grated parmesan cheese. Stir until the cheese is incorporated (about a minute). Season with more salt and pepper if needed.
(4) Serve: Pour over your roasted pork tenderloin and rice.
More Deliciously Low FODMAP™ salads you might enjoy
This post may contain affiliate links so you can easily purchase items listed on the page. In some cases, we have provided a special discount code for IBS Game Changers so be sure to use it when you purchase an item to get the discount that has been arranged just for you!
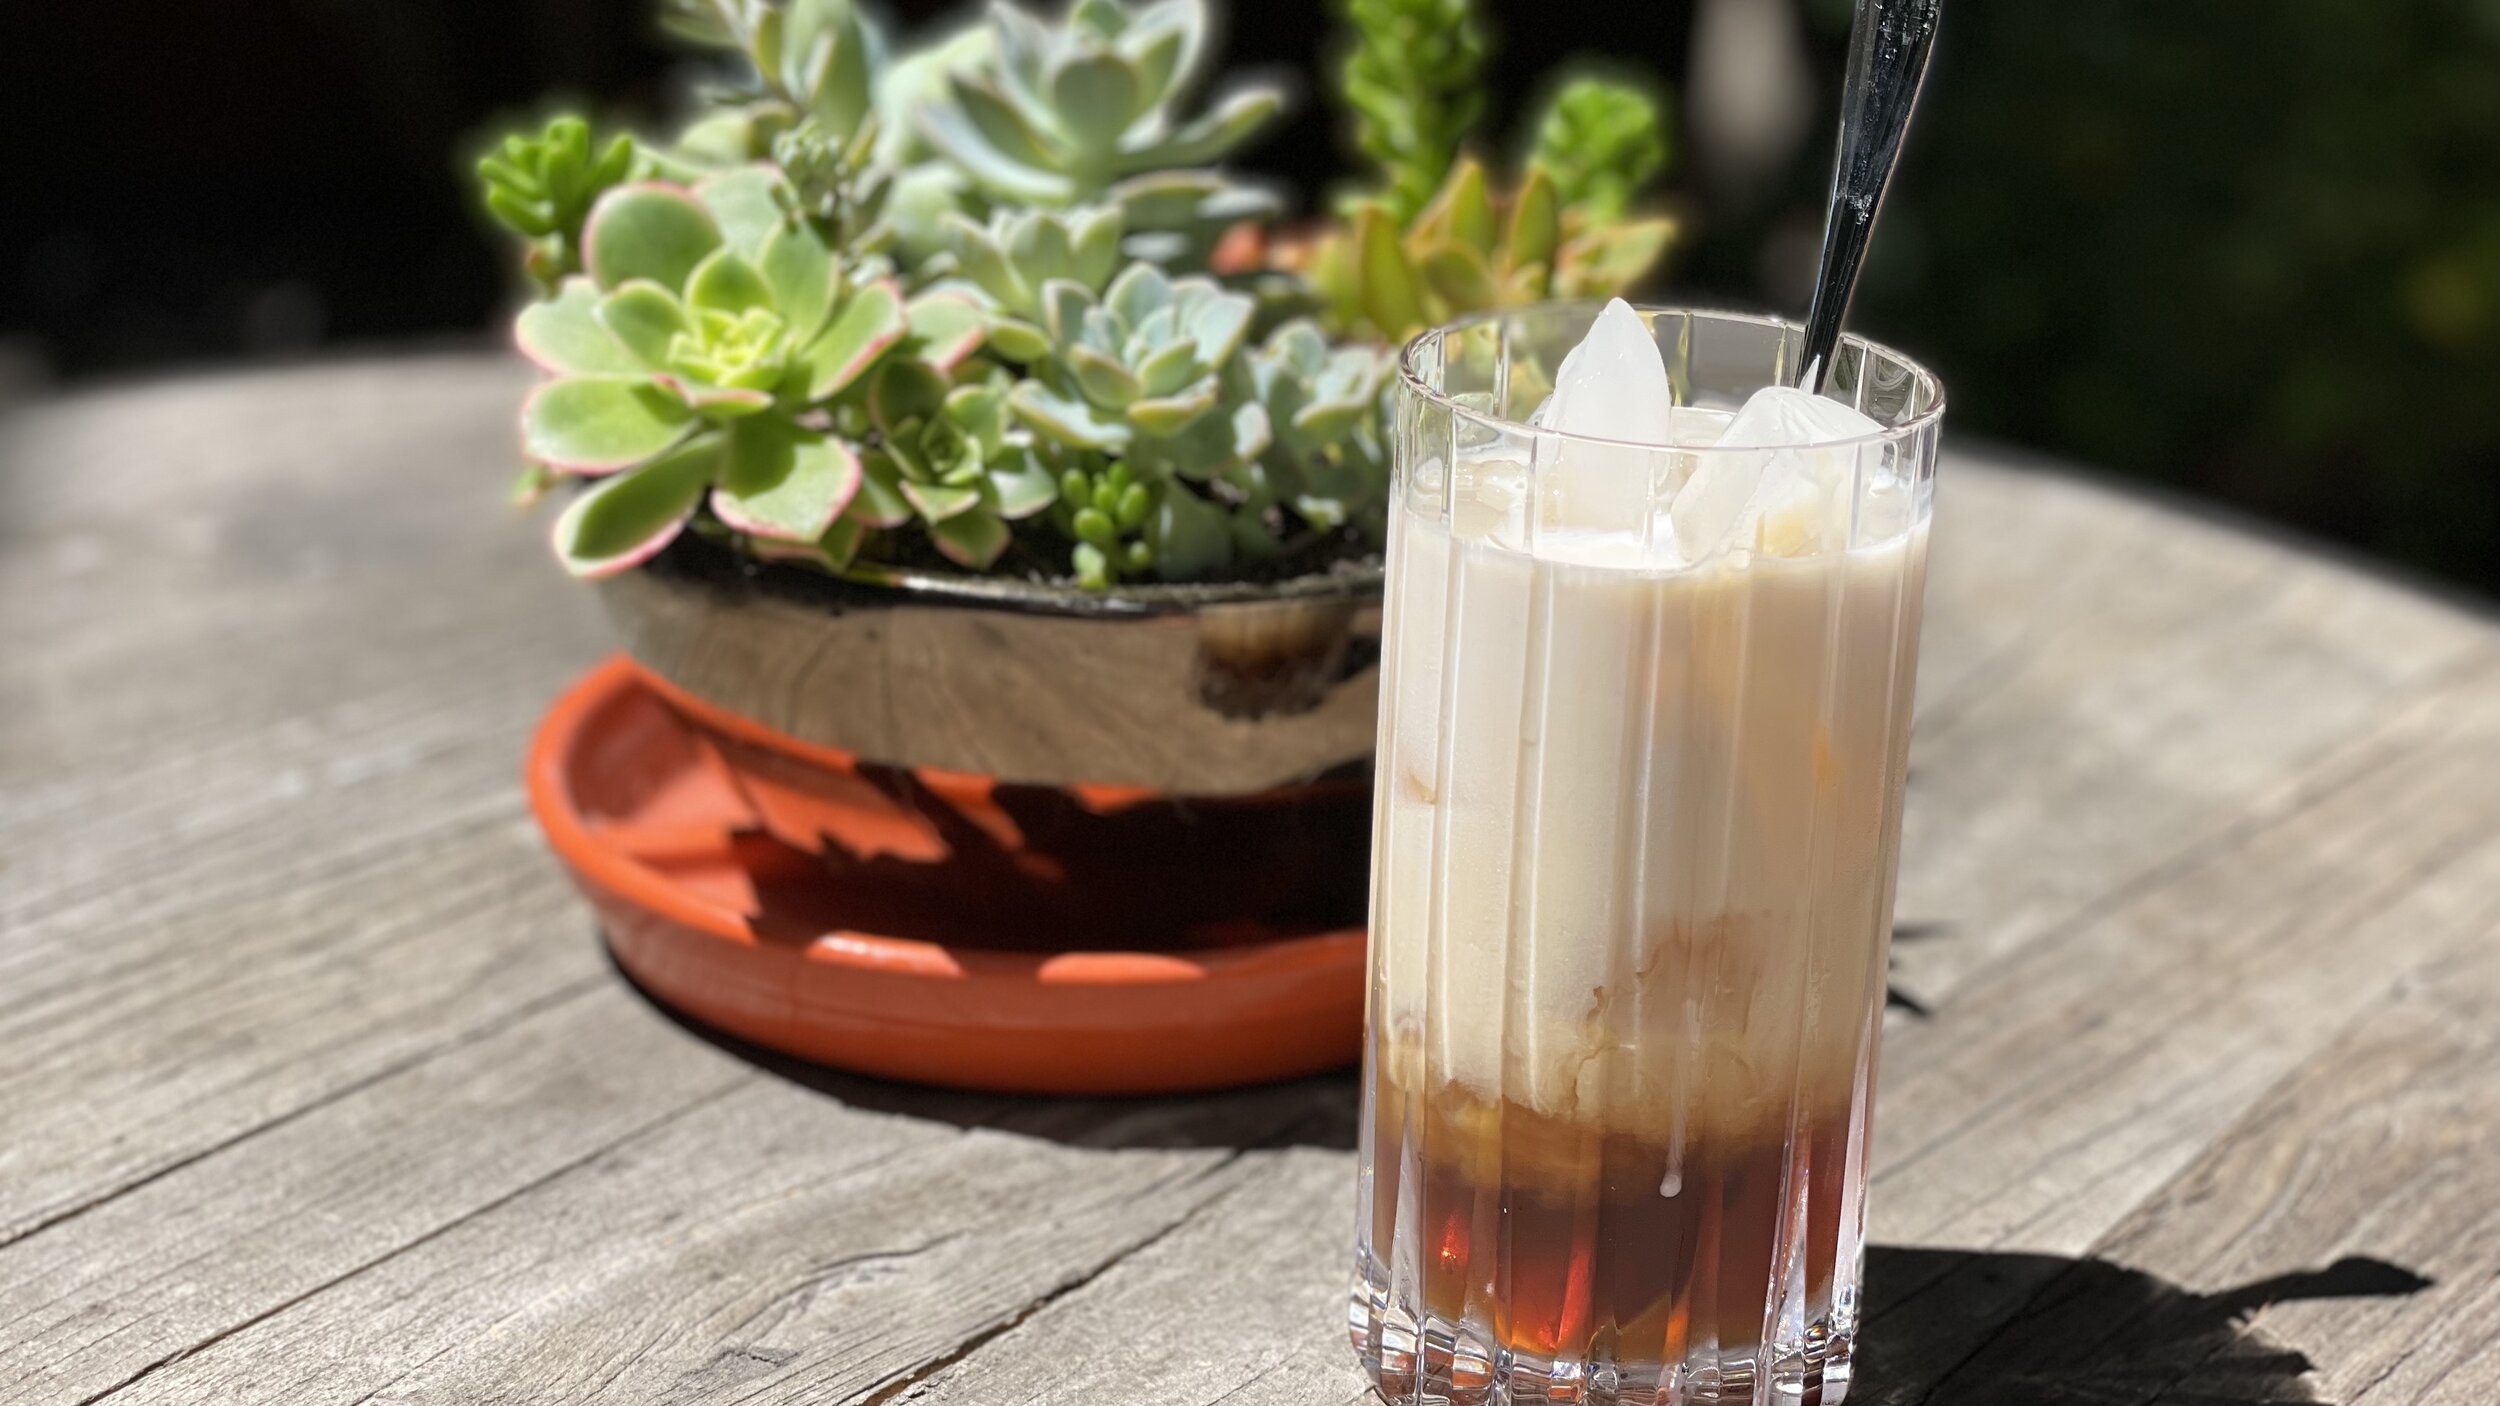
We’ve substituted FODMAP friendly sparkling wine for the champagne in this classic cocktail and it’s delicious!