Deliciously Low FODMAP

Inspire yourself with hundreds of delicious low FODMAP recipes, tips, and tools, and enjoy the abundance that is yours even when you have IBS.
Use the buttons and filters to find something specific or browse the complete collection for inspiration.
Discover a treasure trove of recipes with my FREE recipe club! Get new ideas delivered straight to your inbox every week.
Deliciously Low FODMAP is a trademark of IBS Game Changer, LLC
Filter to find Recipes and Tools
More Filtering Options
- All 734
- Appetizer 50
- BBQ 46
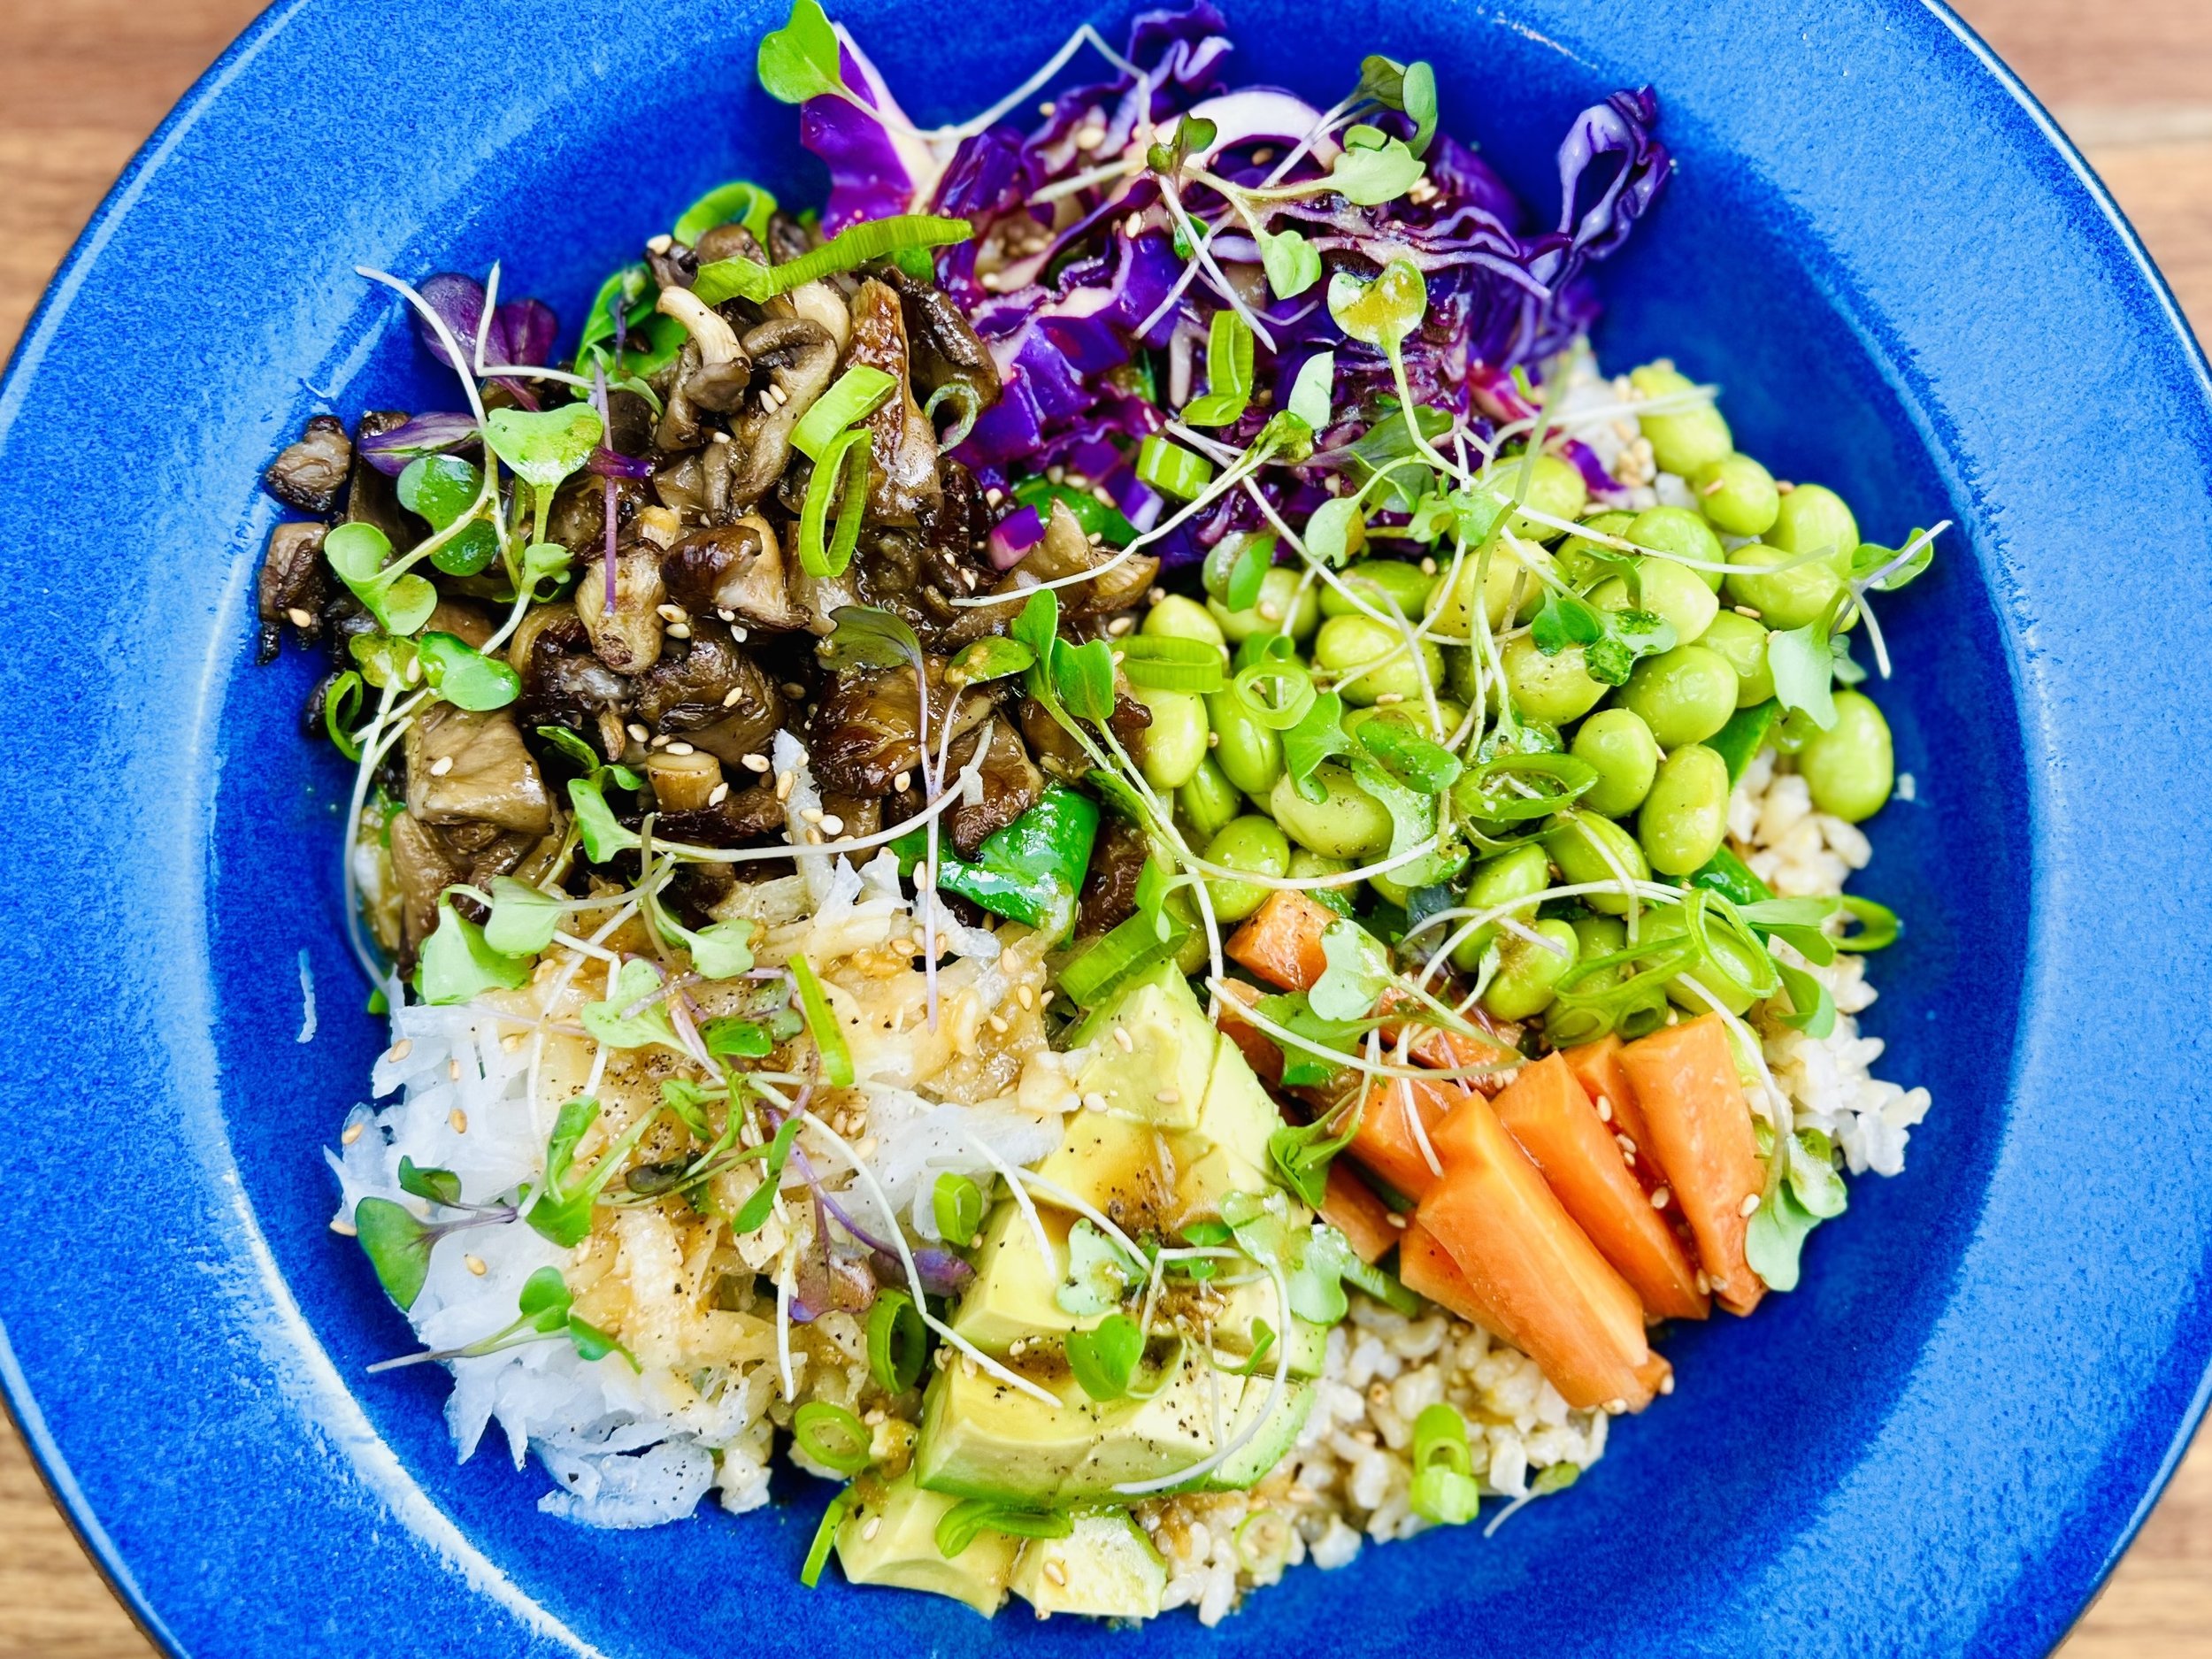
- Bowl 32
- Breakfast 58
- Cocktails 13
- Collection 1 58
- Collection 10 27
- Collection 11 30
- Collection 12 27
- Collection 13 31
- Collection 14 29
- Collection 15 31
- Collection 16 34
- Collection 17 31
- Collection 18 33
- Collection 19 36
- Collection 2 32
- Collection 20 33
- Collection 21 33
- Collection 22 40
- Collection 23 16
- Collection 24 1
- Collection 3 28
- Collection 4 29
- Collection 5 30
- Collection 6 32
- Collection 7 31
- Collection 8 31
- Collection 9 32
- Condiments 6
- Crock Pot 4
- Dessert 108
- Diabetes Game Changer Exception Protocol Contains Alcohol 11
- Diabetes Game Changer Exception Protocol Contains Flour 109
- Diabetes Game Changer Exception Protocol Contains Flour AND Sugar 77
- Diabetes Game Changer Exception Protocol Contains Sugar 49
- Diabetes Game Changer First Four Weeks 367
- Dinner 334
- Drink 8
- Easter 1
- Free Guide 17
- Gluten-free 595
- Gut Microbiome 2
- Guthealth 3
- Holidays 69
- IBS Triggers 4
- Keto Friendly 127
- Lactose-Free 175
- Low FODMAP Diet 720
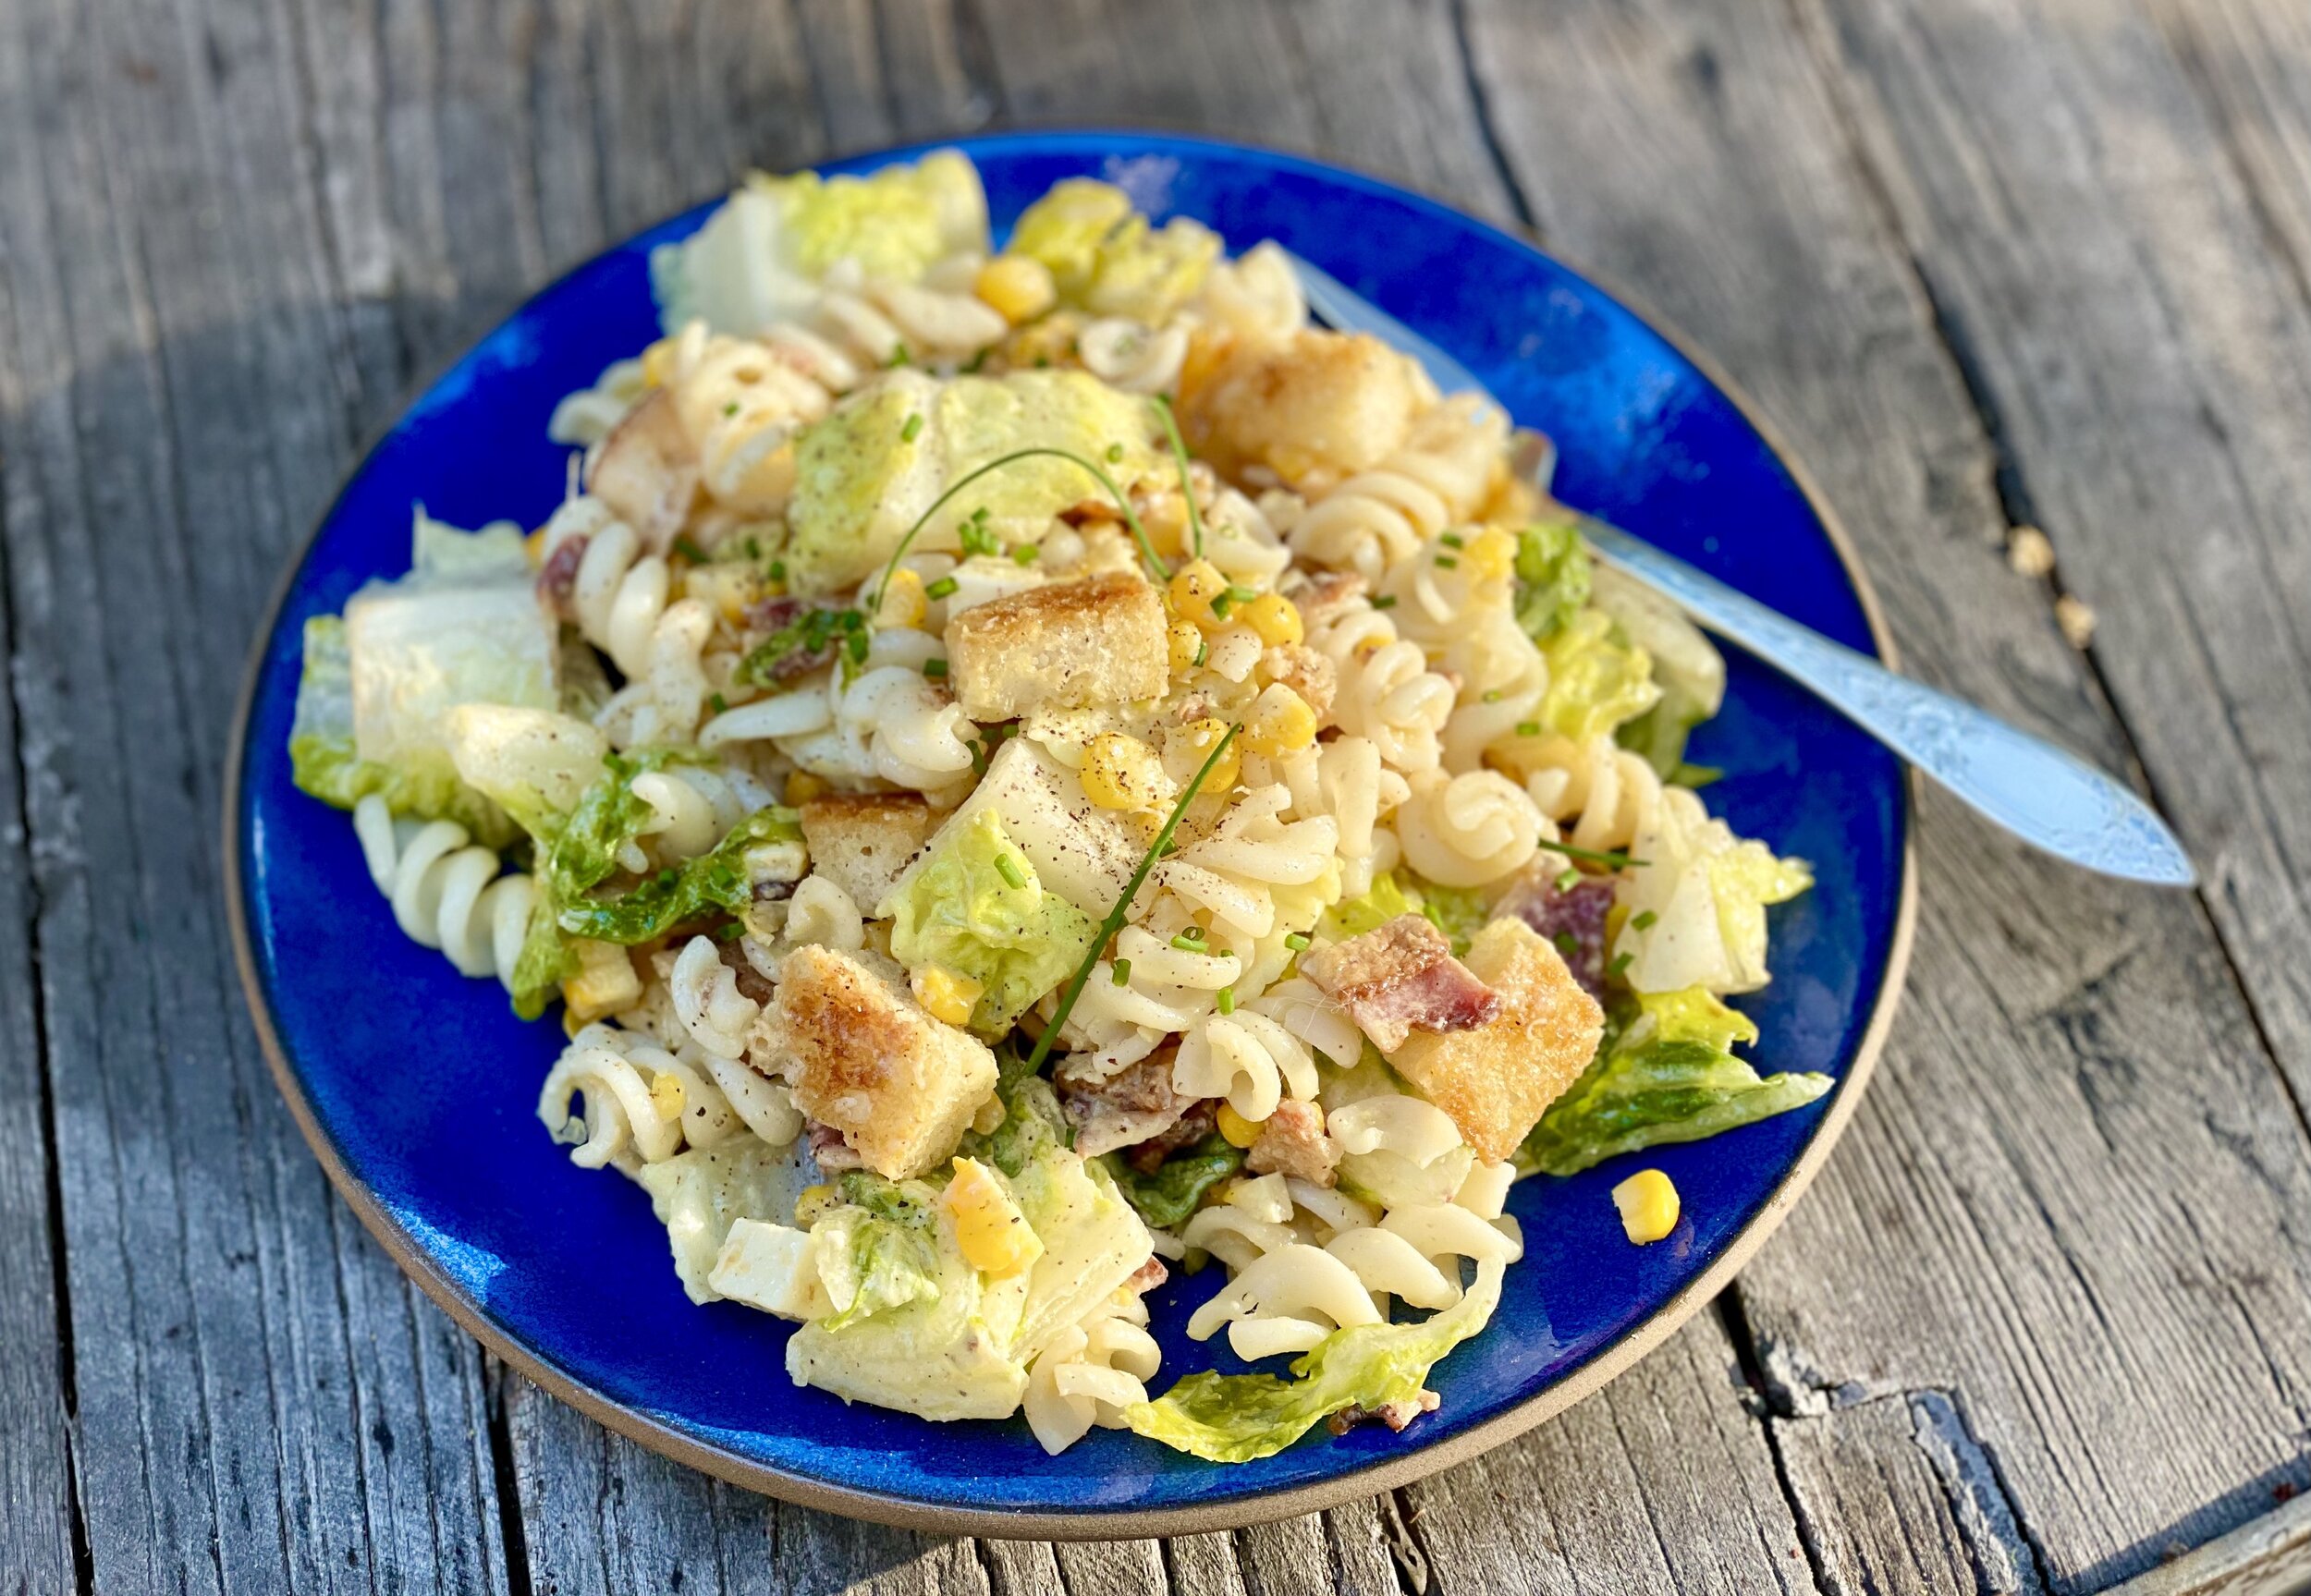
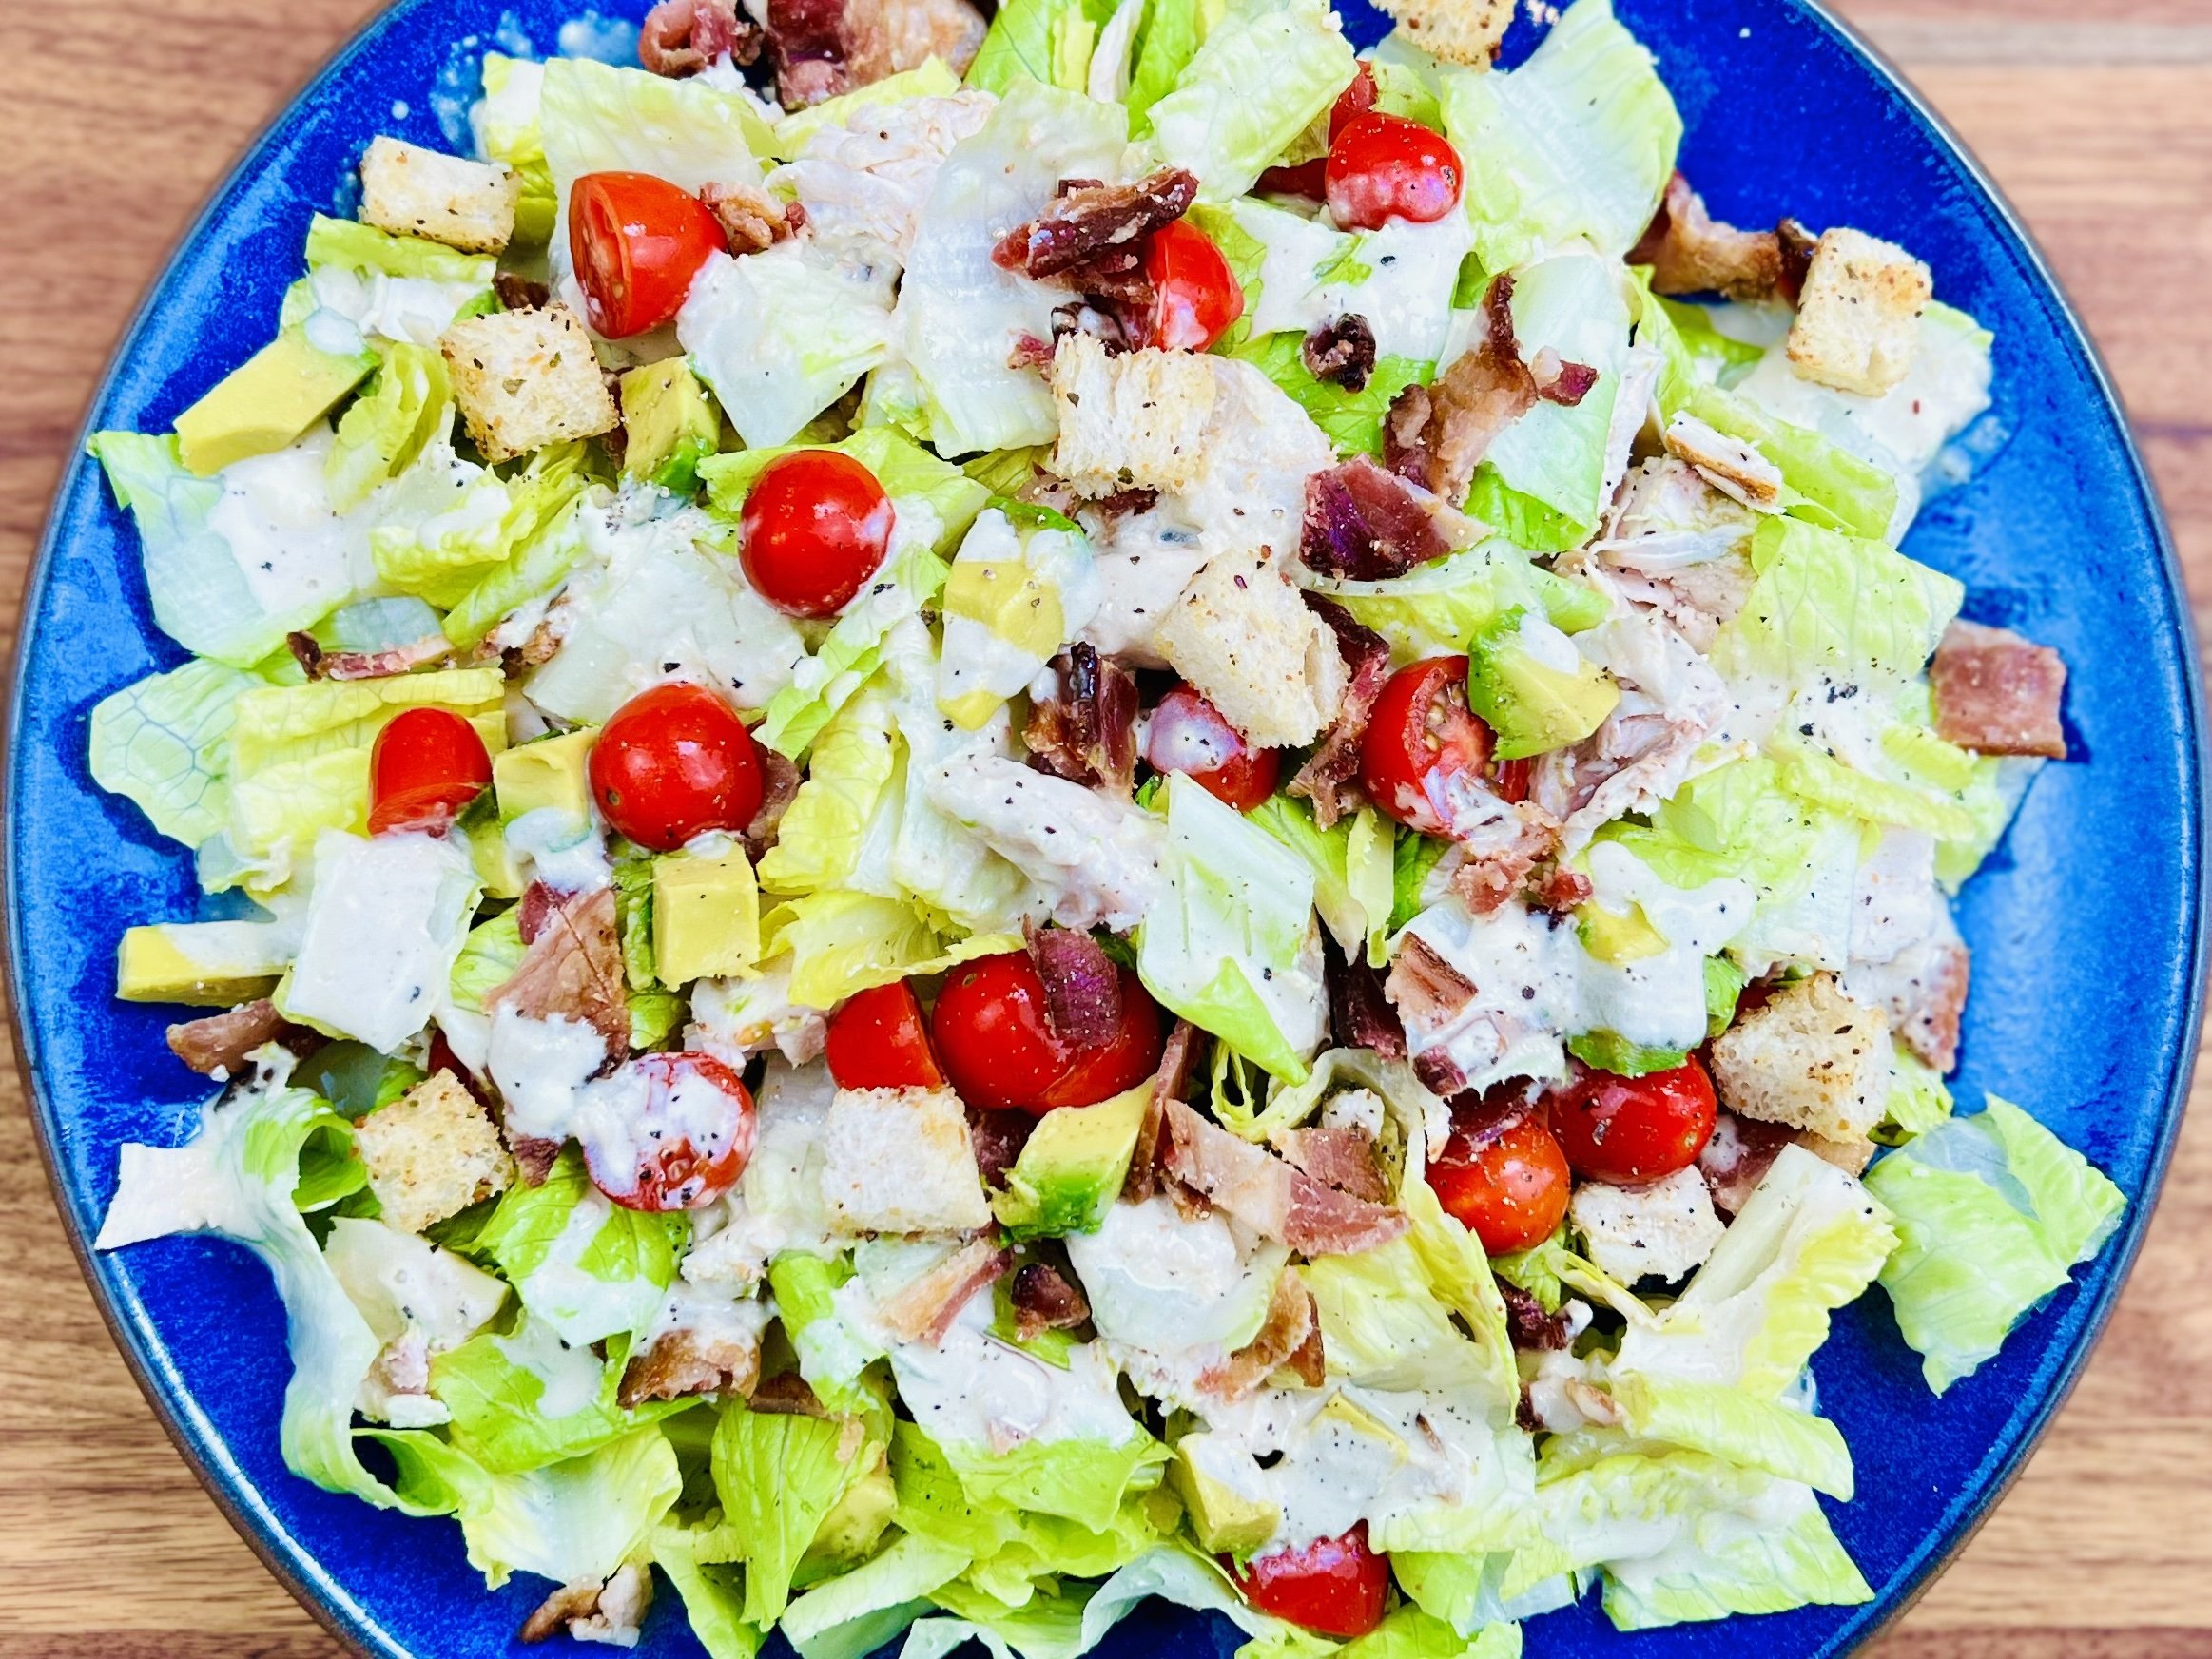
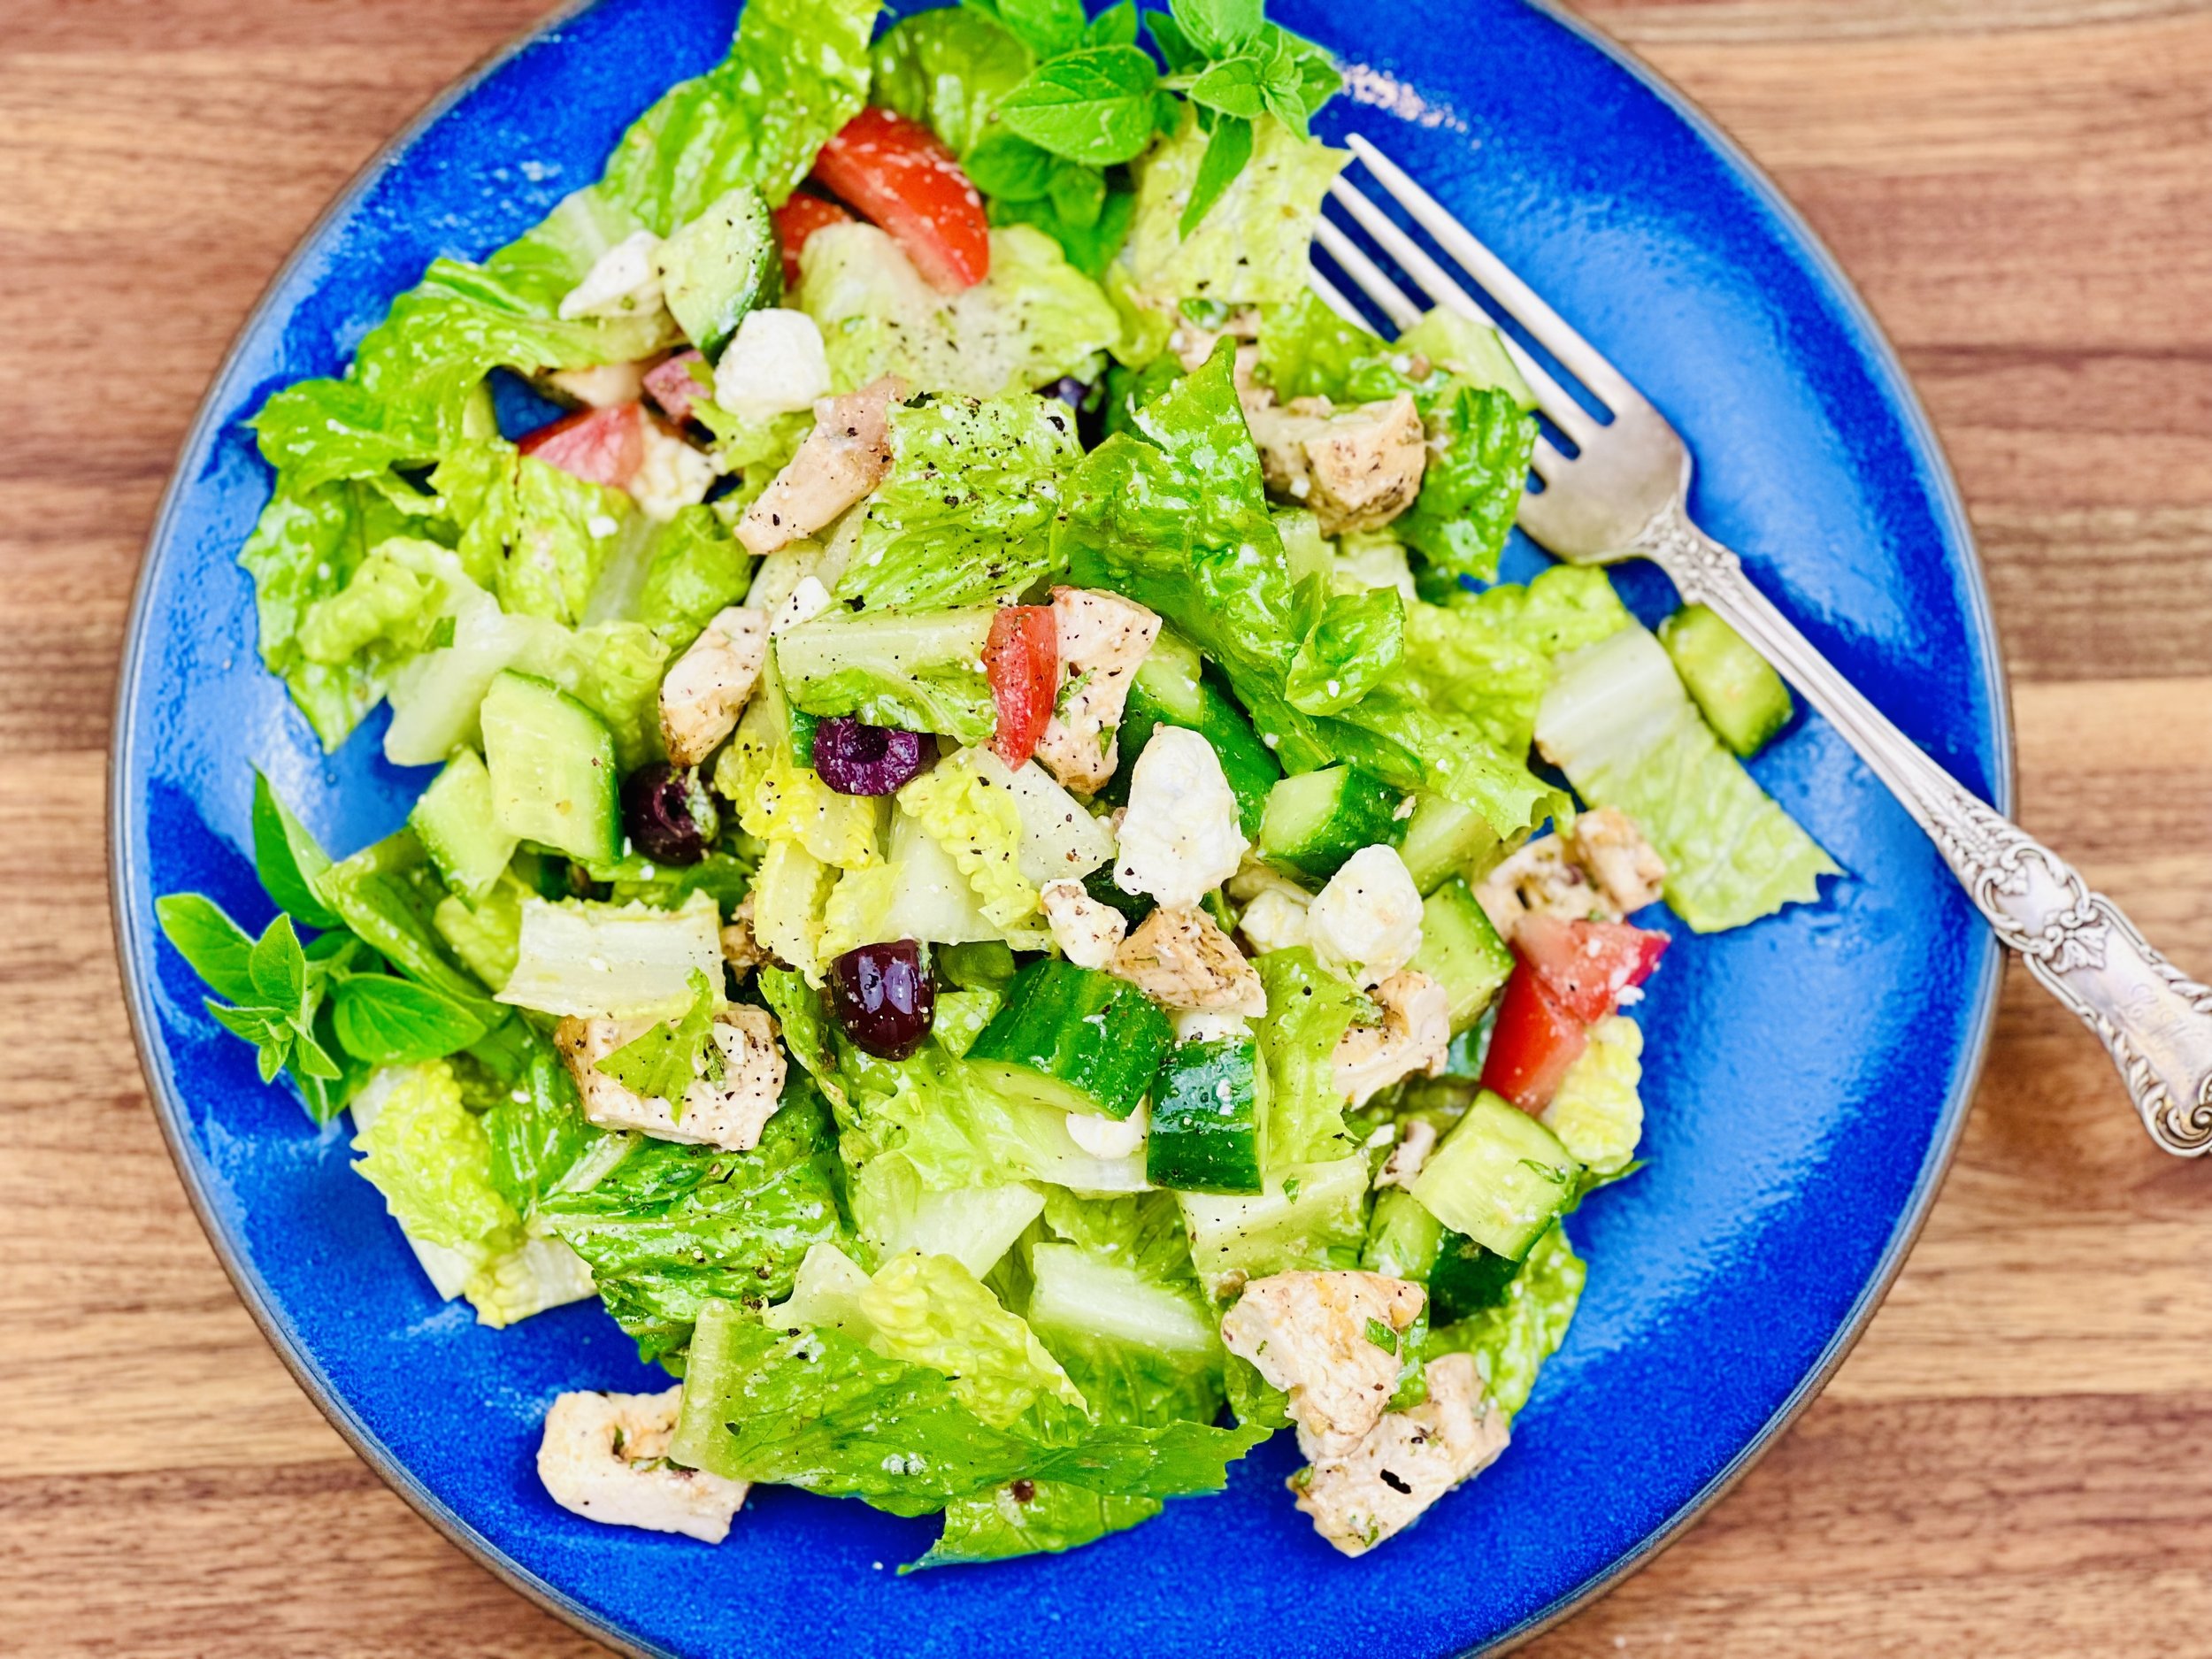
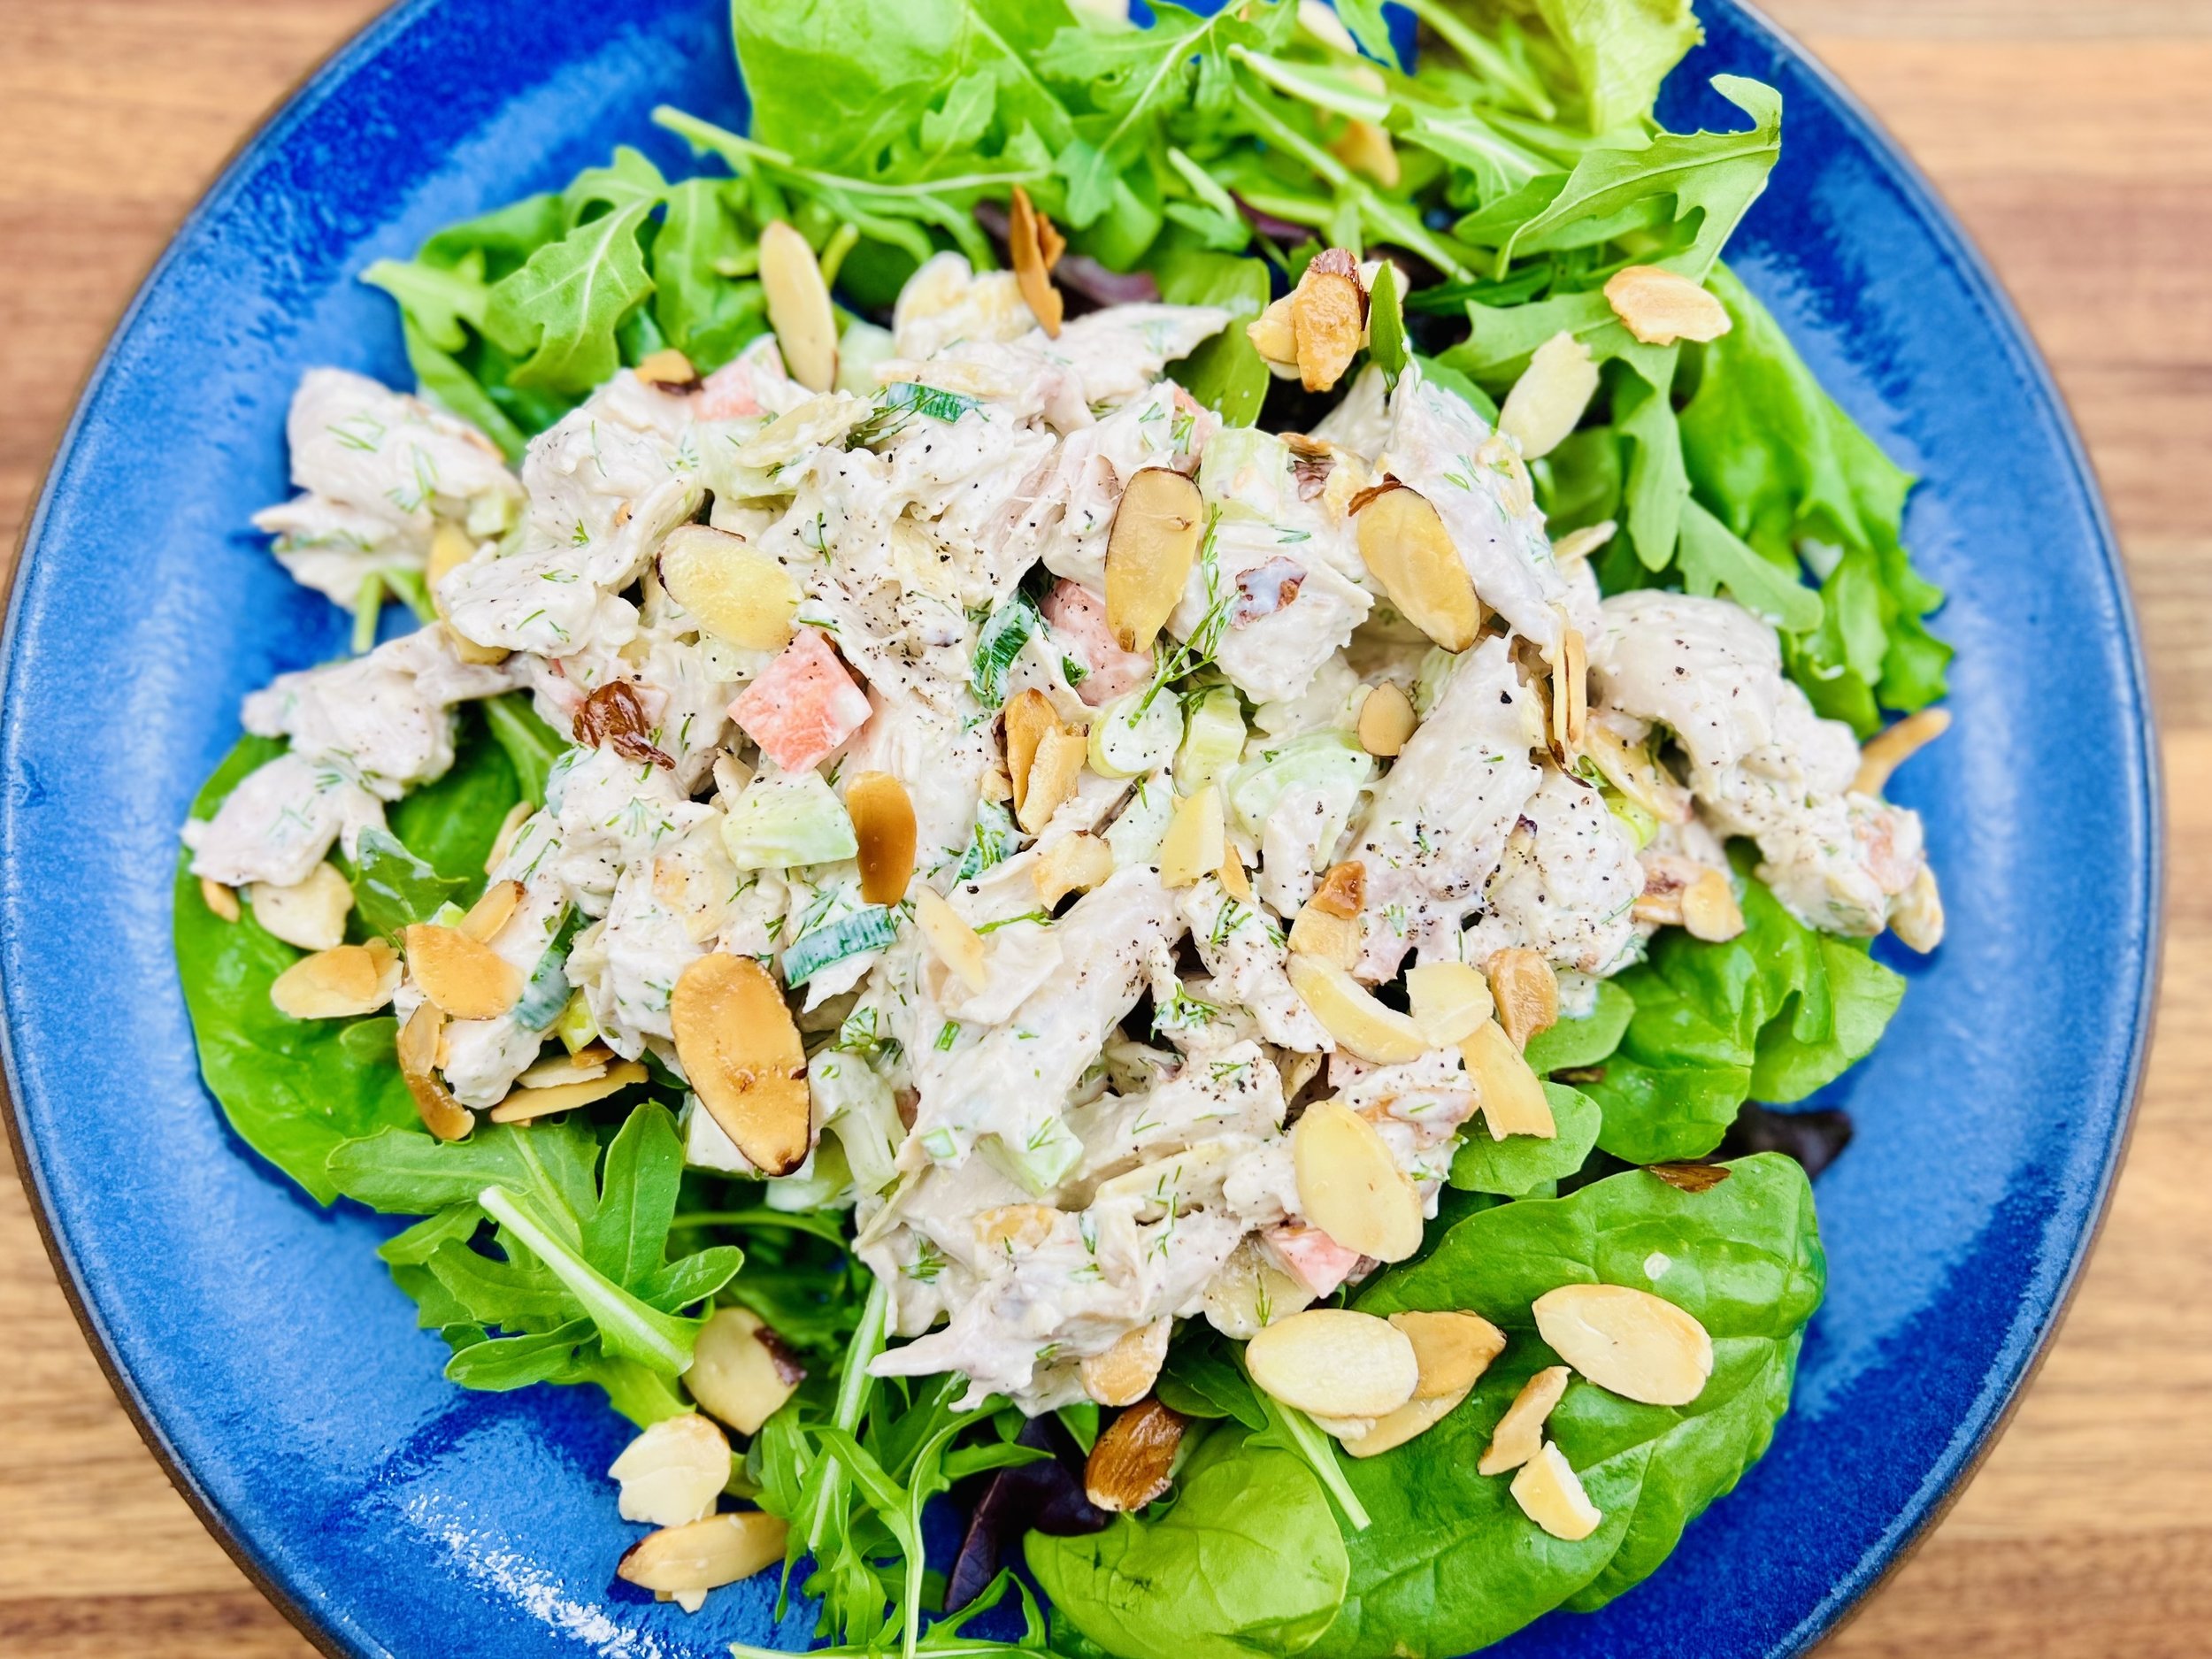
Pasta and green salad (low FODMAP)
30 minutes • Gluten-free • Low FODMAP • Serves 6
30 minutes • Gluten-free • Low FODMAP • Serves 6 • Can’t decide if you want to have green salad or pasta salad? Have both! This salad combines romaine lettuce and pasta with a few other fabulous ingredients to deliver a hearty and delicious salad that’s perfect as a main course or side and unbeatable for a picnic or potluck.
Ingredients
8 ounces (dry) gluten-free pasta
1/3 cup garlic-infused olive oil
Juice of 1 lemon
1/4 cup low FODMAP mayonnaise
1 tablespoon dijon mustard
2 teaspoons gluten-free Worcestershire sauce
1/3 cup grated parmesan
2 tablespoons of our lemon basil pesto (optional)
Salt and black pepper
1 cup cubed extra sharp cheddar or similarly sharp cheese
2 cups real sourdough croutons (recipe below)
3 cups chopped romaine lettuce
2 ears grilled or steamed corn (up to 1/2 cob is low FODMAP serving)
6 slices cooked bacon, crumbled
Freshly ground black pepper and chopped chives for serving
Directions
Preheat oven to 400 degrees F. Line a rimmed baking sheet with foil. Lay your bacon slices in one layer on the foil. Cooke for about 10 minutes until crisp. Remove from oven and set bacon slices on paper towels to drain and cool.
Bring a large pot of salted water to a boil. Boil the pasta to al dente, according to package directions. Drain and set aside to cool. (If you’re not going to assemble the salad right away, toss the pasta with a drizzle of olive oil to keep it from sticking together.)
In a medium jar combine the olive oil, lemon juice, mayonnaise, dijon, Worcestershire, parmesan, and a pinch each of red pepper flakes, salt, and pepper.
In a large bowl, combine the pasta, the pesto (if using) and about 1/3 cup of the dressing and toss to combine. Then add the lettuce, cheddar, corn, bacon, and croutons, tossing to combine.
Top with chopped chives, freshly cracked pepper, and salt.
Eat and enjoy every bite — because you can!
Real Sourdough Croutons: Preheat the oven to 425° F and lay a sheet of parchment on a rimmed baking sheet. Cube several slices of real sourdough bread (no yeast or vinegar in the ingredients). Toss together 2 tablespoons of olive oil, 2 cups cubed real sourdough bread, and a pinch of salt. Bake for 10-12 minutes, until crisp.
More Deliciously Low FODMAP™ salads you might enjoy


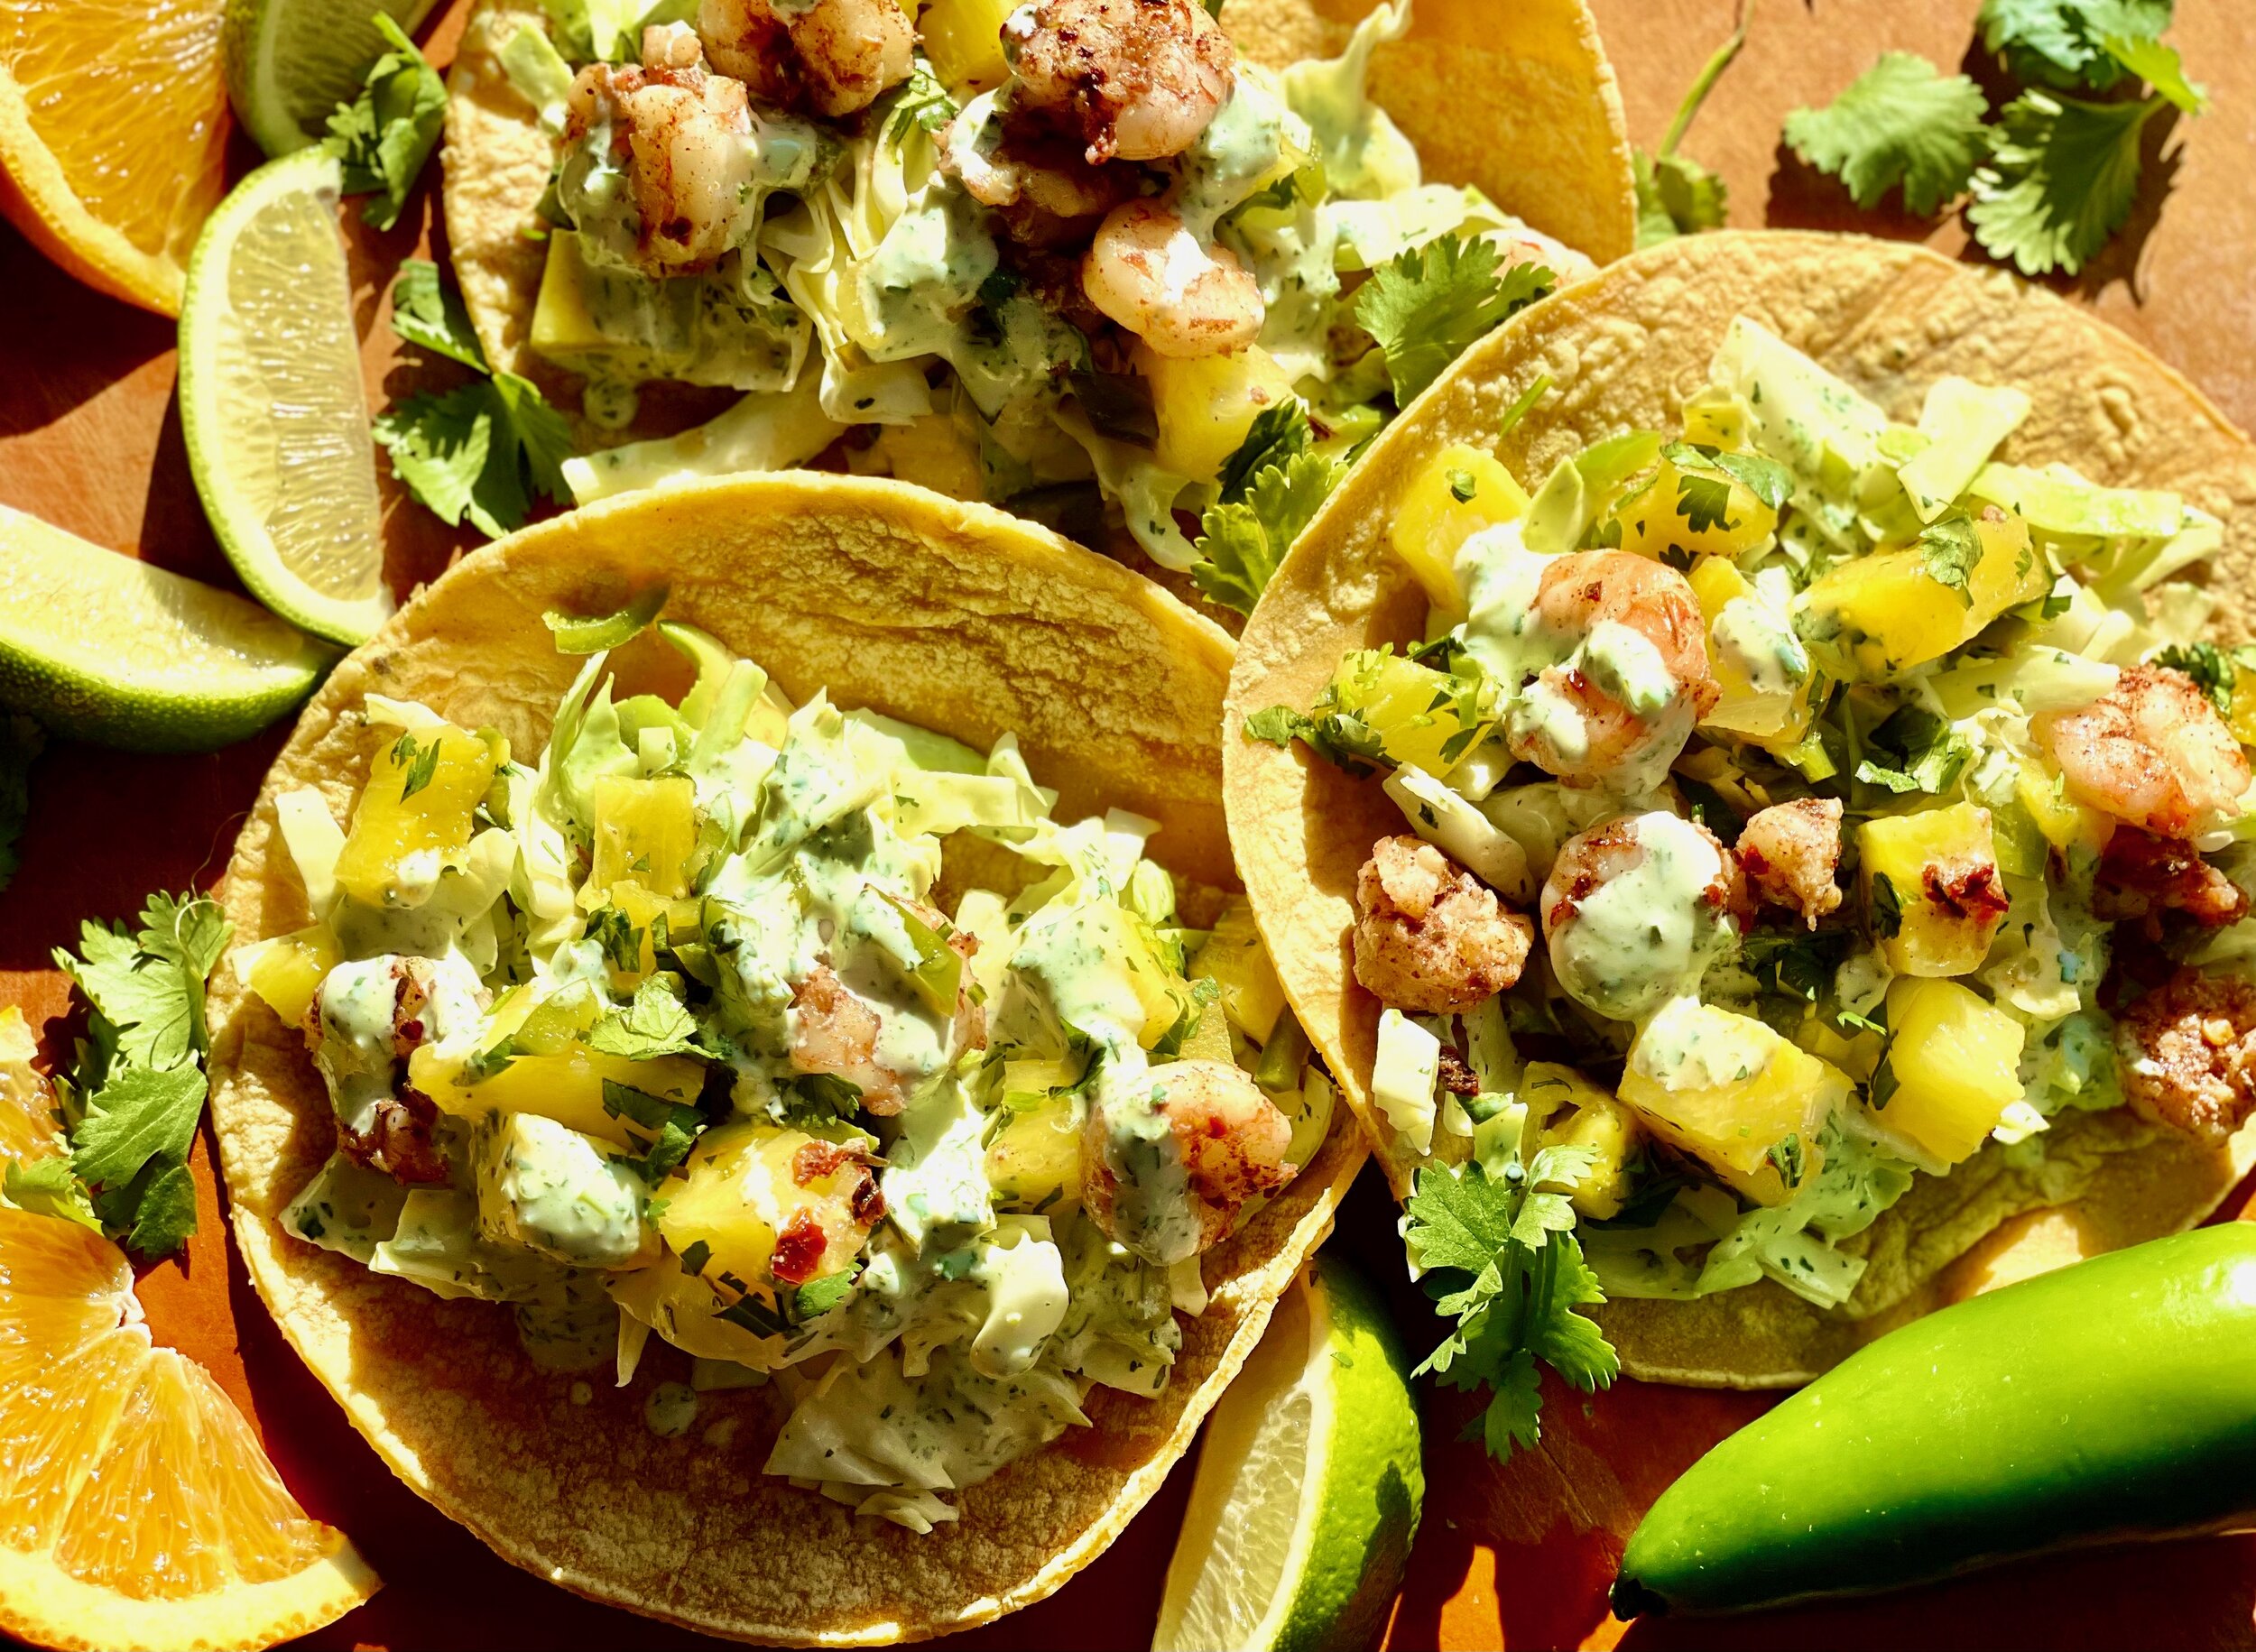
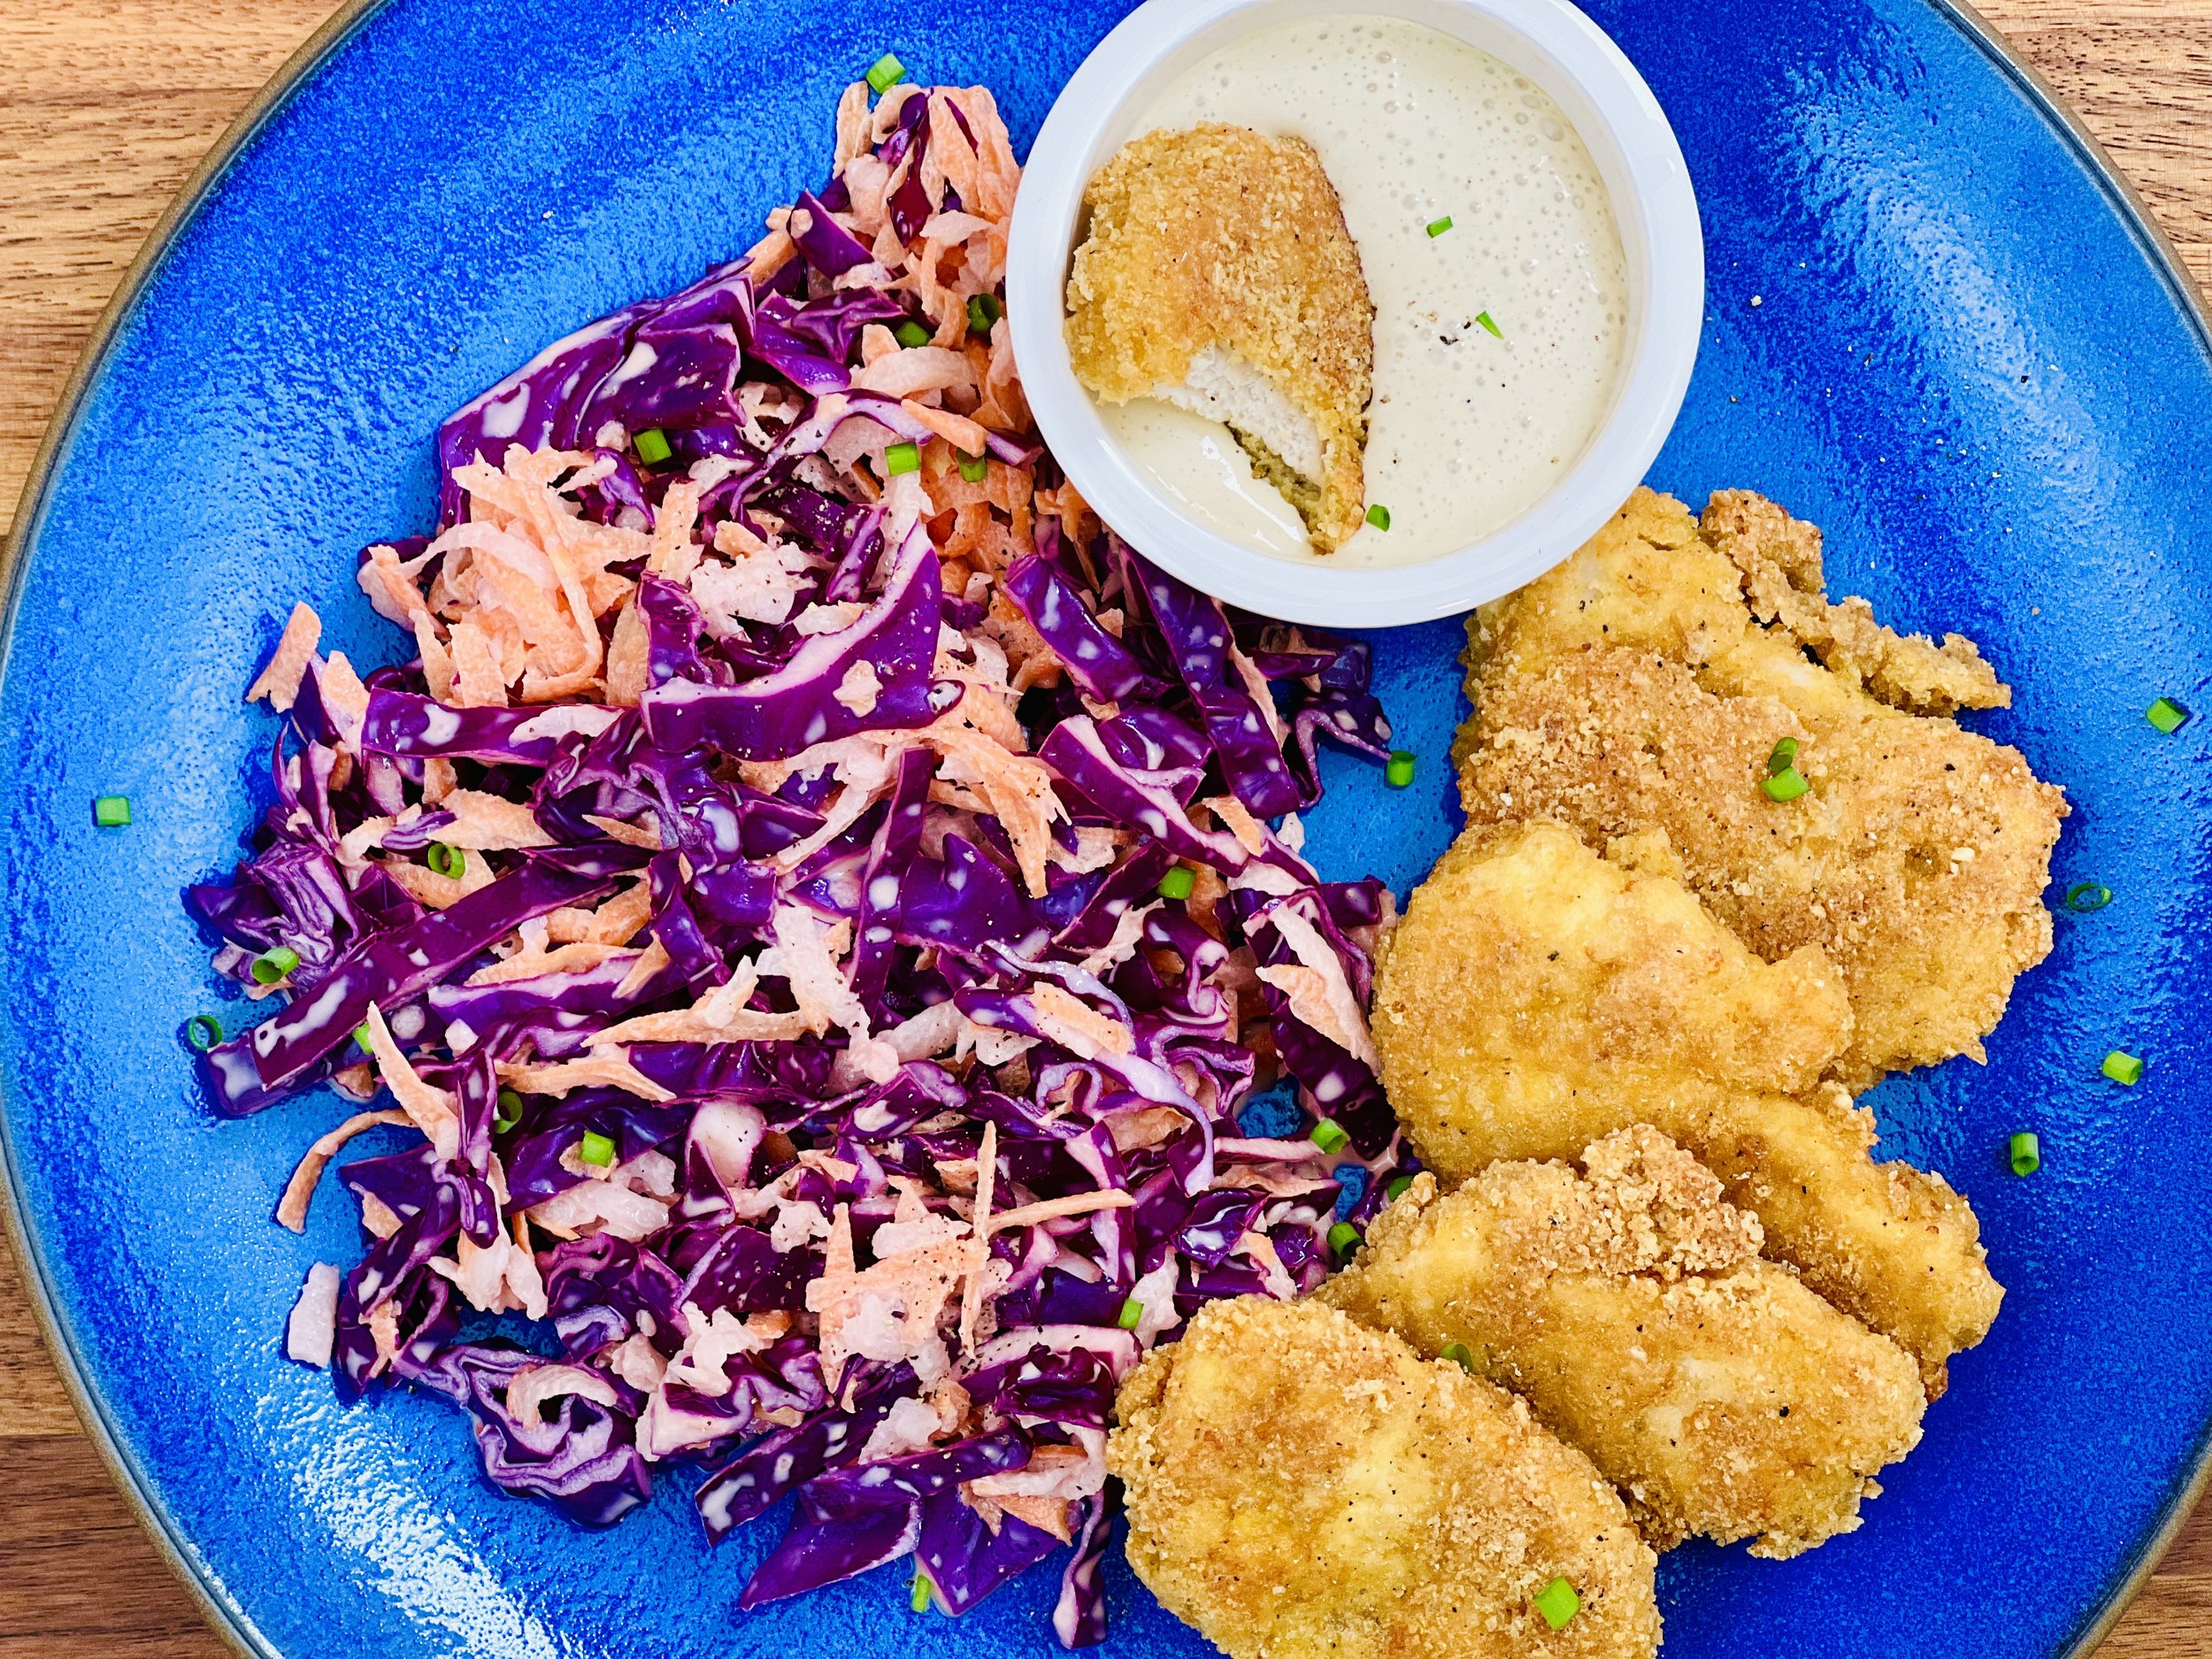
Roasted pineapple shrimp tacos (low FODMAP)
30 minutes • Gluten-free • Lactose-free • Low FODMAP • Serves 4
30 minutes • Gluten-free • Lactose-free • Low FODMAP • Serves 4 • These tacos are fresh, flavorful, and easy to make! I love the slaw all by itself, but in the tacos with the roasted pineapple salsa and shrimp, the flavors are quite wonderful. Roasting the pineapple and jalapeno peppers brings out the sweetness so don’t skip this step!
Ingredients
1 1/2 pounds large shrimp, peeled and deveined
2 tablespoons garlic-infused olive oil
2 teaspoons chipotle chili powder or crushed dry chipotle chilies
1 teaspoon allspice
1/2 teaspoon ground ginger
1/2 teaspoon dried thyme
1/4 teaspoon cinnamon
1/4 teaspoon cayenne pepper
Fresh warm gluten-free tortillas (if not super fresh then quickly fry them in vegetable oil, fold and drain on paper towels before stuffing)
Avocado and extra sauce, for serving
Ingredients - Sauce and Slaw
1/2 cup lactose-free sour cream
2-3 tablespoons fresh squeezed lime juice
1/4 cup chopped green onions (green part only)
1/2 cup fresh cilantro, chopped
1/2 teaspoon Smoke N Sanity Essence of Garlic Salt (use code IBSGC10 for 10% discount)
OR 1/2 teaspoon salt and 1/2 teaspoon Gourmend Garlic Scape powder
2-3 cups shredded green cabbage (3/4 cup is low FODMAP serving)
Ingredients Roasted Pineapple Salsa
1-2 jalapeños halved and seeded (removing the seeds gives you all the flavor without most of the heat)
1 cup diced fresh pineapple
1/2 cup cilantro, roughly chopped
1/4 cup orange juice (about one half an orange)
2 tablespoons lime juice (about 1 lime)
Directions
Preheat the oven to 450° F.
Line a rimmed baking sheet with foil and then toss the shrimp with olive oil, chili powder, allspice, ginger, thyme, cinnamon, cayenne, and a pinch each of salt and pepper on the sheet. Arrange in a single layer at one end of the sheet. Add the pineapple and jalapeños (for the salsa) on the same sheet. Roast 6-8 minutes or until the shrimp is cooked through. During the last minute, switch the oven to broil and broil until lightly charred. Remove from oven and set aside.
To make the sauce. In a blender or food processor fitted with a small bowl, add the lactose-free sour cream and lime juice. Blend until smooth. Add the cilantro, green onions, and salt. Pulse to combine.
Chop the cabbage and put it in a large bowl and toss with 1/3 cup of the sauce.
To make the salsa. Chop the roasted pineapple and jalapeño and add to a bowl with the cilantro, orange juice, lime juice, and a pinch of salt.
Lay warm tortillas out. With a fork, smash a couple of thin slices of avocado directly on the tortilla (keeping in mind 1/8 avocado is a low FODMAP serving). Add a generous scoop of slaw and a spoonful of salsa.
Top with shrimp and drizzle with extra sauce and additional salsa.
Eat and enjoy every bite—because you can!
This post may contain affiliate links so you can easily purchase items listed on the page. In some cases we have provided a special discount code for IBS Game Changers so be sure to use it!
More Deliciously Low FODMAP™ main courses you might enjoy


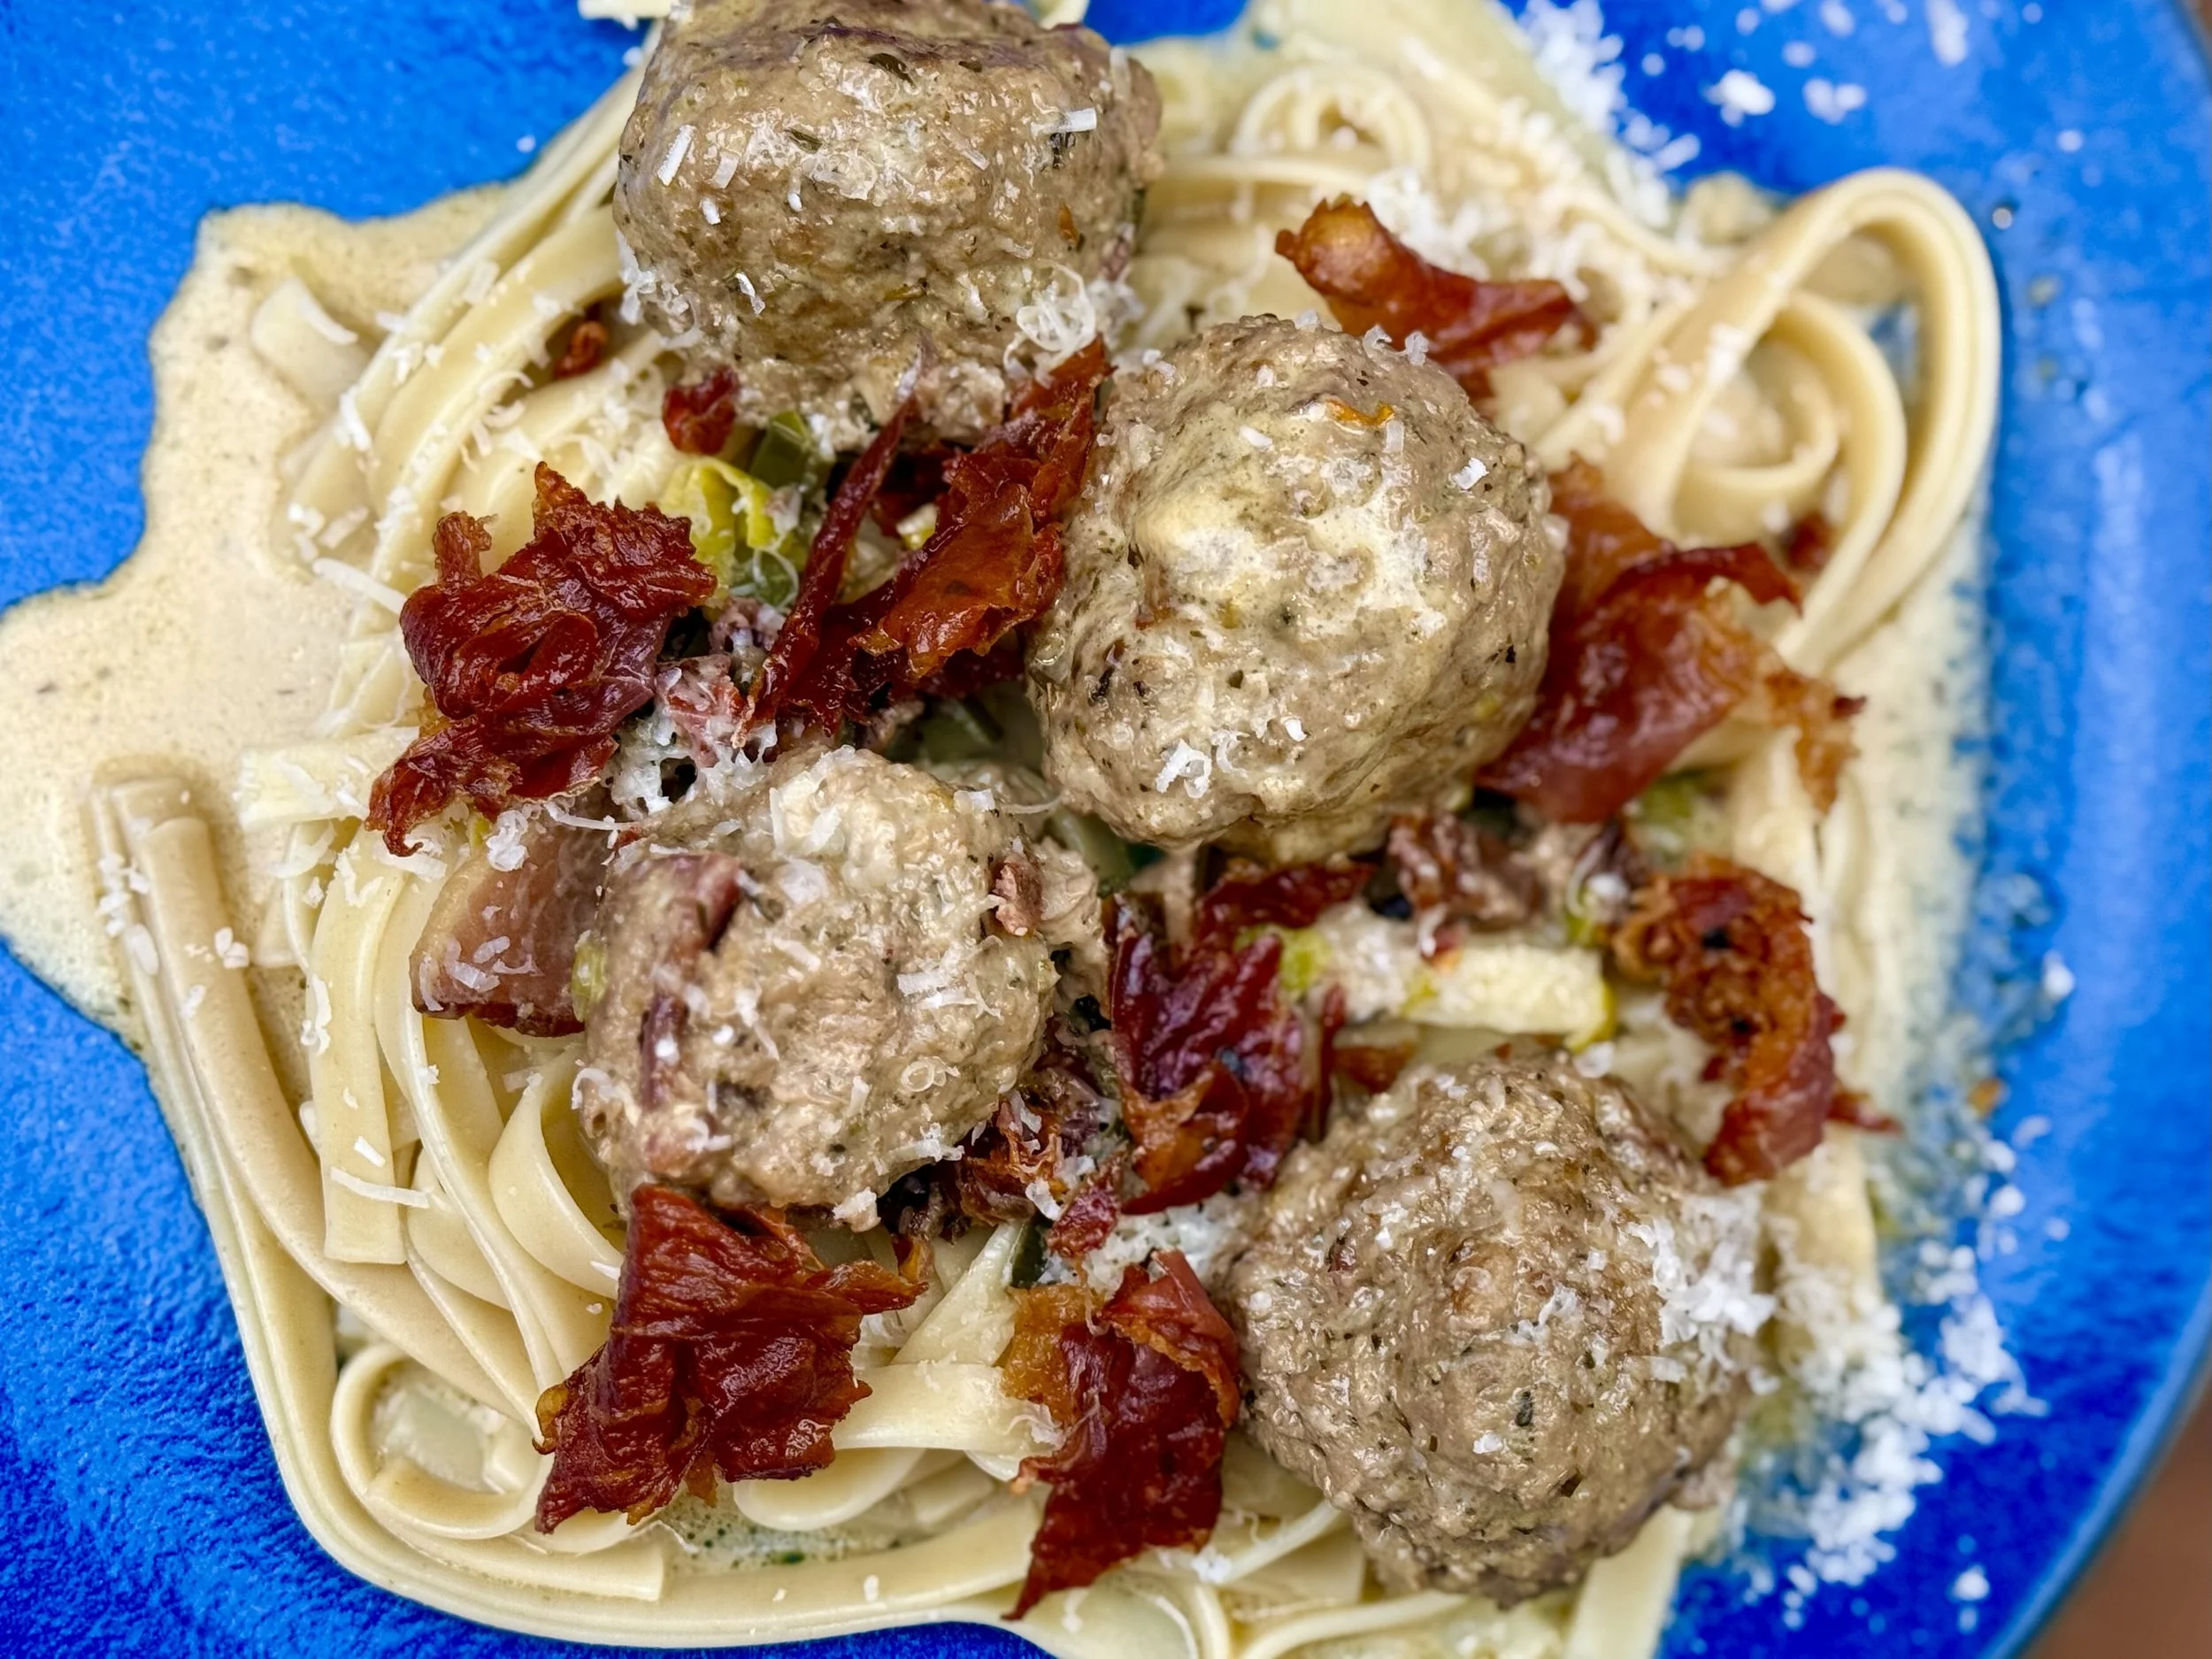


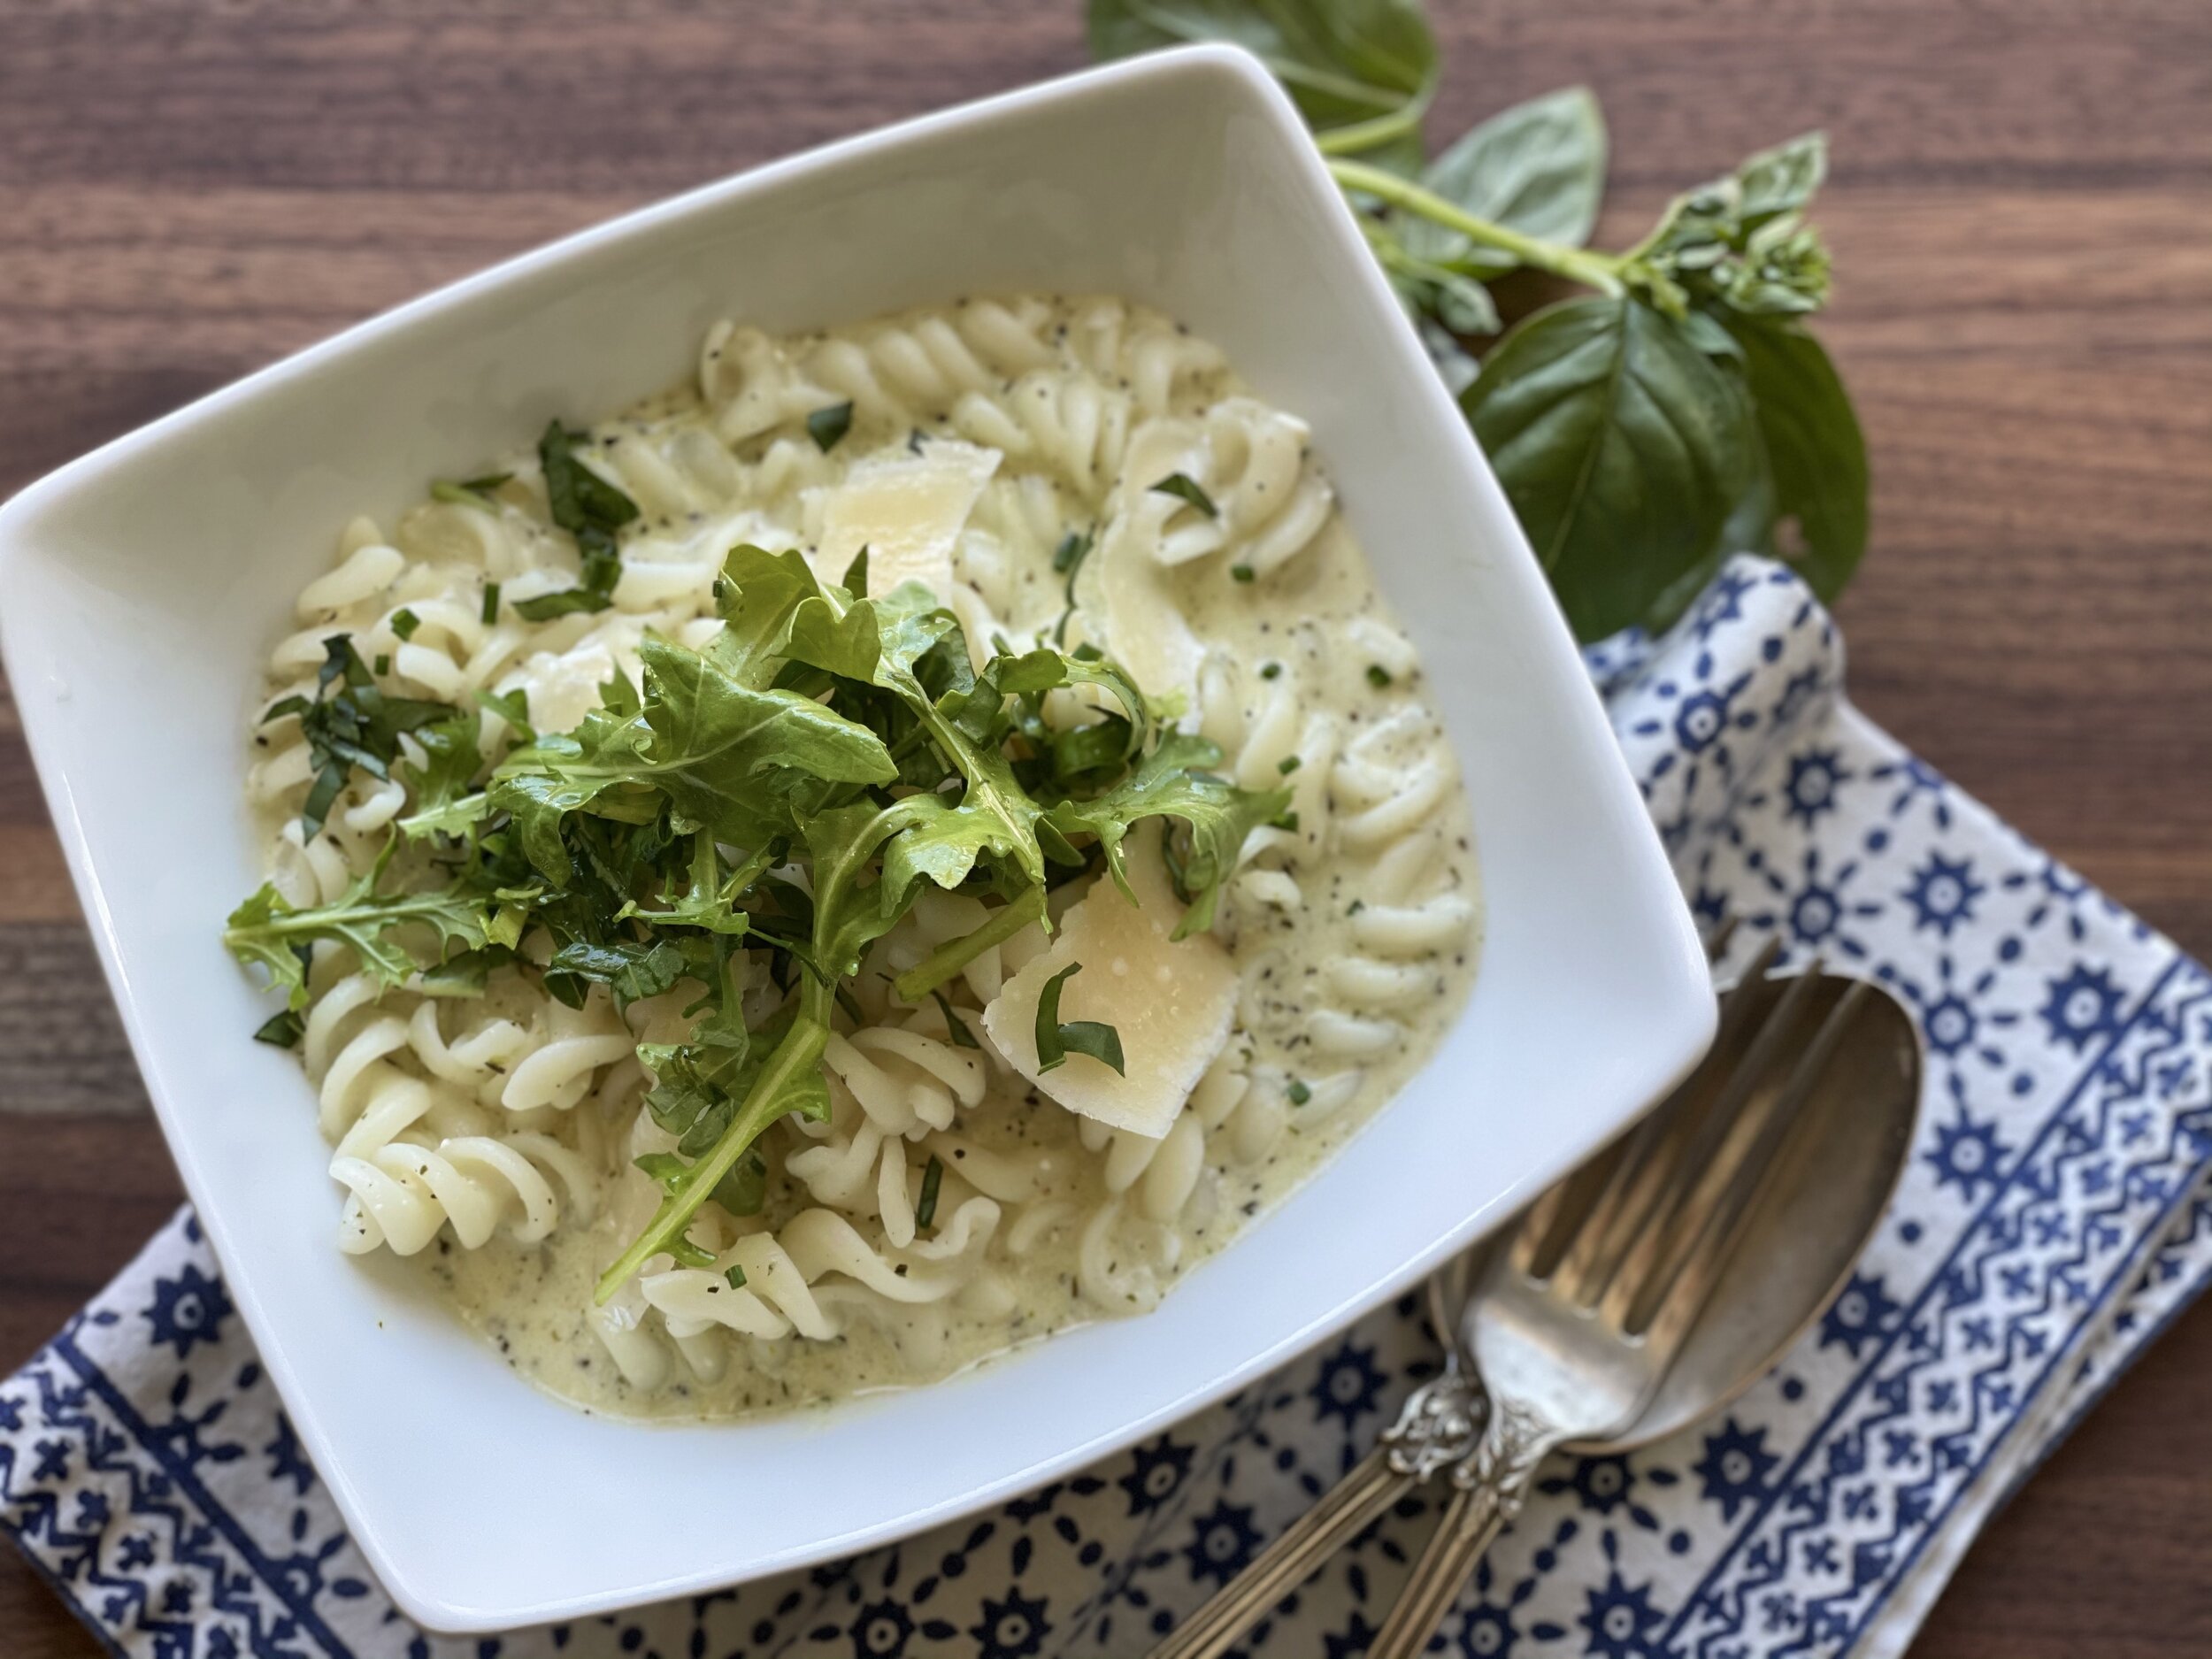
Fusilli with lemon pesto cream (low FODMAP)
30 minutes • Gluten-free • Low FODMAP • Vegetarian • Serves 4
30 minutes • Gluten-free • Low FODMAP • Vegetarian • Serves 4 • This creamy pasta with our lemon basil pesto can be served as a delicious vegetarian main course or a delightful side dish. It’s quick to make and sure to become a family favorite!
INGREDIENTS:
3 tablespoons salted butter
1 tablespoon garlic-infused olive oil
2 teaspoons dried oregano
2 teaspoons dried basil
1 teaspoon Smoke N Sanity Essence of Onion Salt (Use code IBSGC10 for a 10% discount)
OR 1 scallion (green part only) finely chopped and 1/2 teaspoon salt
1 pound gluten-free pasta (I like Andean Dream quinoa fusilli)
1/2 cup lactose-free whole milk or canned coconut milk
1/2 cup heavy cream or canned coconut milk
2 ounces lactose-free cream cheese, at room temperature
1 cup grated Parmesan cheese, plus more for serving
1/3 cup of our lemon basil pesto
Salt and pepper
DIRECTIONS:
Make lemon basil pesto (recipe here)
In a large pot set over medium heat, melt together the butter, 1 tablespoon garlic-infused olive oil, oregano, basil, Smoke N Sanity Essence of Onion salt (OR 1 scallion (green part only) finely chopped and 1/2 teaspoon salt), and a pinch of red pepper. Cook for about a minute to bloom the seasonings. Pour in 3 1/2 cups of water and bring to a boil over high heat. Add 1/2 teaspoon salt and the pasta and cook, stirring occasionally, for about 8 minutes. Do not drain the water. Stir in the milk, cream, and cream cheese and cook until the cream cheese has melted and the pasta is al dente, about 4-6 minutes more.
Stir in the parmesan until melted and creamy. Remove from the heat. Stir in the pesto and season with freshly ground black pepper and additional salt (if needed)
Serve the pasta topped with extra pesto and shaved parmesan.
Enjoy!
This post may contain affiliate links so you can easily purchase items listed on the page. There is no increased cost to you for purchasing items through these links so feel free to use them!
More Deliciously Low FODMAP™ main courses you might enjoy


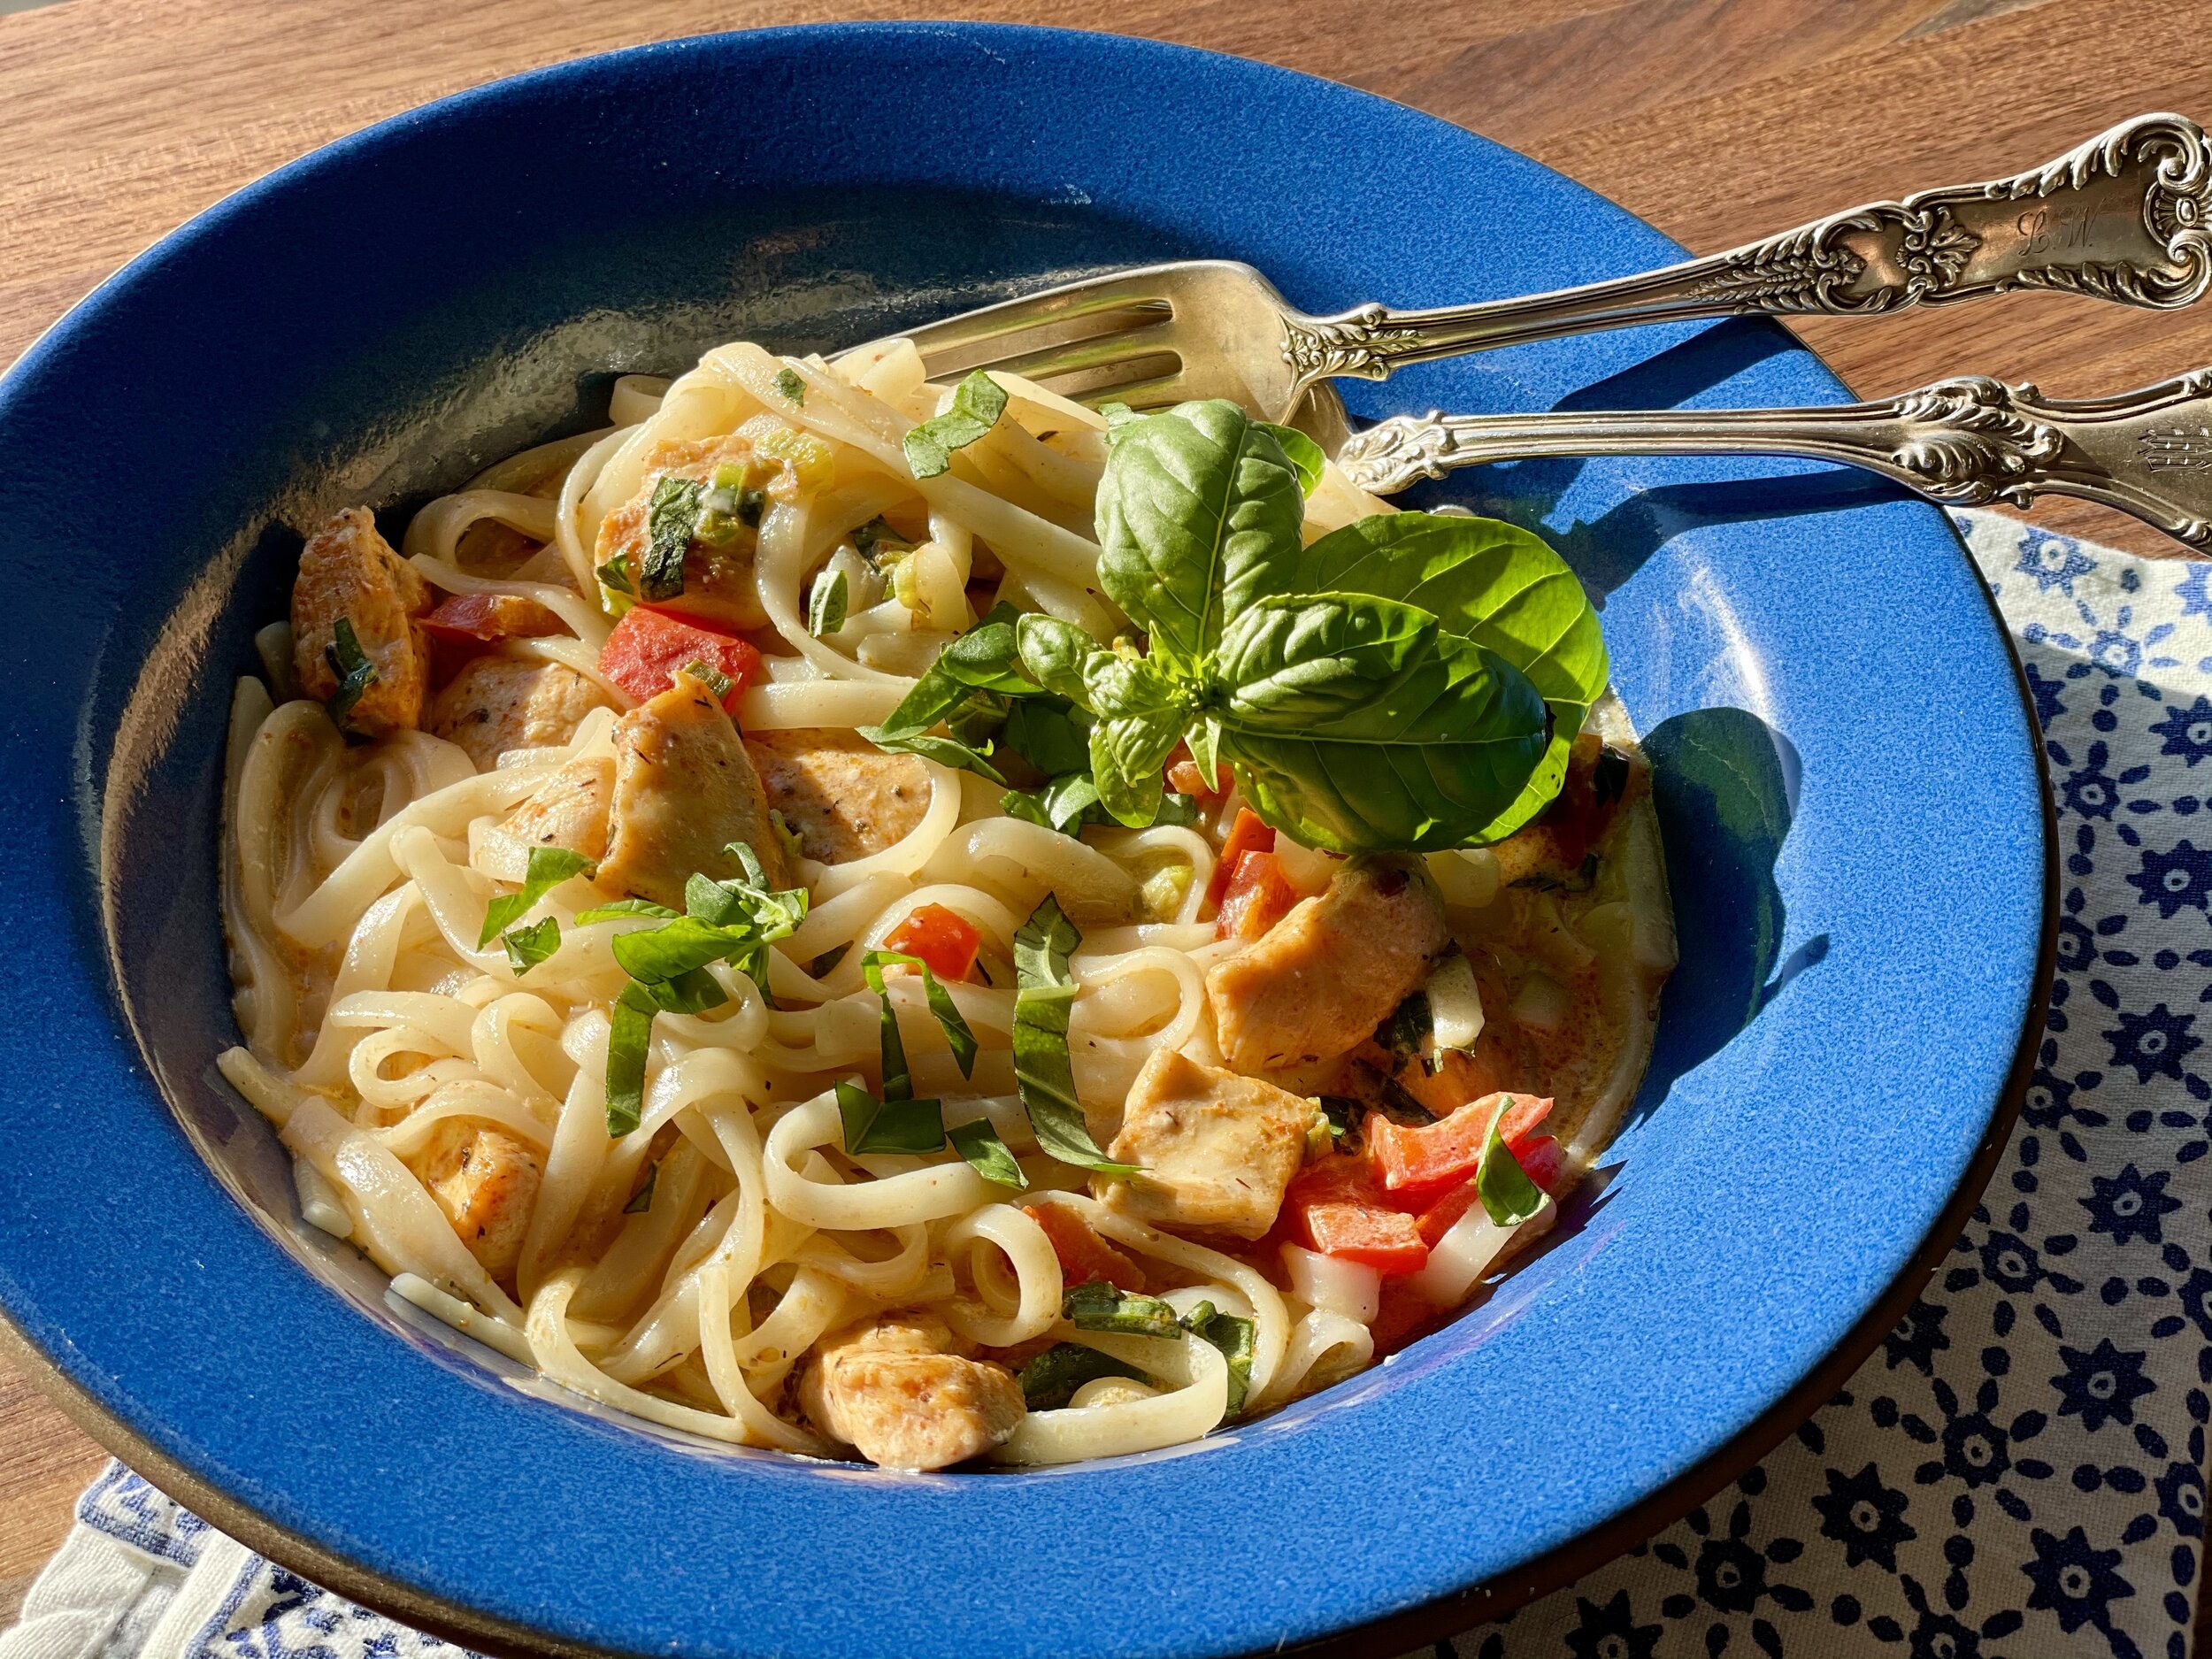
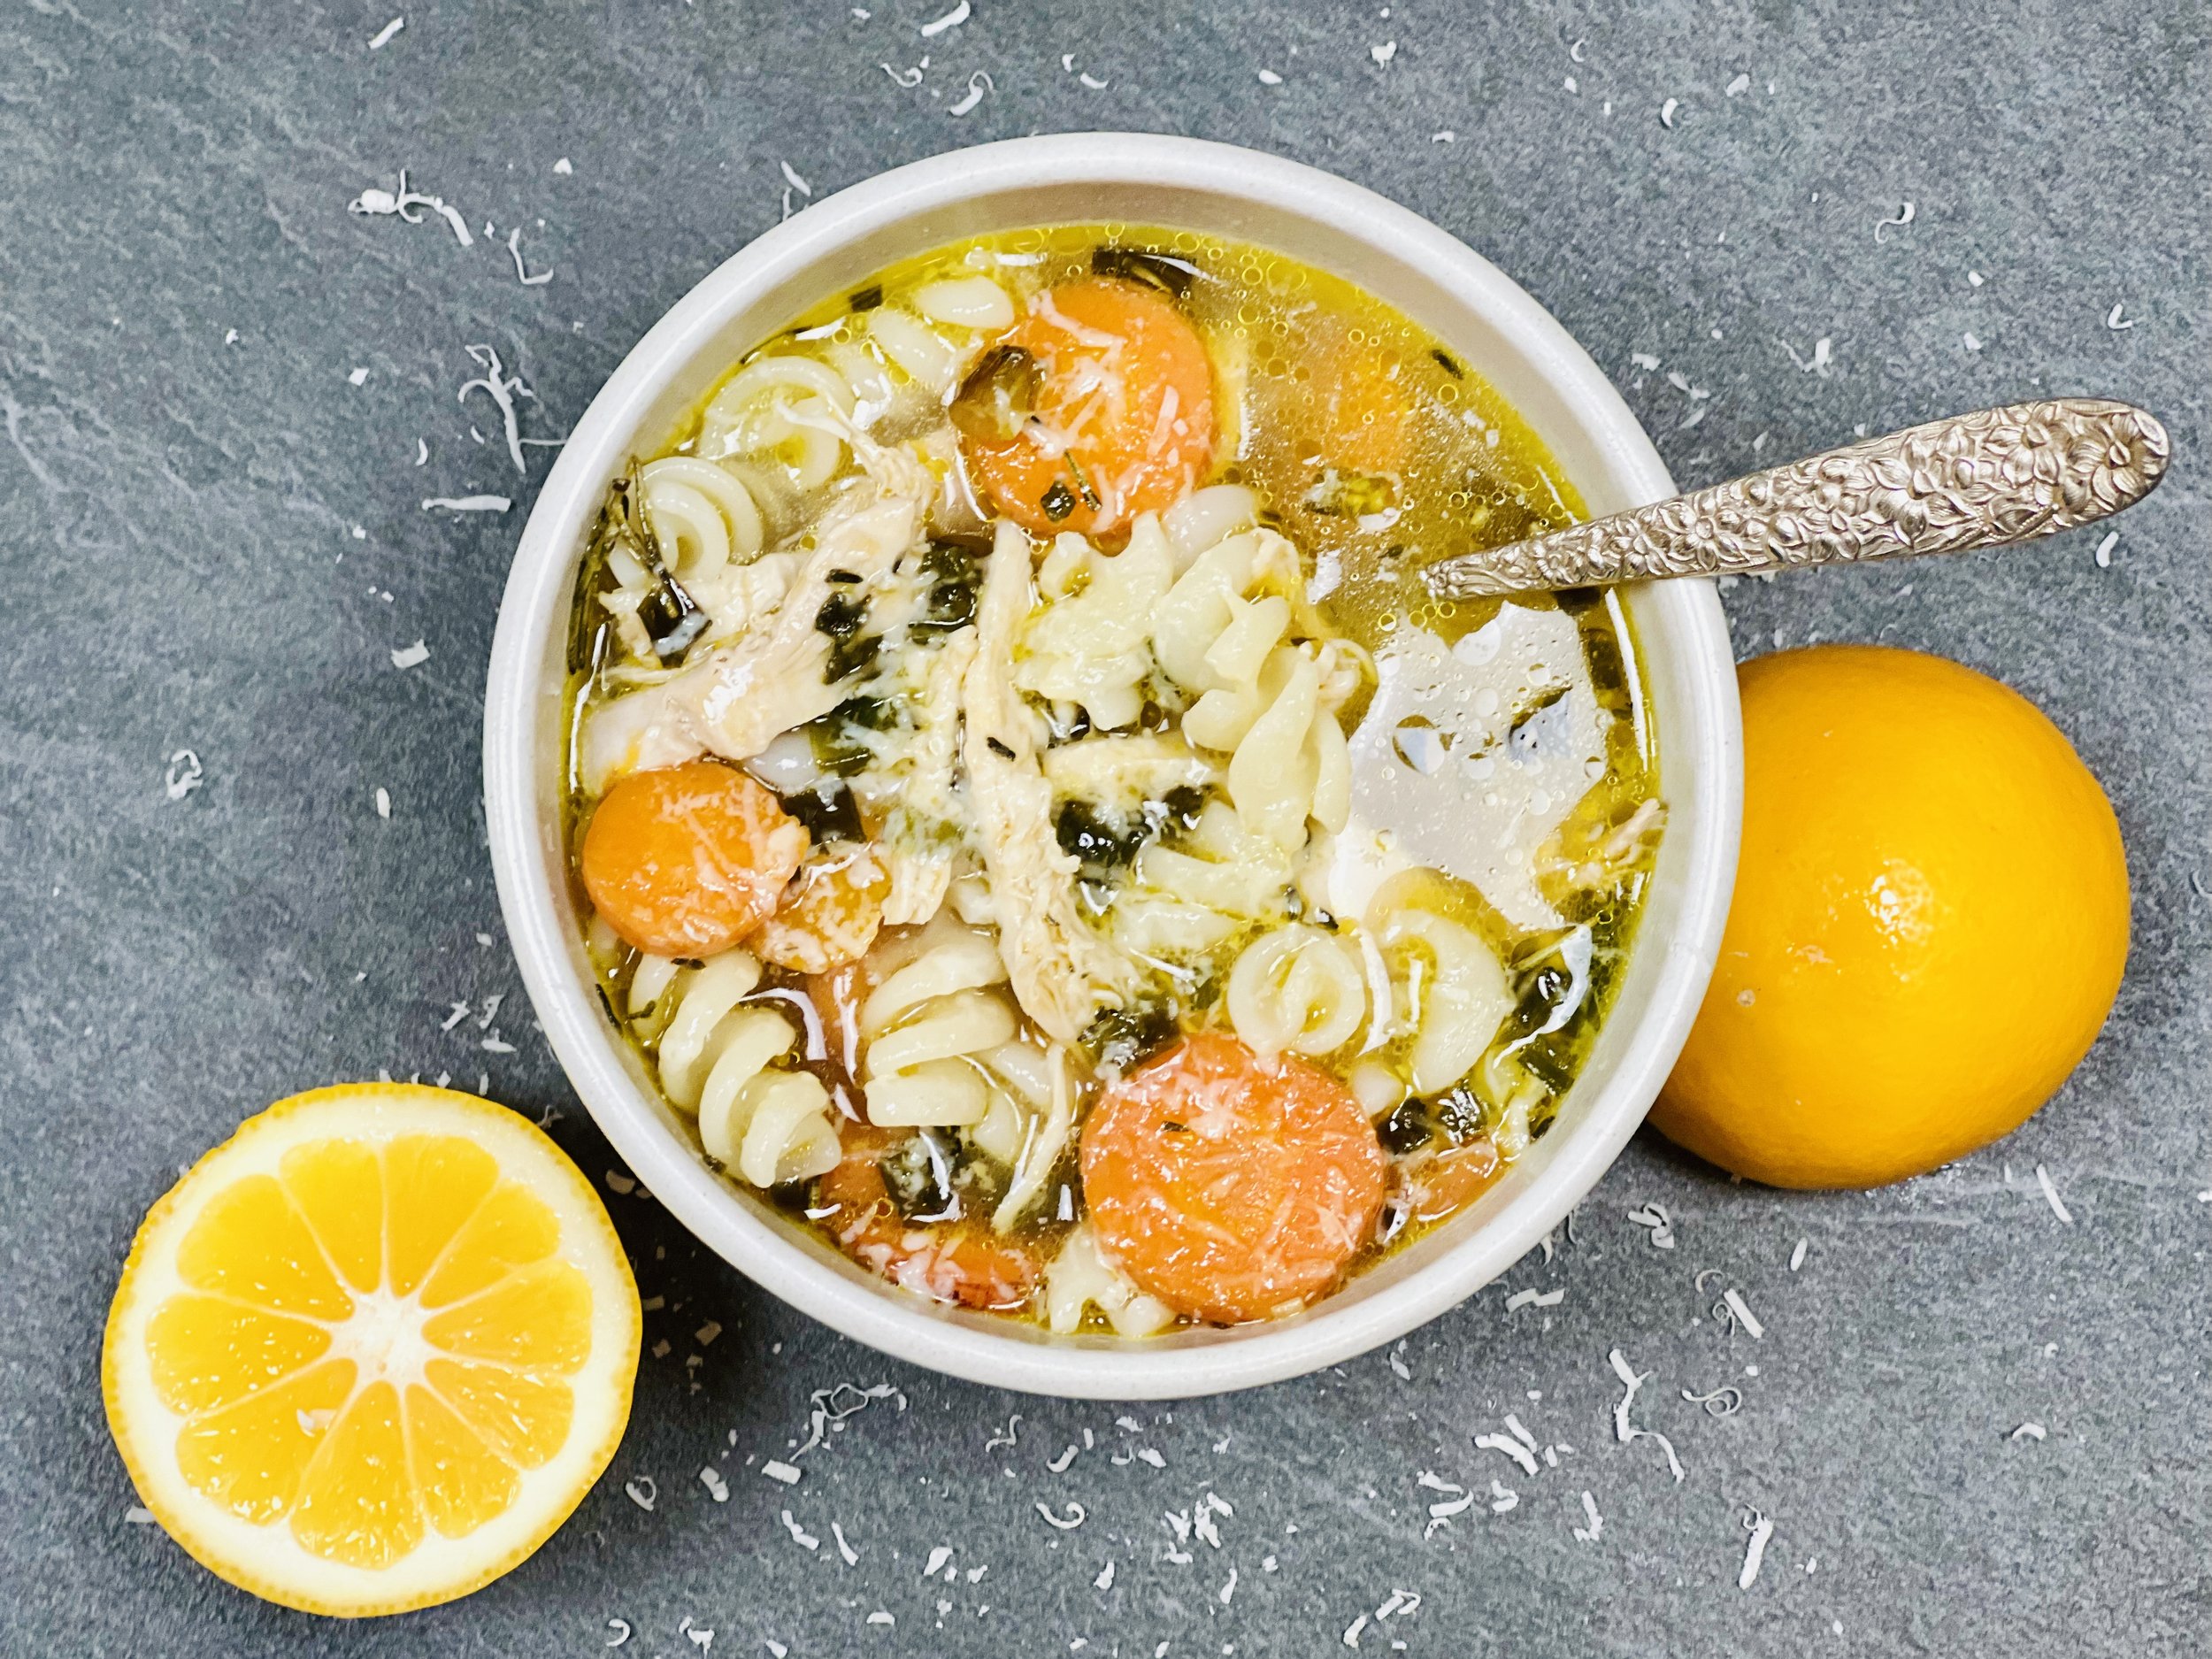
Creamy Cajun pasta with chicken or shrimp (low FODMAP)
25 Minutes • Gluten-free • Low FODMAP • Serves 4
25 Minutes • Gluten-free • Low FODMAP • Serves 4 • This creamy dish with just the right amount of spice is perfect whether you use chicken or shrimp. Made with lactose-free milk the sauce is lighter than a cream-based sauce but still has all the flavor thanks to a bit of cream cheese whisked into the sauce. It’s quick to make and sure to please the whole family. Try it tonight!
INGREDIENTS:
1 pound gluten-free wide rice noodles (or you can use any low-FODMAP pasta you like)
4 tablespoons garlic-infused olive oil
1 pound boneless, skinless chicken breast, cut across horizontally and then cut into bite-size pieces
OR 1 pound shrimp (thawed, shelled, and deveined)
1 tablespoon Smoke n Sanity Cajun Creole seasoning (10% off with code IBSGC10)
4 green onions (green part only), chopped
1 red bell pepper, chopped
1-2 teaspoons Smoke n Sanity Cajun Creole seasoning (10% off with code IBSGC10)
Pinch crushed red pepper flakes
1 cup low FODMAP chicken broth (I like Whole Foods Organic 365 brand)
1 cup lactose-free whole milk
2 ounces lactose-free cream cheese, at room temperature (or heat slightly in the microwave to soften)
1/2 cup freshly grated parmesan cheese
2 tablespoons chopped fresh basil
DIRECTIONS:
Bring a large pot of salted water to a boil. Cook the pasta al dente, according to package directions. Rinse (so it doesn’t stick together) drain and set aside.
In a large frying pan set over medium-high heat, add 2 tablespoons of garlic-infused olive oil, the chopped scallions, chicken or shrimp, and 1 tablespoon Smoke N Sanity Cajun Creole seasoning. Cook until browned all over and just cooked through, about 5 minutes. Remove the chicken from the pan onto a plate and set aside.
To the same pan, add 2 tablespoons of garlic-infused olive oil and the chopped bell peppers. Cook for about 5 minutes until the peppers are soft. Stir in 1-2 teaspoons Smoke N Sanity Cajun Creole seasoning. Add a pinch each of red pepper flakes, salt, and pepper. Cook another minute, until the spices are fragrant, then pour in the broth and milk. Add the cream cheese. Whisk gently until smooth. Bring the sauce to a gentle simmer and cook for 5 minutes, until thickened slightly.
Stir in the parmesan. Then add in the pasta and chicken or shrimp and cook for 2-3 minutes to heat everything through. Remove from the heat and stir in the basil. Serve immediately topped with additional basil.
Enjoy!
Pro tip: We love and recommend Smoke N Sanity’s Cajun Creole seasoning for the wonderful low FODMAP flavor and spice it lends to this dish. Get 10% off when you order your own bottle and use the code “IBSGC10”
This post may contain affiliate links so you can easily purchase items listed on the page. There is no increased cost to you for purchasing items through these links so feel free to use them!
More Deliciously Low FODMAP™ main courses you might enjoy
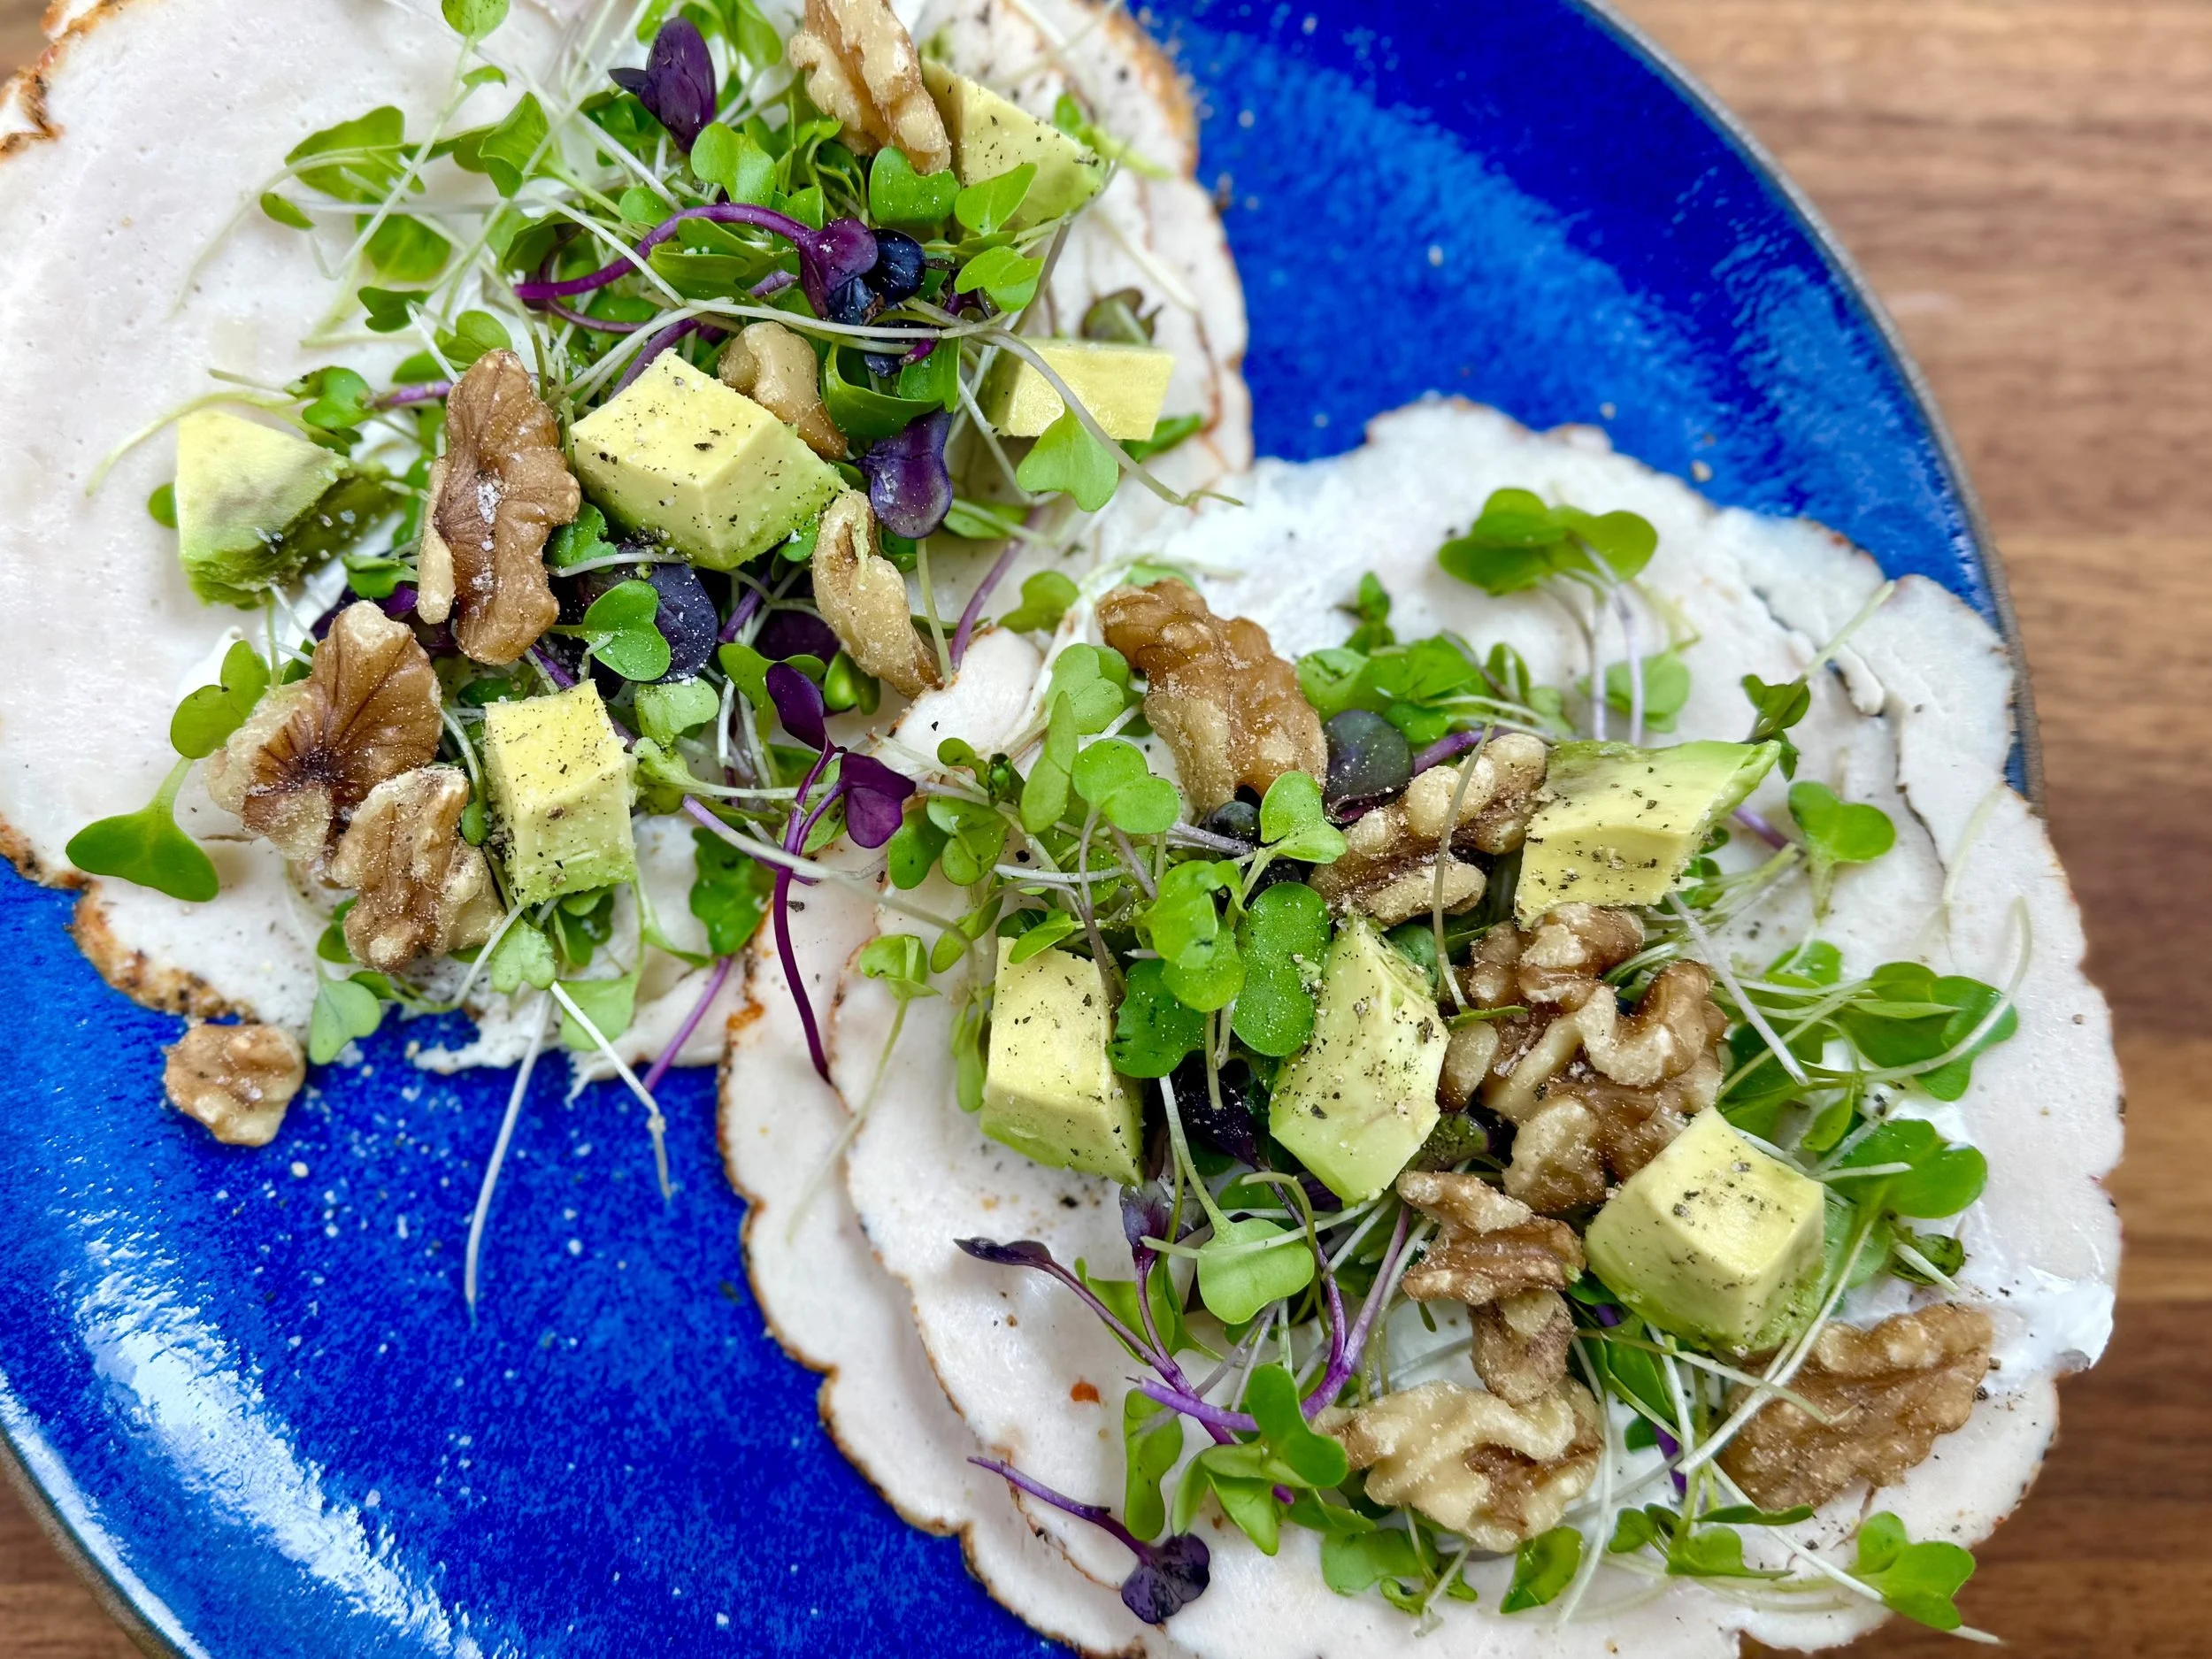
Quick lunch: Prosciutto wraps (low FODMAP)
5 minutes • Gluten-free • Low FODMAP
5 minutes • Gluten-free • Low FODMAP • Here’s another quick lunch idea that is easy and so good! It’s only three ingredients so prep is quick, the flavor is fresh and delicious, and you will be nicely nourished and satisfied.

INGREDIENTS:
Extra sharp cheddar cheese (or other cheese if you prefer)
Prosciutto
Fresh basil leaves
Salt and pepper to taste
DIRECTIONS:
Cut cheese into small strips or matchsticks.
Lay a prosciutto slice out, then lay a basil leaf on it and lay the cheese on the basil leaf.
Roll it up and sprinkle with a bit of salt and freshly ground black pepper.
Enjoy!
More Deliciously Low FODMAP™ lunches you might enjoy


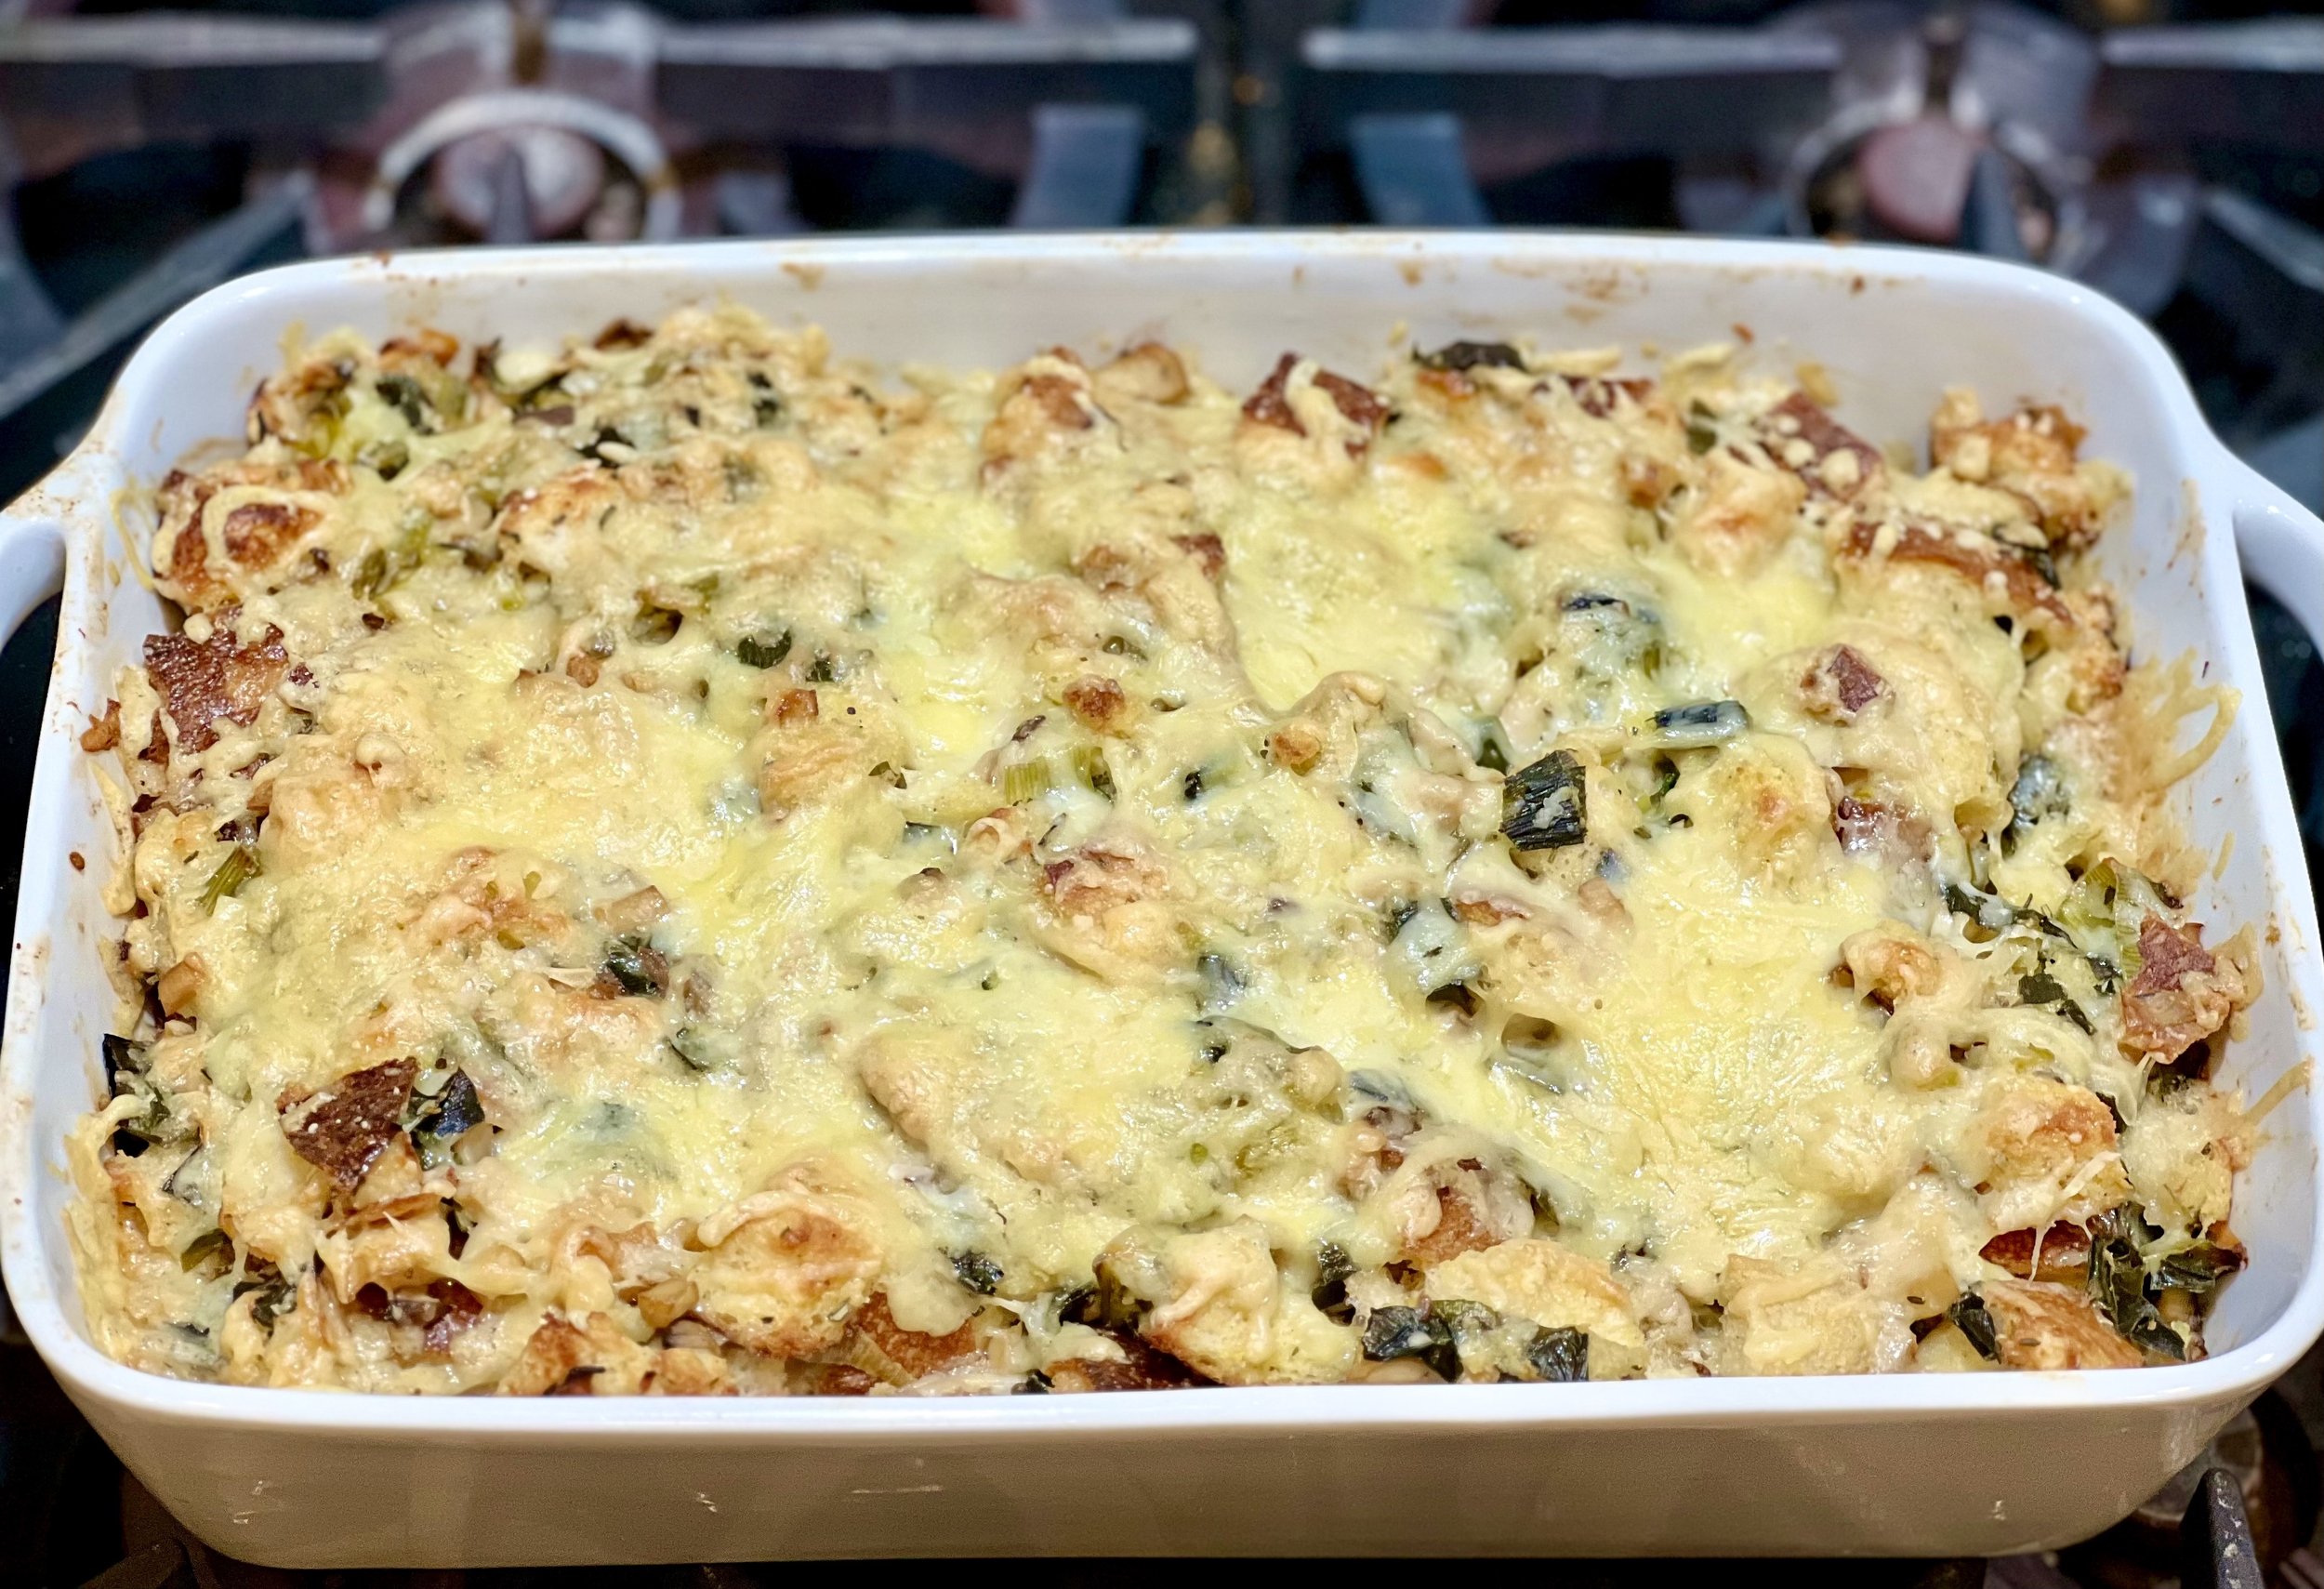
Pesto cheddar sourdough bake (low FODMAP)
45 minutes • Gluten-free • Low FODMAP • Serves 6
45 minutes • Gluten-free • Low FODMAP • Serves 6 • This is a bit like a quiche in a sourdough crust but also like a bread pudding and oh so delicious! Because you use traditional sourdough and our wonderful lemon basil pesto, it is low FODMAP and oh so good!

INGREDIENTS:
1 loaf of traditional sourdough bread (look for sourdough that doens’t include yeast or vinegar in the ingredients)
1 tablespoon garlic-infused olive oil
5-6 large eggs
1/4 lactose-free cup whole milk
1 tablespoon chopped fresh chives
1 cup baby spinach, roughly chopped
1/2 cup shredded Havarti or gouda cheese
Pinch red pepper flakes
1 cup shredded sharp cheddar cheese
1/3 cup lemon basil pesto (ingredients and recipe below)
Crispy bacon, chopped, and extra pesto for serving (optional)
DIRECTIONS:
Preheat the oven to 350° F.
Make the lemon basil pesto (recipe below), cook the bacon (if using), grate the cheeses, chop the spinach and the herbs.
Slice off the top 1/3 of the bread and discard. Then, pull out some of the insides of the bread to make space for the eggs and cheese. Be sure to keep a good layer of bread on the bottom for the eggs to soak into.
Rub the inside of the bread with olive oil and salt and pepper. Bake for 8-10 minutes or until the bread is toasted.
Meanwhile, whisk together the eggs, milk, and a pinch each of salt, pepper, and red pepper flakes. Stir in the chives, spinach, and Havarti.
Sprinkle 1/2 cup cheddar into the bottom of the bread, then drizzle over the pesto. Slowly pour in the eggs allowing the mixture to sink into the bread. Top with the remaining cheddar.
Bake 30-35 minutes until just set in the center.
Slice and serve with bacon, basil, and extra pesto.
Enjoy!
Lemon Basil Pesto
If you’ve never made pesto before, it’s easy and worth the extra few minutes it takes to gather and blend the ingredients so you can have the perfect FODMAP-free pesto.
1 cup basil leaves - chopped
1/4 cup dill - chopped
1/8 cup garlic-infused olive oil
1-2 tablespoons lemon juice
1/4 cup fresh-grated parmesan cheese
Kosher salt and black pepper to taste
DIRECTIONS:
Blend all ingredients except salt and pepper in either a blender or food processor fitted with the small bowl, until smooth.
Add salt and pepper to taste. That’s it! You’re done.
Eat and enjoy every bite because you can!
This post may contain affiliate links so you can easily purchase items listed on the page. There is no increased cost to you for purchasing items through these links so feel free to use them!
More Deliciously Low FODMAP™ main courses you might enjoy
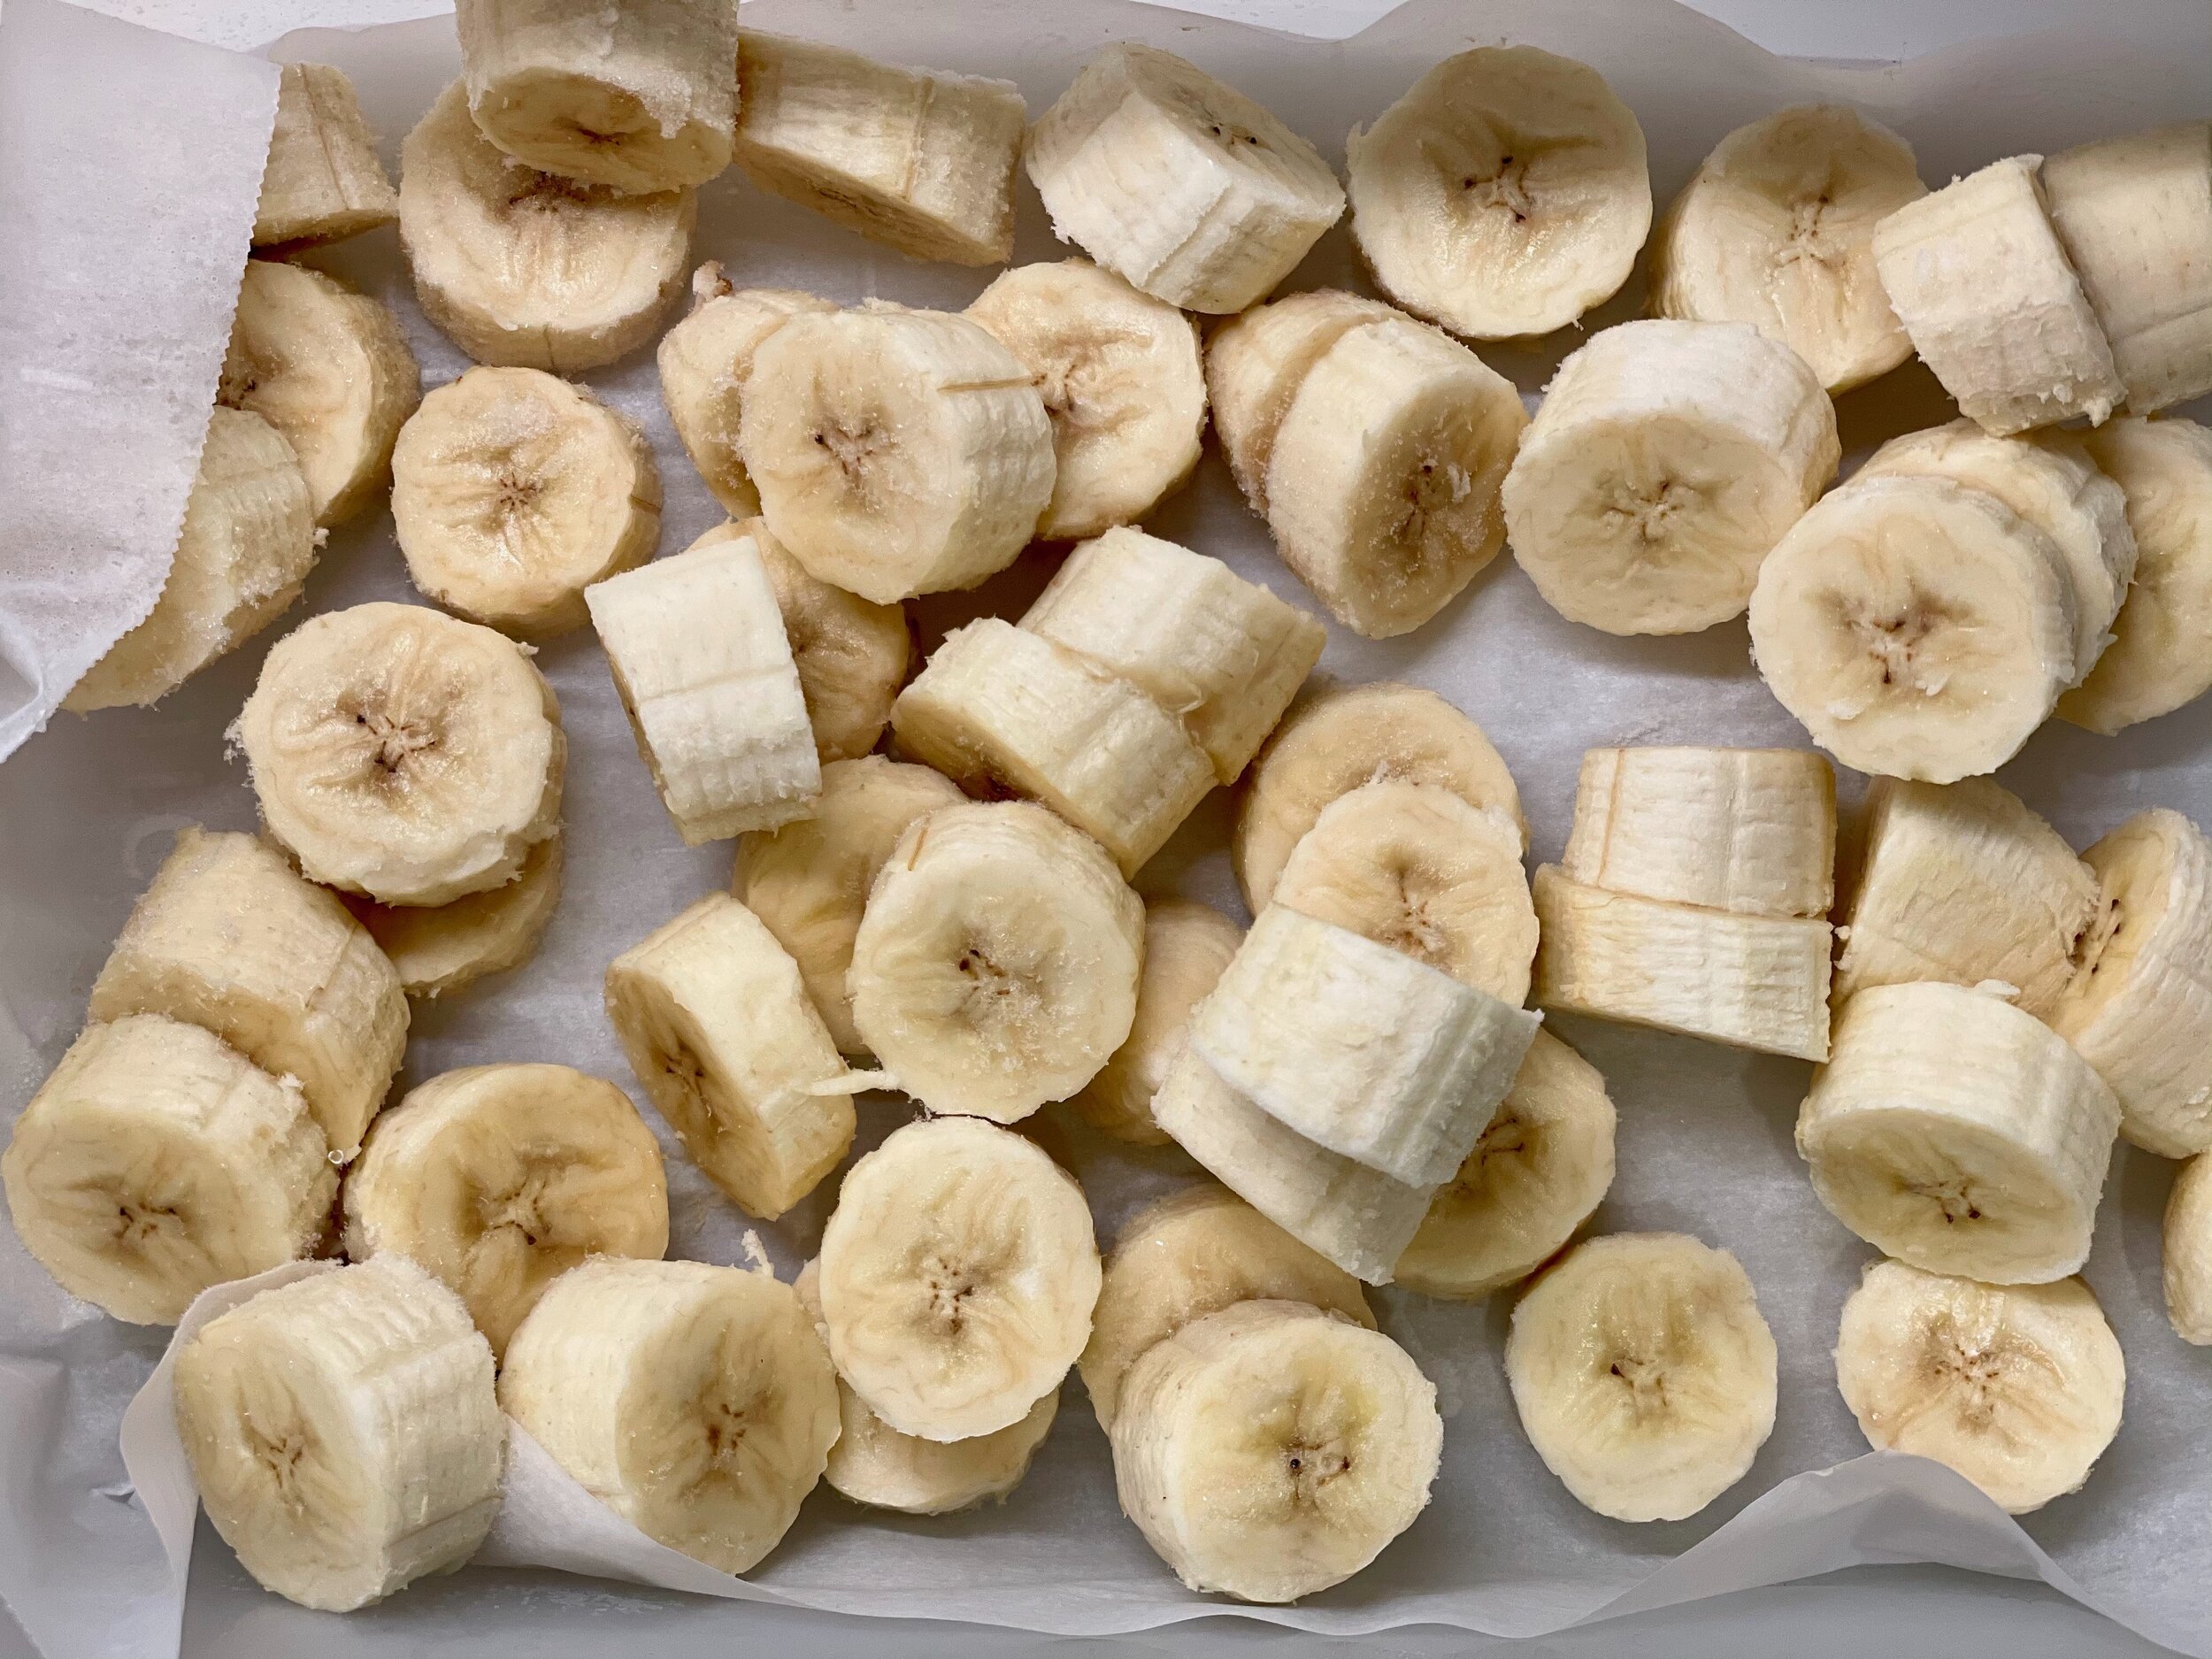
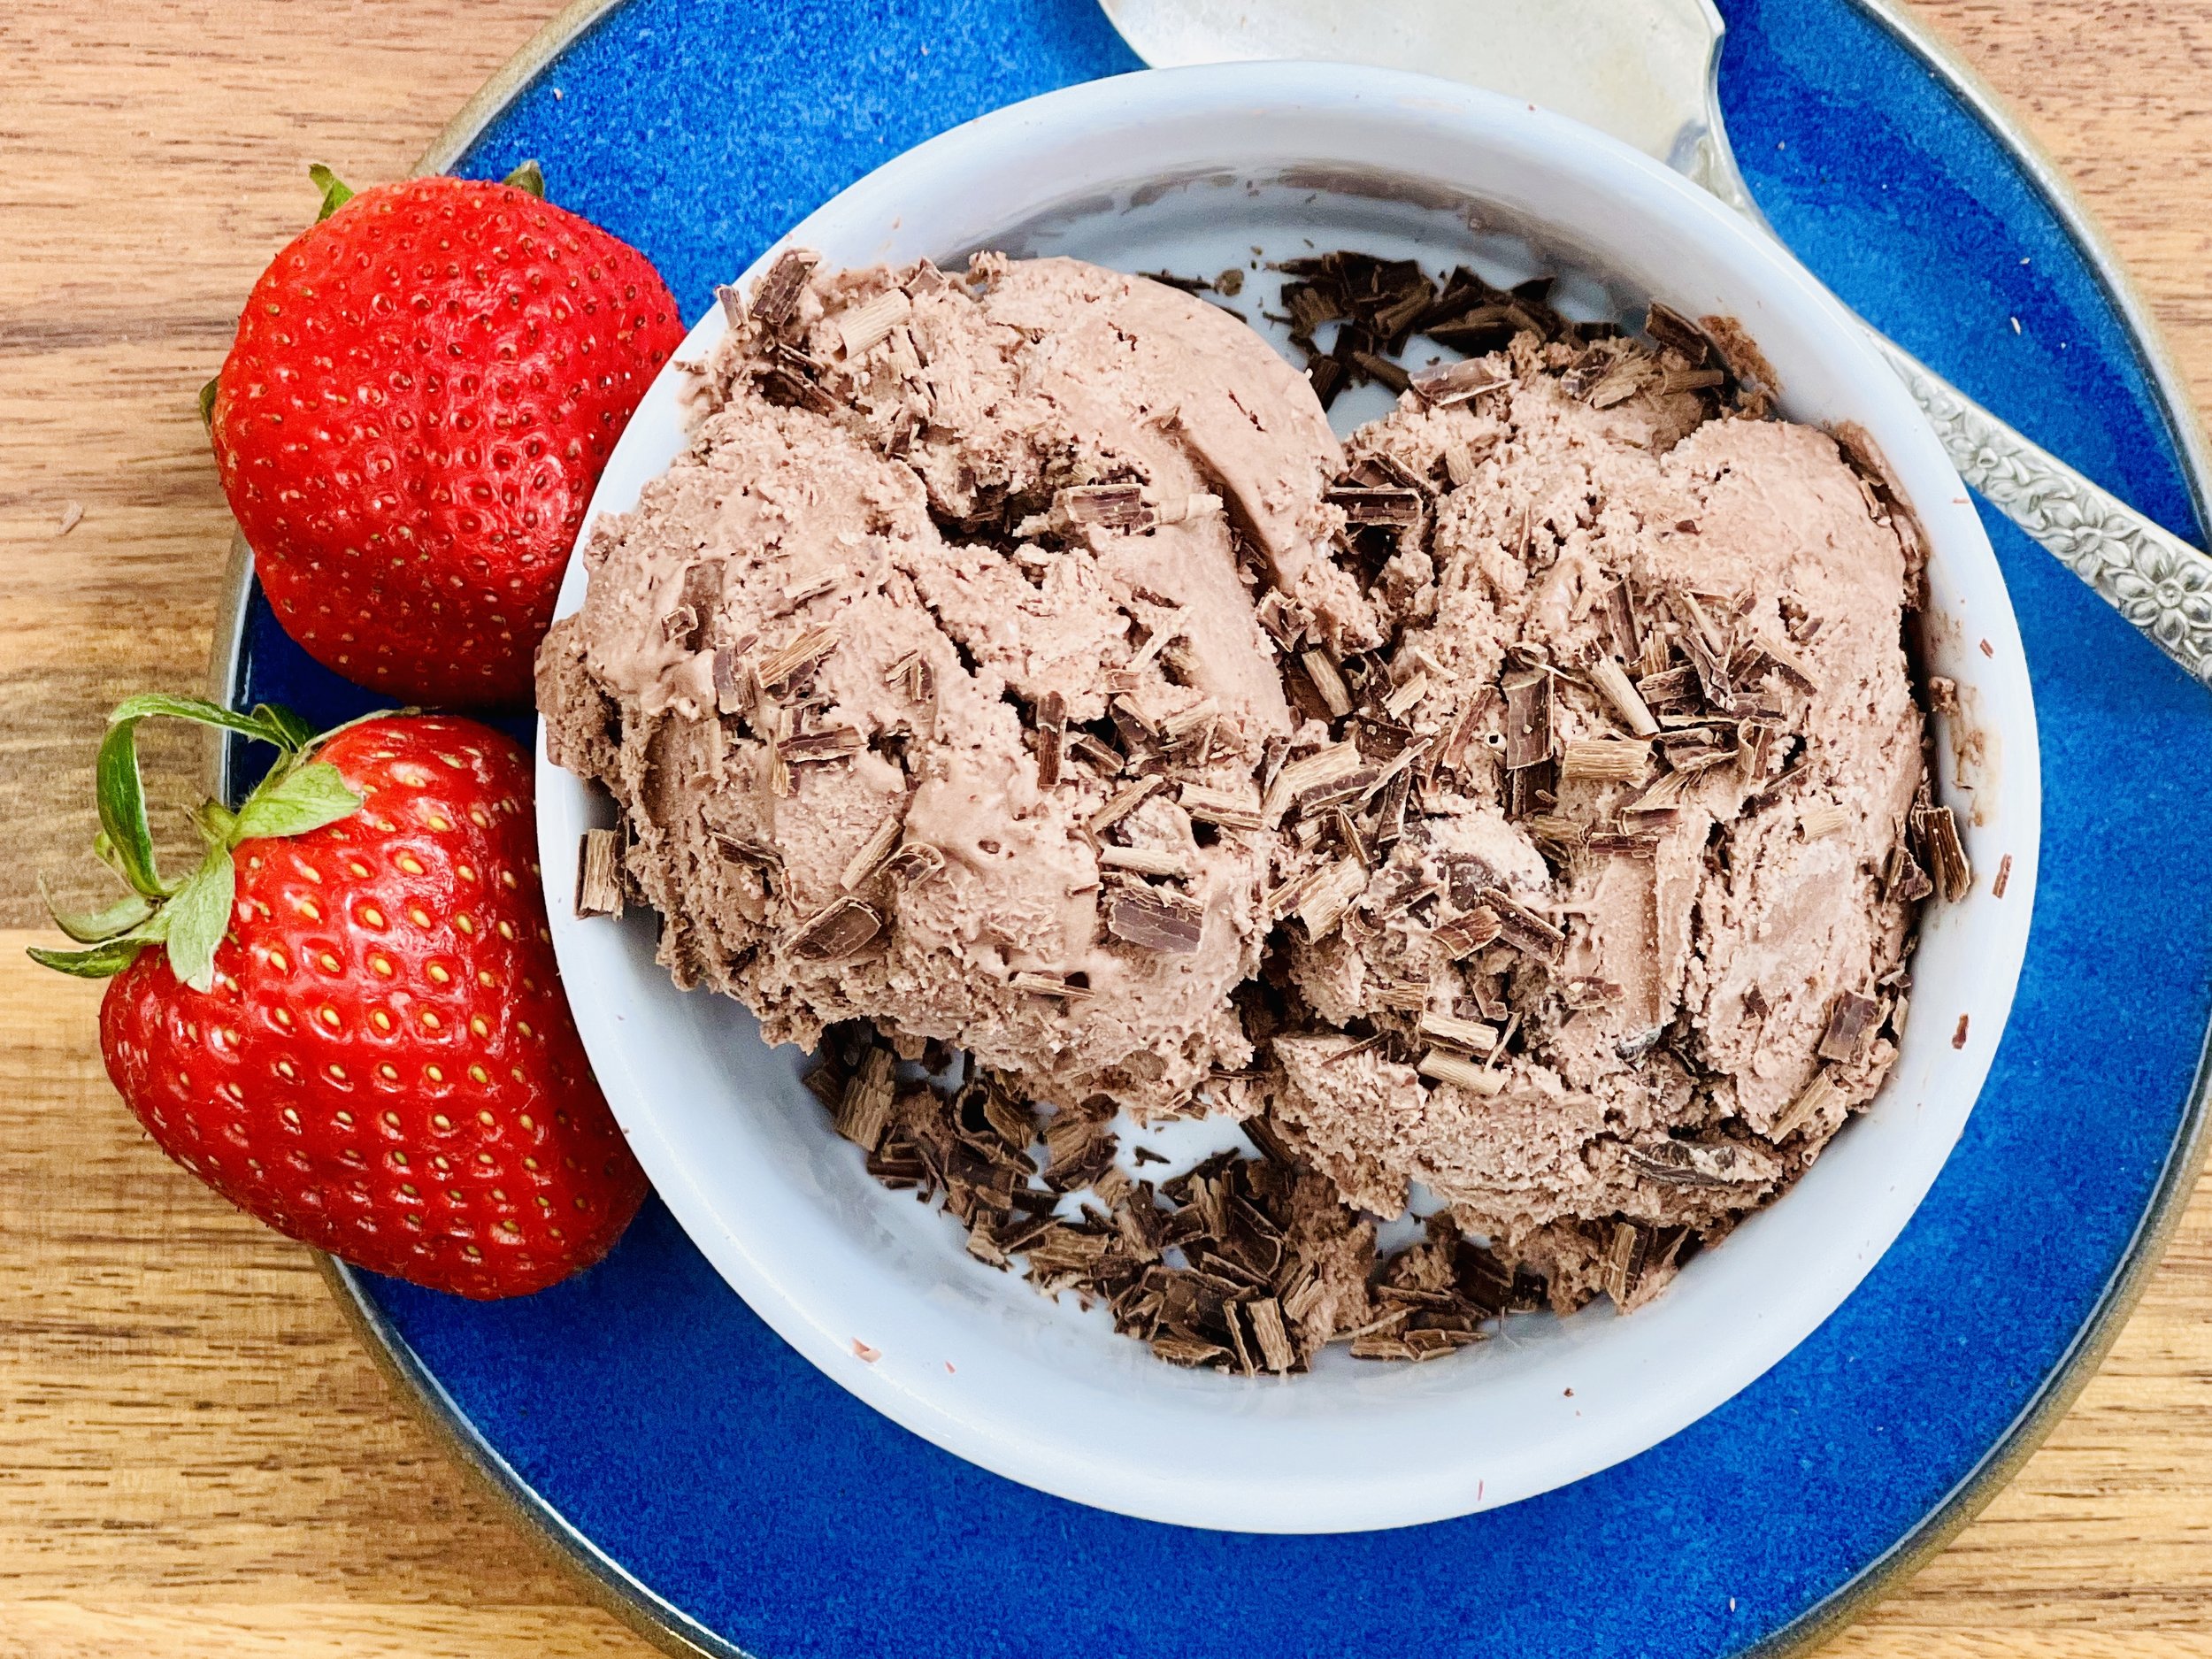
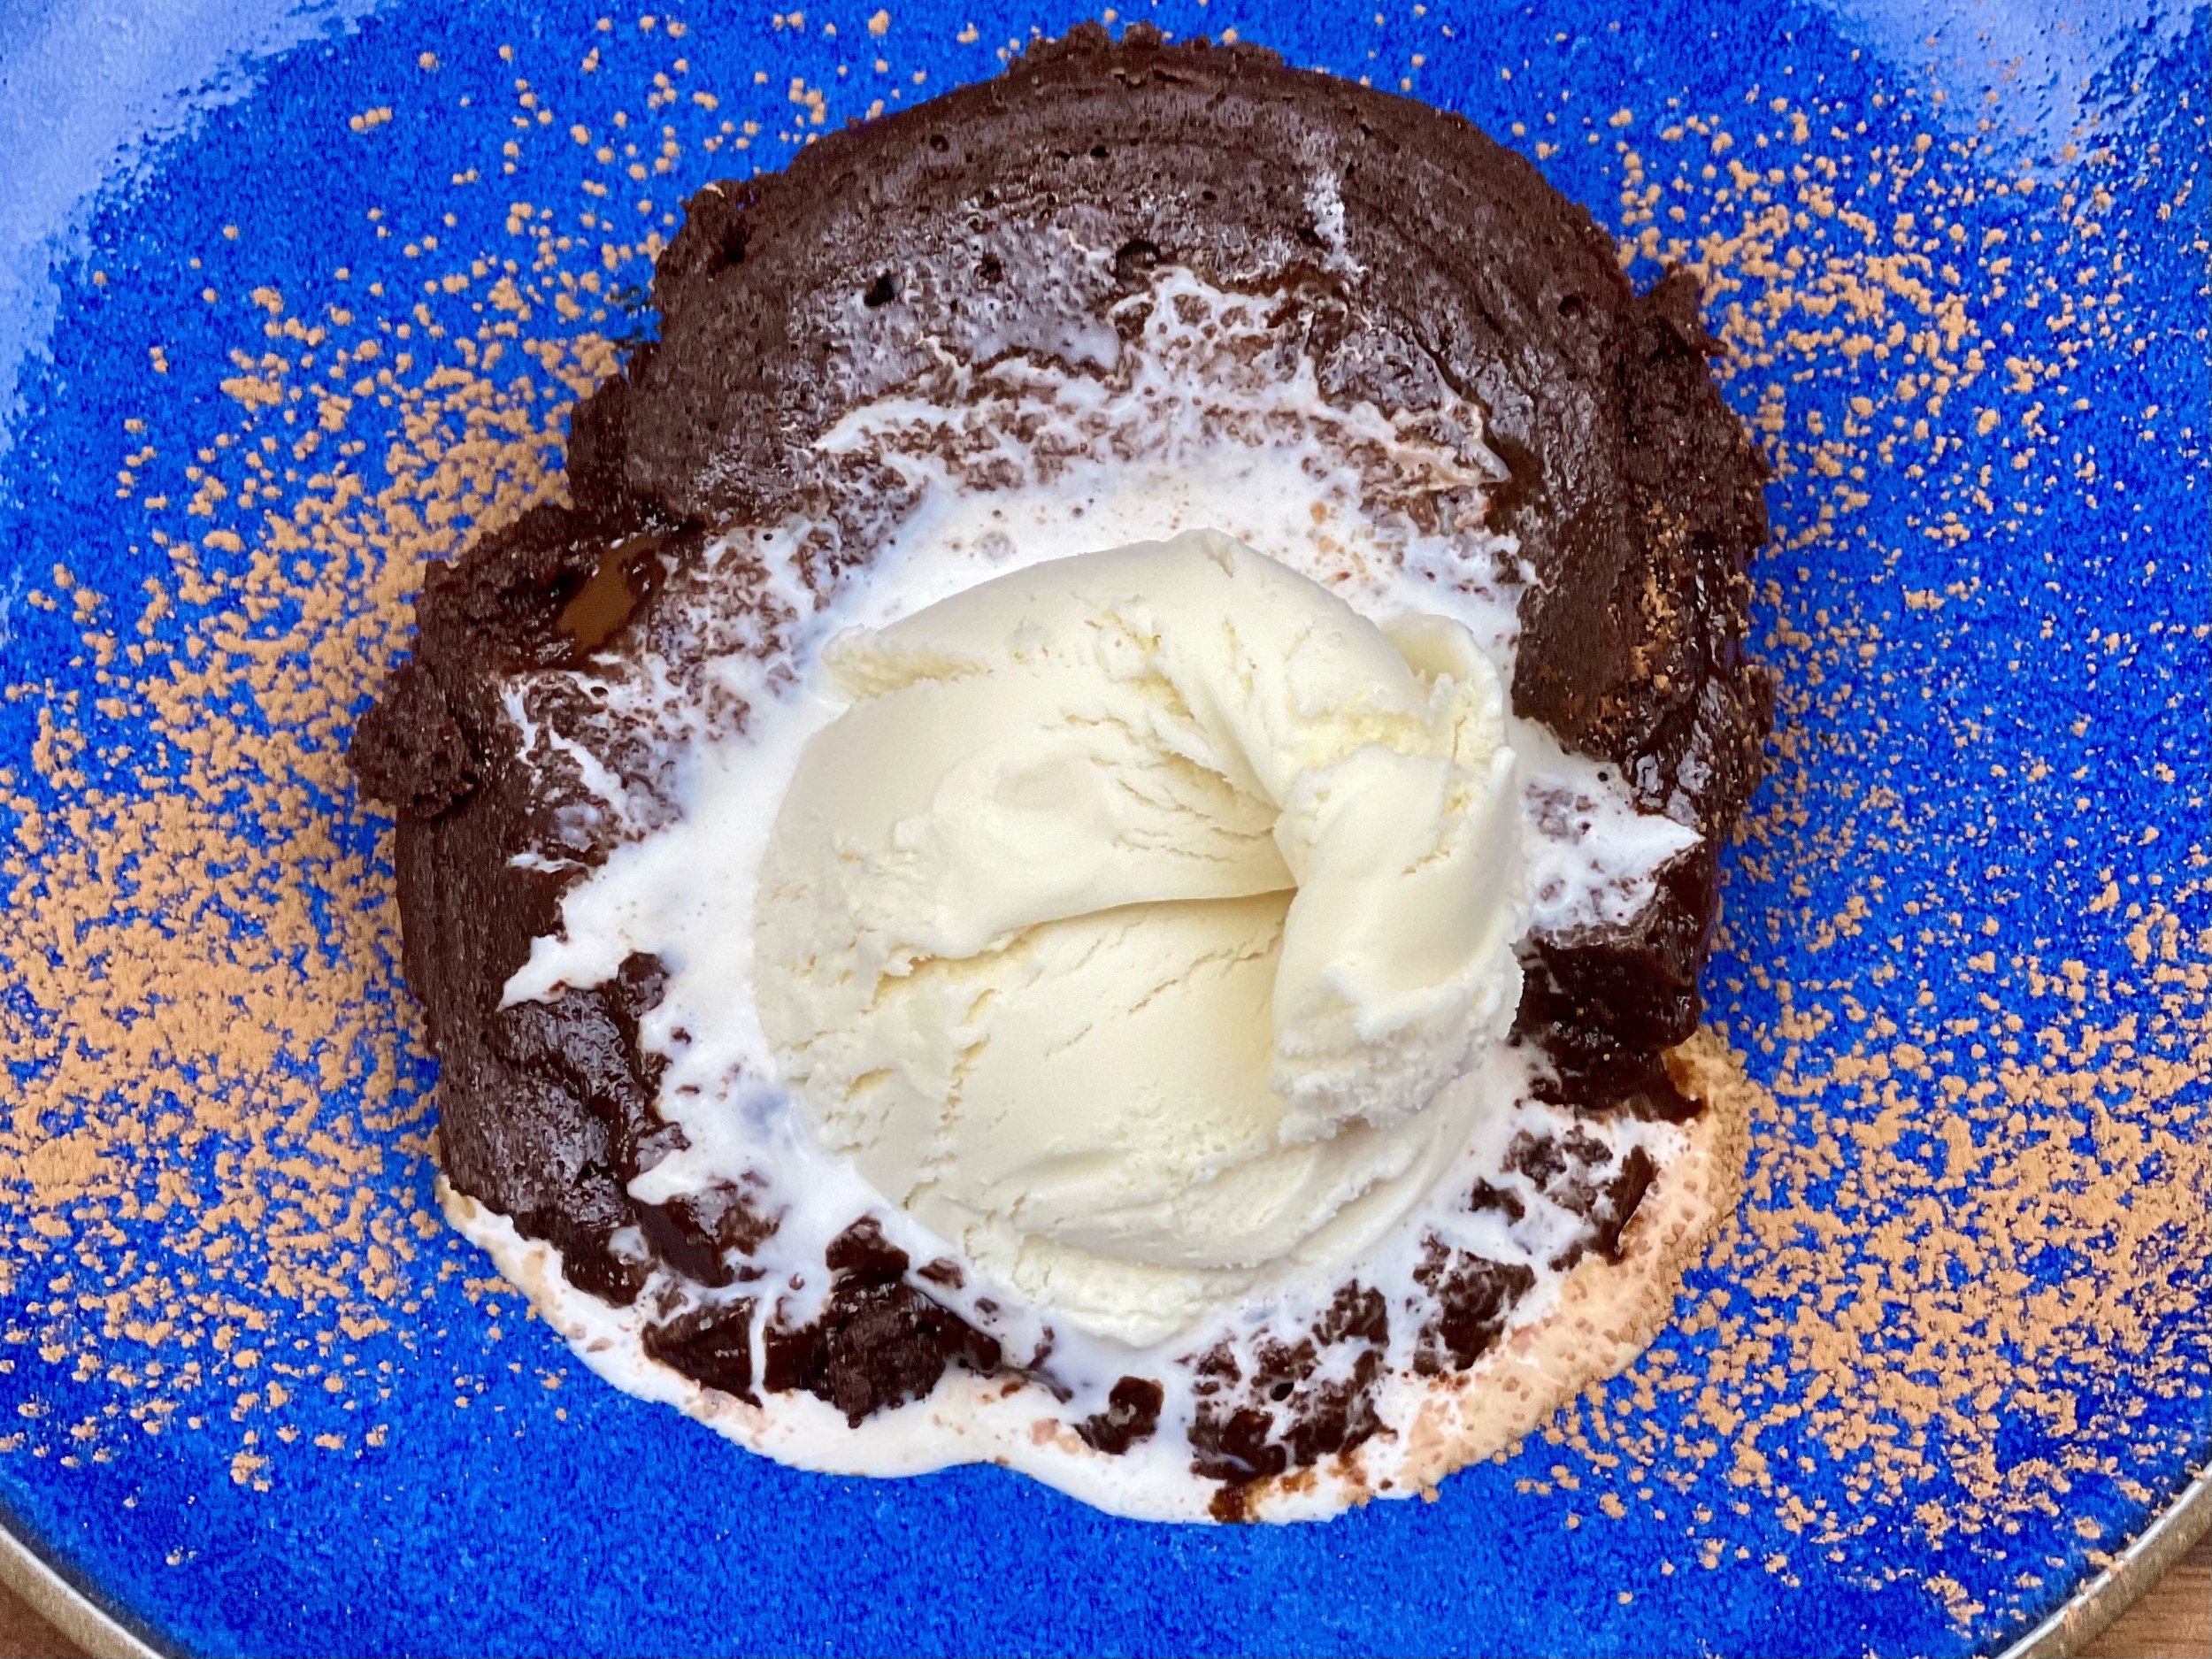
Frozen banana bites, frosty, or “ice cream” (low FODMAP)
5 minutes prep • 2 hours freeze • Gluten-free • Lactose-free • Low FODMAP
5 minutes prep • 2 hours freeze • Gluten-free • Lactose-free • Low FODMAP • Bananas are tasty, tropical, terrific for your health, and only perfectly ripe for about one day. Especially when you have IBS and you know that bananas are only low FODMAP until they get too many spots on them! So, what do you do? Do you buy one banana a day so you always have just one ripe banana at a time? That doesn’t seem very practical! No, you slice them and freeze them when they are at their perfect point and then you eat them at your leisure. Perfection couldn’t be simpler!
INGREDIENTS:
Perfectly ripe bananas (remember bananas are low FODMAP until they start to get a few spots)
DIRECTIONS:
Slice bananas when they are perfectly ripe. Put them in one layer on a parchment-lined tray in the freezer.
After a couple of hours, they should be frozen and you can remove the parchment and push the frozen banana slices off the parchment and into a freezer-safe tightly covered container. Don’t store them in the freezer without covering them as the flavor of the bananas will diminish and the other things in the freezer might start to taste like bananas!
Now, you have perfectly ripe frozen banana slices to eat whenever you like — no worry about them getting too ripe.
Eat and enjoy every bite because you can!
Pro tips:
Want to make a frozen banana frosty? Add frozen banana slices and a bit of lactose-free milk or coconut milk to the blender. Whirl until smooth. You can even throw some peanut butter in there to give it some protein and substance and have it for lunch!
Want to make fancy banana “ice cream?” Find our recipe here.
More Deliciously Low FODMAP™ desserts you might enjoy


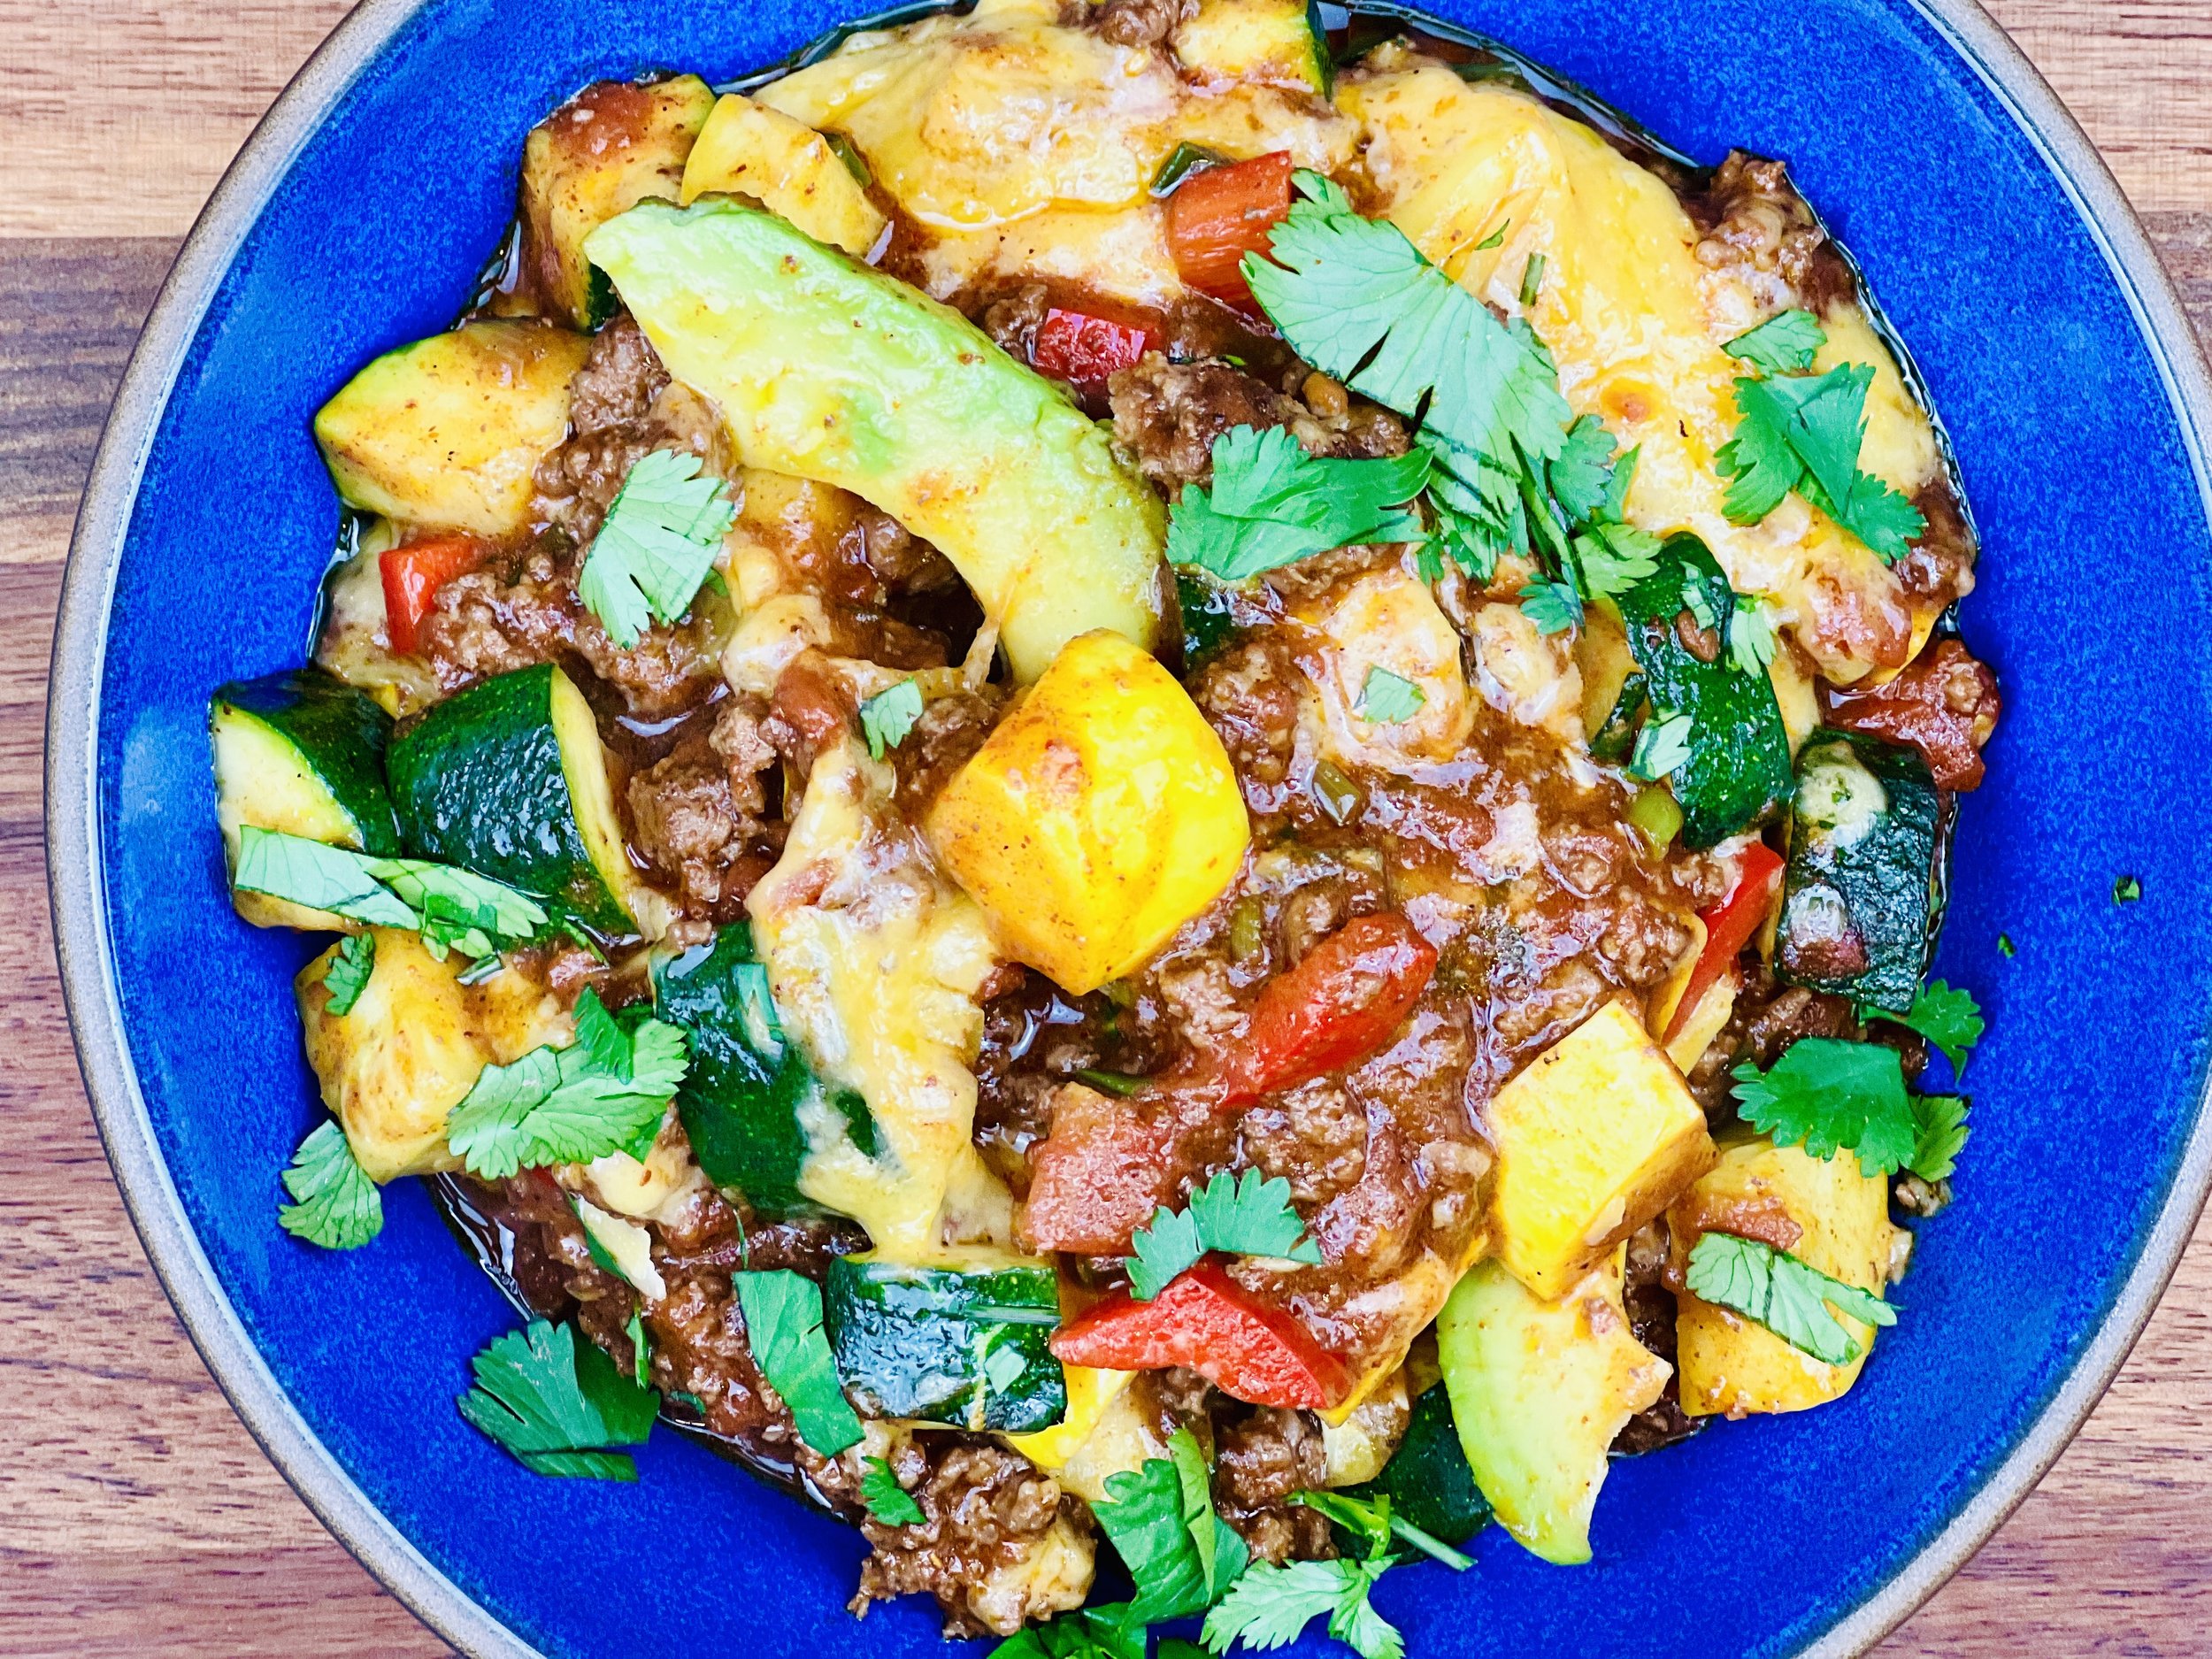
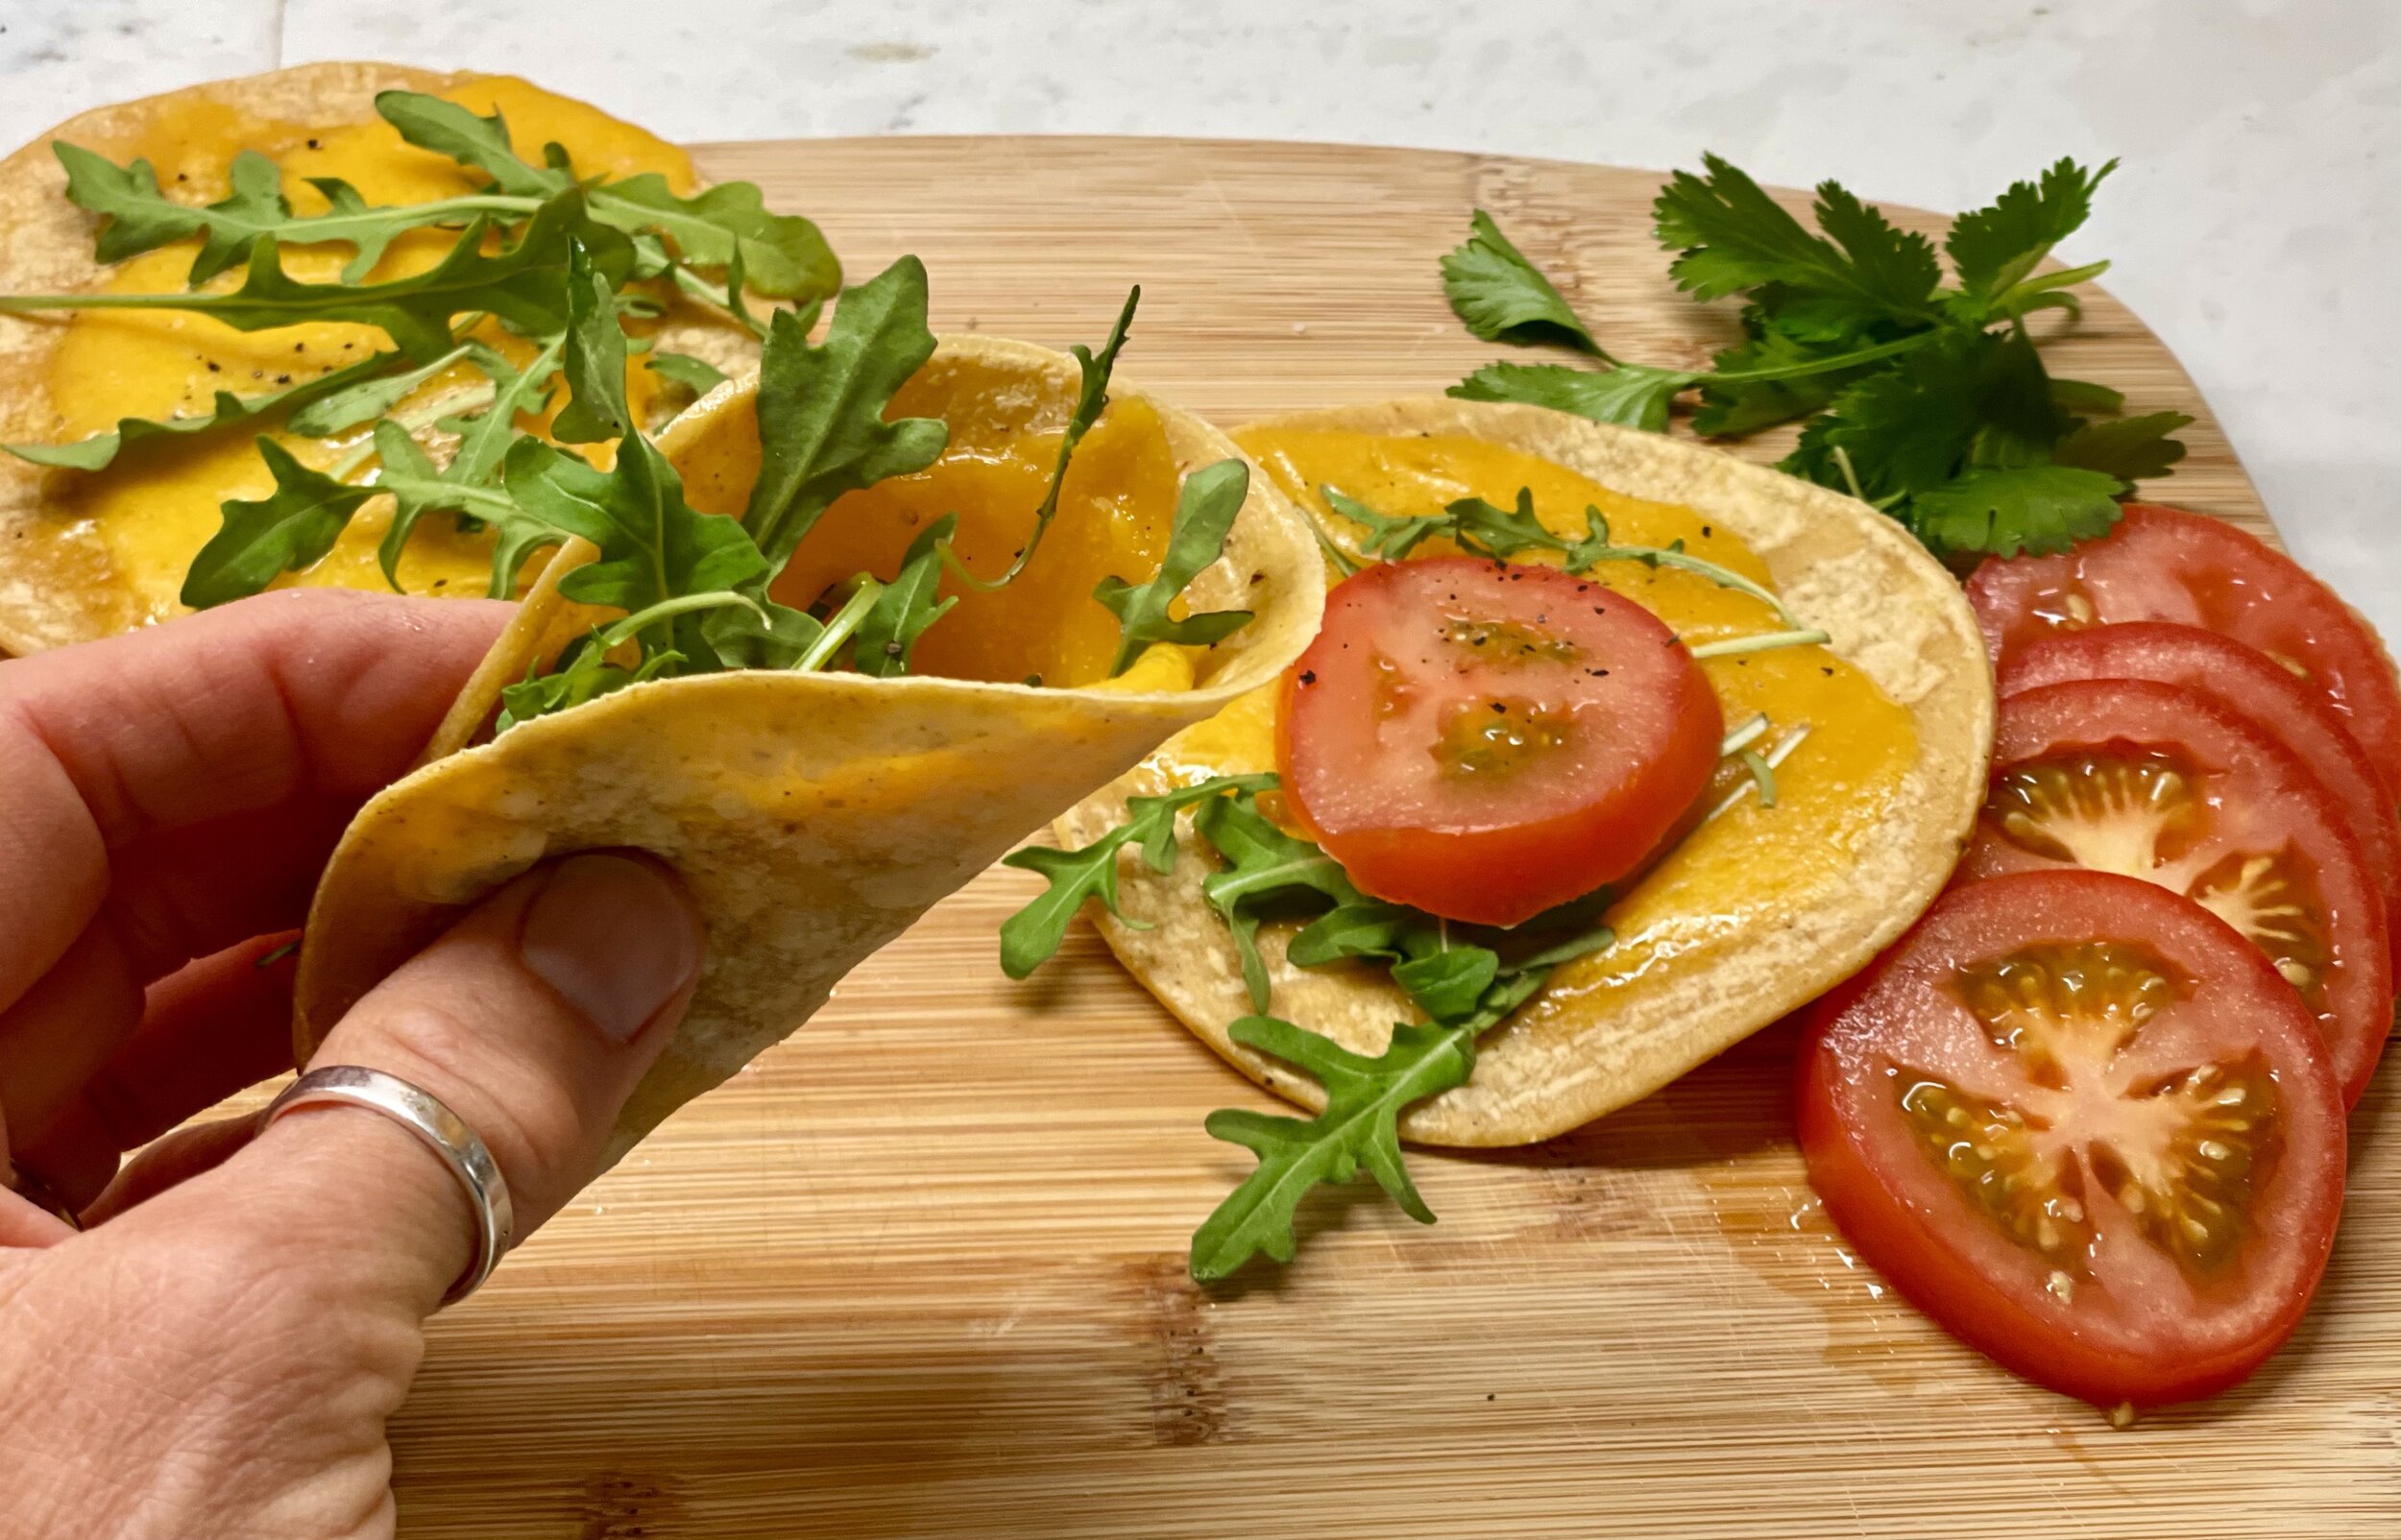
Quick Lunch: Corn tortilla veggie melt (low FODMAP)
5 minutes • Gluten-free • Vegetarian • Low FODMAP • Serves 1
5 minutes • Gluten-free • Vegetarian • Low FODMAP • Serves 1 • These are so easy and so good! They’re one of my favorite go-to quick lunches because they are delicious, satisfying, and can literally be made in less than five minutes. It’s a great way to use up extra cheese you may have on hand and, if you have other leftover savory ingredients, you can toss them in there too!
INGREDIENTS:
Gluten-free mini taco size corn tortillas
Extra sharp cheddar cheese (thinly sliced or grated)
Baby arugula
Fresh tomatoes (sliced)
Salt and pepper
DIRECTIONS:
Put cheese on tortilla and melt for about 45 seconds in the microwave.
Remove from microwave and add arugula and sliced tomatoes, a bit of salt (if you like), and a good grinding of pepper.
Fold and enjoy!
Pro Tip: You can also add sliced avocado, bacon bits, leftover steak or chicken, chopped olives, chopped green chilies, scrambled eggs (for a mini breakfast burrito), etc. Use your imagination and mix it up!
More Deliciously Low FODMAP™ lunches you might enjoy
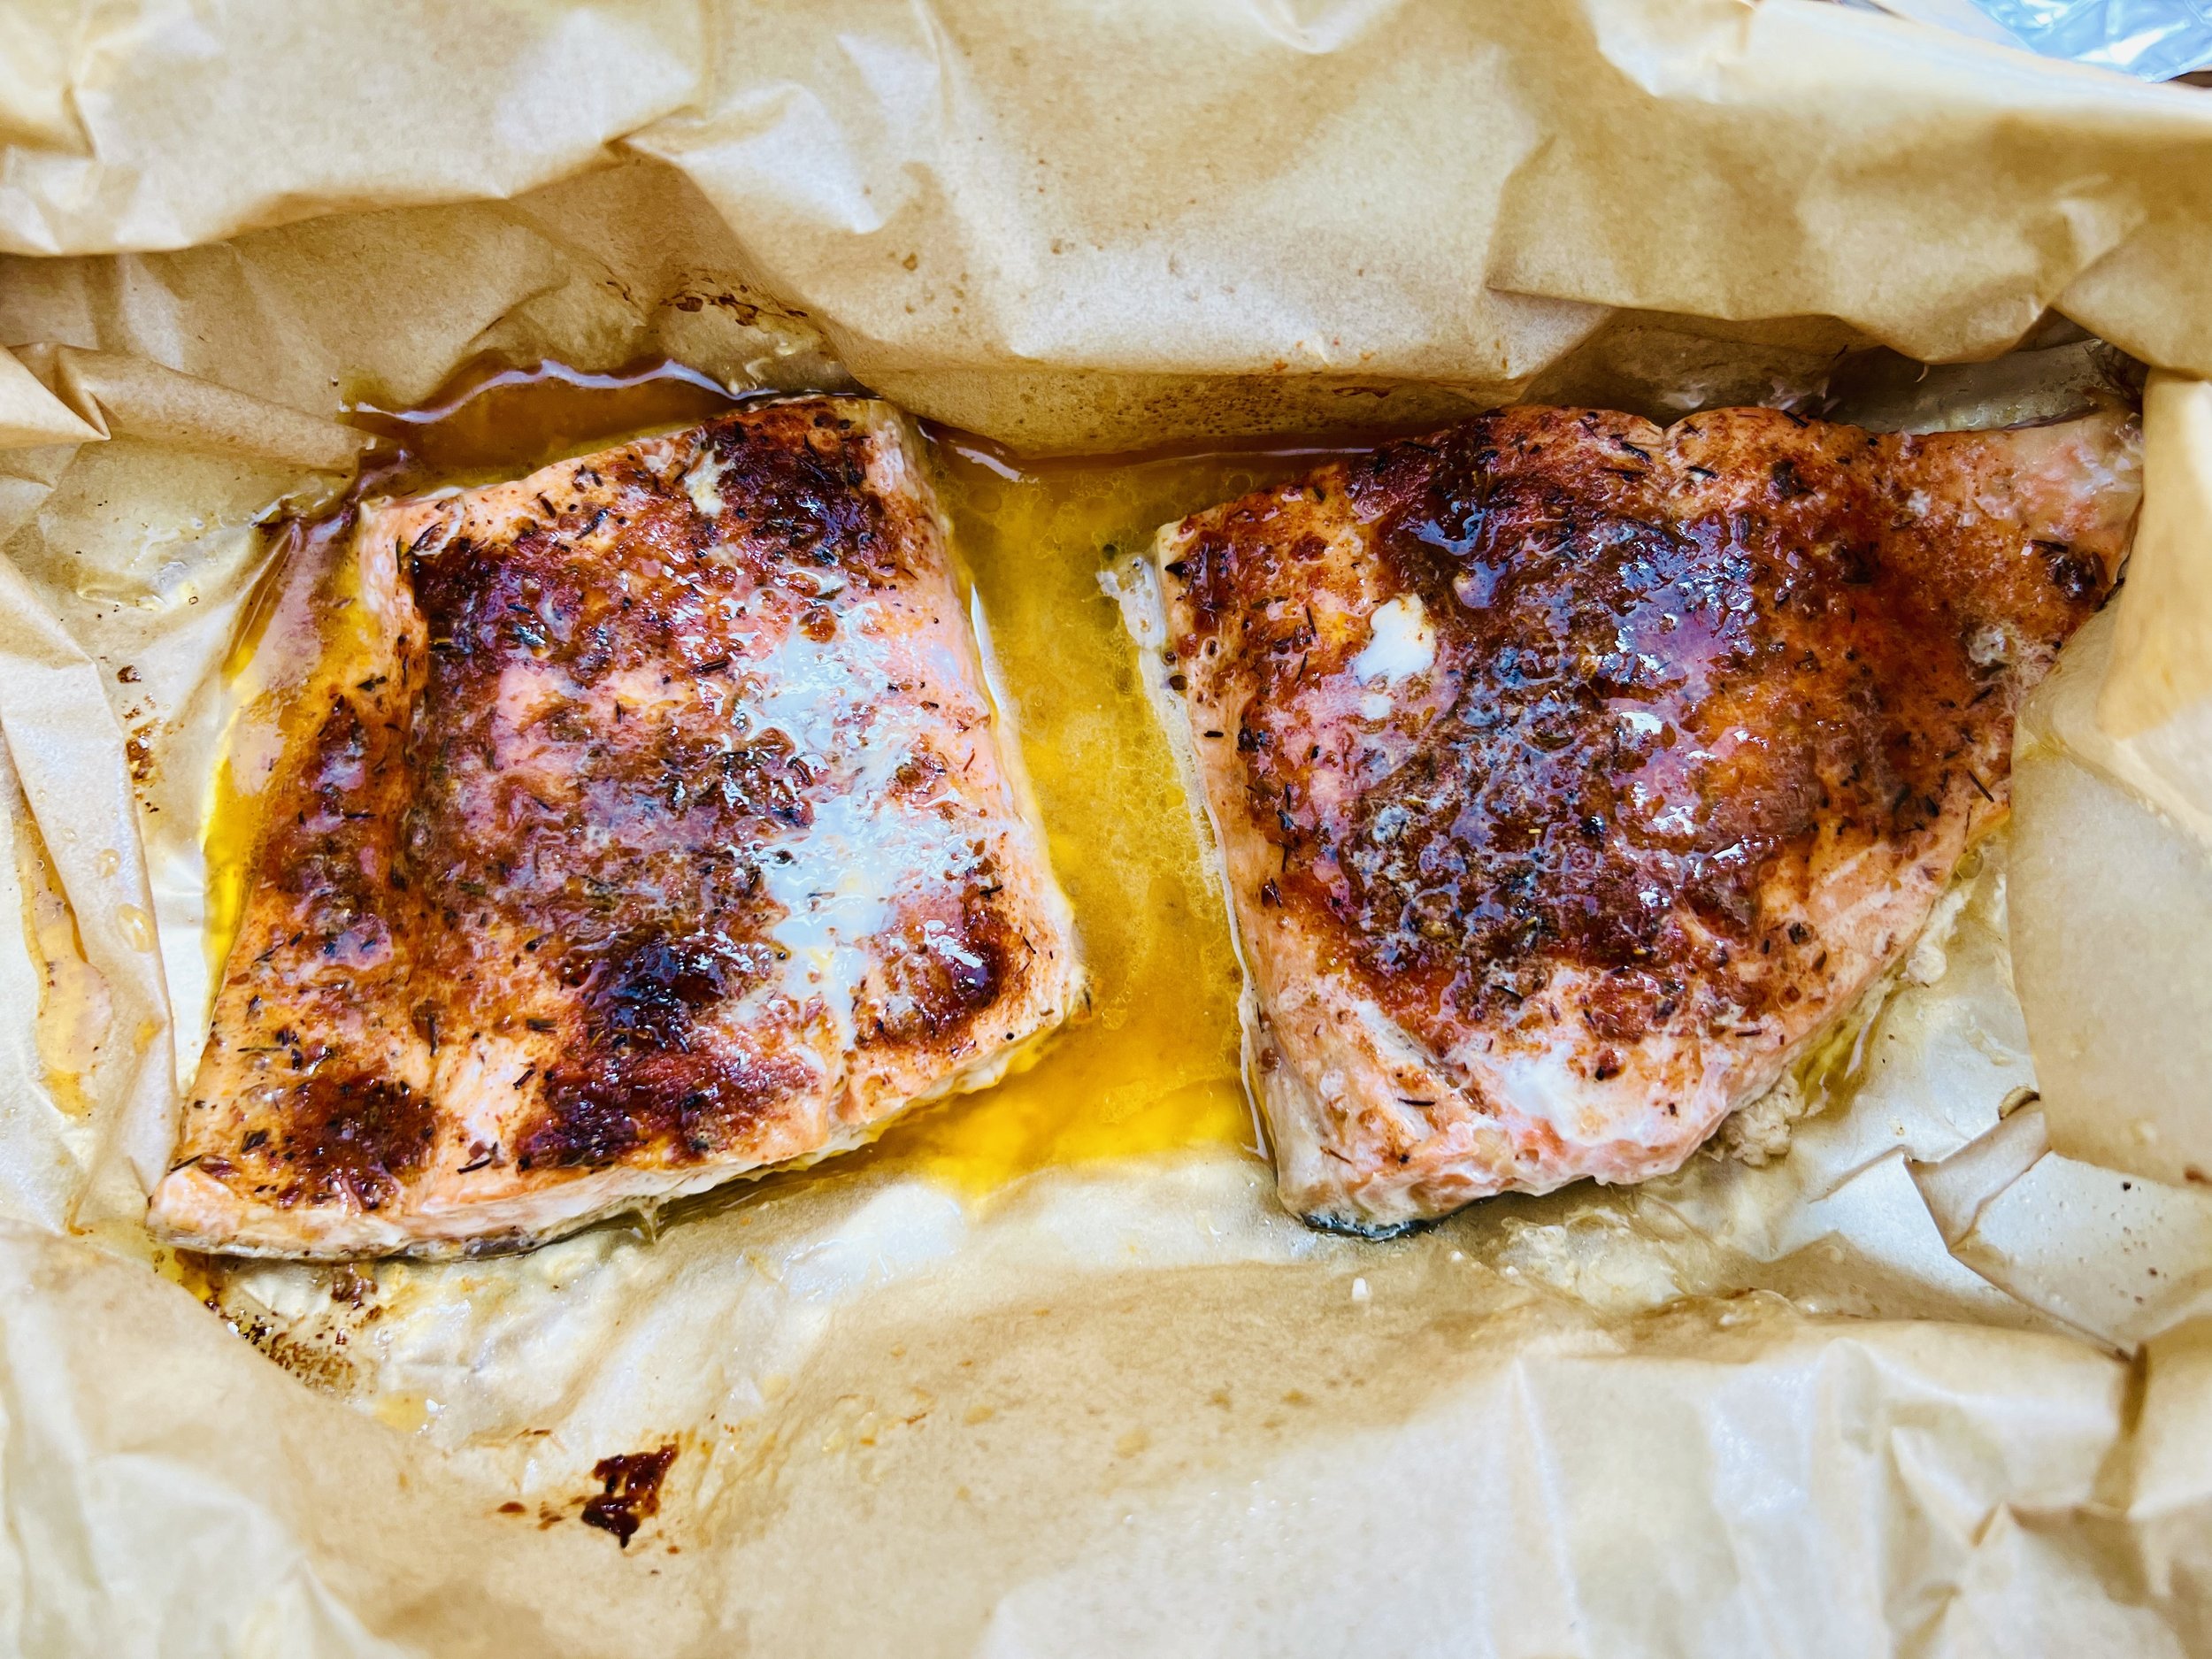
Spring vegetable quiche with broccolini and bacon (low FODMAP)
20 minutes prep • 40 minutes cook • Gluten-free • Low FODMAP • Serves 8
20 minutes prep • 40 minutes cook • Gluten-free • Low FODMAP • Serves 8 • This delicious quiche is equally good served hot or at room temperature so it’s a great make-ahead dish. And, for those of you who love asparagus but can’t tolerate the FODMAPs, you’ll love this quiche, and you’ll swear the broccolini in this recipe is asparagus!

INGREDIENTS:
1 deep dish perfect buttery pate brisee low FODMAP pie crust frozen (alternatively you can use a purchased frozen gluten-free butter pie crust)
1 pound bacon
2 tablespoons garlic-infused olive oil
3 green onions (green part only) chopped
1 bunch broccolini (stems only with leaves removed) cut into 1/2 inch pieces
1 tablespoon chopped chives
1 tablespoon minced fresh thyme
Salt and freshly ground pepper
8 large eggs plus one egg white (you can put the extra yolk in with the rest of the eggs)
1 cup lactose-free whole milk
2 cups white cheddar cheese grated
DIRECTIONS:
Preheat oven to 400 degrees F and line a rimmed baking sheet with foil. Lay your bacon slices on the foil in one layer and put it in the oven.
Bake for 10 minutes and check for doneness. If it’s not yet done, cook another 3-5 minutes. When bacon is cooked through, remove it from the oven and use a pair of tongs to remove the bacon slices and lay them in one layer on folded paper towels to drain and cool.
Meanwhile, prepare the vegetables and herbs and grate the cheese.
Heat 2 tablespoons of garlic-infused olive oil in a medium frying pan. When the oil shimmers, add the green onions and saute for about a minute. Add chopped broccolini and continue to saute for about 5 minutes.
While the vegetables are cooking, chop the cooked bacon.
Add the bacon and chopped chives to the frying pan with the broccolini and season with salt and a good grinding of pepper. Continue cooking until bacon is heated through then set aside.
In a large mixing bowl combine the 8 eggs (plus one egg yolk) and milk and whisk together until light yellow and well blended. Add grated cheese, fresh thyme, and the bacon and broccolini mixture from your frying pan.
Remove pie crust from the freezer and brush with egg white.
Pour the egg, cheese, vegetable mixture into the crust. Reduce oven temperature to 375 degrees F and put the quiche in the oven.
Cook for 30 minutes. If the edges of the pie crust are getting too brown, you can cover them with a strip of foil or silicon crust protector and cook for another 10 minutes until the center is just set but still jiggly.
Remove quiche from the oven and let stand for 10 minutes before cutting and serving.
Eat and enjoy every bite because you can!
This post may contain affiliate links so you can easily purchase items listed on the page. There is no increased cost to you for purchasing items through these links so feel free to use them!
More Deliciously Low FODMAP™ main courses you might enjoy
Carrot spice cake with silky cream cheese frosting (low FODMAP)
15 minutes prep • 45 minutes cook • Gluten-free • Low FODMAP • Makes 12 good-sized pieces
15 minutes prep • 45 minutes cook • Gluten-free • Low FODMAP • Makes 12 good-sized pieces • This cake is very easy to make and delicious to eat. Baking it will fill your home with the spicy-sweet smell of cinnamon and sugar so if you have anyone to impress, put this in the oven before they arrive! This cake is also best the second day so I always make it a day ahead and refrigerate it overnight before serving. This makes it a wonderful make-ahead dessert.

INGREDIENTS
2 cups sifted gluten-free all-purpose flour
2 teaspoons baking soda
2 teaspoons baking powder
2 teaspoons cinnamon
1 teaspoon salt
3 cups grated carrots
1 and 1/3 cups vegetable oil
4 slightly beaten eggs
2 cups granulated sugar
1 - 2 cups finely-chopped walnuts (you can omit if you don’t like walnuts)
1/2 cup drained crushed pineapple or finely-diced fresh pineapple
DIRECTIONS:
Preheat oven to 350 degrees F. Butter and flour a 9'‘ x 13” baking pan or two 9” round pans if you prefer.
Combine flour, baking soda, baking powder, cinnamon, and salt in a sifter.
Mix grated carrots, vegetable oil, and eggs in a mixing bowl and stir well to combine.
Add sugar and stir in.
Finally, add sifted dry ingredients and stir in.
If you’re using walnuts, stir those in now as well.
Pour batter into prepared baking pan. Bake at 350 degrees F for 45 minutes or until a toothpick inserted in the center comes out clean.
Let cool and frost with our silky cream cheese frosting (recipe below).
CREAM CHEESE FROSTING INGREDIENTS:
12 ounces lactose-free cream cheese, at room temperature
1 cup butter, at room temperature
2 tablespoons lactose-free sour cream, at room temperature (gives the frosting that silky quality)
1 teaspoon vanilla
2-3 cups sifted powdered sugar (or enough to achieve a good spreading consistency)
SILKY CREAM CHEESE FROSTING DIRECTIONS:
Combine cream cheese, butter, sour cream, and vanilla in the bowl of your stand mixer and mix until well blended and fluffy. Note: it’s very important to beat the cream cheese, butter, vanilla, and sour cream together before adding the sugar, and to make sure they’re at room temperature before you start. If your ingredients are too cold, or the sugar is added too early, the frosting will be lumpy.
Once the cream cheese mixture is well mixed and smooth, add enough powdered sugar to achieve a good spreading consistency.
Spread the frosting on the cake and chill the cake overnight or until ready to serve.
Enjoy!
Pro Tip: This cake is best the second day so I always make it a day ahead and refrigerate it overnight so it’s a great make-ahead dessert!
Original recipe inspired by Sarah Aitken of Ashland, Oregon
This post may contain affiliate links so you can easily purchase items listed on the page. There is no increased cost to you for purchasing items through these links so feel free to use them!
More Deliciously Low FODMAP™ desserts you might enjoy
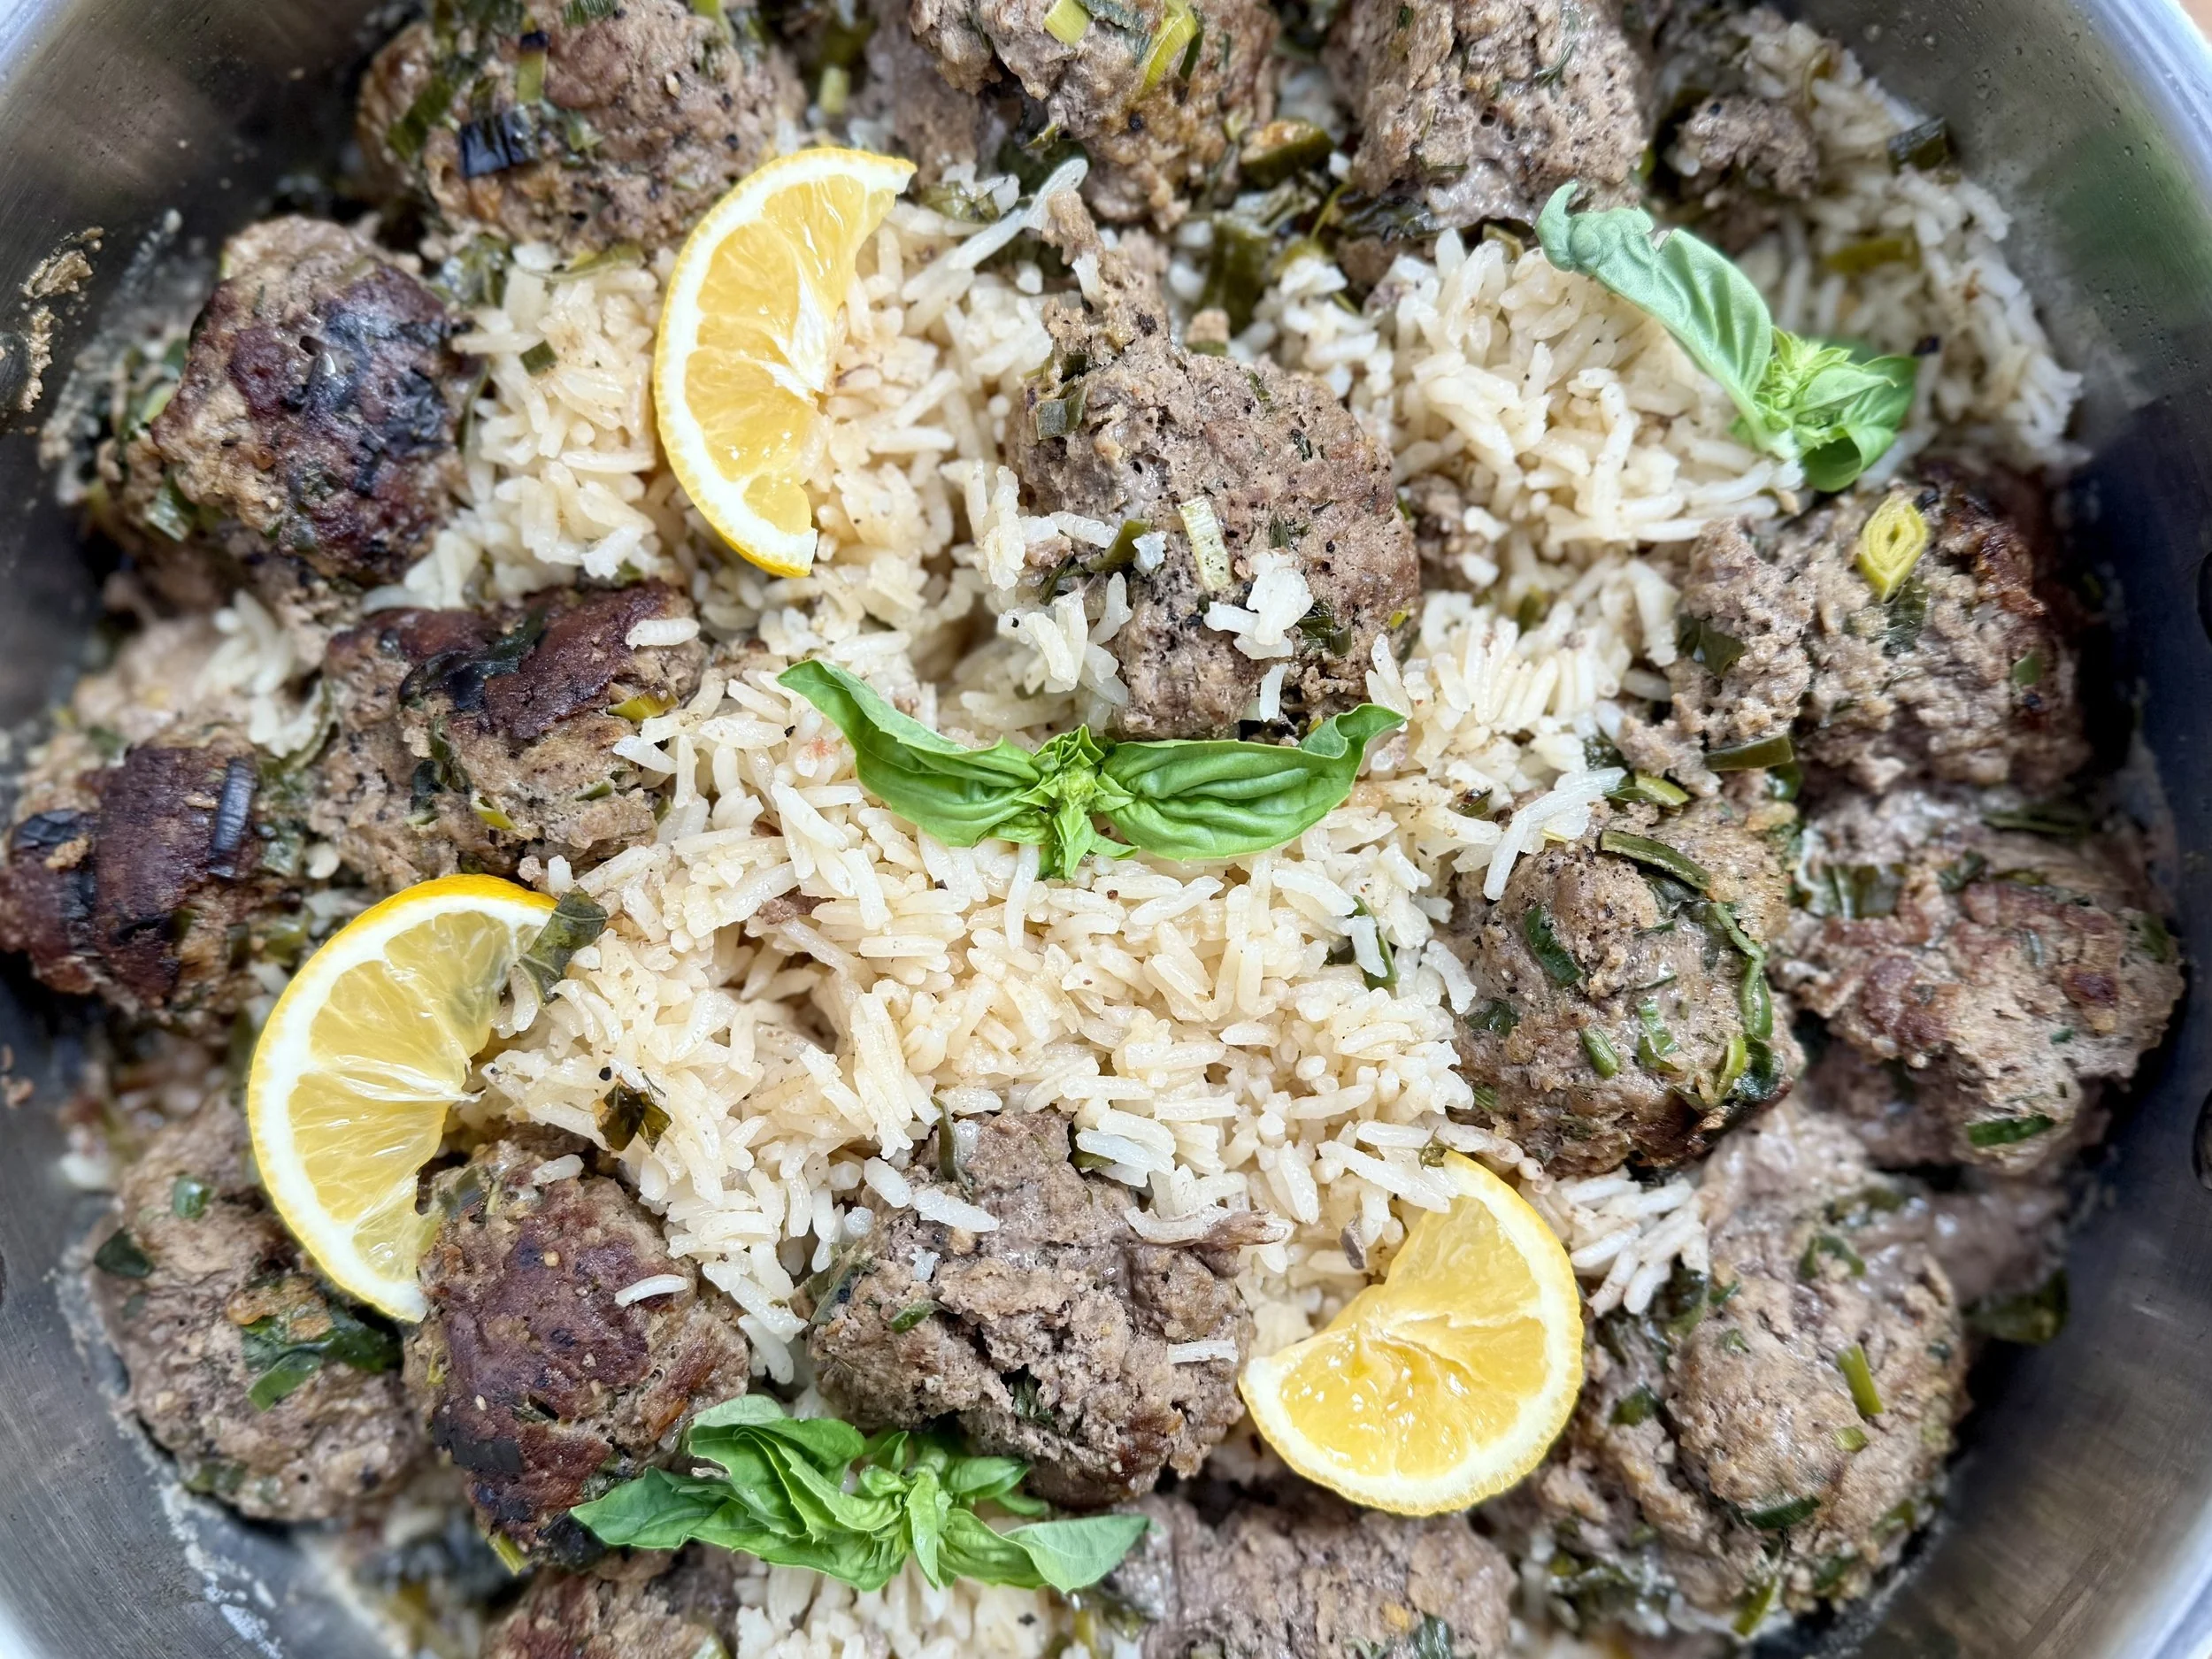
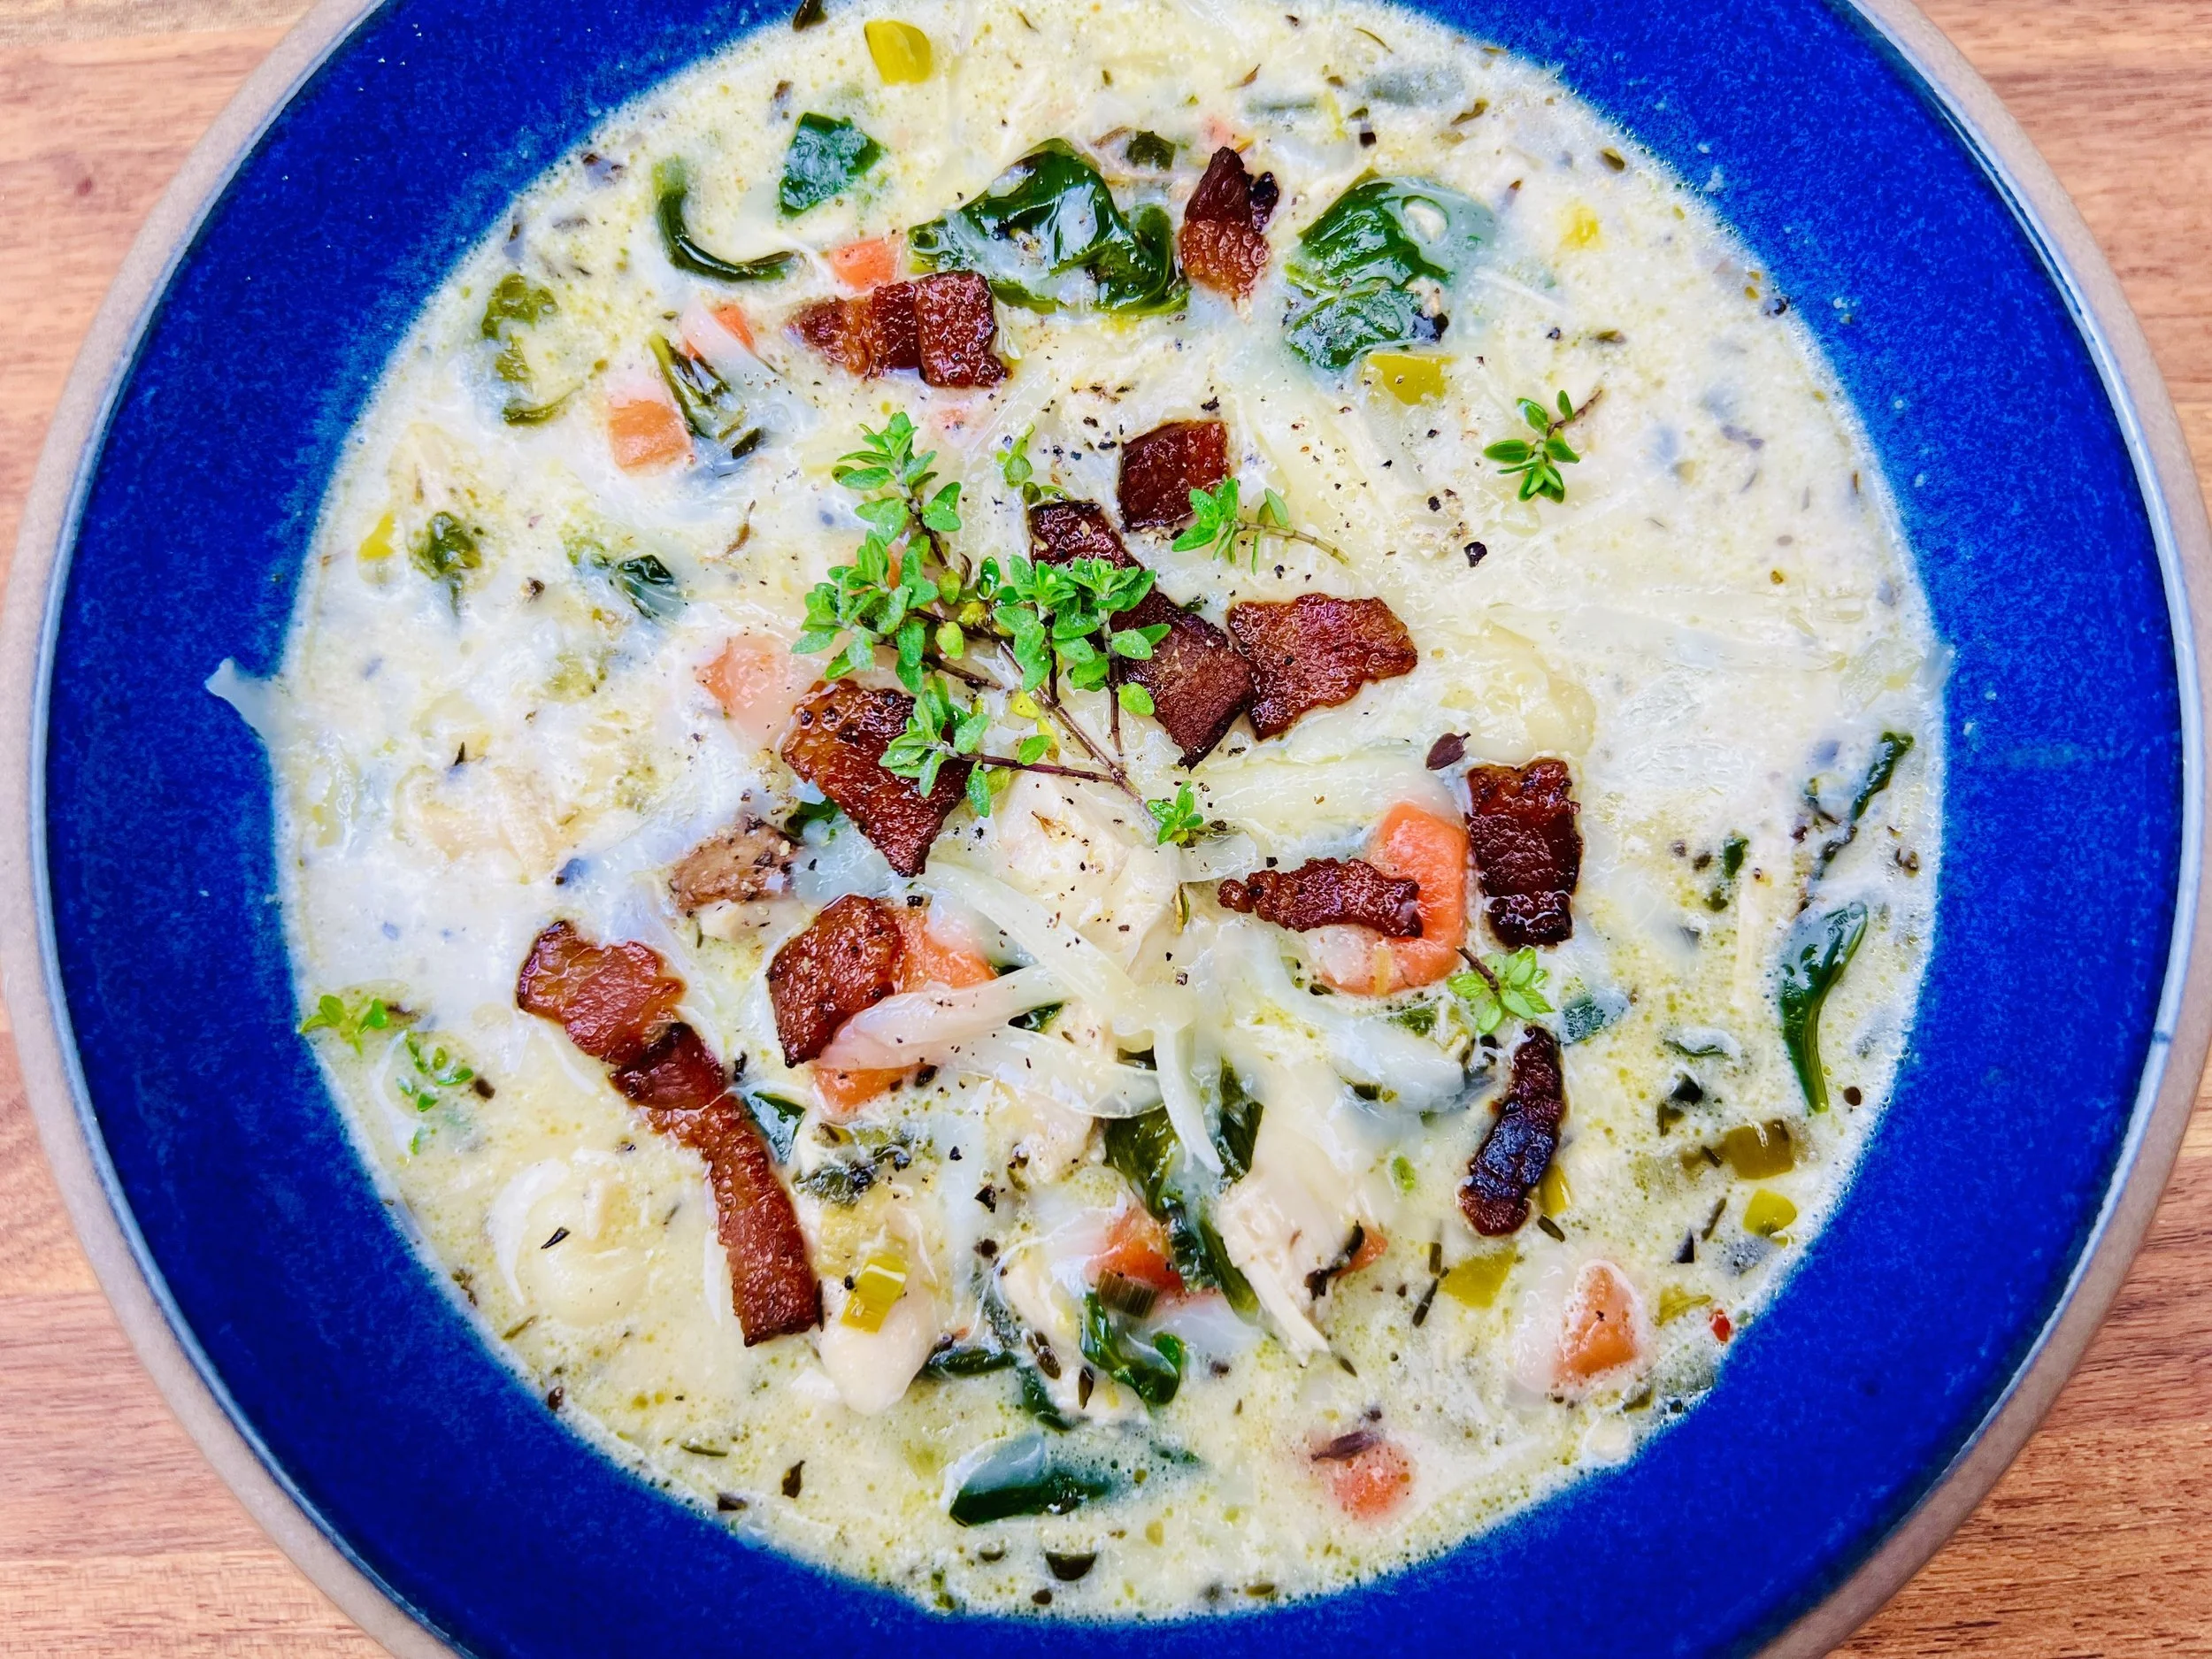
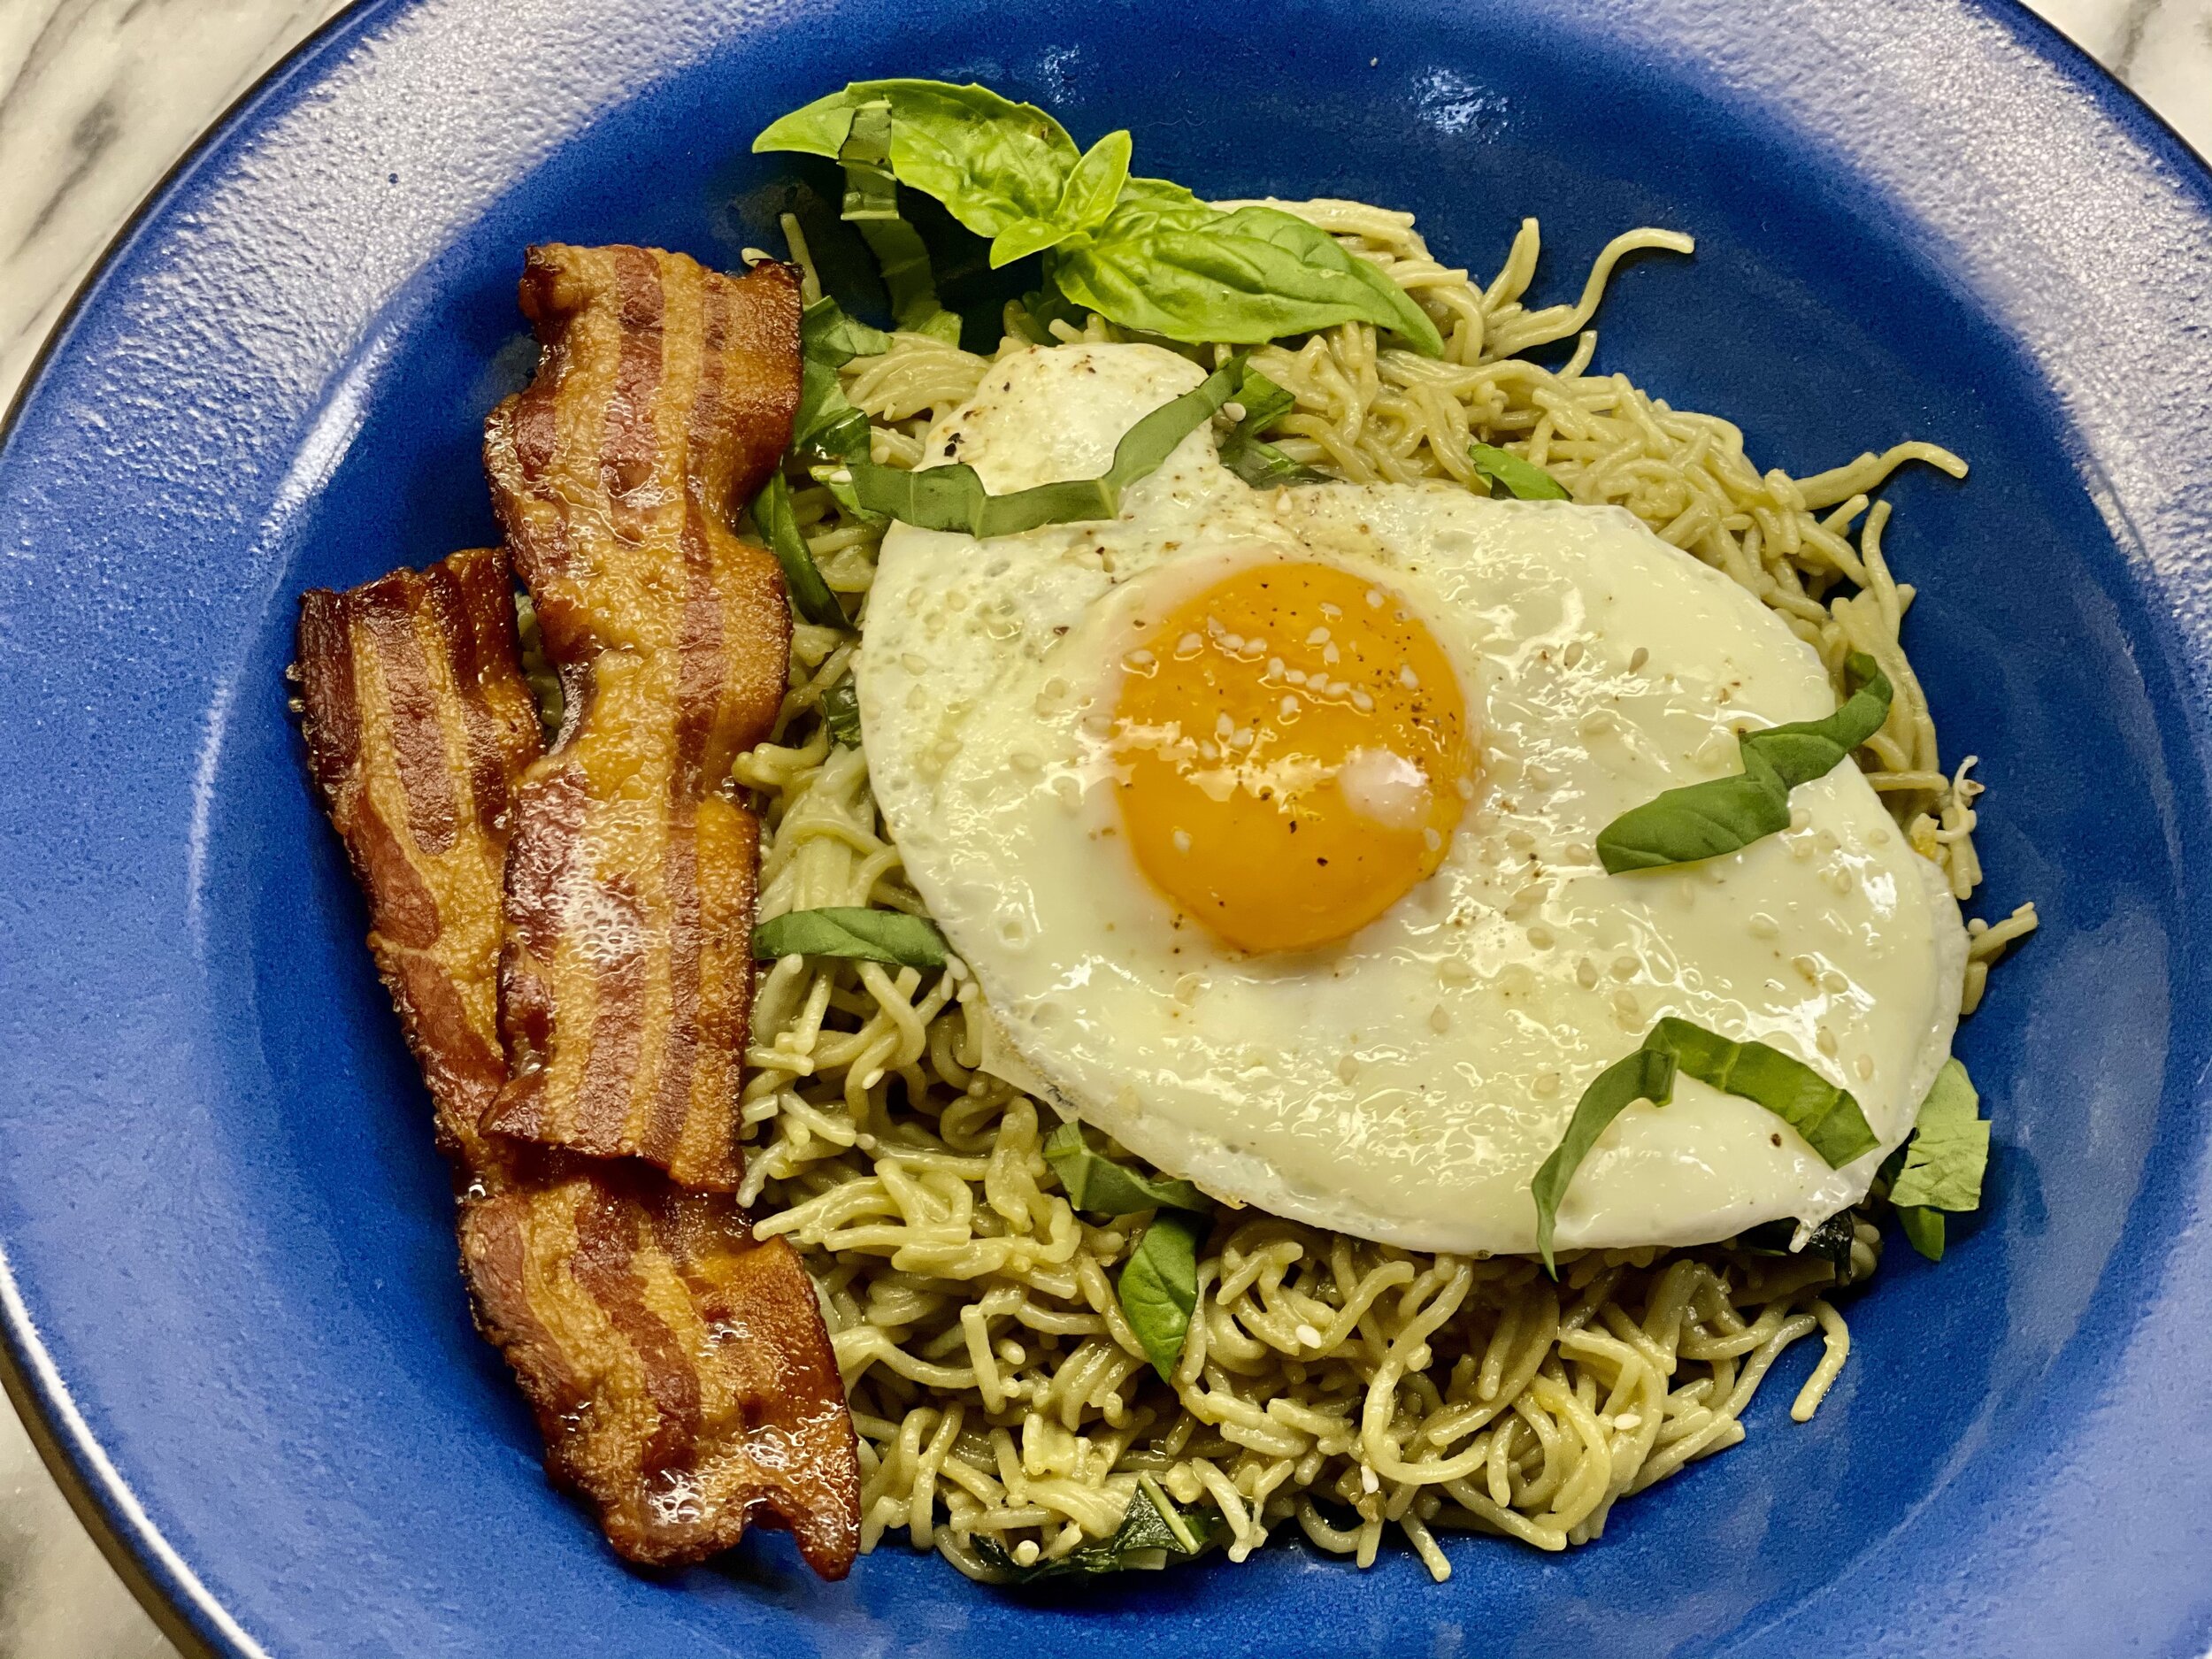
Bacon and egg ramen bowl (low FODMAP)
Prep 10 minutes • Cook 15 minutes • Low FODMAP • Serves 4
Prep 10 minutes • Cook 15 minutes • Gluten-free • Very low Lactose • Low FODMAP • Serves 4 • This ramen makes a great quick supper using basic pantry staples. Perfect for a weeknight pasta dinner or easy Sunday supper. You could even make this for breakfast!
INGREDIENTS
4-6 tablespoons garlic-infused olive oil
4 tablespoons salted butter
4” piece of fresh ginger, peeled and grated
6-8 biscuits (2 packages) of Lotus Foods Jade Pearl rice ramen noodles (or other low FODMAP ramen noodles)
4-6 tablespoons gluten-free low sodium soy sauce
1 cup fresh basil, chopped, plus more for serving
4 eggs
8 slices bacon
Sesame seeds (optional but very pretty)
Freshly ground black pepper
DIRECTIONS
Preheat oven to 400 degrees F.
Line a rimmed baking sheet with foil and lay the bacon slices out flat on the foil.
Cook about 10 minutes in the oven until the bacon has reached your desired crispness. Remove from the oven and put the bacon slices on paper towels to drain and cool. Set aside.
(Cleanup: Once the fat has solidified on the foil you can toss the foil out—fat and all! Such a tidy way to make bacon.)
Meanwhile, cook the ramen noodles according to package instructions. Drain and set aside.
In a large skillet, over medium heat, melt the butter and olive oil together. Add the grated ginger, stirring regularly for about 3 minutes.
Add the cooked ramen noodles, along with the soy sauce, to the frying pan with the ginger. Toss well over medium heat until the ramen is warmed through and coated with the sauce.
Remove from the heat and add the basil, tossing to combine.
Divide the ramen mixture among four warmed bowls.
Add a bit more olive oil to the skillet you used to cook the pasta and place it over medium heat. Crack 4 eggs into the pan – keeping them separated – and cook “sunny side up.” (You may want to put a cover on the pan to help the top cook without overcooking the bottom.)
To serve, top each bowl of ramen with a cooked egg, a sprinkling of toasted sesame seeds, and fresh basil. Season with pepper and serve immediately.
Eat and enjoy every bite because you can!
This post may contain affiliate links so you can easily purchase items listed on the page. There is no increased cost to you for purchasing items through these links so feel free to use them!
More Deliciously Low FODMAP™ main courses you might enjoy
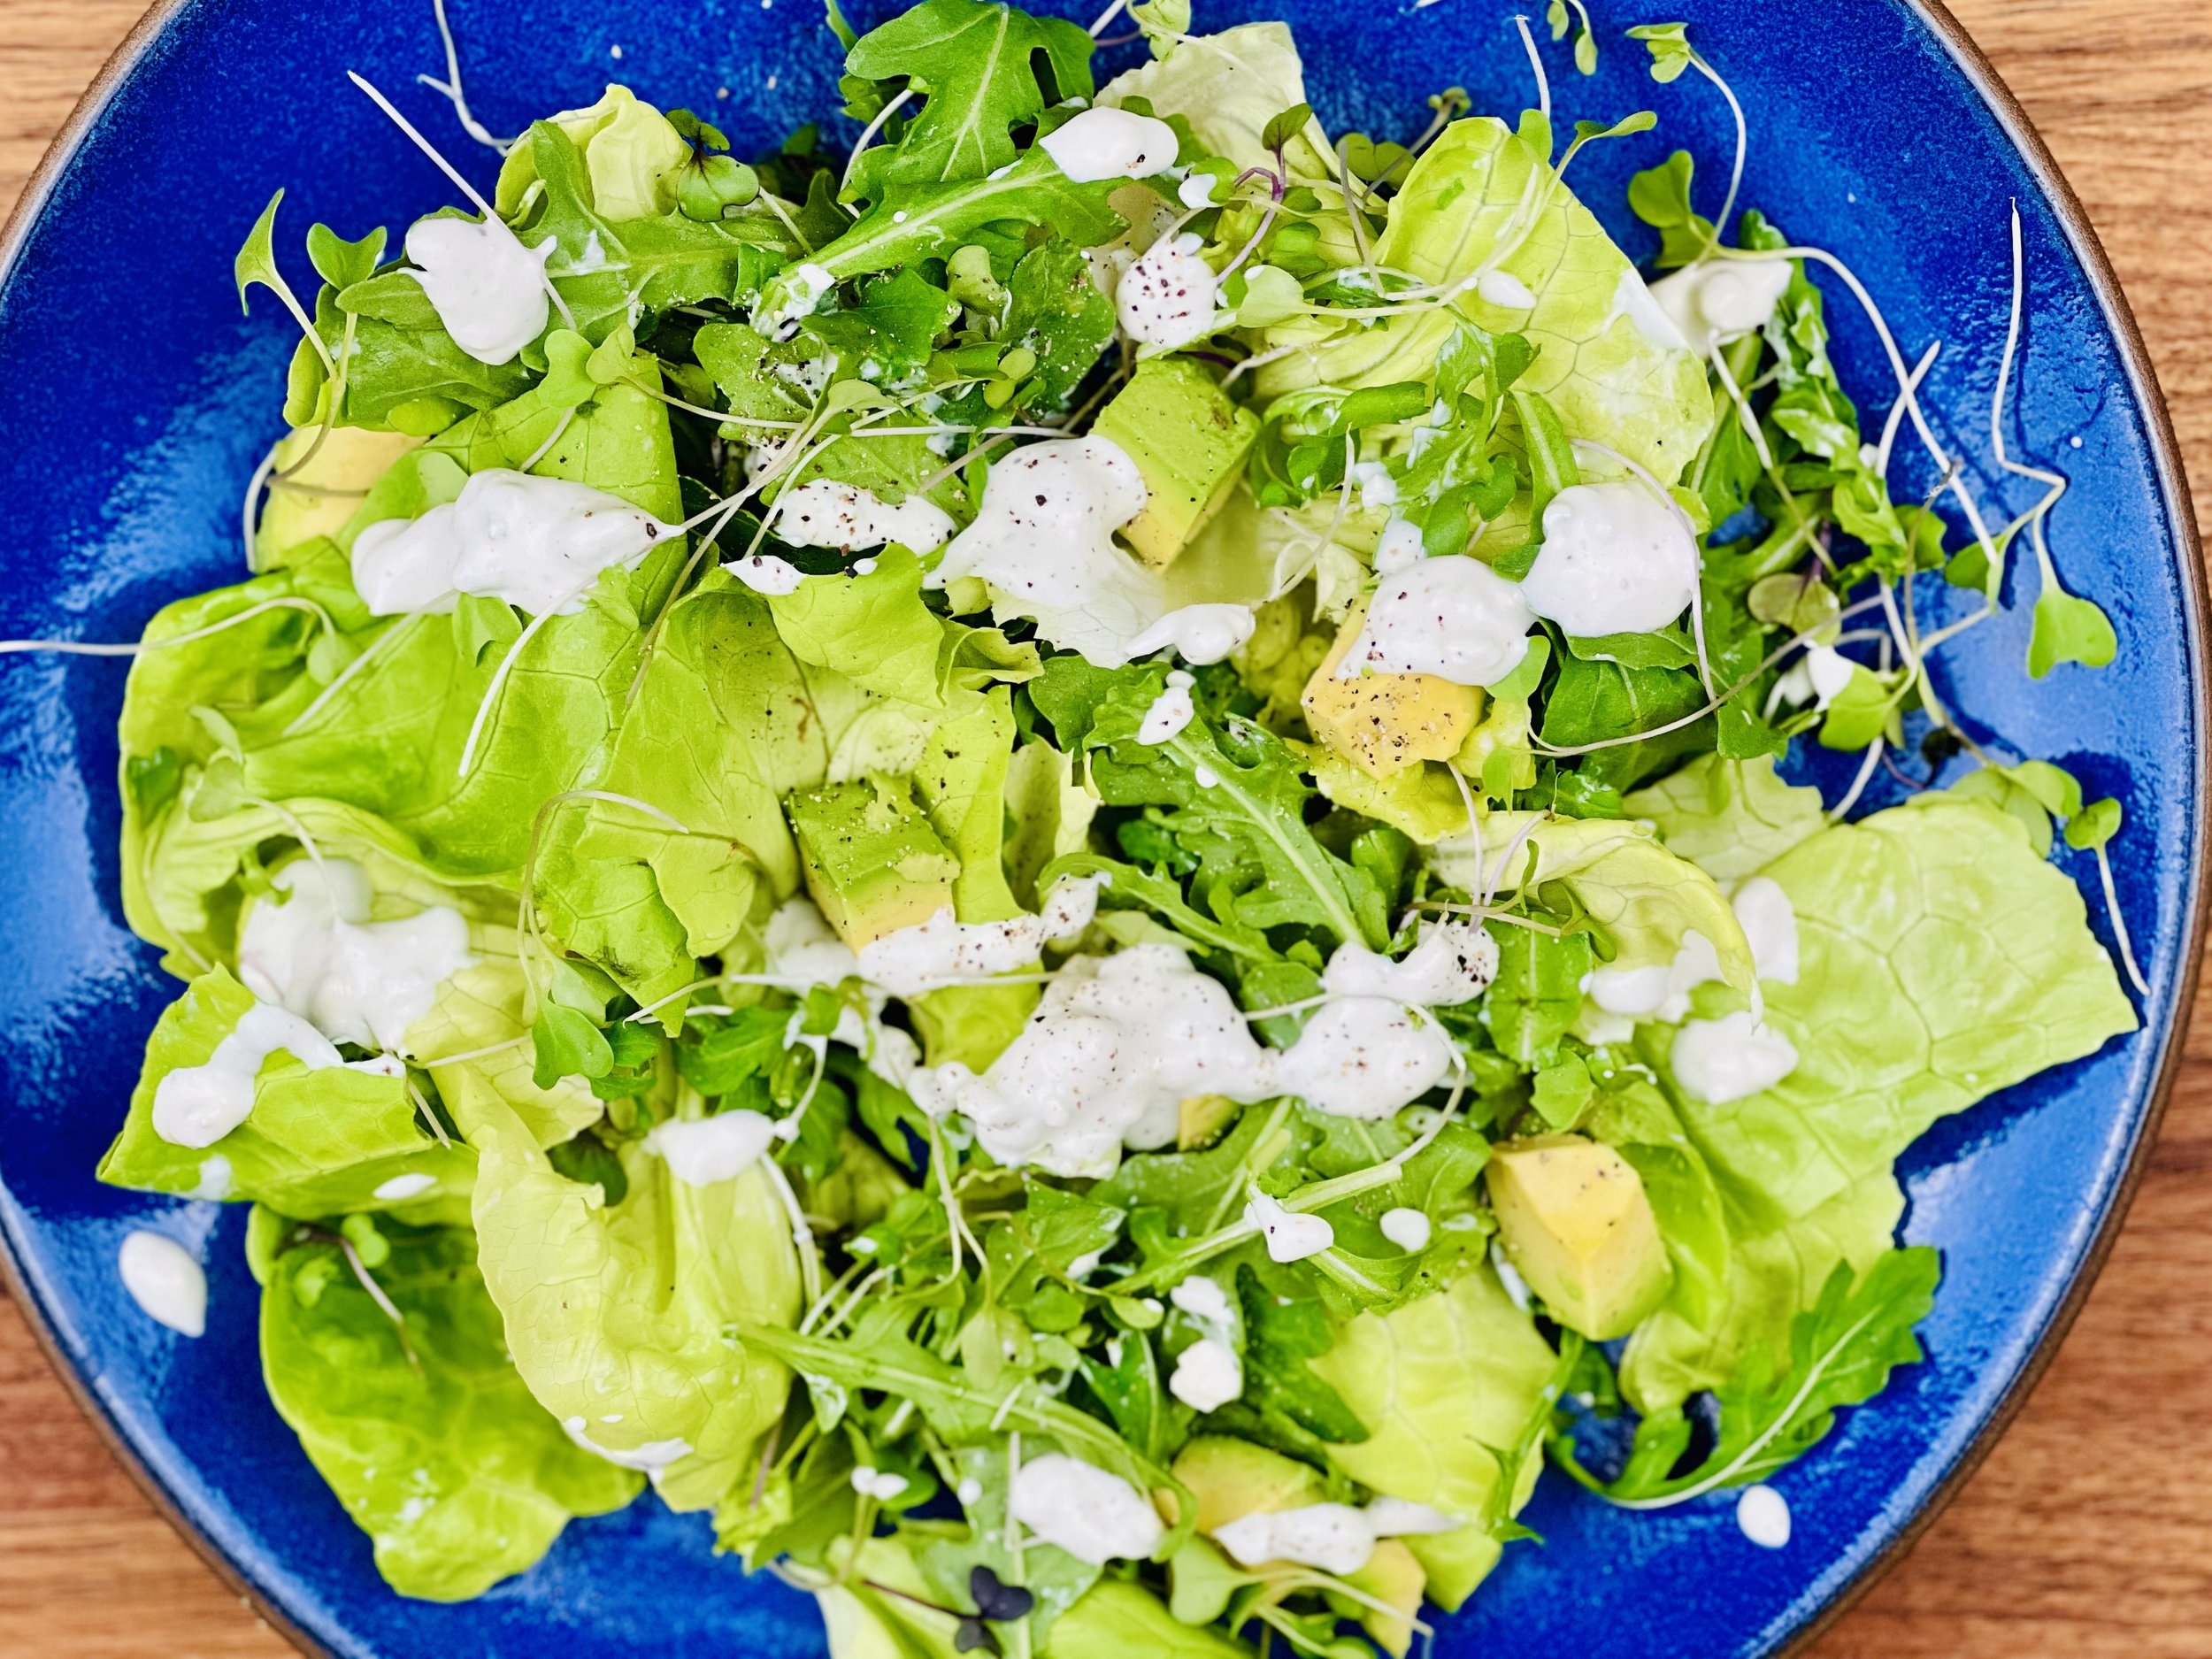
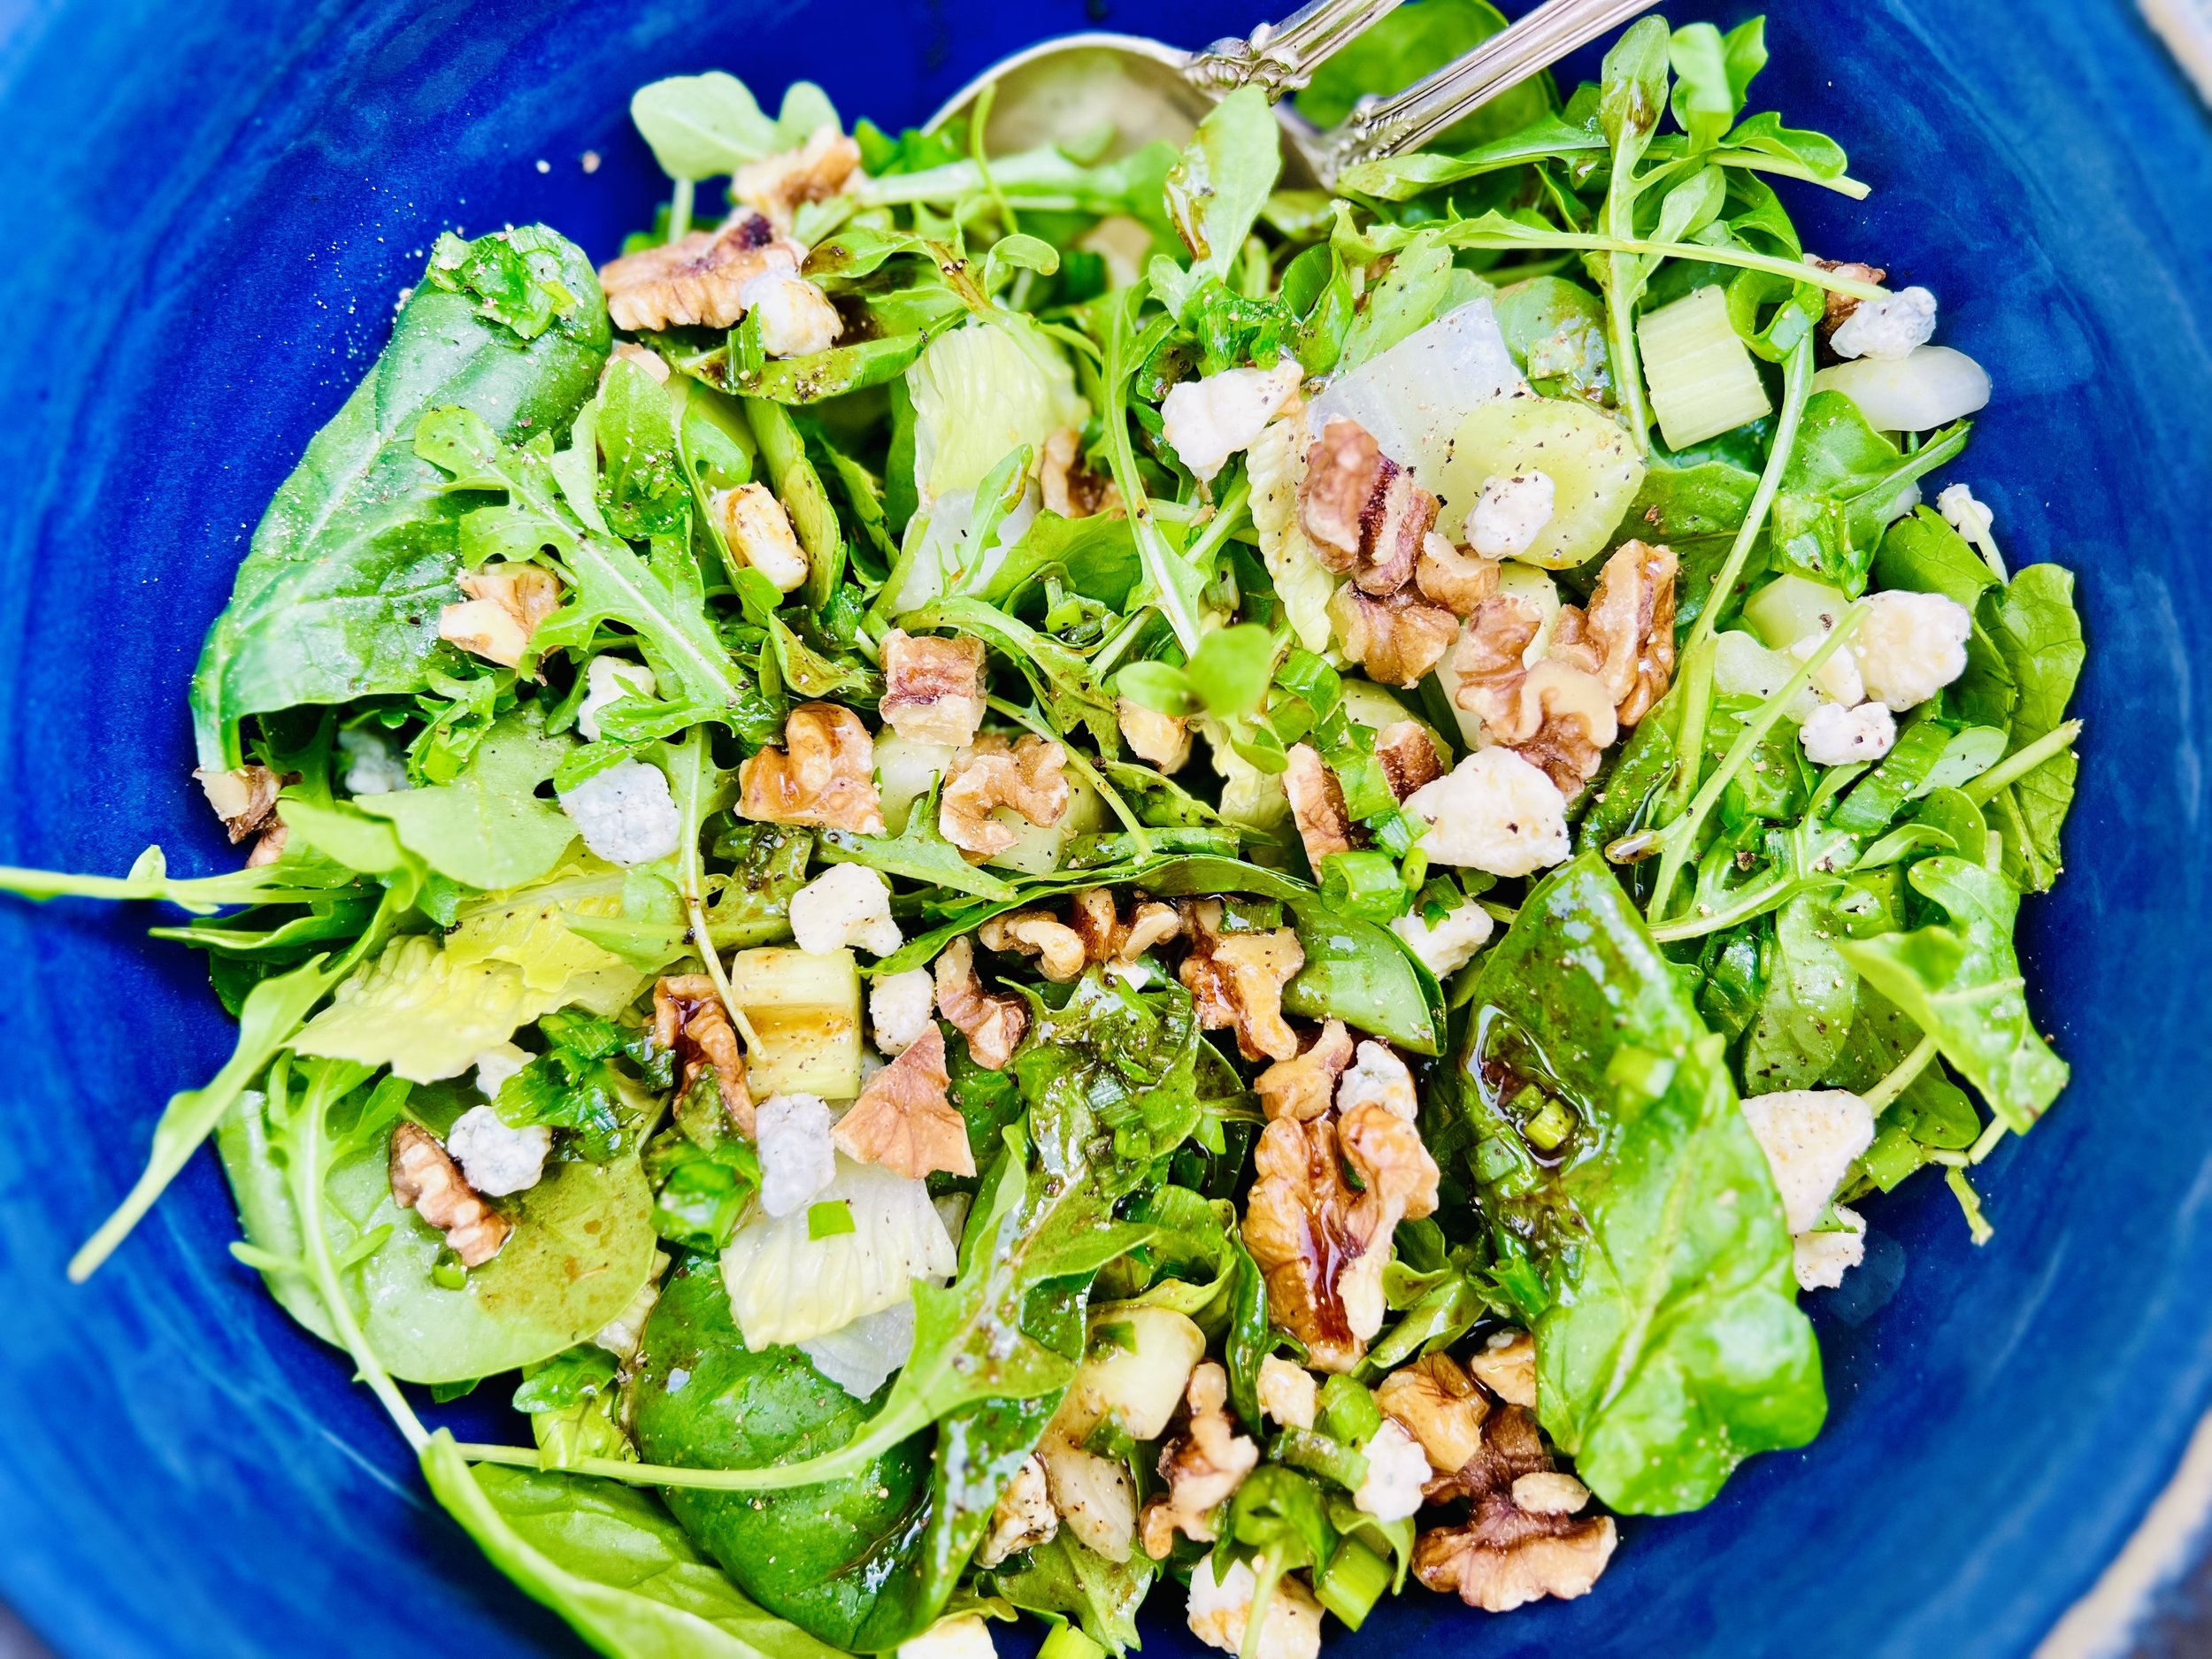
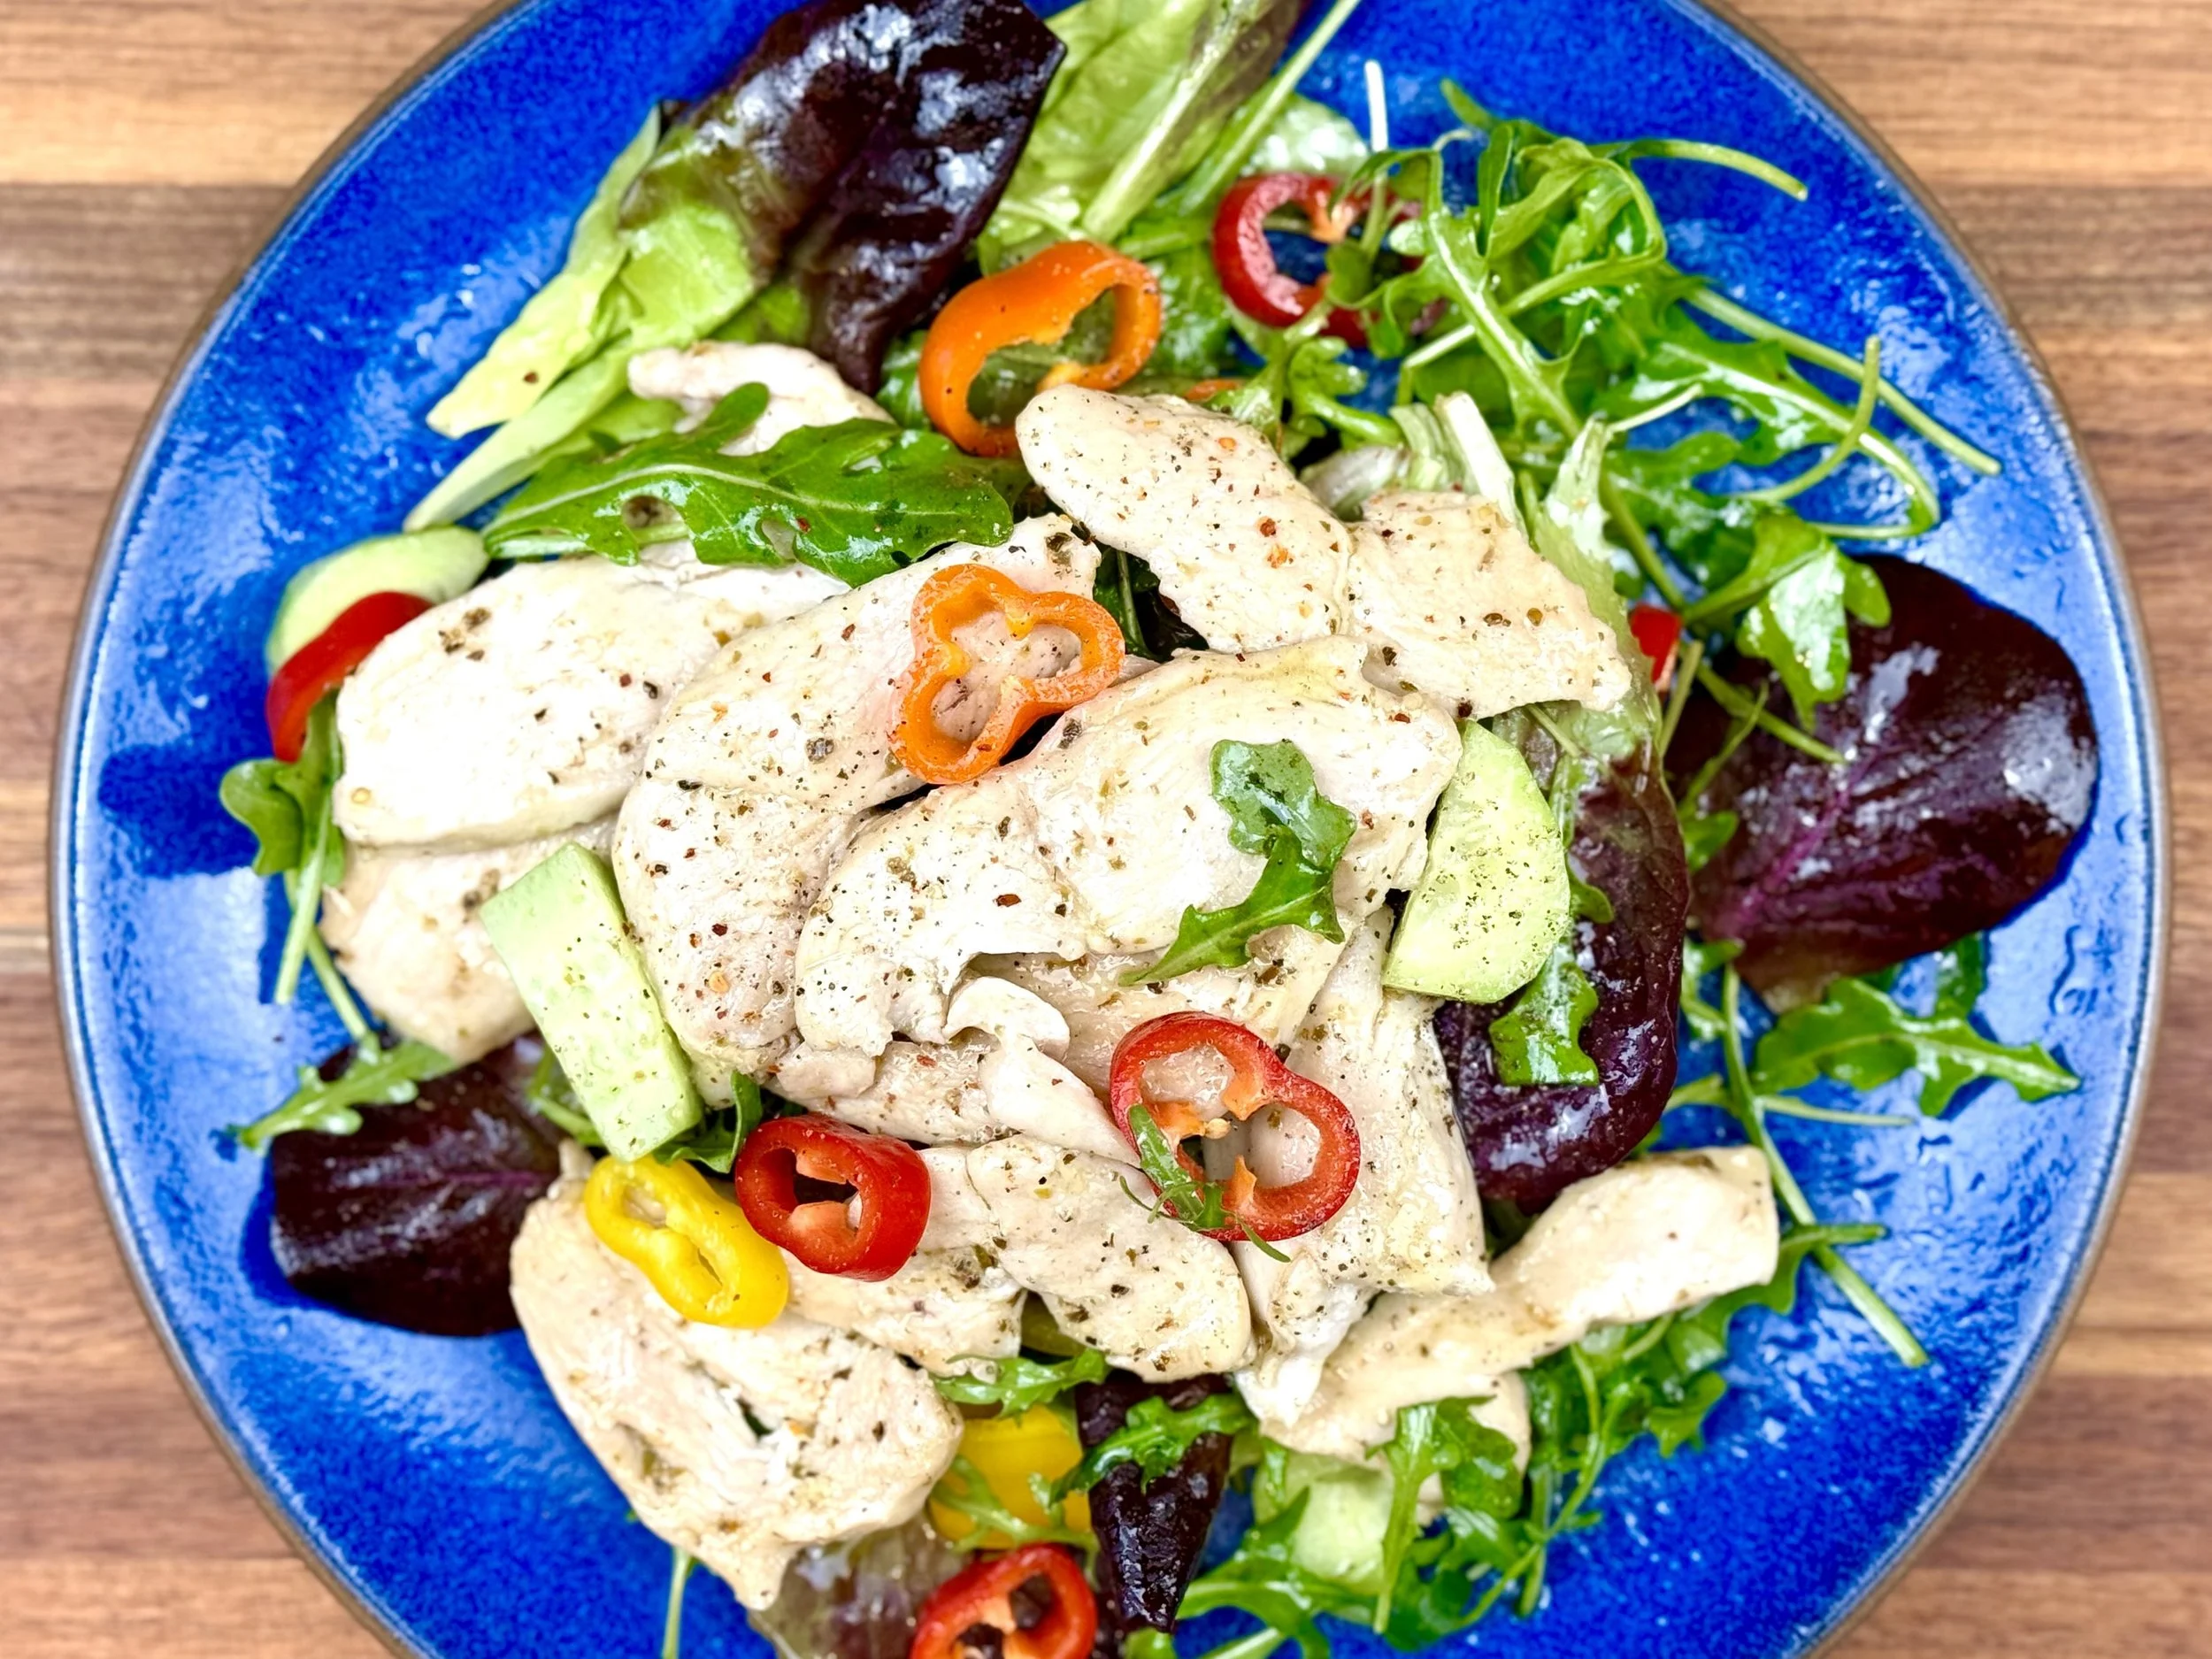
Creamy pasta alfredo and spicy arugula (low FODMAP)
30 minutes • Gluten-free • Low FODMAP • Vegetarian • Serves 4 •
30 minutes • Gluten-free • Low FODMAP • Vegetarian • Serves 4 • I am a huge arugula fan so I absolutely adore this recipe as the sharpness of the arugula provides a wonderful balance with the creaminess of the pasta. You can serve this as a delicious vegetarian main course or a delightful side dish. It’s quick to make and it’s all cooked in one pot so it’s quick to clean up too!

INGREDIENTS:
3 tablespoons salted butter
1 tablespoon garlic-infused olive oil
2 teaspoons dried oregano
2 teaspoons dried basil
1 teaspoon Smoke N Sanity Essence of Onion Salt (10% off with code IBSGC10)
OR 1 scallion (green part only) finely chopped and 1/2 teaspoon salt
1 pound gluten-free pasta (I like Andean Dream quinoa fusilli)
1/2 cup lactose-free whole milk or canned coconut milk
1/2 cup heavy cream or canned coconut milk
2 ounces lactose-free cream cheese, at room temperature
2 cups grated Parmesan cheese, plus more for serving
3 tablespoons chopped fresh parsley
1 tablespoon garlic-infused olive oil
Juice from 1 lemon
2 scallions (green part only), finely chopped
2 cups baby arugula
1/2 cup mixed fresh herbs, such as parsley and basil chopped
DIRECTIONS:
In a large pot set over medium heat, melt together the butter, 1 tablespoon garlic-infused olive oil, oregano, basil, Salt n’ Sanity Essence of Onion salt, and a pinch of red pepper. Cook for about a minute to bloom the seasonings. Pour in 3 1/2 cups of water and bring to a boil over high heat. Add 1 teaspoon salt and the pasta and cook, stirring occasionally, for about 8 minutes. Do not drain the water. Stir in the milk, cream, and cream cheese and cook until the cream cheese has melted and the pasta is al dente, about 4-6 minutes more.
Stir in the parmesan until melted and creamy. Remove from the heat. Stir in the parsley and season with freshly ground black pepper and additional salt (if needed).
To make the arugula, whisk together the olive oil, lemon juice, green onion, and a pinch each of red pepper, salt, and pepper. Add the arugula and mixed herbs, toss to coat.
Serve the pasta topped with arugula and extra parmesan.
Eat and enjoy every bite because you can!
Pro tip: We love and recommend Smoke N Sanity’s Essence of Onion Salt for its wonderful low FODMAP flavor. Get 10% off when you order your own bottle and use the code “IBSGC10”
This post may contain affiliate links so you can easily purchase items listed on the page. There is no increased cost to you for purchasing items through these links so feel free to use them!
More Deliciously Low FODMAP™ main courses you might enjoy
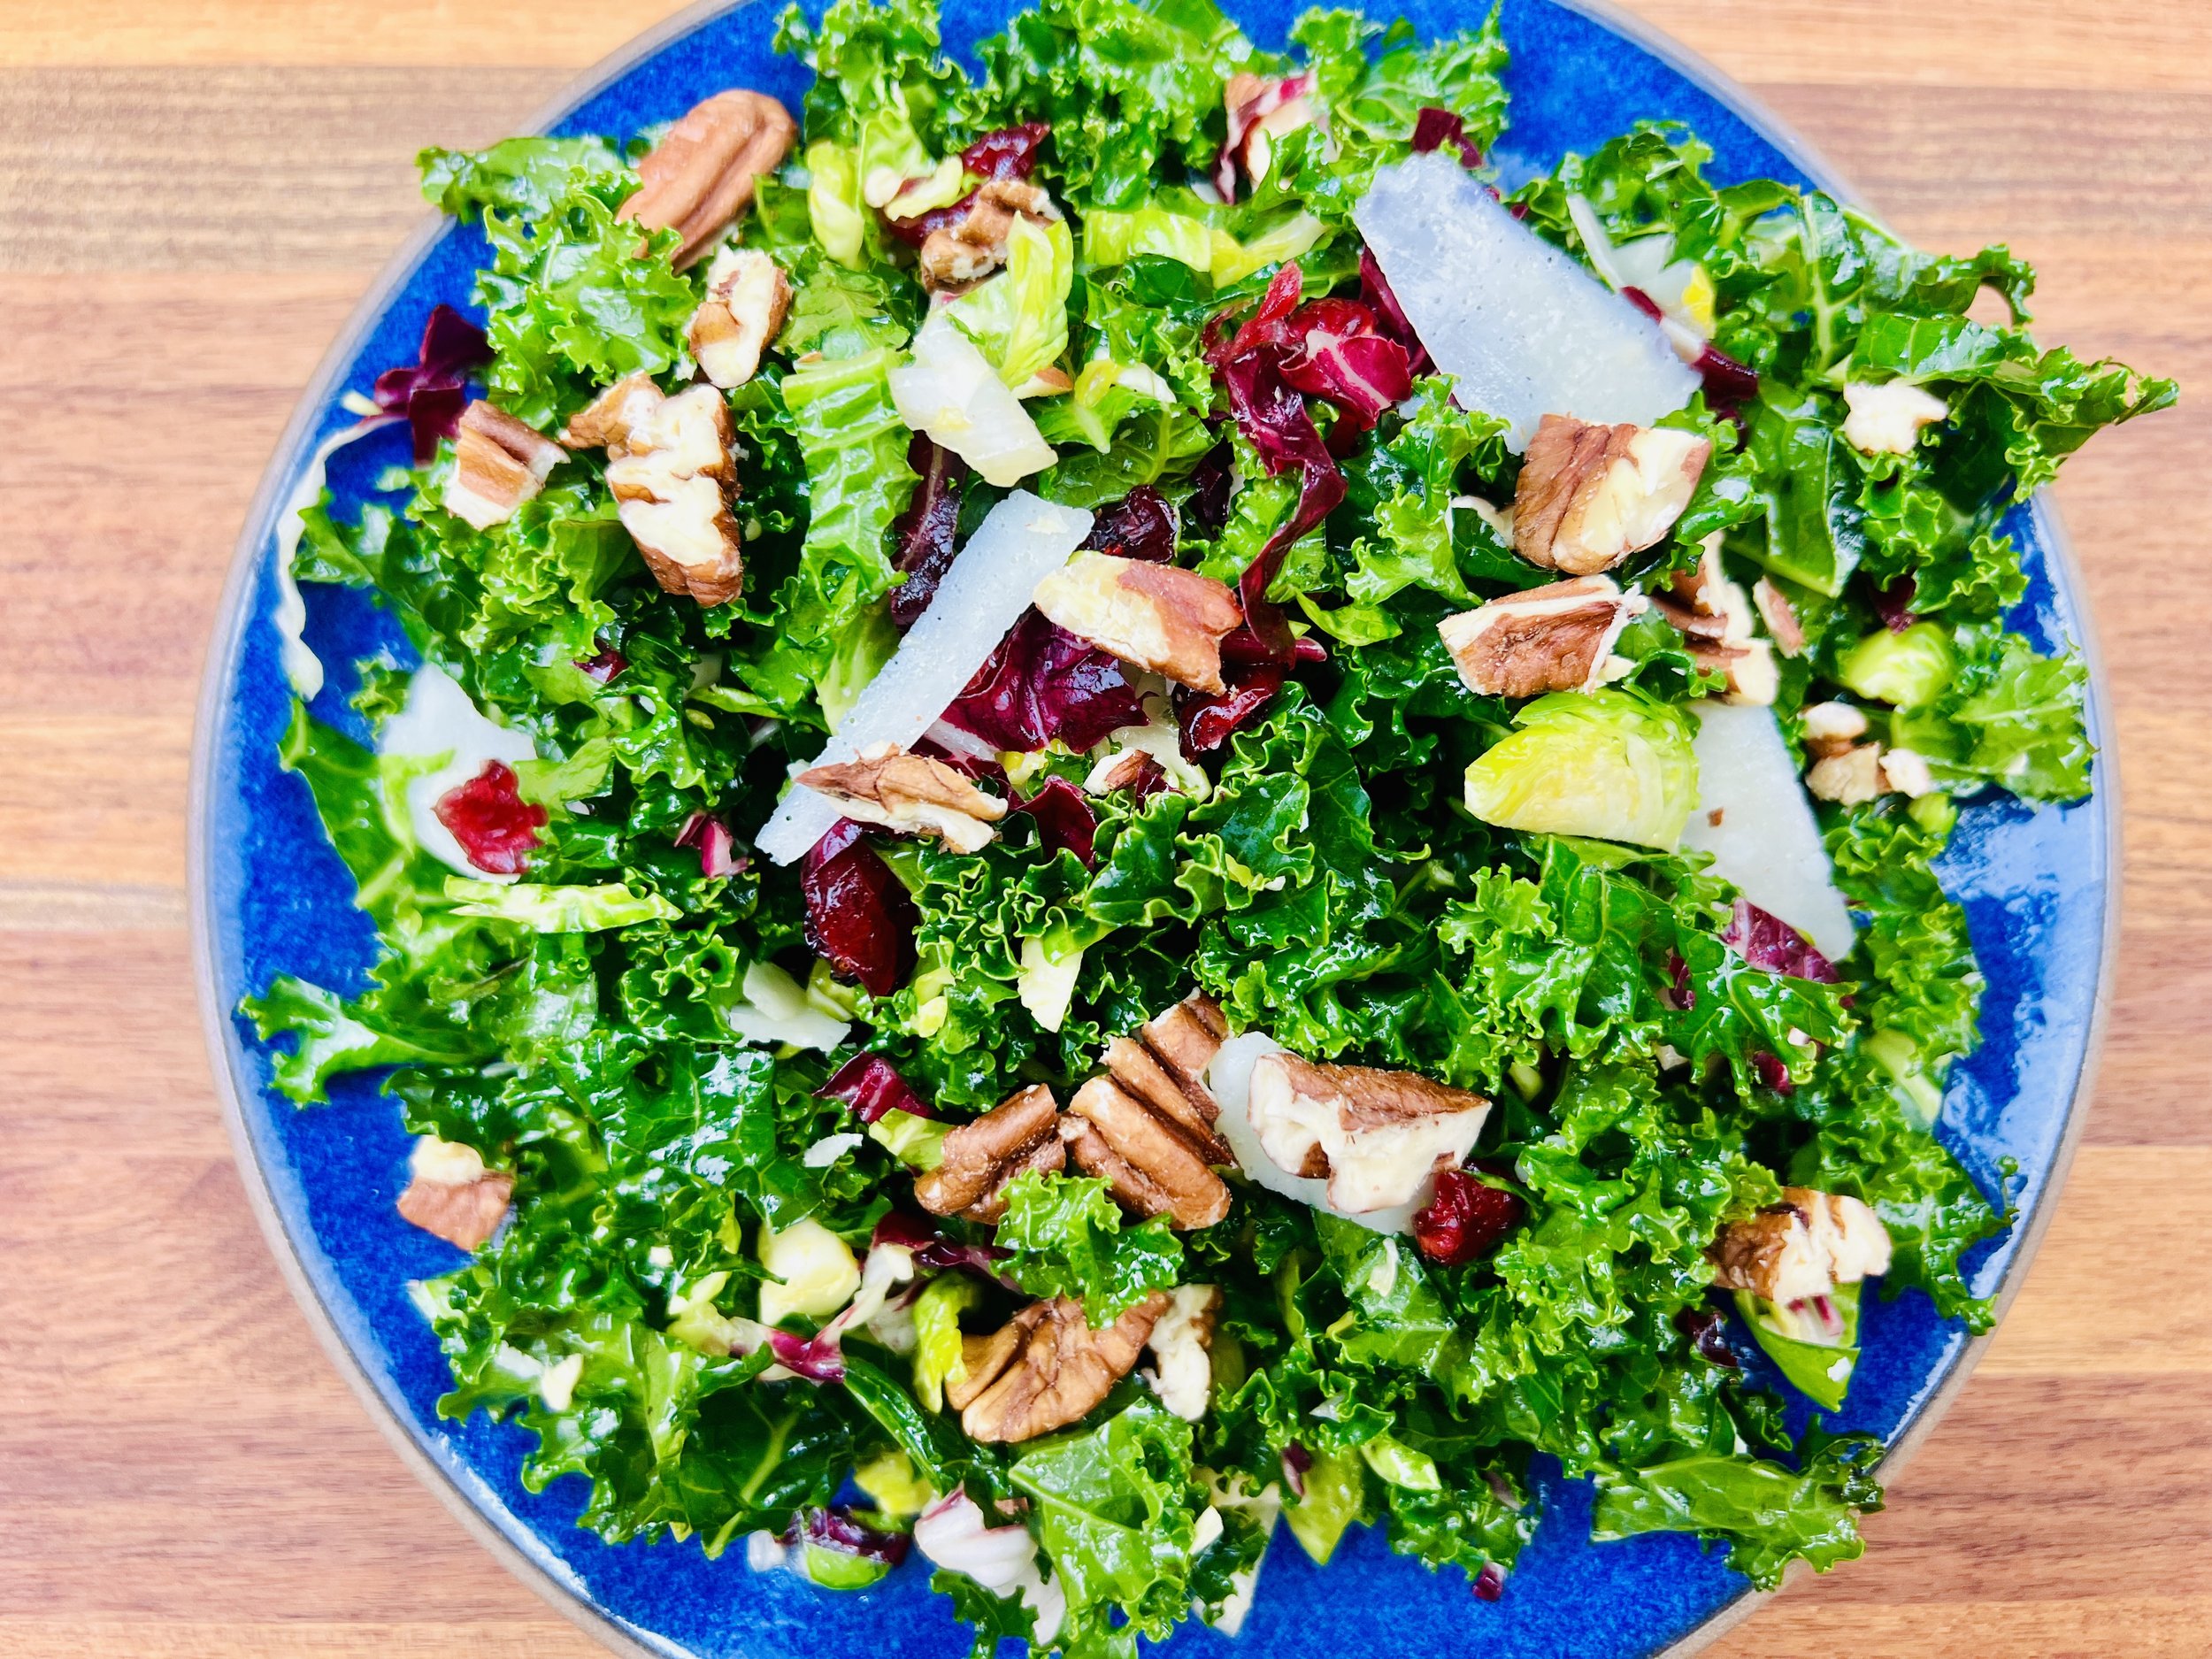
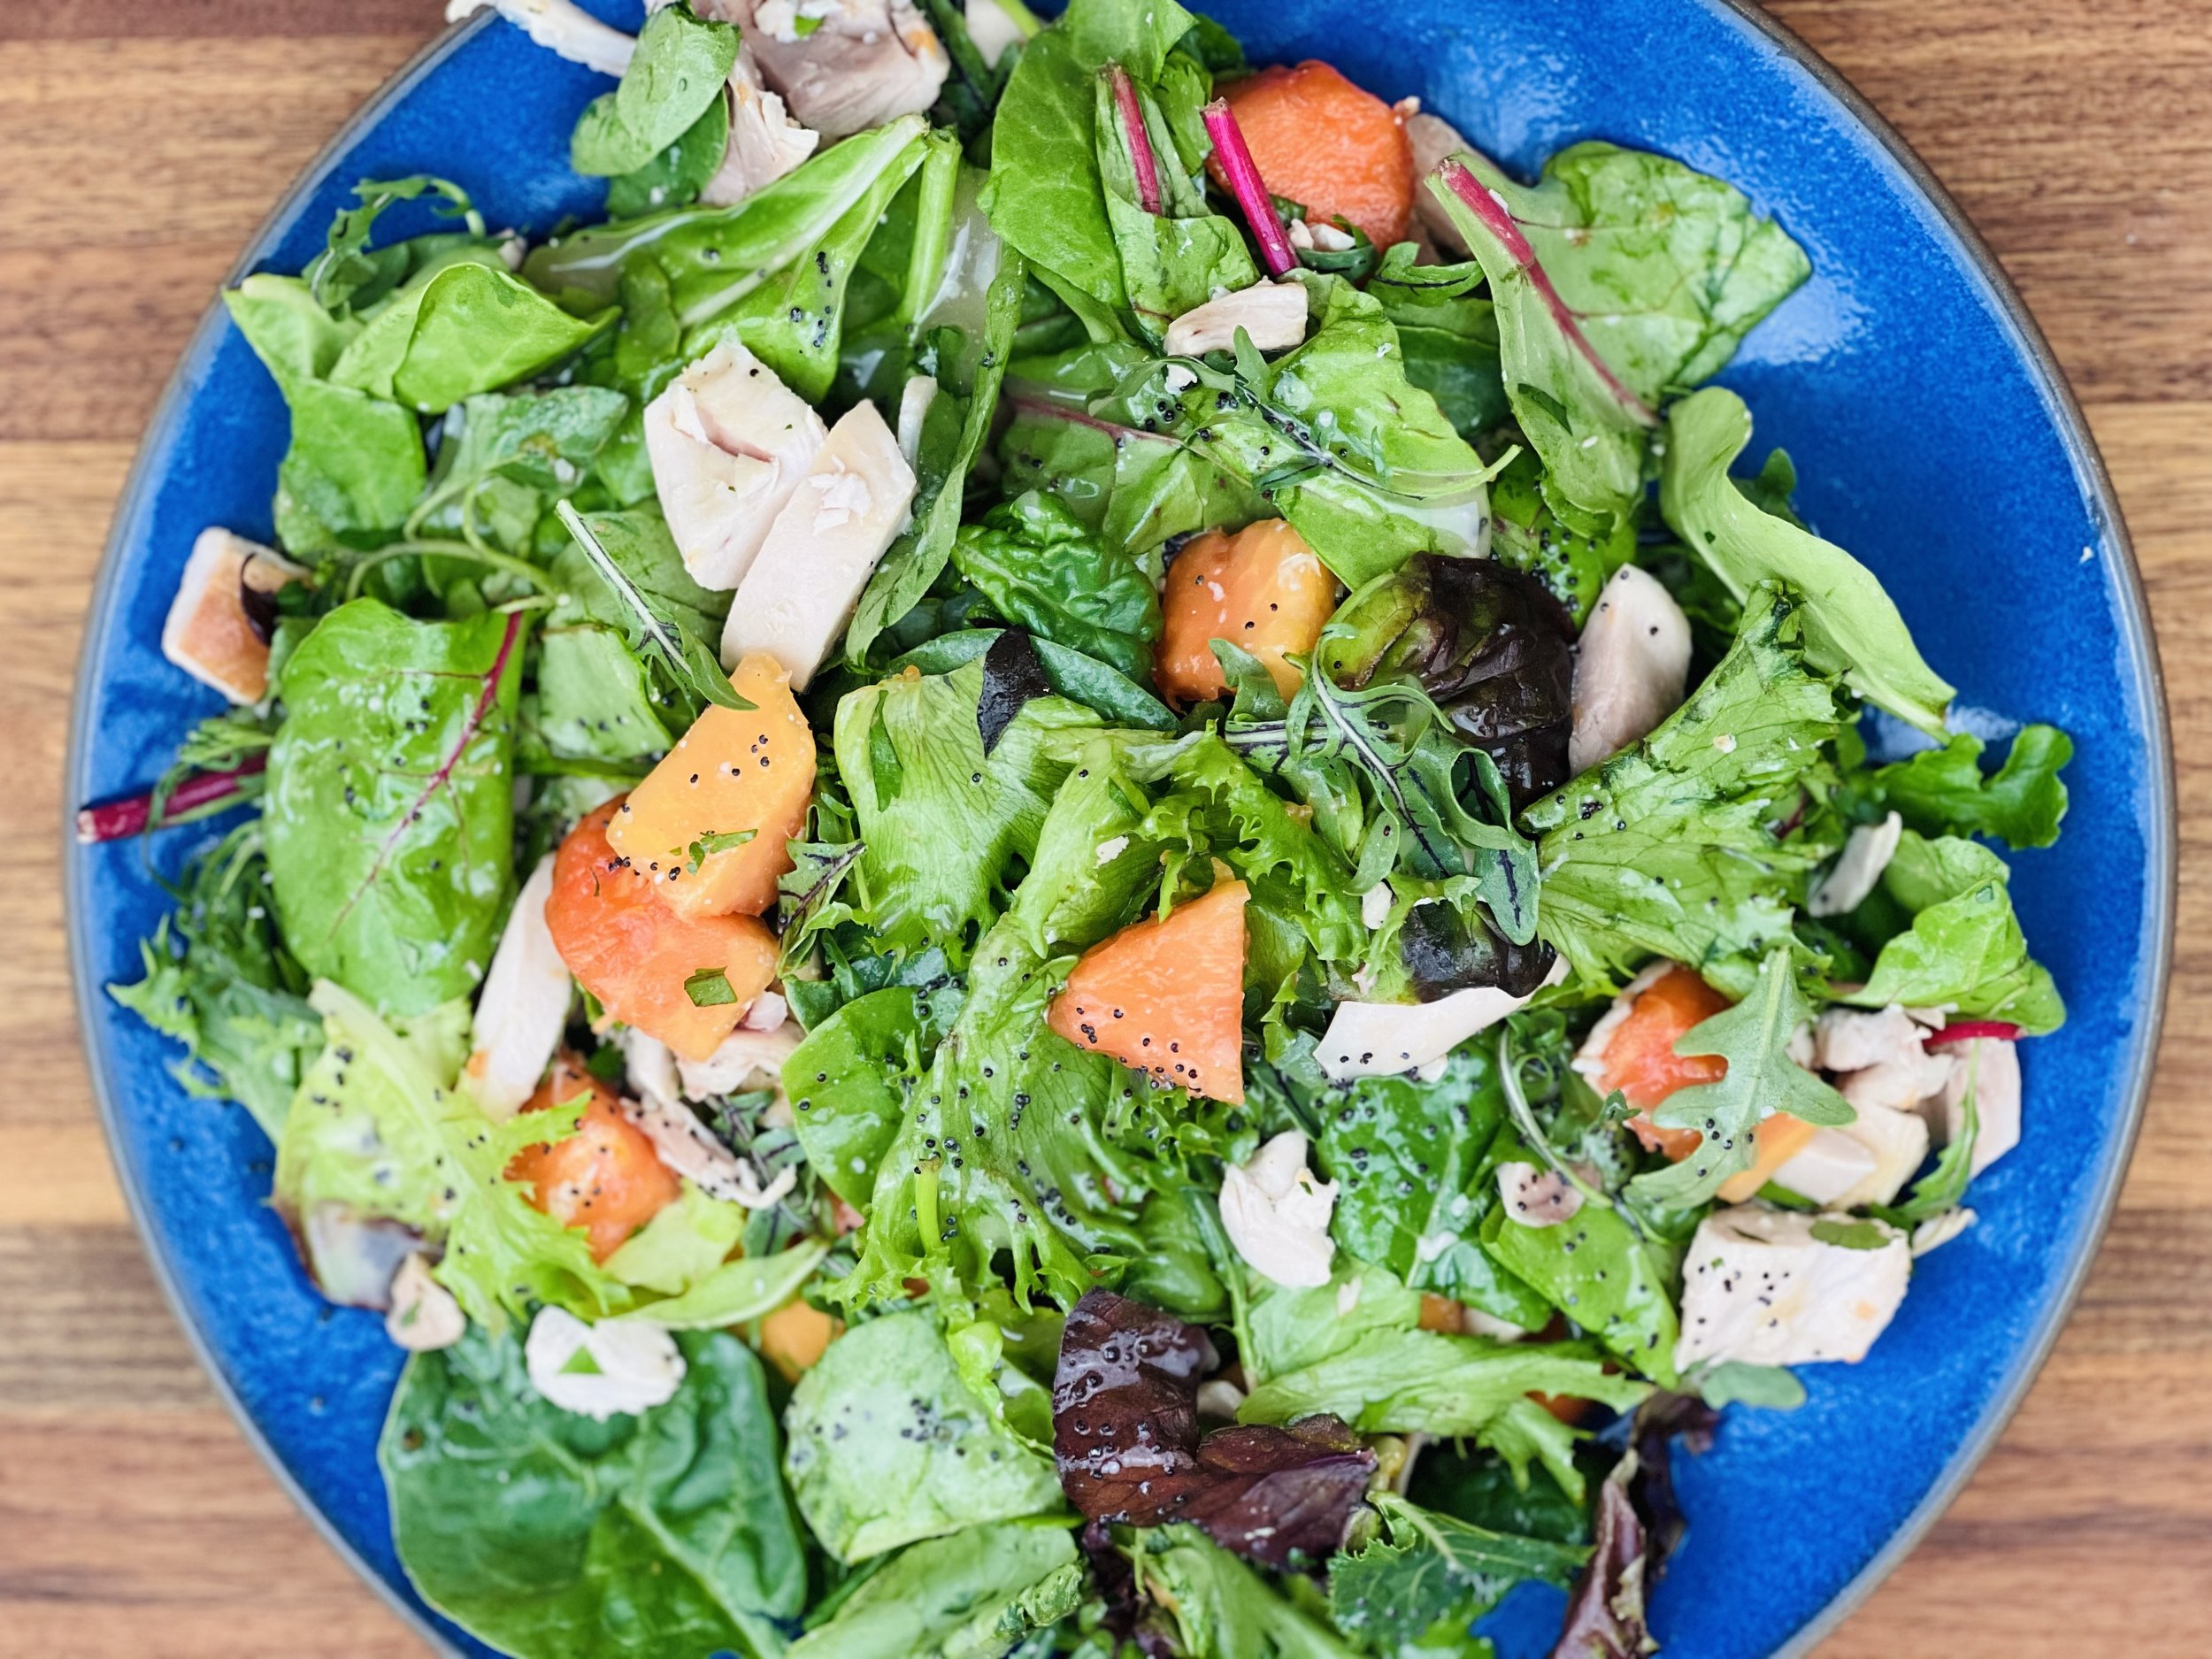
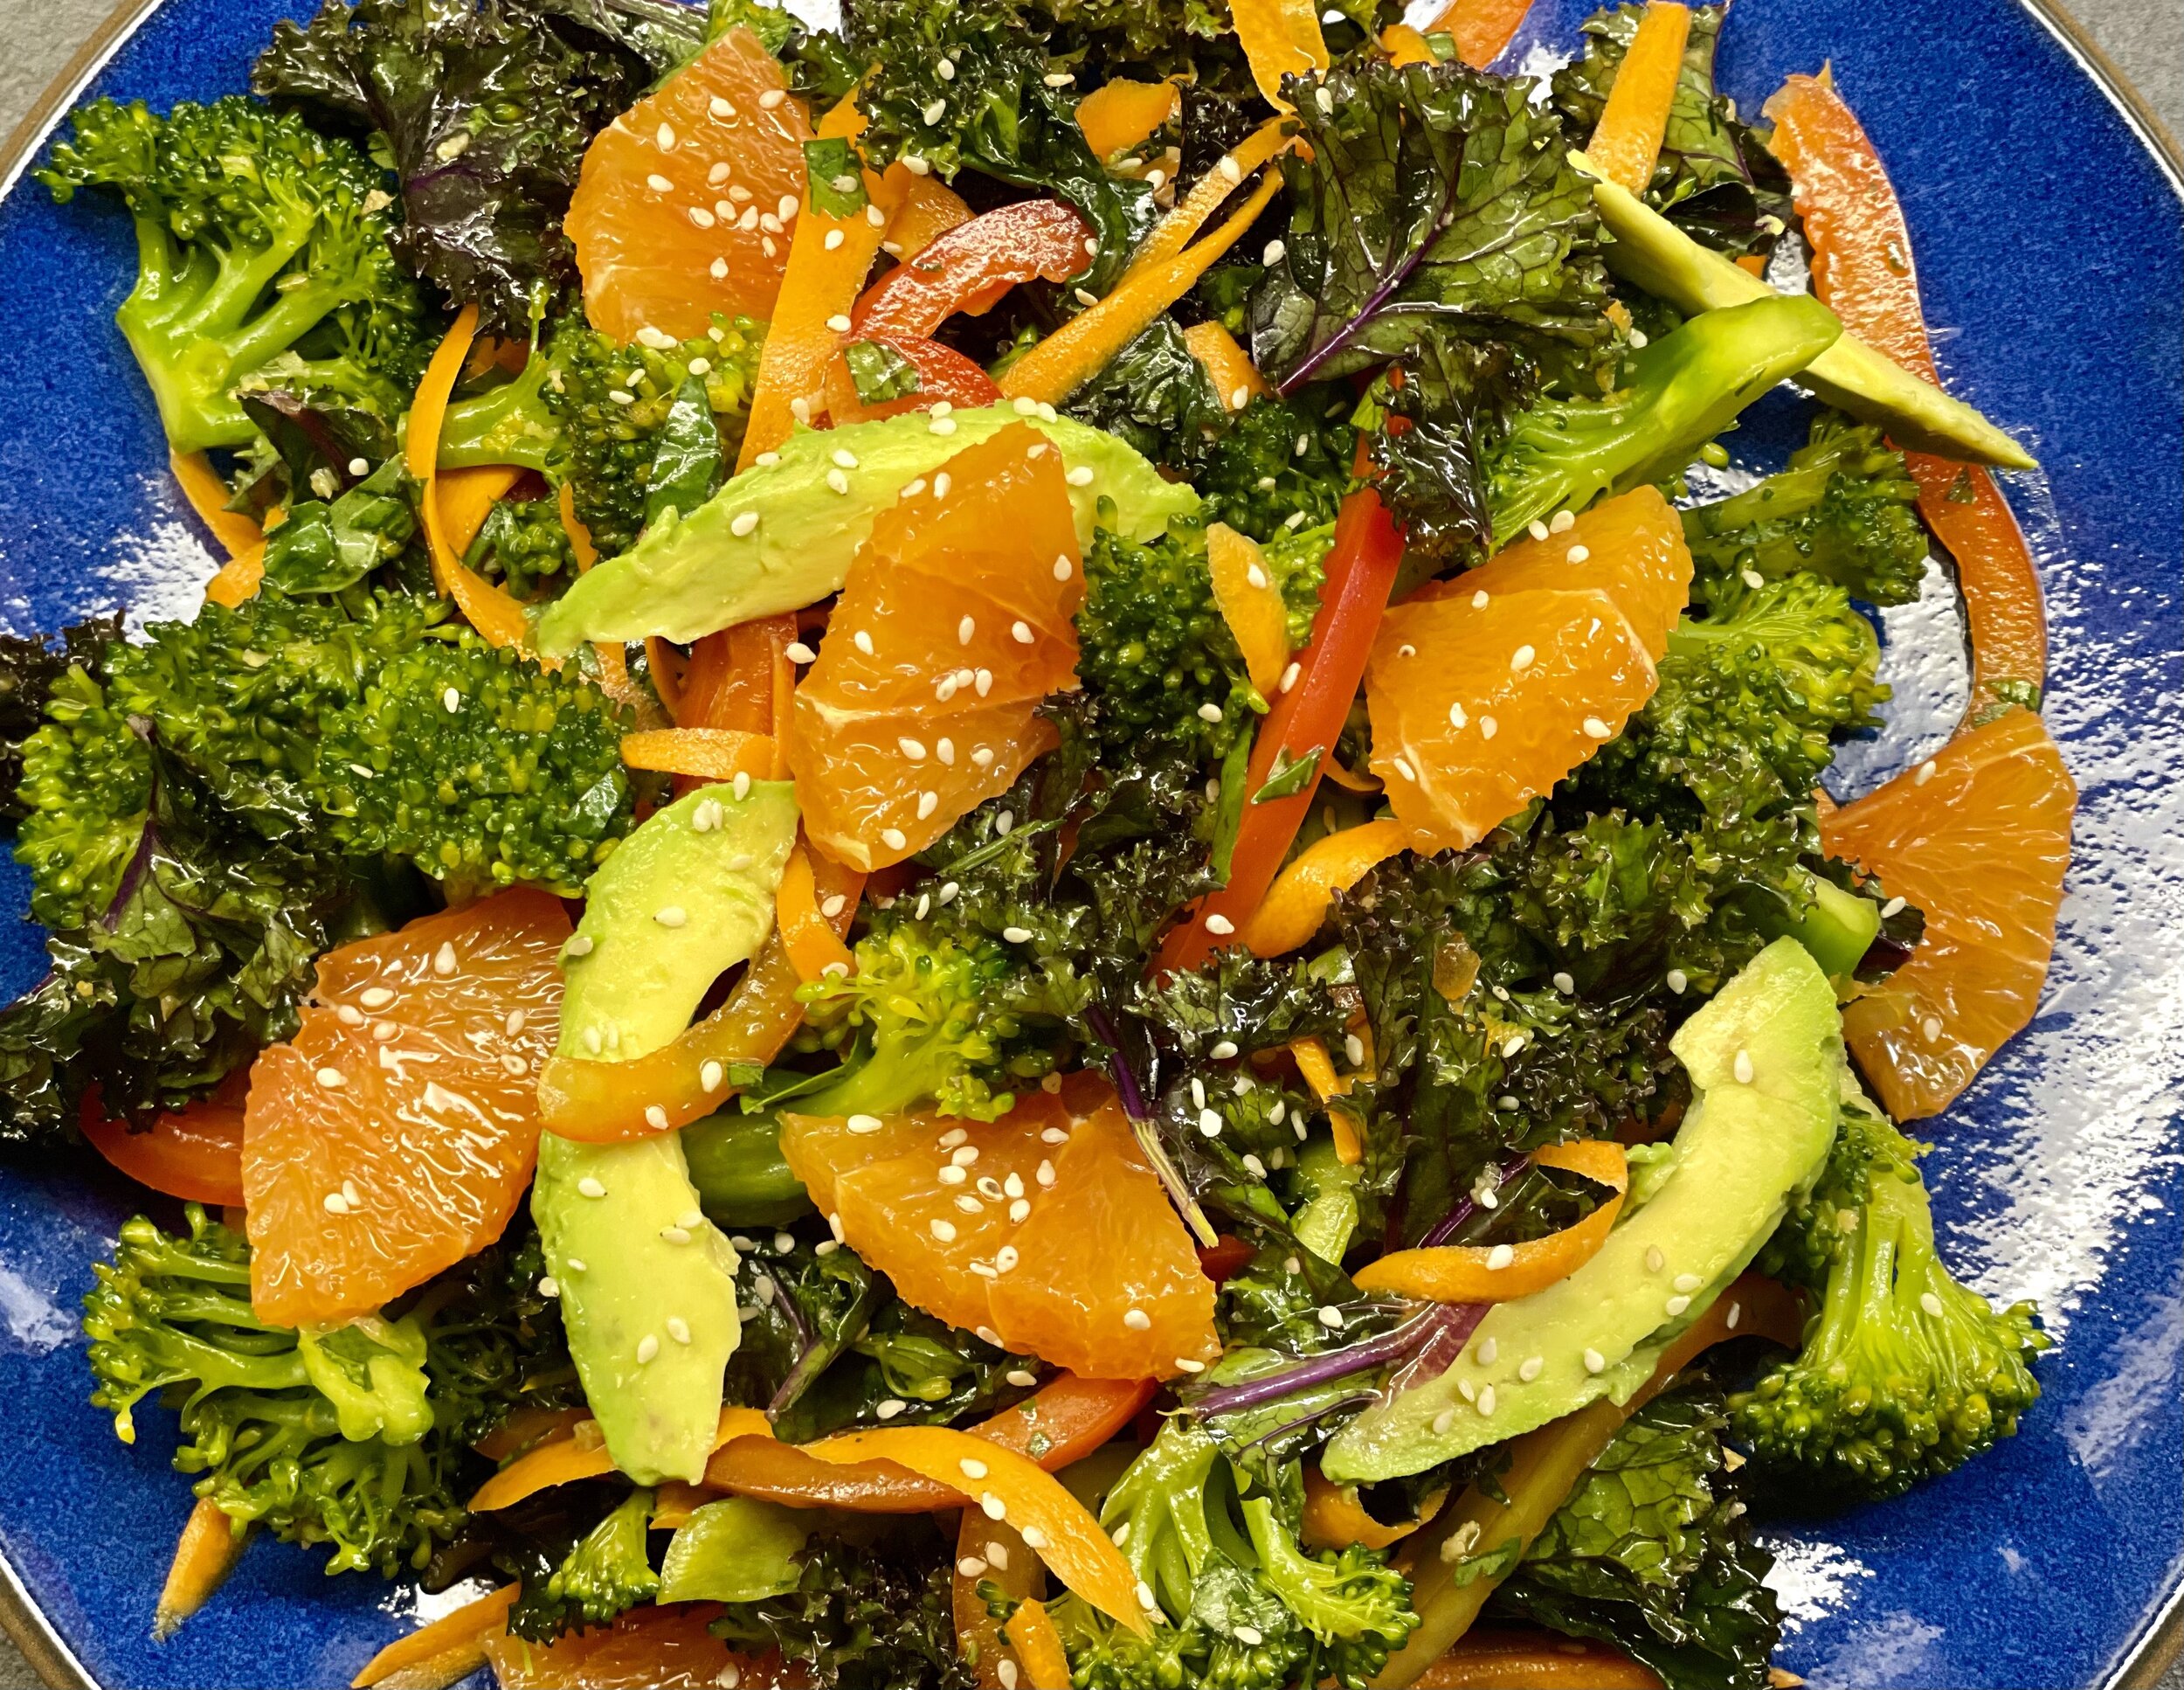
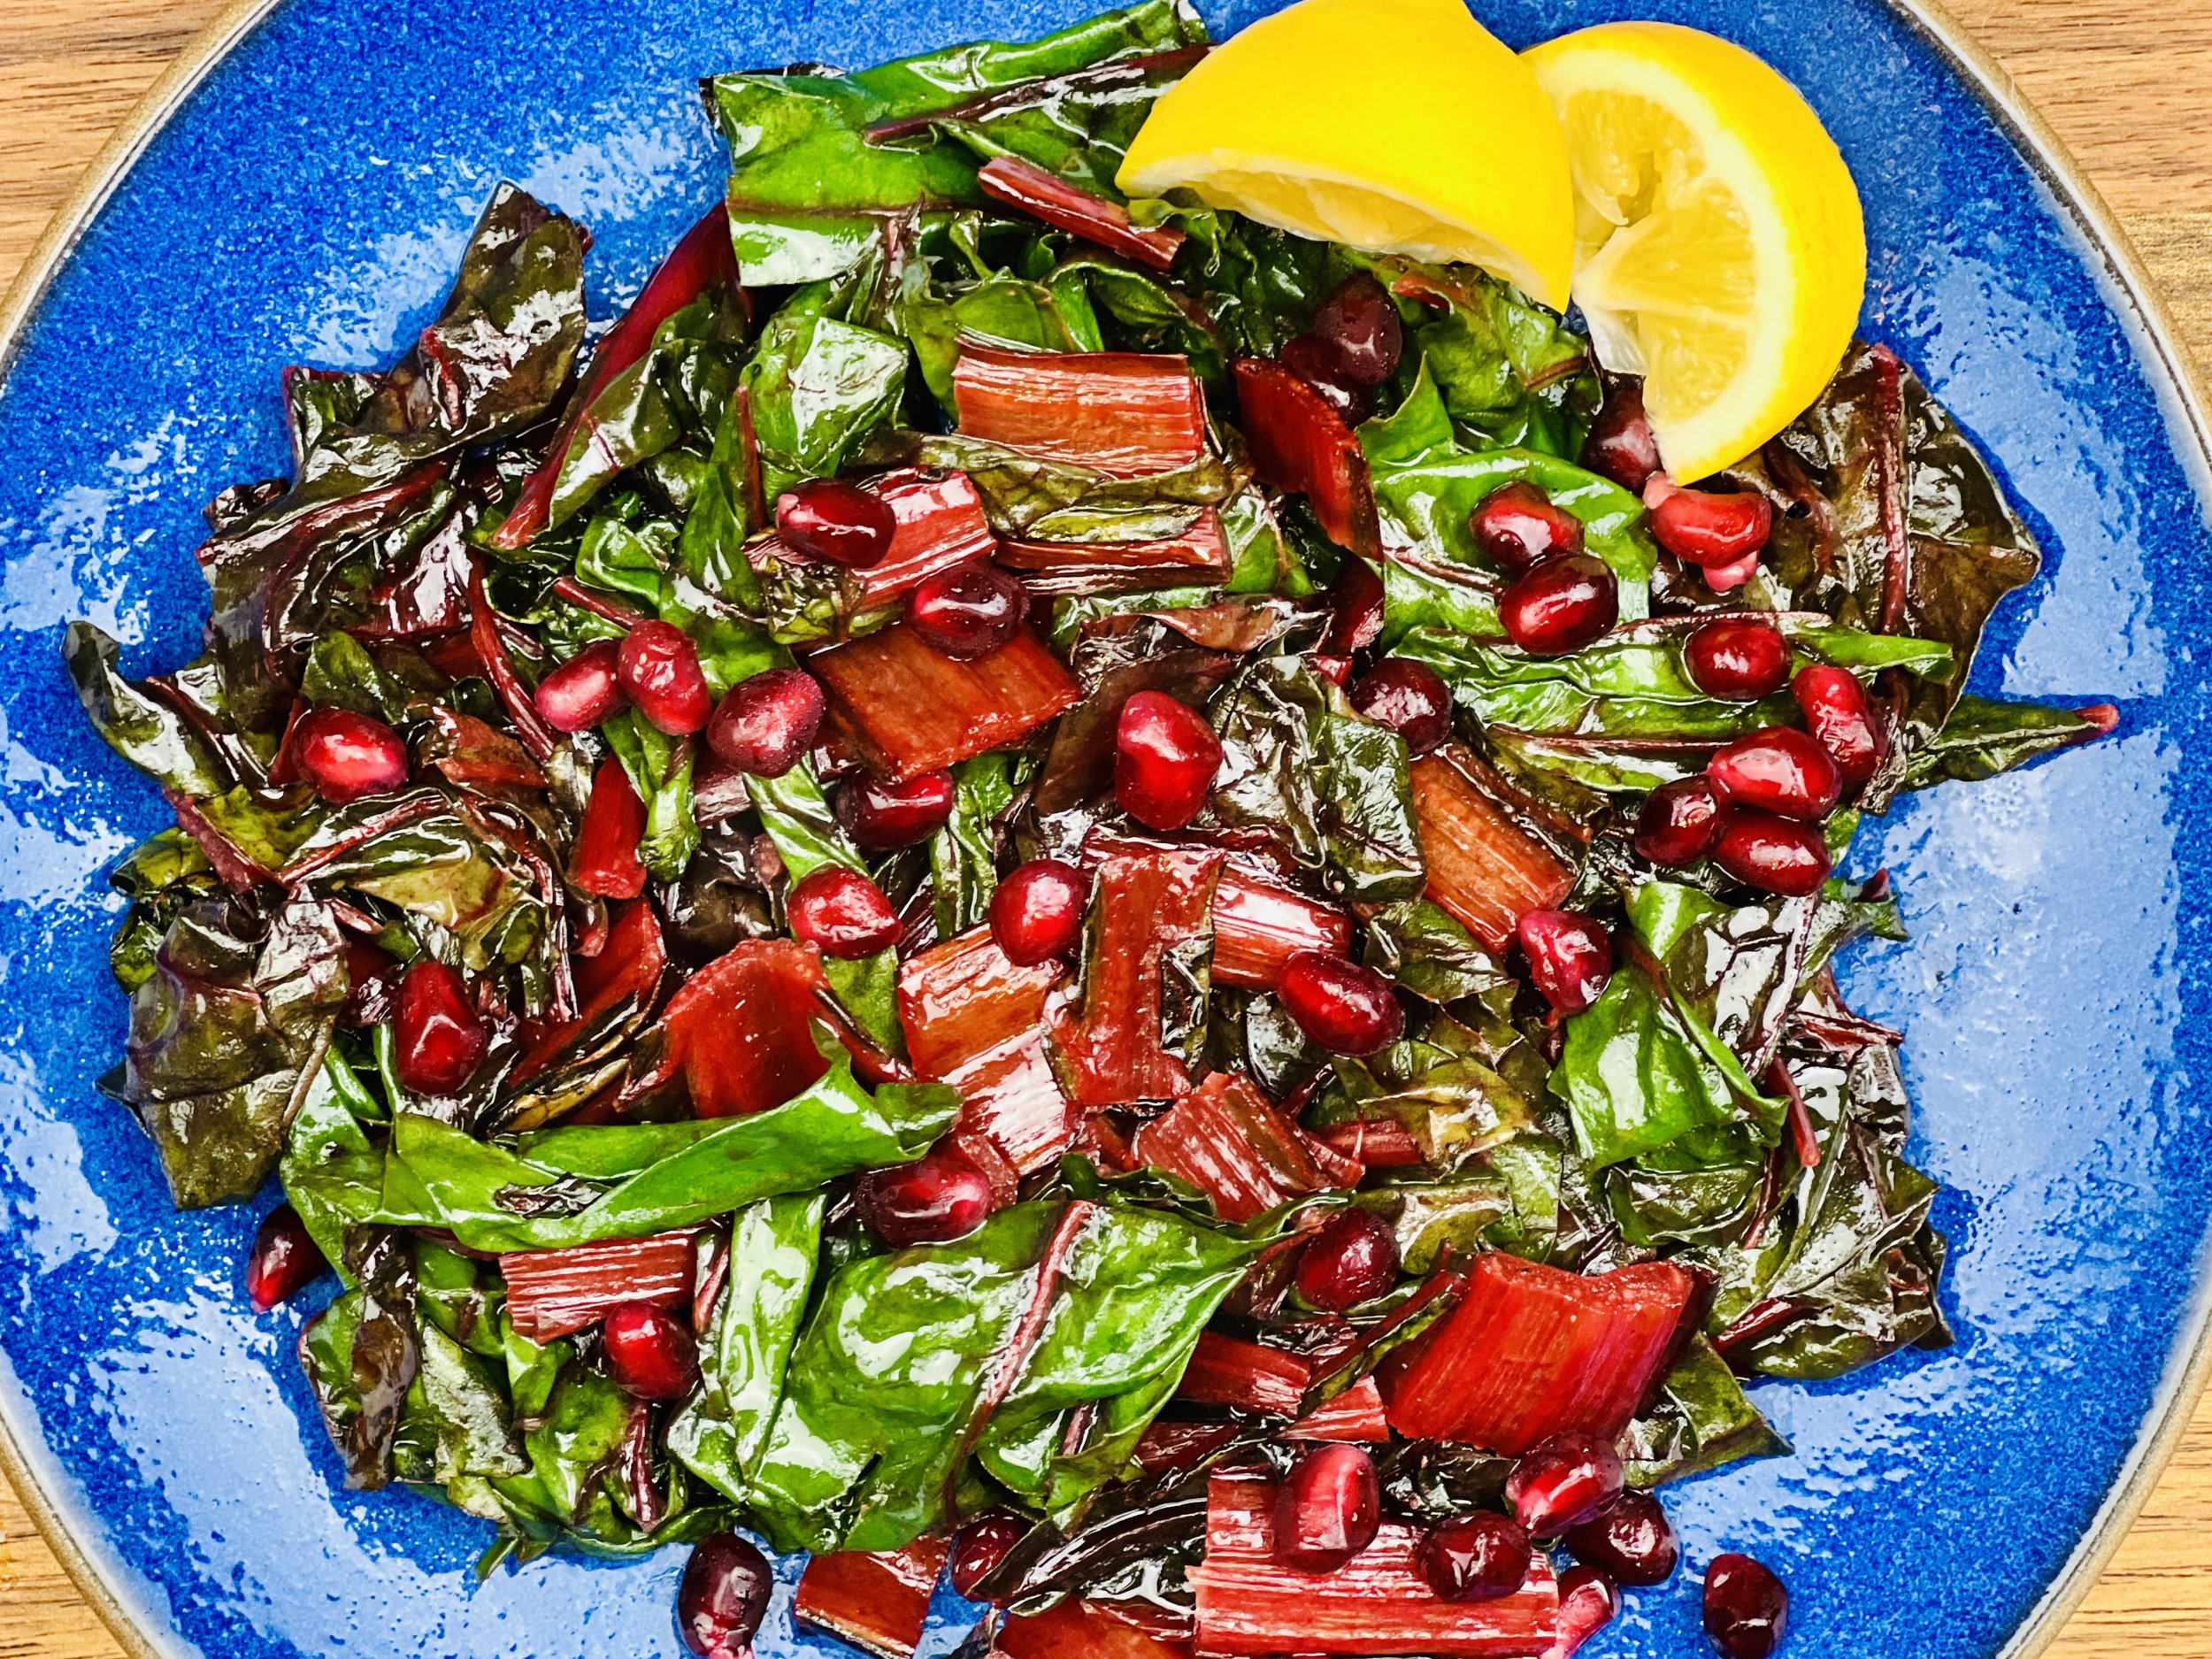
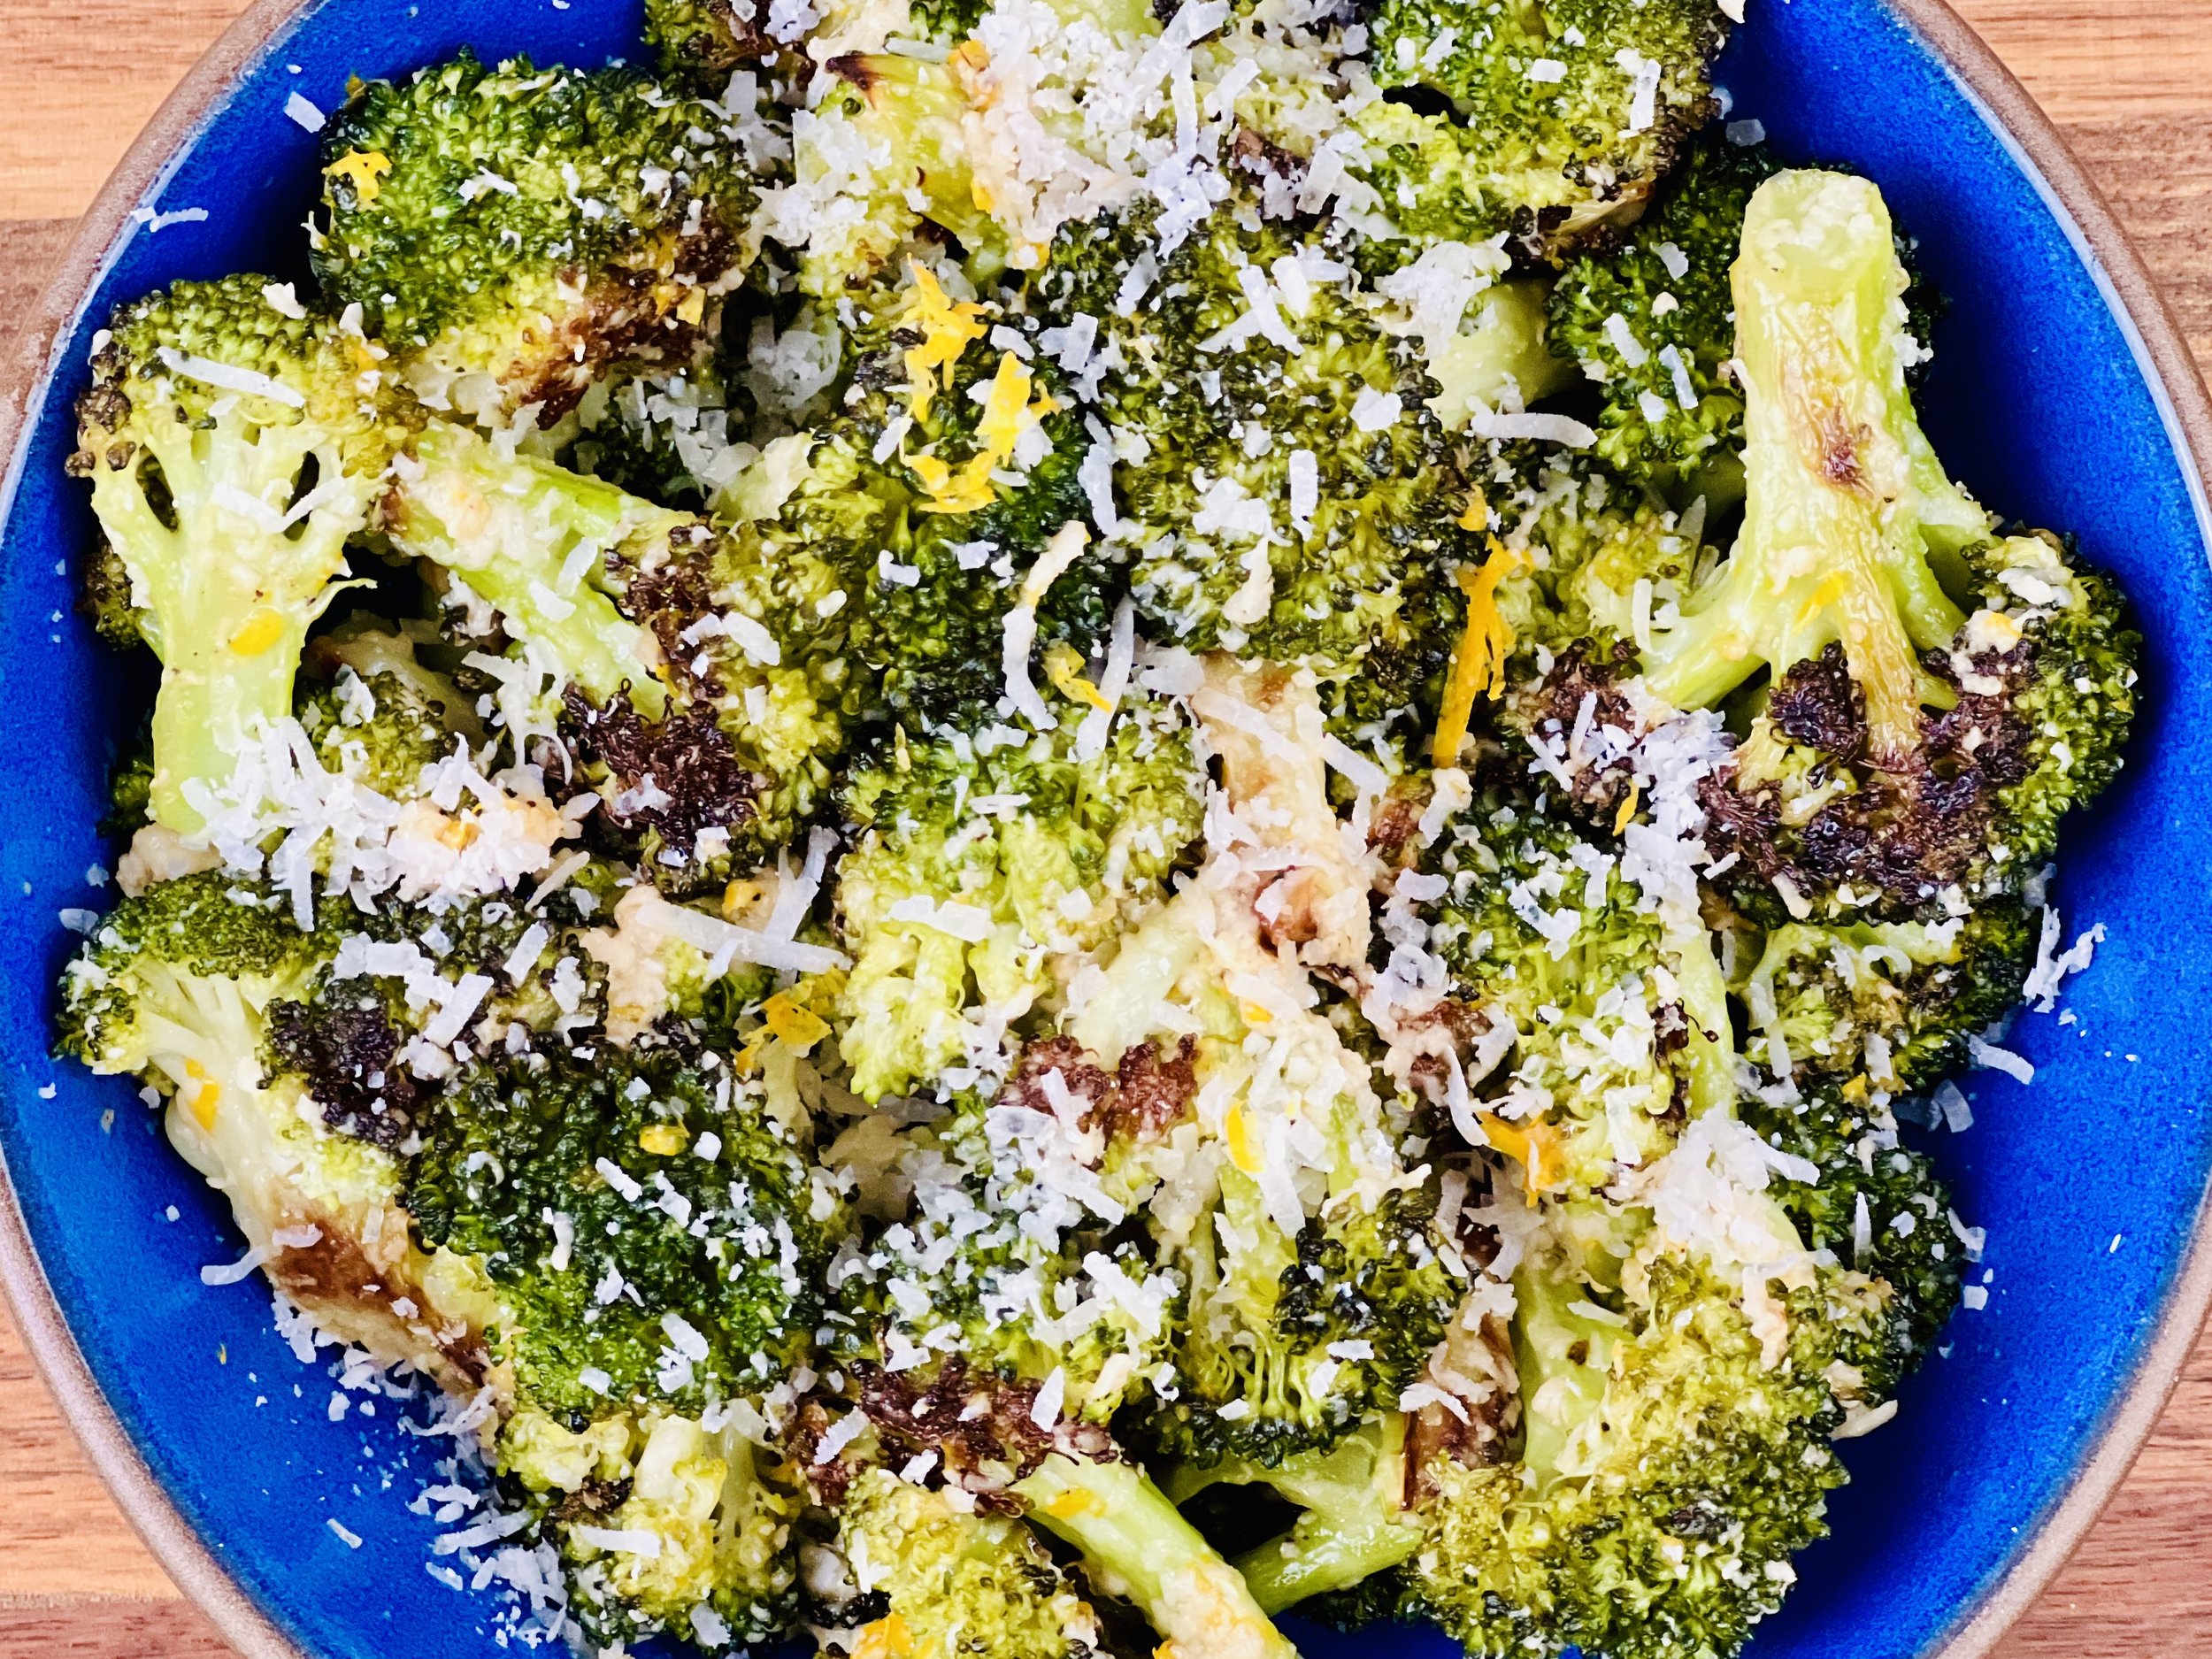
Broccoli and red kale salad with warm ginger dressing (low FODMAP)
25 Minutes prep • 3 hours to overnight sitting time • Gluten-free • Low FODMAP • Serves 4 - 6
25 Minutes prep • 3 hours to overnight sitting time • Gluten-free • Dairy-free • Low FODMAP • Serves 4 - 6 • This is one of those salads that gets better as it sits so it’s perfect as a make-ahead side dish for entertaining or just to have ready for a busy week. The flavors and colors are amazing. The combination of the crisp vegetables with the cool sweetness of the oranges and the creamy taste of the avocado is quite wonderful!
INGREDIENTS:
2 heads broccoli florets only, cut into bite-size pieces
1/2 bunch red kale, torn into bite-size pieces (tough stems removed)
1/3 cup garlic-infused olive oil
1-inch piece fresh ginger, grated
2 tablespoons toasted sesame oil
Zest and juice of 1 lemon
1 tablespoon gluten-free low sodium soy sauce
1 tablespoon maple syrup
1 teaspoon kosher salt
1 pinch crushed red pepper flakes (optional)
2 large carrots, shaved into ribbons
1 bell pepper, thinly sliced
1/4 cup each fresh cilantro and basil, chopped (you can substitute chives for the cilantro if you like)
1 Cara Cara orange, blood orange, or navel orange with the peel cut off, sliced, and quartered
1 avocado, sliced
2 tablespoons toasted sesame seeds
DIRECTIONS:
In a large bowl, toss together the broccoli and the kale.
In a medium skillet, combine the olive oil and ginger over medium heat. Simmer 2-3 minutes. Remove from the heat and add the toasted sesame oil, lemon juice and zest, soy sauce, maple syrup, salt, and a pinch of crushed red pepper flakes (if using).
Pour the warm dressing over the broccoli and kale, massaging it into the greens with your hands. Add the carrots, bell peppers, cilantro, and basil, and toss to combine. Taste and season with salt. If time allows, let the salad sit 30 minutes or up to overnight in the fridge to allow the salad to marinate.
Just before serving, add the orange and avocado. Sprinkle with toasted sesame seeds.
Eat and enjoy every bite because you can!
Pro Tip: You can even make this salad even heartier by adding walnuts, pumpkin seeds, and chunks of cheese or meat if you like. It will be delicious no matter what!
This post may contain affiliate links so you can easily purchase items listed on the page. There is no increased cost to you for purchasing items through these links so feel free to use them!
More Deliciously Low FODMAP™ salads you might enjoy
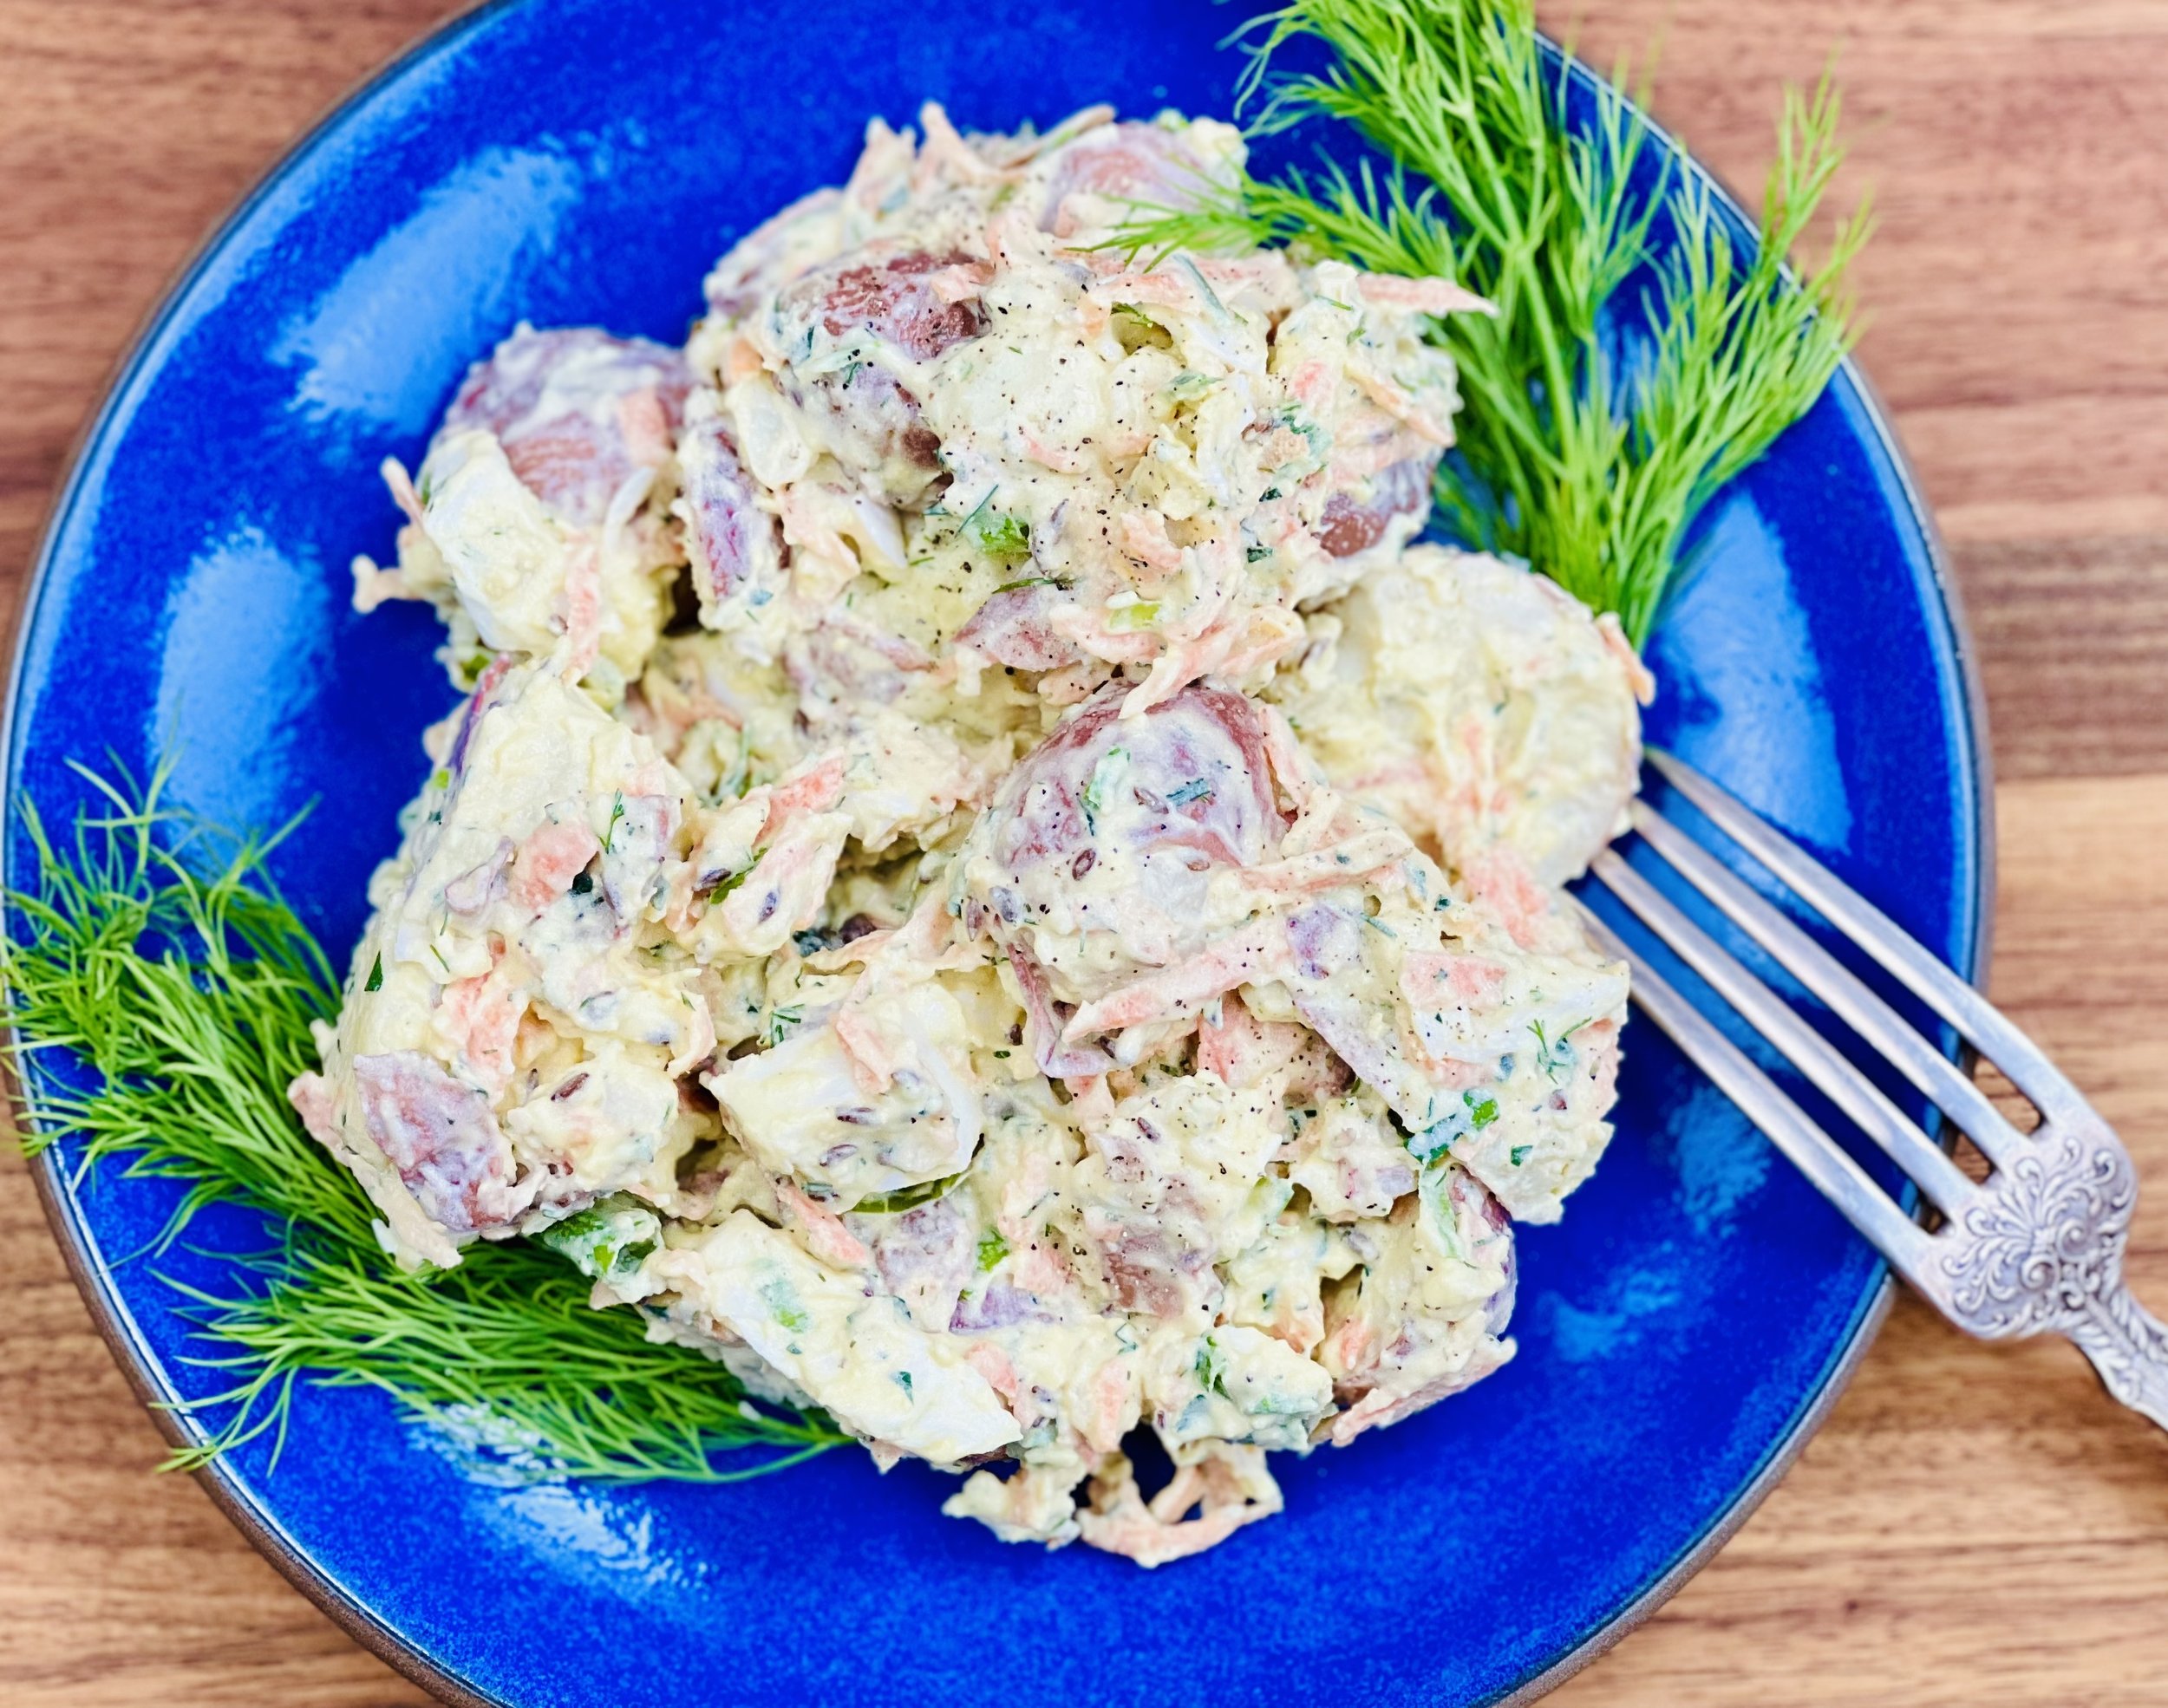
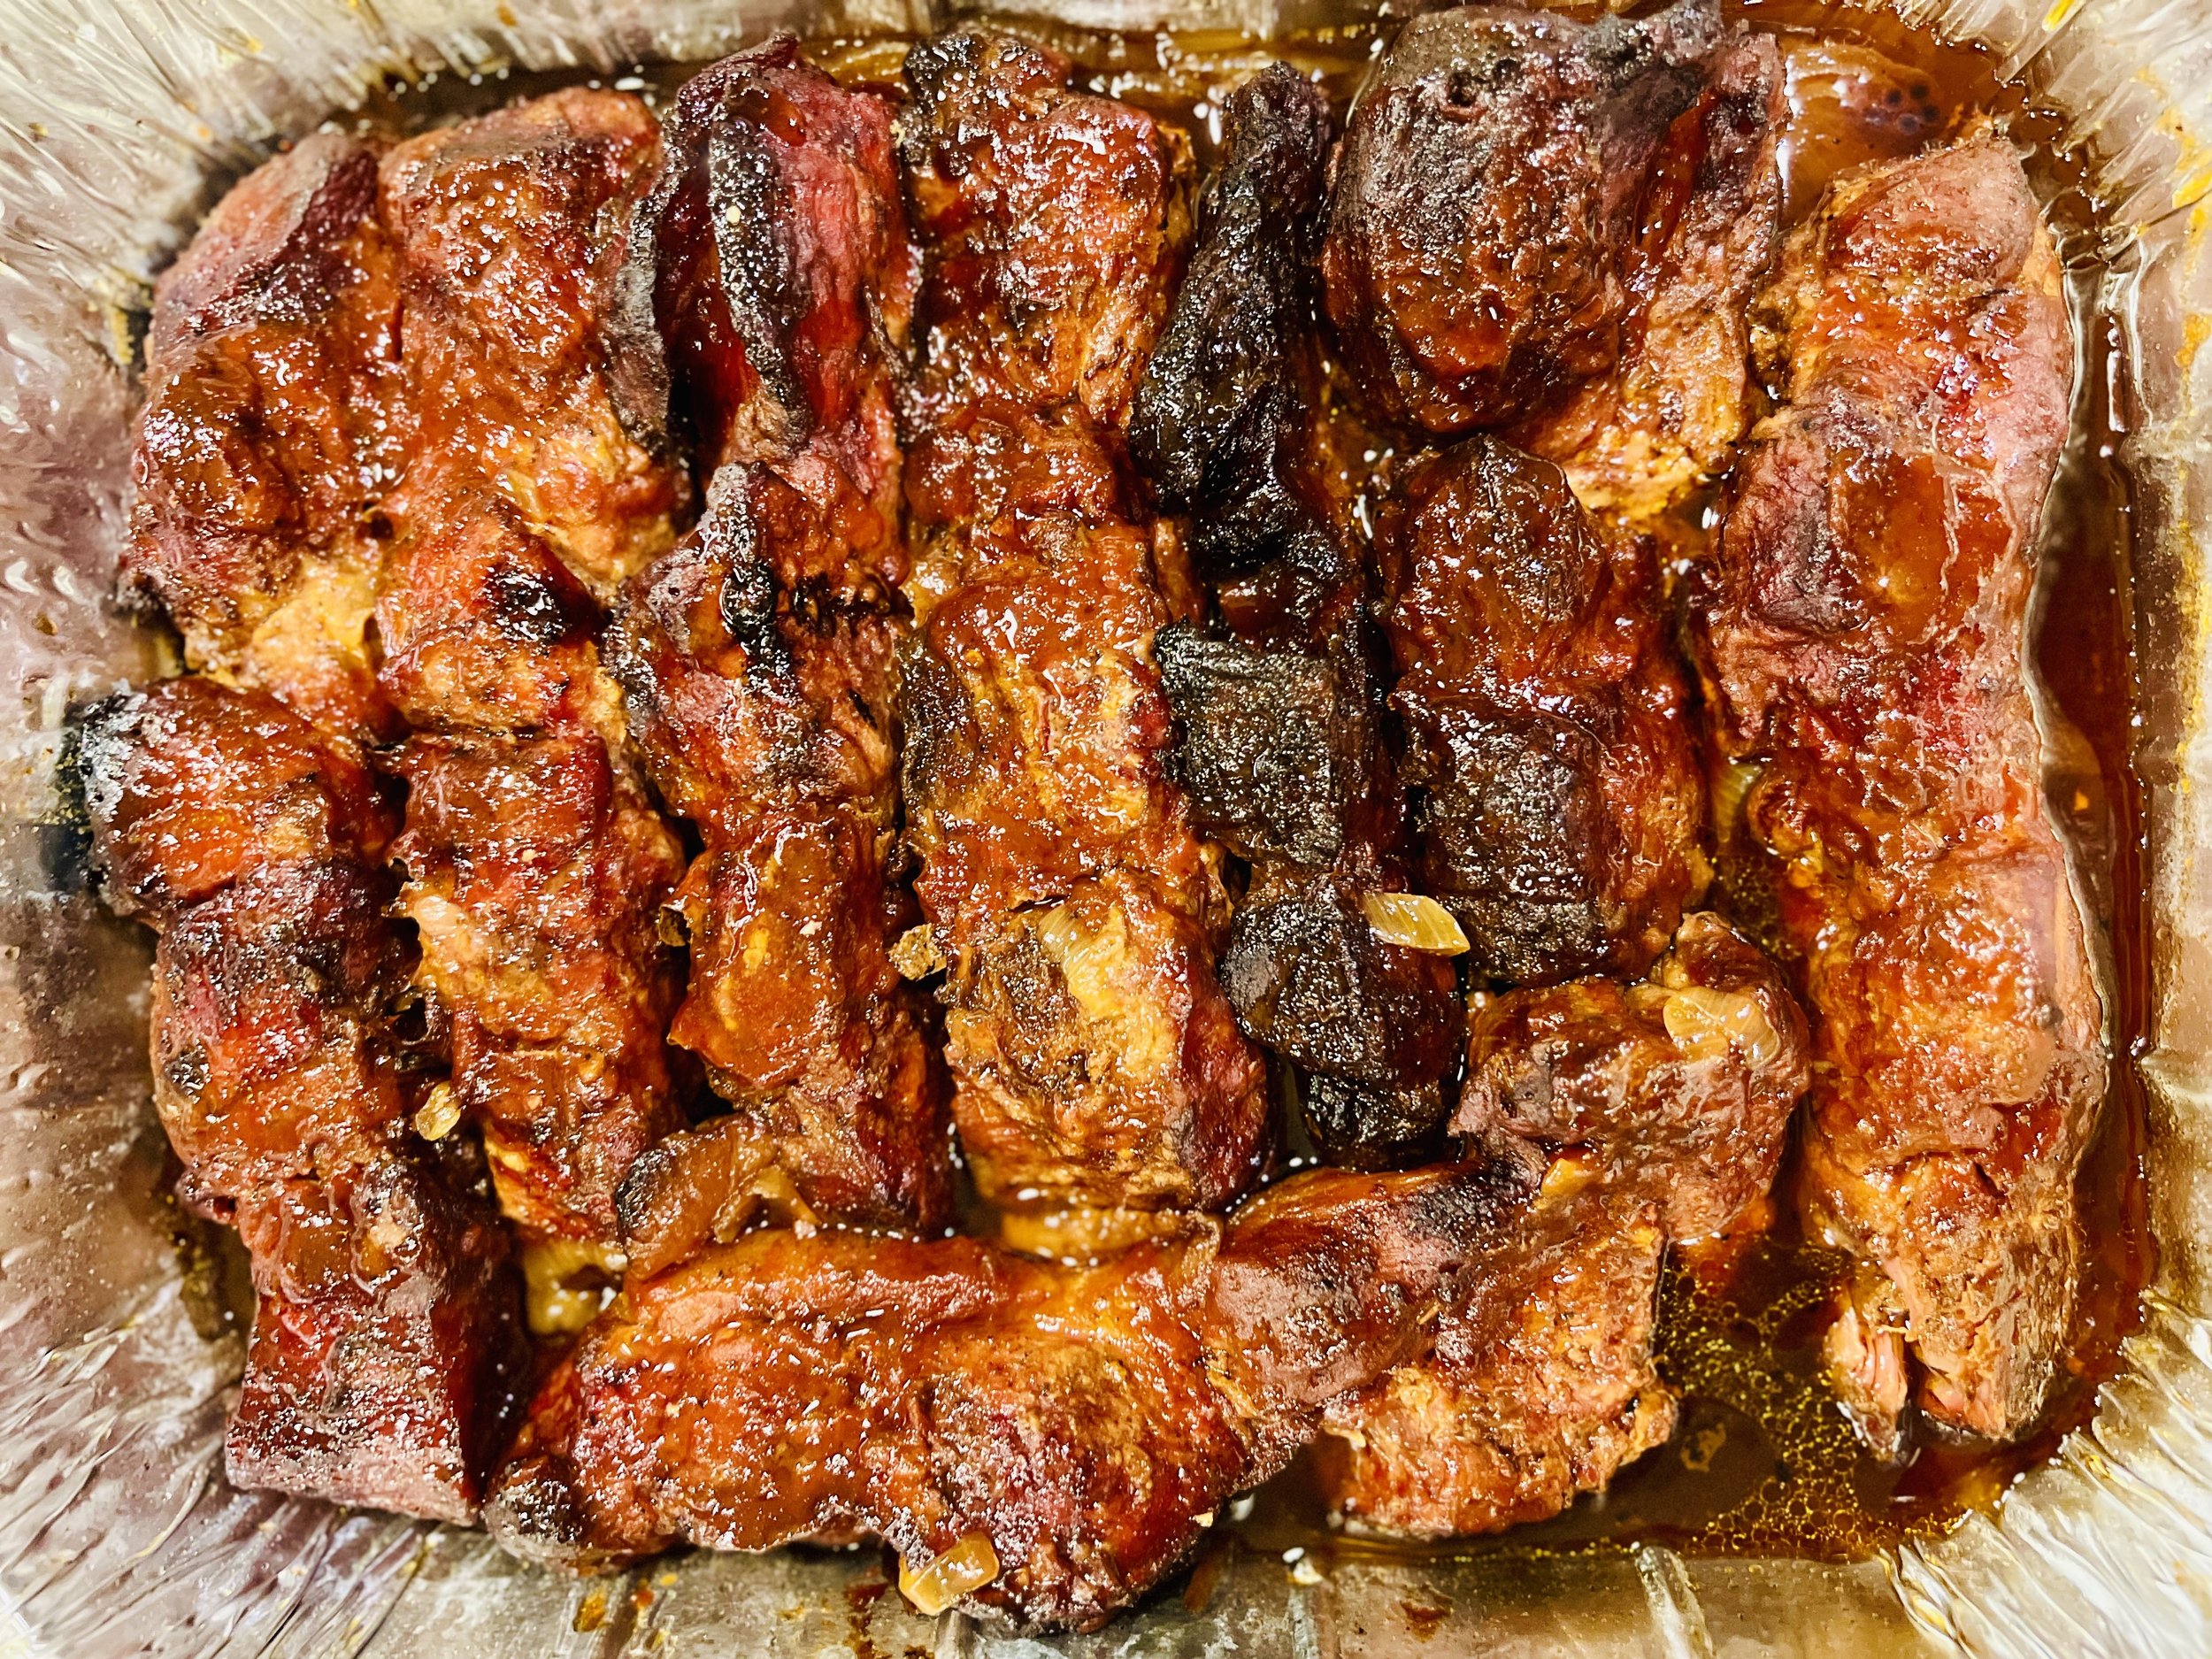
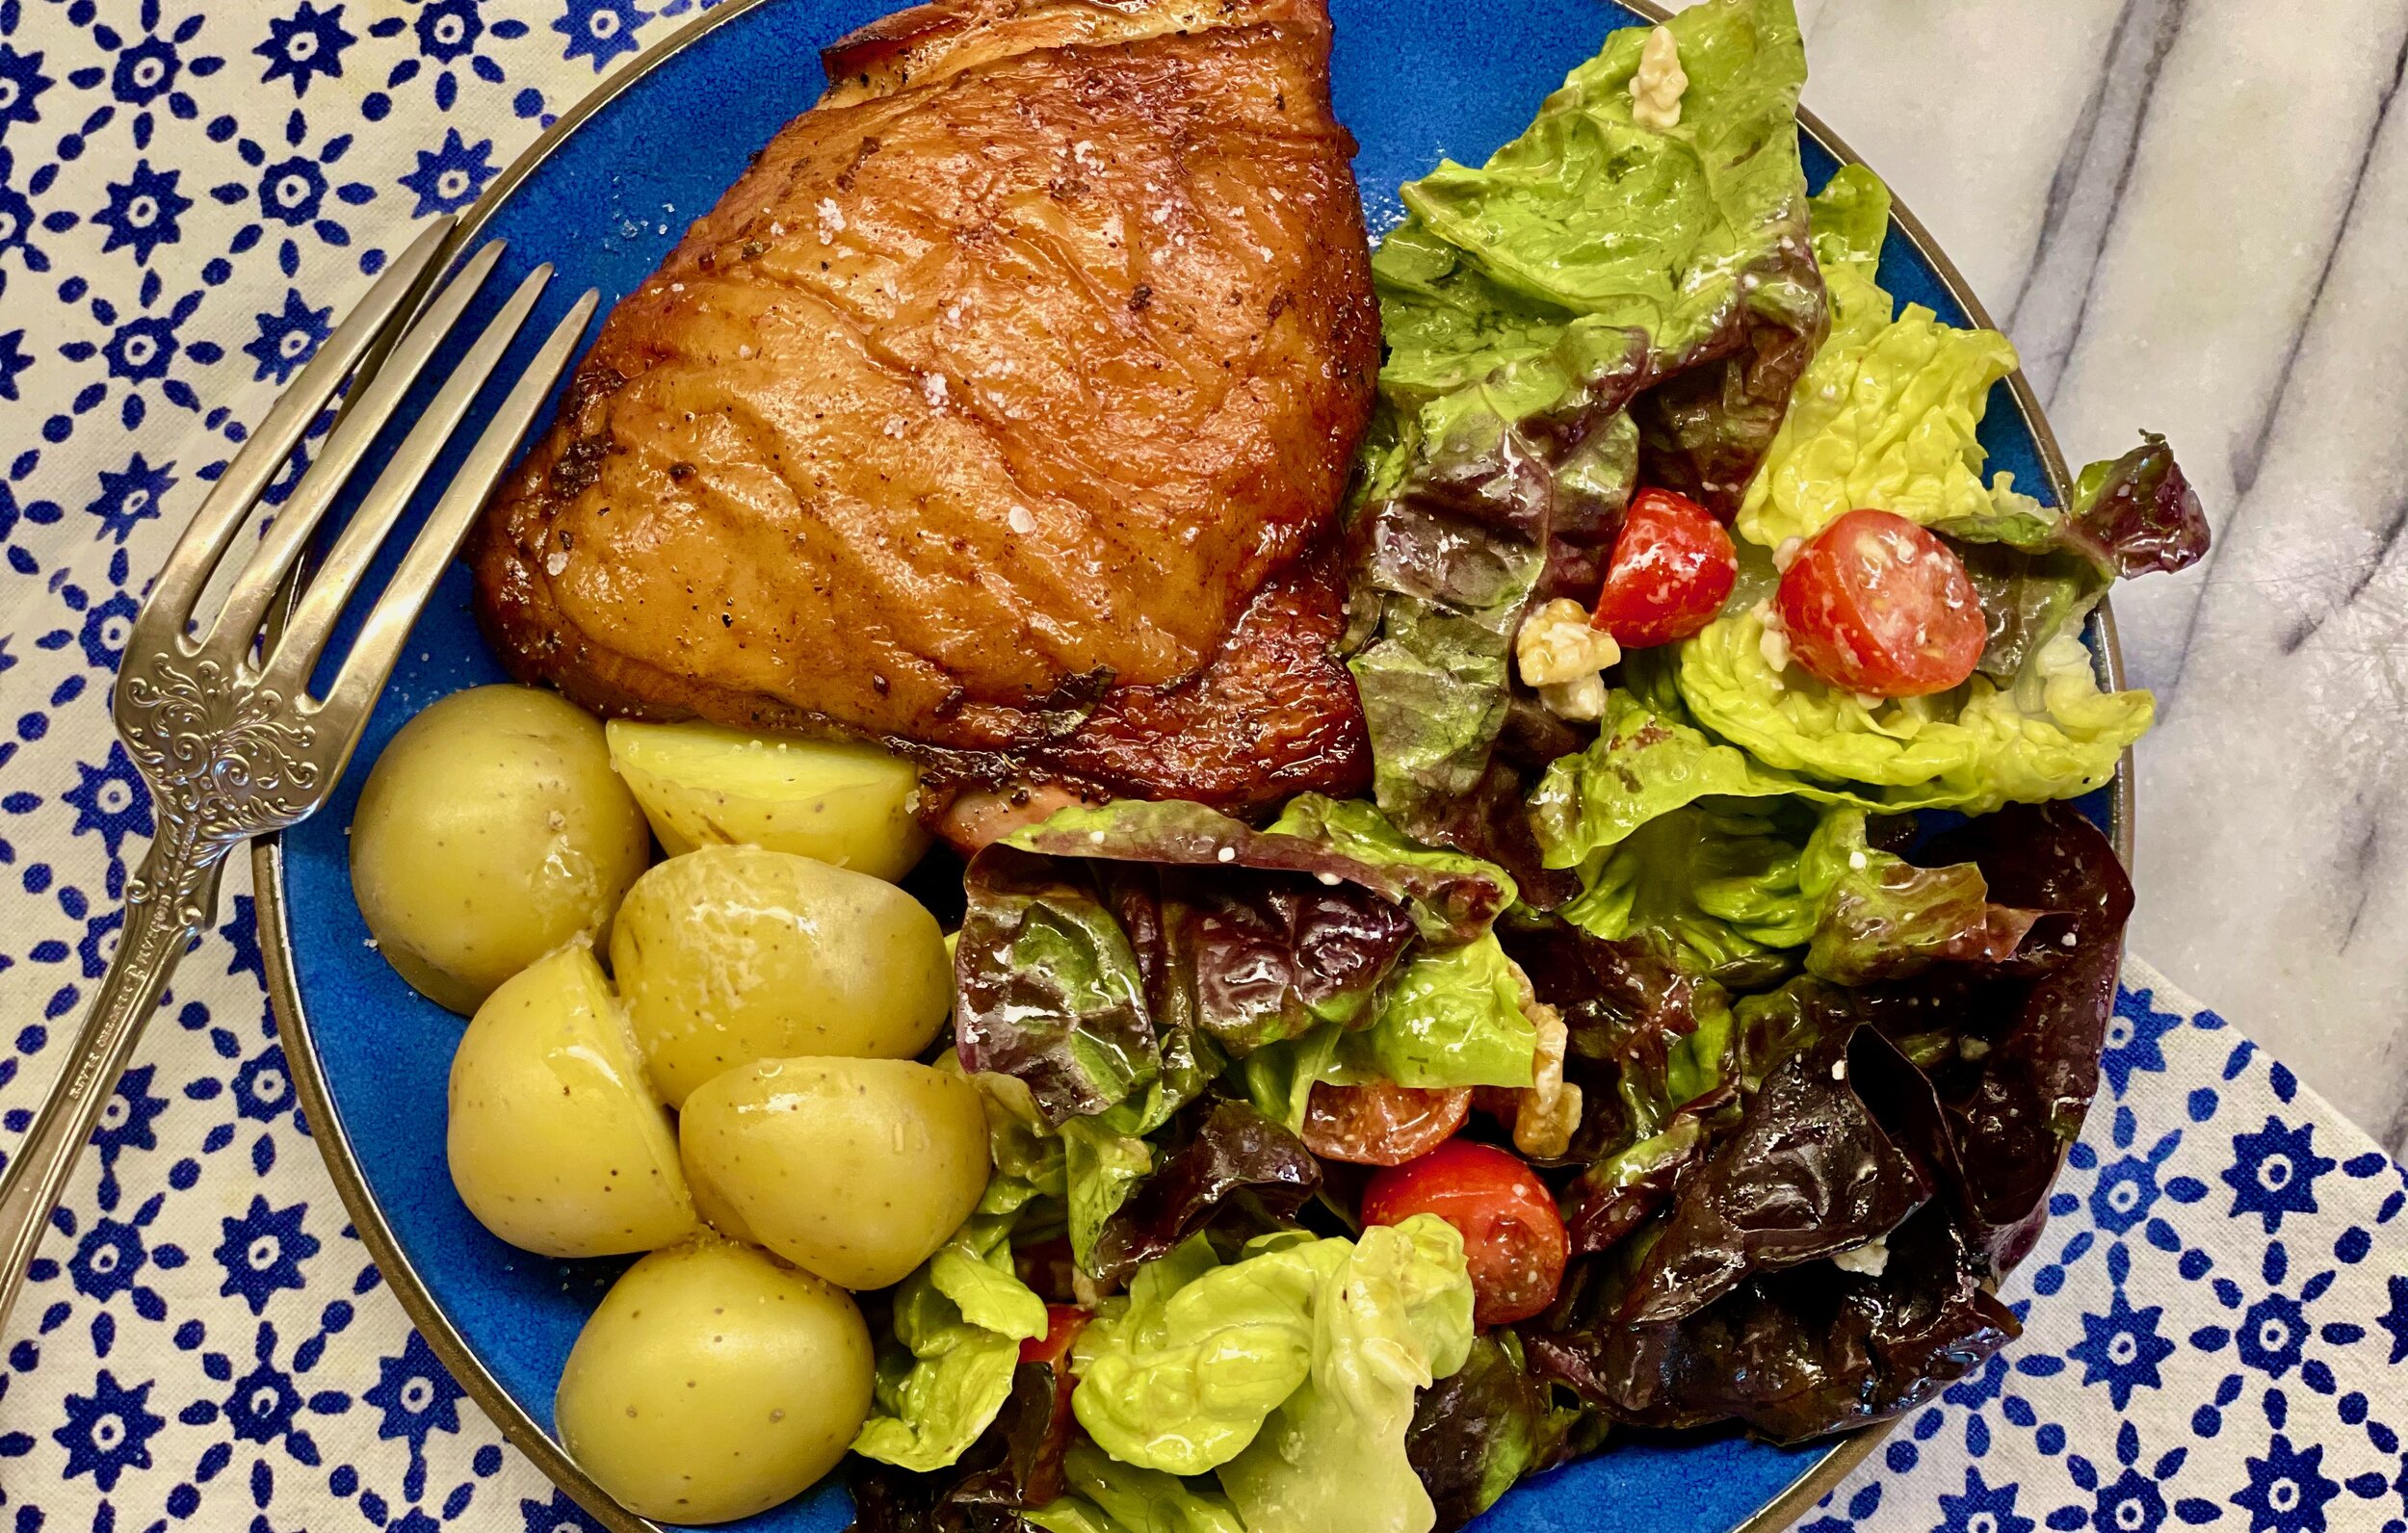
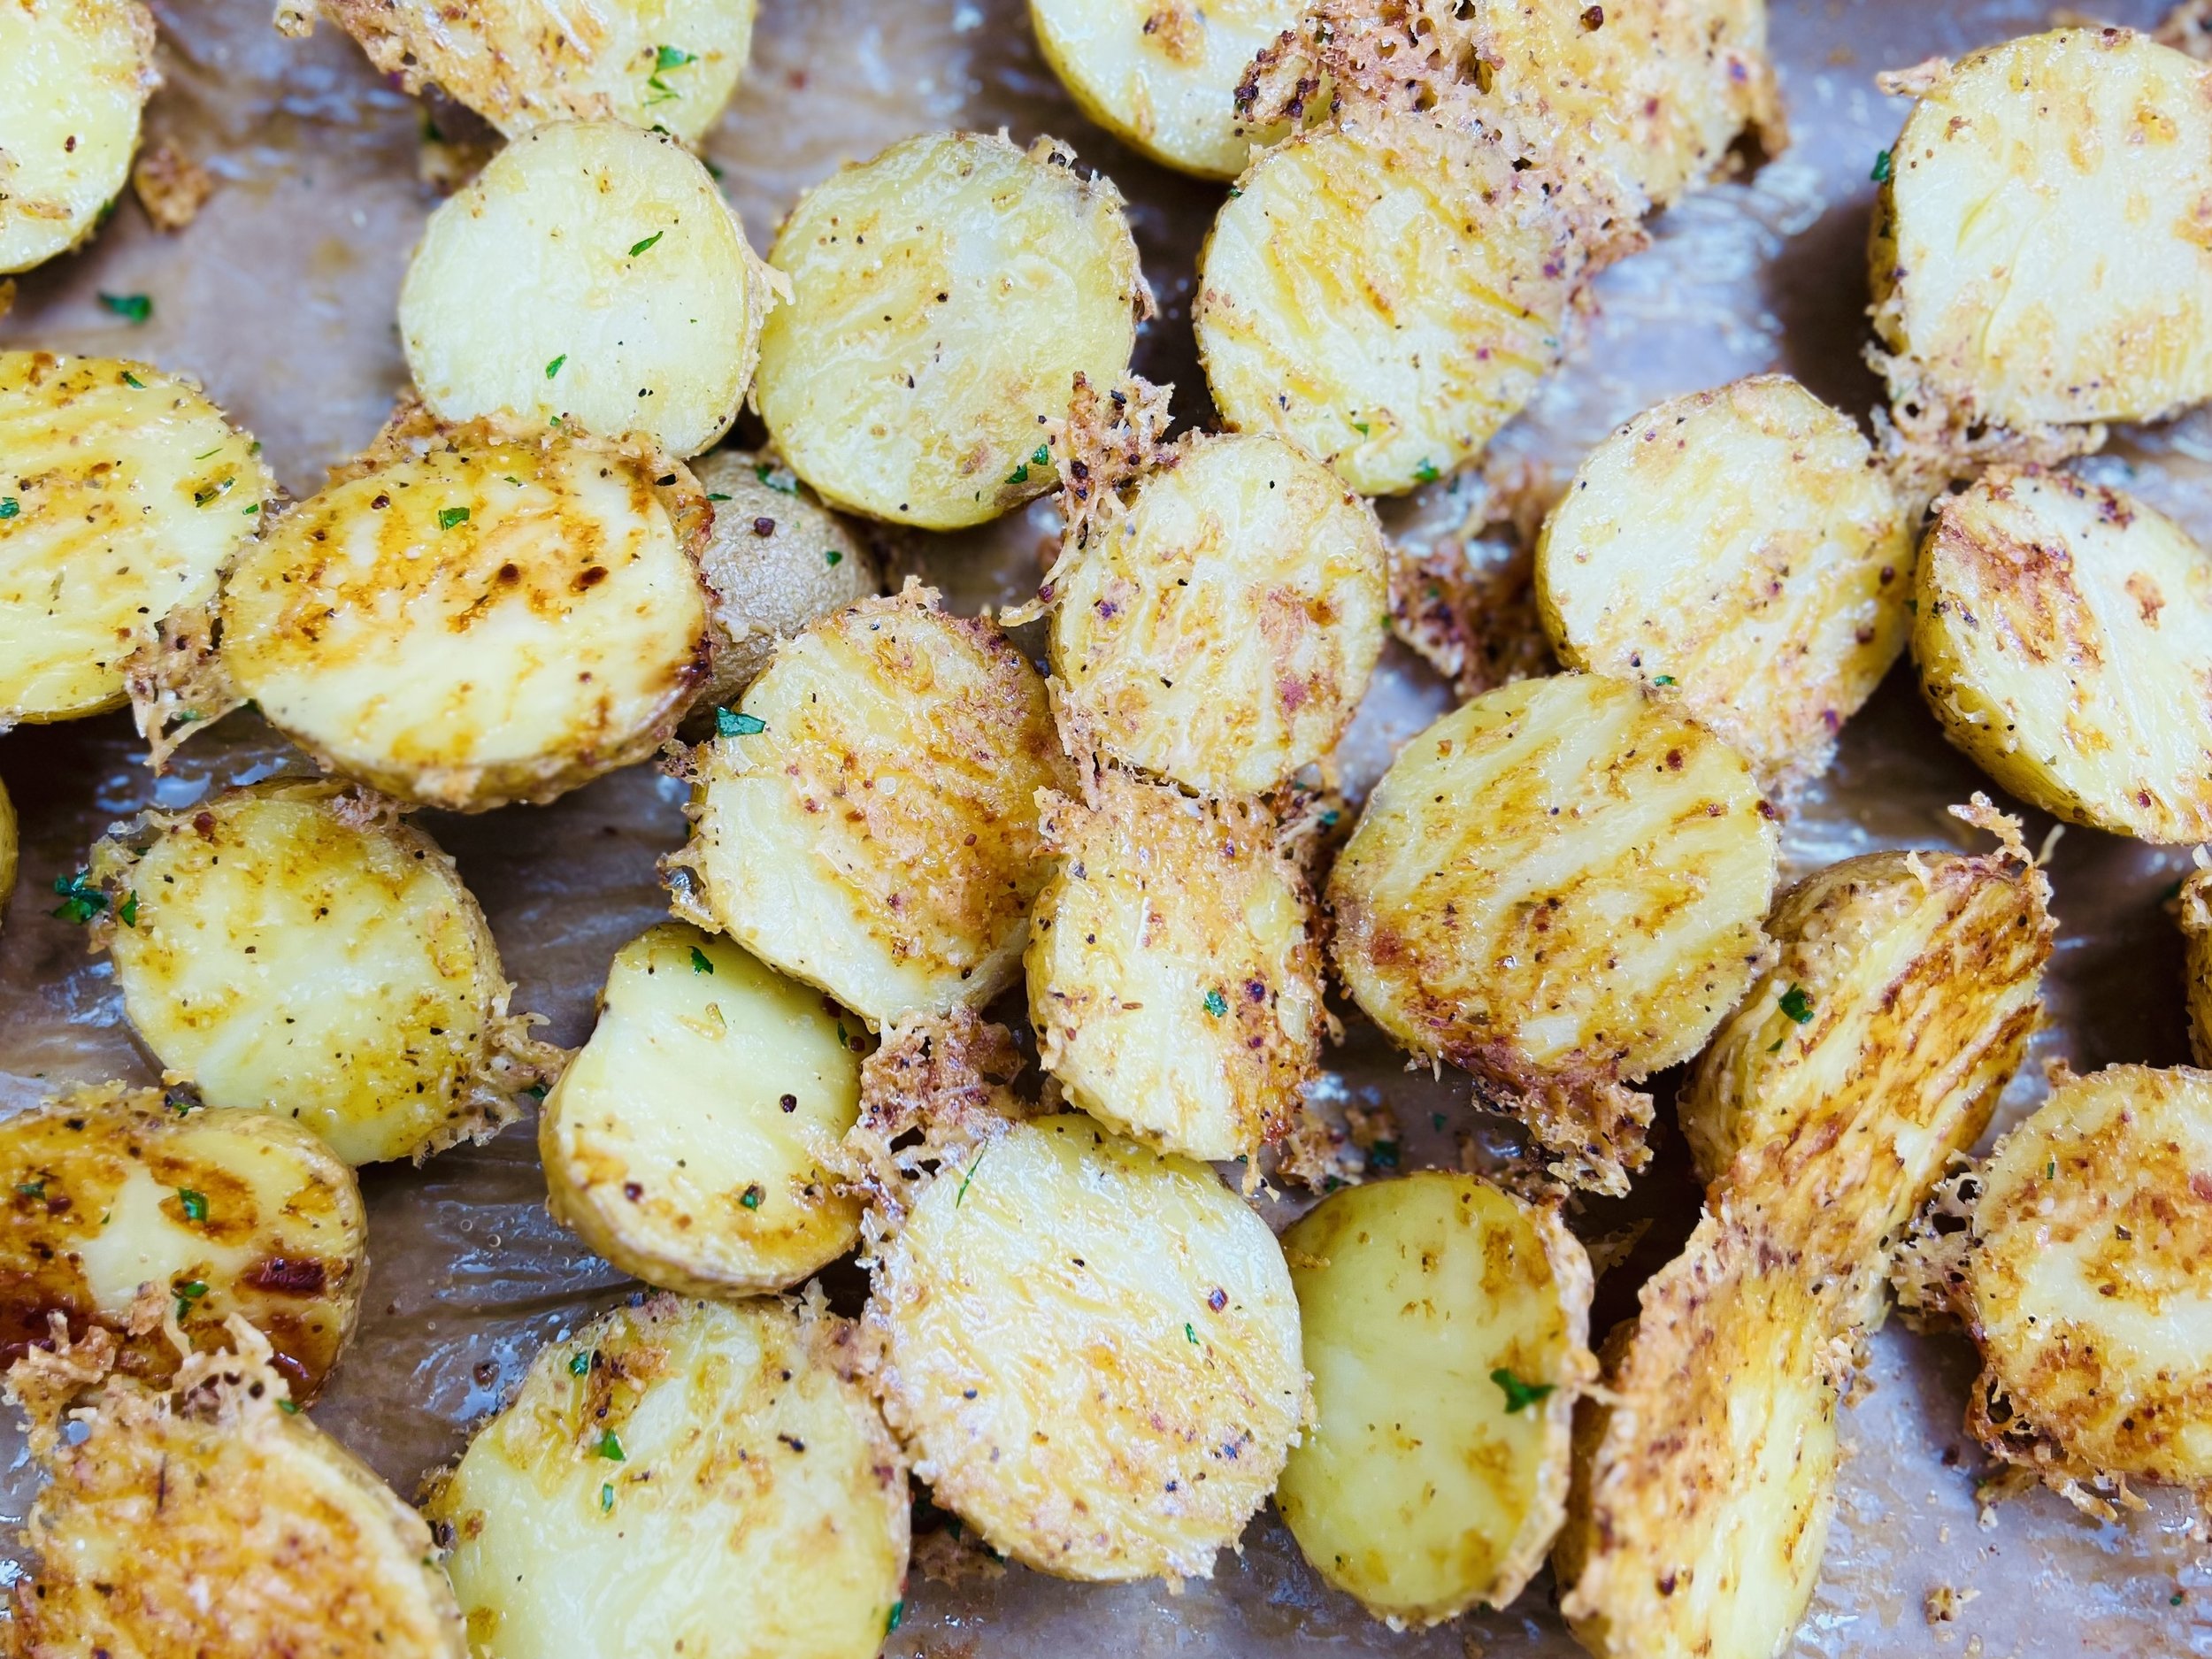
Jamaican jerk chicken and new potatoes (low FODMAP)
45 minutes (plus marinating time) • Gluten-free • Low FODMAP • Serves 6
45 minutes (plus marinating time) • Gluten-free • Low FODMAP • Serves 6 • This super flavorful Jamaican jerk marinade gives your chicken a wonderful and complex flavor. It’s great hot off the grill and even better as a cold course the next day. This would be the perfect chicken to make for a road trip or picnic!
INGREDIENTS:
6 chicken thighs (you can use bone-in or boneless)
2 pounds new potatoes
2 tablespoons butter (or to your taste)
Kosher salt to taste
MARINADE INGREDIENTS:
4 teaspoons brown sugar
2 teaspoon ground allspice
2 teaspoon kosher salt
1 teaspoon ground cinnamon
1 teaspoon dried basil
1 teaspoon dried thyme
1/2 - 1 teaspoon cayenne pepper
1 teaspoon ground nutmeg
1/2 teaspoon freshly ground black pepper
1/4 cup garlic-infused olive oil
1/4 cup gluten-free low sodium soy sauce
1/4 cup red wine vinegar
1/4 cup fresh-squeezed orange juice
2 tablespoon fresh lime juice
2 thinly sliced scallions, green part only
4 teaspoons finely grated fresh ginger
4 teaspoons finely diced jalapeno peppers
DIRECTIONS:
Combine all marinade ingredients in a small bowl or jar and whisk or shake to combine.
Put your chicken in one layer in a shallow pan or in a Ziploc bag. Pour the marinade in with the chicken and refrigerate for several hours or overnight.
When ready to cook, preheat your grill or smoker to 400 degrees F. Lay your chicken in one layer and grill or smoke until done
Bone-in chicken thighs should take about 35 minutes to grill at 400 degrees. If you’re using boneless chicken thighs – they’ll only take about 15-20 minutes. Always check the temperature of your meat before taking it off the grill. Chicken should reach 160 degrees F before you remove them from the grill and they’ll continue to heat up once you remove them and get to the target of 165 degrees F.
Meanwhile, wash your potatoes and cut them in half unless they are quite small. Put in a large pot of salted water. Bring to a boil and boil until potatoes are fork-tender. When ready, remove from heat, drain and put in a serving bowl. Toss with butter and salt to taste.
Serve with a side salad if you like. You’ll find plenty of salad options right here!
Eat and enjoy every bite because you can!
This post may contain affiliate links so you can easily purchase items listed on the page. There is no increased cost to you for purchasing items through these links so feel free to use them!
More Deliciously Low FODMAP™ main courses you might enjoy
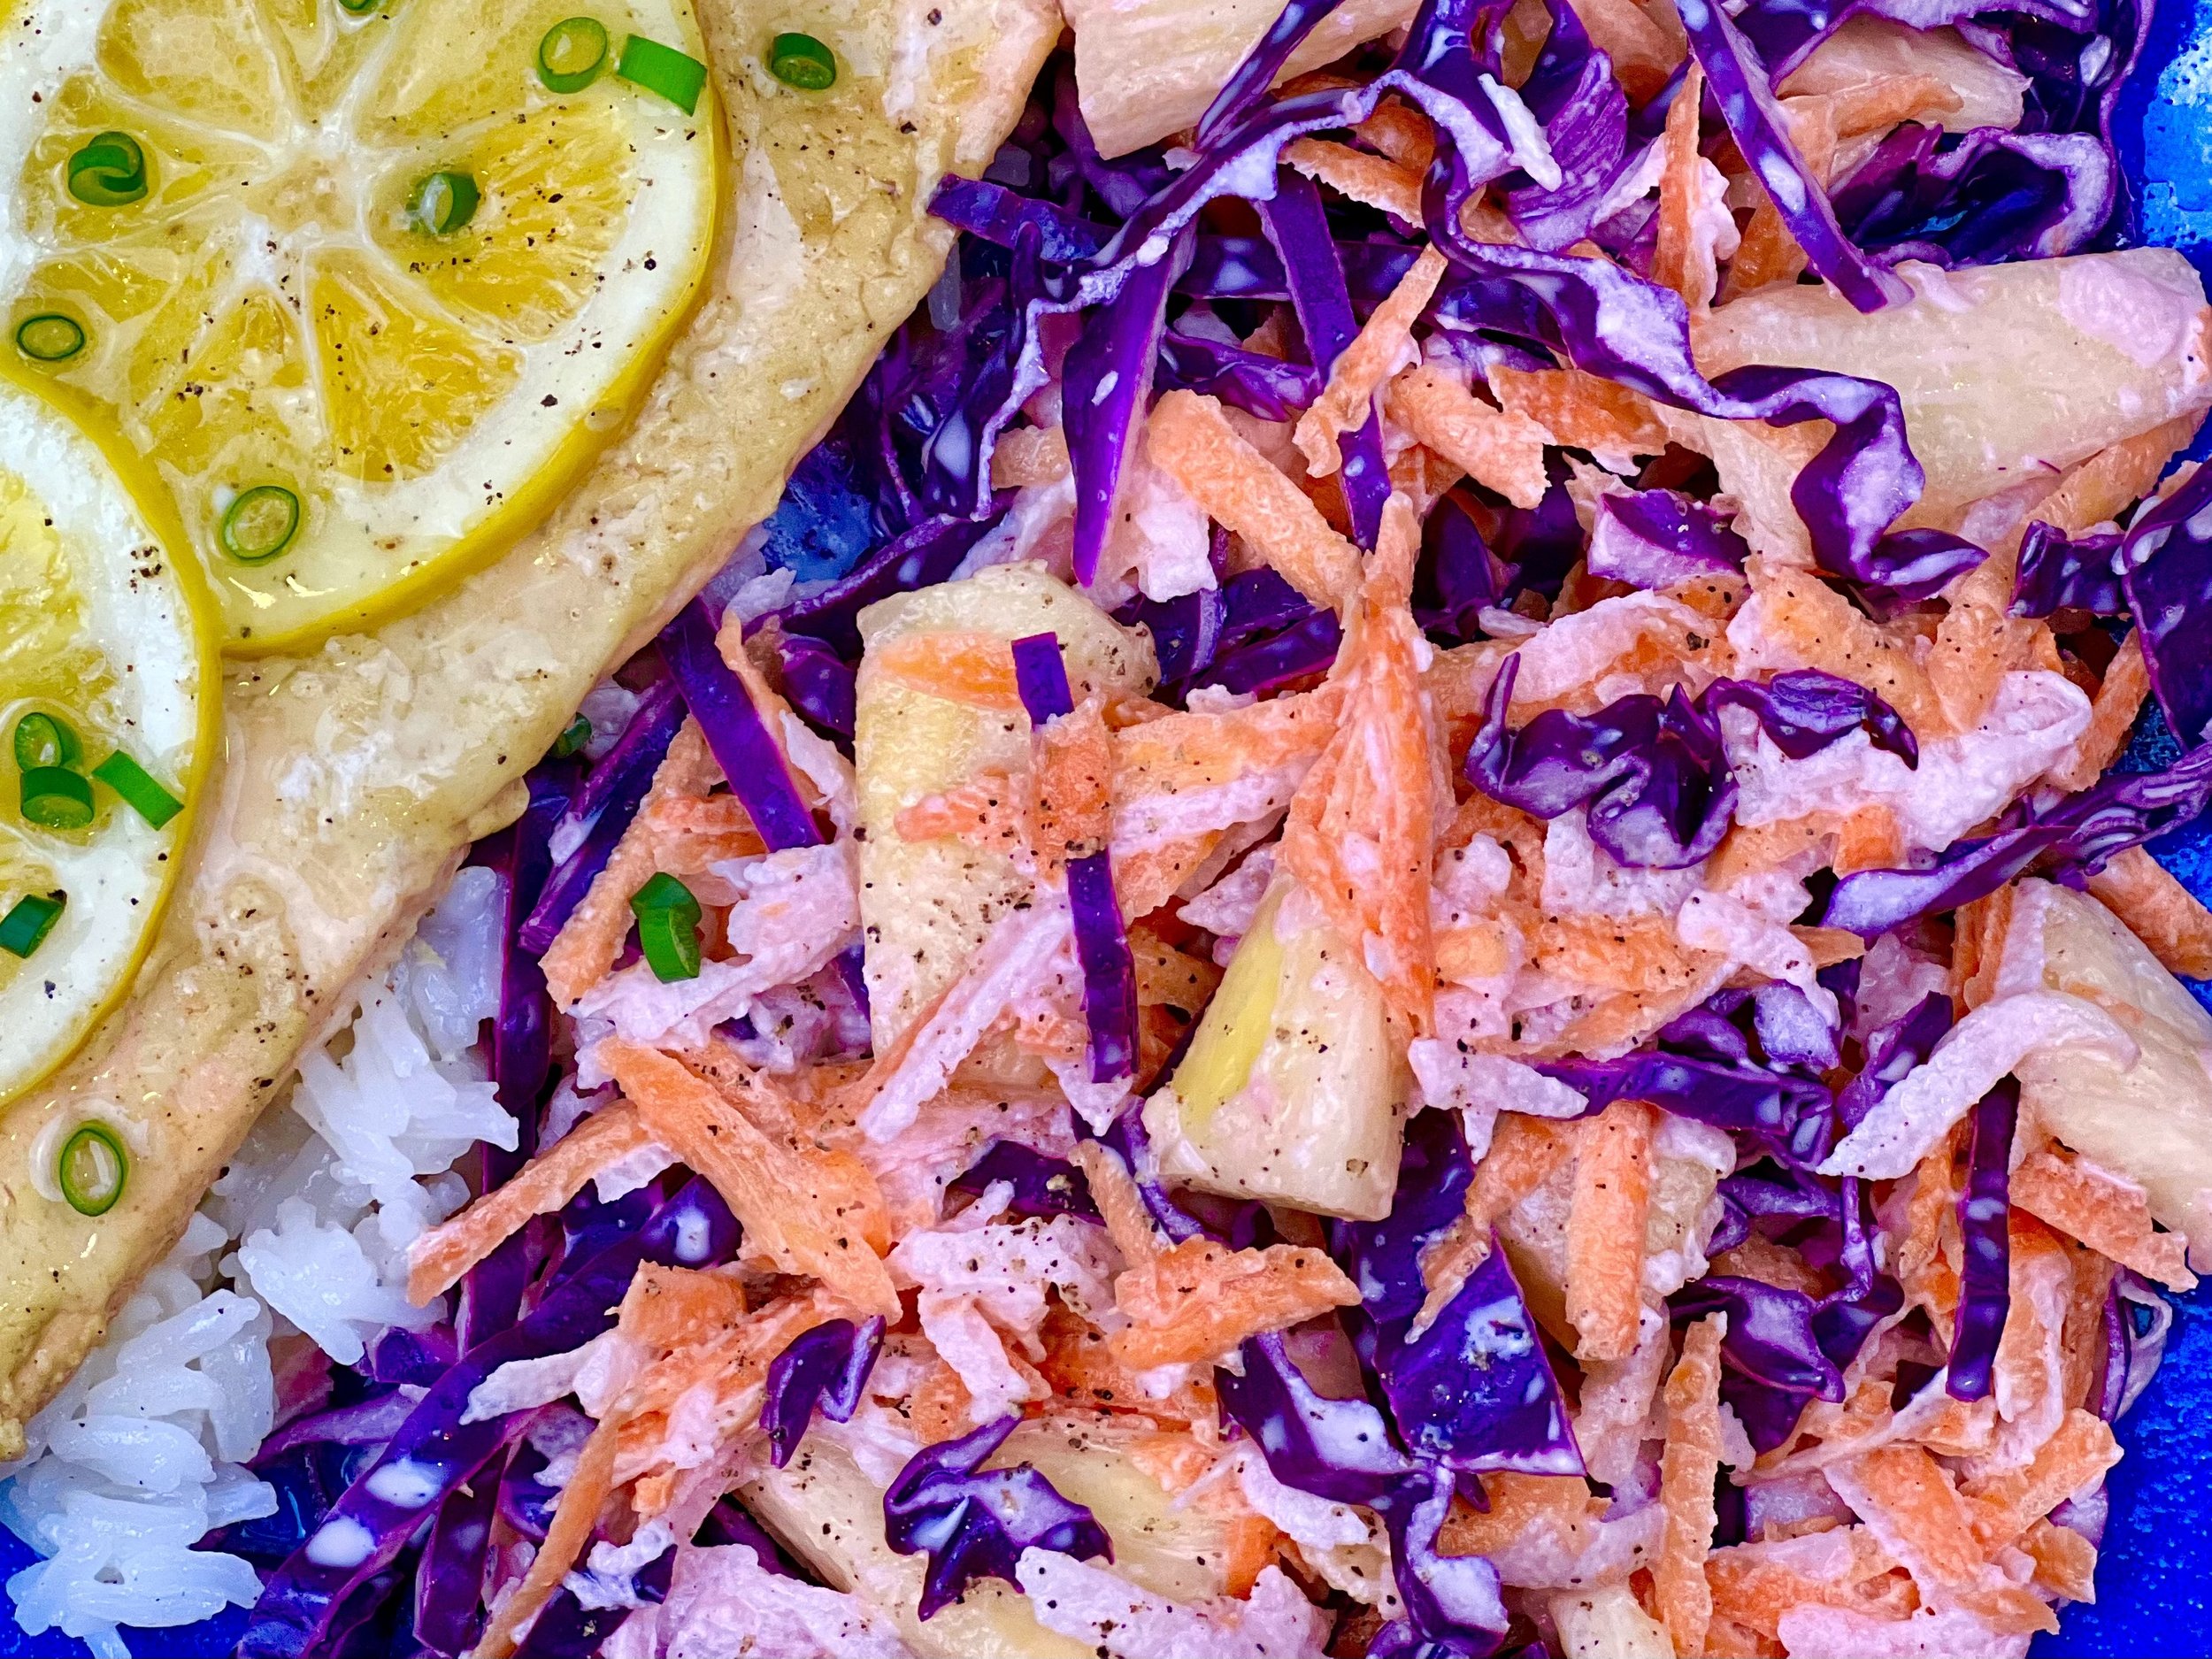
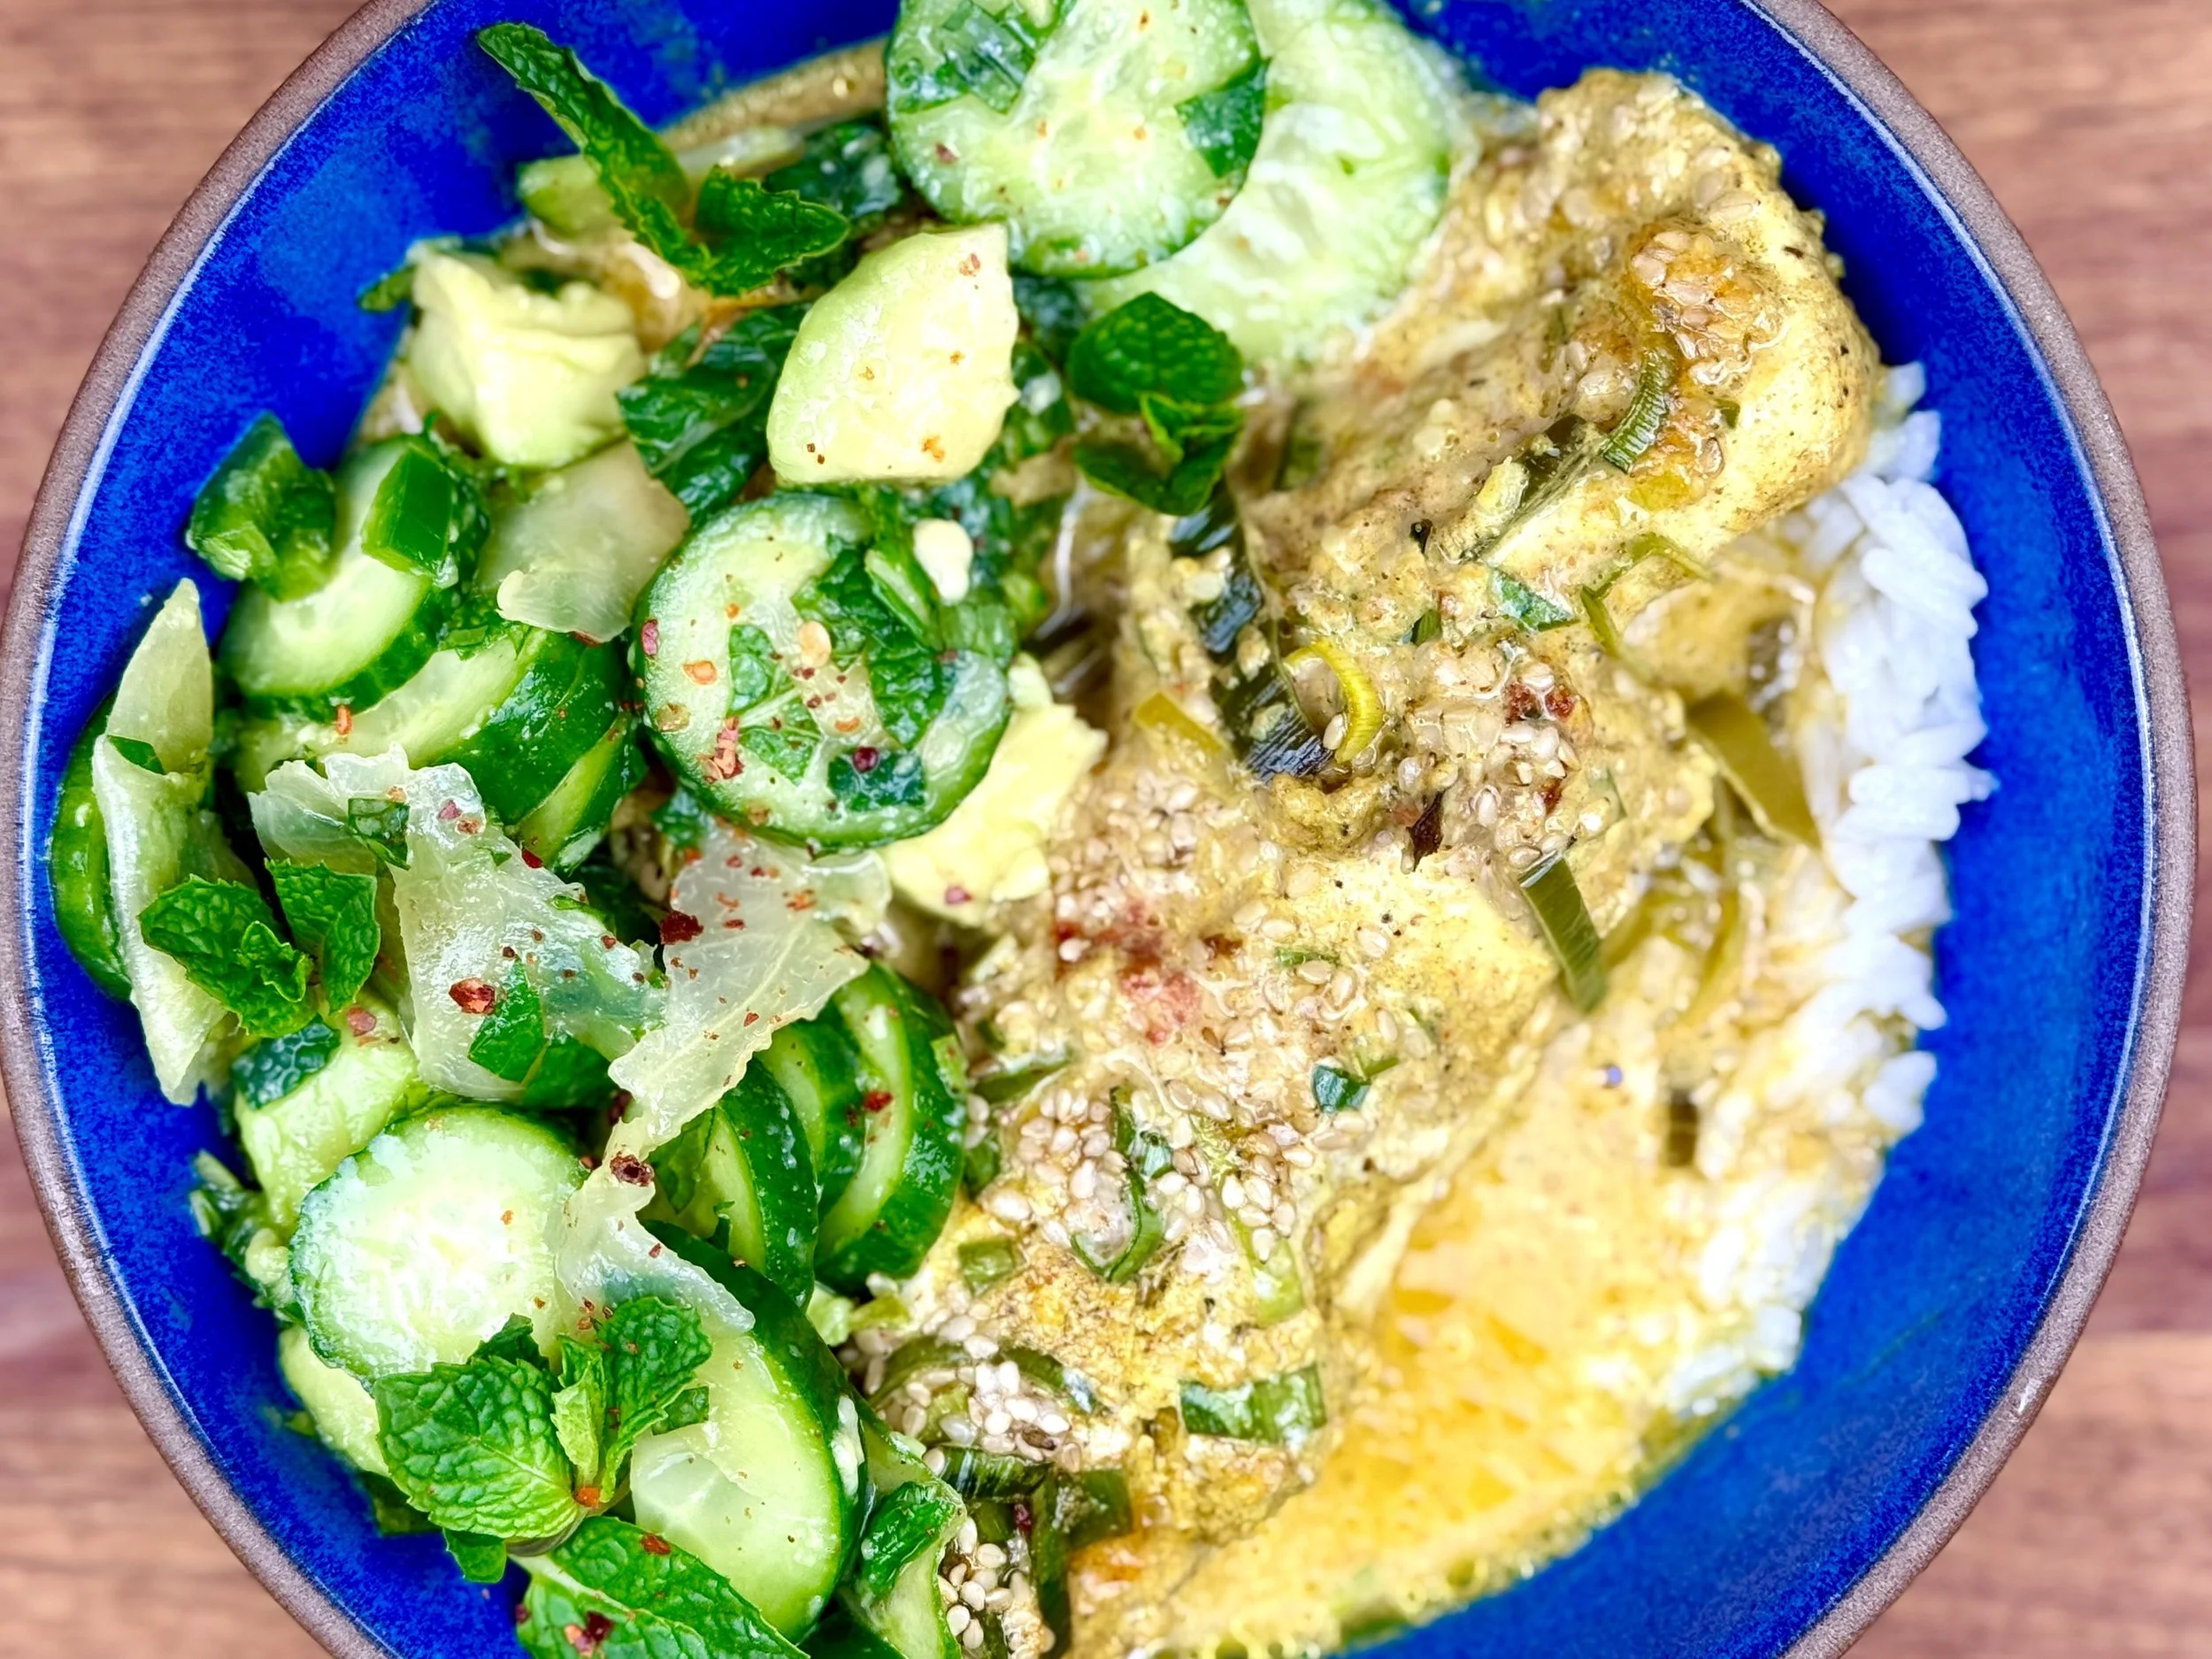
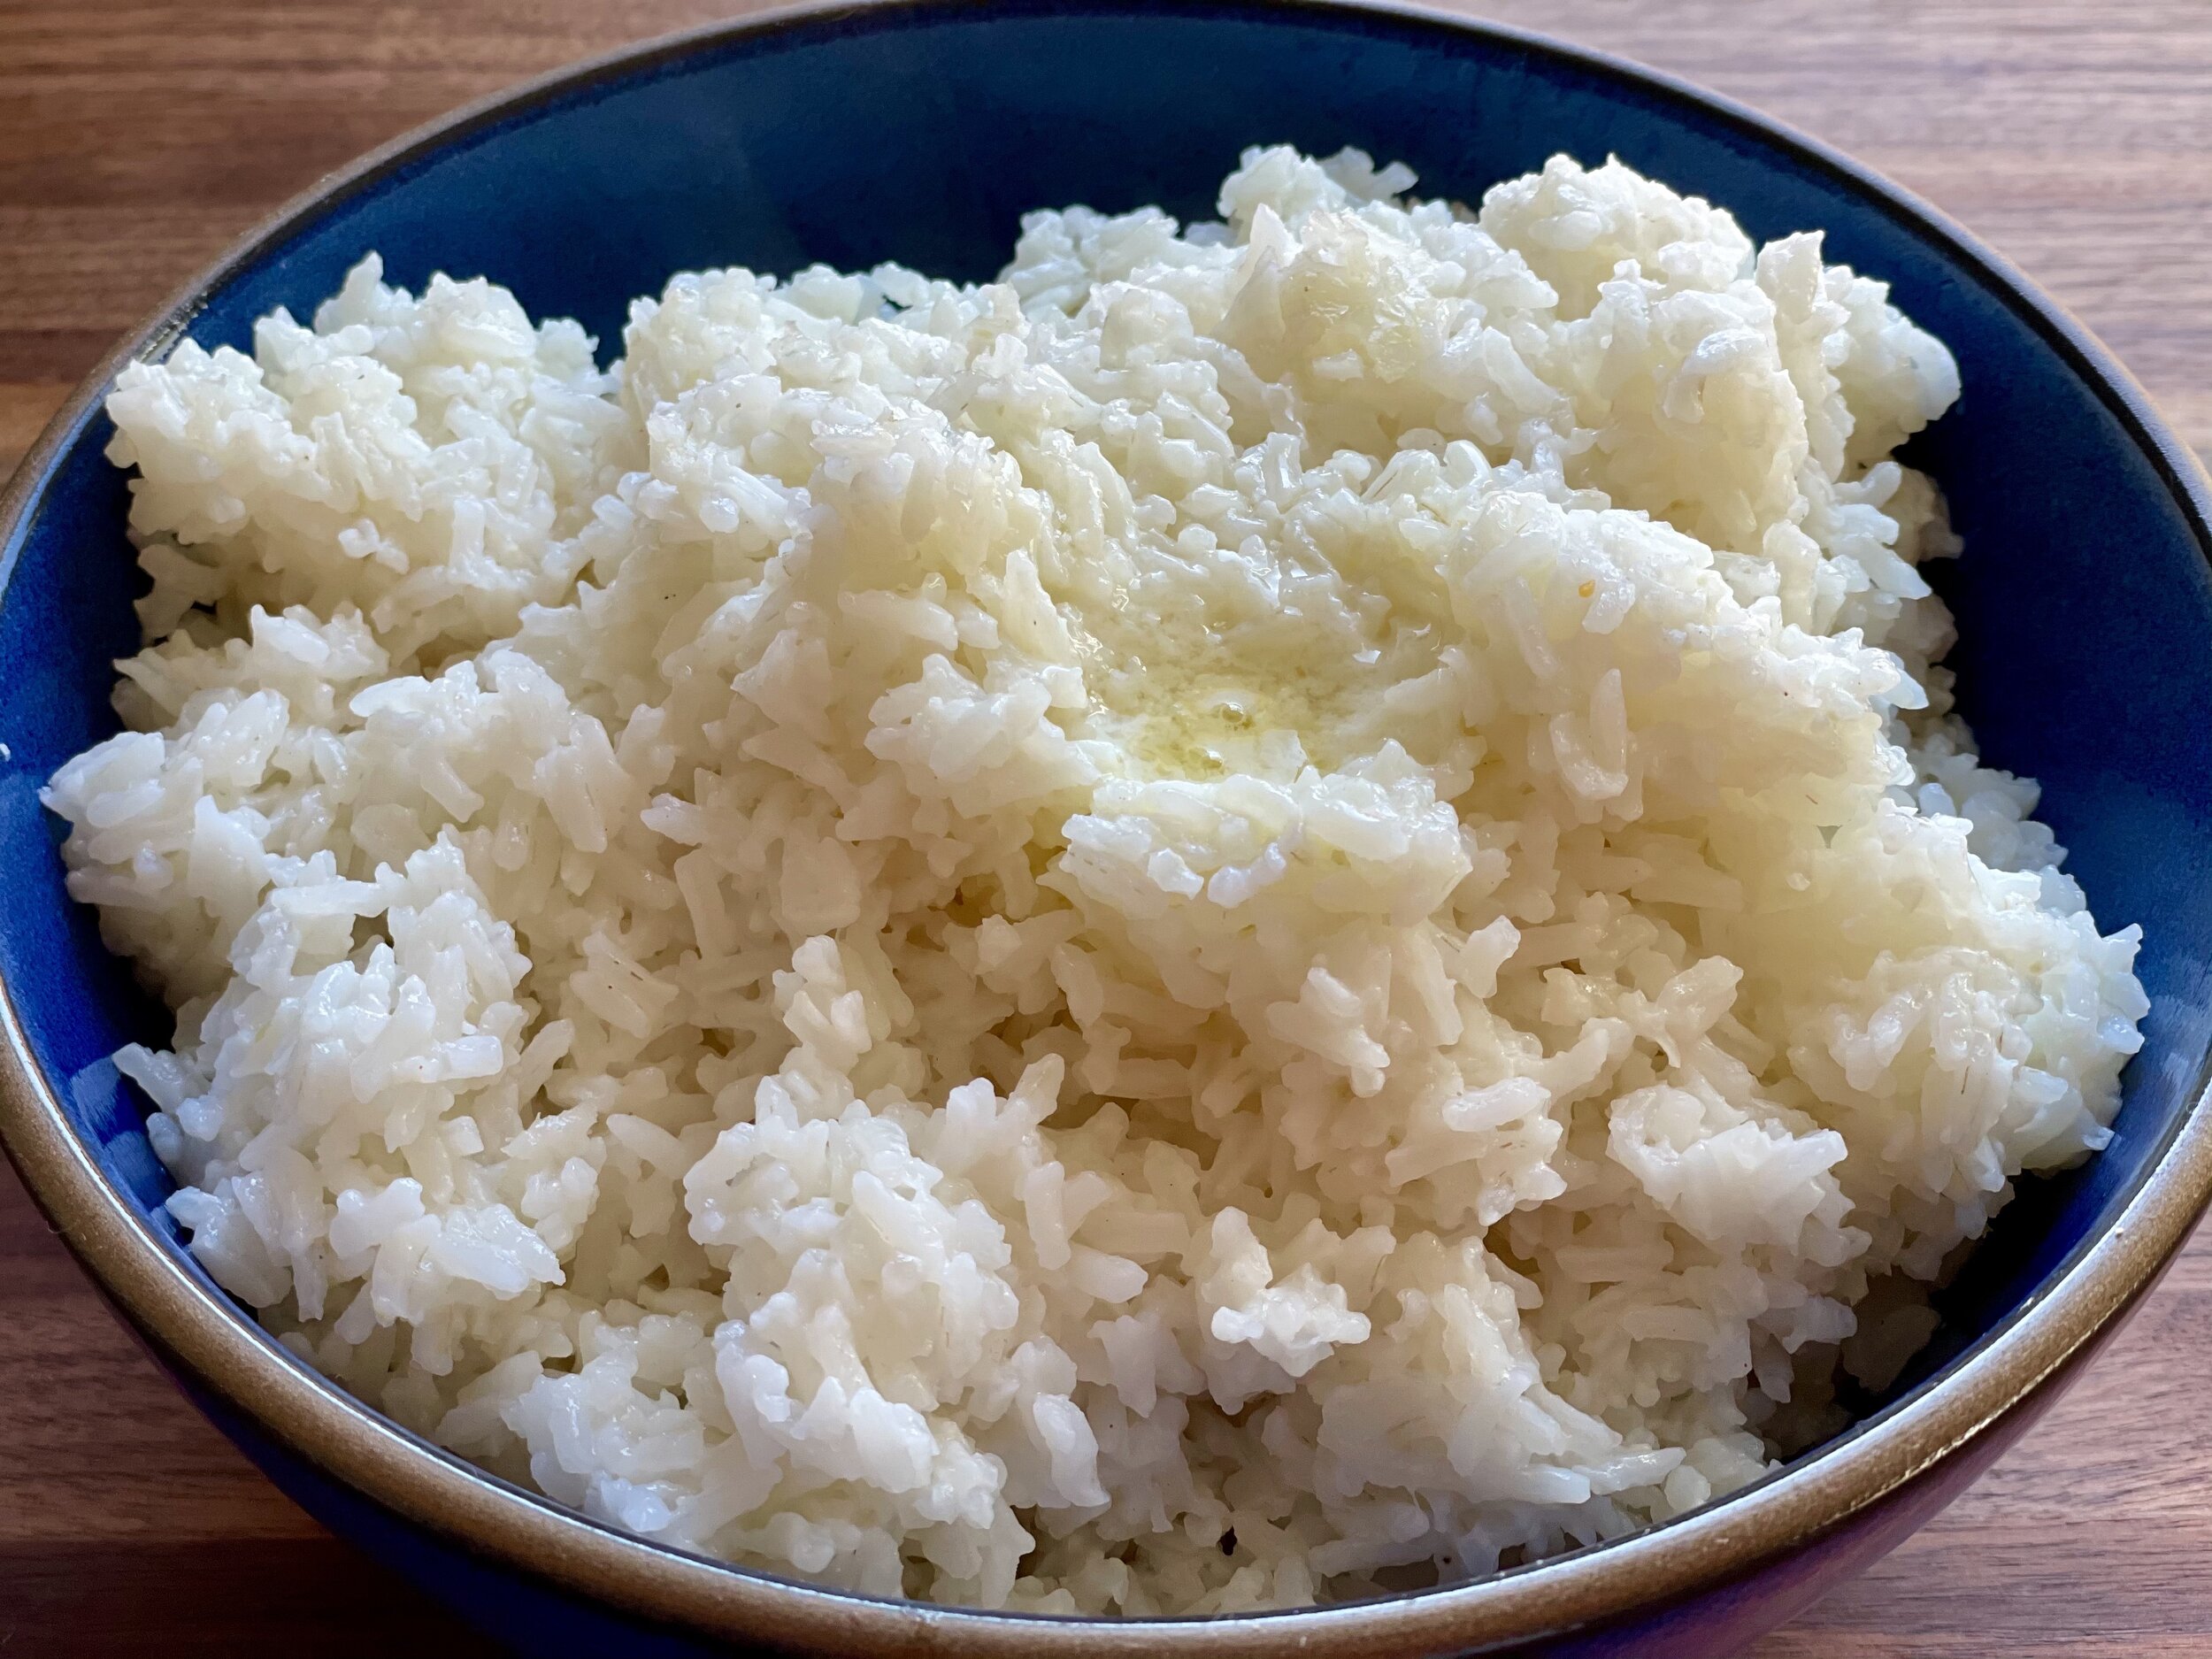
Best Coconut Rice (Low FODMAP)
25 minutes • Gluten-free • Dairy-free • Low FODMAP • Serves 6
5 Minutes prep • 20 Minutes cook • Low FODMAP • Gluten-free • Lactose-free • Serves 6 • Ok to make ahead: Steps 1-4
It’s time to take your rice game up a few notches with this super creamy coconut rice. Serve this rice with our grilled cod and pineapple salsa for an island-themed dinner, or with curried chicken, sticky ginger chicken, kung pao chicken, or stir fry. It makes a delicious foundation for any Asian-themed main course.
Ingredients
2 teaspoons olive oil or toasted sesame oil
2 cups jasmine rice, rinsed and drained
1 can coconut milk (14 ounces)
10 ounces water (for a total of 3 cups of liquid)
1 teaspoon kosher salt
Directions
(1) Prepare: Put the rice in a fine strainer and rinse under cold water until the water runs clear. Set aside and let drain.
(2) Saute: Heat the olive oil or toasted sesame oil in a large saucepan over medium heat. Add the rice and sauté for 2 minutes.
(3) Cook: Add the coconut milk, water, and salt and bring to a boil. Reduce heat to a simmer, cover, and cook 15-20 minutes, until the liquid has been absorbed.
(4) Finish: Fluff with a fork and let sit, covered, until ready to serve.
Eat and enjoy every bite because you can!
Recipe note: I use Diamond Crystal Kosher salt in all my recipes because it has a wonderful flat and crisp flake that tastes delicious. It is also the least salty salt available so you can use it more liberally as a seasoning than you can table salt or sea salt. If you use another type of salt, you may need to reduce the amount so it is not over-salted.
Link note: This post contains links for you to easily purchase items listed on the page. In some cases, we have provided a special discount code for IBS Game Changers so be sure to use it when you purchase an item to get the discount that has been arranged just for you! As an Amazon Associate, I earn a commission from qualifying Amazon purchases.
More Deliciously Low FODMAP™ side dishes
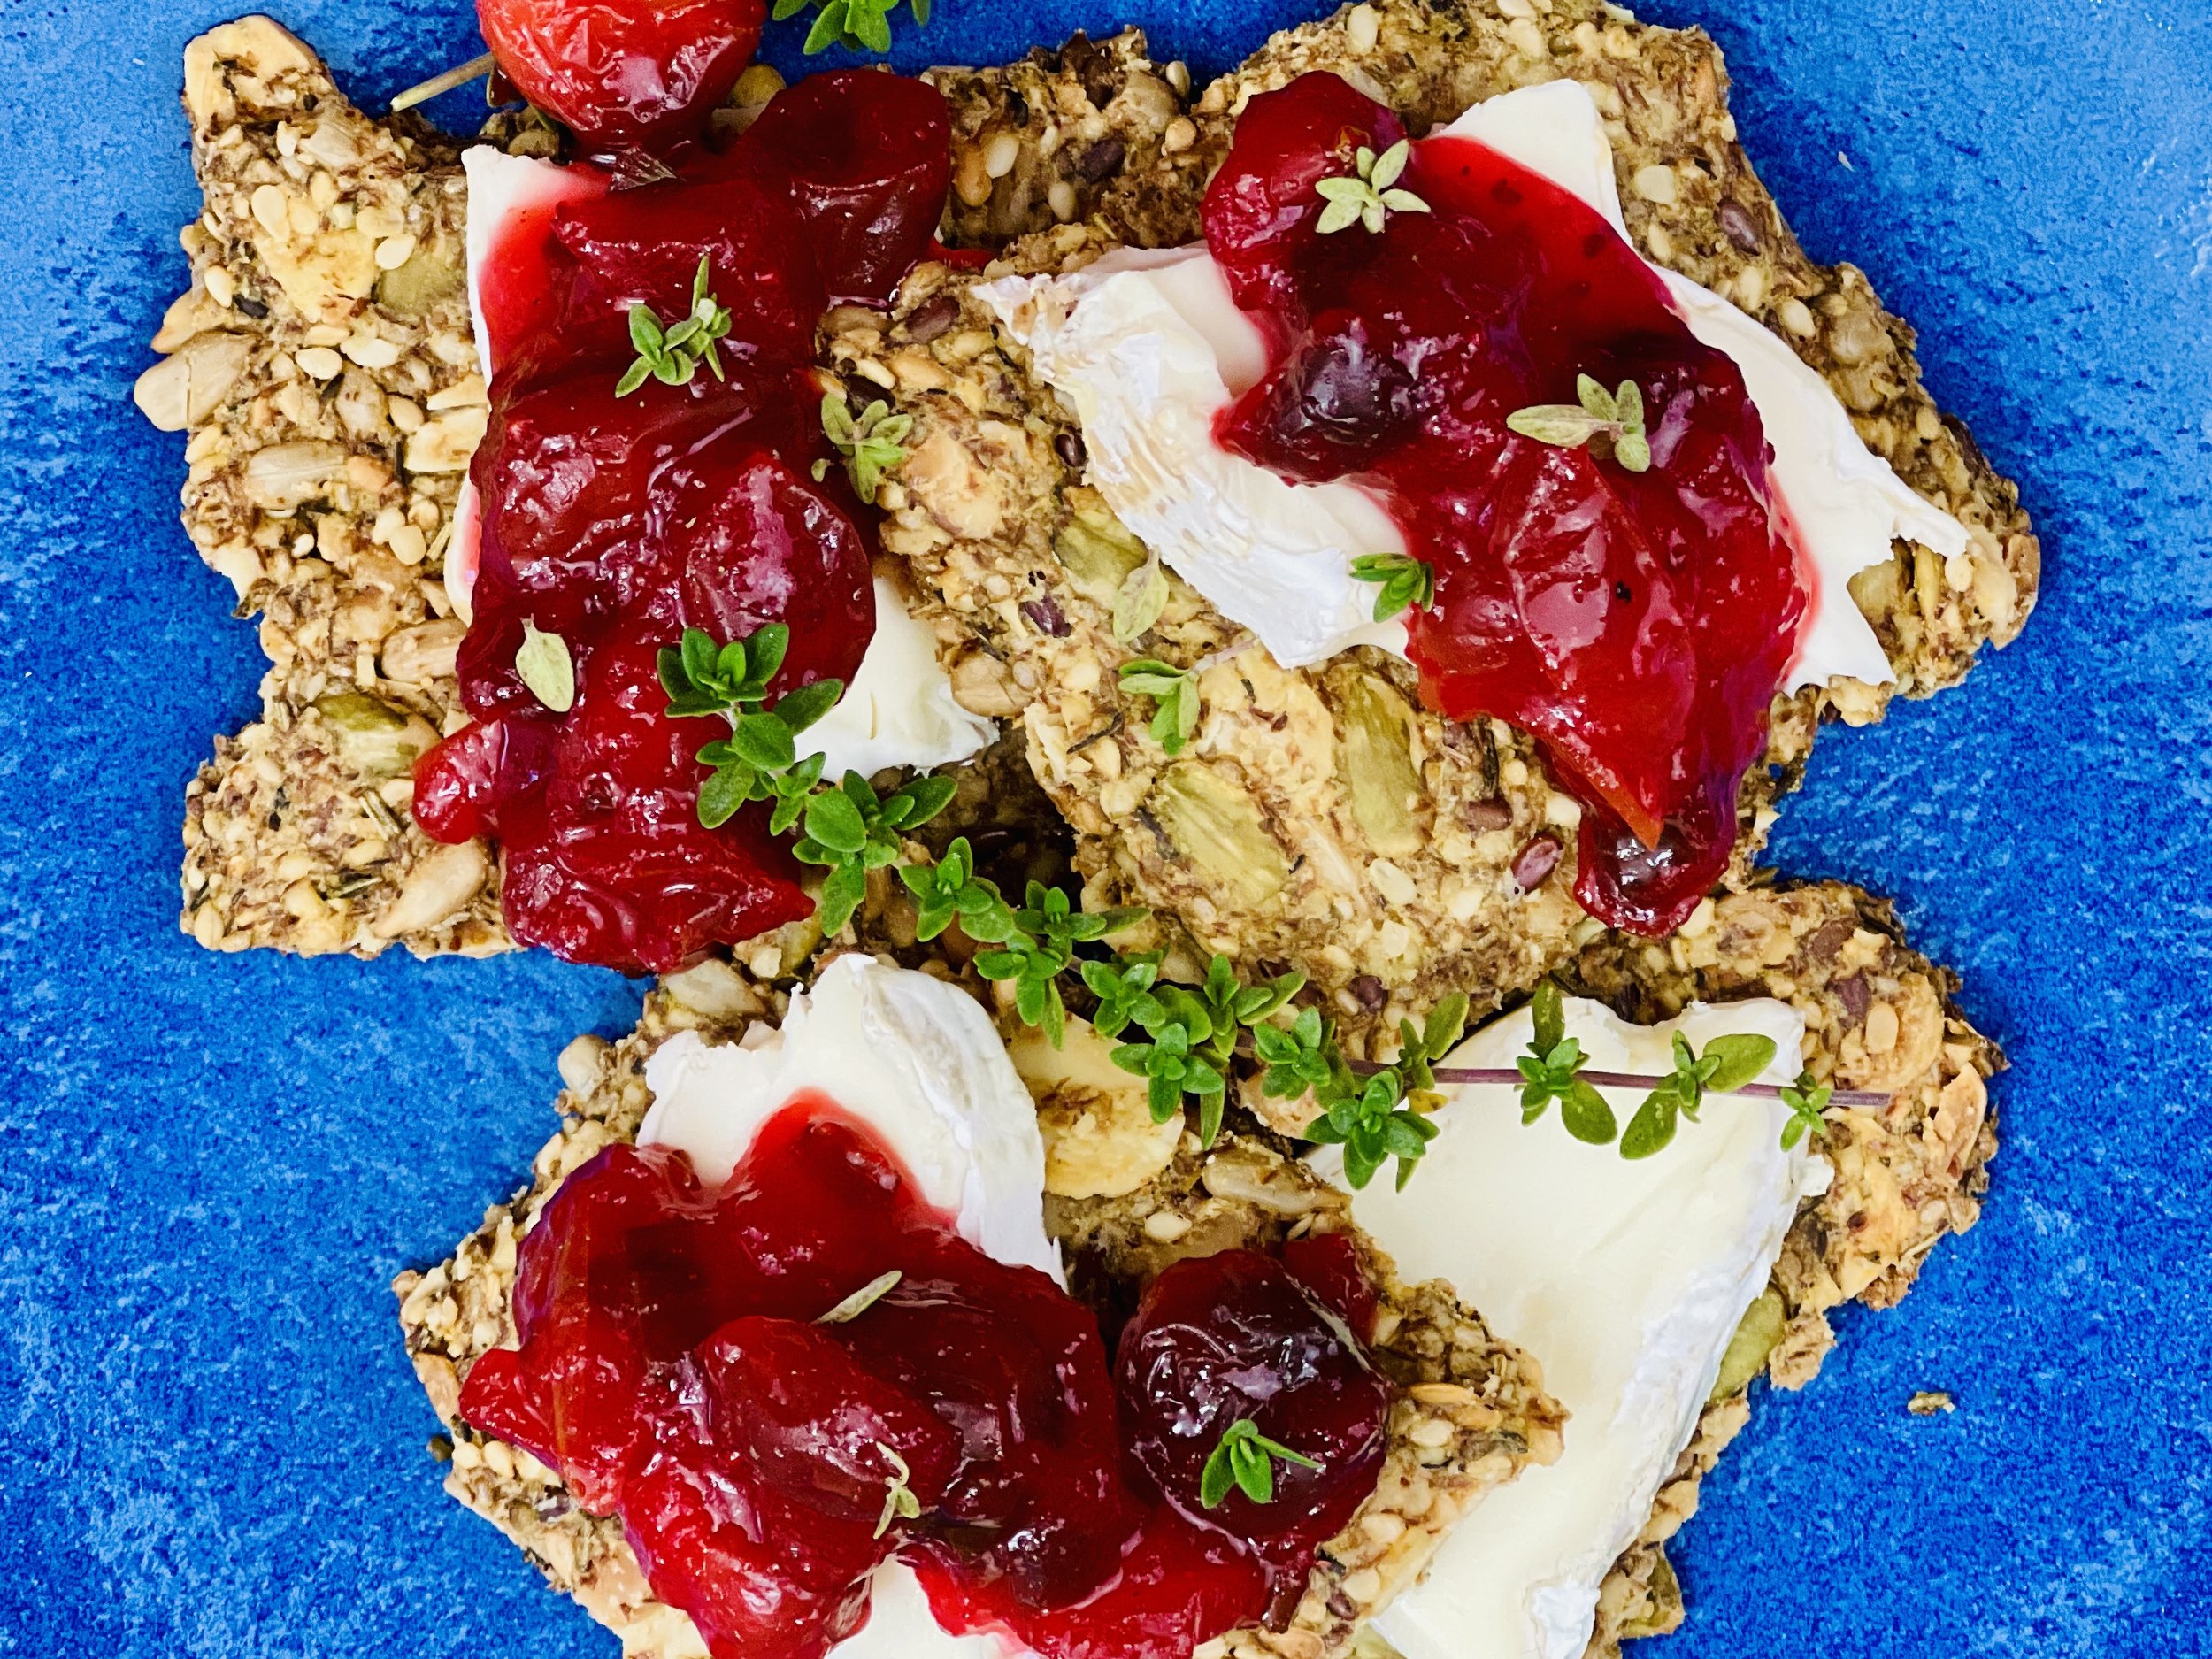


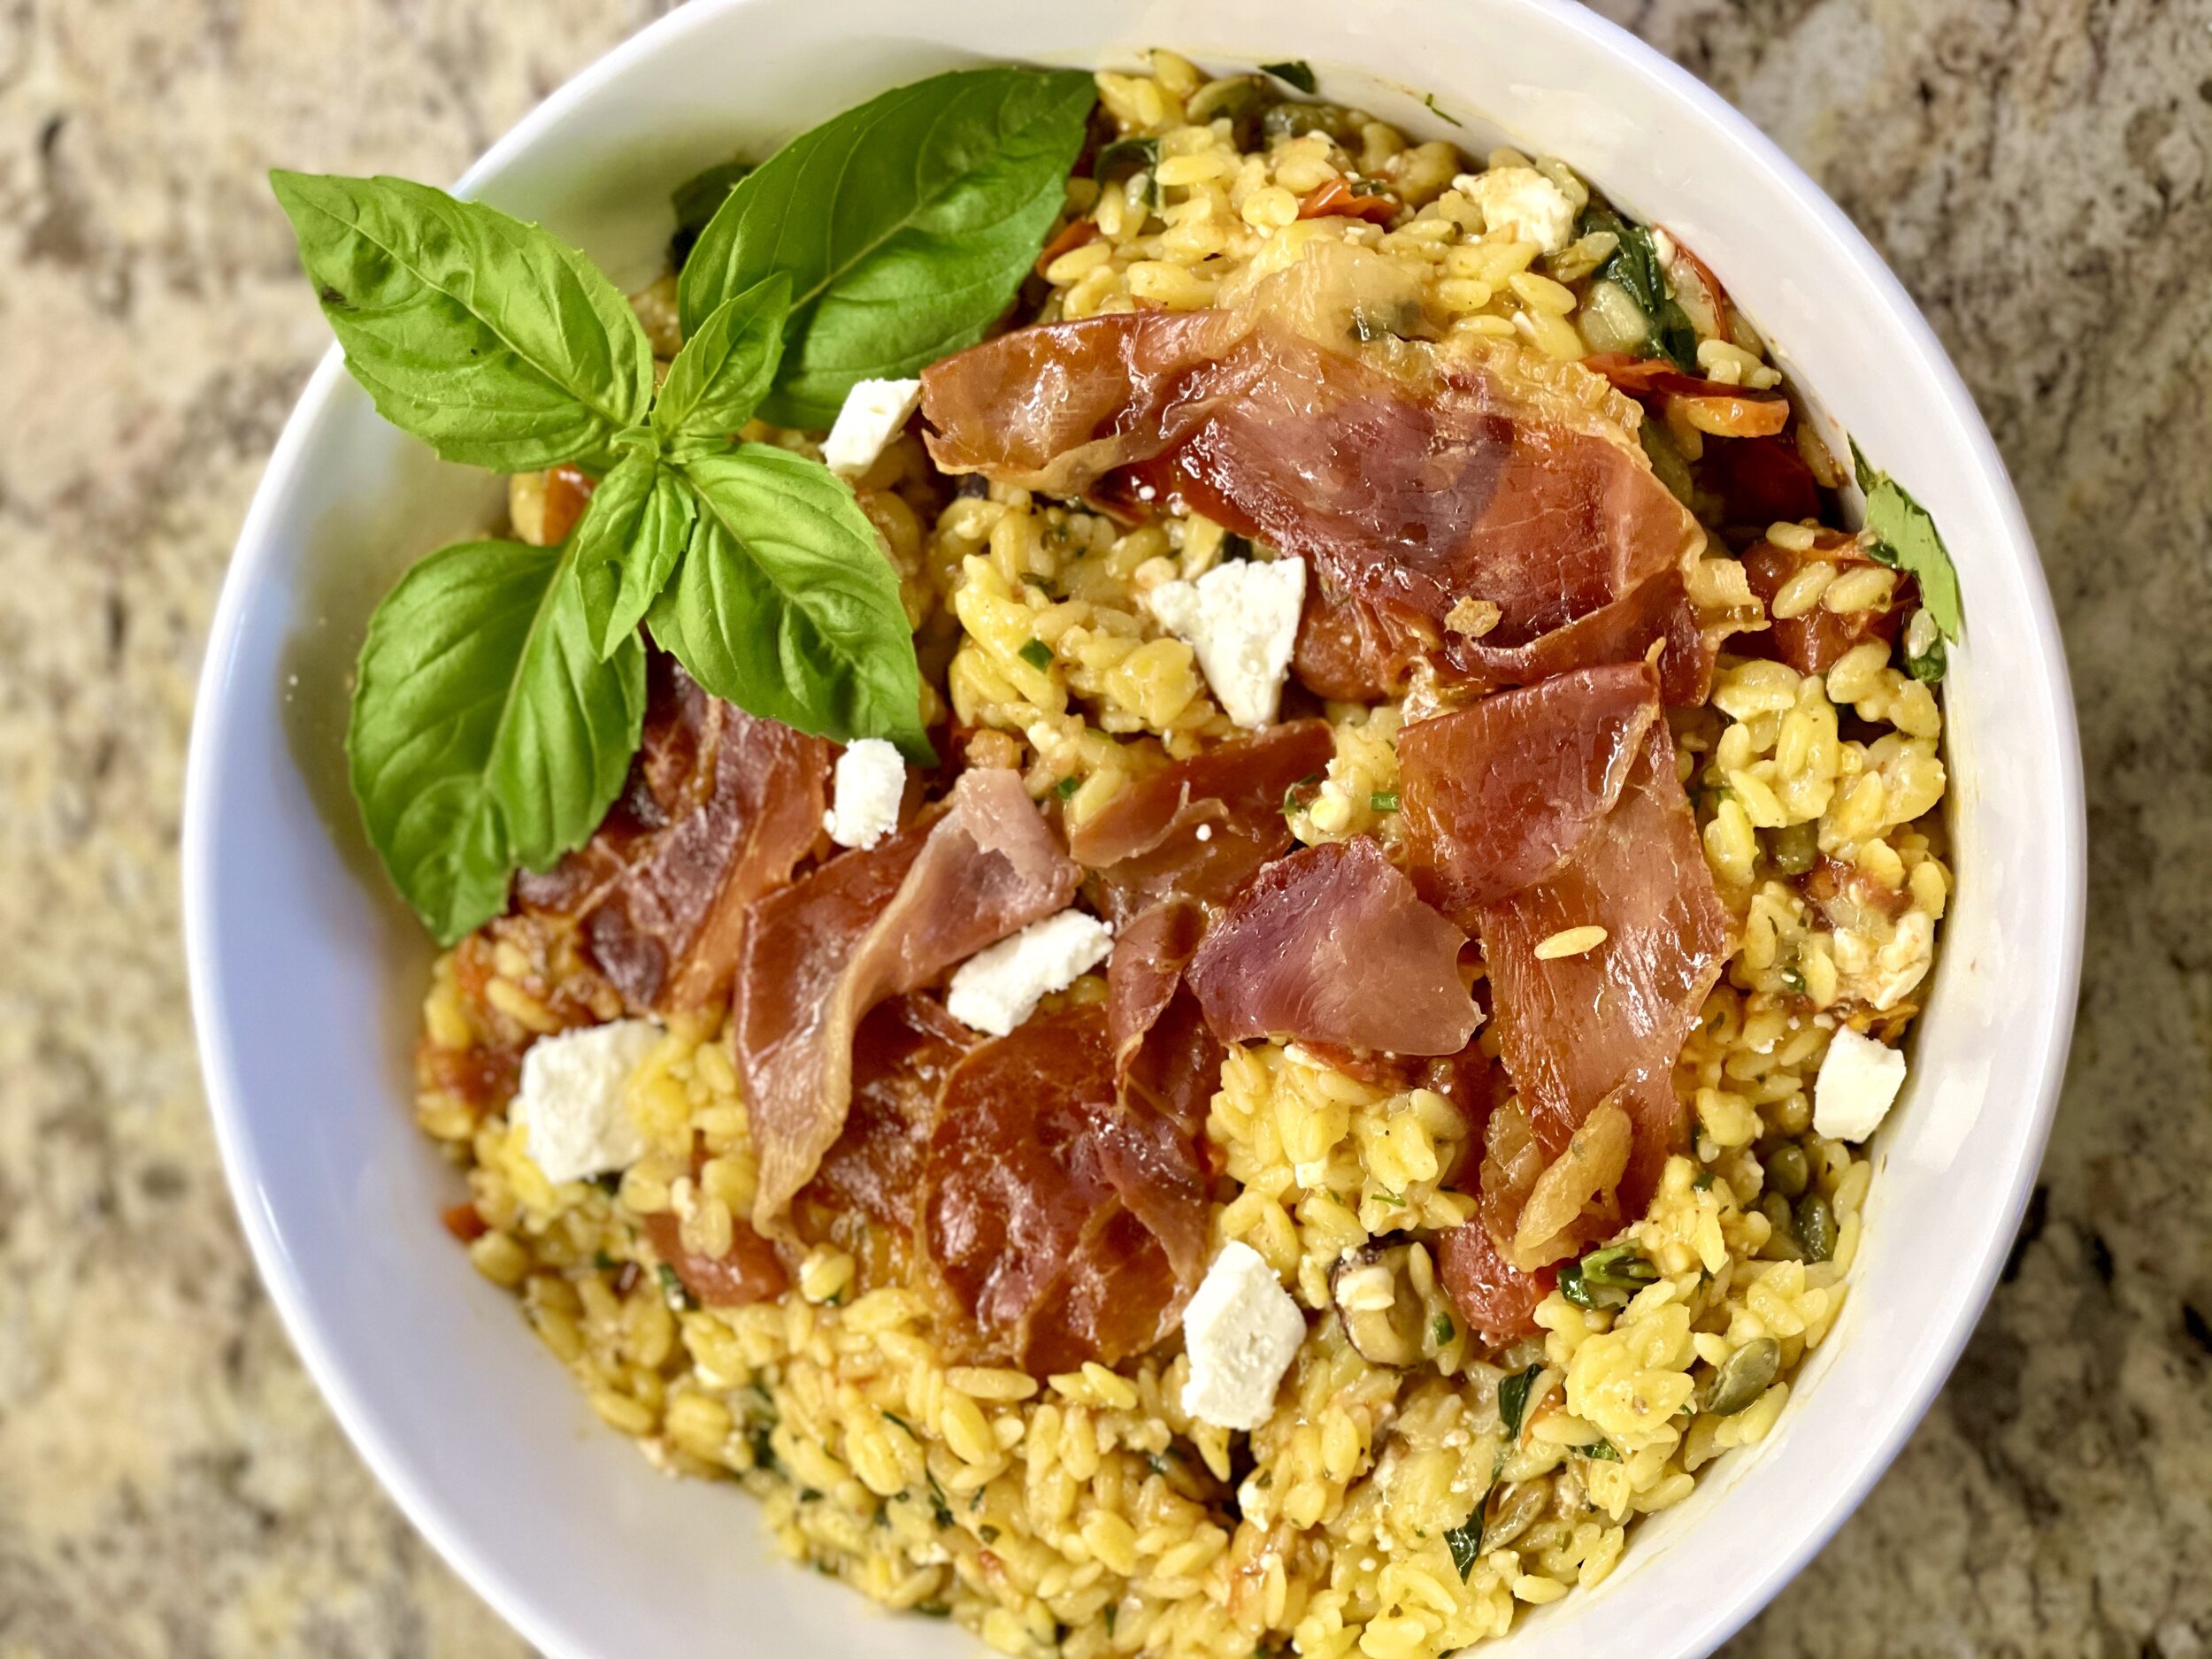
Orzo with roasted cherry tomatoes, and crispy prosciutto (low FODMAP)
30 minutes • Gluten-free • Low FODMAP • Vegetarian option • Serves 4 - 6
30 minutes • Gluten-free • Low FODMAP • Vegetarian option • Serves 4 - 6 • Creamy orzo and crispy prosciutto all wrapped up in a super flavorful sauce make this a wonderful main course or side dish. It can be served warm or chilled so it’s a great make-ahead meal for guests or a busy weeknight. It’s great heated up the next day for lunch too!
INGREDIENTS:
7 tablespoons garlic-infused olive oil
4 cups cherry tomatoes
2 tablespoons fresh thyme leaves (or 2 teaspoons dried thyme)
1 teaspoon chili powder
3 teaspoons maple syrup
3 ounces prosciutto, torn (optional but very good!)
1 pound gluten-free dry orzo pasta (or substitute arborio rice if you prefer to make this more like a risotto)
2 tablespoons red wine vinegar
Pinch red pepper flakes
1/2 cup fresh basil, roughly chopped
Chopped chives for serving (optional)
8 ounces feta cheese, crumbled, plus more for serving
1/3 cup toasted pumpkin seeds or pine nuts plus more for serving
DIRECTIONS:
Preheat the oven to 425° F.
In a roasting pan, combine 3 tablespoons garlic-infused olive oil, tomatoes, thyme, chili powder, 1 teaspoon maple syrup, and a pinch each of salt and pepper. Roast for 20-25 minutes, until the tomatoes burst.
Line a baking sheet with parchment paper and arrange the prosciutto in an even layer. Put in the oven with the tomatoes and bake 5-8 minutes until the prosciutto is crisp.
Bring a large pot of salted water to a boil. Boil the orzo until al dente per package instructions. Drain.
Meanwhile, in a large bowl, combine 4 tablespoons garlic-infused olive oil, the red wine vinegar, 2 teaspoons maple syrup, and a pinch each of red pepper flakes, salt, and pepper. Add the hot orzo and fresh herbs, toss to combine. Add the tomatoes and any juices left in the pan, the feta, and toasted pumpkin seeds or pine nuts, gently toss. Top with prosciutto.
Serve with additional feta, pumpkin seeds, and chopped dill
Eat and enjoy every bite because you can!
Pro tips: This dish can be served warm or chilled as a salad so it’s a great make-ahead dish for guests or a busy weeknight. Leave the prosciutto out for a delicious vegetarian version.
This post may contain affiliate links so you can easily purchase items listed on the page. There is no increased cost to you for purchasing items through these links so feel free to use them!
More Deliciously Low FODMAP™ main courses you might enjoy
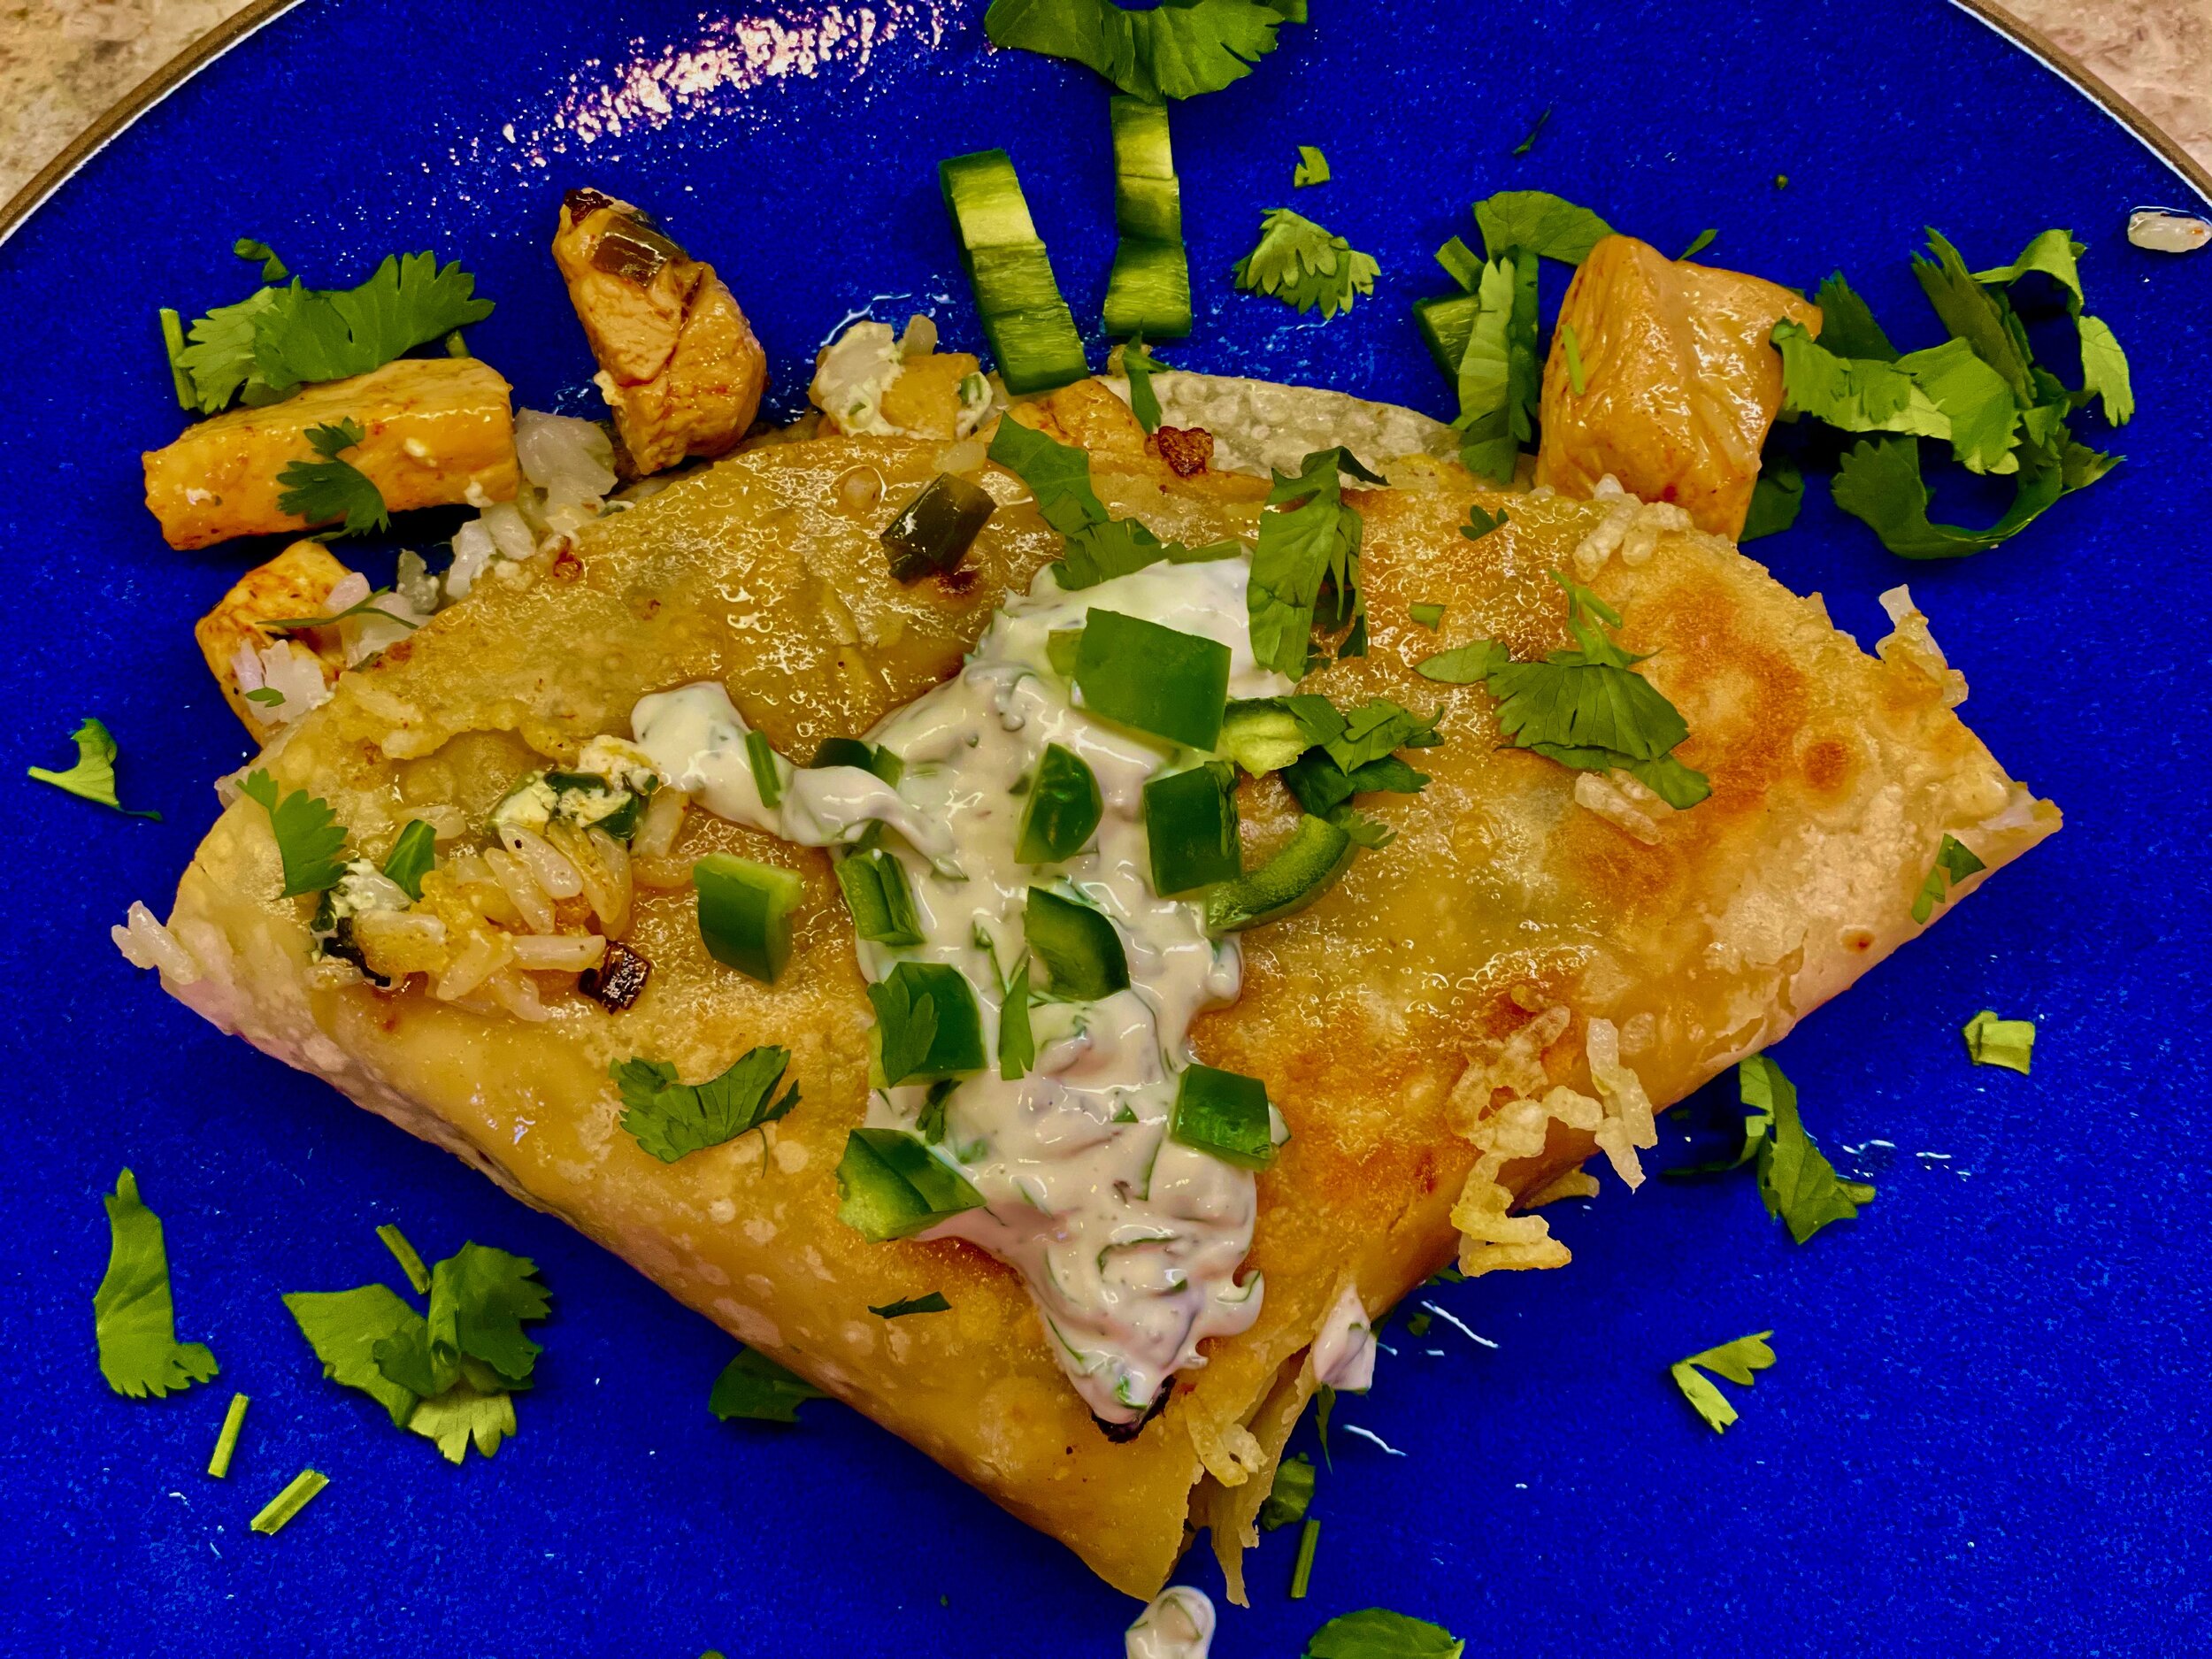
Chipotle chicken crunch wraps (low FODMAP)
30 minutes • Gluten-free • Low FODMAP • Serves 4
30 minutes • Gluten-free • Low FODMAP • Serves 4 • Rich and flavorful chipotle chicken, with rice, cheese, and a spicy ranch dressing all wrapped up in a crunchy tortilla. It’s delicious. My son says this is one of his top five favorites and I agree!
INGREDIENTS:
2 tablespoons Sigona’s garlic-infused olive oil (Sigona’s is the best flavor garlic-infused olive oil I have find and I really recommend it—but you can use other low FODMAP brands as well)
1 pound boneless skinless chicken, cut into bite-size pieces
6 green onions (green part only), chopped
1 teaspoons chipotle chili pepper flakes
1 1/2 teaspoons smoked paprika
1 teaspoon ground cumin
2 teaspoons Smoke n’ Sanity essence of garlic salt
Or: 1 teaspoon Gourmend garlic scape powder and 1 teaspoon kosher salt
1/2 teaspoon dried oregano
6 large (burrito size) brown rice tortillas (or other low FODMAP tortillas)
1 cup cooked white rice or brown rice
1/4 cup fresh cilantro chopped (or substitute chives if you are not a cilantro fan)
2 cups shredded extra-sharp cheddar cheese
1 jalapeno pepper, seeded and chopped (for serving)
SPICY RANCH INGREDIENTS:
1 cup lactose-free sour cream
3/4 cup fresh cilantro, finely chopped (or substitute chives if you are not a cilantro fan)
2 teaspoons Smoke n’ Sanity Supper Club Ranch
Or: 1 teaspoon Gourmend garlic scape powder
1 jalapeño seeded and chopped
Juice of 1 lime
1 teaspoon kosher salt
DIRECTIONS:
Cook the rice per package instructions.
Prepare your ingredients by chopping the chicken and the green onions, grating the cheese, and measuring the spices into a small bowl.
In a large skillet, heat the olive oil over medium-high heat. When the oil shimmers, add the chicken and green onions. Cook until the chicken is browned, about 5 minutes. Add the spices and 3/4 cup water. Reduce the heat to medium and simmer until the sauce has thickened slightly around the chicken, about 10 minutes. Remove from the heat.
Meanwhile, make the ranch dressing. Combine all ingredients in a small bowl and stir until well combined.
Crunch wrapping!
To assemble, cut down from the center of the tortilla to the edge (click “print recipe” to see the PDF with photos to show technique). Spread some ranch on the top right corner, and put some cheese on the bottom right corner. Put a spoon of rice in the top left corner and spread some chicken on the rice. Fold the bottom left corner of the tortilla over the chicken and rice. Then, working clockwise, fold that quarter over the ranch. And finally, fold that quarter down over the cheese until you have a triangle shape with all the ingredients nicely captured inside.
Eat and enjoy every bite because you can!
Pro Tips:
Check out this video for a quick “how-to” on doing the wrap. It’s easy. And fun. And delicious!
Regarding seasoning: I have provided substitutions, but I really recommend the Smoke n’ Sanity essence of garlic salt and the Smoke n’ Sanity low FODMAP Supper Club Ranch seasonings in this recipe as they add complexity and intensify the flavor in a wonderful way. Get 10% off when you order your own bottle and use the code “IBSGC10”
This post may contain affiliate links so you can easily purchase items listed on the page. There is no increased cost to you for purchasing items through these links so feel free to use them!
More Deliciously Low FODMAP™ main courses you might enjoy
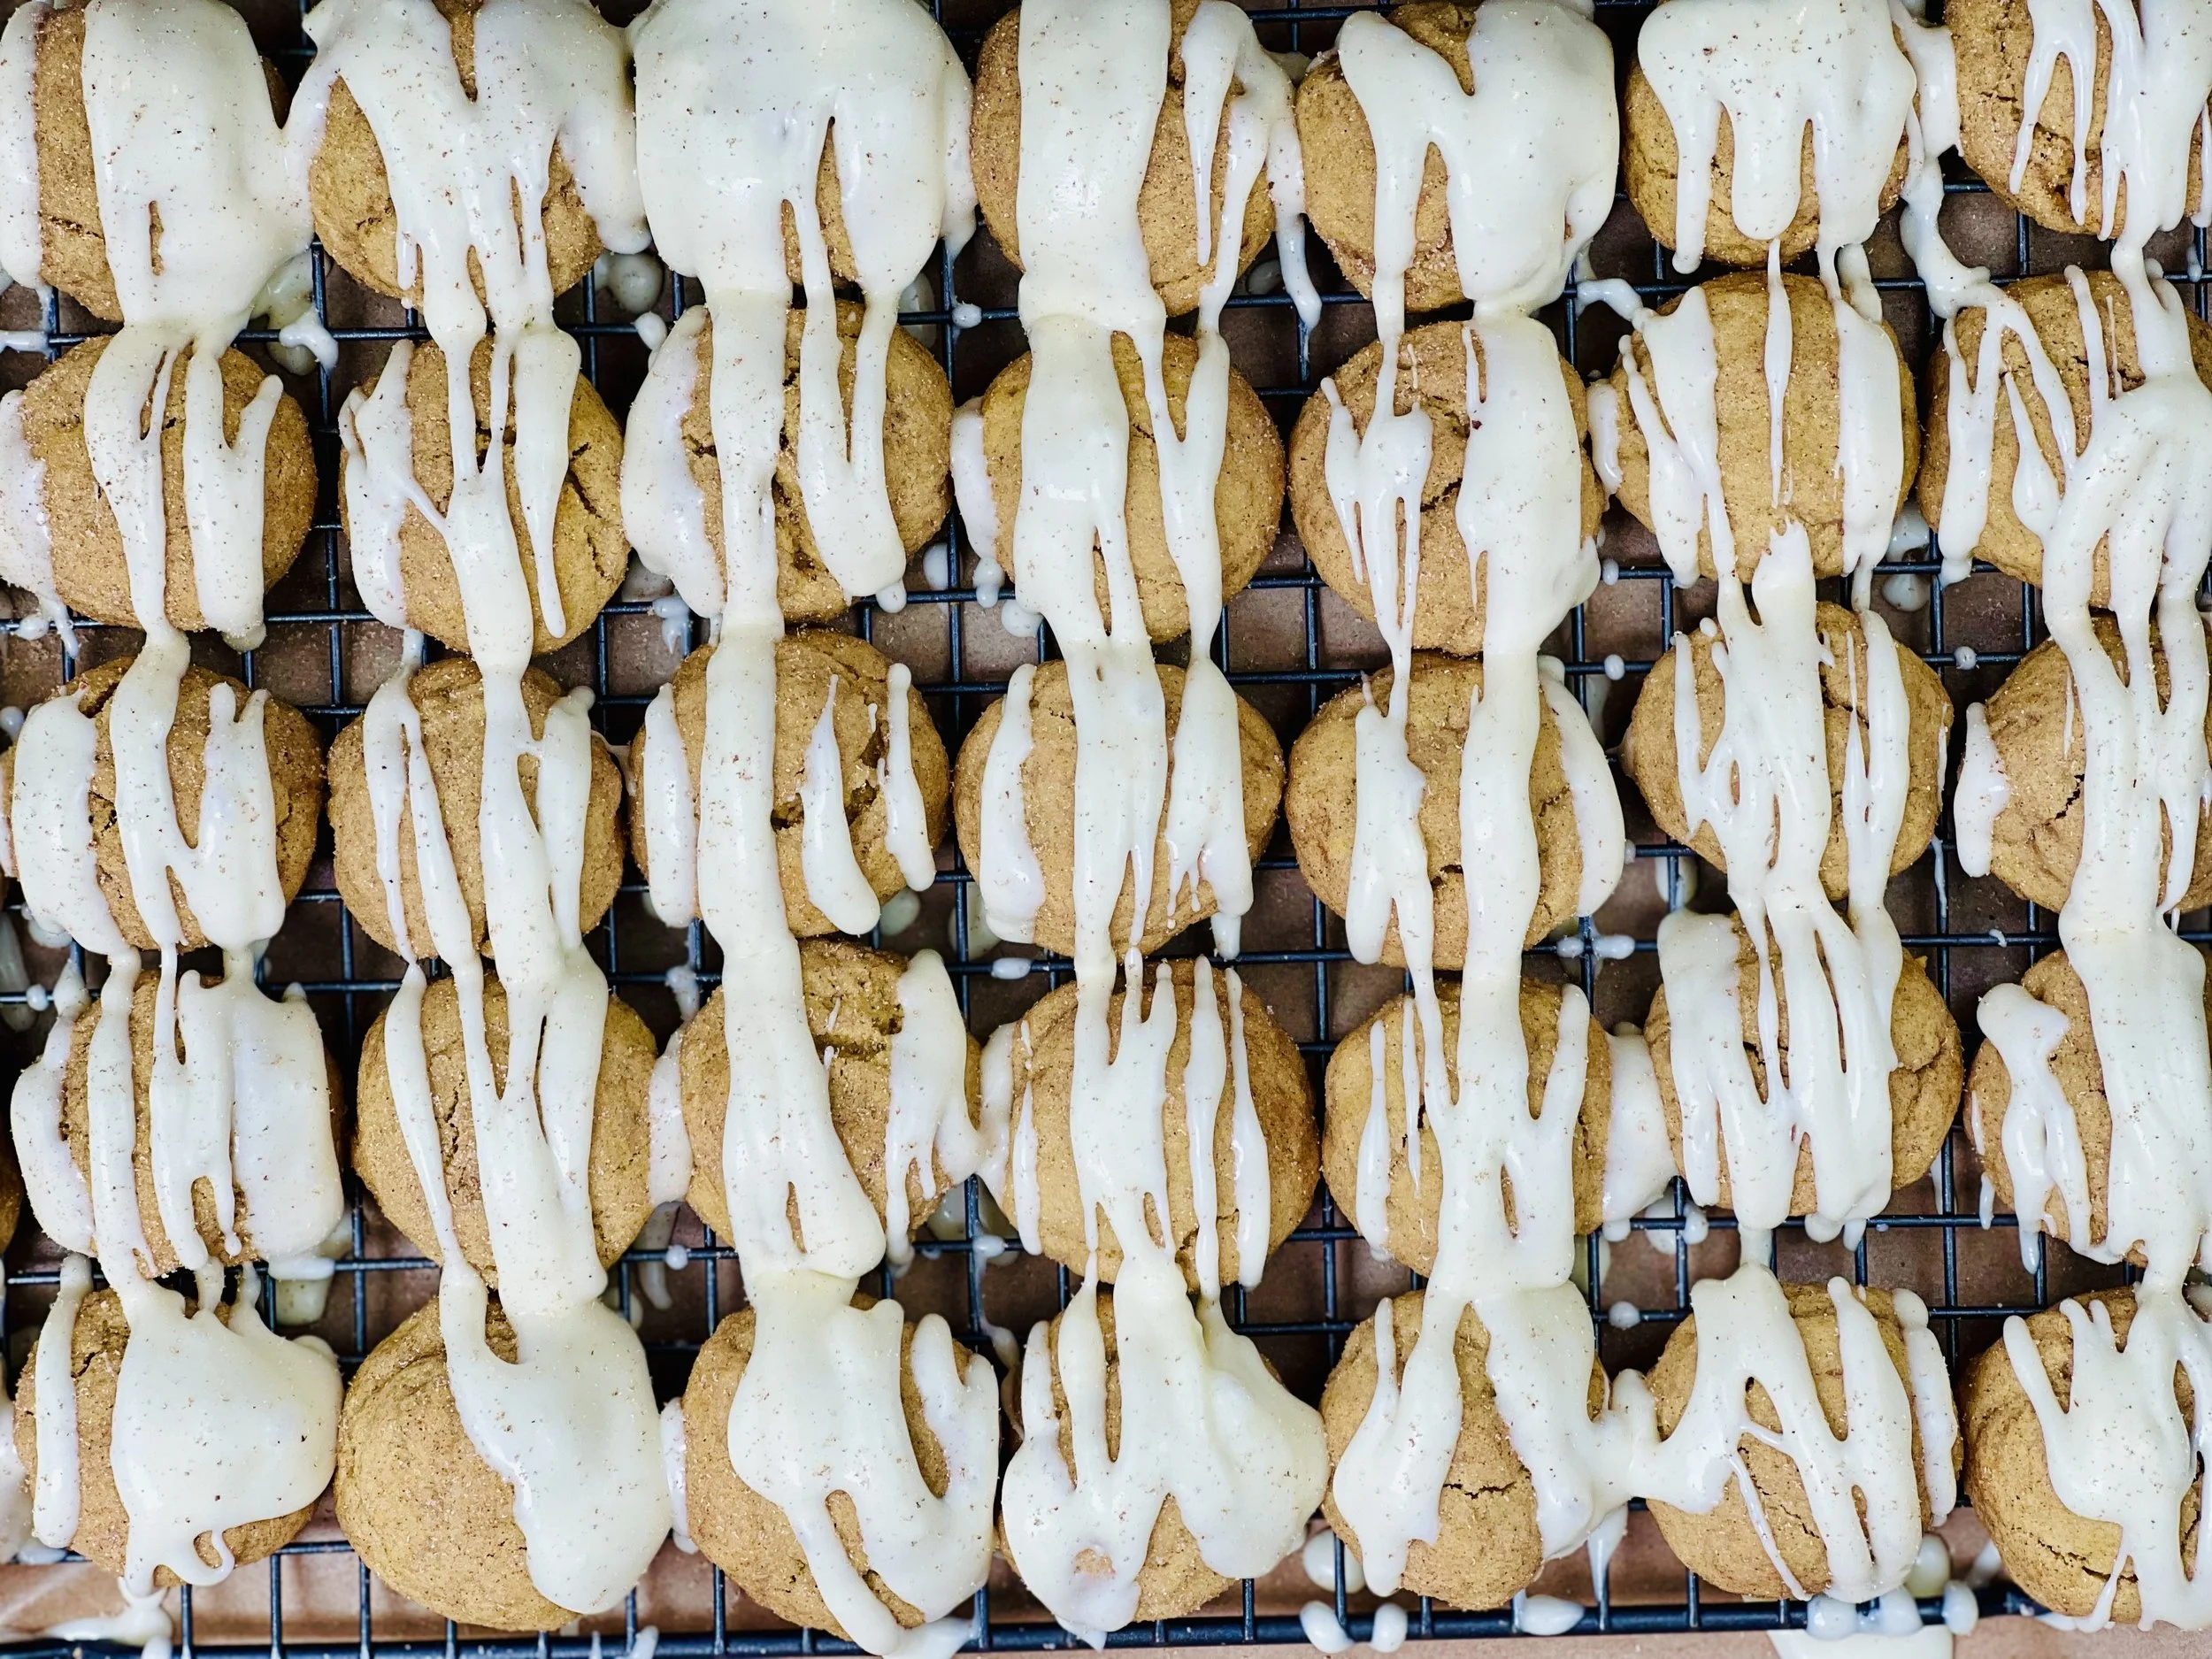
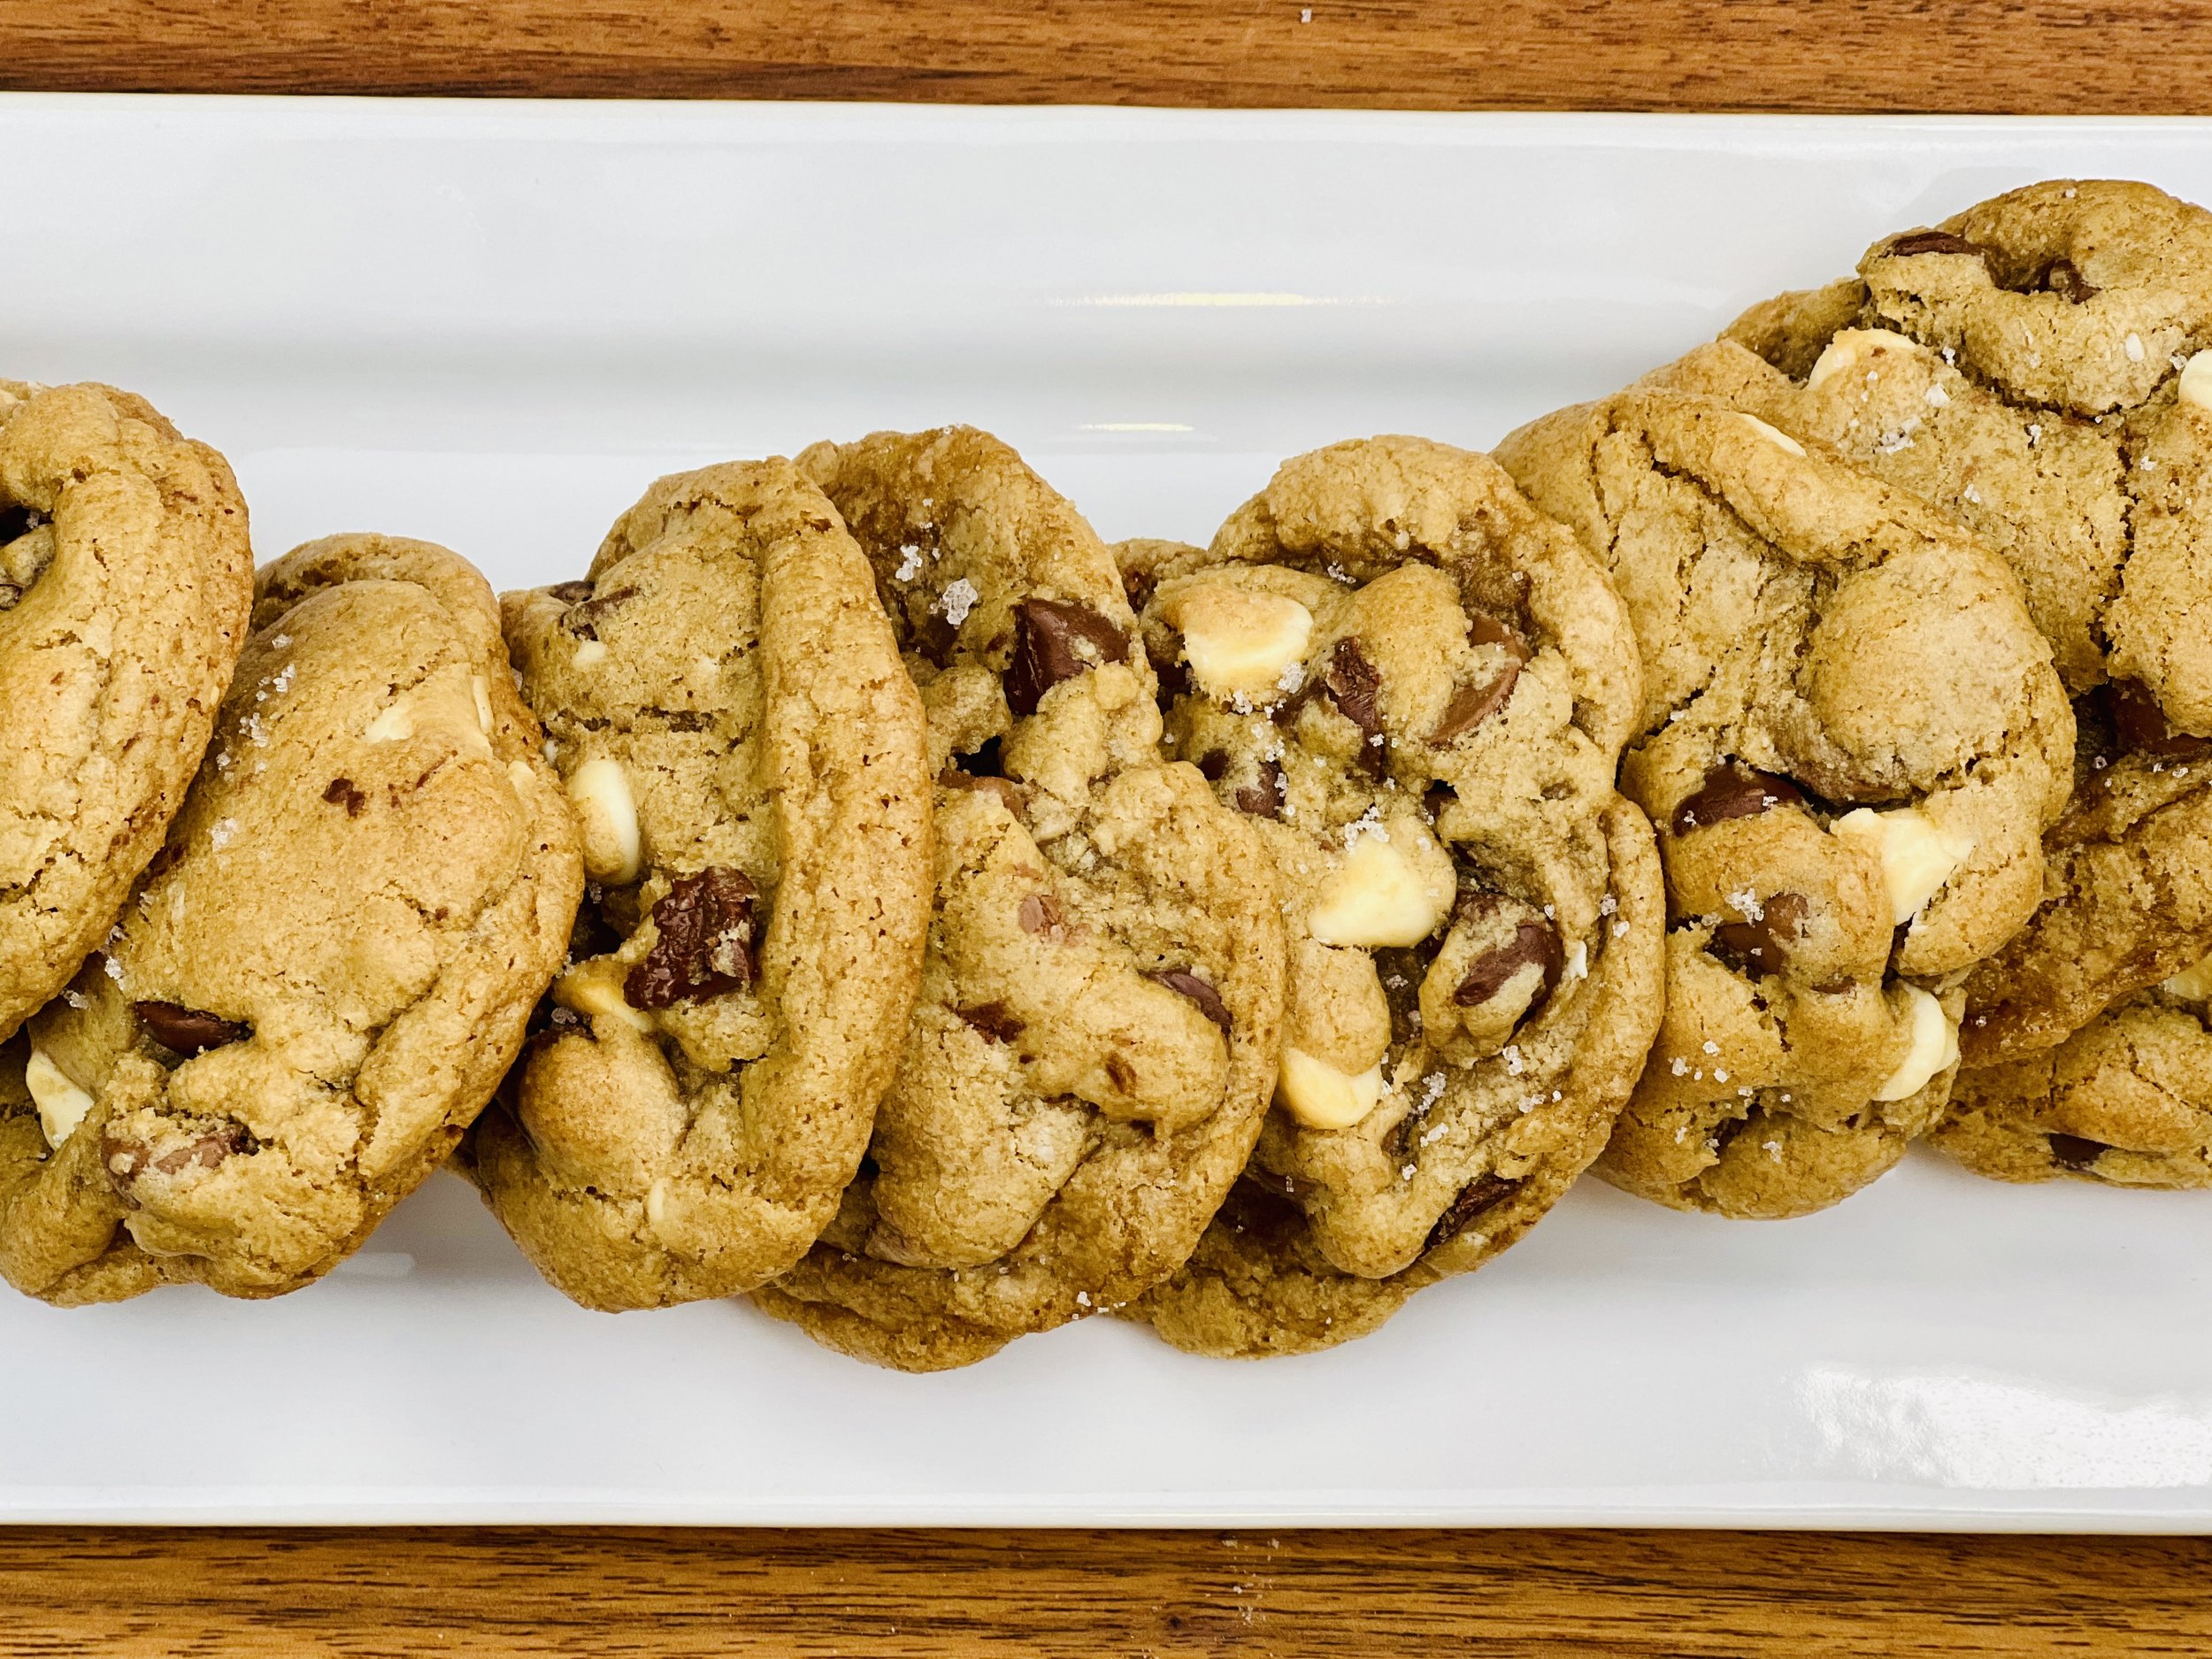
Chocolate dipped mocha meltaways (low FODMAP)
45 minutes • Gluten-free • Low FODMAP • Makes about 3 dozen cookies
45 minutes • Gluten-free • Low FODMAP • Makes about 3 dozen cookies • These chocolate-covered mocha cookies are reminiscent of those classic bakery cookies you had when you were a kid. They’re perfect with a hot cup of tea or coffee. The custard powder gives them a fine texture and the chocolate dip helps hold them together. They are a delightful change of pace from the routine chocolate chip cookie!

INGREDIENTS:
3/4 cups unsalted butter, cubed and softened to room temperature
1 1/4 cup gluten-free all-purpose flour
1/2 cup custard powder, preferably Bird’s (or substitute 6 tablespoons vanilla instant pudding and reduce the sugar by 2 tablespoons)
1/2 cup plus 1 tablespoon confectioners’ sugar
1/2 teaspoon instant decaf espresso powder (such as Starbucks decaf Via)
2 tablespoons lactose-free half and half
1/4 teaspoon vanilla extract
5 1/4 ounces semi-sweet chocolate chips
3/4 cup dark chocolate tempered dipping chocolate wafers
Flaky salt, for sprinkling (optional)
DIRECTIONS:
Preheat oven to 350°F and line two baking sheets with parchment paper.
Add the butter to the bowl of a stand mixer and beat with the paddle attachment until it turns pale and fluffy about 2-3 minutes.
Remove the bowl from the mixer and sift the flour, custard powder, confectioners’ sugar, and espresso powder on top of the butter.
Return to the mixer and mix on low speed until the mixture comes together in an even crumble. Scrape the sides of the bowl down with a rubber spatula.
Add the milk and vanilla and mix on medium speed until you get a smooth dough, about 1 minute.
Add the chocolate chips and mix on medium speed for about 30 seconds until evenly distributed.
Using a tablespoon or cookie dough scoop, drop about 36 evenly sized scoops about 1 inch apart onto the parchment-lined cookie sheets.
The cookies will not spread during baking so before putting them in the oven press them down with the bottom of a glass or with a fork dipped in powdered sugar to prevent them from sticking to the dough.
Bake for about 15 minutes, until the edges start to turn golden brown, swapping the baking sheets between the oven racks and rotating them halfway through the baking time.
Let the cookies cool on the baking sheets for about 5 minutes, then carefully transfer them to a wire rack to cool completely.
Meanwhile, melt the tempered dipping chocolate in the microwave. Dip each cookie and lay them back down on the parchment to let the chocolate set. As the chocolate is setting you may sprinkle with flaky salt if you’d like.
Store the dipped cookies in an airtight container for 2 or 3 days.
Enjoy!
This post may contain affiliate links so you can easily purchase items listed on the page. There is no increased cost to you for purchasing items through these links so feel free to use them!
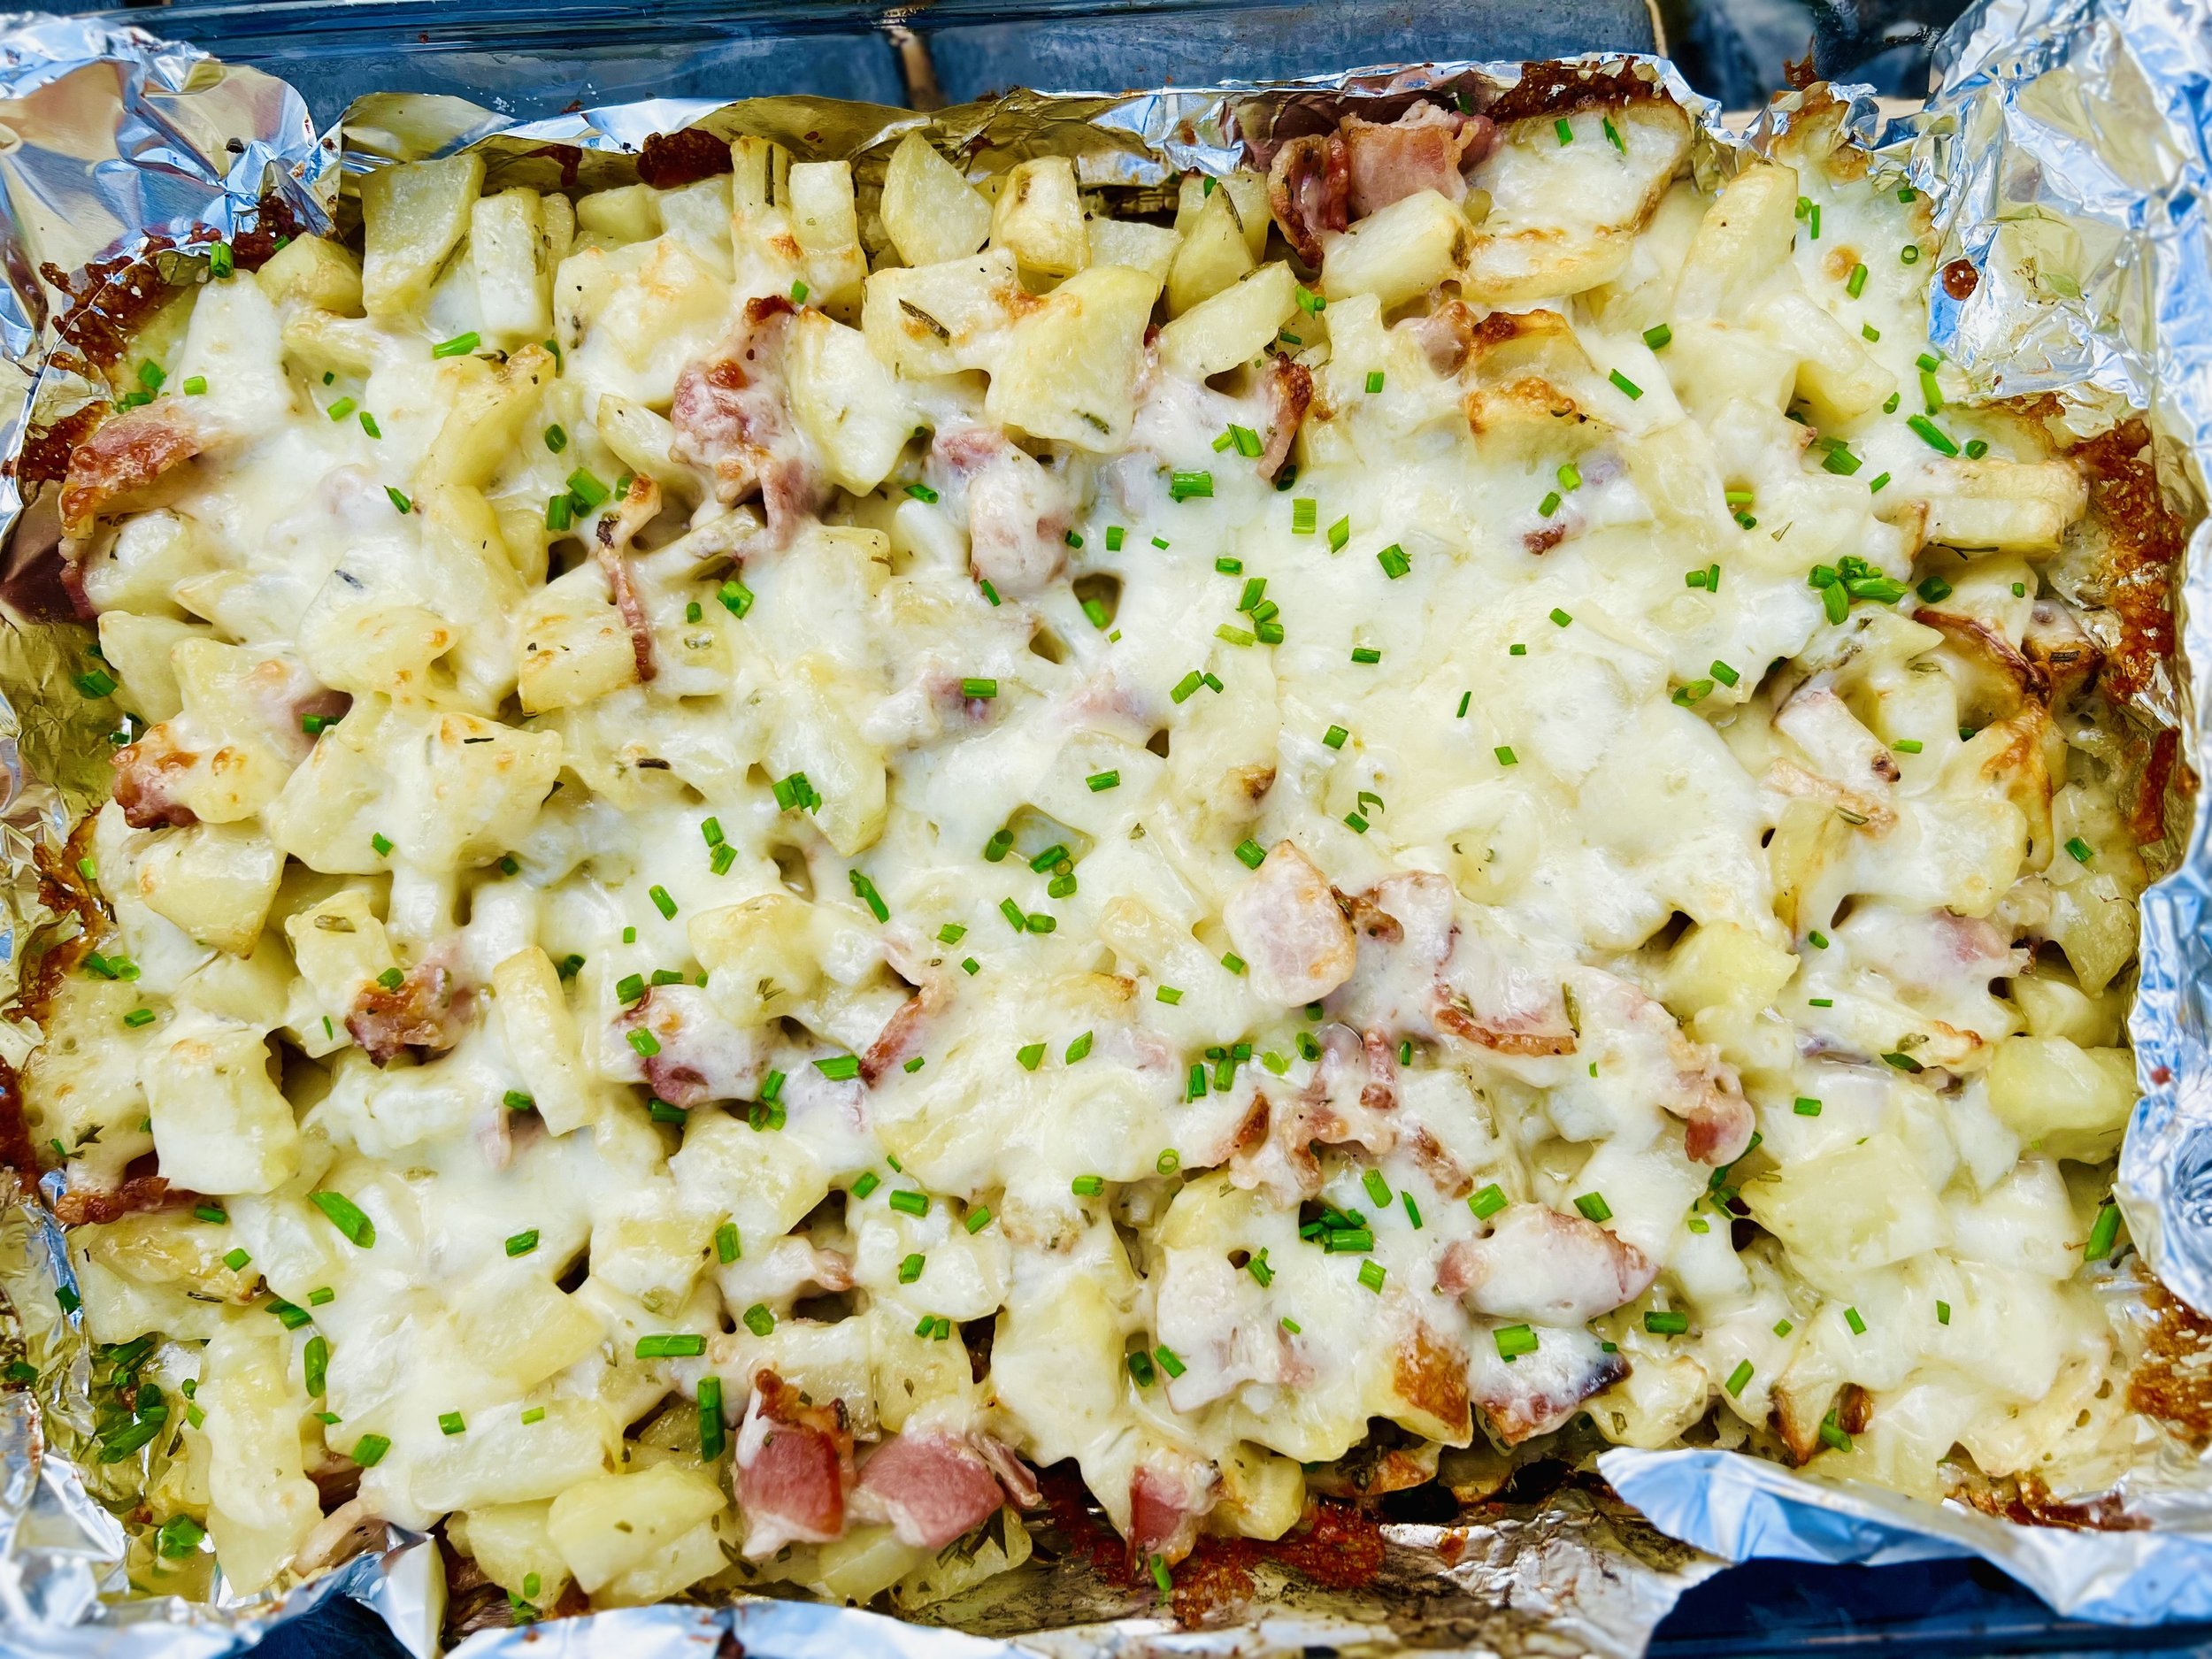
Magnificent Mac n’ Cheese (low FODMAP)
30 minutes • Low FODMAP • Gluten-free • Vegetarian option • Serves 6
30 minutes • Low FODMAP • Gluten-free • Vegetarian option • Serves 6 • When you’re craving mac ‘n cheese, THIS is what you’re craving. Super creamy, cheesy, and flavorful. We’ve used gluten-free pasta and lactose-free milk to make this mac n’ cheese FODMAP friendly but your family will never know the difference! We’re sure you are all going to love it!

INGREDIENTS:
3 cups extra sharp cheddar (about 3/4 pound grated)
8 ounces (uncooked) gluten-free macaroni noodles
1/3 cup butter
1/3 cup gluten-free flour
2 1/2 cups lactose-free whole milk
1 teaspoon salt
1/2 teaspoon pepper
1/2 teaspoon paprika
1/2 teaspoon Coleman’s dry mustard (optional but good!)
6 slices low FODMAP bacon (optional for serving)
1/8 cup chives, chopped (optional for serving)
DIRECTIONS:
Preheat oven to 400 degrees F. Line a rimmed baking sheet with foil.
Lay your bacon slices on the foil and cook in the oven until they reach your desired crispness. Remove and set on paper towels while you prepare the rest of the meal.
After the bacon is cooked, reduce the oven temperature to 350 degrees F.
Meanwhile, butter 6 ramekins or one square (8x8-inch) baking pan or similar-sized baking dish and set aside.
Grate the cheese and set it aside.
Cook the pasta according to package instructions, drain, rinse and set aside.
To make the white sauce, melt the butter in a saucepan over medium heat. Add the flour and stir constantly for about a minute so the flour cooks in the butter. (This is important as it takes away the “raw” taste of the flour in your white sauce.)
Very slowly add the milk while constantly whisking the mixture. Stop periodically to let the sauce heat and thicken and then continue to add the milk in a slow stream while whisking almost constantly. This takes a few minutes but prevents your sauce from burning on the bottom of the pan.
Once all the milk is added and the sauce is thickened, add the salt, pepper, paprika, and about half the grated cheese. Stir until the cheese is melted and remove the sauce from the heat.
Now you’re ready to assemble your Magnificent Mac n’ Cheese.
Fill the buttered dish(es) halfway with pasta. Pour about half the cheese sauce over the pasta. Add another layer of pasta and pour on the remaining half of the sauce. Sprinkle the remaining cheese on top of the mac n’ cheese and put it in the oven for 20 - 30 minutes (larger dishes will take a bit longer) until the cheese is bubbling and starting to brown lightly at the edges.
Remove from the oven and, while the mac n’ cheese cools just a bit, chop your bacon and chives and sprinkle them on the top.
Serve with a side salad.
Enjoy!
This post may contain affiliate links so you can easily purchase items listed on the page. There is no increased cost to you for purchasing items through these links so feel free to use them!
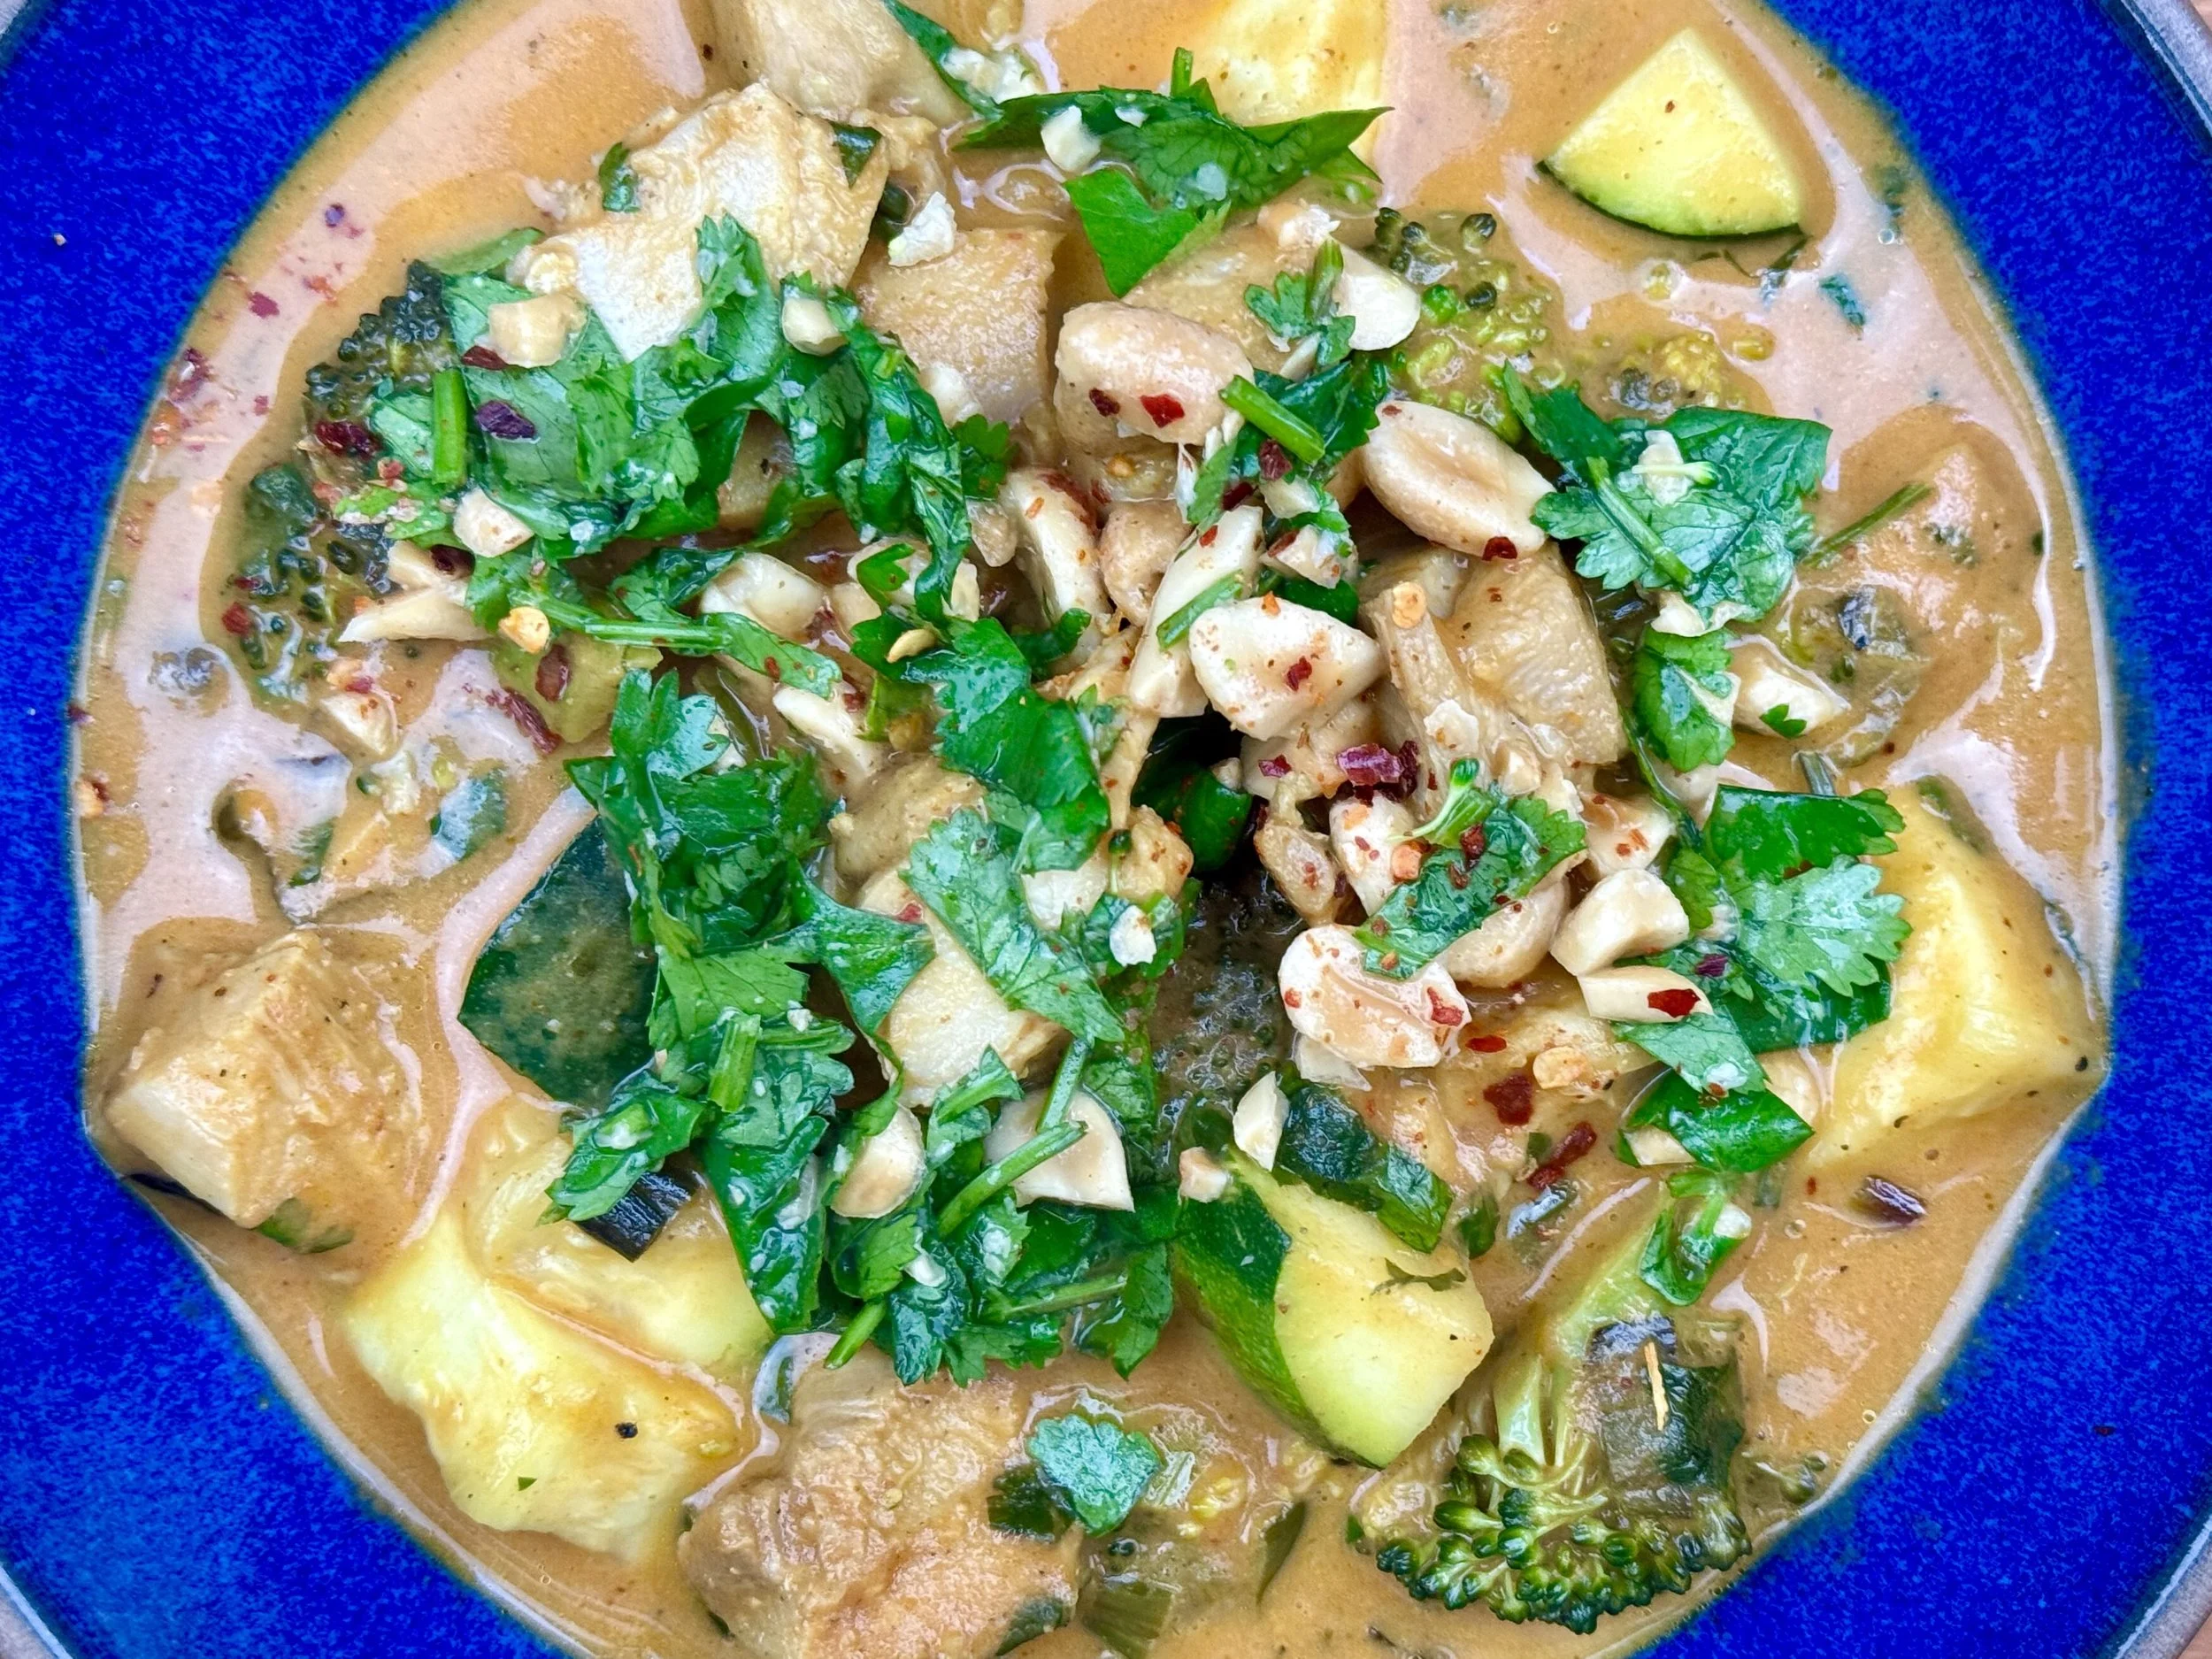
Macadamia nut chicken and coconut noodles (low FODMAP)
20 minutes • Gluten-free • Dairy-free • Low FODMAP • Serves 4
20 minutes • Gluten-free • Dairy-free • Low FODMAP • Serves 4 • Quick to make and wonderful to eat! This chicken is sautéed in a sweet and spicy sauce, with macadamia nuts, fresh basil, and served over creamy coconut noodles. A perfect weeknight dinner.

INGREDIENTS:
1 1/2 pounds boneless skinless chicken breasts, thinly sliced
5 tablespoons gluten-free low-sodium soy sauce
2 tablespoons garlic-infused olive oil
3 tablespoons toasted sesame oil
1 tablespoon tangerine (or other citrus) jam
2 tablespoons maple syrup
1 tablespoon grated ginger
1/2 teaspoon red pepper flakes
1/2 cup roasted and salted macadamia nuts, chopped
1 cup fresh basil, roughly chopped plus more for serving
8 ounces rice noodles
1/3 cup canned coconut milk
Lime wedges, for serving
DIRECTIONS:
Cook the rice noodles according to package directions and set them aside.
In a glass jar, mix together 4 tablespoons soy sauce, citrus jam, and maple syrup.
In a large skillet over medium-high, heat 2 tablespoons of garlic-infused olive oil, the ginger, and red pepper flakes until fragrant, about 30 seconds. Add the chicken and 1 tablespoon soy sauce, cook 5 minutes until lightly caramelized. Stir in the macadamia nuts. Add the maple syrup-soy sauce mixture and cook until the sauce glazes the chicken and the meat is cooked through (about 2 - 3 minutes).
Remove from the heat and stir in the basil.
Meanwhile, set a medium skillet over medium heat. Add 1 tablespoon toasted sesame oil.
When oil shimmers, add noodles and cook for about 2 minutes until heated through. Stir in the coconut milk and toss the noodles in the coconut sauce for about a minute until fully heated.
Divide the noodles between bowls and top with the chicken. Serve with additional chopped basil and a generous squeeze of llime.
Enjoy!
This post may contain affiliate links so you can easily purchase items listed on the page. There is no increased cost to you for purchasing items through these links so feel free to use them!
10 minutes • Gluten-free • Dairy-free • Low FODMAP • Serves 1